Articles

Fire up the Landscape with Red Twig Dogwood

The bloodtwig dogwood ‘Midwinter Fire’ has some of the most brilliant branches for winter.

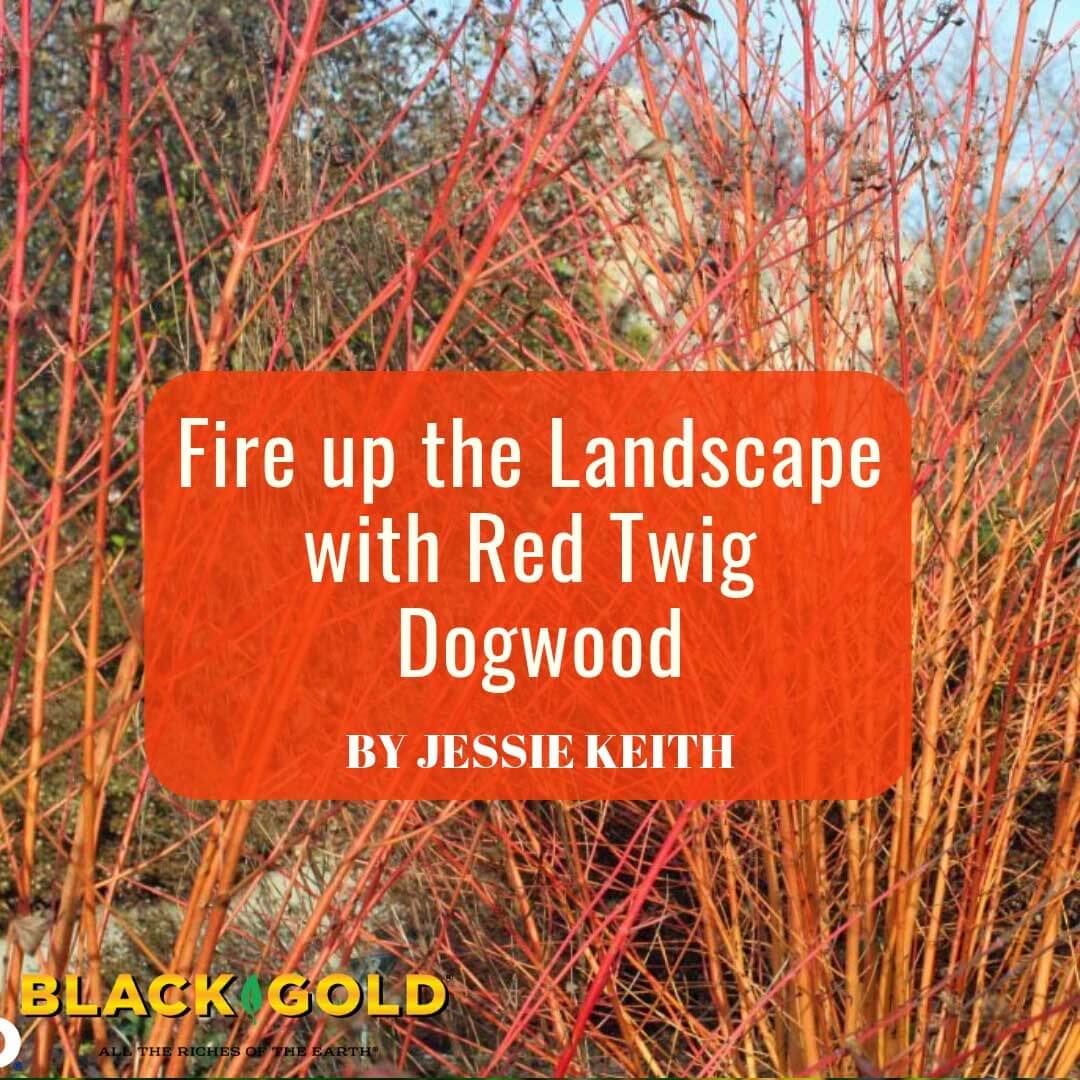
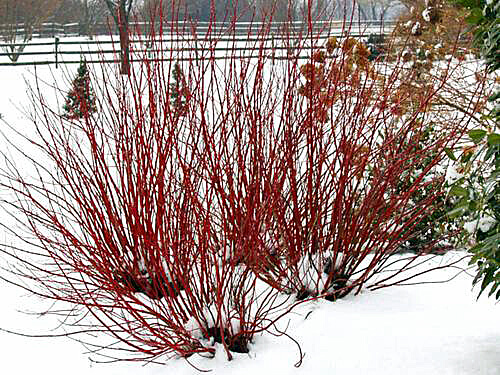
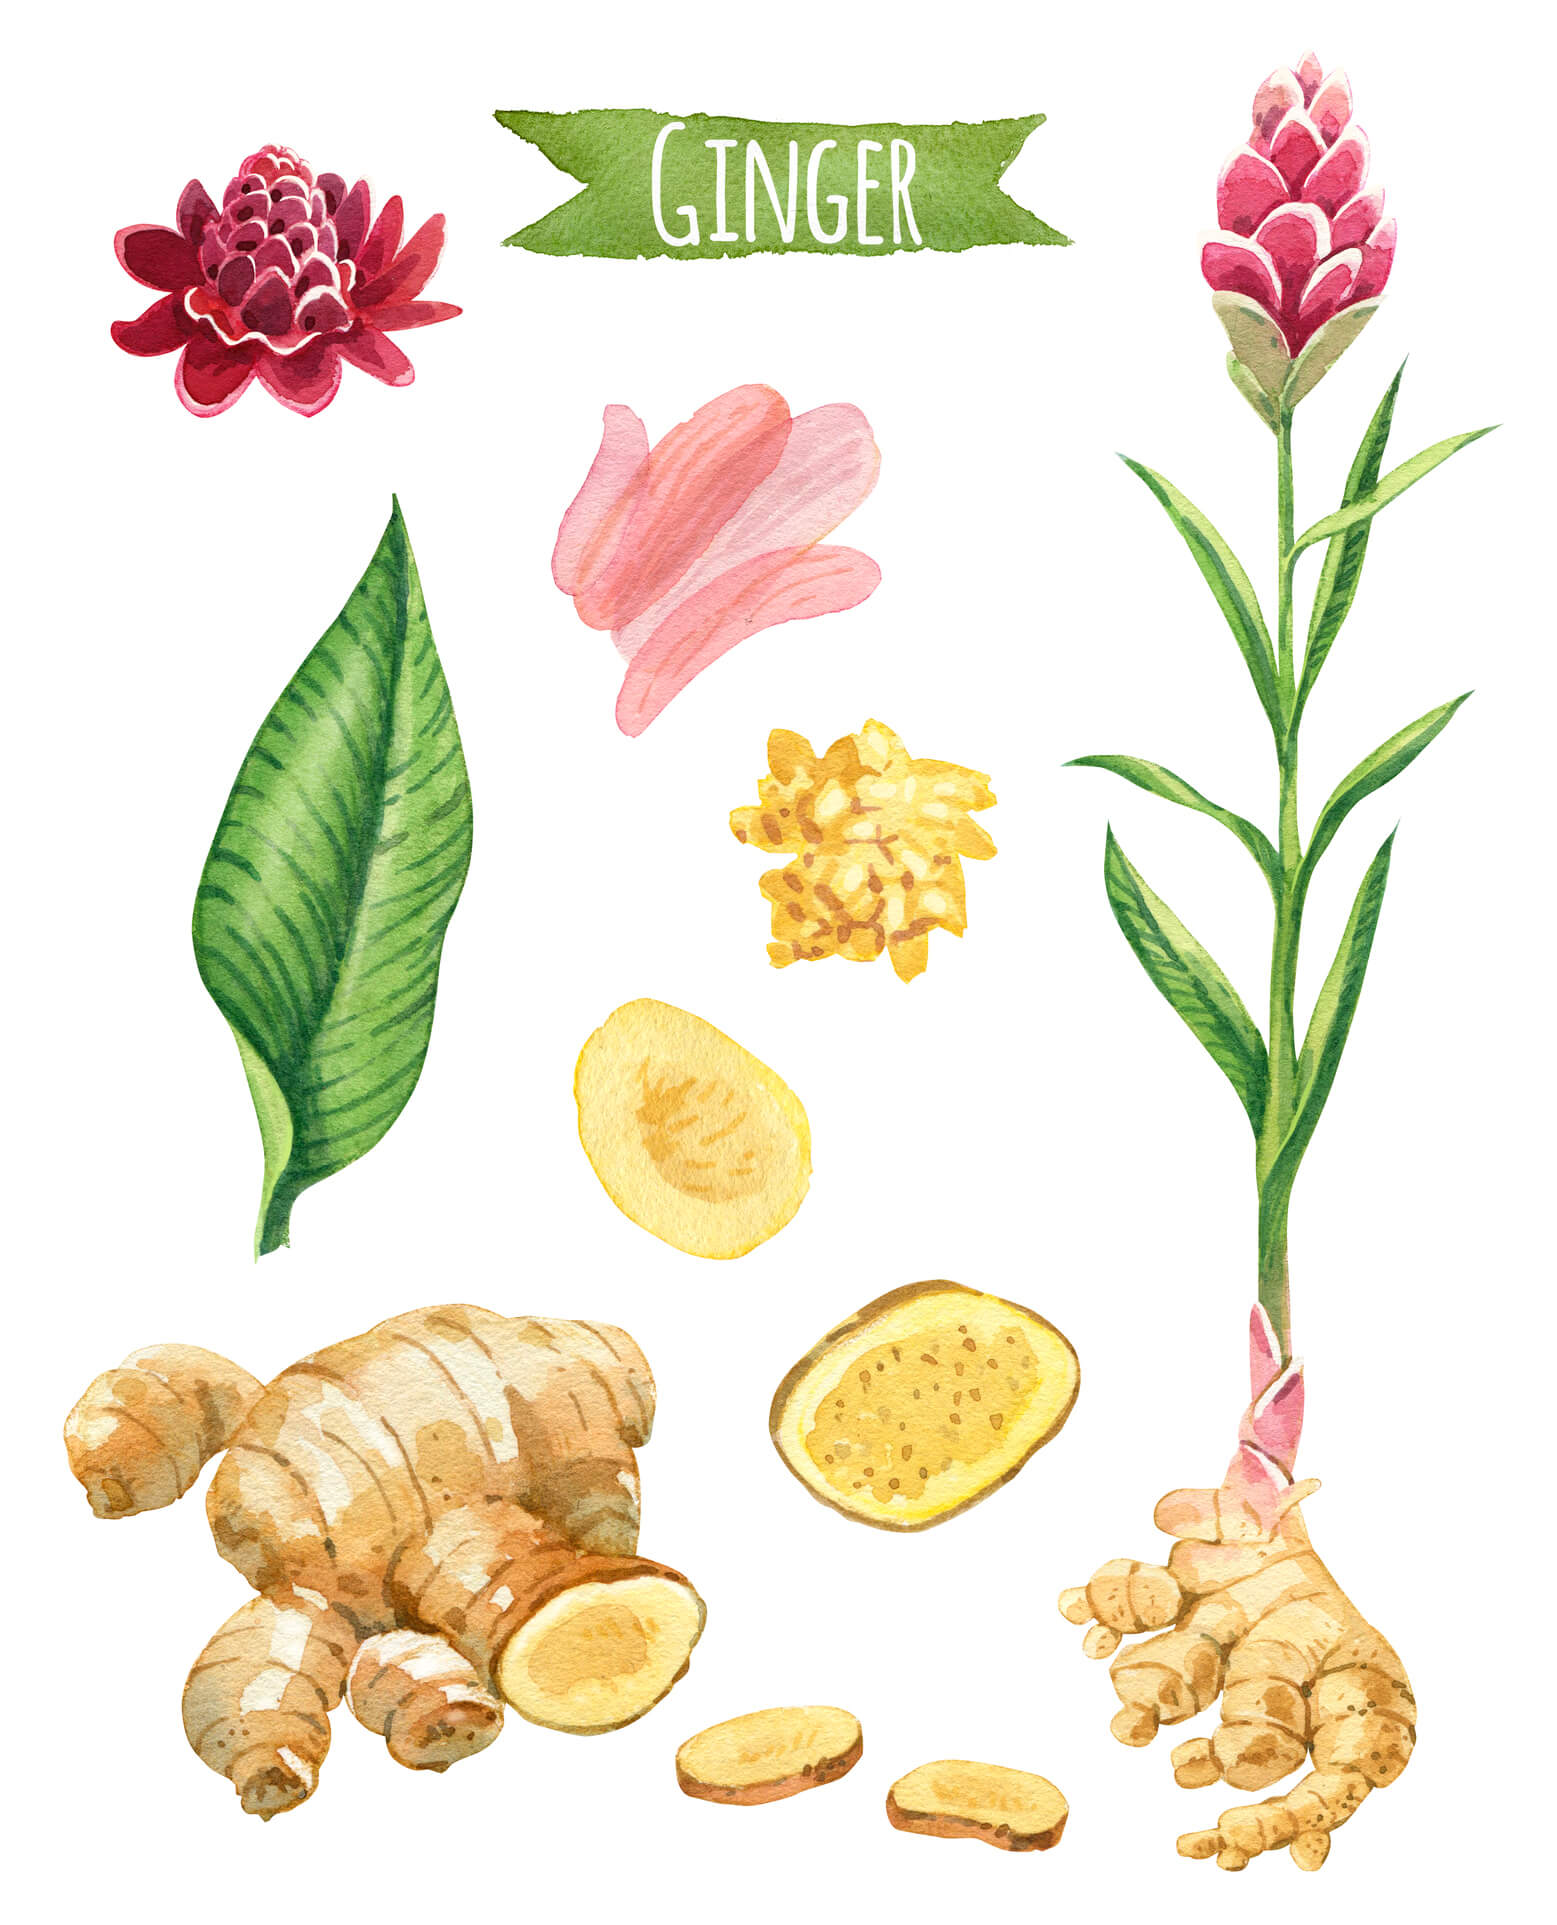
Fiery branches of gold, orange, and red rise from the winter garden, bringing color to the bleakest landscapes. There’s no better complement to evergreen and berried landscape shrubs than brilliant red twig dogwoods (Cornus sericea) and blood twig dogwoods (Cornus sanguinea). Their branches also look attractive in seasonal arrangements.

About Redosier Dogwoods

The fruits of redosier dogwood

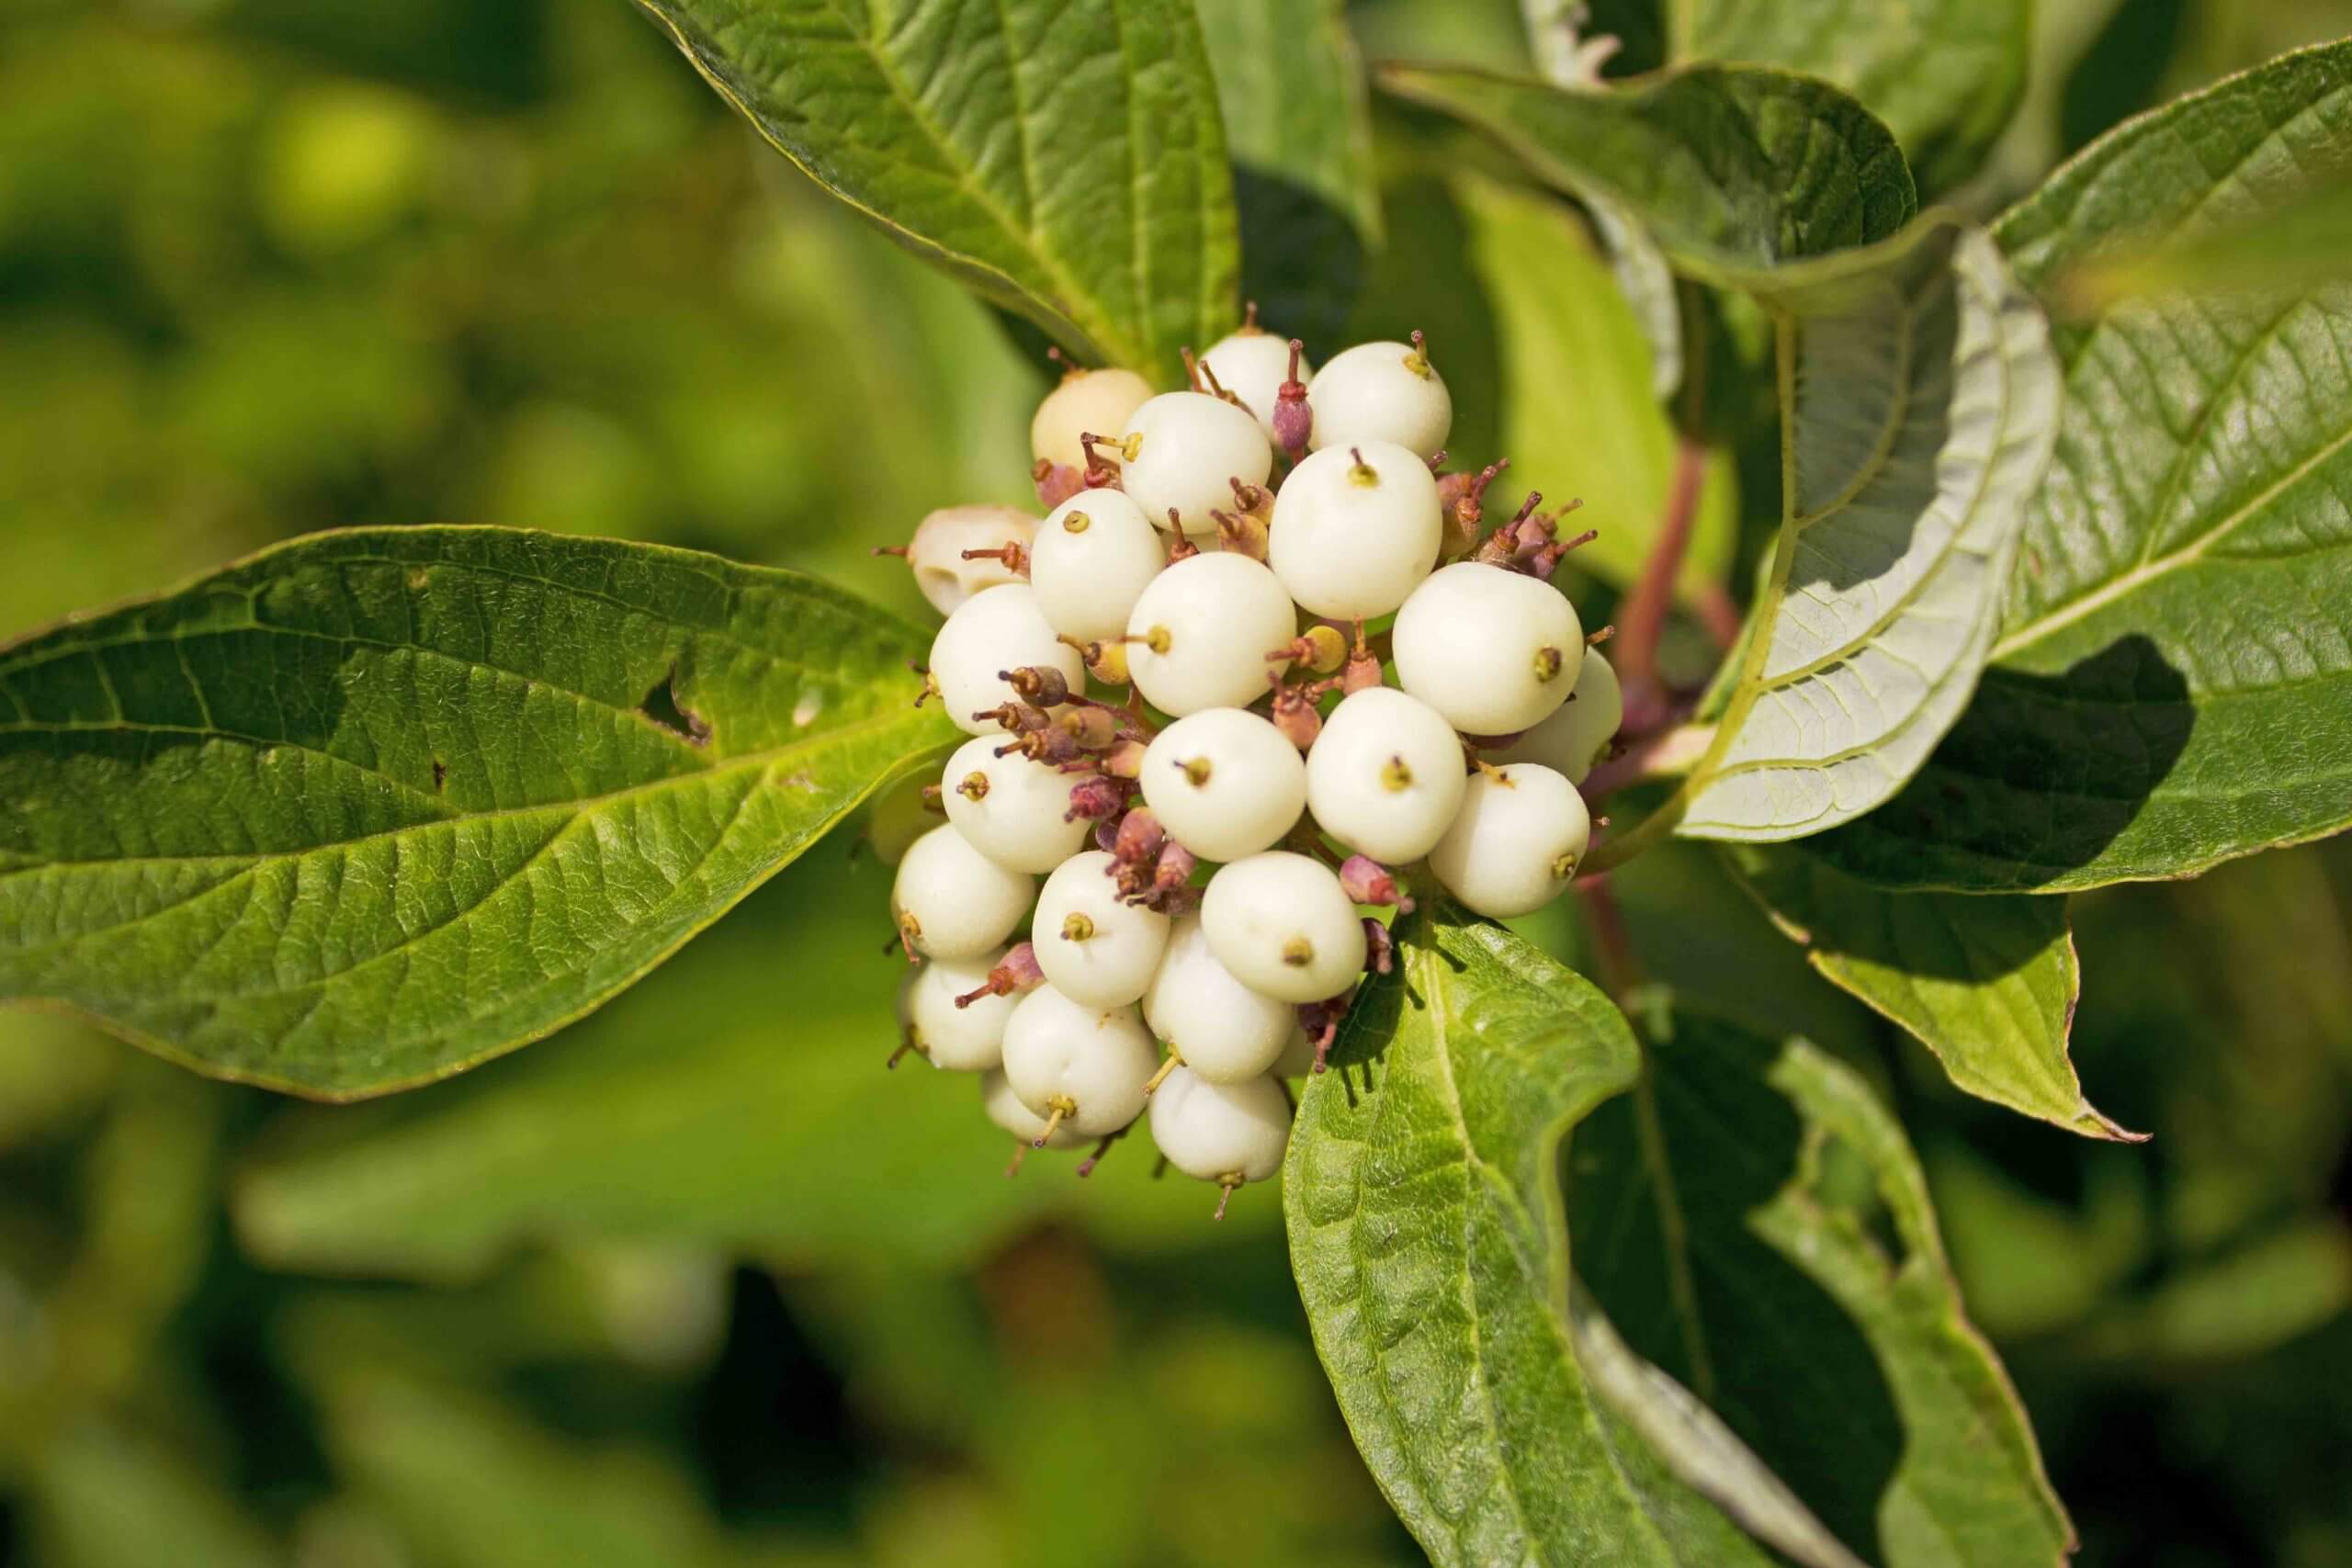
Native to much of North America, redosier dogwood is a remarkably hardy, densely branched shrub (6-12’), growing as far north as Alaska where it survives in USDA Hardiness Zones 2-9. It naturally grows in moist areas or watersides and can even withstand slightly salty soils. It may exist under the shaded canopy of trees or in open sunny areas. In spring, it produces flat-topped clusters of white flowers. These are followed by whitish, berry-like fruits that appear later in the season. The bright green leaves turn shades of wine red or maroon in fall. The younger twigs of wild plants naturally turn shades of red in winter.

The bloodtwig dogwood is just as pretty, but it is Eurasian, inhabiting forested regions and wetland margins from northern Europe to western Asia. It performs in the landscape much like redosier dogwood, but its late-season fruits are black rather than white.

Redosier Dogwoods and Wildlife

Spring azure butterfly caterpillars feed on redosier dogwood foliage. (Photo by D. Gordon E. Robertson)

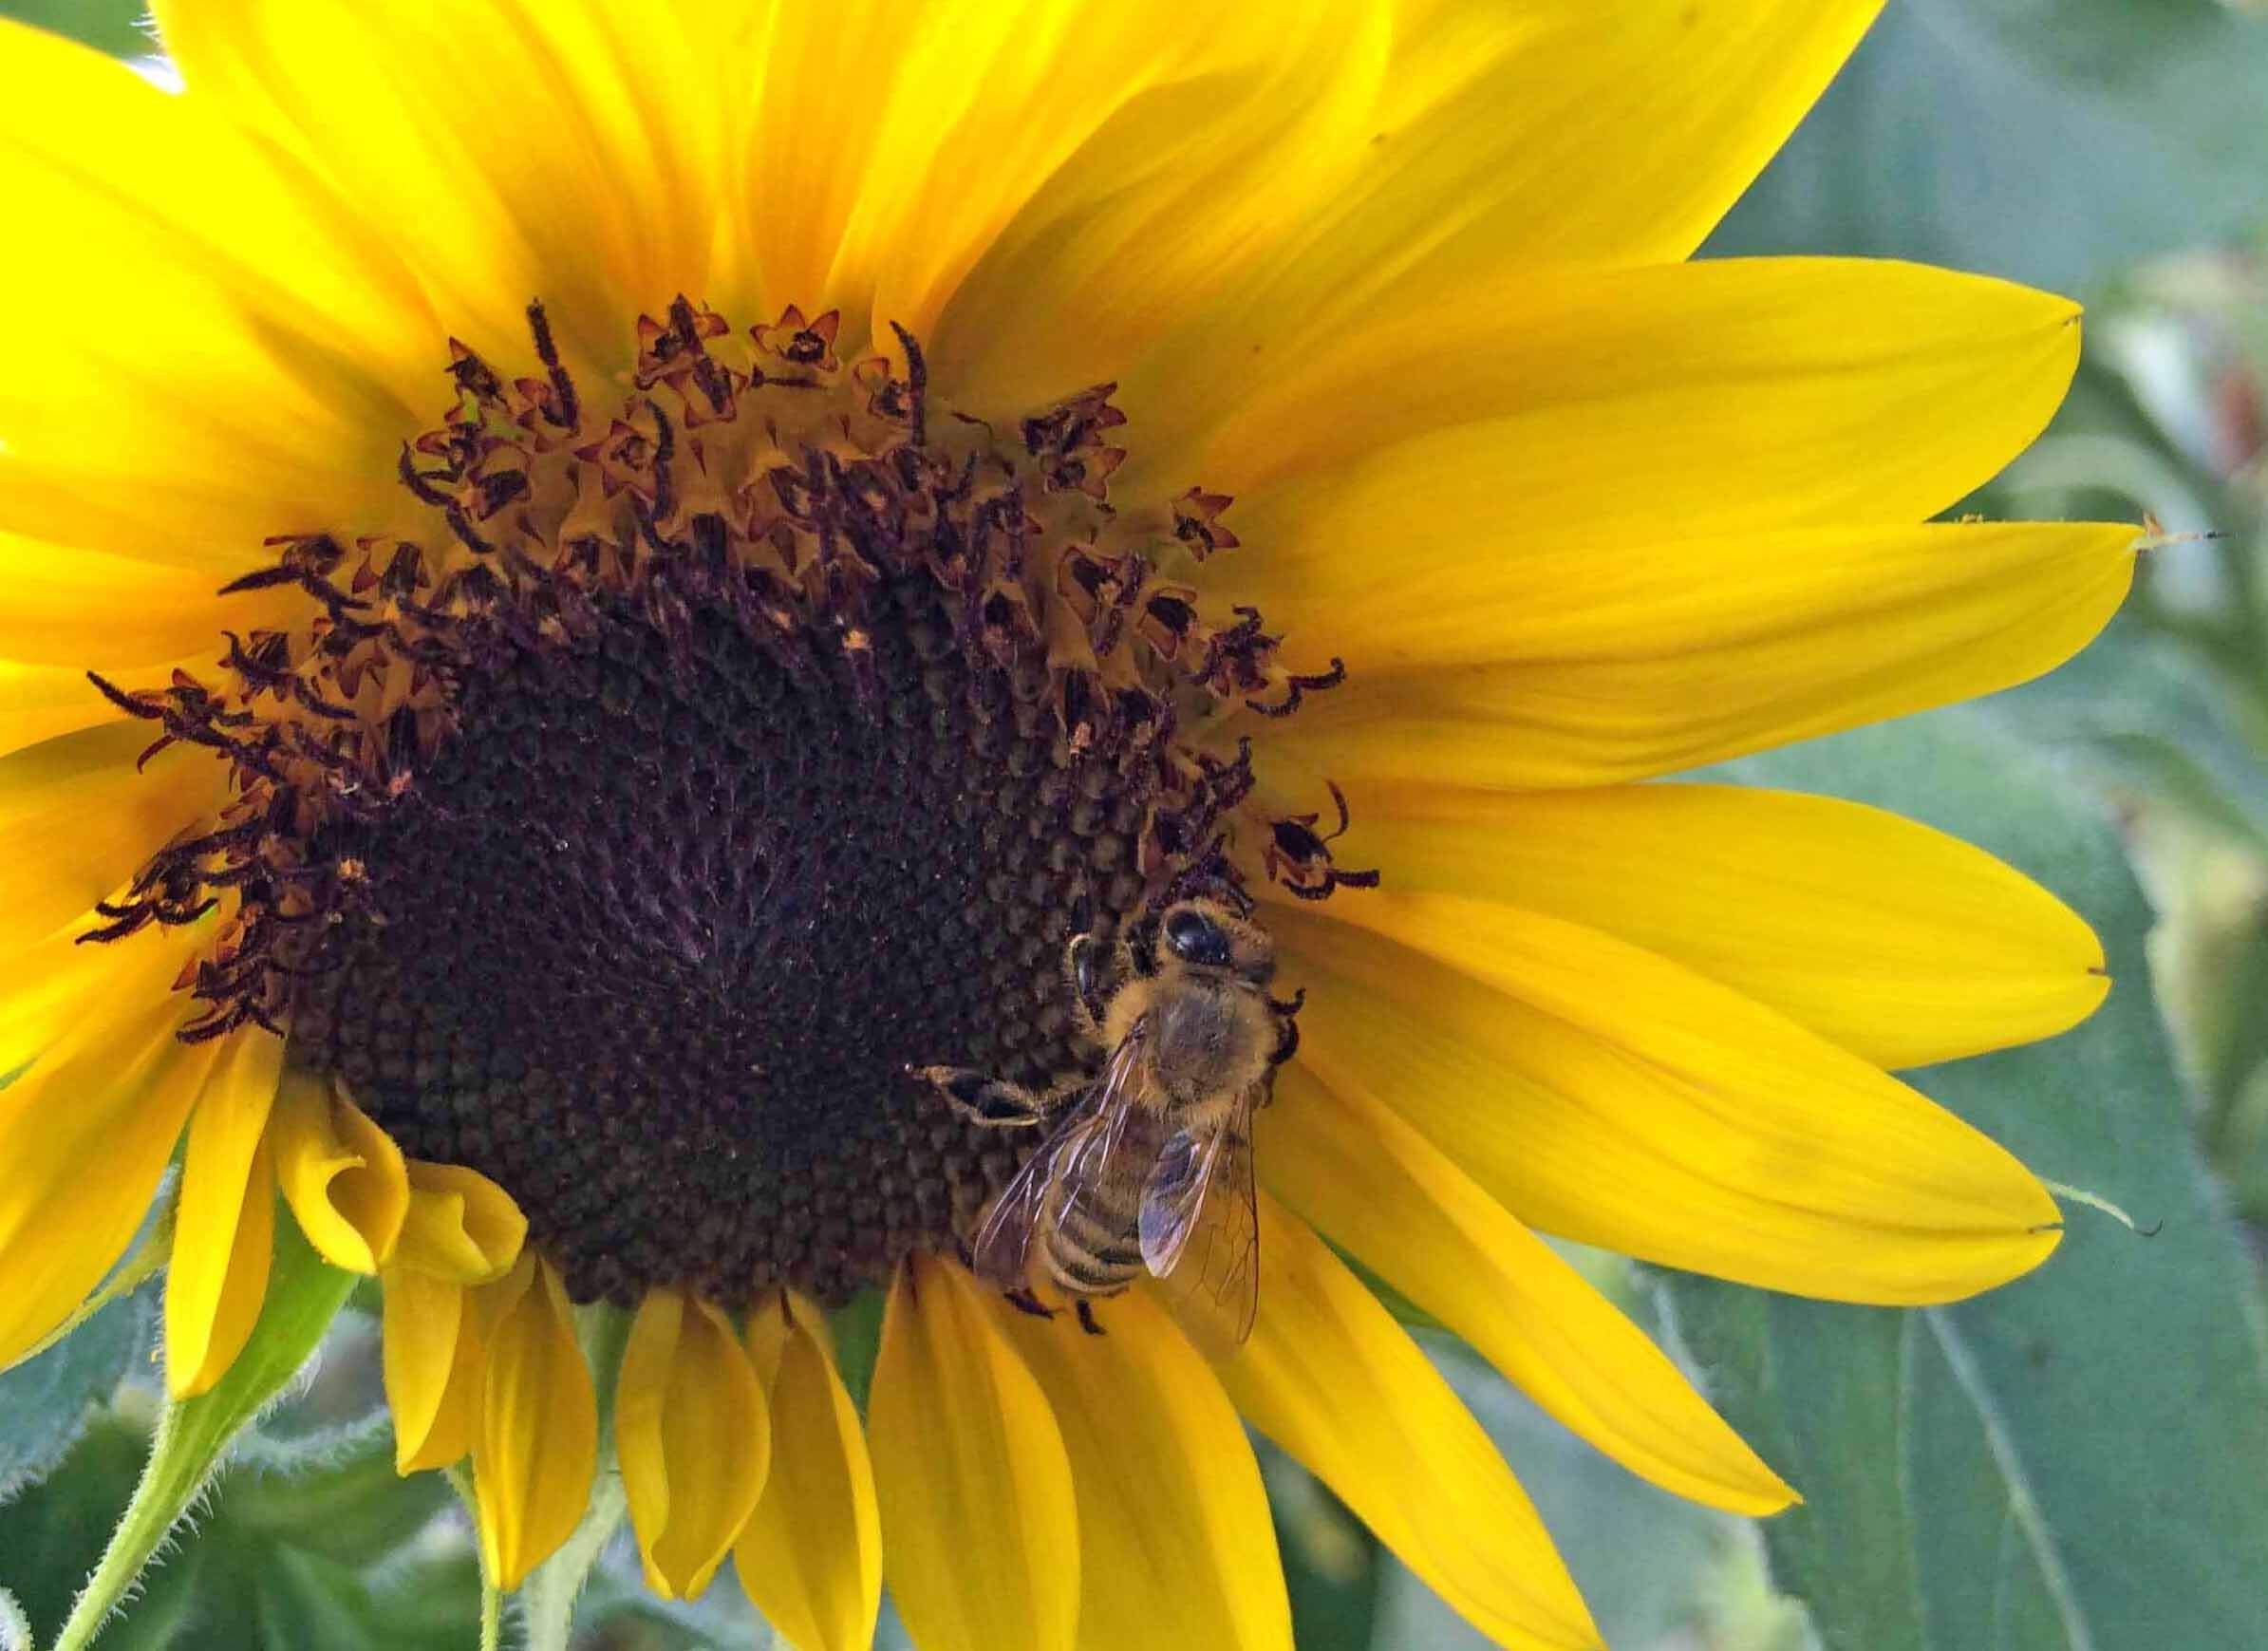
The redosier dogwood has a unique relationship with certain pollinators. The flowers are visited by bees and butterflies, but the foliage is also the larval host of the spring azure butterfly, a beautiful blue butterfly found across much of North America. The bloodtwig dogwood also serves as the larval host plant to the less desirable casebearer moth. Many birds feed on the fruits and rely on the dense branching of these shrubs for nesting and shelter.

Varieties

The yellow twigged Cornus sericea ‘Flaviramea’ has pretty golden twigs in fall.

For brilliant twig color, few redosier dogwoods can beat the classic variety ‘Baileyi’. Its brilliant red branches glow in winter, and the dense shrubs reach up to 9’. A comparable cultivar is ‘Cardinal’, which offers good diseases resistance in addition to red twig color. The more compact redosier dogwood, Arctic Fire®, is a shorter form (6’) that has equally bright red stems. The equally compact bloodtwig dogwood, Arctic Sun®, has golden twigs tipped with orange and coral red, as does the slightly taller ‘Midwinter Fire’. The dwarf redosier dogwood ‘Kelseyi’ (3’) is the smallest of the red twig forms.

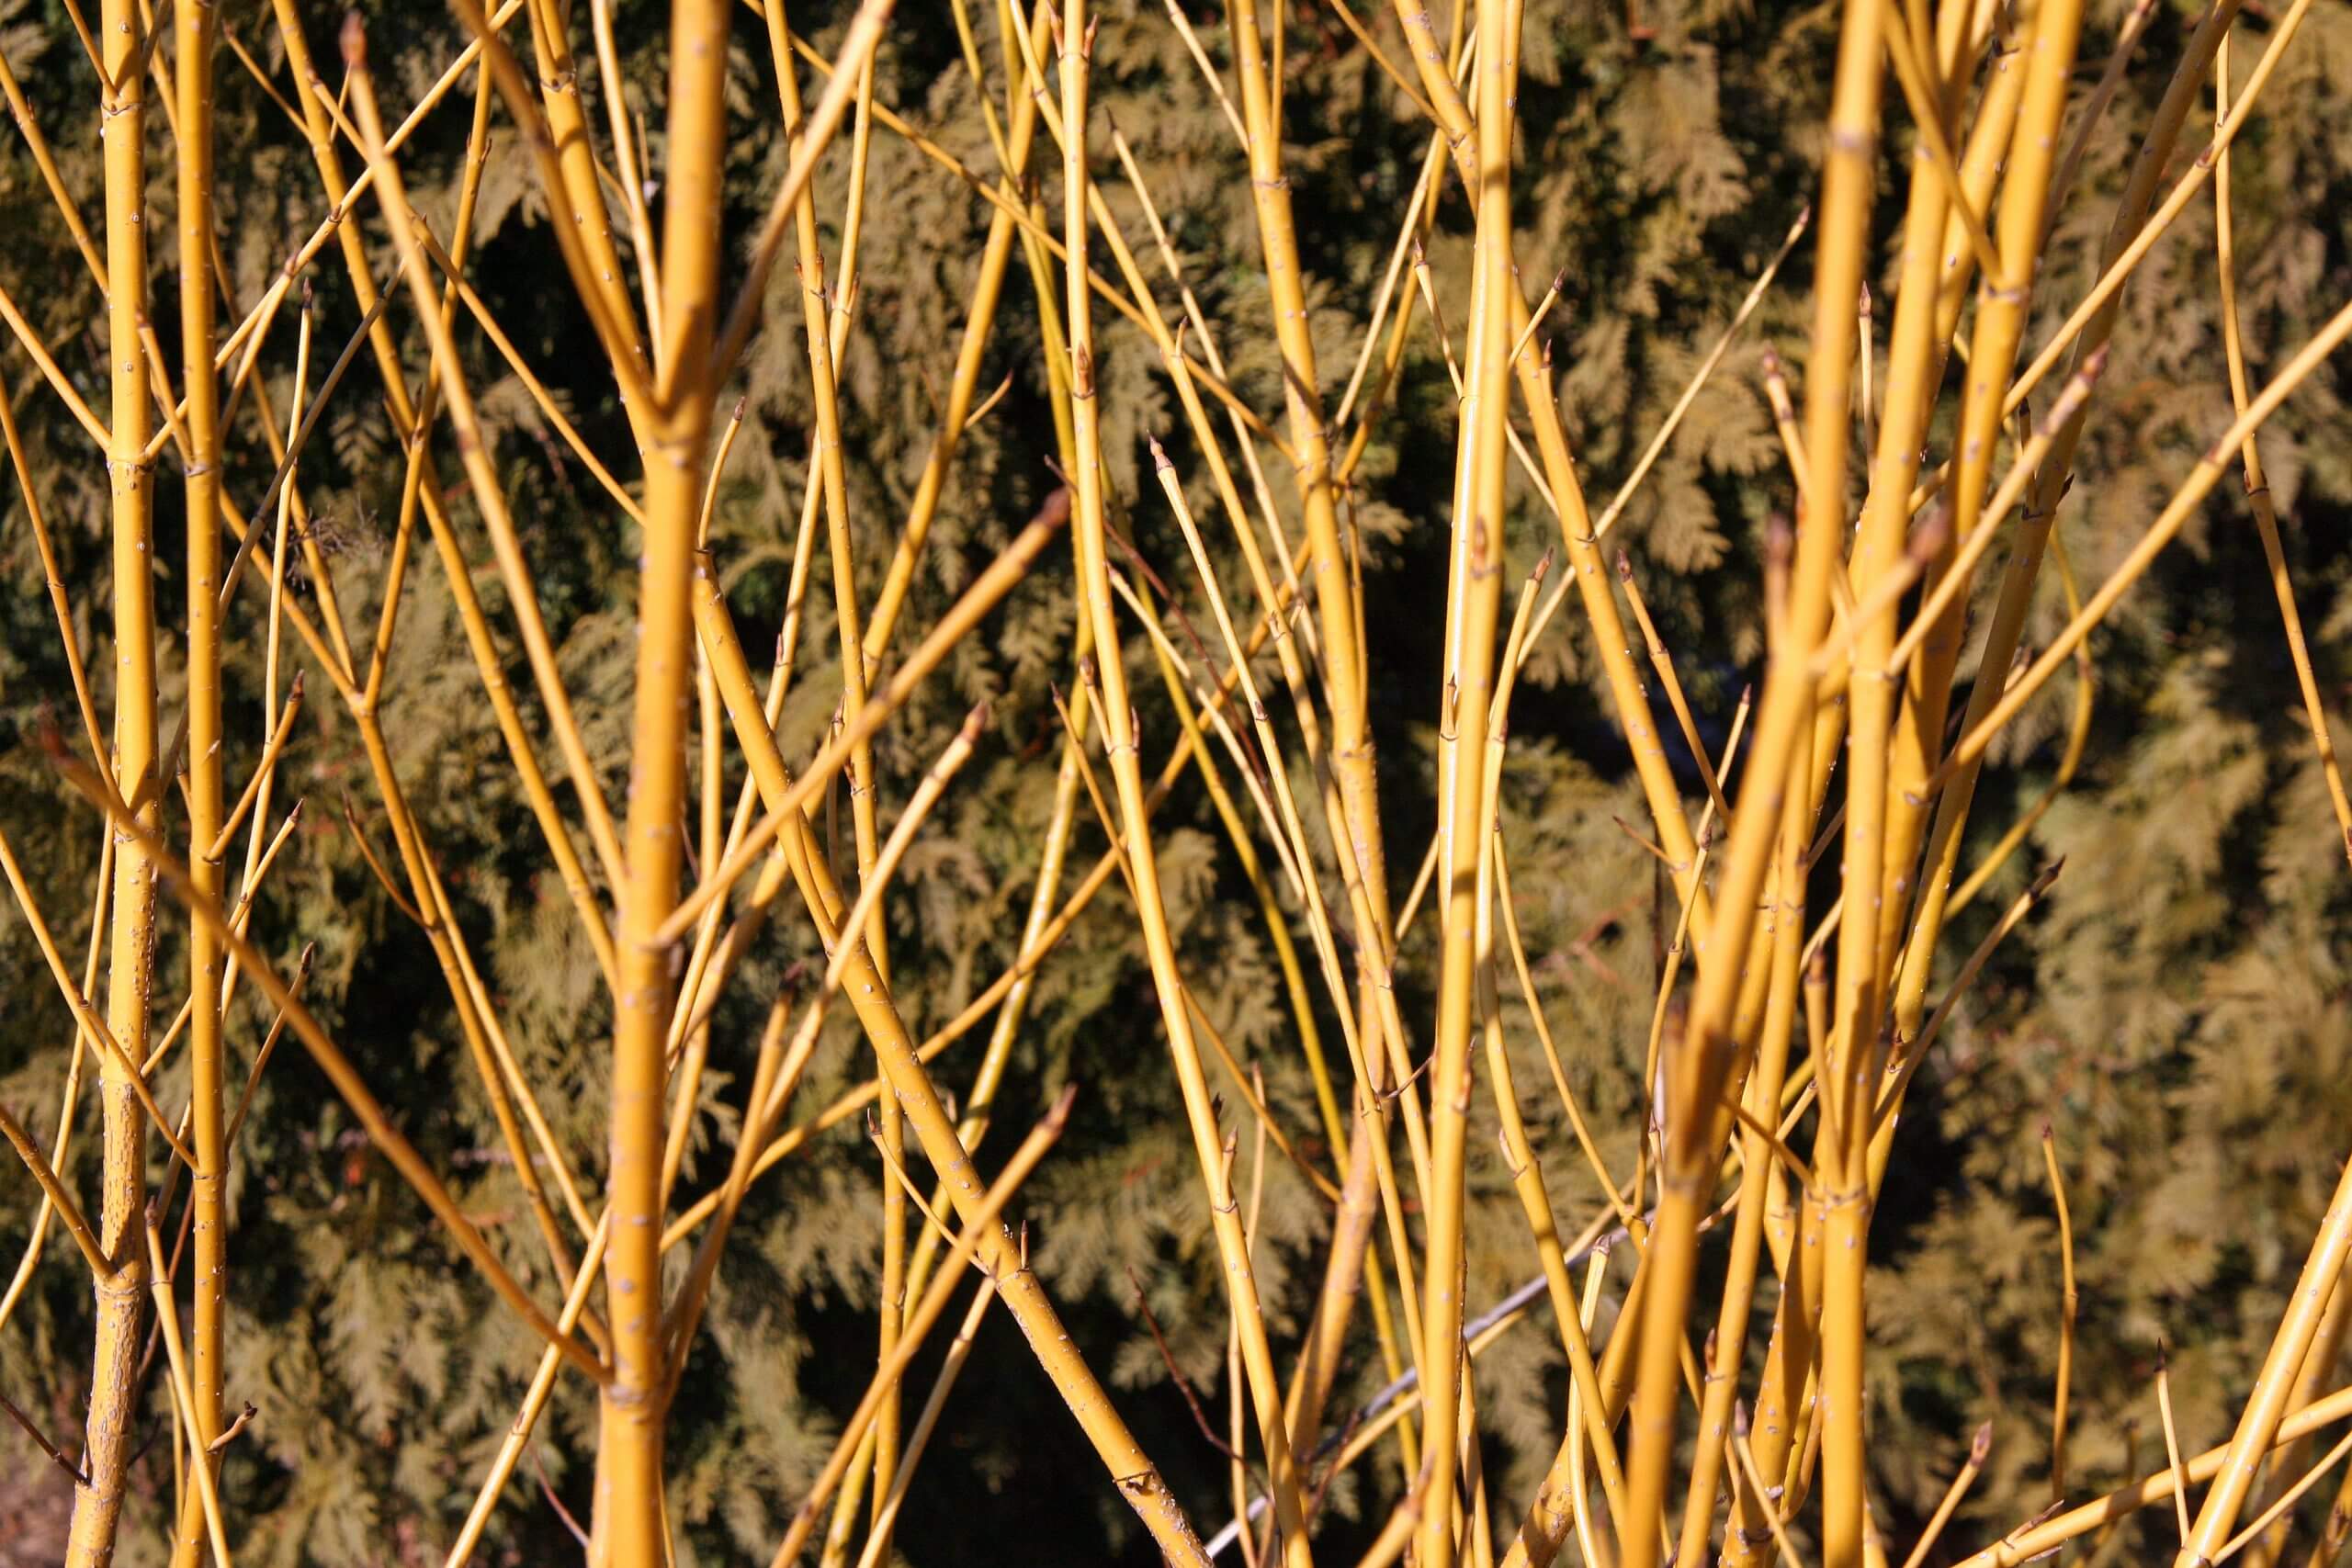
Yellow-twig forms are also striking. The best of these is ‘Flaviramea’ (8’), which develops bright yellow to greenish yellow twigs in winter.  The pretty ‘Silver and Gold’ is a variant of ‘Flaviramea’ with attractive variegated leaves edged in silver, in addition to yellow twigs. Another variety with handsome variegated foliage is ‘Hedgerows Gold’, which has golden-edged leaves that line deep red branches.

Planting

Cornus sericea Arctic Fire® (Proven Winners)

Twig color and growth is best when plants are planted in a sunny to partially sunny location. Choose a spot where the winter twigs will be most conspicuous—either an open area or against a darkly colored mass of evergreens or a substantial foundation. Mass plantings have the best winter effect and are great for stabilizing slopes or watersides.

Soil can be moist or well drained, but fertile soil with a pH of 5.0 to 7.5 is preferred. When planting a new shrub, dig a hole that is twice the size of the shrub’s root ball. Amend your backfill with Black Gold Garden Soil before planting, and set the shrub in the hole, making sure the root line and soil line are level. Fill in along the edges, and pack the soil down firmly to ensure good root-to-soil contact. Irrigate well after planting, and make sure newly planted shrubs stay well irrigated during the summer months.

Pruning and Maintenance

Cut old, overgrown branches to about 1-2’ from the ground.

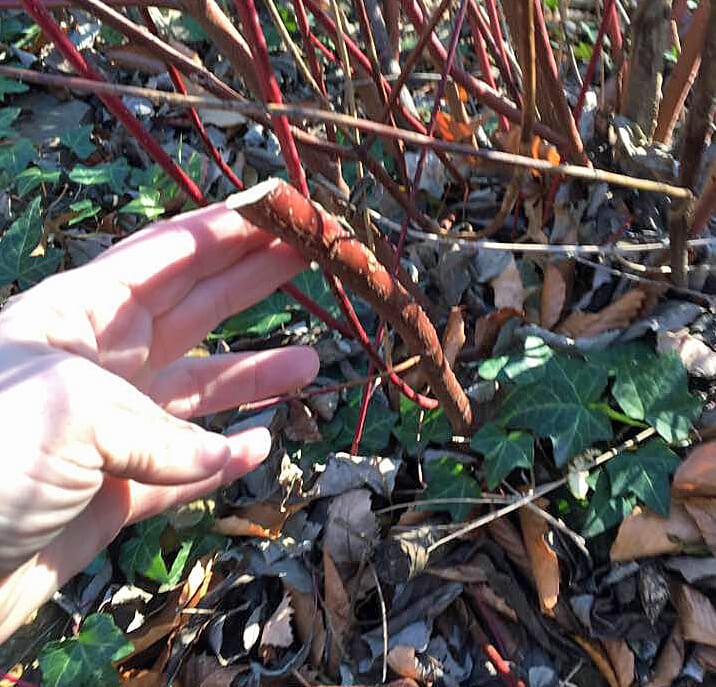
The best twig color comes from younger branches, so it is important to regularly prune redosier dogwood in later winter to early spring. Cut old, overgrown branches to about 1-2’ from the ground to keep shrub height in check and encourage new growth. Pruning cuts should be made at a 45-degree angle. It is important to dip pruners in a 10% bleach solution when pruning each new shrub to avoid any chance of spreading common diseases.

Diseases

Close up of Septoria leaf spot. (USDA Forest Service)

Dogwood stem canker (Botryosphaeria dothidea) is the most notorious disease of these shrubs. It is a fungal disease that causes cankers and branch death. The disease enters the plant via cuts and lesions, which is why it is important to keep pruning tools clean when making cuts. Plants that become stressed are most susceptible to the disease.

This canker is manageable. Remove diseased stems by cutting several inches below the point of infection. Do this in dry weather and clean pruners between cuts. Remove and destroy diseased branches. Irrigating shrubs during dry spells will reduce stress and help ward off the disease. Choosing canker-resistant varieties, such as ‘Cardinal’ is also useful.

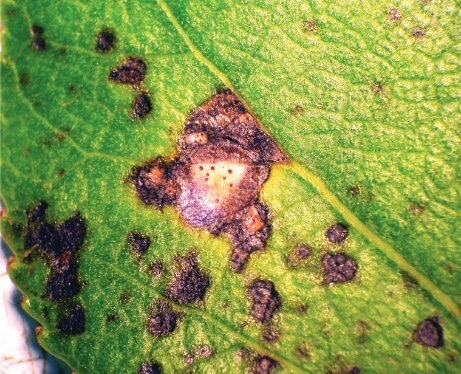
Septoria leaf spot is another common disease that causes unsightly black spots and early leaf shed on the summer leaves of red osier dogwood. The lower leaves are the first to show spots. Several cultural steps can help to control Septoria leaf spot. First, thin overly dense branches to encourage airflow and reduce the chance of infection. The disease overwinters on infected leaf tissue, so remove all fallen leaves underneath the plant.

Redosier dogwood is a true landscape gem. Keep it well maintained, and it will reward you with bright warm color on cold winter days.


The Herbal Tea Garden

Garden fruits and herbs combine well to make delicious herbal tea.

What’s in a cup of herbal tea? Aromatic dried leaves and fruits impart the comforting, rich flavors for herbal tea, which are most welcome in chilly weather. Gardeners that grow herbs, fruits, and spices already have the raw ingredients for tea. From there, it’s a matter of well-timed preservation and creative tea mixing.

History

Unlike teas made from the leaves of the tea shrub (Camellia sinensis), herbal teas are not caffeinated. They are tied to all cultures with some tracing back to the ancient world. The Ancient Egyptians favored a tangy tea made from hibiscus buds (Hibiscus sabdariffa); mint tea (Mentha spp.) was a staple in Northeast Africa; the ancient Greeks drank a sweet tea made from ironwort mountain mint (Sideritis spp.), and the Chinese drank a floral tea made from Chrysanthemum buds. In India, a wonderfully complex herbal tea called Kadha, flavored with ginger, cloves, pepper, cardamom, fennel seeds, cinnamon, and bay leaf, was used to fight colds and flu. These teas were used for traditional medicine as well as enjoyment, and all are still used today.

Herbal Tea Health Benefits

The medicinal value of some herbal tea components have been confirmed. Chamomile and ginger help settle the stomach, mint tea has been shown to help with respiratory ailments, and Echinacea has been proven to ease cold and flu symptoms. Adding rose hips, citrus peel, or cranberries to your tea will add tang and flavor to your tea while also providing a boost of vitamin C. When crafting tea mixes, consider ingredient health benefits as well as flavors.

Garden Herbs for Tea

Many everyday garden herbs can be used for tea making.

All herbs for tea are easy to grow, and most are common to home gardens. (Click here to learn how to grow edible herbs. Click to learn how to grow potted ginger.)

Lemon Verbena (Aloysia citrodora, Zone 8-10, 3-4’): The lemony leaves and flowers of this tender herb maintain their tangy citrus flavor when dried.

Lavender (Lavandula spp.):  Lavender leaves and flowers are traditionally added to Earl Grey tea, but they also taste great in herbal teas.

Mint (Mentha piperita): Peppermint leaves and flowers are widely used for herbal tea and can be steeped fresh or dried. All other culinary mints make great tea.

Lemon Balm (Melissa officinalis):  The citrusy leaves of lemon balm also have a refreshing hint of mint.

Sage (Salvia officinalis): The comforting, warm flavor of sage is favored in wintery dishes but also makes delicious tea.

Stevia (Stevia rebaudiana): Add dried stevia leaf to teas to impart natural sweetness without the need for added sugar.

Wild Bergamot (Monarda fistulosa): The leaves and purplish flowers of wild bergamot are dried to make a heady tea with hints of mint and bergamot orange.

Thyme (Thymus spp.): Orange and lemon thyme varieties are best for tea making

Flowers and Spices for Tea

The buds of roselle (Hibiscus sabdariffa) were first used by the ancient Egyptians for tea.

Elderflower (Sambucus ): Sweet, fragrant elderflowers add a delicate, pleasing flavor to teas.

Chamomile (Matricaria retutica): Clouds of tiny white daisies cover chamomile in late spring. These fragrant flowers can be used for fresh or dry tea.

Roselle (Hibiscus sabdariffa): Late in the season, the tea hibiscus produces maroon buds that are dried to make tangy, fragrant tea that is purplish-red when steeped.

Rosa petals (Rosa spp.): Organically grown rose petals from fragrant roses add floral flavor to teas. Pair them with fruits and citrus peel.

Ginger root (Zingiber officinale): Warm and spicy ginger root tea clears the head and soothes the stomach.

Echinacea root (Echinacea purpurea and Echinacea pallida): Dried Echinacea root has a pungent, aromatic flavor used to make a medicinal tea.

Fruits for Tea

Dried rose hips add a flavorful tang to herbal teas.

Apples (Malus domestica), blackberries and raspberries (Rubus spp.), rose hips (Rosa spp.), cranberries (Vaccinium macrocarpon), elderberries, and citrus peel all impart tart, fruity flavors to tea. They are also vitamin rich, giving teas added nutritive value. Pair them with minty, lemony, and floral tea ingredients. (Here are tips for growing your own apples, blueberries, and, blackberries and raspberries.)

Harvesting and Preserving Tea Ingredients

Hang herbs in a dry place away from sunlight.

Harvest leaves and flowers for tea when they are fresh. Fruits should be fully ripe. For best flavor, gather them on the day you plan to dry them. Gently rinse off the ingredients and pat them dry before preservation. Here are the three most common drying methods:

1. Hanging Herbs

Gather bundles of six stems for quick drying (larger bundles dry more slowly and may mold). Hang them upside down in a cool, dry spot away from the sun. After a couple of days, their leaves should be crispy dry and ready for tea making.

2. Oven Drying Herbs and Fruits

Oven drying speeds the process without the need for a dehydrator. Preheat the oven to 140°F. Space the leafy stems apart on a pan lined with parchment paper and place the tray in the oven until leaves are crisp. This often takes an hour or two, but more time may be needed.

Small fruits should be cut in half and apples should be sliced thinly for fast drying. Drying can take up to two hours or more. The citrus should be zested before drying.

3. Dehydrating Herbs and Fruits

Food dehydrators provide the best drying method for fruits and herbs. Space the stems and cut fruits apart on dehydrator racks and allow them to dry until crisp and leathery. The time it takes depends on the machine and what is being dried. Check them every couple of hours to determine dryness.

After the herbs have been dried, slide your fingers down each stem to separate the leaves. Then mix your teas and store them in tins for up to a year. Freezing teas will help them last longer.

Mixing Tea

When mixing tea, choose herbs and fruits with complementary flavors.

Some teas, like chamomile and mint tea, taste great on their own, but others taste better when mixed with other complementary flavors. Don’t be afraid to experiment! Here are several tasty tea mixes that any gardener can make.

Fragrant Apple Tea

¼ cup chopped, dried apples
¼ cup dried elder flowers
¼ cup chopped, dried cranberries
¼ cup dried wild bergamot leaf
1 teaspoon crushed, dried stevia leaf


Zingy Lemon Mint Tea

½ cup dried mint leaves
¼ cup dried lemon balm or verbena leaves
¼ cup chopped, dried rose hips
1 tablespoon dried lavender leaves
1 teaspoon crushed, dried stevia leaf


Rosy Blackberry Tea

¼ cup chopped, dried rose hips
¼ cup chopped, dried blackberries
¼ cup dried rose petals
¼ cup dried chamomile flowers
1 teaspoon crushed, dried stevia leaf


Wintery Herbal Tea

¼ cup dried wild bergamot leaf
¼ cup dried chamomile flowers
¼ cup chopped dried cranberries
1 tablespoon dried orange thyme leaves
1 tablespoon crushed, dried sage leaves


Orange Ginger Mint Tea

¾ cup dried mint leaves
1 tablespoon dried orange zest
2 tablespoons sliced, dried ginger
1 teaspoon crushed, dried stevia leaf


Herbal Tea for Colds

½ cup dried mint leaves
¼ cup chopped dried hibiscus buds
1 teaspoon crushed, dried stevia leaf
2 tablespoons chopped, dried Echinacea root


How to Grow Ginger Indoors

Whether you cook something sweet or savory, fresh ginger (Zingiber officinale) has a traditional place at the winter table. And, potted ginger is so easy to grow! Contained gingers grow fast for fresh, flavorful roots in any season.

Growing Ginger

Ginger is wonderfully easy to grow as a potted house plant for a sunny window. Start with a spacious container with bottom drainage. Then fill the pot with fertile Black Gold Natural & Organic Potting Mix, leaving at least 2 inches of headspace at the top of the pot for watering. Ginger likes soil with a slightly acid pH between 5.5 and 6.5, so consider adding a little Black Gold Peat Moss Plus to decrease soil pH.

Plants or roots don’t need to be planted deeply; place them just a few inches below the soil surface.  When planting ginger root, be sure to set it with its horn-like buds facing upwards. Lightly press down the soil to ensure good soil-to-root contact and water moderately, keeping roots just moist. Fertilize ginger monthly with an all-purpose water-soluble fertilizer, provide high light, and keep ginger plants warm and humidity high. They don’t appreciate dry air or temperatures below 50 degrees Fahrenheit.

Sourcing Ginger Plants

Store-bought roots from organic grocery stores will work very well or you can purchase plants from retail greenhouses, like Logee’s and Stokes Tropicals.  Just be sure you are choosing culinary ginger (Zingiber officinale) rather than flower ginger plants and that it is organically grown. There are many cultivated varieties of culinary ginger, but most are only available in Asian agricultural markets.

Harvesting Ginger Root

Happy ginger plants will begin to develop generous, fragrant, fleshy roots (rhizomes) that spread outward to fill the sides of the pot. Cut off outer rhizomes for cooking, and leave plenty of plant in the pot to generate lots more ginger for cooking.


Freshly harvested ginger is wonderfully pungent and delicious.

DIY Garden Project: Growing Sunflowers for Birds & Bees

Annual sunflowers (Helianthus annuus) are pure floral gold. Their immense blooms have an almost storybook quality. They track the sun, creating a glowing warm basin of golden pollen and sweet nectar to draw bees and butterflies. Abundant oil-rich seed heads follow, feeding both wildlife and humans. For Native Americans, sunflowers symbolized courage and were cultivated as the “fourth sister”, along with corn, beans, and squash.

Download the Step-by-Step PDF

Growing and Storing Fall Carrots, Beets, and Turnips

Carrots can be grown and harvested into early winter.

Root crops are the finest vegetables for the fall garden. Specialty varieties of carrots, beets, and turnips have been bred just for fall and winter growing and storage. Once the first frost hits, they sweeten up for better flavor. If properly stored, they keep beautifully through winter. Cold-frame gardeners can also rely on them for consistent winter production.

There’s a reason why root-rich stews, roasts, and soups are favored in colder months. These vegetables are superior winter keepers that taste the best in the late-season cool weather. That’s why they have been in constant cultivation for thousands of years across Eurasia. They provided needed food and nutrition when no other fresh vegetables were available. Today’s gardeners also reap the benefits of carrots, beets, and turnips with the added advantage of superior varieties for taste, texture, and performance.

Carrots

‘Dolciva’ is the best carrot for retaining sweetness and flavor after months of storage. (Image from High Mowing Organic Seeds)

Carrots (Daucus carota) are available in lots of colors. Classic orange carrots originate from Europe and tend to be the crispest and sweetest. Purple or red carrots were initially cultivated in the Middle East, Russia, and India and are stronger-tasting and less sweet. All types can be grown as winter carrots, but some perform better than others.

True winter carrots are exceptionally cold hardy, long tapered, often slower to mature, and remain crisp and sweet through the winter months. The heirloom orange varieties ‘Imperator 58’ (75-days, 1933 All-America Selections Winner) and ‘Danvers 126’ (70 days) are two excellent choices favored by gardeners for decades. Newer winter keepers that remain tasty in storage are the slender orange ‘Interceptor’ (120 days), super sweet ‘Napoli’ (58-days), and super keeper ‘Dolciva’ (105-days).

Grow long-tapered carrots in deep, fertile, light soil with a slightly acid pH of 5.5 to 6.5 for best root development. Sow seed in the ground in late August to early September. Amend carrot beds with Black Gold Garden Compost Blend and acidic Black Gold Canadian Sphagnum Peat Moss—working both deeply into the soil. Double digging ensures amendments are incorporated deeply into the soil. (Learn how to double dig your beds here!)

Beets

The classic beet ‘Detroit Dark Red’ is a great keeper! (Image from High Mowing Organic Seeds)

Favored for centuries by Eurasian gardeners living in colder climates, beets (Beta vulgaris) are very hardy and will keep for months. Beets for winter growing are exceptionally hardy and stay smooth and sweet without getting fibrous and woody. Their tops can also be eaten like Swiss Chard. Lots of classic red beets are beautifully suited to cold-weather growing.

The slow-to-mature heirloom ‘Lutz Winter Keeper’ (80 days) was first developed in the 1800s and has proven to be a great selection for fall gardens, yielding large, red beets with good flavor that store very well. Another old-time winter beet is ‘Detroit Dark Red’ (55 days). The classic mid-American variety has uniformly round roots with good sweetness.

Beets prefer a neutral pH and do not grow well in acid soil, so add lime to beet beds if your garden soil is acidic. Next, amend with Black Gold Garden Compost Blend for increased fertility. Before planting beets in the ground, soak the seeds overnight for faster germination. Varieties that take longer to produce should be started no later than early September.

Beet seeds have 2-3 embryos, which means a single seed can yield two or three seedlings, encouraging more seedling clumps that require thinning. For easier thinning plant the single-embryo variety ‘Moneta’ (46 days), which produces just one seedling. Its red beets are also delicious and great for fall and winter cultivation. (Click here to see our video about growing beets!)

Turnips

The red turnip ‘Scarlet Ohno Revival’ is a reliable cold-season variety. (Image thanks to High Mowing Organic Seeds)

Turnips (Brassica rapa) are members of the mustard family (Brassicaceae) along with other cole crops like cabbage, which is why their roots have a sweet cabbage-like flavor. Their slightly bitter greens are also edible.

Historians determined that humans first began to eat turnips in prehistoric times. The easy root crops were grown and eaten by the Greeks and Romans, and in India, they were raised for their flavorful, oil-rich seeds. Turnips are also important to East Asian culinary traditions.

The old-time ‘Purple Top White Globe’ (50 days) is the classic turnip that most gardeners grow. The white roots have electric purple tops, and the young leaves are favored in the South for turnip greens. For something unique, try the red-rooted ‘Scarlet Ohno Revival’ (50 days) turnip, which can be eaten fresh or cooked. The white-rooted Japanese variety ‘Tokyo Market’ (35 days) has a fruity, sweet flavor ideal for eating fresh in salads.

Grow in fertile loam with a neutral to slightly alkaline pH of 6.5 to 8. These are faster growing, so gardeners can wait until early October to sow seeds in fall gardens or cold frames.

Storing Root Vegetables through Winter

Well-protected cold frames allow hardy root vegetables to be grown into winter.

Homeowners used to have root cellars for keeping produce through cold months. The humid cellars maintained roots at optimal storage temperatures between 32 and 40 degrees Fahrenheit. These days we have refrigerators, but if you have a large harvest, you’ll likely need more storage space. Here are four smart, space-saving ways to store your root harvest in winter. (Always remember to remove the greens from your root crops before storing them!)

  1. Provide Garden Cover: This easy method allows gardeners in milder winter areas to keep their crops in the ground. Before hard freezes hit, cover your root crops with a 1- to 2-foot layer of straw. This will protect them from harsh cold and winter heave. Just uncover and dig them as you need them.
  2. Grow in a Cold Frame: The best cold frames are stone or brick-lined, sunken, and plexiglass covered to hold in the heat from the winter sun. Topping cold frame crops with rich compost will add extra protection from cold and make winter harvest easier.
  3. Dig a Root Clamp: This is an old way to store roots without a root cellar. Dig a broad hole about 3-feet across and 1 or 2-feet deep in your garden. Add a thick base layer of straw, layer in your roots, add another thick top layer of straw and cover the sides with a layer of soil and compost. Leave a chimney of thick straw at the top for protection and aeration. Dig in through winter when you want to gather roots for eating!
  4. Create Root Box for a Cool Basement or Garage: If your basement or garage stays below 40 degrees Fahrenheit through winter, create root boxes! Take an aerated wooden or thick cardboard box, layer in straw and lightly moistened peat moss, and add moistened root crops between them. Then collect the roots as you need them.
Home growers used to rely on earth-covered root cellars to store winter root vegetables.

Hot Fall Container Designs with Ornamental Peppers

Ornamental peppers capture the season and look great in containers.

Bright, seasonal ornamental peppers (Capsicum annuum) add warmth and zest to fall plantings. They are truly some of the best container plants of the season—with lots of new varieties being introduced each year to keep the palette fresh. Colorful peppers remain pretty for a long time and pair well with many other seasonal perennials and bedding plants. Try one of our four easy, seasonal container designs, or use elements to inspire your own creations.

Designing Containers with Ornamental Peppers

When creating container designs with these hot, pretty edibles (almost all ornamental peppers are spicy), choose plants with complementary textures (fine, bold, airy, or spiky), colors, and habits. Container designers rely on suites of plants with either vertical, mounding or bushy, and cascading habits married in complementary arrangements where plant heights contrast but flow.

When it comes to color, ornamental pepper colors are most often warm-hued, but those with purple fruits and foliage are cooler colored.  For visual “pop” plant them in color groups that are either similar or contrasting but complementary (on the opposite end of the color wheel, such as purple and yellow, orange and blue, and red and green).

Sun-loving ornamental grasses, fall-flowering annuals, and fall-flowering perennials are all fair game when choosing plants to pair with your sun-loving peppers. Try choosing flowering plants that also feed pollinators. And, if you add a perennial or two to the container, it is always nice to have garden spots to move them to once the container has lost its seasonal luster.

Container Design 1

Capsicum ‘Hot Pops Purple’, Mexican hair grass (Nassella tenuissima), Sempervivum ‘Ruby Heart’

Designed for hot garden spots, this container combination is low-growing, drought-tolerant and looks super through fall! The very small pepper ‘Hot Purple Pops’ (to 7”), has a somewhat spreading habit and numerous rounded peppers that turn from purple to orange (fruits are very hot!).  The hardy hens & chicks will survive the winter and can be either be left in the pot and paired with new annuals in spring or moved to a rock garden or dry border edge in late fall or spring.

Container Design 2

Capsicum ‘Sedona Sun’, Solidago ‘Little Lemon’, Lantana Lucky™ Sunset Rose

Bees and butterflies love this sunny combination, and you will too. The cheerful ‘Sedona Sun’ is a low, spreading pepper (to 12”) with spicy, conical fruits that turn from pale yellow to orange. Its soft, warm colors will light up any sunny porch or patio. The hardy perennial goldenrod can be relocated to a sunny garden spot in fall or spring.

Container Design 3

Capsicum ‘Purple Flash’, Sedum ‘Thunderhead’, Leatherleaf Sedge (Carex buchananii)

This warm and cool container planting is bold and texturally pleasing. The mound-forming pepper ‘Purple Flash’ (to 16”) has tricolored leaves of purple, dark green, and ivory that complement its round peppers that turn from purple-black to cherry red. (Keep the super spicy, berry-like peppers away from children!) The sedum and sedge are both sun-loving, hardy perennials.

Container Design 4

Capsicum ‘Black Pearl’, Origanum laevigatum ‘Herrenhausen’, Silver Dollar Eucalyptus (Eucalyptus cinerea)

Cool-colored and a delight to bees due to the flowering Herrenhausen oregano, this pleasing container will look great up to frost. The pepper ‘Black Pearl’ (to 18”) has a bushy habit, purple-black foliage, and spicy, marble-sized peppers that turn from near black to deep red. The oregano is a hardy ornamental herb that spreads, so relocate it to a spacious sunny bed the following spring.


Containers and Planting

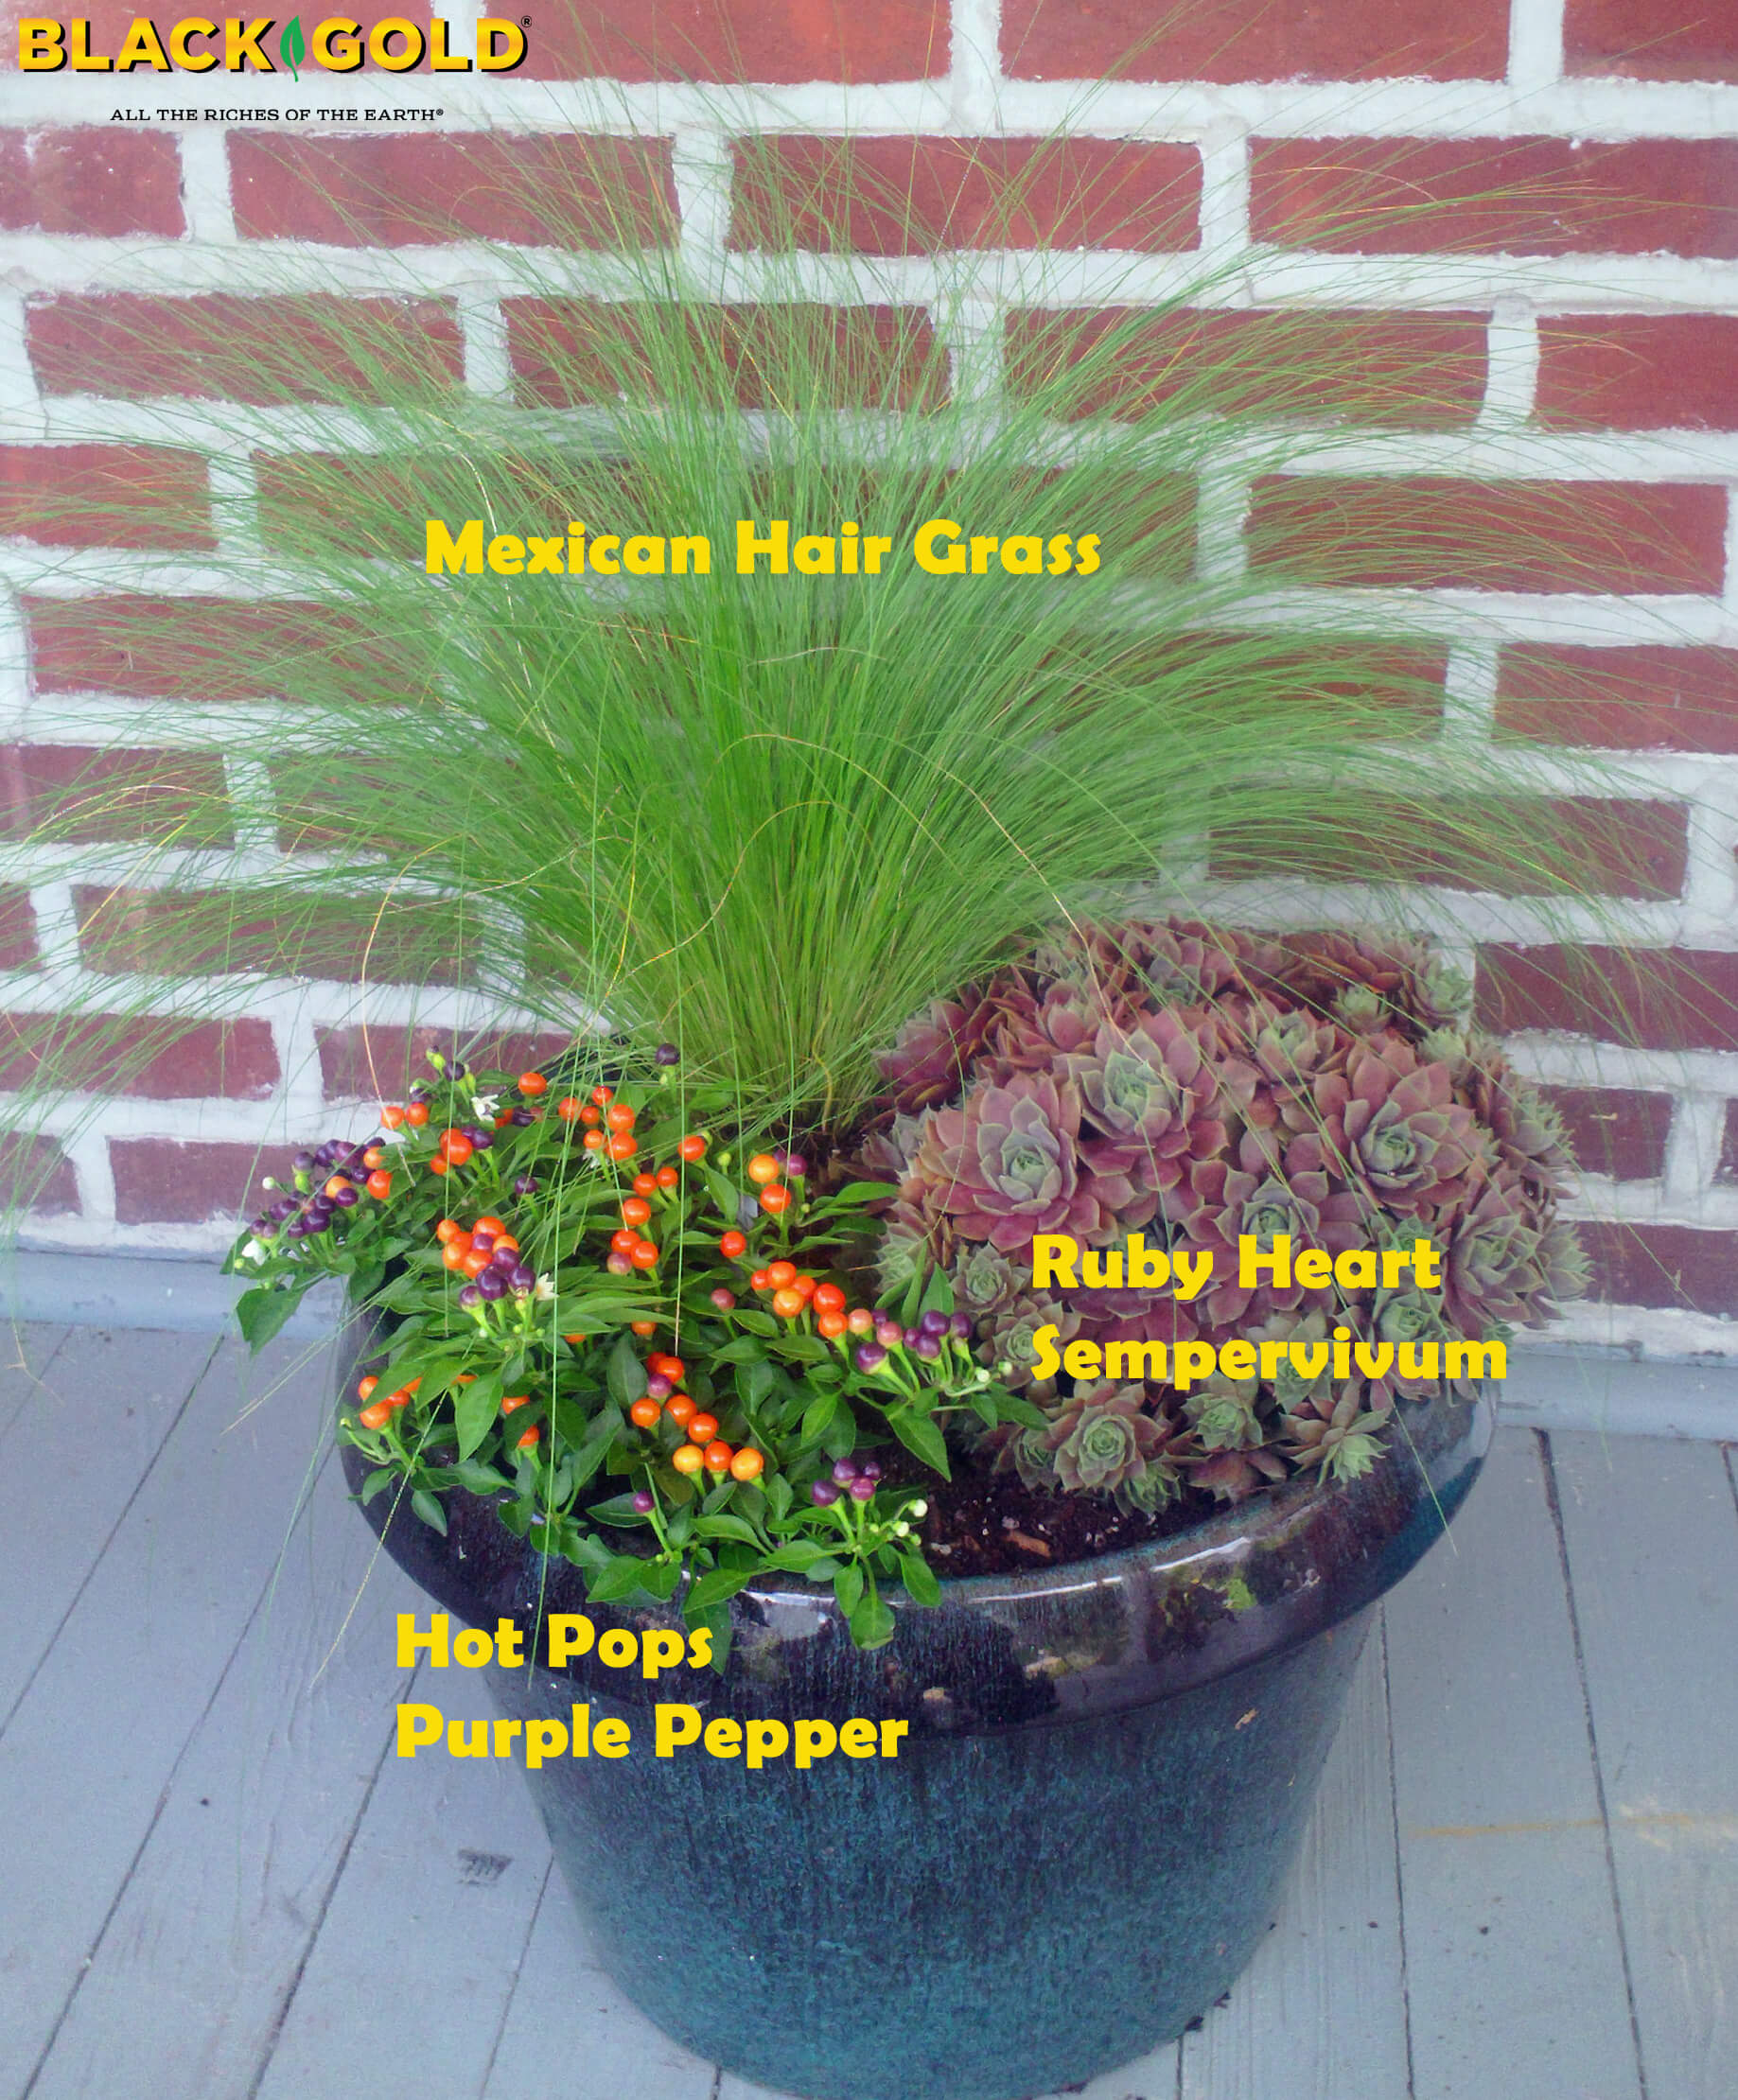
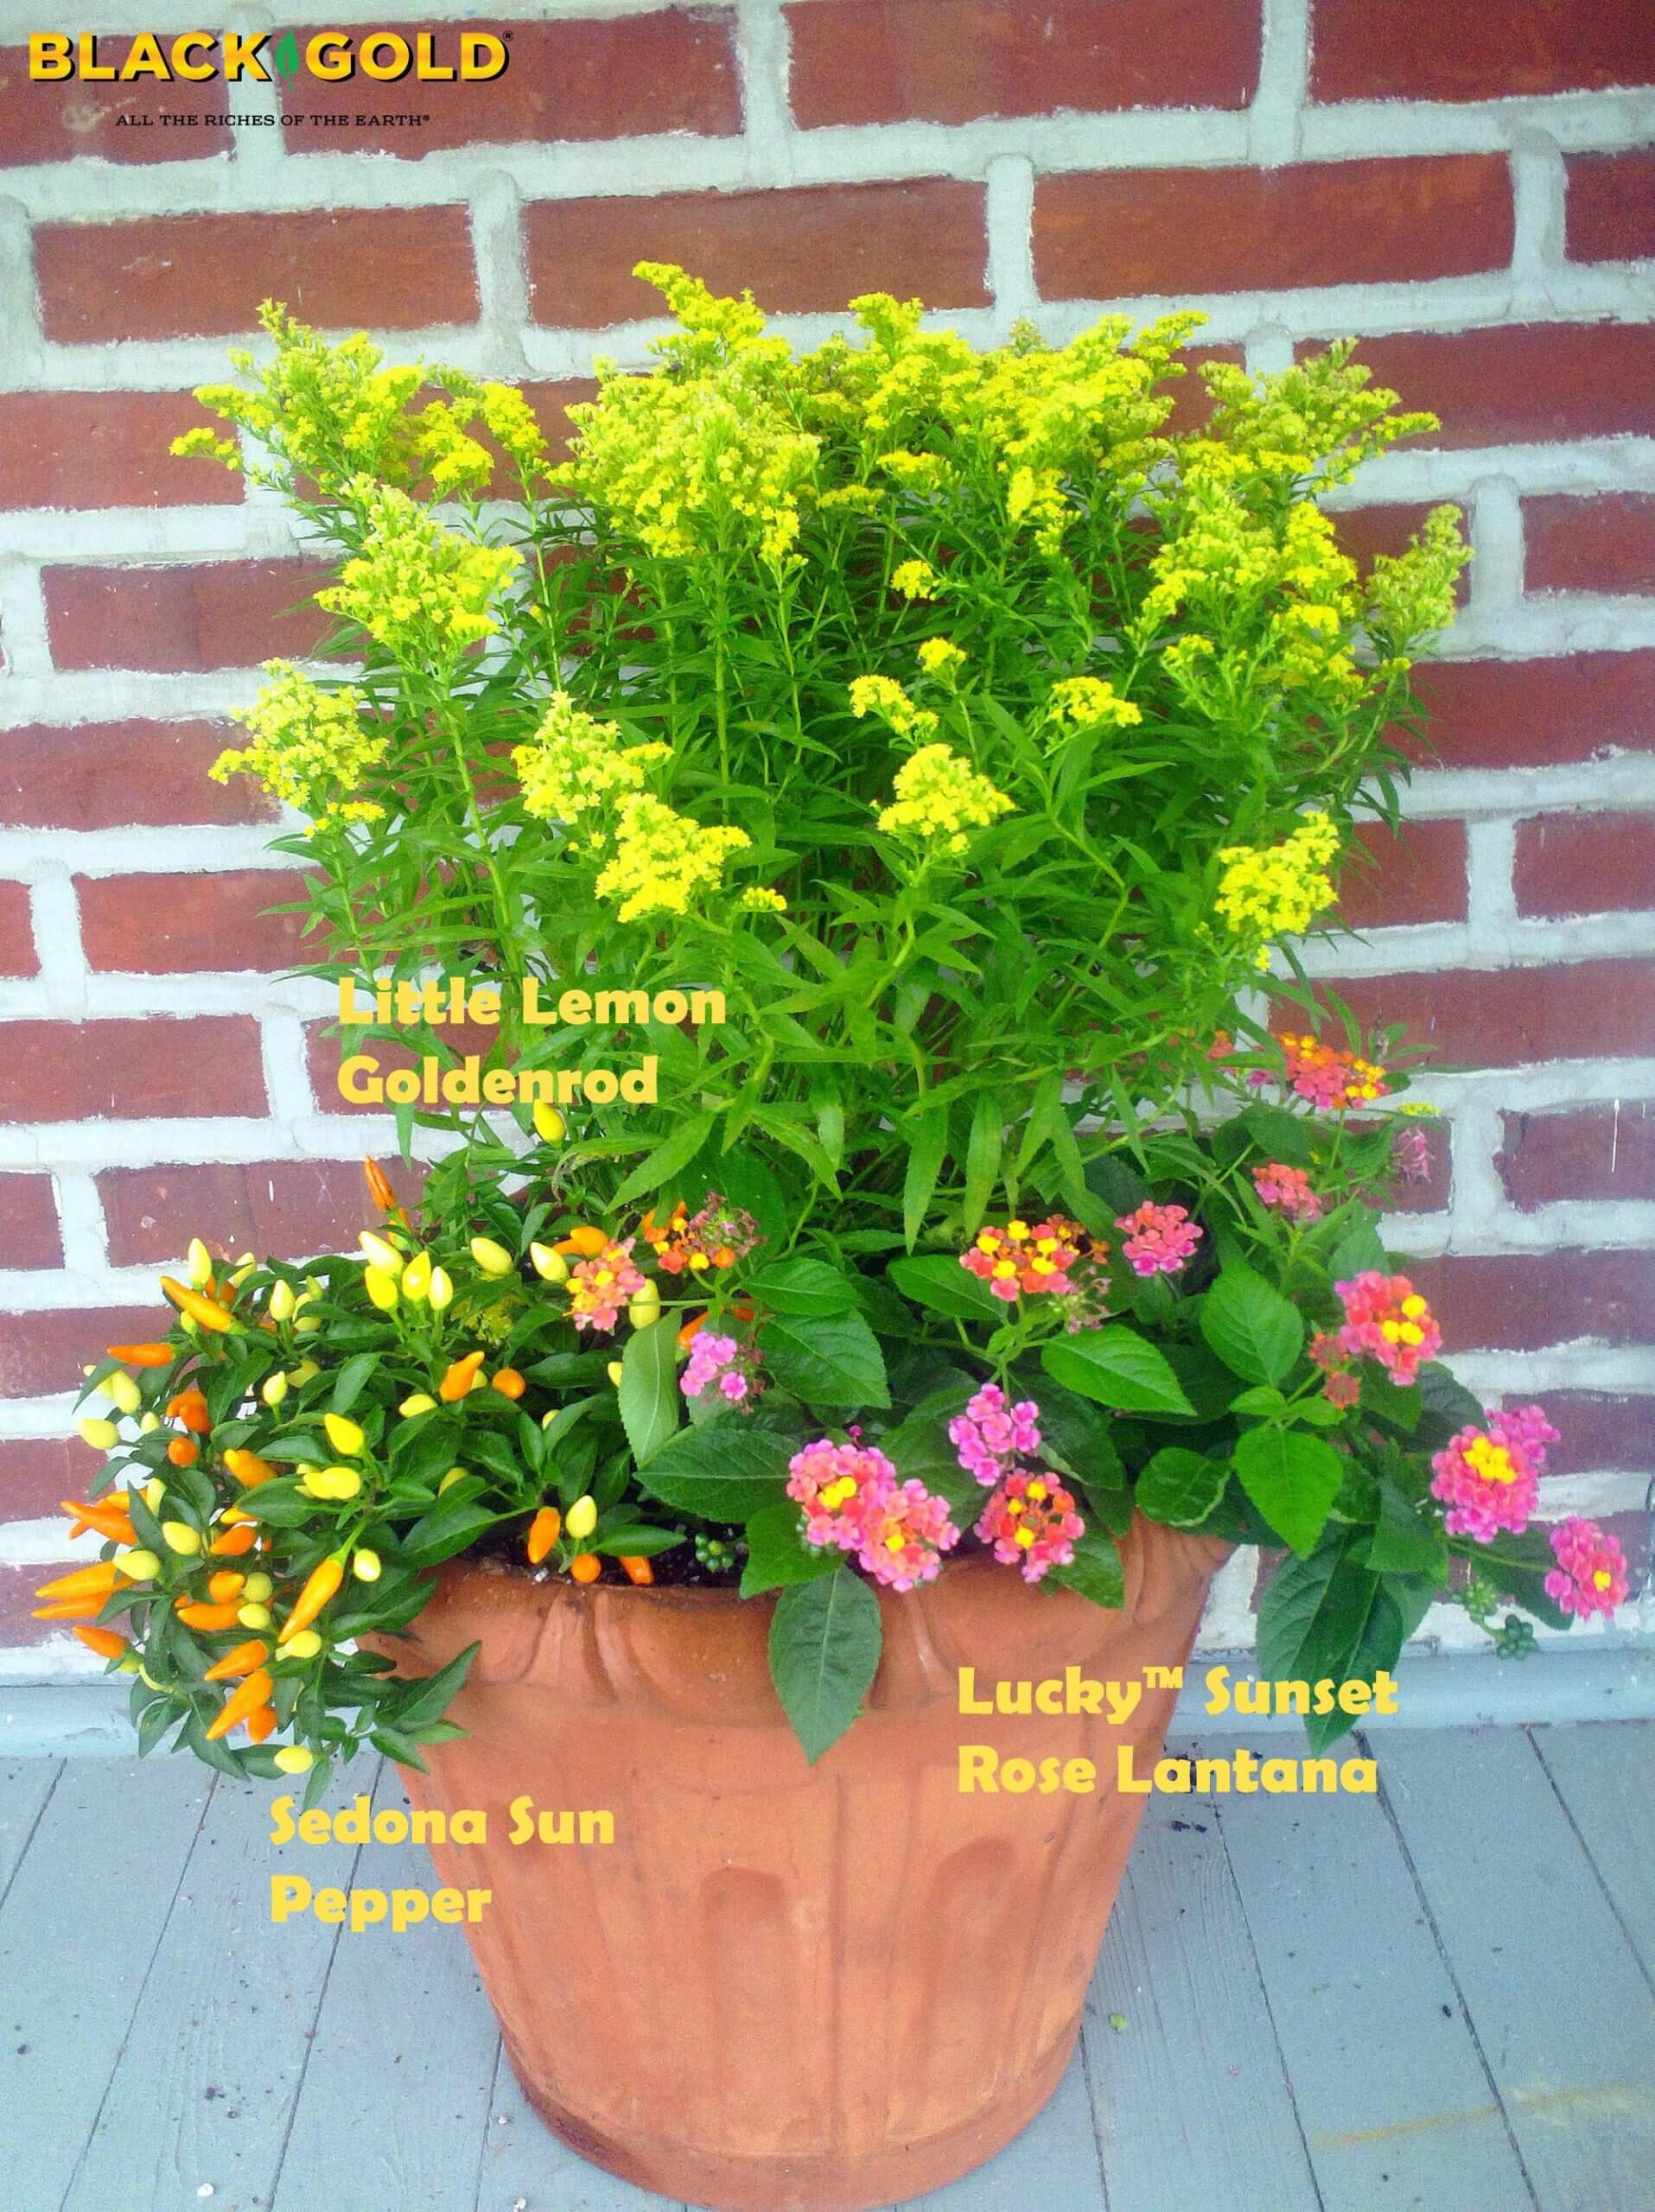
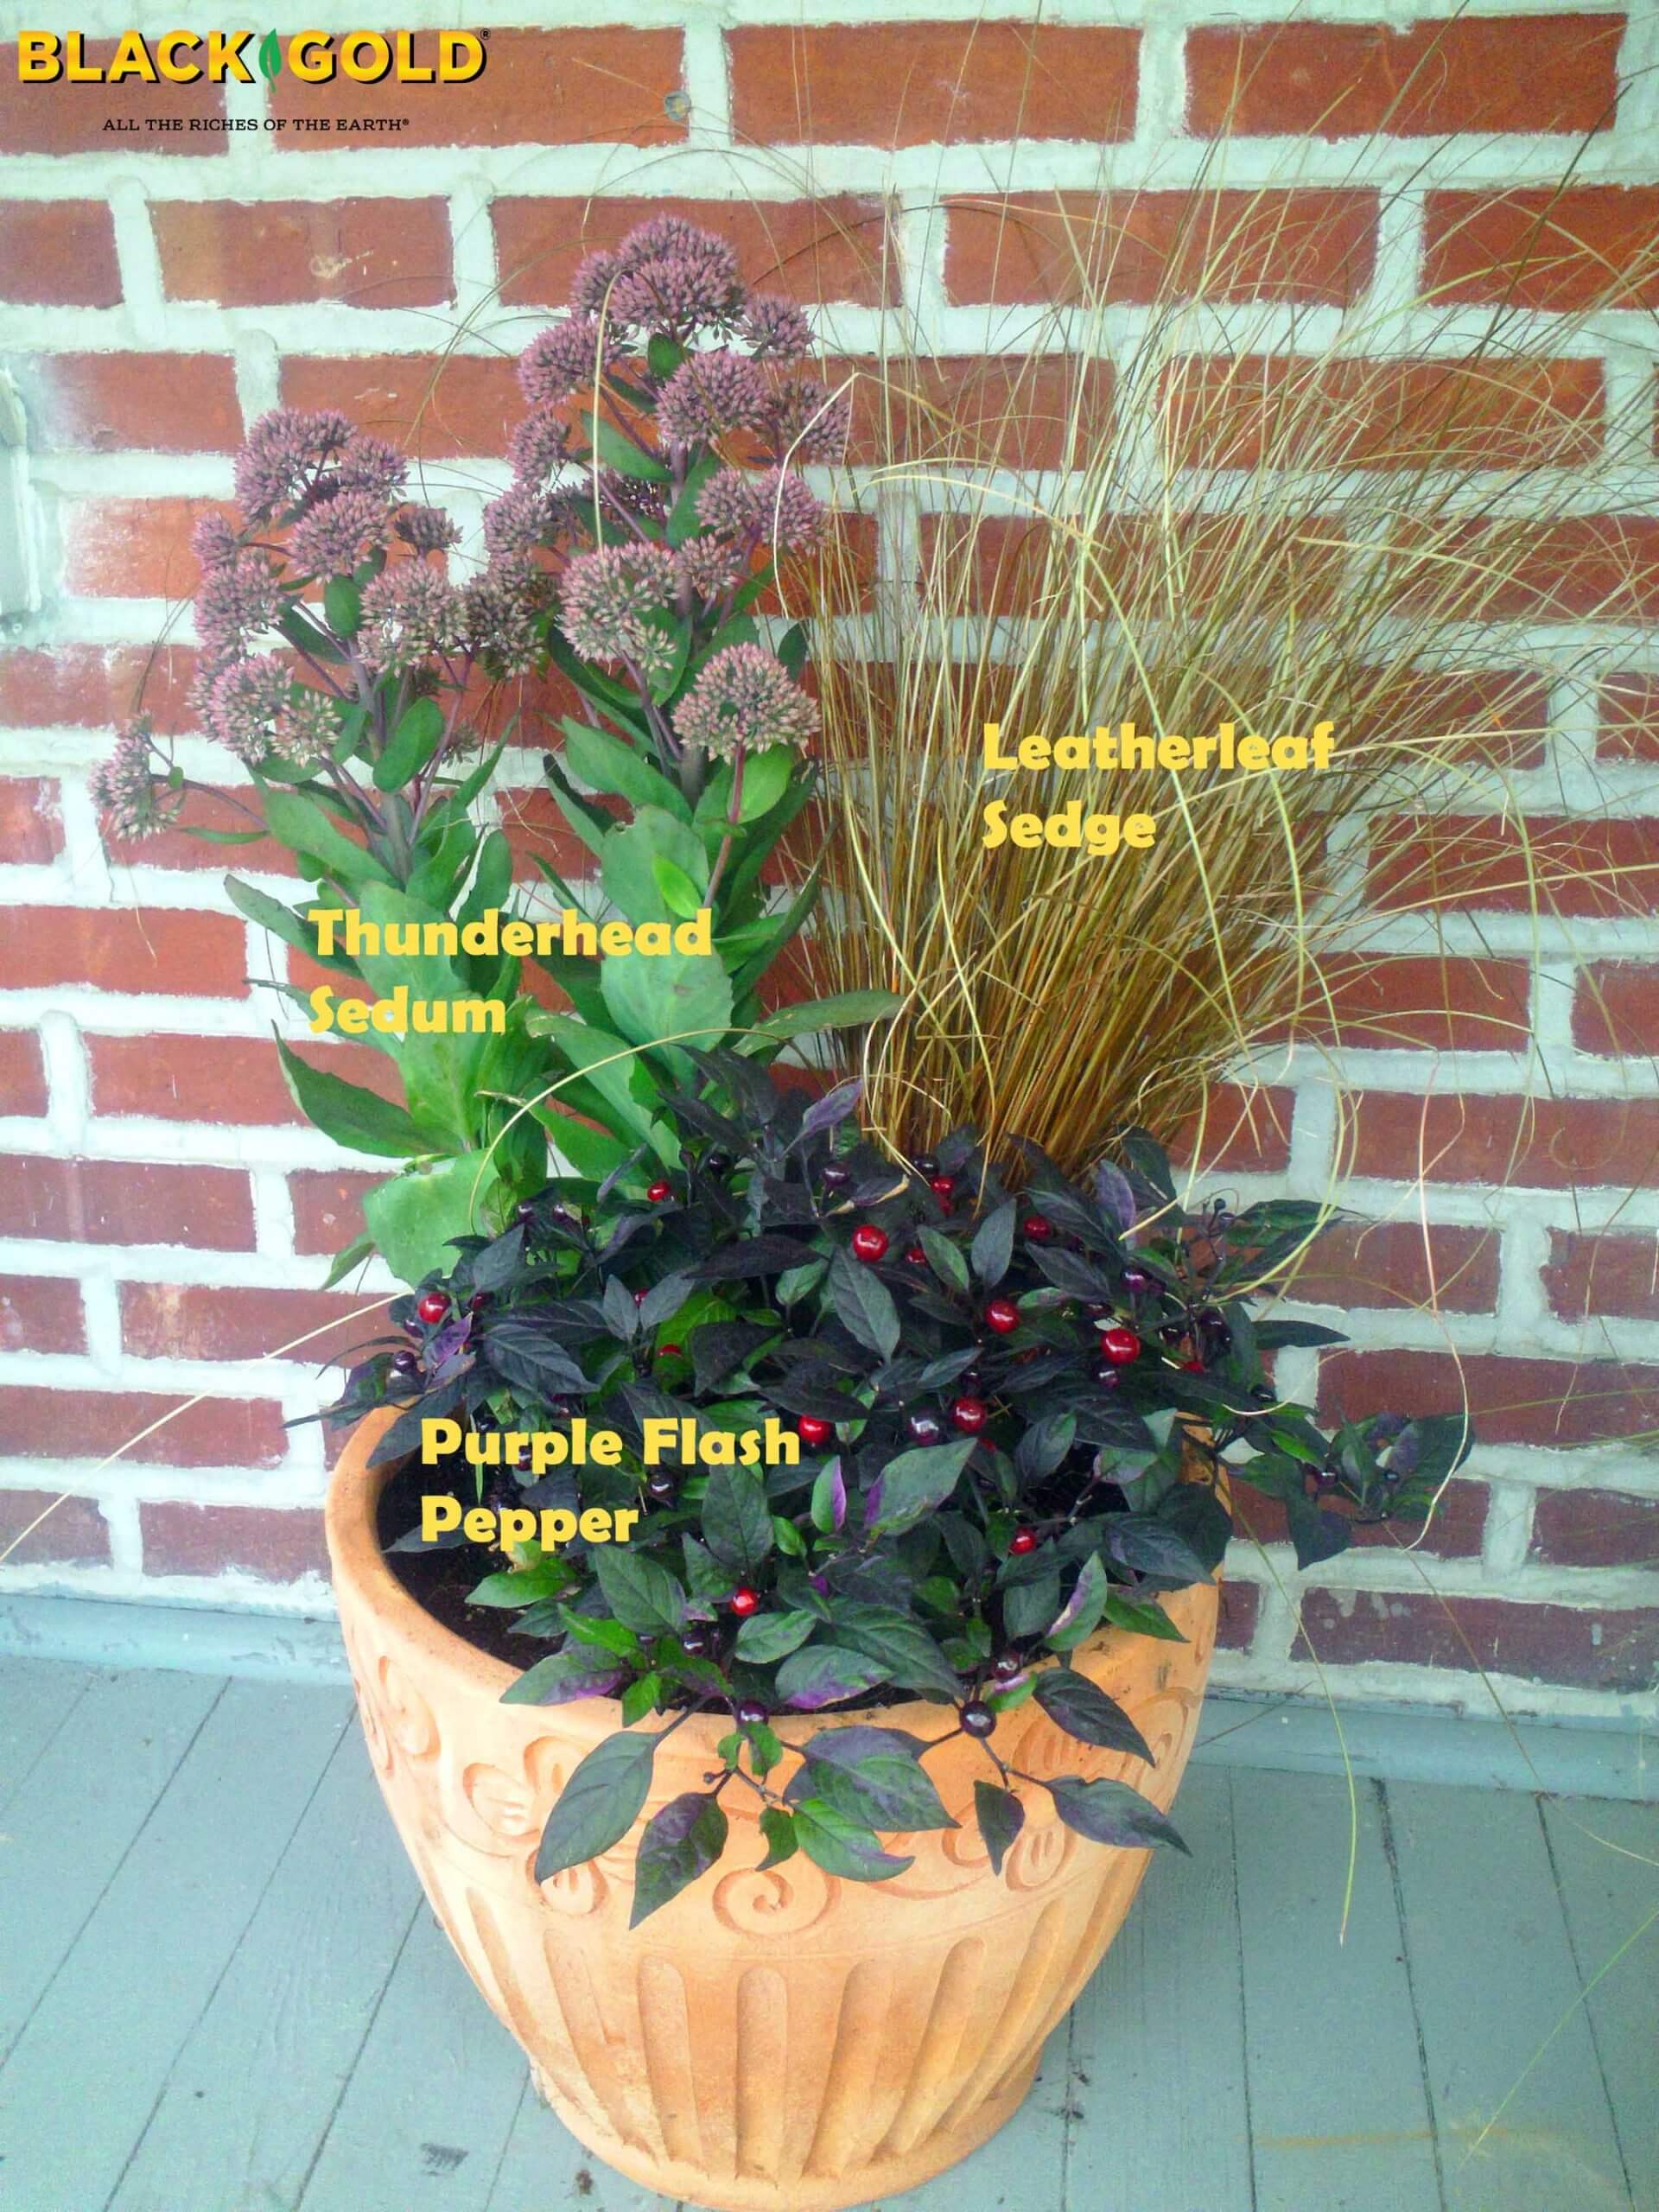
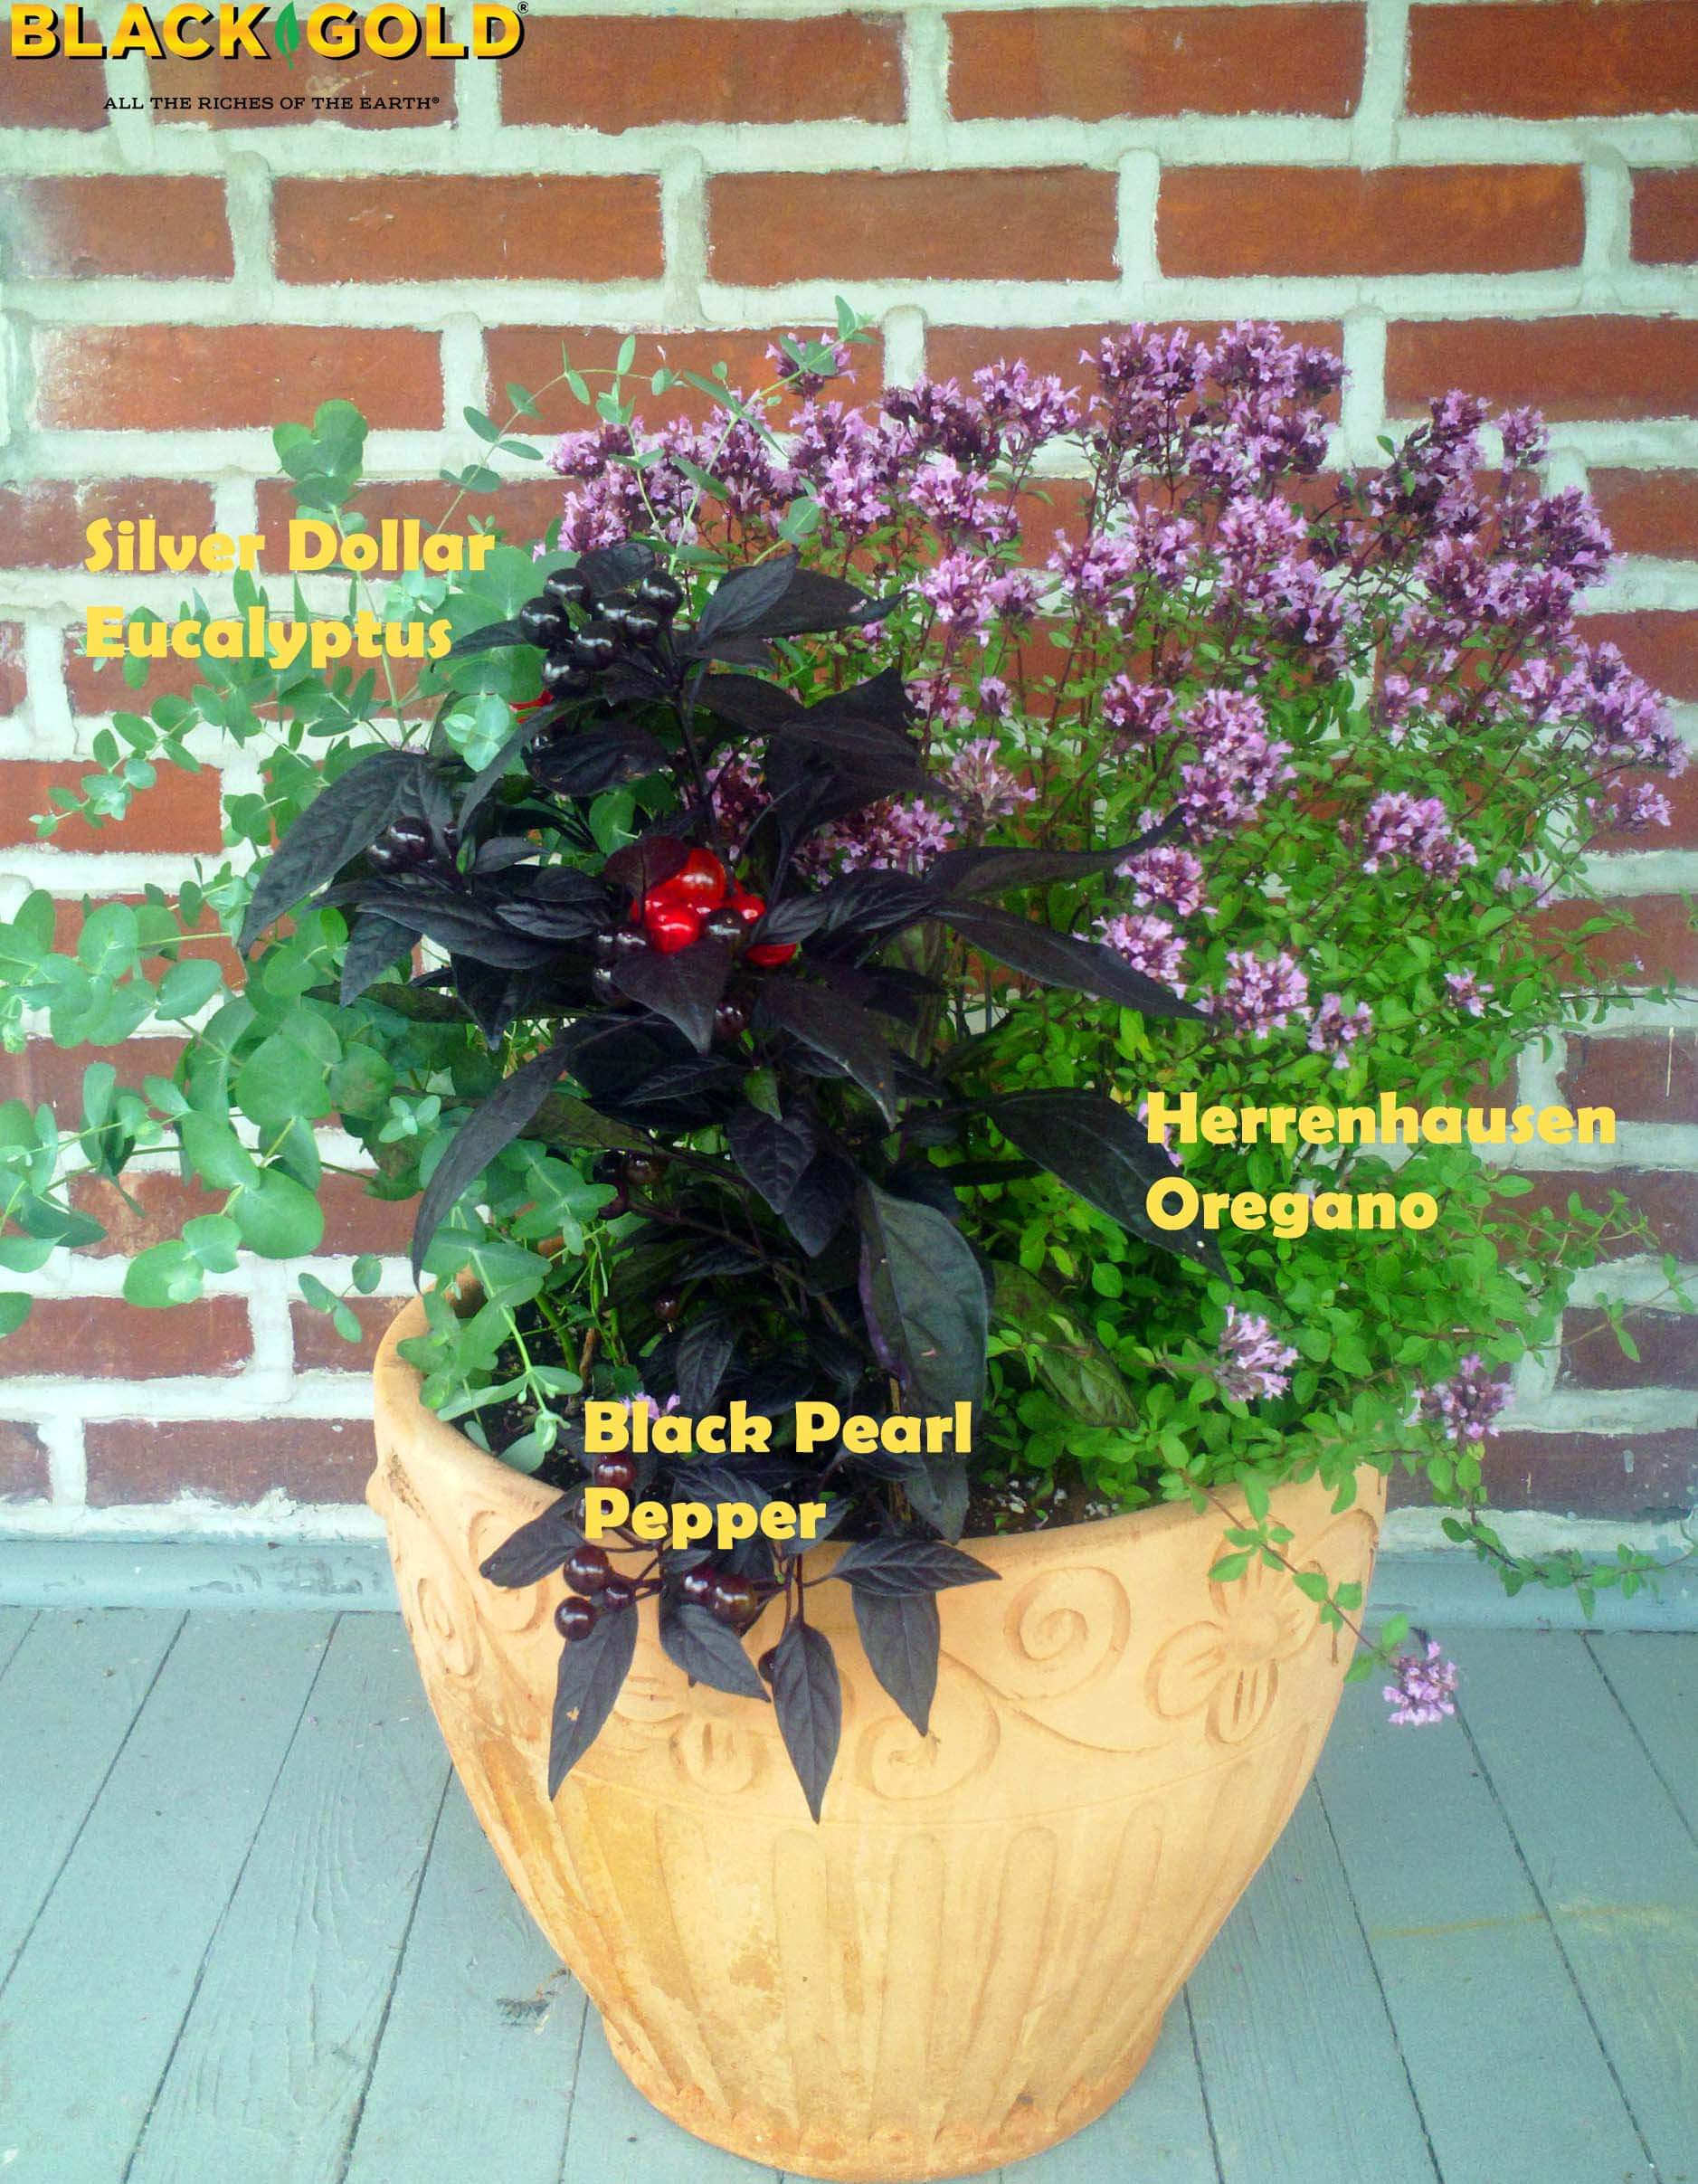
Choose containers that reflect the hues of the season. (I chose three large Terracotta pots and one large blue-black container that made me think of Halloween.) Before planting up pots, always fill them halfway with planting mix. Black Gold® Natural & Organic Mix, Black Gold® Waterhold Cocoblend Potting Mix, or Black Gold Moisture® Supreme Container Mix all work very well. Then arrange your plants as you would like to see them in the containers, remove them from their plastic pots (working up any bound roots), set them, and then fill in the gaps with more mix.

Water finished pots until the water flows from the bottom and fills the saucer. Keep container plantings moist; daily watering is often needed. After a couple of days, feed your plantings with water-soluble Proven Winners® Premium Soluble Plant Food for Flowering Plants. This helps flowering plants perform to their fullest and shine up until frost!

Sunflowers for Bees, Song Birds, and Garden Splendor

Honeybees and native bees rely on sunflowers for pollen and nectar.

Annual sunflowers (Helianthus annuus) are pure floral gold. Their immense blooms have an almost storybook quality. They track the sun, creating a glowing warm basin of golden pollen and sweet nectar to draw bees and butterflies. Abundant oil-rich seed heads follow, feeding both wildlife and humans. For Native Americans, sunflowers symbolized courage and were cultivated as the “fourth sister,” along with corn, beans, and squash.

Sunflower History

Native Americans first cultivated sunflowers nearly 3000 years ago.

Sunflowers are North American natives, with natural populations extending from southernmost Canada to Central Mexico.  Native Americans first cultivated them nearly 3000 years ago, using them for food, dye, medicine, and ceremony. Colonists quickly adopted the flowers—growing them for food, livestock forage, and beauty. Today, the nearly one-billion-dollar sunflower industry has them farmed and manufactured for oil, food, birdseed, cut flowers, and gardening.

Cultivated sunflowers can be traced to two population centers in the central and eastern US, according to research. From these, hundreds of cultivated varieties have arisen with diverse heights, flower sizes, and colors ranging from gold to bronze, orange, burnished red, near black, pale yellow, and ivory. Vibrant new varieties serve the seed, cut flower, and gardening markets, but some of the best selections are Native American heirlooms—offering qualities that sustained peoples for thousands of years.

Sunflowers and Wildlife

Sunflowers feed bees, butterflies, and birds. (Image by Franziska Meyer)

Honeybees and native bees rely on annual sunflowers for pollen and nectar, along with butterflies and other nectar feeders. Mature seed heads become songbird feeding stations—attracting finches, nuthatches, cardinals, and titmice—while also attracting many small mammals. Wildlife prefers large-headed varieties, which can be cut, dried, and saved to feed birds through winter. Avoid growing pollenless sunflower varieties for bees, because they offer less food value to these pollinators.


Sunflowers for Seed

Hungry birds begin to devour seed heads as they develop!

Mammoth Grey Stripe’ is the best-known seed sunflower! Its huge golden blooms are supported by strong stems able to hold the weight of the fully developed seed heads. The massive plants reach 10-12’ in height, and the heads of grey-striped seeds reach up to 12” across. The comparable ‘Mammoth Russian’ is slightly larger with golden petals and striped seed hulls. It reaches 14’ in height and bears 12-14” heads. ‘Giant White Seeded’ is another good seed producer with pure white seed hulls produced on 12” heads. Provide all large sunflowers with lots of space and expect many colorful goldfinches to visit as their heads develop. (Cut or cover any heads you want to save for winter birds!)

Native American Heirloom Sunflowers

‘Hopi Black Dye’ has black-hulled seeds used for natural dye. (Photo courtesy of High Mowing Seeds)

Native American sunflower varieties have unique traits valued by the tribespeople that saved them over generations. The black-hulled ‘Hopi Black Dye’ has large flowers with yellow petals and black-brown centers. The near-black seed hulls were used by the Hopi people to dye wool and baskets.  A great Native American variety for eating is ‘Arikara‘. First collected on the Louis and Clarke expedition, these golden sunflowers were grown by the Arikara people (in present-day Missouri) for their massive seed heads that can reach 16” across. The seeds of this variety also germinate under cooler conditions than many other sunflowers.

Sunflowers for Cutting

‘Sunrich Orange Summer’ is a great pollenless variety for cutting.

Sunflowers produce copious messy pollen, which is why pollenless varieties are preferred for cutting gardens. ‘Pro Cut’ has pollenless chocolate-brown centers and golden petals (much like a giant black-eyed-Susan) that look superb in arrangements. Children love ‘Teddy Bear’, a compact (2-3′), fully double, golden variety with minimal pollen. Choose ‘Sunrich Orange Summer’ for its yellow petals and pollenless brown centers. The deep burgundy ‘Prado Red‘ has almost black centers and bears many pollenless flowers perfect for cutting through summer.

Sunflowers for Gardens

Autumn Beauty mix produces lots of pretty flowers that shine in the garden.

Choose shorter or colorful, long-flowering, multi-branched sunflowers for a big garden show. The well-branched Autumn Beauty Blend sunflowers have long-flowering bold blooms in shades of gold and burnished-red. The 5-6’ plants are perfect for large borders. The ivory and pale yellow flowers of ‘Italian White’ are small, delicate, and borne in profusion on 5-7′, well-branched plants. Both perform well in big garden spaces!

There are lots of super-compact varieties good for small-space gardening. Pick the 1-2′ ‘Big Smile‘ for containers and really small gardens. Its dark-centered yellow flowers are cheerful and prolific. The slightly taller ‘Peach Passion’ is a 2-4’ variety with loads of small, peachy yellow flowers over a season.

Growing Sunflowers

Sunflowers take 50-110 days to bloom from seed, depending on the variety. Plant seeds outdoors in fertile, well-drained soil to a depth of 1-2″, or indoors under grow lights in pots of Black Gold Seedling Mix. Amending garden soil with Black Gold Garden Soil or Black Gold Garden Compost Blend will help facilitate germination and deep root growth. Give sunflowers full sun and lots of space to grow, especially tall varieties. Provide minimal care once established, aside from occasional watering in dry weather.

The burgundy blooms of ‘Prado Red’ are unique and beautiful.

Refrain from planting sunflowers near areas where you intend to direct sow other seeds. Sunflowers excrete chemicals from their roots that reduce germination and seedling growth in many other plant species. This helps sunflowers naturally compete in the wild, but it can create problems in the garden.

Sunflowers are easy to grow, making them one of the best flowers for wildlife and enjoyment. They also self-sow, so you can expect interesting volunteers to pop up in your garden for years to come. Every garden needs a little sun from these cheerful, easy annuals.

The fully double ‘Teddy Bear’ is great for children’s gardens.


Sweet, Sweeter, and Sweetest Sweet Corn

Many bicolored corn varieties are both crisp and sweet.

Sweet corn is summer bliss, but not all ears are the same. So, what makes one type better than the other? It depends on your sweet tooth. Crisp sweet corn comes in different sugar levels, from supersweet to old-time sugary sweet. Here’s what you need to know to choose the best ears to suit your taste.

What Makes Sweet Corn Sweet?

The first sweet corn was sold to American gardeners in the 1820s (a white kerneled variety) and since then, sweeter, tenderer varieties have been developed each year. (One of the earliest varieties, ‘Golden Bantam’ (1902), is still popular today!) This is thanks to three sweet corn genetic groups (sugary (SU), sugar enhanced (SE) and supersweet (SH2)) that provide higher sugar content, less starch, and more tender kernels. New varieties bred from these genetic groups, labeled as synergistic (mix of SE and SH2 kernels on the same ear) and augmented supersweet (sugar amplified SH2), offer the sweetest taste. Gardeners looking for old-fashioned sweet corn with good flavor should look for older SU and SE varieties.

Kernel Size, Color, and Texture

Ripe corn is plump with well-developed kernels and silks that are brown at the top.

Kernel size, texture, and color should also vary between varieties as do ear size and kernel density. There are white, yellow, and bicolor (white and yellow) ears with kernels that are small and rounded, large and angular, or somewhere in between. Supersweet corn often has a crisp texture while sugary tends to have a firmer, creamier texture. Good seed vendors always provide this information to make it easy for gardeners to pick corn with their favorite characteristics.

Sugary Sweet Corn

These old-fashioned classic sweet corn varieties have great flavor, and while they have good sweetness, they are not extremely sugary. ‘Silver Queen’ (92 days) is a classic white sugary variety recognized for its crisp sweet kernels and high performance. For a great tasting yellow variety, try ‘Early Sunglow’ (63 days), which has shorter ears that are early to mature. A sweet and prolific bicolor is the old-fashioned, open-pollinated, pale yellow and white ‘Double Standard‘ (73 days).

Sugar Enhanced Sweet Corn

Plant more than three rows of sweet corn for good production. (Image by Joanna Protz)

Pearly crisp texture, uniform ears, and good sweetness are what make ‘Sugar Pearl‘ (72 days) a favorite among gardeners. The yellow ‘Sugar Buns‘ (70 days) is a good yellow variety with a long window of harvest and short ears that have reliable sweetness. And, the early ‘Trinity‘ (68 days) is an easy-to-find choice with sweet, crisp, white and yellow kernels on shorter ears.

The Sweetest Sweet Corn

‘Honey N’ Pearl’ Corn (Image from AAS Winners)

The disease-resistant ‘Vision MXR‘ (75 days) is a deep yellow supersweet with long ears that grow from tall plants. ‘Honey n’ Pearl‘ bicolor (78 days) is an early supersweet and 1988 AAS Winner noted for its vigor and great taste. A reliable synergistic variety is ‘Sweetness‘ (71 days), which has long, bicolored ears with a super sweet flavor.  Two super sweet types include ‘Multisweet‘ (75 days), an augmented supersweet with gold and yellow kernels and unbelievable flavor, and the 2018 AAS Winner ‘American Dream‘, which has tender pale yellow and ivory ears with unbeatable sugar.

Growing Sweet Corn


Grow corn in rows to ensure good pollination and production. (Image by Joanna Protz)

Plant corn in the ground in late spring, once the soil is warm and frosty mornings are long gone. Seeds should be planted about 2 inches deep and 8-12 inches apart and kept lightly moist for good germination. Plant them in no less than 3 rows of 6 to ensure even pollination and good harvest. Provide full sun and tilled soil that drains well and has average fertility and a neutral pH. Working Black Gold Compost Blend into the soil before planting will increase success. Once temperatures heat up, plants will take off. Keep them irrigated but not wet. Ears will be ready when they are plump, the husks are green, and the tassels have turned brown at the tops.

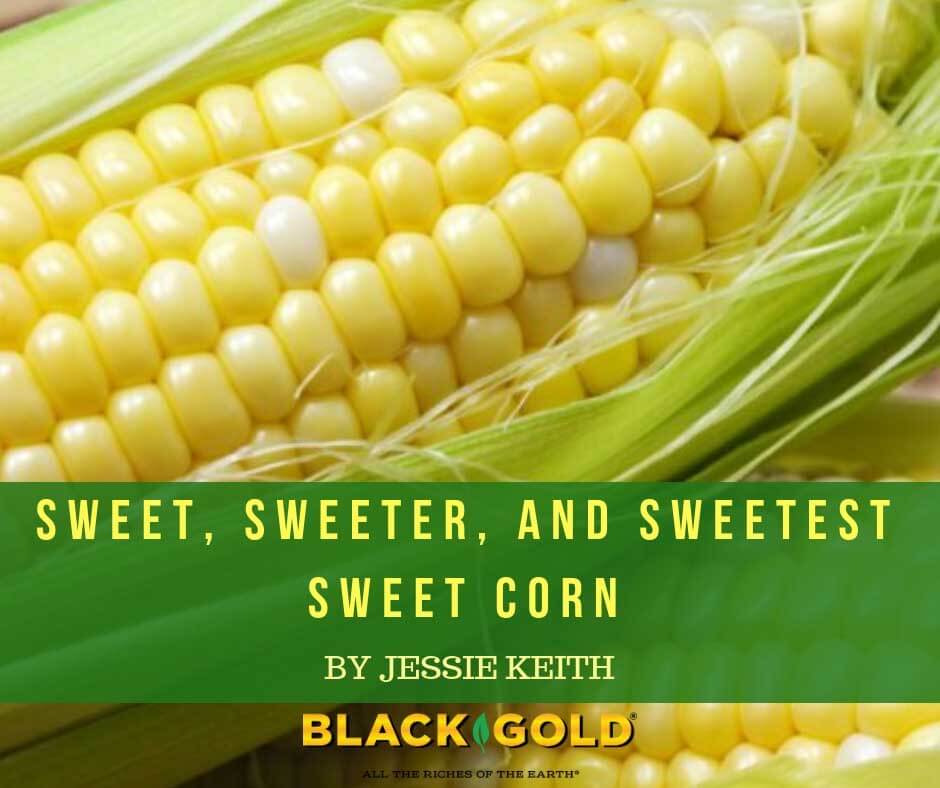
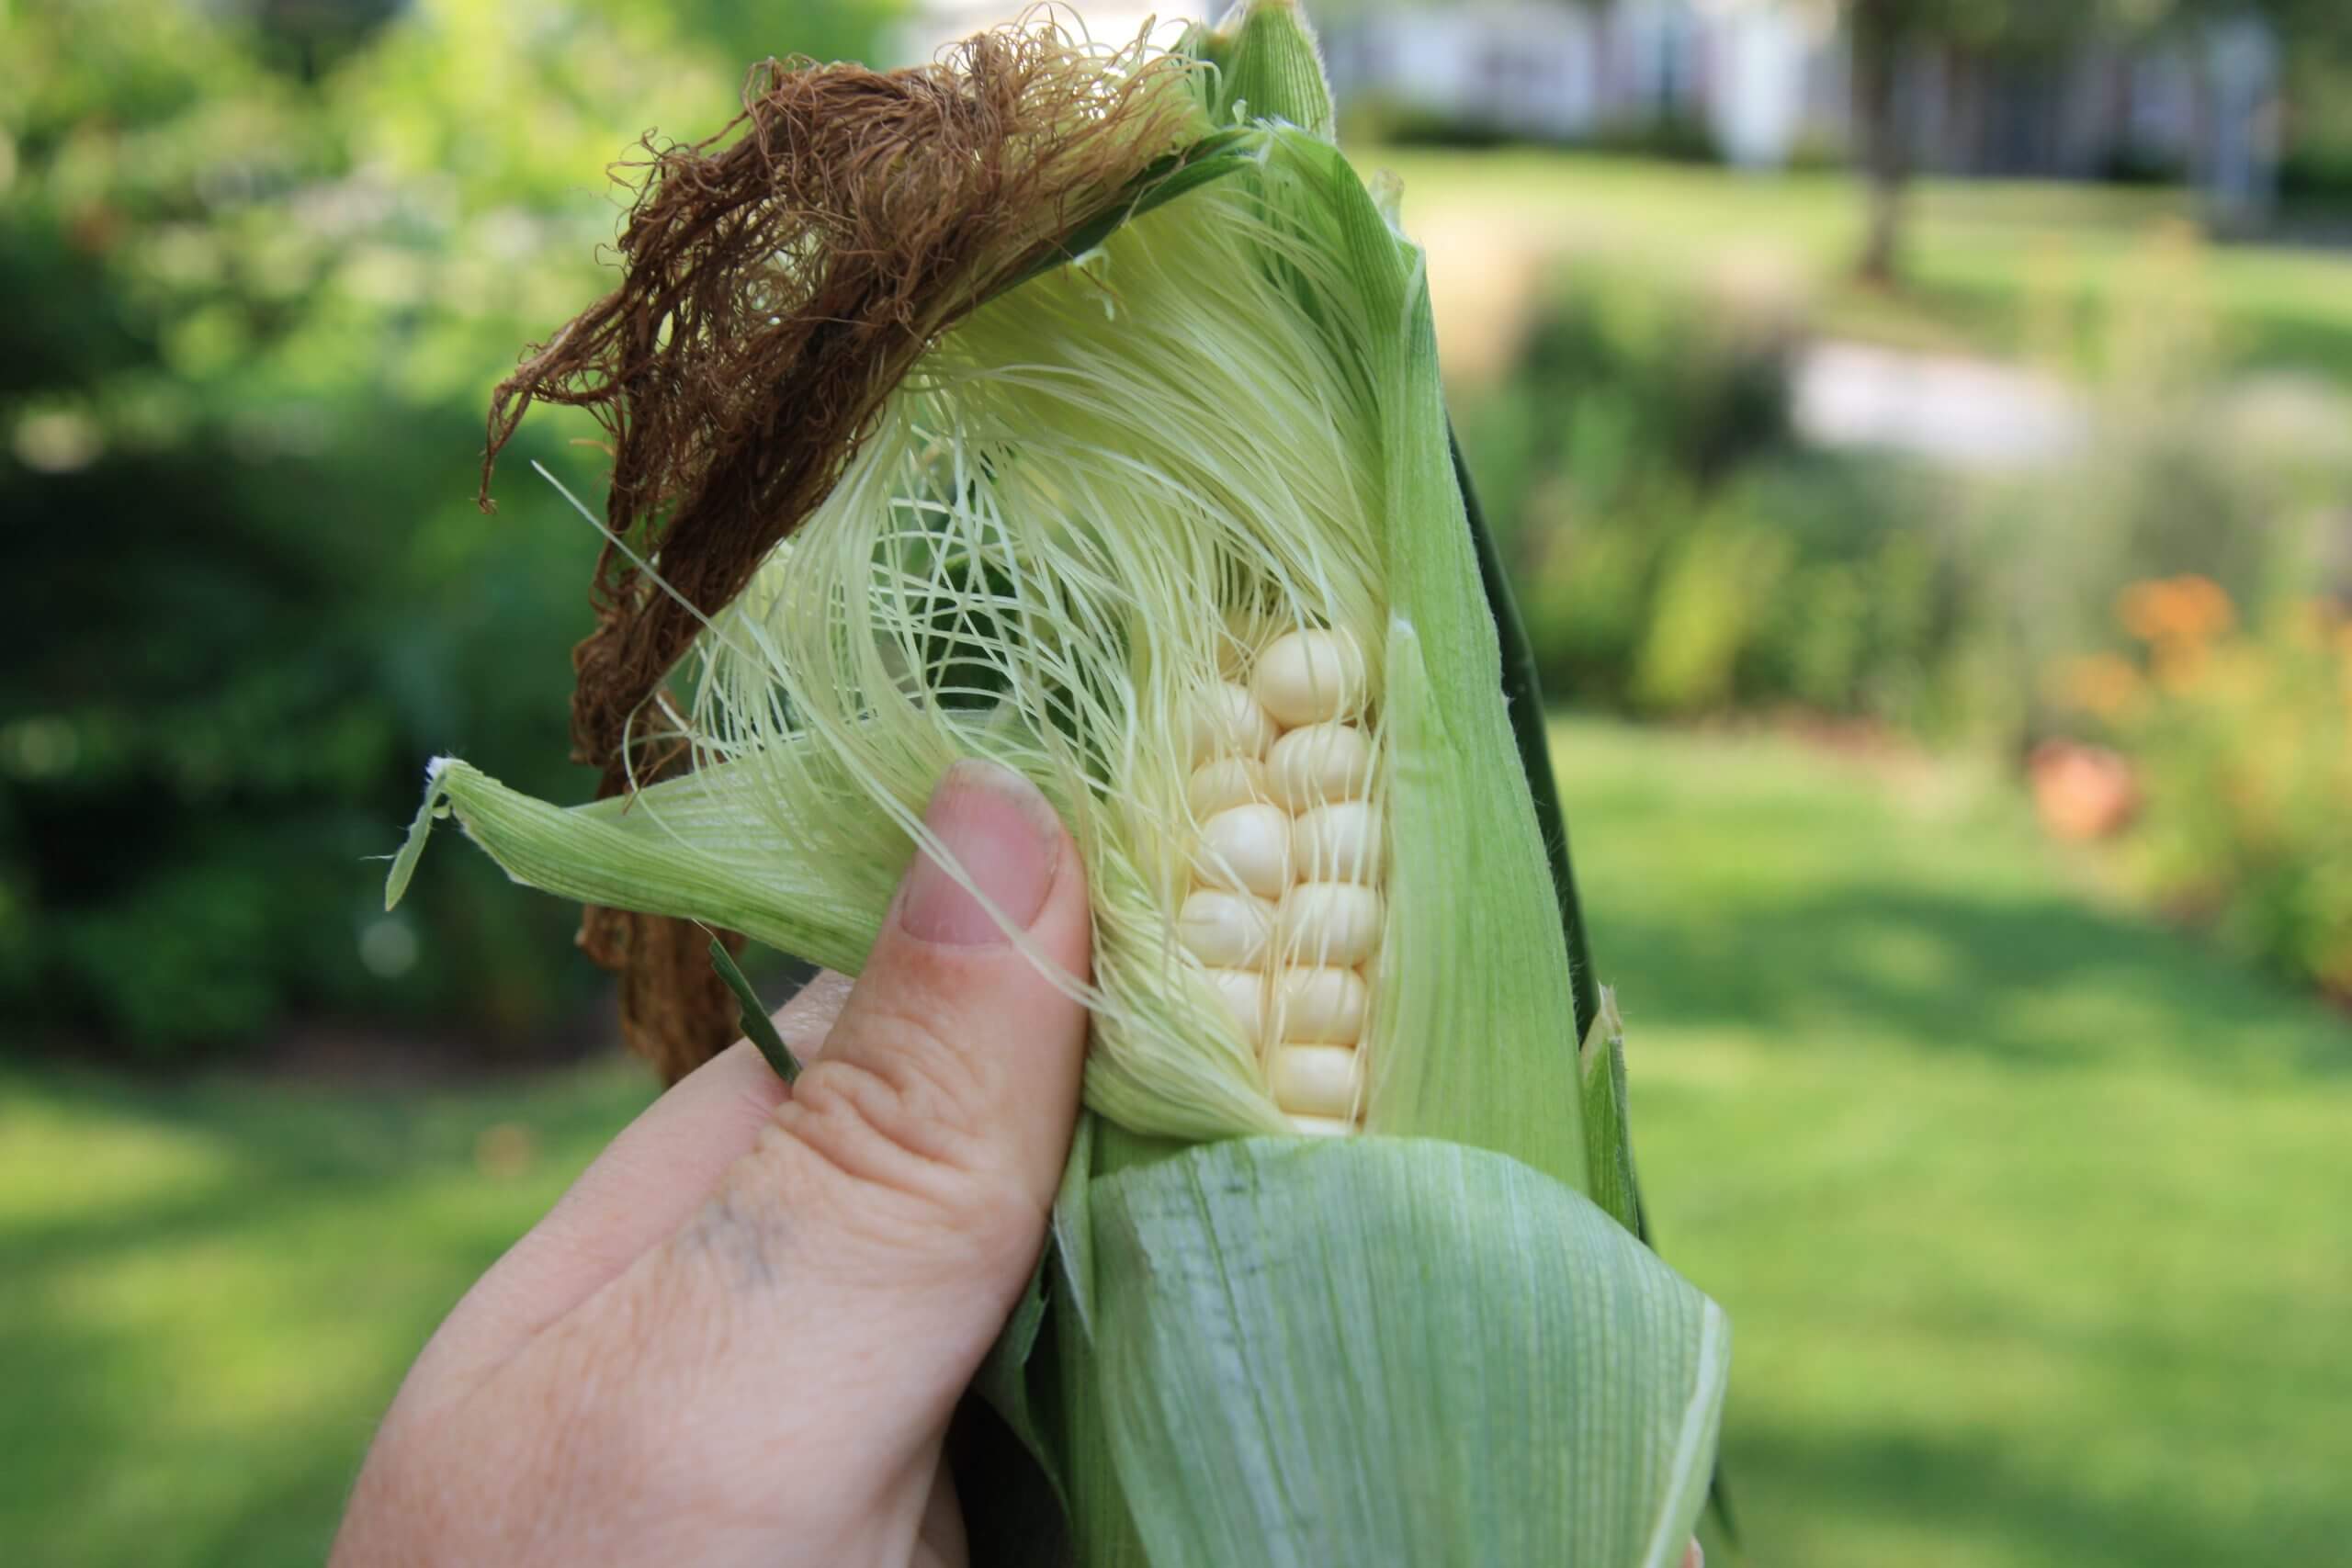
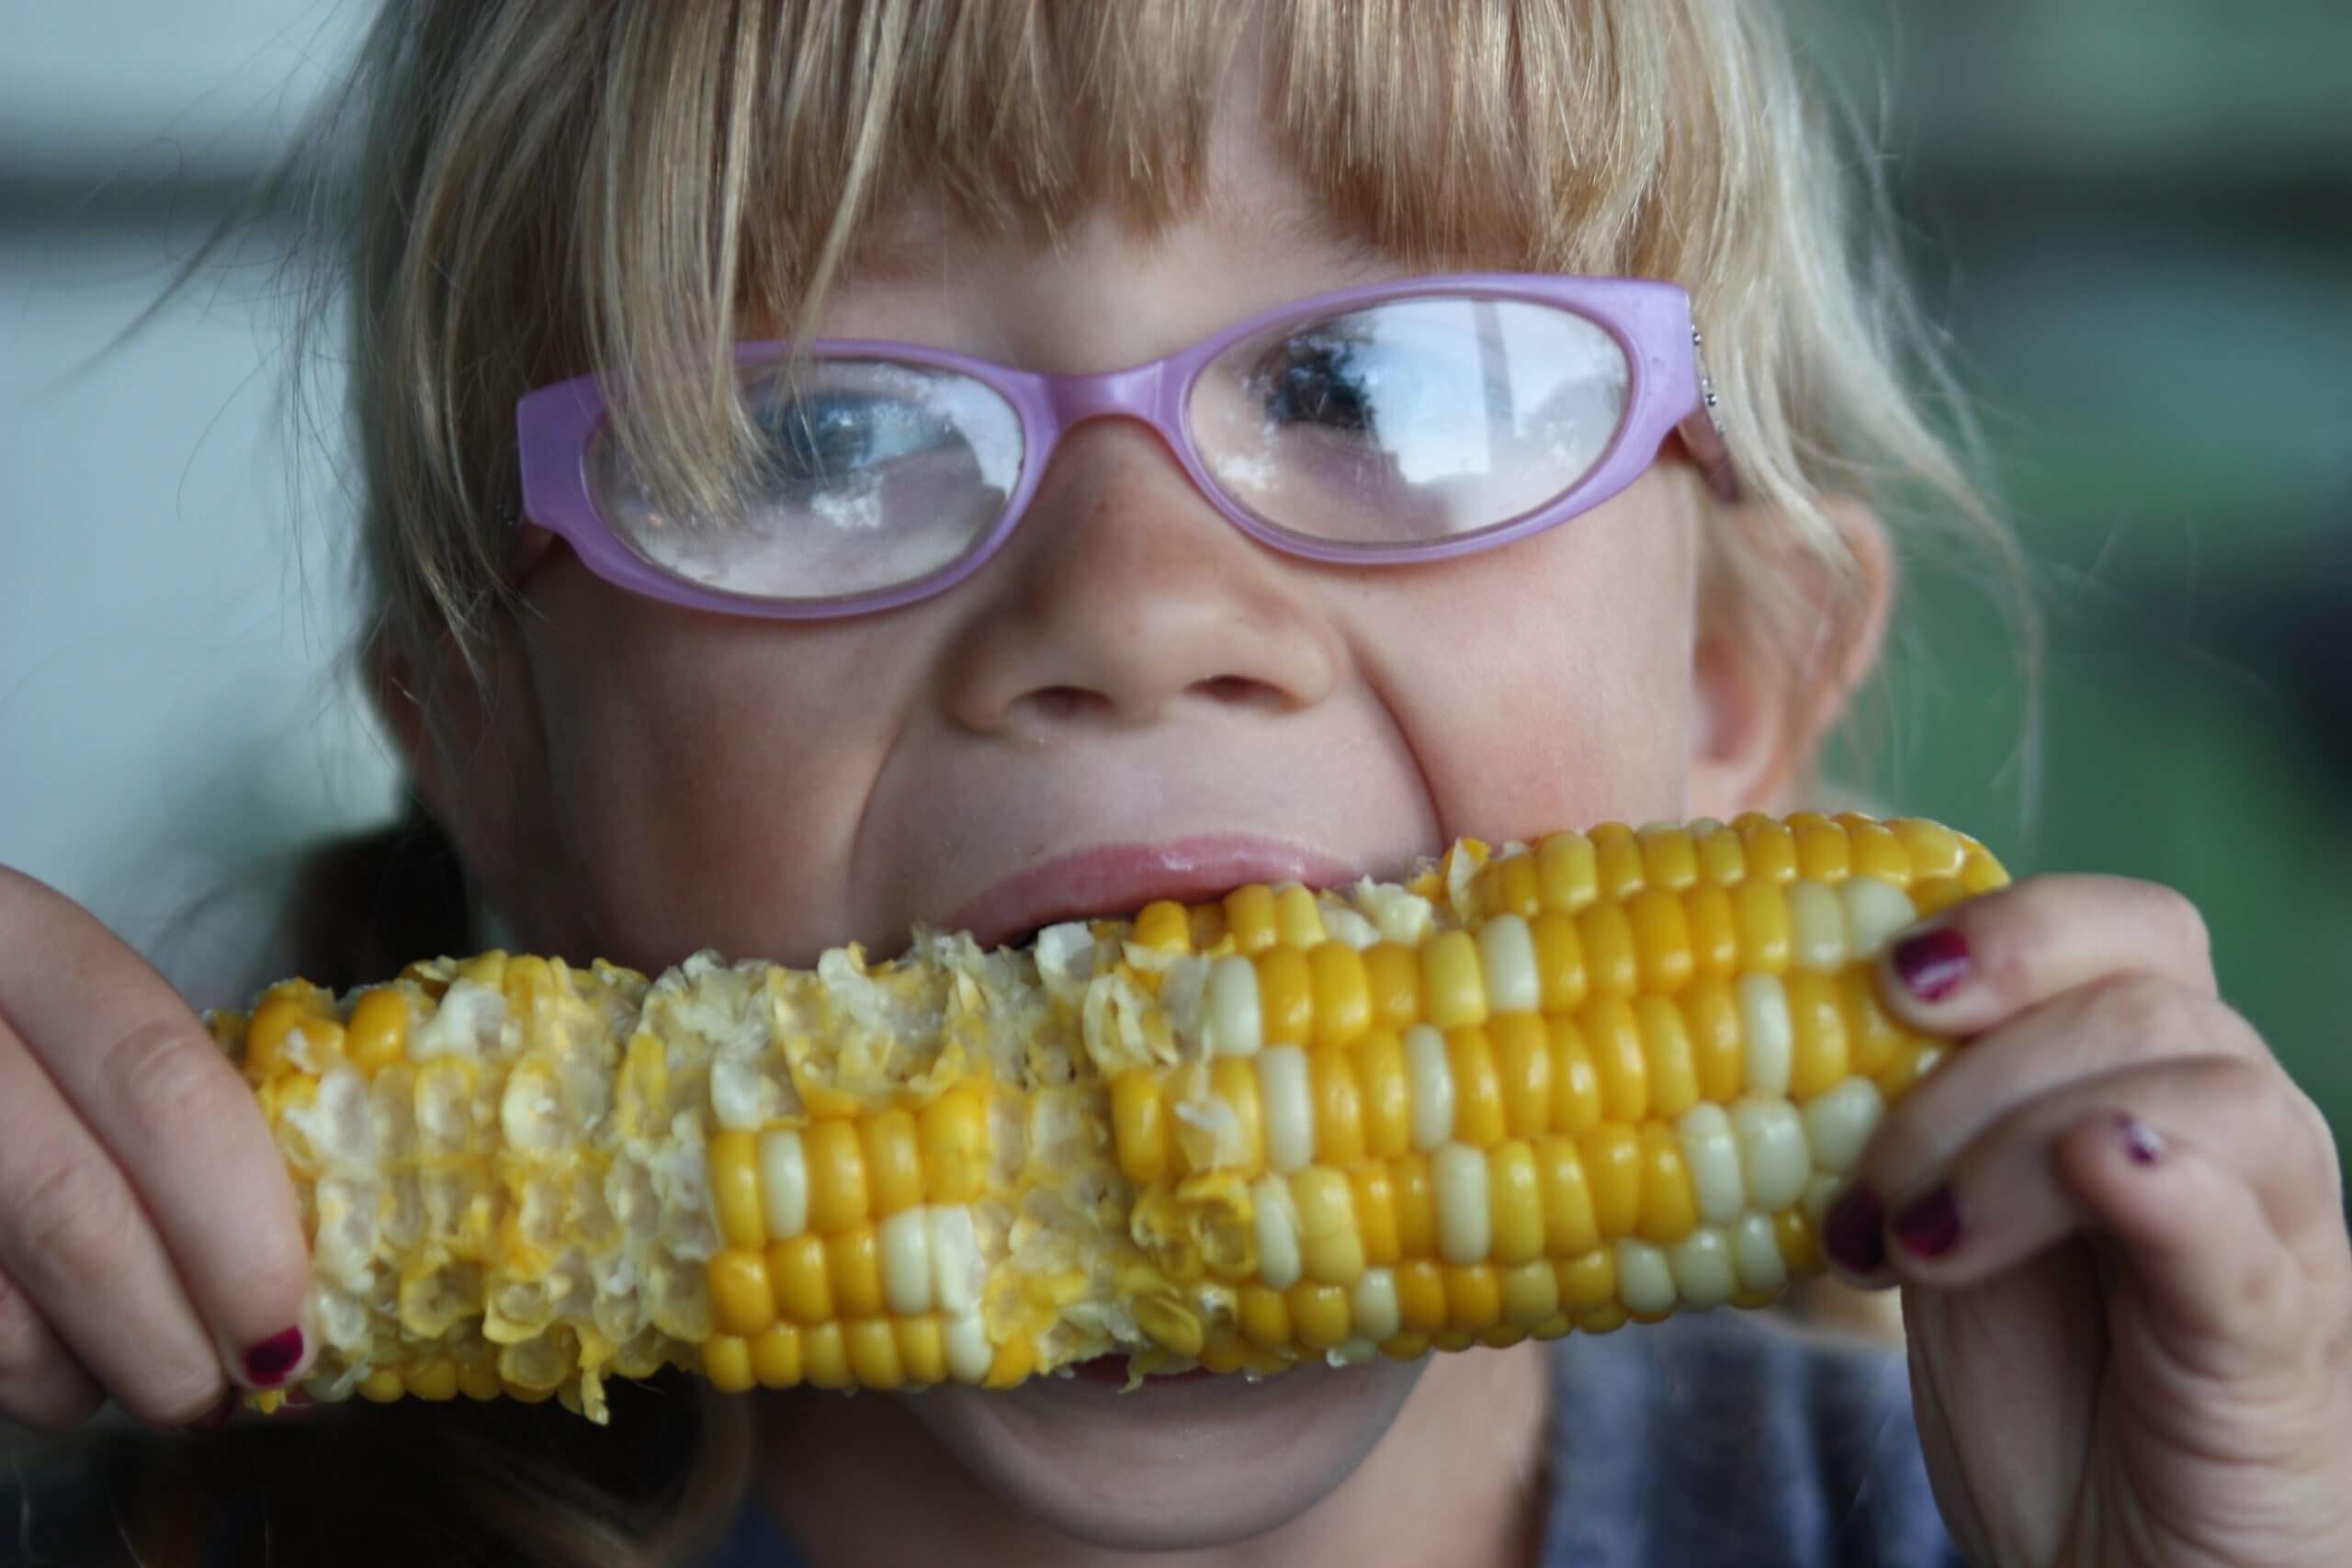
Common pests are corn earworms, which eat the ears from within. Apply BT to the newly forming tassels to keep these pests at bay. Corn smut is a common fungal disease that can distort the ears (read about edible corn smut here!). Fungal corn leaf blights can be a problem in cool, wet weather and cause leaf lesions and seedling death. Bacterial Stewart’s wilt is a less common but deadly disease that causes whole plants to wilt and die. Choosing resistant varieties is your best defense against wilt and blight.

Follow these steps and all you will need is butter and a little salt to season your garden-fresh corn. Depending on what variety you choose, ears should be ready for the plucking by mid to late summer!

Five Best Ways to Save Water in the Garden

Roof rainwater trickles into a classic garden rain barrel.

Smart gardeners prepare for summer dry spells and drought. A little water can go a long way if you plan ahead with effective water conservation techniques. Implement one (or more) of our five ways to save water in the garden, and not only will your plants grow better in dry weather, but you will also spend less time and money on watering.


1. Collect and Redistribute Water

Rain barrels are the best tools for rainwater collection. They connect to gutter downspouts to capture roof runoff. Collecting rainwater reduces watering costs, and plants generally prefer rainwater to tap. Fill watering cans from rain barrels or hook hosing up to them for gentle garden irrigation.

Cisterns are larger above- or below-ground water storage units used to collect rainwater, air conditioning condensate, or even well-water reserves. They are more costly to install but useful for gardeners living where water is limited and often rationed. Roof collection cisterns are only recommended only for areas with adequate annual seasonal rainfall of 15-inches/year or more (click here to see US annual rainfall averages).

Know your roof composition before collecting roof rainwater. In a 2-year study, two roof types leached high concentrations of heavy metals; uncoated galvanized metal roofs released high concentrations of zinc, and treated wood shakes released high concentrations of copper. Refrain from roof water collection if you have these roof types.

Cisterns collect large amounts of rainwater, well-water or even air-conditioning condensate.

2. Irrigate at Soil Level

Ground-level irrigation results in less water loss. For large gardens, weave soaker hoses through beds—setting your intake nozzle closest to the hose spigot. Soaker hoses are water-permeable lines that slowly release water into the soil. They can easily be covered with straw or mulch, to keep beds looking attractive while further retaining soil moisture. Mark covered soaker hoses to keep them from getting damaged by stray trowels or spades.

Plastic drip lines release water from perforated holes or extensions of fine drip tubes. Lines of perforated drip tape are inexpensive and easily set along vegetable garden rows. Pot dripper systems work best for complexes of garden containers. Dripper systems consist of a central hose line that connects smaller lines into each container. (Dripworks makes a great deck garden drip irrigation kit.)

Plastic bottle irrigation is popular with tomato growers. Simply perforate a clean, 2-Liter plastic bottle and fully sink it alongside a newly planted tomato at planting time (leaving the top accessible). At watering time, simply fill the underground bottle with water—being sure to keep the lid on between watering. It’s an inexpensive and effective way to deeply irrigate thirsty tomatoes in the heat of summer.


Well-placed drip lines irrigate lettuce plants at the soil level.


3. Time Irrigation

Timing is everything when it comes to good irrigation. The best summer watering time is in the cool early morning when soil water retention is highest. Early moisture prepares plants for hot midday temperatures. In turn, watering at the hottest time of day—between 12 noon and 3:00 pm—is the least effective time to water because more evaporation occurs and plants take in less water in high heat and sun.

Hose timers streamline watering. There are two kinds—mechanical and digital timers. Mechanical timers are low cost and can be set for between 15 to 120 minutes, though they can’t be preset. Digital timers are more costly, but they can be preset for specific watering times.

For deep watering, set soaker or drip irrigation to low pressure, and time the irrigation to fully wet your garden plants or pots. One to two hours is often adequate, though soil quality should be considered when calculating watering time. Light, porous, organic-rich soil needs less watering time because it readily percolates and retains moisture. Dense, clay-rich soils are slower to percolate and need longer, deeper watering. Poorer quality garden soils should be amended and mulched yearly to improve water retention and porosity.

Drip irrigation systems are easily set on timers for precision watering.

4. Retain Soil Moisture

Good garden soil amendments, such as coconut coir, peat moss, and compost, improve soil porosity and moisture retention, which increases root water uptake. OMRI Listed® Black Gold® Just Coir is pure, organic, processed coconut coir that holds a lot of water to bring added moisture to garden beds and containers. Black Gold® Canadian Sphagnum Peat Moss also has a high water-holding capacity, but it also has a low pH, so apply it to more alkaline soils or where acid-loving plants will be grown. Vegetable and flower gardeners rely on OMRI Listed® Black Gold® Garden Compost Blend to add needed water-holding organic matter to the soil. Compost also makes high-quality light mulch.

Mulches are like soil blankets that hold in water. The best garden mulches include quality compost, fine leaf compost, and straw and grass clippings (for vegetable gardens). Surprisingly, large ornamental rocks hold a lot of soil water beneath them. These are all better than thick bark mulch, which is often applied so thickly that overhead water cannot percolate through to reach plant roots.

Supplement containers with coconut coir or water-holding moisture crystals. Black Gold® Moisture Supreme Container Mix and Black Gold® Waterhold Cocoblend Potting Mix are both fortified with coconut coir for natural water retention.

5. Supply Midday Shade

A little midday shade can help garden plants withhold water better.

Sun-loving plants appreciate one or two hours of protection from the hot midday sun. The hottest time window is between 12 noon and 3 pm, with 3 pm being the hottest point. A well-placed umbrella, pergola, or awning can offer just enough shade to help plants retain moisture through the worst of the day’s heat.

Anyone of these water-saving changes can help you save water while increasing the health and success of your summer plants. All are best done early in the season, allowing you to reap the rewards when summer heat and drought appear.