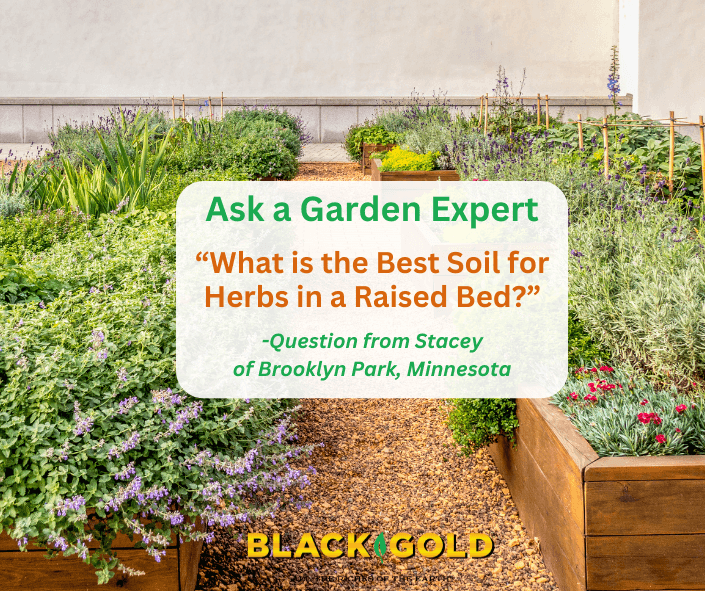
“What soil is best to use for my herbs in a raised bed? I have lemon balm, mint, basil, and thyme.” Stacey of Brooklyn Park, Minnesota
Answer: Our Black Gold Natural and Organic Raised Bed Potting Mix is specially formulated for raised beds and has all of the characteristics needed for growing herbs, including good drainage, ample organic matter, and a neutral pH. Additionally, I always recommend that gardeners mix a little natural topsoil into their raised beds at a ratio of one part topsoil to two parts bagged mix. The addition of natural mineral soil will increase the longevity of the mix and provide natural microbes and minerals.
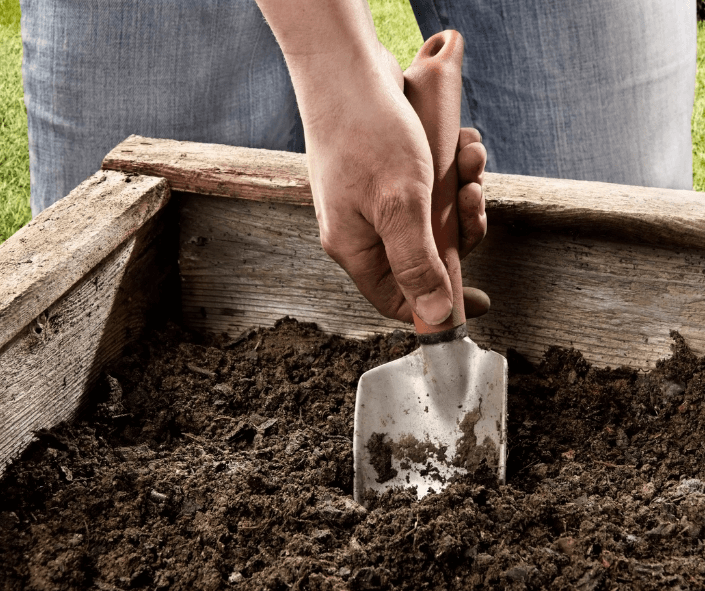
The lemon balm and basil will grow beautifully in the organic-rich mix. In the areas where you plant thyme (or lavender and sage, for future reference), I recommend the addition of a fast-draining mineral amendment, such as sand or gran-i-grit. A small bag will help. Mint is a very aggressive herb that will completely take over a raised bed, so I suggest growing it alone in a large pot.
After your herbs have initially been planted, water them every other day to help them become established. After a couple of weeks, you will only need to water if the soil becomes dry in the absence of rain. Add a slow-release fertilizer for vegetables and herbs at the beginning of the season to ensure that they grow their best. (Click here for more information about growing essential culinary herbs.)
When determining how the amount of mix to add to your beds, use this formula:
How to find soil volume for square or rectangular raised beds:
To find the amount of soil you will need, determine the volume of your square or rectangular bed by measuring its length, width, and height. Then use the following formula: V = L x W x H.
V = soil volume L = bed length W = bed width H = bed height
So, if your bed happens to be 6 feet x 4 feet x 1.5 feet, multiply 6 x 4 x 1.5 = 36 cubic feet. Our raised bed soil is sold in 2.2 cf bales. To determine the amount of bagged soil you might need (36 cubic feet/2.2 cf bales= 16). If you plan to add topsoil at a 1:3 ratio, then you will need 2/3 mix (24 cubic feet (10.66 2.2 cubic foot bags of raised bed potting mix)) and 1/3 topsoil (12 cubic feet of topsoil). If you want to buy topsoil by the yard, then you must know yardage. Divide the answer in cubic feet by 27 to get the number of cubic yards you might need (36/27= 1.3 cubic yards).
Each year, I look forward to writing this article because it’s fun to research and write. Vegetable gardening is popular, and with popularity comes variety and loads of new enticing introductions each year. 2022 is no exception. New prettier, tastier, more disease-resistant vegetable pickings are many, and with inflation on the rise, I hope more people will give home growing a try. Inexpensive fresh food is a huge draw! Successful home growers quickly learn the value of less costly, better-tasting food harvested from their own gardens.
New 2022 Vegetable Introductions
Lots of the plants on this list, I plan to grow myself. Each new introduction was chosen for its advertised flavor, vigor, production, and appeal. Disease resistance is another plus.
Beans and Peas
‘Sweet Gem’ is an exceptional new snap pea from High Mowing Organic Seeds. (Image thanks to High Mowing Organic Seeds)
Starting with cool-season crops, there are a couple of select peas to try. High Mowing Organic Seeds is offering the crisp, new snow pea ‘Blizzard‘ (58 days to harvest). It performed very well in their trials, bearing lots of slender, crisp, sweet snow peas on 30-36 inch vines. Snap peas are my favorite, so I will be trying another new pea they are offering, ‘Sweet Gem’ (63 days) snap pea. Its copious, juicy, crisp, sweet peas are produced on strong 45-52 inch vines, which are disease resistant.
Warm-season bush beans can be grown in 4-week intervals throughout the summer, and I like the space-saving plants. Slender, crisp filet beans are so delicious when freshly harvested, and bright yellow ‘Bamako‘ filet bean (54 days) from Johnny’s Select Seeds is stringless, crisp, and plants become loaded with golden beans in the summer months. The upright bush bean is also very disease-resistant. Green bean lovers should consider the new Red Tail snap bush bean, which bears straight, crisp, glossy, 5-6 inch green beans with excellent flavor. Add it to your list.
Sweet Corn
The new ‘Wild Violet’ sweet corn looks more like an ornamental. Wow! (Image thanks to Burpee)
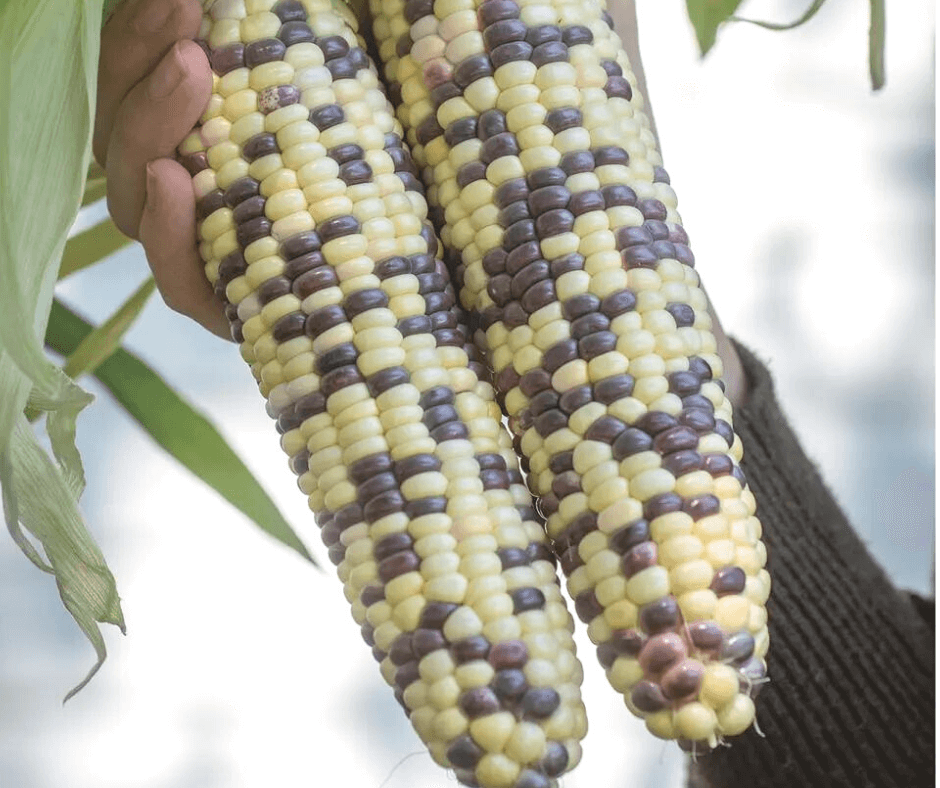
Two new corn varieties stood out to me on the page. The early corn ‘Solstice’ (68 days), offer by Johnnys, is a tasty bicolor with yellow and gold kernels that mature in just a little over two months after sprouting. Blight resistance and reliable productivity are two more reasons to grow it. The unusually beautiful ‘Wild Violet‘ sweet corn is a Burpee offering with blue-grey and white kernels that darken after cooking. Even though it looks like decorative corn, it is sweet, juicy, and flavorful–a must-grow variety for adventurous gardeners.
Greens, Cabbages, and Roots
‘Expect’ cabbage is dense and perfectly formed. (Image thanks to High Mowing Organic Seeds)
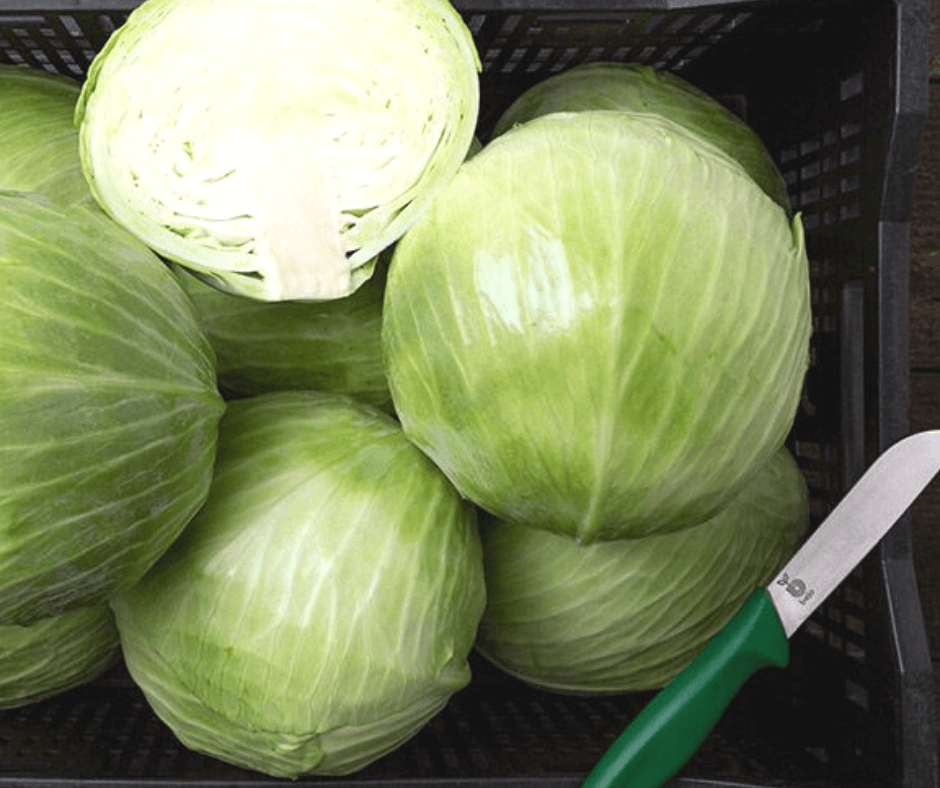
The large, sweet Chinese cabbage ‘Miss Hong‘ (55 days) from Johnny’s Select Seeds has dark-red, crinkled leaves that are noted for their crunchy, yet tender, texture. Those who love traditional cabbage should grow the perfectly round and dense ‘Expect‘ (100 days). It is disease-resistant, heat-tolerant, and flavorful. Another cool new brassica is ‘Rainbow Candy Crush‘ kale from Jung Seed Company. It looks like the prettiest frilliest purple-pink ornamental kale but it is wonderfully flavorful. Plant it in the fall, and harvest it after frost to boost its sweetness.
Salad lovers have many new greens to grow. Butter lettuce is a personal favorite, and the disease-resistant ‘Milagro’ butterhead lettuce produces large, beautiful heads in just 54 days. Plant this with the two reliable, curly, cut-and-come-again lettuces purple EZFLOR and green EZPARK, and you will have fresh salad all spring. The EZ lettuces are long-bearing, bolt-resistant, and disease-resistant.
Unique carrots are always fun to grow, and ‘Yellow Moon‘ is an all-season Nantes x Imperator type carrot that’s crisp, long, and pale yellow. I am sold.
Squash, Melons, and Cucumbers
The sweet, red, seedless watermelon ‘Century Star’ has speckled fruits and leaves. It’s a 2022 regional AAS Winner (Michigan). (Image thanks to AAS Winners)
Parks Seed is selling, Butterbaby butternut squash (100-105 days), which has 4-6 inch, sweet squashes that are as cute as pie. The short-vined plants allow home gardeners with less space to grow them. Those with more space need to try Burpee’s ‘Butterkin’ squash (105 days), which is a pumpkin and butternut squash hybrid with a pumpkin-like look and butternut skin. Its bright orange flesh is noted as being delectably sweet and smooth.
Cucumber and pickle picklers must try ‘Mini-Me’ (45 days), a seedless snack cucumber that’s prolific, just 2-3 inches, and very crisp and sweet. Grow these little Beit-alpha-type seedless cucumbers through summer. The larger beit-alpha cucumber, Merlin (50-55 days), from Burpee Seeds, is equally seedless, sweet, and bears well.
‘Hara Madhu’ is a super sweet melon for hot, dry areas. (Image thanks to Baker Creek Heirloom Seeds)
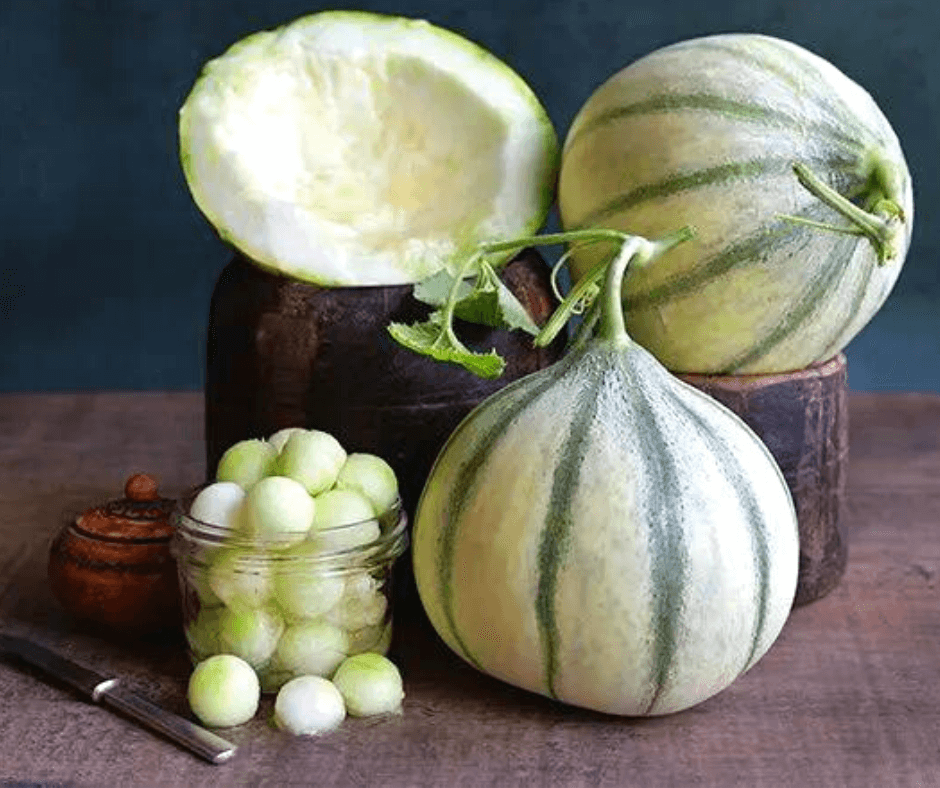
Century Star (80 days) seedless watermelon is a 2022 AAS Regional Winner for a reason. It yielded lots of sweet, seedless, 10 lb melons in Michigan where summers are cool. The fruits and leaves are beautifully dotted with yellow spots as well. Another unique melon I could not resist is the Indian ‘Hara Madhu’ (90 days), which is noted for its exceptional tolerance to hot, dry conditions as well as its honeyed taste. It’s a great choice for those living where summers are hot.
One productive new zucchini from Baker Creek Heirloom Seeds that stood out is ‘Long White of Palermo‘ (45-55 days). The heirloom Mediterranean variety bears buttery zucchinis with a pleasing nutty flavor on bushy plants just right for smaller gardens. The totally unique avocado squash ‘Zapallito Del Tronco‘ (50 days) from Baker Creek also piqued my interest. It is an Argentinian heirloom that looks like a winter squash but eats like summer squash and has buttery soft flesh.
Tomatoes and Peppers
For fantastic peppers try ‘Mocha Swirl’. (Image thanks to Burpee)
Burpee is selling the colorful ‘Mocha Swirl‘ (50-70 days) snacking pepper exclusively, and it is one of the prettiest peppers I’ve ever seen. Its tasty elongated fruits are swirled with shades of red, orange, purple, yellow, and green when mature. Plant it alongside the compact (18″) ‘Purple Beauty‘ bell pepper (75 days), from Baker Creek Heirloom Seed, which has sweet, thick-walled, blocky fruits that mature to almost black. Both will look beautiful on a crudité tray alongside Johnny’s reliable, bright orange ‘Flavorburst’ pepper (67-87 days), which is noted for its high sugar content.
The colorful slicing tomato ‘Alice’s Dream’ has tropical, sweet fruits. (Image thanks to Baker Creek Heirloom Seeds)
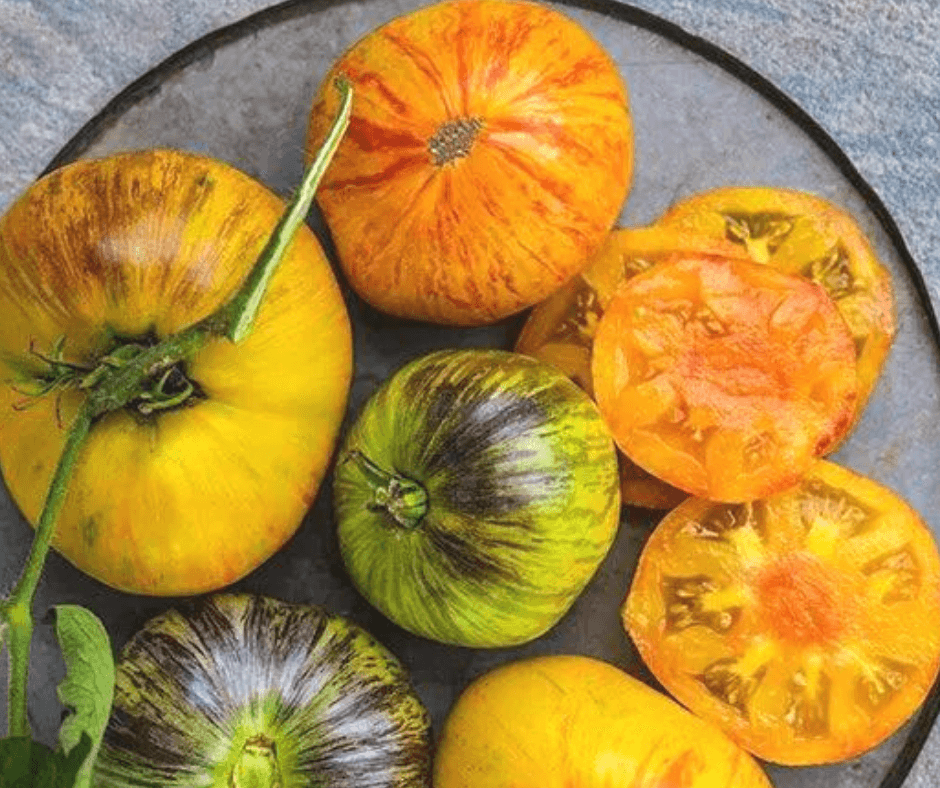
2022 has so many tomato introductions! My final picks were chosen for beauty, trial ratings, disease resistance, and taste (most of all). The bicolored green and red Captain Lucky (75 days, indeterminate) slicing tomato is a new one from Johnny’s with excellent flavor that challenges the best heirloom tomatoes. The yellow, green, pink, and red interior is described as psychedelic. Two more big on beauty and flavor from Baker Creek are ‘Alice’s Dream‘ (80 days, indeterminate) beefsteak and ‘Black Strawberry’ cherry tomato (60 days, indeterminate). ‘Alice’s Dream’ has an orange-yellow exterior striped with purple and a deep orange-yellow interior described as tasting sweet and tropical. The super sweet ‘Black Strawberry’ tomatoes are orange-red caste with a mottled overlay of purple-black and produced in easy-to-harvest trusses. Finally, Burpee’s Bodacious big slicing tomato (80-85 days, indeterminate) deserves attention. The large, red, tasty tomatoes are aromatic and produced on vines that really resist blight. Each can produce 40-50 fruits in a season.
Cool New Herbs
‘Purple Ball’ basil is delicious, beautiful, and compact. (Image thanks to Baker Creek Heirloom Seeds)
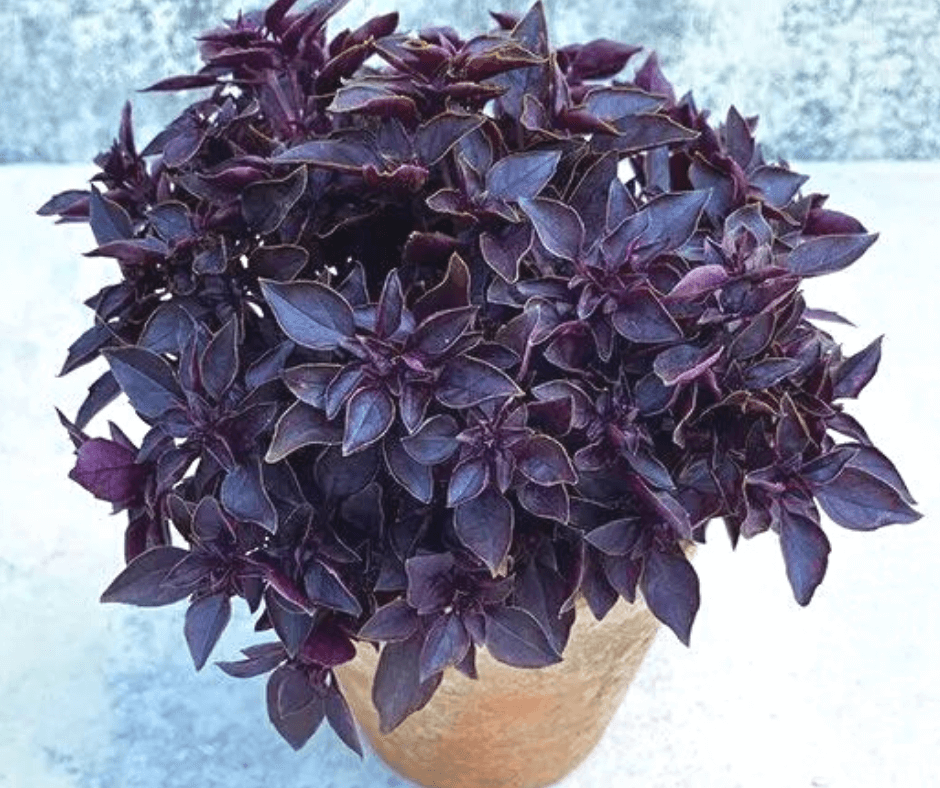
Baker Creek takes the cake when it comes to amazing new herbs for the garden. ‘Orangelo’ thyme (Thymus fragrantissimus ‘Orangelo’, Zones 5-8) looks extra inviting with its promise of true citrus flavor. I have to make space for a couple in my rock garden. There is no want for new and interesting basils. Small-space gardeners will love the deepest-purple, ball-shaped ‘Purple Ball‘, which reaches just under 12 inches. Its sweet, fragrant, darkest purple leaves will look great in salads and pasta. Baker Creek’s ‘Evivi Ntor’ African basil, originally grown and obtained from the Ewe tribe in Ghana, is described as having a sharp, peppery, citrusy flavor. It is also remarkably heat-tolerant. Another basil for flavor and summer heat is Everleaf Thai Towers. The upright plants are slow to bolt, reach 2-3 feet, and have true Thai basil flavor.
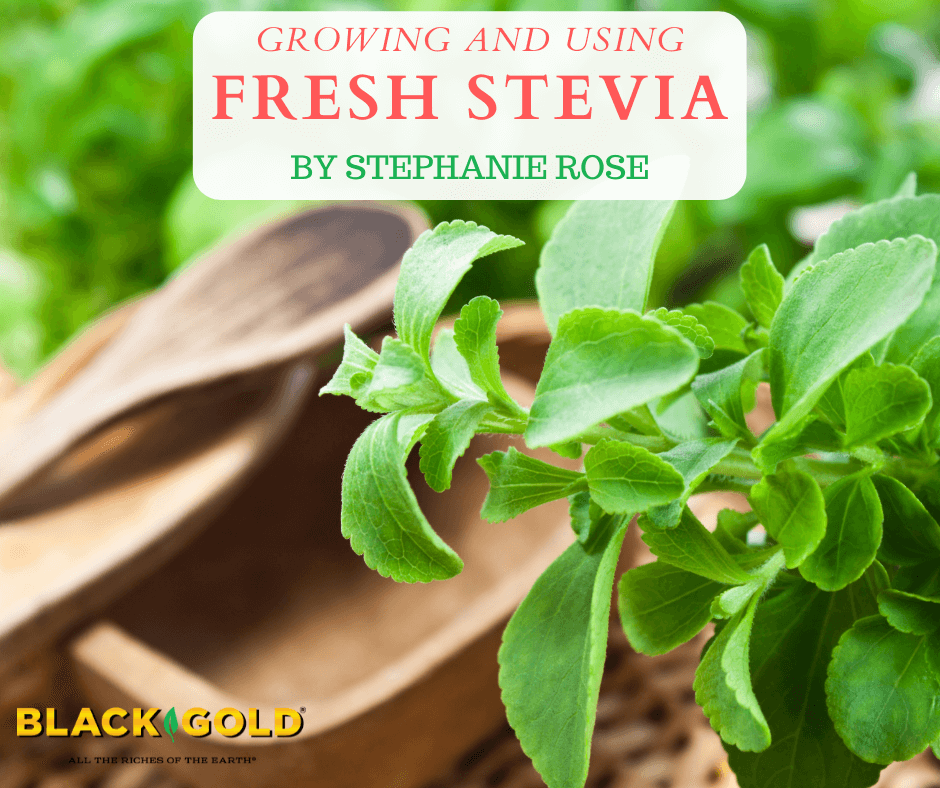
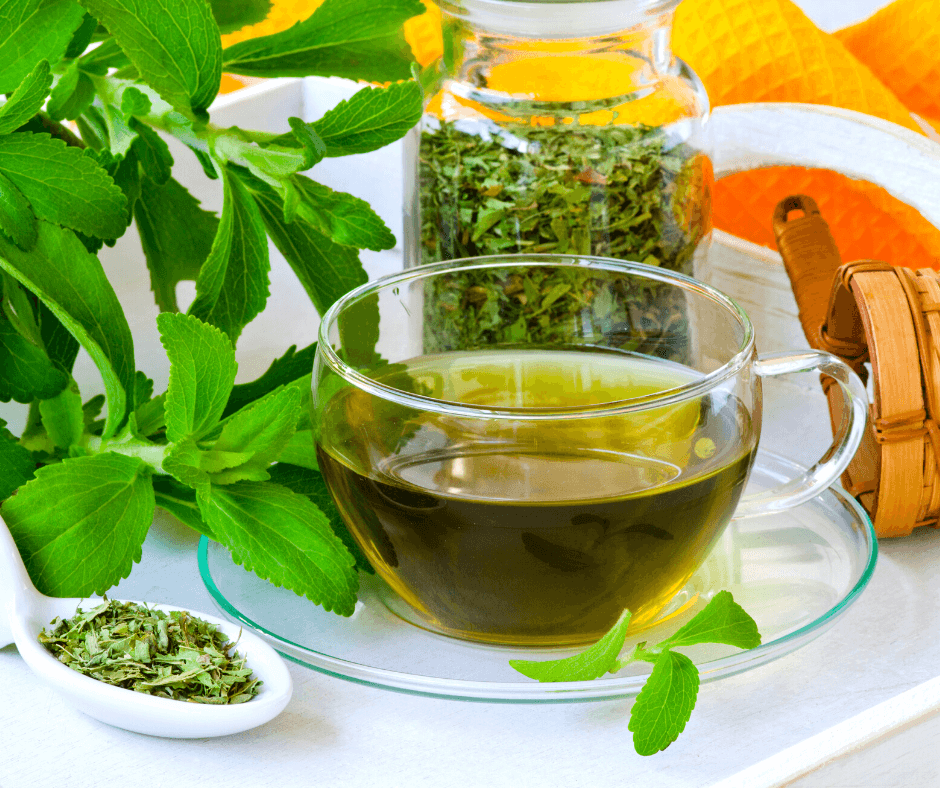
You’ve probably heard rumblings of stevia before. Found in many soft drinks and juices, many people find the taste strange and not at all like sugar. I agree completely with you! When tasting stevia in its white powder or liquid form, I found it to be bitter yet super sweet at the same time, but fresh stevia is different.
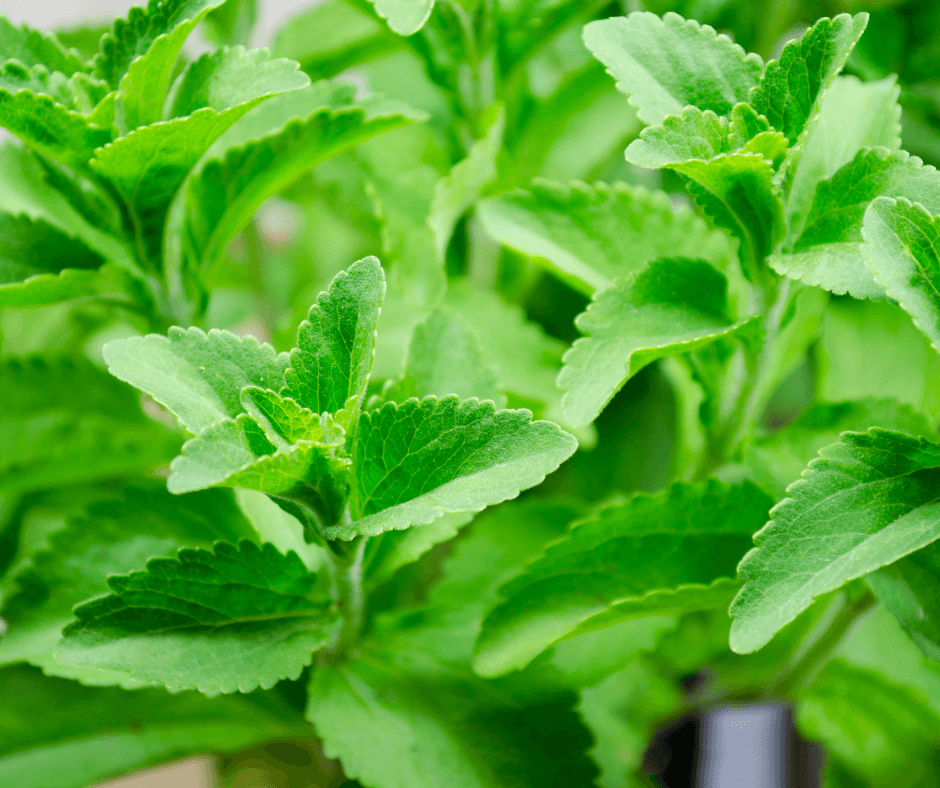
Green stevia (Stevia rebaudiana) is what I grow in the garden and it is completely different than what you will find in the store. Native to South America, it is a tender perennial herb with serrated leaves that is 200 times sweeter than sugar. The fast-growing plant is easily grown in northern climates as an annual.
How to Grow Stevia
Stevia tastes best when the leaves are young and plants are not allowed to flower.
Stevia can be purchased as plants or can be grown directly from seed in OMRI Listed Black Gold Seedling Mix. Nearly every year I plant stevia seeds, and they always grow into happy, bushy herbs. Keep in mind, they like full sun and require lots of warmth to get growing. Plants can be grown in well-drained pots filled with Black Gold Natural & Organic Potting Mix.
You can plant your seeds in containers or in loose soil that drains well. Start your stevia indoors 8-10 weeks before planting outside or directly sow in the ground during late spring. They need warm soil to get growing.
Stevia plants can grow very large in a season, so space your plants 18 inches apart. Expect them to reach anywhere from 2-3 feet tall. Give them light to moderate water. Too much water will reduce leaf sweetness and can cause root rot. You should also pinch the plant back throughout the year to encourage bushier and stronger growth.
Harvesting Stevia
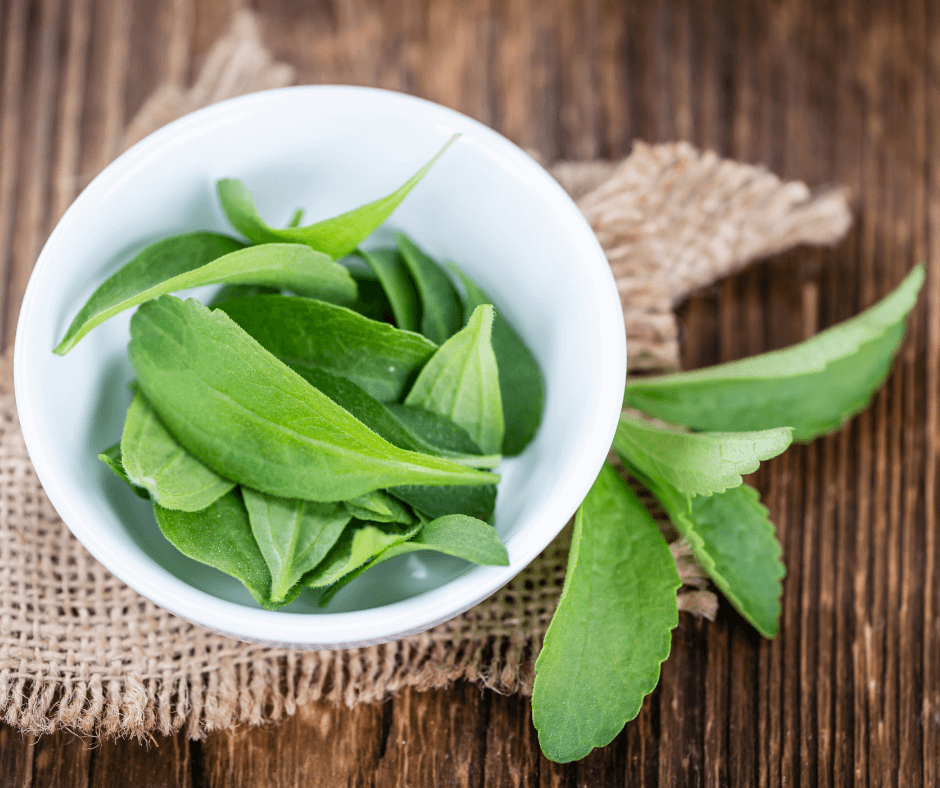
Fresh leaves can be easily dried in the sun or stems can be hung to dry.
Stevia can overwinter in Zone 8 or above, but I prefer to grow fresh stevia each year as the young plant’s leaves taste the best. During the summer, keep stevia cut back to stop flowering. Once the plant flowers, the leaf flavor is no longer tasty. The good news is, every time you prune it, you get to enjoy some fresh stevia!
You can also choose to dry the stevia by bundling stems together and hanging them to dry in a cool, dark place. At the end of the growing season, you will want to harvest the entire plant to dry. It is also best to harvest the stevia in the morning as that is when it is sweetest.
Using Stevia as a Sugar Replacement
I prefer using stevia to sweeten drinks and tea.
Speaking from experience, going sugar-free is not easy. Stevia is a natural way to get your sweet satisfaction without spiking insulin or causing inflammation. When grown organically in my garden, it feels so much healthier to me than synthetic sugar replacements. With that said, I don’t tend to use it as a complete sugar replacement.
Though many people do use stevia in place of sugar, it has its own unique herby taste that I find similar to sweet green tea, and since it is so much sweeter than sugar, a little goes a long way. I personally favor it for sweetening drinks, but it can also be used to sweeten other things.
How to Use Stevia
Stevia powder is easily used for cooking.
Sweetening up homemade baking, cooking, or drinks naturally is easy with stevia. And, the stevia does not need to be processed. Dried stevia leaf works just fine. Store stevia leaves in Mason jars until you’re ready to use them.
A single leaf in a hot cup of tea will bring a sweet, earthy flavor. You can also grind stevia leaves into a fine powder for baking or cooking. This can be done with a coffee grinder or a blender. I don’t recommend using the powder in drinks unless you want it floating at the top of your coffee–not nice.
The last way to enjoy stevia is by infusing it and using it as a liquid extract. To create the extract, stuff your dried herbs into high-proof drinking alcohol, such as vodka, and let sit for 24-36 hours. Any longer and it will get too bitter. Next strain out the leaves with a cheesecloth. You can enjoy it like this or heat the liquid to evaporate the alcohol. Be careful, however, as boiling the mixture will affect the flavor. Keep the heat low and evaporate slow. The final infusion can be added to drinks or used for cooking.
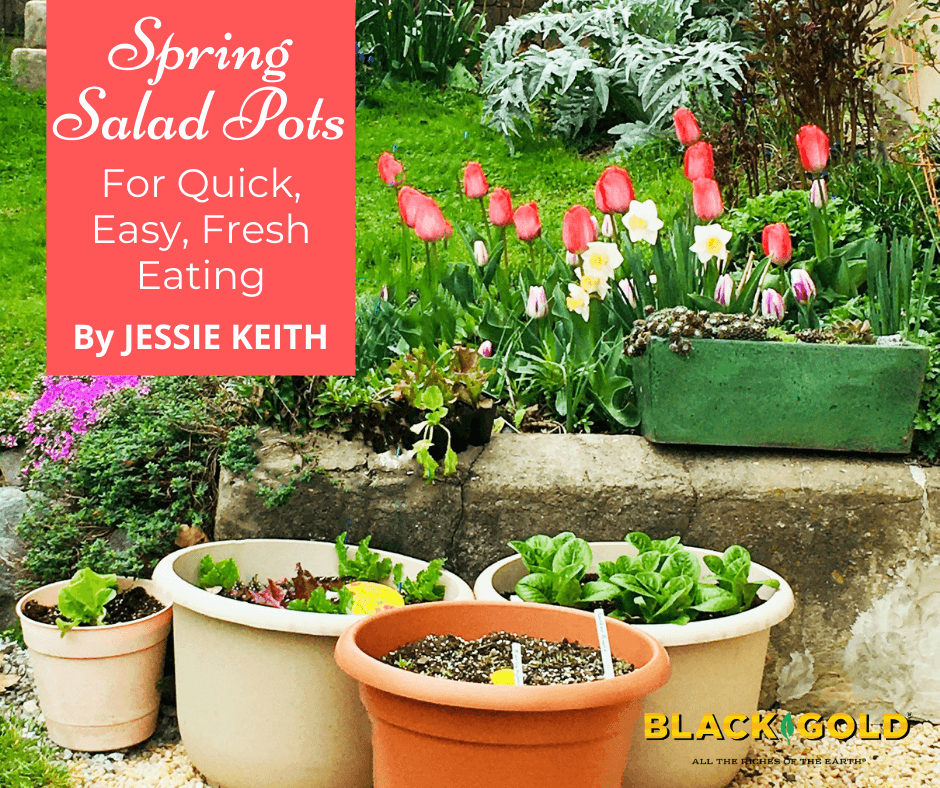
Last year I experimented with salad pots with great results. This shows some of the pots just after planting. They contain mixed lettuce, bok choi, and beets. Another pot contained six large Romaine lettuce plants.
My first spring salad pots were grown in large, inexpensive plastic containers that I bought from the garden center. I filled them with some Black Gold Natural & Organic Potting Mix and added a little fertilizer. They performed so well that I couldn’t believe it. Just a few pots provided delicious salads through spring, so this year I decided to redo this year’s salad containers with a little more flair.
I took it up a notch by creating suites of well-paired greens and herbs for custom-made salad containers–one with an Asian theme, another French, and the last for the Italian palate. Large (18″ or 24″) pots are ideal for these plantings. This will ensure that you can plant enough vegetables in each pot to make several spring salad bowls. As I said, I planted mine in Black Gold Natural & Organic Potting Mix, but this year I plan to try Black Gold Raised Bed & Planting Mix. Both mixes are OMRI Listed for organic gardening. My plant food of choice is a slow-release fertilizer for vegetable growing, though I often hit my plants with some water-soluble fertilizer a week after planting to help them take off.
Asian Salad Pot
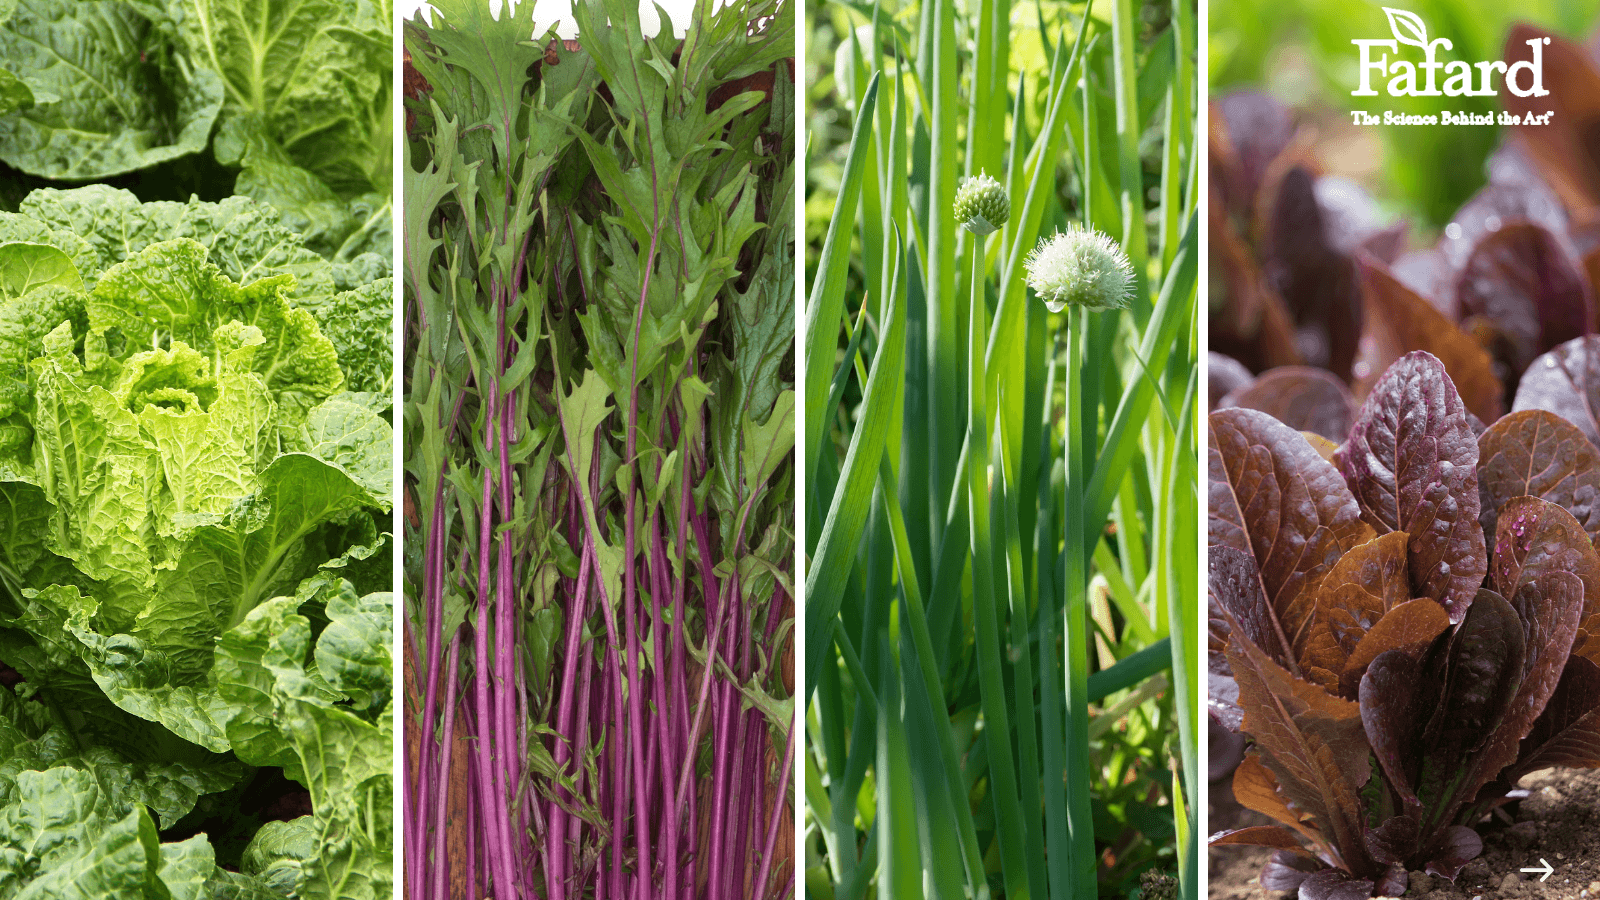
There are many varieties of Chinese cabbage, mizuna, scallions, and romaine to try.
About the blend – This is a two-pot salad mix because Chinese cabbages are bulky. I am confident that the outcome will be worthy of a very tasty sesame salad dressing. The crisp, flavorful Chinese cabbage will combine nicely with the mustardy kick of the mizuna, the mild green-onion flavor of the bunching scallions along with the crunchy, sweet taste and bright color of the red romaine.
Planting tips– I recommend filling one pot with three Chinese cabbage heads with a sprinkling of mizuna around the exterior. Another pot can contain the romaine with scallions planted along the side. Be sure to space the scallions 2-3 inches apart. I always start cabbage, scallions, and lettuce plants indoors several weeks before planting outdoors. I start the seeds in 4-inch pots under grow lights. (Click here for growing tips.) Then I acclimate my seedlings to cool spring temperatures in my enclosed back porch. Scallions are often tender and slender at planting time, so be gentle with them and don’t plant their bulbs too deeply. One-half inch is perfect. The mizuna is a mustard green that can directly be sown in the pots at the time when you plant your seedlings–generally in late March or early April in my USDA Hardiness Zone 7 garden.
This spacing is approximate, depending on the varieties you choose. Just be certain to thin your scallions properly.
French Salad Pot
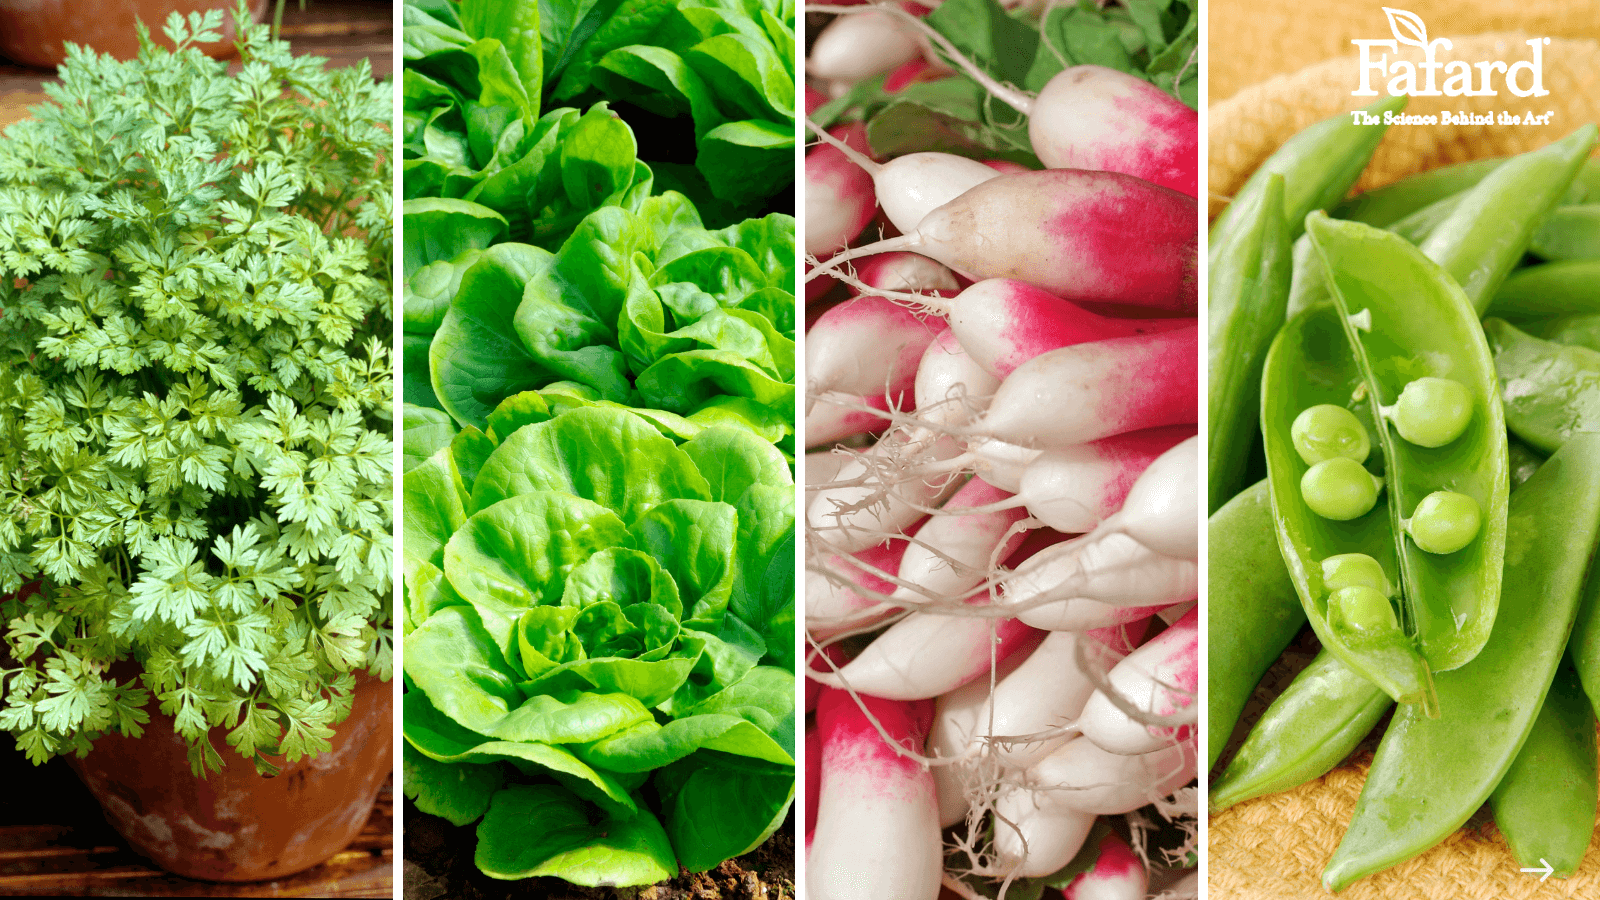
Chervil, butterhead lettuce, French radishes, and crunchy snap peas are a taste of France in a bowl.
About the blend -The sweetness of the snap peas and butter lettuce blend well with the slight heat of the fresh French breakfast radishes. Chervil is added to provide a fresh, slightly anise flavor–much like the flavor of fennel. Together they taste very excellent with a classic French dijon vinegarette. If you are not partial to uncooked snap peas, try blanching them for a minute and then immersing them in an ice-water bath.
Planting tips– I recommend three large pots for this salad blend–one for the peas (a tomato cage makes an easy pea trellis), one for the radishes, and one for the butter lettuce with two chervil plants on the side. It is best to start the chervil and lettuce indoors under grow lights, as recommended for the greens above. The radishes and peas can be directly sown in the pots. Surface-sow the radish seeds and cover them with 1/8 inch of potting mix. Plant them in circular rows 6 inches apart and then thin them to 3 inches apart after they have sprouted. The peas should be planted in a circle at a distance of 3 inches apart and 1 inch below the soil surface. Time everything well, keeping in mind that the peas and greens need more time than the fast-growing radishes.
This spacing is approximate, depending on the varieties you choose. Just be certain to thin your radishes properly.
Italian Salad Pot
A salad of fresh chicory, romaine, and roasted Chioggia baby beets taste great with a fresh balsamic dressing and a touch of Parmesan cheese.
About the blend – The bitter bite of the chicory tastes nice with the sweet crunch of the romaine lettuce and sweetness of the baby beets. Chioggia beets are candy-striped with red and white bands inside, so they are as beautiful as they are delicious. The three taste very good with honey balsamic vinegarette and shaving of Parmesan cheese.
Planting tips– Two large pots are sufficient for this salad blend–one for the chicory and romaine lettuce, and one for the beets. The lettuce and chicory can be started as seedlings indoors, using the same recommendations for the two previous gardens. The beets should be directly sown in the pots. Keep in mind that the beets may germinate more slowly in cool weather, so you may want to plant them a week earlier than recommended on the packet.
This spacing is approximate, depending on the varieties you choose. Just be certain to thin your beets properly.
To learn more about great lettuce varieties, please watch this helpful video!
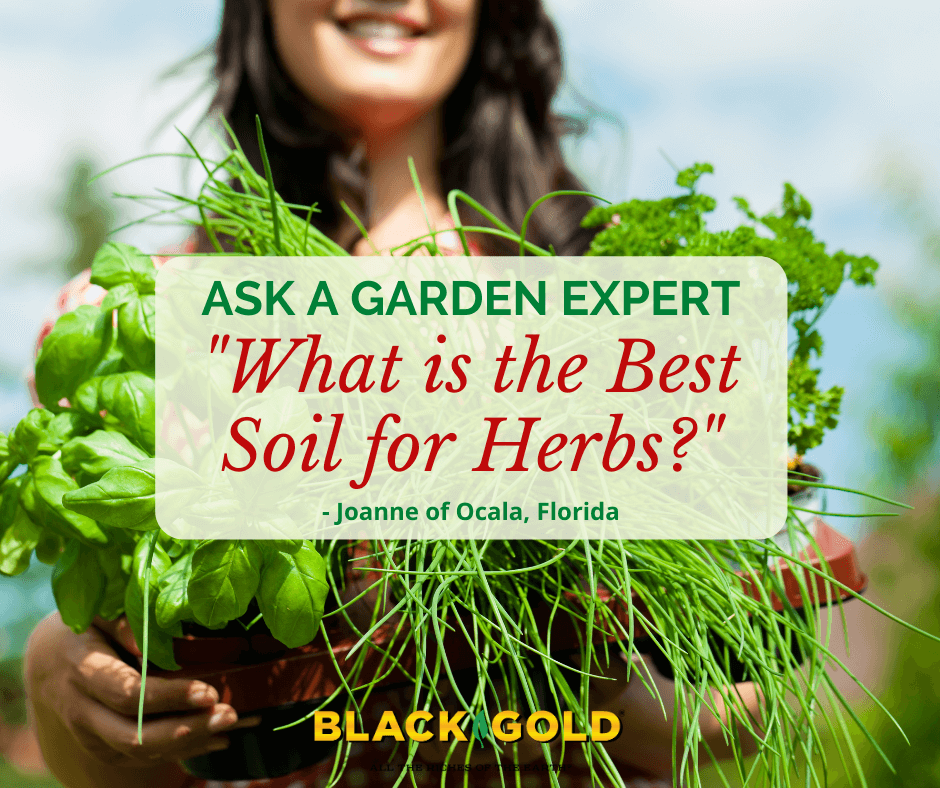
“What is the best soil to use when planting a container herb garden?” Question from Joanne of Ocala, Florida
Answer: You are in luck! Herbs are some of the easiest plants you can grow, if given the right growing conditions–soil included. Almost all herbs require full sun, fertile soil with good drainage, and average water. Some are perennials (meaning they will survive the winter and grow each year) and others are annuals (meaning they will survive just one growing season and die). All are very easy to harvest. Just clip the leaves as you need them, while being sure to leave enough to keep the plant full and healthy.
Soil for Herbs
At planting time, be sure to give them good soil that holds water well, is porous and fertile and drains well. If planting them in pots, they grow best in Black Gold Natural & Organic Potting Mix, which is approved for organic gardening. Sometimes it helps to add extra Black Gold Perlite for added drainage. If eventually want to grow them in the ground, plant them in a prepared, weed-free garden, and work some Black Gold Garden Compost Blend into the soil to ensure that they perform really well. After your herbs have been initially planted, water them every other day to help them become established. After a couple of weeks, you can water garden-grown plants less unless the ground becomes very dry. Potted herbs will need to be watered every other day or even daily if the weather is very hot and windy. Add a slow-release fertilizer at the beginning of the season to ensure that they grow their best. (Click here for more information about essential culinary herbs.)
“How can you stop dill from taking over your garden?” Question from Sylvia of Belle Plaine, Minnesota
Answer: The answer to this question is in the valuable flowers and seed heads of dill. Keep the seeds from dropping to the ground by eating the fresh flower heads in salads or dips, before they set seed. Of you can allow the dill seed heads to mature, and then collect the seed in bags to enjoy for pickling. It is fragrant, useful, and will last a long time in the spice cabinet.
As you have already found, if you let dill seeds drop to the ground, then they will sprout later in summer or even the following spring. If you have too many or do not like where they land, dig them and move them to your herb patch or simply scratch them away with a hoe. These delicate annuals are some of the easiest weedy herbs to weed out. Another option is mulching over garden beds in spring with a hefty layer of Black Gold Natural & Organic Compost. Dill seeds cannot germinate through several inches of compost.
“What is the best practice to ensure a window-sill cilantro plant will thrive? I have a green thumb and can grow or rehab practically any plant/flower/herb/garden. However, each time I’ve purchased a cilantro plant, it wilts after a few months. I only water when dry. Thank you!” Question from Ann of Raleigh, North Carolina
Answer: Cilantro (Coriandrum sativum) is a short-lived annual herb that grows best in full sun and cooler temperatures between 65–70°F. That’s why it dies away after a few months after flowering. It’s just what annuals do. My recommendation is to start it from seed in pots along a sunny windowsill and keep replanting as needed.
Growing Cilantro from Seed
Cilantro seeds germinate well in Black Gold Natural & Organic Potting Mix. Sow the seeds, cover them lightly with 1/8 of an inch of soil, and water them thoroughly. Then keep the seeds lightly moist by spritzing them with water. Expect them to sprout in a week to ten days. Then keep the soil just moist by watering from the bottom. It also helps to apply an application of water-soluble fertilizer weekly after they begin to grow. Typically, you can start trimming the leaves for cooking after a few more weeks. Microgreens can be harvested earlier.
Cilantro remains leafy for only a couple of months before it starts to send up stems of white, lacy flowers. If you let it flower and set seed, you can harvest and dry the coriander seeds for pickling and cooking. If you prefer cilantro, then pull the plants as they flower, and plant seeds anew. You might even maintain a couple of pots and plant them several weeks apart to ensure you have a constant flow of cilantro.
Some cilantro varieties stay leafy longer than others. ‘Calypso‘ is one of these. It is generally ready to harvest 50 days after planting.
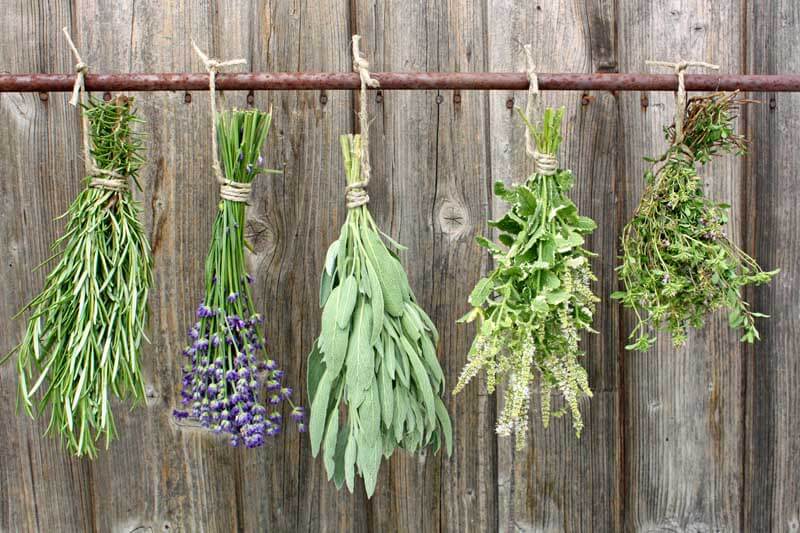
Fresh or dried herbs or herbal flowers can be used to make wonderful medicinal, culinary, or fragrant herbal wreaths in almost any season.
An herbal wreath is a fragrant and decorative way to dry your culinary herbs. While wreaths are most commonly used throughout the holiday season, especially pine or fir wreaths for their fresh scents, herb wreaths can bring aroma and ambiance indoors throughout the year.
Harvesting Herbs for Drying
Drying bundles of herbs
Choose herbs to harvest that have not yet flowered. Cut the stems in the morning after the dew has dried, but before the heat of the day. Use clean, sharp scissors, or pruners. bundle them together in stems of five to ten, and hang them to dry. Once they are 3/4 of the way dry, they are ready to work with. At this point, they are not crisp. To dry bay leaves, place them between two paper towels and set a book on top of them. After a week, they should be ready to use. Here are four potential wreaths to make:
Herbal Tea Wreath–Pineapple Mint or Peppermint, Lemon Balm or Lemon Verbena, Chamomile Flowers, and Flowering Bergamot (Monarda didyma) are all perfect herbs for drying and teamaking. (Click here to learn more about growing and making tea.)
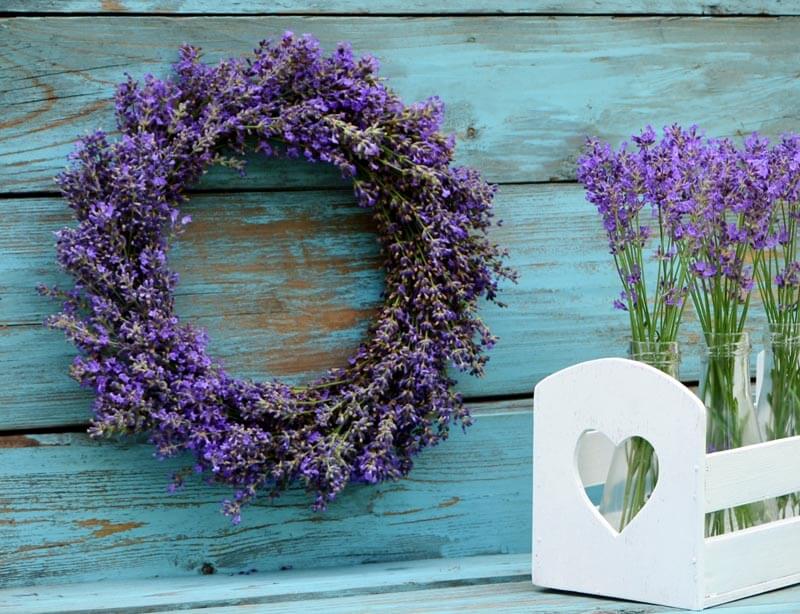
Lavender Wreath— Nothing smells better than a dried lavender wreath in the home.
Mediterranean Wreath–Bay stems, Rosemary, Sage, and Thyme make this a wonderful culinary wreath for any time.
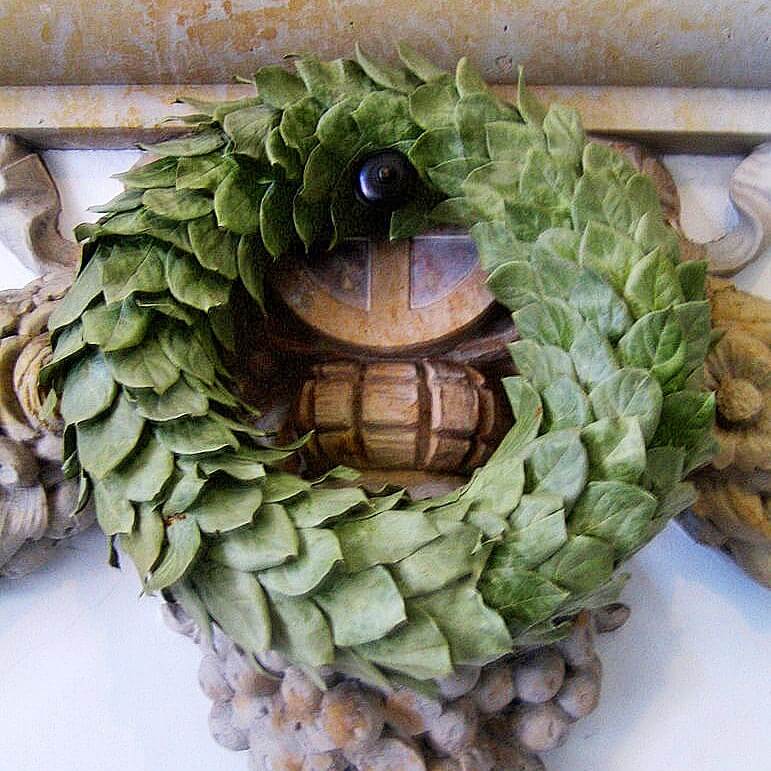
Bay Wreath–Bay leaves can be dried to make a fragrant, culinary wreath to enjoy through winter.
Harvesting Fresh Herbs
Grow lots of fresh herbs for wreath making. Be sure to grow them organically if you intend to consume them.
Some herbs last longer than others in fresh herbal wreaths. Good herbs to choose include evergreens, such as bay stems, lavender, rosemary, sage, and even thyme stems. Flowering herbs, like chamomile, tansy, rosebuds, and yarrow, also work well. Avoid more tender herbs, like dill, parsley, or basil; they do not last and look poorly after just a couple of hours.
Making a Fresh Herb or Dried Herbal Wreath
Twig or grapevine wreath forms make the best bases for herb wreaths, fresh or dry.
Once you have collected a variety of herbs, you can dry them in a beautiful wreath. I like to contrast needles with broad leaves and vary the color, but a wreath made of entirely one type of foliage can also be pretty.
Materials:
Grapevine wreath form
Rosemary, thyme, oregano, lavender, bay, sage, or other garden herbs
Everlasting flowers for color
Floral wire or twine
Scissors or snips
Make it!
A lavender wreath can perfume a home for a full year.
Lay the grapevine wreath on a table, and set out the freshly cut herbs and florist wire.
Build a bundle of herbs in your hands, like gathering a bouquet. I like to incorporate woody-stemmed herbs like rosemary as the base of bouquet because the stems can hold the shape of the softer stems layered on top. Be sure to add a touch of color with lavender flowers or fennel blossoms.
Snip off any long stems and tie the first bundle with florist wire, leaving one end of the wire long. Wrap the long end of the wire around the wreath form to secure the first bundle in place.
Gather the second bunch of foliage. Lay this bunch with the tops overlapping the first one, and secure it to the wreath form with the wire.
Continue adding bundles of herbs to the wreath by overlapping the previous bunch and securing with wire until there are no more gaps to fill.
Secure the final bunch by gently lifting the herbs from the first bunch and tucking the stems underneath it. Secure with wire by twisting it together.
Take a last look at the wreath. You can tuck in a few more greens to even out the design and hang in your kitchen.
As the herbs dry, use needle-nose pliers to twist the wire on the back of the wreath to tighten the hold on the herbs.
Harvest herbs from the wreath for cooking for up to three months or until they lose their flavor and aroma.
When making a bay wreath, use a solid wreath base of straw and arrange the leaves in the same direction all around.
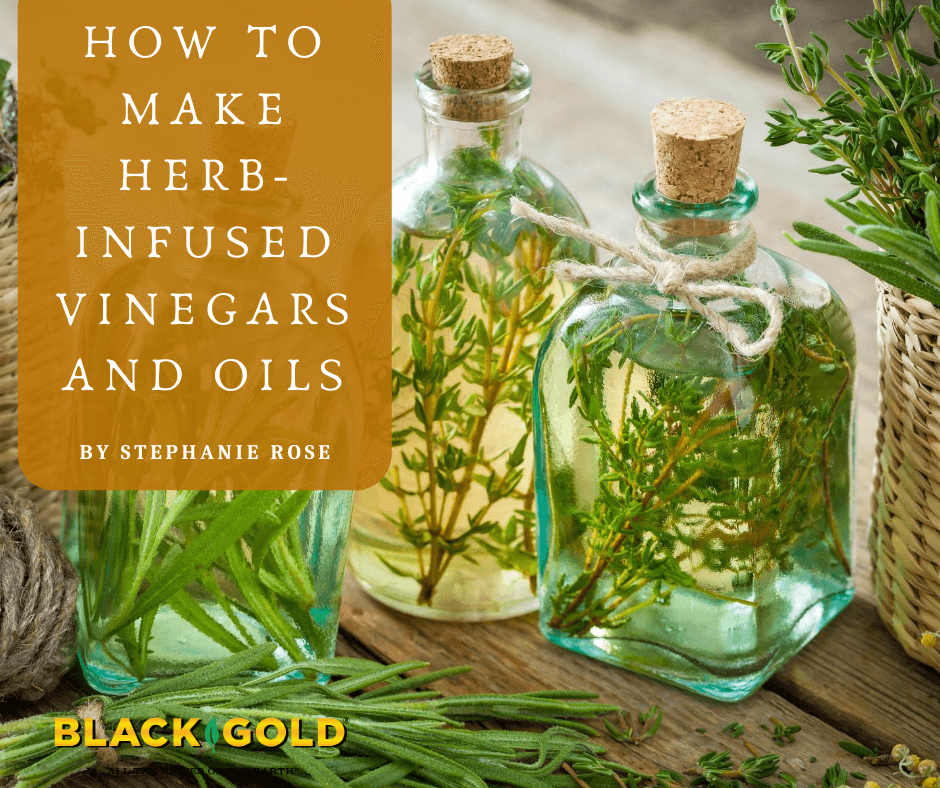
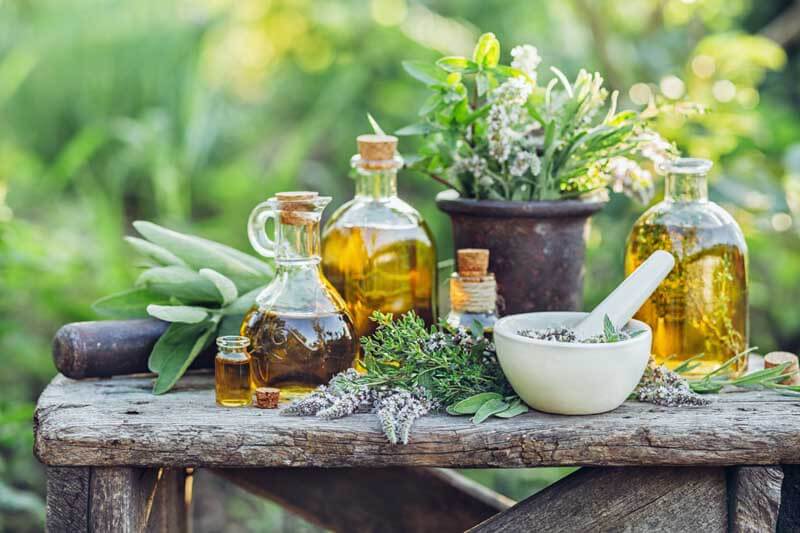
Making your own herbal infusions in oils and vinegar is a great way to preserve herb flavors from your garden. Since comparable store-bought bottles can be pricey, you’ll save money and have some delicious artisanal gifts to give to friends and family.
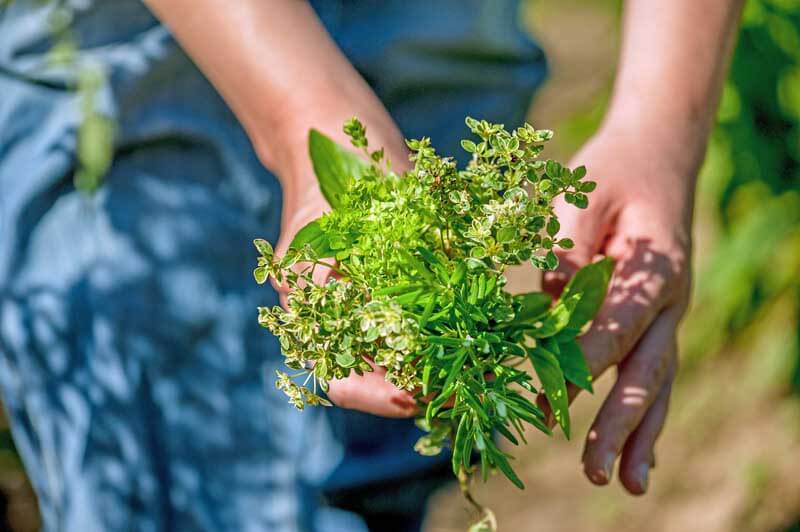
Harvesting and Drying Herbs
Bundles of rosemary, lavender, sage, pineapple mint, and thyme are easy to dry and retail their flavor.
Some herbs can be infused dry; others should be infused fresh. Dill, oregano, thyme, rosemary, and sage are all suited for dry infusion. Basil, cilantro, chili, and chives have the most flavor when infused fresh.
Harvest herbs from your garden early in the morning using clean, sharp scissors or pruners. If you plan to use fresh herbs, start your infusion immediately after cleaning the stems. To prepare dry herbs, hang them upside down in bundles or lay them in a single layer on trays in a dark, cool area. (Click here for some other drying methods.)
Which Herbs to Infuse
Choose herbs that are fresh from the garden in pleasing combinations that suit your taste.
The herbs you choose are entirely up to you! What are you growing? What’s freshest in the garden and best for your flavor palate? You can make single herb infusions, like basil oil or rosemary vinegar, or you can blend flavors together, like citrus zest, chili, and thyme. Choose a few options, and you’ll have plenty of ways to add spice to your kitchen creations.
Oil Infusion Methods
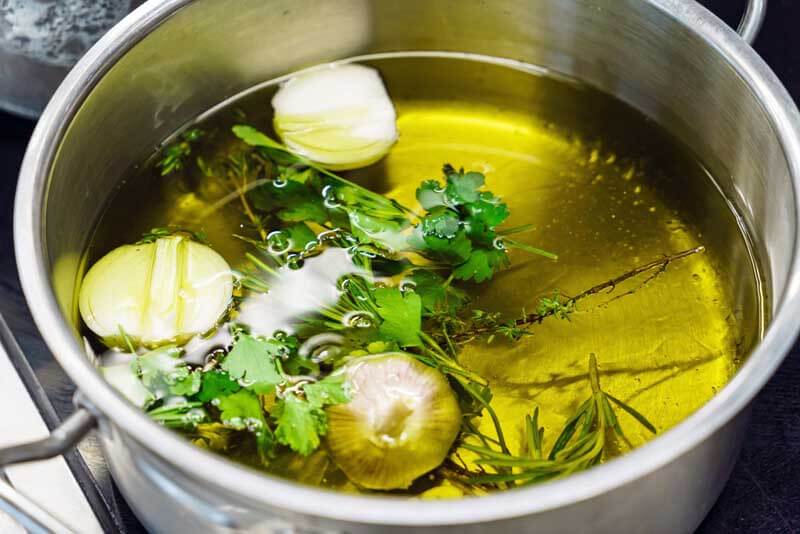
The stovetop method is one way to infuse herbal oil. A double boiler or saucepan set on low heat also work. Cilantro, garlic, rosemary, and thyme are in this infusion.
Infusing the flavors of herbs in oil is most effective when the oil is warmed. This can be done on the stovetop, in the sun, or a Crockpot. The infused oils will be ready in just a few hours this way. You can also place herbs in oil for a cold infusion as long as you have the time to wait for six weeks to get your finished herbal oil.
Safety notes: When infusing herbs into oil, be sure to use dried herbs for the stovetop and sun-infused methods. Jars and bottles must also be dry and sterile. (Click here to learn how to sterilize jars and bottles.) Clean, dry, chopped or processed fresh herbs can be used for the slow-cooker method, as long as the oil is heated to a temperature just over 140 degrees F, which is hot enough to kill bacteria.
Stovetop Oil Infusion
Slowly heat the oil and herbs in a double boiler. Pack as many herbs as possible into the boiler top. Then, pour the oil over them–enough to fill your jars or bottles. Pour an inch of water into the bottom of the double boiler. Heat the double boiler on medium-high for a few minutes. Reduce the heat to low for a few hours until the oil becomes aromatic. If you do not have a double boiler, you can use a saucepan set on the lowest heat setting.
Sun Oil Infusion
Pack herbs into a large mason jar and pour oil over them, covering the herbs completely. Screw the top onto the jar, and leave it out in the sun for up to eight hours. To avoid overheating the herbs and eliminating some of their benefits, don’t use this infusion process during the height of summer. This method works best during the warm parts of late spring and early fall.
Slow Cooker Oil Infusion
Place the dried herbs into the Crockpot. Cover them with oil. Heat on low (190 degrees F) for a few hours or until the oil becomes fragrant. To create multiple oils at the same time, place the herbs in mason jars, cover with oil, and add a lid to each jar. Fill the Crockpot with a couple of inches of water and heat.
Editor’s note: If using fresh herbs, such as basil, start with a large bunch–maybe six big stems. Clean the stems and pat them dry. Blanche them in boiling water for 5-10 seconds, place them on a towel and lightly pat them dry, then put them in a food processor with a pinch of salt and puree them. Add the puree to a clean 16 oz. canning jar, fill with light olive oil, and cover with a lid. Fill the Crockpot with a couple of inches of water, place the jar in the water, and heat for a couple of hours. Finally, place three layers of cheesecloth over a bowl, pour the mixture through, and squeeze out all of the basil oil. Pour the oil in a fresh, clean jar and store it in the refrigerator for a couple of weeks. Another option is to store it in the freezer in a well-sealed plastic freezer container until use. A lidded silicon ice cube tray also makes a good container.
Cold Infusion
Pack dry herbs into a jar, lightly compacting them until filled to the top. Pour olive, canola, or grapeseed oil over them, gently pressing them down with a spoon to release some of the air bubbles. Completely cover the herbs with oil. Set the jar in a cold, dark room for four to six weeks.
Vinegar Infusion Methods
Apple cider vinegar makes lively herbal infusions.
The method you use to infuse vinegar depends on whether you are using herbs alone or adding fruit. In either case, the herbs do not need to be dried first. Pick fresh, clean herbs from the garden, and add them to the vinegar of your choice. Keep in mind that better quality vinegar will result in a better final product. White wine, apple cider, and coconut vinegars are lively when infused. If you have a sweet tooth, white balsamic is good for fruity infusions.
Herb and Fruit Vinegars
Herbs such as basil, lemon balm, and mint can make refreshing vinegars.
If you’re infusing vinegar with both herbs and fruit, such as strawberries, choose fruit that is ripe and free of blemishes. Wash it and cut off any stems. Harvest and wash fresh herbs. Bruise them with the back of a knife to release their scent and taste. Pack the fruit and herbs together into a jar. Cover them with vinegar and secure the top of the jar. Place it in a cool, dark room for ten days. Strain the solids out of the vinegar. Stire it in the fridge for up to a month.
Pack washed and bruised herbs into a jar. Cover them completely with vinegar and secure the top. Place it in a cool, dark room for about two weeks. Strain the herbs out of the vinegar. Store the finished vinegar in the fridge.
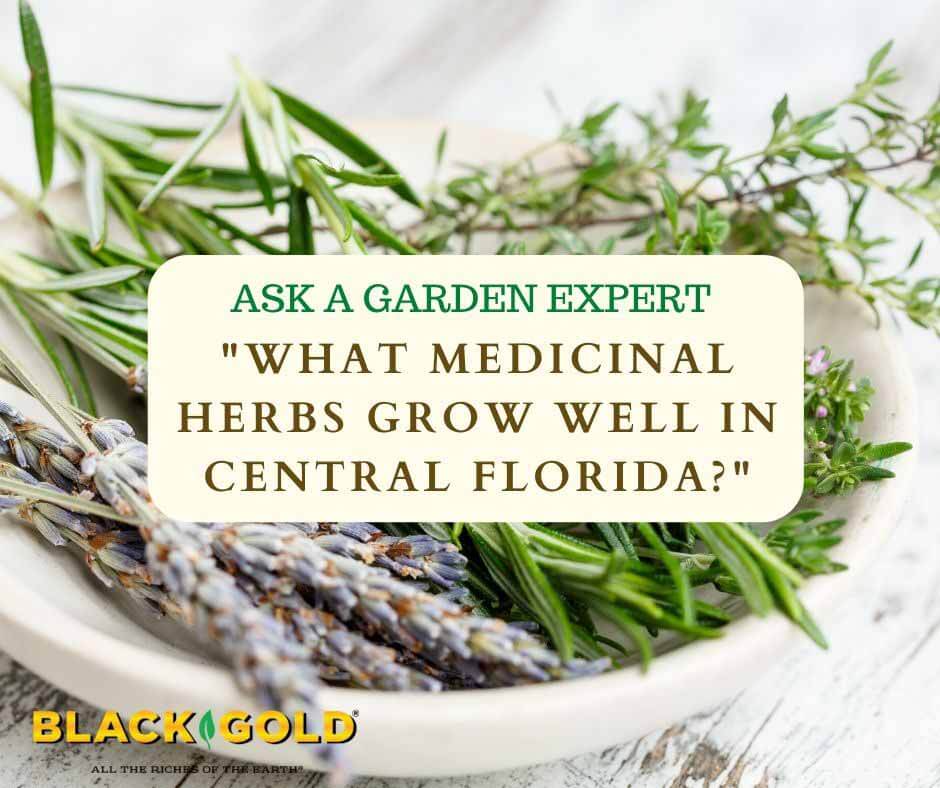
What Medicinal Herbs Grow Well in Central Florida?
“What Medicinal Herbs Grow Well in Central Florida? I moved to Florida and I want to know which native medicinal herbs to look for and grow here at my new home.” Question from Susan of St. Pete Beach, Florida
Answer: There are lots of medicinal herbs that will grow well in your Zone 9 garden. I recommend that you read our article titled Grow anApothecary Garden: Flowers and Herbs for Healing as well as our article about growing an Herbal Tea Garden and one titled Garden Cold and Flu Remedies. Most of the herbs in these articles will grow well in your area. You can even grow your own healing fresh ginger indoors or outdoors in pots in Florida (click here to learn how)! I hope that these resources help.