

Making your own plant markers can be a fun way to repurpose used items and put a touch of personality into your garden. They are a useful and fun activity for a rainy day, humdrum weekend, or when you have extra time on your hands.
Here are some of my favorite ideas for DIY plant markers, all are easy projects for those who love to craft, garden, and be green! These plant markers are fun to make and will help keep your garden beds in order. No matter what your style, skill level, or budget, you will find the perfect DIY plant label for you in this list of seven easy-to-make plant labels using materials that you may already have around the house.
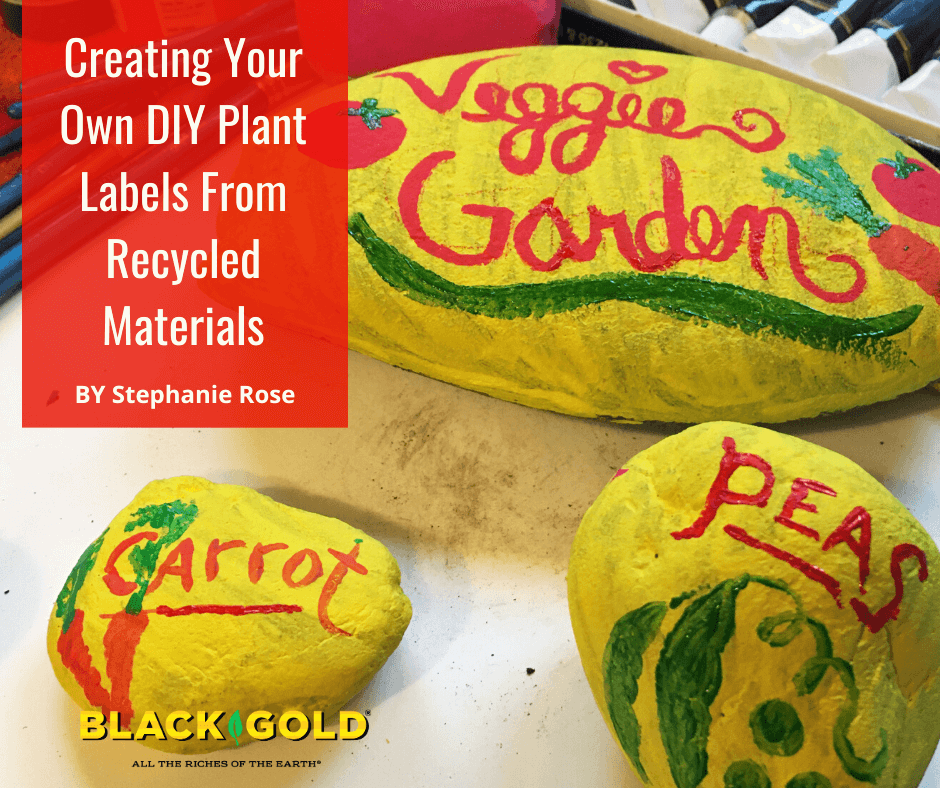
1. Painted Rocks
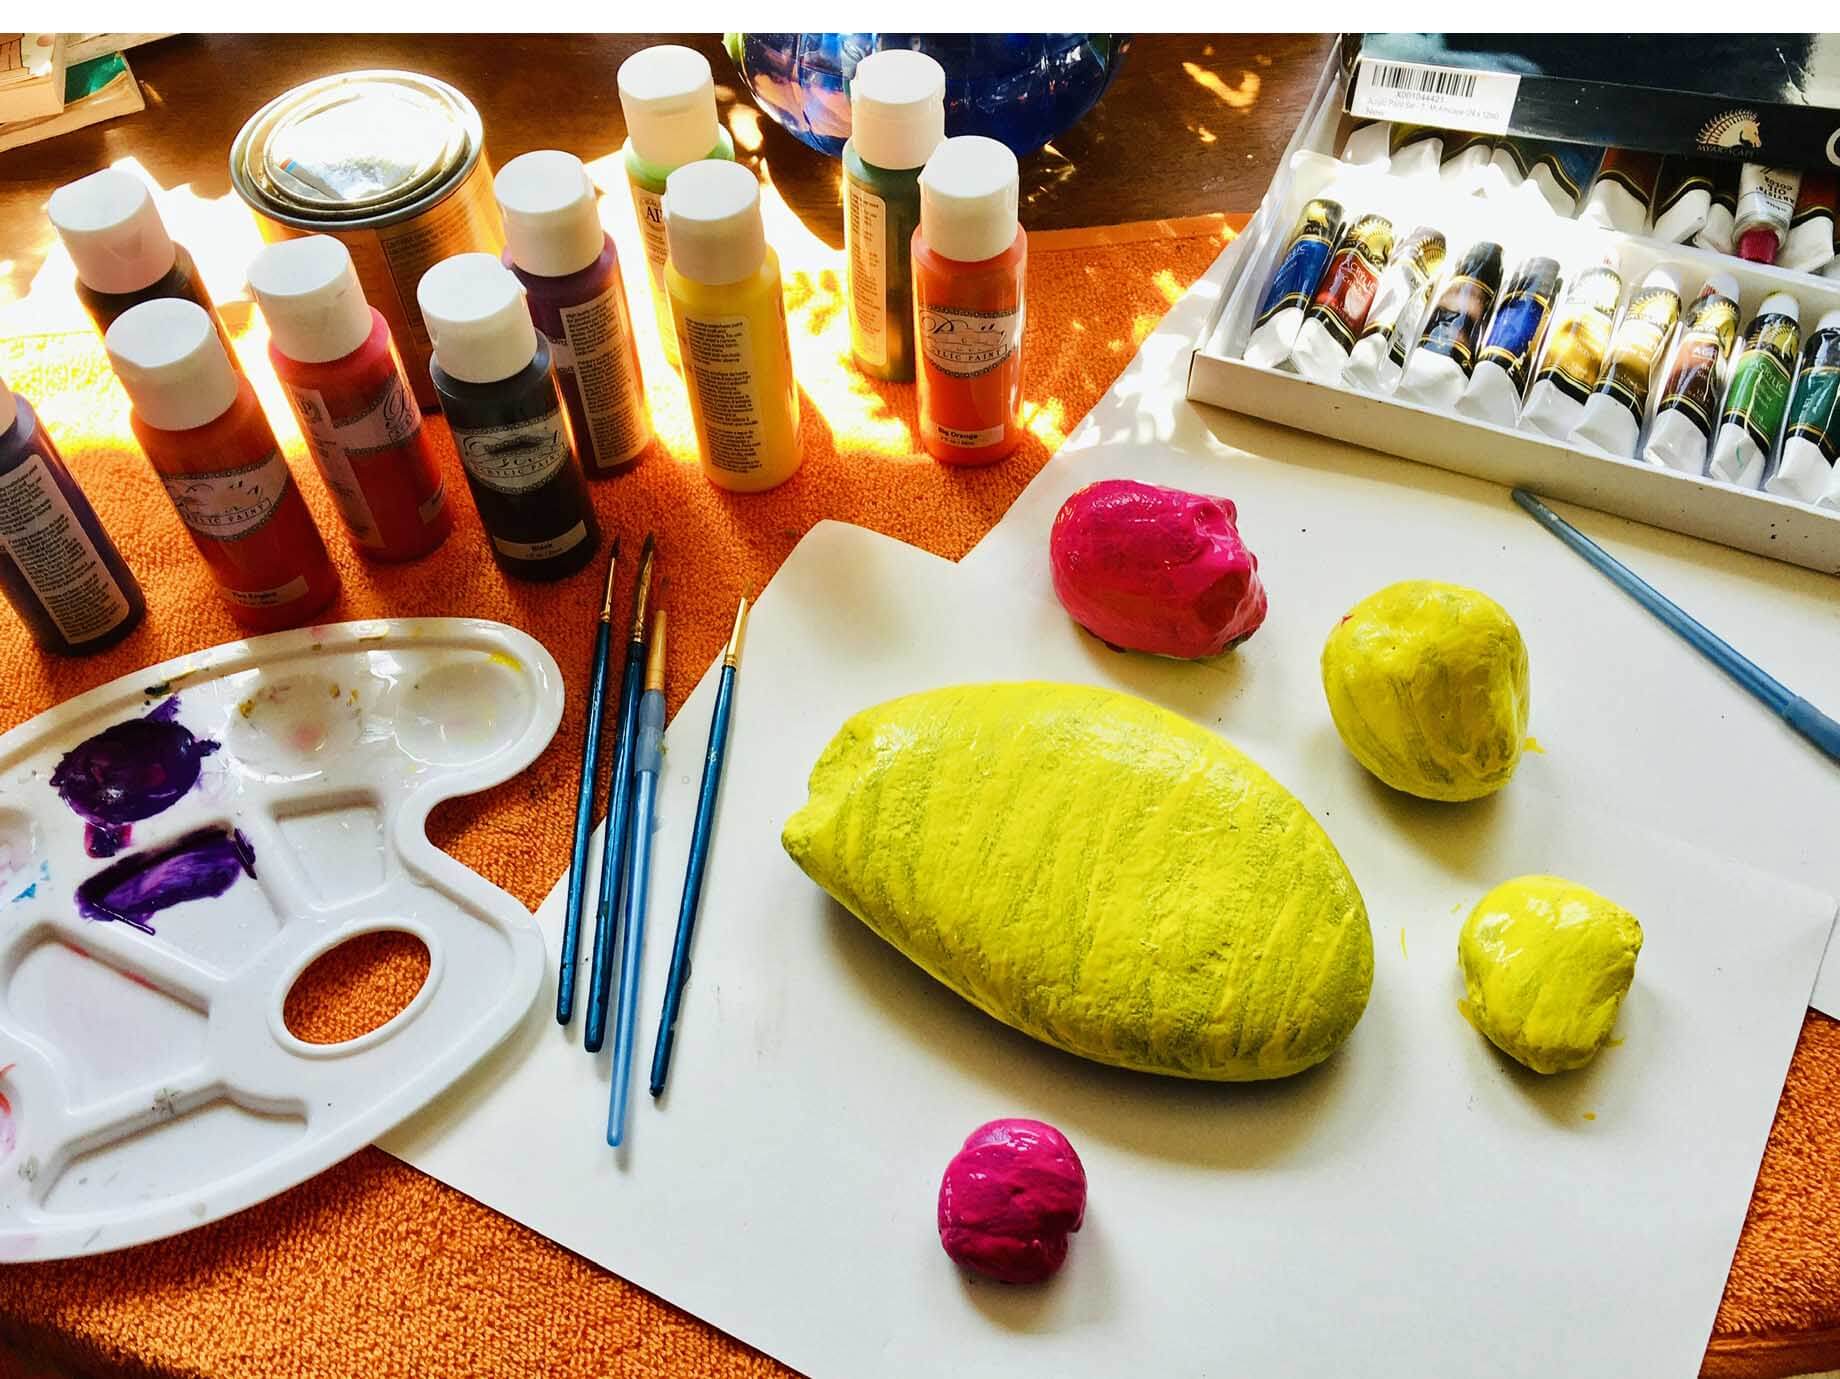
Being a naturally occurring material, stones are easy to obtain and place among your garden plants. Rocks are generally excellent plant markers because they are sure to outlast the winds and rains typical during springtime planting. This is also a fun craft project you can do with kids!
The key to creating a long-lasting rock plant marker is all in the paint. Look for non-toxic acrylic paint to decorate the rock and use an outdoor clear sealer like Mod Podge to protect it from the elements. Speak with the staff at your local craft or hardware store if you’re uncertain about sealer options available to you locally. See the steps to make them here.
2. Twig and Stick Markers
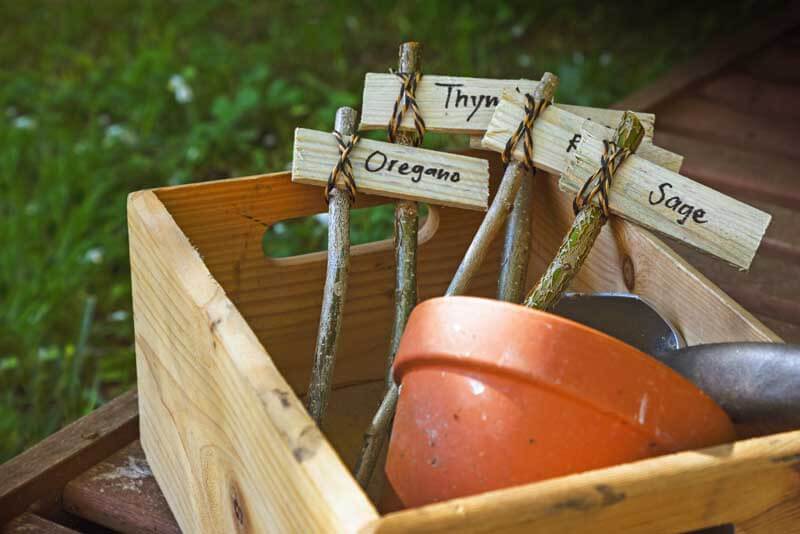
When you are out doing a bit of pruning, be sure to hold on to those sticks and twigs to use as garden markers! There are several ways to do this, simply or using bits of string or wood from around the house. Both start with sticks that are similar in size and shape that have been cut to equal lengths
For the whittled stick method, pare away the bark of the stick to expose the raw wood underneath. You can do this with either a potato peeler or a small sharp knife (a pocket knife will do). Be sure to wear protective gloves. Expose just enough of the stick to be able to write the name of your plant on the raw wood. You can use a permanent marker with a clear coat of sealer, or even a wood-burning pen to get a permanent etch.
Another way is to use the sticks as stakes for more elaborate wooden markers of your creation. Any small, flat piece of wood or bark can be affixed to the twigs with twine and/or strong glue. Then label them as desired.
Once complete, place the stick plant markers into your garden, which may involve using soft mallet hammer if the soil is hard. At the end of the season, simply pop the plant markers in the compost bin and start anew next year.
3. Wood-Burning Tool
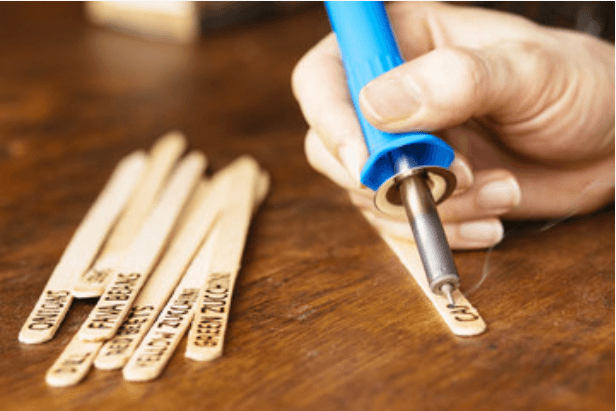
Speaking of wood-burning pens, you can also use pyrography to create charming plant markers with inexpensive wooden spoons, popsicle sticks, or other stakable wooden odds and ends decorated with a wood-burning tool with a pen tip attachment. Draw your label and decorations onto the wood in pencil first, and then go over it with the wood-burning pen. Wood-burning tools are both fun and easy to use, as long as you keep your fingers clear of the tip (youch!).
As for the design, get creative! You can use your wood-burning tool for anything that is wood so practice a bit before you get started. Then try it out on wooden spoons, clothespins, tiny signs from your local craft store, or wood scraps leftover from your last project. Click here to see how to make elaborate wooden spoon markers.
4. Clay Plant Markers

Use oven-bake clay and rubber stamps, cookie cutters, a knife, or ravioli roller to make stylish garden markers for your herb or vegetable garden. Simply roll out the clay with a rolling pin to a 1/4 inch thickness, cut into strips (or circles and shapes for hanging labels), and curl up one end for a decorative topper. Use rubber stamps or toothpicks to imprint or carve the names of the plants before baking. Be sure to put holes at the tops of the circular labels for hanging. Follow the baking instructions on the clay package, and you’re done!
5. Metal Stamped Spoons
Hammer-struck hardware letter stamp sets can be purchased for as little as $20, but they can be used over and over again. There are many ideas available for recycled metal plant markers involving anything metal like frozen juice lids, metal washers, soda cans, and copper sheets. Yet, a simple metal plant marker can be made with just an old spoon, small hammer, two pieces of wood, and a stamping set.
To create a metal stamped spoon label, first select your spoon to create into a marker, and place upside down between two flat pieces of wood. Strike the wood with a hammer until the spoon becomes flat. Remove the top piece of wood, and continue to hammer until the spoon is completely flat. Hammer the name of the plant you want to label, then, color in each letter with a dark permanent marker to make them stand out. Use steel wool to scuff off excess color from the marker.
The spoon shape is ideal for a plant marker, with the handle making insertion into the soil easy. These also are a fun way to label a plant as a gift, or bundle a few together with common herb names as a gift idea.
6. Wine Corks on a Stick

One of my favorite recycled plant label ideas comes from my favorite beverage, wine! It can be as simple drinking saving the corks, adding them to the tops of bamboo skewers, and labeling with a permanent marker. If you need a lot of plant labels, you can always get bags of used corks at a local winery.
7. Chalkboard Paint
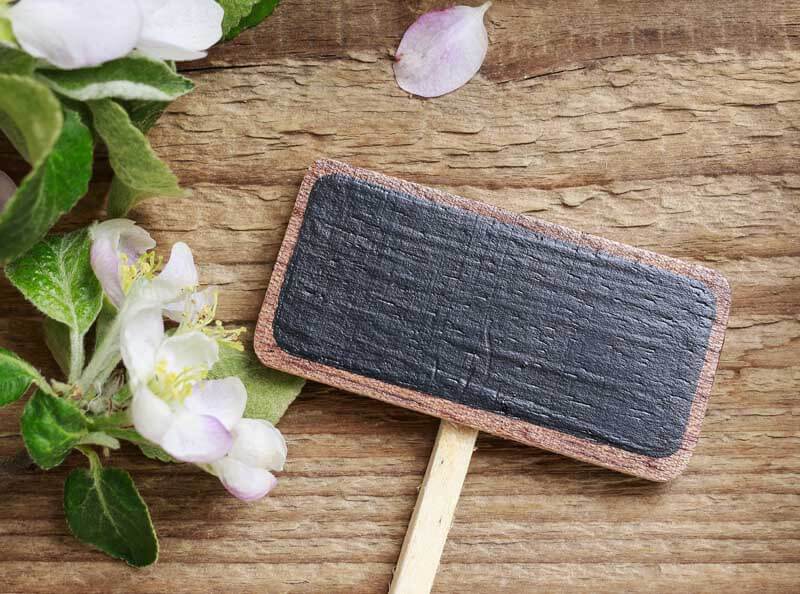
These super easy markers are surprisingly long-lasting and look great. They are especially useful for vegetable gardens because they can be erased and reused once the plants are grown in enough that you no longer need a label to help identify them. Just dip paint stirrers, popsicle sticks, or any wooden label in chalkboard paint, let it dry, and write your labels with a liquid or oil-based chalk pen that will look clean and last for a whole season, even through rain and watering. Click here to see my step-by-step paint stirrer labels.
Hopefully, these projects inspire you to create your own eco-friendly plant markers, which will make organizing your garden both prettier and greener.