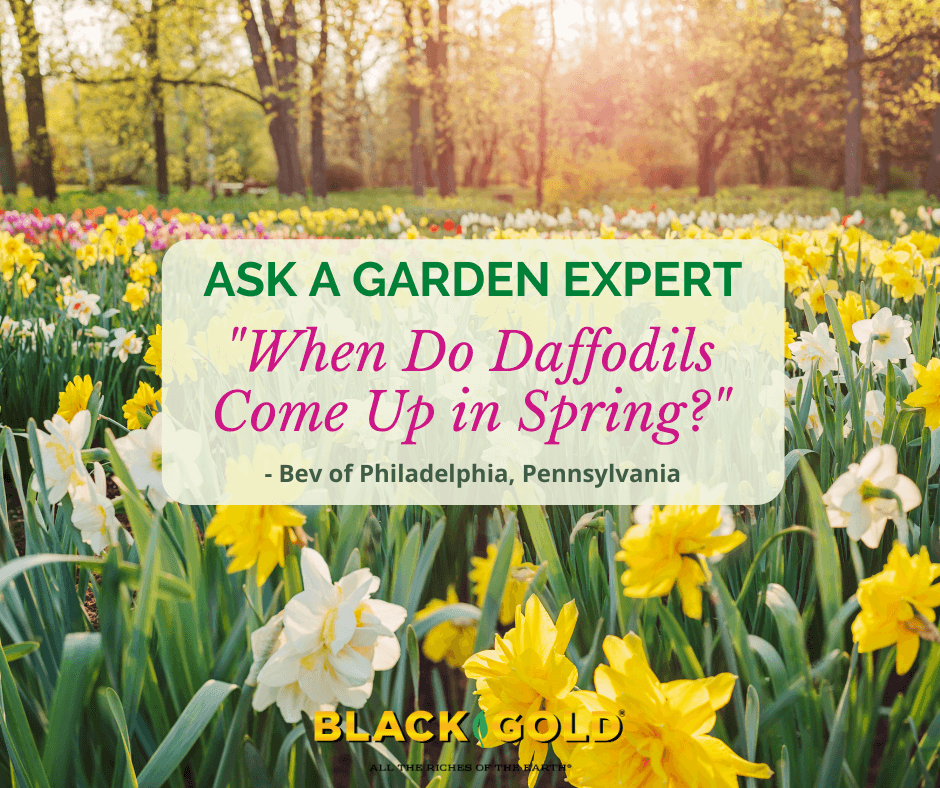
“I just planted my daffodils. Now, when will they start to come up, in the spring? Also, can I just leave them in the ground so that they will come up again the following year?” Question from Bev of Philadelphia, Pennsylvania
Answer: It seems like a question that answers itself, but it is not. Truly, it depends. There are different daffodils that emerge and flower at different times in the spring season. So, the time that your daffodils will emerge depends on the varieties that you planted. (Always make note of your plant’s names, if they are given. They can provide a lot of needed information.)
Daffodil Bloom Times
Daffodils may emerge in early spring (February to March), early to mid-spring (March to April), mid-spring (April), mid-to-late-spring (April-May), or late-spring (May). The short, golden ‘February Gold‘ is an early spring daffodil that was first introduced in 1923; a good early to mid-spring variety is ‘Barrett Browning‘ with its ivory petals and small, dark-orange cups; lots of tiny cream and gold flowers cover the mid-spring bloomer ‘Minnow‘; ‘Ambergate‘ is a mid-to late-spring bloomer with tangerine and dark orange flowers; finally, ‘Sir Winston Churchill‘ is a fragrant, double-flowered daffodil that blooms late. And, if you plant all of these, you can happy sunny daffodils in your garden from February to May!
Daffodils are wonderfully hardy and naturalize over time. They are also very long-lived in the garden, which is why you commonly see them in big swaths around old homes. So, leave them in the ground. Once their greens tops start to turn brown in late spring, trim them back. The following spring, your daffodils should return in even greater numbers.
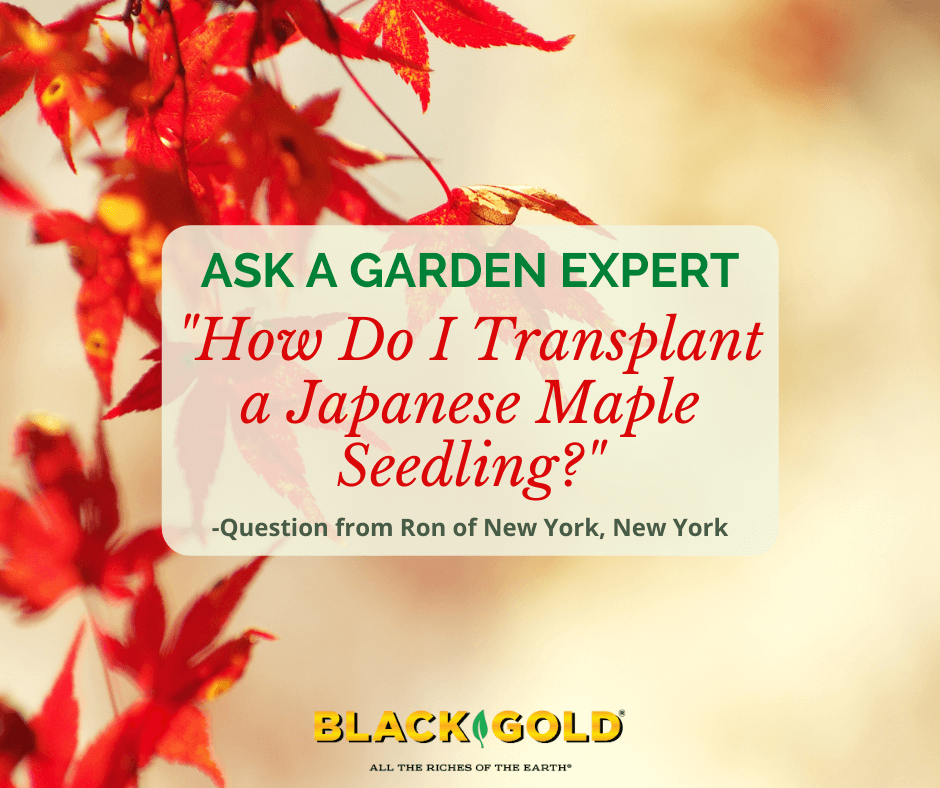
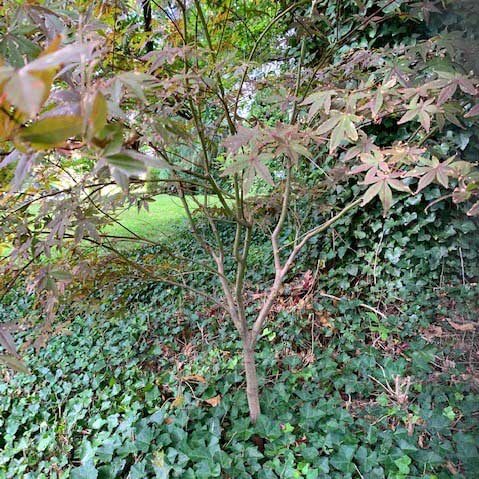
“I recently bought a house in Long Island, NY, and found a 2-foot tall Japanese maple tree (I believe it is a Red Emperor Maple) growing under a much larger tree. The maple apparently sprouted naturally. I would like to transplant it to a more open space. When is the best time to transplant the tree? See pictures of the tree and proposed a new planting spot. This open location will get much more sun, will that be a problem? Any advice on transplanting (size of root ball; conditioning soil) are welcome. From my reading it seems that it is best to transplant the tree before the first frost in autumn, the root ball should be the diameter of the drip line, and the new soil should be well-draining and mixed with lots of organic matter.” Question from Ron of New York, New York
Answer: The tree looks healthy, and the planting spot looks just fine, but seedling trees like this little Japanese maple (Acer palmatum, USDA Hardiness Zones 5-8) have one flaw relative to nursery stock. Their fine, spreading roots are not as dense as those of potted trees, so they do not transplant as well. There is one way to increase root density for better establishment, root pruning. If you prune the roots in fall, the tree will be ready to plant before it leafs out in spring. Here’s how.
How to Root Prune a Tree Before Transplant
You will need a sharp flat spade (King of Spades is best), gloves, and probably some pruning shears to cut away the ivy. Trim the ivy away, clear the area to begin digging. Shoot for a root ball with a circumference of 8-10 inches around the tree. Using your sharp spade, make clean, slightly angeled cuts down to the full length of the spade. You may run into competing tree roots from the larger tree. Cut around them as best you can. Once you have made the cuts all around, leave the tree until spring. Where you made the cuts, new feeder roots will grow over the winter to help the tree become well established when you move it in spring, so you don’t need to cut along the drip line.
In spring, pull away the mulch, and dig a hole that is several inches beyond the height and width of your tree’s root ball. Break up some of the backfill to help plant the tree, and reserve the rest to fill in the hole you will create by digging up the tree.
Next, gently dig around your maple along the lines and cuts you made in fall. You will have to dig a bit beyond the cuts to get any roots that you missed towards the bottom. You should see new root growth along the cuts. Wrap the root ball in plastic or burlap to keep it together. If it breaks apart a little, your tree should still make it. From there, I recommend that you click on this link to follow Russell Stafford’s guidelines for planting a new tree.
As to the variety of your Asian-native Japanese maple, it is difficult to say. These maples seed in from planted landscape specimens, and the seedlings are not necessarily true to parent. With that said, it should still be a fine tree. They can reach a maximum height of 25 feet, so it will provide some shade in your front yard.
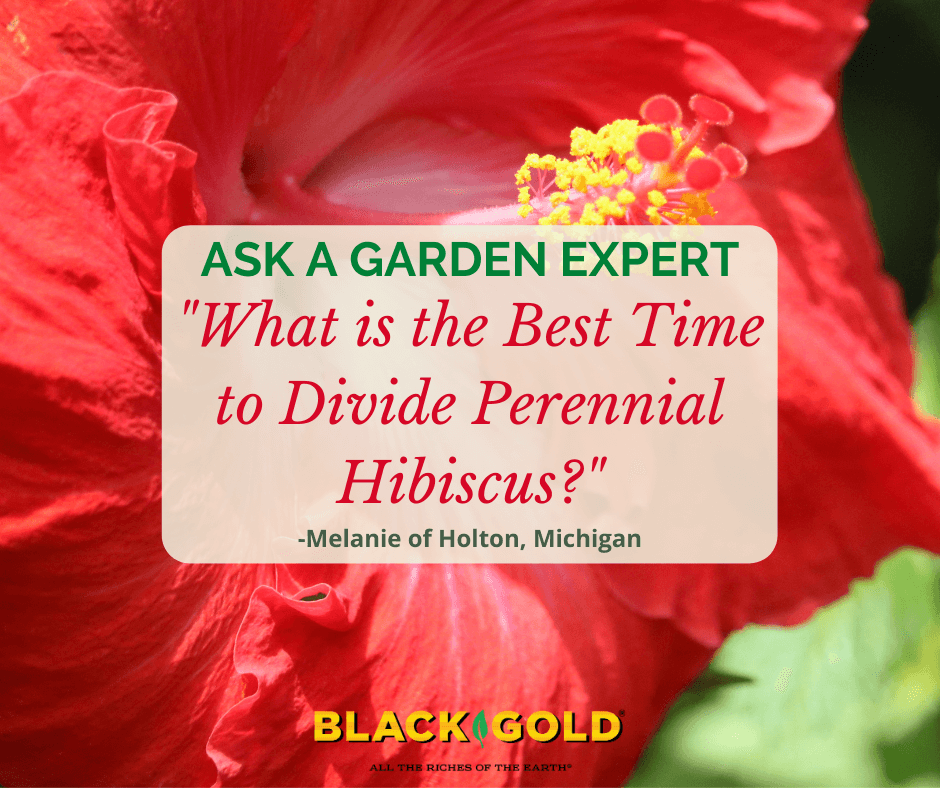
What is the Best Time to Divide Perennial Hibiscus?
“When is the best time to divide Hibiscus?” Question from Melanie of Holton, Michigan
Answer: Mid-spring is the best time to divide perennial Hibiscus (Hibiscus moscheutos and hybrids, USDA Hardiness Zone 5-9), especially when you live further north. Remember that this hibiscus requires warmth to sprout from the ground, so it is one of the last perennials to emerge in late spring. First, only divide clumps that are 8 to 10 inches across. Anything smaller is too small to create a big show in the coming summer. Then, using a sharp spade, cut down the center of the clump to split it in half. Amend the soil with quality organic matter, such as Canadian Sphagnum Peat Moss or Garden Compost Blend, before planting. A Continuous Release Fertilizer formulated for flowering perennials is also recommended.
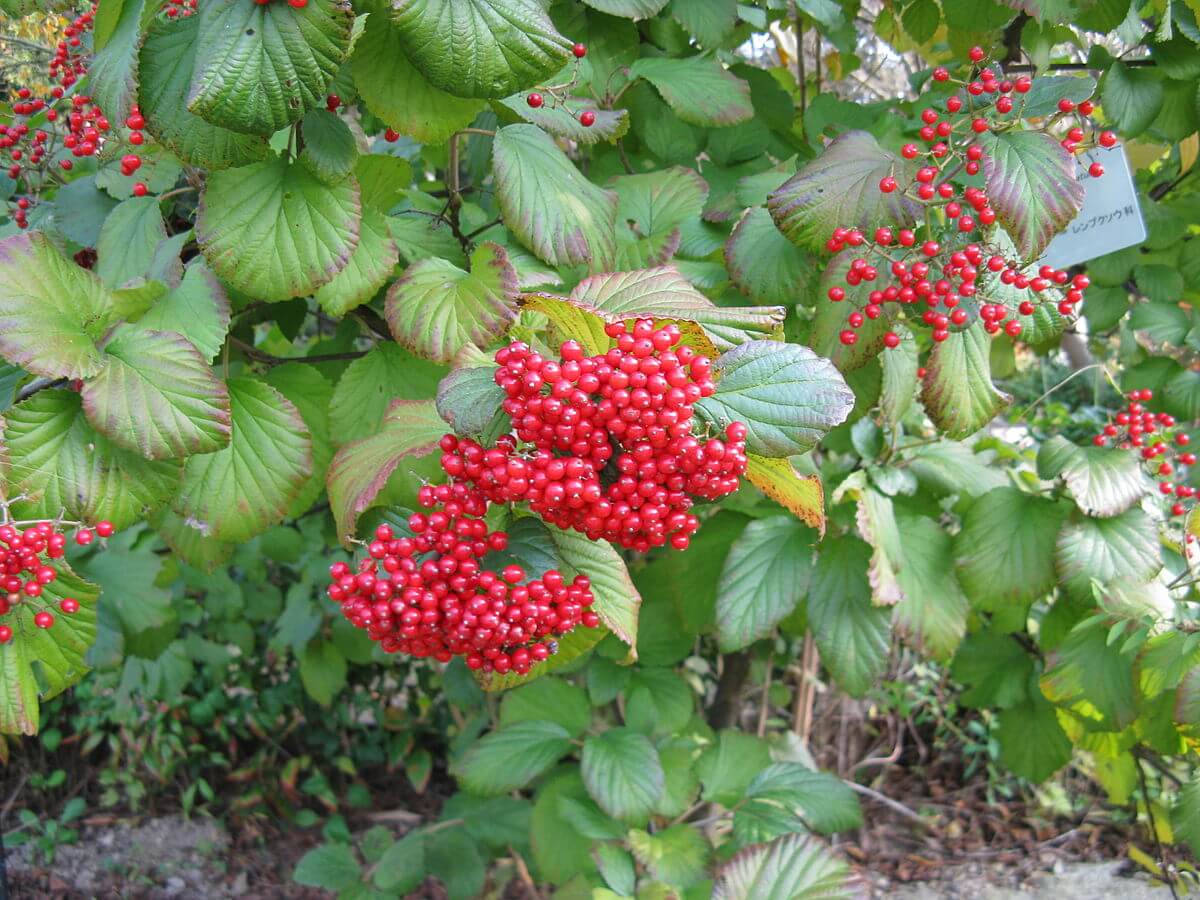
Right: bright red Viburnum opulus berries, do droop. They also feed hungry songbirds.
What exactly is a Viburnum? Viburnums are trees or shrubs, evergreen or deciduous, that may be diminutive three-foot globes or grow 60 feet tall. Their leaf texture varies from smoothly shiny to velvety, and, their leaf edges may be serrated, dentate, lobed, or not! Viburnum flowers are either round or flattish and range in color from white to pink. The blossoms are either deliciously fragrant, have absolutely no scent, or can be downright offensive. Just forget trying to determine what viburnum you are admiring by its fruit color alone since berries range from yellow to orange, red to black, and blue to purple.
According to the great Georgia plantsman, Dr. Michael Dirr, their characteristics are simply too varied to make a definitive identification without a very good reference guide. In his 2007 guidebook, Viburnums, Flowering Shrubs for Every Season, by Timber Press, Dirr admits that even taxonomists can’t agree on how many species presently exist in the genus Viburnum with the true number probably falling somewhere between 160 to 250.
What makes a Viburnum a Viburnum?
The Koreanspice bush, V. carlesii, provides a perfect example of a viburnum’s opposite leave arrangement.
Famed tree and shrub specialist Michael Dirr’s definition is:
The fruit is a drupe, generally ellipsoidal, flattened, ovoid to rounded, with a fleshy coat, hard bony endocarp, and a single seed within; and
The leaves are always arranged opposite; a few species, occasionally, have three leaves at a node.
Growing Viburnum
Viburnum diltatum (Image by KENPEI)
Besides their exquisite beauty, the main reason why we embrace viburnums in our home landscapes is their extreme hardiness. Many varieties can be very drought tolerant (once established) as some of our best Southeastern native viburnum hail from dry woodlands. A few, such as our native Arrowwood, will also tolerate wet feet. Most will grow well in full sun to part shade, can take a variety of soil types, and still thrive.
Planting Viburnum
In the absence of good soil, you could amend the planting hole fill dirt with Black Gold Garden Soil for improved drainage that will still provide enough moisture retention essential for a newly transplanted viburnum. Otherwise, mulch the base of your new addition with Black Gold’s Garden Compost Blend in order to help hold moisture, keep developing roots cool in summer and warmer in winter, and to suppress weeds.
Great Viburnum
In my home landscape, I have found several species of viburnum grow well under the canopy of a large Black Walnut tree, where it is very dry. Here I have planted Koreanspice bush (V. carlesii) and Cranberry viburnum (V. opulus), and they both perform beautifully.
Viburnums have also been evaluated for their resistance to deer grazing. The toughest survivors of deer predation are our native Arrowwood (V. dentatum); Blackhaw (V. prunifolium); Smooth witherod (V. nudum), which is sometimes erroneously called “possum haw” and, the Maple-leaf arrowwood (V. acerfolium).
Koreanspice Viburnum
The flowers of Koreanspice viburnum are so fragrant. (Image by Bouba)
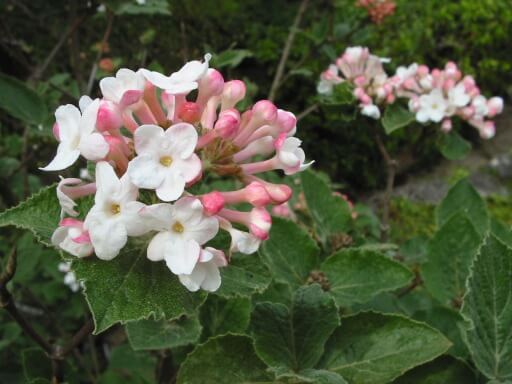
Koreanspice viburnum (V. carlesii, Zones 4-7) is one of our most popular, old-fashioned, pass-along southern shrubs. Grown for its intensely sweet springtime fragrance, the late March to early April flowers of Koreanspice begin pale pink, turning white with age, grow 2-3 inches across, and are rounded. This 8-10 foot tall shrub has dull green leaves that turn reddish in the fall, and red to black fruits.
Cranberry Viburnum
Cranberry viburnum is named for its brilliant cherry-red fruit clusters that begin coloring in late summer. The popular double-flowered variety ‘Roseum’ is sterile and bears no fruit.
The Cranberry viburnum is named for its brilliant cherry-red fruit clusters that begin coloring in late summer. Its famous leaf fall color is much more dramatic in cooler regions where leaves turn gold, red, and burgundy. A very good cultivar is V. opulus ‘Compactum’, which should top out at just 5-6 feet.
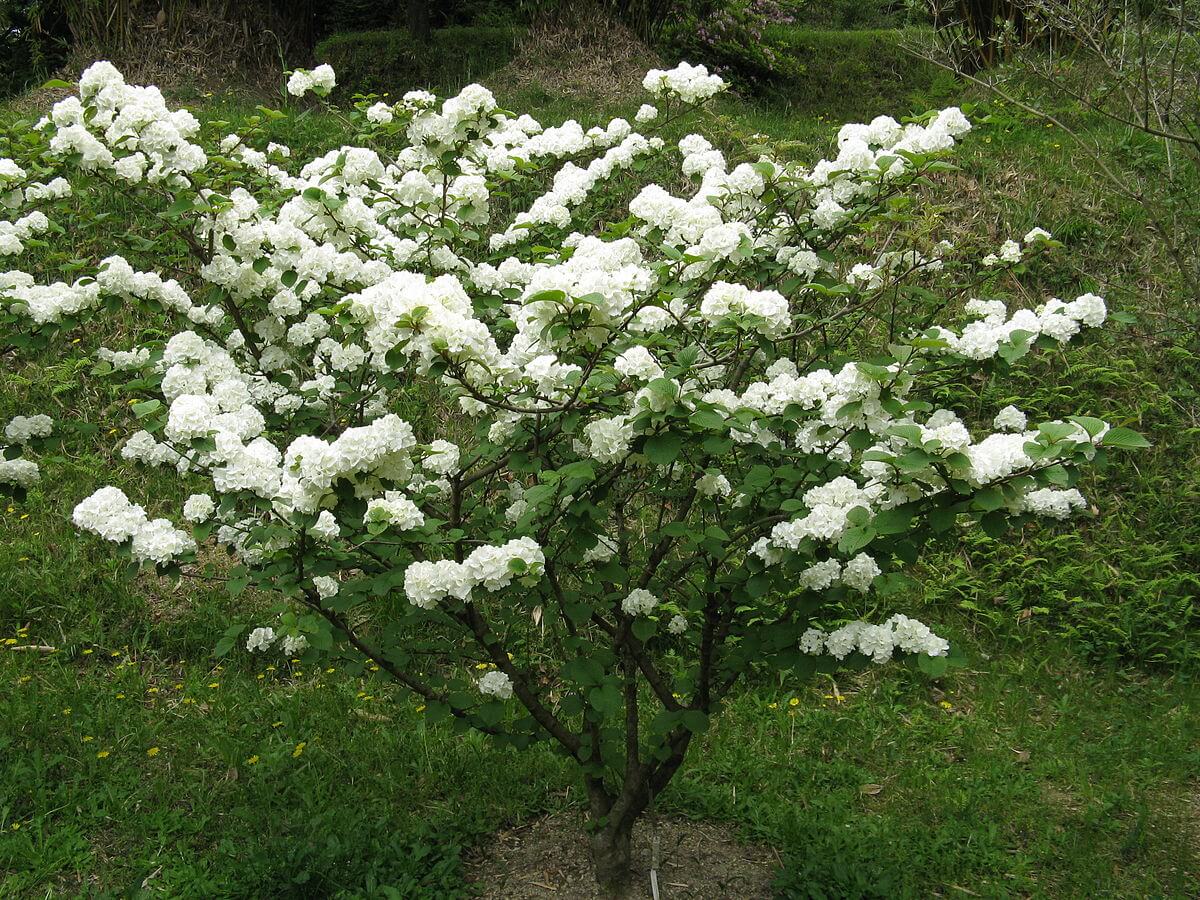
Chinese Snowball
For sheer drama, nothing compares to the Chinese Snowball (V. macrocephalum). This multi-trunked small tree can reach 12-feet or more in height and grow just as wide. Sometimes semi-evergreen in mild winters, this very dark-leafed viburnum is beloved for its 6-8 inch, rounded, springtime flowers that begin pale chartreuse and age to purest white. They are so beautiful that we can forgive it for not bearing any scent. A significant bonus is that it also flowers again from late summer into fall. Since the Chinese Snowball’s hydrangea-like flowers are sterile, there is no fruit, therefore no unwanted seedlings.
Bodnant Viburnum
Viburnum x bodnantense ‘Dawn’ is an early bloomer with lovely fragrant pink flowers. (Image by Magnus Manske)
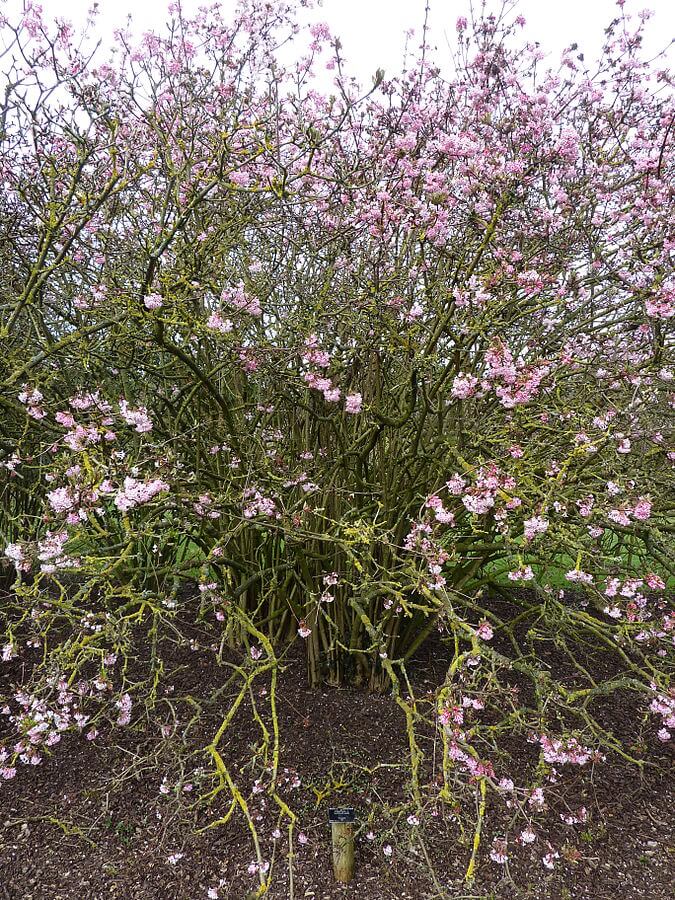
Your winter landscape could be delightful including a Bodnant viburnum in it. Viburnum x bodnantense ‘Dawn’ has bright pink, strongly perfumed flowers in late February to early March in my Wake Forest, North Carolina, Zone 7-8 garden. The small, rounded, sweetly fragrant flowers are borne on bare branches on a rather rangy shrub, but ‘Dawn’ blends nicely into the mixed border the rest of the year.
Viburnum Tinus
Garden centers offer V. tinus ‘Spring Bouquet’ in autumn, which is the right time to plant them. During the late fall months ‘Spring Bouquet’ forms tight rose-colored clusters of buds that will start popping open during the first months of the new year. These viburnum flowers are only slightly fragrant, but they will cover the small shrub. This evergreen viburnum will need part shade in summer, winter protection from sun, plus they benefit from being shielded from desiccating winds.
Doublefile Viburnum
Doublefile viburnum (Viburnum plicatum) has lovely tiered branching and should not be pruned.
Since they bloom in early April, Doublefile viburnums, V. plicatum f. tomentosum, are great substitutes for ailing native dogwoods. Named for its flowering habit of doily-flat flowers positioned side-by-side along the top of long horizontal branches, this is a stunning small tree. These viburnum are deciduous in winter, have dark green foliage in summer, and bright red berries in late fall. A cultivar named ‘Summer Snowflake’ will bloom well in early spring, then sporadically repeat off-and-on throughout the summer.
Chindo Viburnum
Chindo viburnum is another popular viburnum that isn’t grown for its flowers at all. Promoted by the late Dr. J C Raulston of North Carolina State University, V. awabuki ‘Chindo’, is a loosely pyramidal-shaped, shiny-leafed, evergreen shrub that can reach 15-20 feet. It grows in sun or shade and is shaped reminiscent of a large-leafed holly, so it makes an ideal screening plant. One warning is that a Chindo viburnum won’t like winter temperatures that drop below zero; so, if it does get that cold you may have to trim your plant back severely in springtime to encourage new growth to flush.
There is probably a perfect viburnum for just about any location in your landscape, so how do you go about narrowing your selections? Ask your garden center professional for their recommendations, check with your local Cooperative Extension Service, and find a copy of Dirr’s Viburnums book.
The ‘Chindo’ viburnum is an outstanding evergreen screening shrub. (Photo by Pam Beck)
“When is the best time to transplant roses?” Question from Betty in Omaha, Nebraska
Answer: It is always better to give roses a full season to establish roots, especially in colder zones like yours, USDA Hardiness Zone 5. Many roses are just hardy to where you live, another reason to plant or transplant them in spring. The more established a plant is, the better able it is to withstand harsh, cold winters.
When you do transplant your roses, be sure to dig around the root system and wrap the rootball in burlap to keep the ball intact and disturb as few roots as possible while moving it. Have a hole ready and waiting to plant it in. Be sure to feed your new rose with organic alfalfa meal and mulch around the base. Black Gold Garden Compost Blend makes a great mulch that also feeds the soil. Water it deeply twice weekly, in the absence of rain, until it becomes well established. I encourage you to watch the video below to get more tips on growing roses to perfection.
“When should I plant bulbs for spring blooms here in Kentucky?” Question from Karen of Cannon, Kentucky
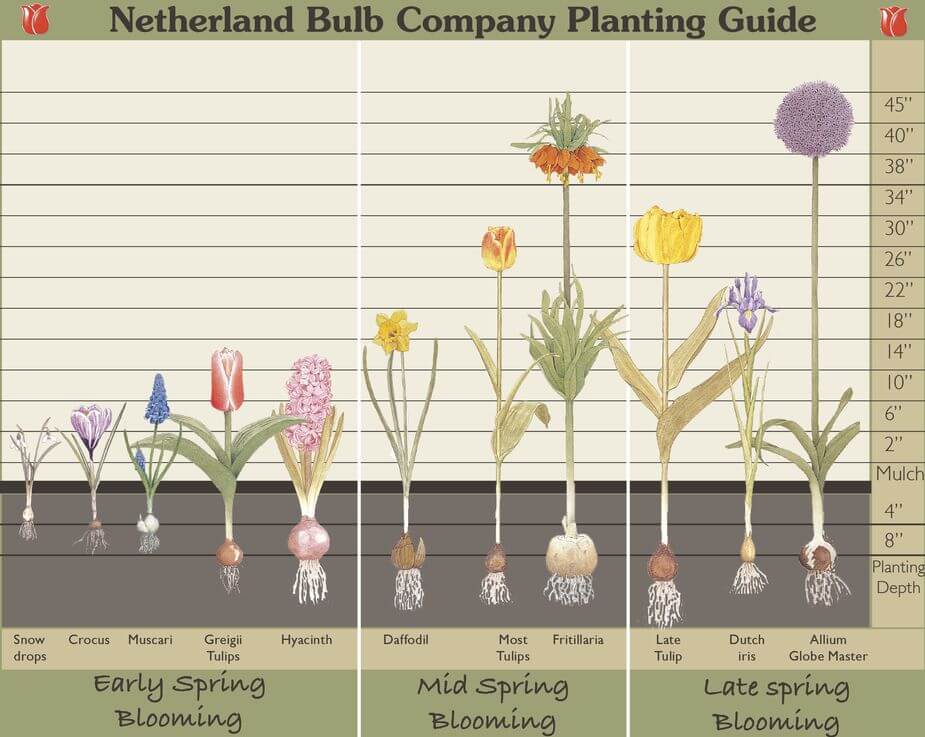
Answer: Late September to early November is the best time to plant fall bulbs for spring in Kentucky. Just don’t wait until the soil surface freezes over. It always helps to amend beds before planting bulbs. It makes the soils easier to work. Also, be sure to have a planting knife or bulb planter on hand for fast planting.
For best bulb performance, amend your planting soil with Black Gold Garden Compost Blend and bonemeal. Both products will ensure that your bulbs will bloom and grow well. It is also essential to plant different bulbs at the correct recommended depths. If you plant bulbs too deeply or shallowly, they will not perform as well and may not even emerge, especially small bulbs. Just follow the package instructions.
When is the Best Time to Plant Lettuce in California?
“When generally is the best month to start lettuce planting [in California]?” Question from Rebekah of Clovis, California
Answer: Lettuce is a cool-season crop, which means that it thrives in cool weather and can even take a light frost but not hard freezes. When the weather becomes hot, most lettuce varieties quickly become bitter-tasting and set seed (bolt).
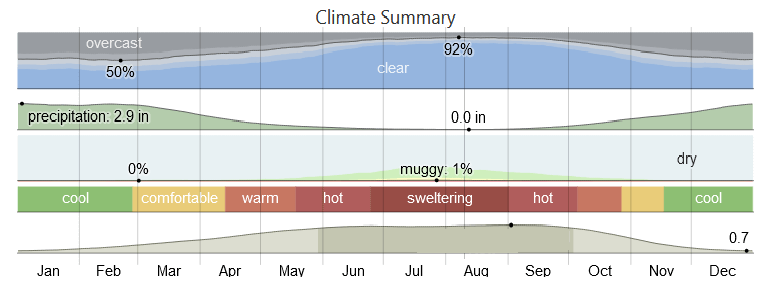
Based on the Clovis climate summary, your weather remains cool enough for lettuce from October through to April or May. Within this time, you should be able to grow more than one crop. Just be sure to grow it in fertile soil and keep the beds well irrigated during dry weather. We recommend drip irrigation for dry California climates. (Click here to learn about adding drip irrigation to raised beds.) If you anticipate an unexpected frost, cover your plants with frost cloth.
Clovis, California Climate Summary
I encourage you to watch the following video about the 10 best lettuce varieties and how to grow them from seed.
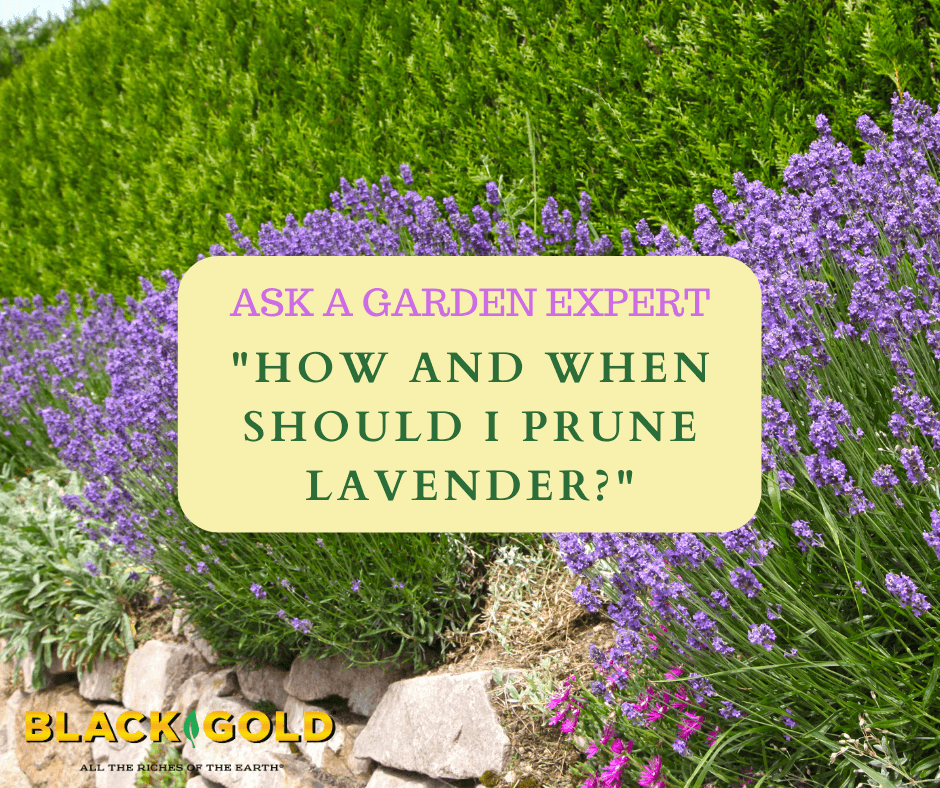
“When should I prune lavender? I tried it at the end of summer last year, but I think I might have cut too far back.” Question from Manda of Florence, Kentucky
Answer: In my experience, lavender has the best regrowth results if one waits to prune until the plants begin to produce fresh spring leaves. It simply bounces back best when it has begun to actively grow. It is a warm-season perennial, so wait until April before trimming it.
The best pruning method is to cut the shrubby top growth back by 1/3, using sharp pruning shears. Try to keep the top rounded to maintain a pleasing, bushy habit. At this time, you will also want to remove any dead or dying stems. Don’t be tempted to cut it back further. If you prune lavender back too far towards the base, it can invite fungal disease and disable the plant from fully recovering to its former glory.
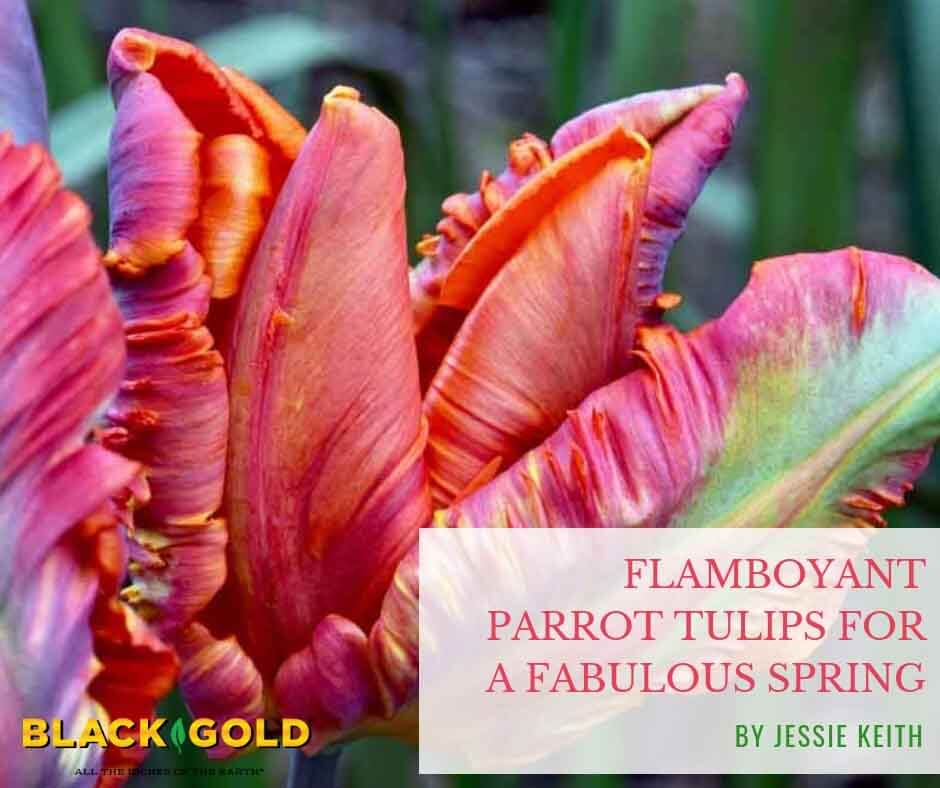
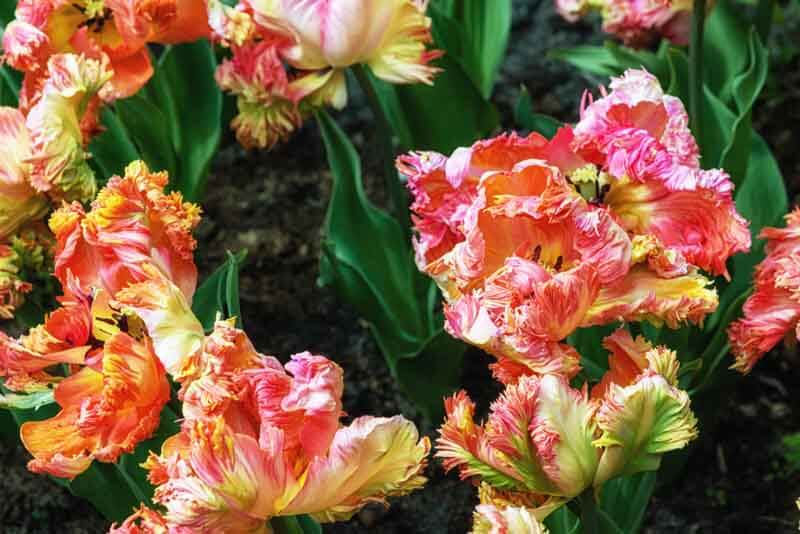
Spring bulbs are for fall planting, and when you plan next spring’s garden palette, plant boldly with Parrot tulips. These bulbs were bred to impress. Each bloom has feathery, undulating petals in brilliant colors that look more tropical than temperate. Many a still life has detailed the artful beauty of these tulips.
Parrot Tulip Origins
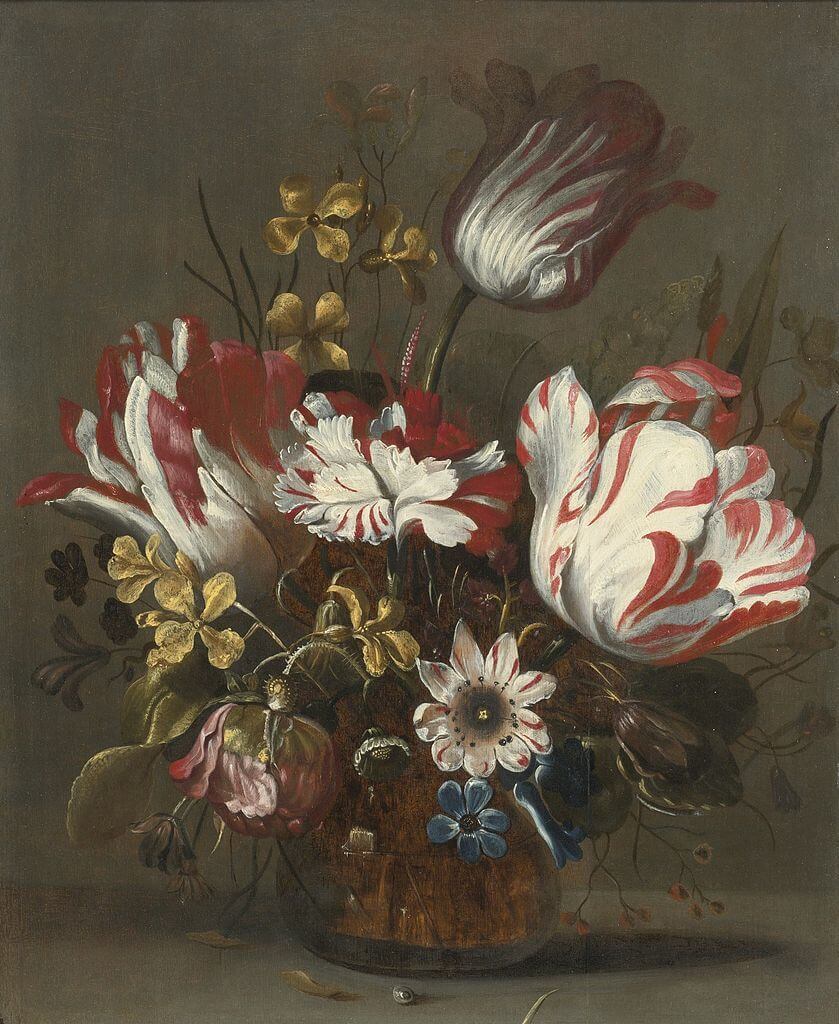
Tulips made their way from the Middle East to Europe and quickly became flowers for rich nobles. Most breeding and selection happened in Holland, which is still the case today. When unusual tulips with broken colors began to appear in Dutch gardens in the 1630s, their popularity soared. These rare bulbs fueled Tulip Mania, a phenomenon where bulbs were purchased for sums equivalent of hundreds of thousands today. The mania crashed after a short couple of years–much to the financial woe of collectors. Since then, many modern-day hybrid divisions have been developed, such as Darwin, Triumph, Fringed, and Parrot tulips.
Parrot-like viral-infected tulips, such as these in a 17th century still life by Hans Bollongier, fueled Tulip Mania.
Today’s Parrot tulips have many of the same floral features of the Tulip-Mania types but are a result of selection and breeding rather than disease. They and can be traced to the 18th and 19th centuries, so they’re at home in both modern and heirloom gardens. Early Parrot varieties appeared as genetic sports (mutants) of standard tulips. For example, the award-winning Parrot ‘Rococo’(1942) appeared as a chance sport of the single early tulip ‘Couleur Cardinal’ (1845). In the mid-1970s, they discovered a genetic Parrot tulip, and through breeding, many new varieties appeared.
Parrot Tulips and Companions
Consider height and color when planning your Parrot-tulip-filled spring garden. These factors guide pairings for the most beautiful garden ensembles. All are cold hardy and bloom from mid to late spring. Here are just a few selections cultivars and companions from which to choose.
Apricots
‘Apricot Parrot’ has undulating petals of apricot, pink, and orange with green feathering.
‘Apricot Parrot’ (16-18 inches): A mix of apricots, pinks, and greens exist in each scalloped, flamboyant blossom. The bright-yellow tulip ‘Strong Gold’ will highlight its apricot hues while the pretty pink tulip ‘Salmon Pearl’ will bring out its pinks. The white, orange-red-cupped daffodil ‘Barret Browning’ will blend well with the mix.
‘Amazing’ (18-22 inches): This tulip looks like a birthday party — the deeply feathered flowers of apricot and raspberry-pink are radiant. Its raspberry color is intensified by the deep-rose-pink tulip ‘Don Quichotte’. Flank the pair with the white and apricot-cupped daffodil ‘Chromacolor’.
Black and Purples
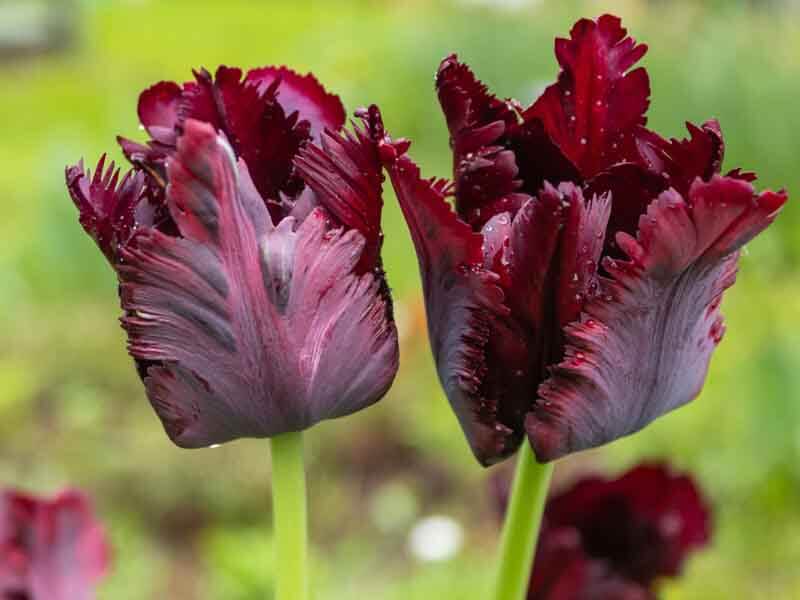
Tulip ‘black parrot’ is fused with deep burgundy and purple.
‘Black Parrot’ (20 inches): Bold fringe and deepest burgundy, purple, and near-black color make ‘Black Parrot’ stand out in the garden like night. The plum-red Triumph tulip ‘Bastogne’ will bring out its deep color while the pure-white daffodil ‘Snowboard’ will add a shock of white.
‘Blue Parrot’ (22 inches): Rather than blue, the wild, irregular flowers of ‘Blue Parrot’ are violet-purple with white tips. Pair this with orange and yellow ‘Daydream’ tulips.
‘Rococo’ (14 inches): This remarkable tulip has undulating, feathered flowers of deepest red marked with purple and green. The green, gold, and rose Viridiflora tulip ‘Golden Artist’ is a bold partner.
Pinks
‘Green Wave’ (20 inches): Broad, green feathers mark the pink, deeply incised petals/tepals of this untamed tulip. As the flowers age, they open wide. The white Darwin hybrid ‘White Clouds’ is a safe pairing for such an exotic flower.
‘Pinkvision’ (18-20 inches): The pink, feathery flowers have small markings of green at the base. Plant them alongside the daffodil ‘Las Vegas’, which is ivory with large butter-yellow trumpets.
Reds and Oranges
‘Estella Rijnveld’ (20-22 inches): Bicolored flowers of white with broad feathers of red grace this 1954 variety. Plant the tall, lively tulip among the white Darwin hybrid ‘White Clouds’.
‘Bright Parrot’ (14 inches): Large, glowing red flowers of red with flaming yellow tips are borne on shorter plants. Plant it with the equally compact Narcissus ‘Actaea’, which is highly fragrant, pure white and has tiny orange-red-tipped yellow cups.
Yellows
‘Flaming Parrot’ (22 inches): The award-winning tulip glows in the sunshine. It has bicolored yellow blooms with stripes of red down each petal/tepal. Pair it with another award-winner, the long-lasting, golden daffodil ‘Gigantic Star, which has huge, 5-inch flowers.
‘Carribean’ (16 inches): Here’s a beautifully bicolored Parrot of gold with fanned, red-feathered tips. The canary yellow daffodil ‘Unsurpassable’ is a perfect compliment.
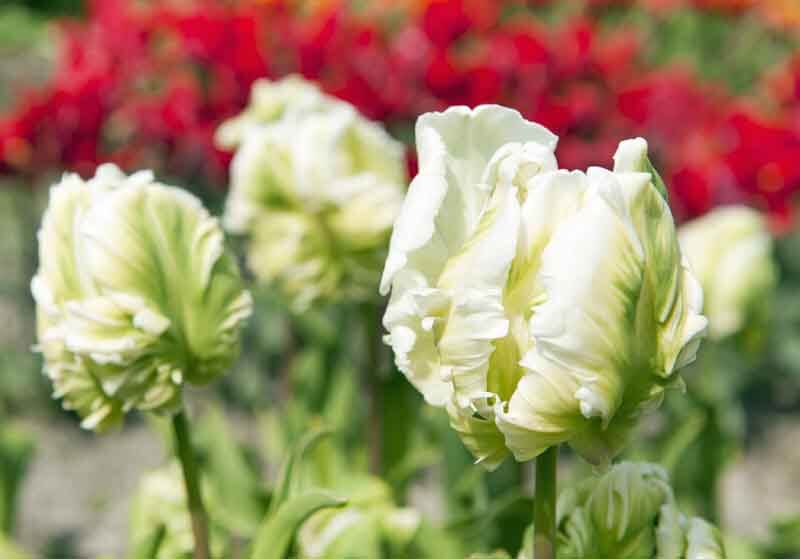
Whites
White parrot tulips are bright white and green.
‘White Parrot’ (18 inches): No Parrot tulip is just one color. These white blooms are feathered with green. Plant any spring bulb of the same height and bloom time alongside it.
Planting Tulips
Healthy tulip bulbs should be large, firm, and ivory with a papery covering. Any brown spotting, dry patches, or blue mold on the bulbs indicate poor health. These may underperform or rot. In this case, either return the bulbs or buy new.
The bulb on the far right shows a touch of yellowing and blue mold at the base, which means it may rot or underperform.
Plant large tulips and daffodils 6 inches deep. A bulb planter or planting knife are handy tools for getting the job done quickly. Before planting, work the soil and add fertile amendments as needed. OMRI-listedBlack Gold Garden Compost, with its rich blend of compost, bark, and Canadian Sphagnum peat moss, will help your bulbs root quickly and grow well in spring.
At planting time, lay the bulbs out in the pattern you wish. Intermingle the bulb pairings evenly or in sweeps of single colors. Always plant them diagonally rather than in rows. In general, space them 6 inches apart. Fertilize with bone meal or fertilizer formulated for bulbs.
You will not believe the flamboyant party in your garden once mid- to late-spring arrives. You can also cut and bring your Parrots indoors for still-life-worthy flower arrangements.
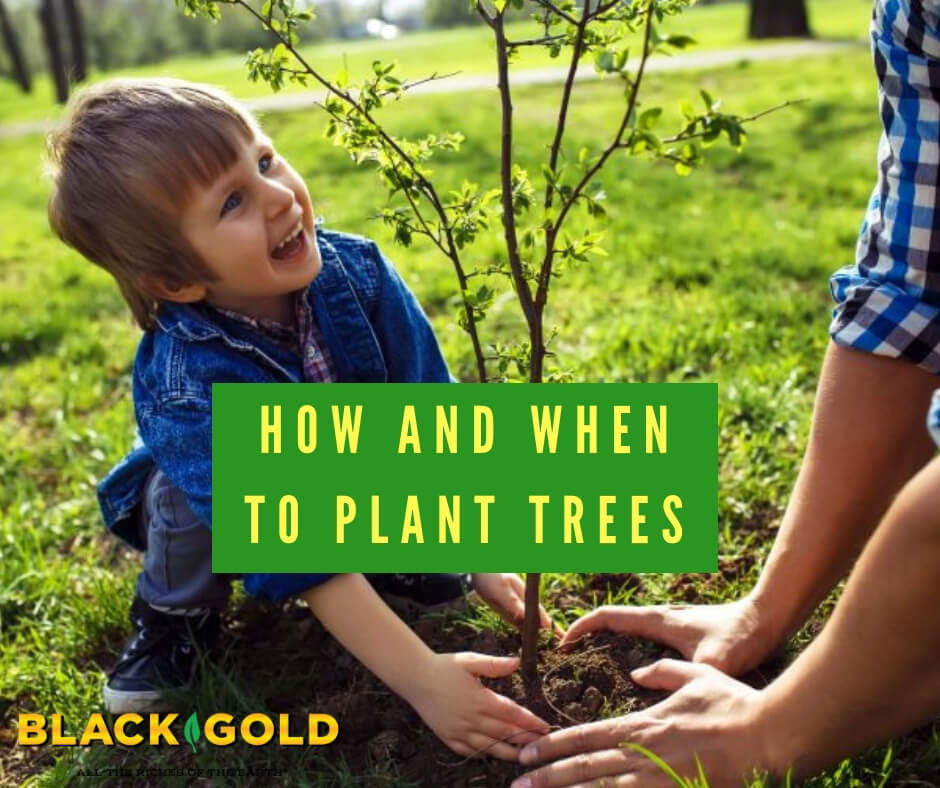
Springtime is tree planting time. Planting trees early in the season, as soon as the soil warms, gives new trees a whole season to set deep roots and top growth. (This is especially the case with marginally hardy trees.) But tree planting is only as good as your planting method and summer care. Here are seven steps for planting trees right!
Step 1: Select a Good Tree
First, choose a tree that is hardy to your growing area. Then choose the most perfect specimen you can find. A tree is a long-term investment, so buy yours at a quality garden center or nursery. Choose a tree free of any signs of bark damage that could invite pests and diseases to enter. The tree’s form should be perfect without oddball branching that could spoil its beauty.
Step 2: Dig a Hole
Dig a hole roughly twice the diameter of your tree’s root ball.
Dig a hole roughly twice the diameter of your tree’s root ball. Dig it deep enough so that when the root ball is set into the hole its surface is level with the surrounding soil. If the ball is set too deep, you risk smothering the tree and introducing trunk rot. It it is shallowly planted, its surface roots will die and it will be slower to establish. Make the bottom of the hole flat, and then dig a deeper band around the edges. This keeps the root ball on a pedestal, allowing water to drain off into the recessed band. Keep the pedestal soil undisturbed, so it won’t settle later on.
Step 3: Amend
Your goal is to encourage that tree to root beyond the container root ball into the surrounding soil. Give roots a reward for being adventurous. Enrich your excavated soil with Black Gold Garden Compost Blend. This encourages more rapid and widespread root development. If your soil is heavy clay or has poor fertility, then this sweetened backfill provides what the tree needs in those first few years as it adapts to its new home.
Step 4: Mix and Plant
Thoroughly mix your Black Gold Soil Amendment into the pile of soil you excavated from the hole you dug. Then return it to the hole in layers, packing each one down with the end of the shovel handle to collapse any air pockets.
Step 5: Fashion a Well and Mulch
Use the leftover soil to fashion a healthy berm on the undisturbed ground around the outside edge of the planting hole. This will hold water directly over the root ball until it has time to percolate down naturally. Then cover the planting circle with a 3-inch layer of mulch, being sure to keep the mulch away from the tree’s trunk. (Excess mulch around the trunk can smother trees.)
Step 6: Water In
Use the garden hose to fill your water well, then wait for it all to percolate down into the ground before you fill it the second time. Thorough saturation is key to preventing transplant shock. Repeat every few days, particularly if the weather turns hot or windy.
Mulching trees will help hold soil moisture and protect trunks from mower and weed wacker damage.
Step 7: Stake and Protect
Stake your tree for additional support during storm winds and rains. Always stake trees on the windward side, and use ties that will not girdle the tree or cause abrasions on the bark.
Provide a protective sleeve of chicken wire around the young trunk because hungry rabbits and other wildlife may damage the bark during the winter. Come fall, when temperatures begin to drop, apply additional mulch around the base of the tree to protect the root zone and hold moisture through cold winter days.