Articles

Growing Lemons, Oranges, and Other Citrus Indoors

Mature Chinotto Sour Orange (Citrus x aurantium ‘Chinotto’) Fruits. (Image by Jessie Keith)

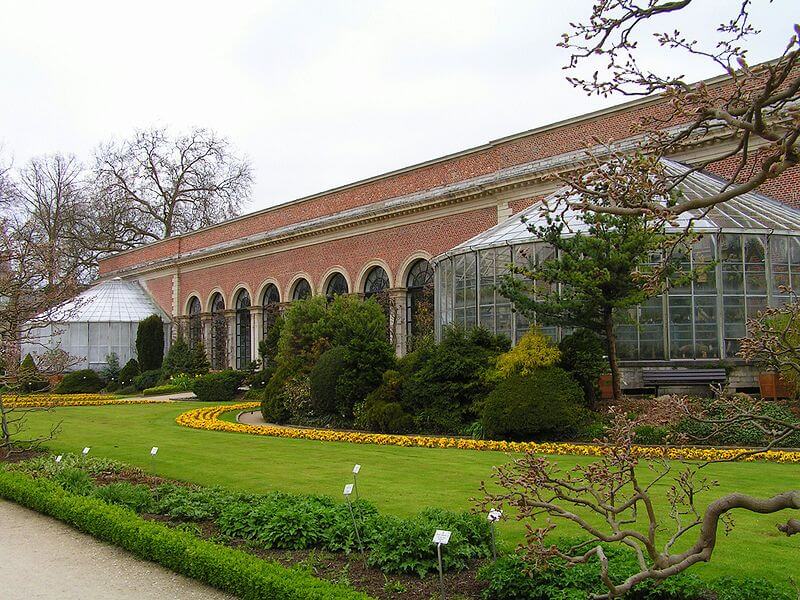
From the seventeenth to nineteenth-century European aristocrats in the north grew citrus and other tender fruits in specialty greenhouses called orangeries. By the early Renaissance, pane glass could be sufficiently produced for the creation of greenhouses large enough to hold tropical and subtropical fruit trees. These glasshouses were status symbols, in addition to being functional.

Fine examples still existing palace grounds from the period, to include the Versailles Orangerie, which housed 3000 citrus trees in its heyday. The indoor cultivation of citrus was also perfected at this time, and much of what was learned then still benefits gardeners today.

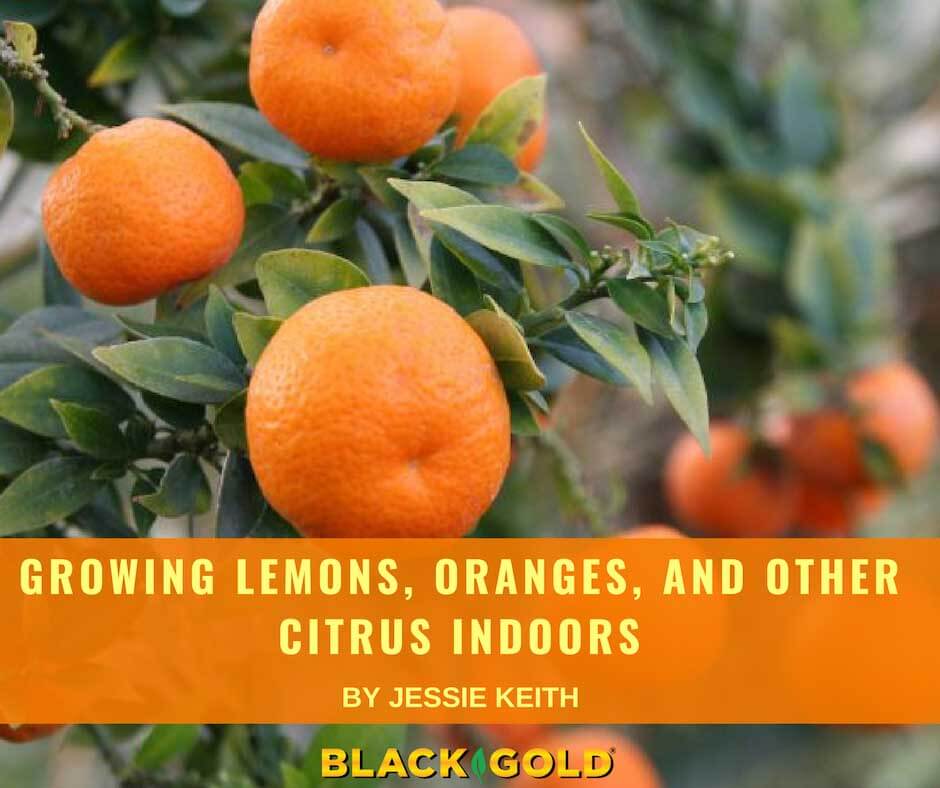
Many citrus trees produce mature fruit from fall to winter. This is why temperate gardeners must grow them indoors in winter. Choosing the right varieties for indoor culture and giving them the right care will ensure fruiting success.

Good Varieties for Indoor Growing

Orangerie Kruidtuin in Leuven, Belgium (Image by Athenchen)
The Orangerie Kruidtuin in Leuven, Belgium (Image by Athenchen)

For starters, gardeners wanting to grow their own citrus need to choose compact varieties developed for indoor growing. If you start your own orange or lemon from seed, it can take 8-12 years before the plants will begin to fruit. Seed-grown plants will also be very large and quickly outgrow most indoor sunrooms or conservatories without regular pruning.

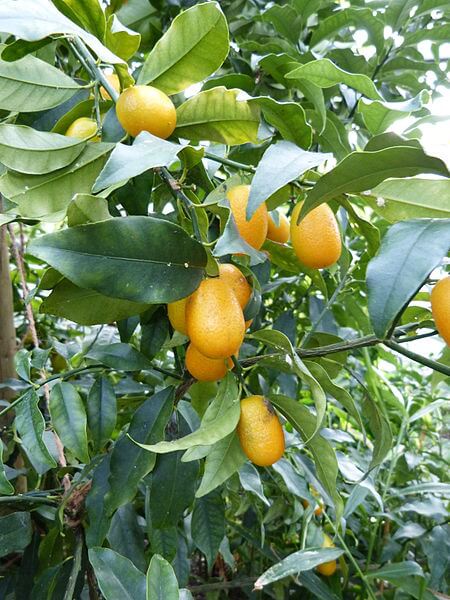
Good varieties include the calamondin (Citrus x microcarpa), Fukushu kumquat (Fortunella obovata ‘Fukushu’), Chinotto sour orange (Citrus x aurantium ‘Chinotto’), Thai lime (Citrus hystrix), Meyer lemon (Citrus meyeri). All set fruit reliably—especially the calamondin and kumquat. Those purchased from specialty nurseries for pot culture are often grafted onto dwarfing rootstock, though happy specimens may still reach 8 to 10 feet without pruning.

Planting Potted Citrus

Kumquats growing in a winter conservatory. (Image by Abaddon1337)

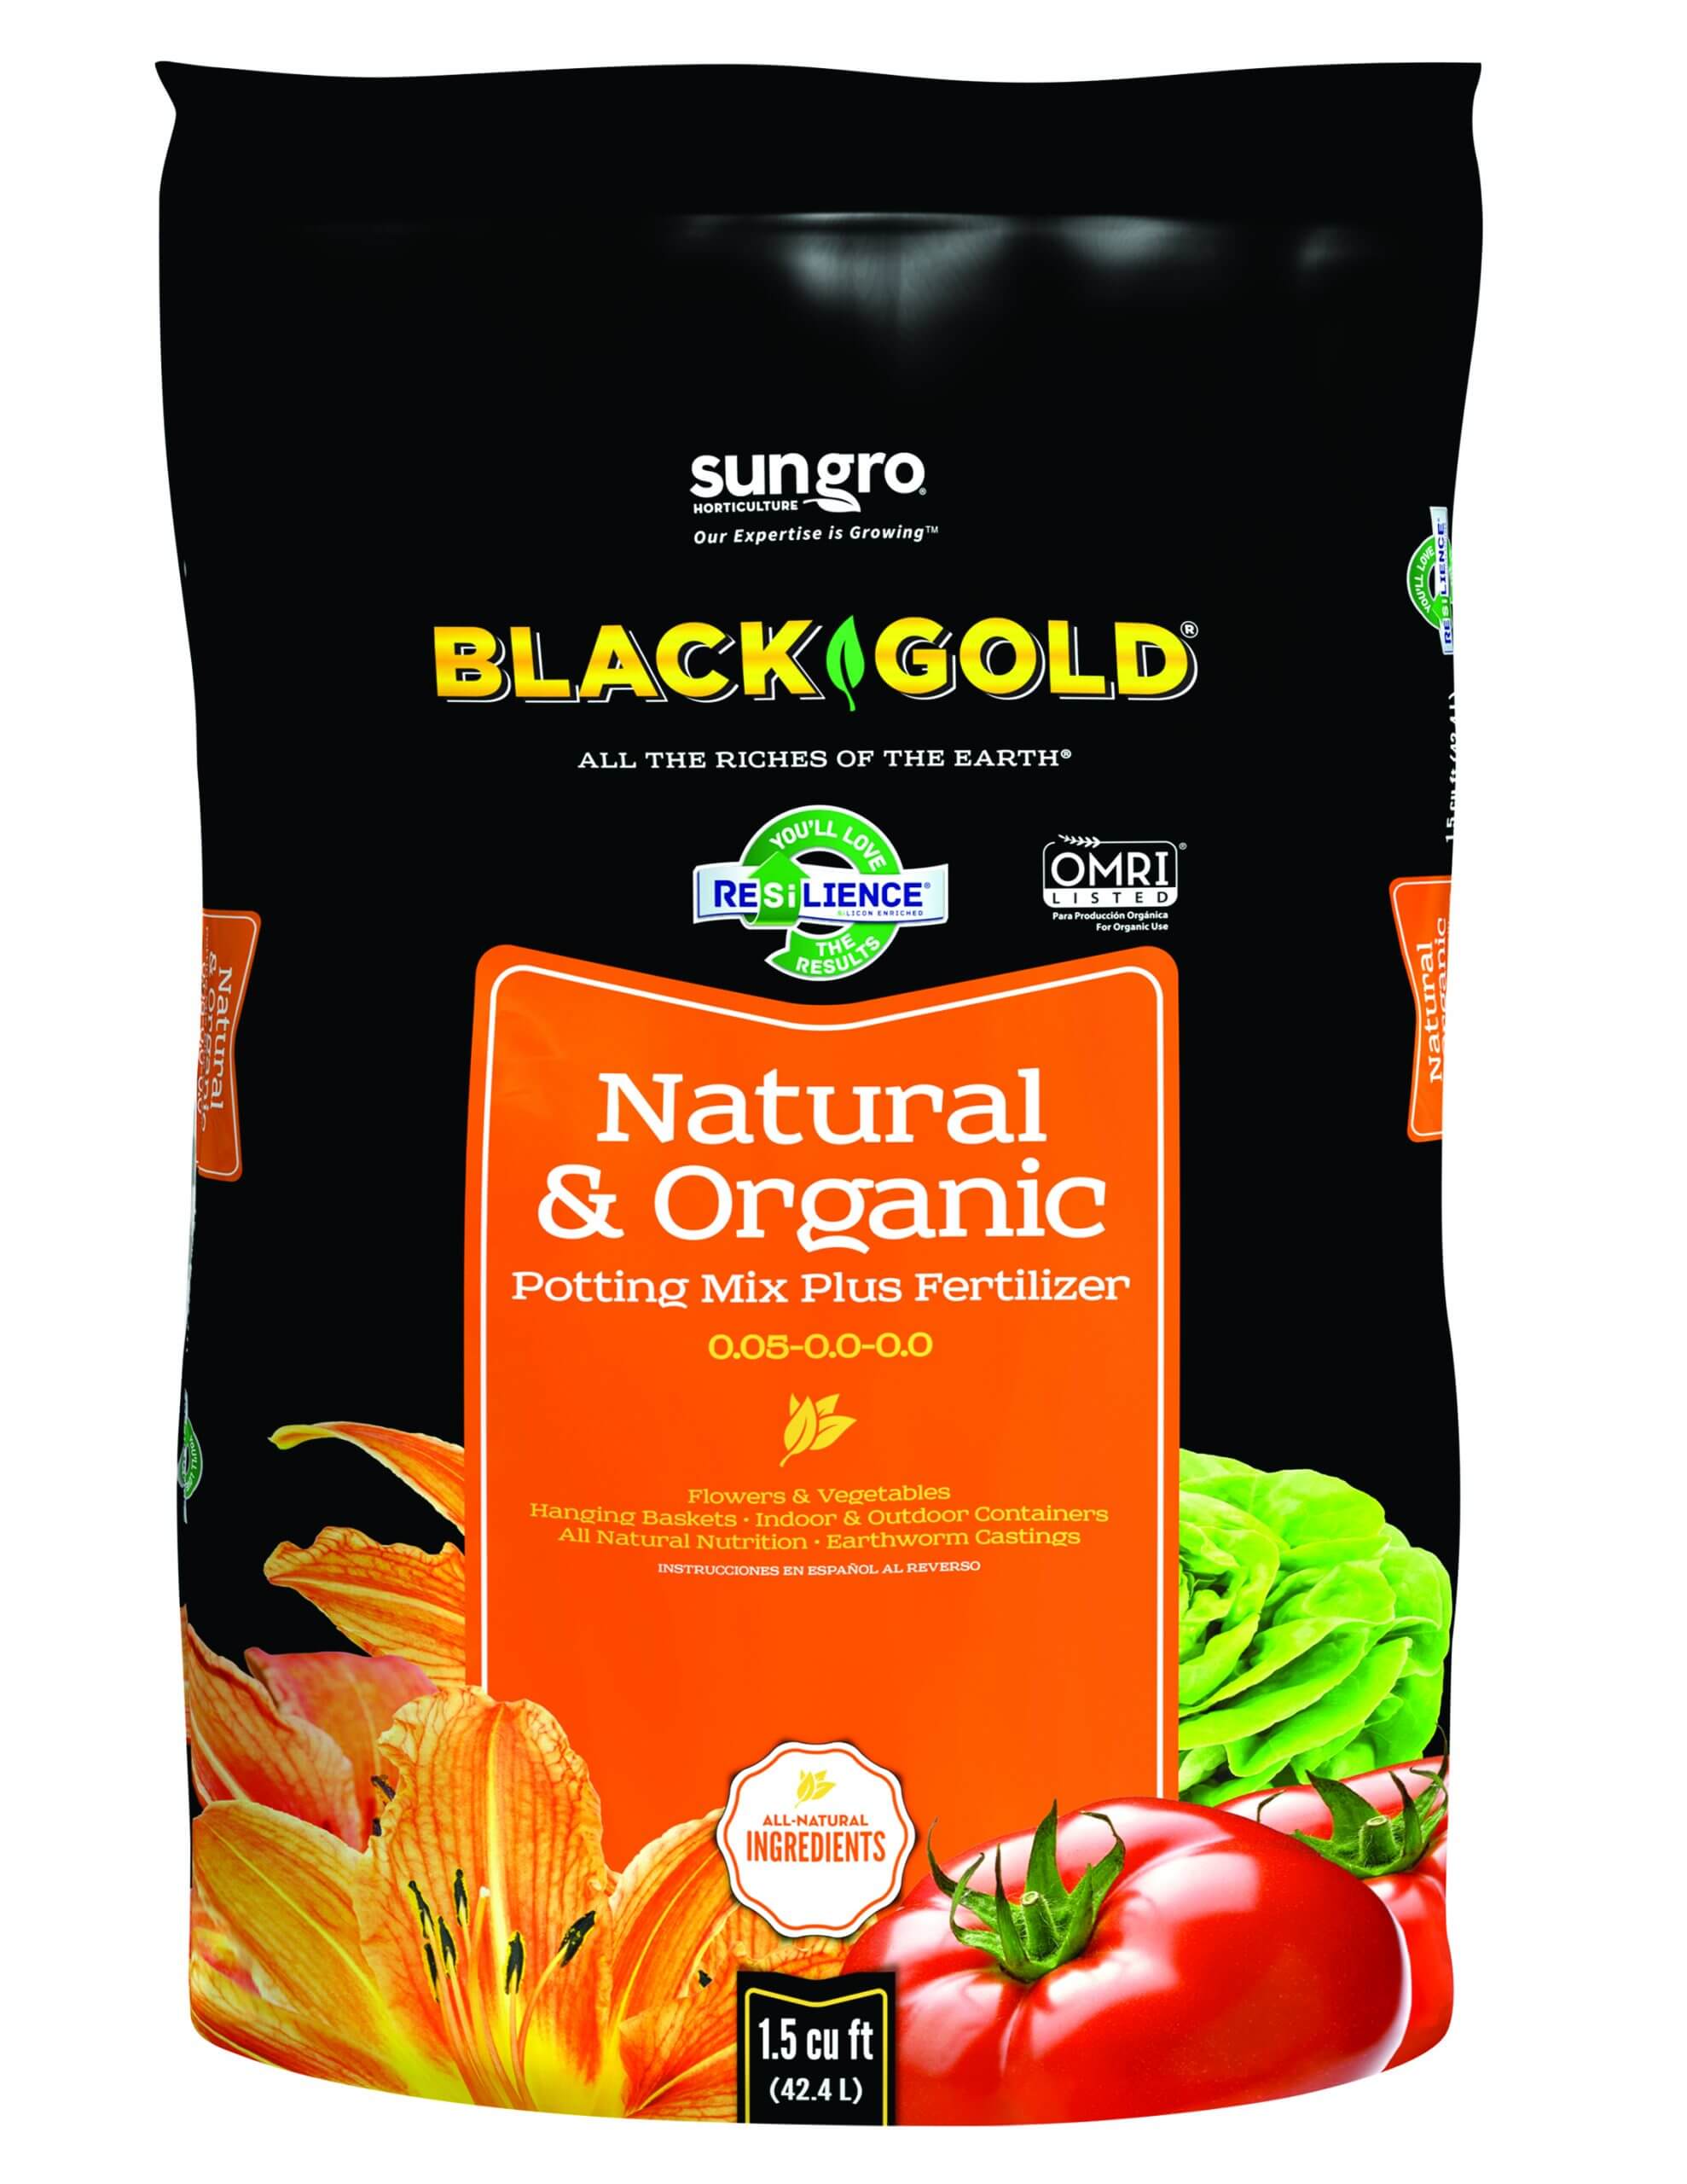
Plant your citrus in an excellent potting mix with good drainage and a slightly acid pH. A 1:1 combination of Black Gold Natural & Organic Potting Mix and Black Gold Cactus Blend will offer a balance of good drainage and needed organic matter for good nutrient and water retention. Plant trees in a substantial, well-drained pot with a fitted saucer. Trees will likely stay in the pot for years, so choose something attractive and well made. The pot should be just a few inches wider than your tree’s root ball. Dwarf trees may begin to flower and fruit at three to five years of age, depending on the variety.

Indoor Citrus Flowering and Fruiting

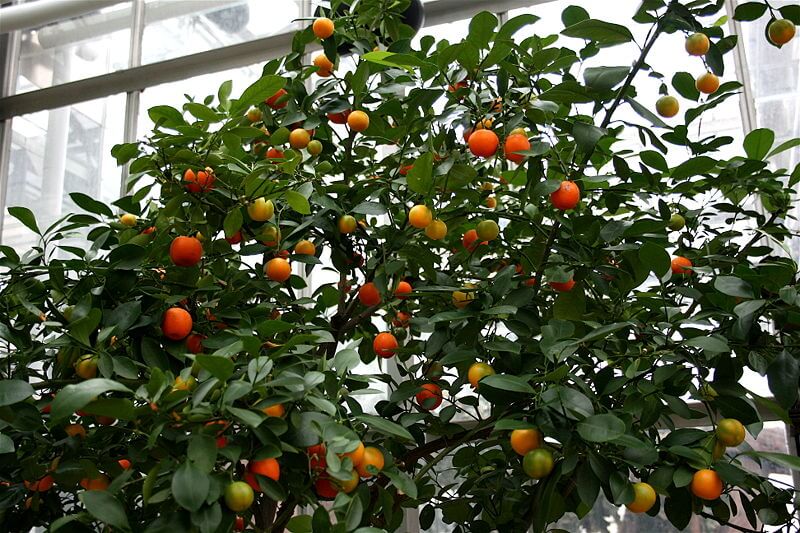
Successful fruiting starts with healthy flowering. Most varieties flower most heavily in late winter and early spring, but many recommended for indoor growing will continue to flower up until fall. (Click here for a full Citrus variety flowering and fruiting chart.) Almost all cultivated citrus are self-fruitful, which means that they will set fruit on their own without needing another tree for cross-pollination. Good sunlight, fertilization, and care will encourage healthy flowering. The right seasonal care is also essential.

Citrus Year-Round Growing Needs

In summer, bring potted citrus outdoors on a sunny porch or patio. Trees require a minimum of 8 hours of sunlight a day; 12 hours is better. Bathing them in the sunshine will encourage vigorous growth for more successful fruit production because this is the season when newly-set fruit starts to develop. It typically takes between six to nine months for lemons to mature and up to 12 months for oranges and related citrus to mature. During this time, provide them with a quality fertilizer formulated for fruit and citrus and apply as directed.

Cody Hough800px-Calamondin_Orange
A fruitful calamondin orange. (Image by Cody Hough)

Water plants deeply until the water drains from the bottom of the pot. Allow pots to become somewhat dry between each watering–the tops should be dry and the soil below should be moderately dry (stick your finger down to a few inches if you are not sure). Outdoor plants may need to be watered once every 3-4 days while indoor plants may need to be watered every 5-7 days. During the months, when growth naturally slows, the watering regime should be reduced. Signs of overwatering include leaf yellowing and drop and eventually stem death. Trees allowed to become too dry may also unexpectedly drop some leaves.

Those living in zones below USDA hardiness zone 9 must bring their potted citrus indoors in fall. Choose a cool, sunny indoor location. Plants placed in a low-light location with less than 6 hours of sunlight should be provided supplemental light with high-spectrum grow lights. Citrus trees never go fully dormant but instead undergo a period of quiescence during the cold months when growth slows and leaf set stops. During this time, reduce watering and feeding and allow trees to rest. Keeping them in a cool (40-50 degrees F) but humid location during this time is also important as it helps facilitate their natural cycle.

Indoor Citrus Pruning

The highly fragrant, waxy, white flowers of citrus trees will appear in spring. Pruning can occur at any time when plants are actively growing. Simply pinch back growing points and cut back unruly branches. Leggy growth indicates plants are not getting enough light.

Indoor Citrus Pests and Diseases

Citrus reticulata 'Encore' (Mandarin Group)
Citrus flowers are white, waxy, and wonderfully fragrant.

Scale is a common problem that occurs on Citrus stems and branches, and aphids, whiteflies, and spider mites are sucking insects known to plague foliage. Horticultural oil and insecticidal soap can help reduce indoor pest problems. Keeping stems and leaves clean is always a good practice; especially when bringing plants indoors in fall. Cleaning stems and leaves and treating them with horticultural oil will keep any hitchhikers from coming indoors. Common fungal diseases, nutrient, and physiological ailments are also known to cause all manner of problems with Citrus. To learn more about frequent pests, diseases, and solutions, visit the UC Davis IPM page for Citrus.

The joy of growing your own citrus is knowing that these long-lived house plants will produce fruits for over 50 years, with good care. To determine when your fruits are ready to harvest, wait until their skins are fully colored and then pick and test a fruit. If the flesh is juicy, and it tastes good, it’s time to harvest!

“Show Us Your Black Gold® Garden!” Photo Contest Winners

After receiving many submissions for the “Show Us Your Black Gold® Garden!” Photo Contest, we selected the first, second and third place winners. The photos were judged by a team of five Black Gold® staff members. Photo content, quality, and written submissions were all considered in the selection process. We were so excited to see and hear stories about everyday gardeners having success with Black Gold® potting mixes and amendments! Here are our winners:


First-Prize Winner, Carolyn Frazier

Carolyn, a retired Horticulture Agent from the University of Florida, uses Black Gold® Garden Compost Blend and Black Gold® All Purpose Potting Mix to keep her dahlias and hanging baskets looking great! Here is what she said about her gardening experiences with our products: “I wouldn’t think of using any other potting soil for my heritage dahlia garden or for my hanging baskets. I recommend this to all my gardening friends because it really is the BEST product on the market.”

Carolyn Frazier
A heritage dahlia grown in Carolyn Frazier’s garden.


Second-Prize Winner, Tee Anderson

Tee uses Black Gold® All Purpose Potting Mix to make her bulbs and other garden flowers look outstanding. She shared with us: “Using Black Gold All Purpose Potting Mix, I grew the prettiest spring flowers.  Black Gold makes my flowers grow bigger.”

Tee Anderson
Tee’s beautiful spring bulbs.


Third-Prize Winner, Laurie Steiner

Garden Art by Laurie Steiner
Laurie Steiner’s potted annual tower.

Laurie uses Black Gold® Natural & Organic Potting Mix to make her many container garden plantings shine. She told us: “Our garden is laced with our homemade “art” where we showcase some pretty flowers.  Black Gold All Purpose Potting Mix assures they start and stay gorgeous!”

Recipes: Holiday Favorites from Black Gold

Making a simple gingerbread house is easy!

This is the time of year to feel thankful for the past year,  hopeful for the new, and to share food and festivities with friends. Black Gold employees took the time to share some favorite seasonal recipes. Hopefully, these time-tested treats will also bring some holiday cheer to our customers and supporters. Happy Holidays!

Holiday Gingered Sangria

Holiday Gingered Sangria (Image by Lobo)

Shawnee S. Vetanovetz is Black Gold’s Retail Customer Support Specialist, and she likes a holiday party as much as anyone else. Here’s a fast and delicious gingered sangria she enjoys making around the holidays that looks as great as it tastes.

Ingredients

1 bottle (750 ml) good Cabernet Sauvignon
½ cup dark rum
1 (12 oz.) can ginger ale
Juice from ½ small lime
Juice from ½ small lemon
1 lemon, lime, and orange sliced
1 slice fresh ginger

Directions

Mix together all liquid ingredients together in a glass pitcher.

Add the slices of lemon, lime, orange, and ginger.

Refrigerate (to chill) for 1 – 2 hours, if desired. If you prefer a fruitier sangria, allow the mix to refrigerate and “marry” for up to 24 hours.

Serve!


Spiced Candied Popcorn

Spiced Candied Popcorn

Sales Rep Miranda Kelly takes care of Black Gold sales in the California region, and in her spare time, she loves to cook. This recipe was adapted from one she found online sometime back. Now she makes it every year. It’s a little like Cracker Jack but healthier and tastier.

Ingredients

4-6 cups plain popcorn
1 cup raw chopped cashews or pecans
3 tablespoons butter
2 tablespoons honey
½ teaspoon cinnamon
¼ teaspoon ground ginger
¼ teaspoon salt

Directions

Preheat the oven to 325 degrees F.

In a small pot set to low heat, melt the butter and honey together. Mix in the cinnamon, ginger, and salt.

Put the nuts in an extra large mixing bowl. Coat them with about a tablespoon of the butter/honey/spice mixture.

Spread the coated nuts onto a baking sheet covered with parchment paper and bake for 6 minutes.

Meanwhile, in the same large bowl evenly coat the plain popcorn with the remaining butter/honey mixture, being sure to remove any unpopped kernels.

After the nuts have been in the oven for 6 minutes, take out the tray, add the popcorn to it, and mix it all up together. Stick the tray back in the oven and set the timer for 6 minutes.

After 6 minutes open the oven and stir or shake the mixture around on the baking sheet. Set the timer for 4 more minutes.

Once again open the oven and stir/shake the mixture so there are no hot spots that could get burnt. Set the timer for 2 more minutes at which point the mixture will once again need to be checked/stirred.

Repeat the process of checking/stirring the popcorn mixture every minute then take it out of the oven once it turns a dark brown. (Be careful! It can burn easily toward the end!) My total bake time is generally 6 minutes for the nuts then an additional 8 or 10 minutes once the popcorn has been added.

The popcorn and nuts will be slightly wet right out of the oven but will harden as they cool.


Fruited Cranberry Sauce

Fruited Cranberry Sauce (Image by John Cummings)

The holidays are not complete without this delicious homemade cranberry sauce, which is made yearly by Jessie Keith who manages communications for Black Gold. Truly, it is not your average cranberry sauce. It’s loaded with fruit, nuts, and Grand Marnier, making it more like a dessert than a condiment for turkey. It even tastes great on pumpkin pie!

Ingredients

1 cup sugar
3/4  cup water
2 cups fresh cranberries
1 cup finely chopped apple (a tart cooking apple is best)
3/4 cup chopped, toasted pecans
3/4 cup golden raisins
1/2 cup Grand Marnier
1 large orange, zested and juiced

Directions

Boil sugar and water in a medium saucepan until the sugar has totally dissolved, around 5 minutes. Add in the fresh cranberries, return to a boil, then lower the temperature to medium-low heat and simmer for 8 minutes. Add the apples, golden raisins, orange juice, orange zest, and Grand Marnier and cook for 10 to 15 minutes. Make sure all the cranberries have popped by squishing those that are still whole. Remove from the heat and let the sauce cool. Mix in the pecans before serving.

Add the mix atop a piece of pumpkin pie or enjoy with a festive turkey dinner.


Jessie’s Favorite Gingerbread

IMG_7148
Jessie’s children decorated this gingerbread house!

This amazing, tasty gingerbread is another favorite of Jessie Keith’s. Each year she uses it as a base to make gingerbread houses with her children.

Wet Ingredients
¾ cup salted butter
¾ cup sugar
¾ cup dark molasses (not black strap!)
¼ cup warm water
1 tablespoon fresh, macerated ginger
1 tablespoon fresh orange zest

Dry Ingredients
½ teaspoon baking soda
1 teaspoon ground cinnamon
½ teaspoon ground nutmeg
¼ teaspoon cloves
¼ teaspoon ground cardamom
A healthy pinch of salt
3 ¼ cups sifted flour


Directions
Cream butter and sugar until fluffy then mix in the molasses and water. Sift the dry ingredients then add them to the wet until fully combined (be sure not to over mix).

Flour your hands and pull the dough together into a flattened ball and chill for at least 12 hours. Before you roll the cookies, preheat the oven to 350 degrees Fahrenheit. Flour up a board and pin and cut your dough in two. Roll out the dough to around 1/4 inch thickness. Be sure to keep the board and pin floured to stop the dough from sticking.

Cut out your shapes and reroll any excess dough, though try not to overwork it as this results in tough cookies. Place the rolled cookies onto a cookie sheet lined with parchment paper and bake for 8 to 10 minutes. The less baked, the chewier the cookie. Allow the cookies to cool before decorating. Royal icing is the best for gingerbread house building and gel food coloring provides the deepest icing colors.

Show Us Your Black Gold Garden Photo Contest

Photo contest lg
Submit a photo to win!

Show off your Black Gold garden in a picture! We want to see your garden successes with our products. Share your harvest, a beautiful container or bed, a proud gardening moment, or simply a beautiful plant or garden vignette made possible by Black Gold products. Winning photos will show amazing, bountiful gardens. Good photo quality is a plus! Click here to enter!

Submit photos between Friday, September 23, 2016 and Friday, October 21, 2016. Each photo should include the photographer/gardener’s name/s, Black Gold product used, location, and two sentences describing your photograph. Enter as many times as you like. Click here to enter!

Winnings

First Place:  A $100 gift certificate at your local Black Gold Retailer, a Black Gold t-shirt, and a post of the winning photo on Black Gold’s Facebook page and website (www.blackgold.bz).

Second Place:  A $25 gift certificate at your local Black Gold Retailer, A Black Gold t-shirt, and a post of the winning photo on Black Gold’s Facebook page and website (www.blackgold.bz).

Third Place:   A $10 gift certificate at your local Black Gold Retailer, and a post of the winning photo on Black Gold’s Facebook page and website (www.blackgold.bz).

Heirloom Vegetable Seed Saving

IMG_1049
These ripe heirloom vegetables contain seeds that are ready to harvest and store for the next year.

Seed saving is easy, saves money, and ensures that your seeds have come from a reliable source (your garden!). Smart seed saving requires that you (1) allow your seeds to fully mature, (2) clean your seeds properly, (3) store your seeds correctly, and (4) know exactly what you are saving and storing. Step 4 is probably the most essential and least understood.

Seed-saving gardeners want to collect true-to-parent seed that performs like the parent plants, but this requires a basic understanding of heirlooms, hybrids, and pollination. Will the tomato seed you are saving be a true-to-parent heirloom, or are you saving the anomalous, mystery progeny of a hybrid? To answer these questions, you must know your vegetable varieties and their hybrid statuses.

Hybrid Seeds

Lycopersicon esculentum 'Early Girl' JaKMPM
Hybrids, such as this F1 hybrid ‘Early Girl’ tomato, do not produce true-to-parent seed.

If you bought any F1 hybrids, then these vegetables were hybrid crosses between two carefully selected, known parents. Hybrids are more vigorous and have desirable traits that make them special—such as added disease and pest resistance and great fruit production. With F1 hybrids, crop performance wins, but seed saving doesn’t because they don’t yield true-to-parent seeds. The only way to grow a given hybrid each year is to purchase new seed from a vendor. Hybrid seed is also more expensive because the hybridization process takes more time and money.

So, what if you did collect F1 hybrid seed? What do open-pollinated hybrids yield? Their seed would produce unstable variations of the parent plants. For example, take the slicing tomato ‘Big Red’, which is a disease-resistant F1 cross between the two tomato varieties, ‘Pritchard’ x ‘Jubilee’. An open-pollinated ‘Big Red’ may cross with other garden tomatoes, which will introduce variation. In addition, the saved seed would also yield plants with a mix of traits representing the original parents, ‘Pritchard’ and ‘Jubilee’. What a mess! There is no way to know what you might get.

Heirloom Seeds

IMG_16141-1024x752
Heirlooms, such as these ‘Brandywine’ tomatoes, are reliable in producing true-to-parent seed.

Open-pollinated heirloom varieties are more stable. This means that you can collect them from year to year, and the collected seed will be like the parents, with few exceptions. For example, if you save seed from ‘Brandywine’ (1889), ‘Black Krim’ or ‘Gold Medal’ (1921) tomatoes, the seed will produce plants much like the parents.

On occasion, an unexpected variant might arise in saved heirloom seed. It is up to the gardener to assess whether new variant should be maintained. If a mystery plant appears with desirable traits, then maybe you have found something special, and selection is in order. Selection means carefully choosing variants over generations for desirable traits, such as large and tasty fruit, good growth habit, and productivity.

There are many seed vendors that specialize in open-pollinated heirlooms that can be saved with confidence. The Seed Savers Exchange is one of the oldest and most reliable sources of old, heirloom varieties.

Collecting, Cleaning, and Storing Seeds

IMG_1064
Packets of seeds ready to store. (Note that the dill seed contains some chaff.)

On average, seeds cost around $3.00 a packet, so you can save money by collecting your own. Good, viable seed can only come from fully mature fruits. This means that bean or okra pods, husks of corn, or tomato and pepper fruits must be fully dry, colored, and ripe before collection.  You might also consider leaving a few herbs, carrots, lettuce, beets, and radishes to flower and set seed for collection, in addition to the more obvious fruiting crops.

Dry Seed Cleaning

This Indonesian winnowing basket, called a Nyiru, was created for rice.
This Indonesian winnowing basket, called a Nyiru, was created for cleaning rice seed.

It is easy to collect seeds from dry or open fruits. For example, pepper seeds can be lightly scraped from cavities (beware of spicy fingers from hot peppers!), poppy seeds shake out of dry capsules, and corn kernels pop off of dry ears. This process, called threshing, may be clean or messy, depending on the seeds and their fruits.

Threshed  seeds often contain chaff (unwanted bits of dry plant material, dirt, and insects), which can be picked out by hand, sifted off, or removed by winnowing. Winnowing is the process of removing the lighter chaff from the heavier seed by tossing it in the air and allowing the wind to carry the chaff away.

Winnowing baskets were created across cultures to assist with this process. These can still be purchased today and used for home seed cleaning.

Water winnowing is another option for dry seeds. Here, very small seeds are placed in a bowl of water. The seeds will settle to the bottom, and the chaff will float to the top. Then the water can be gently poured away until the seeds are left at the bottom. The seeds can be gently picked up with a paper towel to dry.

Wet Seed Cleaning

IMG_1063
Fermenting ‘Red Currant’ tomato seeds

The seeds of fleshy, wet fruits require more elaborate cleaning steps. Tomato seeds are the messiest to save. The juicy fruits have seeds with a slimy membrane that should be removed to ensure good storage and germination.

In nature, the fruits are eaten by animals and the seeds pass through and out, membrane free, but this is hardly helpful for the seed collector. Two-day fermentation is the easiest way to naturally remove the seed membranes.

Start by cutting open the tomatoes and scraping out seeds from the fruits. Place them in a clear, lidded glass or jar. Add 2 to 3 inches of clean tap water. Lightly cover and allow the seeds to sit for one to two days, or until the contents become frothy on top. Pour the contents through a sieve and rinse the seeds in water until clean. Allow them to dry completely on a clean, dry towel.

BG-Seedling-1.5cuPumpkin, melon, and cucumber seeds can simply be scooped and cleaned in a fine colander under warm running water. Pieces of membrane may need to be picked away from the pumpkin or squash seeds. The clean seeds will be a little slippery, but that is okay. Dry the seeds on a light colored towel before packaging.

Package and label the seeds before storage. Plain paper packets are best. Number 1 coin envelopes are the perfect size and shape. Be sure to label each with the plant name and date, for consistency. Store the packets in a lidded paper box kept in a cool, dry place.

Then, towards winter’s end, break out the Black Gold Seedling Mix, plant up your seeds, and start your vegetable garden planning anew.

BLACK GOLD® Garden Amendment Guide

Black Gold® amendments cover everything from basic coir, to premium peat moss, compost, and earthworm castings.  Each has an important application in your garden and landscape planning. For product basics and best uses, follow this simple guide.

BLACK GOLD® Just Coir

BG_JSTCOIR-2cu-FRONTFew natural amendments hold water and air as well as coir. It is recommended as an amendment where extra organic matter and increased water holding capacity are needed. Apply it as a broadcast amendment in raised beds or add it to containers or small beds on a plant-by-plant basis.

OMRI® Listed BLACK GOLD® Coir is derived from coconut husks and a sustainable byproduct of the coconut industry. Unlike peat moss, it breaks down more slowly and maintains a more neutral pH (5.5 to 6.8) than peat (3.5-4.5). Our premium coir is fine and highly processed. It is a popular media for professional hydroponic growers, but it also does wonders as an additive to container plantings and small garden beds. Evenly work it into the soil for best results and consider adding a layer to the top of container plantings for added water retention. (Just be sure to water thoroughly to fully soak pots at each watering!)

Coir should be added to plantings in spring, but it can also be incorporated into fall containers. Gardeners living in drier regions, such as the American Southwest, should definitely add coir to their plantings to reduce the need to water. 

BLACK GOLD® Garden Compost Blend

BG-GRDNCMPST-BLND_1cu-FRONTFew amendments enrich plantings as well as compost. It is the best broadcast amendment to add to all of your raised and in-ground garden beds in spring. BLACK GOLD® Garden Compost Blend contains a quality mix of compost, bark, and Canadian sphagnum peat moss to improve the texture, water-holding capacity, and overall quality of your garden soil. Even better, it is OMRI® Listed for organic gardening.

Compost can be applied and tilled into the soil or used as attractive mulch for vegetable and flower beds. To calculate how much compost (or other broadcast amendments) to apply in cubic yards over a defined area, we recommend the following formula.

Amendment Application Formula for Beds

For square or rectangular beds, multiply the bed’s length by its width to get square footage (L *W= ft2). If you wish to lay mulch 2-inches deep, then have a look at the table below to get the corresponding square footage covered by 1 cubic yard of compost, mulch, or peat moss. Then divide the square footage in the table that matches the 2-inch depth.

For example: If you had a 12-foot x 24-foot bed that required 2 inches of peat moss for tillage, calculate 12 feet x 24 feet = 288 square feet, then from the chart, you can determine that 288 ft2/162 ft = 1.78 cubic yards of mulch. 

Square Feet to Cubic Yards Conversion Table

1 cubic yard of an amendment or mulch will cover the following square footage to each depth.

Depth of Amendment

Square Footage Covered

1”

324 ft2

2”

162 ft2

3”

108 ft2

4”

81 ft2

To calculate the square footage of other bed shapes, please click here for an excellent reference. You can also click here to view a handy mulch/amendment calculator.

Spring is the best time to liberally apply compost to gardens, but if you also plan to do significant fall planting, reapply in autumn. Organic matter breaks down over the course of the season and needs to be replenished. If you plan any winter or cold-frame gardening, apply compost as both an amendment and protective mulch.

BLACK GOLD® Earthworm Castings Blend 0.8-0.0-0.0

BG_EARTHWORM_8QT-FRONT
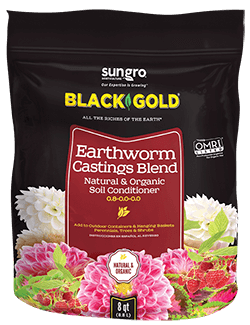
Rich in nitrogen and soil microbes, BLACK GOLD® Earthworm Castings Blend 0.8-0.0-0.0 is a combination of pure earthworm castings and Canadian sphagnum peat moss. It is OMRI® Listed, making it a choice amendment for organic gardening. Apply it to vegetable gardens and landscape beds needing added organic matter and a boost of natural nitrogen.

In spring, add it to garden beds—working it deep into the soil. Later in the season, add it to plantings as an enriching mulch, or top dressing. It can also be added to container plantings as supplemental mulch.

Mix a cup into a gallon of water to make enriching “castings tea” to add to potted or garden plants during the growing season. This is most recommended for foliage plants needing added nitrogen.

BLACK GOLD® Canadian Sphagnum Peat Moss and Peat Moss Plus

BGPeatMoss2.2cu Front-WEB
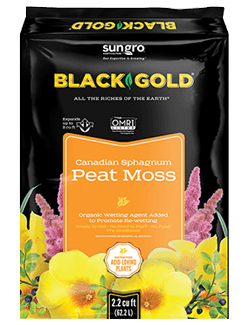
Peat moss is naturally organic and one of nature’s most effective soil amendments. It quickly adds loads of organic matter, which increases soil water retention and aeration, and its acid pH (3.5-4.5) will lower the pH of alkaline soils. This makes it the perfect amendment for clay-rich and alkaline soils. Acid-loving plants, such as blueberries, rhododendrons, azaleas, and camellias, also grow best in garden soil amended with peat moss.

Apply peat to the soil in spring and till it in well. Peat moss is naturally dry, so we recommend opening bags and lightly wetting the contents before tilling. This will reduce airborne peat and ensure it incorporates well into your soil.  If you have loamy soil that is more friable, consider turning the peat into the soil by hand. Much of the peat will break down in a season, so if you plan to plant new perennials and woody plants in the fall, be sure to add additional peat at planting time.

Compressed bales of BLACK GOLD® Canadian Sphagnum Peat Moss go far—with our largest bales covering as much as 3.8 cubic feet. BLACK GOLD® Peat Moss Plus is just offered in smaller bags; the easy-to-wet formula is recommended for indoor and outdoor container gardening. Both are OMRI® Listed for organic gardening.

BLACK GOLD® Perlite and Vermiculite

BG_PERLITE_8QT-FRONT
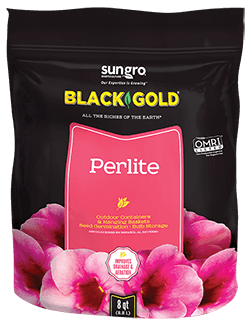
Two of the most important basic mineral additives to potting mix blends are perlite and vermiculite. Both are essential potting mix components. They can also be used on their own for leaf- and stem-cutting propagation or at-home hydroponic growing.

Perlite is a porous, lightweight, expanded volcanic rock that improves the drainage of any growing mix. It is also an essential mineral for hydroponics. It holds water well and retains nutrients, but it also dries quickly and keeps roots well aerated.

Vermiculite is a spongy, absorbent mineral derived from mica. Its properties are similar to perlite, but its spongy structure holds more water and retains more nutrients. Vermiculite is also more delicate and will lose its structure and effectiveness faster than perlite.

BG_VERMICULITE_8QT-FRONT
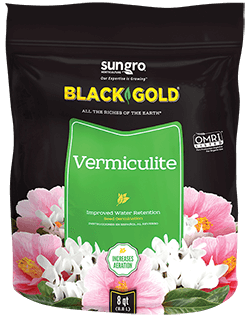
Both BLACK GOLD® Perlite and Vermiculite can be added to Peat Moss Plus, Just Coir, Garden Compost Blend, and Earthworm Castings Blend to formulate mix-your-own potting mixes. Here are several mix recipes to try:

Seedling Mix

Mix 2 parts Peat Moss Plus to 1 part Vermiculite and 1 part Perlite for a fine mix for seed starting and seedling culture.

Water-Holding Potting Mix

Mix 2 parts Garden Compost Blend, 1 part Just Coir, 1 part Vermiculite for an organic-rich potting mix that holds water well.

Well-Drained Potting Mix

Mix 1 part Peat Moss Plus, 1 part Garden Compost Blend, 1 part Vermiculite, and 1 part Perlite for a fast-draining mix that also holds water and nutrients.

Potting Mix for Foliage Plants

Mix 2 parts Earthworm Castings Blend 0.8-0.0-0.0, 1 part Peat Moss Plus, 1 part Perlite for a nitrogen-rich potting mix that holds water and nutrients while also providing good drainage.

We use only the finest ingredients in all of our amendments, so gardeners can be confident when choosing these and other BLACK GOLD® Products.

Windowsill Salad Greens for Indoor Growing

Cut-and-come-again lettuce is the perfect cool-season crop for fall and winter gardens.

Windowsill greens, such as small lettuces and micro-greens, are fast-growing and gratifying.  Growing them indoors is a piece of cake, as long as you have good sunlight, quality soil, the right watering regime, and some gardening know-how. Start with the right greens, master some of the cultural basics, and you’ll be eating fresh salad through even the coldest winter months.

Growing Windowsill Greens

Planter troughs or window boxes can be purchased in a variety of sizes and are best for growing windowsill greens. Adequate pot and soil drainage is a must for success. Black Gold Natural & Organic Potting Mix is a great mix choice. It provides superior moisture retention, excellent drainage, and is specially formulated with a controlled release fertilizer that feeds plants for up to six months. Just be sure to fill the pot to a depth that allows at least 2” of headspace at the top for watering and planting.

Planters should be placed in as sunny a location as possible. Supplemental light can be provided with the use of broad-spectrum grow lights, but natural light is best. When watering, provide just enough water to wet the soil—allowing the mix to dry slightly between. Once plants are actively growing, the need for water will increase. Just be sure to avoid wet soil, which can rot roots and encourage soil-borne pests and pathogens, such as shore flies and fungus gnats. (Click here to learn how to rid pots of fungus gnats.)

Salanova Red Incised Leaf grows well in pots and is pretty in salads.

Seeds can be directly sown on the soil’s surface or seedlings planted. The seeds of many greens require light to germinate, so surface-sow seed for best results. This means gently sowing the seeds along the soil’s surface and keeping them lightly moist. Once they have germinated, thin seedlings to around 2 to 3 inches apart. This is a little closer than outdoor-grown greens, but denser plantings yield more greens indoors.

Finally, be sure you choose the right crops for indoor growing. Here is a sampling of the types of salad greens you might consider:

Micro Lettuce

Mixed Salanova baby lettuces (55 days from seed) are a great, fast choice for indoor growers. They form dense, small heads that are sweet and crunchy. The mix offers a variety of purple- and green-leaved selections.  Baby Leaf Mix is another great choice. Rather than heads, this mix offers cut-and-come-again looseleaf lettuces that produce edible greens in just 28-35 days from seed.

‘Red Russian’ is a lovely kale that can be harvested young and grown indoors. (Photo care of Johnny’s Selected Seeds)

Baby Kale

Looseleaf kales germinate fast, grow quickly, and can be clipped back regularly for home salads. There are several varieties to choose from—‘Red Russian’ and ‘Toscano’ being two of the best. Both are mild and produce edible leaves in just a few short weeks.

Baby Chard

Just about any chard can be grown inside. All are tender and can be harvested young. Most growers opt for colorful varieties because they are high in antioxidants and look pretty in salads. Bright Lights Mix and ‘Ruby Red’ are two festive chards that always taste great when young.

Mizuna

One of the fastest greens for growing is mizuna. Popular in Japanese cooking, its tasty leaves have a mild, spicy flavor and look feathery and pretty in salads. Purple mizuna is a popular choice that will begin to produce edible leaves in just 21 days.

Mustard Greens

The easy-to-grow micro mustard green ‘Green Wave’ is so easy and delicious that you will wonder why you didn’t start growing your own greens sooner. It produces harvestable microgreens just two weeks after germination. Grow plants a little longer to harvest larger leaves.

These are just a few of many salad greens for indoor growing. Gardeners new to indoor growing may want to try one or two greens, like lettuce and kale, before experimenting with other types. One good success will get you hooked.

Salvias for Fall-Migrating Hummingbirds

Autumn Sage (Salvia greggii) (Image by Maureen Gilmer)

Hummingbirds rely on the nectar of many fall-blooming salvias to assist in their late-season migration. The striking beauty, bright colors, and architectural statures of these plants also make them great for the garden. Most cultivated salvias are from Mexico and the Southwest United States, which is why pollinators migrating south are attracted to them. Their relationship is mutually beneficial; the flowers feed the birds and the birds pollinate the flowers.

Fall Salvias

Nonstop flowers of red, pink, or white appear on Salvia coccinea (Texas sage, 1-3′ tall, zones 8-10) starting in midsummer. These will continue well into frost and draw lots of hummingbirds. Deadheading old flower stalks will keep plants looking clean and attractive.

IMG_0137
Pineapple Sage (Salvia elegans) (Image by Maureen Gilmer)

The Brazilian red velvet sage (Salvia confertiflora, 4-6′ tall, zones 9-11) blooms with delicate spikes of tiny velvety red flowers. It is also bushy and large, reaching 4 to 5’ in height. Though its flowers feed tropical hummingbirds, they are also perfect for migrating North American species. They bloom from midsummer to season’s end. Just be sure give this plant lots of space.

Pineapple sage (Salvia elegans, 3-4′ tall, zones 8-10) is an enormous, bushy sage best known for its aromatic leaves that smell of sweet pineapple. Its scarlet fall flowers make a spectacular show starting in early fall. The popular cultivar ‘Golden Delicious’ boasts outstanding golden leaf color all season long.

Autumn sage (Salvia greggii, 1-3′ tall, zones 6-9) blooms for much of the season but offers a strong fall flush of red, orange-red, white, pink, and purple flowers. Native to South Texas and Mexico, it is an essential wildflower for migrating hummingbirds. In its native form, it also looks nice in the garden. Cut late-summer stems back to keep this open but bushy perennial looking great.

Salvia leucantha 'All Purple' JaKMPM
Mexican bush sage (Salvia leucantha ‘All Purple’) (Image by Jessie Keith)

Height and elegance make Salvia leucantha (Mexican bush sage, 2-3′ tall, zones 8-10) one of the most outstanding fall salvias for large spaces. Streamers of soft, velvety flowers in shades of pink, purple, magenta, and white emerge on stems lined with silvery leaves in late summer and continue through fall. When not in bloom, its leaves still add visual flair.

Unique primrose-yellow flower color and long floral stems make forsythia sage (Salvia madrensis, 6-8’ tall, zones 7-11) a true architectural gem for the fall border. The enormous plant requires lots of room but looks great when well-placed in the landscape. Blooming starts in mid-fall and continues up until frost.

Growing Fall Salvias

All of these salvias are sun-loving and can take the heat, though they really shine in the cool of autumn. Plant them in spring for full effect, but also keep an eye out for large potted specimens to fit into late-summer beds. Before planting, amend the ground with Black Gold Garden Soil. Its mix of peat moss and compost makes for rich soil to support good growth.

Most of these salvias are tender, meaning they should be grown as annuals, but some are perennial where winters are mild. Fall-migrating hummingbirds and other pollinators will thank you for planting these gorgeous fall flowers, and your gardens will be none worse for the wear.

Supertunia-Royal-Magenta-Salvia-leucantha-and-Lantana-camara
Salvia leucantha ‘All Purple’ appears in the background of a fall annual border, which also contains Lantana camara and Petunia Supertunia® Royal Magenta. (Image by Jessie Keith)