Articles

Planting a Barrel Cactus Safely

The ferocious spines of the golden barrel cactus make them very difficult to pot. (Image by Jessie Keith)

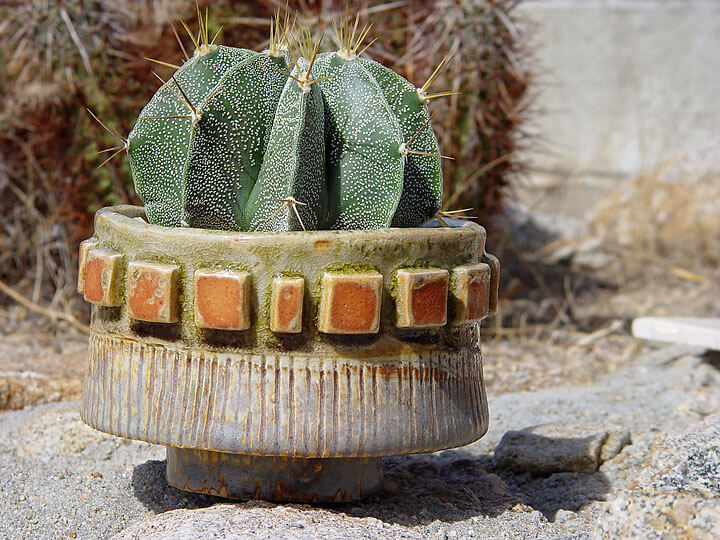
The golden barrel (Echinocactus grusonii) is America’s favorite cactus. All over the Southwest, it has become a coveted living ornament in landscapes. When backlit by the sun, the bright canary-yellow spines literally glow, creating high drama against blue agaves and succulents. A big yellow cactus potted on porch or patio becomes the quintessential year-round focal point that never loses its warm color.

Large golden barrel specimens and other large barrel cacti thrive in big, strong pots if they are planted properly. What folks don’t know is that they are darned difficult to handle, and painful, too. The challenge is transplanting the stemless ball of wickedly sharp spines. The combined soil and plant weight makes golden barrel unwieldy to carry, which complicates matters further.  Here’s how to do it safely without damage to you or the plant.

Protect Yourself

potted
This basketball-sized golden barrel is planted in a perfect-sized salvaged container to allow for future growth and easy watering.

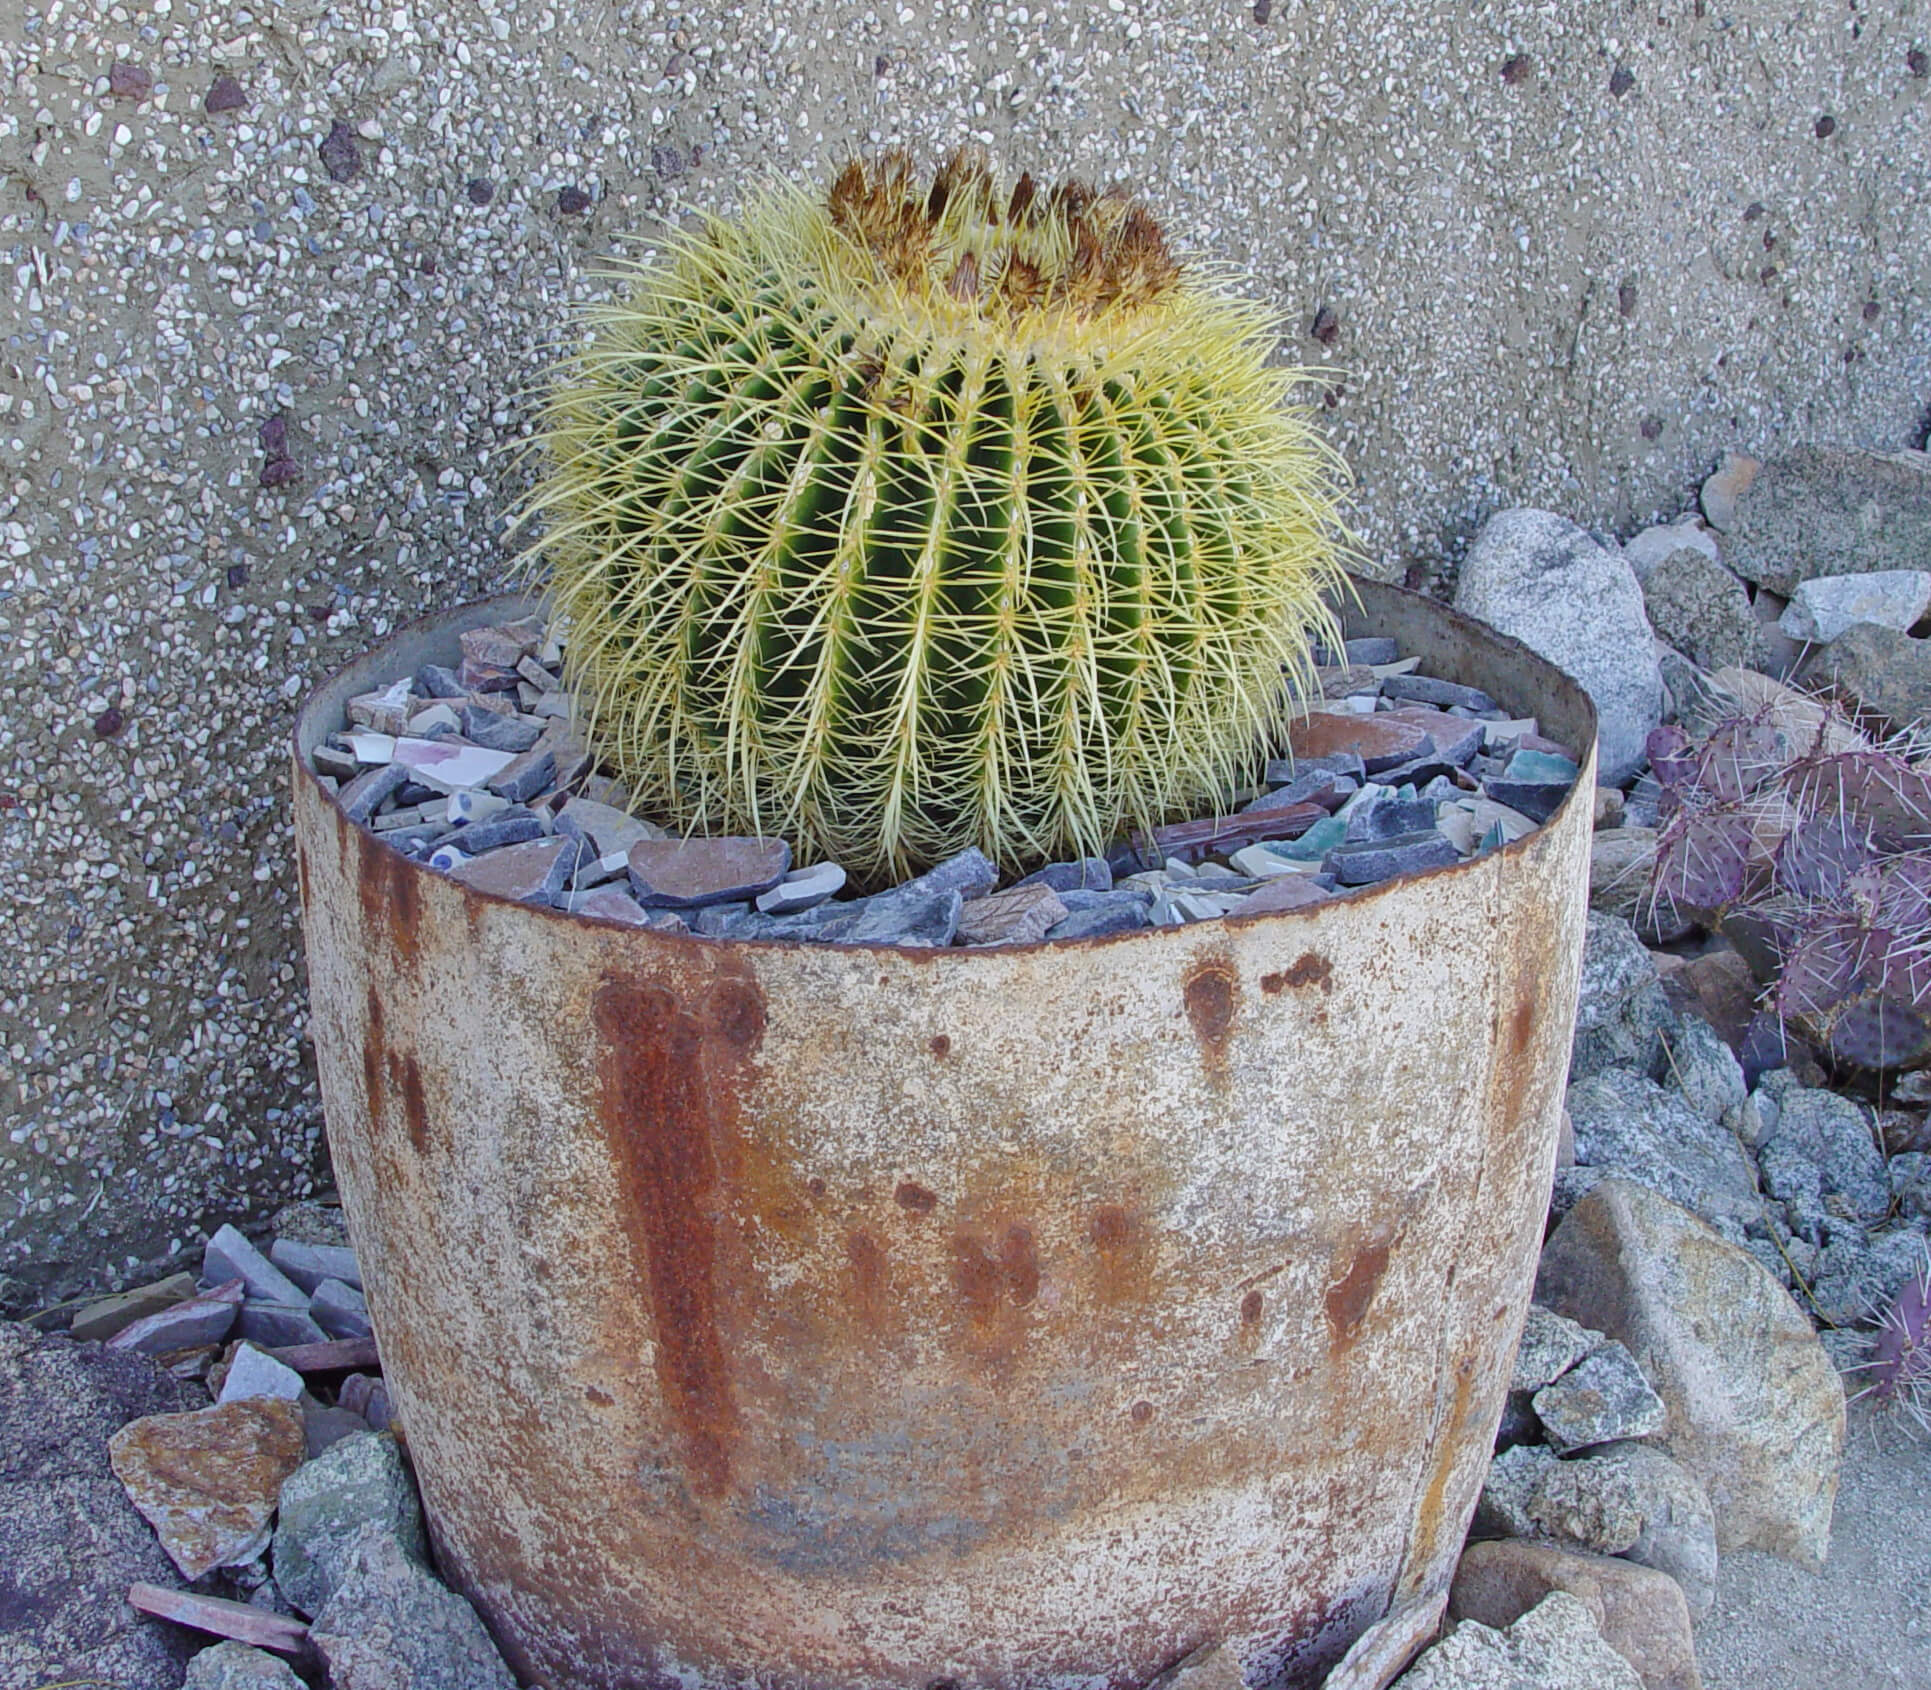
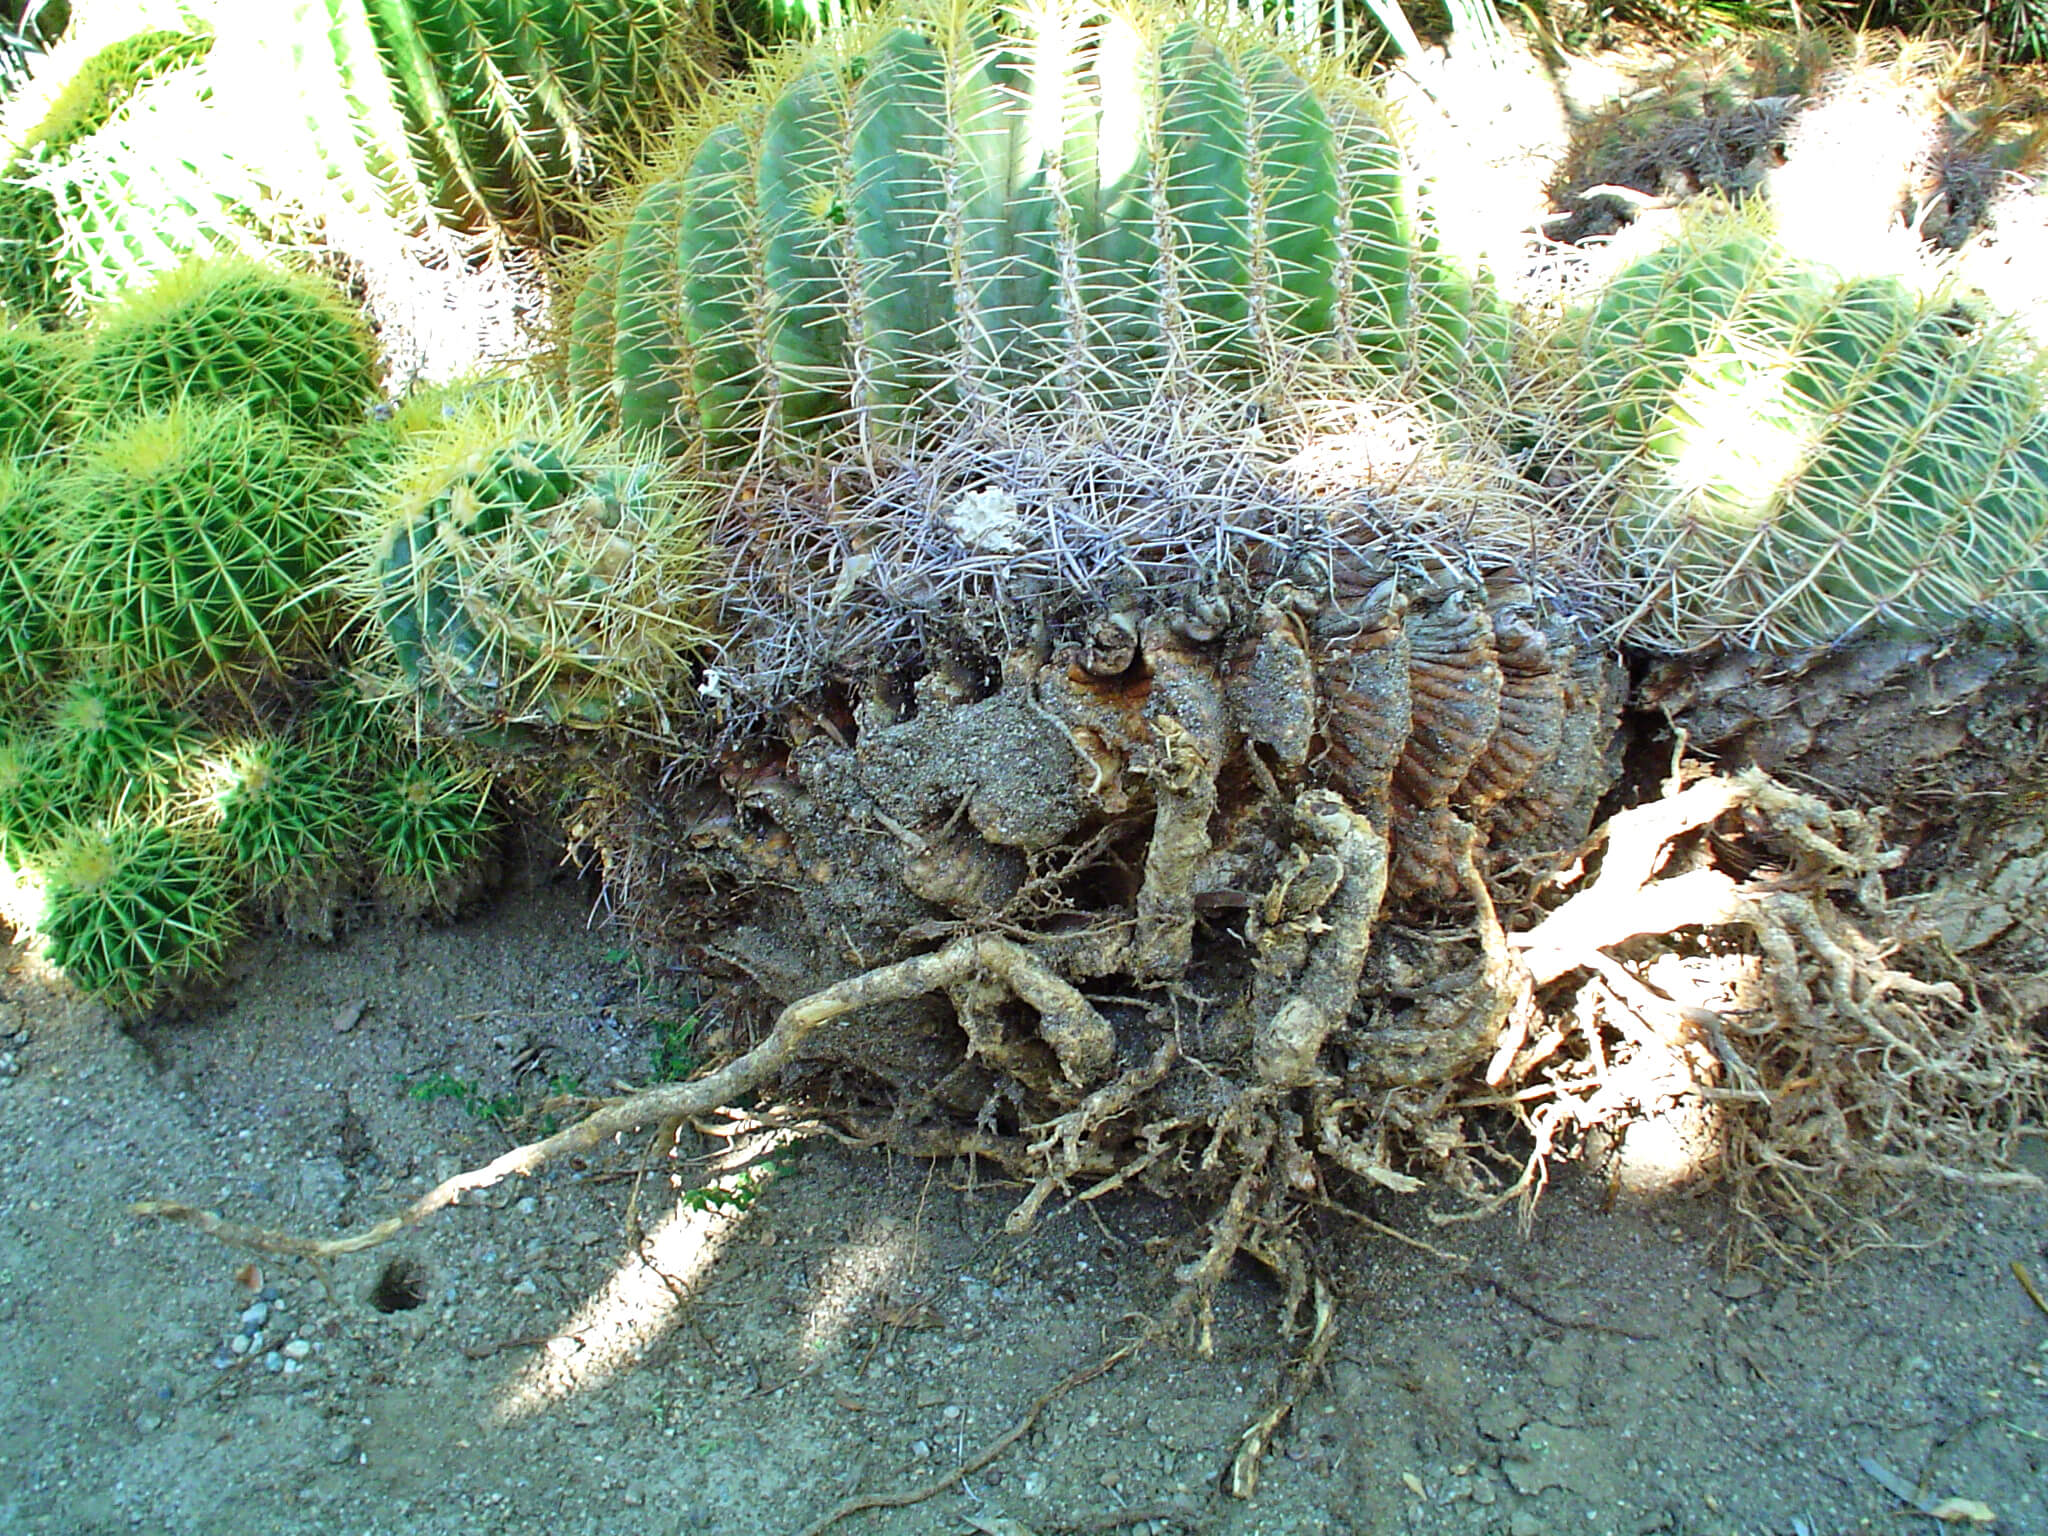
To start, you’ll need long, thick, solid-leather gloves, because picking up pots of golden barrels is a wrist and knuckle nightmare for bare skin. Loosely wrap the cactus in a piece of carpeting, or find a cardboard box that fits over the spines tight enough to “catch”. The box is a bit better because it lets you turn the cactus upside down to stand while you carefully remove the pot. This exposes the root ball and facilitates preparation for transplanting.

When inspecting the root ball, look to see if your large cactus has been field grown and recently potted up. Field-grown cacti are cultivated on slopes that provide rapid drainage. They are dug and potted up in nursery soils that typically drain more slowly and are less suited to cacti longevity because they’re viewed as temporary. To protect your investment, inspect the bottom of the plant and remove any organic matter that may provide excess moisture. Then you will want to prepare your container for planting.

Planting Barrel Cacti

bare root
Newly dug from the grower’s field, the shallow, wide roots of the golden barrel are exposed temporarily until transplanted.

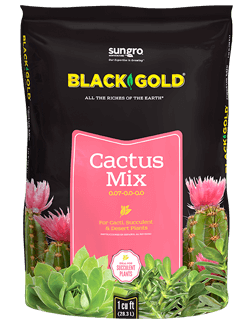
Your decorative pot must be wide enough to contain the cactus and have at least 1 inch or more free space on all sides to allow for new growth, watering space, and surface evaporation. Use a concave pottery shard to dome over the drain hole to prevent erosion. Then open a fresh bag of Black Gold Cactus Mix, a fast-draining medium containing a blend of perlite/pumice or cinders, earthworm castings, and compost. It encourages vigorous growth while ensuring ample aeration and drainage.

Use dry potting soil right out of the bag when potting up your golden barrel cactus. Place a layer of soil at the base of the pot, then set the top of the cactus root ball about 1-2 inches below the pot’s edge, and hold it there while you pour in the mix around the sides. Allow the mix to filter down and lightly pack it to create a porous yet solid base.

BG_CACTUSMIX_1CF-FRONTDo not water the cactus directly after planting, and put it in a partially shaded location. Wait a couple of days before watering, so any injuries to roots during the planting process have had time to heal themselves. Then water in thoroughly. Add more potting soil where settling or pockets occur.

For more visual interest, try adding a surface layer of gravel, glazed tile shards, or tumbled glass. Place in full sun.

Finally, try raising the bottom of the pot up with broken tile shards to create a gap between the drain hole and saucer. This facilitates rapid drainage to create the perfect conditions for cacti and succulents. It also protects decks and paving from what can become a very heavy, beautiful and ferocious plant in your garden.

Succulents: Beware Over Packed Pots!

color-gilmer2
This composition of mixed succulents may look pretty, but the gang-potted group will not survive unless transplanted into their own Terracotta pots.


Those big, popular succulent collections sold in pots and troughs (otherwise known as “gang pots”) are dying out all over. Each container may be packed with a dozen or more species of succulent plants that often originate from vastly different locations and have different cultural needs.  Many are native to South Africa while others originate from Mexico on the other side of the world. Dry climates are not all the same. There is more variation in the growing preferences of different succulents than you might think.

balcony outside
This wrought-iron slatted window balcony shelf offers great drainage for succulents.

That’s why these ganged creations just don’t last that long.  Those succulents that need drier conditions are in conflict with those that need more moisture.  In the end, the one-size-fits-all gang pot results in gang watering, which will cause mixed-succulent-pot decline due to too much or too little moisture.

Secondly there’s no way to adjust the lighting given to different succulents in gang pots.  Different succulents often have different light requirements, but when they are set in one position in gang pots, you can’t give different plants the sunlight they need.  This is why you never see serious succulent aficionados growing this way.  When you are unable to control light or moisture well, these plantings die out in spots and look generally ratty most of the time.

Choose Individual Pots

It’s far better to grow window box and balcony succulents in individual pots.  That way you get to rearrange them any time you want.  Watering is simple because you must look at each pot to determine how dry it is.  Just like kids, succulents can be very different, even when closely related, and unless you treat them accordingly, they’ll show it in the form of decline.

clay-maureen-gilmer
Planting one specimen, such as this star cactus, in an artful Terracotta pot is best.

Growing individuals in Terracotta pots is the best way to create a beautiful composition that blends easily, offers plants what they need, and allows you to bring them all indoors at season’s end to brighten your winter home.  Don’t fall for big, overflowing gang pots this year. Shop for the succulents you love, then bring them home to be planted in their new pots, and placed out in the sun where they thrive.

Potting Mix and Drainage

Key to your potted succulent’s success is Black Gold Cactus Mix, which ensures each new succulent is planted in very fast-draining soil.   Choose pots in scale with the size of the plant with very large or numerous drain holes.  Once planted, top the soil with a thin layer of Black Gold Washed Gravel or White Rock to hold in moisture and discourage perlite floaters that otherwise accumulate there.

darcy-Jade-in-Red-Pot-720px
A specimen jade plant in a red clay pot. (photo by Mike Darcy)

Consider setting your pots on an open, free-draining, slatted shelf on the patio or balcony that encourages drainage.  This ensures there’s plenty of free drainage plus pot walls are in the open air where oxygen and moisture readily exchange through Terracotta.  Open air also encourages evaporative cooling to keep containers adequately cool in the high heat of late summer.  If left in plastic containers, direct sun can cause such high interior soil temperatures that roots can literally cook.

Over time you can add and subtract from your collection as your succulents grow large and take on their best looks.  They can be fed individually, evaluated for health often, and best of all, a diseased or pest-ridden plant can be moved elsewhere.  That’s why succulent lovers keep their specimen plants in individual pots rather than gang pots that spoil the overall success of the team.

Big, Bold, Tropical Foliage Plants

Brilliant crotons and cascading Scaevola aemula ‘Blue Fan’ look striking in this container planting.

Big, bold, tropical plants look amazing in summer gardens and large containers and drink up the summer heat and humidity. Ornamental bananas, exotic elephant ears, upright sansevierias, strappy cordyline, and colorful croton are typically grown only indoors or way down South, but they thrive in any place that’s steamy. Placing them in the right spot in summer with the bedding plant companions is part of the fun.

Big Leaves

IMG_9073
Codiaeum variegatum

The multi-colored visual pop of croton (Codiaeum variegatum) leaves look good in any bold planting. The Southeast Asian shrub likes it as hot and humid as it gets and looks great in partial shade or sun. Provide it with quality, well-drained potting soil (Black Gold All-Purpose Potting Soil with RESiLIENCE®) and regular water, it will perform well. There are many varieties with leaves that vary in color and size. (Visit the Croton Society webpage to learn more.) The manageable size of croton makes it a good plant to pair in containers with colorful bloomers, such as Lantana camera, cascading Scaevola aemula ‘Blue Fan’, and tropical Hibiscus rosa-sinensis, which has brightly colored disc-shaped flowers.

Cordyline fruticosa 'Kiwi'
Cordyline fruticosa ‘Kiwi’

Tropicals with bold, strappier leaves include the West Pacific native Cordyline, African Sansevieria, and corn plant (Dracaena fragrans). Plant these in beds or large pots for a dramatic impact. The more colorful the foliage, the better. Cordyline fruticosa ‘Kiwi’ has a soft but notable color with its pink-, cream-, and green-striped foliage. For pretty gold and green variegated foliage, choose Dracaena fragrans ‘Golden Coast’ with its leaves striped with gold, dark green, and medium green. The nearly vertical leaves of the drought-tolerant Sansevieria trifasciata look great on their own in a pot or paired with a cascading accompaniment of plants at the base, like Dichondra argentea ‘Silver Falls’ or creeping sedums. 

Bigger Leaves

Elephant ear or ornamental taro (Colocasia esculenta), originates from Southeast Asia and has big leaves that come in lots of attractive colors. Choose extra colorful purple-black cultivars and cheerful chartreuse or gold variants. Bicolors, such as the green-leaved, purple-speckled ‘Mojito’, also make a big garden statement.

IMG_3812
Colocasia esculenta ‘Mojito’

Elephant ears are moisture-loving and grow well in wet soils if given the opportunity. They make excellent container specimens and should be planted in an ultra-organic potting soil with a high water-holding capacity, such as Black Gold® Moisture Supreme Container Mix with RESiLIENCE.


Biggest Leaves

Gigantic-leaved plants require tons of space but look spectacular and fun if properly placed in the landscape. Add one plant to a single pot. Abyssinian red banana (Ensete maurelii), with its broad, reddish green leaves, or the massive giant elephant ear (Colocasia gigantea), with its 5-6′ leaves, command visual attention and are best planted where big, focal statements are needed. An open patio area or broad, open

IMG_8994
Ensete maurelii

fence line or border would be perfect. The 6-8′, banana canna (Canna ‘Musifolia’), which has reddish leaves much like those of Ensete maurelii, is another impressive easy-to-grow garden plant. Grow these in full to partial sun alongside finer-leaved, colorful companions. Tall amaranths, purple-red-leaved Hibiscus acetocellus, and formidable ornamental grasses are all great choices.

Grow these bold ornamentals if you are seeking to fill space fast and want your garden to feel like a tropical paradise. Once the threat of frost has passed you can plant them outdoors, but don’t expect them to take off until the warm, humid weather of the summer months begins. Then, watch the magic!

How to Manage Mice in Raised Planters

Young tomato seedlings in my Grow Box  – note the water-fill opening and mouse access on front.

As the heat of “dead summer”  begins its slow ebb into fall, it’s planting time in California and the Southwest.  While most folks across the US plant in spring, here the mild fall is our second growing season for food crops.  What we grow now feeds us into the holidays with roots and greens and maybe even squash or peppers with the right system and climate.  I grow many ways, in raised beds with row covers, in the greenhouse and out in the open air, depending on the season and crop.  This allows me to compare the methods for different crops at different times of the year.

mature
By June, my tomato plants were healthy and happy!

Planting Grow Boxes

Last year I tested Grow Boxes in the greenhouse attached to the south side of my home.  With such low humidity in the desert, these boxes with their 4-gallon reservoir keep plants far better hydrated than any other method.  The box is designed so plants produce long trailing roots that dangle into a large water reservoir sucking up all the moisture they need rather than being limited to watering times.  Last year I planted the boxes with tomato seedlings in February when high UV in the desert allows greenhouse growing in the high desert and year around in the low desert.

I selected ordinary tomato varieties to evaluate how well the boxes work here.  Because indeterminate tomato varieties are long blooming, I wanted to determine if my tomatoes could indeed become perennial and produce year around without frost.  I was thrilled to find the seedlings literally exploded out of the boxes and never stopped growing or producing new fruit until that sudden August decline.  The tomato plants quit taking up water, became discolored and generally failed for no particular reason.  And whenever I don’t know the reason, my mentor always advised, “dig a hole”.

Grow box Sept
Grow box with tomato roots

Managing Mice in Grow Boxes

The cause was revealed when I disassembled the boxes to take my first glimpse at the roots that should dangle down into the water reservoir.  They were gone!  I discovered this was due to a design flaw of the Grow Box: reservoir accessibility to mice in my greenhouse during our blistering desert summers when they are keen on cool, moist places.  The Grow Box opening for water access is easy for any small rodent or insect to enter.  When water was low or dry in between fill-ups, the mice entered the reservoir and literally ate all the dangling roots, explaining why my tomatoes suddenly quit taking up water.   We finally captured the mice, but there may be more in the future.  I’ll be fashioning a hardware cloth cover for the fill holes of my six Grow Boxes to keep smaller creatures out, or the very same thing will happen again in this rodent-rich desert, particularly if grown outdoors on porch or patio!

roots consumed
Grow Box with tomato roots eaten by mice

This year I upgraded and replaced the potting soil with Black Gold Moisture Supreme Container Mix with RESiLIENCE®, which I hope will enhance the wicking crucial to the function of the Grow Box.  This year I will test fall-planted vegetables in the greenhouse Grow Boxes to learn whether the fruit will ripen in November, despite cooler weather and shorter days. Only testing will prove whether plants that require pollination and long, hot days to ripen can be coaxed to fruit in the short, dark, cool winter.

Here in the desert, and everywhere else that is difficult to grow things, these quasi-hydroponic Grow Boxes are an ideal way to keep plants fully hydrated and healthy.  They are a useful solution to grow efficiently in drought.  And now with Moisture Supreme, they will be better able to take the heat, and perhaps I will finally learn whether or not indeterminate tomatoes can indeed be grown year round in my greenhouse.

Summer Vegetable Garden Nutrient Deficiencies

pepper
The yellowing of this formerly green pepper plant is a sign of nitrogen deficiency that often crops up at the end of the growing season when soil is depleted.


Organic gardeners must be readers of signs, which are the silent and often subtle ways plants communicate their needs to us. Summer vegetable garden nutrient deficiencies appear as changes that indicate something isn’t right.  They’ll show up during the heat of midsummer vegetable gardens because plants are working overtime to mature and reproduce, which requires optimal nutrition.

BG Earthworm Casting frontIt’s not unusual to find signs of nutrient deficiency in raised beds.  This is because the original potting soil may have been poor quality, or has simply worn out over the first year or two because vegetable plants are heavy feeders.  If the soil is depleted, the plants weaken, resulting in minimal yields, small size and perpetual problems with pests and diseases.  Raised beds must be liberally fortified with organic amendments and fertilizers each year to compensate for what was consumed by the plants over the previous growing season.

When garden soil is lacking one or more nutrients, plants often show it by changing color.  Their emerald foliage may fade to yellow green or develop yellowing is visible in stripes.  Sometimes just the leaf veins are green with yellow spaces, or the veins are yellow with green spaces. Poor leaf color can indicate disease, but often it is due to chlorosis, a result of a macro- or micronutrient deficiency. Macronutrients are needed in larger quantities and micronutrients are taken up in smaller quantities, but both are needed for good growth.

So what are these nutrients?

Macronutrients:  Nitrogen, phosphorus, potassium, calcium, magnesium, and sulfur.

Micronutrients:  Boron, chlorine, copper, iron, manganese, zinc, molybdenum and nickel.

If your plant is experiencing chlorosis, or you see other curious signs, you may never know exactly what nutrient is absent or deficient.  The best solution is a shotgun approach using amendments or fertilizers known to be rich in a wide range of nutrients.

macroNutMagnesiumBlack Gold Earthworm Castings is perfect for solving micronutrient deficiency.  Castings are rich in all sorts of minerals derived from the fertile soils where worms lived, and these can be easily introduced to your soil and root zone.  For a larger scale application, cultivate dry castings into the soil around each plant or along each row, then water generously so the material works it way deeper down.

For smaller gardens and raised beds, an application in solution generates more rapid results.  Mix castings into a bucket of water, then ladle or pour out this “soup” onto the soil around each plant.  Be generous because this is not a concentrated fertilizer, so it won’t burn. It’s impossible to overdo it.

Sometimes young gardens that haven’t benefitted from years of soil amendments can experience macronutrient deficiencies, such as low nitrogen.  Because nitrogen is responsible for leaf and stem growth, the plant will show signs of being stunted or it simply languishes when it should be thriving.  To test for a nitrogen deficiency in organic gardens, work alfalfa meal into the soil and water generously.  If the plants begin to put on new growth and larger more lush leaves within a few weeks after application, you’ll know it’s a nitrogen problem.

BG-Fert-All-Purpose-OMRI-120608Both macro and micro nutrient problems can be avoided altogether by adding quantities of rich organic amendments such as Black Gold Garden Compost and an all-purpose fertilizer in both spring and fall.

Avoid resorting to poor-quality, less natural fertilizers as a quick fix to nutrient deficiency because it’s only short term and not beneficial to the soil food web.  It’s much like eating a doughnut for energy, which won’t last long, then you feel lethargic and crash from low blood sugar. It matters what you eat, how much you consume, and how often you dine.  Be diligent, because feeding your organic garden generously in spring and fall with slower acting organic amendments and fertilizers ensures it remains chlorosis free and consistently fertile all year, every year.

vegetables 026 (2)
Here is the same pepper several weeks after fertilization and good care.


Bold Container Gardening

Red Banana and Forest Grass
The glossy red leaves of a potted red banana unfurl amid golden forest grass.

The arrival of May means that in my garden it is time for getting serious about container gardening. This is the time to go to a garden center and look for new and ‘must have’ plants. Last year in one of my articles, I mentioned that I counted the containers throughout my garden and the final tally at that time was 148. Since none have been broken, and a there are a few additions, I will have to get a final count later this season.

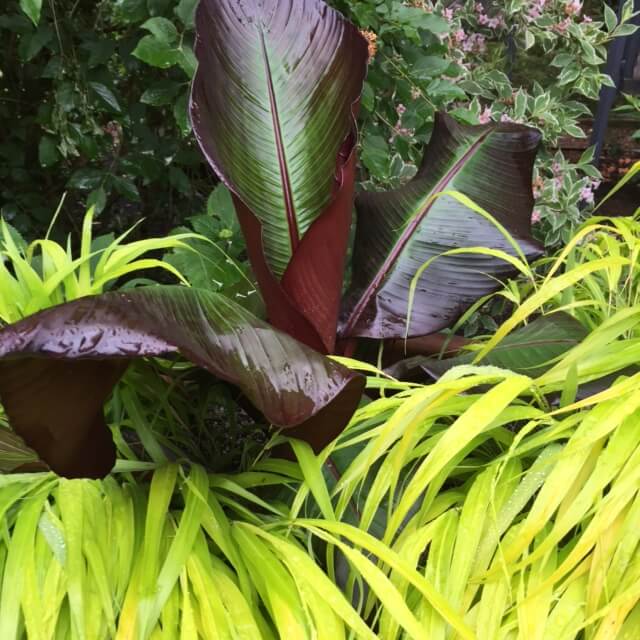
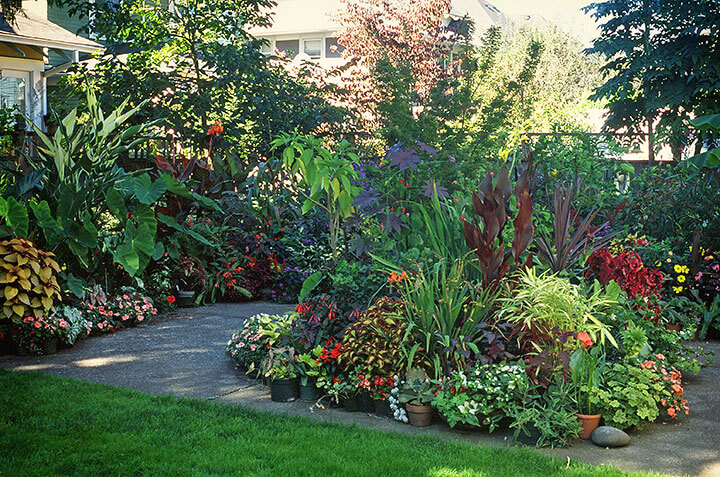
Potting Bold Container Plants

When I add new plants to an existing container that has previously been planted, if it is a small container, I take out all of the old soil and add new. If it is a large container, I take out about half of the old, add new and mix it with what is left in the container. My potting mix of choice is OMRI® Listed Black Gold Natural & Organic Potting Soil. On some plants, such as Papyrus, (Cyperus papyrus), that prefer a moist soil, I will use Black Gold Waterhold Cocoblend Potting Soil. I have learned that the roots of Papyrus are so vigorous that they will fill up even a large pot with such a thick mass of roots that I need replenish the entire pot with new soil each year. However, by midsummer the plants are so stunning that I don’t mind. I have two pots of Papyrus now, newly planted on my deck, and the plants are so small that it is hard to believe how much they will have grown by midsummer.

Papyrus (Giant)
Giant papyrus make a simple, but dramatic impact in the container garden.

Bold Container Plants

I always get some plants that are new to me for my containers and this season has been no exception. Since we have some areas that are shaded, I bought felt fern (Pyrrosia haslata) and find that these have already drawn attention of visitors. It is a terrestrial fern with smooth-edged fleshy fronds and a felt-like underside. Another new container combination that I planted is cabbage tree (Cussonia spicata) and at the base I planted Acacia Cognata Dwarf, sometimes referred to as ‘Cousin It’ because of the thick and thin branches. I do not expect these to be winter hardy here, especially in a container, but the cabbage tree has such an unusual leaf pattern that I believe will draw attention and in my mind I will consider them both annuals.

Papyrus 5-8-15
This newly planted papyrus will fill the summer pot in no time!

There are some plants that I continually repeat plant every spring because they are ‘must haves’, and they have become traditional plants for our deck. Several salvias are included in this mix with Salvia guaranitica ‘Black and Blue’ being a long time favorite. With blue flowers that are now appearing, they will continue to bloom all summer and are a magnet for hummingbirds. A new salvia for me last year was ‘Amistad’, which is similar to ‘Black and Blue’ except the flowers are purple. It is also excellent for attracting hummingbirds. Digiplexis ‘Illumination Flame’ was new to me last year but has already been planted this season. It has continuous blooms on tall stalks, like foxgloves to which it is related, but unlike a foxglove it blooms all summer with yellow centered coral peach flowers. It has proved to be an outstanding plant.

One of the many advantages of container gardening is that pots can be moved around, depending on the season. We had hellebores blooming on our deck containers this winter but have now moved them back part of our garden since their blooming period is over. Summer pots get filled with bold, warm season standbys like red banana, a perennial favorite that’s a real standout with big, glossy, reddish leaves.

What can be planted in a container can be endless, and there are so many wonderful choices for pottery that contrasting the color of the pot with the flowers and/or foliage of a container can make for an eye catching display that can be seasonal.

Island With Pots - Photo by Rich Baer
This “island of pots” shows how creative gardeners can be with bold container plantings!


Three Drought Strategies for Tomatoes

irrigation
Young seedlings need only one drip emitter to start, but plan on adding more as plants grow larger and demand more moisture.

With statewide mandatory cutbacks in California water due to drought, we can’t grow vegetables the same way we used to when water was more plentiful.  In the desert, where water is precious and expensive, we’ve learned many ways to help vegetables grow in the heat with minimal irrigation. Since tomatoes are always the favorite crop of home gardeners, the goal is to help them get a really strong start for greater resilience when stressed in the dead heat of summer. Here are a few smart drought strategies for tomatoes.

Lycopersicon esculentum 'Early Girl' JaKMPM
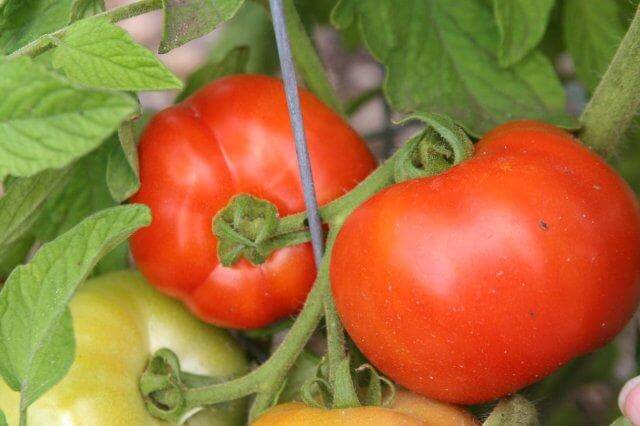
1. Increase Water-Holding Potential

Potting soils designed for dry climates have an increased ability to absorb and hold moisture for much longer than average garden soils.  When planting your tomatoes in containers, use Black Gold Waterhold Cocoblend Potting Soil or Black Gold Moisture Supreme Container Mix (with RESiLIENCE®) For planting in ground, blend equal part Black Gold Just Coir and Black Gold Garden Soil, then work a generous amount into the soil of planting area to capture and hold moisture immediately around young growing roots.

2. Train for a Larger Root System

BG-WATERHOLD_1cu-FRONT
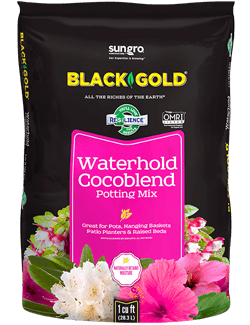
Drought-resistant plants often share large adventurous root systems to access trapped moisture far underground.  When tomatoes are planted like other crops, the root system remains relatively small.  But if you plant your tomatoes lying down in a trench, they develop prodigious roots all along the buried stem.  With a far larger root system that tomato will have much greater ability to survive heat with minimal moisture.

3. Mulch like Crazy

Perfect magazine-quality food gardens will soon be a thing of the past because thick mulches are more important than ever to conserve water. The thicker the mulch layer, the less soil moisture is lost to surface evaporation.  For larger gardens, invest in a bale of straw to cover all exposed soils, including pathways, to keep the overall soil mass evenly cool and moist.  Plan to thicken or renew mulches periodically throughout the growing season.

flowering
When vegetables begin to flower, up your irrigation rates and increase mulched area to ensure the entire root zone is protected.

Finally, be conscious of every pitcher, glass, or bottle of water you pour down the drain as well as water that runs as you’re waiting for the hot water before doing dishes or taking a bath.  Homes with a long distance from hot water heater to sink may require many gallons to pass through before you get water hot enough.  If you keep a plastic pitcher under the sink, every time there’s clean water that would otherwise be poured down the drain, dump it in the pitcher.  When full go out to your tomatoes or any other plant, and pour it on.

Autumn Sage for All Seasons

habit
Autumn sage matures into a large plant that reaches three feet in height and width.


When nature gives you lemons, it’s time to make lemonade.  There’s nothing more powerful than drought to bring some really great plants front and center.  In lieu of thirsty annuals this year, plant water-conserving perennials that live long and bloom even longer.  There is no better choice than a rugged Texas native called Autumn sage (Salvia greggii), which has become the backbone of California arid flower gardening.  It thrives just as well on the cool coast as it does the blistering low desert, proving this plant is among the most adaptable to less-than-ideal conditions throughout the southwestern states.

In the desert, Autumn sage is one of the few plants that continue blooming when temperatures approach 120° F. It is grown as a garden perennial but is technically a subshrub due to its semi-woody branches, which are key to its drought resistance.  From its twiggy framework rises fast-growing stems with small leaves that end in carefree spires of vivid blooms.

The colorful flowers of Autumn sage look pretty even in the harshest weather.

The wild species produces firecracker-red flowers that hummingbirds find irresistible.  Wild forms may be the most heat and drought tolerant because some cultivated varieties seem to be less tolerant of harsh growing conditions.  Still, quite a few cultivars have proven their worth in arid gardens, allowing gardeners to fill their beds with multicolored Autumn sages that bring vibrant movement to the yard, no matter how hot the summer.

When choosing a spot for your sage, consider its natural habitat. In the wild, autumn sage grows in open sandy or gravelly ground or on rocky cliffs and slopes, so planting areas should have full sun and soil with rapid drainage. This makes sage an ideal problem solver for hot spots and erosive ground where fertility is too low for many other species.  For best results in clay soils, amend beds with organic matter and raise the root crown a bit with rocks and potting soil to keep it above saturated ground.

BG Cactus Mix front
Autumn sage grows well in well-drained potting mix, such as Black Gold Cactus Potting Mix.

Autumn sage is also suited to culture in pots for porch or patio. Container specimens do best when planted as mature, one-gallon-sized plants, though quart-sized specimens are fine for smaller pots. Grow autumn sage in spacious, well-drained containers that allow plenty of air and moisture movement.  This reduces potential problems with root rot from wet soil.  The ideal potting soil for this sage blends equal parts of Black Gold Cactus and Succulent Mix with Black Gold Natural and Organic Potting Soil with Resilience.  This combination allows superb drainage during the cooler wetter parts of the year, while retaining enough moisture in hot, dry months to ensure rapid growth and continuous bloom.

Autumn sage is ideal for bringing hummers in close without the hassle of feeders.  Stud your deck with different colored varieties. Consider more unique selections, such as ‘Hot Lips’ with its bicolored blooms of hot pink and white.  Other forms come in colors such as snow white, purple and various shades of red, pink, magenta and coral.  There’s no need to know the varietal names because these plants start blooming so young you can select them by flower color.

Two things keep Autumn sage blooming its heart out for months on end.  First feed with a fertilizer formulated for garden flowers.  Second, nip off any flower spikes that are through producing buds.  This prevents seed development, which can slow new bud formation.

salvia g red
Hummingbirds can’t resist this plant and they will often nest close by.

Drought can be a challenge to traditional gardens and plants, but it’s a great opportunity to become familiar with new species for your landscape.  As the lack of rain demands wild plants in the West to change their habits, we must change ours too, and by planting smart we’ll turn sour garden lemons into the sweetest most colorful lemonade.

Designing Small Garden Spaces

Uniformly colored patio furniture that echos a garden’s color theme is perfect for a small garden.

The good news is that your landscape is small. Less outdoor area to maintain means more free time for you and your family. You will save a lot of money on water and the cost of hardscaping. Your choice specimen plants will be noticed since they aren’t competing with swaths of other plants, and any decorative items you place in the garden will take center stage.

But, there are still two major issues facing your landscaping plans. The first is creating privacy and the second is effectively designing your small garden to make it feel more spacious.

Designing for Privacy

If designing for privacy, choose well when selected screening plantings for small garden spaces. Some trees grow quickly and seem ideal for hiding the neighbor’s neon swing set, but if the screening plants grow wide, then you’ve lost a large chunk of your own backyard. Look for evergreens that are narrow and tolerate shearing.

1-17
Large-leaved plants are placed in the foreground and fine-textured plants in back, making this small garden space appear deeper.

When a space is too small for large trees, vertical lines can be accomplished by erecting arbors, obelisks, pergolas, or other supports, for evergreen vines. Drawing the eye upward in the landscape takes away from the confines of modest space. Another advantage of placing an arbor covered with a vine along or over a deck is blocking the neighbor’s view when you want to sit outside. Privacy goes both ways.

Add Walls and Walkways

Try to tie all of the elements of the garden together to extend the space. If you have brick walls, use brick walkways. When grouping containerized plants by using one type of material (such as terracotta), the uniformity will create harmony. Continuity is soothing in a small space.

Plant Accordingly

Many good landscapes lose their sense of balance because of the size of the plants, accents, or furniture placed within them. Large trees or oversized pots will dominate a diminutive garden. One dramatic statue becomes a focal point, but many become a crowd. Less can be more.

Search for scaled-down cultivars of the plants you love. Dwarf trees, miniature conifers, petite bulbs, and Lilliputian groundcovers can fill a limited space with delightfully contrasting texture and color. The only thing to remember when admiring an undersized plant with an innocent-sounding scientific name ending in ‘Nana’, is that depending on the plant, the smallest selection could still be pretty big.

Use plants that do double duty. A single daphne can perfume an entire landscape in late winter and is an attractive evergreen shrub fulfilling two jobs. Woody herbs make aromatic small shrubs and groundcovers. A hedge of blueberries gives seasonal interest with late-winter flowers, delicious summertime fruits, and add brilliant fall color. Small fruiting trees, strawberry groundcovers, and a trellis draped with raspberries or grapes will enable you to have your landscape and eat it, too.

1-IMG_4575
Hiding parts of the garden with plantings and structures creates mystery in this section of the North Carolina Arboretum in Asheville, North Carolina.

Consider a Water Feature

If you want a water feature, a simple recycling fountain can add the white noise of splashing you need to drown out the drone of street sounds. A bowl of goldfish in a shady nook, a tub filled with hardy water lilies, or a narrow stream bubbling along a garden path are miniature projects that embellish your small landscape.

Maximize Space

Utilize every square inch. Garden all the way to the front curb. If the only sunny spot for your bush tomatoes is at the mailbox, plant them there surrounded by purple basil, and then run a cucumber up the post for salads. Train decorative vines up the house or espalier small trees against the foundation. Fill your patio with containers. Hang baskets from the eaves. Window boxes and deck-railing planters give you even more room to grow. Ensure container and small-space gardening success with a mix that will save you watering time and worry, such as Black Gold® Waterhold Potting Soil (with Resilience™).

When your lot is long and narrow, try staggering your vertical lines from trees, structures, and statuary to create mystery. Your goal should be to screen parts of the landscape so that a visitor cannot see the entire garden upon first arrival. Curved walkways, prominent screens of evergreens, and sections of fencing increase the adventure of discovery of what awaits.

Depending on your neighborhood covenants, you may or may not be able to fence off your property. If you can fence, choose a style that will complement the house and still do what you need. As the old adage goes, “Good fences make good neighbors.”

The visitor's eye is directed upward by narrow conifers and the peaked roof line of the arbor in this intimate area at the Sarah P. Duke Gardens in Durham, North Carolina.
The visitor’s eye is directed upward by narrow conifers and the peaked roof line of the arbor in this intimate area at the Sarah P. Duke Gardens in Durham, North Carolina.

Consider the View

Do your neighbors have a spectacular specimen tree, water feature, or garden view that you would enjoy seeing every day? This principle of “borrowed view” will create the illusion of enlarging your property by extending the line of sight into the landscape beyond. In this situation, you would not want to totally screen your property. A break in the hedge or a window in the fence may be what you need.

A few tricks of perspective will allow the garden to appear larger than it really is. Make your walkways wider as you enter the garden, then narrow the path toward the end to create the illusion of depth. Use broad-leaved plants close to the entrance, then scale down foliage size through the landscape until your tiniest leaves are at the back of the property.

Ensure small-space gardening success with a mix that saves watering time and worry, such as Black Gold® Waterhold Potting Soil.

Placing a landscape on a diagonal line adds interest. Varied levels with a series of stairs in the landscape can create the feeling of greater distance traveled. Try a folly at the end of a path that looks like a doorway into another garden when it is really a mirror reflecting your own garden.

For depth, use colors that recede, like blues and purples, not only in your flowers, but also in your painted hardscaping and seating. To make an unsightly item disappear, paint it flat black or dark brown, if in a mulched bed, or deep forest green, if around evergreen plantings. On the other hand, if you want to brighten a dark corner of the garden, a wash of warm bright color or white paint will definitely draw attention to that area.

The advantage of gardening in a small space is that you will probably spend less money than landscaping a large property, but every decision will have a big impact. Each corner of the property will be closely examined. Your plants must be carefully chosen. Attention to detail is critical. Keep it simple.

Raised Bed Rotation and Rejuvination

Raised Bed - Mike Darcy
All raised beds require crop rotation and soil replenishment to avoid the accumulation of soil-borne pests and diseases.

Mothers always admonish us “not to hang out the dirty laundry”, which is code speak for keeping unpleasant family secrets out of neighborhood gossip.  This same problem is afflicting the raised bed garden world where nobody wants to hear the downside of these tiny plots of food plants.  At the heart of it is the very old concept of crop rotation. Even the ancients knew that crops grown in the same place year after year developed big problems without rotation.

Why Rotate Crops?

The science is quite simple because diseases and pests can accumulate every year you cultivate a small vegetable garden.  It may not be visible the first or even the second year, but by year three it can strike with a vengeance.  This is how long it takes for your soil to foster a killer dose of pests and pathogens.

Imagine a 4-foot-by-8-foot planting area (the size of a typical raised bed) that you grow tomatoes in year after year.  A mature tomato can occupy half that square footage, with its roots fanning out over the area underground.  To properly rotate your crops, you must not grow tomatoes in the same place you did the previous year.  In this case, the only choice is to plant on the opposite end of the raised bed.  That leaves only two possible spots for the tomatoes.

Farmers know to rotate their fields over four years to ensure healthy crops.  That’s four entirely different growing areas for crops in the course of four years; three years with the crop being grown in a different spot and a fourth year for a given growing area to lay fallow to “rest”.  But farmers have space for rotation. What about home gardeners working within the confines to small raised beds? Without sufficient space for rotation, the results can be devastating.

nematodes 062
You cannot miss the damage caused by root knot nematodes. Roots appear swollen and distorted.

For example, a microscopic pest called root-knot nematode often strikes when tomatoes are grown in the same location or very close-by year after year.  This pest is invisible to the eye and is common to most soils but present in such small numbers that it doesn’t cause serious problems.  But when tomato crops are not rotated, these nematodes multiply to fatal proportions. As a result, tomato plants begin to turn yellow and die because too many nematodes have invaded their roots.  No matter how much you water or fertilize, nothing will change this downward spiral.

You won’t know the cause until you pull up an ailing or recently deceased plant to see first hand what the roots look like.  Root-knot-nematode-infected roots look bizarrely knotted and swollen and are obviously unable to support the plant.  As tomato fruits mature and heat stimulates growth, the plants can’t keep up. There is no cure for badly infected plants, and fear of this organism is why gardeners often plant big African marigolds (Tagetes erecta) around food plants because it is known to discourages nematode populations.

Replace Old Soil

Rotation is key, but soil replacement can also work wonders towards keeping raised bed problems at bay. Replacing your garden or potting soil with fresh every other year will help discourage the accumulation of diseases and pests, such as the root-knot nematode.  Quality garden soil like Black Gold Garden Soil is rich, fertile, and fresh.  It reduces the need to rotate crops, will fortify your garden to increase yields, and rid your raised bed of “dirty laundry” that could mean the downfall of your summer garden plantings.

The more cautious your are about ensuring healthy soil for your raised garden, the better. For example, if you move into a new home with an existing raised garden, it’s best to assume its potting soil is nutritionally exhausted and that crop rotation has not occurred.  Plus, it’s just a good idea to replace the soil anyway because the removal process may give you clues to other problems, like drainage or the presence of aggressive underground grass roots.  Excavation will help you discover if there are problems lurking below.

Small gardens don’t have to be hotbeds of pests and diseases, if you know how to compensate with rotation and garden soil replenishment. Rotate your crops liberally (preferably on a 4-year cycle), replace old, spent soil, and reap the harvest!