Articles

Late-Summer Vegetables to Grow From Seed Sowing

Late-summer and fall vegetables grown from seed.

It’s absolutely counterintuitive to plant anything in August or September, but intuition is not always right.  Go against your instincts, and sow cool-season seeds right now.  Do it soon, and you’ll get your fall and winter garden started just in time.

Starting Fall Vegetables

If you’re a beginner and have never grown food outside the strict summer garden, now is your chance to give it a try.  Sowing now takes advantage of the natural transition toward ever shortening day length and cooler temperatures.  In the hot Southwest, frost holds off until later in the season, so a fall garden can often feed a family deep into the winter.

Drip irrigation is a great way to keep seedlings well watered.

Though the summer food plants are in decline, many are still producing. Once a plant stops or dies, take it out promptly, and start sowing leaf and root crops like kale, carrots, beets, and chard. All of them can be sown directly into garden soil in late summer when it is warm enough to stimulate germination. The transition will be more gradual than spring planting because soil is prepared incrementally as space is freed up by plant removal.  For example, after an aged squash dies back or mildews, simply take it out and sow cool-season seeds in its place.

BG_EARTHWORM_8QT-FRONT
Earthworm Castings are high in nitrogen and great for feeding fall greens.

Sowing Fall Seeds

Every time you take out a dying summer plant, prep the soil before sowing because that soil has consumed much of its spring fertilizer and amendments.  Lots of rich humus is needed to drive leaf- and stem-producing edibles.  This requires amending the area to about six inches deep with a claw or fork to open the ground, then generously working in Black Gold Garden Compost.  Don’t compact the soil, leave it fluffy so the seeds settle down into the moisture-retentive humus.  Lightly cover seed with compost or sprinkle Black Gold Earthworm Castings on top of freshly sown seeds to introduce fresh microbes and micronutrients.  (Fall seedlings can also be started indoors. Click here to learn how.)

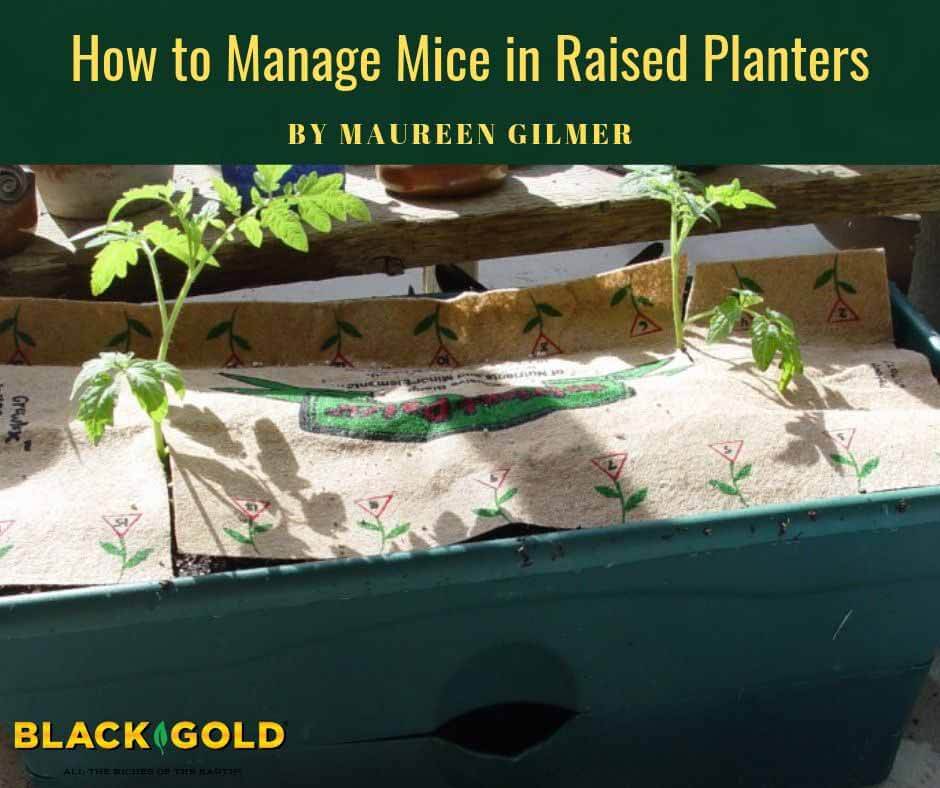
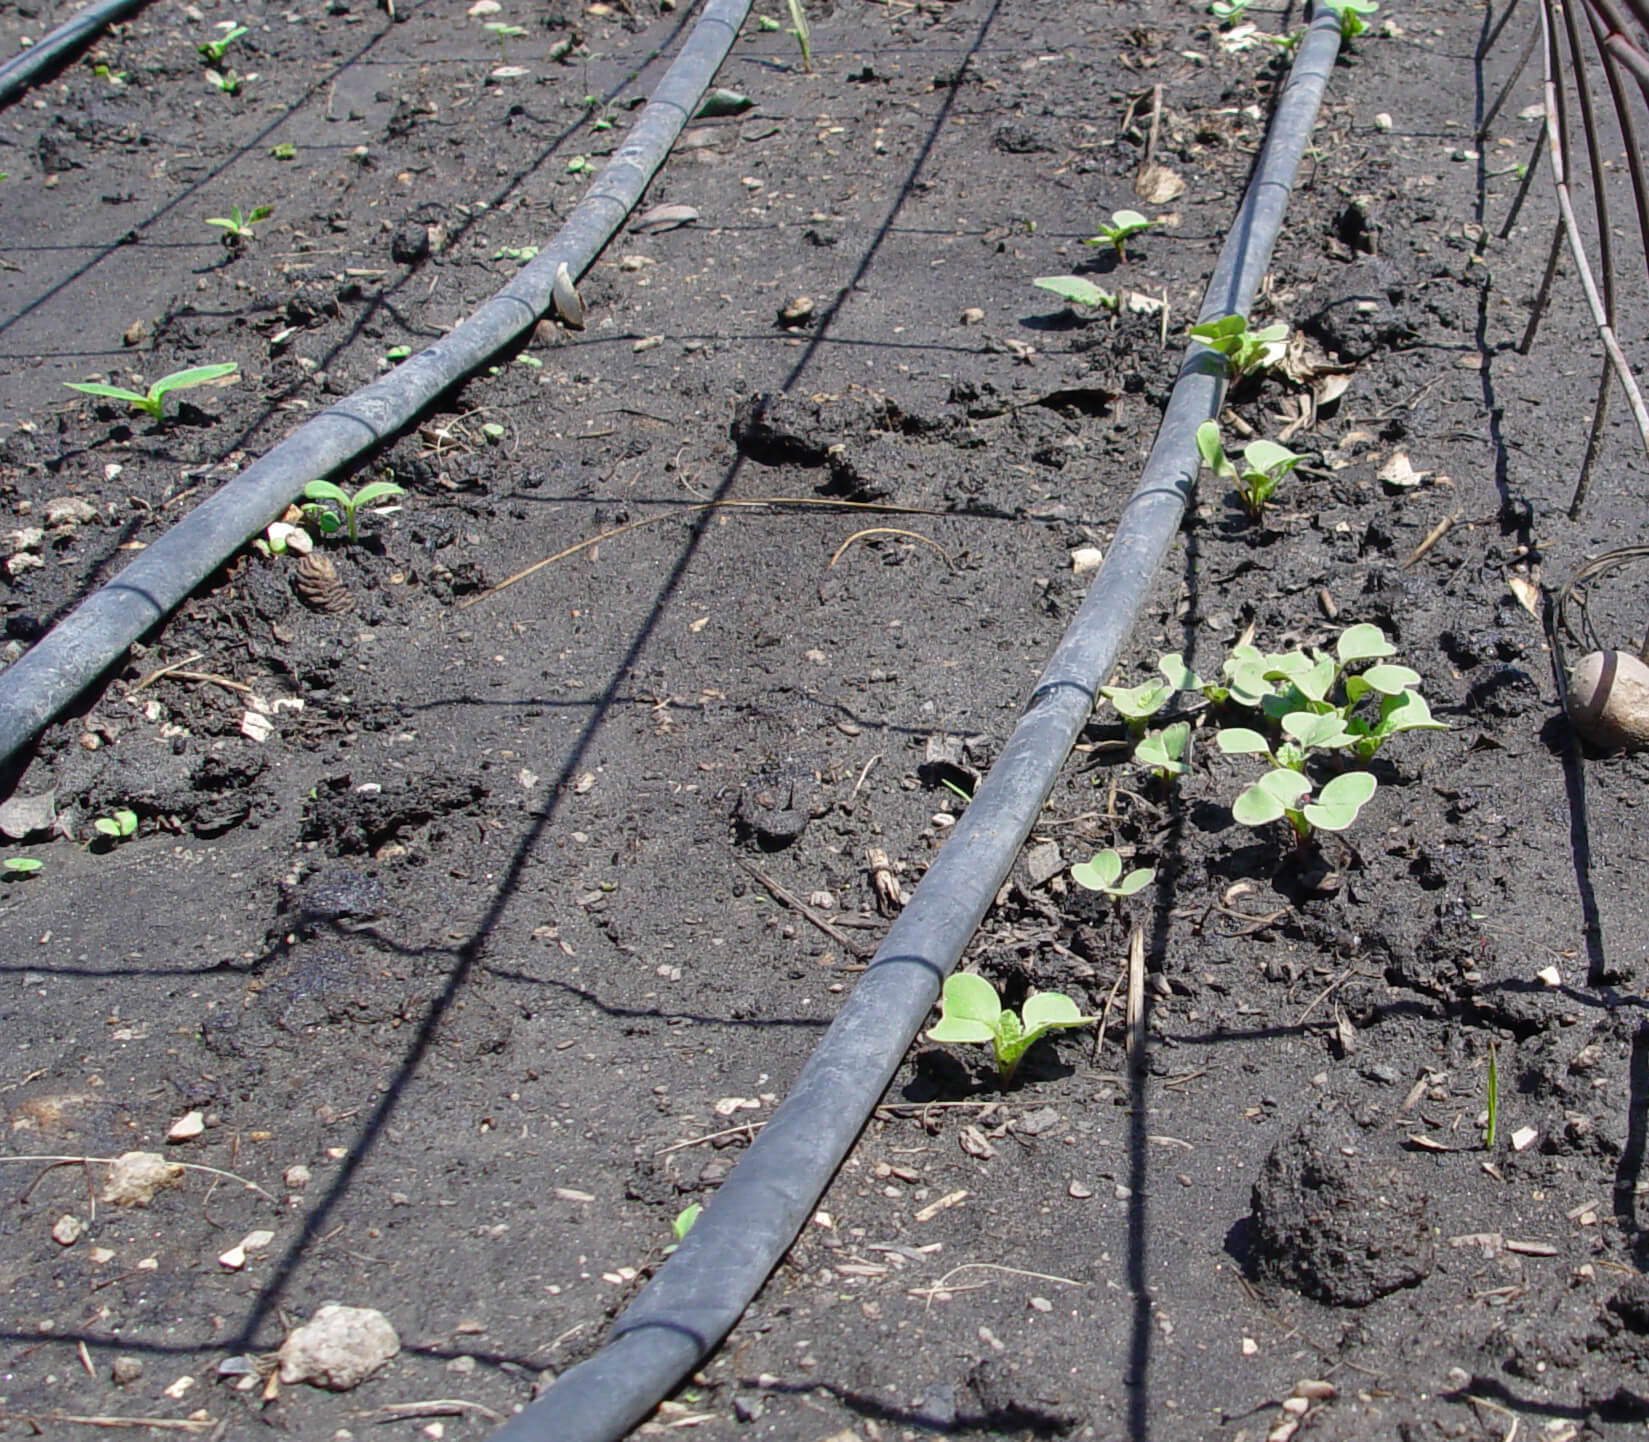
The biggest challenge in getting the fall garden started is keeping the seedbeds adequately moist.  An old method uses burlap laid right over the sown seedbed and pegged down on the corners.  Water is applied right through the burlap which prevents dislodging the soil particles and acts like a mulch to keep the seed bed from drying out in the sun.  Burlap is moved only after the little green shoots appear.  A heat wave at this stage may require little burlap shade structures to shelter the seedlings until they harden off to direct sun. Drip irrigation is a great way to keep plants well irrigated once seedlings have popped up from the ground and the burlap is removed.
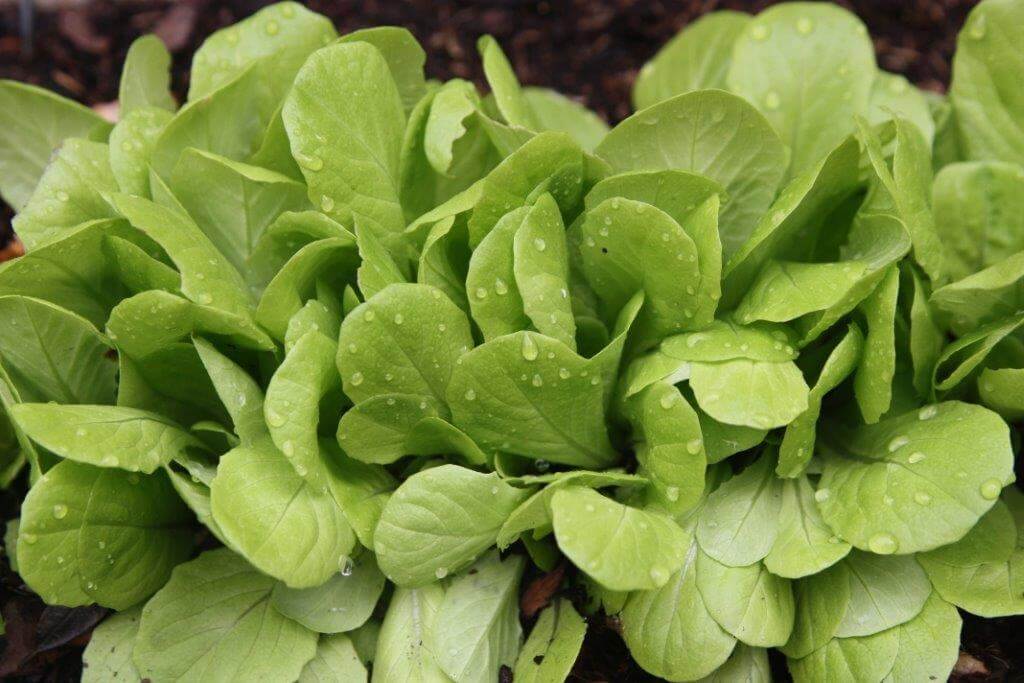
Choose Leafy Greens

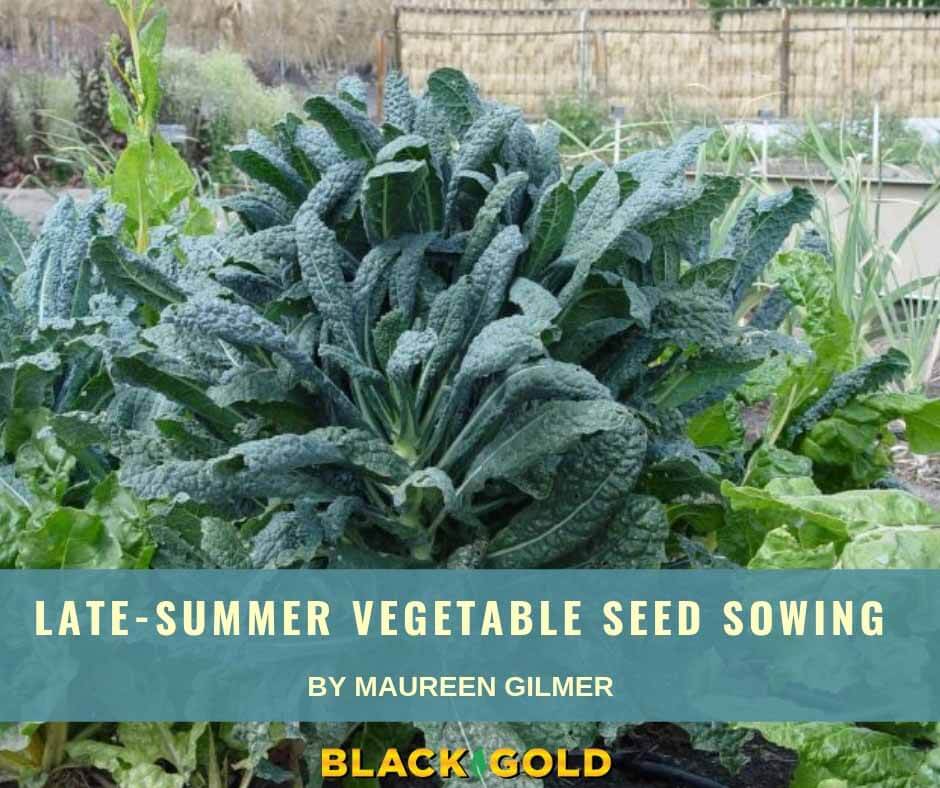
Don’t overlook the ability to sow cool-season leafy vegetable seeds everywhere you can.  Sow beets in the window boxes, colorful Bright Lights chard on the patio, but make sure you leave plenty of room for Dinosaur, or ‘Lacinato’, kale.  This big burly kale from Italy takes more heat

and cold than any other.  Though rather bold looking, it’s great eating because the best-tasting leaves are the old ones!

Cut-and-come-again lettuce is the perfect cool-season crop for fall and winter gardens.

Keep in mind that nitrogen is important to any plant that produces an edible stem or leaf.  Puny growth is often due to nitrogen depletion.  Slow growth may not happen all at once, but you may see a reduction in plant size by late fall or early winter.  Concentrated liquid fish fertilizer is the best organic nitrogen source for the long fall and winter growing season in the West.

How to Manage Mice in Raised Planters

Young tomato seedlings in my Grow Box  – note the water-fill opening and mouse access on front.

As the heat of “dead summer”  begins its slow ebb into fall, it’s planting time in California and the Southwest.  While most folks across the US plant in spring, here the mild fall is our second growing season for food crops.  What we grow now feeds us into the holidays with roots and greens and maybe even squash or peppers with the right system and climate.  I grow many ways, in raised beds with row covers, in the greenhouse and out in the open air, depending on the season and crop.  This allows me to compare the methods for different crops at different times of the year.

mature
By June, my tomato plants were healthy and happy!

Planting Grow Boxes

Last year I tested Grow Boxes in the greenhouse attached to the south side of my home.  With such low humidity in the desert, these boxes with their 4-gallon reservoir keep plants far better hydrated than any other method.  The box is designed so plants produce long trailing roots that dangle into a large water reservoir sucking up all the moisture they need rather than being limited to watering times.  Last year I planted the boxes with tomato seedlings in February when high UV in the desert allows greenhouse growing in the high desert and year around in the low desert.

I selected ordinary tomato varieties to evaluate how well the boxes work here.  Because indeterminate tomato varieties are long blooming, I wanted to determine if my tomatoes could indeed become perennial and produce year around without frost.  I was thrilled to find the seedlings literally exploded out of the boxes and never stopped growing or producing new fruit until that sudden August decline.  The tomato plants quit taking up water, became discolored and generally failed for no particular reason.  And whenever I don’t know the reason, my mentor always advised, “dig a hole”.

Grow box Sept
Grow box with tomato roots

Managing Mice in Grow Boxes

The cause was revealed when I disassembled the boxes to take my first glimpse at the roots that should dangle down into the water reservoir.  They were gone!  I discovered this was due to a design flaw of the Grow Box: reservoir accessibility to mice in my greenhouse during our blistering desert summers when they are keen on cool, moist places.  The Grow Box opening for water access is easy for any small rodent or insect to enter.  When water was low or dry in between fill-ups, the mice entered the reservoir and literally ate all the dangling roots, explaining why my tomatoes suddenly quit taking up water.   We finally captured the mice, but there may be more in the future.  I’ll be fashioning a hardware cloth cover for the fill holes of my six Grow Boxes to keep smaller creatures out, or the very same thing will happen again in this rodent-rich desert, particularly if grown outdoors on porch or patio!

roots consumed
Grow Box with tomato roots eaten by mice

This year I upgraded and replaced the potting soil with Black Gold Moisture Supreme Container Mix with RESiLIENCE®, which I hope will enhance the wicking crucial to the function of the Grow Box.  This year I will test fall-planted vegetables in the greenhouse Grow Boxes to learn whether the fruit will ripen in November, despite cooler weather and shorter days. Only testing will prove whether plants that require pollination and long, hot days to ripen can be coaxed to fruit in the short, dark, cool winter.

Here in the desert, and everywhere else that is difficult to grow things, these quasi-hydroponic Grow Boxes are an ideal way to keep plants fully hydrated and healthy.  They are a useful solution to grow efficiently in drought.  And now with Moisture Supreme, they will be better able to take the heat, and perhaps I will finally learn whether or not indeterminate tomatoes can indeed be grown year round in my greenhouse.

Dealing With Pacific Northwest Drought

Mike Darcy’s garden in happier days.

Here in the Pacific Northwest, we have had a summer with some of the highest temperatures and least rainfall on record. I believe that we have had more days with temperatures over 90 degrees F since weather temperatures have been recorded. While gardeners here often say we are in a zone of “winter wet and summer dry”, we certainly do not expect the summers to be this dry. Furthermore, not only were the days hot, the night temperatures did not cool down as usually occurs in the summer.

IMG_1444
By August, many plants had leaves that had been scorched.

Garden Drought Stress

As a result of the heat and drought, many plants suffered. Plants were wilting even though the soil was wet as it was so hot for certain plants that their roots could not take in moisture to supply the leaves and the leaves wilted as though they did not have adequate moisture. In my own garden, I would water plants in the morning and see them wilting by noon. I would check the soil and it was moist. As plants stressed and leaves wilted, the leaves would often scorch or become sunburned. It became a constant effort to keep the garden looking good and with garden tour groups coming for a visit, I felt it was imperative to keep my plants looking as good as possible.

Since we do not usually have summers like this, many gardeners including myself had planted many plants that require more cool and moist conditions. Hydrangeas, rhododendrons, and azaleas are mainstay plants in many gardens and these are all prone to heat stress. By August, many plants had leaves that had been scorched,

Coir naturally holds water at the root zone, so it proved to be a good amendment for the unusually dry season.

Garden Drought Stress Solutions

In my garden, I also have many plants in containers and having used Black Gold Natural & Organic Potting Soil proved to be a huge benefit. As the summer heat continued, I used Black Gold Just Coir as a top mulch in some of my pots and this was an excellent mulch to help the soil retain moisture. I have learned that coir, which is coconut pith, has amazing water retaining capabilities. In several of my hanging baskets, I had used Black Gold Cocoblend Potting Soil at the time of planting and this was a tremendous asset in keeping these containers from drying out with the summer sun, heat and sometimes dry wind. Black Gold Cocoblend Potting Soil was particularly effective with the fuchsias and begonias which need plenty of moisture and even in September, these plants were full of flowers and looking great.

Mulching our plants is something we can often forget but the benefits of mulch can be enormous. Mulching helps to conserve water and we are all learning that water is not the unlimited resource that it has been. As an added benefit to mulching, when I am planting new plants in the soil, I regularly use Black Gold Soil Conditioner. I mix it in the soil around the root zone and always work some into the top 1-2 inches of soil.

IMG_1440
Rhododendrons have suffered badly in the unusual heat and drought of the season.

This was the summer when gardeners began to think about what plants they were planting and what location they were in. I learned that my hydrangeas need a little more shade to look their best and I will be doing some transplanting this fall. There is also a trend to use more plants that have low water requirements like Arctostaphylos (Manzanita), Ceanothus, Mahonia, and many others that have good garden appeal.

We need to remember that in nature, plants get mulched naturally by their leaves, flowers, and stems. In many home gardens, the area under plants is constantly being raked to keep it clean and ‘looking neat’, but we should not forget the role mulch plays in the health of a plant. Learn to know your plants, observe them, and my guess is they will ‘tell’ you if they need a mulch.

Fun Fall Decorating with Pumpkins

This elaborate collection of pumpkins and gourds annually graces Lisa and Jeff Tice’s home in Greenville, SC. (Photo by Marian St Clair)

Once upon a time, pumpkins only appeared briefly as round, orange Jack-o’-lanterns for Halloween night, as the tasty main ingredient in a traditional pie at Thanksgiving, or were mentioned in passing as a potential means of transportation and affordable housing in children’s fairy tales. Today, however, pumpkins have quickly transformed into the hottest decorating item for fall.

DSC_6170 - Copy - Copy
This colorful pumpkin planter is the creation of Marian St Clair of Greenville, SC. (Photo by Marian St Clair)

Not bad for a native New World fruit (no, a pumpkin isn’t a vegetable). Pumpkins, Cucurbita pepo, and C. maxima, are members of the squash family, which includes juicy cucumbers, loofah sponges, tough-skinned winter squash, and gourds.

Carved Pumpkins

The reason for the pumpkin’s surge in popularity is its good looks and long durability, potentially lasting weeks in outdoor arrangements thanks to its colorful hardened outer skin – if it has been cured correctly. This amazing resilience, plus the wide variety of sizes, shapes, and colors now being grown for both crafters and foodies, provides homeowners and professional designers with quite a bit of inspiration.

For those who love the time-honored ritual of carving a pumpkin, there are carving kits complete with specific tools and traceable patterns, and many how-to videos will help you create something more dramatic than the simple triangular eyes and noses of the grinning jack-o’-lanterns of yesterday.

1-IMG_4824 - Copy - Copy
Master pumpkin carvers display their amazing skills at the North Carolina State Fair in Raleigh, NC each October.

Painted Pumpkins

If you have a really steady hand, a pale three-dimensional face can be artistically carved into a pumpkin. Though removing the outer skin may cause the pumpkin to deteriorate more quickly, the inner flesh is firm enough to hold up for several days to a week if outdoor temperatures are cool and you keep your work of art out of direct sunlight. Part of the fun, however, may be watching your sculpture transform into something really ghoulish as it disintegrates.

Painting pumpkins has become a recent popular trend. You can spray paint them solid black, white, or even gild them in gold, silver, and bronze to match your other porch embellishment. Stenciling designs, university logos, and your house numbers with acrylic paint onto a pumpkin should last awhile, as the pumpkin’s outer shell hasn’t been compromised. Having your children or grandchildren paint faces on several smaller pumpkins, rather than carve them, is another great way to enjoy their precious creations a little longer, too.

1-DSC_0032 - Copy - Copy
Small painted pumpkin faces for sale at the North Carolina State Farmer’s Market in Raleigh, NC.

Small painted pumpkin faces for sale at the North Carolina State Farmer’s Market in Raleigh, NC. Pumpkins can also be utilized as containers. Cutting off the top, then scooping out the seeds and most of the inner flesh provides a temporary seasonal pot for mums and pansies. Remember that if you plant directly into the fruit, moisture in the potting medium could cause the pumpkin to rot quickly; but, if you simply set an already potted plant into the open shell, it may hold up better.

Choosing Varieties

Since there are so many varieties of pumpkins on the market, grouping them in natural arrangements is another way to showcase your front door for fall. Whether you simply line pumpkins up the stairs or assemble them around your threshold, their size, shape, and color will certainly make a spectacular statement.

StateFairPumpkins
The giant pumpkins at the North Carolina State Fair in Raleigh, NC are worthy of becoming Cinderella’s coach. (Photo by Celeste Sagi)

For more inspiration, visit your local farmer’s markets, botanical gardens, and zoos where grand displays of pumpkins are popping up everywhere. If you want to try your hand at growing your own pumpkins for next fall, here are a few growing tips:

Growing Pumpkins

Pumpkins need a long growing season, often requiring over 100 growing days to transform from flattened seed to fully mature vines, producing thick-skinned fruits to cut for display.

They also require full, direct sun, and they need lots of room to sprawl, with vines easily covering an area 20-feet across. Pumpkins don’t like cold soil, so direct plant seed once the soil temps are closer to 70-75 degrees F.

Starting seed indoors can be tricky, as pumpkin seed germinates quickly and seedlings get leggy fast, so they are difficult to transplant with success.

The reasons pumpkins are traditionally planted on a hill is that mounded soil heats up quickly and drains well. Black Gold® Garden Soil would be a good choice for creating these raised planting areas in the home garden.

Pumpkins are greedy feeders, needing additional fertilizer and supplemental watering in droughty summers. Here is another reason why incorporating Black Gold® Garden Soil into the planting area would provide essential organic matter to hold moisture, while at the same time helping feed these hungry plants for up to six months.

When watering your pumpkin patch, try to keep water off of the foliage to help prevent foliar diseases, instead deliver it down to the roots where it is needed. Soaker hoses are perfect for this.

Harvesting Pumpkins

The deep color change is a pretty good indicator that your pumpkins are getting ready to harvest. Another indicator is that their supporting vines begin to turn brown, but the best test is when you can no longer easily puncture the outer skin of a pumpkin with your fingernail. (Some pumpkins are more soft-skinned, but overall this is a good test.)

You may find that you are developing impatience to pick and enjoy your pumpkin crop, feeling much like Linus waiting for the Great Pumpkin in the Peanuts comic strip, but resist the temptation to cut them too early. Pumpkins last much longer when harvested after they are fully mature. Then you will be able to enjoy them longer for all of your fall decorating needs.

Mounding Garden Beds For Succulents Out West

These linear plantings of agave and cacti are aligned perpendicular to the slope to check the speed of runoff.

Love succulents but hate your clay soil?  Solve it by creating a simple mound of quality soil that ensures your finicky succulents will be happy with perfect drainage.  Under these conditions, your plants won’t suffer waterlogged roots, and rotting will be a thing of the past if you irrigate with a slow drip system.

A mound with all the mistakes: Pointed top, steep sides and dry sandy soil with no cohesiveness that will melt in the first hard rain.
A mound with all the mistakes: Pointed top, steep sides and dry sandy soil that will melt in the first hard rain.

Incorrectly constructed mounds become failures for a variety of reasons.  Most importantly, the soil won’t stay put and soak in when you water, and improper irrigation can leave conditions way too dry, even for succulents.  These problems are due to the shape of the mound; if made too steep on the sides, the water runs off before it can penetrate. Effective succulent mounds need to rise up gradually, provide that flat place on top, and drop down just as gently on the other side.

Sizing Your Mound With Math

A mound is composed of three plains: The upslope, a level zone along the top, and the downslope on the other side.  How high you go is dictated by how much space is available.  The slope is governed by the angle of repose, which for traditional plants must be no more than 30% if the water is to penetrate.  That’s a one-foot “rise” in elevation for every three feet of length or “run”.

Example:  6′ upslope distance + 3′ top of mound + 6′ downslope distance = 15 linear feet

diversity
To create a standout succulent mound, use a wide range of colors, sizes, and textures to give it endless visual appeal.

This equation limits the width of your hypothetical mound to 2 feet in height. Once you calculate its dimensions, do the same for the length.  Then use length x width x height to find the overall volume of the proposed mound in cubic feet. The largest bag of Black Gold Moisture Supreme Container Mix contains 2 cubic feet of material, so either make the whole mound out of this mix or blend it 50-50 with natural soil. Aggregate can be added to increase drainage.

Grading Your Mound

Where soils aren’t heavy clay, the container mix is an extender and to better integrate local soil flora into the mound.  Mix very well with a tiller or fork, then gently grade the mound into a graceful shape without broken curves or undulations. When grading out your mound, keep the soil damp and lightly compact the surface so it holds together.  Use boulders where conditions are irregular or create fields of smaller attractive pebbles to hold ground or control runoff.

Succulent Planting Strategy

angle of repose
Planting on this slope features larger agaves and masses of small succulents to hold soil against erosion.

Water flows downhill picking up soil particles with speed. To keep this from happening plant against the direction of the water flow.  (This is what wheat farmers do to minimize erosion; they align their planting rows perpendicular to the natural flow of water.)  Use small, densely planted succulents for steeper spots then irrigate with micro-spray irrigation to allow roots to create a network better able to hold the slope.  Larger succulents, like aloes, further guide runoff away from more vulnerable locations with a single drip emitter.

A mound for succulents doesn’t need to be as high as those for plants with deeper root systems.  In most cases, they are fine with just one foot of elevation to keep plants and root crowns high and dry.  When the mound is in and fully planted, finish it off with a fine layer of stone or pebble that blends in with your cobbles and boulders for a perfectly designed display garden you’ll be proud of.

Traditional Fall Harvest Pies with a Twist

Savory tomato pie is a perfect side for dinner or addition to breakfast.
Savory tomato pie is a perfect side for dinner or addition to a holiday breakfast.

Unlike the cool berry and citrus pies of summertime, pies made with fall fruits and veggies are warmer, spicier, and richer in flavor. Choosing a dessert to make for holiday gatherings can be a struggle when one family member craves a deep dish apple pie with a flaky crust and gooey interior, perfectly complimented with a generous scoop of vanilla ice cream, but another guest insists on an old-fashioned pumpkin pie, aromatic with cinnamon, ginger, and nutmeg, and topped with a dollop of whipped cream. Continue reading “Traditional Fall Harvest Pies with a Twist”

Trick-or-Treat Gardening

Craig Venus Fly Trap
“Oh, noooo!” Plants are a great way to add to the Halloween fun!

The gardening season we experienced this past summer and early fall has been one of the best that I can remember. Vegetable gardens performed beyond the expectation of most gardeners with tomatoes, especially some of the long-season and late-ripening varieties, benefiting from the warm summer and fall. However, this is October, and it is time to say goodbye to summer and hello to autumn and Halloween. Continue reading “Trick-or-Treat Gardening”

Tips to Make Flower Gardening Easier

IMG_8295 Dahlia Pooh
Staking dahlias at planting time will support plants all season and keep the tuberous roots from being pierced by stakes.

When visiting other gardens and with other gardeners, I find that people enjoy sharing their tips to make gardening easier. Even in my own garden, I often realize there is a better and quicker way to perform a particular task, and I cannot imagine why I had not thought of it before. Particularly on my radio program, when I ask listeners call in with tips, I almost always learn something new. Even though gardening is very enjoyable, I think gardeners are always on the lookout for a easier and quicker way to get something done.
Continue reading “Tips to Make Flower Gardening Easier”

Cool-Season Vegetables for Western Gardens

Bottles create a unique raised container for ruffled kale, the new "super food".
Immersed bottles create a unique raised container for fall kale, the new “super food”, and chard.

While frost strikes early in the mountain states, the rest of the West is in a state of flux.  Heat-loving summer vegetables may be past their peak with production in decline, but rather than watch this process of attrition, consider starting anew with the cool-season leaf and root crops we struggle to grow over summer.

The Best Western Cool-Season Crops

Our dry heat makes cole crops, such as kale, cabbage and broccoli, wither, and those that can withstand the onslaught become a Mecca for wooly aphids that lodge in the nooks and crannies of leaves and flowers.  Yet when they are sown in August, these seedlings thrive in the warm ground and come to maturity in mid- to late-fall when cooler temperatures limit aphids and other pests.  Even better, cole crops actually taste better after a frost!

Large pots on a sunny porch or patio can be packed with greens for easy picking.

The same is true for Swiss chard, lettuce, arugula, and other tender greens that bolt with the early summer heat and develop bitter flavors.  Sow these at summer’s end to yield salads that are lush and tasty until frost cuts them down.

Root crops are also ideal for cool-season growing. Of these crops, beets are a stellar performer because the leaves are edible as pot or salad greens before the root matures for harvest.  Other root crops include carrots, turnips, and radishes.  Enormous Asian daikon radishes are good root vegetables for opening up clay soils with their large powerful taproots. Some varieties are spicy while others can be surprisingly crisp and mild.

Preparing the Cool-Season Garden

Now is time to prepare for your own cool-season vegetable garden. The first step is to create space for these cool-season crops.  Remove any warm-season vegetables that are no longer productive, especially large, ground-covering vines that take up a lot of space.  If green beans passed their prime, let them go too.  Where these vegetables grew, the soil will require fresh fortification with quality amendments and organic fertilizer to replace what consumed by microbes and summer crops.

Root crops grow extra large in light soil, preferably sandy loam.  Unfortunately many gardeners have earth that is predominately clay, so unless you amend this ground with organic matter, root crops won’t reach their full potential.  The best tool for this is a spading fork ideal for small spaces and spot planting by cultivating deeply enough for root crops. Double digging is also a good practice. (Read double digging article here.)

tower
A plant tower allows you to grow a wide range of greens in little space.

After removing summer plants, dig and turn the ground while also removing any plant remnants that are not decomposed. These can be deposited in your compost bin.  Then apply Black Gold Garden Compost Blend  in a layer at least 2 to 3 inches overall. It’s difficult to overdo it with compost, so be generous because the more you use now, the bigger your root crops will be at harvest time.  Turn the ground again to mix it up, then use an iron rake to break down the smallest clods and smooth the surface to make a suitable seedbed.

Growing Cool-Season Crops in Containers

Leaf crops are ideal for containers, too.  A few flower pots or more extensive troughs on the deck or patio are a great place to get started.  Don’t hesitate to begin with fresh Black Gold Natural & Organic Potting Soil Plus Fertilizer that’s fully fortified with microbes, nutrients and plenty of organic matter.  Containers are perfect for lettuce, exotic greens and kale, the new super food.  In deeper containers, sow a variety of different radishes every week over the next month. That way you’ll  have some at peak of perfection all fall for impromptu salads and dips.

Autumn is the second growing season that is too often ignored in the back-to-school rush, but now is the time to think ahead and replant with leaf and root for healthy fresh eating out West.