Articles

How Can I Keep Plants Cool During Scorching Heatwaves?

Move potted plants to cooler locations during the most dangerous periods of a heatwave.

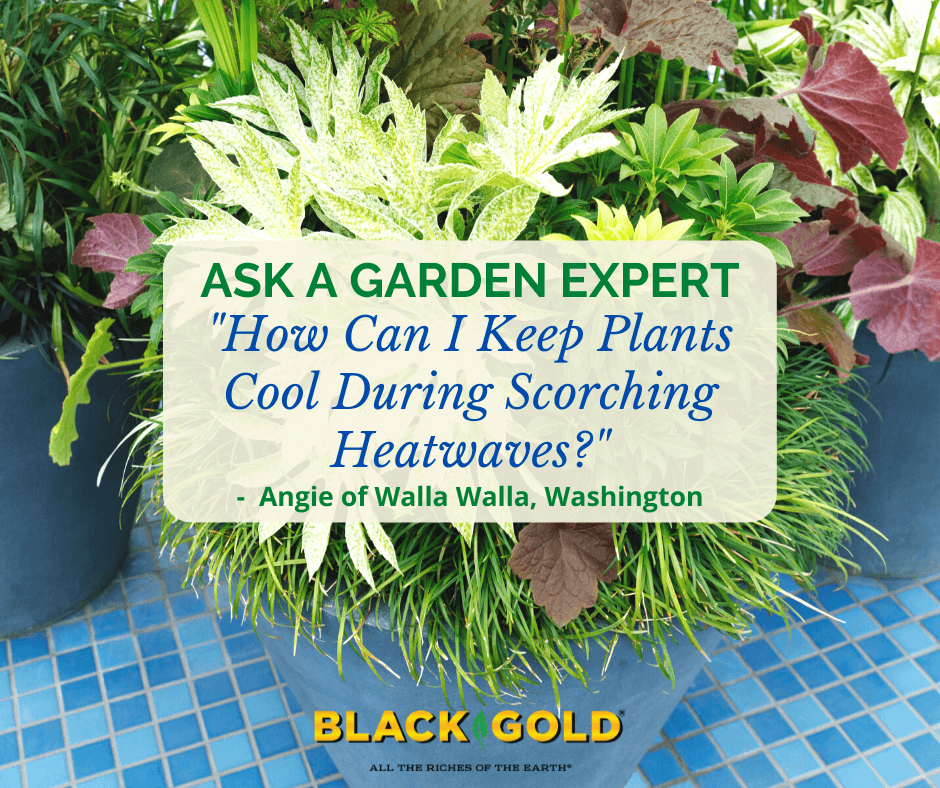
“It has been hotter than it’s ever been on record. How can I protect my plants from the severe heat?” Angie of Walla Walla, Washington

Answer: It’s scary when you live in an area that typically has mild summer temperatures, and you unexpectedly experience super high heat. Your tender plants are as used to it as you are, which means they’re going to struggle. From what I have read, your average June temperatures have highs around 80 degrees F. Being faced with temperatures well over 100 and even 110 degrees F must be really awful. Here are some ways to help protect your plants, especially those that are less heat tolerant. Specimens planted in full sunlight during the hottest times of the day (around 2:00 pm to 4:00 pm) need the most protection.

Four Ways to Cool Plants in High Heat

  1. Irrigate plants very well in the early morning. If temperatures exceed 100 degrees F, water again in the evening after the sun has fallen.
  2. Protect plants that are in full sunlight with floating row covers fitted with white shade cloth. These covers are easily placed over plants and removed. You can also simply purchase shade cloth and drape it over highly exposed plants. Both methods help. Gardeners in your area have also informed me that they have been moving patio umbrellas around their yards to shade their most prized plants. (One even said that her neighbor did not, and it resulted in some substantially fried rhododendrons and hostas.)
  3. Move containers into shaded areas or indoors during the most dangerous heat and water twice daily.
  4. Opt for lightweight, light-colored mulches. A cooling layer of straw around vegetable roots will really protect plants from heat, and long-fibered sphagnum peat moss makes a good, cooling cover for shade beds and containers. (Click here to learn about more mulch options.)

I also want to note that pets and wildlife also feel the stress. Leave water out for the animals and keep your pets from going outdoors for extended periods of time and walking on hot surfaces (grass only!). I also recommend that you read the following two garden articles for more helpful tips.

Cool Gardens: Designing for Summer Temperature Control

Nine Water-Saving Garden Tips to Fight Drought

Stay cool and happy gardening,

Jessie Keith

Black Gold Horticulturist

Why Won’t My Basil Grow Well?

“My basil always is short and flowers.  It is in full sun, and I suspect it’s too much sun.  I would like lots of succulent leaves, but the leaves are small and thin 🙁  How many hours of direct sun is enough? or maybe I should move it to part shade?” Question from Catherine of Tampa, Florida

Answer: Basil needs just a few things to really grow well. These are.

  1. Well-drained, fertile soil with a neutral pH
  2. Full sun (6 hours or more)
  3. Average water
  4. Fertilizer for vegetables and herbs (follow product instructions)
  5. Regular deadheading to keep it from flowering
Thai basil is compact, beautiful, and tasty!

Check your soil and make sure that it is porous and fertile. Amending your herb garden with Black Gold Garden Compost Blend will certainly improve its texture and quality.

There are some basils that have been bred to refrain from flowering while producing non-stop flavorful leaves. Proven Winners Amazel Basil and the tall, gorgeous, variegated Pesto Perpetuo Basil are two excellent varieties that are sure to perform beautifully and DO NOT FLOWER. I also recommend that you try Thai basil, which is pretty, tasty, and very heat tolerant. ‘Cardinal’ is a super beautiful variety that I am growing this year. You can let Thai basil flower with no ill effect. Its purplish-red flowers are fantastic and delicious!

Happy gardening,

Jessie Keith

Black Gold Horticulturist

How Do I Get My Cymbidium Orchid to Rebloom?

“I have an orchid plant that I have had for 8 years; it grows and duplicates (I had to get another container to separate it) but won’t grow the stalk to bloom. It hasn’t bloomed since the first year I got it. It isn’t the typical large rubbery leaf kind. I believe Cymbidium Orchid. When I got it, it had green flowers. It grows long leaves beautifully, but I would like to get some blooms. I have tried reducing water, changed organic potting, tried using orchid fertilizer… I even put them outside one year to try to cold shock it into bloom…After so many years you would think I would have done something right, but I have helped it grow and thrive so there is some hope. Do you have any suggestions?” Question from Amy of Chandler, Texas

Answer: As with any orchid, Cymbidiums require certain criteria to be met to flower. Timing and temperature must be managed to achieve blooming. Here are the recommended steps to take.

Flower spike initiation takes place in spring or summer when plants will get good light and a drop between warm daytime and cool nighttime temperatures. Placing the plants outside in spring after the threat of frost has passed will help, so that they can experience the warm days and cool nights for flower spike initiation. Once they have begun to set spikes, keep the plants cool (59-65 degrees F) until they begin to flower. Warmer temperatures and dry air and soil can cause the spikes to wither. Once flowering has begun, you can take your Cymbidium to a warmer spot where they can be enjoyed, if you desire. The spikes can become quite large and heavy, so support them with small wooden or bamboo stakes and soft plant ties. The long-lasting flowers can bloom for up to eight weeks. Cut them back to the base once they have stopped. (Click here for an excellent reference for Cymbidium care.) Semi-terrestrial orchids like these grow beautifully in Black Gold Orchid Mix!

Happy gardening!

Jessie Keith

Black Gold Horticulturist

How Do I Protect Apple Trees from Fungal Disease?

“I have fungal diseases on my apple trees and fruits. I have tried all different sprays and had no results.” Question from Candace of Bradyville, Tennesee

Answer: Apple trees get loads of fungal diseases (Click on this link for a full list). Some cause trees serious damage while others are just disfiguring and reduce fruit set. Either way, you can reduce fungal disease problems by taking these steps.

Wet springs are sure to cause fungal disease symptoms on infected trees. There are several cultural and safe chemical means of controlling them. These include:

  1. Applyingdormant oil fungicide spray in late fall, again in late winter before the trees leaf out, and again after they begin to leaf out in spring. If the spring is unusually wet, apply an additional copper-based fungicide spray through the spring during a dry spell. (Click here to read more about dormant oil sprays.)
  2. Watching for leaf spotting when weather conditions are favorable, and spraying with a Bordeaux mixture fungicide of copper sulfate (CuSO4) and slaked lime (Ca(OH)2) as soon as they appear. (Note: Moist spring air between the temperatures of 40 degrees F and 86 degrees F encourages the onset of fungal diseases.)
  3. Spraying with a Bordeaux mixture fungicide during the growing months. This fungicide is effective and approved for organic growing.
  4. Removing badly infected or dying stems with clean shears or loppers as you see them.
  5. Raking up all of the fallen leaves that may carry disease in fall, and bagging and disposing of them in the garbage.

Repeat treatment yearly as needed, especially in moist years, to overcome this common fungal disease of apples!

Happy gardening,

Jessie Keith

Black Gold Horticulturist

Will Mowing Hostas Kill Them?

“I live in a ground-floor apartment. I had Hostas in front of my patio. The ground crew mowed right over them.  Since there is less than an inch sticking up, do you think they’ll come back this year?” Question from Amy of Cincinnati, Ohio

Answer: Perennials like hosta have buds that reside at or just below the soil surface. If the mowers did not scalp the buds from the soil, then your hosta should return without a problem. They are particularly hardy perennials that will survive really tough winter weather. I expect that they will return for you in spring!

Happy gardening,

Jessie Keith

Black Gold Horticulturist

How Do I Remove and Manage Mealybugs?

“What is the best way to remove ground mealybug or should I dispose of the whole plant?” Question from Erin of Conover, North Carolina

Answer: Mealybugs can be overcome. It just takes a little time and patience. The main reason is that one has to eradicate both the adults as well as the juvenile crawlers, which are almost invisible to the eye. Outdoors, ladybugs and other natural predators keep populations down, but inside the house mealybugs can take over a plant really quickly.

How To Manage Mealybugs

Here is an excerpt from my blog, Managing the Worst House Plant Pests:

Mealybugs are soft, white, and feed on the juices of plant leaves and stems, particularly in the crevices between leaves and stems. Mealybug infestations are hard to manage because these pests travel and spread as crawlers. Crawlers are the nearly invisible nymphs that hatch from the pest’s white, cottony egg masses and “crawl” several feet to quickly infest other plants. You can’t always see these crawlers, so to manage them, you have to clean plants, containers, and surrounding surfaces when you see an infestation.  They produce copious crawlers, so the sooner you notice mealybugs, the better.

At high populations, mealybugs produce lots of cottony egg masses, adult bugs, and nearly microscopic crawlers. All must be completely removed if the plant is to be saved. (Image by Alexlutor)

To remove mealybugs, start by cleaning your plant, its pot, and all surfaces surrounding the plant. Remove the top two inches of potting soil and replace it with fresh. Finally, spray the plants. One of the best mealybug sprays is a 10-25% solution of isopropyl alcohol. Fill a spray bottle with 1/4 cup of isopropyl alcohol and 2/4 cup water and shake to combine. When treating plants with this solution, keep them out of direct sunlight because it can cause leaf burn in the bright sun. You can also treat plants with insecticidal soap or Neem oil. Repeat spray treatments until plants are mealybug-free.

Another method to stop crawlers is to surround infected areas with double-sided tape traps. As the crawlers hatch and begin crawling, they will get stuck on the tape and die. You can also surround plant bases and pot edges with double-sided tape to keep crawlers from moving beyond an infected plant.

I hope that these tips help!

Happy gardening,

Jessie Keith

Black Gold Horticulturist

How Do I Protect My Tomato Fruits from Insects and Slugs?

How Do I Protect My Tomato Fruits from Insects and Slugs?

“How can I keep bugs and slugs from destroying my tomato fruit? They totally decimated my crop this year leaving me nothing to can for the winter months.” Question from Sylvia of Belle Plaine, Minnesota

Answer: There are several things that you can do to ensure that insects and slugs don’t damage your tomatoes. Here are six methods.

Six Ways to Stop Pests From Eating Tomatoes

  1. Clean your vegetable beds up completely in the fall, and till lightly in the spring. This will remove any overwintering pest eggs.
  2. In the spring, apply a layer of quality compost as a surface mulch to stop weeds and create an open, weed-free layer to keep slugs away (slugs often hide in weeds).
  3. Use tall tomato cages, and prune your tomatoes to keep developing fruits off of the ground and away from slugs and critters.
  4. Apply diatomaceous earth at the base of your tomato plants to deter slugs. You can also use Sluggo, a good slug killer that is approved for organic gardening.
  5. Plant your tomatoes in the full sun (8+ hours) at least 3-4 feet apart, leaving space between plants. This will discourage slugs, which cannot withstand the sun and avoid open ground.
  6. Apply BT spray, which is also approved for organic gardening, if tomato hornworms or other caterpillars attack your plants and fruits.

Finally, be sure to choose good tomato varieties for northern gardeners for better yields. (Click here for more tomato growing tips and varieties for northern gardeners.)

I hope that these tips help!

Happy tomato growing,


Why Didn’t My Cannas Bloom?

“This year, I didn’t get many blooms on my cannas. Any ideas?” Question from Gloria of Morgan Hill, California

Answer: I’m sorry to hear that your cannas did not bloom well. Let me cover everything that they need to grow and flower to their fullest, followed up by some danger areas, and you can troubleshoot from there.

What Cannas Need to Grow Well

Cannas (Canna species and hybrids, Zones 8-11) are lush, tropical to subtropical perennials adapted to full to partial sun, and rich moist to average soils. Providing a boost of continuous-release fertilizer formulated for flowers always encourages good blooming. They originate from warm regions of the Americas where climates are humid and rainy. When growing conditions are ideal, they will flower with no trouble. If they are not hardy where you live, dig their rhizomes in fall and store them in a cool, dark place through winter.

Conditions that Discourage Canna Flowering

Here are several suboptimal growing conditions that will discourage blooming cannas: too little water, too little light, low humidity, and too little fertilizer.

There are also several viral diseases that will discourage growth and flowering in cannas. These include the Canna yellow streak virus (CaYSV) and Canna yellow mottle virus (CaYMV), among others. Plants with these diseases show abnormal leaves with browning or yellowing streaks of mottled patterns. If your canna leaves exhibit either, dispose of the plants immediately and replace them with certified virus-free stock (specialty growers are usually the most reliable source). Be sure not to reuse the potting soil, if your plants are in containers.

I hope that this helps!

Jessie Keith

Black Gold Horticulturist

How Can I Remove Spider Mites from My Adenium?

“Help!  My 4-year-old Adenium has always thrived.  Last year it put out 6 seed pods and this year the blooms were massive overpowering any green.  When the blooms finally stopped all the older leaves turned yellow and dropped.  But new ones were coming out.  Now the new ones are all curling and while green on the top the bottoms have brown spots.  It’s in the sun all day long and while we had a wet spring (before the blooms) the summer has been dry and hot.  When the leaves started turning yellow (over a month ago) I noticed spider mites so I sprayed them with an insecticide soap for 2 weeks and they are gone but now the leaves are all curled and brown spots on the underside only.  How can I save this plant?” Question from Julie of McKinney Texas

Answer: The good thing is the succulents like Adeniums have lots of stored energy, so once you totally rid them of the spider mites, they will bounce back quickly. To truly eradicate the mites, you will have to spray more than just the foliage.

How to Treat Plants for Spider Mites

Here are the steps I would take to completely remove spider mites from an Adenium.

  1. Remove damaged, yellowing leaves.
  2. Wipe down the base of the plant and stems.
  3. Wipe down the pot.
  4. Remove the top 2 inches of potting mix, and replace it with a quality cactus mix, such as Black Gold Cactus Mix.
  5. Fertilize with a water-soluble fertilizer formulated for flowering plants.
  6. Spray all plant parts with insecticidal soap or Neem oil.

The white-paper test is my favorite way to further test for mites. Take a clean piece of white paper, hold it beneath the leaves, then tap the leaves onto the paper. If you have mites, tiny specs will fall, and eventually, they will start crawling around. These are spider mites. Continue to do the tap test and gently wipe down leaves and stems and spray them until healthy new growth appears and remains undamaged. It may take time, but you can overcome spider mites.

Happy gardening!

Jessie Keith

Black Gold Horticulturist

How Do I Stop My Tomatoes from Cracking?

How do I stop my tomatoes from cracking? There are several ways to end this problem.

“Stop my tomatoes from cracking! Last year even though the weather was optimal with sun and rain my cherry tomatoes continued to split as they grew and most were not edible as the bugs got into them as soon as they split. Is there a way to stop them from splitting like that?” Question from Sylvia of Belle Plaine, Minnesota

Answer: There are several things that you can do. Let me start by explaining what causes tomato splitting. Splitting occurs when a tomato is ripe and full of natural sugars and then it rains significantly. Tomato plants take up water fast, and due to a natural process called osmosis, the water is attracted to the plant parts with the most sugar–ripe fruits. So essentially, those sugary tomatoes fill up with too much water too fast and split. Here are the three best solutions to keep this from happening.

Ways to Stop My Tomatoes from Cracking

1. Choose crack-resistant tomato varieties. Some tomatoes either naturally resist cracking or were bred to be crack-resistant. The sweet cherry tomatoes ‘Ladybug‘ and ‘Jasper‘ are just two of many that are reliably crack resistant. You may see a crack here and there, but they are infrequent when compared to average cherries. ‘Baby Cakes’ salad tomato is tasty and both crack- and disease-resistant. And ‘Big Rainbow’ is a beautiful heirloom with great taste and crack resistance. And, if you like delicious orange slicers, ‘Chef’s Choice Orange‘ cannot be beaten for flavor and crack resistance. These are just a few of many options.

2. Give your tomatoes maximum drainage. Amend your vegetable garden soil well, and berm it up in your tomato beds to facilitate the best drainage possible. Excellent soil drainage will keep your tomatoes from taking up as much water as fast. Our best vegetable garden soil amendments include Black Gold Canadian Sphagnum Peat Moss, Garden Soil, and Garden Compost Blend. Till these in and then rake up the bed areas into wide berms where you plant your tomatoes. (Click here to read our top 10 essential tips for vegetable gardening success for more bed prep tips.)

3. Pick tomatoes just before they are fully ripe. If you pick tomatoes just before they are fully ripe and allow them to ripen in a bag or on a windowsill, you can avoid the cracking problem. Slightly underripe tomatoes lack the full-sugar load that causes cracking.

For further tips on growing beautiful tomatoes, I recommend you watch our video about growing tomatoes from seed to harvest below.

Happy gardening,

Jessie Keith

Black Gold Horticulturist