Articles

Seven Mediterranean Food Plants for the Dry Edible Garden

Pomegranates are common fruits for southern California.

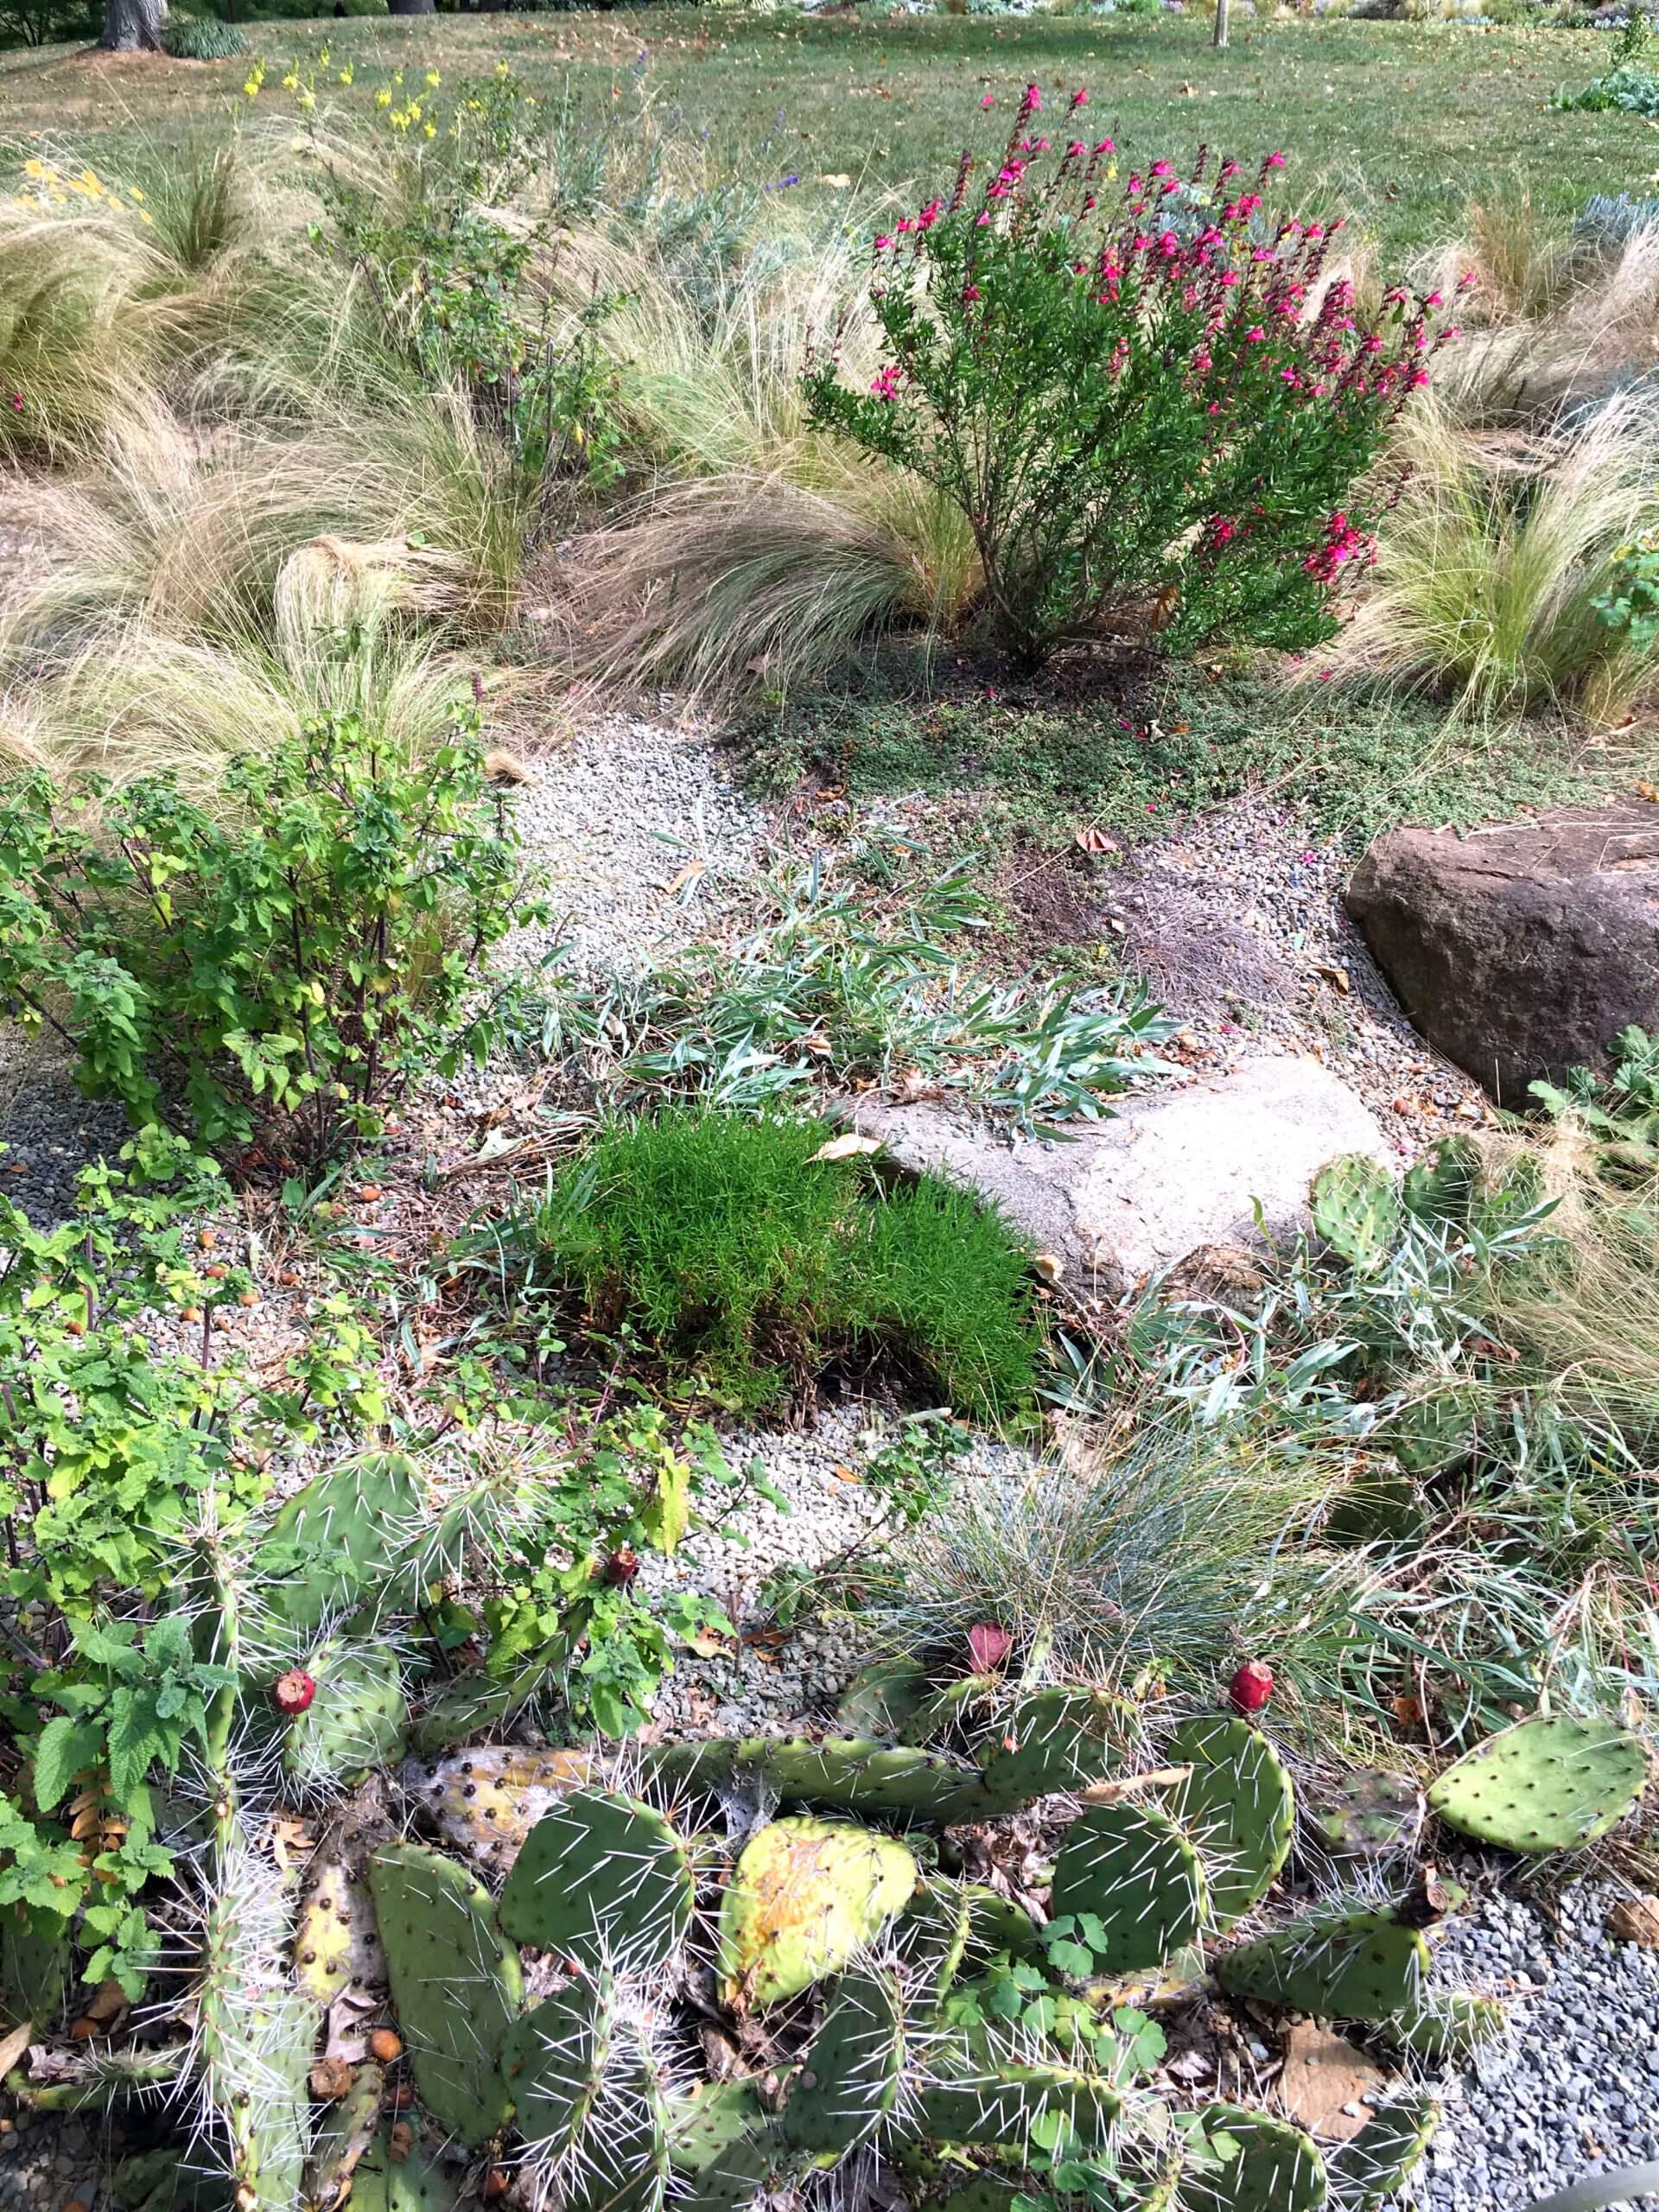
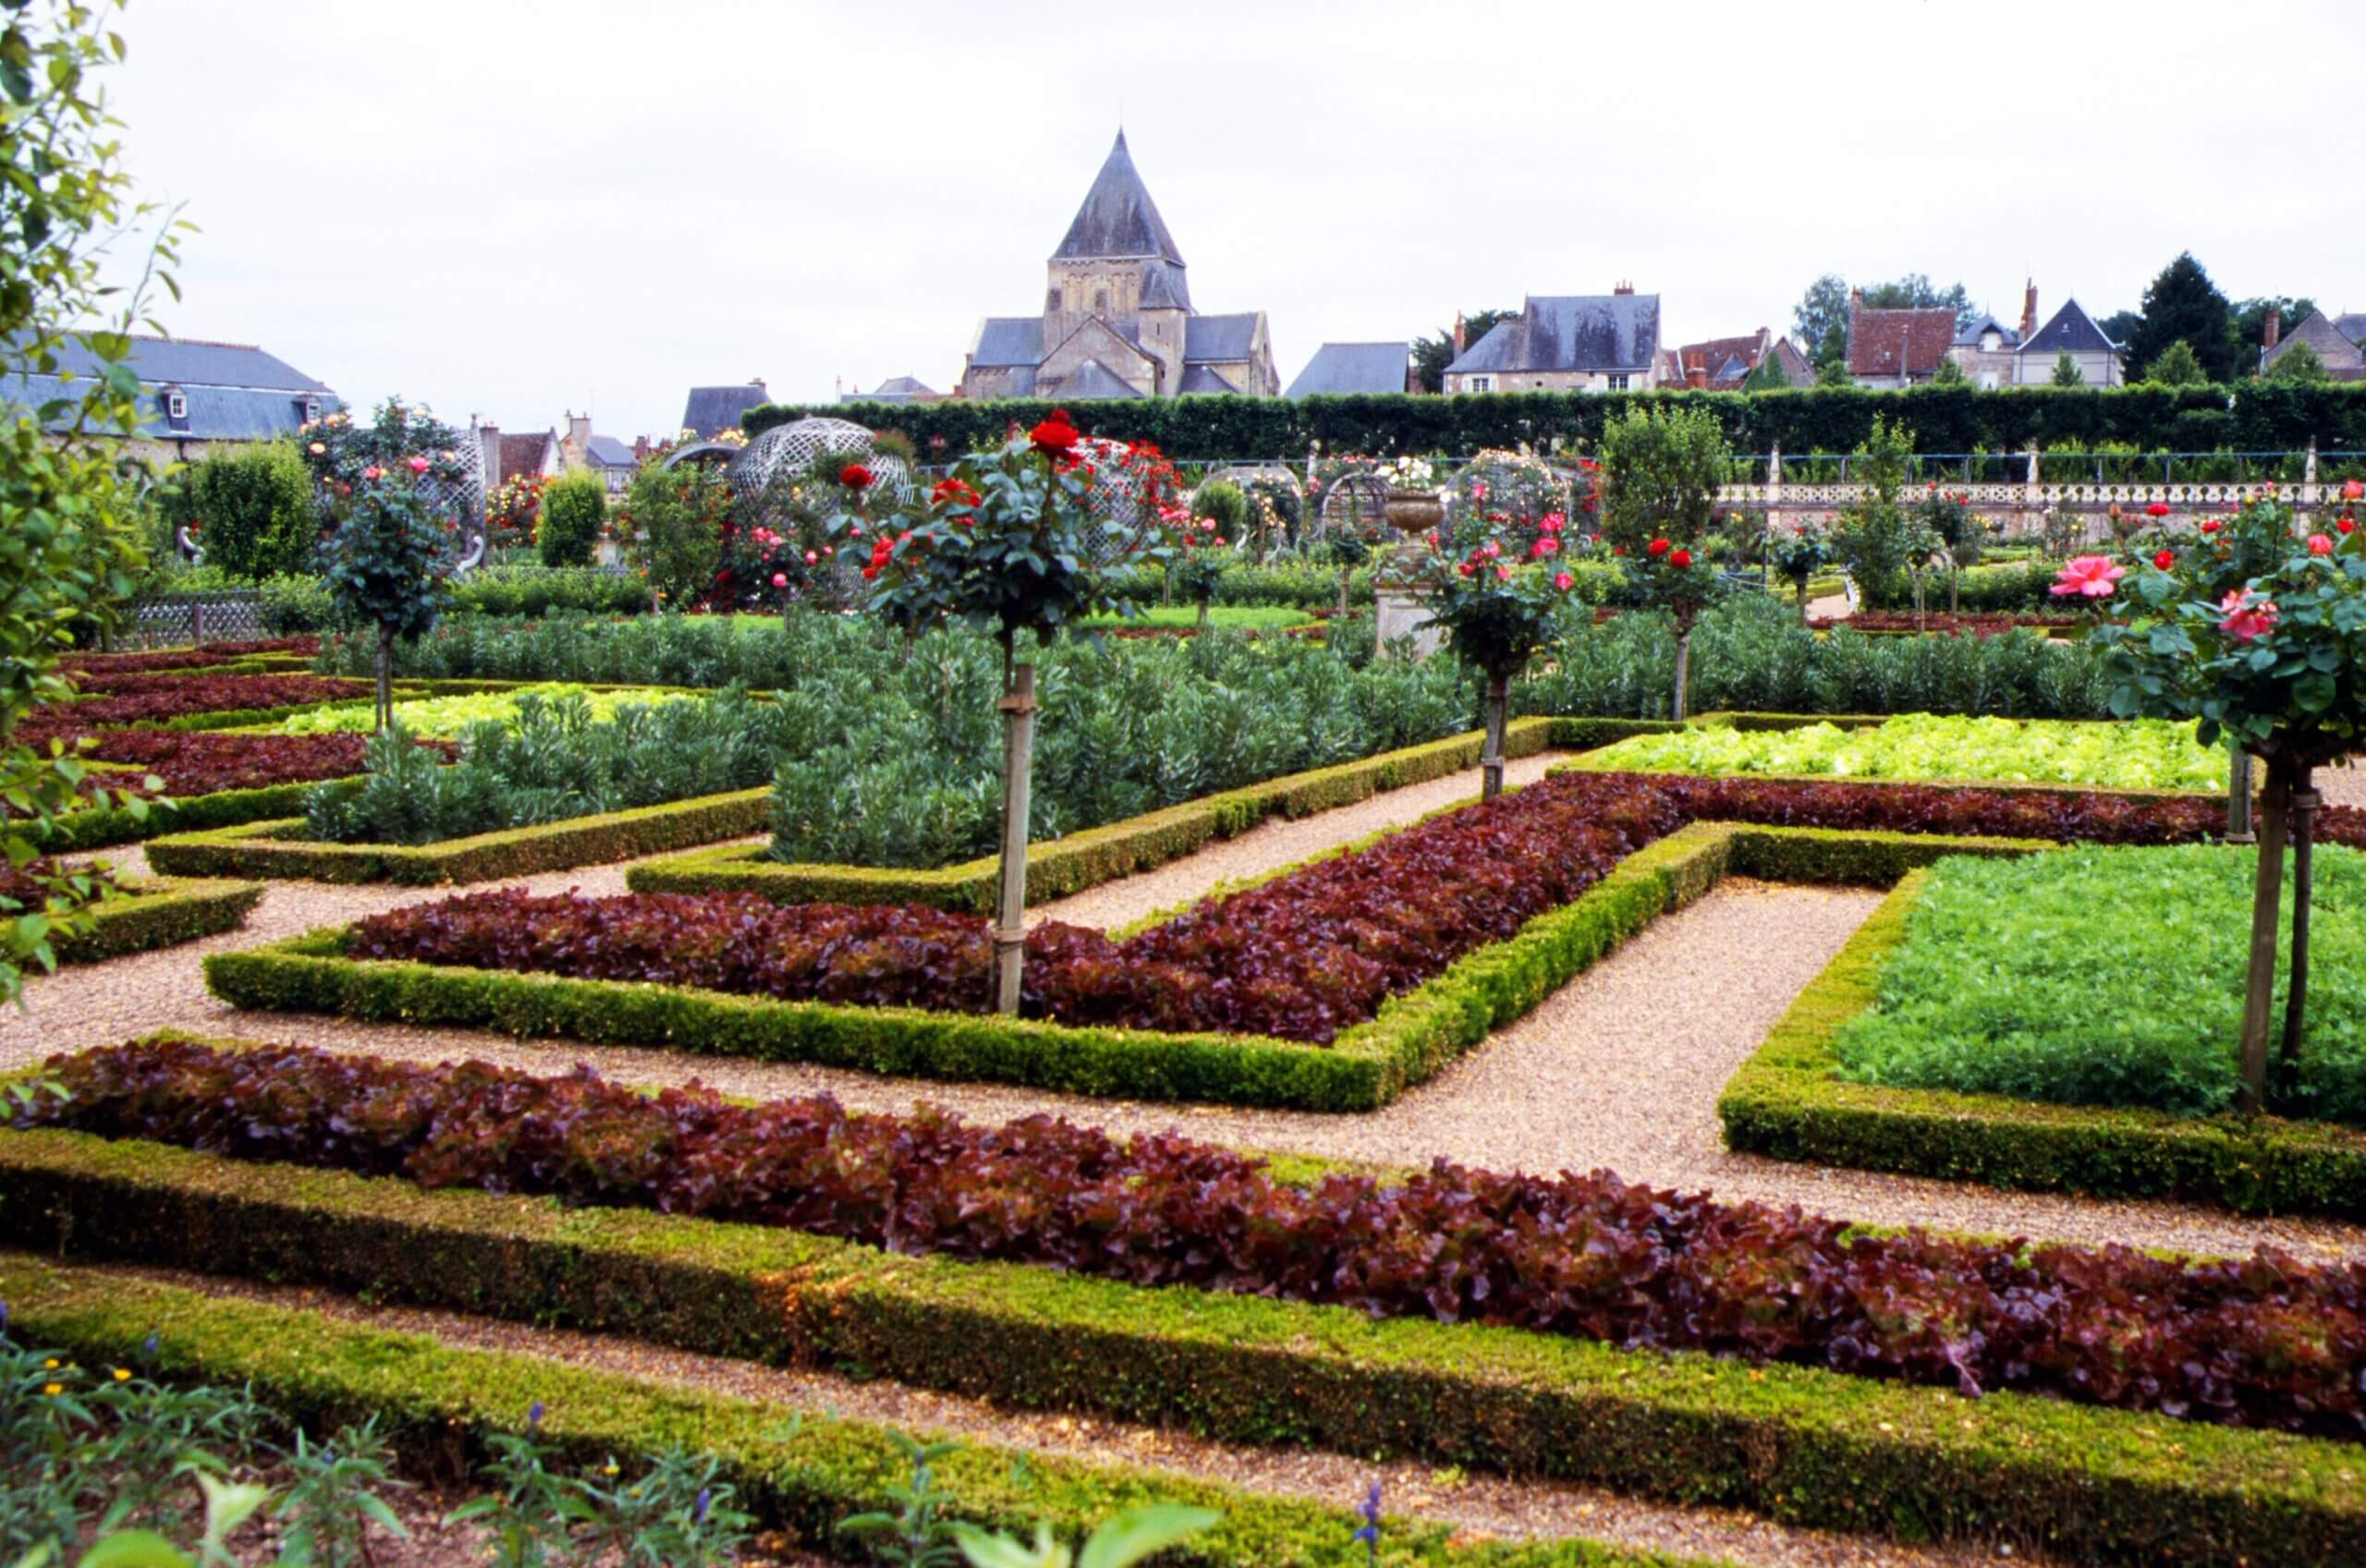
The dry edible garden is rooted in classical civilizations around the Mediterranean Sea. The Greeks, Romans, and Carthaginians shared their ancient local food crops throughout the western world. Some of the best are grapes, pomegranates, date palms, rosemary, artichokes, cardoons, and figs. All are still vital to contemporary agriculture in deserts and dry places around the world and make great choices for arid-zone gardens.

Growing Mediterranean Edibles

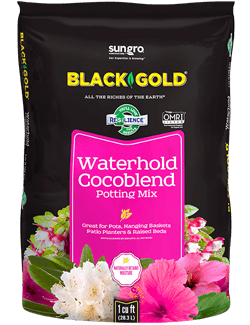
Because most of these Mediterranean edibles are not very cold hardy, you need to know their tolerances before trying to grow any outdoors. Further north, grow dwarf varieties in containers that can be brought indoors for the winter. Water-holding, Black Gold Moisture Supreme potting soil is an ideal mix for contained arid food plants.

One potential problem is that some of these plants, such as date palms, need long-term high heat for their fruit to ripen properly. Though fruits might appear in cooler temps, they aren’t nearly as sweet or just won’t fully ripen.

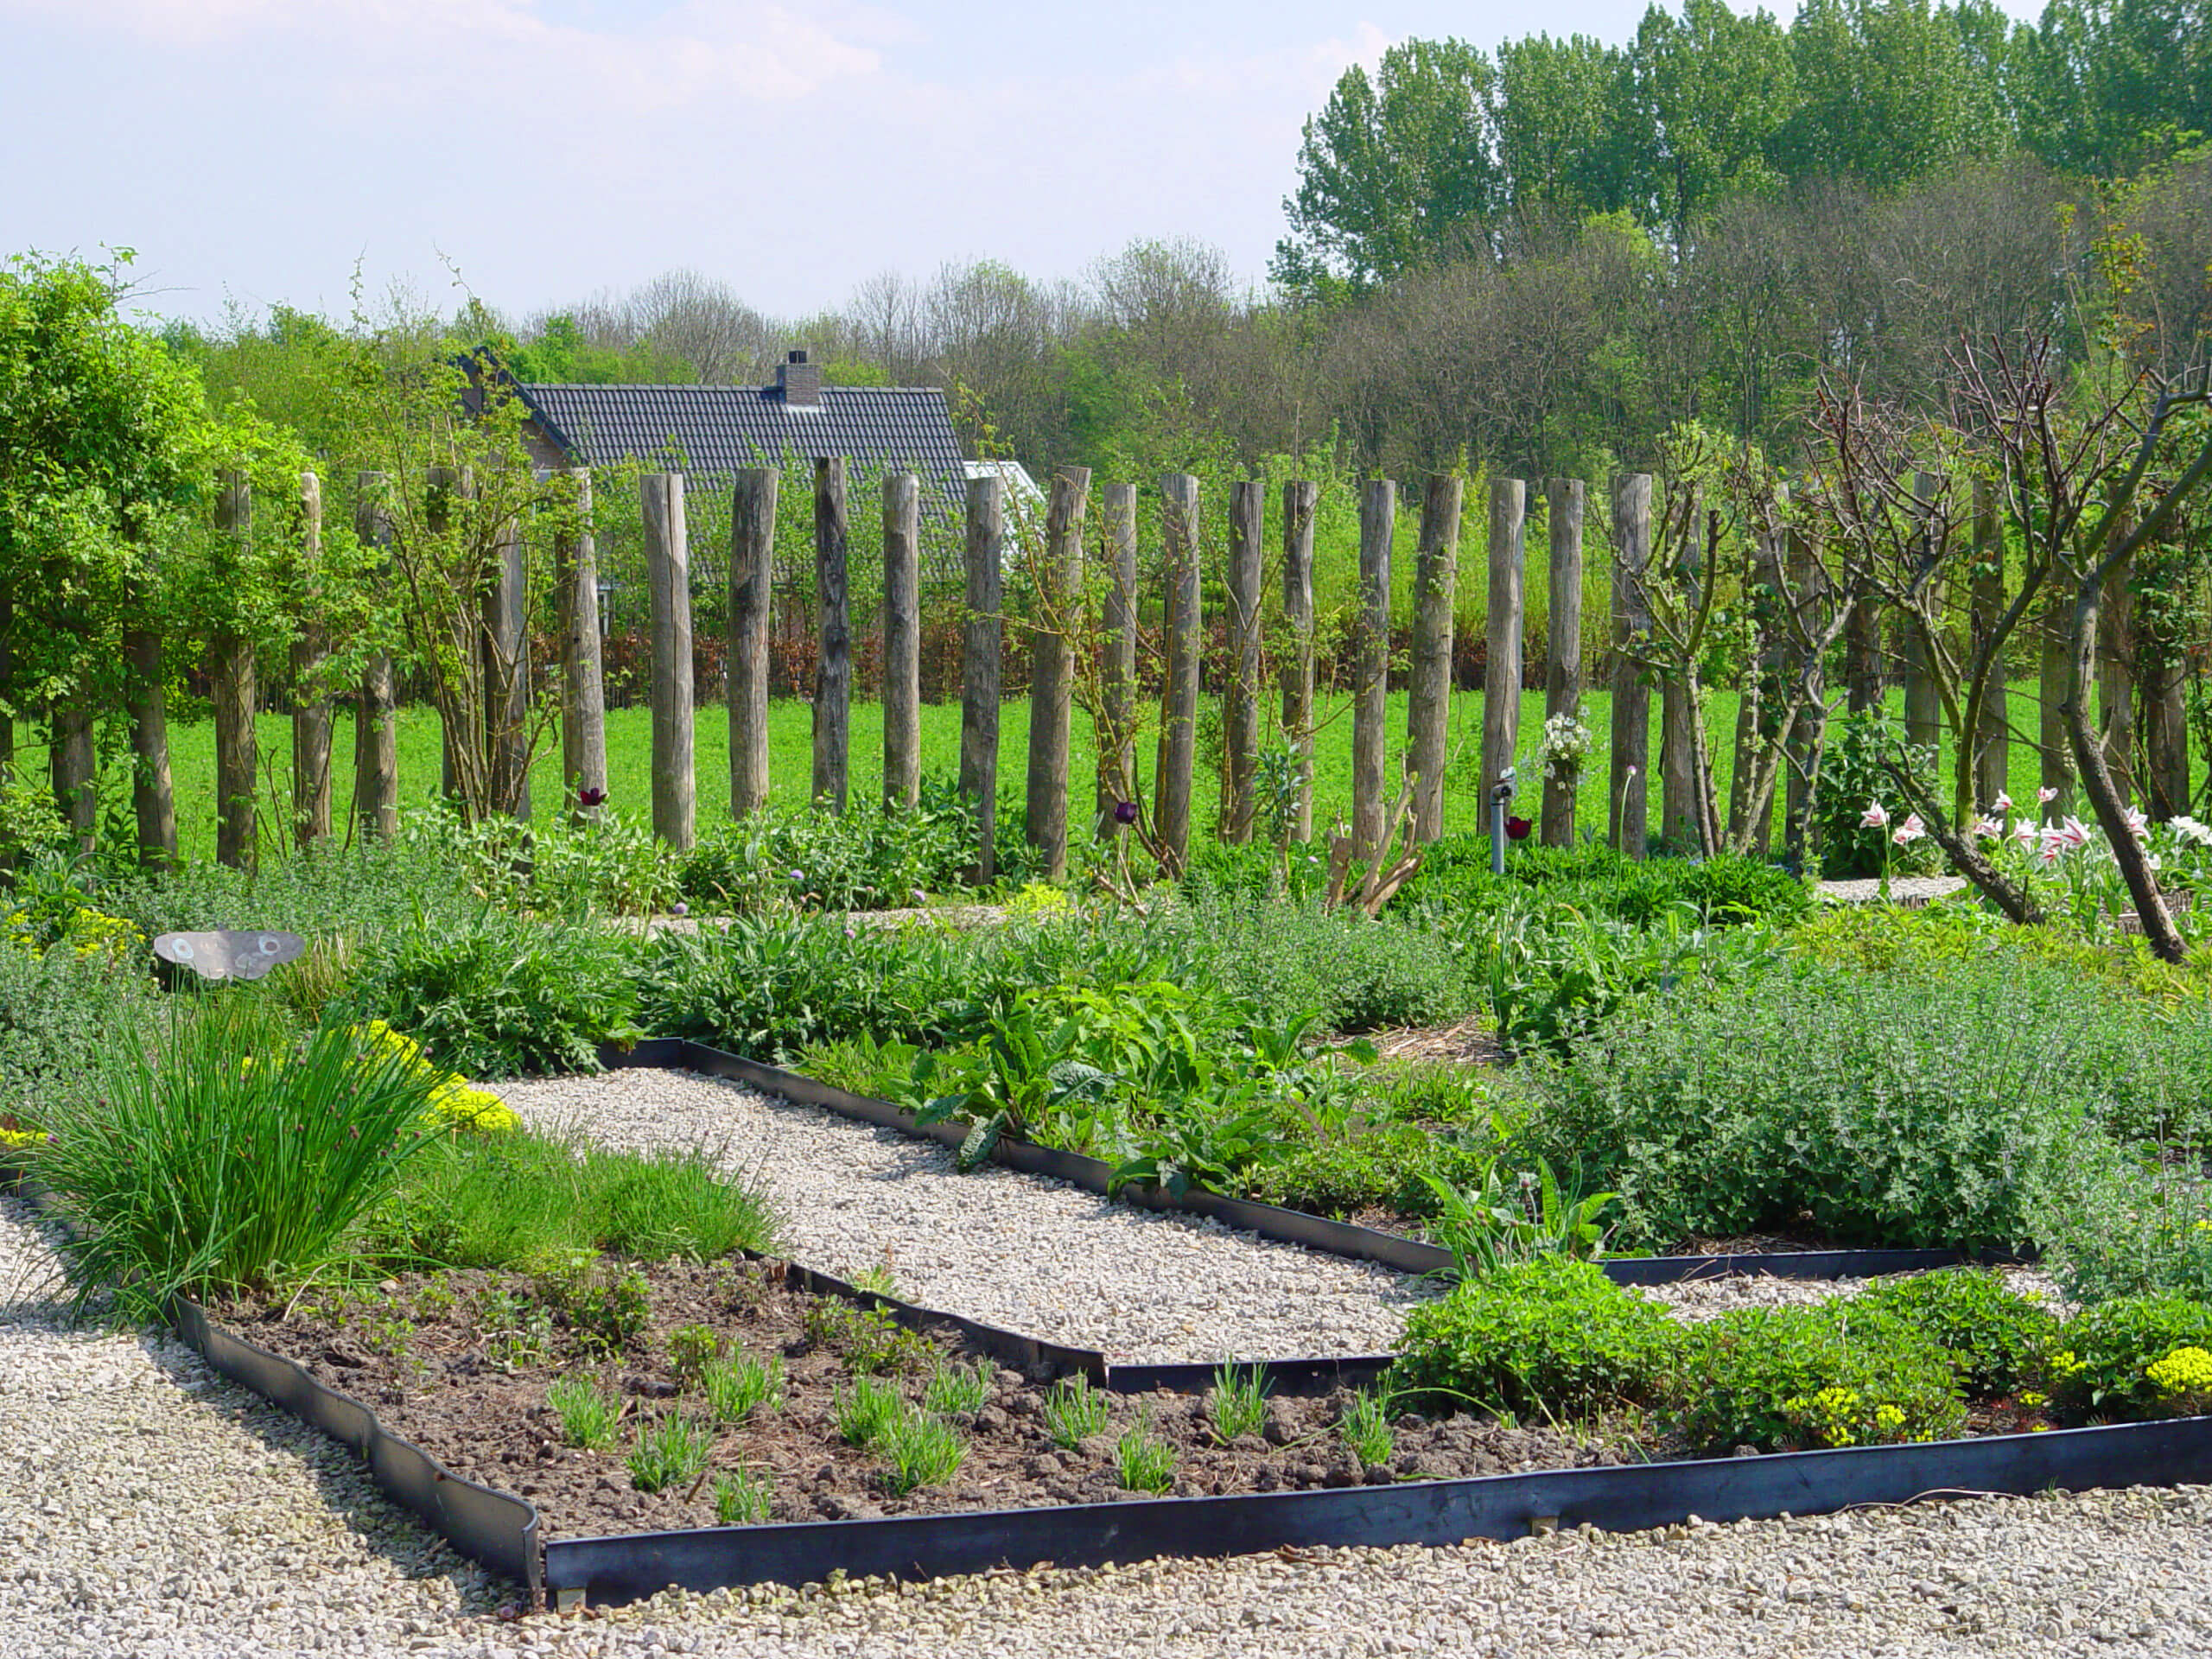
If you live where they are hardy, grapes, pomegranates, date palms, rosemary, artichokes, cardoons, and figs make outstanding landscape plants that thrive despite limited water and high heat. Keep in mind that sufficient irrigation is required, particularly in porous, fast draining soils, if they are to produce quality fruit. Here are additional tips for growing each.

1. 2. Artichokes and Cardoons

Artichokes have naturalized in arid coastal California, proving their adaptability. (Image by Maureen Gilmer)

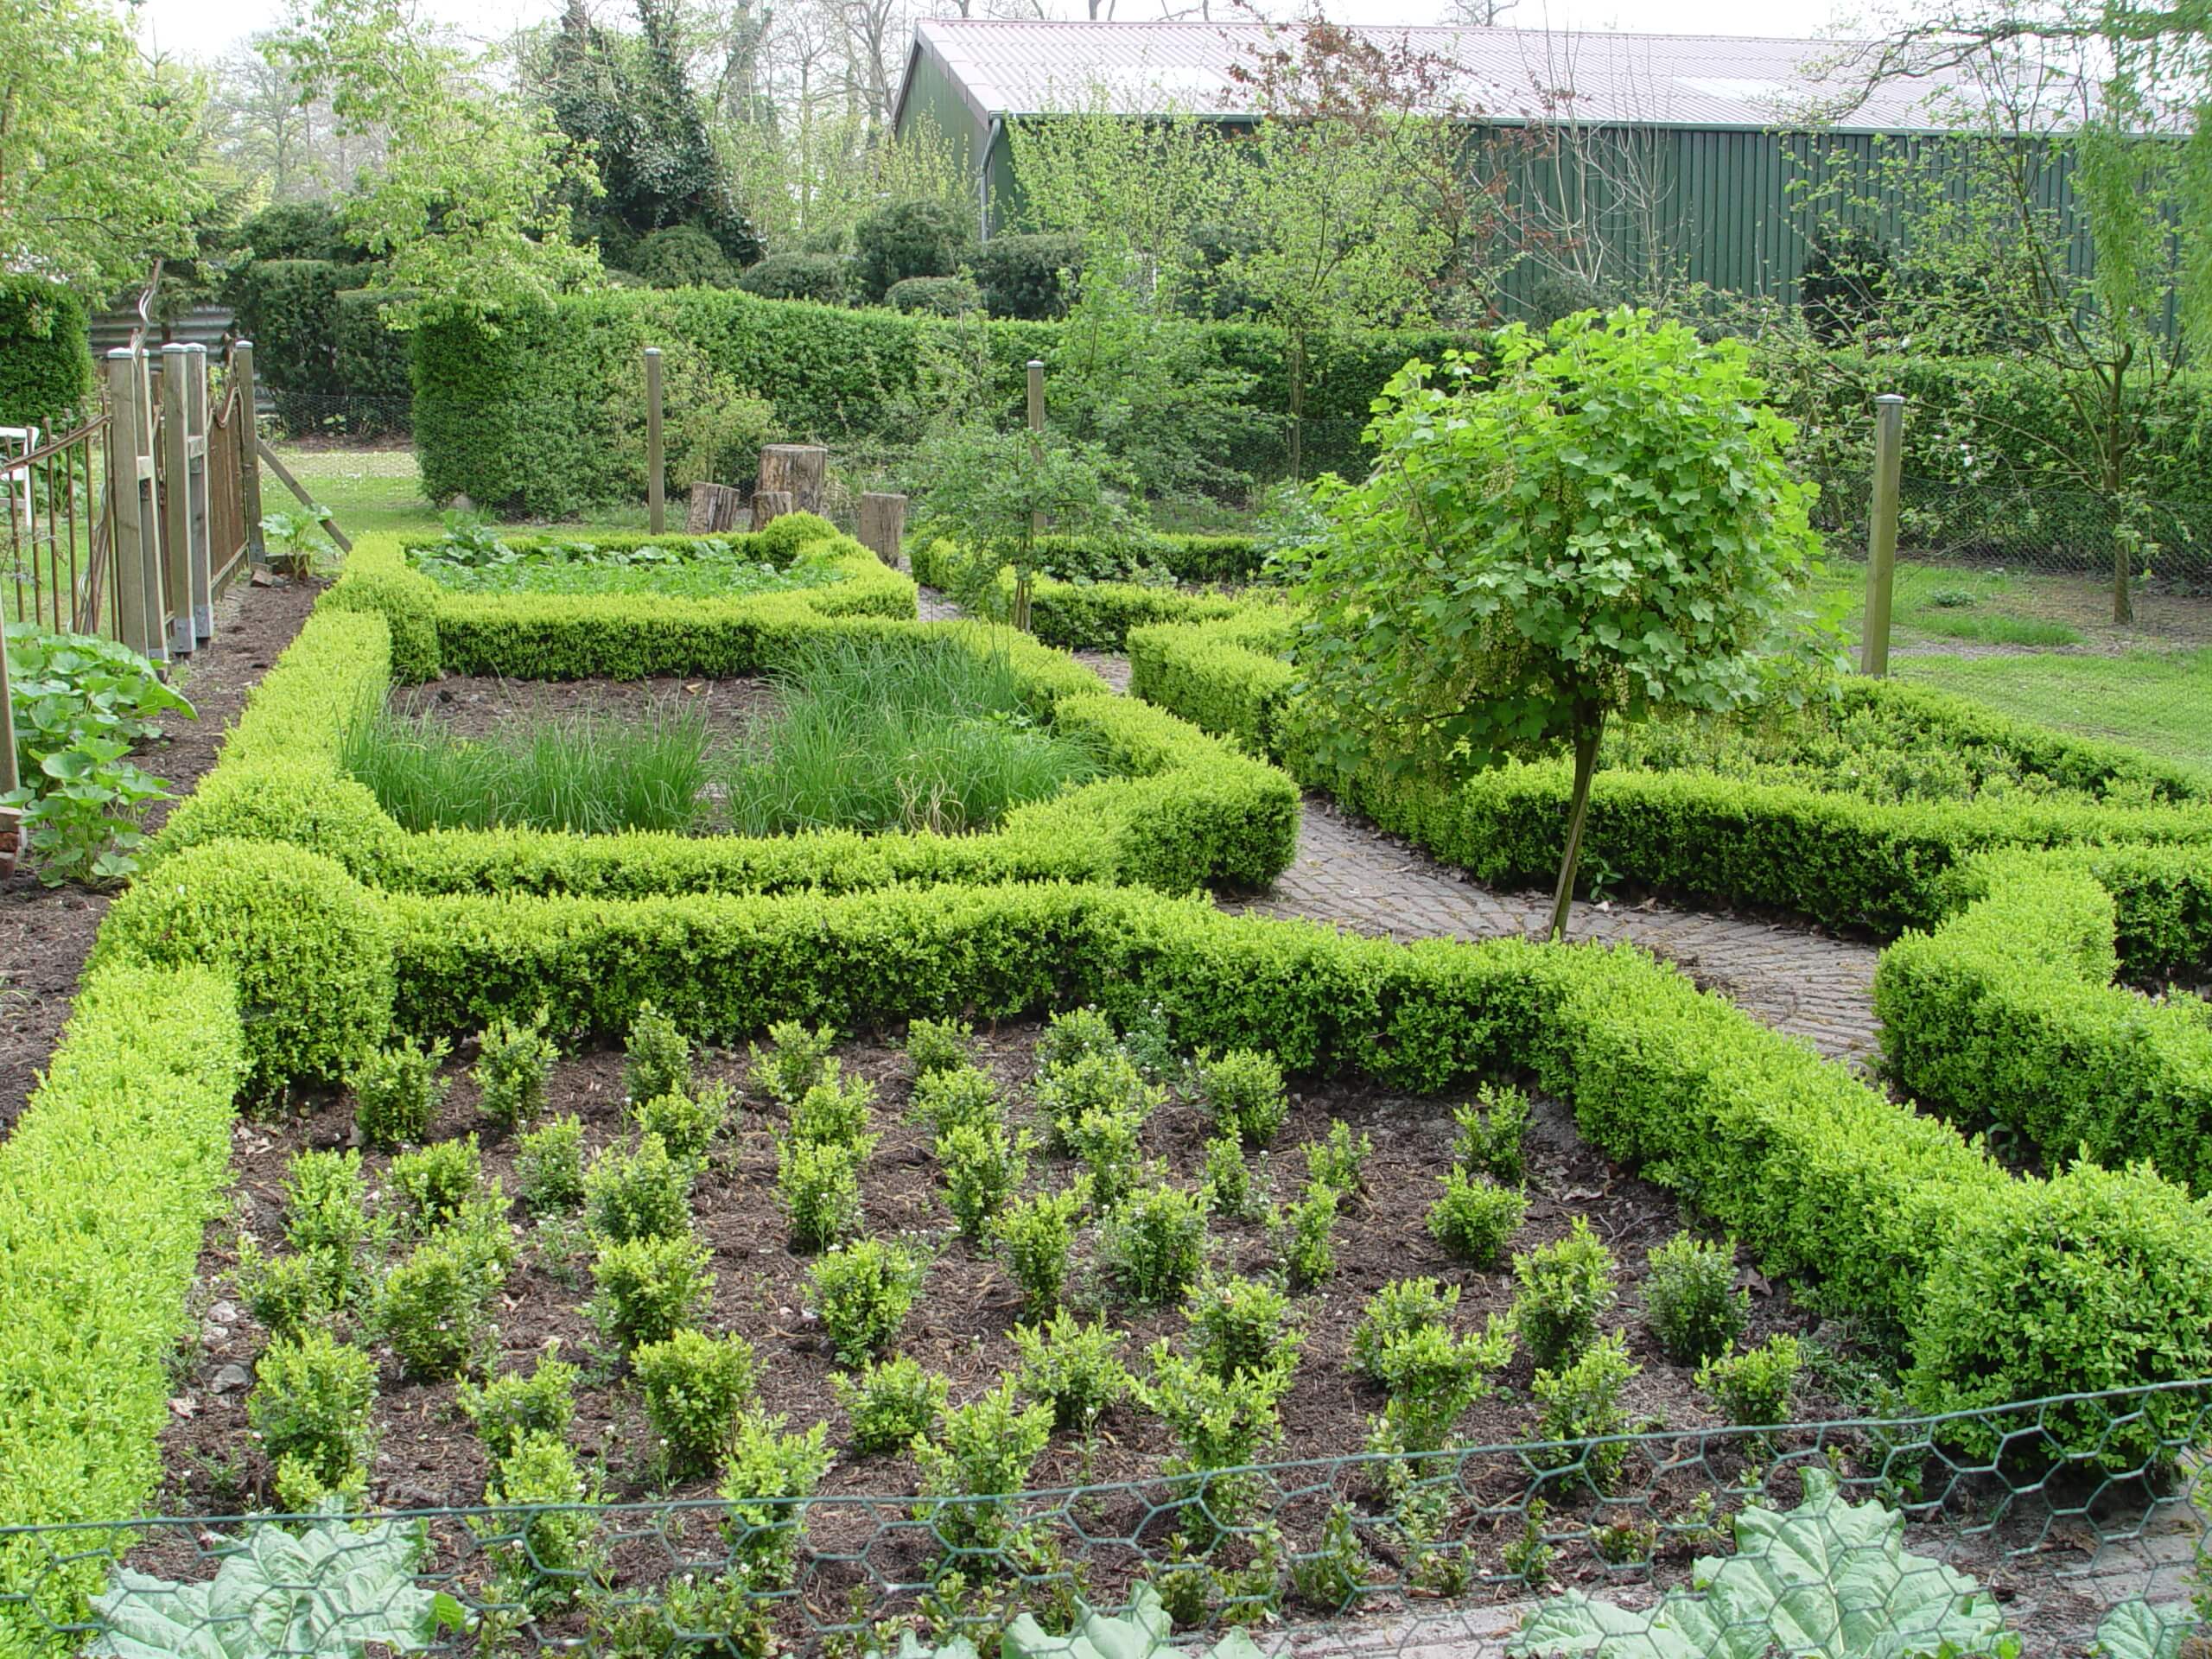
Out in the garden, the easiest arid vegetables to start with are artichokes and their close relative, cardoon. Both act as ornamental and edible perennials. The artichoke we eat is the flower bud, which should be harvested when buds are full-sized with tight bracts. For a big floral show, leave the buds to mature into huge, purple thistle-like blooms. This plant also bears fabulous lobed grayish foliage that’s exceptional for gray gardens. [Click here to learn more about growing artichokes.]

Cardoons have flavorful stems that can be blanched and eaten. The bold silvery leaves also look great when planted in arid flower gardens, and are followed by large, purplish, thistle-like flowers.

3. Date Palms

Fresh dates on a date palm tree.

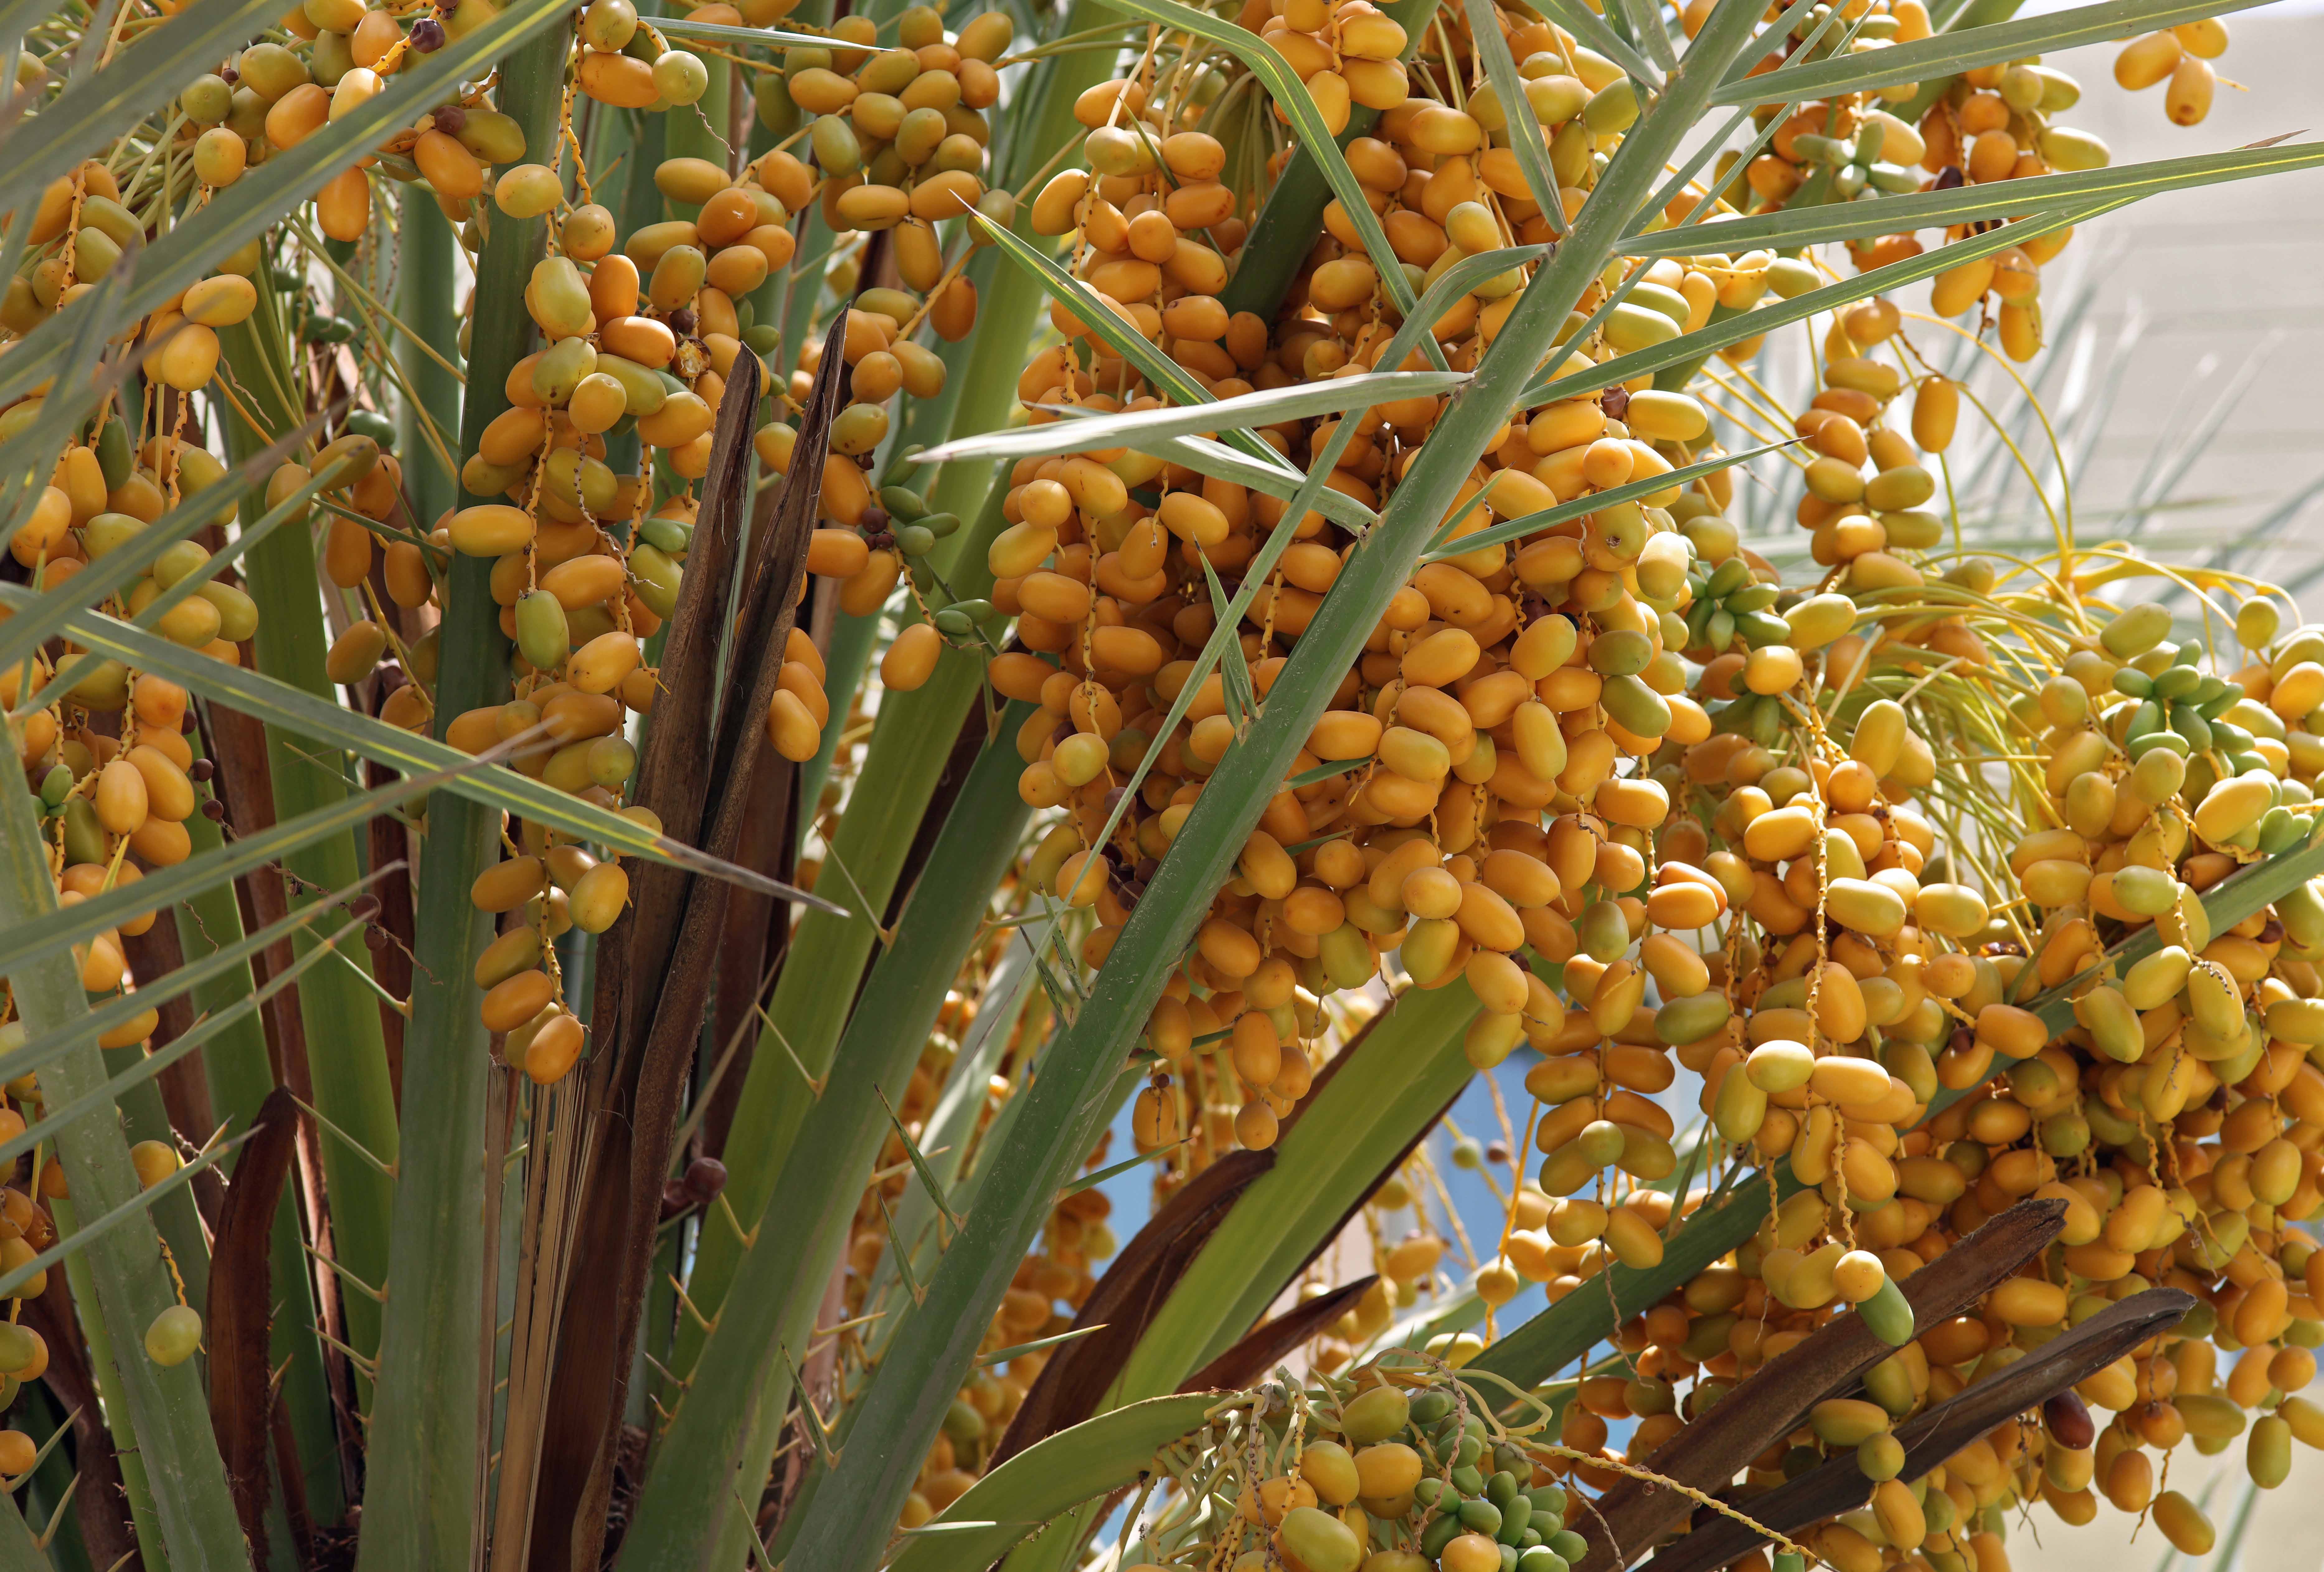
Mediterranean date palms (Phoenix dactylifera) reach up to 100-feet and like heat and drought. They are hardy to USDA Zones 8b11, so they can only be grown in the hot and dry American landscapes of Arizona, California, Nevada, Texas, and Florida. Full sun and well-drained dry soil are required for good growth. Male and female flowers exist on separate plants, so at least one male and female plant are needed for cross-pollination and fruit set.

(Editor’s Note: If space is limited, try growing the Southeast Asian pygmy date palm (Phoenix roebelenii), which reaches 8-10 feet, can be container grown, and is hardy to USDA Hardiness Zones 9 to 11. Its dark purplish fruits are thin-skinned but edible.)

4. Figs

Many figs grow well in large containers.

Dwarf forms of fig (Ficus carica) are specially bred for small-space areas. They grow well in containers that are fit for small city gardens or high-density neighborhoods in hot climates. Hardiness depends on the variety. Some are hardy to USDA Zone 6, as is the case with ‘Chicago Hardy’, while most others are hardy to USDA Zones 8-11. Here too, learn if their fruit cycle works locally by checking with your local garden center. You want the plant to thrive in a large patio container during summer, then plan for winter protection strategies. You may need wheels or a good dolly to bring pots indoors.
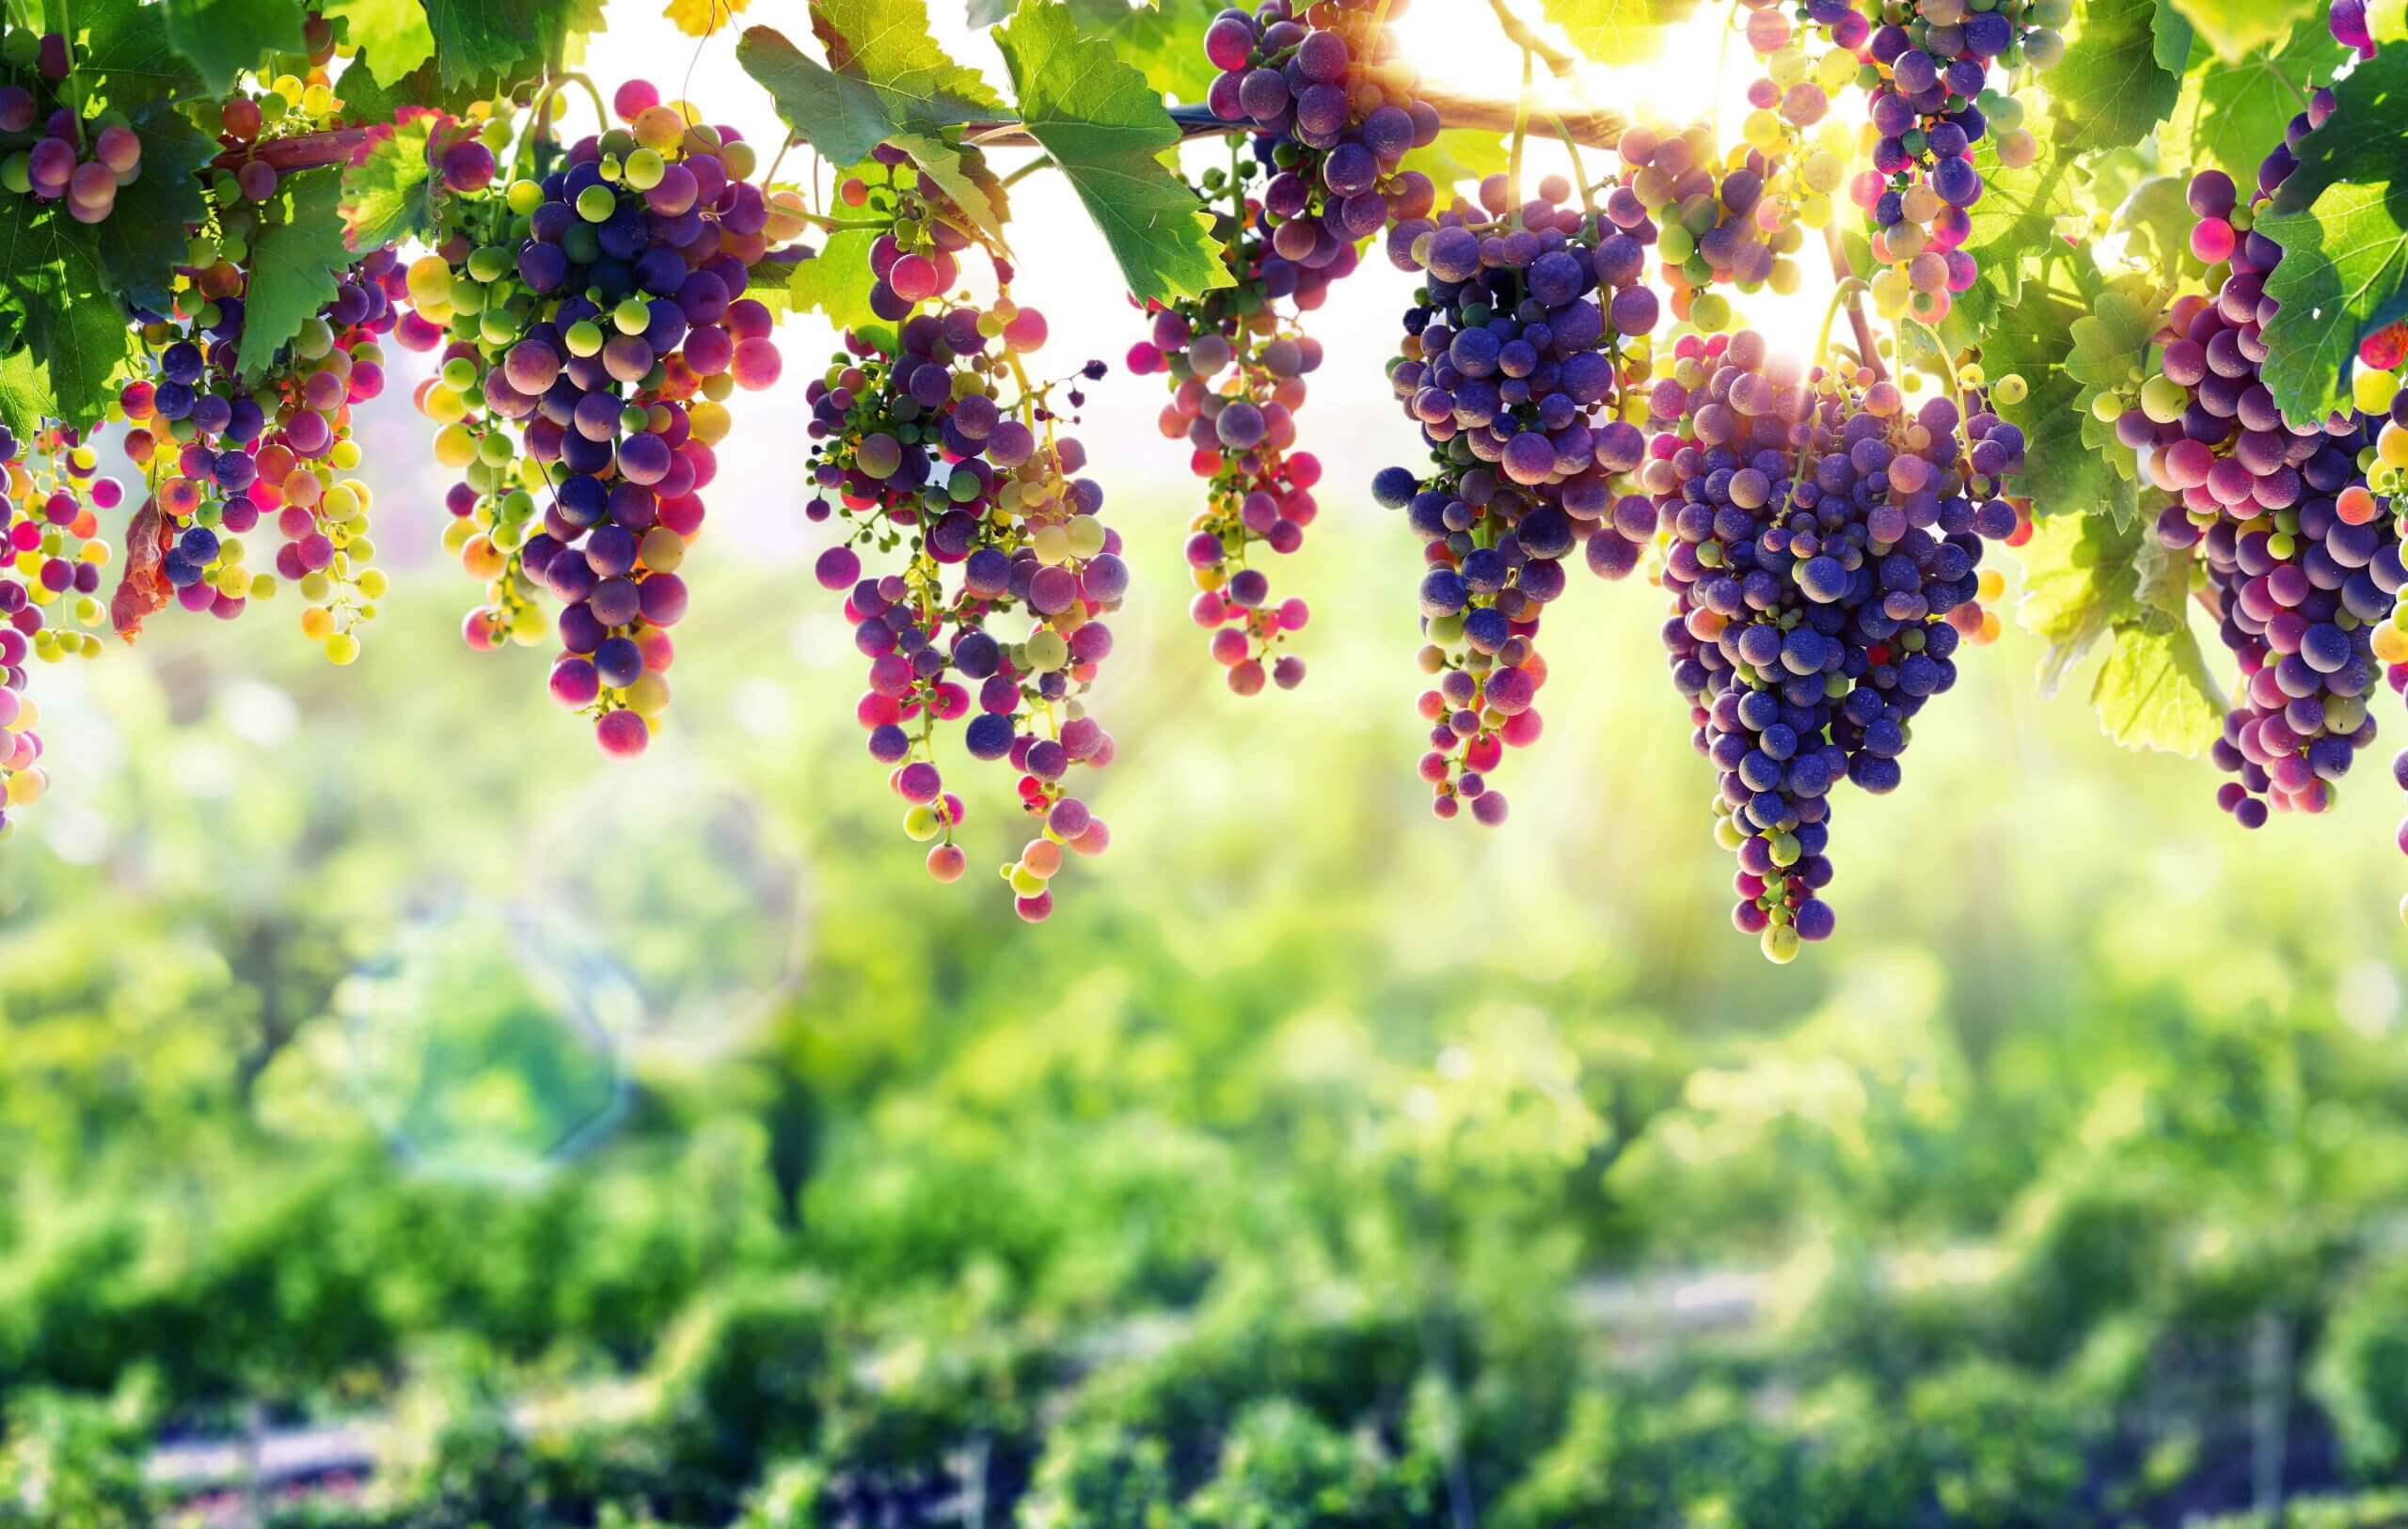
5. Grapes

The green hose marks the single watering point for this grapevine in the high desert. (Image by Maureen Gilmer)

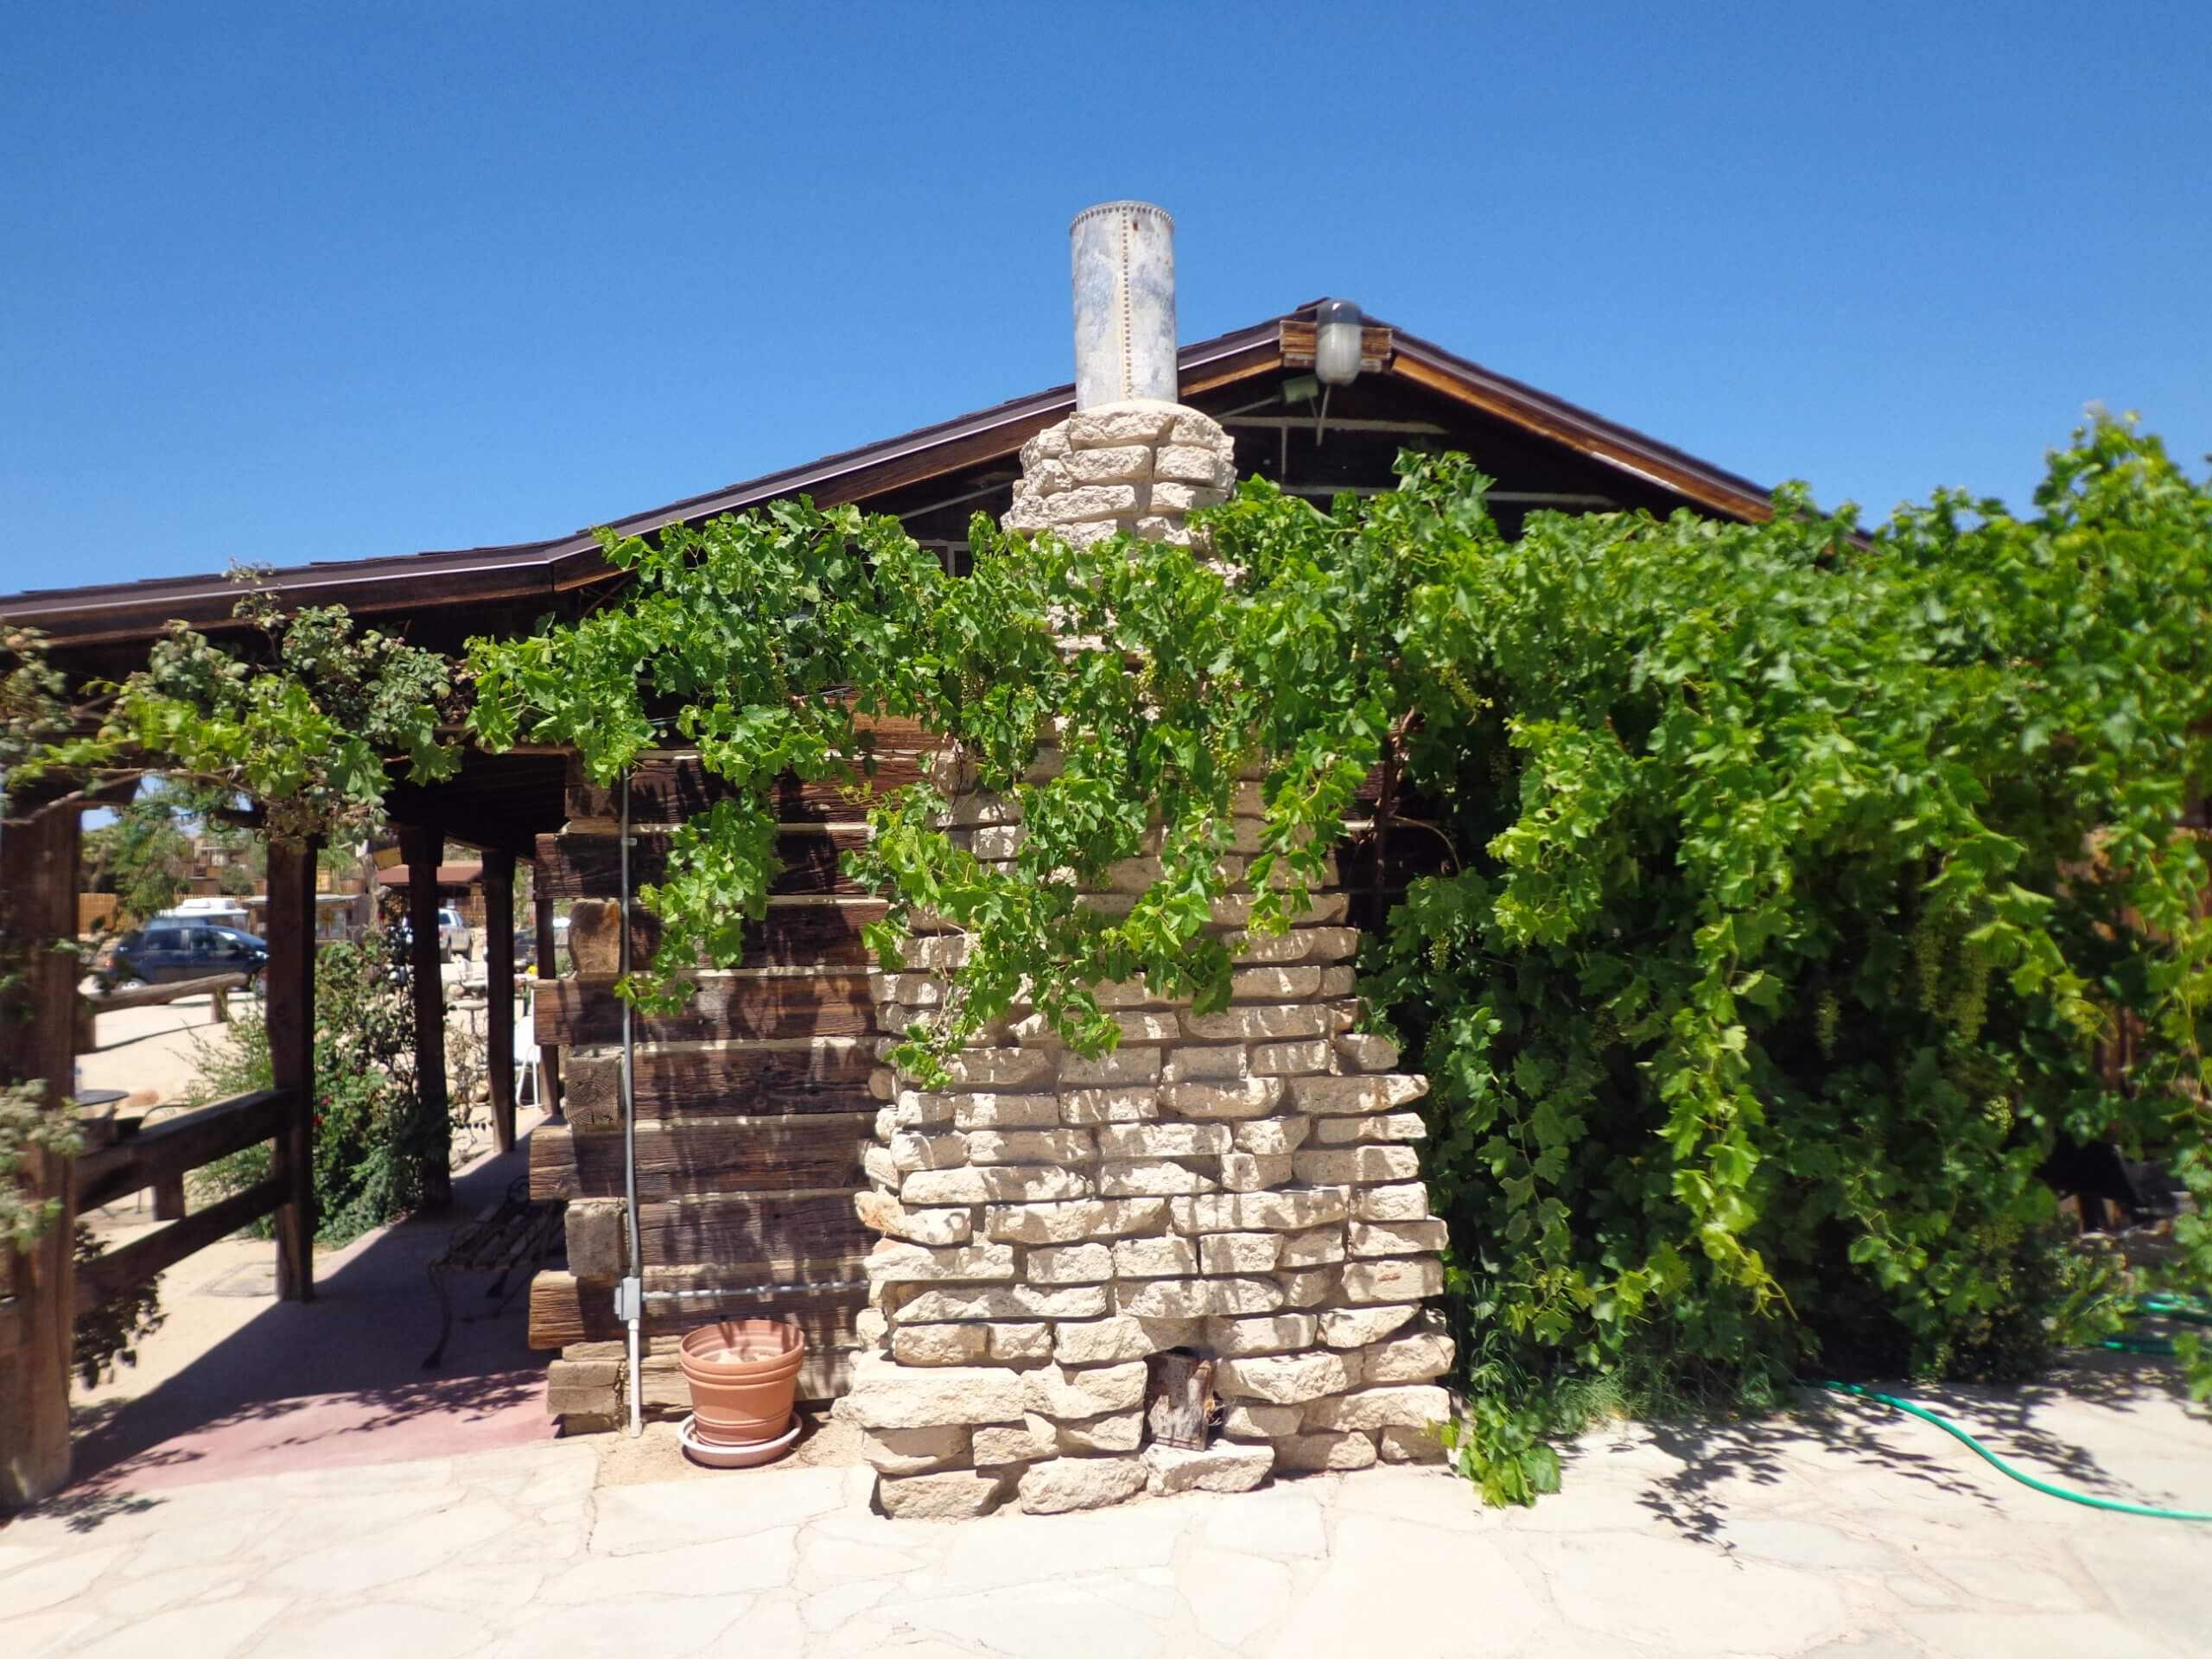
Common grapes (Vitis vinifera) are amazing vines that provide both extensive shade and an annual crop of fruit grown for fresh eating or winemaking. Grapevine covered ramadas were landscape fixtures in early California and served as the first true “outdoor rooms” in the region.

The beauty of grapes is that they have one stem per plant, making irrigation of single plants easy. Drip irrigation helps sustain vines that survive an average of 30-40 years and become enormous over time, even with pruning. Grapes offer more than fruit; the young leaves are easily canned for homemade stuffed grape leaves (dolmas) from scratch.
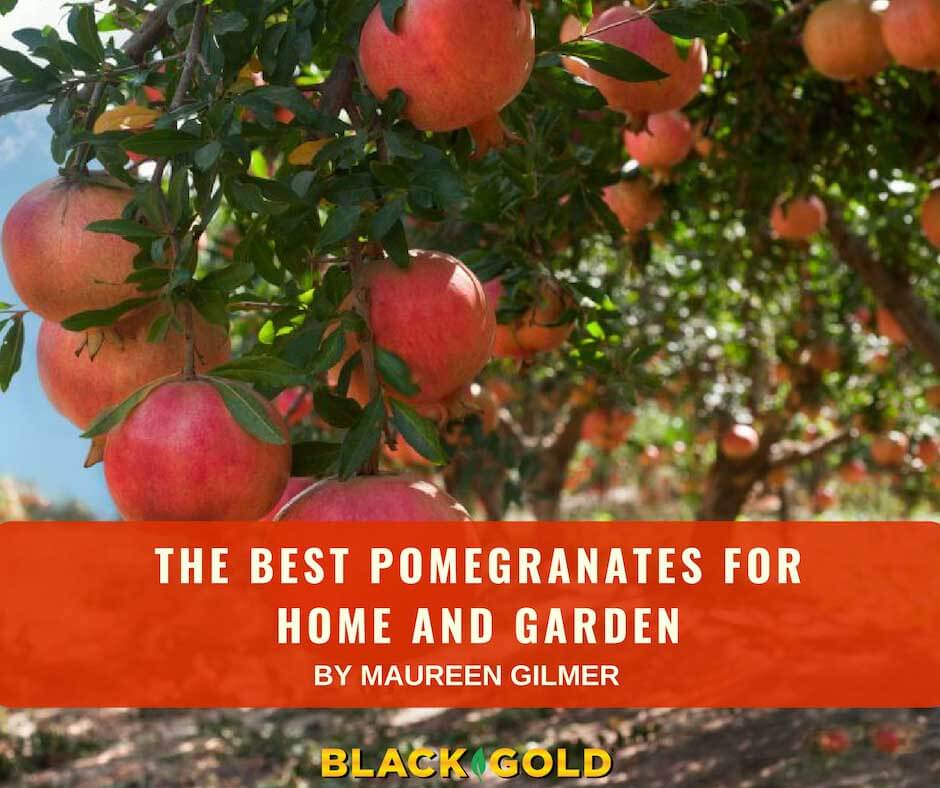
6. Pomegranates

Grapes have been cultivated in the Mediterranean since ancient times.

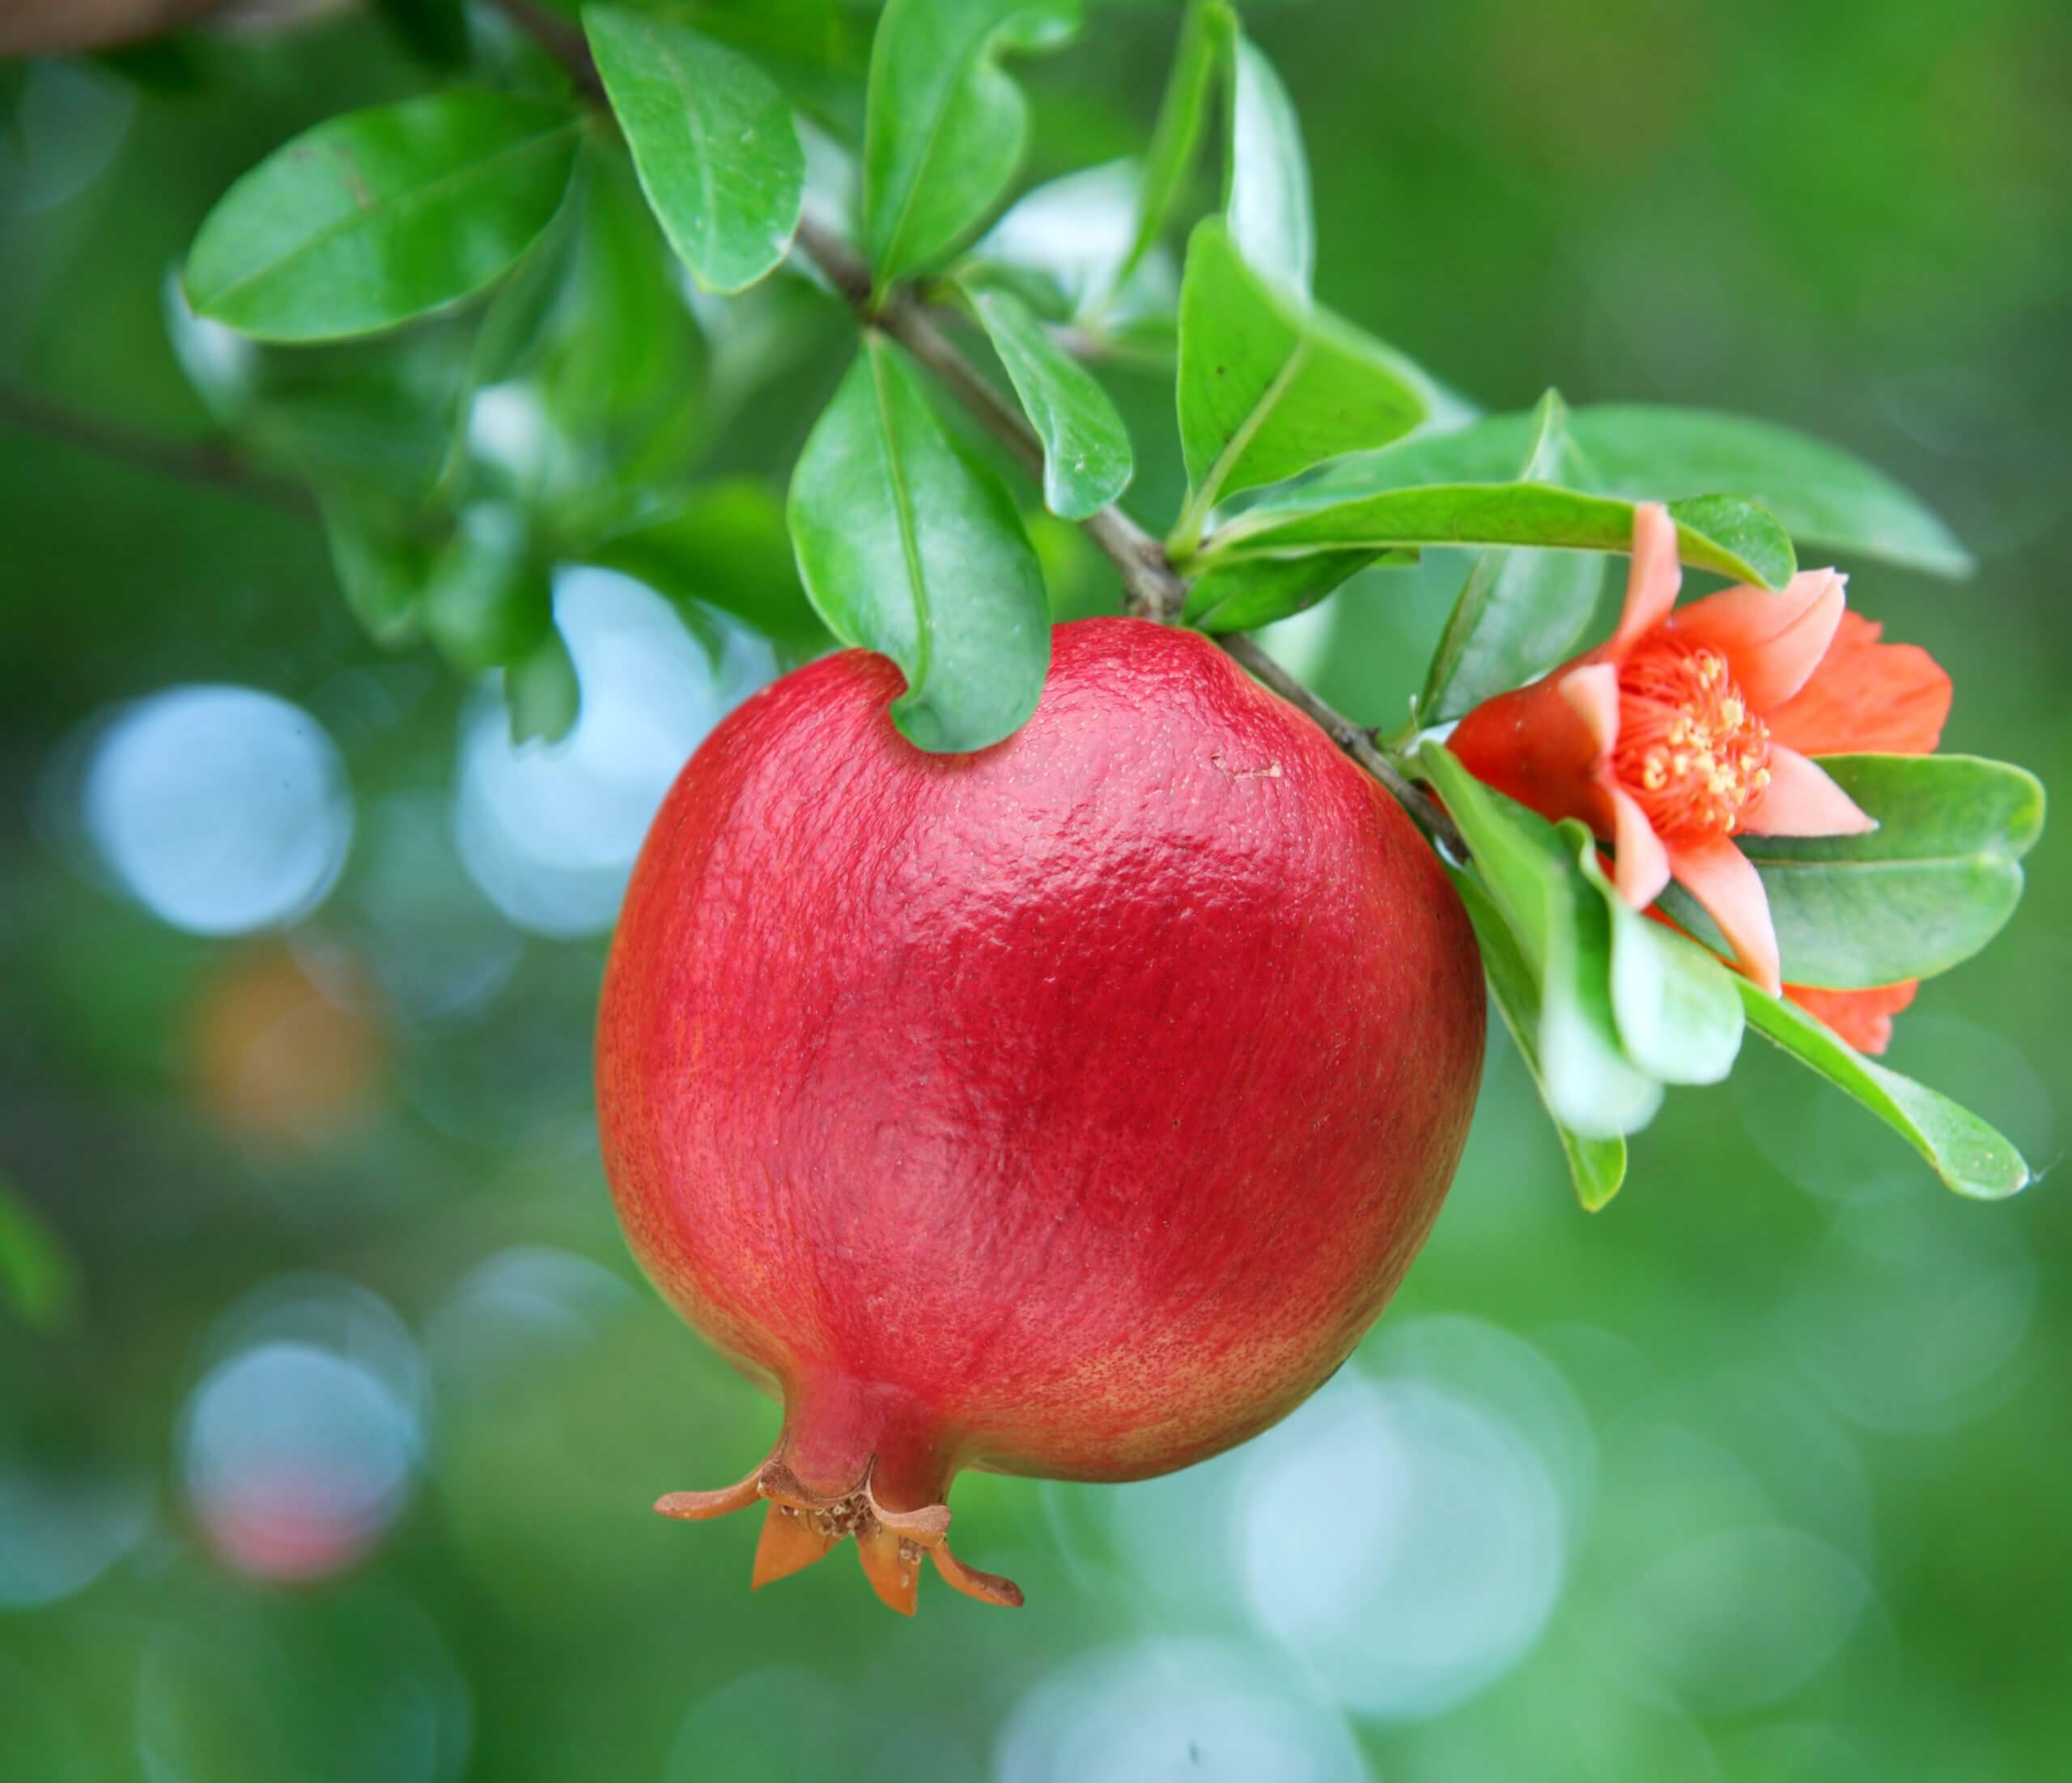
Today’s pomegranate (Punica granatum) trees come in a huge range of sizes, with smaller trees for city yards or larger trees for orchards or spacious landscape plantings.  So long as the local climate is within the cold tolerance range (USDA Hardiness Zones 8-11) and summers are not humid and rainy, pomegranates should thrive.

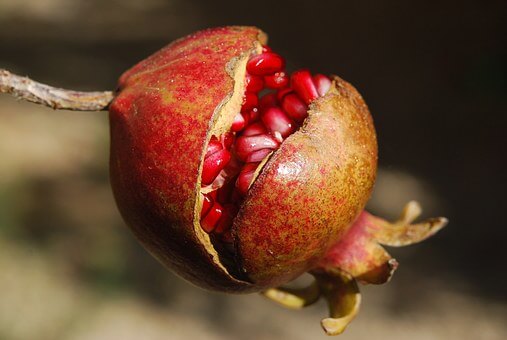
They grow well in poor, dry, rocky soils, but benefit from soils fortified with organic matter. (Commercial growers know that to achieve the largest juiciest fruits regular moisture and nutrition are needed.)  If the soil drains well, a pomegranate will appreciate added soil amendment.  The best choice is to blend Black Gold Garden Compost into the soil at planting time.  This helps young potted trees transition from potting soil to native soil. [Click here to learn more about growing pomegranates.]

7. Rosemary

A rosemary shrub in flower.

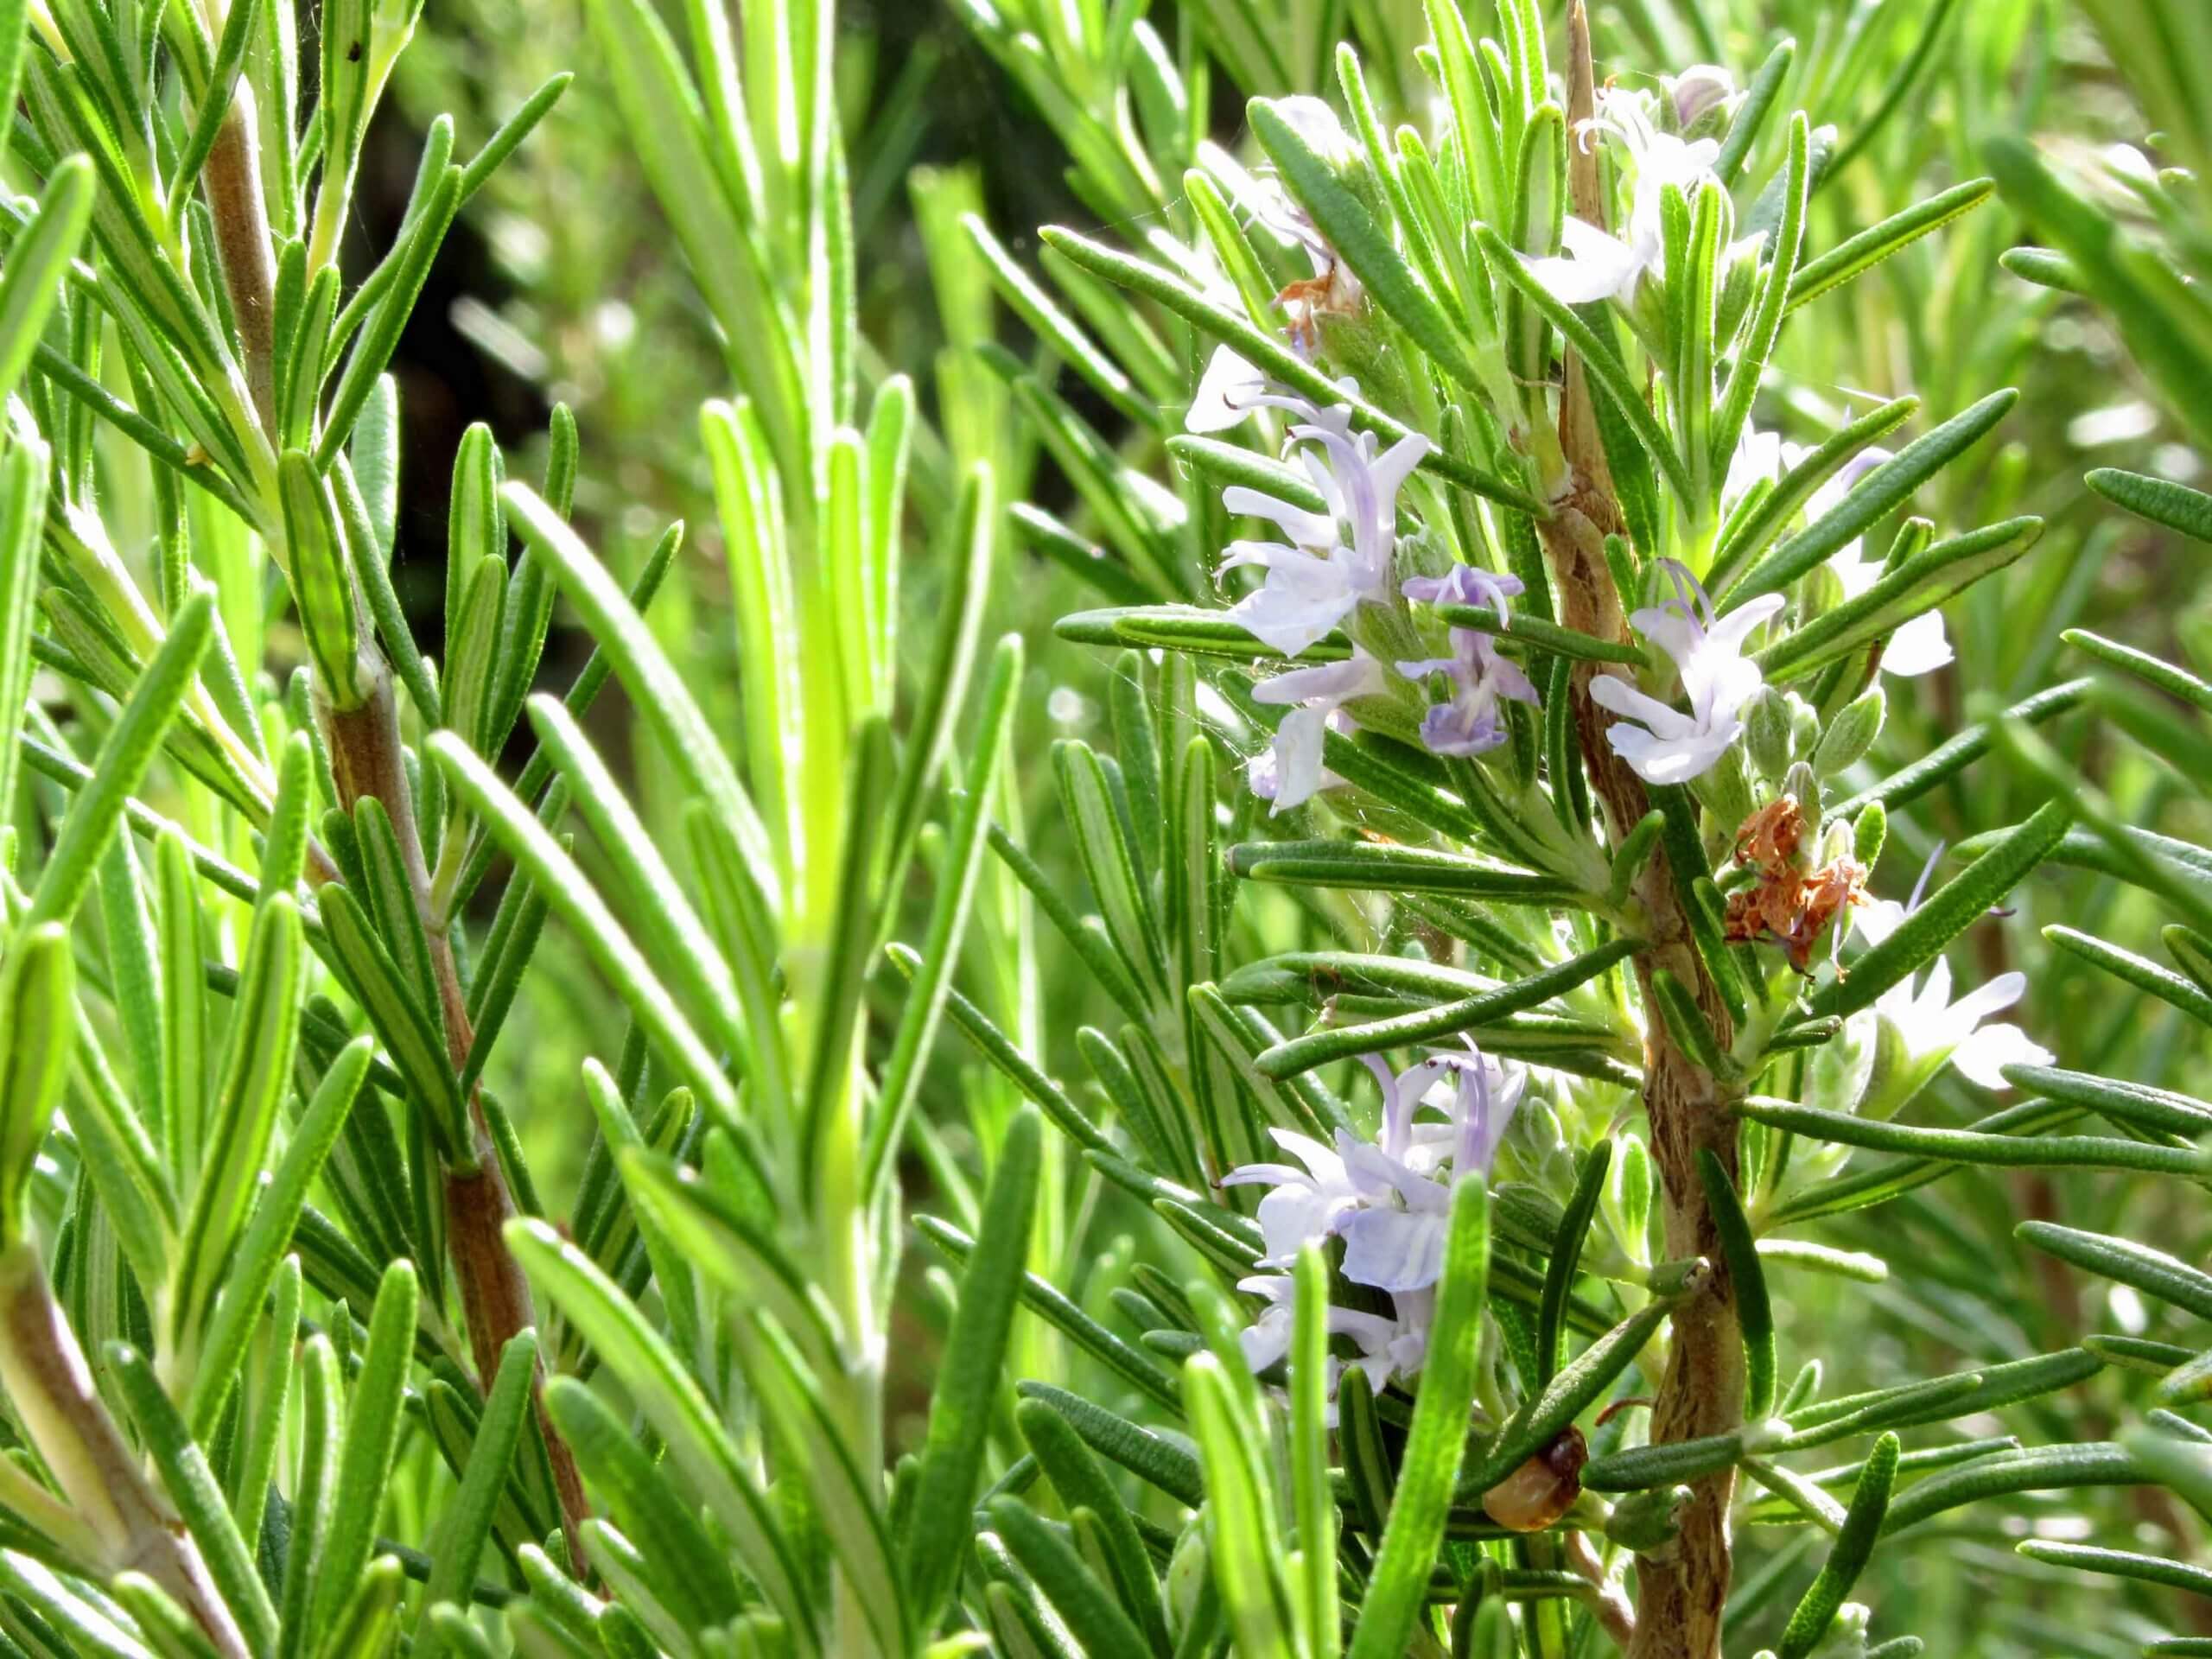
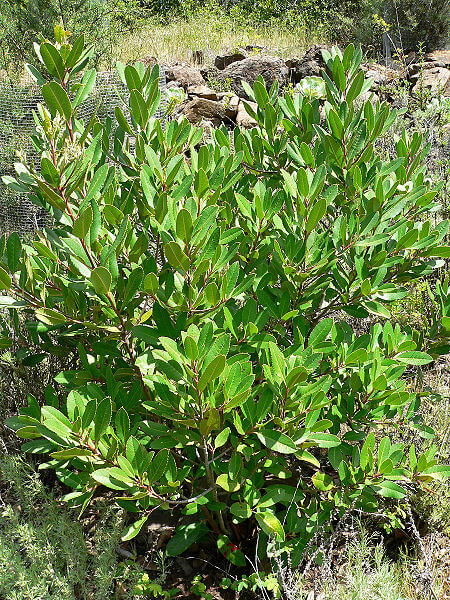
The herb rosemary (Rosmarinus officinalis) is a large evergreen shrub that grows well in arid regions and tolerates intense sun.  It has many uses. Enjoy it as a culinary herb, cut flower, and or essential oil scent. The fresh stems also make great flavored kebob sticks and/or barbecue brushes. Plant potted rosemary in Black Gold potting soil and place on a sunny, west-facing patio or deck.

Quality potting soils with high water-holding capacity are the best choice for growing edible plants with fewer irrigation demands. Good mixes rich in organics hold more water for longer than low-grade potting mixes. That means you can grow more with less water, and harvest fruit and veggies at a fraction of the price of shipped fruit from grocery stores.

Healing the Land after Fire: Post-Fire Planting

Wildfire is ubiquitous in the west but has spread to new areas due to lack of forest thinning.

Wildfire is an equal opportunity killer.  This year it took out multimillion-dollar vineyards in Napa County, CA just as ferociously as it destroyed a lot and block subdivisions in Santa Rosa, CA, neither considered high fire hazard locations (click here for the California Fire Hazard Severity Zone map).  For all of those faced with a burned homesite or blackened land, there is one important thing to do as the winter rains come—stabilize your soils. This can be achieved by several seeding methods.

Aerial Seeding

The US Forest Service flies over newly burned forest land releasing grass seed during the California winter.  It’s to help stabilize the newly exposed soils, so they don’t erode and fill waterways with sediment carried away by runoff.  Seeded plants help to retain as much topsoil as possible by holding the surface layer with a network of roots.  The plants themselves break the fall of raindrops, protecting soil-surface particles from being eroded with runoff.  The result is much faster regeneration of the site in that first winter after a fire and increased revegetation going forward.

Home Seeding

California poppies were sown over a large area on this property to heal over disturbed land.

Post-wildfire seeding by homeowners can be done with any seed mix, but those containing local native grasses and wildflower species will adapt the best.  One seed source for Western states is S & S Seeds, a California company that produces bulk seed mixes for large-scale revegetation projects. Their Chaparral Sage Scrub Mix is a useful blend of native grasses, shrubs, and wildflowers that includes white sage, lupine, California poppy, and buckwheat.  The seeding rate for this mix is 49 pounds per acre.  To estimate how much you need, roughly calculate your square footage and order by the pound (43,560 square feet = 1 acre. To convert square feet to acres divide your property’s square footage area measurement by 43,560).  At $60 per pound, this helps with estimating costs, too. Another recommended S & S mix is the California Native Wildflower mix, which contains all the local flowers to turn your blackened ground into a colorful show come spring!

Pasture Seeding

Large-scale seeding of fire-damaged sites provides vegetative cover to reduce post-fire rain erosion.

For those with farm animals and livestock, most of the non-irrigated pasture mixes of grasses and clovers work quite well, if seeded in the late fall.  These will cover the earth with a nutritious group of plants to transform the black ashy mud that plagues these sites into rich cover.  You’ll be able to graze animals there without any toxic plant concerns.

Large-Scale Seeding

For large-scale applications consider hydroseeding, but for average homesites invest in a paddle spreader ($50), which hangs on your shoulder like a big purse with a crank that flings the seed.  It’s better than wheeled spreaders for seeding ground that is uneven, rocky, or debris covered.  The hand-held spreaders fling seed up to 20 feet on all sides as you walk along, so they’re a good time saver.  Shoulder bag or belly-spreaders are worth buying when sowing more than a half acre. Flingers ensure even distribution of seed, so the entire site blooms evenly.

Preparation and Fertilization

This densely forested canyon will burn, but the native silver lupine on the canyon edge naturally adds nitrogen to the soil, making it a good species for seeding.

Because fire can actually consume the nitrogen, organic matter, and microbes in your soil, be prepared to fertilize the land after the new shoots are up and growing well.  You can use the fling spreader to apply fertilizer granules over a large area, too.  A dose of nitrogen-rich blood meal (12-0-0) or all-purpose lawn and garden fertilizer (16-16-16) will also help your landscape or pasture fill in quickly while you replace landscaping, fences, and livestock pens.

Timing

Timing is important to this process, so you need to have seed and spreader in hand at the start of the rainy season.  Sow your seed as close to the start of the first heavy rain as possible.  Sowing in advance leaves your seed on the barren ground where it’s easily consumed by birds and rodents.  Sow the day before a good rain, and it will work your new seed down into the soil to immediately begin the germination process.

After you sow over your blackened earth, Mother Nature will take over.  Soon, the bright green fuzz will spread across all that black ground.  Then early annual wildflowers will emerge to help you celebrate a new beginning as nature demonstrates how to heal the land with flowers.

Sloped ground is most susceptible to post-fire soil erosion.
Editor’s Footnote: Another option recommended by fire researchers is to stabilize post-fire land with natural erosion barriers made of straw, coconut fibers, and/or jute. These protect the soil from erosion while encouraging the native seeds existing in the soil to naturally sprout when rains come, without competition from non-native species. They believe that native plants existing in an area have a better chance to create long-lasting cover adapted to the area.

Tough Garden Yuccas      

Adam’s needle (Yucca filamentosa) is an adaptable, bold landscape plant!

“This flower was made for the moon, as the Heliotrope is for the sun…and refuses to display her beauty in any other light.”  This lovely Victorian quote, taken from the 1878 edition of Vicks Monthly Magazine, set off a fad for yucca plants.  Though they flower in the sun, their blossoms become fragrant at dusk, releasing a seductive scent to draw their pollinators, yucca moths (Tegeticula and Parategeticula moth species).  Yucca species depend on specific yucca moths for pollination, and yucca moths lay their eggs in yucca flowers where the young feed on some (but not all) of the developing seeds. Both moths and plants need one another for survival.

Growing yucca is a snap if you choose the right one.  With so many species and new varieties available at garden centers, it can be mind-boggling.  The best choices for those in yucca country are locally native species available in outdoor garden centers.  These will be the best adapted to your region and most likely to bloom well.

Central and Eastern Yucca for Landscapes

Moundlily yucca growing in a sandy plain in the American Southeast.

Yuccas may form single clumps, multiple clumps, or be tree-like.  Clump-forming species are more prevalent in the East and Southeast coastal regions.  Common garden-worthy forms include Adam’s needle (Yucca filamentosa), an eastern native that inhabits fields and open woodlands, the southeastern moundlily yucca (Y. gloriosa and Y. gloriosa var. recurvifolia) that inhabits coastal landscapes, and the Central US soapweed yucca (Y. glauca) of the dry plains. Spanish bayonet (Y. aloifolia) is a trunked species that inhabits southeastern coasts. These are more tolerant of regular rainwater and soils with clay, but all require well-drained soil and will withstand drought.

Western Yucca for Landscapes

The beautiful flowers of banana yucca rising from a tough cluster of leaves.

In the arid west, Yucca species are adapted to perpetual wind and nonexistent humidity.  Species such as the clump-forming banana yucca (Y. baccata) and tree-like beaked yucca (Y. thompsoniana) have thicker leaves plus a hard outer skin that make them super desert hardy, but painfully slow growing.  That means these are best purchased as mature specimens because young plants take so long to reach a visible landscape size. Arid yucca prefer south-facing, sloping ground with rapid drainage or naturally porous soils.  That’s why it’s essential to know the origin of any yucca you’re considering, to make sure you get a proper fit with your microclimate.

Landscape yucca of all kinds have been getting a makeover; ordinary green-leaf species are now offered as variegated cultivars that you can buy at garden centers.  These feature brightly striped or blue leaves and compact versions that are ideal for container gardens.  Variegated forms may bring shades of bright gold, ivory, and mint green into the garden for year-round color.

Growing Yucca in Gardens

‘Color Guard’ is a popular variegated Adam’s needle for containers and gardens.

In the landscape, some yucca species develop a trunk-like growth with age, so they get taller with time.  Others spread laterally, producing large clumps around the mother plant.  Since there are so many species in cultivation, the list below identifies the most widely grown and available species for gardens.  Different cultivated varieties may be available at the garden center, and though they may look different, grow them as you would the parent species.

Provide your yuccas with soils that drain well. Sandy or gravelly soil is often preferred, though Adam’s needle can withstand loamy soils. Be sure you know the hardiness of these sun lovers before planting them in the garden. Most landscape species are remarkably cold hardy, but the lack of winter light may be problematic for overall vigor.  Southwestern species cannot withstand winter moisture.

Growing Yucca in Pots

Mature Y. gloriosa var. recurvifolia become tree-like with age.

When growing yucca in a large pot, it’s best to make sure there is optimal flow for drainage.  If you create a small gap between the drain hole and the underlying surface or saucer, the pot will drain more freely.  Take at least 2 pieces of old tile, and slide them under the pot where you can’t see them.  It is important to “gap” the pot with any arid plant grown in containers.

Juvenile yuccas do beautifully in pots.  Plant them in porous Black Gold Cactus Mix instead of ordinary potting soil, so there’s less chance of overwatering them.  Buy a youngster for a cute matching pot to enjoy up close. As it grows, pot it up into larger containers until it becomes a stunning mature patio specimen.

Unlike agaves that bloom once at the end of life, yuccas bloom each year with stalked iridescent sprays of snow-white blossoms.  They shine in the moonlight reflecting light to lure their moth pollinators, so be sure to plant them where you can’t miss the show for full-moon viewing.

List of Common Yucca Species for Gardening

Latin Name Common Name Form US Region Zone
Y. aloifolia Spanish Bayonet Tree-like SE 7-11
Y. baccata Banana Yucca Clumping SW 7-11
Y. filamentosa Adam’s Needle Clumping SE 4-9
Y. gloriosa    Spanish Dagger Tree-like SE 6-11
Y. glauca Soapweed Yucca Clumping C 4-10
Y. thompsoniana
Beaked Yucca Tree-like SW 6-11
Glowing yucca flowers develop a sweet scent at night.

4-Layer Easy Rock Garden Design

Created on a slight incline, this beautiful western rock garden featuring aloes, cacti, and local stones and cobble.

Alpine succulents from the Atlas Mountains flooded into 17th-century England where the climate and soils were totally unsuitable for growing them.  This created a learning curve for English gardeners. Daily summer rains and great soil explains why their gardens are so fabulous, but succulents need high sun, fast draining soil, and occasional watering to thrive. To compensate, English gardeners learned how to build rockeries or rock gardens.

Created along a driveway slot, this layered alpine rock garden shows the adaptability of rockeries to small spaces.

They learned that succulents could survive English winters if the soil was as well drained as a mountain scree.  In the wild, alpine species thrive on mountainsides where elevated natural pockets between the rock keep them high and dry. So, the elevated English rockeries were raised with rock and pebble and created on south-facing inclines. Contemporary rock gardens in the American West use similar techniques, but the plants grown are more tender species from South Africa and Mexico.

American succulent rock gardens are easy to make, sustainable, and demand little water.  Their size can be as small as a rocky trough or cover an entire front yard, but all must be sloped or mounded for increased drainage.  They are easiest to create on a preexisting slope that receives full sun. South-facing slopes are best.

Creating Layered Rock Gardens

Rock gardens are created in four layers.  Allow plenty of time for a thoughtful arrangement of the rocks; placement really matters.  Hand place materials to resemble a natural feature where each stone looks at its best and compliments the plantings. Without careful design and placement, rock gardens can look like rock piles!

Layer 1 – Place Anchors:  Anchors are key boulders and large rocks that are higher than the final garden grade. They provide height, help support smaller stones, and reduce erosion.  Set them within the bed area in a naturalistic, irregular arrangement that’s pleasing to the eye.

Layer 2 – Cobble/Rubble:  Stones on this layer range from slightly larger than your fist to robin’s egg sized.  They can be rounded river rock, cobble, or coarse crushed stone with sharp edges that grab the soil on slopes.  Rounded rock or cobble tends to roll or slide without the structure of supporting anchor stones. Leave gaps between the anchor stones to support and raise the planting layer on top.  Leave deeper pockets for planting larger plants.

Layer 3 – Fill Soil: Pour Black Gold Cactus Mix into all the openings between the cobble/rubble layer. Pack the mix well to avoid washouts.

Layer 4 – Gravel Mulch:   Succulents of all kinds love gravel surface mulch.  It prevents the mix from washing out and reduces slope erosion.  Its addition will result in conditions ideal for both tender and hardy succulents as well as small arid grasses and perennials.

Keep Planting!

A rock garden isn’t static; it’s always changing.  Alpine Sedum will spread into crevices and along stones to create vivid mats of color.  Bright Sempervivum will send up their tall blossoms in late spring.  Gorgeous Echeveria hybrids will prove to be the perfect accent plants for hot summer weather.

Over time, rock garden soils will settle and gravel will erode, but that’s okay.  It’s a natural process.  When soil layers become too thin, add more Black Gold Cactus Mix.  To slow erosion as you add the mix, loosen the soil at the bottom, incorporate the mix, and cover with fresh gravel mulch. If you want to create new planting pockets, just remove some small- to medium-sized rocks, dig a new hole, and add fresh mix.

Locally mined stone is more affordable due to the short hauling distance.  Visit a local rock yard and take a good look at what’s available in your area before you start your rock garden. Visualize what you want, determine the garden’s area and plantings, order the rock, succulents, and bags of Black Gold Cactus Mix, and you’re on your way to a fabulous new succulent rock garden!

Gravel mulch holds soil and is the perfect cover for arid grasses and perennials. (by Jessie Keith)

The Best Pomegranates for Home and Garden

‘Wonderful’ is a popular orchard variety pomegranate that also grows well in home gardens.

Since antiquity, the bright red seeds of the pomegranate (Punica granatumhave been likened to rubies.  The fleshy seeds are a sign of the nutritional treasure hidden inside the fruit’s tough, leathery rind. The covering of these Middle Eastern fruits protects them from birds and dehydration, unlike fully exposed stone fruits and berries.

The pomegranate tree has changed little since the earliest biblical references, making it a paleo fruit. They provided vital nutrition for the Mediterranean, Middle Eastern, and North African people who traditionally grew them in wall gardens that protected the foliage from drying winds and cool weather.  This is key to growing pomegranates because a lack of heat or too much wind will limit fruiting.  Untimely rains in the fruit’s late-summer and fall ripening season can also cause rinds to crack open prematurely, spoiling the contents.

Growing Pomegranates

Bright foliage and coral blossoms make pomegranates a beautiful early color source for gardens.

Pomegranates may be deciduous, semi-evergreen, or evergreen, depending on the climate and variety. In the American Southwest, they are deciduous. What makes them so great in gardens is that the small trees or large shrubs are both ornamental and edible.  The flowers are vivid coral red, offering early visual interest. As fruits ripen later in the season, they offer more visual interest.

Today’s pomegranate trees come in a huge range of sizes, with smaller trees for city yards or larger trees with abnormally large fruits for orchards or spacious landscape plantings.  So long as the local climate is within the cold tolerance range (USDA Hardiness Zones 8-11) and summers are not humid and rainy, pomegranates should thrive.

Just because pomegranates grow well in poor, dry, rocky soils doesn’t mean they don’t benefit from organically fortified soil.  Commercial growers know that to achieve the largest juiciest fruits regular moisture and nutrition are needed.  If the soil drains well, a pomegranate will appreciate added soil amendment.  The best choice is to blend Black Gold Garden Compost into the soil at planting time.  This helps young potted trees transition from potting soil to native soil.

fruit
Pomegranates crack open on the tree when there is too much summer rain.

The addition of a balanced NPK fertilizer has also been shown to increase fruit yields and decrease fruit cracking.  As temperatures rise, mulch the young pomegranate with more compost to keep roots cool and moist as you deeply water them over the first summer.

Each “ruby” inside the fruit has a tart, sweet, juicy outer flesh that envelopes a BB-sized seed  Seeds are typically hard, but breeding has reduced seed size. The seeds of some new varieties are nearly non-existent, so only the flesh develops.  These types are preferred for eating out of hand, so be aware of fruit quality when choosing a variety.

Pomegranate Varieties

The very ancient pomegranates grown by the Spanish in the California missions did not have attractive fruit.  New varieties are different. Twentieth-century breeding has yielded dozens of excellent improved selections with varying fruit and seed color, tree sizes, and tolerance to cool coastal growing conditions.

Choosing the right variety may be as simple as selecting the universally popular heirloom variety ‘Wonderful’ (1898), or picking the right-sized variety for your landscape or patio.

Top Varieties of Pomegranates for Western Gardens

‘Wonderful’: The most commonly grown commercial variety preferred by those who grow for juice.

‘Ambrosia’: Identical to ‘Wonderful’ except its fruit is three times larger.

‘Sweet’: Preferred for cooler summer climates and container culture.

‘Eversweet’: An early seedless variety ideal for short growing seasons further north or at higher elevations of foothills.

‘Pink Satin’: A super sweet, semi-seedless variety for eating out of hand.

‘Red Silk’: A dwarf selection (6′) perfect for small city gardens or for containers on the patio, conservatory, courtyard, or greenhouse.

‘Kashmir Blend’: Fruits have a complex flavor favored by connoisseurs and chefs.

Ripe pomegranate on the branch. The foliage on the background.
Healthy, ripe pomegranates look colorful and beautiful on the branch.

With so many pomegranate varieties emerging from around the world, consider it a jumping-off point to find the optimal fit for your yard.  Before you take the plunge, inquire at a local garden center or with a local extension agent for the varieties best suited to your climate to ensure plentiful fruiting.

The American Southwest is an optimal location to grow pomegranates as both decorative garden or productive home orchard plants.  Reach back into the Old World to cultivate this ancient crop now updated to become the arid zone’s favorite edible tree, second only to the date palm.


The Well-Prepared Parterre Potager

The grand French Chateau de Villandry Ornamental Parterre Garden is in the foreground with the Ornamental Kitchen Garden in the background. (Image by Maureen Gilmer)

As with most things French, even vegetable gardens can be decidedly beautiful.  What makes them so special are parterre potagers, a practice of creating symmetrical, geometric patterns with beds of vegetables of different colors and textures. Within the geometric beds, which are often lined with trimmed boxwood, rosemary, or santolina hedges, are planted many different food crops over the season, sometimes formal, sometimes country casual.  What they all share, however, is the highly geometric layouts and the diversity of plants grown there.

Grand Parterres

Villandry
The vegetable beds at Villandry are edged in boxwood and filled with colorful edibles. (Image by Maureen Gilmer)

Parterres were originally created using clipped hedges and colorful ornamentals placed in grand designs for the French Aristocracy. They were to be appreciated from the high windows of a palace or chateau, such as the famous Chateau de Villandry built in the Loire Valley during the Renaissance. Patterns can be as simple as repeating squares and rectangles or consist of intricate designs, such as repeating Fleur de Lis, knotwork, and starbursts. The designs were created on a large scale, but their clean geometry also made them adaptable on a smaller scale with more functional plants.

Potager Parterres

The potager parterre doubles as both a kitchen garden and appealing ornamental garden and fits nicely into small spaces. Raised edging can create the same impact as low hedges without additional maintenance.  This makes it easier to create a unique look with symmetrically designed beds delineated by edging and gravel walkways.

edging
Simple, contemporary edging and gravel combine to create a French-inspired herb and vegetable parterre. (Image by Maureen Gilmer)

What makes the French garden so fun is that it’s rich in herbs as well as vegetables and other plants that contribute to the famous cuisine.  Some may be perennial, such as lavender, rosemary, and thyme, while most others are annual vegetables of all kinds.  Often the annuals are cycled in and out of the same ground, as the cool and warm seasons pass.  In the South of France, where conditions are warmer, these hard-working gardens are packed with heavy feeding veggies most of the year.  Unfortunately, many of these gardens experience a nutrient decline over time unless the soils are routinely fed with quality soil amendments and added fertilizer.

Amending Parterre Soil

When native soil is worn out and the microbial content depleted, it’s best to err on the side of overdoing it.  It is rare to experience ill effects caused by too much compost, because it’s quickly consumed by soil microbes, in a healthy organic environment.  The more the microbes feed, the more amendments you need to keep their numbers high for consistent soil fertility year in and year out.

BG-GRDNCMPST-BLND_1cu-FRONT
Black Gold Garden Compost Blend is superb food for microbes.

The best choice for in-ground parterres is OMRI Listed® Black Gold Garden Compost Blend, which is superb food for microbes.  Compost can be added to natural soil in spring and fall.  Turn your earth gently with a fork and blend in the compost at least 6-inches deep before planting.  This ensures there will be plentiful organic matter for crops to do their best.

For additional grow power and added nitrogen, amend with OMRI Listed® Black Gold Earthworm Castings Blend.  At planting time, work a handful of castings into each planting hole to ensure the roots will encounter a boost of natural nitrogen and micro-nutrients derived from the earthworm’s diet.

For parterres with hedge edges, mulch them with the leftover compost and worm castings to keep them healthy, green, and beautiful.  Just leave a 3″ ring of open ground around the base of the hedges to let their trunks breathe.

Petite parterres are a great way to create a formal look or one that’s rooted in history.  They can be planted with vegetables, or flowers, or both.  That’s what makes this garden style so inspiring. One can grow good food while never sacrificing great design.

hedges
This mid-sized parterre is a good solution for a functional backyard landscape. (Image by Maureen Gilmer)


Blueberries for Western and Southern Gardens

New, heat-tolerant blueberries should be enjoyed in more gardens south of the Mason Dixon Line and in the Southwest.

Forget that blueberries (Vaccinium spp.) are just a crop for the far north because that’s changed.  Modern selection and breeding have resulted in a range of hybrids and varieties that extend blueberries into almost every growing zone.  What makes this such a great opportunity is that blueberries are produced on shrubs.  That means they will fit right into any existing ornamental landscape while producing annual crops of berries.

Best Warm-Climate Blueberries

shrub
A blueberry is no different from any other acid-loving shrub in your landscape.

Choose from two blueberry types for warmer climates: drought-tolerant rabbiteye hybrids (Vaccinium ashei hybrids, Zones 7-9, 10-12′), and southern highbush hybrids (Vaccinium corymbosum x V. darrowii x V. ashei hybrids, Zones 7-10, 6′).  In the Southwest and California, try rabbiteyes such as ‘Bluebelle’, ‘Southland’, and ‘Tifblue’.  In Northwest California and the American South, where there’s higher rainfall, try the southern highbush varieties ‘Jubilee’, ‘Misty’, ‘O’Neal’, and ‘Southmoon’.

While many cultivated blueberries are self-fertile, pollination and yields are increased by growing different varieties with the same bloom times. Blueberries are pollinated by native bees and honeybees, so it also pays to plant extra spring-blooming bee plants to increase pollinator density at blueberry flowering time.

Siting Blueberries

Like rhododendrons and azaleas, blueberries are ericaceous plants that originate from woodland environments with well-drained, acid (pH 4.0 to 5.0), sandy loam with a shallow layer of organic matter, called the “duff layer”, which lies just below the tree litter.  This is why they grow best with some shade and have wide, shallow root systems that favor low pH soils.  Even if you get a blueberry stipulated for warmer climates, they still require this universal soil condition.

BGPeatMoss2.2cu Front-WEB
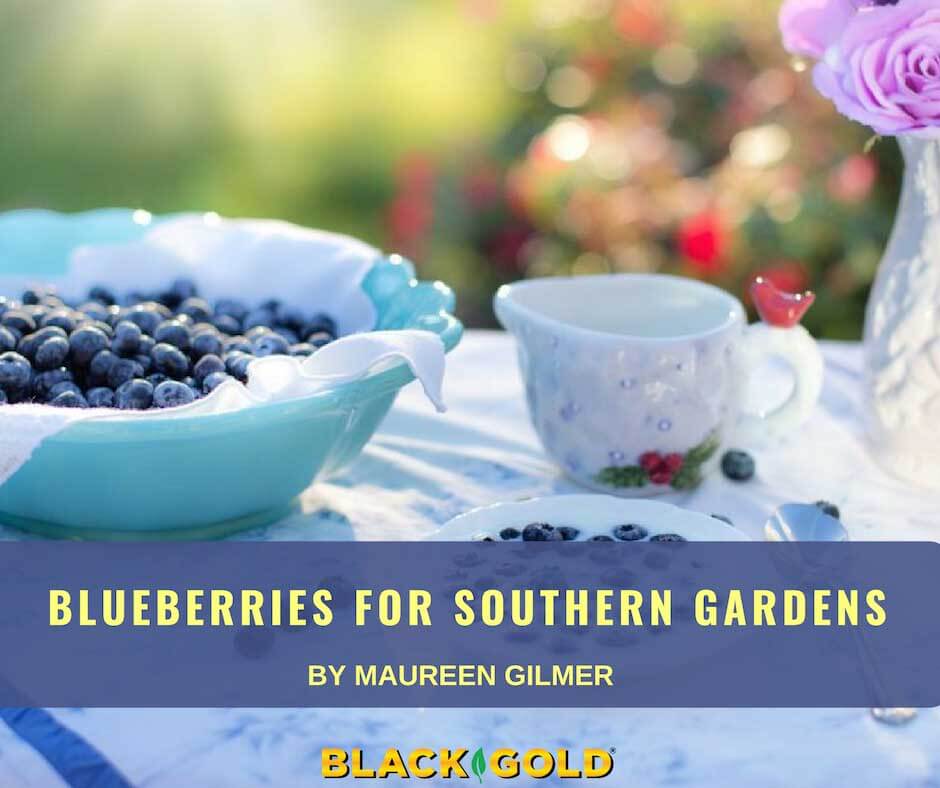
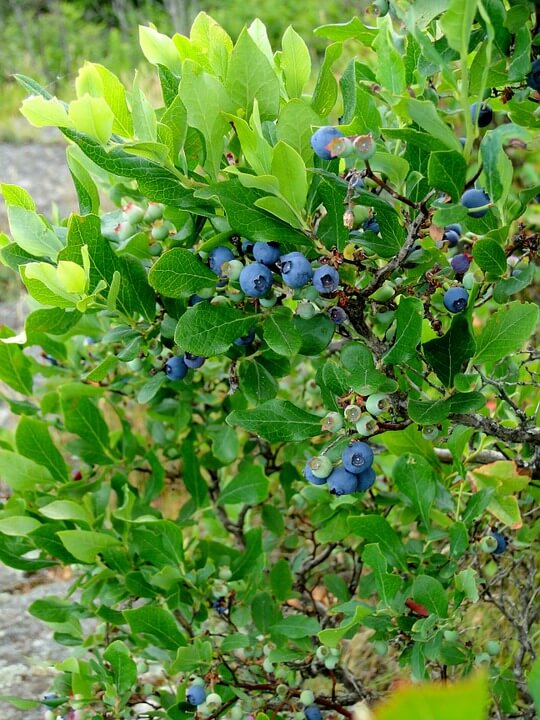
This makes blueberries the perfect edible plant for those properties with good soil drainage and high tree canopies. While most other edibles need direct sun, blueberries do exceptionally well under tall shade trees that provide substantial filtered light and morning sun exposure.

Choose an upland site with low soil moisture and good drainage—sandy to average loam soils are best. If the soil quality is not suitable, be it too alkaline or too rich in clay, be prepared to amend your soil.

Cultivating Blueberries

Peat moss is the best source of organic matter for acid-loving plants like blueberries. Dig a hole three times as wide as it is deep and mix the native soil with 50% Black Gold Canadian Sphagnum Peat Moss. Then add a high-acid fertilizer contain ammonium sulfate or sulfur-coated urea (apply using package recommendations) and backfill. Finish by adding a  3″ mulching layer of Black Gold Garden Compost Blend to help keep root zones cool and moist. Providing an organic-rich, fertile layer of acid soil around the new plant stimulates rapid lateral root growth and helps protect against periodic heat and drought.

Blueberries also grow well in large patio containers filled with OMRI Listed® Black Gold Waterhold Cocoblend Potting Soil, which is approved for organic gardening and ideal for keeping roots from drying out in the summer months without using excess water.

fruit
In warmer winter climates, southern blueberries ripen earlier than late-blooming northern varieties.

Because blueberries fruit on newer stems, refrain from pruning them in the first couple of years to help them become better established.  [Click here to learn how to prune established blueberry bushes.] In fact, it is best to strip off the first-year flowers and blueberries to help plants invest all their early growth towards sturdy roots and stems.

Blueberries are long-lived shrubs that will bring yields to your landscape for years to come.  They will also allow you and your family to enjoy the bounty of home-grown organic fruit in just about any landscape or garden.

Heirloom Vegetable Power: Why Old Seed is New Again

A diverse collection of dried heirloom beans.

Every seed has a story.  When it comes to heirloom vegetable seeds, those with great stories have been nurtured for hundreds and thousands of years by diverse peoples worldwide. Many heirlooms have been lost in time, but some have been preserved, bringing with them wonderful traits that tell us something about the people who grew them and the environments where they were grown.

For millennia, farmers across the globe developed their own local crop varieties—selecting for flavor, production, and resilience. These became the foundation of modern breeding, but many old varieties were lost when modern breeding took hold. Thankfully, some old crops cultivated in harsh climates using ancient agricultural methods have remained in continuous cultivation. These are being collected and assessed for their adaptability to a changing climate. The potential for increased genetic adaptability of these ancient crops may help future farmers (and gardeners).

Native American Heirlooms

In the Southwest, for example, the selection of agricultural varieties was done by many Pueblo tribes who farmed the desert in innovative ways.  Waffle gardens and the Three Sisters methods of Layout 1
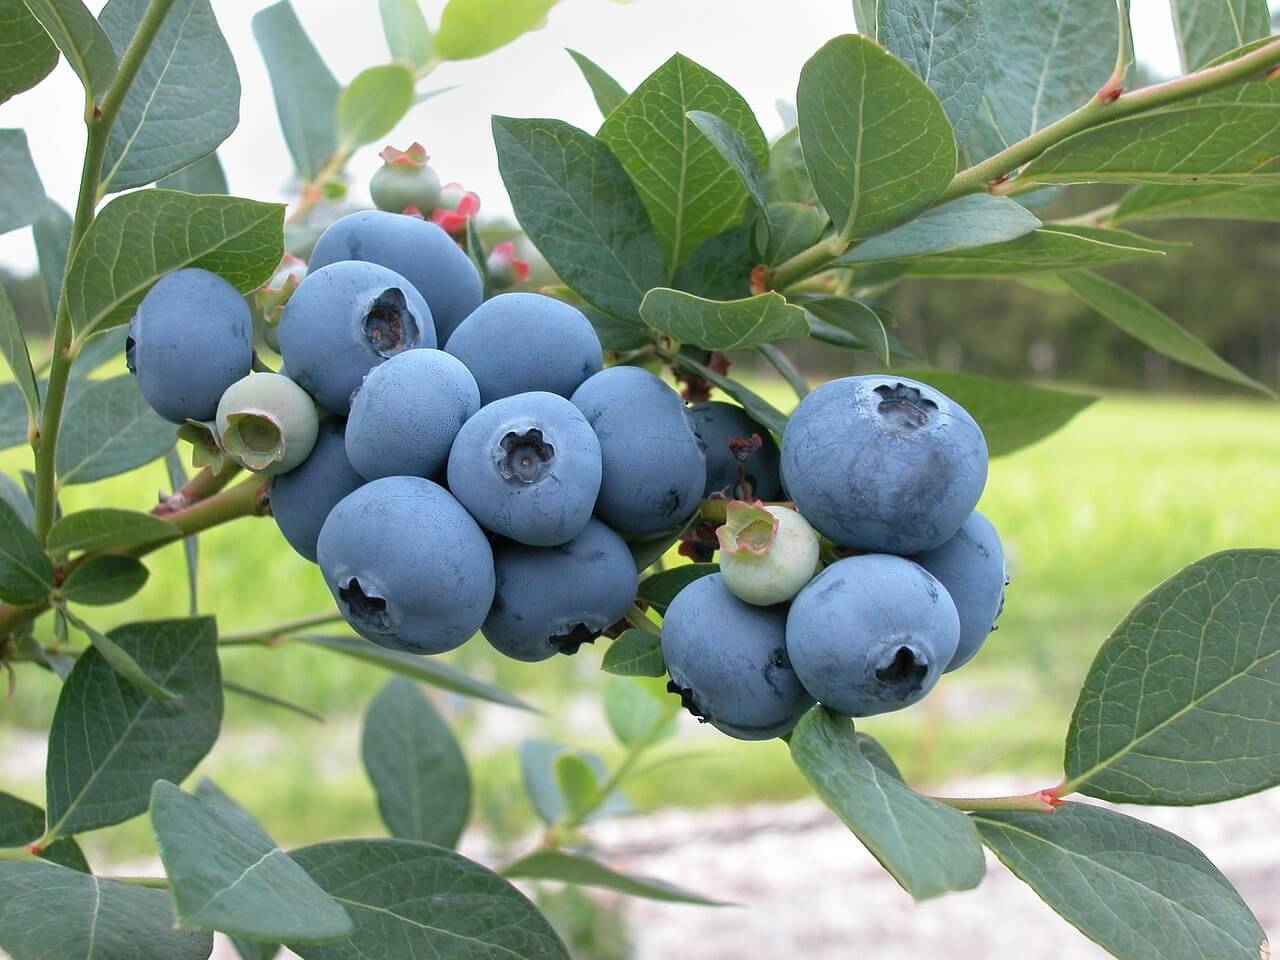
planting were both used.  Corn, beans, squash, and sunflowers were the favored crops, but others were also grown. The seed strains chosen were selected over thousands of years to become the original diet of the tribes.

After losing many indigenous heirloom seeds over the 20th century, Native Seed/Search, was formed. This nonprofit organization in Tucson, Arizona is dedicated to preserving desert vegetable varieties.  Not only do they sell the seeds abroad, but they also make them available to local tribes for their farms and gardens. This keeps crops in perpetual cultivation and helps local tribespeople maintain healthy diets and combat diabetes. Groups like Native Seed/Search protect heirloom strains and their ancient genetics for the future.  By purchasing and saving these, gardeners also help maintain them for future generations.

Heirloom Seed Sources

Other heirloom seed sources offer crops from across the globe, but gardeners in the arid or hot regions should opt for those collected from places with significant heat and drought. Israeli growers have many named varieties developed for their dry climate.  Similarly, many heirloom tomatoes made it out of Iraq early on and are offered by seed catalogs.  Italian varieties and Greek heirlooms are also heated loving and easy to find.  With a little geography, you can match origins to your local conditions to create the perfect marriage of adaptability to flavor and yield. Just be sure to check when choosing an heirloom variety from your favorite seed catalog.

Seed Saving Workshops 1
Native Seed/SEARCH works with local tribes to rekindle their heritage strains and agriculture.

The slow perusal of seed catalogs as the snow flies is a time-honored gardener’s ritual of winter. Though you must await delivery, studying heavily illustrated seed catalogs in January and February allows you to make your list leisurely, then order online. Keep in mind that not all seed is an heirloom, so check before ordering. In addition to Native Seed/Search, we recommend Baker Creek Heirloom Seeds, Heirloom Seeds, Seeds of Italy, Seed Savers Exchange, and Victory Seeds as reliable heirloom seed sources. Those needing seed in a pinch might also find racks of heirlooms and boutique seed at garden centers.

pots
Be sure to wash and sterilize last year’s pots before reusing, or just buy peat pots.

Heirlooms are open-pollinated and true to the parent. This means the seed is non-hybridized, field-collected, and will yield plants that are genetically similar to the parent plants. It also means that you can save your own heirloom seed. Think of each packet you buy as the start of a long, and hopefully fruitful relationship.  After you grow it the first year, save the seed to plant next year. Over time, a gardener can grow lots of different heirlooms and accumulate a nice seed collection of old standbys and new discoveries with each spring garden.  (Check out our heirloom tomato seed-saving video to learn an easy technique to harvest your own seed for the future. There are also seed-saving workshops and other resources at Seed Savers Exchange.)


Potting Heirloom Seeds

Once you place your seed order, the next step is to start saving salad boxes for sprouting seeds.  They hold in moisture helping your heirlooms to sprout safe and sound in protected conditions. You’ll need a bag of Black Gold Seedling Mix to fill the boxes! (Click here for my full step-by-step guide to seed starting.)

Next, organize your small pots from last year to hold the little sprouts after they transplant from the seed box. Wash the pots well, then dip them in a 10% bleach solution and air dry.  If you don’t save pots, newly purchased seedling flats do nicely as do small peat pots.  (Just remember to peel the peat off when planting peat pots because it can impede the speed of root growth into natural soil.)  When transplanting in the ground, supplement the planting area with OMRI Listed Black Gold Waterhold Cocoblend Potting Mix to help your seedlings develop large root systems fast.

BG-WATERHOLD_1cu-FRONTWhether a great heirloom vegetable was cultivated a state away or on the other side of the world, growing and saving heirloom vegetables brings all of humanity together. By growing and saving your own heirloom seeds, you carry on a time-honored tradition and become a link in the chain of sustainability.

Growing California Christmasberry

Large sprays of bright red berry-like fruits mature in time for holiday decorating.

In my old High Sierra home, I decorated with my own native Christmasberry (Heteromeles arbutifolia, USDA Zone 8) fruit every winter for nearly 20 years. Also called California toyon, this shrub produces large sprays of bright red fruits that are so seasonally welcome, I wondered why it was not more popular in landscaping.

Christmasberry makes a fine alternative to Asian Frasier’s photinia (Photinia fraseri), non-native hollies (Ilex spp.), and other exotic evergreens.  Deep, emerald-green foliage makes the red fruits really stand out in the winter garden while providing bird habitat all year long. In the High Sierras, the wild evergreens remained unchanged from the end of late-spring rains to December, when the rains returned.  That’s a minimum of seven months with no supplemental water!

Potted Christmasberry

Like so many California native shrubs, Christmasberry is difficult to grow commercially in pots because of its deep, wide-spreading root system — the key to its amazing drought resistance.  Natives with large root systems rapidly outgrow nursery pots by the end of the first year, when grown from seed.  If not transplanted into a deeper pot, the roots will hit the pot bottom and grow sideways.

A young Christmasberry shrub.

Distorted tap and feeder roots will keep a growing shrub from achieving proper root depth once planted in the ground.  This is why Christmasberry, and comparable native trees and shrubs, are uncommon in garden centers.  So many have disproportionate top-to-root growth. A tiny seedling may have a three-foot-deep root system that refuses to adapt to container culture.  This was such a problem with California native oaks, that growers finally gave up on trying to pot them and planted acorns instead.

Purchase the smallest, youngest potted plants, if you can find Heteromeles arbutifolia for sale locally.  A big plant in a small pot won’t adapt well to drought.

Growing Christmasberry from Seed

Sowing Christmasberry plants from gathered seed is an even better option. Home-grown shrubs can quickly be planted outdoors, allowing the tiny seedlings to freely root into the soil and adapt to local rainfall limitations.

First gather mature, red fruits and clean each one to release the two seeds inside.  In my High Sierra home, robins came each year to feed on the fruits, excreting clean, ready-to-germinate seed on my land.  To simulate this same scenario at home, separate the seed cleanly from the fruit and allow the seed to dry.  This seed will remain viable for only about 8 months.

BG_NATORGPTTINGMIX_1cu-FRONT
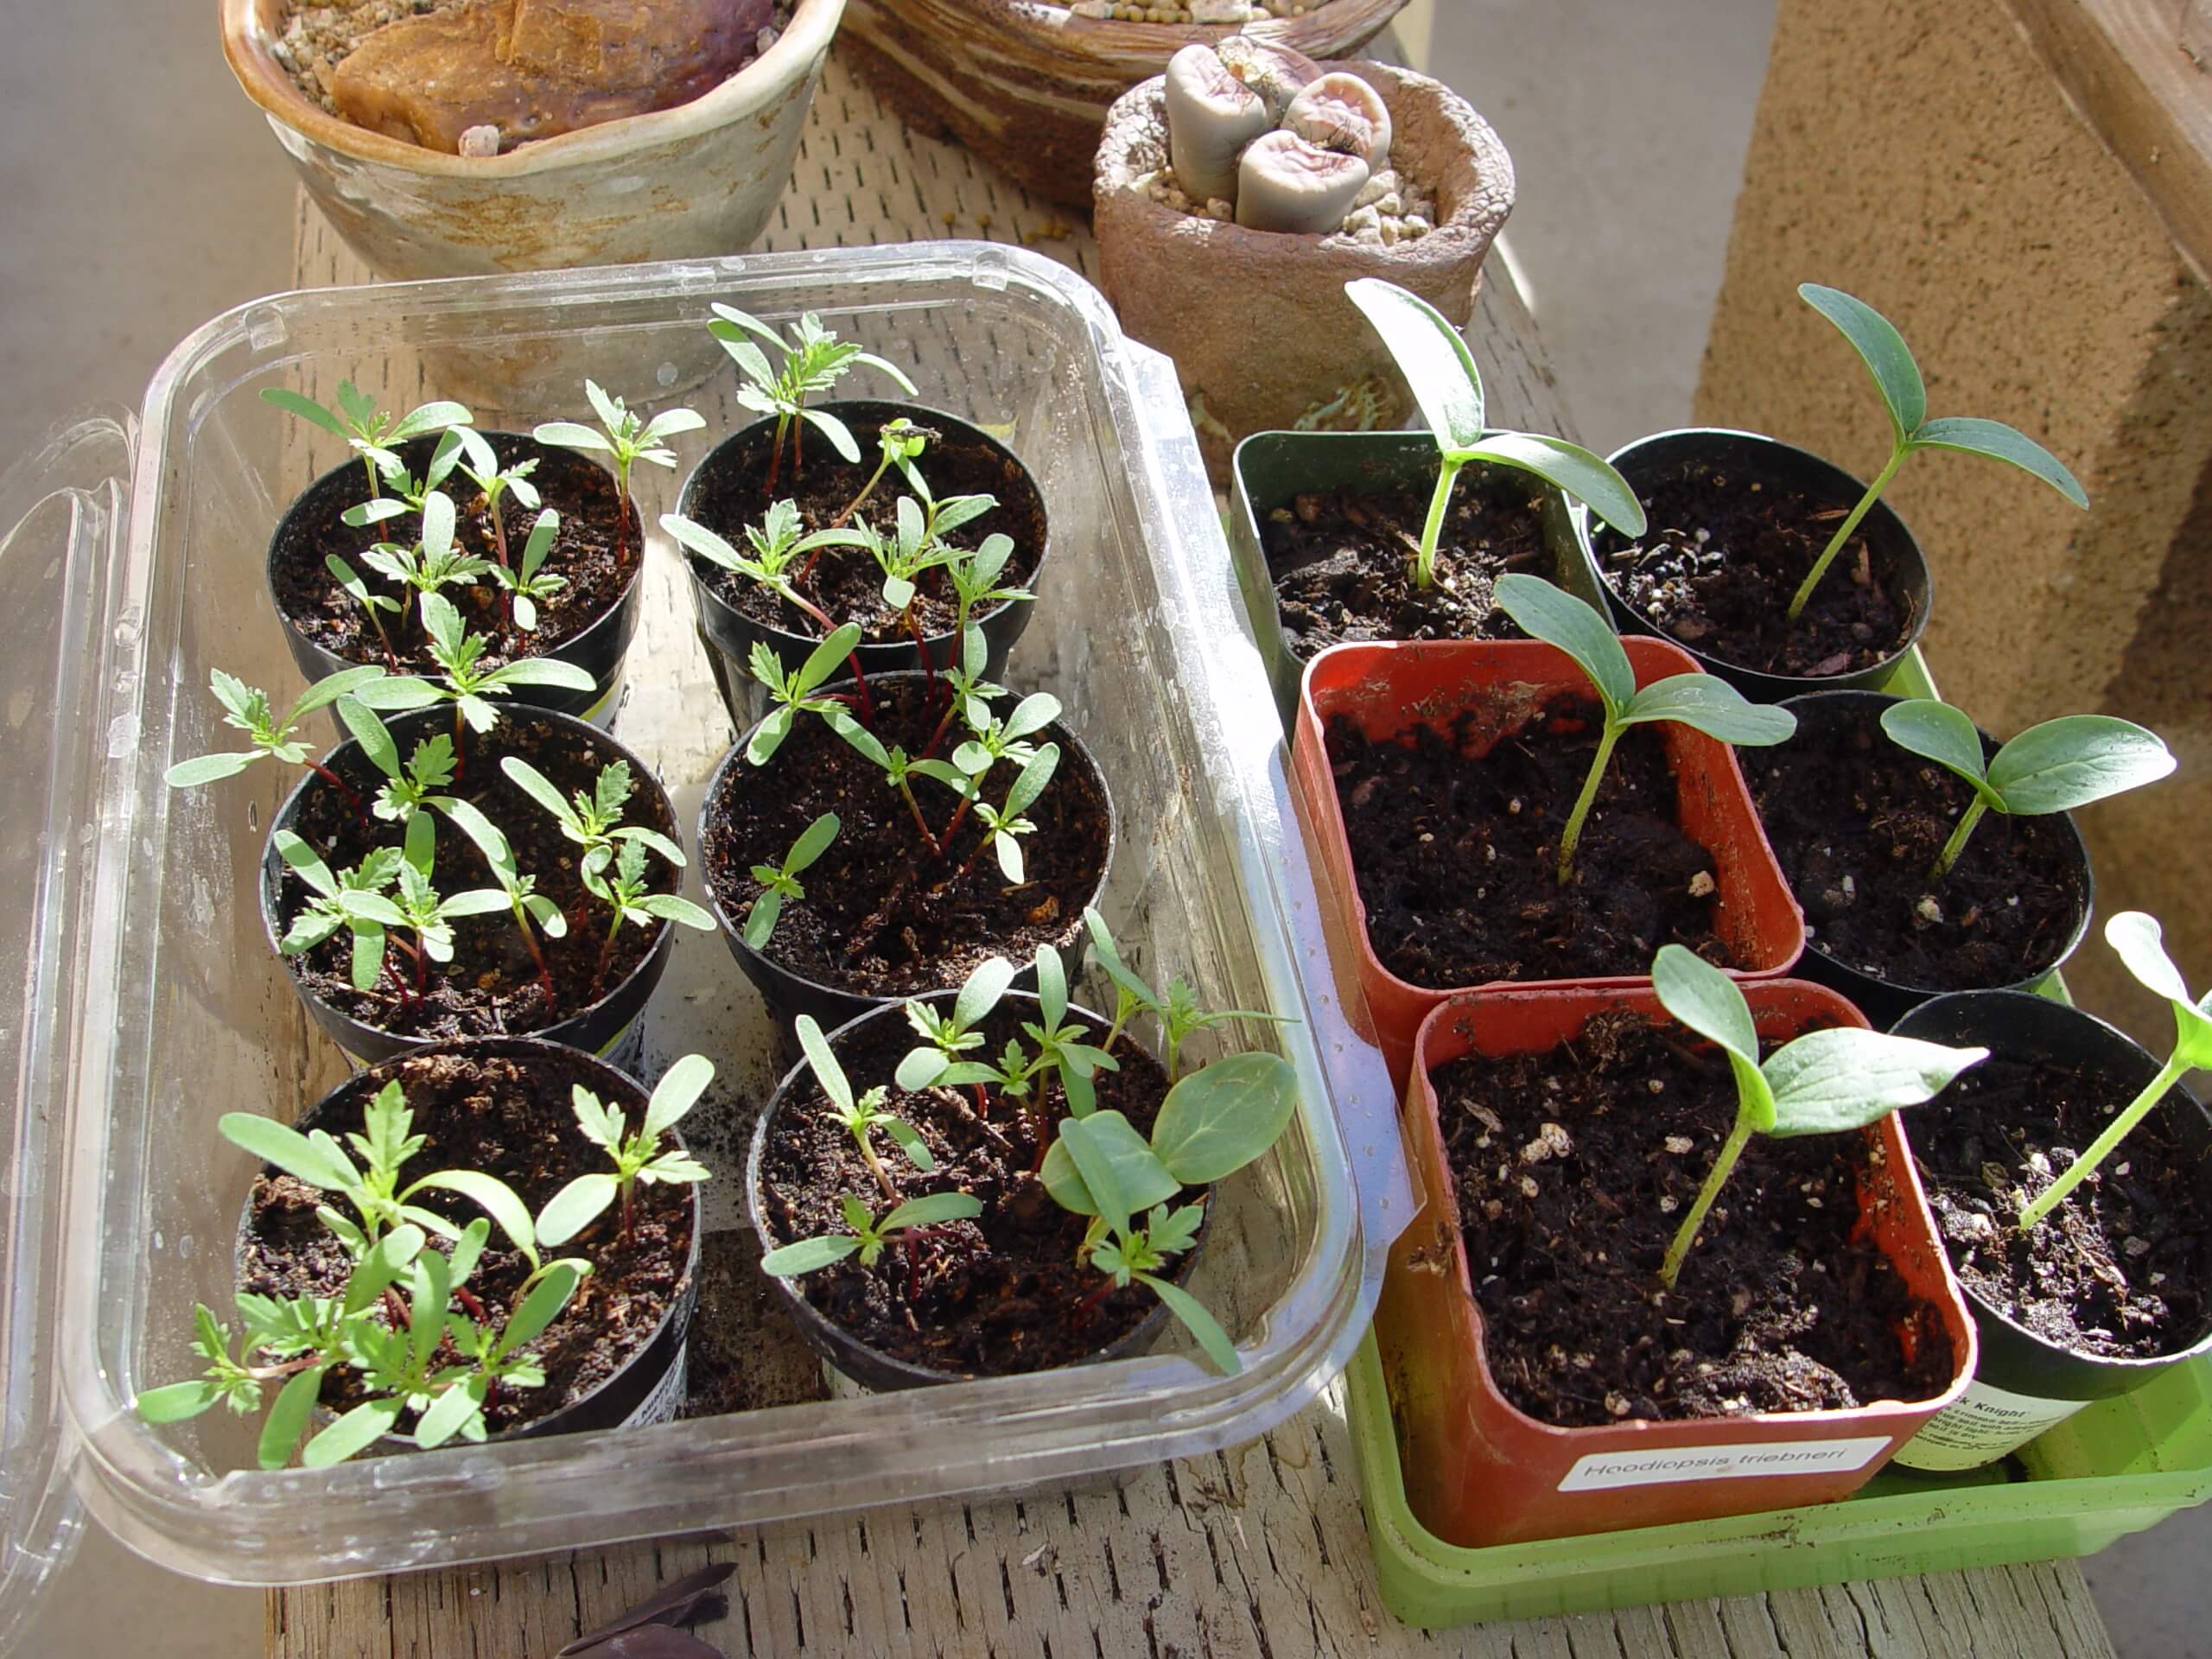
Sow the dry seed in winter to get them started, just like wild seed with the spring rains. Choose a light, natural garden soil, such as Black Gold Seedling Mix. Start by filling a plastic lidded salad or fruit box with the fresh mix, and set the seed into the moist media, but don’t cover it.  Keep the seeds lightly moist and at room temperature, and they should sprout in about a week.  Transplant newly sprouted seedlings into deep pots of Black Gold Natural & Organic Potting Mix. Place them under bright light until they reach 1-inch in height, usually within six weeks.  Transplant into the landscape once the soil can be worked to ensure healthy root growth and easy planting. Spring planted seedlings should be deeply watered once or twice, then let them grow on rainfall unless conditions are unseasonably arid.

Planting Christmasberry

In the wild, Christmasberry typically grows on rocky slopes with dry, well-drained soils that are sometimes a bit saline. Keep this in mind when selecting a location to plant or sow your shrubs. As long as the roots are free to grow deeply, they will out-perform thirsty hollies and other exotic holiday berries without asking for much, if any, supplemental water.

Mature shrubs are bushy, somewhat shade tolerant, and typically reach 6-10 feet or more. In early summer clusters of white flowers are produced. These are transformed into red, berry-like fruits that persist into winter. Established plants can live up to 200 years.

hedge
This relatively young hedge shows how fast Christmasberry produces a drought-resistant screen with high wildlife value.

Other natural, shrubby companions found with Christmasberry are California lilac (Ceanothus spp.), manzanita (Arctostaphylos spp.), western redbud (Cercis occidentalis), and fremontia (Fremontodendron spp.), all of which grew on or near my old property.  This is the essential palette of native California shrubs or small trees that promise beauty in drought.

There is no better recommendation for a species to withstand the perpetual “shake, bake, and irrigate” of the West Coast. Christmasberry survives fire and holds slopes against mudslides, according to Lester Rowntree in her classic 1947 book, Flowering Shrubs of California.  Lester wrote: “I have seen acres of toyon [Christmasberry], in solid formation, come back after fire from the roots of old bushes, ringing the bases of burned 18-foot stems, standing black and dead, with the bright rich green of new growth.”

Planting a Barrel Cactus Safely

The ferocious spines of the golden barrel cactus make them very difficult to pot. (Image by Jessie Keith)

The golden barrel (Echinocactus grusonii) is America’s favorite cactus. All over the Southwest, it has become a coveted living ornament in landscapes. When backlit by the sun, the bright canary-yellow spines literally glow, creating high drama against blue agaves and succulents. A big yellow cactus potted on porch or patio becomes the quintessential year-round focal point that never loses its warm color.

Large golden barrel specimens and other large barrel cacti thrive in big, strong pots if they are planted properly. What folks don’t know is that they are darned difficult to handle, and painful, too. The challenge is transplanting the stemless ball of wickedly sharp spines. The combined soil and plant weight makes golden barrel unwieldy to carry, which complicates matters further.  Here’s how to do it safely without damage to you or the plant.

Protect Yourself

potted
This basketball-sized golden barrel is planted in a perfect-sized salvaged container to allow for future growth and easy watering.

To start, you’ll need long, thick, solid-leather gloves, because picking up pots of golden barrels is a wrist and knuckle nightmare for bare skin. Loosely wrap the cactus in a piece of carpeting, or find a cardboard box that fits over the spines tight enough to “catch”. The box is a bit better because it lets you turn the cactus upside down to stand while you carefully remove the pot. This exposes the root ball and facilitates preparation for transplanting.

When inspecting the root ball, look to see if your large cactus has been field grown and recently potted up. Field-grown cacti are cultivated on slopes that provide rapid drainage. They are dug and potted up in nursery soils that typically drain more slowly and are less suited to cacti longevity because they’re viewed as temporary. To protect your investment, inspect the bottom of the plant and remove any organic matter that may provide excess moisture. Then you will want to prepare your container for planting.

Planting Barrel Cacti

bare root
Newly dug from the grower’s field, the shallow, wide roots of the golden barrel are exposed temporarily until transplanted.

Your decorative pot must be wide enough to contain the cactus and have at least 1 inch or more free space on all sides to allow for new growth, watering space, and surface evaporation. Use a concave pottery shard to dome over the drain hole to prevent erosion. Then open a fresh bag of Black Gold Cactus Mix, a fast-draining medium containing a blend of perlite/pumice or cinders, earthworm castings, and compost. It encourages vigorous growth while ensuring ample aeration and drainage.

Use dry potting soil right out of the bag when potting up your golden barrel cactus. Place a layer of soil at the base of the pot, then set the top of the cactus root ball about 1-2 inches below the pot’s edge, and hold it there while you pour in the mix around the sides. Allow the mix to filter down and lightly pack it to create a porous yet solid base.

BG_CACTUSMIX_1CF-FRONTDo not water the cactus directly after planting, and put it in a partially shaded location. Wait a couple of days before watering, so any injuries to roots during the planting process have had time to heal themselves. Then water in thoroughly. Add more potting soil where settling or pockets occur.

For more visual interest, try adding a surface layer of gravel, glazed tile shards, or tumbled glass. Place in full sun.

Finally, try raising the bottom of the pot up with broken tile shards to create a gap between the drain hole and saucer. This facilitates rapid drainage to create the perfect conditions for cacti and succulents. It also protects decks and paving from what can become a very heavy, beautiful and ferocious plant in your garden.