Articles

Rehab Raised Beds Inside and Out

Raised-bed hoops and row covers can help you protect crops from harsh growing conditions and winter cold.

Second gardens are always better than first gardens.  When those first gardens were your raised beds, then maybe it’s time to raise the bar.  Bigger, better, and more prolific are garden characteristics that all gardeners want, so perhaps it’s time to rehab and expand in preparation for next year’s summer garden.

So many raised beds were at first experimental or created with the kids as a family project without long-term planning and smart design.  That’s why they often don’t last as long as they should.  Earth-to-wood contact (something forbidden in house building) introduces wood rot and invites pests, such as termites. You need to know what you are doing to get more life from your raised bed.

Choosing the Best Raised Bed Building Materials

layers
Redwood ties are naturally rot resistant and great for raised bed building.

Early on, wooden railroad tie beds [read more about railroad tie beds] became popular and kept the rot problem at bay, but ties are made from heavily treated wood. They contain dangerous heavy metals and creosote, which can leach into the soil and be taken up by edible plants. Pressure treated wood has the same problem. It is treated with fungicides and other compounds to reduce rot that can leach into the soil.

Untreated woods are not all the same. Many break down fast, resulting in short-lived raised beds. If you want long-lasting beds, avoid soft or rustic reclaimed woods certain to rot quickly. Instead, choose long-lasting red cedar or redwood. Both decompose slowly and are the most recommended for beautiful frames that resist rot. Trex, and other polymer/wood alternatives, also last forever and look great. All of the rot-resistant options are initially more expensive but worth it if you plan to garden for years.

Rehabbing Your Raised Bed

coir
Just Coir creates a good organic base layer for raised bed gardens.

If you already have raised beds made with fast-to-decompose wood, you may already be experiencing the unfortunate and very common results. They are rotting, bowing, or breaking open at the seams due to decomposing edges weakened by the weight of soil, plants, and mulch.  This means it is either time to rebuild or refurbish the frames.

Moreover, if you have had your beds for a while, the soil will be low and in need of replacement. Like all garden beds, soil volume falls as microbes consume the fine humus, and nutrients are depleted by garden plants. Poor garden soil will produce poor garden plants.

Fall is the best time to replenish raised bed soil and fix repairs. Take advantage of the fabulous fall weather to replace all rotting or bowing boards or edges, and revive sad, tired soil.  Here’s the five-step process in a nutshell:

  1. Remove existing soil, if it’s degraded to mostly woody matter and perlite.  Stockpile the old soil material for future use as summer mulch, or layer it into the compost heap.
  2. Inspect the newly exposed sidewalls by stabbing questionable spots with a screwdriver.  If the metal penetrates the wood,  then there’s rot, and they need to be replaced.  Also, check and reinforce loose corners.
  3. Make repairs to sidewalls using Trex or long-lasting, untreated wood boards. Consider adding more height if you would like to grow plants with deeper root systems. Not only should you use strong, quality wood, but investing in heavy hardware will add to the longevity of your beds. Choose heavy wood screws tightened with an electric screwdriver to keep beds from loosening with the seasonal shrink and swell of the wood.
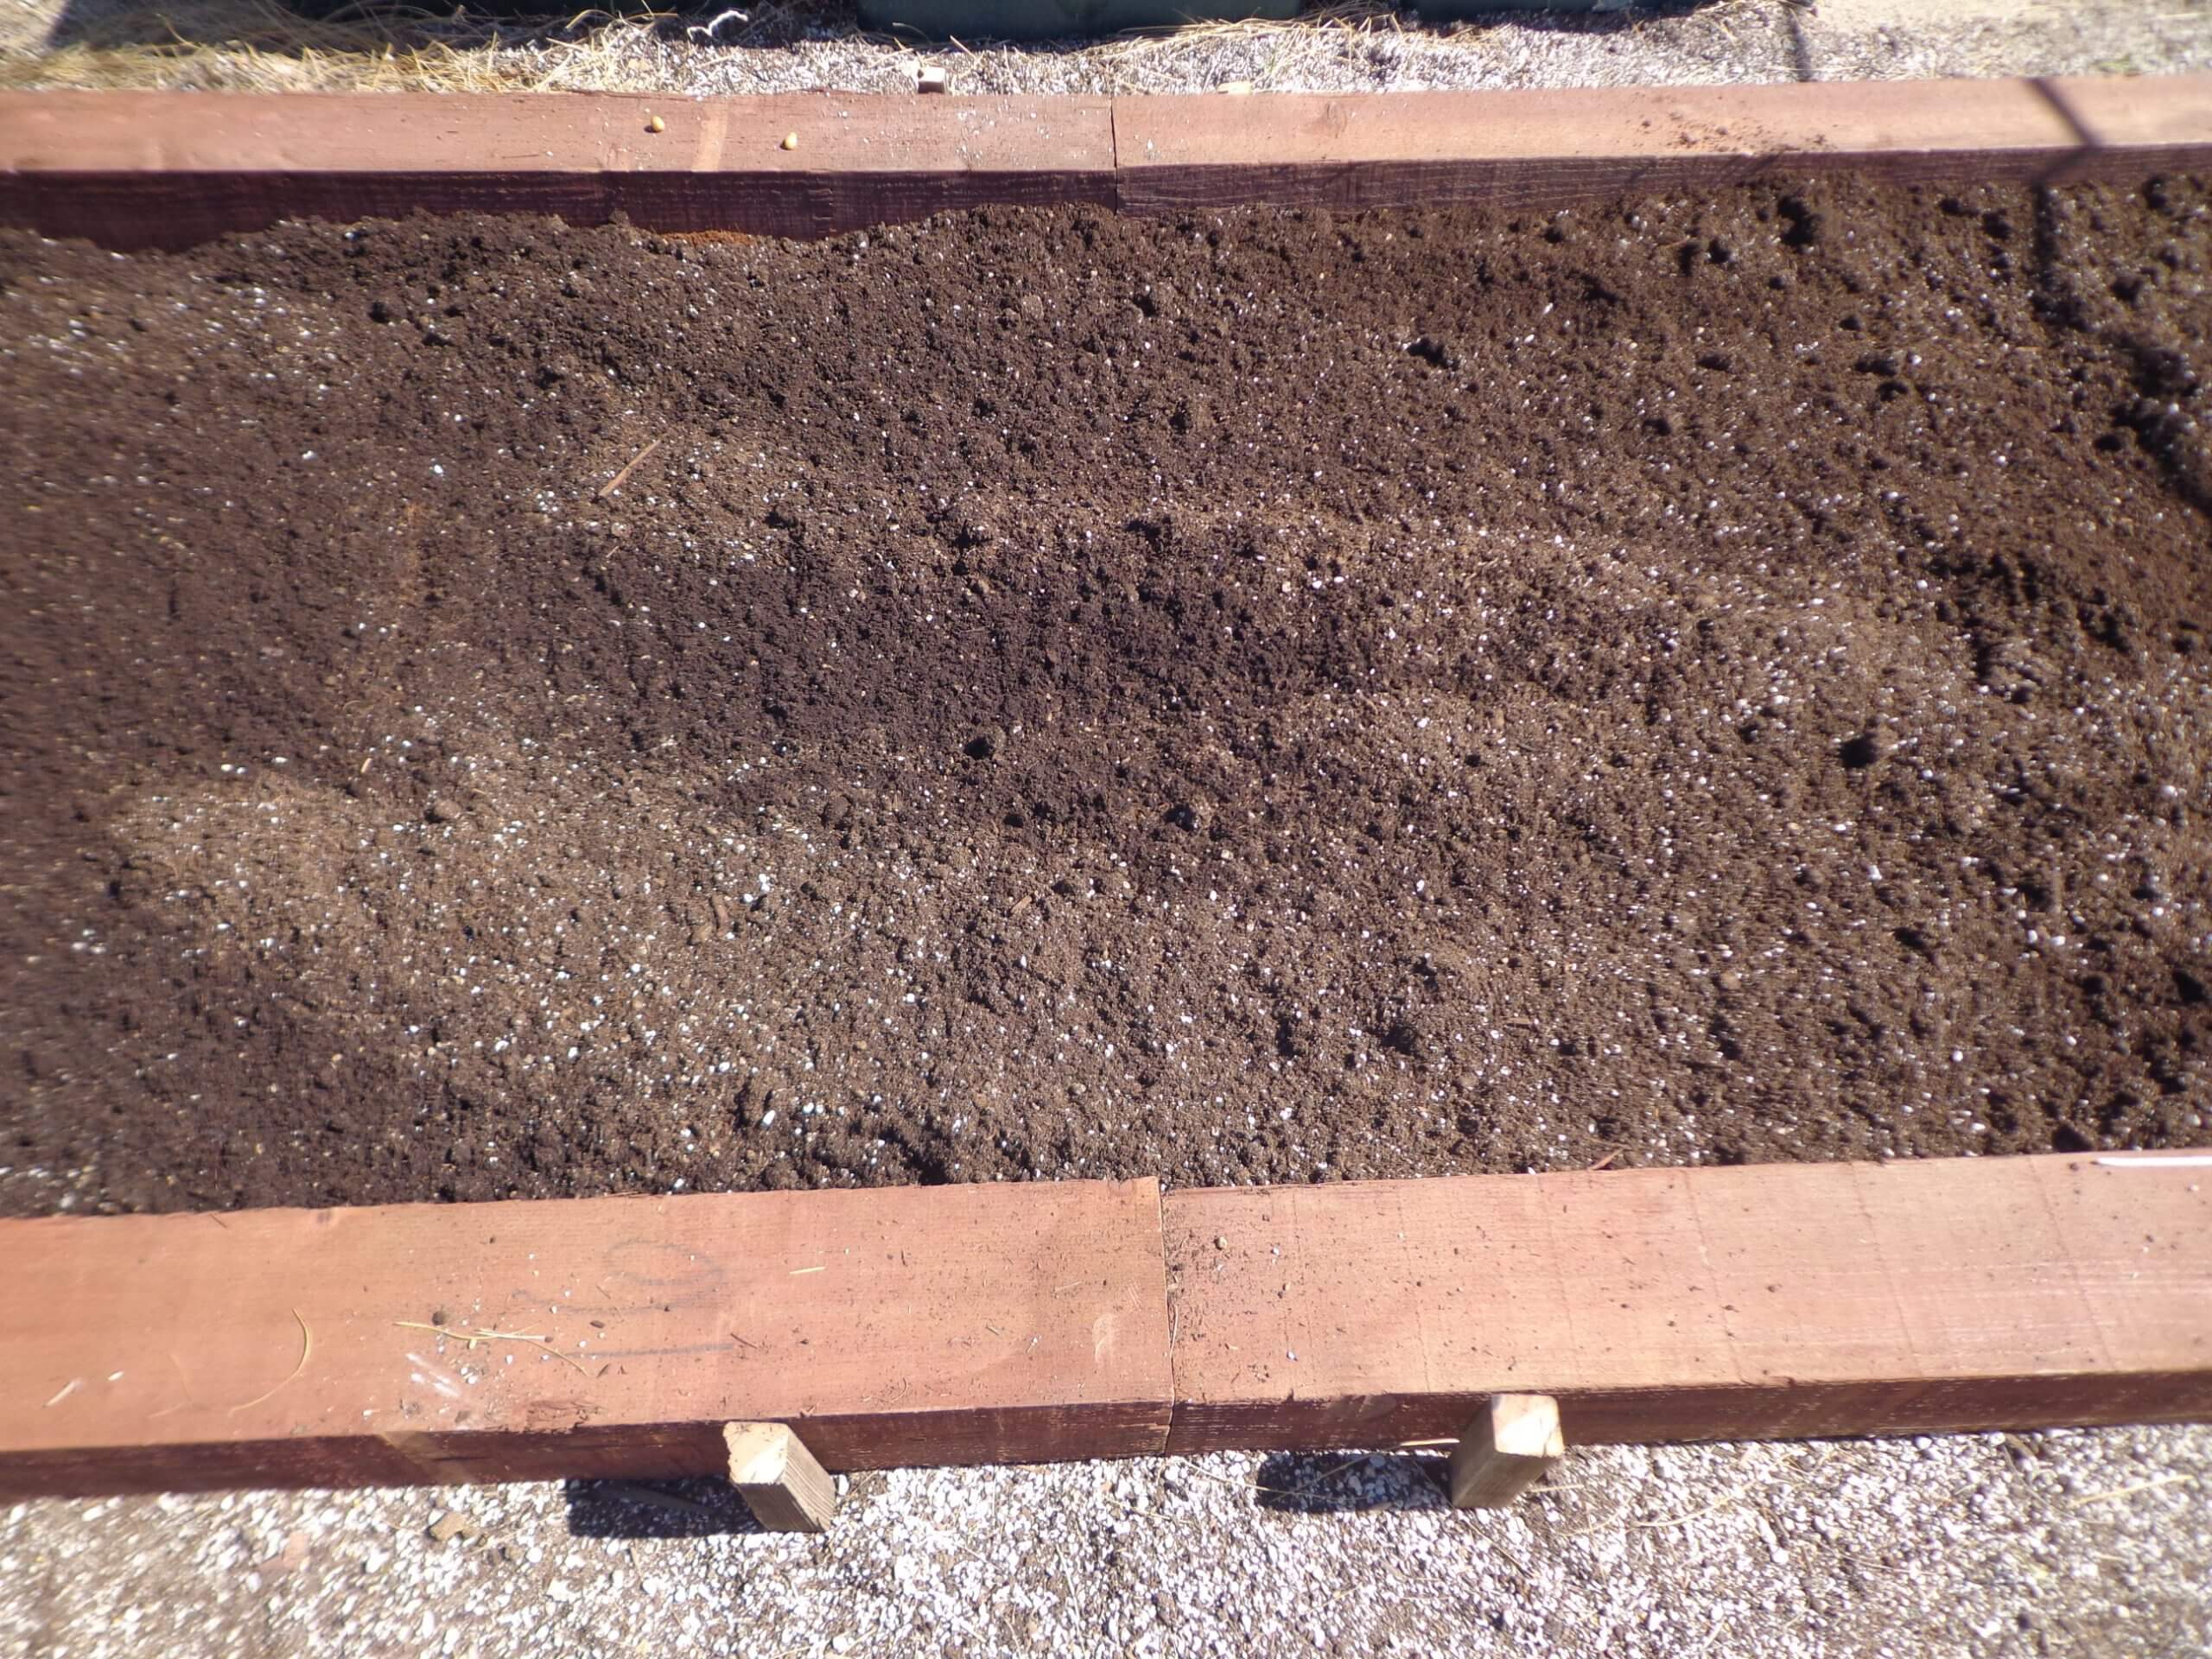
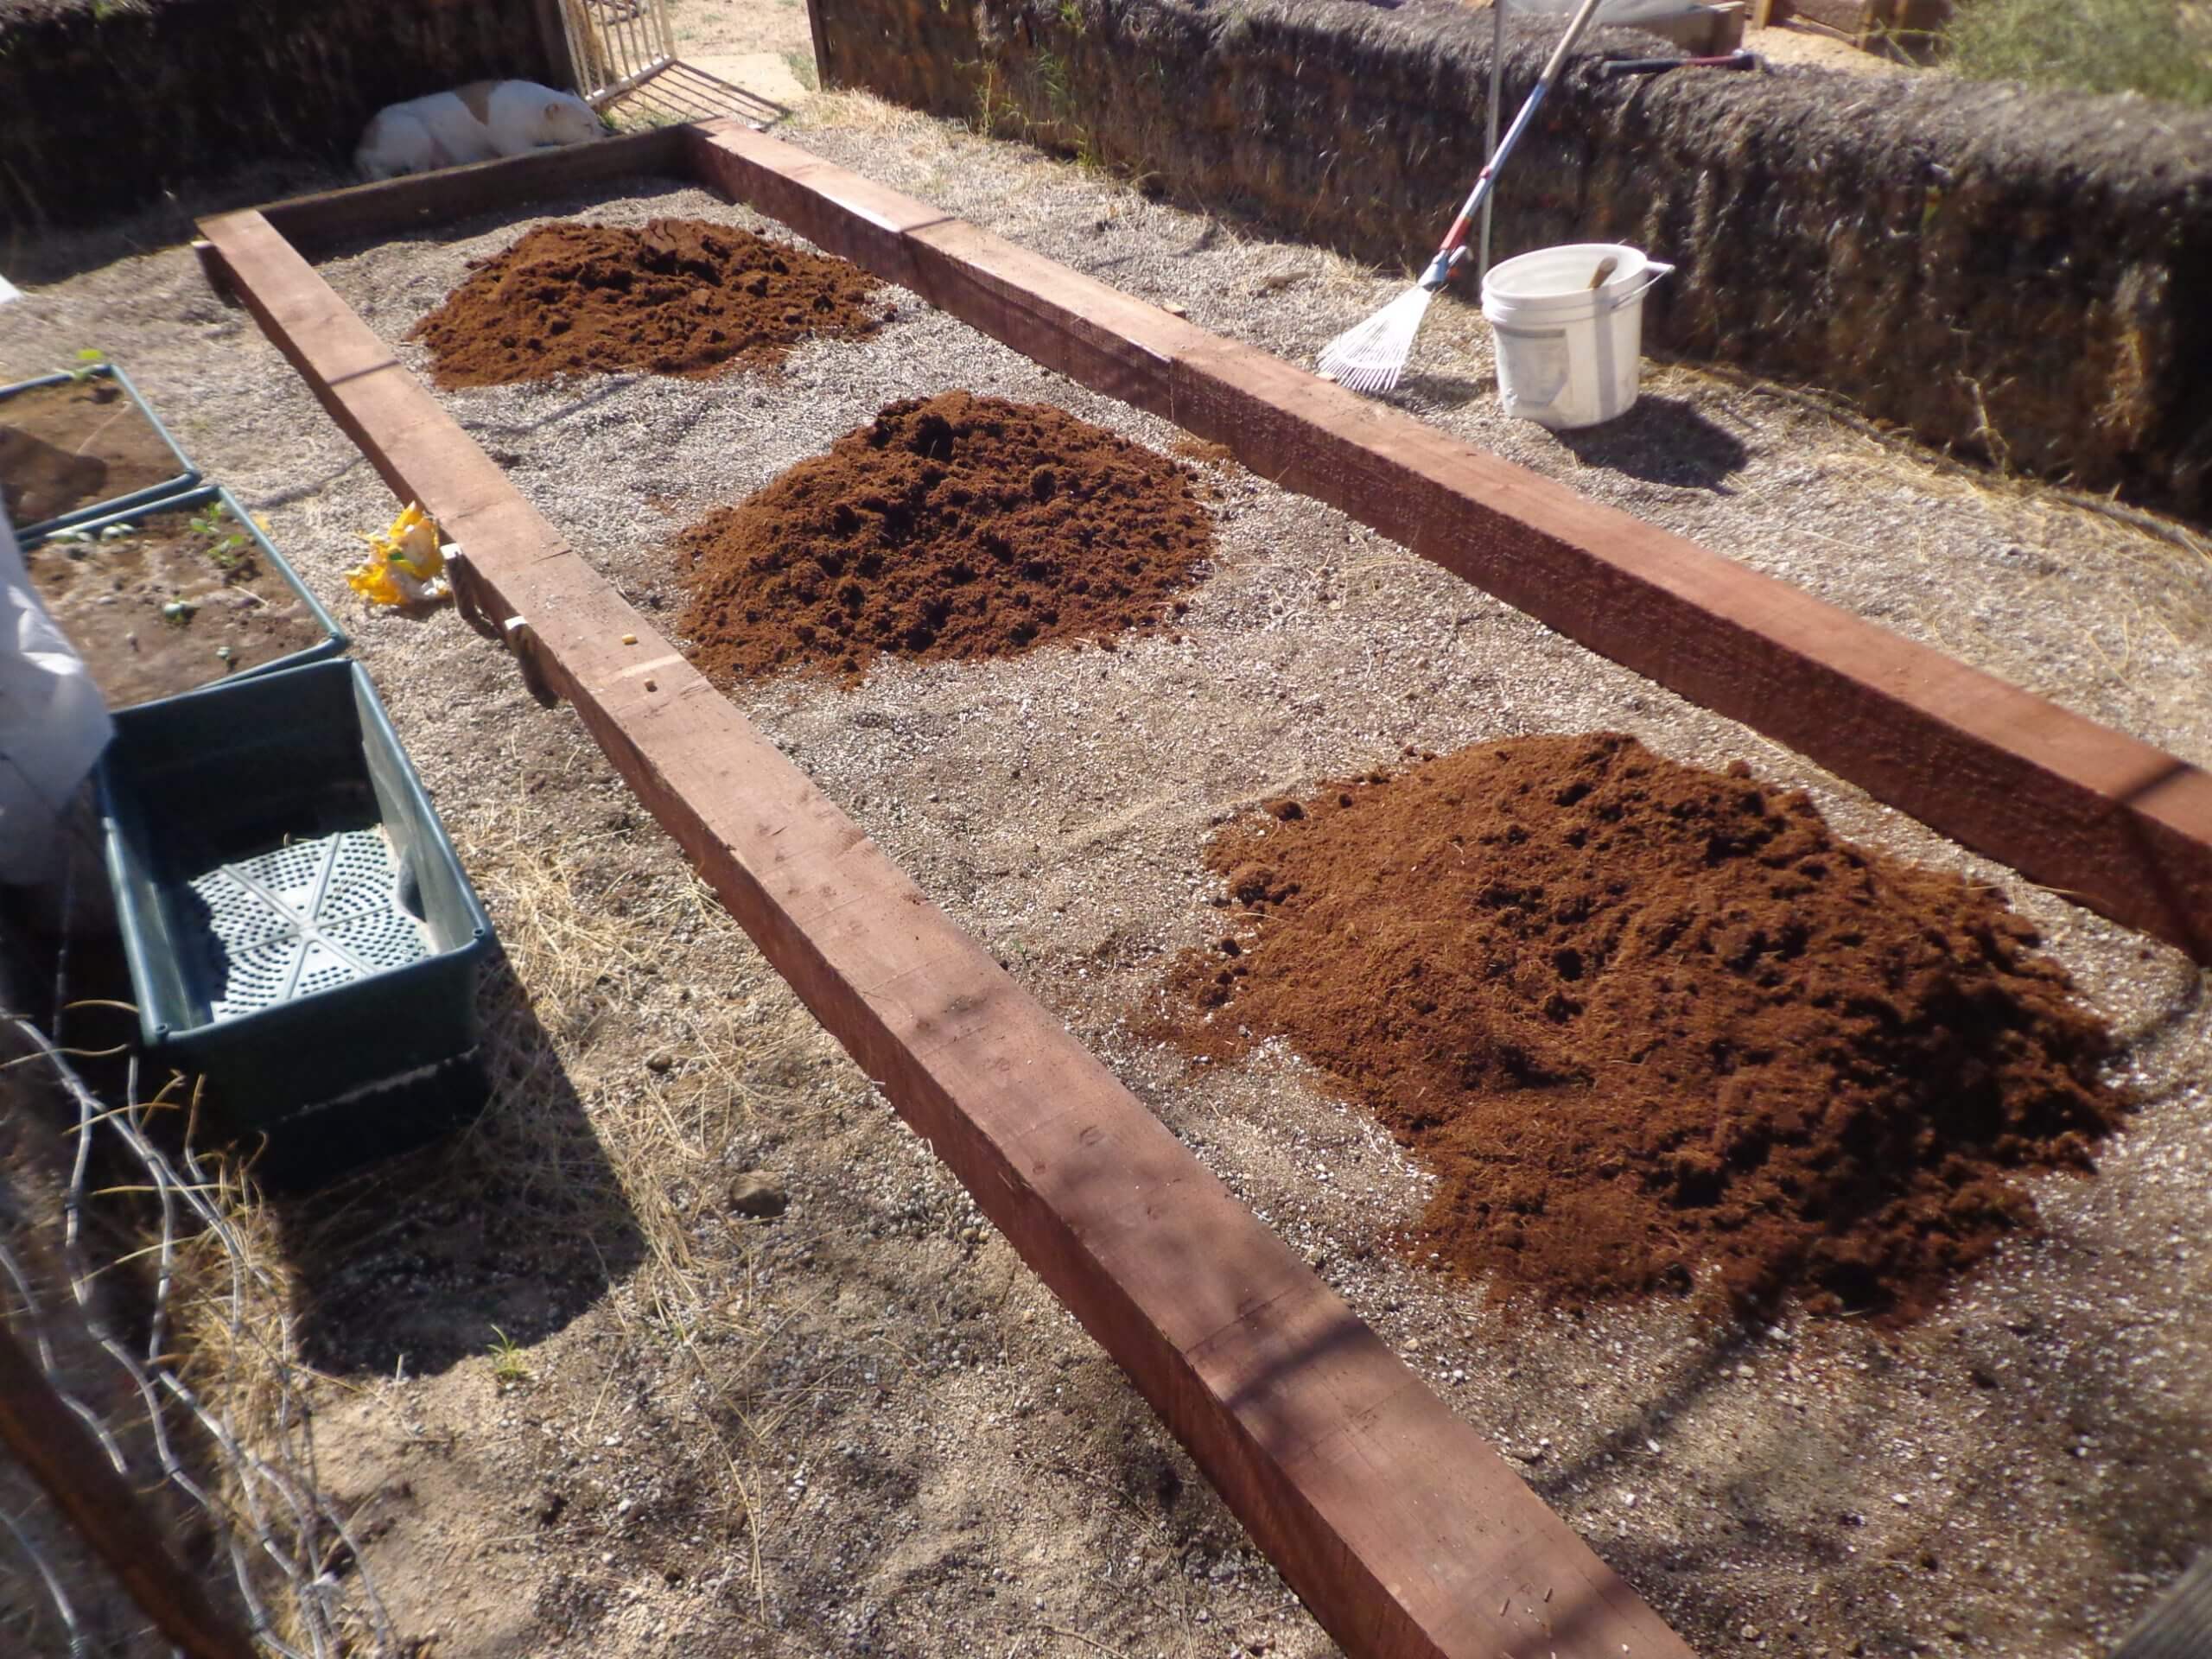
  4. Replace the soil in stages.  Black Gold Just Coir creates a 100% organic matter barrier that holds water and repels root-knot nematodes.  The heart of the raised bed should contain a rich mix of local topsoil amended with Black Gold Garden Compost Blend and a soilless potting mix, such as Black Gold Natural and Organic Potting Soil. The combination depends on the quality of your local soil; great topsoil requires fewer amendments. In general, an even mix of 2 parts topsoil to 1 part compost and 1 part soilless potting mix will yield great results. If drought is a problem in your area, adding a mulching layer of Black Gold Just Coir or Garden Compost Blend will reduce surface water loss.
  5. Add an all-purpose fertilizer, at the manufacturer’s prescribed application, to help drive explosive growth.

Irrigate and Sow

irrigation
Inline drip tubing that invisibly waters your garden without ugly surface tubes and emitters.

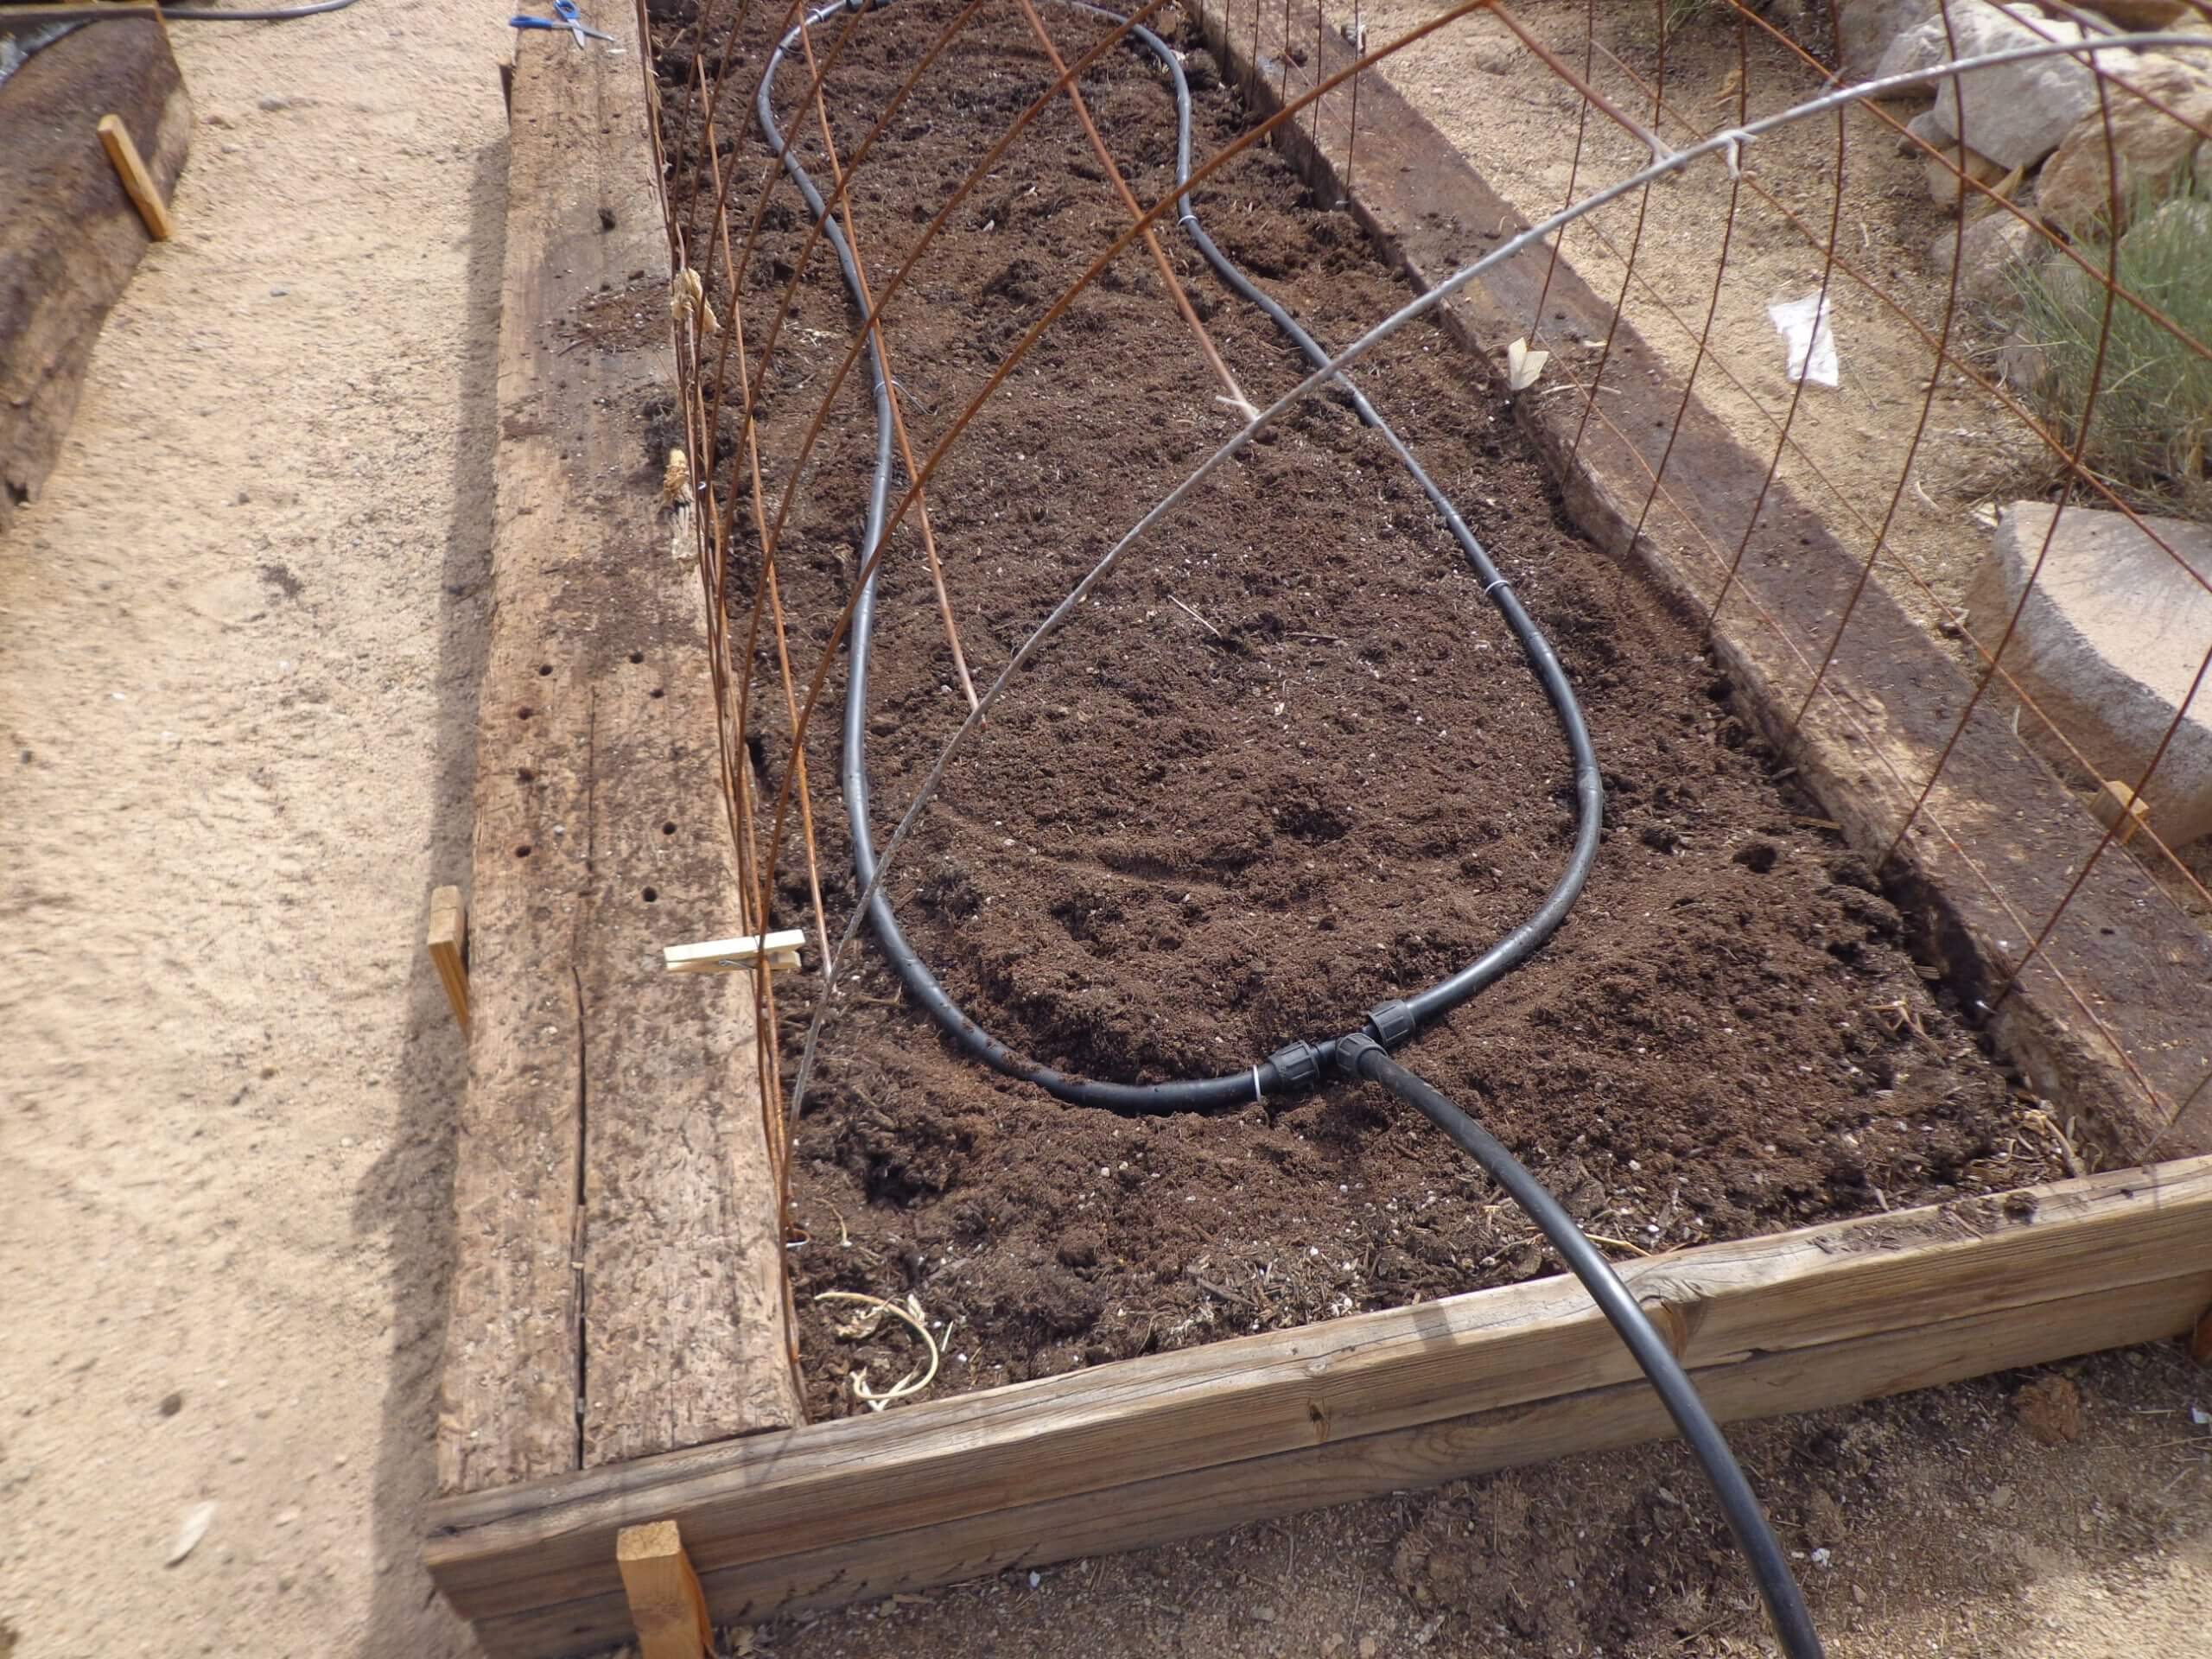
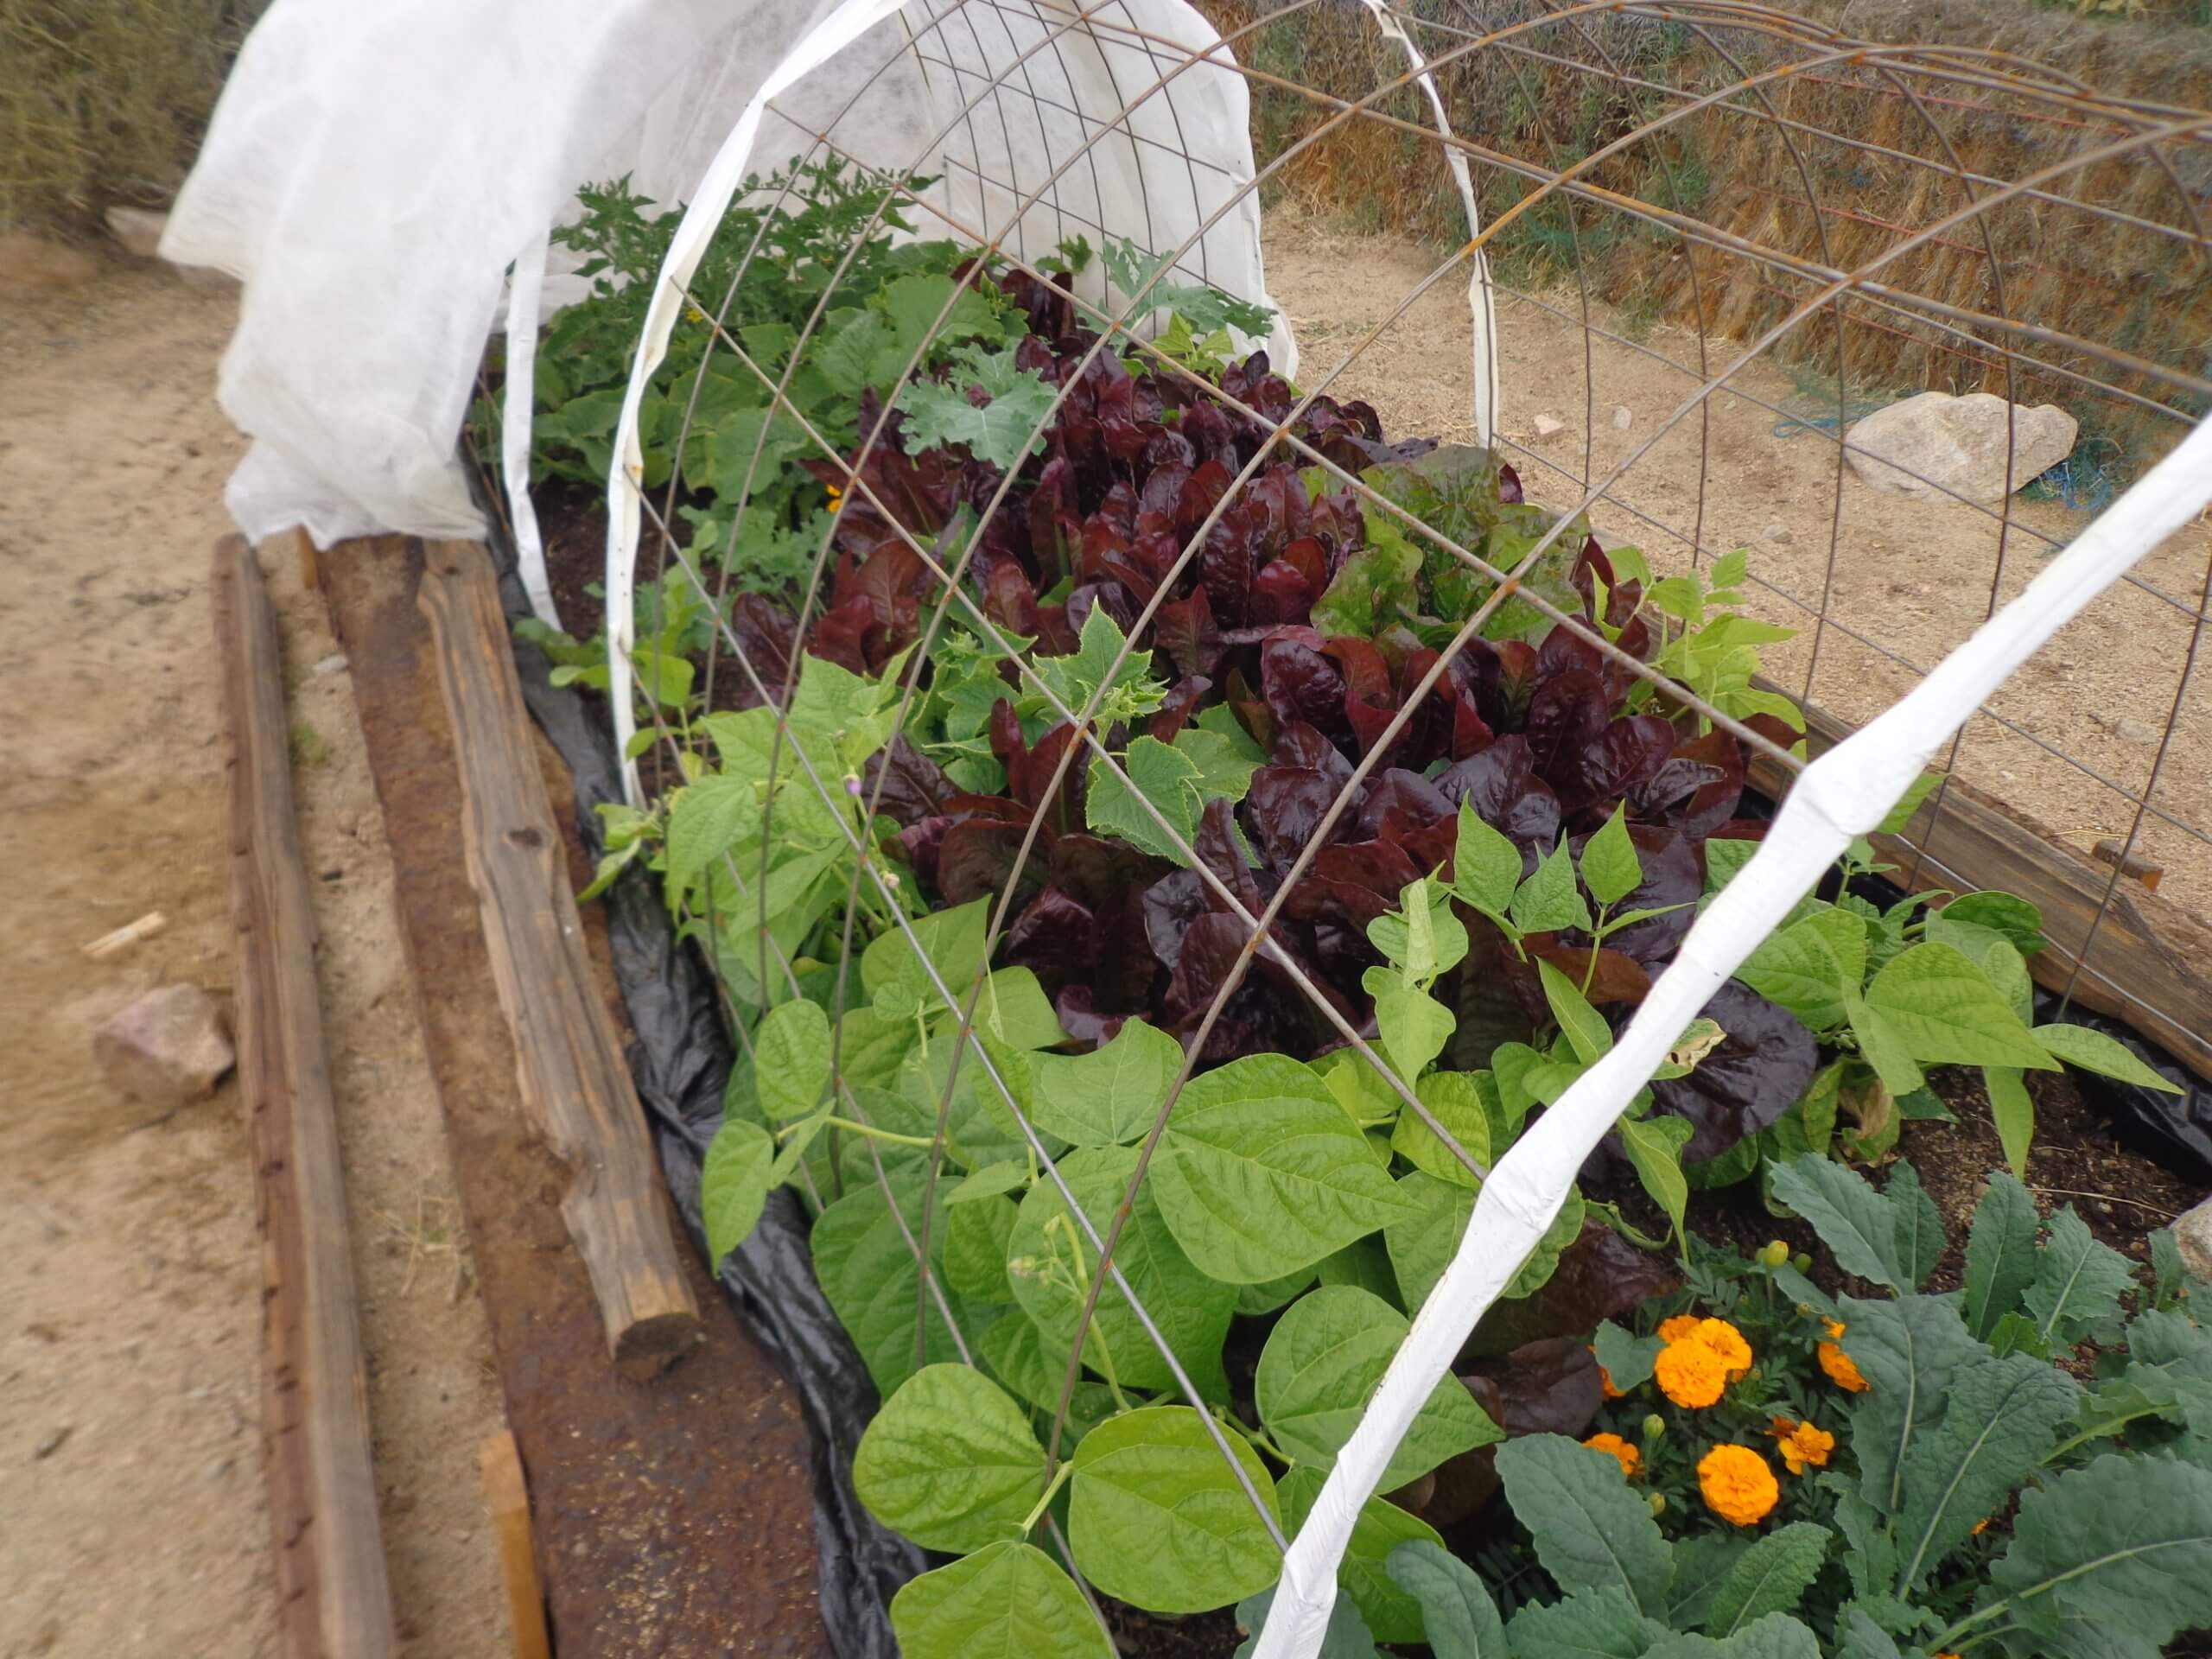
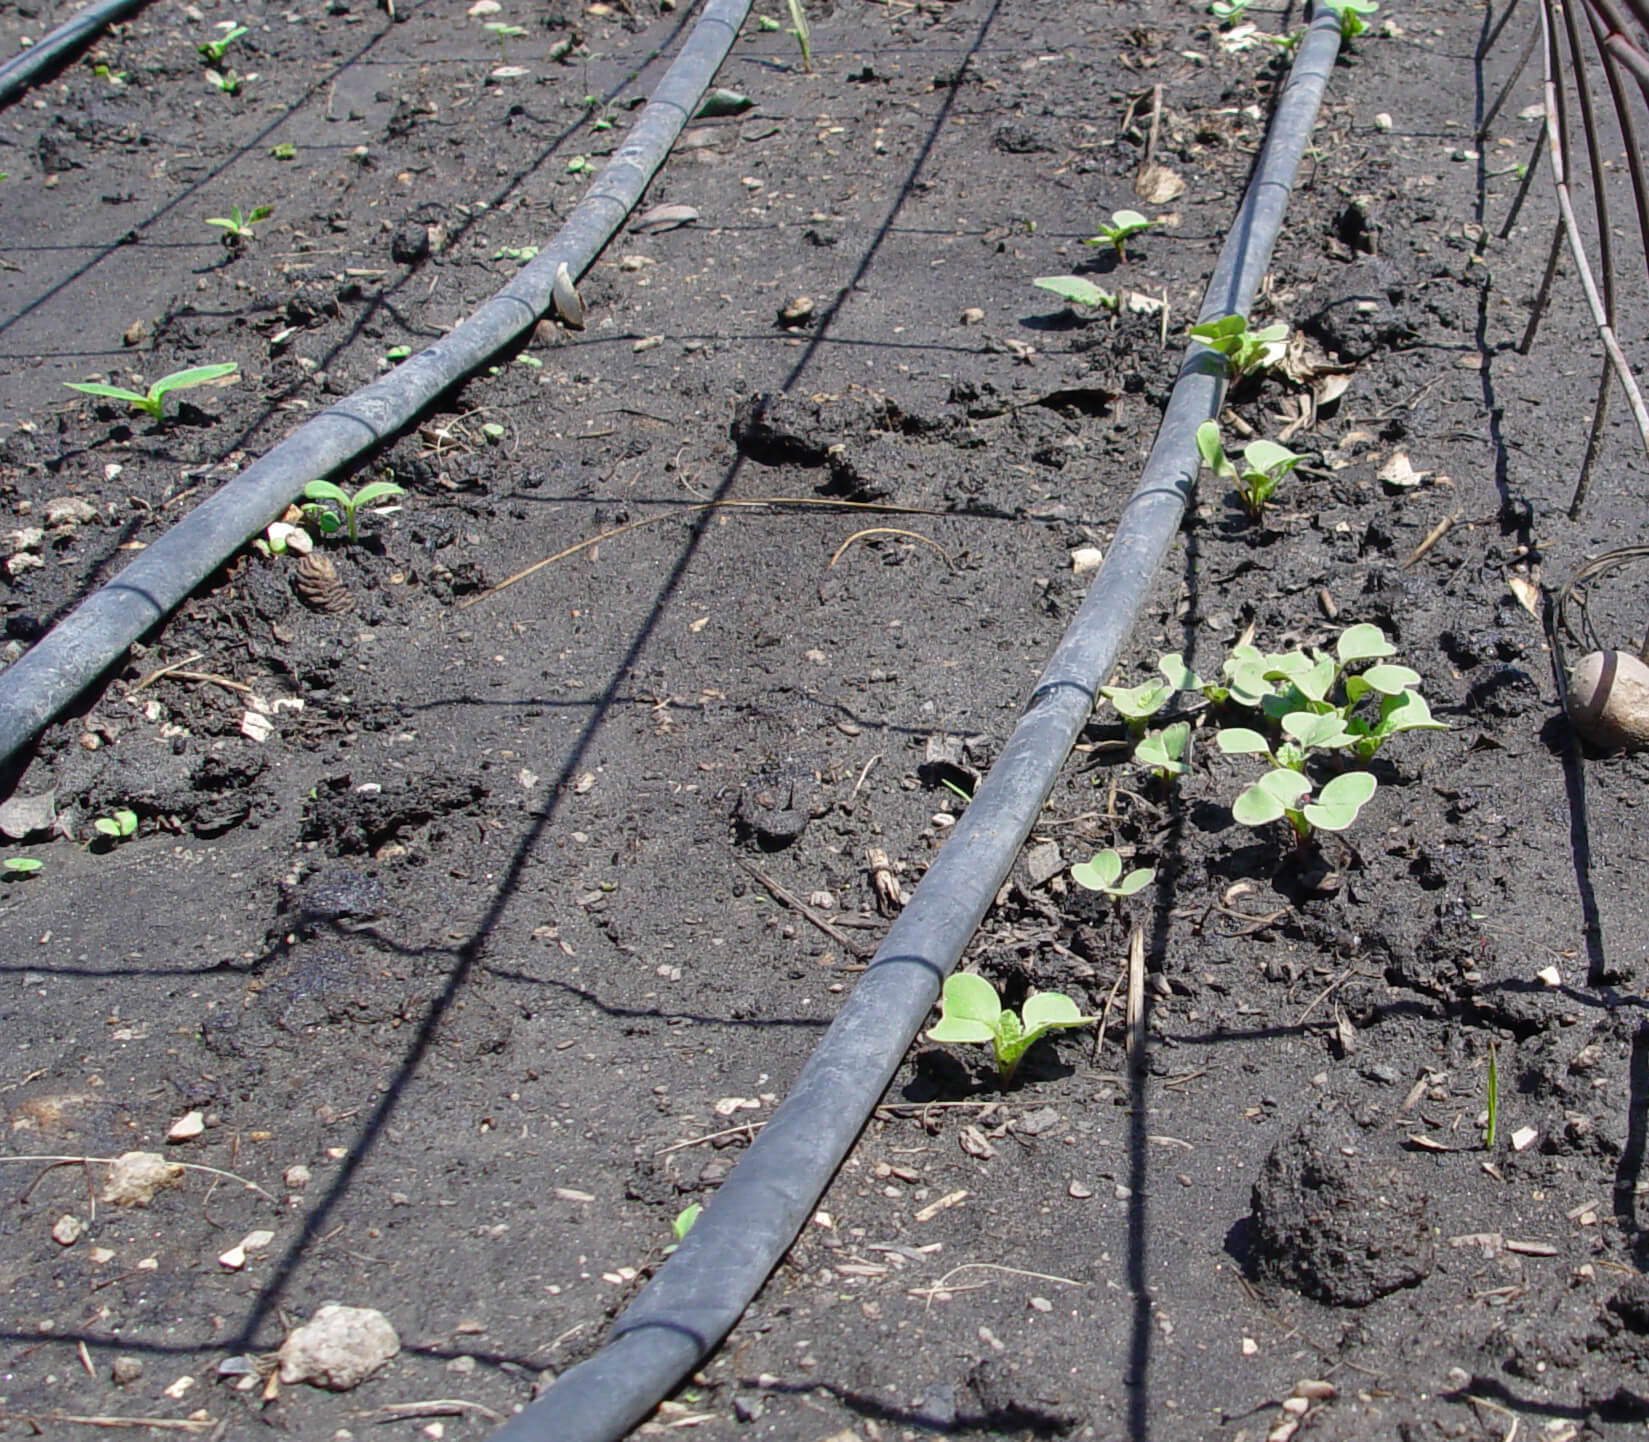
Gently water your raised beds to allow them to settle and marry over the winter months.  If you don’t already have it, drip irrigation is highly recommended for effortless raised bed gardening.  Try soaker hoses or buried underground inline drip tubing that invisibly waters your garden without ugly surface tubes and emitters.  If you want to expand next year, put in a new bed close to the old one and share the irrigation.

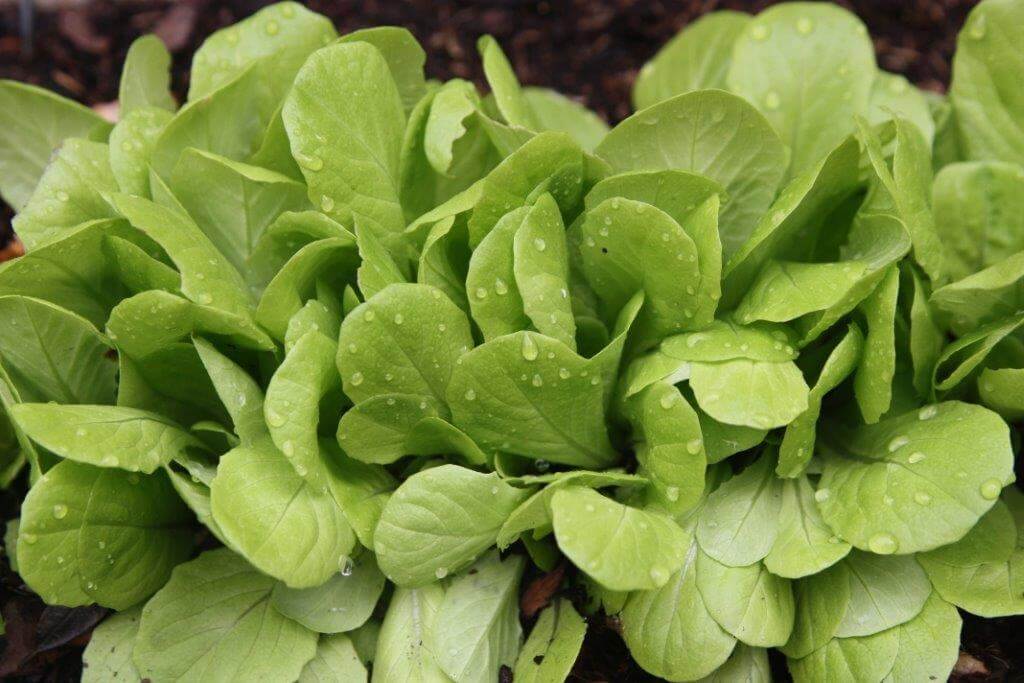
While watering your rehabbed raised beds, throw in some seeds for beets, radishes, turnips, and other root crops that germinate at temps down to 40 degrees F.  The addition of row covers will protect cool-season crops well into winter.  Harvest the leaves, eat the sweet roots, and enjoy long winter yields as your refreshed raised beds do all of the work for you.

Late-Summer Vegetables to Grow From Seed Sowing

Late-summer and fall vegetables grown from seed.

It’s absolutely counterintuitive to plant anything in August or September, but intuition is not always right.  Go against your instincts, and sow cool-season seeds right now.  Do it soon, and you’ll get your fall and winter garden started just in time.

Starting Fall Vegetables

If you’re a beginner and have never grown food outside the strict summer garden, now is your chance to give it a try.  Sowing now takes advantage of the natural transition toward ever shortening day length and cooler temperatures.  In the hot Southwest, frost holds off until later in the season, so a fall garden can often feed a family deep into the winter.

Drip irrigation is a great way to keep seedlings well watered.

Though the summer food plants are in decline, many are still producing. Once a plant stops or dies, take it out promptly, and start sowing leaf and root crops like kale, carrots, beets, and chard. All of them can be sown directly into garden soil in late summer when it is warm enough to stimulate germination. The transition will be more gradual than spring planting because soil is prepared incrementally as space is freed up by plant removal.  For example, after an aged squash dies back or mildews, simply take it out and sow cool-season seeds in its place.

BG_EARTHWORM_8QT-FRONT
Earthworm Castings are high in nitrogen and great for feeding fall greens.

Sowing Fall Seeds

Every time you take out a dying summer plant, prep the soil before sowing because that soil has consumed much of its spring fertilizer and amendments.  Lots of rich humus is needed to drive leaf- and stem-producing edibles.  This requires amending the area to about six inches deep with a claw or fork to open the ground, then generously working in Black Gold Garden Compost.  Don’t compact the soil, leave it fluffy so the seeds settle down into the moisture-retentive humus.  Lightly cover seed with compost or sprinkle Black Gold Earthworm Castings on top of freshly sown seeds to introduce fresh microbes and micronutrients.  (Fall seedlings can also be started indoors. Click here to learn how.)

The biggest challenge in getting the fall garden started is keeping the seedbeds adequately moist.  An old method uses burlap laid right over the sown seedbed and pegged down on the corners.  Water is applied right through the burlap which prevents dislodging the soil particles and acts like a mulch to keep the seed bed from drying out in the sun.  Burlap is moved only after the little green shoots appear.  A heat wave at this stage may require little burlap shade structures to shelter the seedlings until they harden off to direct sun. Drip irrigation is a great way to keep plants well irrigated once seedlings have popped up from the ground and the burlap is removed.

Choose Leafy Greens

Don’t overlook the ability to sow cool-season leafy vegetable seeds everywhere you can.  Sow beets in the window boxes, colorful Bright Lights chard on the patio, but make sure you leave plenty of room for Dinosaur, or ‘Lacinato’, kale.  This big burly kale from Italy takes more heat

and cold than any other.  Though rather bold looking, it’s great eating because the best-tasting leaves are the old ones!

Cut-and-come-again lettuce is the perfect cool-season crop for fall and winter gardens.

Keep in mind that nitrogen is important to any plant that produces an edible stem or leaf.  Puny growth is often due to nitrogen depletion.  Slow growth may not happen all at once, but you may see a reduction in plant size by late fall or early winter.  Concentrated liquid fish fertilizer is the best organic nitrogen source for the long fall and winter growing season in the West.

When in Drought, Choose Succulents

Barrel cacti, agave, and echeverias are all bold succulents for droughty landscapes.

Whenever there are statewide water cutbacks in California, everyone has to rethink some of the plants in their home landscapes. Rather than viewing this as a tragedy, make it an opportunity to dive into some of trendiest plants filling gardens of the rich and famous.  If you’ve always wanted that great, clean succulent garden look, there is no better time to make the change.

In the past, most gardeners planted annual flowers for pockets of color.  Instead, plant these same spaces with exciting and colorful succulents.  This is a great idea for high-profile areas around outdoor living spaces, pools and spas, or courtyards where you can enjoy their diverse beauty up close and personal.  Be prepared to treat them as annuals, if you live in a frosty climate. You can also overwinter them indoors. Just dig and pot them up at summer’s end to green up indoor rooms all winter long.

The Best Soil for Succulents

The single biggest problem with succulents in traditional gardens is too much water caused by over irrigation in slow-draining clay ground.  Too much water rots succulent roots and stems—killing plants quickly.  Solve the soil dilemma by creating pockets of Black Gold Cactus Mix potting soil to improve rooting conditions. Do this with larger succulents by replacing the soil one hole at the time.  You can provide even sharper drainage by amending mixes with additional Black Gold Perlite.

Sometimes succulent pots need extra water-holding amendments, especially when irrigation cutbacks start drying out your planters. Black Gold Cactus Mix has just enough water-holding capacity to keep roots growing well.


forms gilmer3
Jewel-box succulent container garden

Planting Succulent Beds

Once your soil and pots are prepared, its time to bring the vibrant echeverias, festive flapjacks, and ever-popular black aeoniums into your yard.  If you’re planting a six-inch potted specimen, dig your hole twice as wide and half again as deep as the nursery root ball.  Puncture the natural soil at bottom of the hole numerous times with a piece of pipe or rebar.  Go as deeply as you can to provide miniature sumps that encourage filtration and keep water from accumulating at the bottom of the hole.  Then fill with potting soil, and plant away.

Planting Succulent Containers

BG_CACTUSMIX_1CF-FRONT
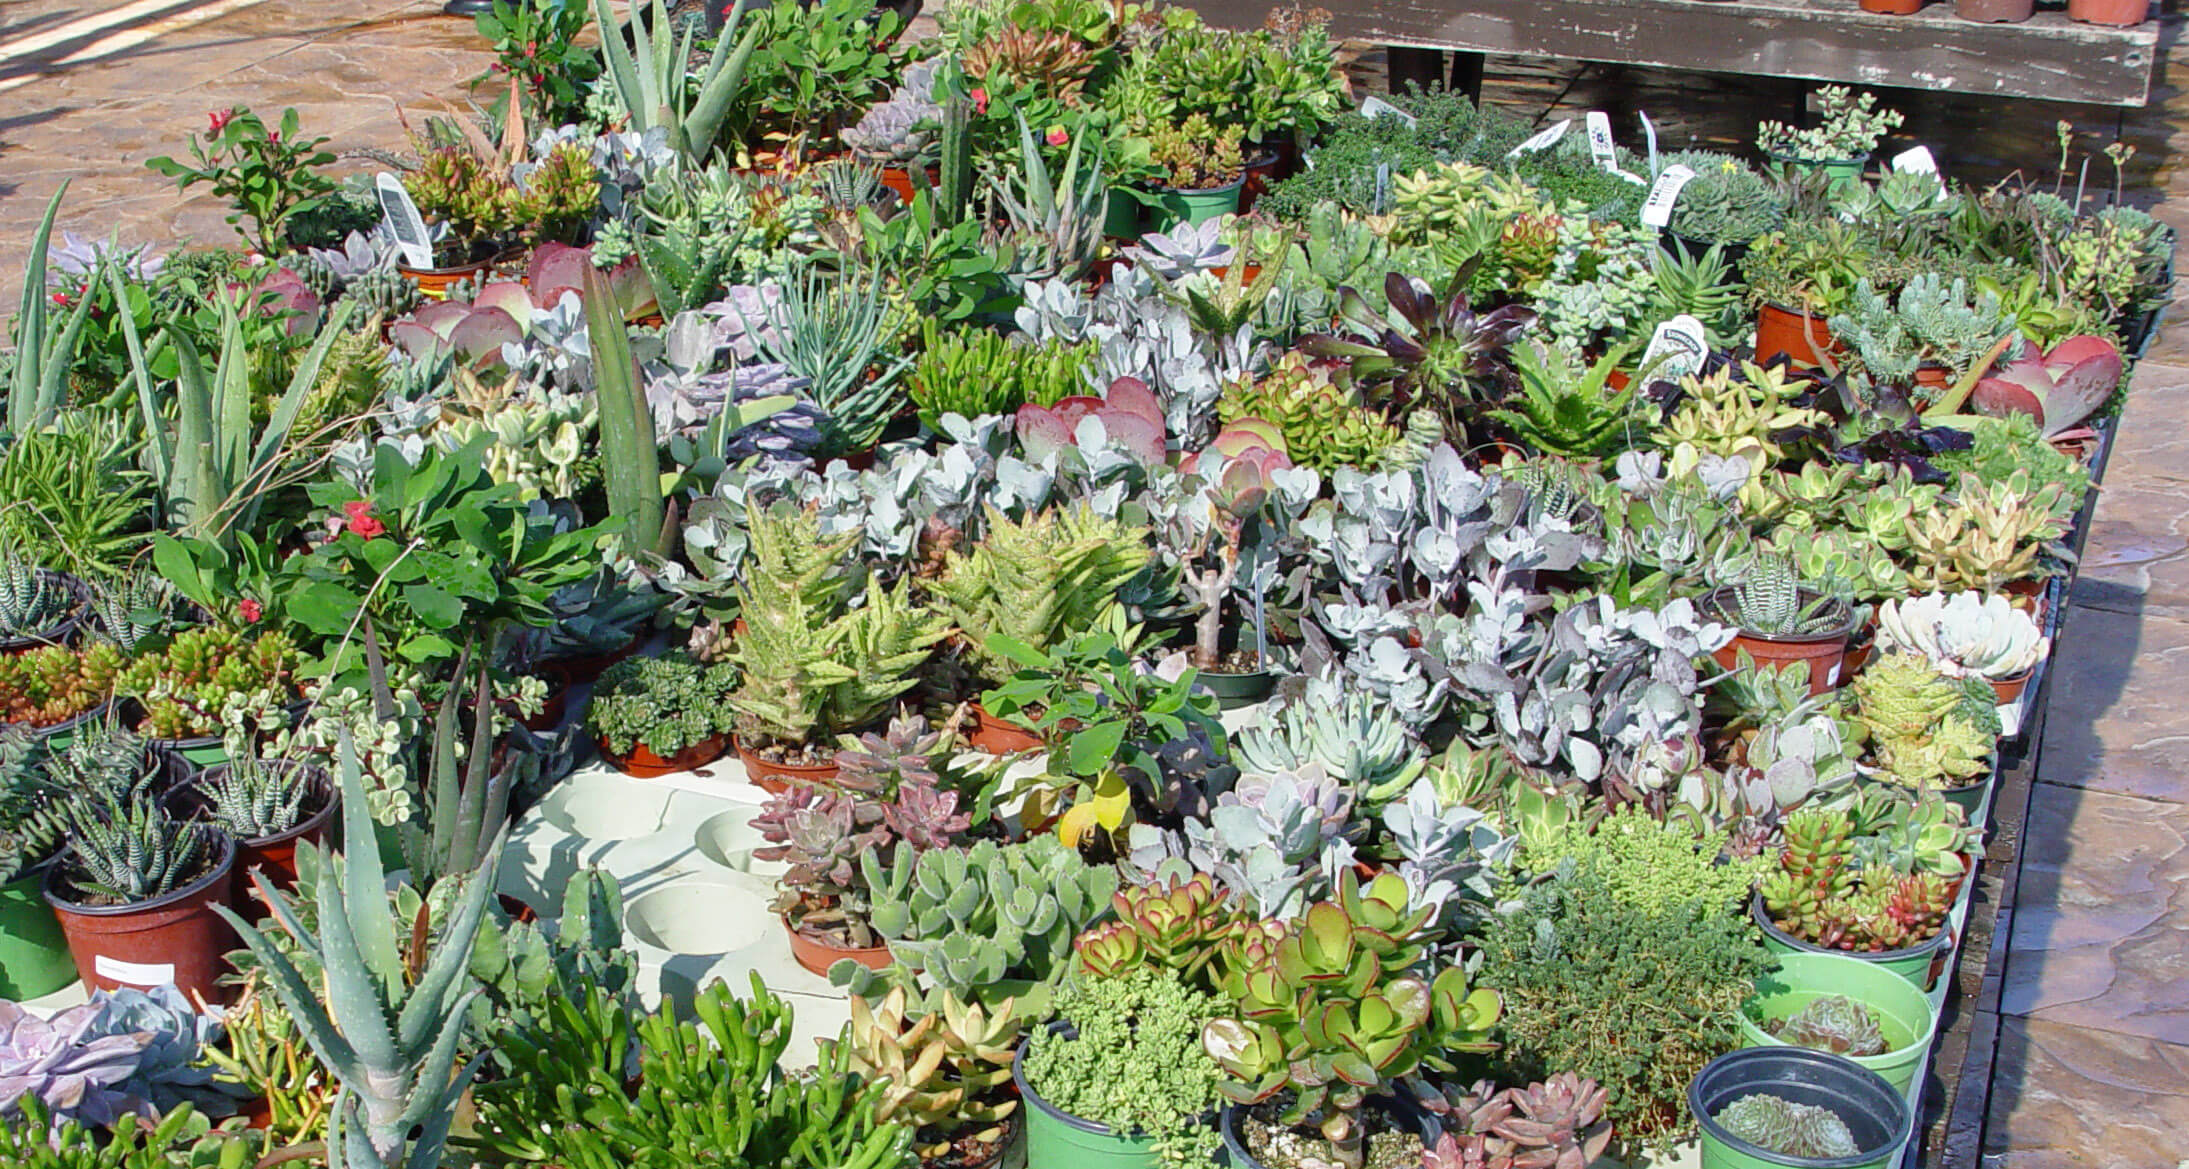
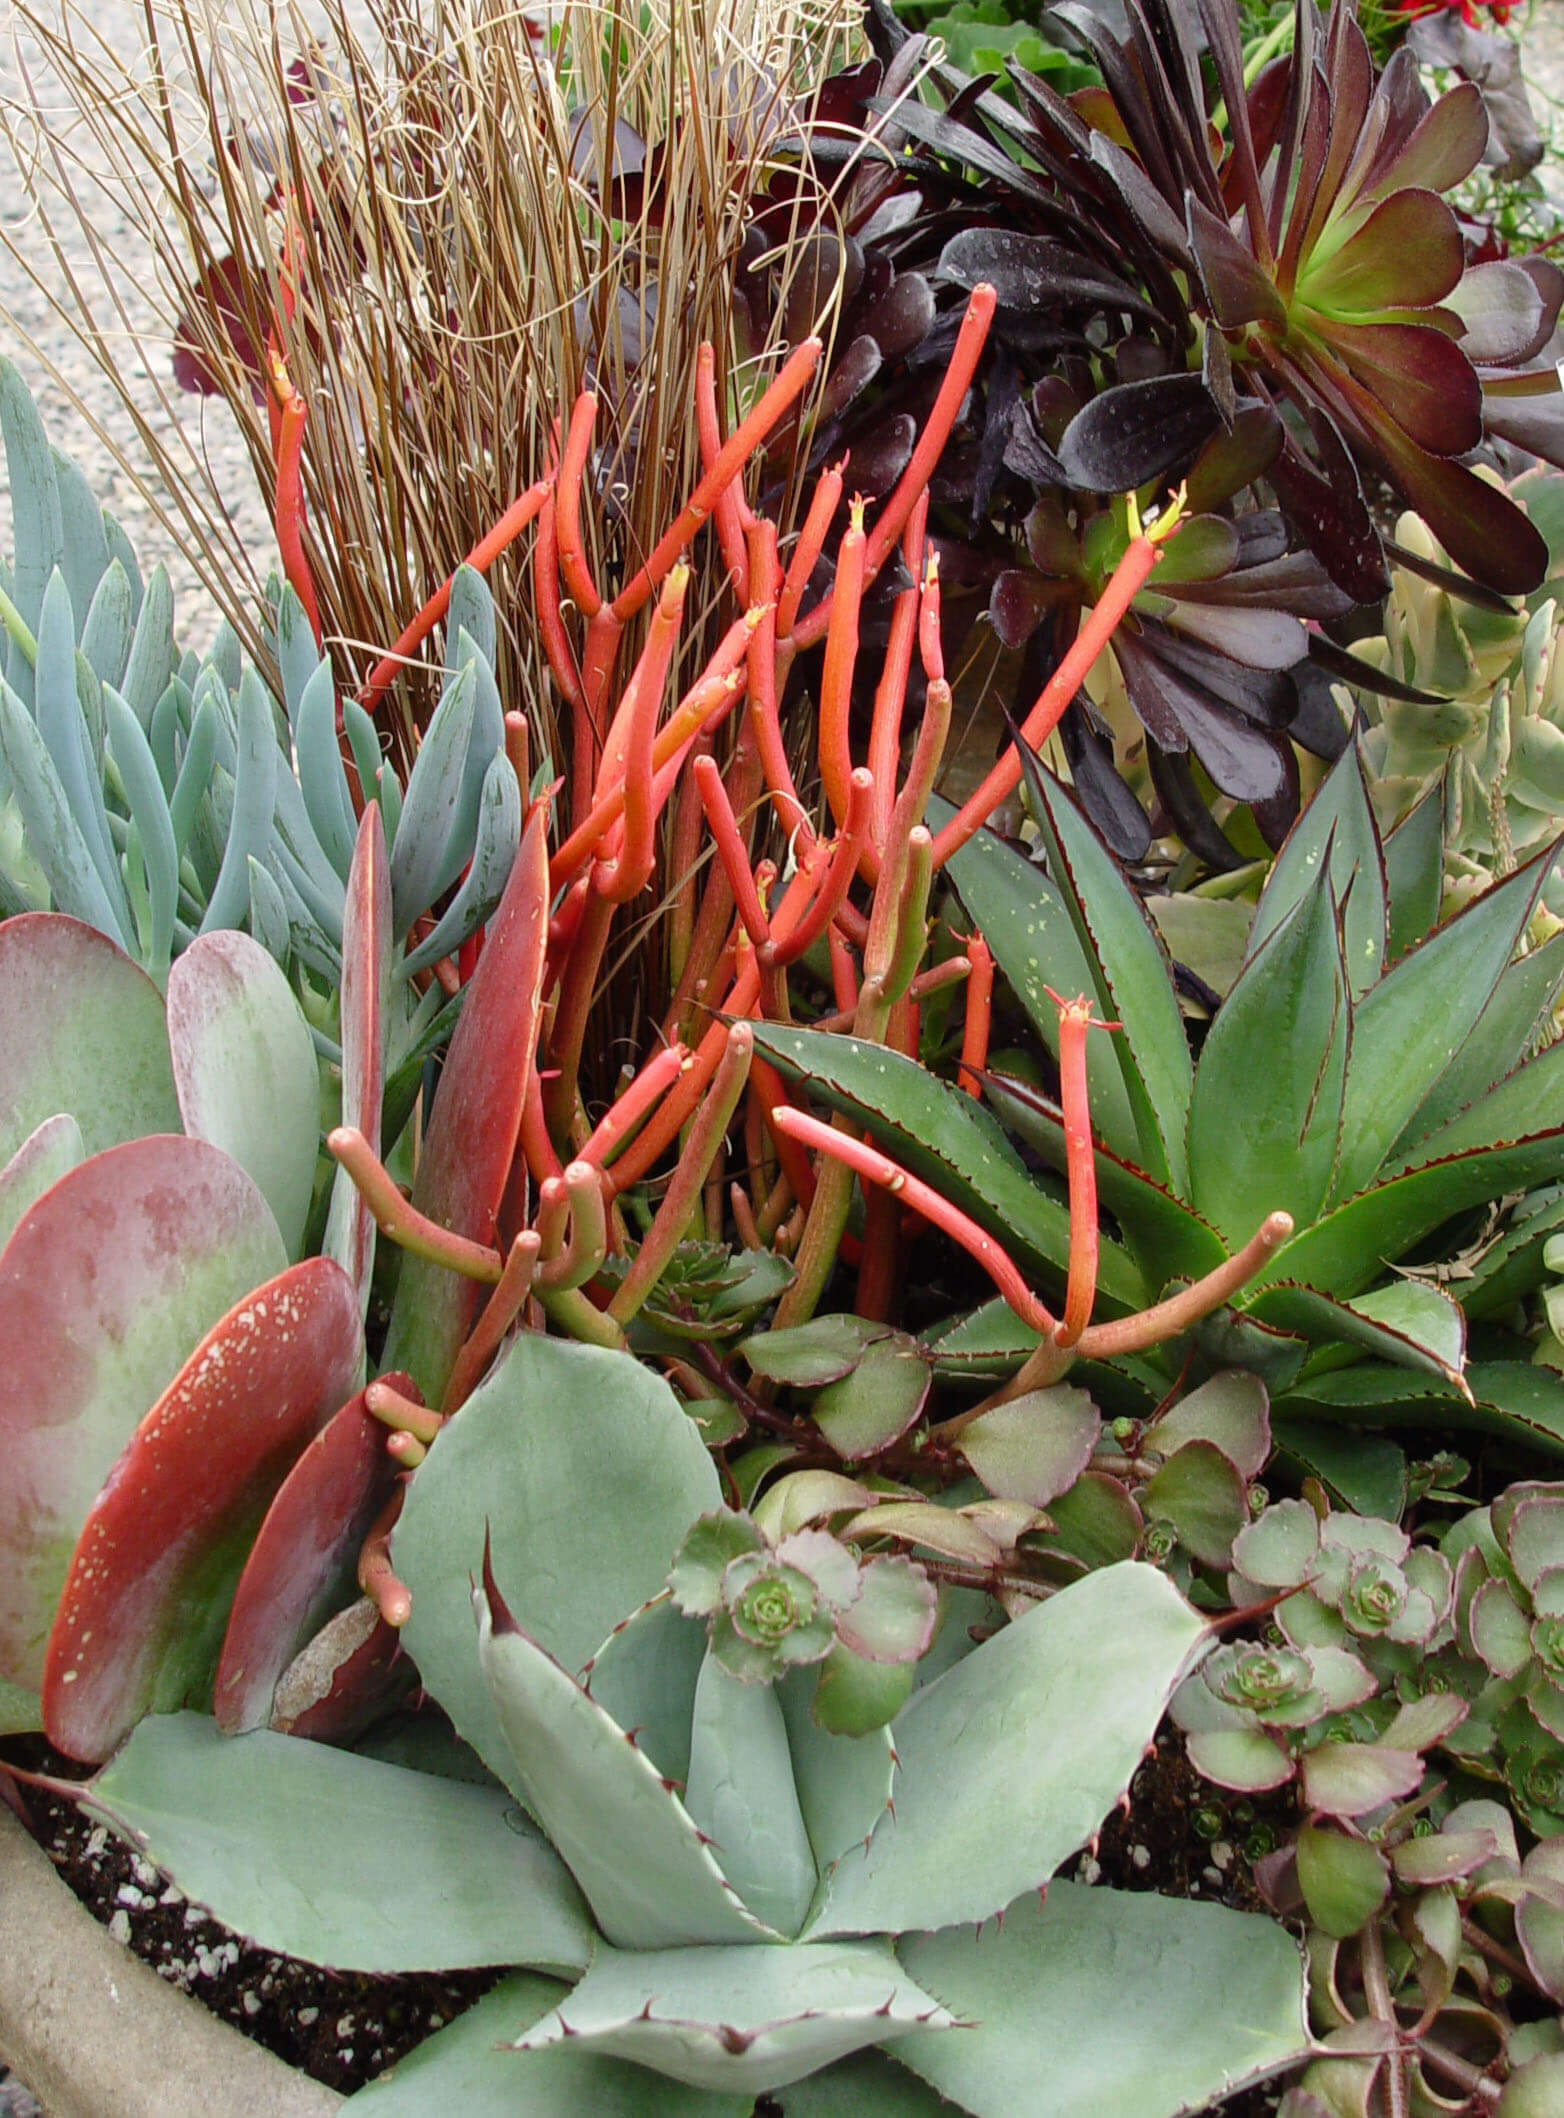
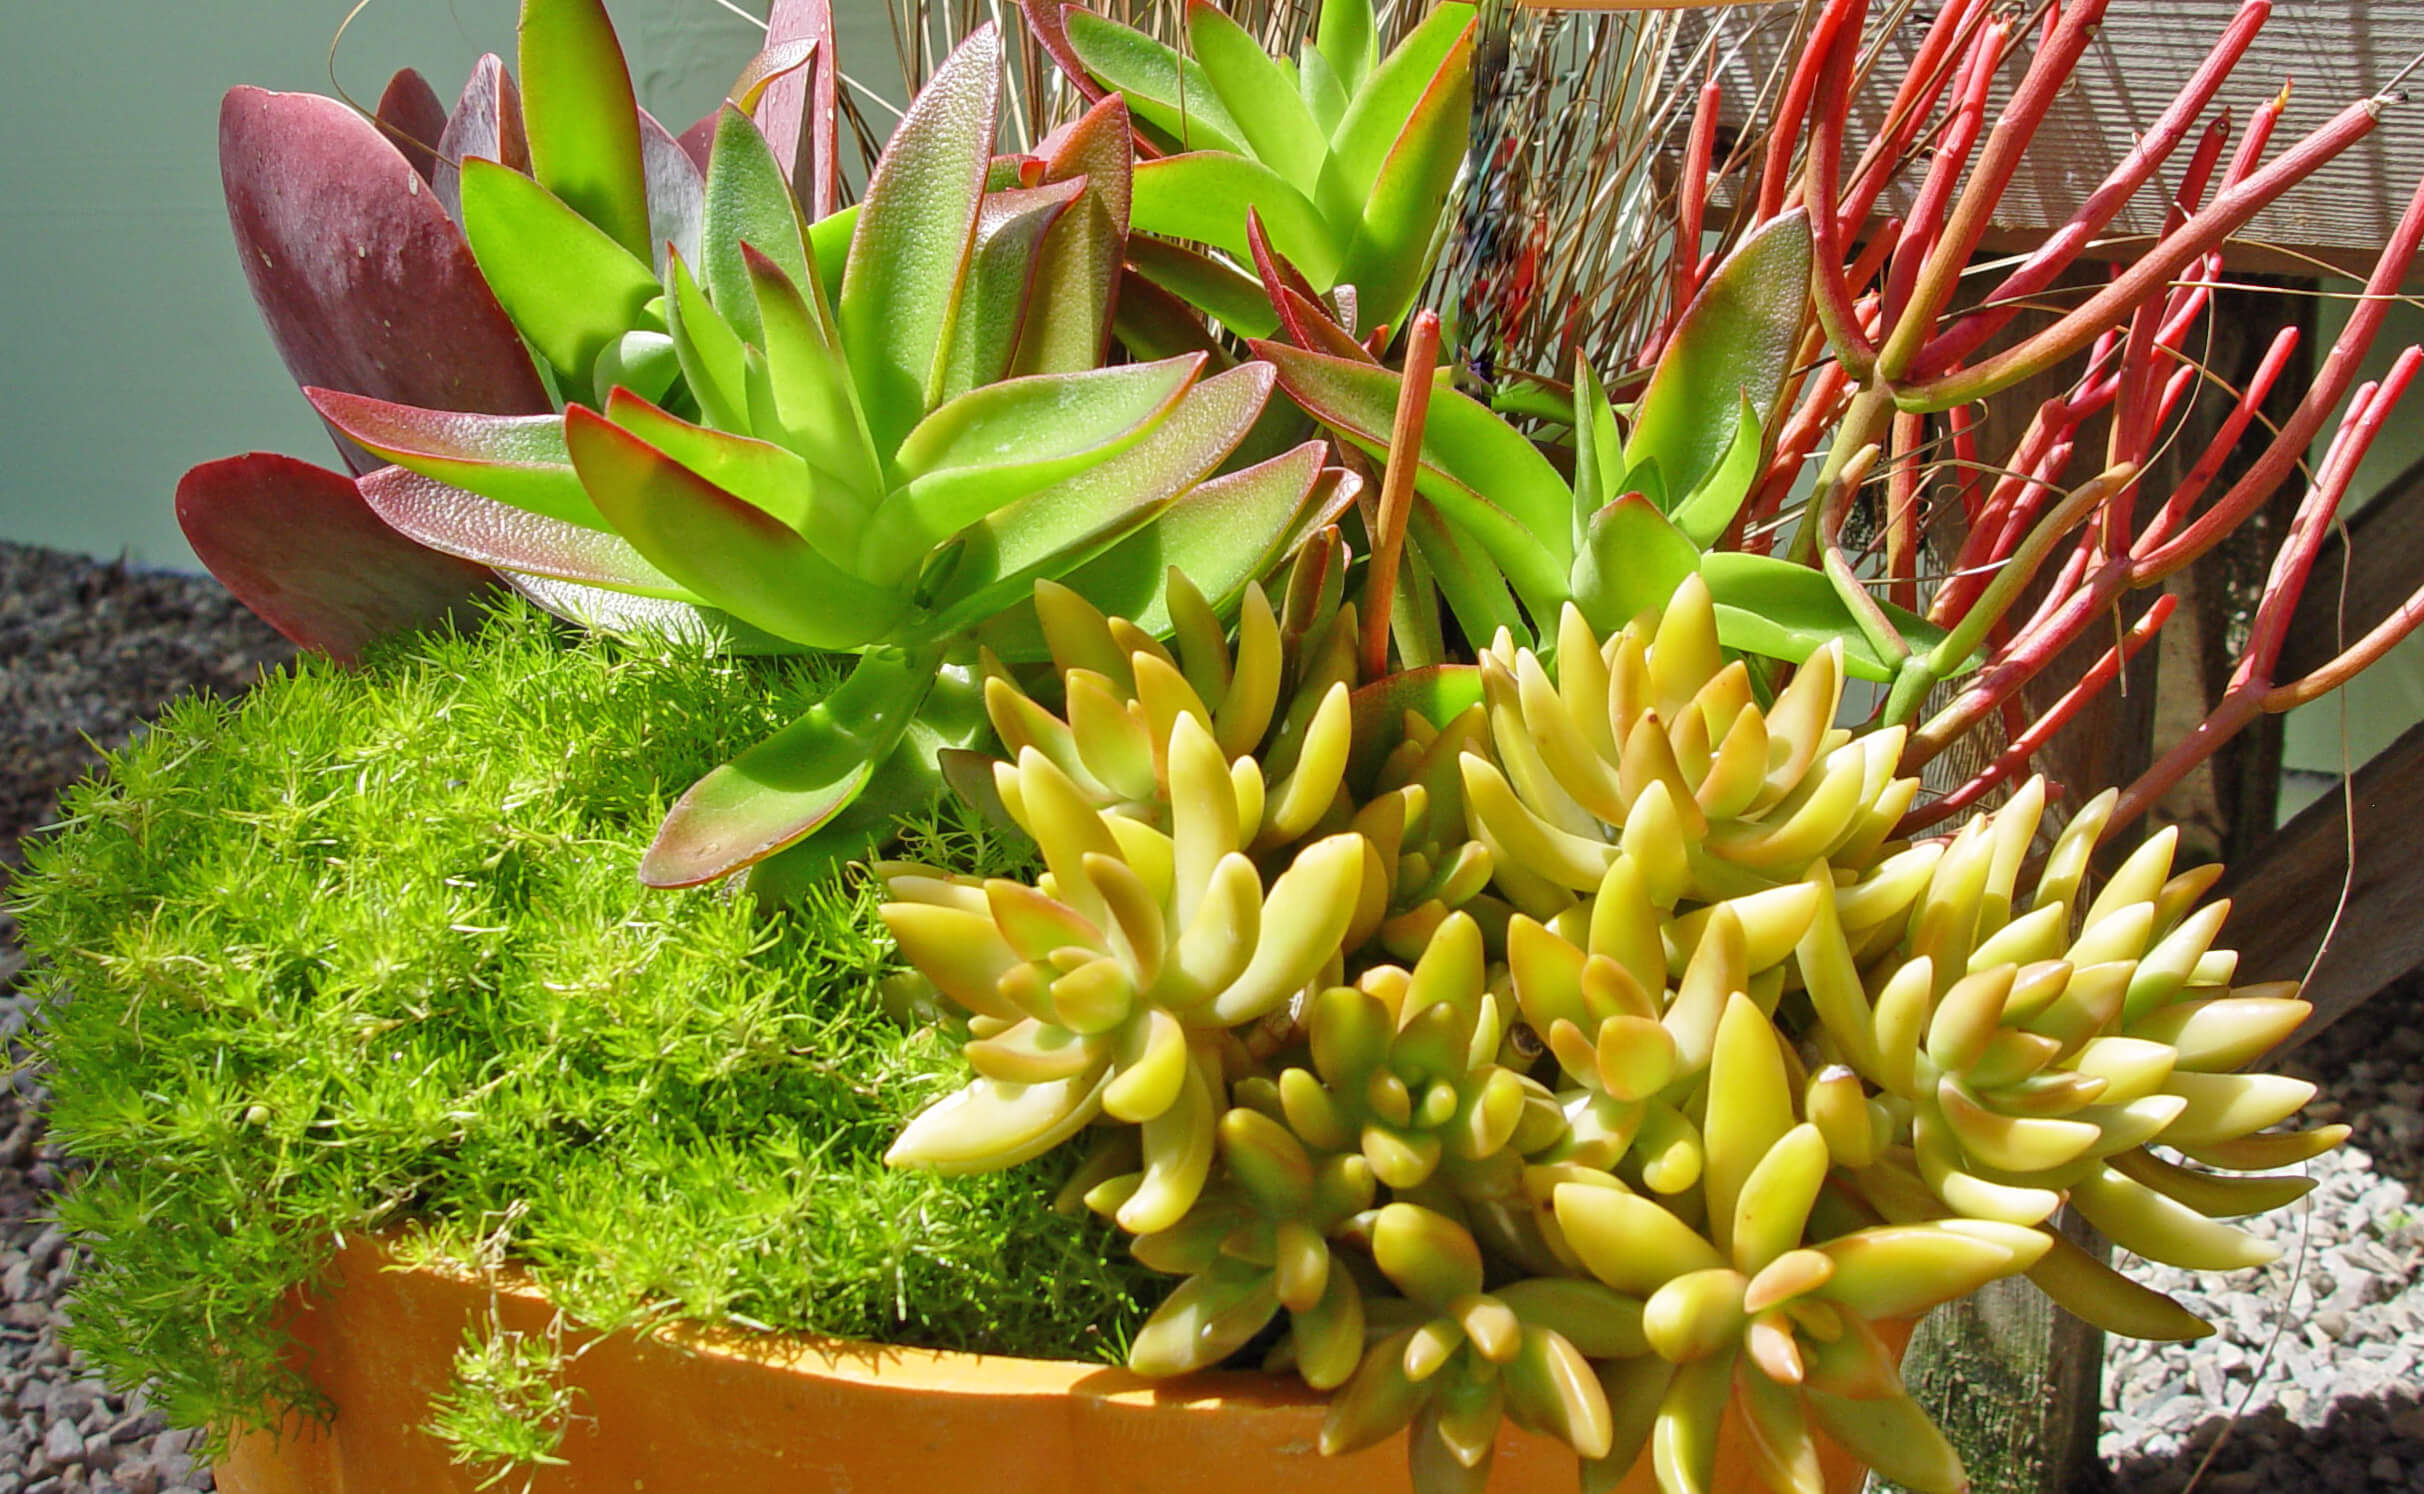
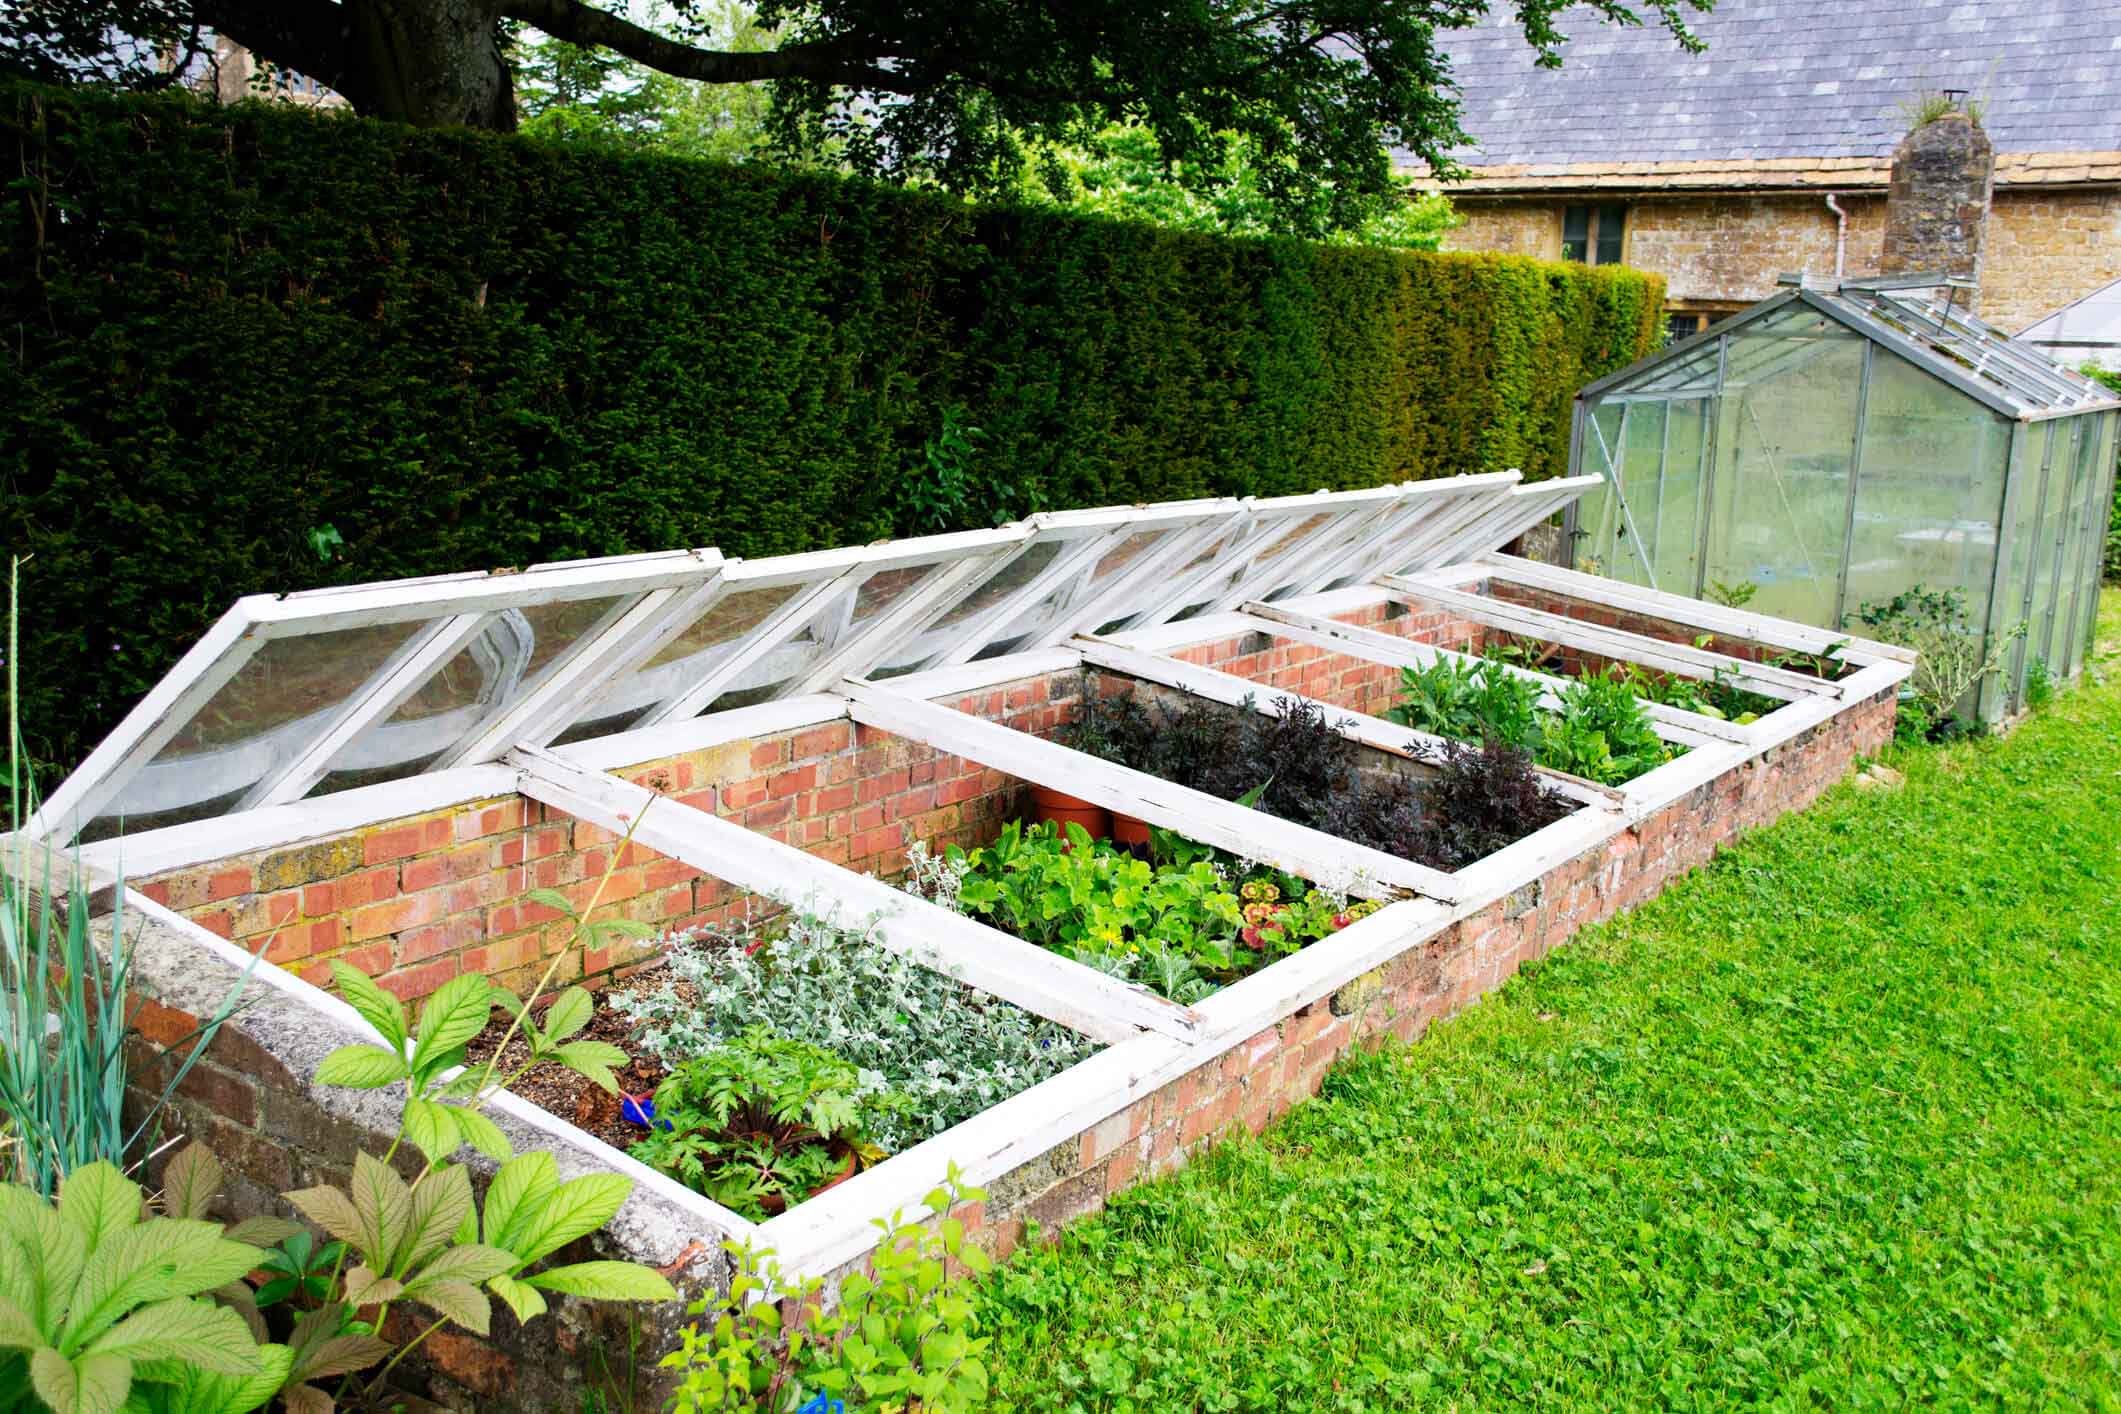
If you have a built-in masonry planter, create a close-range jewel-box garden.  This term is used for the vivid succulent gardens that are as colorful as the contents of grandmother’s costume jewelry box.  Here you can plant a lovely rainbow of kalanchoes, flowering aloes, and geometric crassulas.  When you add hardy sedums and sempervivums, they’ll survive through the coldest winter to anchor next year’s display.

Remove the top foot of soil in the planter and replace it with cactus potting soil, then arrange your colors in drifts or swaths of small bright plants.  Accent them with sparkling slag glass, driftwood or special rock minerals and crystals for an exciting jewel-box look.

Although this California drought is a disaster for many, it may be the catalyst you need to replace water-intensive plants with exciting new succulents.  In the beginning, you may not know their names or their ultimate forms, but over the coming months, you’ll learn to recognize them and get a feel for how each grows. Though we are often averse to change in life, it’s often the doorway to our greatest accomplishments.

Succulents: Beware Over Packed Pots!

color-gilmer2
This composition of mixed succulents may look pretty, but the gang-potted group will not survive unless transplanted into their own Terracotta pots.


Those big, popular succulent collections sold in pots and troughs (otherwise known as “gang pots”) are dying out all over. Each container may be packed with a dozen or more species of succulent plants that often originate from vastly different locations and have different cultural needs.  Many are native to South Africa while others originate from Mexico on the other side of the world. Dry climates are not all the same. There is more variation in the growing preferences of different succulents than you might think.

balcony outside
This wrought-iron slatted window balcony shelf offers great drainage for succulents.

That’s why these ganged creations just don’t last that long.  Those succulents that need drier conditions are in conflict with those that need more moisture.  In the end, the one-size-fits-all gang pot results in gang watering, which will cause mixed-succulent-pot decline due to too much or too little moisture.

Secondly there’s no way to adjust the lighting given to different succulents in gang pots.  Different succulents often have different light requirements, but when they are set in one position in gang pots, you can’t give different plants the sunlight they need.  This is why you never see serious succulent aficionados growing this way.  When you are unable to control light or moisture well, these plantings die out in spots and look generally ratty most of the time.

Choose Individual Pots

It’s far better to grow window box and balcony succulents in individual pots.  That way you get to rearrange them any time you want.  Watering is simple because you must look at each pot to determine how dry it is.  Just like kids, succulents can be very different, even when closely related, and unless you treat them accordingly, they’ll show it in the form of decline.

clay-maureen-gilmer
Planting one specimen, such as this star cactus, in an artful Terracotta pot is best.

Growing individuals in Terracotta pots is the best way to create a beautiful composition that blends easily, offers plants what they need, and allows you to bring them all indoors at season’s end to brighten your winter home.  Don’t fall for big, overflowing gang pots this year. Shop for the succulents you love, then bring them home to be planted in their new pots, and placed out in the sun where they thrive.

Potting Mix and Drainage

Key to your potted succulent’s success is Black Gold Cactus Mix, which ensures each new succulent is planted in very fast-draining soil.   Choose pots in scale with the size of the plant with very large or numerous drain holes.  Once planted, top the soil with a thin layer of Black Gold Washed Gravel or White Rock to hold in moisture and discourage perlite floaters that otherwise accumulate there.

darcy-Jade-in-Red-Pot-720px
A specimen jade plant in a red clay pot. (photo by Mike Darcy)

Consider setting your pots on an open, free-draining, slatted shelf on the patio or balcony that encourages drainage.  This ensures there’s plenty of free drainage plus pot walls are in the open air where oxygen and moisture readily exchange through Terracotta.  Open air also encourages evaporative cooling to keep containers adequately cool in the high heat of late summer.  If left in plastic containers, direct sun can cause such high interior soil temperatures that roots can literally cook.

Over time you can add and subtract from your collection as your succulents grow large and take on their best looks.  They can be fed individually, evaluated for health often, and best of all, a diseased or pest-ridden plant can be moved elsewhere.  That’s why succulent lovers keep their specimen plants in individual pots rather than gang pots that spoil the overall success of the team.

DIY: Make This Trickle-Down Succulent Tower

Donkey Tails (Senecio morganianum) in a vertical can cascade.

This idea came from deep within Mexico where plastic nursery containers are rare and coveted.  Tin cans are used, whenever possible, instead of pots to save money.  When I found the tower at Xochemilco, I realized this is trickle-down-watering at its finest.  It’s also the most innovative idea I’d seen for recycling and saving money.  It also offered a great way to grow more plants with less water and space.  Anyone with a fence post, porch post or just a single 4′ x 4′ in a post hole can create this vertical green tower.

stall

String of Bananas (Senecio radicans)

Cascading Succulents

The good news is that it’s used for the most beautiful of all succulents: string of pearls (Senecio rowleyanus), donkey tails (Senecio morganianum),  string of bananas (Senecio radicans), and rosary vine (Ceropegia woodii).  All produce long, dangling tresses that soon cloak the post in pendulous foliage.  Though frost tender, they benefit from your cover, or simply remove cans before the first frost and decorate your sunny windows for the winter.

For most who live where there is summer rain, this vertical system solves the problem of keeping succulents dry enough, so they don’t rot in the heat.  It was invented in Mexico City by a cottage-level succulent grower to protect cacti and succulents with overhead tarps where it rains in the afternoons.  It will work with your climate, too.   When you grow plants under patio covers on posts, they’re covered from rain but still exposed to plenty of sun.  This keeps them dry until you decide they need water.

Rosary vine (Ceropegia woodii)

Rosary vine (Ceropegia woodii)

Watering and Drainage

Watering is the most fun since each can drains into the one below it and so on.  That means every drop of water you apply is utilized.   This system will work for virtually any kind of plant and offers a great way to grow herbs, greens, and flowers, too.

If you use succulents to create your version, you must ensure the cans drain quickly by using a nail to punch numerous holes in the bottom, not just one.  Use only Black Gold Cactus Mix when planting each can.  Tin cans are ideally sized for cell-pack succulent starts or small 2″ potted seedlings, the largest root ball that fits.

Potting Mix

Due to the small root zone, keeping water in the cans is vital for less drought-resistant plants, such as cilantro.   Take advantage of Black Gold Waterhold Cocoblend Potting Soil to help each plant maintain moisture over a much longer period as well as benefiting from higher fertility levels and RESiLIENCE®, which may reduce wilting. Pine needles are used in Mexico for mulch which is stuffed into the tops of the cans to hold on to moisture and extend time spans between trickle-down watering.

Waterhold Coco BlendThere are a dozen variations possible on this basic idea, from fancy wire bales on the cans to upsizing everything too much larger containers for the same trickle-down on a larger scale.  It’s endless how Black Gold potting soils can turn discarded cans into the biggest problem solver of the season.  Start collecting them today.  Then plant your succulents any time of year and sow winter greens late summer for easy picking on the porch.

Mulching Gardens With Black Gold Amendments

When the drought is long, soils are poor, and money is short, one way to revitalize struggling garden plants is to protect their roots with mulch. Good mulches help to retain moisture, cool the root zone, and discourage weeds. The conventional wisdom is to mulch with wood chips or ground up bark, but both are very slow to decompose and can bind needed soil nutrients. The better option is to protect small beds and containers with organic-rich amendments that give back.

Garden Mulches for Soil Enrichment

Rich compost, peat moss, coir, or Black Gold Earthworm Castings are all amendments that double as mulches–alone or as home-mixed blends–in small ornamental gardens or vegetable gardens.  All offer needed organic matter, which helps soils better retain water and maintain porosity. They also offer structural and water-holding benefits.  For example, Black Gold Garden Compost Blend contains peat moss for water retention and compost give poor soils better aeration for easier establishment and performance.

Amendment mulching is often most effective in shaded areas because it helps to simulate conditions on the forest floor.  If you take a cross section of this “duff” layer, you’ll see that it’s mostly leaves or needles with a fine, dark layer that sits right on top of the earth.  It’s rich in decomposing organic matter, which is why shade plants are often surface rooted.

Landscape Mulches for Trees and Shrubs

This is also true of acid-loving plants, such as azaleas or camellias, which  develop a wide, shallow root system where the majority of the soil nutrition lies. In fact, without a yearly surface application of organic matter, these plants can suffer. All too often you see the surface roots of azaleas exposed after years without the addition of a mulch layer.  The organic matter is essential to keep their roots moist and cool, especially when drought descends. We recommend mixing a 1:1 of Black Gold Garden Compost Blend and Black Gold Peat Moss for acid lovers. Both products offer needed organic matter and peat moss is a little more acid, which benefits these plants.

Assess your favorite plants, planters, individual trees and shrubs to determine if they will benefit from this special treatment.   Apply a 2- to 3-inch layer of amendment around the base of the plant.  Always keep it few inches clear of the trunk to prevent bark-to- mulch contact, which can induce stress and rot.  Extend the mulch layer out to the edge of the drip line.

Don’t work the amendment in. Just smooth and pat it with your palm to flatten it out for better soil contact.   Moisten often with just a light spray or collected household water to keep these amazing shrubs and trees happy on minimal rainfall.  For areas with brief drought, mulch provides great short-term protection from an abnormally dry or hot summer.

As landscapes everywhere are being altered to be more efficient, don’t forget that amendment mulch can mean so much more to your plants.  If you already have bark mulch in place, the next best thing is to sprinkle amendments over the bark, so they can filter down and provide support the next deep water day or after a welcome summer cloudburst.

Raised Beds: Respecting the Law of Return

To enrich a full raised bed, use low volume, high potency organic fertilizers before planting time in early spring.

If you’re growing vegetables in raised beds, you must respect the Law of Return.  This law states that nutrients extracted from the soil by growing plants must be compensated for by tilling their dead remnants back into the soil or fertility loss will result.  Because plants are often grown more densely in small or raised beds, proportionately more nutrition is drawn from the soil each year than in in-ground gardens.  The chances of running a deficit are very real, and your plants will show it, but by then it’s too late.

The challenge of raised beds is that there’s no room for adding gobs of compost to the box because it was filled to the top in the first place.  The fertility of all raised beds will decline each year unless you return it with fertilizer to compensate for these losses.

Add Organic Matter

High-density gardening in raised beds draws proportionately more nutrition from the soil over the course of each season.

To keep microbe populations high, organic matter is needed.  If your potting soil is decomposing so the soil level has dropped, can you refill it with any of the Black Gold potting soils with RESiLIENCE® or just use Black Gold Garden Compost and work it into the old stuff.  But if your soil mass is maxed out, use fertilizers that provide higher levels of nutrition without much volume. Older soilless mixes can also acidify, which will inhibit plants from taking in needed nutrients while reducing soil microbes and overall soil health. A simple soil pH test should be conducted to determine soil acidity/alkalinity. To return acid soils to a  neutral ph is ideal, a liming agent is required.

Fertilize

Organic fertilizers are slower to become available to plants than synthetics, so preparing your raised bed soil well in advance of planting time.  Fall is ideal, but early spring works just as well.  This allows time for the various raw materials to decompose, interact and create the synergy between plants, microbes, and earth to give your garden everything it needs, naturally.

For gardens where there’s little space, two organic fertilizers offer everything needed to fuel this year’s vegetable crops.  They’re like ordering a la carte or choosing a combination plate at a Mexican restaurant. The combination is a tomato & vegetable fertilizer with added alfalfa meal.

An organic tomato & vegetable fertilizer, with a balanced ratio of nitrogen, phosphorus, and potassium should be added.  Estimate at least one bag of fertilizer for each 4′ by 8′ raised bed to calculate how much you need.

Rose growers have always been keen on using alfalfa Meal a la carte, which contains about 3% nitrogen plus other benefits.  What makes it doubly valuable is that alfalfa is a legume, a nitrogen-fixing plant, so all of its remnants from baled hay to this byproduct of milling also contain vestiges of the mycorrhizae, unique fungi that live symbiotically within these plants.

To apply these fertilizers, spade up your raised bed with a fork to open it up a foot or so deep, then sprinkle the fertilizers evenly over the soil.  Let them filter down into the nooks and crannies, then spade over each bed again to help the soil tighten around the fertilizer.  Once thoroughly blended, rake the surface smooth so it’s ready to plant.  Water deeply, if there has not been sufficient rain.

The Law of Return

Replenished raised beds perform better!

The longer the garden sits after you’ve returned nutrients to the soil, the more fertile it becomes.  As temperatures warm, microbes activate and enrich the soil further.  So when it’s time to plant your peas in March, and anything else after that, complying with the Law Of Return will guarantee you vegetables show their appreciation with the most generous harvests you can imagine.

Soil Matters to Lavender


Distinguished by long thin wand-like flower stems, English lavender is the hardiest of them all.

The Serenity Prayer asks us to “accept the things we cannot change, the courage to change the things we can, with the wisdom to know the difference.”  If you’ve tried growing lavender with little success, maybe it’s time to identify what you can change to make this year’s garden a fragrant bee filled blend of drought-resistant lavenders for landscaping. It only takes a little wisdom to make a difference.

french lavender
French lavender is the commercially grown species popular throughout southern Europe.

Origins

Lavender comes from Europe where it has been grown in the South of France since Roman times.  There, the Mediterranean climate mirrors that of California where winters are wet and mild with long dry seasons extending from May to as late as December. These plants are naturally adapted to loose friable soils, sandy loam and fill soils that don’t pack down.  In areas with persistent humidity, extensive summer rain, and dense acid soils, lavenders languish.

A Need for Porous Ground

Naturally, fast-draining soils ensure the roots are exposed to plenty of oxygen during the growing season, and if irrigated or rain falls, it moves in and out of the root zone quickly.  Such porous ground, particularly on a south-facing slope, helps to counteract the slow soil surface evaporation caused by humid climates with stagnant air.

spanish lavender
Larger flowers and a shorter stature define the heat-tolerant Spanish lavender.

In northern California where rainfall can be very heavy in winter and soils are dense and extremely rich, lavender struggles despite its preference for the climate.  Fields now growing commercial lavender are plowed into mounded rows well above grade to enhance drainage and keep the root zone sufficiently aerated.

Amending Soil

Fortunately, the soil is among the things we can change by adding amendments that open its structure.  Prepare the natural soil by blending it with pumice and Black Gold Garden Compost Blend.  Use this enhanced mix to raise up the soil surface so the crown or base of the stem of the plant is above the surrounding grade.  This is also a good way to create soils that are perfect for rocky outcrops and raised beds where lavender thrives.

In San Francisco where conditions are cool and damp, growers prefer to mulch their lavenders with minerals such as washed sand or decorative gravel that help reflect heat back onto the plant. This porous material also creates a dry barrier between damp soil and the plant foliage to discourage mold.

Choosing a Lavender

varieties
All three species have yielded endless horticultural varieties to choose from.

Before you select a lavender for marginal areas, consult a local expert to find the best species and or variety to match your microclimate and soil conditions.  They vary in cold hardiness, size, and color from the cold-tolerant English lavender to a Spanish lavender to fill that super hot spot.  And for those romantics who love the notion of true French lavender in the garden, these plants will be the genesis of homemade tinctures, fragrant waters, sachets, potpourri, soap and a wide range of natural herbal cosmetics.

Once you know what to plant, select a sun-filled area and improve the soil for drainage, then plant in spring so there’s plenty of time to adapt your ground before the summer heat and fragrant flowers to come.

Bottom Heat for Happy Heirloom Seed Starting

The only way to have heirloom vegetables and flowers in your garden is to grow them from seed.  Most heirlooms simply aren’t grown commercially, so they’re not often available as seedlings.  To obtain those antique varieties and to savor their long-lost flavors,  we must order the seed and start the plants ourselves.  This also applies when starting your vegetables in advance of the last frost date as well.  Virtually any time you must grow anything from seed it can either be a nightmare or a grand success and getting soil temperature right is essential.

Essential Soil Temperatures

germination tray
Plant seeds in a small tray that’s easy to bottom heat in the kitchen or when using the small heating mat.

Seeds are programmed to sprout when the soil is warm enough to ensure conditions for vigorous growth.  That’s why it’s traditional to start seeds in a sunny window.  It’s not that buried seed needs sunlight (though some seeds like lettuce do need light to sprout), but weak winter sun helps to warm the potting soil to kick off germination.  Most summer crops require soil temperatures around 70 to 80 degrees Fahrenheit.  Cool-season crops will germinate in much cooler ground, the average being 45 to 60 degrees Fahrenheit.  Beets, for example, sprout in the coldest earth at 41 degrees.

seed mat
This bottom heat seed mat is available at Gardener Supply (image care of www.gardeners.com).

Cold soil is often the culprit when sown seed fails to germinate, or it takes substantially longer than normal to sprout.  Often, delayed germination can cause the seed to rot in the pot before it sprouts.  Sitting too long in a very moist or damp conditions encourages damping off, a fungal disease that can wipe out the whole crop of tender seedlings. Avoiding these problems is why bottom heat plays a big part in speeding along this seed germinating process.

Seed-Starting Mats

While perusing your seed catalogs, seek out electric seed-starting mats, which start at about $35 for the smallest size.  These are much like a large electric heating pad that’s impervious to moisture.  Growers place them beneath the flats to warm the soil from the bottom up to speed germination.  It also encourages new roots to grow downward toward the heat source rather than remaining close to the surface of the soil warmed by sunlight.  This shapes the roots so that once transplanted, they are better able to access moisture deeper down.

flats
To direct seed into pots or flats, you’ll need a larger seedling mat for uniform bottom heat.

It’s important to use clean seed-starting media when using bottom heat because warmth can stimulate the growth of undesirable organisms.  Black Gold Seedling Mix is a quality media that gives seeds and seedlings a good head start.  It’s lightweight, porous, and quick to drain, so moisture won’t build up inside a pot to cause seed rot or damping off.

Sowing Seeds

There are two ways to sow seeds.  The first method gets a lot of plants germinated without watching a lot of little pots for signs of life.  You can start with a small plastic salad box bottom, or something similar, that will be easy to warm with a small seedling heat mat.  Plant seeds very close together as they won’t be in there long.  Once seeds germinate, use a thin stick to pop out each seedling from well below the roots.  Transplant each into a small container of potting soil and place all of these atop the mat to continue deep rooting on the warmth of the mat.  If you have a larger heat mat, go straight to seeding individual pots to eliminate the transplanting step.

Long ago I’d set my sown trays on the wood stove mantle where the rising heat warmed them from below.  When seedlings appeared, they were moved to a place with sunlight. Cash-strapped gardeners have devised ingenious alternatives to seedling mats, such as repurposed water-proof outdoor holiday string or rope lights wound up beneath the flats to achieve the same end, though this is not as safe and reliable as tried-and-true seed-starting mats.  No matter how you get ‘er done, the key is bottom heat to mimic Mother Nature’s earthy warming many months before she wakes from her winter nap.

Three Sisters Gardens

Along the flood plains of America’s rivers, indigenous tribes cultivated crops for centuries.  Before levees, rivers spread out far and wide, yet shallow, with each spring flood depositing yet another layer of rich silt upon those from millennia past. These tribes grew the three sisters of Native American agriculture: corn, squash, and beans.  Growing in the three-sisters style is a great way to teach youngsters or to create a family project that demonstrates much about gardens, climate, and history.

087
Winter squash benefits from the shelter of the corn and beans.

The Benefits of Three Sisters Gardens

Unlike our farm-row monoculture plantings, three sisters agriculture plants all three crops close together on a single mound of earth. First, the corn is sown, germinates, and produces a young stalk.  Next, the beans are sown next to the corn to climb that stalk.  Like other legumes, beans fix atmospheric nitrogen into the soil to fertilize the heavy -feeding corn.  Winter squash is third, which benefits from the shelter of the corn and beans while the large squash leaves shade soil to keep root zone temperatures lower under each mound.

This easy backyard garden project is adaptable to different size spaces by adjusting the mound’s dimensions. It can be just 18″ in diameter for small spaces or for large gardens go up to four feet with proportionately more plants.  While irrigating with drip systems, some like to create a depression in the center of the mound that allows for an occasional deep watering ideal for hot dry days.

In the riverbank Indian villages, they saved bones and other leftovers from their fish preparation to fertilize the mounds. The heads, bones, fins, and organs were buried deep into the mound to decompose there and release important nutrients throughout the growing season.

Creating a Three Sisters Garden

ajaxhelper
Buffalo Bird Woman of the Hidatsa tribe.

When creating your own mounds, blend in generous amounts of Black Gold Garden Compost Blend to increase humus levels and overall fertility.  To boost microbe and micronutrient content work Black Gold Earthworm Castings Blend into the surface soil where the seeds will be sown.  In lieu of fish heads, which attract pests, install pockets of fertilizer deep within the soil mound where roots can find them for long-term availability to the plants.

Virtually any corn, squash or climbing beans can be used, but heirloom varieties of these American plants will be closer to those grown by the Indians. In the west explore Native Seed/SEARCH online for rare strains grown by tribes in the desert and northern Mexico.  These are the original three sisters varieties developed by Pueblo farmers, but those heirlooms grown by tribes in the north and east are adapted to shorter growing seasons.

bookThe river gardens were closely protected during the growing season by tribal members who kept a sharp eye out for marauding wildlife or theft. Often young women sat upon an elevated platform for a better view of the field and sang while watching for stealthy young men who’d steal the fresh ears to cook for themselves, and in the process, many marriages found their start amidst the “sisters”.

Buffalo Bird Woman’s Garden is a reprint of the 1917 book that documents the Hidatsa tribal gardens on the Missouri River flood plain. In this personal account, you will learn everything about the gardens and the role of women within them.  Most of all we learn from Buffalo Bird Woman just how intimate these indigenous people were with their crops:  “We cared for our corn in those days as we would care for a child; for we Indian people loved our gardens, just as a mother loves her children; and we thought that our growing corn liked to hear us sing, just as children like to hear their mother sing to them.”

Three Sisters On The Mound

indian cornSister #1 Maize   Any kind of corn grows this way but heirloom varieties are shorter with strong stout stalks.  If you find decorative Indian corn in the store and love the color, save those ears in a cool dry place to plant in your three sisters garden next year.  Order Indian corn seed online for the widest selection, particularly the new Glass Gem popcorn.  Small mound: 4 or 5 seeds 6″ apart.


Bean Diversity3Sister #2 Beans   For this growing method use standard climbing beans.  Most indigenous tribes grew beans for drying and winter storage, but any green bean that climbs is fine.  Small mound:  4  beans close enough to corn for easy climbing.


Navajo Tail SquashSister #3 Squash  Winter squash were harvested, sliced, strung onto sticks and dried in the open air before storage.  Stick with one variety to avoid cross-pollination.  Small mound:  2 seeds, one on each side of the mound.