Articles

10 Award-Winning Annuals to Grow from Seed

Flats of garden flowers are costly, but you can grow a whole garden’s worth with just a handful of seed packets and a few inexpensive supplies. Petunias, geraniums, impatiens, marigolds, and salvias are several of the common annual favorites easily grown from seed. Choosing award-winning varieties will ensure good garden performance and consistent summer color. This how-to will help you pick the best seed-grown varieties (for sun or shade) and grow them to perfection.

What are Annuals?

Most bedding plants for long-lasting color are annuals. They are distinguished by their single season of flowering. Once the frosts come, they die, but their consistent colorful blooms make them worth the effort. Annuals are the best plants for containers and empty spots in front beds where bright color is desired. Most attract pollinators, too.

Plant Awards

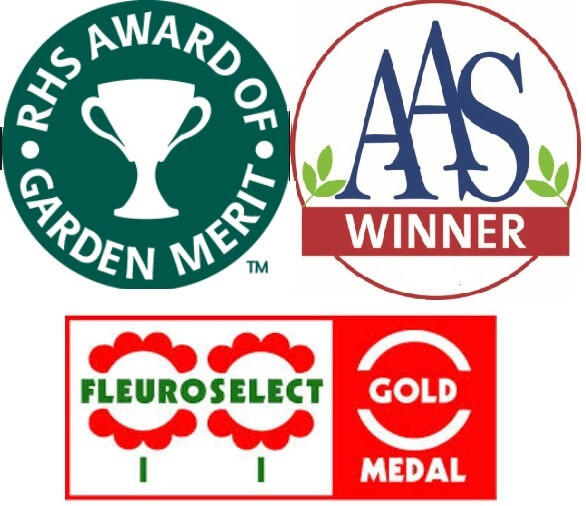
In the United States, the primary organization that tests and awards plants for performance is All-America Selections (AAS). Fleuroselect is an international organization dedicated to awarding outstanding ornamental plants, and The Royal Horticultural Society is a UK-based society that awards excellent plants with the Award of Garden Merit (AGM). Plants marked by these awards have been repeatedly tested for good performance in a variety of locations and growing conditions.

Award-Winning Annuals

Hummingbird Mint

Agastache Arcado Pink ( Fleuroselect)

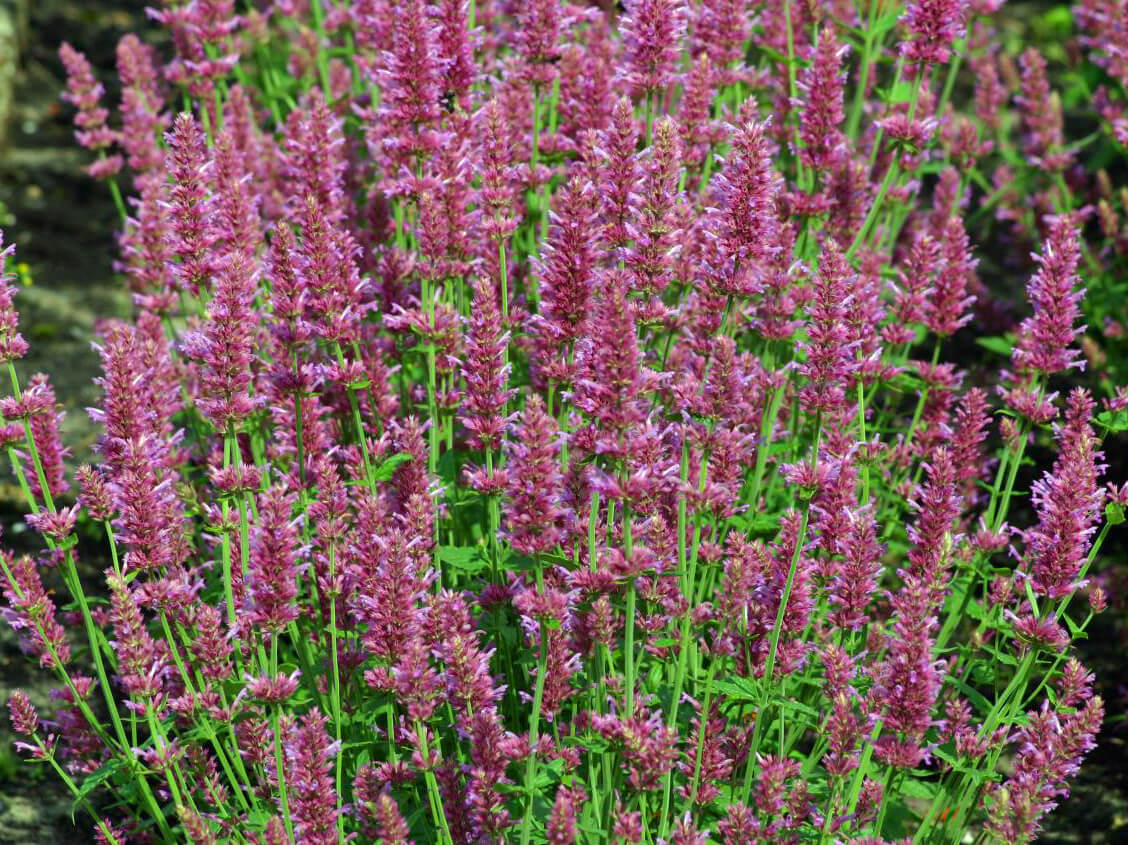
When it comes to consistent color for high-heat areas, few bedding plants can beat hummingbird mint (Agastache spp.). This everbloomer for summer also has highly fragrant foliage and flowers. The 2010 Fleuroselect winner,  Agastache Arcado Pink is easily grown from seed and produces wands of fragrant pink flowers. Bees and hummingbirds visit the blooms, and plants will sometimes survive the winter as short-lived perennials.

Cosmos

The colorful, delicate daisies of cosmos also attract bees and butterflies.

Cosmos Cupcakes Mix (AAS Winners)

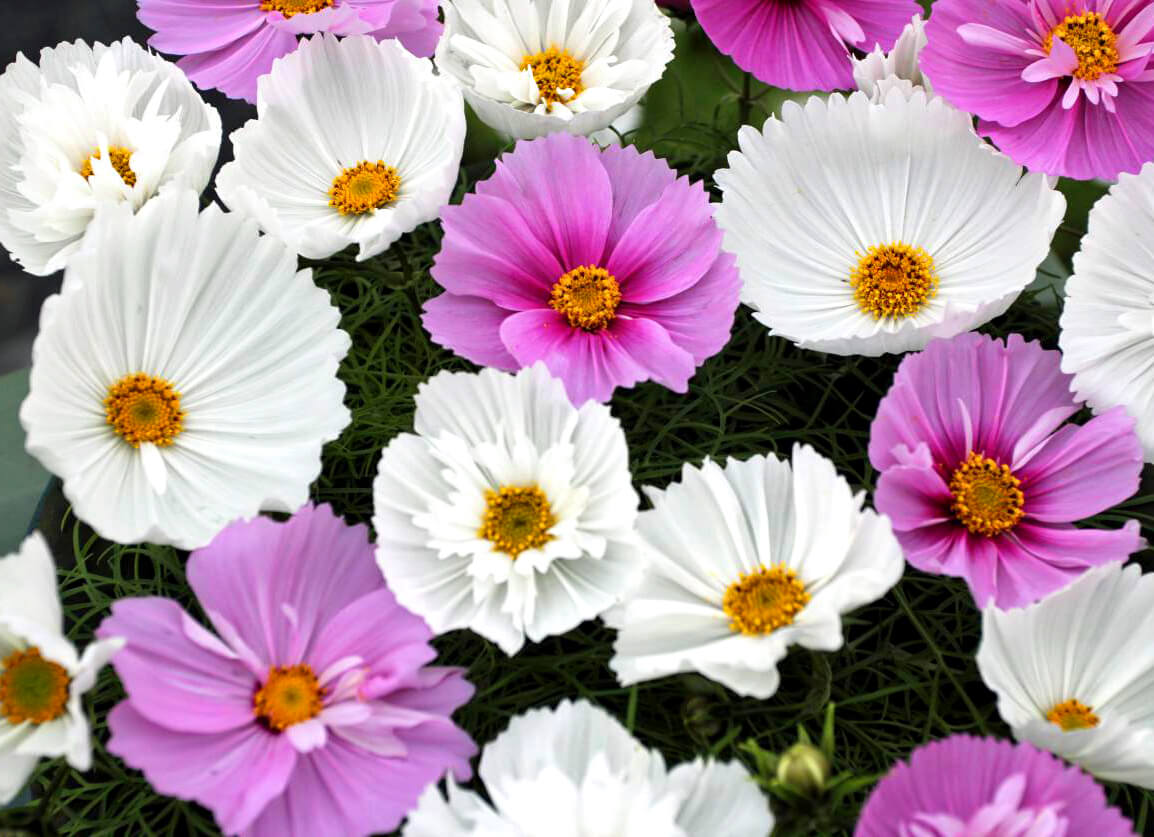
Common cosmos (Cosmos bipinnatus) has rose, pink, or white flowers that may be single or double. Cosmos Cupcakes mix is a 2014 Fleuroselect winner with cupped flowers of white, pink, and rose produced on 3- to 4-foot plants that bloom for three months. The 2015 Fleuroselect award winner Cosmos ‘Rubinato’ bears large, single rose-pink flowers on sturdy plants that reach 18 inches.

Sulfur cosmos (Cosmos sulphureus) has orange and golden flowers and thrives in high heat. Of these, the super short ‘Cosmic Orange’, a 2000 AAS award winner, is one of the best for the garden.
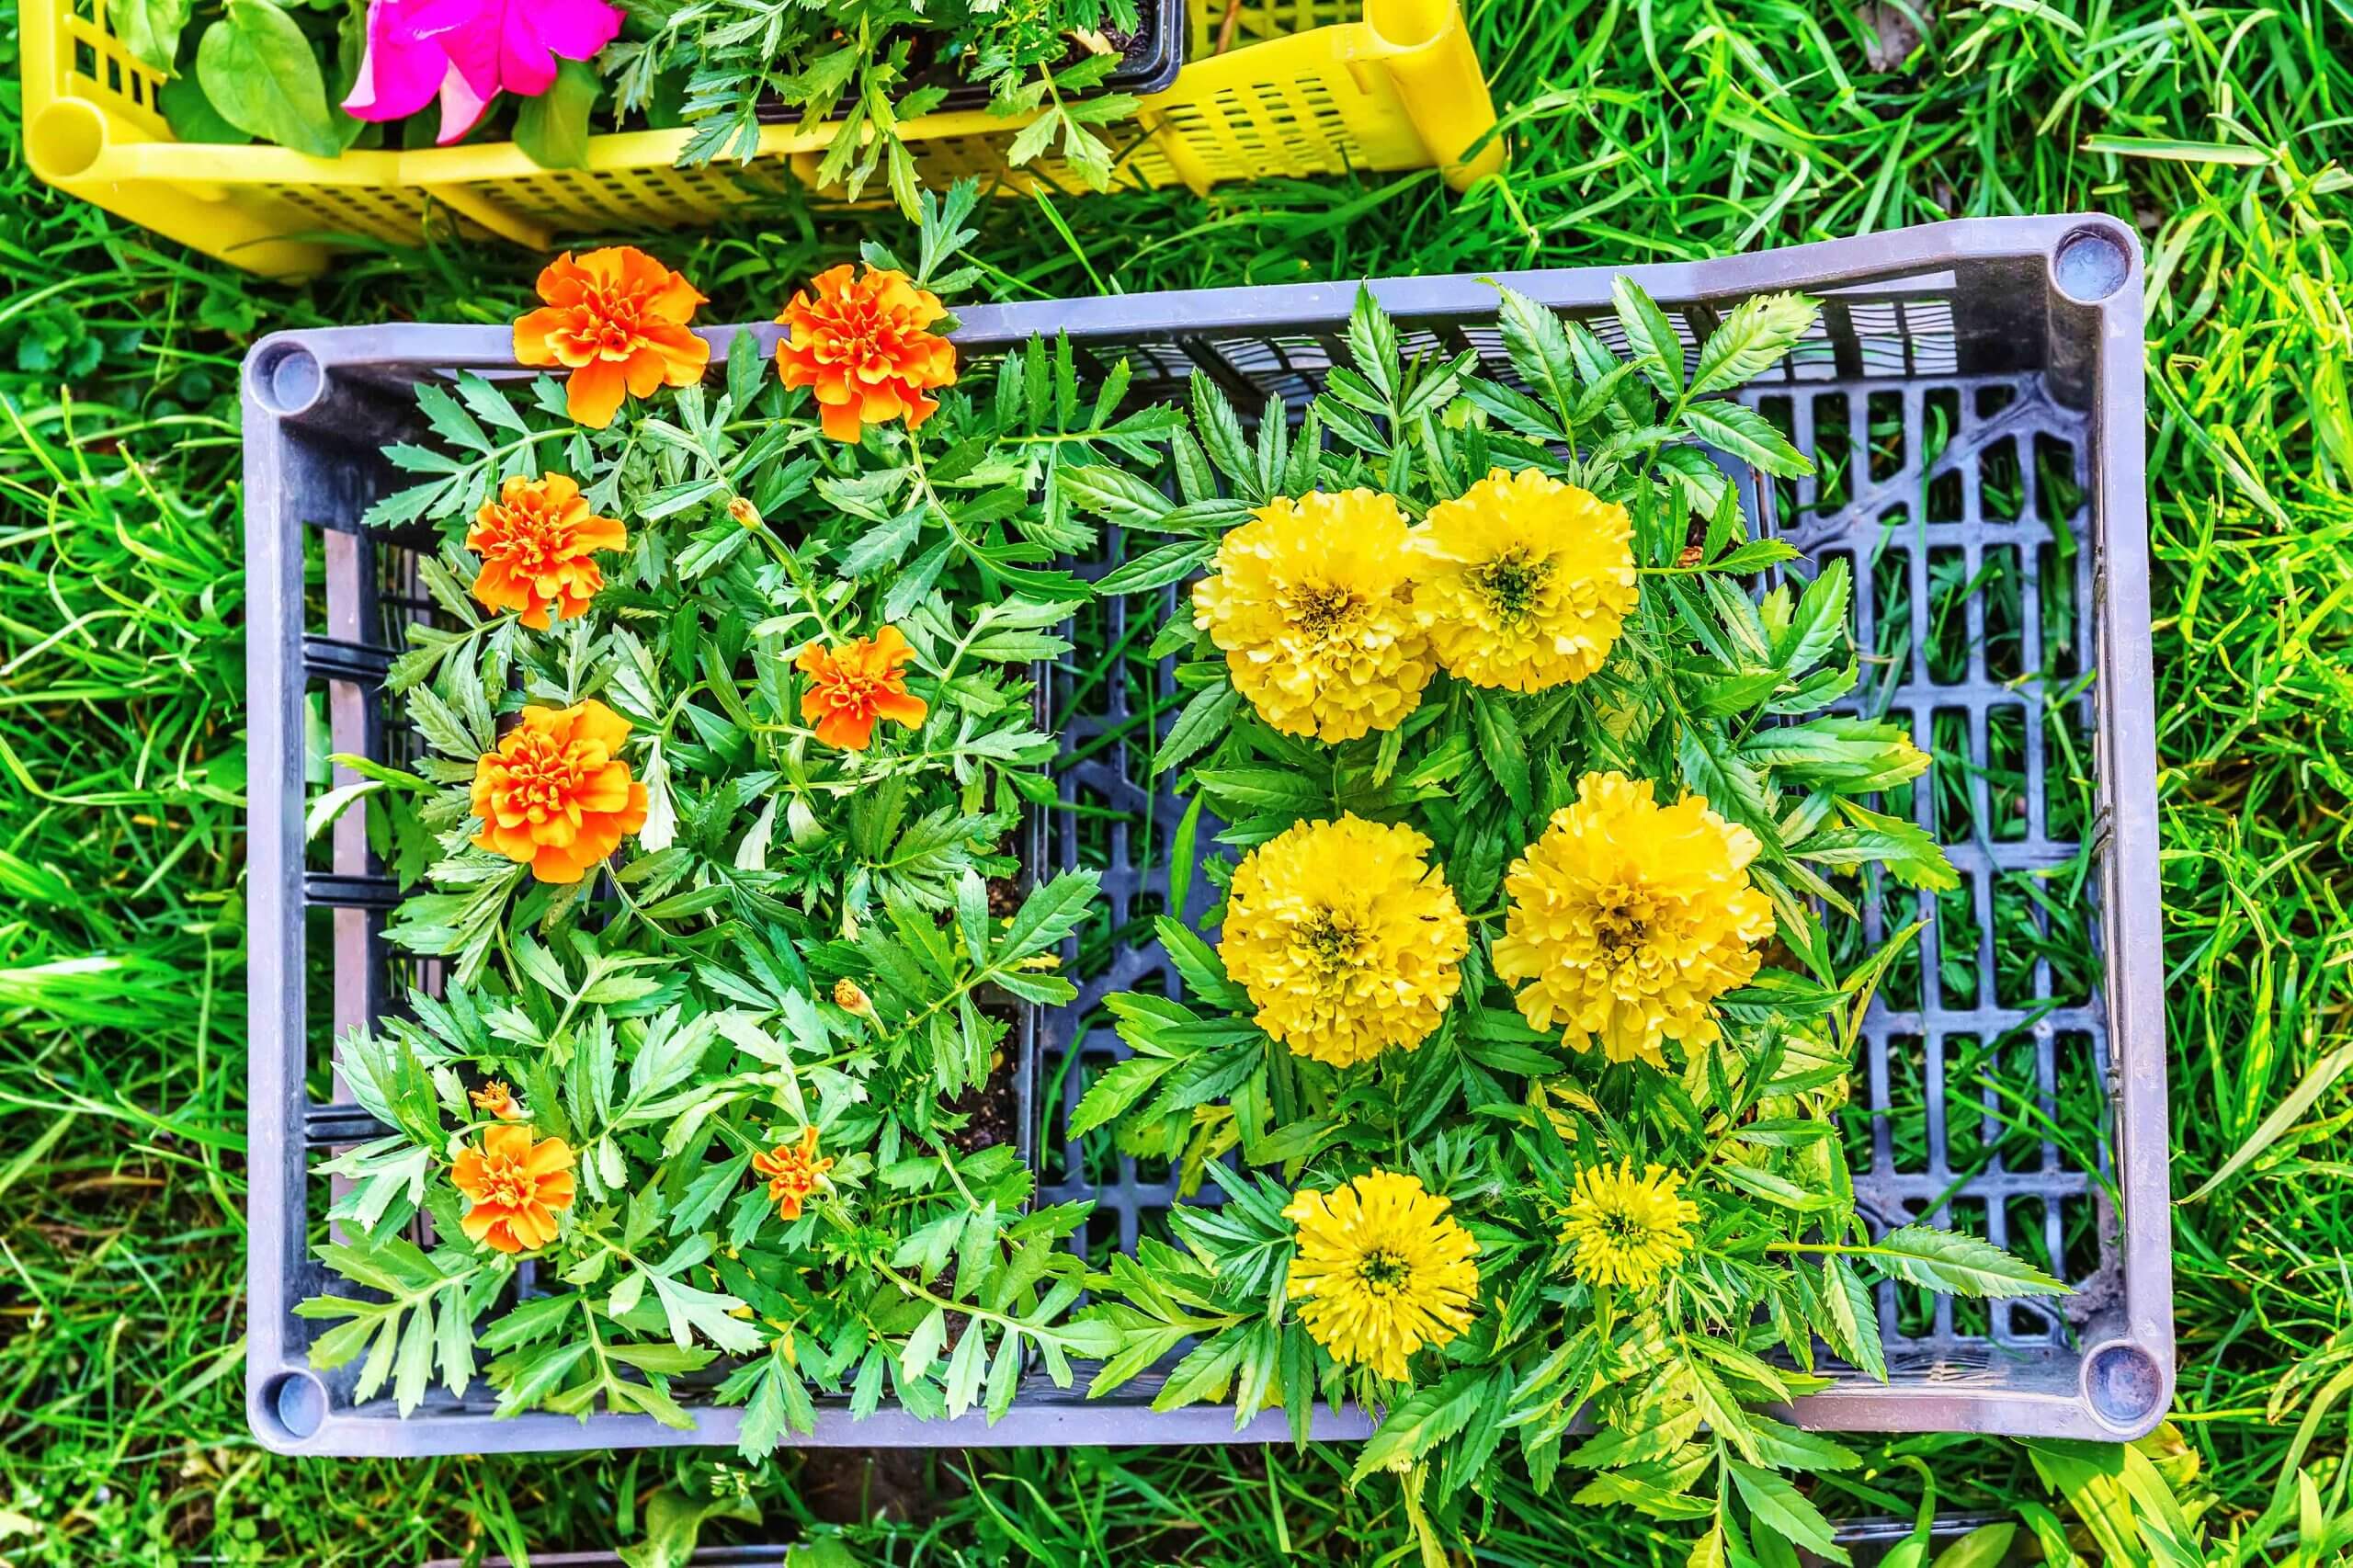
Marigolds

Marigold ‘Super Hero Spry’ (AAS Winners)

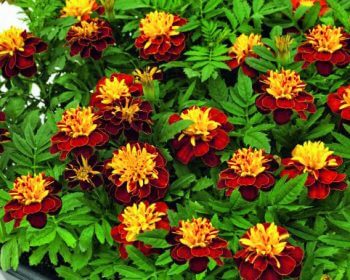
Whether you prefer tall African marigolds or short French marigolds (Tagetes hybrids), there are award-winners for you!

For compact French types, try the single-flowers, primrose yellow marigold Alumia™ Vanilla Cream, which was awarded the 2012 Fleuroselect Novelty award, or the 2018 AAS award-winning ‘Super Hero Spry’, which is super compact and has double flowers of maroon and yellow.

For tall African marigolds, the 2010 AAS winner ‘Moonsong Deep Orange’ produces huge fade-resistant flowers of tangerine on sturdy, heat-tolerant plants. The classic 1977 award-winning ‘Primrose Lady’ is another superb variety with big, pale-yellow blooms.

Petunias

Petunia ‘Evening Scentsation’ (AAS Winners)

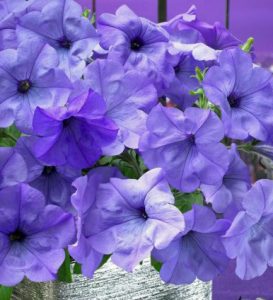
Petunias thrive in hanging baskets, window boxes, and front beds—blooming the summer away, even in hot summer weather. Bees and hummingbirds visit their flowers that come in a huge array of colors to fit almost any planting scheme.

The 2017 AAS-winning Petunia ‘Evening Scentsation is a beautiful seed-grown lavender-blue hybrid with large flowers that emit a sweet scent that attracts bees. Another for big color and endless bloom is the 2015 AAS winner, Petunia Tidal Wave® Red Velour, which bears deep red flowers on spreading plants. The smaller-flowered Petunia ‘Opera Supreme Pink Morn has deep pink flowers with white and yellow throats and was given a 2007 AAS award for superior bloom and performance.

Salvias

Salvia Summer Jewel Red (AAS Winners)

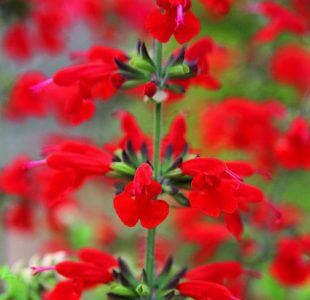
Flowers of red, lavender, pink and white appear on the Summer Jewel™ salvias (Salvia coccinea Summer Jewel™ series) in the hottest heat of summer. All members of the Summer Jewel™ series were given All-America Selection awards, Summer Jewel™ Pink won the 2010 Fleuroselect Novelty Award, and Summer Jewel™ Red won the 2012 Fleuroselect Gold Medal! Their blooms are favored by hummingbirds, and the compact, bushy plants bloom until fall.

Fairy Queen mealycup sage (Salvia farinacea ‘Fairy Queen’) is a stellar variety that bears wands of blue and white flowers. It was awarded the 2008 Fleuroselect Gold Medal for its compact habit and excellent flowering. The purple-flowered Evolution® Violet is another great selection that was given 2006 AAS and Fleuroselect awards for its nonstop color.

Zinnias

Zinnia ‘Profusion Red’ (AAS Winners)

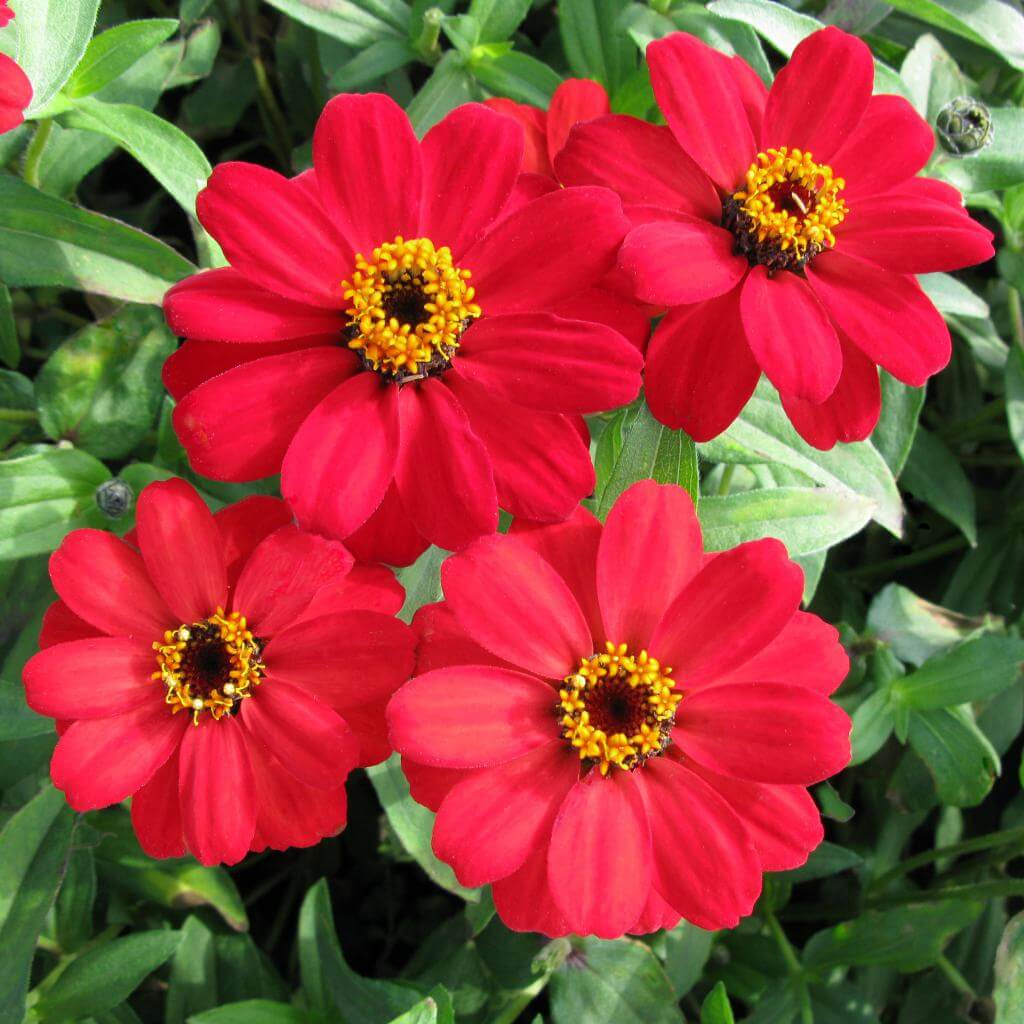
Zinnias come in low-growing forms fit for sunny border edges or containers. Tall forms are better for cutting gardens or larger flower beds.

The low-growing Zinnia ‘Profusion Red’ is an effortless low-growing bloomer that was awarded the 2018 Fleuroselect Gold Medal and a 2017 AAS award. It is both heat and drought tolerant and loved by bees and butterflies. A great tall zinnia for cutting gardens and borders is Zinnia elegans ‘Benary’s Giant Lilac’, the AGM winner has big pastel purple blooms on 2.5-foot plants.

Impatiens

Impatiens Florific® Sweet Orange (AAS Winners)

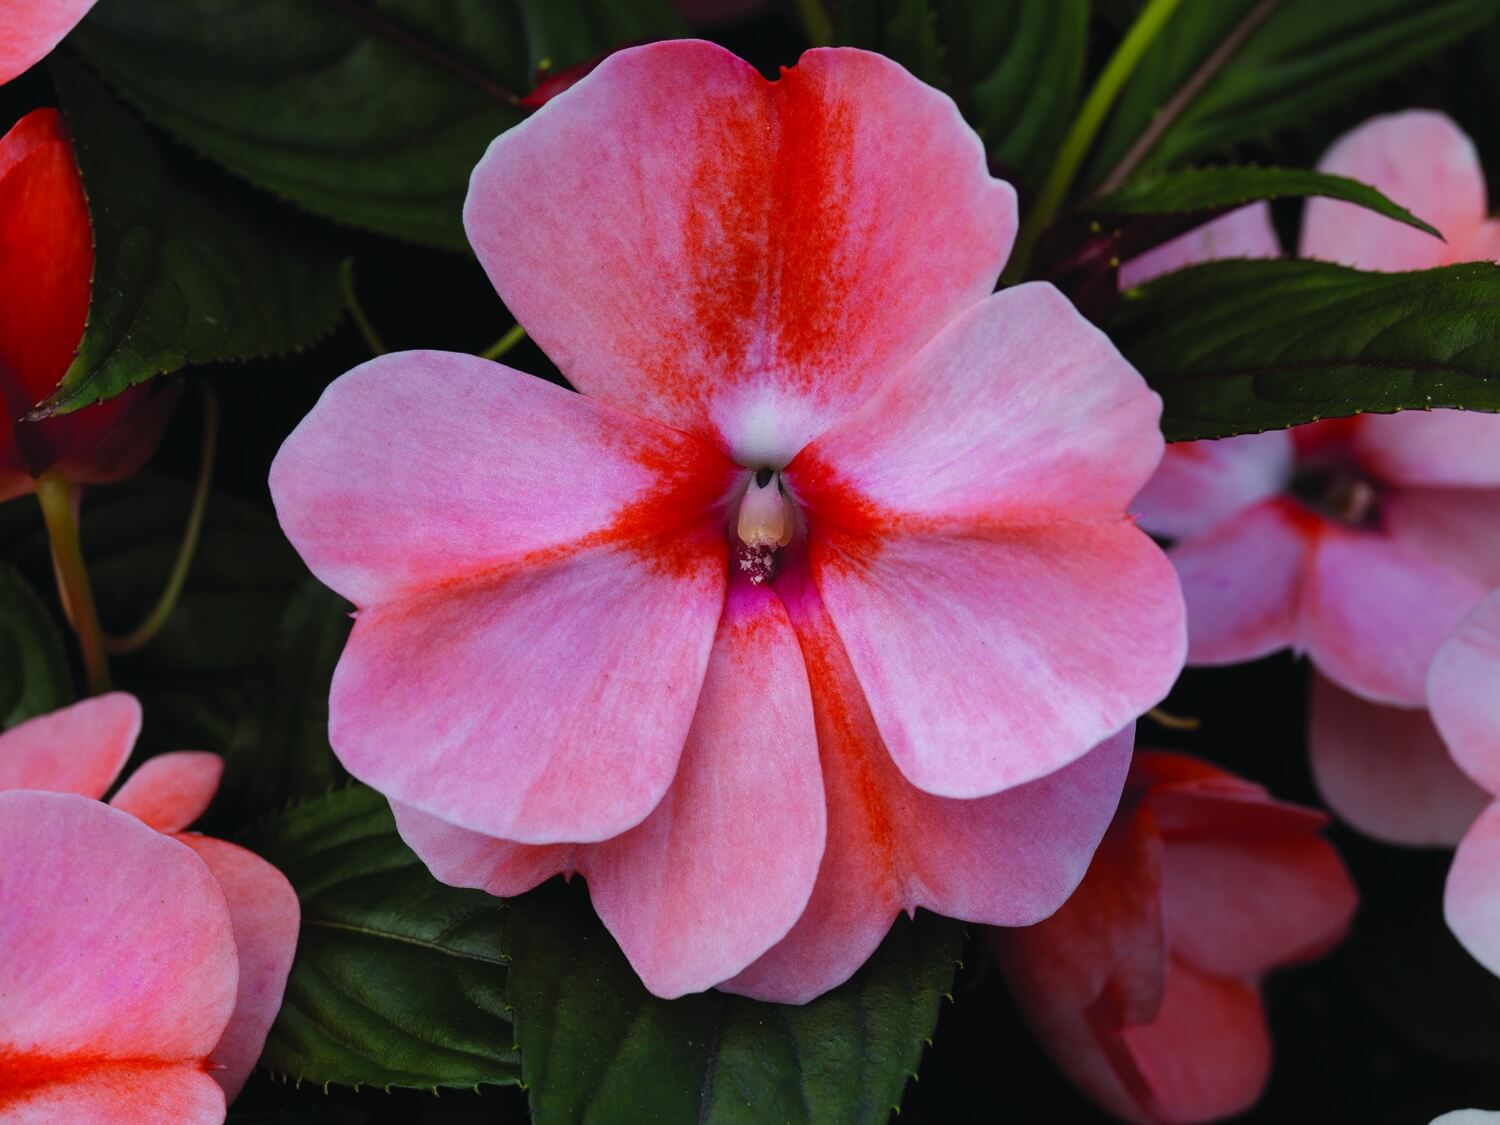
Impatiens are everblooming annuals that give shade gardens a burst of color. There are quite a few award winners to choose from. Of these, the New Guinea Impatiens Florific® Sweet Orange is a 2015 Fleuroselect Gold Medal winner with pale pink flowers blotched with orange-red. The large-flowered Impatiens walleriana Accent Red is a classic red Impatiens that’s easily grown from seed and achieved an AGM award. Both of these classic bedding plants bloom beautifully in full shade. Just be sure to keep them well fed and watered, especially when summer weather heats up.
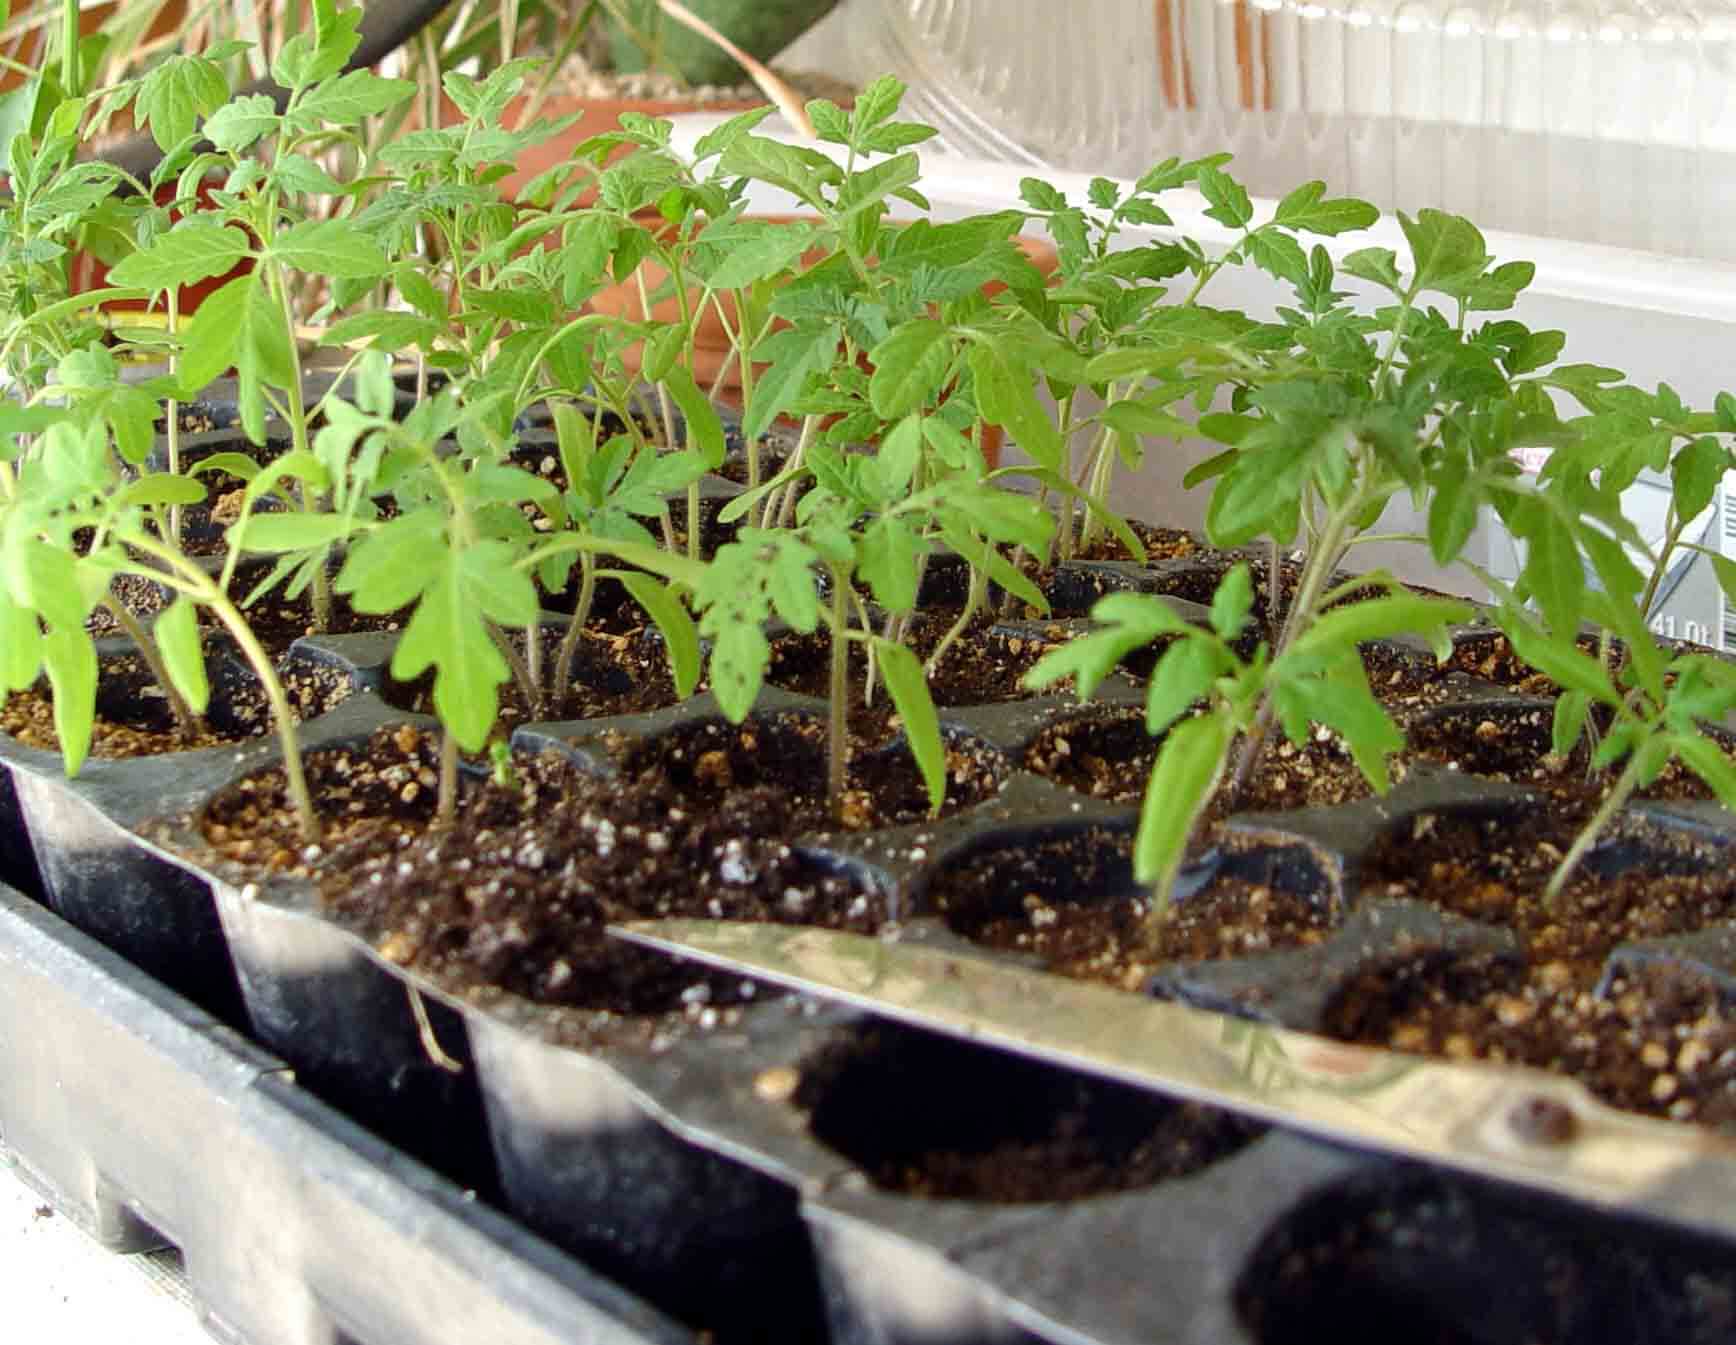
 

Seed Starting

Harden off homegrown bedding annuals before planting them outdoors.

Start your seeds in seed trays fitted with five-count, six-pack flats; these give growing annuals enough space for root growth before outdoor planting. Fill the flats with finely textured Black Gold Seedling Mix, which holds moisture and drains well. This seed-starting mix is also OMRI Listed for organic gardening. Lightly moisten the mix before planting.

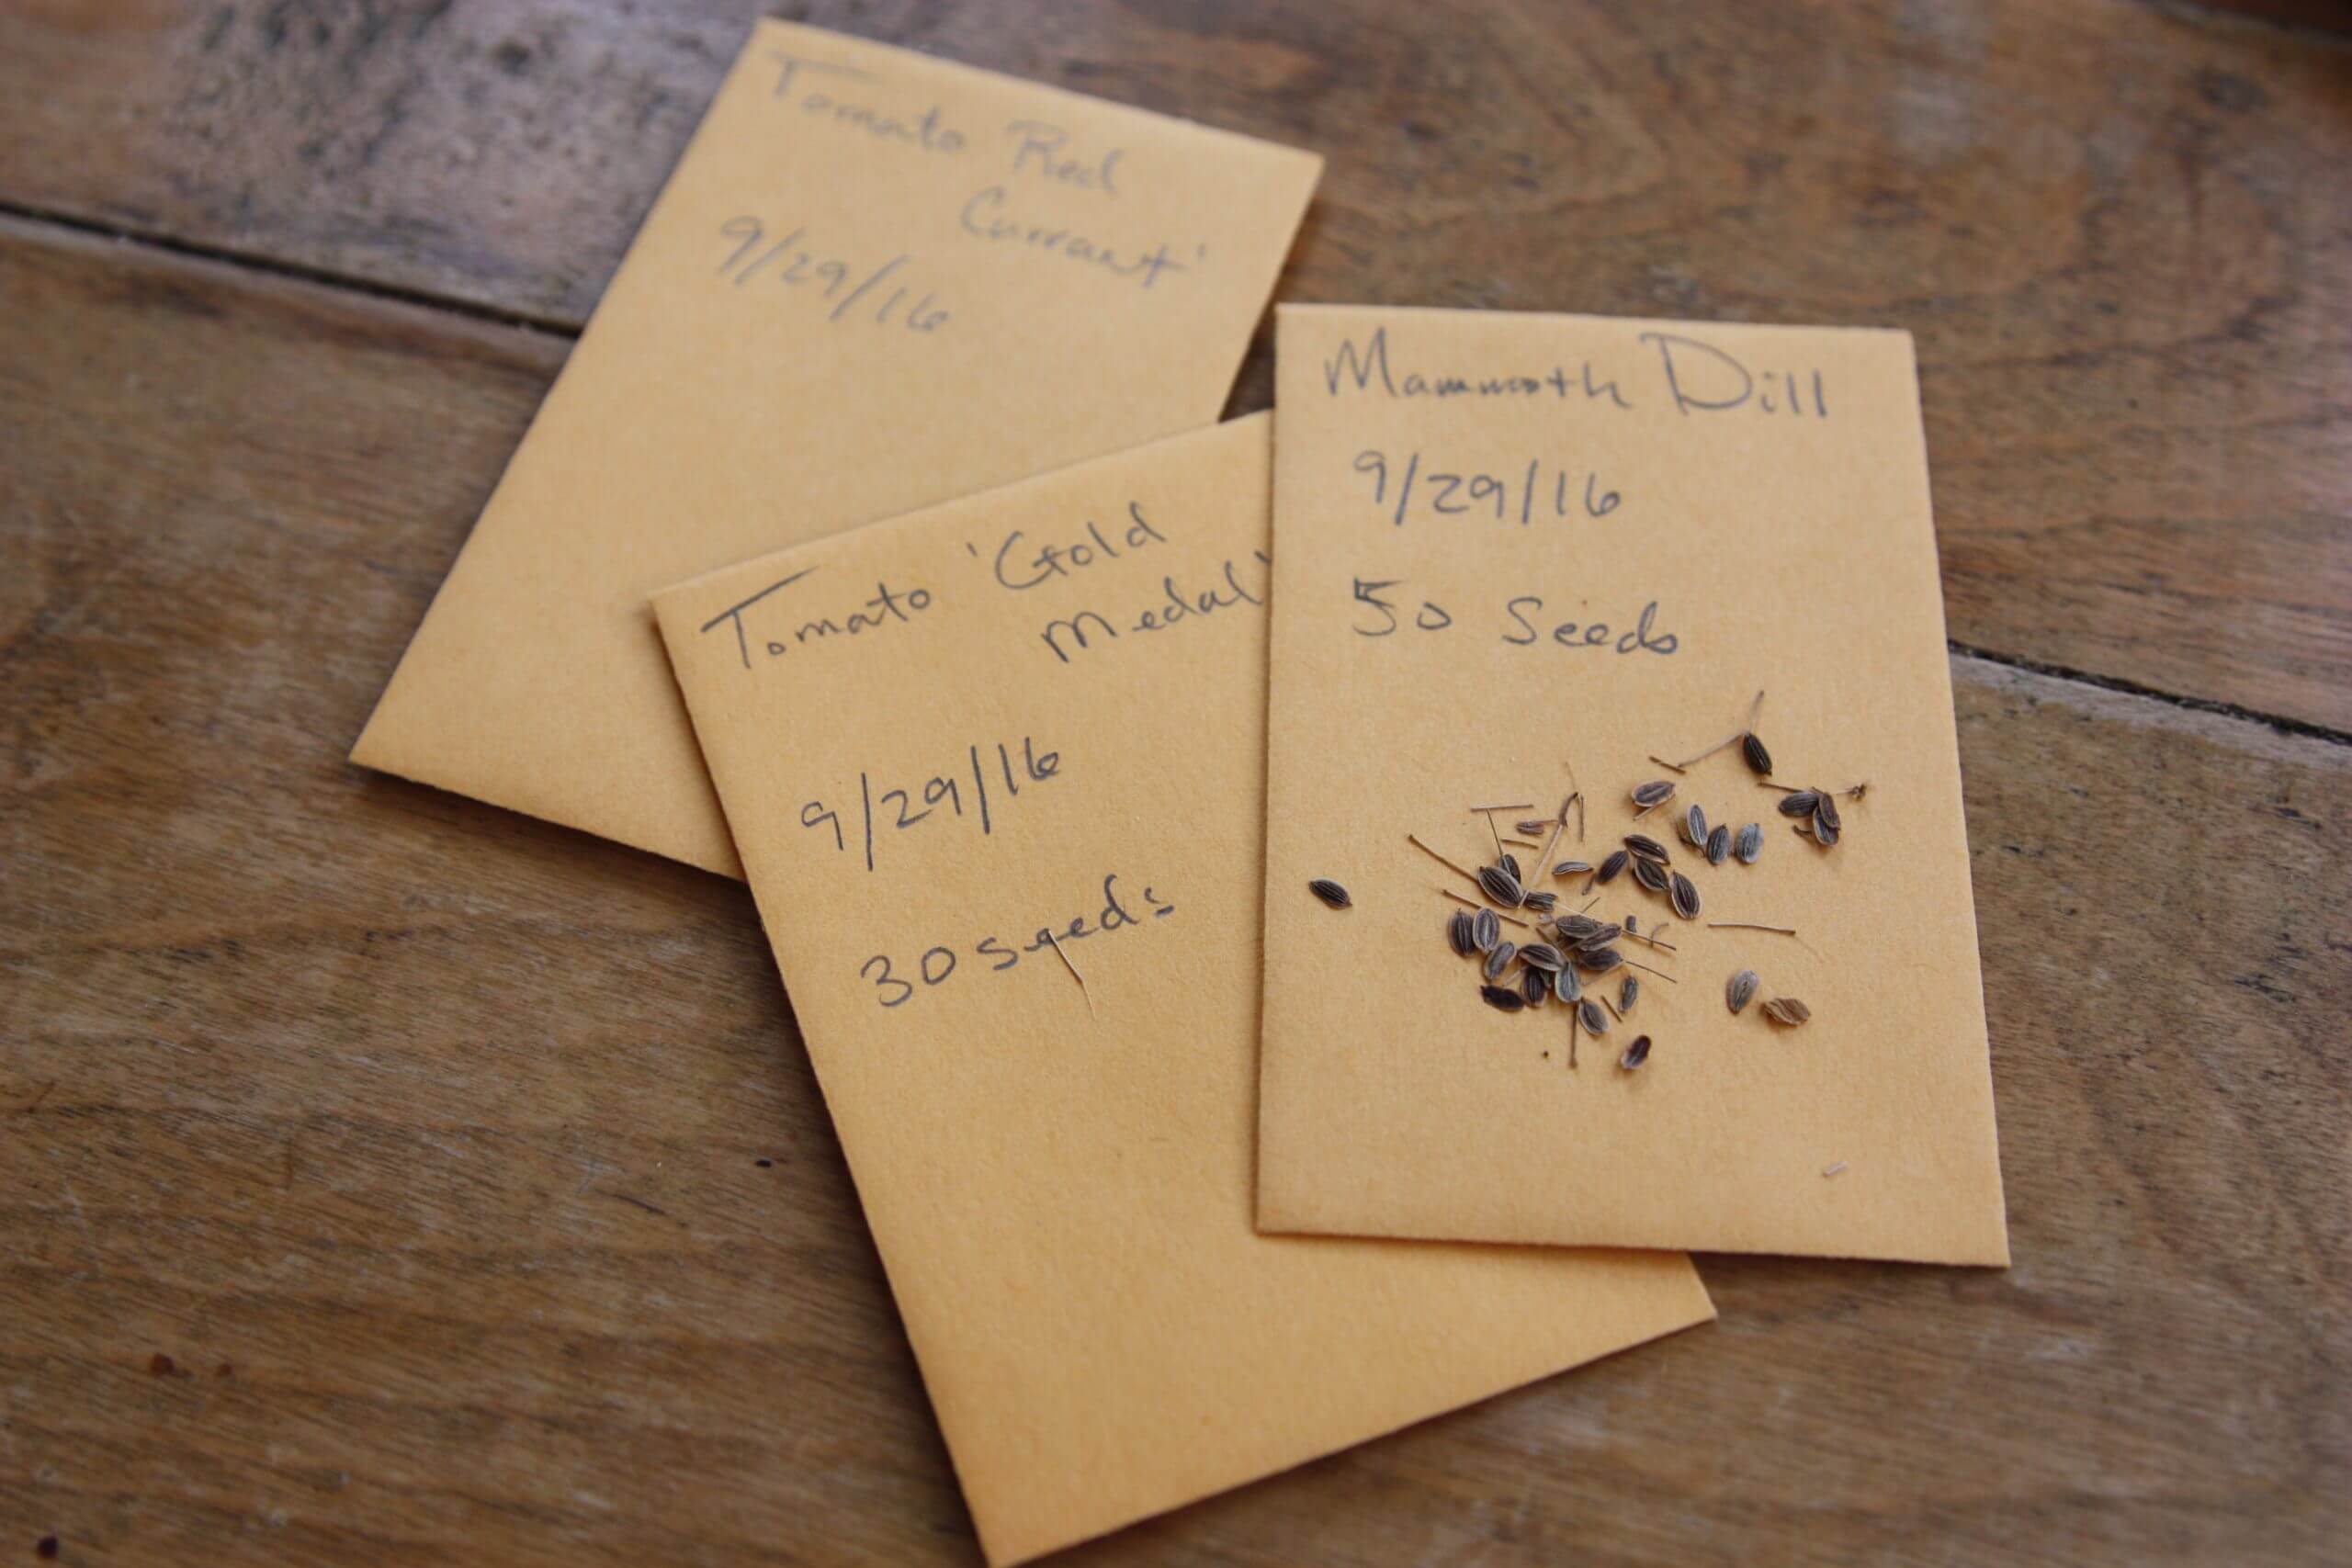
Read the seed packet for complete planting details and expected germination times before seeding. Most should be lightly covered with mix and kept slightly moist. Plant each cell with two to three seeds to ensure germination in each cell. Seedlings grow best if there is only one plant per cell, so move or pinch off extra seedlings that may sprout. Maintain a warm temperature of at least 68-73º F for best germination. Annuals that like hot weather often germinate faster if flats are placed on heat mats.

Strip shop lights fitted with broad-spectrum grow lights will ensure good seedling growth and provide trays with even light. One shop light will illuminate two trays. Keep trays 4 inches from the grow lights for good germination and to keep seedlings from getting leggy. Raise the lights as your plants grow. Once seedlings have emerged and their new leaves have begun to grow, feed them with half-strength Proven Winners Premium Water Soluble Plant Food.

Before bringing your seedlings outdoors in late spring, slowly get them acclimated to natural sunlight and wind by placing them in a protected spot with partial sun for one week. This process of “hardening off” allows tender seedlings that have been grown indoors to toughen up before outdoor planting. After this step, they will be ready to plant!

The Well-Prepared Parterre Potager

The grand French Chateau de Villandry Ornamental Parterre Garden is in the foreground with the Ornamental Kitchen Garden in the background. (Image by Maureen Gilmer)

As with most things French, even vegetable gardens can be decidedly beautiful.  What makes them so special are parterre potagers, a practice of creating symmetrical, geometric patterns with beds of vegetables of different colors and textures. Within the geometric beds, which are often lined with trimmed boxwood, rosemary, or santolina hedges, are planted many different food crops over the season, sometimes formal, sometimes country casual.  What they all share, however, is the highly geometric layouts and the diversity of plants grown there.

Grand Parterres

Villandry
The vegetable beds at Villandry are edged in boxwood and filled with colorful edibles. (Image by Maureen Gilmer)

Parterres were originally created using clipped hedges and colorful ornamentals placed in grand designs for the French Aristocracy. They were to be appreciated from the high windows of a palace or chateau, such as the famous Chateau de Villandry built in the Loire Valley during the Renaissance. Patterns can be as simple as repeating squares and rectangles or consist of intricate designs, such as repeating Fleur de Lis, knotwork, and starbursts. The designs were created on a large scale, but their clean geometry also made them adaptable on a smaller scale with more functional plants.

Potager Parterres

The potager parterre doubles as both a kitchen garden and appealing ornamental garden and fits nicely into small spaces. Raised edging can create the same impact as low hedges without additional maintenance.  This makes it easier to create a unique look with symmetrically designed beds delineated by edging and gravel walkways.

edging
Simple, contemporary edging and gravel combine to create a French-inspired herb and vegetable parterre. (Image by Maureen Gilmer)

What makes the French garden so fun is that it’s rich in herbs as well as vegetables and other plants that contribute to the famous cuisine.  Some may be perennial, such as lavender, rosemary, and thyme, while most others are annual vegetables of all kinds.  Often the annuals are cycled in and out of the same ground, as the cool and warm seasons pass.  In the South of France, where conditions are warmer, these hard-working gardens are packed with heavy feeding veggies most of the year.  Unfortunately, many of these gardens experience a nutrient decline over time unless the soils are routinely fed with quality soil amendments and added fertilizer.

Amending Parterre Soil

When native soil is worn out and the microbial content depleted, it’s best to err on the side of overdoing it.  It is rare to experience ill effects caused by too much compost, because it’s quickly consumed by soil microbes, in a healthy organic environment.  The more the microbes feed, the more amendments you need to keep their numbers high for consistent soil fertility year in and year out.

BG-GRDNCMPST-BLND_1cu-FRONT
Black Gold Garden Compost Blend is superb food for microbes.

The best choice for in-ground parterres is OMRI Listed® Black Gold Garden Compost Blend, which is superb food for microbes.  Compost can be added to natural soil in spring and fall.  Turn your earth gently with a fork and blend in the compost at least 6-inches deep before planting.  This ensures there will be plentiful organic matter for crops to do their best.

For additional grow power and added nitrogen, amend with OMRI Listed® Black Gold Earthworm Castings Blend.  At planting time, work a handful of castings into each planting hole to ensure the roots will encounter a boost of natural nitrogen and micro-nutrients derived from the earthworm’s diet.

For parterres with hedge edges, mulch them with the leftover compost and worm castings to keep them healthy, green, and beautiful.  Just leave a 3″ ring of open ground around the base of the hedges to let their trunks breathe.

Petite parterres are a great way to create a formal look or one that’s rooted in history.  They can be planted with vegetables, or flowers, or both.  That’s what makes this garden style so inspiring. One can grow good food while never sacrificing great design.

hedges
This mid-sized parterre is a good solution for a functional backyard landscape. (Image by Maureen Gilmer)


Growing California Christmasberry

Large sprays of bright red berry-like fruits mature in time for holiday decorating.

In my old High Sierra home, I decorated with my own native Christmasberry (Heteromeles arbutifolia, USDA Zone 8) fruit every winter for nearly 20 years. Also called California toyon, this shrub produces large sprays of bright red fruits that are so seasonally welcome, I wondered why it was not more popular in landscaping.

Christmasberry makes a fine alternative to Asian Frasier’s photinia (Photinia fraseri), non-native hollies (Ilex spp.), and other exotic evergreens.  Deep, emerald-green foliage makes the red fruits really stand out in the winter garden while providing bird habitat all year long. In the High Sierras, the wild evergreens remained unchanged from the end of late-spring rains to December, when the rains returned.  That’s a minimum of seven months with no supplemental water!

Potted Christmasberry

Like so many California native shrubs, Christmasberry is difficult to grow commercially in pots because of its deep, wide-spreading root system — the key to its amazing drought resistance.  Natives with large root systems rapidly outgrow nursery pots by the end of the first year, when grown from seed.  If not transplanted into a deeper pot, the roots will hit the pot bottom and grow sideways.

A young Christmasberry shrub.

Distorted tap and feeder roots will keep a growing shrub from achieving proper root depth once planted in the ground.  This is why Christmasberry, and comparable native trees and shrubs, are uncommon in garden centers.  So many have disproportionate top-to-root growth. A tiny seedling may have a three-foot-deep root system that refuses to adapt to container culture.  This was such a problem with California native oaks, that growers finally gave up on trying to pot them and planted acorns instead.

Purchase the smallest, youngest potted plants, if you can find Heteromeles arbutifolia for sale locally.  A big plant in a small pot won’t adapt well to drought.

Growing Christmasberry from Seed

Sowing Christmasberry plants from gathered seed is an even better option. Home-grown shrubs can quickly be planted outdoors, allowing the tiny seedlings to freely root into the soil and adapt to local rainfall limitations.

First gather mature, red fruits and clean each one to release the two seeds inside.  In my High Sierra home, robins came each year to feed on the fruits, excreting clean, ready-to-germinate seed on my land.  To simulate this same scenario at home, separate the seed cleanly from the fruit and allow the seed to dry.  This seed will remain viable for only about 8 months.

BG_NATORGPTTINGMIX_1cu-FRONTSow the dry seed in winter to get them started, just like wild seed with the spring rains. Choose a light, natural garden soil, such as Black Gold Seedling Mix. Start by filling a plastic lidded salad or fruit box with the fresh mix, and set the seed into the moist media, but don’t cover it.  Keep the seeds lightly moist and at room temperature, and they should sprout in about a week.  Transplant newly sprouted seedlings into deep pots of Black Gold Natural & Organic Potting Mix. Place them under bright light until they reach 1-inch in height, usually within six weeks.  Transplant into the landscape once the soil can be worked to ensure healthy root growth and easy planting. Spring planted seedlings should be deeply watered once or twice, then let them grow on rainfall unless conditions are unseasonably arid.

Planting Christmasberry

In the wild, Christmasberry typically grows on rocky slopes with dry, well-drained soils that are sometimes a bit saline. Keep this in mind when selecting a location to plant or sow your shrubs. As long as the roots are free to grow deeply, they will out-perform thirsty hollies and other exotic holiday berries without asking for much, if any, supplemental water.

Mature shrubs are bushy, somewhat shade tolerant, and typically reach 6-10 feet or more. In early summer clusters of white flowers are produced. These are transformed into red, berry-like fruits that persist into winter. Established plants can live up to 200 years.

hedge
This relatively young hedge shows how fast Christmasberry produces a drought-resistant screen with high wildlife value.

Other natural, shrubby companions found with Christmasberry are California lilac (Ceanothus spp.), manzanita (Arctostaphylos spp.), western redbud (Cercis occidentalis), and fremontia (Fremontodendron spp.), all of which grew on or near my old property.  This is the essential palette of native California shrubs or small trees that promise beauty in drought.

There is no better recommendation for a species to withstand the perpetual “shake, bake, and irrigate” of the West Coast. Christmasberry survives fire and holds slopes against mudslides, according to Lester Rowntree in her classic 1947 book, Flowering Shrubs of California.  Lester wrote: “I have seen acres of toyon [Christmasberry], in solid formation, come back after fire from the roots of old bushes, ringing the bases of burned 18-foot stems, standing black and dead, with the bright rich green of new growth.”

Heirloom Vegetable Seed Saving

IMG_1049
These ripe heirloom vegetables contain seeds that are ready to harvest and store for the next year.

Seed saving is easy, saves money, and ensures that your seeds have come from a reliable source (your garden!). Smart seed saving requires that you (1) allow your seeds to fully mature, (2) clean your seeds properly, (3) store your seeds correctly, and (4) know exactly what you are saving and storing. Step 4 is probably the most essential and least understood.

Seed-saving gardeners want to collect true-to-parent seed that performs like the parent plants, but this requires a basic understanding of heirlooms, hybrids, and pollination. Will the tomato seed you are saving be a true-to-parent heirloom, or are you saving the anomalous, mystery progeny of a hybrid? To answer these questions, you must know your vegetable varieties and their hybrid statuses.

Hybrid Seeds

Lycopersicon esculentum 'Early Girl' JaKMPM
Hybrids, such as this F1 hybrid ‘Early Girl’ tomato, do not produce true-to-parent seed.

If you bought any F1 hybrids, then these vegetables were hybrid crosses between two carefully selected, known parents. Hybrids are more vigorous and have desirable traits that make them special—such as added disease and pest resistance and great fruit production. With F1 hybrids, crop performance wins, but seed saving doesn’t because they don’t yield true-to-parent seeds. The only way to grow a given hybrid each year is to purchase new seed from a vendor. Hybrid seed is also more expensive because the hybridization process takes more time and money.

So, what if you did collect F1 hybrid seed? What do open-pollinated hybrids yield? Their seed would produce unstable variations of the parent plants. For example, take the slicing tomato ‘Big Red’, which is a disease-resistant F1 cross between the two tomato varieties, ‘Pritchard’ x ‘Jubilee’. An open-pollinated ‘Big Red’ may cross with other garden tomatoes, which will introduce variation. In addition, the saved seed would also yield plants with a mix of traits representing the original parents, ‘Pritchard’ and ‘Jubilee’. What a mess! There is no way to know what you might get.

Heirloom Seeds

IMG_16141-1024x752
Heirlooms, such as these ‘Brandywine’ tomatoes, are reliable in producing true-to-parent seed.

Open-pollinated heirloom varieties are more stable. This means that you can collect them from year to year, and the collected seed will be like the parents, with few exceptions. For example, if you save seed from ‘Brandywine’ (1889), ‘Black Krim’ or ‘Gold Medal’ (1921) tomatoes, the seed will produce plants much like the parents.

On occasion, an unexpected variant might arise in saved heirloom seed. It is up to the gardener to assess whether new variant should be maintained. If a mystery plant appears with desirable traits, then maybe you have found something special, and selection is in order. Selection means carefully choosing variants over generations for desirable traits, such as large and tasty fruit, good growth habit, and productivity.

There are many seed vendors that specialize in open-pollinated heirlooms that can be saved with confidence. The Seed Savers Exchange is one of the oldest and most reliable sources of old, heirloom varieties.

Collecting, Cleaning, and Storing Seeds

IMG_1064
Packets of seeds ready to store. (Note that the dill seed contains some chaff.)

On average, seeds cost around $3.00 a packet, so you can save money by collecting your own. Good, viable seed can only come from fully mature fruits. This means that bean or okra pods, husks of corn, or tomato and pepper fruits must be fully dry, colored, and ripe before collection.  You might also consider leaving a few herbs, carrots, lettuce, beets, and radishes to flower and set seed for collection, in addition to the more obvious fruiting crops.

Dry Seed Cleaning

This Indonesian winnowing basket, called a Nyiru, was created for rice.
This Indonesian winnowing basket, called a Nyiru, was created for cleaning rice seed.

It is easy to collect seeds from dry or open fruits. For example, pepper seeds can be lightly scraped from cavities (beware of spicy fingers from hot peppers!), poppy seeds shake out of dry capsules, and corn kernels pop off of dry ears. This process, called threshing, may be clean or messy, depending on the seeds and their fruits.

Threshed  seeds often contain chaff (unwanted bits of dry plant material, dirt, and insects), which can be picked out by hand, sifted off, or removed by winnowing. Winnowing is the process of removing the lighter chaff from the heavier seed by tossing it in the air and allowing the wind to carry the chaff away.

Winnowing baskets were created across cultures to assist with this process. These can still be purchased today and used for home seed cleaning.

Water winnowing is another option for dry seeds. Here, very small seeds are placed in a bowl of water. The seeds will settle to the bottom, and the chaff will float to the top. Then the water can be gently poured away until the seeds are left at the bottom. The seeds can be gently picked up with a paper towel to dry.

Wet Seed Cleaning

IMG_1063
Fermenting ‘Red Currant’ tomato seeds

The seeds of fleshy, wet fruits require more elaborate cleaning steps. Tomato seeds are the messiest to save. The juicy fruits have seeds with a slimy membrane that should be removed to ensure good storage and germination.

In nature, the fruits are eaten by animals and the seeds pass through and out, membrane free, but this is hardly helpful for the seed collector. Two-day fermentation is the easiest way to naturally remove the seed membranes.

Start by cutting open the tomatoes and scraping out seeds from the fruits. Place them in a clear, lidded glass or jar. Add 2 to 3 inches of clean tap water. Lightly cover and allow the seeds to sit for one to two days, or until the contents become frothy on top. Pour the contents through a sieve and rinse the seeds in water until clean. Allow them to dry completely on a clean, dry towel.

BG-Seedling-1.5cuPumpkin, melon, and cucumber seeds can simply be scooped and cleaned in a fine colander under warm running water. Pieces of membrane may need to be picked away from the pumpkin or squash seeds. The clean seeds will be a little slippery, but that is okay. Dry the seeds on a light colored towel before packaging.

Package and label the seeds before storage. Plain paper packets are best. Number 1 coin envelopes are the perfect size and shape. Be sure to label each with the plant name and date, for consistency. Store the packets in a lidded paper box kept in a cool, dry place.

Then, towards winter’s end, break out the Black Gold Seedling Mix, plant up your seeds, and start your vegetable garden planning anew.

Late-Summer Vegetables to Grow From Seed Sowing

Late-summer and fall vegetables grown from seed.

It’s absolutely counterintuitive to plant anything in August or September, but intuition is not always right.  Go against your instincts, and sow cool-season seeds right now.  Do it soon, and you’ll get your fall and winter garden started just in time.

Starting Fall Vegetables

If you’re a beginner and have never grown food outside the strict summer garden, now is your chance to give it a try.  Sowing now takes advantage of the natural transition toward ever shortening day length and cooler temperatures.  In the hot Southwest, frost holds off until later in the season, so a fall garden can often feed a family deep into the winter.

Drip irrigation is a great way to keep seedlings well watered.

Though the summer food plants are in decline, many are still producing. Once a plant stops or dies, take it out promptly, and start sowing leaf and root crops like kale, carrots, beets, and chard. All of them can be sown directly into garden soil in late summer when it is warm enough to stimulate germination. The transition will be more gradual than spring planting because soil is prepared incrementally as space is freed up by plant removal.  For example, after an aged squash dies back or mildews, simply take it out and sow cool-season seeds in its place.

BG_EARTHWORM_8QT-FRONT
Earthworm Castings are high in nitrogen and great for feeding fall greens.

Sowing Fall Seeds

Every time you take out a dying summer plant, prep the soil before sowing because that soil has consumed much of its spring fertilizer and amendments.  Lots of rich humus is needed to drive leaf- and stem-producing edibles.  This requires amending the area to about six inches deep with a claw or fork to open the ground, then generously working in Black Gold Garden Compost.  Don’t compact the soil, leave it fluffy so the seeds settle down into the moisture-retentive humus.  Lightly cover seed with compost or sprinkle Black Gold Earthworm Castings on top of freshly sown seeds to introduce fresh microbes and micronutrients.  (Fall seedlings can also be started indoors. Click here to learn how.)

The biggest challenge in getting the fall garden started is keeping the seedbeds adequately moist.  An old method uses burlap laid right over the sown seedbed and pegged down on the corners.  Water is applied right through the burlap which prevents dislodging the soil particles and acts like a mulch to keep the seed bed from drying out in the sun.  Burlap is moved only after the little green shoots appear.  A heat wave at this stage may require little burlap shade structures to shelter the seedlings until they harden off to direct sun. Drip irrigation is a great way to keep plants well irrigated once seedlings have popped up from the ground and the burlap is removed.

Choose Leafy Greens

Don’t overlook the ability to sow cool-season leafy vegetable seeds everywhere you can.  Sow beets in the window boxes, colorful Bright Lights chard on the patio, but make sure you leave plenty of room for Dinosaur, or ‘Lacinato’, kale.  This big burly kale from Italy takes more heat

and cold than any other.  Though rather bold looking, it’s great eating because the best-tasting leaves are the old ones!

Cut-and-come-again lettuce is the perfect cool-season crop for fall and winter gardens.

Keep in mind that nitrogen is important to any plant that produces an edible stem or leaf.  Puny growth is often due to nitrogen depletion.  Slow growth may not happen all at once, but you may see a reduction in plant size by late fall or early winter.  Concentrated liquid fish fertilizer is the best organic nitrogen source for the long fall and winter growing season in the West.

Testimonial: Black Gold Seed Starting Mix

BG-Seedling-1.5cuWhether you are starting seeds for spring or fall crops, Black Gold Seed Starting Mix will give great results. Just read the recent review from Charles Sims. He wrote:

“This is the very best seed starting soil that I have used. I have used many different kinds, but this is now my preferred brand. I used it to start Tomato and Pepper seeds. The tomatoes sprouted in 4 days. The Peppers in 6 days. Moisture retention is very good.”

We love to hear about your gardening successes with Black Gold. Have a success story to share? Please email Sun Gro .

Bottom Heat for Happy Heirloom Seed Starting

The only way to have heirloom vegetables and flowers in your garden is to grow them from seed.  Most heirlooms simply aren’t grown commercially, so they’re not often available as seedlings.  To obtain those antique varieties and to savor their long-lost flavors,  we must order the seed and start the plants ourselves.  This also applies when starting your vegetables in advance of the last frost date as well.  Virtually any time you must grow anything from seed it can either be a nightmare or a grand success and getting soil temperature right is essential.

Essential Soil Temperatures

germination tray
Plant seeds in a small tray that’s easy to bottom heat in the kitchen or when using the small heating mat.

Seeds are programmed to sprout when the soil is warm enough to ensure conditions for vigorous growth.  That’s why it’s traditional to start seeds in a sunny window.  It’s not that buried seed needs sunlight (though some seeds like lettuce do need light to sprout), but weak winter sun helps to warm the potting soil to kick off germination.  Most summer crops require soil temperatures around 70 to 80 degrees Fahrenheit.  Cool-season crops will germinate in much cooler ground, the average being 45 to 60 degrees Fahrenheit.  Beets, for example, sprout in the coldest earth at 41 degrees.

seed mat
This bottom heat seed mat is available at Gardener Supply (image care of www.gardeners.com).

Cold soil is often the culprit when sown seed fails to germinate, or it takes substantially longer than normal to sprout.  Often, delayed germination can cause the seed to rot in the pot before it sprouts.  Sitting too long in a very moist or damp conditions encourages damping off, a fungal disease that can wipe out the whole crop of tender seedlings. Avoiding these problems is why bottom heat plays a big part in speeding along this seed germinating process.

Seed-Starting Mats

While perusing your seed catalogs, seek out electric seed-starting mats, which start at about $35 for the smallest size.  These are much like a large electric heating pad that’s impervious to moisture.  Growers place them beneath the flats to warm the soil from the bottom up to speed germination.  It also encourages new roots to grow downward toward the heat source rather than remaining close to the surface of the soil warmed by sunlight.  This shapes the roots so that once transplanted, they are better able to access moisture deeper down.

flats
To direct seed into pots or flats, you’ll need a larger seedling mat for uniform bottom heat.

It’s important to use clean seed-starting media when using bottom heat because warmth can stimulate the growth of undesirable organisms.  Black Gold Seedling Mix is a quality media that gives seeds and seedlings a good head start.  It’s lightweight, porous, and quick to drain, so moisture won’t build up inside a pot to cause seed rot or damping off.

Sowing Seeds

There are two ways to sow seeds.  The first method gets a lot of plants germinated without watching a lot of little pots for signs of life.  You can start with a small plastic salad box bottom, or something similar, that will be easy to warm with a small seedling heat mat.  Plant seeds very close together as they won’t be in there long.  Once seeds germinate, use a thin stick to pop out each seedling from well below the roots.  Transplant each into a small container of potting soil and place all of these atop the mat to continue deep rooting on the warmth of the mat.  If you have a larger heat mat, go straight to seeding individual pots to eliminate the transplanting step.

Long ago I’d set my sown trays on the wood stove mantle where the rising heat warmed them from below.  When seedlings appeared, they were moved to a place with sunlight. Cash-strapped gardeners have devised ingenious alternatives to seedling mats, such as repurposed water-proof outdoor holiday string or rope lights wound up beneath the flats to achieve the same end, though this is not as safe and reliable as tried-and-true seed-starting mats.  No matter how you get ‘er done, the key is bottom heat to mimic Mother Nature’s earthy warming many months before she wakes from her winter nap.

Growing Tomatoes from Seed to Harvest

Nothing is more gratifying than a big tomato harvest in summer!

Homegrown summer tomatoes simply taste better. That’s why they’re the most popular warm-season crop. They are inexpensive to grow and offer big payloads of delicious fruits, which are pricy at farmers’ markets and grocery stores. It pays to grow your own from seed because they are easy to start, and if you grow organically it’s the best way to know that your stock is pesticide-free. And, there are loads of wonderful tomato varieties only offered from seed.

Tomato Basics

  • Common Name: Tomato
  • Botanical Name: Lycopersicon esculentum
  • Days to Harvest: 65 to 85 days after planting, depending on the variety
  • Planting Time: After the last frost date
  • Light: Full sun
  • Soil: Rich, porous, well-drained loam
  • Water: Regular water for even moisture
  • Temperature: Fruiting is best with 78 -92ᵒ F days and 70ᵒ-80 F nights.
  • Fertilization: Quality fertilizer formulated for tomatoes
  • Pests: Tomato hornworms and Colorado potato beetles feed on foliage and fruits, causing significant damage.
  • Diseases: Plant wilt, leaf damage, fruit damage, or poor performance can be caused by many tomato diseases, including early and late blight, fusarium wilt, tomato mosaic virus, and verticillium wilt.
  • Disorders: Blossom end rot (caused by calcium deficiency), splitting/cracking (caused by excessive water or temperature fluctuations), and fruit toughness, cat-facing, and reduced productivity (caused by cool temperatures) are the most common disorders.

Days to Harvest Steps for Tomatoes

'Pomodoro' is a fantastic all-purpose tomato for fresh eating and cooking.
‘Franchi’s Italian Pear’ is a fantastic all-purpose tomato for fresh eating and cooking.

Starting Seeds

It takes around six to eight weeks to grow tomatoes from seed to ready-to-plant seedlings. Start seeds indoors for the best results. Sow seeds in cells filled with OMRI Listed Black Gold Seedling Mix and lightly sprinkle a bit on top to cover. Gently moisten the cells with water, and then place the trays right under the warmth of grow lights. Keep the mix moist but never wet. In 5 to 12 days, your tomato seeds should germinate. Germination is best when temperatures are warm  (68°-75° F (20-24° C)). A heat mat for seed starting will dramatically hasten germination. (Click here for more detailed seed-starting instructions.)

Tending Seedlings

Tomato seedlings are delicate and have two lance-shaped seed leaves when they first emerge. The true leaves, which are feathery and divided, appear in 2 to 3 days. At this point, feed seedlings with diluted, water-soluble tomato fertilizer. Keep the soil moist but not wet. Wet soil can encourage fungal diseases that cause seedlings to rot or “damp off.” To avoid leaf burn, lift grow lights up as plants get closer to the bulbs.

Tending Small Plants

Happy tomato seedlings

Tomato plants should be around 8- to 10-inches tall and garden-ready after eight weeks. Indoor grown seedlings are tender, have weak stems, and need time to adjust to full sun. If directly planted outdoors, they will develop leaf burn and may die. To avoid this, they need to be hardened off for at least a week before planting. Hardening off means acclimating seedlings from their cushy indoor growing conditions to the windy, sunny outdoors where temperatures fluctuate.

To harden seedlings off, place the potted plants in a protected spot that gets a few hours of sun per day. Each day move them to a new location where they get a little more light and wind each day. After a week or so, they should be tough enough to plant in the garden.

'Matt's Wild Cherry' is a delicious, tiny cherry tomato with big flavor.
‘Matt’s Wild Cherry’ is a delicious, tiny cherry tomato with big flavor.

Garden or Container Planting

Choose a good spot for your tomatoes. They require at least 8 hours of full sun and well-drained soil that’s fertile. Vining (indeterminate) types need caging or trellising, while bush (determinant) types need staking; both types benefit from summer pruning.

Before planting in the garden, amend beds by digging and turning the soil deeply and adding rich Black Gold Natural & Organic Compost Blend and an OMRI Listed tomato fertilizer. Plant tomatoes around 4 feet apart and mulch with another 2- to 3-inch layer of Black Gold Natural & Organic Compost Blend. Young plants can be planted deep, with only several leaves above ground–just be sure to gently remove the leaves from all stem parts that will be covered with soil. Water regularly to keep root moist. As plants grow, they will demand more water.

Tomatoes are such aggressive feeders and water hounds that you have to give serious attention to container-grown plants. Start with a really large pot. Determinant tomatoes are best, but indeterminates will also work if you keep them well caged and pruned. A good, water-holding potting soil is perfect for container culture. I recommend Black Gold® Natural & Organic Potting Mix, which also contains Resilience™ for stronger stems and better root development. Container-grown tomatoes need to be watered daily and fed more frequently, but if you give them ample attention, they should thrive and produce beautifully. (Click here to watch a video about how to grow tomatoes in containers.)

Harvest

Tomato fruits develop the best when days are warm (between 78 and 92 degrees Fahrenheit) and nights are warm (at least 70 degrees Fahrenheit). Tomatoes can be harvested green for fried green tomatoes and green tomato chutney, but they are best picked when they are fully ripe (well colored, slightly soft to the touch). Some tomatoes are naturally easy to pull from the vine when mature, while others cling. I always keep a pair of pruning sheers on hand for clingers. If you accidentally harvest a few fruits with a bit of green, let them stand on a sunny windowsill for a couple of days, and they will ripen up right away.

Pruning

Tomatoes can be cut and shaped to keep them from overtaking a trellis or container. Use sharp, clean pruners to cut whole branches back to main stems as needed. Try to maintain productive fruit and flower-laden branches, if at all possible. As a precautionary measure, it’s wise to dip pruners in a 10% bleach solution when pruning from plant to plant, just to avoid the possibility of spreading disease. Dip and wipe the pruners after pruning one plant and going to another. (Click here for a video about how to prune cherry tomatoes.)

Tomatoes to Try

'Gold Medal' is one of the best-tasting, prettiest beefsteak tomatoes.
Gold Medal’ is one of the best-tasting, prettiest beefsteak tomatoes.

Tomatoes come in all colors, shapes, and sizes and their flavors are surprisingly variable. In my garden, I always choose several slicers, sauce tomatoes, salad tomatoes, and cherries each year. Some of my favorite pickings include the heirloom red and yellow slicer ‘Gold Medal‘, the French salad tomato ‘Crimson Carmello‘, and orange beefsteak ‘Kellogg’s Orange Breakfast‘. My favorite sauce tomatoes are the Italian powerhouses ‘Red Pear‘, ‘San Marzano Redorta‘ as well as the salad-sized ‘Principe Borghese‘, which is touted as the best tomato for sun drying. My cherry tomatoes of choice are the sweet, golden ‘Sun Gold‘, tiny red ‘Matt’s Wild Cherry‘, and delectable yellow and red ‘Isis Candy‘.  All are beautiful and have exceptional flavor.

Enjoy Your Tomatoes

This is the easy part. Lavish burgers with big, hearty tomato slices, eat them fresh in salads or make homemade tomato sauce and salsa. To extend the season, freeze whole tomatoes and sauce for winter. (This generally requires at least ten healthy tomato plants to provide enough to store through winter.)

Growing tomatoes is gratifying if you follow the proper steps and give them the best care. If you do it right, you should have more than enough tomatoes to enjoy and share. I wish you the best tomato season!

Follow these instructions and you'll have enough tomatoes for storing and sharing with friends.
Follow these instructions and you’ll have enough tomatoes for storing and sharing with friends.

5-Step Vegetable Garden Planning

6 packs
It pays to save six-pack containers from store-bought plants to sow your own seeds. Just be sure to wash the packs before reuse.

The quiet of the January new year is the ideal time to start vegetable garden planning.  This is the month of contemplation when you begin to conjure up next year’s crop in all its glorious diversity.  Whether it’s just an Earth box or a huge family plot, all vegetable gardens start the same way.  Success requires early organization, the ability to assemble exactly what you need, and the ability to time it all to perfection.  In fact, it’s much like planning a holiday meal with a half dozen different dishes that all need to be ready at the same time.  You need to make lists, shop for all the ingredients, and strategize your space in the oven and stove before bringing everything to the table.
Continue reading “5-Step Vegetable Garden Planning”