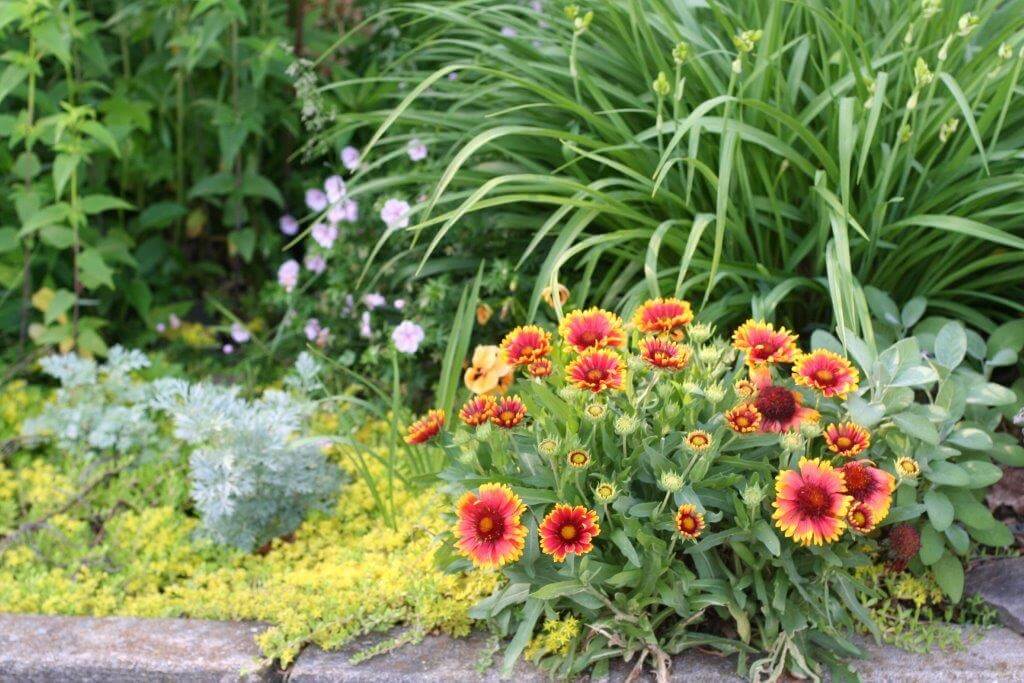
Fanfare blanketflower blooms in the forefront of a vibrant perennial border.
Growing your own perennials does not have to be difficult or expensive. Sure, some seeds can be pricey or require a lot of work (chilling, warming, seed coat nicking, soaking) which can take months of effort. But, many others are cheap and nearly effortless to grow, taking little more work than starting annual seeds. Perennial gardening from seed is worth the effort. Continue reading “Amazing, Easy, Cheap Perennial Gardening from Seed”
Those new to indoor seed growing should start with annuals such as zinnias, cosmos, basil, and gloriosa daisies.
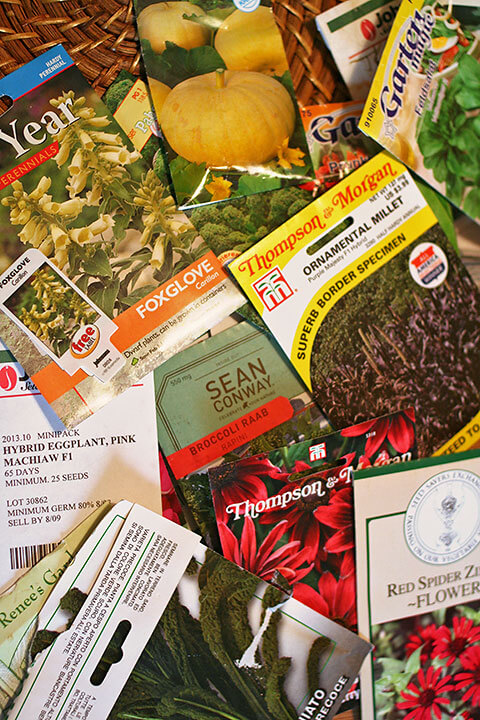
The seed-starting season is upon us. Soon loads of colorful and alluring seed catalogs will be populating mailboxes (and inboxes) nationwide. Raising plants from seed has huge benefits. One can grow unique varieties not found in garden centers for less money, and it’s fun. The process takes fortitude and patience. But, if you do everything right, your plants should be as robust as nursery-grown stock.
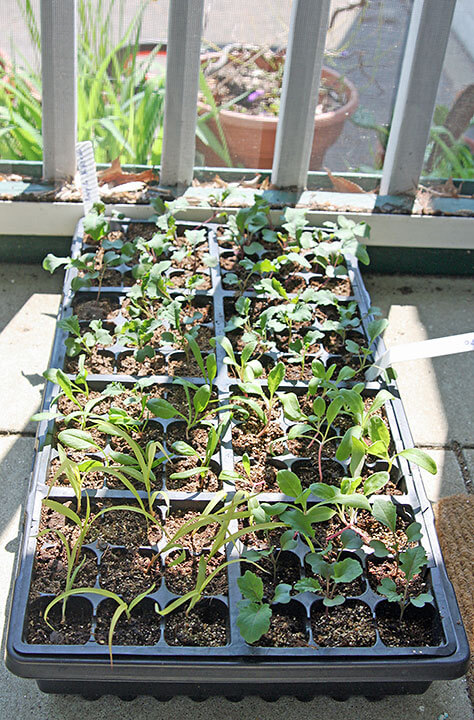
These newly planted homegrown cabbage seedlings are healthy and robust!
The key to happy seedlings is maintaining the right balance of light, temperature, soil, nutrition, and water, it’s just a matter of getting the balance right. Truth-be-told, most new seed growers fail one or more growing steps (often poor light or improper water) and produce leggy, pale, weak plantlets rather than stout, multi-stemmed, green ones. This matters because weak seedlings have a higher mortality rate and are slow to establish, while robust seedlings look better, fill out faster, and yield more flowers and fruits sooner.
Light
For best growth place seedlings 2 to 3 inches from high-intensity fluorescent bulbs.
Good light is essential for seed starting because too little causes seedling etiolation (long, spindly, pale growth), while too much can cause leaf burn. Gardeners lacking a sunny conservatory or greenhouse should choose the next best thing, a light table. And for high-grade seedlings refrain from window-growing; even south-facing-window-light is rarely uniform or strong enough for robust growth. A growing table fitted with broad-spectrum shop lights will do a much better job.
Here are four growing table “dos” to abide by:
1. Do choose the right location and table.
A warm, sunny room is ideal. Prefabricated grow tables (sold by many seed vendors) are handy but expensive. Standard 4-level utility shelves (sold at home improvement centers) fitted with shop lights are just as effective and much cheaper.
2. Do choose the right fixture and bulbs.
Standard 48-inch shop lights fitted with high-intensity fluorescent bulbs are the best, most cost-effective choice. Choose fluorescent bulbs that are specially designed for plant growing and cover much of the light spectrum. In general, fluorescent bulbs are not very strong, so they must be placed just inches above plants for best light reception and growth.
3. Do place your seeds and seedlings the right distance from the light.
Pots and seedlings should be kept 2-to-3-inches from fluorescent bulbs. The light fixtures should be hung from chains for easy height adjustment.
4. Do acclimate sun-loving seedlings to natural light before outdoor planting.
Sunlight is stronger than artificial light and can burn tender seedlings. Over seven to ten days, slowly move seedlings from indirect outdoor light to full exposure—increasing exposure every couple of days.
How to Plant Seeds
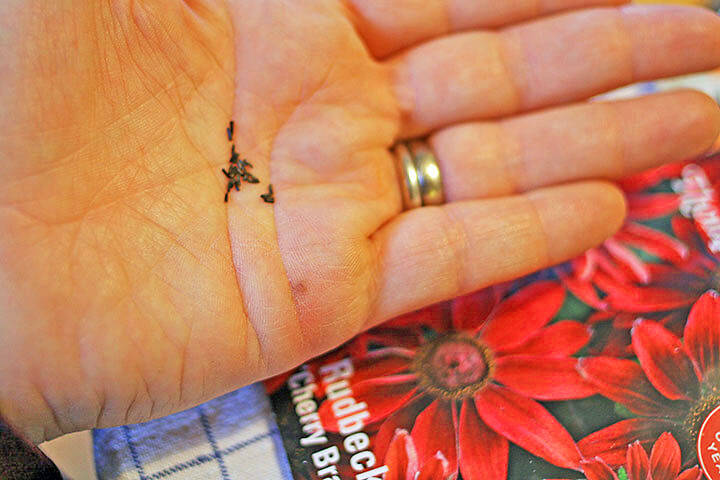
Be careful to space out very small seeds.
Containers and growing medium are the planting essentials. Standard six-cell, six-pack growing flats with non-draining trays are perfect for most seedlings, and Black Gold Seedling Mix, with its blend of high-grade Canadian Sphagnum peat moss and perlite, is the best choice for seeds and seedlings. Our mix is also easily wetted and uniformly fine for light seed coverage. Light coverage is essential because most seeds naturally germinate on or close to the soil’s surface, so when planting seeds, stick to the mantra “lighter coverage for lighter seeds and greater coverage for greater seeds.” Dust-like seeds can simply be sprinkled on the top of the medium, and large seeds rarely need to be planted deeper than 1/2 inch—despite what some seed-starting guides advise. Seeds can also be lightly covered with fine perlite or vermiculite instead of mix. Coverage with either can reduce damping off, a common fungal disease of seedlings that causes wilting and death. Using fresh mix and sterilizing planting containers will also reduce damping-off (click here to learn how).
Temperature
Happy seedlings are green and are not leggy.
Optimal temperature needs vary from seed to seed and plant to plant. Some like it cool and others like it warm, but most thrive at room temperature (68 degrees Fahrenheit). Warm-season plants, like tomatoes, peppers, and zinnias, germinate and grow faster with warmer temperatures. Seedling heat mats, which are commonly available at garden centers, will hasten germination and growth for these and other summer growers.
Watering
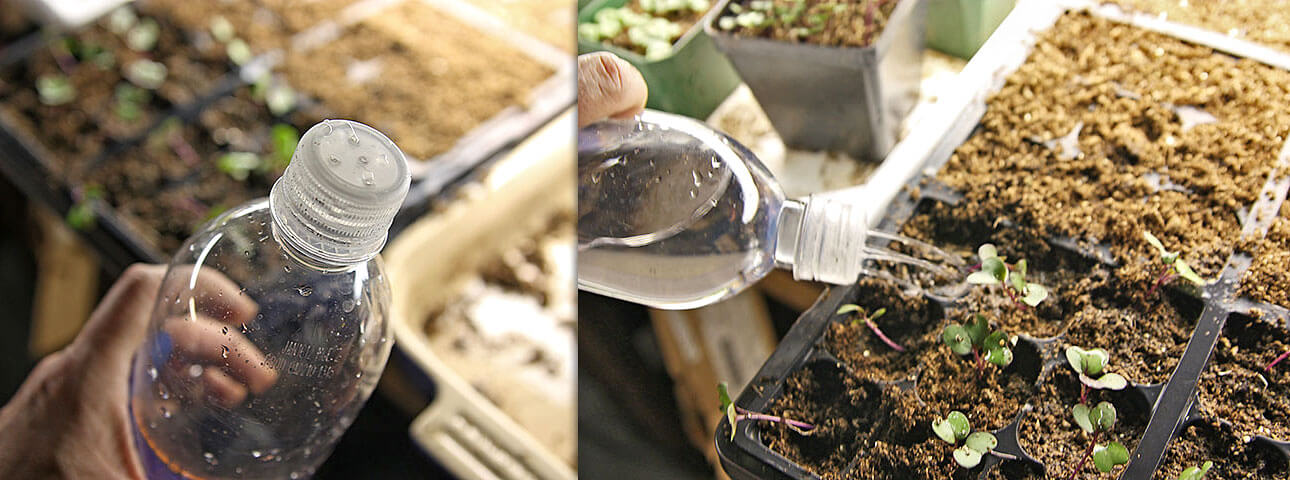
Left: A plastic bottle with holes punched in the top makes a perfect seed waterer! Right: Be sure to allow only one seedling per planting cell for best success.
Good watering technique will make or break growing success. The key is remembering that overwatering is worse than underwatering. Too much water encourages fungal disease and root and stem rot and invites pests, like fungus gnats, whose larvae feed on seedlings, and shore flies, whose excrement damages seedlings. Once these problems are established, they are hard to get rid of. (Click here to watch a video about fungus gnats.)
To avoid overwatering seeds and seedlings: (1) water gently and (2) water until the mix is moist then allow it to dry slightly before watering again. These two steps are most important before and right after seeds germinate because seeds and seedlings use less water and are easily drowned. A plastic water bottle with five holes poked into top makes a great gentle seed and seedling waterer (see photo). Bottom watering with a self-watering capillary mat is also recommended. Just be sure that no standing water remains at the tray base at any time.
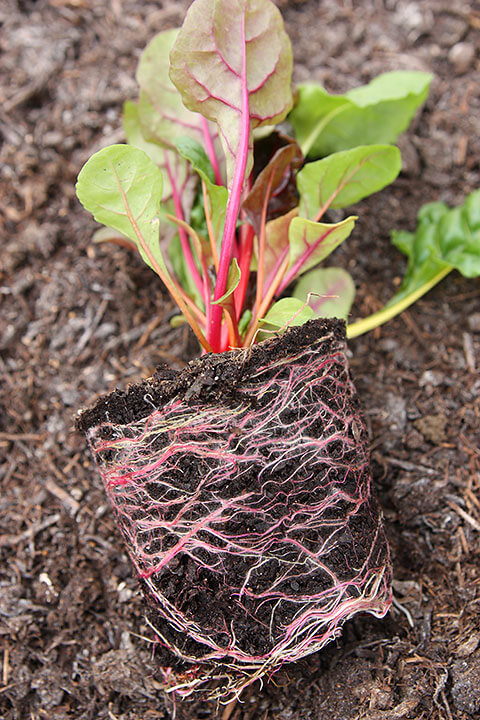
Properly grown seedlings should have healthy roots to the bottom of the pot.
Once plants develop multiple leaves, more water can be applied. The amount ultimately depends on how quickly plants are growing and using water. It’s wise to check fast-growing seedlings twice daily to assess their water needs. If you think you may be watering too much, err on the side of less water. Slight wilting is better than rot and ruin.
Nutrition
Homegrown plantlets, like these fennel, should only be planted in the garden after they have hardened off.
Nutrition is not a factor until plants develop their “true leaves” (sometimes called their second leaves). In fact, fertilizer can actually inhibit seed germination and burn new seedlings, which is why good seed-starting mixes are always fertilizer free. Once seedlings have reached two inches or so, a feather-light sprinkle of starter & transplant fertilizer will keep them pot-healthy until planting day.
Harding Off
When the threat of frost has passed, incrementally introduce your flats of plantlets to the great outdoors. Incremental exposure allows tender plants to healthfully acclimate to the high light, wind and temperature changes of the garden. Start by placing them in a protected location with diffuse light and slowly move them into a more open spot with higher light. After seven to ten days your plants should be garden-ready, and if you follow this guide they should look like those grown by the pros!
Exposure to dappled sunlight can help seedlings adjust to natural sunlight more quickly.
There’s a reason why seed-starting is popular. Gardeners can grow cooler plants, for less.
Just below these hollyhock flowers the round seed capsules already forming while above the flowers buds have yet to open.
Hollyhocks have long been America’s favorite flower for country gardens because the Hollyhock seed can be gathered and sown for free. Althea rosea is a biennial, growing from seed the first year with modest blooms, then the plants come back from the roots the second year for a far more magnificent showing. Therefore sow hollyhock every year. The first flowers will be going to seed by the time the last ones open at the top the stalk. Down low you’ll find capsules of small disk-like seeds. As each capsule matures the outer covering becomes fragile and papery when the seed is ready to be gathered to store. They’ll be ready for spring sowing in Black Gold Seedling Mix for an even bigger display next year.
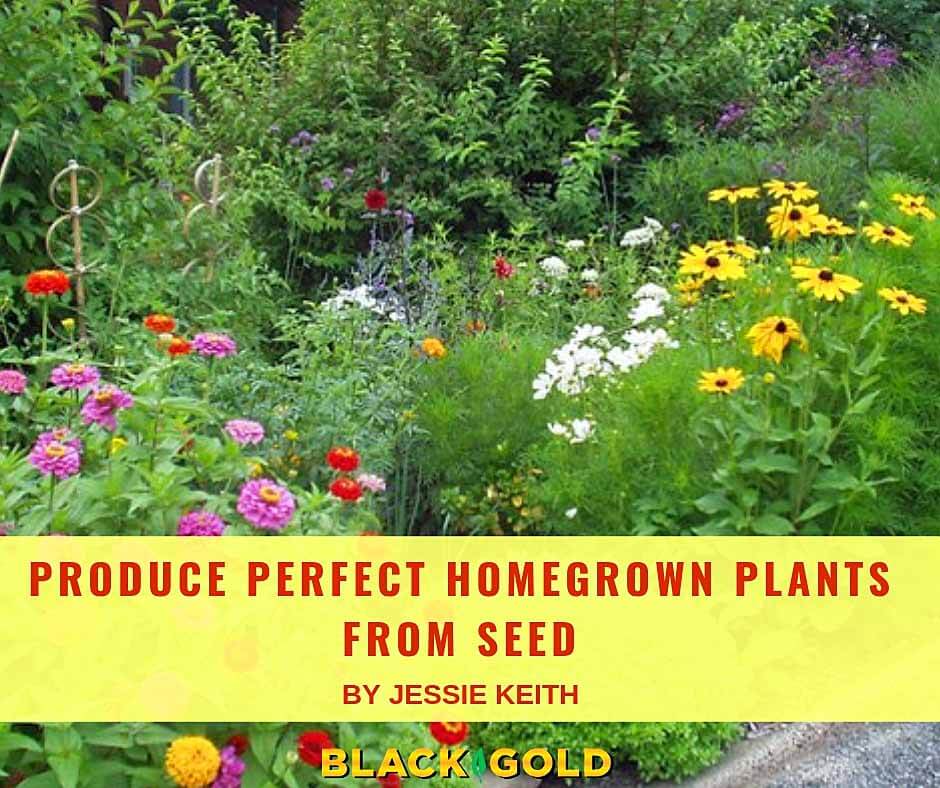
A healthy summer garden starts with vigorous plants.
Whether you are planting summer vegetable seeds or seedlings (young transplants), this is probably the peak time of year for many summer vegetables and flowers. Here in the Pacific Northwest the soil temperature is getting warmer and there is still time to plant many familiar summer vegetables from seed. Or to get a head start, set out young transplants.
Sprouting Squash
Winter Squash from Seed
Sometimes it is easier and safer (less of a pest problem) to start seeds indoors and then plant them outdoors. When a local gardening friend read an article with glowing reports about a winter squash called “Musquee de Provence”, he decided to try some and planted seeds indoors in 4” pots using Black Gold Seedling Mix. Within a week, the seedlings began emerging from the soil and within two weeks, they will be ready to be planted outdoors. This particular squash was introduced to American gardeners in 1899 and has a deep orange flesh that keeps well. While it is not usually available on local seed racks, it is available from Seed Savers Exchange at SeedSavers.org or 563-382-5990. I think it is always fun to try something new in the vegetable garden.
Bib Lettuce Seedlings
Lettuce from Seed
Lettuce is very easy to start from seed and there are many choices from either seed or transplants at local garden centers. If planting from seed, try extending the harvest by staggering the planting. Plant new seeds at 2-3 week intervals and you will be amazed at how easy it is to continually cut fresh lettuce leaves. Lettuce will survive a light frost and so the growing season does not necessarily end as compared to a tomato. With some protection, such as a cold frame, if the winter is not too severe, I have seen gardeners harvest lettuce throughout the winter.
Radishes from Seed
Radish is a very easy and quick crop. Not only do the seeds germinate quickly, many varieties will provide a mature crop in 30 days. This is an excellent plant to get children involved with because of the short maturity date and the quick germination. It also teaches them about plants we eat that grow underground.
Growing Potatoes
A favorite of mine to get children involved in gardening is the potato. This is another good lesson in things we eat that grow underground. Even if space is limited, potatoes can be easily grown in a container and will thrive as long as they get adequate sunlight. The example in the photo is a large nursery pot that provides a way to grow them with limited space. Using Black Gold Natural & Organic Potting Soil, this gardener (see photo below) built a wire cage around the inside diameter of the container and used two metal plant stakes to prevent the cage from collapsing. Potatoes were purchased from a farm store and were cut into pieces with at least one ‘eye’ per piece. Once cut, let them air dry for a day or so and this will help seal the cut portion and lessen the chance of diseases. Potatoes were planted about 6 inches deep from the top of the container. Be leery of buying potatoes from the produce section of a grocery store as they might have been treated to prevent sprouting.
Sprouting Potatoes
The potato that was planted will produce a stem from the ‘eye’. The tubers we eat are produced along the stem and the longer the stem, the more tubers. Potato tubers must be kept in the dark and so as the stem grows, straw or some other organic material is continually added, hence the reason for the cage.
Beans from Seed
Beans are among the easiest summer vegetables to grow from seed and since it is a large seed, it is easy for children to plant. Once the soil is warm, sow bean seeds and they should germinate in 7-10 days. Beans need full sun and continual picking. The more you pick, the more the plant will produce. For limited space there are bush types although for maximum yield, I have found the tall vine types produce the best.
Chard from Seed
For some color in the vegetable garden, consider Rainbow Swiss Chard. This has such colorful stems, I have seen in planted in pots on decks just for the stems. “Rainbow” is an appropriate name as the stem colors are shades of red, orange, purple, yellow, and even white. Rainbow Swiss Chard is not just for color; it is excellent for eating and is easy to grow from seed.
Bean Seedlings
I would be remiss without mentioning a summer edible plant we always have in a pot on our deck and that is basil. Basil absolutely needs heat and should never be planted outdoors until the weather is warm. It makes a wonderful container plant and having a container on our deck makes it easily accessible to the kitchen. There are many types of basil available and varieties not only have different color and texture of foliage, but there are different flavors.
A warning for gardeners with newly germinated seedlings or seedlings is to be aware of the slug. It is one of the most prevalent pests we have in the Pacific Northwest that can cause extensive damage on newly planted seedlings. Slugs can almost ruin a home garden crop of new seedlings overnight. It is best to use some type of slug bait or barrier for newly germinated seedlings and/or transplants. If using a chemical type of bait, be sure to check and read the label carefully as not all baits are approved for use in a vegetable garden.
This season, take a chance on some vegetable seeds or seedlings. It is quite satisfying to grow your own fresh fruit or vegetables and gives you a connection to the earth.
Early spring is the time to begin thinking about a vegetable garden and with the seed catalogs that have been arriving at my house; it is a telling signal that the arrival of spring is not far away. I enjoy seeing and reading about the many new introductions as well as reading about old favorites. Then it’s time to begin starting seeds indoors.
With the cool weather we often have here in the Pacific Northwest, there are many summer vegetable plants that need to be started indoors from seed and then set out into the garden once warm weather arrives. Starting seeds indoors is quite easy and with a little preparation and planning, many gardeners look forward to this aspect of gardening. If you do not have a sunny window, there are many types of grow lights that can be used in areas that do not get enough natural light. Check out your local garden center or seed catalog for seed trays and peat moss or plastic pots to get started. Often times a special heating pad for plants will help warm up the soil and encourage germination. Starting with good soil is critical and Black Gold Seedling Mix is especially made for starting seeds.
Planning your Plantings
When planning what is to be planted, think about what vegetables you most enjoy eating fresh and consider the space and location available for planting. Pumpkins and many squash take lots of ground space as they send their stems out over the ground. Cucumbers are also crawlers but can be trained to grow on a trellis and thus free up ground space. It is interesting what some gardeners think of and how they can be very creative in small space situations. I have seen cucumbers growing in a container on a deck with a trellis for support and lettuce growing at the base. Lettuce is very easy to grow from seed and with its’ different colored leaves, it can make an attractive foliage plant on a deck. Also having a plant close to the kitchen makes it convenient to cut leaves for salad. Sow lettuce seeds directly in a pot and then thin seedling as necessary and set pot outside.
Photo courtesy of Territorial Seed Company.
Be Creative
As part of the planning stage for where vegetables might be grown, think outside the box and it might be surprising what spaces you might have available. Several years ago, a local garden center got very creative and made a vegetable garden over what was a gravel parking area. They built a raised bed garden in what was a gravel area and planted it with a wide assortment of vegetables. Last year I saw this same idea used by a homeowner over what had been an unused driveway. This was very creative and produced an abundance of fresh produce. If this idea is feasible for your space, do a rough layout of the produce you want to plant and start seeds from tender summer plants now.
Indoors or Out?
The seeds you select to start indoors should primarily be those that, for a homeowner, are best not directly sown outdoors. Seeds such as beans and corn which are usually sown directly outdoors, can be started indoors and by doing so you will have a head start on their growth when you transplant them outdoors.
Photo by Rich Baer
When seeds germinate and the new leaves appear, they are at one of their most vulnerable stages. Make sure they have adequate light so they do not become ‘leggy’ and be sure to give them sufficient moisture. In Pacific Northwest gardens, slugs can be a major pest and are attracted to the tender new leaves of many plants. Seedlings will likely be damaged by slugs if some kind of bait is not applied when plants are set outdoors.
Tomatoes from Seed
The most popular of all home grown produce is the tomato. There are so many different varieties to choose from, it can be overwhelming. I always suggest looking at the name tag of the plant and there should be an indication of the length of days to maturity. Select an assortment, early, mid-season, and late to extend your harvest. The early and mid-season types are more reliable if we have a cool fall season, many of the later maturing tomatoes will not ripen. Check with neighbors and see which varieties perform best for them and then, of course, try some new ones.
Tomatoes should be started indoors and a good indication of when to start the seeds is about six weeks before it is time to set plants outdoors. Use Black Gold Seedling Mix and just barely cover the seed. Keep the soil moist and the use of a heating pad is advisable.
Indigo Rose Tomato. Photo courtesy of Territorial Seed Company.
As gardeners are always on the lookout for something new, a tomato that has recently be introduced called Indigo Rose would be one to try. It was developed by Oregon State University and so has been bred for our area. It is very high in anthocyanin (a naturally occurring pigment that has been shown to help fight certain diseases in humans) and this anthocyanin creates what is almost a blue skin tomato. The inside flesh is the same rouge tone we expect and the flavor is excellent. The fruits are about 2-inch round, are very prolific and remind me of clusters of purple plums.
Do not be intimidated by starting seeds. You will have a much wider of a selection of varieties to chose from and have the enjoyment of knowing you started your own plants. I always like to mention that getting children in a seed starting project is an excellent way to introduce them to gardening. A seed that I find works especially well is nasturtium. It is a large seed, germinates quickly, grows fast and all parts of the plant are edible.
One of the most important tasks of getting the garden ready for transplanting seedlings is preparing the soil. Whether you will be setting out small transplants or planting seeds directly into the garden, the soil is something that needs to be prepared prior to planting. In my own garden, I use Black Gold Garden Soil and work it into the soil before planting or seeding. The photo shown is lettuce that has been planted in a soil that has been amended using this simple process and Soil Conditioner. This lettuce should grow and thrive in the healthy soil.
Inner-city kids from Head Start programs perform at much higher levels of literacy and language than kids of the same socioeconomic groups who did not attend the program. Likewise, starting vegetable seeds indoors while it’s still cold helps gardeners get a head start in the spring and summer garden. Many vegetables perform much better when they are nurtured indoors before outdoor planting.
Timing Planting
Start different vegetables at varying times before outdoor planting. For example, the rule of thumb for tomatoes and peppers is to sow them six to eight weeks before the estimated planting date, which is usually a couple of weeks after the last frost of spring. To accomplish this, start them in late February or early March. At planting time, tomato and pepper starts should be six inches tall or more.
Seedling: You can protect tiny seedlings much easier indoors, then transplant into the garden after the last frost.
Where summers are short, starting early means harvesting early. (Planting early-to-produce vegetables also ensures an earlier harvest.) Warm outdoor soil and strong root systems will make them vigorous growers after transplanting.
Home Seed Starting Advantages
The advantages of starting seedlings at home are that they cost less, seed catalogs offer more choice than nurseries, and, if you are an organic gardener, you can be confident that your plants have been grown organically. (OMRI Listed Black Gold Seedling Mix is approved for organic gardening.) Seed catalogs carry wonderful specialty vegetables and heirlooms that are often tastier and a lot more fun to cook with.
The Seed Starting Environment
Growing seeds indoors requires a sunny windowsill, sun porch, greenhouse, or cold frame. Choose a south-facing window that provides at least 6-hours of sunlight. If that’s not available, consider investing in full-spectrum grow lights to start seeds.
Head Start: It’s easy to start a garden in new or recycled containers.
Before you begin sowing seed, it’s important to gather all the materials you’ll need ahead of time. A quality growing mix is essential. Black Gold’s Seedling Mix is light and airy for reliable germination and root growth.
Other Materials Required:
Black Gold’s Seedling Mix
Seed
Plastic pots or cell packs with water-holding flats and clear plastic cover
When starting seeds indoors, some kind of container needs to be used and there are many materials available. Plastic pots have often been a choice but there is a trend, especially among many gardeners, to try to be less dependent on plastic. Consider Cow Pots for your seedling this year. Made from composted cow manure, they can be planted directly into the soil. They are odorless, non-toxic and promote recycling agricultural waste. And another benefit is they provide nutrients for your plants.
Don’t throw away old salad containers when you can reuse them to start your own homegrown entrees.
Whether you are starting your seeds directly in Black Gold Seedling Mix or testing your seed’s viability by sprouting them between wet paper towels, repurposed fast-food salad containers are an economical and environmentally sustainable way to sprout veggies indoors this Spring. Look for clam shell containers with small vented holes in the top, or punch ventilation holes in the tops and bottoms for best results.
When reusing containers be sure to properly sterilize them first.
Whether you recycle nursery containers or reuse those from last year’s garden, make sure all are properly sterilized before planting seeds. Containers for planting seeds must always be clean as can be before planting!
Wash out all remnants of soil or organic matter sticking to the sides. Then dip each clean container into a bucket containing a 10% bleach solution to kill any remnants of prior diseases that could attack your seedlings. Wait until your clean, sterilized pots dry before adding OMRI Listed Black Gold Seedling Mix for a safe, sterile germination bed for your seeds. Not only does it do a great job, but this mix is approved for organic gardening!