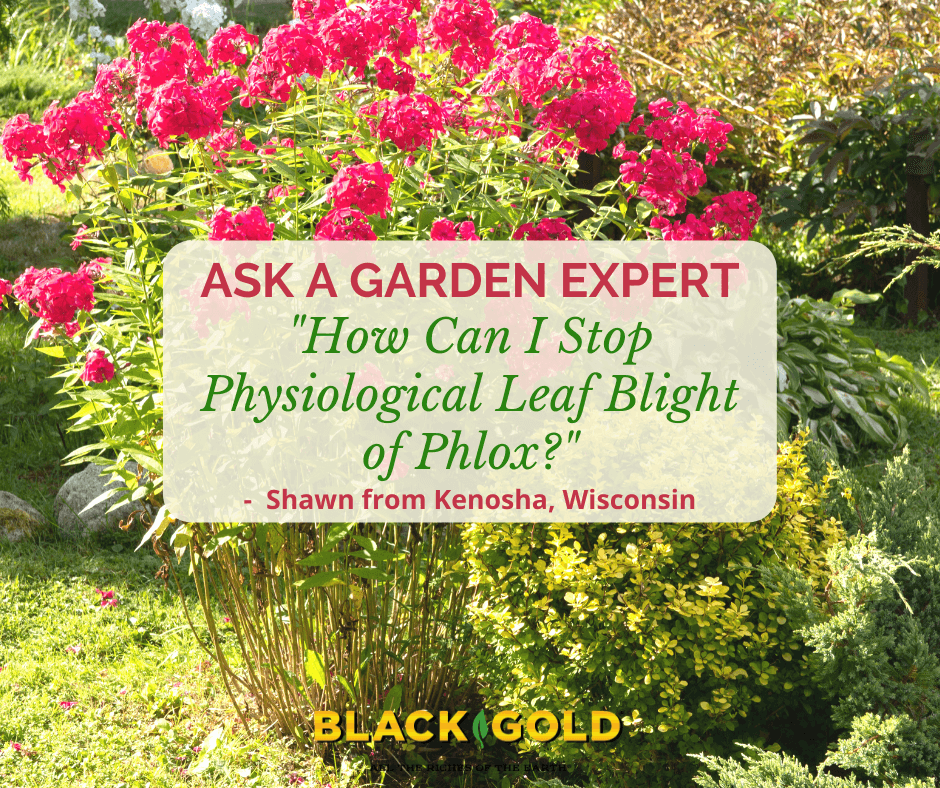
“I have phlox growing in a big container. The bottom leaves are looking mottled/veiny. I have fed them and also added iron, but it doesn’t seem to be improving. Is there something else it needs?” Shawn from Kenosha, Wisconsin
Answer: Tall phlox (Phlox paniculata) varieties are prone to a series of diseases and foliage disorders, but yours sounds like it is physiological leaf blight of Phlox. It is a physical disorder caused by a water imbalance in the plant that can occur in some tall phlox varieties. Water circulation goes haywire–causing water to bypass the older leaves and only supply water to the new shoots. Here are the symptoms and solutions for this disorder:
Physiological Leaf Blight of Phlox Symptoms
Mature clumps are most often affected.
Lower leaves become mottled with prominent green veins before they eventually shrivel and die.
New growth is not impacted.
Physiological Leaf Blight of Phlox Solutions
Cut plants back at the end of the growing season, yearly.
Mulch plants to conserve water.
Water a little bit extra–though this only works in mild cases. Sometimes the circulatory disorder simply disables older leaves from accessing water.
“What is the best way to remove ground mealybug or should I dispose of the whole plant?”Question from Erin of Conover, North Carolina
Answer: Mealybugs can be overcome. It just takes a little time and patience. The main reason is that one has to eradicate both the adults as well as the juvenile crawlers, which are almost invisible to the eye. Outdoors, ladybugs and other natural predators keep populations down, but inside the house mealybugs can take over a plant really quickly.
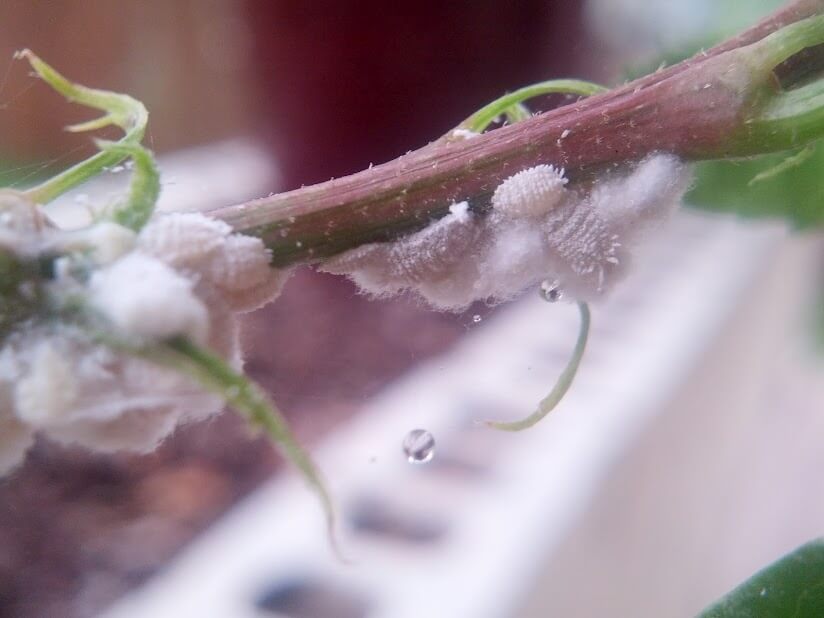
Mealybugs are soft, white, and feed on the juices of plant leaves and stems, particularly in the crevices between leaves and stems. Mealybug infestations are hard to manage because these pests travel and spread as crawlers. Crawlers are the nearly invisible nymphs that hatch from the pest’s white, cottony egg masses and “crawl” several feet to quickly infest other plants. You can’t always see these crawlers, so to manage them, you have to clean plants, containers, and surrounding surfaces when you see an infestation. They produce copious crawlers, so the sooner you notice mealybugs, the better.
At high populations, mealybugs produce lots of cottony egg masses, adult bugs, and nearly microscopic crawlers. All must be completely removed if the plant is to be saved. (Image by Alexlutor)
To remove mealybugs, start by cleaning your plant, its pot, and all surfaces surrounding the plant. Remove the top two inches of potting soil and replace it with fresh. Finally, spray the plants. One of the best mealybug sprays is a 10-25% solution of isopropyl alcohol. Fill a spray bottle with 1/4 cup of isopropyl alcohol and 2/4 cup water and shake to combine. When treating plants with this solution, keep them out of direct sunlight because it can cause leaf burn in the bright sun. You can also treat plants with insecticidal soap or Neem oil. Repeat spray treatments until plants are mealybug-free.
Another method to stop crawlers is to surround infected areas with double-sided tape traps. As the crawlers hatch and begin crawling, they will get stuck on the tape and die. You can also surround plant bases and pot edges with double-sided tape to keep crawlers from moving beyond an infected plant.
“Curious to know if anyone has figured out a way to get rid of viruses and diseases out of your soil. Mosaic, for example. Flea beetles spread it. Is my garden gone forever? I’m willing to do ANYTHING!” Question from Pam of Conroe, Texas
Answer: Different fungal, bacterial, and viral diseases of plants exist in the soil for various amounts of time. Some are not soil-borne at all, while others will remain in the soil without a host plant for several years. For example, tomato mosaic virus and tobacco mosaic virus will survive in dry soil and dead plant debris for up to two years. If the soil is moist, the diseases will only remain in the ground for a matter of months. Here are some methods of general soil health and disease removal.
How to Restore Garden Soil with Soil-Borne Diseases
Keep it Clean – Remove all diseased plant material, from the plant to fallen leaves to the roots. Do not compost infected plants. Instead, dispose of it in the trash or burn pile.
Weed and Mulch – Weeds can be carriers of common garden diseases. Their removal will help keep disease out of your garden.
Stop Insect Carriers – Many insect pests, like cucumber beetles, flea beetles, leafhoppers, whiteflies, and aphids, can carry and spread different diseases. Keeping their populations low in the garden can reduce diseases that can become soil-borne. Click here to learn how to naturally tackle the top 5 vegetable garden pests.
Plant Disease-Resistant Varieties – Plants that resist common diseases bring less disease to the soil.
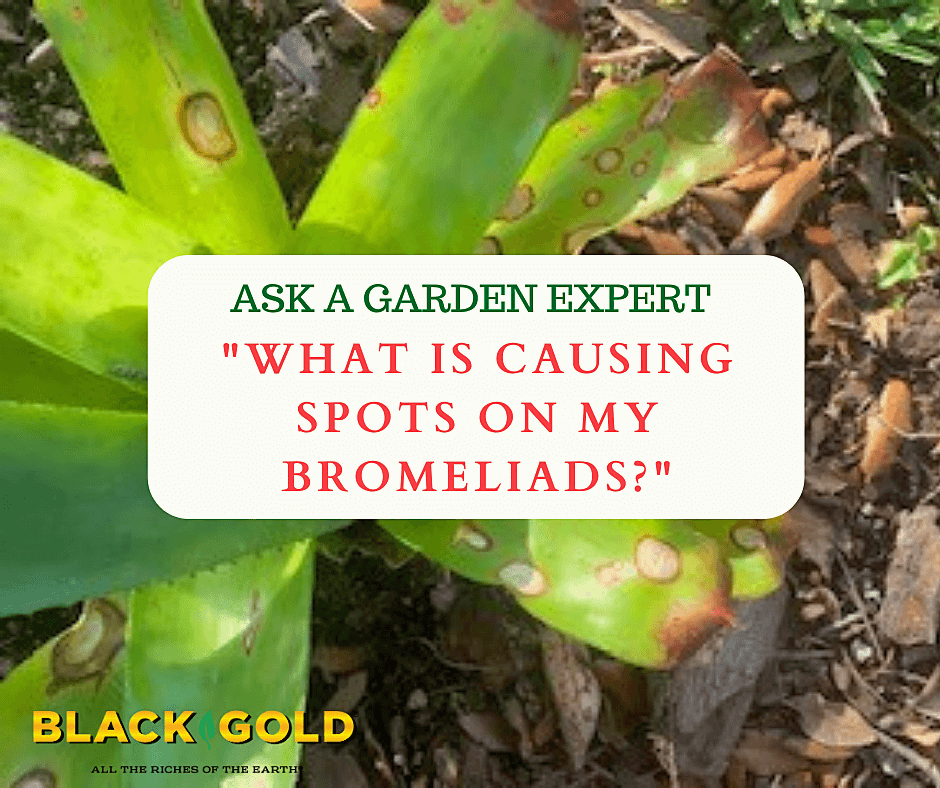
“I have several beautiful outdoor bromeliads that sit well under a large tree. But about two months ago, they started developing white circle spots all over their leaves. Like measles. Not sure if you can help me identify what this is so that I can treat it.” Question from Jorleen Aguiles
Answer: From what I can determine, the fungal leaf spot disease that plagues your bromeliads is Helminthosporium (formerly Exserohilum) leaf spot. It can be managed with reduced watering, cleanup, and fungicide, but without management, the disease can invade the central plant and cause decline and eventually death.
Reduce Watering
Overwatering encourages the disease, so reduce any supplemental water you might give your plants. If it has been an unusually wet season, try to protect the plants from excess rain. Wet foliage encourages the movement and spread of fungal spot diseases. Keeping the leaves dry helps a lot.
Clean Up
Cut off badly damaged and infected leaves with clean, sharp shears. Dip the shears in a sterilizing 10% bleach and water solution between cuts to refrain from spreading the disease further. I also recommend removing the dead leaves below the plants and cleaning up the area, just in case they harbor fungal spores. Pebbles, rock, or pine straw do not encourage fungal growth and would look attractive at the base.
Consider Fungicide
The only fungicides I would recommend for bromeliads are systemic products containing propiconazole. Avoid any copper-based foliar fungicides as these are not good for bromeliads and have even been known to kill them.
“Why aren’t my roses growing? My rose bushes do not grow, and I fertilize them once a month, but they don’t grow. Soil is clay-like. They are semi-shade, I have a lot of big trees. They do flower. What else can I do?” Question from April of Dresden, Tennesee
Answer: There are three key factors that are likely keeping your roses from growing, thriving, and flowering to their fullest. They are:
Sunlight: Roses need full sun to grow and flower at their fullest. Six hours per day is the bare minimum they need to really perform well. Eight to twelve hours is even better. The morning sun is preferable to dry leaves early in the day, which dissuades fungal diseases.
Soil: Roses require a fertile, well-drained soil that is slightly acidic (pH 6.5-7) and high in organic matter to perform at their fullest. Amend the soil where they are planted to encourage better root growth and performance. Black Gold Garden Soil and Black Gold Canadian Sphagnum Peat Moss are two excellent amendments to consider
Competition: Tree roots quickly drain water and nutrients from the soil. It is wise to plant roses away from tree roots to avoid competition.
Please watch the video below to learn more about growing roses organically.
“I have tree roots that have been exposed near the ground because of soil erosion. Should I try to recover with soil or leave it be? Will it kill the tree? I think they are the roots of a very large willow oak. There is also a very large poplar tree close by, too.” Question from Richard of Winston Salem, North Carolina
Answer: Extensive root exposure can be damaging to trees, so I recommend restoring the eroded area. Exposed, large woody roots are not a problem, but the broad exposure of smaller feeder roots can cause trouble and indicates a severe erosion problem.
Different trees can tolerate different levels of root-soil cover. Willow oak (Quercus phellos) has a shallow root zone and should not be covered with a thick layer of soil. Two to three inches of soil over the layer of smaller roots should be enough. Poplars have large, extensive root systems and are less prone to damage from high levels of erosion. Still, erosion is always troublesome in the landscape and should be stopped. It can also cause tree instability and make them far more prone to falling during storms.
Here are my recommendations for managing your erosion and tree-root exposure problem.
Identify and attempt to stop the source of erosion. If you can identify the water source, you can often divert the water. Your method of diversion would depend on the source. Feel free to provide more information regarding the source, so I can provide specific solutions.
Cover the exposed feeder roots with at least 2 to 3 inches of topsoil and press it down. We also recommend mixing a good organic amendment into the topsoil, such as Black Gold Canadian Sphagnum Peat Moss.
Apply a straw mat or burlap erosion mat to keep the soil in place.
Plant plugs of groundcover for dry shade between the matting. A good groundcover layer will hold the soil in place as it becomes established (list below).
Keep the plugs watered and cared for until they begin to really grow and spread–around two to three months.
There are lots of good groundcovers for dry shade that reduce or stop erosion. These include creeping wire vine (Muehlenbeckia axillaris ‘Nana’, light shade, Zones 6-10), evergreen vinca (Vinca minor, shade, Zones 4-9), dwarf mondo grass (Ophiopogon japonicus ‘Nana’, shade, Zones 6-11), golden sweet flag (Acorus gramineus ‘Ogon’, shade to part shade, Zones 5-11), and the evergreen creeping plum yew (Cephalotaxus harringtonia ‘Prostrata’, Zones 6-9), which I highly recommend.
If you like native groundcovers, consider wild ginger (Asarum canadense, shade, Zones 3-8), Allegheny spurge (Pachysandra procumbens, shade, Zones 4-9), and the pretty green-and-gold (Chrysogonum virginianum, part sun to shade, Zones 5-8).
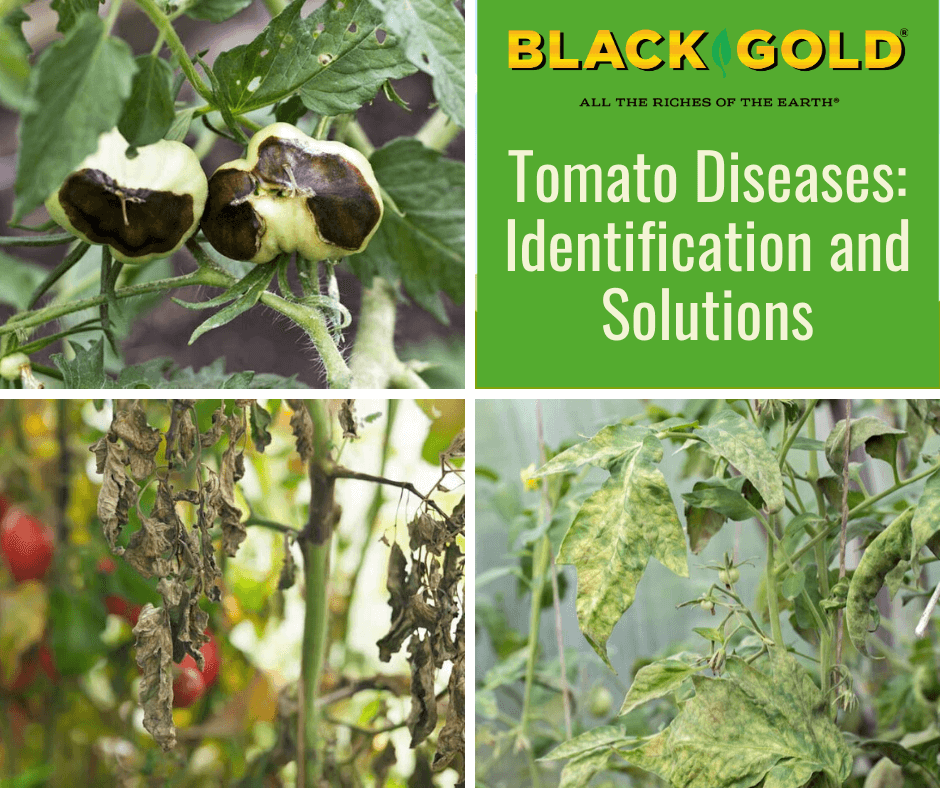
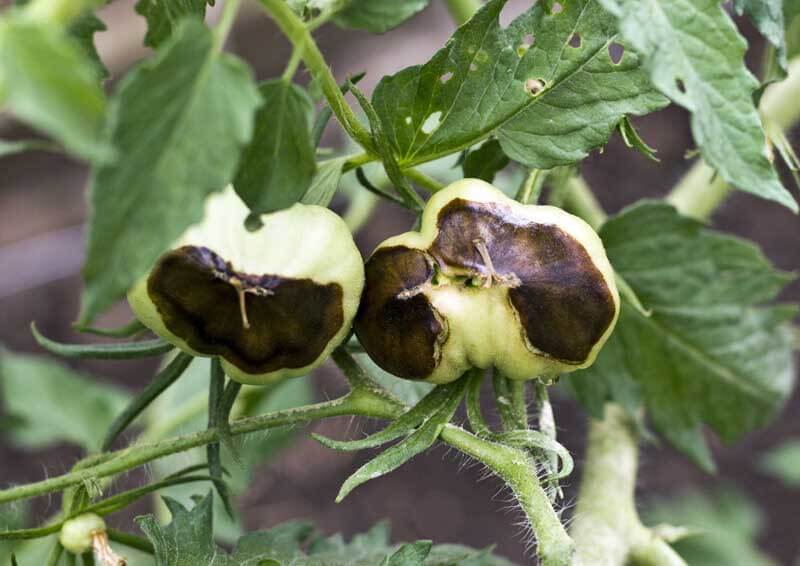
From upper left: blossom end rot, late blight, and tobacco mosaic virus.
Tomatoes are the roses of vegetables–everything attacks them. So, gardeners can count on experiencing any number of tomato diseases in their growing experience. It pays to grow disease-resistant tomatoes, but lots of the best heirlooms don’t fall into this category. That’s why tomato growers need to be armed with knowledge and IPM (integrated pest management) tools to keep harvests high. Learning how to spot the most common tomato diseases is a start.
Plant diseases are typically either fungal, bacterial, or viral. Some cause quick plant death, but others can be managed–allowing gardeners to eke out a harvest until the end of the season. But avoidance is the best starting point.
The four keys to avoiding tomato diseases are:
Start with healthy plants.
Choose a disease-resistant variety.
Plant them in disease-free soil.
Give them the best care.
Starting with healthy plants, a healthy environment, and keeping plants stress-free will help keep them disease-free, but pests or diseased weeds, or even wind can still bring disease into the garden. People can, too. Gardeners need to stay watchful.
If you have never experienced serious tomato diseases in your garden, you can feel confident planting heirlooms or family favorites with less resistance. But, always choose disease-resistant varieties if you have experienced diseases in the recent past. You might also consider growing tomatoes in containers to ensure that soil-borne diseases are not a problem. (Click here to learn how to grow tomatoes in containers.)
Top Disease-Resistant Tomatoes
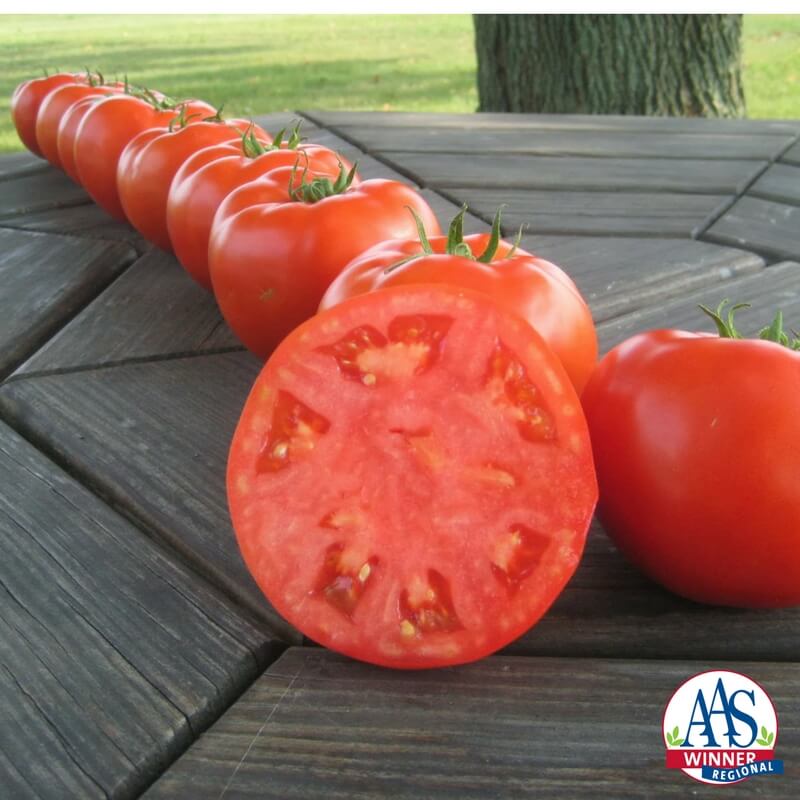
Mountain Merit is an All-America Selections Winner that resists five common diseases. (Image care of AAS)
Before reading the depressing litany of common tomato diseases, feel encouraged by the power of super disease-resistant tomatoes. Plant breeders constantly work hard to create new and wonderful tomato varieties able to beat diseases and produce high yields of delicious tomatoes. When identifying a disease-resistant tomato, refer to the Tomato Disease Resistance Code list below to better understand the code system. Here is an example of five good, tough tomatoes that resist multiple diseases.
‘Galahad’ (F3, GLS, LB, N, TSWV): The new, 2020 All-America Selections Winner ‘Galahad’ is a big, red, slicing tomato with excellent flavor that resists five diseases!
‘Granadero’ (F2, PM, TMV, V, N, TSWV): Sauce tomato lovers should try this super disease-resistant paste tomato with uniform, red, well-flavored fruits. It is also an AAS award winner.
‘Mountain Merit‘ (F3, LB, N, TSWV, V): Lots of large, red tomatoes with good, sweet flavor are produced on this compact bush tomato.
‘Toronjina’ (F2, LM, TMV): Highly disease-resistant plants produce lots of sweet and tart, orange cherry tomatoes on shorter indeterminate vines.
‘Sakura‘ (F2, LM, TMV, N): Red cherry tomatoes are produced early and in abundance on this long-vined, highly disease-resistant tomato.
Good cultural practices will also help tomatoes fight disease. Plant them in very well-drained, aerated, raised beds amended with Black Gold Garden Soil, and keep plants strong and vigorous by feeding them with a tomato & vegetable fertilizer. It also helps to encourage air-flow by spacing plants well (3 to 4 feet apart, or wide enough to walk around) and keeping them pruned (click here for a tomato pruning tutorial). Drip irrigation helps keep plants drier up top, which can reduce the spread of diseases. Remove and discard infected plants as you see them, and at the end of the season, clean all plant material from your vegetable garden for good measure. Then at planting time, mulch tomatoes with a layer of straw or Black Gold Garden Compost Blend to help keep disease-carrying weeds at bay. (Click here for more tips on how to grow robust tomato plants from seed to harvest.)
Tomato Disease Resistance Codes
Tomato late blight (Phytophthora infestans) damages foliage, causes stem cankers, and destroys fruits.
When seeking out a disease-resistant tomato, you will see these codes indicating resistance. The most common diseases are covered in this piece. (Adapted from Johnny’s Seeds Growers’ Library)
HR = High Resistance IR = Intermediate Resistance
A | Anthracnose | Fungus
AS | Alternaria Stem Canker | Fungus | Alternaria alternata f. sp. lycopersici
V | Verticillium Wilt | Fungus | Verticillium albo–atrum
Tomato Foliage Diseases
These are the first tomato diseases that you will see and experience. All leaf spot diseases start from the bottom up–beginning with older leaves. Here are the top 5 most common types that you will see.
Bacterial Leaf Spot
Bacterial leaf spots are small, brown, and dry.
The common leaf spot (Xanthomonas spp.) results in spots that are small, dry, brown, and often surrounded by yellow halos. It disease intensifies and spreads further with excess rain, overhead watering, and when plants are planted too close together. As it progresses, it can also cause spotting on fruits and cankers on stems.
You cannot get rid of bacterial leaf spot once you have it, but you can slow its damage. To reduce its proliferation, increase airflow by pruning off unnecessary and badly infected branches. Keep it from taking hold in the first place by spacing plants well to encourage airflow. Cleaning up your garden yearly is also essential. The disease is maintained from year to year on infected crops and weeds in the tomato family.
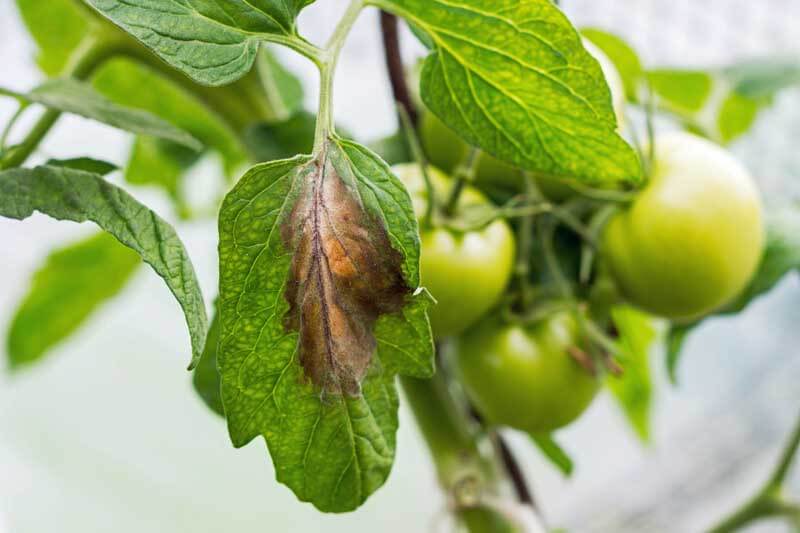
Early Blight and Late Blight
Late blighted leaves show large brown blotches.
These two blights are the most common diseases of tomatoes.
Early Blight (Alternaria tomatophila and Alternaria solani): The leaf spots are pretty distinctive; circular lesions appear, reaching up to a half an inch in diameter with dark concentric circles inside. Early blight can occur at the seedling stage by causing seedling rot (damping-off). At later stages, it causes leaf blight on older leaves, stem cankers, and black fruit rot.
Late Blight (Phytophthora infestans): The deadly disease first causes large brown leaf spots on older leaves, followed by stem lesions, and discolored, oily patches on fruits. It’s the noxious disease that caused the Irish Potato Famine, which is a testament to its severity. It kills tomatoes more slowly, but it destroys fruits and will eventually kill whole plants. Tomatoes subjected to drought stress will die more quickly.
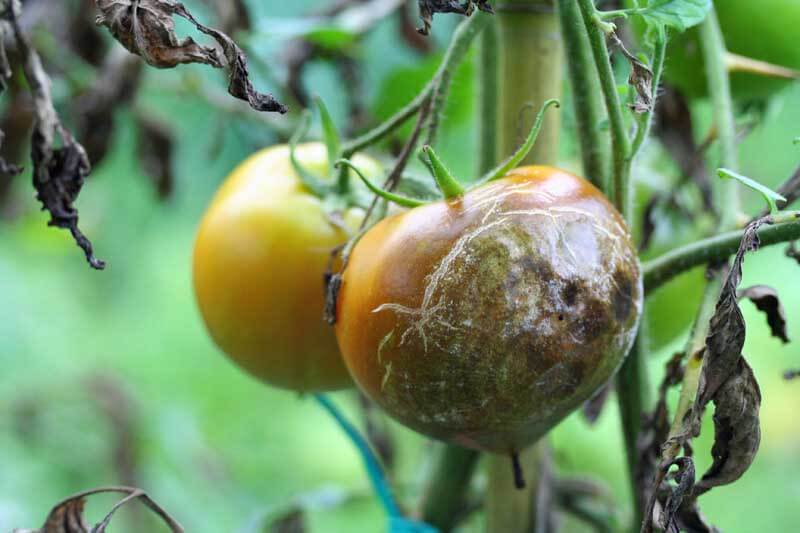
Late blight gives diseased tomatoes an ugly oily look.
Both early and late blight diseases are controlled by avoidance, cleanliness, and rotation. The blights survive and overwinter on infected plant material or in the soil. To prevent tomato blight, plant only healthy plants that you have grown from seed or purchased from a reliable grower. Also, plant only blight-resistant varieties (check out this list from Cornell University). If you find diseased plants, immediately remove them from the garden, and keep them from the compost bin. Bag and toss them instead. Keep beds weeded to remove weedy tomato relatives that can get blight, like nightshade and ground cherry. Next, rotate crops on a three-year cycle to help keep soil disease-free where you experienced blight. That means planting your tomatoes in a new spot each year and allowing three years to pass before planting them in the same spot. The soil should be rid of the disease after this time.
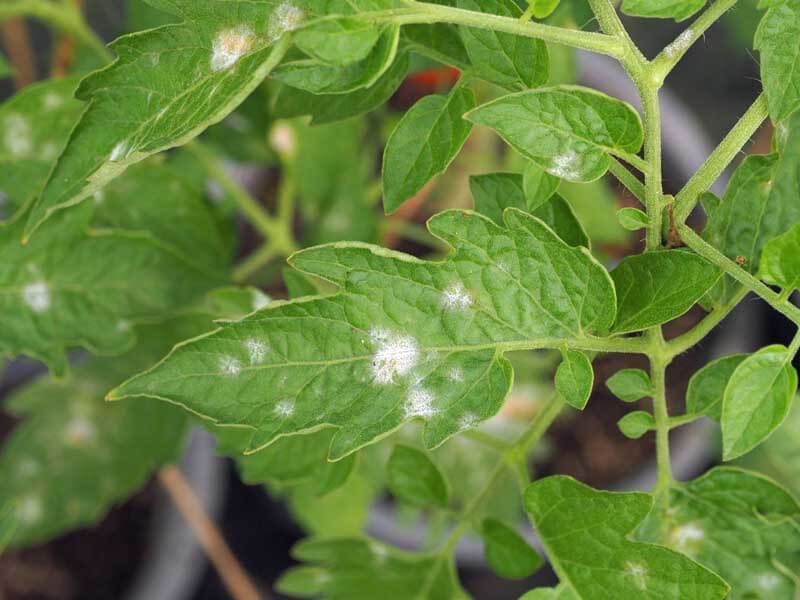
Powdery Mildew
Powdery mildew starts as white, dusty spots on leaves.
Powdery mildew (Erysiphales fungi): The easy-to-identify powdery mildew is a common fungal infection that attacks leaves, causing white, powdery looking surfaces and blotches, particularly from mid to late summer. It is not deadly, but it will cause plants to decline more quickly and put a stop to good fruit production.
To stop powdery mildew, give plants plenty of sun, water, and airflow. Prune off diseased stems as you see them (clean your pruners well after cutting any diseased plant). Finally, apply the organic fungicide Green Cure, which quickly stops powdery mildew. Apply it, at first sight, to stop the disease in its tracks.
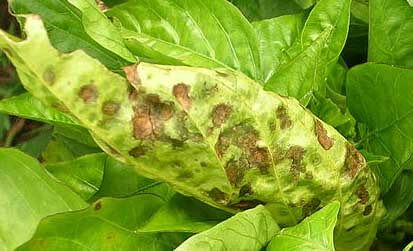
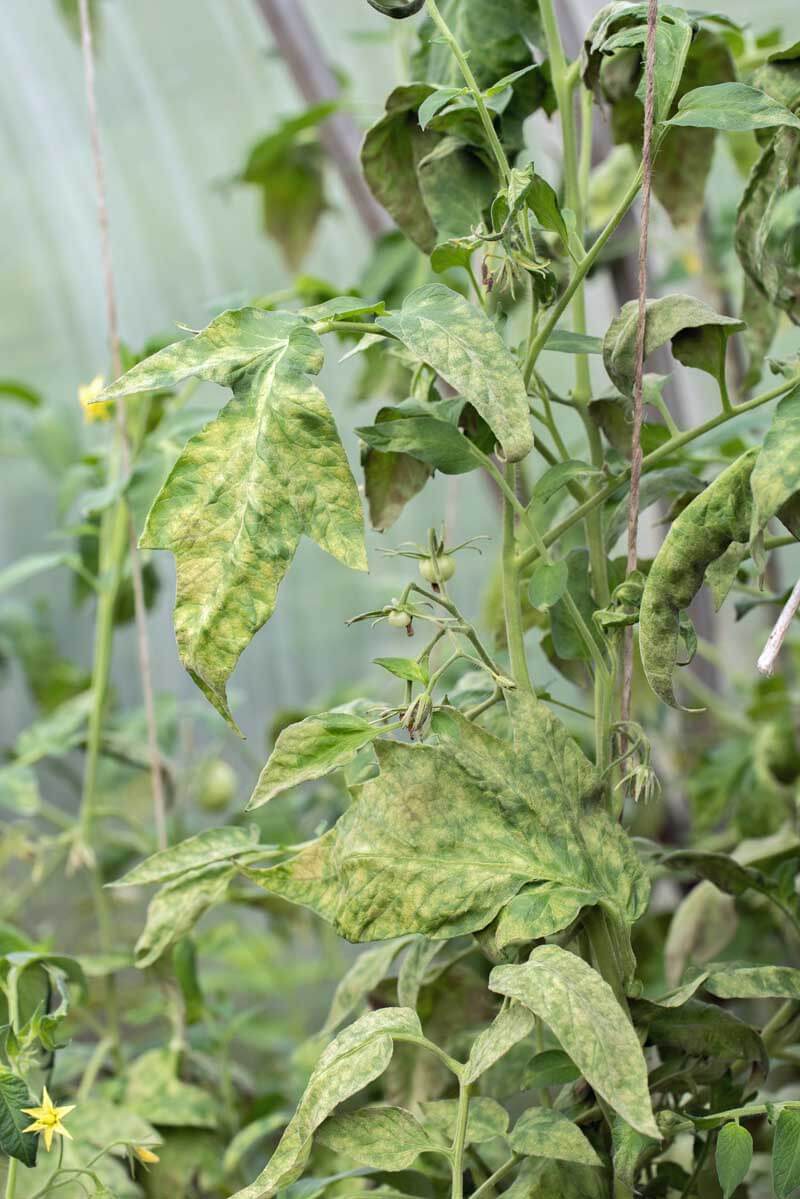
Tobacco Mosaic Virus
Tobacco mosaic virus causes leaves to become disfigured and discolored.
When tomatoes contract tobacco mosaic virus, they develop yellow mosaic patterns across the foliage and leaves often become elongated and almost ferny. Once you have it, or any other virus, the only thing that you can do is quickly remove and dispose of the plants and then rotate your crops. The best means of control is prevention. Grow resistant tomatoes, and make sure you buy seed or purchase plants that are certified to be disease-free.
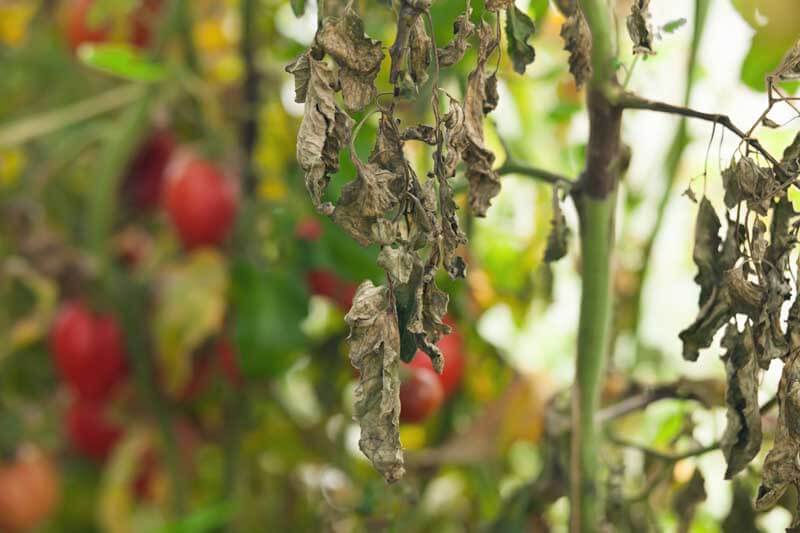
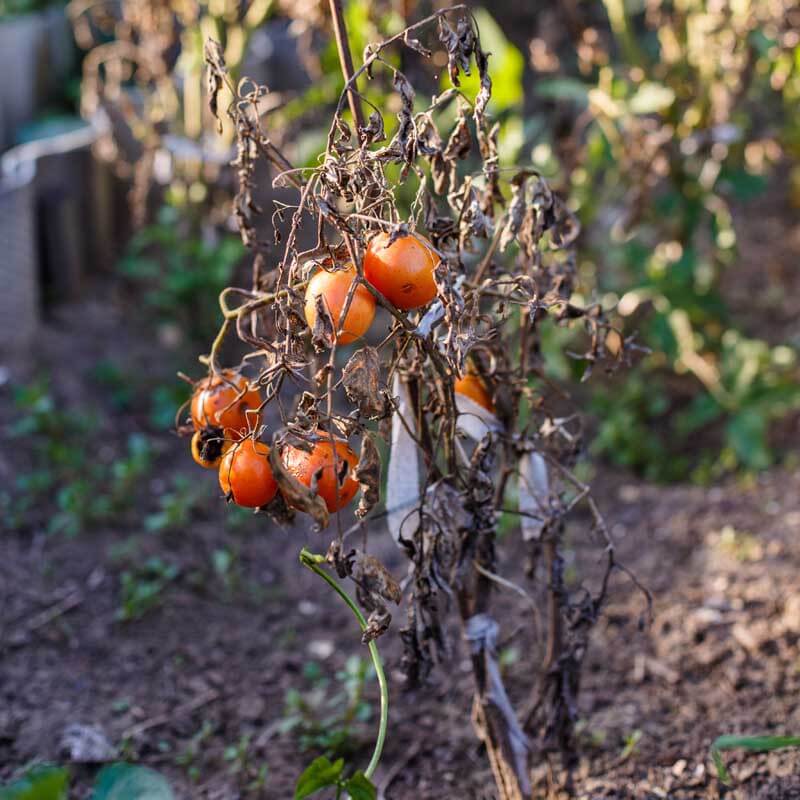
Tomato Wilts
Fruit wilts can kill susceptible plants quickly.
These affect the whole plant causing overall wilt and decline. Both diseases exist in the soil. The best means of beating them is to plant resistant varieties. When susceptible plants become infected, it’s a death sentence. Plants must be removed from the garden.
Fusarium Wilt (F)
Fusarium wilt (Fusarium oxysporum sp. lycopersici) is the most common tomato wilt. At its first signs, older leaves wilt, turn yellow, then brown, and then fall. The stunted plants will eventually die. To beat it, look for resistant varieties, discard diseased plant material, and rotate on a three-year cycle.
Verticillium Wilt (V)
Verticillium wilt (Verticillium albo–atrum) is less common than fusarium wilt and is typically seen late in the season when soils are cooler. Its first symptoms are v-shaped blotches on the lower leaves, followed by browning veins and blotches. Symptoms then spread upwards, causing wilting and leaf damage. If you were to cut into the stem, the internal veins would be brown and discolored from the ground up to 12 inches. Treat it as you would fusarium wilt.
Tomato Fruit Diseases
Aside from the ugly oily patches caused by late blight (above) and the common black-based fruits caused by blossom end rot or irregular bases caused by cat-facing (see below), most other tomato fruit problems are fungal or bacterial.
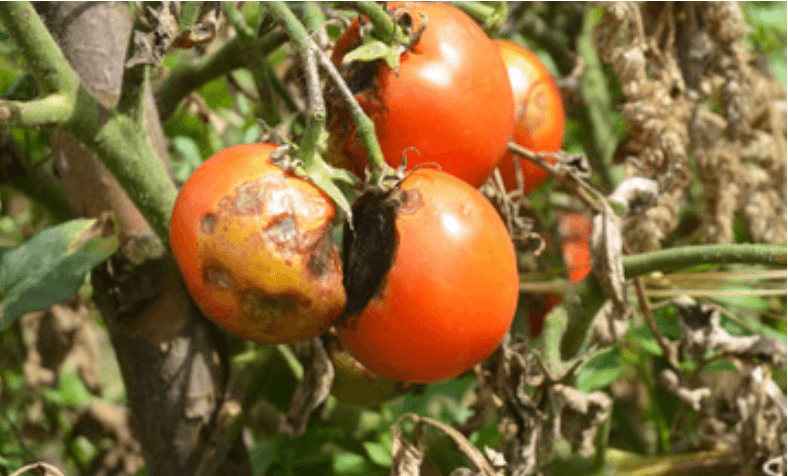
Anthracnose Tomato Spot (A)
Anthracnose spot has damaged this ripe tomato.
Anthracnose tomato spot is a fungal disease that appears as sunken bull’s-eye marks on ripe fruits. Several steps can be taken to reduce the disease on developing fruit. Refrain from overwatering, which will reduce moisture on the leaves and the spread of the disease. Remove and dispose of damaged fruit, and prune to increase airflow can keep fruits from developing this disease on the vine.
Various Fruit Rots
Various fruit spots and rots can attack fruits.
There is a whole suite of fungal and other fruit rots that can damage good, ripe fruit on the vine. You can always identify a fungal spot on fruit by its bull’s-eye appearance. The center of the eye is where the fungal spore took hold, and the radiating circles show its progressive cycle of infection. The treatment of these diseases is the same as for Anthracnose tomato spot. Good airflow is always key in keeping fungal diseases at bay.
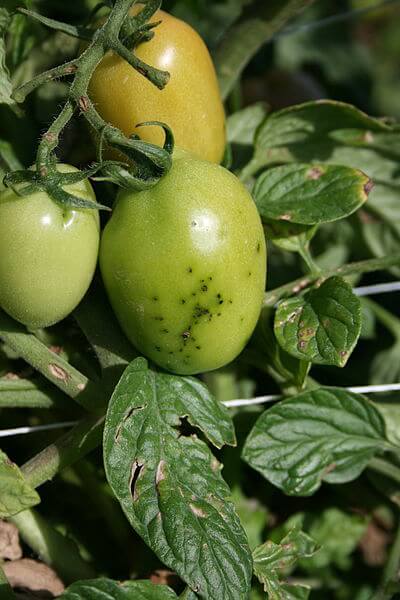
Bacterial Spot and Bacterial Canker
This shows bacterial speck on developing fruit. (Image by Chris Smart)
Some bacterial spot diseases of leaves can impact fruits. Bacterial fruit spots are smaller than those caused by fungal diseases, brown or black towards the center, and often surrounded by rings of yellow or green. In the case of bacterial canker, the spots are ringed in white with a green or dark-brown center. Sometimes the spots are raised. When fruits have bacterial spots, this means that it is time to remove and dispose of the whole plant.
Tomato Disorders
Blossom end rot is a common fruit disorder caused by a calcium deficiency.
Disorders often look like diseases, but they are caused by either nutrient deficiencies or adverse weather conditions rather than disease-causing fungi, bacteria, or viruses. Even better, they can be cured.
Fruit blossom end rot (caused by calcium deficiency), splitting or cracking (caused by excessive water or temperature fluctuations), fruit toughness, cat-facing, and reduced productivity (caused by cool temperatures) are the most common disorders of tomato fruit. Leaves with nutrient deficiencies can show all manner of yellowing or poor pigmentation, but if you feed your tomatoes well with a tomato fertilizer all season, your plants shouldn’t suffer any nutrient deficiencies (unless you have soil with severely acid or basic soil pH). Problem solved. Generally, if you plant your tomatoes in warm conditions, feed and care for them well, you can avoid most tomato disorders.
Can’t find your tomato problem here? Then ask our garden experts on our Ask a Garden Expert page and upload a photo of your plant! We will help you identify the problem and gprovide solutions.
“What are the reasons leaves drop from [tropical] hibiscus?” Question from Brenda of Miami, Florida
Answer: Tropical hibiscus (Hibiscusrosa–sinensis) are lovely shrubs when they are healthy and happy, but they look so dismal when they’re in poor shape–especially when they start dropping their leaves. There are LOTS of problems that can lead to leaf drop. Some of these depend on whether your plants are potted or in the ground.
Here are several common leaf-drop causes in potted hibiscus.
Bound Roots – This means the plant has overgrown its pot and needs an upgrade. In this situation, the roots cannot access proper water and nutrients, and plants begin to decline. Poor growth, wilting, and leaf drop are just a few of the signs. Watch the video below to learn how to identify and repot pot-bound plants.
Overwatering or Underwatering – Watering too little or too liberally can stress plants out. Tropical hibiscus need good soil moisture, but they can’t stand waterlogged soil. Irrigate when the top inch or two of the potting mix feels dry, and then water the pot thoroughly until the plant’s saucer is full. Your soil must also drain well while holding lots of moisture (Black Gold Moisture Supreme Container Mix is a good choice).
Change of Scenery – If you recently moved your hibiscus to a shadier, windier, or indoor location, changes like this can cause stress and subsequent leaf drop. Give them good care, and they will snap out of it.
Spider Mites – These tiny, destructive pests are nearly impossible to see but cause discoloration of leaves and eventual leaf drop. If you have them, you might also see little webs on the leaves and tender stems of infested plants. To determine if you have mites, take a clean piece of white paper, hold it beneath the leaves, then tap the leaves onto the paper. If you have mites, lots of tiny specs will fall and eventually, they will start crawling around. These are spider mites! (Click here for everything you need to know about getting rid of these pests.)
Poor Soil and Lack of Fertilizer – Be sure to refresh your plant’s soil every two years, and provide it with ample fertilizer for lush growth and flowering (follow manufacturer’s recommendations).
If your plants are growing in the ground, sharp temperature changes and high winds can cause leaf drop as can pest and disease problems. Considering that you live in Miami, I doubt that temperature changes are an issue.
Please let me know if any of these solutions help!
In-ground, grasses are perfect for planting in dry stream beds and among wildflowers. (Photo by Maureen Gilmer)
When landscape grasses take on full autumn color in the western states, they are always the focal point of the late season. It is the driest part of the year when their life cycle peaks after flowers pollinate, seeds form and are finally released into the wind to repopulate the land. These annual reproductive structures are why ornamental grasses own the fall garden when few other plants bloom. Even in the early winter, the standing flower stalks offer attractive interest through the snow.
It’s the less desirable grass habits that are less understood. These influence selection, placement, and other issues you won’t hear about elsewhere. Here are some tips to help you select and design grasses into your landscaping, so they don’t become problems later on.
Grass Litter
When this Pennisetum sheds flower parts and seeds, it goes right into the pool. (Photo by Maureen Gilmer)
After pollination, grasses shed their flower parts. When the seed is released, they shed their hulls. A lot of fine litter is dispersed over a long period. If the grasses are located upwind from a swimming pool or water feature, the litter is blown directly into the water. This can make it challenging to keep pumps and equipment clear and the water quality sparkling.
Therefore, know the direction of your prevailing winds and storm winds before you decide where to plant grasses. Limit planting areas downwind or away from the pool. However, it’s common for wind direction to change with the seasons, so if you plant them poolside, planting them downwind is not foolproof. Cutting the seedheads back may be necessary.
Invasive Grasses
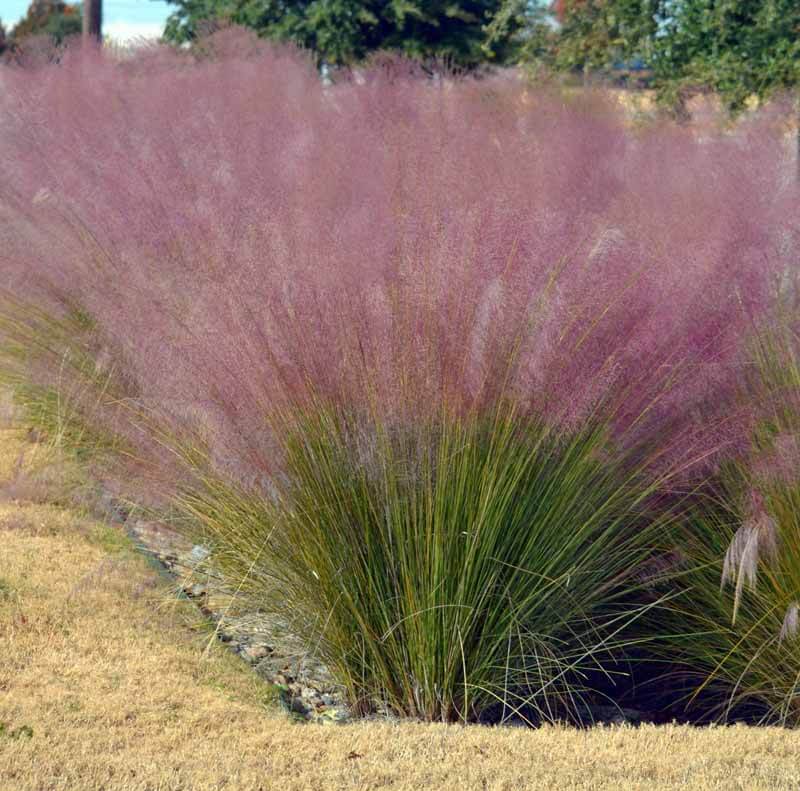
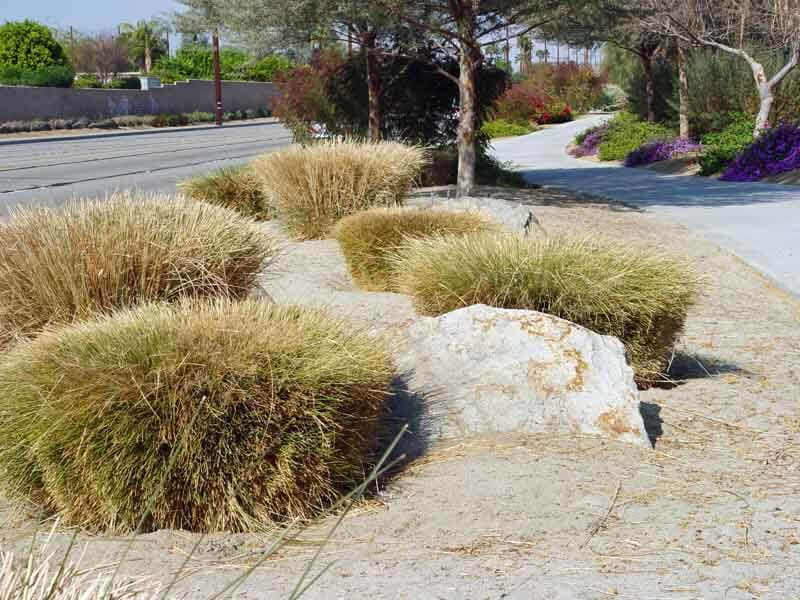
Native deer grass (Muhlenbergia rigens) is quite long-lived and fairly trouble-free.
The reason you hear so much bad press about fountain grass (Pennisetum species and varieties) is that they love our climate and sprout anywhere there is enough moisture to grow. There are many ornamental species with weedy tendencies. Some garden favorites are hardy perennials, like foxtail fountain grass (Pennisetum alopecuroides), but in milder western climates tender perennial forms, like purple fountain grass (Pennisetumsetaceum ‘Rubrum‘), will survive several seasons, too. Perennial forms don’t die back and are long-lived. Pennisetum such as these are displacing less aggressive native species in low, moist areas.
The same applies to your yard. If the seeds fall near irrigation heads, they sprout into weeds. It may have been open ground, but now it’s become a longterm weed problem. Such introductions are hard to stop and take a few seasons of dedicated handwork to clean out.
Runner Grasses
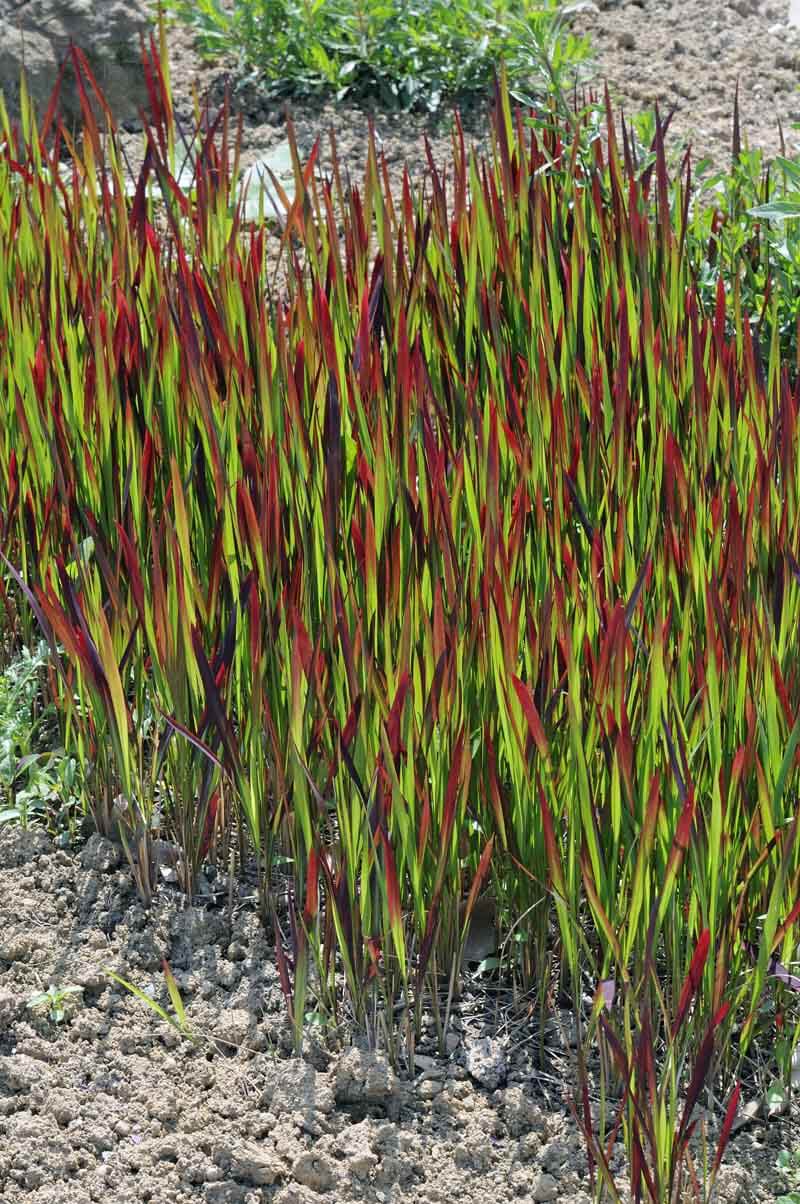
Runner grasses, like Japanese bloodgrass (shown) and Bermuda grass, will invade and become intertwined with perennials and other ornamental grasses.
Runner grasses spread, unlike stayput bunch grasses. The common southern lawngrass, Bermuda grass (Cynodon dactylon), is the poster child for a host of aggressive runner grasses that spread fast and invade perennials and well-behaved bunchgrasses. Another ornamental grass to add to the equation is Japanese bloodgrass (Imperata cylindrica), with its red-tipped blades and fast-spreading runners that will quickly overtake moister beds. The problem is the worst when runner grasses overtake bunch grasses. They creep unseen beneath a garden grass, and then once well rooted, the runner grass becomes nearly inextricable. If the bunchgrass is large and broad, the two grasses will forever be bound together, foliage plaited into a nest, and there’s no separation once established. Prevention is everything. Beware adding these, or any aggressive runner grass, to your yard or garden.
Short-Lived Grasses
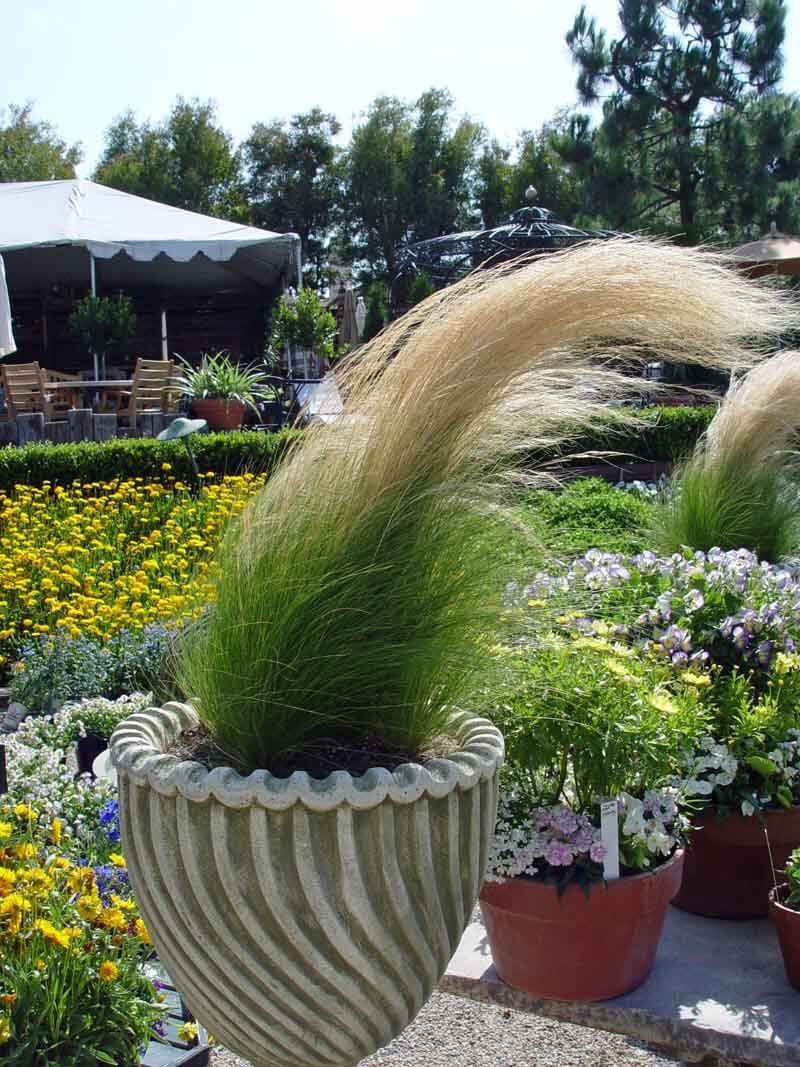
This fine-textured Mexican hair grass in full flower and nodding in the breeze. (Photo by Maureen Gilmer)
Grasses are ephemeral plants by nature, adapted to range fires in the wild, grazing, floods, and landslides. Those that evolved with a long life span prove that they have adapted to climate change, since well before the Pleistocene, and are still super adapted for the future. The most long-lived, resilient grasses to grow in arid gardens are native deer grass (Muhlenbergia rigens) and its kin (Muhlenbergia group). But, more short-lived species, such as the windswept Mexican hair grass (Nassella tenuissima) or purple fountain grass, die out in just a few years.
Clump Splitting
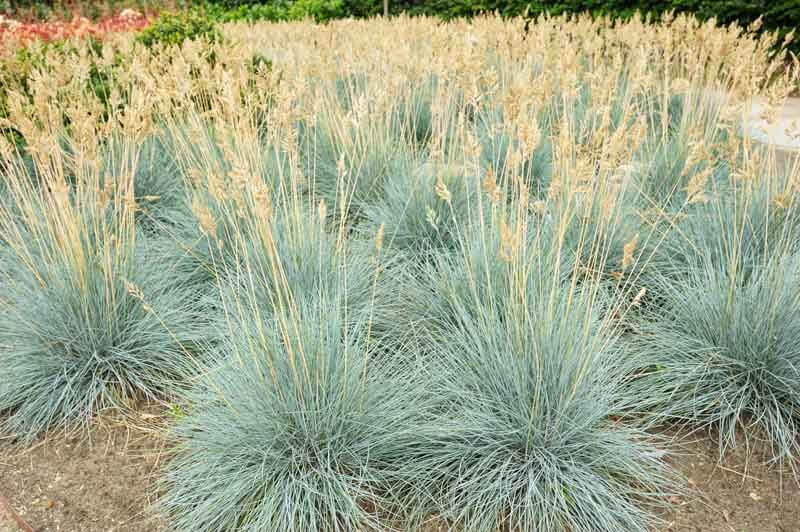
These newly planted blue fescues have not suffered crown split yet.
Early in the life span of blue fescue (Festucaglauca varieties), the mounds of icy blue needles are perfect hemispheres. Like many other grasses, fescues grow too tall and heavy then split down the middle, allowing light to reach the root crown at the center of the clump. The direct sun sears those formerly shaded crown stems, causing premature aging while the rest of the plant is perfect. Replacement is often required if the plants are depended upon to create full geometric domes. This is a natural process for fescues, so they are best planted with other species that take up the slack visually if they decide to split.
Midwinter Decline
In warm-winter climates, grasses are cut back midwinter, in colder ones, late winter. (Photo by Maureen Gilmer)
As dramatic as sweeping monocultures of grasses are, they are best used with ever-beautiful support plants due to an unattractive period in midwinter, even if not fully dormant. The grasses are routinely cut back to just a few inches to simulate a cold event. This removes dead and dormant growth as well as detritus inside the clump to make way for the renewal of foliage. To avoid the barren ground, it’s wise to choose other evergreen plants to carry this composition until green grass shoots start up again in spring. Renewal is part of grass biology, so cutting back is regenerative and makes them healthier overall.
Ornamental grasses are an important cornerstone of today’s arid-zone gardens. Those species adapted to warmer climates without summer rain offer a change in texture as well as wind-blown beauty in containers on porch or patio. They require lots of nutrition, so be sure to use Black Gold Moisture Supreme Container Mix when planting for efficient water-holding potential and water conservation. The best grass for containers and garden at higher elevations or further north are Miscanthus varieties, which ask for a bit more water. (Choose low-seeding or sterile forms, such as giant miscanthus (Miscanthus x giganteus).)
While shrubs and succulents can be inanimate, the slightest breeze begins the gentle sway of a thousand soft grass blades. The animation of the nodding flower spikes liven up a dying landscape in the dry autumn winds.
With 150+ potted containers throughout my garden, it is important that I overwinter them well. Living on the relatively mild western slope of Oregon’s Willamette Valley, our winters do not compare with those in colder parts of the country, but we do get freezing temperatures. Almost every winter, we will have some nights when the temperatures dip into the low 20’s and sometimes into the high teens. While we also have our fair share of rain during the winter months, we often get a few days of snow and ice, which can wreak havoc on containers.
Protecting Wintering Containers
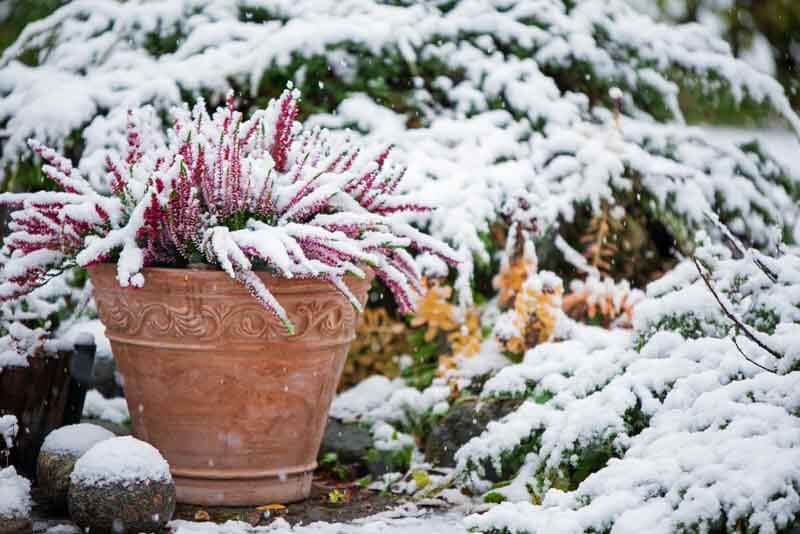
This snow-covered Italian Terracotta flower pot will likely weather through the winter.
Plants in containers are exposed to the elements more than those in the ground. Pots do not offer roots as much insulation or protection, but each is different in its protection and durability, whether glazed ceramic, concrete, plastic, Terracotta, or stone. (In this article, we will cover ceramic pots, which are what I use.) Just like the hot summer sun can quickly dry soil in a container, especially with Terracotta pots, cold temperatures, and winter wind can freeze the soil. The ice expands, and as it does, it often has enough force to crack certain pots, especially if the soil is moist.
The question is, what ceramic containers endure winter cold without cracking? In our climate, it would be very unusual for a container not to have soil wet from the winter rain and then potentially freeze. So, having the right container is an important necessity.
Over the years, I have learned through trial and error what pots work. The conclusions that I have reached are not scientific but based on my own experience in dealing with different types of pottery from different places. Some behave poorly outdoors and are better reserved for indoor plantings.
Pots for Indoor Use
Mexican pottery is fantastically pretty but cracks easily outdoors in freezing winters.
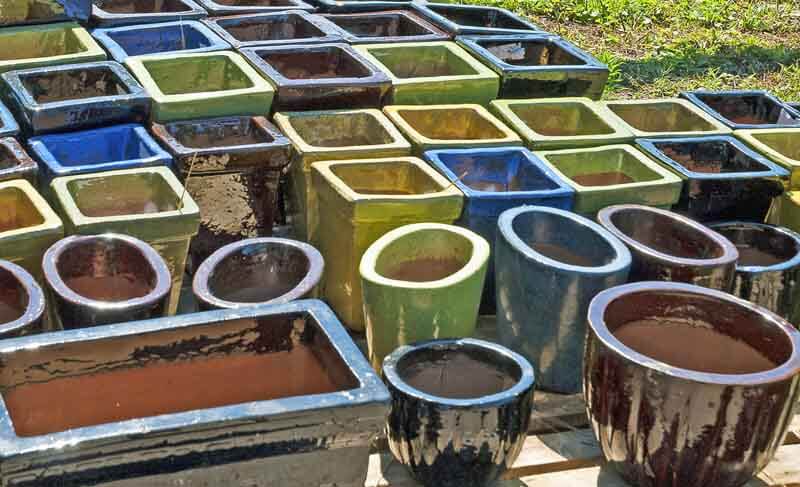
First, bear in mind that some manufacturers add elements to their clay to make pots more winter hardy, and some don’t. Thickness and firing temperature can also help prevent cracking. Generally, I have found that Terracotta-based Mexican pottery, glazed or unglazed, will not survive a cold winter without cracking. Likewise, most pottery from China is variable, but the thin pots tend to crack. Some of the most beautiful pottery that I have seen is from Thailand, but it tends to be thin-walled and is poor for outdoor planting.
Thin-walled ceramic pots tend to crack while thicker-walled pots don’t.
We do have some pots from Thailand in our garden, though. These tend to have unique designs and colors and create much interest from visitors. We use Thai pots as pieces of garden art with nothing planted in them. There are holes in the bottom for the rain to drain through, so there is no concern about cracking.
If you choose to grow summer annuals in pots that are not reliably frost-proof, take out the soil when you remove the annuals. Or, if your containers are mobile, move them into a garage to protect them.
Pots for Outdoor Use
Thick-walled, high-fired Vietnamese pottery survives the winter very well for me.
Containers from Italy seem to go through our winters just fine, but those that consistently weather through without cracking are from Vietnam. In our area, the Vietnamese pots sold in local garden centers are thick-walled, highly glazed and fired, very heavy, and frost proof. I have some pots from Vietnam on our deck that we have had for 15 plus years, and they have never cracked. These pots are exposed to winter winds, rain, freezing; they have no protection from the elements.
Thick, high-fired Italian pottery also withstands winter cracking better.
Another important factor when a purchasing pot is getting the right pot for the right location. Check the selection of winter-hardy pots at your local garden center for colors, sizes, and styles with good thickness, high fire, and thick glaze. I have found that the right colorful containers scattered throughout the garden are permanent additions that also serve as garden art.
Microclimates play a role, too. Try to protect your outdoor pots through winter by placing them below overhangs or patios close to the house. Not only can this further help protect them from cracking, it helps the shrubs or perennials they hold.