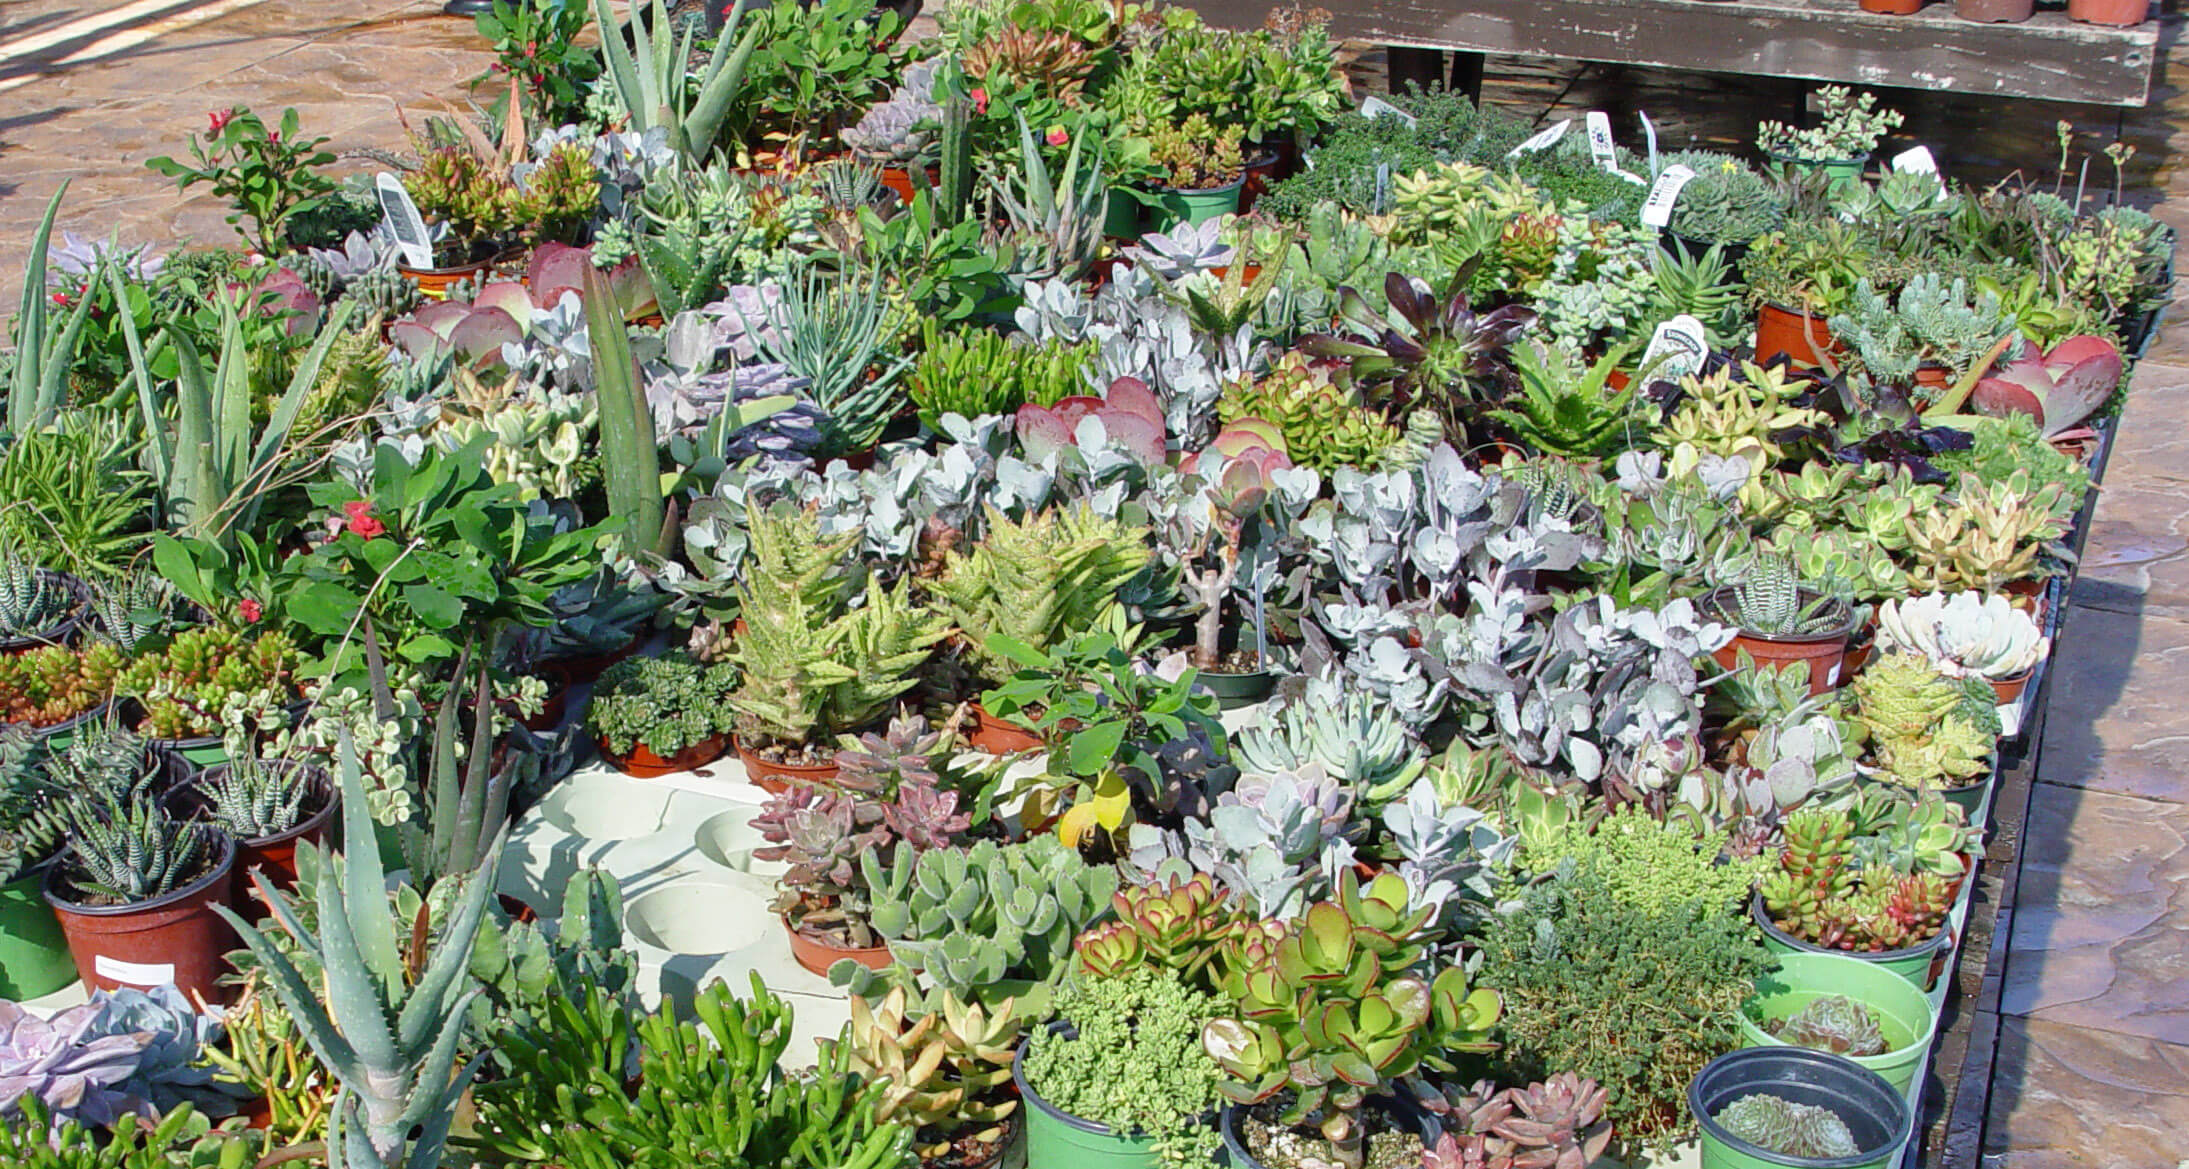
“My cactus and succulents are indoors and under lights all year. Should I try to give them a dormancy period with less light and lower room temps in the winter?” Question from Kendra of Humboldt, Iowa
Answer: It looks like your succulents have plenty of light! They look great. Keep them under lights for winter, but feel free to turn them off at night. If you want to save money on lighting bills, consider bringing them outdoors in the summer months, after the threat of frost has passed. They will thrive in the natural sunlight. Just be sure to check them for insects before bringing them back indoors in fall; cleaning the plants with insecticidal soap is also a protective measure.
When it comes to winter growing temperatures, cacti and succulents do like it a little cooler. Maintaining a room temperature between 50 and 55 degrees Fahrenheit would be ideal.
Water less, too. Indoor succulents tend to require little to no water during the winter months. This mimics the winter dry season that they experience in their natural habitats, so be sure to water them very sparingly during the cold season. It also pays to plant them in a premium, fast-draining mix, like Black Gold Cactus Mix.
Large sprays of bright red berry-like fruits mature in time for holiday decorating.
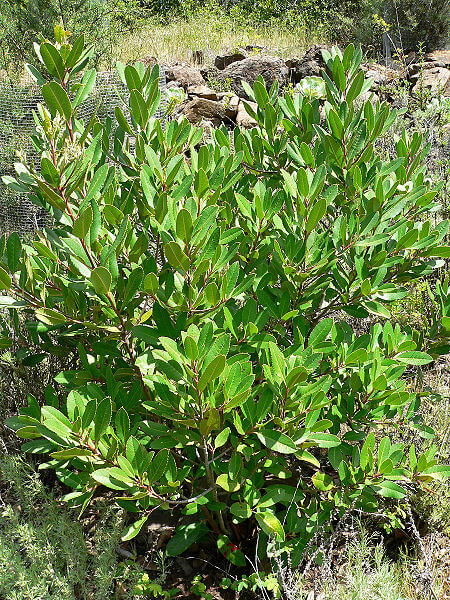
In my old High Sierra home, I decorated with my own native Christmasberry (Heteromeles arbutifolia, USDA Zone 8)fruit every winter for nearly 20 years. Also called California toyon, this shrub produces large sprays of bright red fruits that are so seasonally welcome, I wondered why it was not more popular in landscaping.
Christmasberry makes a fine alternative to Asian Frasier’s photinia (Photinia fraseri), non-native hollies (Ilex spp.), and other exotic evergreens. Deep, emerald-green foliage makes the red fruits really stand out in the winter garden while providing bird habitat all year long. In the High Sierras, the wild evergreens remained unchanged from the end of late-spring rains to December, when the rains returned. That’s a minimum of seven months with no supplemental water!
Potted Christmasberry
Like so many California native shrubs, Christmasberry is difficult to grow commercially in pots because of its deep, wide-spreading root system — the key to its amazing drought resistance. Natives with large root systems rapidly outgrow nursery pots by the end of the first year, when grown from seed. If not transplanted into a deeper pot, the roots will hit the pot bottom and grow sideways.
A young Christmasberry shrub.
Distorted tap and feeder roots will keep a growing shrub from achieving proper root depth once planted in the ground. This is why Christmasberry, and comparable native trees and shrubs, are uncommon in garden centers. So many have disproportionate top-to-root growth. A tiny seedling may have a three-foot-deep root system that refuses to adapt to container culture. This was such a problem with California native oaks, that growers finally gave up on trying to pot them and planted acorns instead.
Purchase the smallest, youngest potted plants, if you can find Heteromeles arbutifolia for sale locally. A big plant in a small pot won’t adapt well to drought.
Growing Christmasberry from Seed
Sowing Christmasberry plants from gathered seed is an even better option. Home-grown shrubs can quickly be planted outdoors, allowing the tiny seedlings to freely root into the soil and adapt to local rainfall limitations.
First gather mature, red fruits and clean each one to release the two seeds inside. In my High Sierra home, robins came each year to feed on the fruits, excreting clean, ready-to-germinate seed on my land. To simulate this same scenario at home, separate the seed cleanly from the fruit and allow the seed to dry. This seed will remain viable for only about 8 months.
Sow the dry seed in winter to get them started, just like wild seed with the spring rains. Choose a light, natural garden soil, such as Black Gold Seedling Mix. Start by filling a plastic lidded salad or fruit box with the fresh mix, and set the seed into the moist media, but don’t cover it. Keep the seeds lightly moist and at room temperature, and they should sprout in about a week. Transplant newly sprouted seedlings into deep pots of Black Gold Natural & Organic Potting Mix. Place them under bright light until they reach 1-inch in height, usually within six weeks. Transplant into the landscape once the soil can be worked to ensure healthy root growth and easy planting. Spring planted seedlings should be deeply watered once or twice, then let them grow on rainfall unless conditions are unseasonably arid.
Planting Christmasberry
In the wild, Christmasberry typically grows on rocky slopes with dry, well-drained soils that are sometimes a bit saline. Keep this in mind when selecting a location to plant or sow your shrubs. As long as the roots are free to grow deeply, they will out-perform thirsty hollies and other exotic holiday berries without asking for much, if any, supplemental water.
Mature shrubs are bushy, somewhat shade tolerant, and typically reach 6-10 feet or more. In early summer clusters of white flowers are produced. These are transformed into red, berry-like fruits that persist into winter. Established plants can live up to 200 years.
This relatively young hedge shows how fast Christmasberry produces a drought-resistant screen with high wildlife value.
Other natural, shrubby companions found with Christmasberry are California lilac (Ceanothus spp.), manzanita (Arctostaphylos spp.), western redbud (Cercis occidentalis), and fremontia (Fremontodendron spp.), all of which grew on or near my old property. This is the essential palette of native California shrubs or small trees that promise beauty in drought.
There is no better recommendation for a species to withstand the perpetual “shake, bake, and irrigate” of the West Coast. Christmasberry survives fire and holds slopes against mudslides, according to Lester Rowntree in her classic 1947 book, Flowering Shrubs of California. Lester wrote: “I have seen acres of toyon [Christmasberry], in solid formation, come back after fire from the roots of old bushes, ringing the bases of burned 18-foot stems, standing black and dead, with the bright rich green of new growth.”
This is the time of year to feel thankful for the past year, hopeful for the new, and to share food and festivities with friends. Black Gold employees took the time to share some favorite seasonal recipes. Hopefully, these time-tested treats will also bring some holiday cheer to our customers and supporters. Happy Holidays!
Holiday Gingered Sangria
Holiday Gingered Sangria (Image by Lobo)
Shawnee S. Vetanovetz is Black Gold’s Retail Customer Support Specialist, and she likes a holiday party as much as anyone else. Here’s a fast and delicious gingered sangria she enjoys making around the holidays that looks as great as it tastes.
Ingredients
1 bottle (750 ml) good Cabernet Sauvignon
½ cup dark rum
1 (12 oz.) can ginger ale
Juice from ½ small lime
Juice from ½ small lemon
1 lemon, lime, and orange sliced
1 slice fresh ginger
Directions
Mix together all liquid ingredients together in a glass pitcher.
Add the slices of lemon, lime, orange, and ginger.
Refrigerate (to chill) for 1 – 2 hours, if desired. If you prefer a fruitier sangria, allow the mix to refrigerate and “marry” for up to 24 hours.
Serve!
Spiced Candied Popcorn
Spiced Candied Popcorn
Sales Rep Miranda Kelly takes care of Black Gold sales in the California region, and in her spare time, she loves to cook. This recipe was adapted from one she found online sometime back. Now she makes it every year. It’s a little like Cracker Jack but healthier and tastier.
Ingredients
4-6 cups plain popcorn
1 cup raw chopped cashews or pecans
3 tablespoons butter
2 tablespoons honey
½ teaspoon cinnamon
¼ teaspoon ground ginger
¼ teaspoon salt
Directions
Preheat the oven to 325 degrees F.
In a small pot set to low heat, melt the butter and honey together. Mix in the cinnamon, ginger, and salt.
Put the nuts in an extra large mixing bowl. Coat them with about a tablespoon of the butter/honey/spice mixture.
Spread the coated nuts onto a baking sheet covered with parchment paper and bake for 6 minutes.
Meanwhile, in the same large bowl evenly coat the plain popcorn with the remaining butter/honey mixture, being sure to remove any unpopped kernels.
After the nuts have been in the oven for 6 minutes, take out the tray, add the popcorn to it, and mix it all up together. Stick the tray back in the oven and set the timer for 6 minutes.
After 6 minutes open the oven and stir or shake the mixture around on the baking sheet. Set the timer for 4 more minutes.
Once again open the oven and stir/shake the mixture so there are no hot spots that could get burnt. Set the timer for 2 more minutes at which point the mixture will once again need to be checked/stirred.
Repeat the process of checking/stirring the popcorn mixture every minute then take it out of the oven once it turns a dark brown. (Be careful! It can burn easily toward the end!) My total bake time is generally 6 minutes for the nuts then an additional 8 or 10 minutes once the popcorn has been added.
The popcorn and nuts will be slightly wet right out of the oven but will harden as they cool.
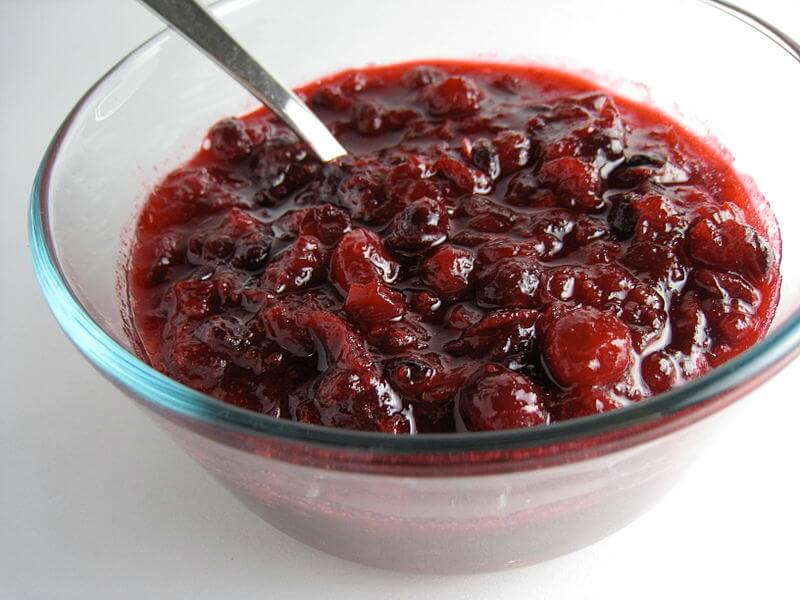
Fruited Cranberry Sauce
Fruited Cranberry Sauce (Image by John Cummings)
The holidays are not complete without this delicious homemade cranberry sauce, which is made yearly by Jessie Keith who manages communications for Black Gold. Truly, it is not your average cranberry sauce. It’s loaded with fruit, nuts, and Grand Marnier, making it more like a dessert than a condiment for turkey. It even tastes great on pumpkin pie!
Ingredients
1 cup sugar
3/4 cup water
2 cups fresh cranberries
1 cup finely chopped apple (a tart cooking apple is best)
3/4 cup chopped, toasted pecans
3/4 cup golden raisins
1/2 cup Grand Marnier
1 large orange, zested and juiced
Directions
Boil sugar and water in a medium saucepan until the sugar has totally dissolved, around 5 minutes. Add in the fresh cranberries, return to a boil, then lower the temperature to medium-low heat and simmer for 8 minutes. Add the apples, golden raisins, orange juice, orange zest, and Grand Marnier and cook for 10 to 15 minutes. Make sure all the cranberries have popped by squishing those that are still whole. Remove from the heat and let the sauce cool. Mix in the pecans before serving.
Add the mix atop a piece of pumpkin pie or enjoy with a festive turkey dinner.
Jessie’s Favorite Gingerbread
Jessie’s children decorated this gingerbread house!
This amazing, tasty gingerbread is another favorite of Jessie Keith’s. Each year she uses it as a base to make gingerbread houses with her children.
Wet Ingredients
¾ cup salted butter
¾ cup sugar
¾ cup dark molasses (not black strap!)
¼ cup warm water
1 tablespoon fresh, macerated ginger
1 tablespoon fresh orange zest
Dry Ingredients
½ teaspoon baking soda
1 teaspoon ground cinnamon
½ teaspoon ground nutmeg
¼ teaspoon cloves
¼ teaspoon ground cardamom
A healthy pinch of salt
3 ¼ cups sifted flour
Directions
Cream butter and sugar until fluffy then mix in the molasses and water. Sift the dry ingredients then add them to the wet until fully combined (be sure not to over mix).
Flour your hands and pull the dough together into a flattened ball and chill for at least 12 hours. Before you roll the cookies, preheat the oven to 350 degrees Fahrenheit. Flour up a board and pin and cut your dough in two. Roll out the dough to around 1/4 inch thickness. Be sure to keep the board and pin floured to stop the dough from sticking.
Cut out your shapes and reroll any excess dough, though try not to overwork it as this results in tough cookies. Place the rolled cookies onto a cookie sheet lined with parchment paper and bake for 8 to 10 minutes. The less baked, the chewier the cookie. Allow the cookies to cool before decorating. Royal icing is the best for gingerbread house building and gel food coloring provides the deepest icing colors.
Raised-bed hoops and row covers can help you protect crops from harsh growing conditions and winter cold.
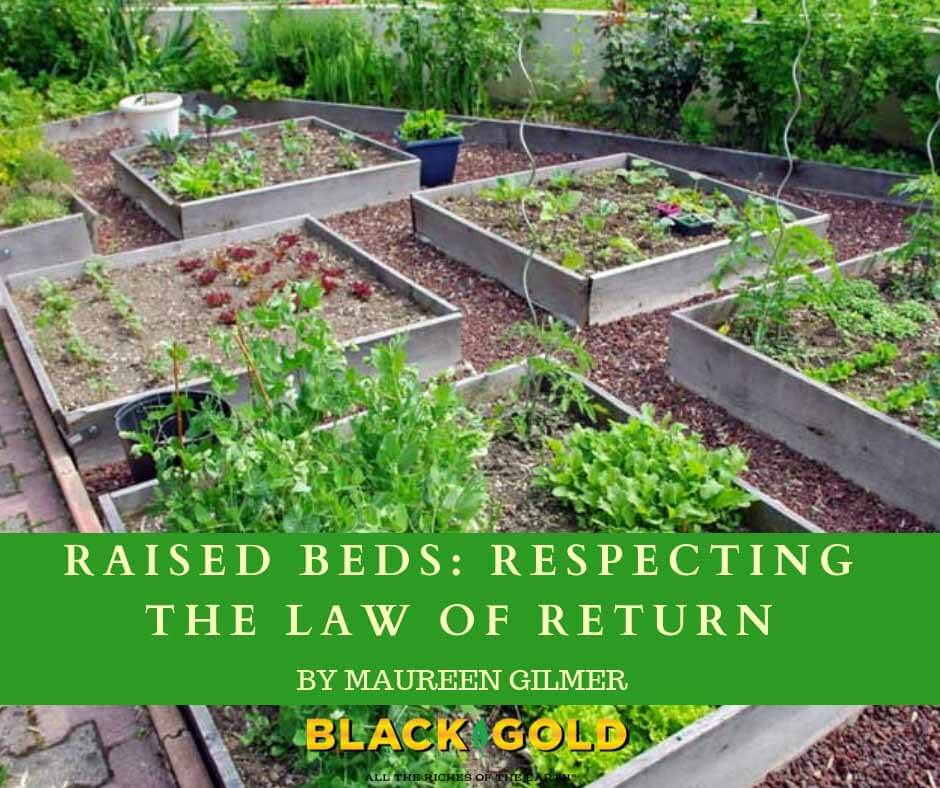
Second gardens are always better than first gardens. When those first gardens were your raised beds, then maybe it’s time to raise the bar. Bigger, better, and more prolific are garden characteristics that all gardeners want, so perhaps it’s time to rehab and expand in preparation for next year’s summer garden.
So many raised beds were at first experimental or created with the kids as a family project without long-term planning and smart design. That’s why they often don’t last as long as they should. Earth-to-wood contact (something forbidden in house building) introduces wood rot and invites pests, such as termites. You need to know what you are doing to get more life from your raised bed.
Choosing the Best Raised Bed Building Materials
Redwood ties are naturally rot resistant and great for raised bed building.
Early on, wooden railroad tie beds [read more about railroad tie beds] became popular and kept the rot problem at bay, but ties are made from heavily treated wood. They contain dangerous heavy metals and creosote, which can leach into the soil and be taken up by edible plants. Pressure treated wood has the same problem. It is treated with fungicides and other compounds to reduce rot that can leach into the soil.
Untreated woods are not all the same. Many break down fast, resulting in short-lived raised beds. If you want long-lasting beds, avoid soft or rustic reclaimed woods certain to rot quickly. Instead, choose long-lasting red cedar or redwood. Both decompose slowly and are the most recommended for beautiful frames that resist rot. Trex, and other polymer/wood alternatives, also last forever and look great. All of the rot-resistant options are initially more expensive but worth it if you plan to garden for years.
Rehabbing Your Raised Bed
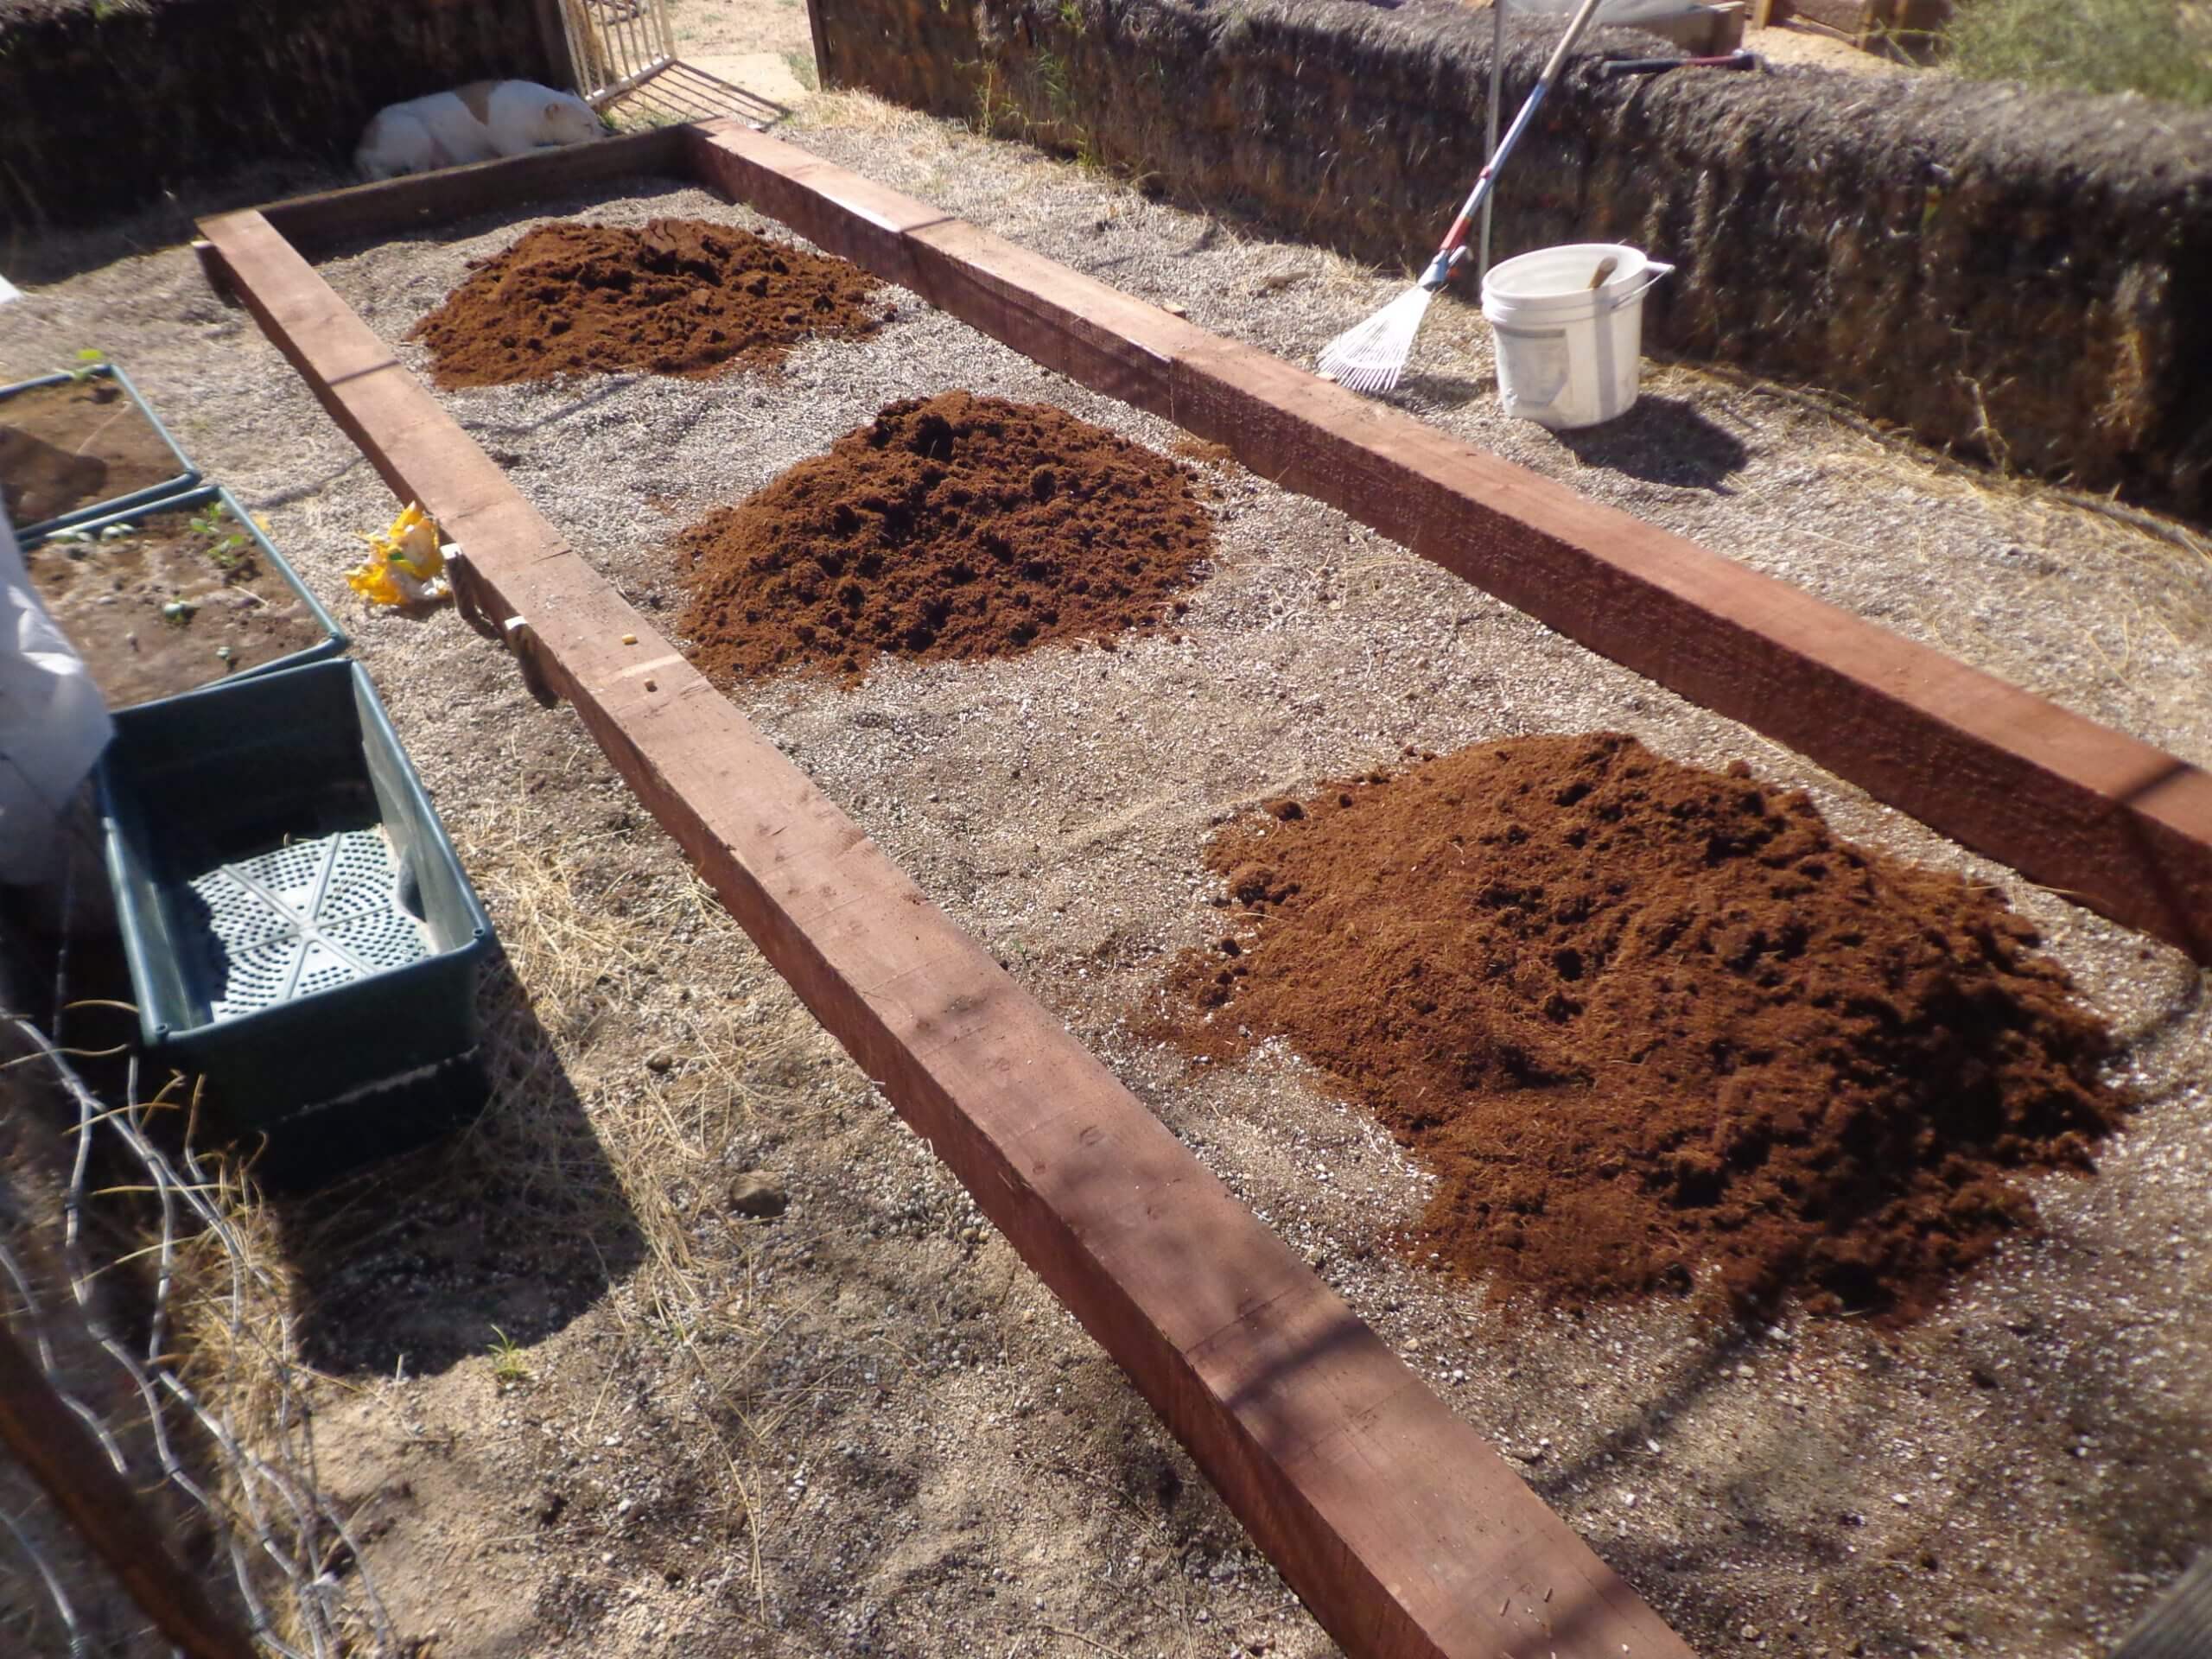
Just Coir creates a good organic base layer for raised bed gardens.
If you already have raised beds made with fast-to-decompose wood, you may already be experiencing the unfortunate and very common results. They are rotting, bowing, or breaking open at the seams due to decomposing edges weakened by the weight of soil, plants, and mulch. This means it is either time to rebuild or refurbish the frames.
Moreover, if you have had your beds for a while, the soil will be low and in need of replacement. Like all garden beds, soil volume falls as microbes consume the fine humus, and nutrients are depleted by garden plants. Poor garden soil will produce poor garden plants.
Fall is the best time to replenish raised bed soil and fix repairs. Take advantage of the fabulous fall weather to replace all rotting or bowing boards or edges, and revive sad, tired soil. Here’s the five-step process in a nutshell:
Remove existing soil, if it’s degraded to mostly woody matter and perlite. Stockpile the old soil material for future use as summer mulch, or layer it into the compost heap.
Inspect the newly exposed sidewalls by stabbing questionable spots with a screwdriver. If the metal penetrates the wood, then there’s rot, and they need to be replaced. Also, check and reinforce loose corners.
Make repairs to sidewalls using Trex or long-lasting, untreated wood boards. Consider adding more height if you would like to grow plants with deeper root systems. Not only should you use strong, quality wood, but investing in heavy hardware will add to the longevity of your beds. Choose heavy wood screws tightened with an electric screwdriver to keep beds from loosening with the seasonal shrink and swell of the wood.
Replace the soil in stages. Black Gold Just Coir creates a 100% organic matter barrier that holds water and repels root-knot nematodes. The heart of the raised bed should contain a rich mix of local topsoil amended with Black Gold Garden Compost Blend and a soilless potting mix, such as Black Gold Natural and Organic Potting Soil. The combination depends on the quality of your local soil; great topsoil requires fewer amendments. In general, an even mix of 2 parts topsoil to 1 part compost and 1 part soilless potting mix will yield great results. If drought is a problem in your area, adding a mulching layer of Black Gold Just Coir or Garden Compost Blend will reduce surface water loss.
Add an all-purpose fertilizer, at the manufacturer’s prescribed application, to help drive explosive growth.
Irrigate and Sow
Inline drip tubing that invisibly waters your garden without ugly surface tubes and emitters.
Gently water your raised beds to allow them to settle and marry over the winter months. If you don’t already have it, drip irrigation is highly recommended for effortless raised bed gardening. Try soaker hoses or buried underground inline drip tubing that invisibly waters your garden without ugly surface tubes and emitters. If you want to expand next year, put in a new bed close to the old one and share the irrigation.
While watering your rehabbed raised beds, throw in some seeds for beets, radishes, turnips, and other root crops that germinate at temps down to 40 degrees F. The addition of row covers will protect cool-season crops well into winter. Harvest the leaves, eat the sweet roots, and enjoy long winter yields as your refreshed raised beds do all of the work for you.
While this may be winter (not official until December 22, but most gardeners would say this is winter), there are so many things we can harvest from our gardens to decorate our homes to help celebrate the holidays. We have had several inches of rain in just the past few days here in western Oregon, with more expected, and this morning as I walked around in my very soggy wet garden I discovered that there was a bounty of materials to chose from.
Berried Winter Plants
The berries of heavenly bamboo look great outdoors or cut and brought indoors.
Many of the plants that we can use for holiday decorating from the garden are readily available in our gardens–if not in your own garden, take a walk around your neighborhood. You may have neighbors that would be happy to share some their plants; some selecting pruning might be welcome. Two plants that are usually readily available in local gardens are Nandina domestica, (heavenly bamboo, not related to bamboo), and Callicarpa bodinieri (beautyberry). Both of these are well suited to winter arrangements. The Nandina has clusters of red berries and the Callicarpa has bunches of purple berries on bare stems.
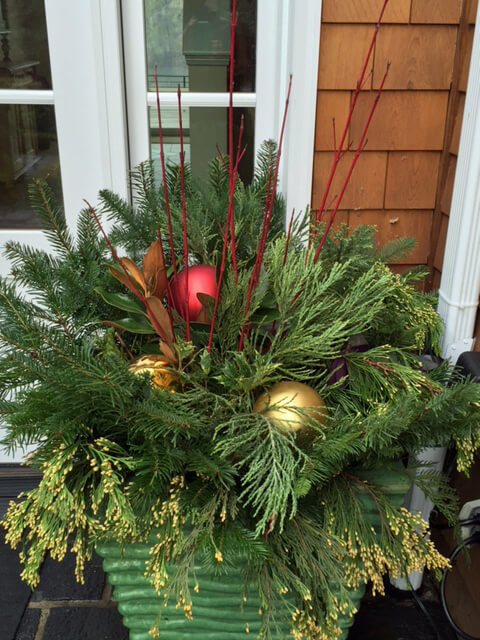
A festive wintergreen basket.
I am not a creative designer in our family, but I enjoy gathering branches and letting my wife create a holiday arrangement. Whether it is large or small, she seems to know just how to put it all together. An example is her use of a simple small wooden basket which makes a very attractive feature for an entryway. A pine branch, or one from another evergreen conifer, can be added. Red berries from a Gaultheria procumbens (wintergreen) added festive natural color and then she tied on a red ribbon for a finishing touch. (Note: this Gaultheria is an example of how common names, while usually easy to say and remember, can be confusing. This plant is sometimes referred to as winterberry as well as wintergreen, but true Winterberry is actually the holly, Ilex verticillata.)
Hydrangea macrophylla ‘Shooting Star’ makes a great potted plant that can be planted outside in mild weather.
Holiday Potted Plants
Recently, while visiting a local garden center and viewing their vast selection of poinsettias, dazzling white Hydrangea macrophylla ‘Shooting Star’ flowers were being offered among the sea of red. The multi-petaled ‘stars’ shoot from the flowers like fireworks, hence the name ‘Shooting Star’. An added bonus is that for many of us living in western Oregon and Washington, this is also a garden plant that can be planted out in the garden to become a permanent shrub. This hydrangea looks beautiful planted in a decorative gold container with decorative conifer branches around the edges. The look is simple but very effective.
Arrangement Ideas
During my weekly radio program last week, I asked listeners to send in photos of winter arrangements that they were made from local plants. Here are two of my favorites.
Holiday mugs make cute seasonal vases for arrangements.
Susan Bechtol had a holiday decoration party during her work lunch hour with the theme of creating an arrangement in a cup. Another was Nancy Wirth who created a lovely arrangement from plants in her garden She used red branches fromher Cornus sericea (red-twig dogwood) and evergreen branches are from her garden as well as some she found on the ground in a parking lot. (How is that for reuse?)
Gardeners tend to be a very imaginative group and are especially creative when using plants from their own gardens. Try experimenting by using some plants from your own garden for a holiday decoration. You might be surprised at what you can create! Check out your local garden center to see what winter-interest plants you can add to your garden when the ground is still soft enough to plant.
Whatever you do this holiday season, take the time to enjoy it. The New Year will be here before we know it. Happy New Year and Happy Gardening!
A mix of evergreen branches and red-twig dogwood brighten an outdoor pot.
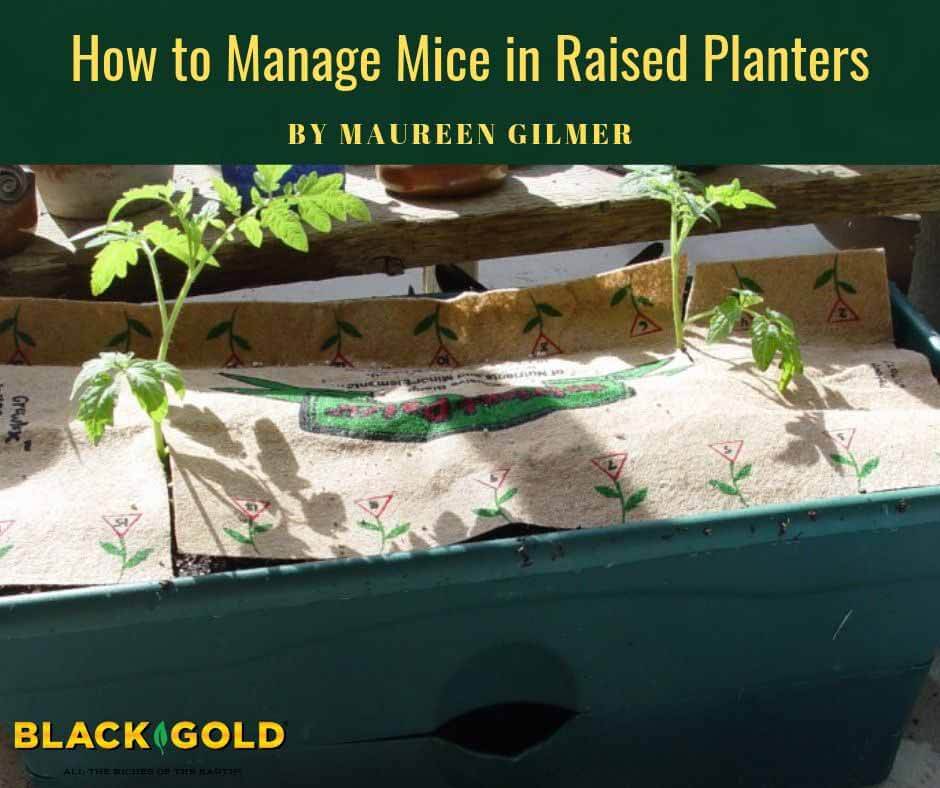
Young tomato seedlings in my Grow Box – note the water-fill opening and mouse access on front.
As the heat of “dead summer” begins its slow ebb into fall, it’s planting time in California and the Southwest. While most folks across the US plant in spring, here the mild fall is our second growing season for food crops. What we grow now feeds us into the holidays with roots and greens and maybe even squash or peppers with the right system and climate. I grow many ways, in raised beds with row covers, in the greenhouse and out in the open air, depending on the season and crop. This allows me to compare the methods for different crops at different times of the year.
By June, my tomato plants were healthy and happy!
Planting Grow Boxes
Last year I tested Grow Boxes in the greenhouse attached to the south side of my home. With such low humidity in the desert, these boxes with their 4-gallon reservoir keep plants far better hydrated than any other method. The box is designed so plants produce long trailing roots that dangle into a large water reservoir sucking up all the moisture they need rather than being limited to watering times. Last year I planted the boxes with tomato seedlings in February when high UV in the desert allows greenhouse growing in the high desert and year around in the low desert.
I selected ordinary tomato varieties to evaluate how well the boxes work here. Because indeterminate tomato varieties are long blooming, I wanted to determine if my tomatoes could indeed become perennial and produce year around without frost. I was thrilled to find the seedlings literally exploded out of the boxes and never stopped growing or producing new fruit until that sudden August decline. The tomato plants quit taking up water, became discolored and generally failed for no particular reason. And whenever I don’t know the reason, my mentor always advised, “dig a hole”.
Grow box with tomato roots
Managing Mice in Grow Boxes
The cause was revealed when I disassembled the boxes to take my first glimpse at the roots that should dangle down into the water reservoir. They were gone! I discovered this was due to a design flaw of the Grow Box: reservoir accessibility to mice in my greenhouse during our blistering desert summers when they are keen on cool, moist places. The Grow Box opening for water access is easy for any small rodent or insect to enter. When water was low or dry in between fill-ups, the mice entered the reservoir and literally ate all the dangling roots, explaining why my tomatoes suddenly quit taking up water. We finally captured the mice, but there may be more in the future. I’ll be fashioning a hardware cloth cover for the fill holes of my six Grow Boxes to keep smaller creatures out, or the very same thing will happen again in this rodent-rich desert, particularly if grown outdoors on porch or patio!
Grow Box with tomato roots eaten by mice
This year I upgraded and replaced the potting soil with Black Gold Moisture Supreme Container Mix with RESiLIENCE®, which I hope will enhance the wicking crucial to the function of the Grow Box. This year I will test fall-planted vegetables in the greenhouse Grow Boxes to learn whether the fruit will ripen in November, despite cooler weather and shorter days. Only testing will prove whether plants that require pollination and long, hot days to ripen can be coaxed to fruit in the short, dark, cool winter.
Here in the desert, and everywhere else that is difficult to grow things, these quasi-hydroponic Grow Boxes are an ideal way to keep plants fully hydrated and healthy. They are a useful solution to grow efficiently in drought. And now with Moisture Supreme, they will be better able to take the heat, and perhaps I will finally learn whether or not indeterminate tomatoes can indeed be grown year round in my greenhouse.
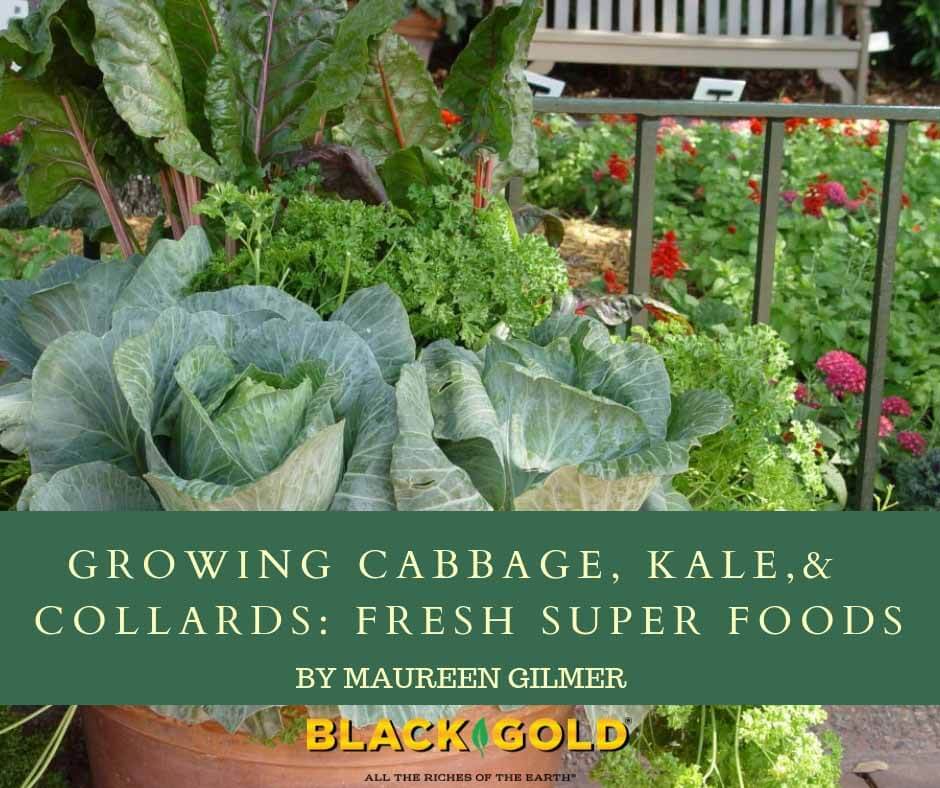
A single large clay pot easily supports cabbage, parsley and Swiss chard for porch or patio.
Until recently, collard greens were known only in the South and among African Americans who brought this “soul food” into northern cities during the Great Migration a century ago. Today collards and kales are heralded as “fresh super foods” due to the high nutritional value of these large-leaved members of the cabbage family. These “pot greens” are eaten stewed, steamed, or wilted for a quick healthy meal.
Curly leaf kale is actually sweeter after it’s exposed to frost making this an ideal Fall crop.
Brassica is a genus with dozens of variants, most being from the original species, Brassica oleracea. Among them are cauliflower and broccoli, Brussels sprouts, and collard greens. Such close relations mean virtually all of them are grown the same way in western gardens.
Let back-to-school ornamental kale and cabbage displays in the grocery store be your reminder that it is Brassica season. August is the time to start your fall and winter garden, which can feed a family with healthy greens even after frost sets in. If row covers are used, plants can remain productive despite significant late-fall cold inland and at higher elevations. The key is sowing your brassicas while it’s warm enough stimulate good germination and maturation of seedlings, indoors or out.
Start Them Indoors
Brassicas can best be grown from seed sown indoors in advance while conditions are too warm to plant outdoors. Time their indoor planting so they’re ready to plant out into the garden when temperatures cool off in September. Seed germinates best between 65 to 75º F but will sprout at lower temperatures, though it may take more time.
Collard greens are a staple of the old South that’s catching on everywhere for plentiful pot greens.
Cabbage family greens also germinate nicely out in the garden while the soil is warm. It’s an old custom to cover seedbeds in wet burlap on hot dry days to keep them moist and shaded during germination. Some gardeners create shade covers to aid seedling development.
Pick a “mess” of greens from the garden for a quick, easy and highly nutritious meal.
If you grow a “mess of greens”, it’s enough to feed a family for months since leaves are cut while the plant lives on to make more foliage. A big pile of leaves lose a lot of volume in the cooking process, so don’t underestimate the numbers of plants needed. Err on the side of overdoing it. Space the plants as stipulated on the seed packet since these will be very large at maturity.
Recondition soil before you introduce your Brassica seeds or seedlings into the garden. The ground may be depleted by summer crops, so it’s important to boost fertility. Greens depend on nitrogen, the nutrient responsible for stem and leaf development in plants. Make sure you fork in Black Gold Garden Compost Blend before planting.
Grow Them in Pots
Flowering cabbage, yet another Brassica, is often grown in pots with annual flowers for winter gardens. This demonstrates how well-adapted leafy greens are to pots and troughs on your porch, patio or deck. Blend your greens with violas and calendulas, both easy-to-grow cool-season annual flowers with edible blossoms.
Too many Americans have grown up without ever tasting real “pot greens”, but when picked fresh their rich sweet flavor will soon become a family favorite. (Keep in mind that most greens actually tastes better after it’s exposed to frost!) What’s even more surprising is it takes less than an hour to harvest and cook greens into a healthy, garden-fresh meal. That makes it a time saver that doesn’t sacrifice nutrition.
This year, grow a wide range of these super foods in your fall and winter garden, so there’s always fresh picked fast food in your kitchen at the end of a busy day.
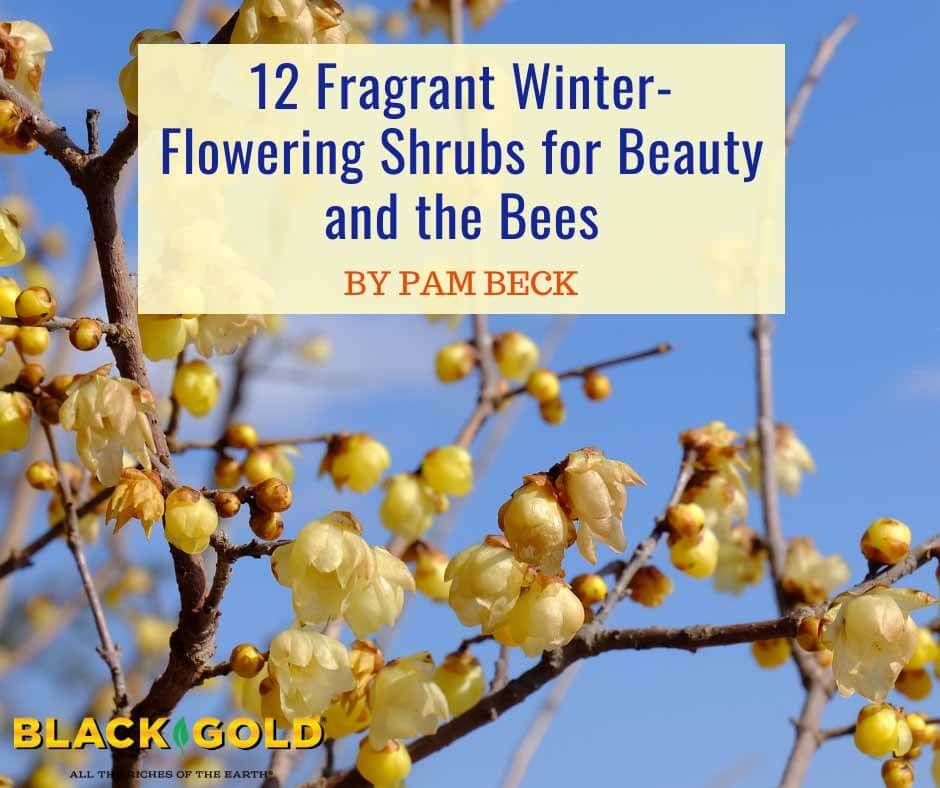
The coppery flowers of Hamamelis x intermedia ‘Jelena’ are very fragrant and pretty. (Image by Jessie Keith)
Take a random survey of 10 neighbors and asked the question: “When you hear the words ‘witch hazel’, what do you think of?” For most, the answer will not be a plant. They will probably say something like: “That stuff you find at the drug store for skin care.” I did ask several neighbors this question, and not one mentioned the beautiful landscape shrub gardeners revere. When I told my neighbors that the word also refers to a plant, most said: “Gardeners live in their own world.”
The primrose yellow flowers of Hamamelis x intermedia ‘Arnold Promise’ are large and fragrant.
It is probably true that gardeners can easily get caught up in their own world, and talking about witch hazel is a good example. To gardeners, the name refers to a wonderful group of shrubs in the genus Hamamelis. Many of these are late-winter bloomers that bring needed color to the garden.
Witch Hazel Care
Winter witch hazel are one of the earliest shrubs to bloom. They are also easy, low maintenance plants that require little care once established. They like a rich organic soil, and the addition of OMRI Listed Black Gold Garden Soil would be ideal to work into the soil at planting time. They grow best in full sun but can withstand partial shade. Afternoon shade is best because it protects plants from hot afternoon sun in summer. Pruning is not recommended because these plants develop a beautiful natural habit, so plant them where they will have lots of space to grow.
Hybrid Witch Hazel Varieties
Most of the witch hazel plants found in garden centers will be hybrids (Hamamelis x intermedia). These common hybrids come in lots of excellent varieties. As a general rule, witch hazels grow to 12-15 feet tall and have a spreading growth habit. They are deciduous plants with flowers that bloom before the foliage appears, which adds to their striking winter appearance.
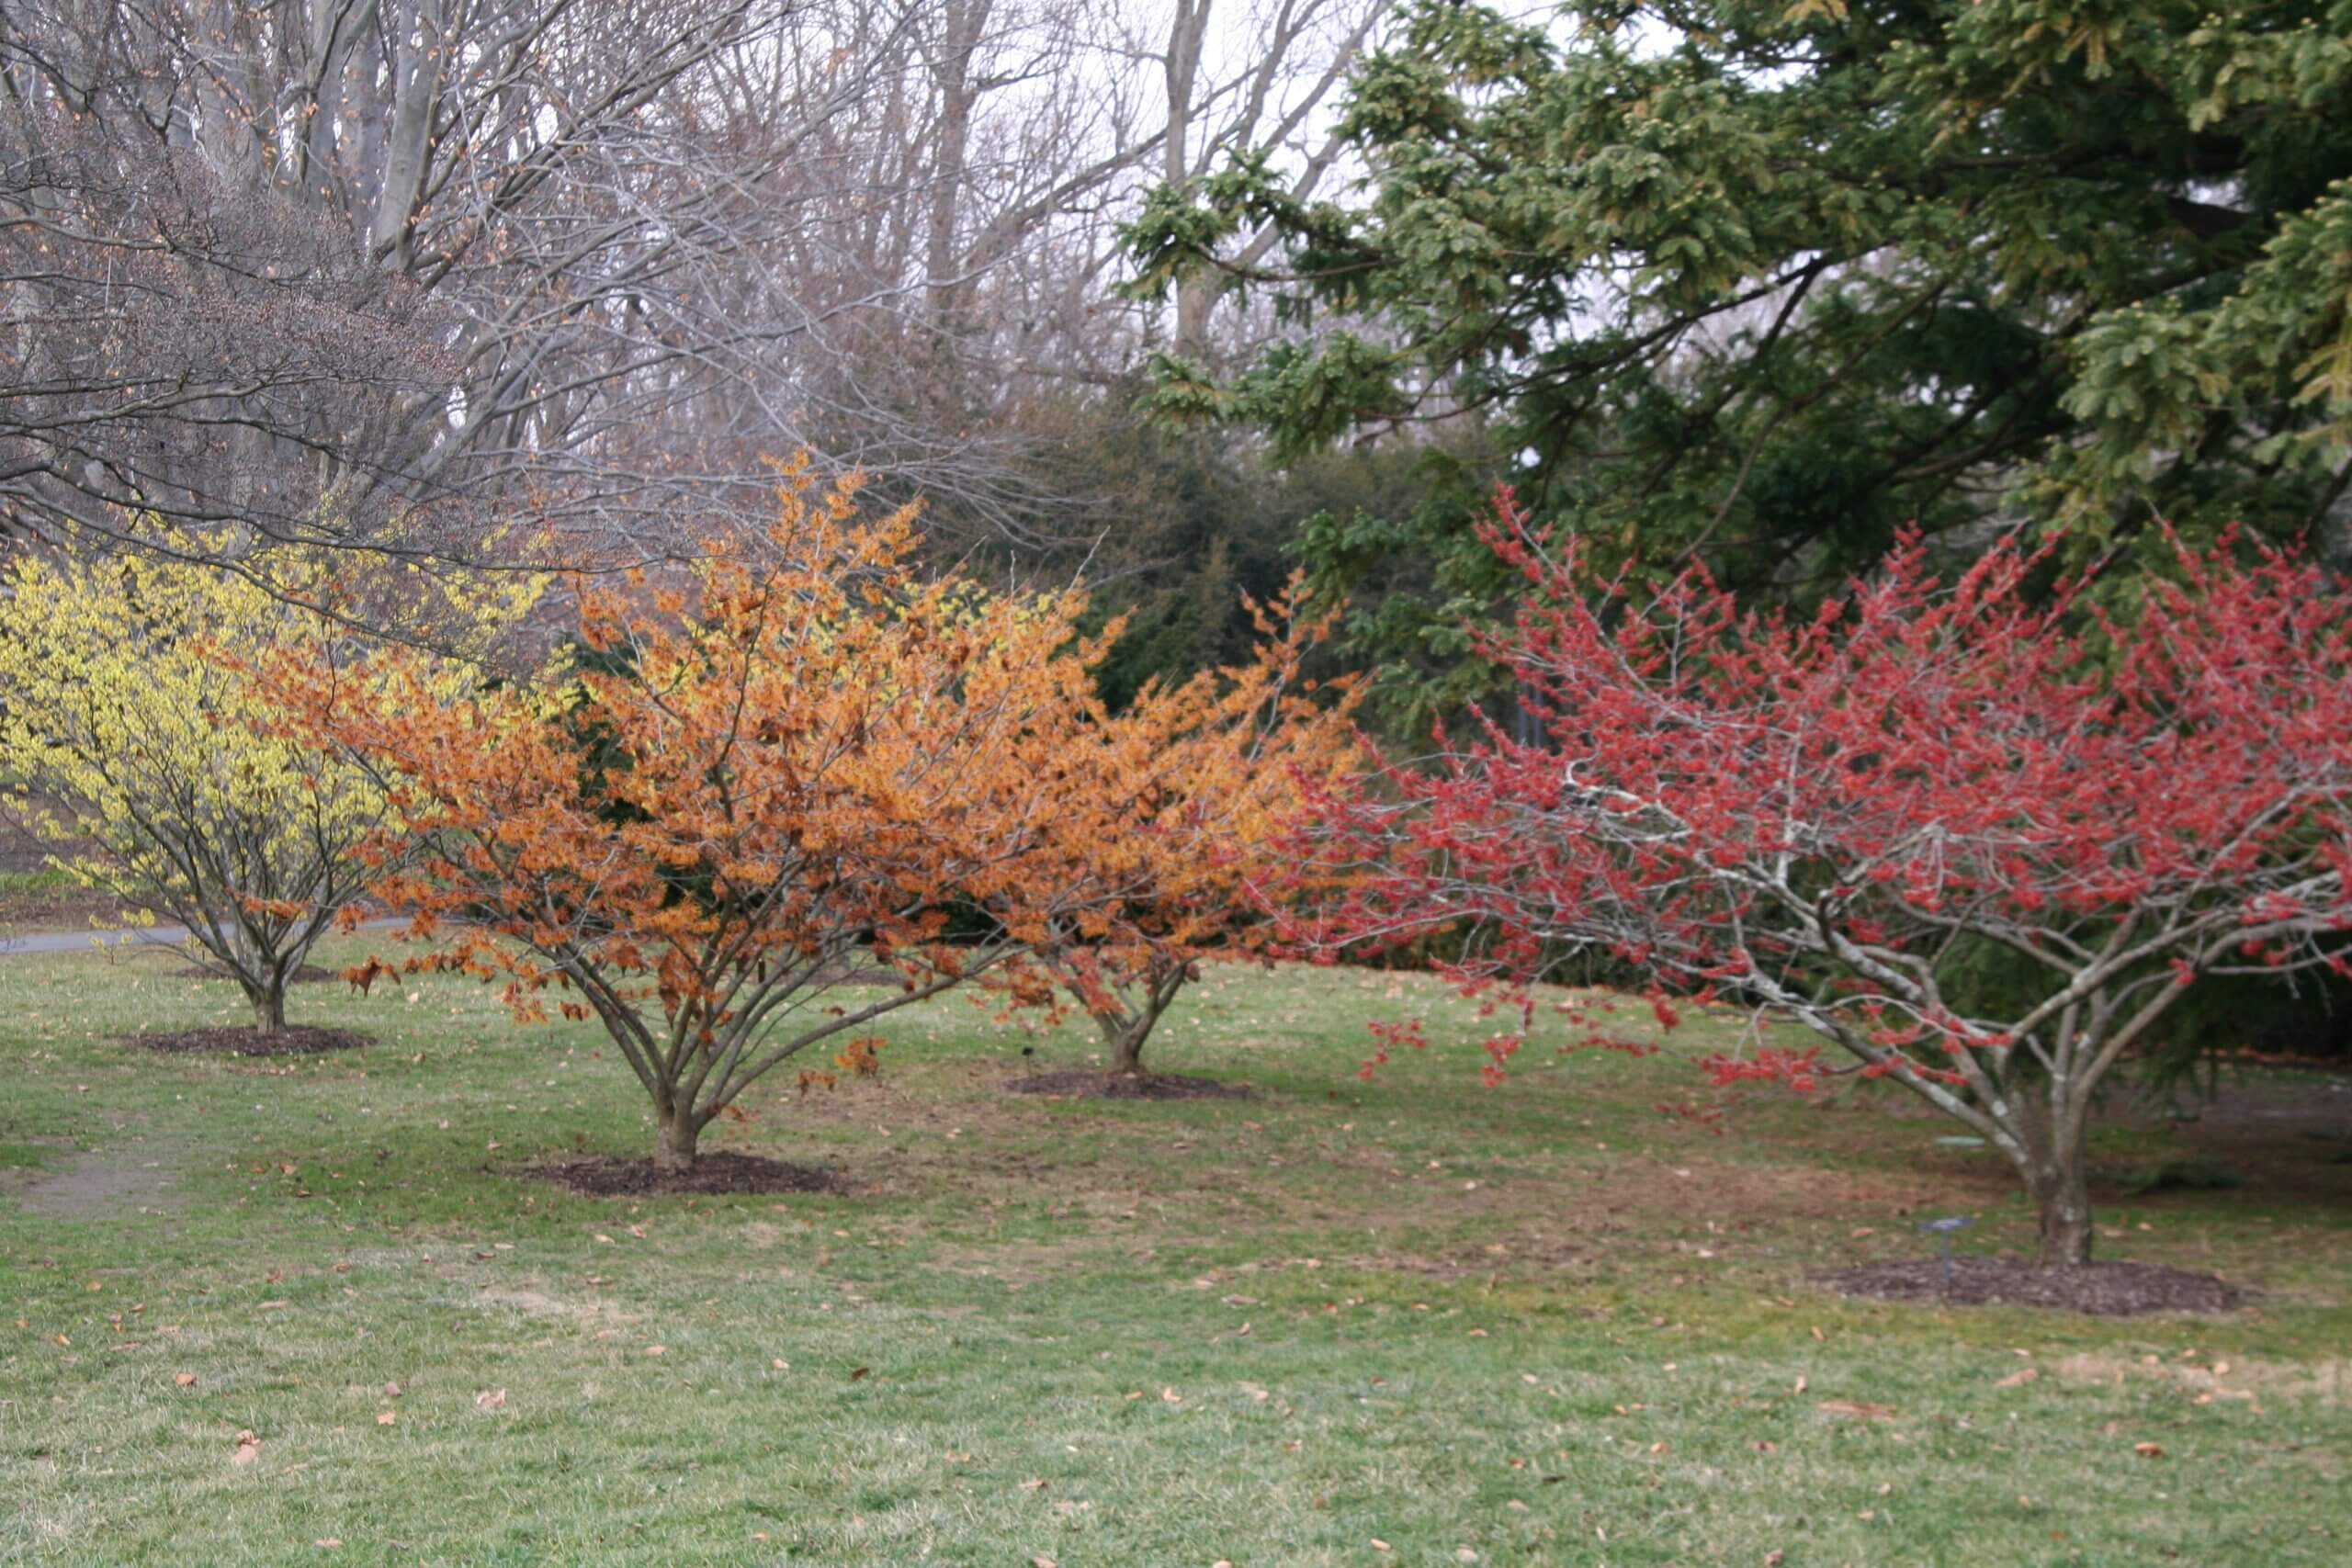
The flowers are fragrant, so consider placing them in an area where their fragrance can be noticed. Bees are attracted to the blooms, making them valuable winter plants for early pollinators. The flowers of some varieties are more fragrant than others, so I suggest going to a garden center when the plants are in bloom and giving them a sniff test. In addition to early flowering and fragrance, most witch hazels have beautiful fall color in shades of red, gold, purple, and orange.
A suite of hybrid witch hazels light up the winter landscape. (Image by Jessie Keith)
Popular cultivars that are probably available at your local garden centers include:
Hamamelis x intermedia ‘Arnold Promise’– January-February bloomer with bright yellow flowers and excellent fall leaf color
Hamamelis x intermedia ‘Jelena’ (syn. ‘Coppery Beauty’) — popular early January bloomer, with coppery orange flowers
Hamamelis x intermedia ‘Diane’ — red flowers in January-February, reddish purple fall foliage
Hamamelis x intermedia ‘Sunburst’ — one of the brightest yellow flowers an any witch hazel
Witch hazel shrubs have pleasing, spreading habits and generally don’t require heavy pruning.
Other Witch Hazels
And now back to the source of the medicinal witch hazel, which is derived from common witch hazel (Hamamelis virginiana). This native plant is found in the eastern United States and was first used for medicinal purposes by Native Americans. The bark and branches are harvested to make the witch hazel that we find in pharmacies. This plant has small, fragrant, yellow flowers that appear in the fall. Sometimes they are obscured by persistent fall leaves that fail to drop before bloom time.
Another eastern native witch hazel for the garden is the Ozark witch hazel (Hamamelis vernalis). Like the hybrids, this is a late-winter bloomer with lovely golden flowers that are fragrant. It also has an appealing, broad habit that looks nice in landscapes. Its golden-orange fall color also adds great appeal.
Those that would like some early winter color and fragrance should consider winter-flowering witch hazels for their landscape or garden. For some summer color, try planting a Clematis at the base of your witch hazel. Train the Clematis to wind through its branches and surprise your neighbors when the flowers appear.
An excellent mail order nursery for Hamamelis is Gossler Farms Nursery, 1200 Weaver Road, Springfield, OR 97478. You can get a copy of their catalog by calling 541/746-3922.
It pays to save six-pack containers from store-bought plants to sow your own seeds. Just be sure to wash the packs before reuse.
The quiet of the January new year is the ideal time to start vegetable garden planning. This is the month of contemplation when you begin to conjure up next year’s crop in all its glorious diversity. Whether it’s just an Earth box or a huge family plot, all vegetable gardens start the same way. Success requires early organization, the ability to assemble exactly what you need, and the ability to time it all to perfection. In fact, it’s much like planning a holiday meal with a half dozen different dishes that all need to be ready at the same time. You need to make lists, shop for all the ingredients, and strategize your space in the oven and stove before bringing everything to the table. Continue reading “5-Step Vegetable Garden Planning”


 Sow the dry seed in winter to get them started, just like wild seed with the spring rains. Choose a light, natural garden soil, such as


 While this may be winter (not official until December 22, but most gardeners would say this is winter), there are so many things we can harvest from our gardens to decorate our homes to help celebrate the holidays. We have had several inches of rain in just the past few days here in western Oregon, with more expected, and this morning as I walked around in my very soggy wet garden I discovered that there was a bounty of materials to chose from.