Articles

Hummingbird Flowers for Hot, Dry Gardens

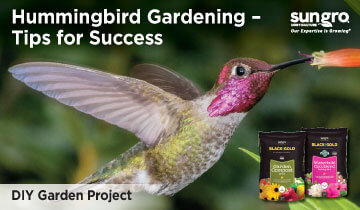
All red flowers draw hummingbirds, and tubular red-flowers make hummers go crazy. The birds recognize familiar species that have co-evolved with them for eons for pollination, with flowers held in such a way that hummers can hover and feed freely during extended nectar flows. Many hummingbird-pollinated species originate in hot, dry parts of the American Southwest and Mexico. These are the plants hummers fight over, guard jealously, and build their nests nearby. (Unless you’ve seen a rufous hummingbird in battle, you don’t know the territorial nature of hummingbirds!)

Hot Hummingbird Flowers

California Fuchsia

California fuchsia is a rufous hummingbird favorite. (Image by Maureen Gilmer)

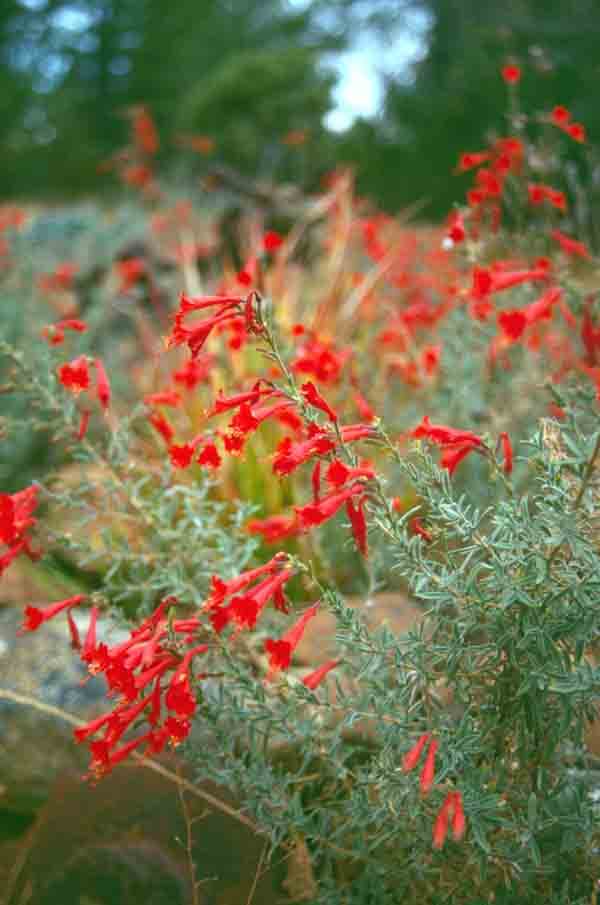
California fuchsia (Zauschneria californica, aka Epilobium canum var. garettii (USDA Hardiness Zones 7-10)), a native from New Mexico to southern Oregon, is one of the finest native hummingbird perennials for hot, dry gardens. Tolerant of full southern exposure and long, late-summer drought, this beauty, with its vivid tubular flowers, thrives in poor, well-drained soils. Hardy and rabbit resistant, this is an ideal plant for rocky outcrops, sloping properties, and perennial cottage gardens. Be sure to give it excellent drainage, and it will thrive.

Firecracker Plant

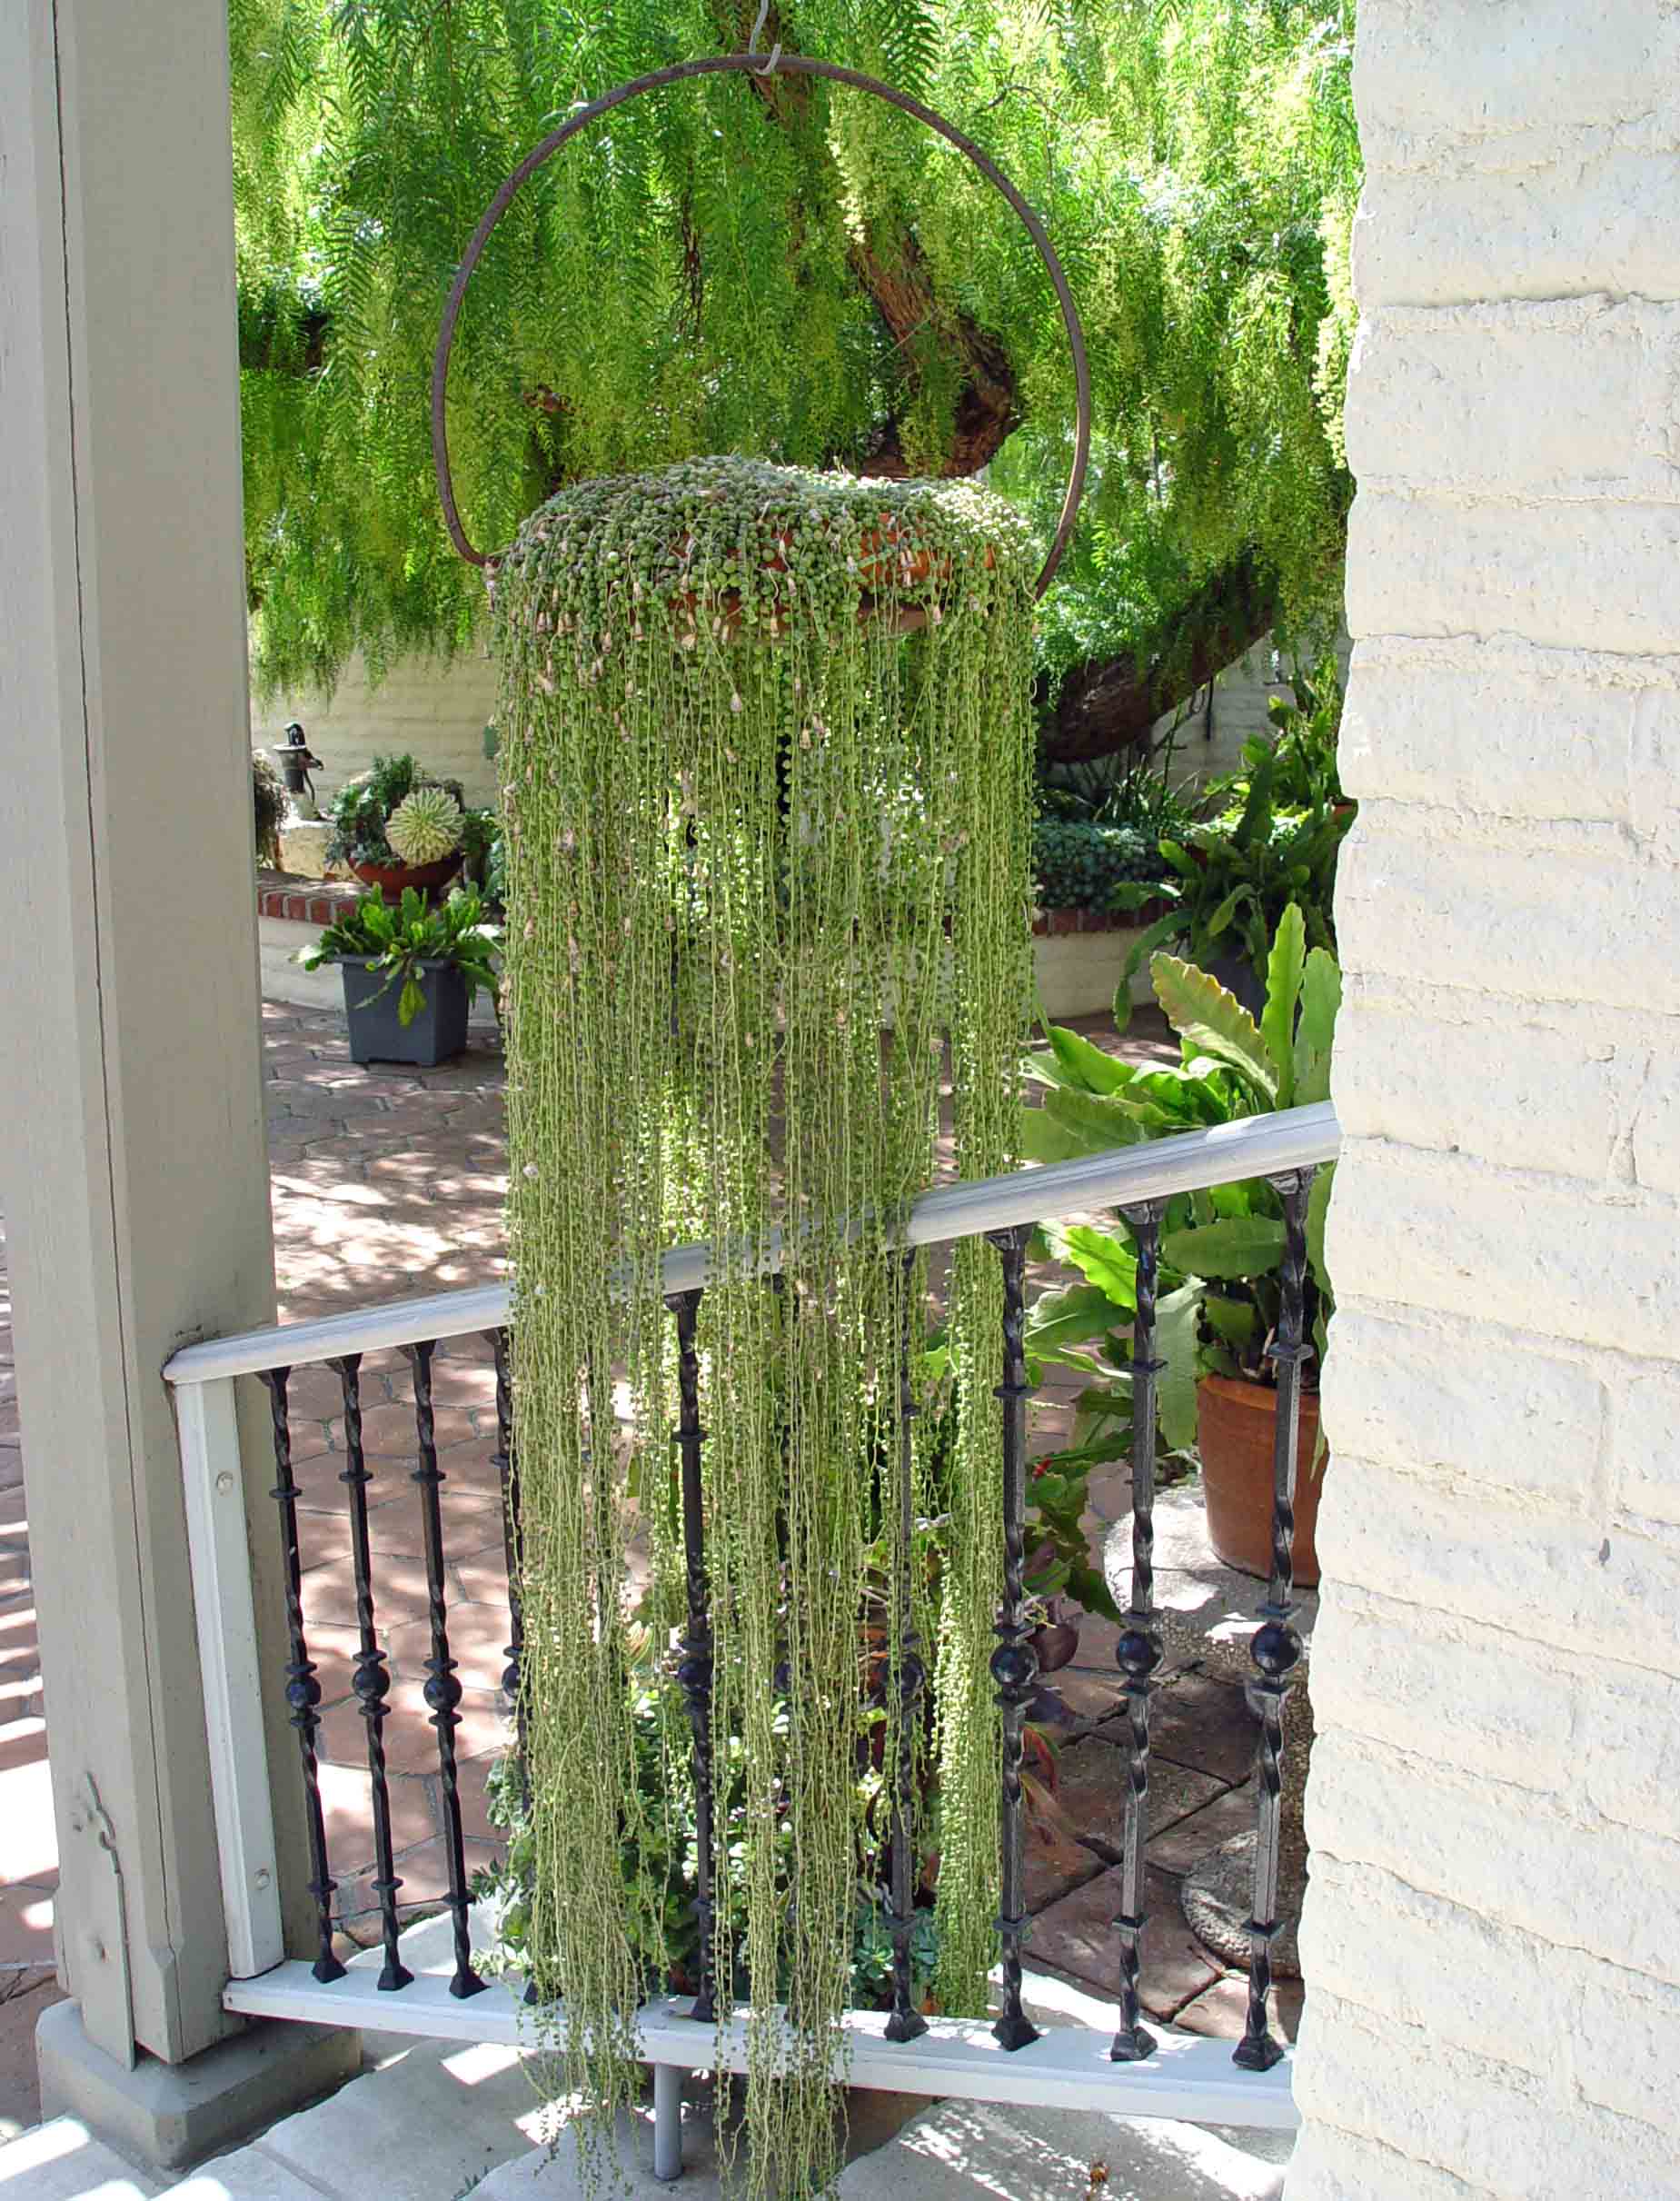
In striking contrast is the best container plant of all for the summertime hummingbird extravaganza, firecracker plant (Russellia equisetiformis (USDA Hardiness Zones 9-11)). It bears bright red tubular flowers on long, slender stems like horsehair. What makes this the perfect weekend-container-project plant is that it’s well-adapted to grow in taller pots. Firecracker plant weeps and cascades, so when you put it in pots, its beauty is revealed.

Firecracker plants arch and dangle freely in containers. (Image by Maureen Gilmer)

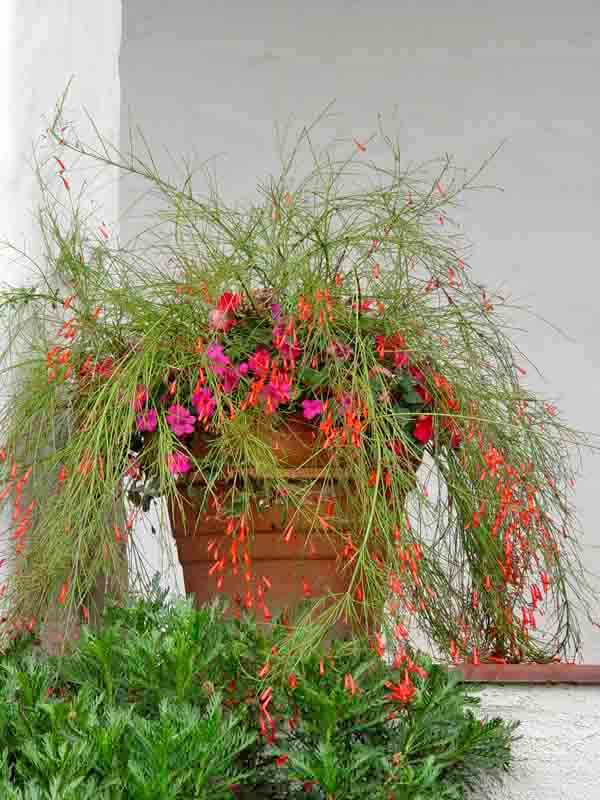
This Mexican perennial has also proved itself in the low desert where it has become a popular landscape plant. When cultivated on slopes or raised beds, the weeping foliage will cascade off the edge. When grown in-ground, the tips sweep the earth and build up internal foliage instead of growing longer.

The fine-textured stems of firecracker plant bloom nonstop until frost. They remain permanent garden fixtures in light or no-frost zones but must be sheltered in pots in colder winter zones. Once recognized by the local hummer population, they’ll return time and again to your patio to feed on this prolific plant. Firecracker plant is now widely available in garden centers. Give it a try this year to bring hummingbirds to your patio every day.

Use these planting tips for success: The most important thing is to find a tall pot that isn’t too big around. Consider knee-height the minimum. For a great contemporary look, choose dark pottery, so the plant appears to float in space as the dangling foliage grows longer. Plant your firecracker in Black Gold All Purpose Potting Mix, but leave at least 2 or 3 inches of the rim at the top. This greater fill space allows for more efficient hand watering.
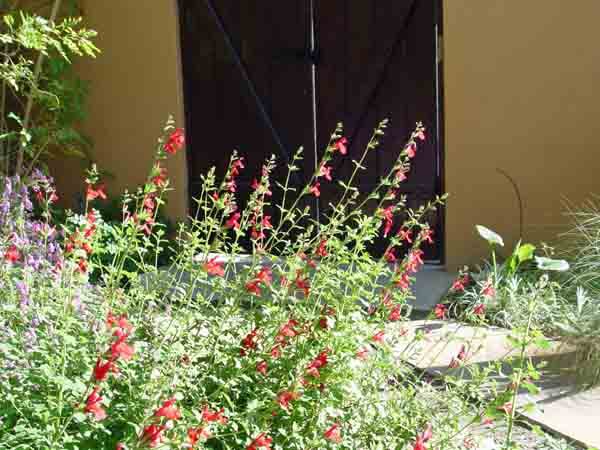
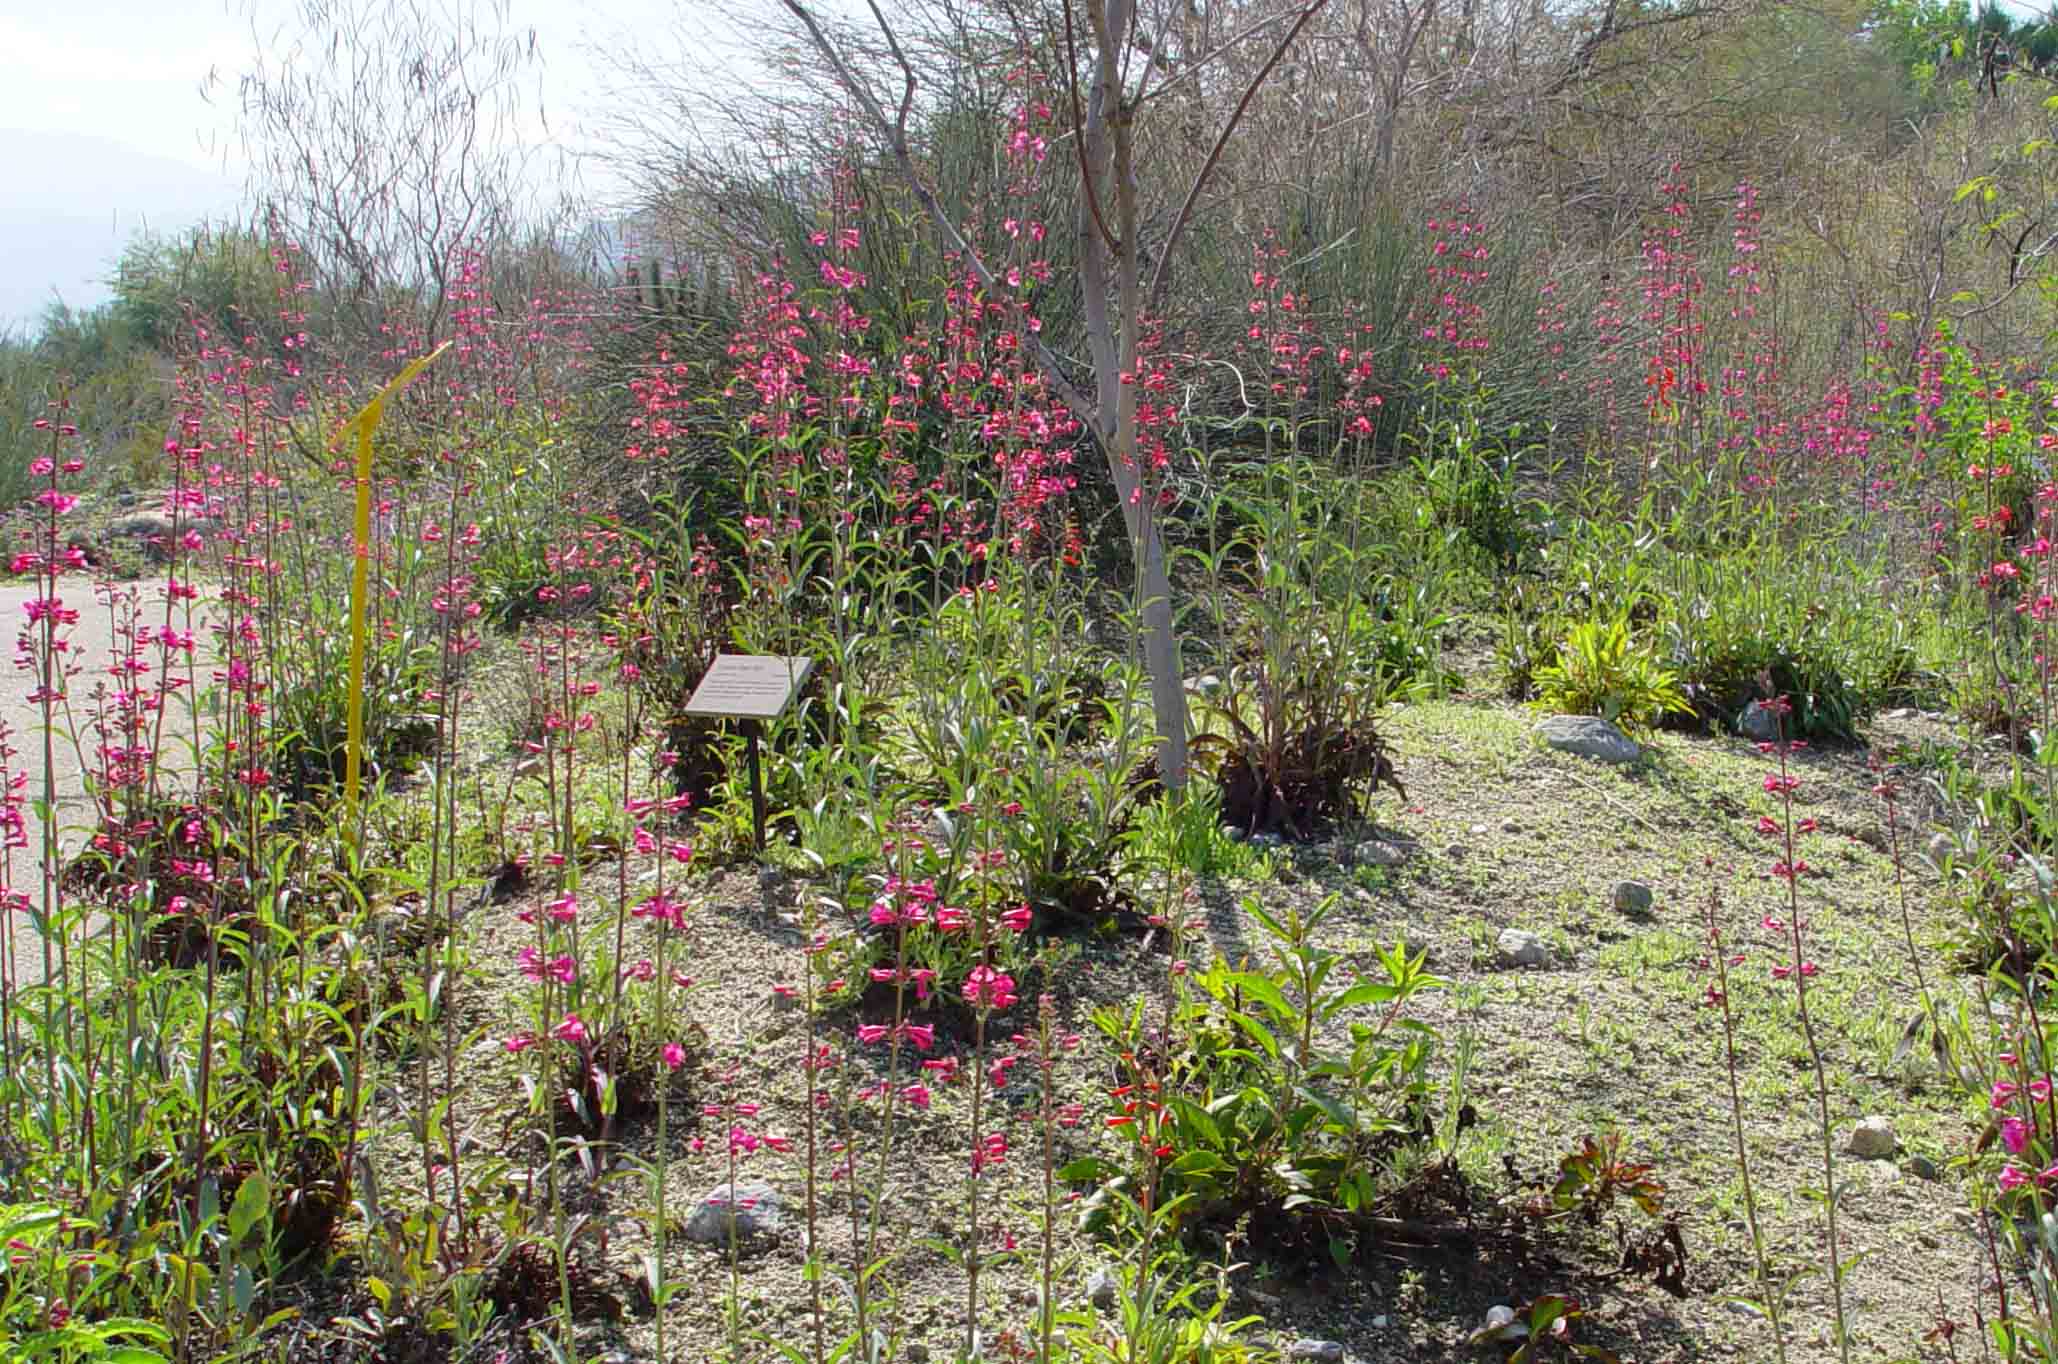
Autumn Sage

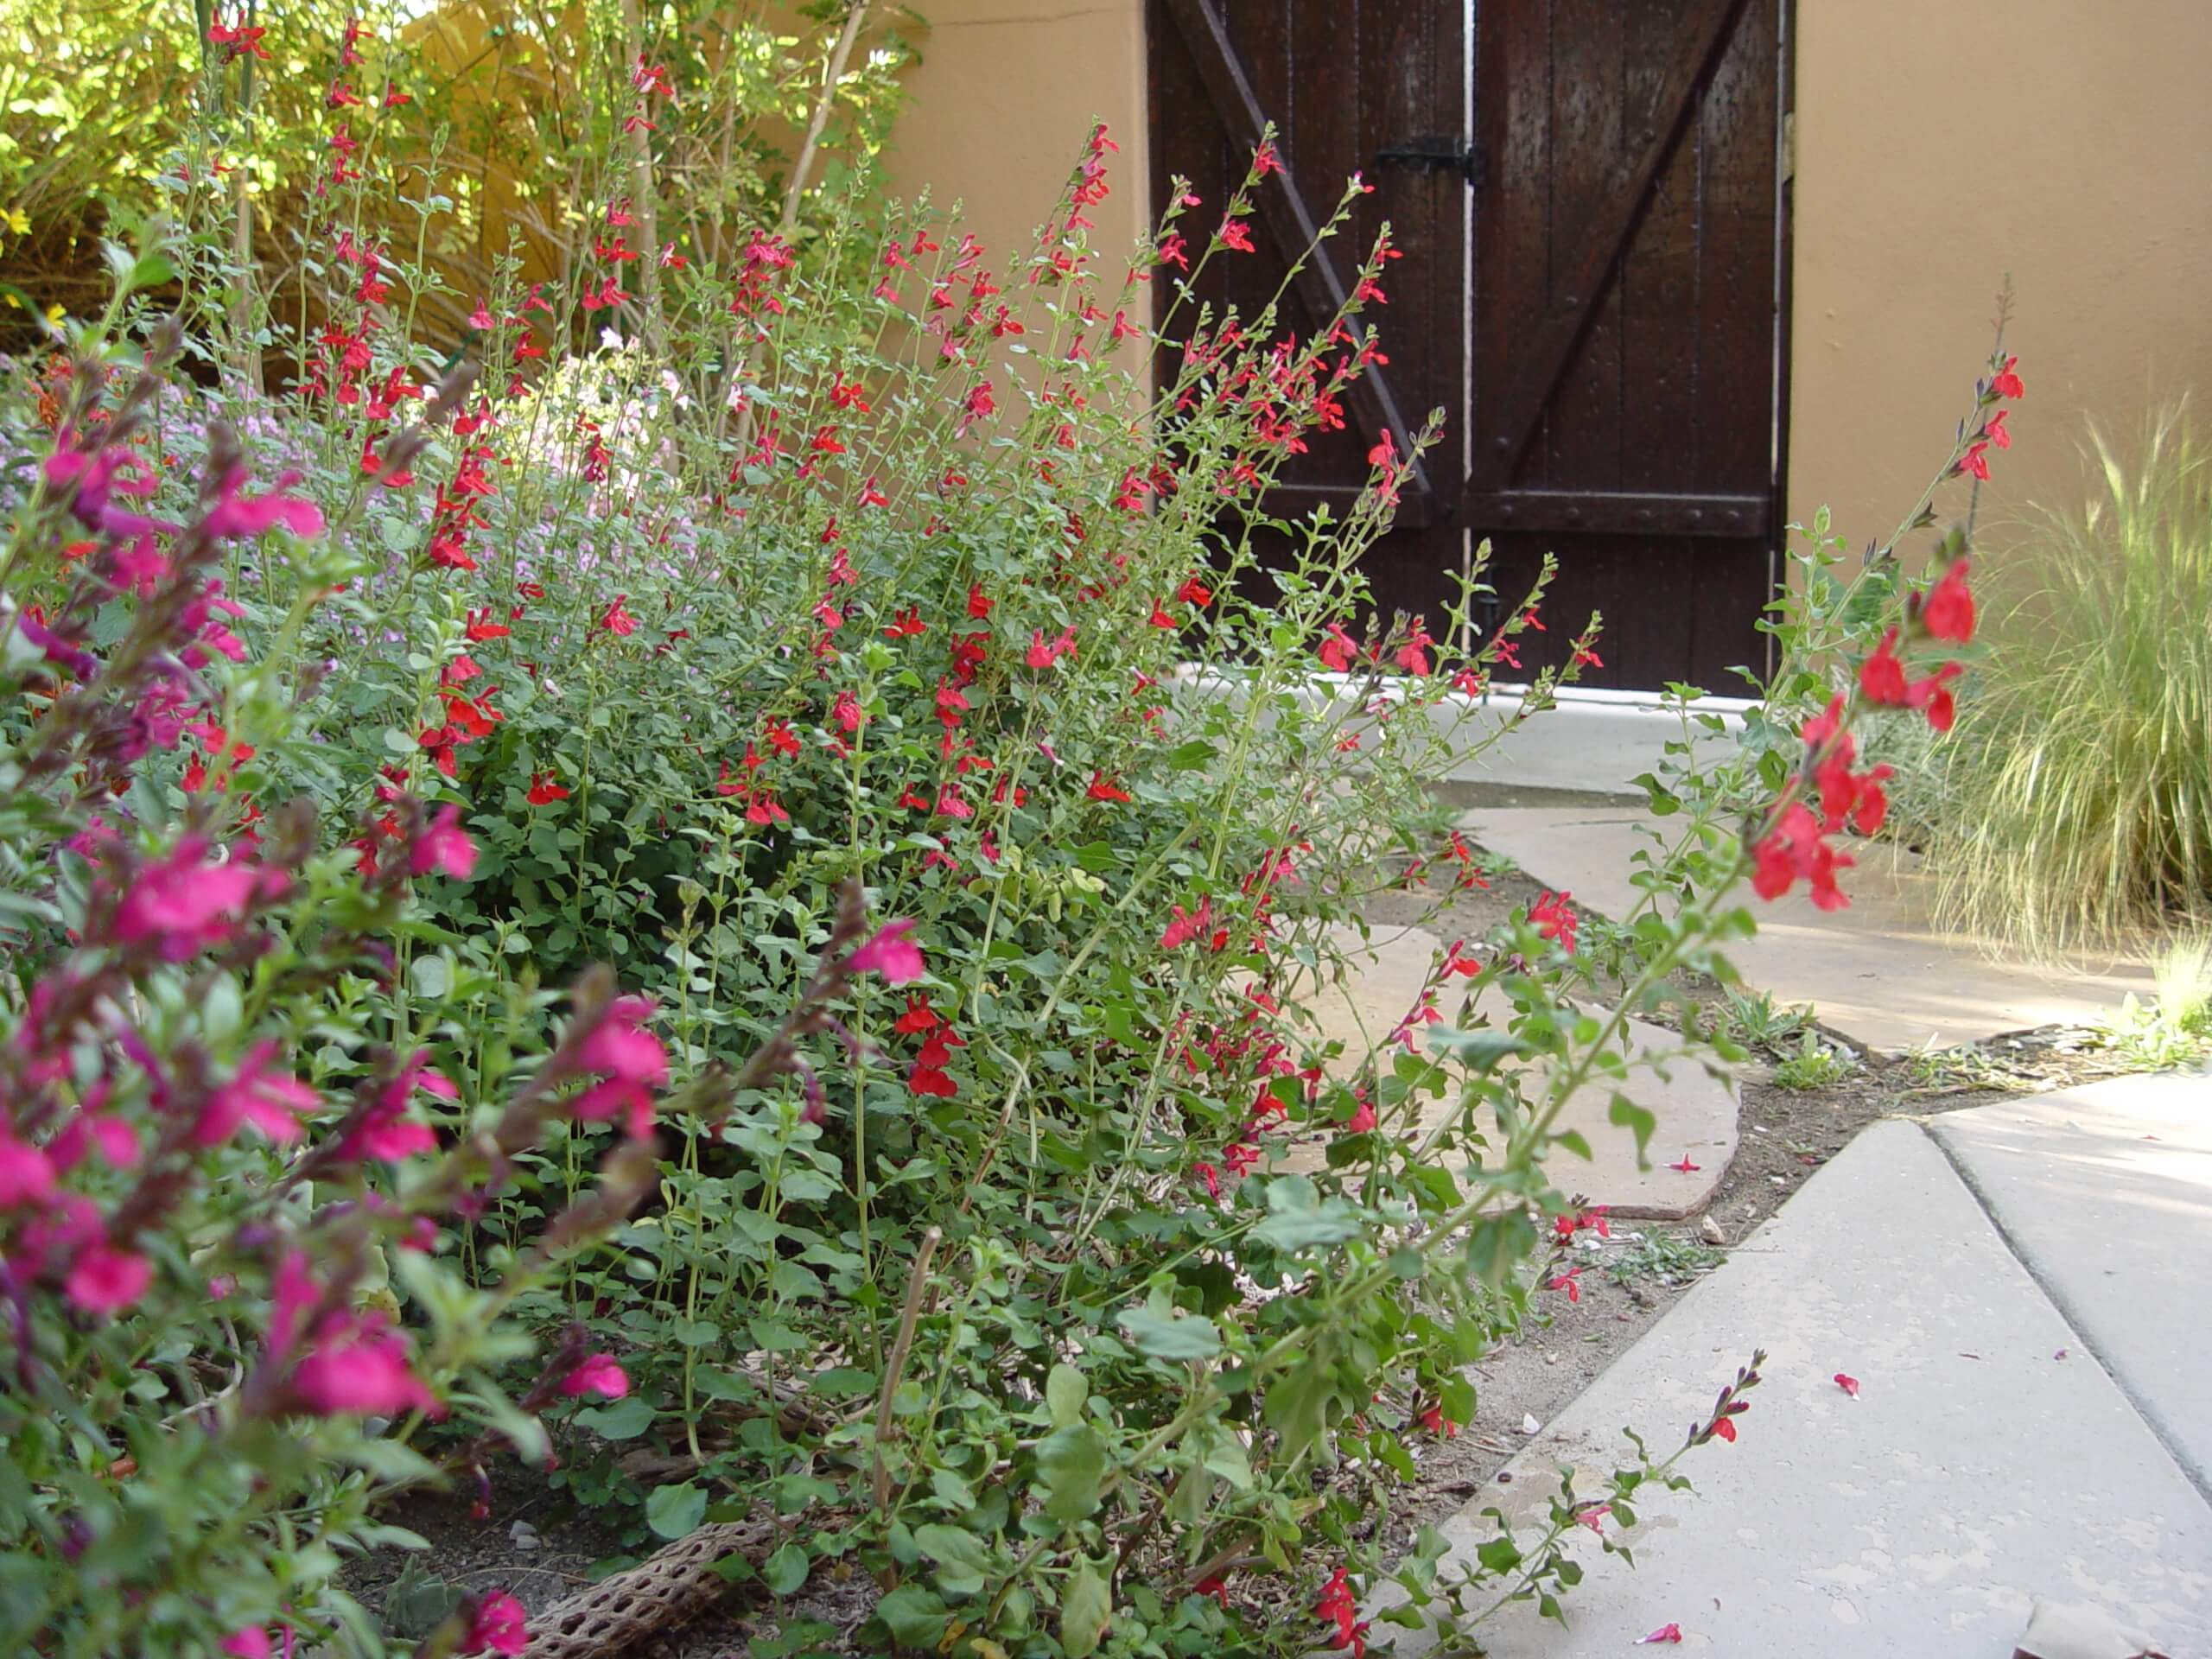
Another arid-zone hummingbird plant that does well throughout the hot, dry west is autumn sage (Salvia greggii (USDA Hardiness Zones 7-10)). It is a super long-blooming, red-flowered native of Texas and Mexico. It’s been bred into many cultivated varieties to add a diversity of hues to your hummer garden. The comparable Southwest native, littleleaf sage (Salvia microphylla (USDA Hardiness Zones 7-10)), has equally lovely flowers, tiny leaves, and many varieties to choose from.

Lantana

A male ruby-throated hummingbird feeds on lantana flowers.

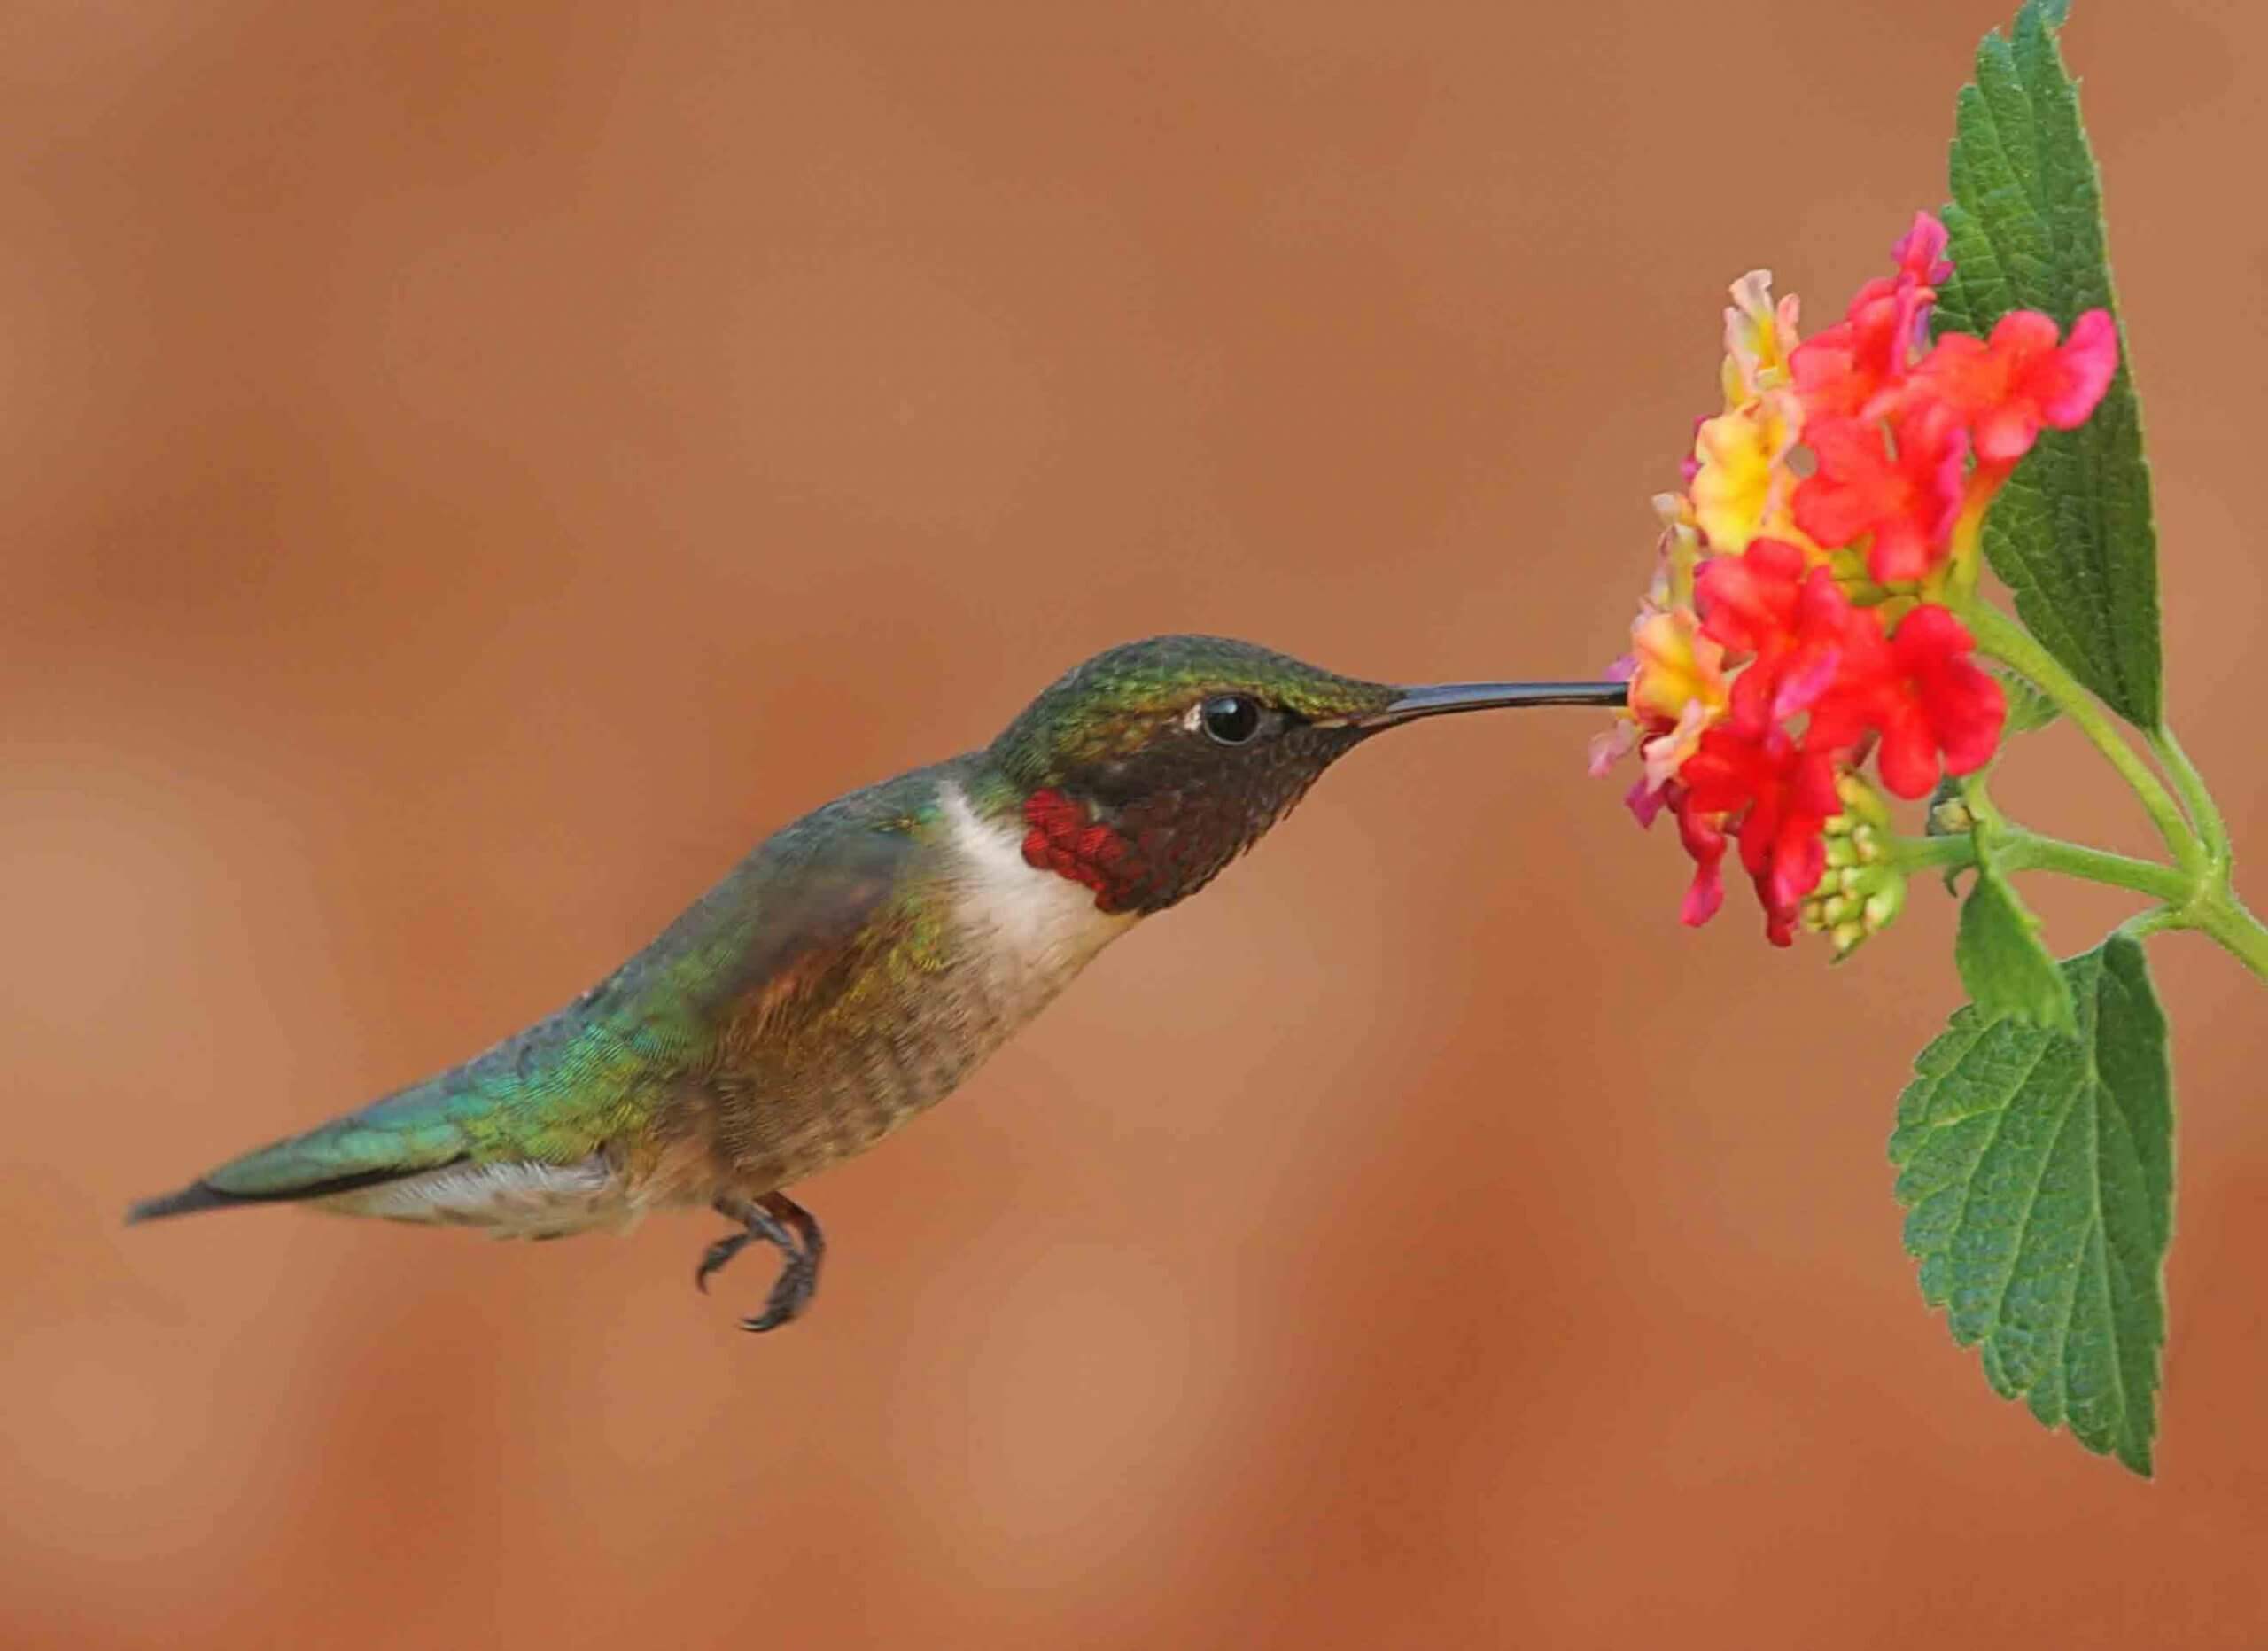
Though technically adapted for butterfly pollination, the flowers of lantana (Lantana camara (USDA Hardiness Zones 10-11)) also lure hummingbirds. Lantana hybrids that are sterile and seedless, such as the pink and ivory ‘Pinkie’ and members of the Patriot series, prevent invasive volunteers and offer some stunning flower colors. Both creeping and upright forms of these shrubby plants are available. Where it’s colder, put them in hanging baskets, so hummers visit at eye level.

Attract hummingbirds naturally by avoiding feeders altogether; they are messy, a hassle, and flower nectar is healthier for these birds. If you plant properly, hummers will come, nest, and return year after year without you having to lift a finger.

Hummers love the red flowers of autumn sage. (Image by Maureen Gilmer)

Fight Fires with Garden Flowers

Cistus ‘Brilliancy’ is a low-fuel-volume shrub with lovely magenta flowers.

You can fight fires with flowers. When landscaping around high-fire-hazard homes, the key is to think about minimizing fire fuel volume, or the amount of burnable material that plants provide to oncoming fire. For example, a pine tree has a huge fuel mass, but a sage plant, with its lovely lavender-blue flowers, has negligible fuel mass.

To further understand the concept of fuel mass, imagine the plant on fire. The overall flame produced is roughly three times the plant’s height; the greater the overall mass and size, the greater the fuel volume. (Chemical composition also play a role in fire susceptibility. For example, creosote bush (Larrea tridentata) contains many resinous, volatile oils that are highly flammable.) This demonstrates the problem with woody trees and shrubs that are taller and have enormous fuel volumes.

Plants for Firescaping

Native penstemons are timed for winter and spring bloom and gone by the fire season. (Maureen Gilmer)

The good news is that annuals, perennials, biennials, and low-growing shrubs are all better landscape candidates for firescaping. Ornamentals below 2-feet in height are better choices for areas with fall or winter fire seasons. Early frosts often cut these plants back, or the heat of late summer makes them listless in the arid West. Many western natives are also fully dormant by fall, an adaptation that allows them to withstand the dry heat and drought of this season. Once the plants have died back, gardeners can cut them back to further reduce fuel mass around the home.

Some flowers are also fire resistant, but are these the best for the arid West? Scientific research has yielded data on plant fire susceptibility and fuel mass with simple testing.  The tests are done by placing plant samples in a furnace and timing how long it takes for them to catch fire and burn. This makes no allowances for weather, wind, and topography, so in a real fire situation, the test results may be deceiving. All plants burn in catastrophic wildfires. The ” fire-resistant” plants may simply ignite a second or two later than non-fire-resistant plants, so gardeners should not worry about just planting fire-resistant plants.

The key is choosing drought-tolerant landscape plants that also have a low fuel volume. What you can grow locally is dictated by your rainfall and winter cold. You must choose plants adapted to your growing region. Every elevation and geographic area will have its own list of suitable native and non-native herbaceous flowers and subshrubs that fulfill both the fuel height and drought requirements.

Select Flowers for Firescaping

Avoid shrubs and plant blooming succulents, like rock purslane. (Maureen Gilmer)

Drought resistant, low-fuel-volume flowering landscape perennials:

Botanical Name          Common Name           USDA Zone            Color

Achillea tomentosa         Wooly Yarrow            3-8                         Yellow

Arctotis hybrids               Cape Daisy               9-11                        Many

Cistanthe grandiflora      Rock Purslane          8-11                        Magenta

Cistus ‘Brilliancy’             Rock Rose               8-11                        Magenta

Penstemon spp.              Penstemon              Varies                      Varies

Rosmarinus ‘Prostratus’ Rosemary                 7-10                        Lavender

Santolina spp.                 Lavender Cotton      6-10                          Yellow

These are just a few select perennials for starters. Any of these will grow best with drip irrigation in the arid West. You might also plant spring bulbs and wildflowers, which are already naturally adapted to survive fire due to their seasonality; they bloom and grow in the low-fire season. Succulents are also recommended because they contain so much water, they rarely burn. In wetter areas, low fuel volume options include bearded iris (Iris hybrids), sea thrift (Armeria maritima), and many other beauties.

To boost flower production in your newly planted low-fuel-volume flowers this year, generously work Black Gold Garden Compost Blend or Just Coir into the soil to increase water holding capacity, drainage, and fertility. This superior growing amendment is also OMRI Listed for organic gardening.

This garden features the best drought-resistant, low-fuel-volume flowers for firescapes. (Maureen Gilmer)

Planting to Reduce Fire

The commonly used term for firescaping, “planting for fire”, is actually an oxymoron. It should be “planting to reduce fire”. The less fuel there is, the safer you are, but homeowners in high fire zones should not be afraid to have beautifully landscaped gardens. Human beings want beautiful home landscapes with diversity and color, so the hyper-safe fuel-free parking lot approach is not appealing to anyone. Instead, think it through yourself, select wisely chosen low-fuel plants, then start flower gardening in your high-fire zone today.

The final caveat is what’s lying on the ground.  Thick leaf litter and duff ignites quickly from embers, then smolders for many days afterward.  So, another key to fire survival is managing the property so these organic accumulations remain thin or absent. You can also reduce unnecessary top growth. Cutting back plants at the start of fire season should be an annual ritual for reducing overall fuel loads.

There are no easy answers to the new wind-driven fires in the American West, and the future is uncertain. What we can do is realize that survival can rest in your landscape. Plant the flowers you love, explore new plant discoveries, and choose anything else with low fuel volume, so you are ready to fight fires after the flowers bloom.

Arctotis ‘Louise’ is a tough, cool-colored perennial that’s good for firescaping.

String of Pearls: Living Beads for Hanging Baskets

String of pearls is delicate yet tough, low maintenance and incredibly rewarding.

They are living jewelry no woman can resist, the most coveted house plant, string of pearls. This tender succulent is feminine looking, delicate yet tough, low maintenance and incredibly rewarding. There are two species that can transform traditional or modern spaces, indoors or out. Hang them like living necklaces to bring awe to your home.

Origins

String of pearls (Image by Maureen Gilmer)

The true string of pearls is a South African native from the maritime Cape of Good Hope, so it loves the humid coast. Dubbed Senecio rowleyanus, its leaves are like tiny grey-green peas on the finest dangling stems. Its cousin from drier inland is Senecio radicans, fondly called “string of bananas” due to its sickle-shaped leaves. These do better in hot inland climates. Both make great house plants.

In the wild, both senecios grow as ground covers that root as they spread, so they rarely look like the hanging beauties we buy from the garden center. Yet, when planted to dangle in hanging baskets or raised pots and placed in a bright room, specimens almost look like living sculptures.

In gardens where winters are mild, these senecios can be grown outside, usually in raised pots or baskets that ensure perfect drainage. Indoors they are equally desirous of porous soils and hanging pots that are shallow and wide. Wide pots allow the ground-hugging plants to generate a lot of surface roots to hold soil tightly against the weight of their hanging strands.

Potting

String of bananas (Image by Maureen Gilmer)

A key to success is rapid drainage in your container. The best hanging pots have many holes in the bottom to ensure plants remain dry at the root zone. When creating your hanging string-of-pearls sculpture, start with the right pot—perhaps a mid-century throwback with a macramé hanger. Once you’ve found it, buy your pearls or bananas and get ‘er done.

You’ll need super well-drained potting soil to keep your plants from becoming too wet. When transplanting to your beautiful hanging pot, Black Gold Cactus Mix offers the ideal porosity. This fast-draining potting soil will make it much harder to over water your string of pearls.

When you get ready to transplant these senecios, study the root ball that comes out of the nursery pot. Gently remove any potting soil that does not have roots on the lower half of the mass. This will allow you to better fit the root ball into your shallow pot.

Set the plant, then lightly backfill with Black Gold Cactus Mix that has not been pre-moistened. If it sifts out of the drain holes, line the bottom with salvaged window screen before planting. Finally, tap the pot to help the plant settle into the potting soil, and wait to water. Allow a day or two for any damaged succulent tissues to callus over before you introduce moisture. This is essential to avoiding potential rot at the soil line.

Watering

When you do water, plug the drain of your kitchen sink, add 2 inches of water, and put the whole pot in the sink.  Let it wick up water until you can see wet soil on top.  This means it’s time to drain the sink. Leave the pot to drain for a few hours before returning it to its hanger. This watering method keeps moisture away from rot-prone stems that are the Achilles heel

A happy string of pearls can reach great lengths. (Image by Maureen Gilmer)

of these delicate succulents. As strands grow longer, be sure to lay them along the counter on the sink’s edge to keep them from getting wet.

A final key to success with all dangling succulents, particularly fine-stemmed ones like these, is avoiding the wind. Continual swaying wears down the stems along the pot edge, causing injury that limits moisture transfer to the stem tips where new growth occurs.

These senecios are easy to root, so if you find one that works well for you, propagate it.  Just take a runner and bend it up to the soil mass on top where it will root on contact quickly. Then sever it from the mother plant to start a whole new living sculpture of favorite pearls or bananas galore, without risk.

Seven Mediterranean Food Plants for the Dry Edible Garden

Pomegranates are common fruits for southern California.

The dry edible garden is rooted in classical civilizations around the Mediterranean Sea. The Greeks, Romans, and Carthaginians shared their ancient local food crops throughout the western world. Some of the best are grapes, pomegranates, date palms, rosemary, artichokes, cardoons, and figs. All are still vital to contemporary agriculture in deserts and dry places around the world and make great choices for arid-zone gardens.

Growing Mediterranean Edibles

Because most of these Mediterranean edibles are not very cold hardy, you need to know their tolerances before trying to grow any outdoors. Further north, grow dwarf varieties in containers that can be brought indoors for the winter. Water-holding, Black Gold Moisture Supreme potting soil is an ideal mix for contained arid food plants.

One potential problem is that some of these plants, such as date palms, need long-term high heat for their fruit to ripen properly. Though fruits might appear in cooler temps, they aren’t nearly as sweet or just won’t fully ripen.

If you live where they are hardy, grapes, pomegranates, date palms, rosemary, artichokes, cardoons, and figs make outstanding landscape plants that thrive despite limited water and high heat. Keep in mind that sufficient irrigation is required, particularly in porous, fast draining soils, if they are to produce quality fruit. Here are additional tips for growing each.

1. 2. Artichokes and Cardoons

Artichokes have naturalized in arid coastal California, proving their adaptability. (Image by Maureen Gilmer)

Out in the garden, the easiest arid vegetables to start with are artichokes and their close relative, cardoon. Both act as ornamental and edible perennials. The artichoke we eat is the flower bud, which should be harvested when buds are full-sized with tight bracts. For a big floral show, leave the buds to mature into huge, purple thistle-like blooms. This plant also bears fabulous lobed grayish foliage that’s exceptional for gray gardens. [Click here to learn more about growing artichokes.]

Cardoons have flavorful stems that can be blanched and eaten. The bold silvery leaves also look great when planted in arid flower gardens, and are followed by large, purplish, thistle-like flowers.

3. Date Palms

Fresh dates on a date palm tree.

Mediterranean date palms (Phoenix dactylifera) reach up to 100-feet and like heat and drought. They are hardy to USDA Zones 8b11, so they can only be grown in the hot and dry American landscapes of Arizona, California, Nevada, Texas, and Florida. Full sun and well-drained dry soil are required for good growth. Male and female flowers exist on separate plants, so at least one male and female plant are needed for cross-pollination and fruit set.

(Editor’s Note: If space is limited, try growing the Southeast Asian pygmy date palm (Phoenix roebelenii), which reaches 8-10 feet, can be container grown, and is hardy to USDA Hardiness Zones 9 to 11. Its dark purplish fruits are thin-skinned but edible.)

4. Figs

Many figs grow well in large containers.

Dwarf forms of fig (Ficus carica) are specially bred for small-space areas. They grow well in containers that are fit for small city gardens or high-density neighborhoods in hot climates. Hardiness depends on the variety. Some are hardy to USDA Zone 6, as is the case with ‘Chicago Hardy’, while most others are hardy to USDA Zones 8-11. Here too, learn if their fruit cycle works locally by checking with your local garden center. You want the plant to thrive in a large patio container during summer, then plan for winter protection strategies. You may need wheels or a good dolly to bring pots indoors.

5. Grapes

The green hose marks the single watering point for this grapevine in the high desert. (Image by Maureen Gilmer)

Common grapes (Vitis vinifera) are amazing vines that provide both extensive shade and an annual crop of fruit grown for fresh eating or winemaking. Grapevine covered ramadas were landscape fixtures in early California and served as the first true “outdoor rooms” in the region.

The beauty of grapes is that they have one stem per plant, making irrigation of single plants easy. Drip irrigation helps sustain vines that survive an average of 30-40 years and become enormous over time, even with pruning. Grapes offer more than fruit; the young leaves are easily canned for homemade stuffed grape leaves (dolmas) from scratch.

6. Pomegranates

Grapes have been cultivated in the Mediterranean since ancient times.

Today’s pomegranate (Punica granatum) trees come in a huge range of sizes, with smaller trees for city yards or larger trees for orchards or spacious landscape plantings.  So long as the local climate is within the cold tolerance range (USDA Hardiness Zones 8-11) and summers are not humid and rainy, pomegranates should thrive.

They grow well in poor, dry, rocky soils, but benefit from soils fortified with organic matter. (Commercial growers know that to achieve the largest juiciest fruits regular moisture and nutrition are needed.)  If the soil drains well, a pomegranate will appreciate added soil amendment.  The best choice is to blend Black Gold Garden Compost into the soil at planting time.  This helps young potted trees transition from potting soil to native soil. [Click here to learn more about growing pomegranates.]

7. Rosemary

A rosemary shrub in flower.

The herb rosemary (Rosmarinus officinalis) is a large evergreen shrub that grows well in arid regions and tolerates intense sun.  It has many uses. Enjoy it as a culinary herb, cut flower, and or essential oil scent. The fresh stems also make great flavored kebob sticks and/or barbecue brushes. Plant potted rosemary in Black Gold potting soil and place on a sunny, west-facing patio or deck.

Quality potting soils with high water-holding capacity are the best choice for growing edible plants with fewer irrigation demands. Good mixes rich in organics hold more water for longer than low-grade potting mixes. That means you can grow more with less water, and harvest fruit and veggies at a fraction of the price of shipped fruit from grocery stores.

Healing the Land after Fire: Post-Fire Planting

Wildfire is ubiquitous in the west but has spread to new areas due to lack of forest thinning.

Wildfire is an equal opportunity killer.  This year it took out multimillion-dollar vineyards in Napa County, CA just as ferociously as it destroyed a lot and block subdivisions in Santa Rosa, CA, neither considered high fire hazard locations (click here for the California Fire Hazard Severity Zone map).  For all of those faced with a burned homesite or blackened land, there is one important thing to do as the winter rains come—stabilize your soils. This can be achieved by several seeding methods.

Aerial Seeding

The US Forest Service flies over newly burned forest land releasing grass seed during the California winter.  It’s to help stabilize the newly exposed soils, so they don’t erode and fill waterways with sediment carried away by runoff.  Seeded plants help to retain as much topsoil as possible by holding the surface layer with a network of roots.  The plants themselves break the fall of raindrops, protecting soil-surface particles from being eroded with runoff.  The result is much faster regeneration of the site in that first winter after a fire and increased revegetation going forward.

Home Seeding

California poppies were sown over a large area on this property to heal over disturbed land.

Post-wildfire seeding by homeowners can be done with any seed mix, but those containing local native grasses and wildflower species will adapt the best.  One seed source for Western states is S & S Seeds, a California company that produces bulk seed mixes for large-scale revegetation projects. Their Chaparral Sage Scrub Mix is a useful blend of native grasses, shrubs, and wildflowers that includes white sage, lupine, California poppy, and buckwheat.  The seeding rate for this mix is 49 pounds per acre.  To estimate how much you need, roughly calculate your square footage and order by the pound (43,560 square feet = 1 acre. To convert square feet to acres divide your property’s square footage area measurement by 43,560).  At $60 per pound, this helps with estimating costs, too. Another recommended S & S mix is the California Native Wildflower mix, which contains all the local flowers to turn your blackened ground into a colorful show come spring!

Pasture Seeding

Large-scale seeding of fire-damaged sites provides vegetative cover to reduce post-fire rain erosion.

For those with farm animals and livestock, most of the non-irrigated pasture mixes of grasses and clovers work quite well, if seeded in the late fall.  These will cover the earth with a nutritious group of plants to transform the black ashy mud that plagues these sites into rich cover.  You’ll be able to graze animals there without any toxic plant concerns.

Large-Scale Seeding

For large-scale applications consider hydroseeding, but for average homesites invest in a paddle spreader ($50), which hangs on your shoulder like a big purse with a crank that flings the seed.  It’s better than wheeled spreaders for seeding ground that is uneven, rocky, or debris covered.  The hand-held spreaders fling seed up to 20 feet on all sides as you walk along, so they’re a good time saver.  Shoulder bag or belly-spreaders are worth buying when sowing more than a half acre. Flingers ensure even distribution of seed, so the entire site blooms evenly.

Preparation and Fertilization

This densely forested canyon will burn, but the native silver lupine on the canyon edge naturally adds nitrogen to the soil, making it a good species for seeding.

Because fire can actually consume the nitrogen, organic matter, and microbes in your soil, be prepared to fertilize the land after the new shoots are up and growing well.  You can use the fling spreader to apply fertilizer granules over a large area, too.  A dose of nitrogen-rich blood meal (12-0-0) or all-purpose lawn and garden fertilizer (16-16-16) will also help your landscape or pasture fill in quickly while you replace landscaping, fences, and livestock pens.

Timing

Timing is important to this process, so you need to have seed and spreader in hand at the start of the rainy season.  Sow your seed as close to the start of the first heavy rain as possible.  Sowing in advance leaves your seed on the barren ground where it’s easily consumed by birds and rodents.  Sow the day before a good rain, and it will work your new seed down into the soil to immediately begin the germination process.

After you sow over your blackened earth, Mother Nature will take over.  Soon, the bright green fuzz will spread across all that black ground.  Then early annual wildflowers will emerge to help you celebrate a new beginning as nature demonstrates how to heal the land with flowers.

Sloped ground is most susceptible to post-fire soil erosion.
Editor’s Footnote: Another option recommended by fire researchers is to stabilize post-fire land with natural erosion barriers made of straw, coconut fibers, and/or jute. These protect the soil from erosion while encouraging the native seeds existing in the soil to naturally sprout when rains come, without competition from non-native species. They believe that native plants existing in an area have a better chance to create long-lasting cover adapted to the area.

Tough Garden Yuccas      

Adam’s needle (Yucca filamentosa) is an adaptable, bold landscape plant!

“This flower was made for the moon, as the Heliotrope is for the sun…and refuses to display her beauty in any other light.”  This lovely Victorian quote, taken from the 1878 edition of Vicks Monthly Magazine, set off a fad for yucca plants.  Though they flower in the sun, their blossoms become fragrant at dusk, releasing a seductive scent to draw their pollinators, yucca moths (Tegeticula and Parategeticula moth species).  Yucca species depend on specific yucca moths for pollination, and yucca moths lay their eggs in yucca flowers where the young feed on some (but not all) of the developing seeds. Both moths and plants need one another for survival.

Growing yucca is a snap if you choose the right one.  With so many species and new varieties available at garden centers, it can be mind-boggling.  The best choices for those in yucca country are locally native species available in outdoor garden centers.  These will be the best adapted to your region and most likely to bloom well.

Central and Eastern Yucca for Landscapes

Moundlily yucca growing in a sandy plain in the American Southeast.

Yuccas may form single clumps, multiple clumps, or be tree-like.  Clump-forming species are more prevalent in the East and Southeast coastal regions.  Common garden-worthy forms include Adam’s needle (Yucca filamentosa), an eastern native that inhabits fields and open woodlands, the southeastern moundlily yucca (Y. gloriosa and Y. gloriosa var. recurvifolia) that inhabits coastal landscapes, and the Central US soapweed yucca (Y. glauca) of the dry plains. Spanish bayonet (Y. aloifolia) is a trunked species that inhabits southeastern coasts. These are more tolerant of regular rainwater and soils with clay, but all require well-drained soil and will withstand drought.

Western Yucca for Landscapes

The beautiful flowers of banana yucca rising from a tough cluster of leaves.

In the arid west, Yucca species are adapted to perpetual wind and nonexistent humidity.  Species such as the clump-forming banana yucca (Y. baccata) and tree-like beaked yucca (Y. thompsoniana) have thicker leaves plus a hard outer skin that make them super desert hardy, but painfully slow growing.  That means these are best purchased as mature specimens because young plants take so long to reach a visible landscape size. Arid yucca prefer south-facing, sloping ground with rapid drainage or naturally porous soils.  That’s why it’s essential to know the origin of any yucca you’re considering, to make sure you get a proper fit with your microclimate.

Landscape yucca of all kinds have been getting a makeover; ordinary green-leaf species are now offered as variegated cultivars that you can buy at garden centers.  These feature brightly striped or blue leaves and compact versions that are ideal for container gardens.  Variegated forms may bring shades of bright gold, ivory, and mint green into the garden for year-round color.

Growing Yucca in Gardens

‘Color Guard’ is a popular variegated Adam’s needle for containers and gardens.

In the landscape, some yucca species develop a trunk-like growth with age, so they get taller with time.  Others spread laterally, producing large clumps around the mother plant.  Since there are so many species in cultivation, the list below identifies the most widely grown and available species for gardens.  Different cultivated varieties may be available at the garden center, and though they may look different, grow them as you would the parent species.

Provide your yuccas with soils that drain well. Sandy or gravelly soil is often preferred, though Adam’s needle can withstand loamy soils. Be sure you know the hardiness of these sun lovers before planting them in the garden. Most landscape species are remarkably cold hardy, but the lack of winter light may be problematic for overall vigor.  Southwestern species cannot withstand winter moisture.

Growing Yucca in Pots

Mature Y. gloriosa var. recurvifolia become tree-like with age.

When growing yucca in a large pot, it’s best to make sure there is optimal flow for drainage.  If you create a small gap between the drain hole and the underlying surface or saucer, the pot will drain more freely.  Take at least 2 pieces of old tile, and slide them under the pot where you can’t see them.  It is important to “gap” the pot with any arid plant grown in containers.

Juvenile yuccas do beautifully in pots.  Plant them in porous Black Gold Cactus Mix instead of ordinary potting soil, so there’s less chance of overwatering them.  Buy a youngster for a cute matching pot to enjoy up close. As it grows, pot it up into larger containers until it becomes a stunning mature patio specimen.

Unlike agaves that bloom once at the end of life, yuccas bloom each year with stalked iridescent sprays of snow-white blossoms.  They shine in the moonlight reflecting light to lure their moth pollinators, so be sure to plant them where you can’t miss the show for full-moon viewing.

List of Common Yucca Species for Gardening

Latin Name Common Name Form US Region Zone
Y. aloifolia Spanish Bayonet Tree-like SE 7-11
Y. baccata Banana Yucca Clumping SW 7-11
Y. filamentosa Adam’s Needle Clumping SE 4-9
Y. gloriosa    Spanish Dagger Tree-like SE 6-11
Y. glauca Soapweed Yucca Clumping C 4-10
Y. thompsoniana
Beaked Yucca Tree-like SW 6-11
Glowing yucca flowers develop a sweet scent at night.

4-Layer Easy Rock Garden Design

Created on a slight incline, this beautiful western rock garden featuring aloes, cacti, and local stones and cobble.

Alpine succulents from the Atlas Mountains flooded into 17th-century England where the climate and soils were totally unsuitable for growing them.  This created a learning curve for English gardeners. Daily summer rains and great soil explains why their gardens are so fabulous, but succulents need high sun, fast draining soil, and occasional watering to thrive. To compensate, English gardeners learned how to build rockeries or rock gardens.

Created along a driveway slot, this layered alpine rock garden shows the adaptability of rockeries to small spaces.

They learned that succulents could survive English winters if the soil was as well drained as a mountain scree.  In the wild, alpine species thrive on mountainsides where elevated natural pockets between the rock keep them high and dry. So, the elevated English rockeries were raised with rock and pebble and created on south-facing inclines. Contemporary rock gardens in the American West use similar techniques, but the plants grown are more tender species from South Africa and Mexico.

American succulent rock gardens are easy to make, sustainable, and demand little water.  Their size can be as small as a rocky trough or cover an entire front yard, but all must be sloped or mounded for increased drainage.  They are easiest to create on a preexisting slope that receives full sun. South-facing slopes are best.

Creating Layered Rock Gardens

Rock gardens are created in four layers.  Allow plenty of time for a thoughtful arrangement of the rocks; placement really matters.  Hand place materials to resemble a natural feature where each stone looks at its best and compliments the plantings. Without careful design and placement, rock gardens can look like rock piles!

Layer 1 – Place Anchors:  Anchors are key boulders and large rocks that are higher than the final garden grade. They provide height, help support smaller stones, and reduce erosion.  Set them within the bed area in a naturalistic, irregular arrangement that’s pleasing to the eye.

Layer 2 – Cobble/Rubble:  Stones on this layer range from slightly larger than your fist to robin’s egg sized.  They can be rounded river rock, cobble, or coarse crushed stone with sharp edges that grab the soil on slopes.  Rounded rock or cobble tends to roll or slide without the structure of supporting anchor stones. Leave gaps between the anchor stones to support and raise the planting layer on top.  Leave deeper pockets for planting larger plants.

Layer 3 – Fill Soil: Pour Black Gold Cactus Mix into all the openings between the cobble/rubble layer. Pack the mix well to avoid washouts.

Layer 4 – Gravel Mulch:   Succulents of all kinds love gravel surface mulch.  It prevents the mix from washing out and reduces slope erosion.  Its addition will result in conditions ideal for both tender and hardy succulents as well as small arid grasses and perennials.

Keep Planting!

A rock garden isn’t static; it’s always changing.  Alpine Sedum will spread into crevices and along stones to create vivid mats of color.  Bright Sempervivum will send up their tall blossoms in late spring.  Gorgeous Echeveria hybrids will prove to be the perfect accent plants for hot summer weather.

Over time, rock garden soils will settle and gravel will erode, but that’s okay.  It’s a natural process.  When soil layers become too thin, add more Black Gold Cactus Mix.  To slow erosion as you add the mix, loosen the soil at the bottom, incorporate the mix, and cover with fresh gravel mulch. If you want to create new planting pockets, just remove some small- to medium-sized rocks, dig a new hole, and add fresh mix.

Locally mined stone is more affordable due to the short hauling distance.  Visit a local rock yard and take a good look at what’s available in your area before you start your rock garden. Visualize what you want, determine the garden’s area and plantings, order the rock, succulents, and bags of Black Gold Cactus Mix, and you’re on your way to a fabulous new succulent rock garden!

Gravel mulch holds soil and is the perfect cover for arid grasses and perennials. (by Jessie Keith)

Get an Edge on Porous Paving

Short, dense perennials are the ultimate edge plants to tidy up after repairs to eroding edges.

Artists learn early on that the most important parts of a line are the beginning and end points.  The quality of the start and end define the line’s value. No matter how light the line weight is between the two points, the line continuum will stay intact because the viewer will naturally extrapolate by filling in a missing or faint center.

This essential working element of design also applies to gardens and landscapes, with garden edges setting the lines that define the flow and focal points of a given space. But, smart landscape and garden designers also consider the functionality of garden edges.

Path and Patio Edge Problems


“New” porous patios and paths have become popular because they facilitate ground drainage, but they can also have hidden design flaws. The trend to design patios that enhance drainage has placed emphasis on the patios rather than the gardens that frame them.  The truth is that the most important part of a garden composition is how well the planting line meets a gravel, flagstone, or paver area.  A close edge planting is often omitted in porous paving plantings, which leads to erosion and disrupts the visual flow of the design, causing structural and visual disarray for everyone to see.

Every time it rains, particles will flow onto the flagstone and into the pool beyond.

Unplanted edges and paving gaps are subject to tremendous erosion caused by hard rains powerful enough to dislodge gravel and surface soil particles.  The porous fill flows away with runoff and settles out on low ground.  The greater the impact of each raindrop, the more soil is lost, creating washout spots, gaps, and hidden cavities under stones.  Erosive rains can also undercut the units or frames that hold edging stones in place, creating a double-foot-traffic hazard for tripping.

Once porous paving starts having these problems, impacted plantings may fail to thrive or die, and your pavers may become loose and unsteady.  Gravel has traveled and thinned at the edges.  Low muddy spots have become a mess and hazard.  Getting that patio created was just half the battle.  What they didn’t tell you is that unlike solid paving (lay it and forget it), porous paving requires well-planted edges and a little more maintenance.

Plant Your Edges!


Planting low plants like thyme among pavers can also reduce erosion and add to the beauty of a porous patio.

Use the mild fall weather to rehabilitate your porous patio and path edges with beautiful plantings that control erosion. Here’s the process:

  1. Fill low edge spots and pack cavities below pavers or flagstones with natural soil blended with 20 percent Black Gold Garden Soil. Shoot for a soil level at least 1 inch below the top surface of your stones to keep them high and dry.
  2. Regrade all peripheral soil beyond the garden edges, so it’s not draining back onto the patio when you water. Reset any pavers or flagstones that have shifted or tilted.
  3. Set your plants along the edges in pleasing designs that consider height and flowering time as well as cultural needs. Choose dense edge plants to hold the soil in place where it has washed out before. Enrich planting holes with more Black Gold Garden Soil to encourage quicker establishment of plants.
  4. Apply gravel, attractive rock, or dense organic mulch over the top of any exposed soil after planting. This protects against future surface erosion every time it rains.

Edge plantings slow runoff to limit erosion along and below the most vulnerable, outermost paving materials.  Their established roots also reduce gravel creep.  The right plants for this scenario are low and dense, deep-rooted, and hardy.  They should be selected for the exposure of your garden space, be it sun or shade.  Most of all, avoid short-lived, easily damaged species, or those with spines and thorns – all unsuitable for this condition.

Once your garden plantings around your porous patio are dense enough, they will protect it from washout, whether the porous material is recycled antique brick mosaic or pea gravel.  Just remember, when it comes to porous paving, begin with the edges, and the rest will take care of itself.


“Nest” perennial plantings along the edge to hold soil and gravel and reduce erosion.

Cultivate Beneficial Insects in the Garden

Ladybug adults and larvae (orange and black) waging war on black aphids!

Your garden is a battlefield with more life and death drama than the Serengeti during wildlife migrations.  Among your beautiful plants and flowers, there is that age-old war playing out every day as the insect world fights over who eats what.  Some insects are pests that eat your plants – they are garden prey.  Other insects are there to eat the plant pests – they are the predators.  Your goal is to provide the perfect environment for predators to thrive to help keep insect pest populations under control.

Where to Find Garden Pests

Whiteflies are common pests consumed by beneficial insects. (Image by Jessie Keith)

New gardeners need to know this: plant pests, such as white flies, aphids and mites,  show up on the weakest plants first.  When a plant’s natural resistance starts to fail, it sends out stress hormones that attract the pests that feed on them, so always study stressed plants to get a real pest assessment. On the upside, stressed plants also produce stress compounds that attract the beneficial insects that consume these pests, which is why it’s smart to hold off on the pesticides.

All too often the response to finding pests on your plants is to spray everything in sight with botanical pesticides to stop the spread.  Sadly, there are often beneficial troops in the field, such as ladybugs, that will get killed, too. Spray should always be a last resort. The best solution is to either give the plant extra care to help it fight off pests. You can also remove badly infested stems or whole plants entirely, to quickly relieve pests from your garden.  This decision is up to you, commander and chief, but identifying your garden’s beneficials will help you get to know them, so you can protect them.

Beneficial Insects

Baby praying mantids are smaller than a fingernail.

Praying mantids:  Easy to spot due to their folded, prayer-like front pincers, praying mantids are large and fearless. These champion bug eaters are a gardener’s palace guard.  They consume a great number of insects, particularly larvae which cause rapid, serious damage.  You’ll find mantid egg cases (which look like they are made of builder’s foam) on bark, stems, fences, and walls, so don’t disturb them.  New mantids will hatch as nymphs; tiny identical copies of their parents.

Ladybug adults are cute, which is why everyone loves them! (Image by Jessie Keith)

Ladybugs:  These are our best bugs for teaching the kids about insect pests and beneficials because ladybugs are cute, not scary. You can always find ladybugs in thriving, insecticide-free gardens. Wherever there are aphids you will find these spotted red beetles and their weird looking larvae. The larvae are the hungriest, eating loads of aphids at a go, but this is also the stage when they are most vulnerable to pyrethrins and other pesticides.

Lacewings:  These delicate transparent insects are voracious feeders that travel from plant to plant gobbling up pests, such as aphids, mites, whiteflies, mealybugs, and thrips.  They’re universally present, like ladybugs, in diverse gardens where there are no chemicals to limit their numbers. Lacewings have long been used for the control of whiteflies in greenhouses, and they do lots of good outdoors too.

Many spider species dwell in the garden.

Garden spiders:  Most folks are naturally afraid of spiders, but in the garden, these predators are at the top of the list when it comes to attacking pests.  There are many types of garden spiders, which cast a wide net to catch prey on the wing or as they move from plant to plant. Even though they may catch the occasional pollinator, they do far more good than damage.

Heavy artillery:  Though not insect predators, the heavy bombers of your garden are birds in the daytime and bats at night.  Bats are vital to consuming tomato hornworm moths, and a single bat can eat up to 600 mosquitoes a night, which benefits everyone.

Quick List of Common Garden Pests

A praying mantid laying in wait for its next meal. (Image by Jessie Keith)

Aphids: These sucking insects attach many flower and vegetable plants, and populations can get out of control fast without the help of beneficials. Their natural predators include ladybugs and lacewings.

Mealybugs: White mealybugs crawl along plant stems and leaves sucking out their juices and doing a lot of damage fast. They particularly like stem crevices. Natural predators include ladybugs, lacewings, and the mealybug destroyer (Cryptolaemus montrouzieri).

Spider Mites: Tiny spider mites populate quickly and suck juices from below the leaves of plants. The beetles and larvae of the all-black spider mite destroyer ladybug (Stethorus picipes) will do serious damage to populations. Standard ladybugs will also eat them.

Thrips: These tiny sucking insects damage the leaves and flowers of many garden plants. Ladybugs and lacewings are two of their biggest natural predators.

Whiteflies: Ladybugs and lacewings will attack the clouds of small whiteflies that feed on the leaves of many garden flowers and veggies.

Leafhoppers: Fast-moving leafhoppers suck the juices from plant leaves and spread viral diseases along the way. Ladybugs and lacewings will help keep them under control.

Assorted larvae: The larvae of many pesky beetles and moths will chew on lots of favorite garden vegetables and flowers. Predators include praying mantids, lacewings, and ladybugs. Birds and bats will also feed on them.

Building Insect Armies

Tomato hornworms are large enough for a praying mantid to devour.

Your first protective step should be to give your plants good care to keep them strong and vigorous! Do not draw your sword to kill a fly, as the Korean saying goes.  Build your armies instead by tending your plants. Use quality Black Gold potting soil and amendments to help keep plants vigorous and further support the age-old secret war of the garden.  Manage pest populations naturally, by removing badly infested stems and plants. Do this and you’ve become a partner of your garden predator protectors who will return the favor, just as beloved watchdogs protect homes at night.


Plant a Cactus Fruit Garden

Prickly pear fruits are tangy and often deep red. (Opuntia ficus-indica shown)

Cactus fruits are forgotten staples of hot climates where they ripen quickly with very high sugar content.  Fruits are cooked down into syrups, squeezed into icy drinks, made into jam, or eaten fresh after peeling.  These native fruits of the American Southwest and Mexico are both a staple and survival food, depending on the quality of the fruit.

All over Mexico, the wild summer cactus fruit harvest is ongoing every year.  Flowers of spring mature into huge fruits savored by both humans and birds alike.  From Native American gatherings to haute fresh cuisine, the right kinds of cactus in your western garden yields these same fruits, too.

Fruiting cactus for gardens can be divided into three basic groups, prickly pear, apple cactus, and vine cactus.  Prickly pears (Opuntia spp.) exist across the Americans with many cold hardy North American species.  The Peruvian apple (Cereus repandus) and dragon fruit (Hylocereus spp.) are from South America are best grown in frost-free climates.   All of these produce fabulously large or brightly colored spring flowers, as well as delicious fruits and are very ornamental edibles.


Prickly Pear


Large prickly pears make large fruit that’s ideal for making summer jams and jellies.

The prickly pears offer some of the most colorful and prolific species bearing bright fruits on colorful paddles. They have cast iron constitutions and many are hardy.  The larger the fruit produced by a particular plant, the better it is for eating. These fruits are called pears or “tunas” in Mexico.  They are very spiny and difficult to both pick and peel.  Tunas must be handled with tongs, then their small spines (called glochids) rubbed off in sand or burned with a hand torch before peeling.  Eat fresh or cook them down into syrup for recipes.  Their seeds are BB sized.  Buy prickly pears in summer with fruit forming to find the best plants for eating.  North American species can be quite cold hardy, particularly our many native species from western states, and the eastern devil’s tongue (O. humifusa).


Apple Cactus


Smooth-skinned fruit makes apple cactus the favorite where winters are mild.

Cereus repandus is a very popular tall branching cactus well established in southern California and across the Southwest.  A Peruvian species, it was chosen as the orchard cactus for Israeli farms due to its large, spineless fruit with orange-red skin and snow white flesh.  Vigorous and easy to propagate from cuttings, this cactus is adaptable to heavier soils than most. Smooth skin makes ripe fruits popular with birds, if not picked promptly.


Dragon Fruit


Dragon fruit (Hylocereus spp.) are colorful, delicious fruits borne from vines.

Dragon fruit (Hylocereus spp.) are fabulous supermarket fruits borne from vines.  They make famous hedges in  Hawaiian landscapes but are being rediscovered as arid fruits for small spaces in other warm-climate areas with mild winters.  Vines don’t ask for much ground to produce a lot of stems, flowers, and fruits on a fence, wall, trellis, or arbor.  This makes them ideal for hot and humid, coastal conditions, or sheltered areas with more moisture in the desert.  Vine cactus are night bloomers that are pollinated by bats in the night and remain open in the early morning for bees to pollinate until breakfast time.

Cactus Soils

When grown in-ground, amend the soil for cactus to speed drainage.  The crown, where the root meets stem on these cacti, is the vulnerable part, so be sure to keep soils here as sandy and light as you can.  Consider using Black Gold Just Coir to mix into heavy arid soils at planting time because it enhances drainage and resists decomposition. Unlike white perlite, which visually contaminates natural soil, coir offers more pathways for holding water and providing air pockets.

Grow container cactus in Black Gold Cactus Mix.  Above all, make sure the drain holes in the container are numerous, large, and free-flowing.  This is because moisture accumulation in the bottom of the pot will fill air pockets and cause root rot.  It also helps reduce the chance of over watering, particularly when there is occasional summer rain.

All these cacti are easy for everyone to grow.  Spend your summer shopping for plants while they’re still showing their fruits.  Bring them home to create an atypical approach to summer-fresh fruit growing, with little to no extra water required.

Both the vine and apple cactus bear white-fleshed fruit with crunchy seeds.