Articles

Western Invasive Plants: Battling Ultimate Survivors

Star thistle is one of the worst of all western weeds.

The empire of plants is expansionist and certainly colonial. Immigrant plants are designed by nature to be incredibly self-sustaining through droughts, floods, and wildfires in their place of nativity, and beyond.  They must be able to survive Earth-shattering asteroids and volcanoes without becoming extinct.  The most competitive immigrants are from droughty climates where it takes hardcore adaptability to survive.  Put them in more genteel circumstances, and they not only hang around but start an aggressive expansion into new territory.

These invasives freak out ecologists and botanists who like their plants segregated into long-established, ecologically harmonious North American native plant communities. But, the landscape has changed. The nature of colonization is more like the Oklahoma Land Rush, with expansionist plants trying to find a place to put down roots, often with displacing effects.

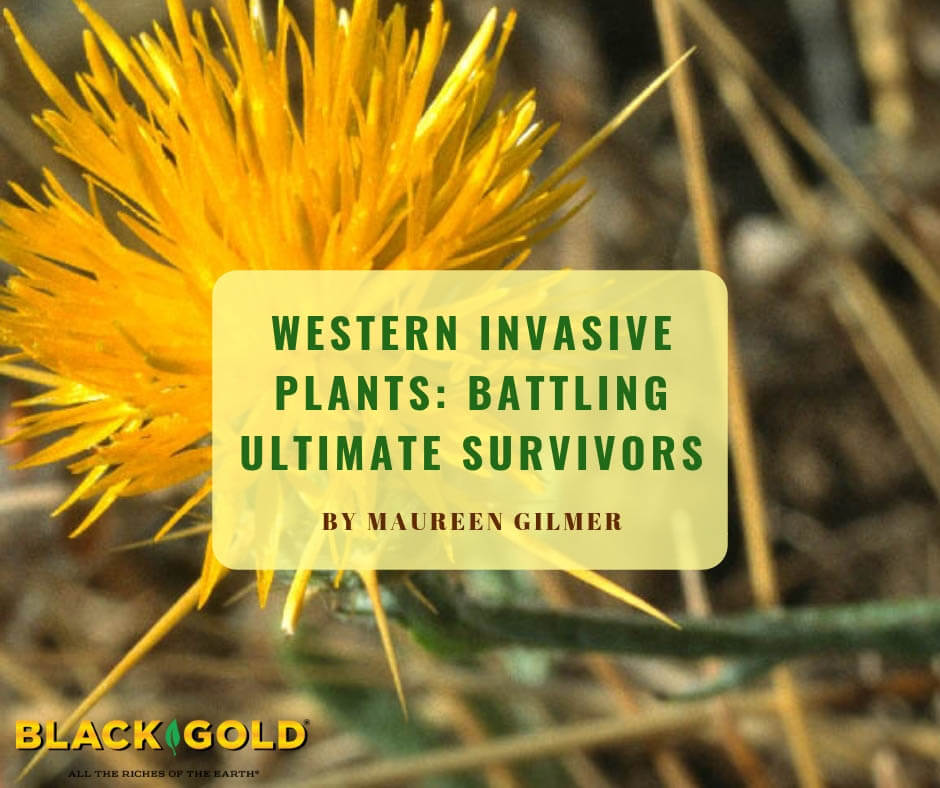
Some Common Invasive Western Weeds

Scotch broom, introduced during the Goldrush, has displaced chaparral species in mountains and foothills. (Image by Maureen Gilmer)

For example, Eurasian yellow star thistle (Centaurea solstitialis), which was introduced in the 1800s via contaminated imported seed, can rapidly displace acres of our favorite native wildflowers in just a couple of years.  It is also unpalatable to livestock and can damage the eyes of grazers, making it a nightmare for ranchers. For gardeners, this weed is no less unpleasant.

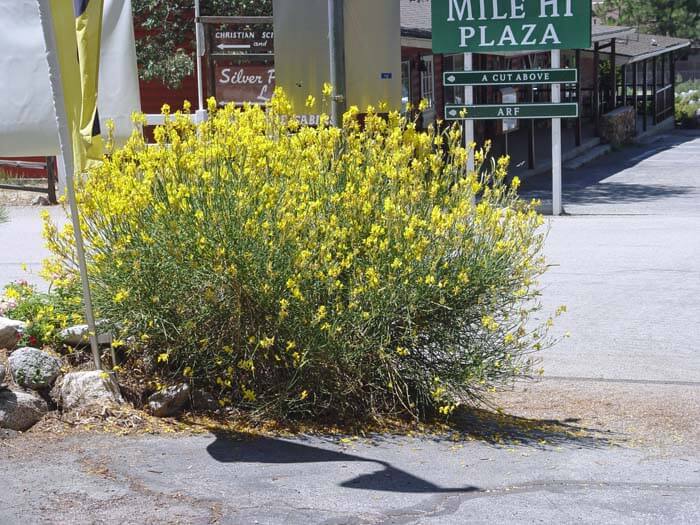
In the forest and chaparral arises Scotch broom (Cytisus scoparius), originally introduced in the west in the 1800s as packing material for the Irish whiskey trade.  Broom is still present in the goldfields, everywhere whiskey crates were opened in the western mining camps. When it pops up in the garden, you have to learn how to tackle it fast before it takes hold.

Spanish sheep herds sowed manure enriched with invasive seed all over early California, introducing familiar pernicious species of the old world such as teasel (Dipsacus fullonum, US introduction in 1800s) and field bindweed (Convolvulusarvensis, US introduction in 1800s) as well livestock-unfriendly grasses such as medusahead (Taeniatherum caput-medusae, US introduction in 1887) and Bermuda grass (Cynodon dactylon). The exotic weeds and grasses proved so much more adaptable than the nutritious local native grasses that they were soon the dominant species. They are also a pain in the garden.

When unwanted plants become expansionist, only the strongest survive, and they play to mine the scant moisture underground with deep, aggressive roots. They also bring down the utility and value of farmland, both for livestock and crops, natural lands, and they can take over gardens in a blink of an eye.

Invasive Plant Designation

Field bindweed is one of the most notorious invasive plants in the US.

The designation of plants as invasive is often misunderstood. It’s really a local issue relative to the soil and climate around your land and home. In arid-zone southern California, for example, artichokes are invasive. Decades ago edible artichokes escaped the fields and naturalized on the hills along the coast.  Due to frost tenderness of this perennial, the invasiveness is limited to the coastal foothills, while it burns back or dies inland when exposed to frost. Therefore concern for its invasiveness is only in a small coastal strip, not all of California unless future climate change forces it to die out or expand and flourish.

This is why big national invasive plant lists aren’t always accurate for you locally.  Learn more about the high-risk plant species by region via the USDA National Invasive Species Information Center, Federal Invasive Plant Program, and also refer to local invasive plant lists, such as the California Cal-IPC Inventory. You can also view USDA state maps of invasive plants that show the prevalence of invasives county by county. Here are guidelines for proper management and ultimate removal of select western invasive species, based on reproductive potential.

Western Invasive Plant Management

Bermuda grass is a pernicious species with deep, fine roots and coarse, fast-growing surface rhizomes that rapidly spread. (Image by Maureen Gilmer)

Each invasive is managed differently. For example, Scotch broom spreads by producing large quantities of seed that germinates and establishes quickly.  Just removing adults doesn’t fix the problem because there’s so much dormant seed in the ground just ready to sprout.  A no-till situation and thick mulch application can keep seedlings in check.

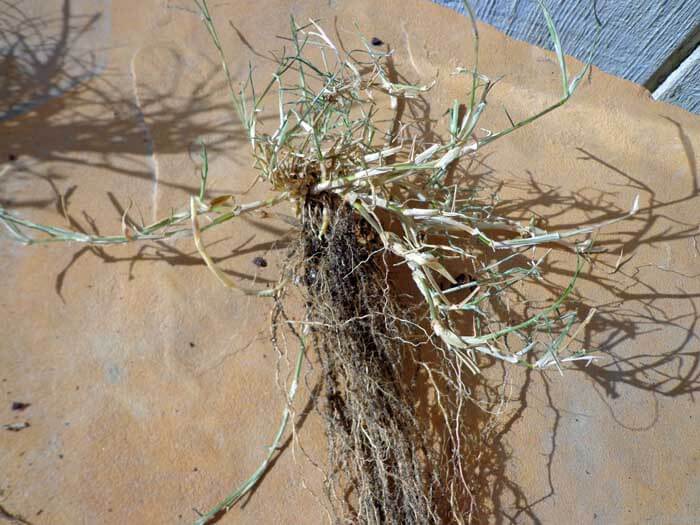
In contrast, Bermuda grass spreads by the most aggressive root system you’ll ever see, and removal it tough. Typically sprouts emerge from tiny root pieces to start whole new plants, no matter how carefully dug out. Covering invaded areas with a black plastic cover for a month or two is one way to eradicate any leftover pieces. For the further management of many western invasive plant species, UC Davis has an excellent Invasive Plants IPM website.

We are learning that certain communities are best left as-is in perpetuity, but when invasive, expansionist plants decide that they have a right to displace native plant communities by force, it becomes an invasion.  Sadly, many areas are so infested with these pernicious species that takes a war to root them out, and even then there will be casualties on both sides.

Before you dream up next year’s changes to your garden, use these dark winter days to study invasive plant information online for your immediate area. Get to know these plants, so you can recognize them in the wild, in your garden, and in the garden center and root them out as you see them.


Ponytail Palm Indoors or Out

This ponytail palm at the San Diego Zoo demonstrates how graceful they become.

Many believe Dr. Seuss’ Truffula Tree was inspired by a curious cypress in a San Diego park.  But maybe this isn’t true at all.  Maybe it’s San Diego’s epic ponytail palms that were the real inspiration for the Lorax story.  These are botanically known as Beaucarnea (“beautiful flesh” in Latin), a name that refers to the broad, fleshy bases of these succulent trees.

Ponytail Palms for the Landscape

Young, one-gallon, potted ponytail palms (Beaucarnea recurvata, USDA Hardiness Zones 9-11, 4-30 feet) are sold at affordable prices at florists, succulent nurseries, and most other garden centers. A native of Mexico, it is not a true palm but instead more closely related to lilies. It grows slowly and luxuriously, but in time will reach landscape proportions in mild climates where it will become a beautiful and long-lived specimen. Here in Palm Springs, this common house plant is an incredible landscape specimen that can reach 30-feet in height.

Ponytail Palms for the Home

Use Beaucarnea to create small architectural wonders with the right pots and stones.

Get the same miniature palm-tree look for your home or apartment with these evergreen “trees” for bright rooms. Its foliage grows longer and longer, just like hair, so ponytail palms become more feminine and elegant looking with time. They can be easily moved outdoors after the last frost in colder climates with little summer rainfall. Or you can place them on a dry, sunny porch where they will be protected from excess rain. Outside in the desert they tolerate intense sun.

Ponytail Palm Growth Habit

This grove of mature ponytail palms, in Pasadena’s Huntington Desert Garden, is a century old.

The wide base of this plant is a unique structure called a caudex. Its a drought adaptation found in many woody succulents. Inside the semi-woody caudex are succulent cells that take up water quickly and hold it for a long time. The foliage remains luxurious, even with minimal soil moisture.

When fully hydrated, the caudex is smooth and hard to the touch. As it dehydrates, during the depths of the dry season, it looks and feels like an overripe cantaloupe. Subtle depressions appear at the sites of maximum moisture loss. You might see wrinkles show up on the outer skin as the diameter of the drying caudex shrinks. These are all signs that a ponytail palm needs water.

This caudex is its most vulnerable part of the Beaucarnea. Its thin bark protects it from injury and infection, which is the most fatal problem for succulent species. Inside tissue is sterile, much like your own body. If the bark or skin is breached in any way (nicked or punctured), microorganisms are allowed to invade. Often they are carried inside by rain or irrigation water, which creates the perfect conditions for rot to flourish. A tiny wound can take down a huge specimen if it is exposed to excess moisture.

Ponytail Palm Care

Ponytail palm specimens grow best in pots with good drainage.

For best indoor results, grow these succulents in fast-draining Black Gold Cactus Mix to keep moisture under control. Use only pots with large drainage holes. More succulents are killed by heavily absorptive soils and over-watering than death by dehydration, so when in doubt wait a week and then maybe water. Ponytails need more water during the warm season. In winter, water very sparingly, and when you water avoid wetting the caudex!

With large, old plants caudex injury is a worst-case scenario. Once the caudex is breached, on a plant large or small, and infection takes hold, the only way to try and save it is to carve out all the damaged tissue. It’s a lot like skin cancer surgery where layer after layer is removed until the tissue shows no more discoloration. Then refrain from watering. It will heal with an ugly callused scar upon the beautiful flesh of the trunk, but at least the plant will be saved.

Use this same technique if you get rot spots on young, indoor ponytail palms. Do surgery with a razor-sharp knife, then allow all exposed tissue to dry out in the shade afterward. A dry callus will form to seal it off from infection.

Beaucarnea is one of the most underrated landscape plants for arid zones and house plants for contemporary homes. Affordable, architectural in form, adaptable, and requiring minimal moisture, its design possibilities are endless. Just remember, the ponytail palm is not a palm at all but a beautiful head of long green hair upon a most graceful body.

Bottle Gourds: Growing Ancient History

The calabash or bottle gourd (Lagenaria siceraria) has been valued worldwide since ancient times and believed to be one of the oldest plant introductions into the Americas. Early botanical research has long attributed the origins of American bottle gourds to Africa, believing specimens floated across the Atlantic to reach the New World, though some studies tell a different story. Regardless of their path of arrival, these versatile gourds were an asset to early American peoples.

Gourd Origins

Hand-painted gourds demonstrate Anasazi pottery patterns from the American Southwest.

Native to Africa and Asia, bottle gourds were first introduced to the Americas 10,000 years before cultivation. Most believe that they passively arrived at the New World via ocean currents from Africa, but a few researchers believe that human beings intentionally brought them as they moved eastward into North America. The gourd’s strong, lightweight shells would have been ideal for portable containers carried by nomadic peoples to the New World. Gourd shapes would later become the models for the first Native American ceramic vessels, which were heavier and preferred by more settled cultures.

Choosing seed from plants that produced larger or different-shaped gourds was an early example of selective breeding by human beings. Soon the fruits were far larger than their wild-type progenitors. Gourd variations made shapes suitable for canteens, dippers for drinking, ladles, and even storage containers. The sheer diversity of gourds grown today descends from human intervention.

Why Plant Gourds?

A dry gourd can be transformed with a simple wood burner to reflect ancient design.

In America, the love of gourd arts and crafts remains the chief reason this plant remains in cultivation. Learning to create with gourds is an age-old skill that’s fun to learn and even more rewarding if you grow your own gourds. Small-budget gardeners will find gourd art-and-craft costs next to nothing, and the results are highly coveted handmade containers and gifts.

Bottle gourds are a cousin of winter squash and just as easy to grow. Commercial growers let them ramble across fields of rich agricultural soils, demonstrating how much water and nutrition they need to mature, though they will tolerate high heat and moderate drought as the summer heats up.

Growing Gourds

Grow gourds on the fence surrounding your yard or vegetable garden.

Sow seeds in native soil enriched with Black Gold Garden Compost Blend and Black Gold Earthworm Castings to ensure plenty of microbes and fertility for big, strong gourds. Plant them outdoors after the threat of frost has passed, and give them plenty of space to grow.

Even if you don’t have space to cultivate them in a field, gourd vines are happy grown on fences and arbors, too. They thrive on chain link or woven field fence where their tendrils can hold on tightly. Gourds that hang tend to be far more symmetrical with rounded bottoms. It’s traditional to grow long-handled dipper gourds from overhead trellises for straight handles. Gourds are grown on the ground and set upright early make better stand-up pots and vases because their bottoms develop flat.

Gourd vines bear both male and female flowers, which are white and held on thin stems above the foliage. Unlike bee-pollinated winter squash, gourds are pollinated at night by moths. Male flowers are produced first and female flowers follow. Aficionados often pinch off some male flowers to force more female blooms to increase yield. Vines are allowed to die back at season’s end; then gourds are left in the field to cure naturally in the sun before storing for winter.

Curing Gourds

Animal effigies and African watermelon beads make this gourd jewelry box special.

When gourds mature, they are still quite heavy because the tissues contain a great deal of moisture. A gourd requires up to a year to dry out fully and become ready to make into containers. To speed the process, drill a few small holes in the top and bottom of a fresh gourd to help moisture escape. Cure gourds overwinter in a dry place, such as a garage or barn loft.

Some folks dip their gourds in a mild bleach solution prior to winter curing to discourage discoloring mildew and fungi. If molds do form, don’t try to remove them as this interferes with the gourd’s outer surface integrity and patina. Mold can be easily removed much later when the gourd is completely dry.

Gourds are commercially grown all over America, proving their universal appeal and utility. Autumn is the best time to see them in their natural state at pumpkin patches in the fall.

This year don’t stop with pumpkins, select gourds you’d like to grow, too. Come spring they’ll be dry, and their internal seeds will be ready to harvest. Plant first-year seeds to grow gourds for many years to come without spending another penny.

A Wind Garden in Mendocino

Over time, evergreen shrubs provide enough protection to add perennials to spaces around the heathers.

The Pacific Coast becomes a cold, damp and windy world, sandwiched between Pacific Palisades and redwood forested hills along Highway 1 in Mendocino, California.  The windswept tableland is brutal for most plants but grasses. Native Monterrey cypress (Cupressus macrocarpa) trees are capable of standing up to the wind, too.  Many century-old cypress windbreaks are found around coastal towns like Mendocino.  With the tree’s protection, and the right plants, a late friend of mine created a wind garden designed with spit-and-polish military attention to detail.

The Beginnings of a Wind Garden

The barn and cypress windbreak offered perfect “bones” for protecting this fabulous garden.

When the Army Colonel retired from a life of world travel, he bought part of an old coastal homestead and made a garden around its redwood barn.  From his small house he could sip whiskey and look out to the Pacific Ocean across a wide grassland dotted with volunteer cypress.  This garden would have to preserve that view, so the veteran began his odyssey of growing low, moorland heaths (Erica spp.) and heathers (Calluna spp.) in his cool coastal garden.  The high rainfall and cold, windy weather is what these UK natives are adapted to, and the maritime Pacific Coast allows cultivation of nearly all of them.

The beauty of these plants is their tiny bell-shaped blossoms that bloom through most of the summer. Changes in fall foliage colors lend a patchwork of heights and textures.  The large flat garden was threaded with bark-chip pathways.  Because moors are well drained and Mendocino is on clay soil, the Colonel created raised planting islands, using his military gabion training, then filled them with organic, acid soils.  He elevated them to no more than a foot or two – just enough to keep the plants dry.  Today there is no visible sign of these underpinnings of the plants, but now you know the secret too.

My friendship with the Colonel goes way back to the beginning of this garden.  Most of the early plants were propagated from cuttings outdoors in a slotted, sloping, south-facing cold frame.  This allowed one rare heather to be used as a propagation plant to generate many more.

Wind Garden Perimeter Plantings

The heather garden offers color and interest without blocking views.

Around the fenced perimeter of the garden, the Colonel planted native rhododendrons and dwarf conifers to create a green background for the hot-colored heather foliage.  Because the plants themselves can be so vivid, the flowers seem secondary, except that they excel as cut flowers.  And while the flowers last a short season, heather stems maintain their color, and may even grow brighter during certain times of year.

The original plan for this garden was to add many diverse plants tucked around the old homestead. It was a true collector’s garden. But now, Vinca minor threatens to take over the disintegrating farm house and remnants of the old garden’s Victorian camellias, still bloom.  Such is the power of low-growing plants to thrive within the confines or protection of large old evergreen trees.  It proves that little can thrive in this wind unless provided consistent care and protection, unless specially adapted to the harsh growing conditions.

Creating Your Own Wind Garden

At the edge of the plank walkway are exposed wood gabions stacked like Lincoln logs to hold peat-rich soils above the clay.

With high-quality Black Gold Canadian Sphagnum peat moss, anyone can copy this growing method for heaths and heathers along the West Coast.  Since few have the porous, peaty ground of the moors, raise the plants up by 6 to 12 inches with sideboards or dry rock walls, then mix the peat in with the ground soil at a 2:1 ratio for ideal soil at the root zone.

There are hundreds of species and varieties of heaths and heathers with widely differing cold hardiness requirements, but the hardiest hail from the British Isles. The Colonel believed they could grow along California’s difficult windy coast, and he proved it with his North Coast garden.  It shows that growing plants in the wind is about adaptation and a military-level awareness of site conditions.

“Start with the perimeter, protect your assets and hunker down,” he told me one day.  “It’s how we always do it in the U.S. Army during the winds of war.”

The late Col. Jim Thompson and his lovely wife Beverly.

How and When to Plant Trees

Plant trees in spring as soon as the soil warms.

Springtime is tree planting time. Planting trees early in the season, as soon as the soil warms, gives new trees a whole season to set deep roots and top growth. (This is especially the case with marginally hardy trees.) But tree planting is only as good as your planting method and summer care. Here are seven steps for planting trees right!

Step 1: Select a Good Tree

First, choose a tree that is hardy to your growing area. Then choose the most perfect specimen you can find. A tree is a long-term investment, so buy yours at a quality garden center or nursery. Choose a tree free of any signs of bark damage that could invite pests and diseases to enter. The tree’s form should be perfect without oddball branching that could spoil its beauty.

Step 2: Dig a Hole

Dig a hole roughly twice the diameter of your tree’s root ball.

Dig a hole roughly twice the diameter of your tree’s root ball. Dig it deep enough so that when the root ball is set into the hole its surface is level with the surrounding soil. If the ball is set too deep, you risk smothering the tree and introducing trunk rot. It it is shallowly planted, its surface roots will die and it will be slower to establish. Make the bottom of the hole flat, and then dig a deeper band around the edges. This keeps the root ball on a pedestal, allowing water to drain off into the recessed band. Keep the pedestal soil undisturbed, so it won’t settle later on.

Step 3: Amend

Your goal is to encourage that tree to root beyond the container root ball into the surrounding soil. Give roots a reward for being adventurous. Enrich your excavated soil with Black Gold Garden Compost Blend. This encourages more rapid and widespread root development. If your soil is heavy clay or has poor fertility, then this sweetened backfill provides what the tree needs in those first few years as it adapts to its new home.

Step 4: Mix and Plant

Thoroughly mix your Black Gold Soil Amendment into the pile of soil you excavated from the hole you dug. Then return it to the hole in layers, packing each one down with the end of the shovel handle to collapse any air pockets.

Step 5: Fashion a Well and Mulch

Use the leftover soil to fashion a healthy berm on the undisturbed ground around the outside edge of the planting hole. This will hold water directly over the root ball until it has time to percolate down naturally. Then cover the planting circle with a 3-inch layer of mulch, being sure to keep the mulch away from the tree’s trunk. (Excess mulch around the trunk can smother trees.)

Step 6: Water In

Use the garden hose to fill your water well, then wait for it all to percolate down into the ground before you fill it the second time. Thorough saturation is key to preventing transplant shock. Repeat every few days, particularly if the weather turns hot or windy.

Mulching trees will help hold soil moisture and protect trunks from mower and weed wacker damage.

Step 7: Stake and Protect

Stake your tree for additional support during storm winds and rains. Always stake trees on the windward side, and use ties that will not girdle the tree or cause abrasions on the bark.

Provide a protective sleeve of chicken wire around the young trunk because hungry rabbits and other wildlife may damage the bark during the winter. Come fall, when temperatures begin to drop, apply additional mulch around the base of the tree  to protect the root zone and hold moisture through cold winter days.


Growing Carrion Flower: Nature’s Flycatcher

Just imagine if you could grow a drought-tolerant plant that may actually reduce fly populations. One group of South African succulents, carrion flowers (Stapelia spp.), does just that. Unique carrion flowers have evolved very exotic starfish-like blossoms that kill the most ubiquitous insect in Africa: the fly. But death does not come until these insects have first pollinated the blooms. Prey are always prevalent and active, keeping these curious succulent flowers well pollinated.

Carrion Flower Fly Catching

Desiccated maggots (fly larvae) dot the center of this meat-colored carrion flower.

So just how do they kill flies? Let’s look at Stapelia gigantea, which thrives in the high heat and low humidity of the desert. When flies peak in late summer, it comes into bloom with buds like pointed balloons and unique leathery blossoms that actually look like starfish road kill. The largest can be dinner-plate-sized. Some are creamy yellow (puss colored) with hairs while others have smaller flowers that are the color of red meat (these are more commonly available to gardeners). Both share the fetid odor of rotten meat and death that originates at the center of the flower where flies of all types may be found vying for a place to reproduce.

Such activity ensures flower pollination and fly death. Convinced there will be plenty of carrion for their larvae to thrive, female flies lay their eggs beneath the central pistil, where the scent is strongest. But when the larvae hatch out, they have no food and quickly starve to death. Over the life of each flower, hundreds of flies will leave their progeny, the accumulating corpses highly visible to the naked eye. Growing lots of them around the chicken coop or dog run may prove to be helpful biological fly control where it’s too dry for other options. Where it’s cold, grow carrion flowers in pots to move indoors before frost and bring out for the summer.

Caring for Carrion Flowers

Stapelia gigantea is a fine garden plant for arid, warm winter regions of the American Southwest

In general, carrion flowers like dry heat. Wait until they show wilt before watering, unless they are growing in a very fast-draining pot. Beware watering at all in humid heat, during rain, or under any conditions that don’t allow pots to dry quickly. Moisture trapped inside pots is what usually kills them. That’s why they do very well in low wide pots with large or multiple drainage holes. This provides room for them to grow and spread. Ensure superior drainage by planting them in pure Black Gold Cactus Mix.

Carrion flowers bloom on new growth. If you keep them actively growing through summer, and don’t trim, they will bloom far more prolifically. Once blooming season ends,  cease watering through the winter.

Propagating Carrion Flowers

The blood-red variety of carrion flower is popular for dry gardens with shade.

Experience proves carrion flowers ask for different means of propagation than other succulents. After they flower is the best time to take cuttings. Take cuttings at the natural joints. (I like to let them break cleanly at the weakest point.) Don’t sever a stem or cut it in parts as open wounds invite fungal exposure and potential rot.

Stapelia cuttings are highly vulnerable to fungi in the soil, so burial is not advisable. Instead, lay a cutting down onto damp Black Gold Cactus Mix, and snug it into place. Do not cut the stem or cover any part of it because that’s what kills cuttings.

Set the pot in a warm, dry place with bright shade, and roots will quickly form during the fall. Check occasionally for signs of rooting all along the bottom, then transplant once they are deep enough to support the cutting.

Buying Carrion Flowers

You can buy carrions online, but many succulent growers include them in small flats of inexpensive mixed plants. Once you learn to spot them, buy them up. They are great fun to experiment with; each is a surprise when it blooms.

Let carrion flowers remind us that flies are pollinators, too. Curious floral adaptations for fly attraction can become useful, if we collect and cultivate these maggot tricksters.


Gravelscape and Green your Front Yard

Gravel can make architectural plants stand out like sculpture. (Image by Maureen Gilmer)

Nowhere are water-needy lawns disappearing as fast as in arid southern California and the American Southwest. This is the proving ground for a lot of alternatives to traditional turfgrass. A big problem is always the front yard, where your property value is rooted in curb appeal. What you do there will have a big impact on the future marketability of your home. This is why unconventional front yard solutions, no matter how sustainable, may cost far more than you realize, but desirable low-cost options do exist.

Gravelscaping

A border of colorful succulents stands out against a gravel patio.

The most versatile and affordable replacement material for lawns out west is gravel, due to lower cost, availability and color range. Spreading gravel takes muscle, but it’s an easier DIY project than precision placement of precast concrete units. Gravel can be raked and walked on, leaving a beautiful blank canvas to envision your dryland planting ideas.

All manner of bold cacti and succulents look great against a gravel base. You can even color coordinate your gravel colors and textures with regionally appropriate plantings for a sharp, clean, low-water landscape your neighbors will appreciate. Just be sure to consider plantings as you plant your gravel lawn, so you can establish them as you lay your gravelscape. Increasing soil fertility, with enrichments such as Black Gold Cactus Mix and Just Coir, will give your low-water plants a head start.

Replacing Lawn with Gravel

Here are eight rules we have learned in the desert to guide your lawn replacement with gravel:

  1. Use proper edging. Where your gravel ends, problems begin. Use a solid edge boarder (metal, wood, plastic) that is at least 1 to 2 inches above grade to ensure no spill over onto adjacent beds or paving.
  2. Lay dividers between gravel colors. It’s fun to use more than one color to create just the right look, but if you don’t divide them well, they eventually merge together resulting in a visually muddy colored mess. Make plans for a substantial divider within that great crisp edge you created.
  3. Insist on professional-grade weed barrier. Landscape suppliers provide thick, heavy-grade weed barrier fabric that is easy to install and long lasting, though a bit more expensive than consumer grade. It stays put, won’t tear and most importantly, resists decomposition far longer.
  4. Be sure all the lawn is dead. Failure to kill all of the grass and weeds that once grew in your lawn can doom your gravel to future infestation. Even with weed barrier fabric, Bermuda grass can travel many feet underneath to find light and water, if not properly eradicated before-hand.
  5. Choose the right gravel from the start. Though weed barrier helps keep gravel from your soil, some gravel will always make its way in. If you bring in gravel that’s in high contrast with your soil color, it’s there to stay. In the future, some of it will mixed in to forever speckle that ground.
  6. Avoid dark gravel in hot climates. Dark gravel colors absorb heat quickly, then radiates it back into adjacent spaces after sunset. Conversely, white gravel is coolest but causes glare. Neutrals are ideal.
  7. Grade and ensure adequate thickness. Gravel should be laid from 2 to 2.5 inches thick on a uniform surface. When adding gravel to critical junctures with paving, the ground must be dug out so all grades are even. Too often the gravel layer is thinned to meet the patio surface grade, which always results in bald spots at these high traffic areas.
  8. Pedestrians first. Round river gravel is great to walk on, but it rolls easily, so it cannot be used on an incline. Crushed gravel has sharp edges and points that dig into moist earth for anchorage but is not easy on the feet. Always consider gravel texture on walkways in your design, especially with respect to senior citizens and small children.

Everyone can have a beautiful gravel front garden the neighborhood will love. Make it broad and beautiful, in any style, so your property values are maintained while conserving water.

Gravel Style Guide

A selection of different types of gravel.

Different gravel textures and colors yield different looks and offer different functionalities. Here are some of the most common design styles using gravel:

Earthy: Fine, sand-colored gravel can be swept to visual perfection to make architectural plants stand out like sculpture.

An earthy, sculptural gravelscape. (Image by Maureen Gilmer)

Modern: Warm-colored, 2-inch gravel is easy to clean and rake around and sets the stage for bold planting options for mid-century modern homes.

A modern, warm gravelscape. (Image by Maureen Gilmer)

Parterre: Replace a sweeping front lawn with gravel and creative flowing paths and beds lined with edging pavers.

A creative gravel parterre. (Image by Maureen Gilmer)

Urban: Postage stamp urban yard becomes a sleek modern space with just gravel, a few trees and grasses.

A small, urban yard with clean gravel base. (Image by Maureen Gilmer)

Transitions: This fresh edge between green and rosy gravel (below) is not sustainable without a strongly defined divider to keep it crisp; rose gravel already too thin at top of concrete slab where grade is much too high.

Gravel transitions must be delineated by dividers to remain clean. (Image by Maureen Gilmer)

Little Aloe World: Discover Dwarf Aloes

Dense and colorful, Aloe juvenna (foreground) makes a great rockery subject or potted specimen.

While we ogle big fancy aloes blooming in frost-free gardens, their sensitivity to cold winters limits their cultivation elsewhere. The plants in the same genus as Aloe vera, the popular Arabian species used for skin care, rarely survive the winters of sub-tropical zones. For everyone who cannot grow succulents outdoors year round, like we do in coastal California, welcome to my little aloe world.

South African Beauties

A grass aloe (center front) will fill a pot quickly for lots of easy offsets to divide and transplant.

The aloes of southern Africa include some very small species that produce the most exquisite bell-shaped blossoms. They have always reminded me of a lady’s drop earrings because they droop from very thin wiry stems. Even the slightest breeze will send their blooms nodding and swaying. Like the big aloes, they bloom every spring, attracting hummingbirds to porch or patio, and light up a home and sun porch with early spring color.

Most garden aloes hail from the maritime Cape Floristic Region or the east coast of South Africa on the Indian Ocean. These are soft, beautiful, and adaptable. The further inland you go, the larger and stiffer and pricklier the aloe species become, so that big game cannot browse upon them during drought. In the wide, treeless, grasslands of the African veldt the little grass aloes blend into big patches among the grasses.

Collecting Aloes

Most of the tiniest aloes have been collected at the Huntington Desert Garden to view.

I began to learn about little aloes by collecting all that I could find, whether named or not. I purchased small ones from succulent racks (without labels), then tested each in my desert garden. I also started new plants from fallen pieces of rare grass aloes gleaned from working at the botanical garden in Palm Springs. Still, more offsets (also unidentified) were shared from friends’ mature aloes. I had a stone slab front entry walk edged with these tiny aloes, potted and in-ground, which provided the jewel box garden I had dreamed of creating.

Planting Aloes

Grass aloes, which are native to African grasslands, produce delicate bell-shaped flowers.

For beginners, aloes are among the easiest succulents to start with because they aren’t finicky. Plant them in Black Gold Cactus Mix to make sure they have supreme drainage. Choose deeper pots for big aloes, because their roots are a lot like a daylily’s, thick and deep. Blend cactus mix with equal amounts of Black Gold All Purpose Potting Soil at a 50-50 ratio to boost fertility and blooming.

It’s easy to know when your potted aloe needs water during the growing season. It should be fully turgid, which means its cells are full of water. Squeeze one, and it should be firm. When they run short of water the cells loose turgidity, stems soften, lose color, and small wrinkles appear on the skin.

Hand water your ground aloes sparingly as many become summer dormant after blooming. Bottom water your little pots by setting them in a pan of water. Allow them to wick up moisture for over an hour’s time, then drain and return them to their place. This will ensure their soil is fully saturated, while keeping water away from your potted aloes’ crowns, where rot begins.

Aloe Sources

Aloe brevifolia offers orange flower stalks that hummers just love.

A great selection of little aloes is available at the California succulent nursery, Mountain Crest Gardens. Quality photos, accurate labeling, and excellent cultural information is offered for each plant. And, they will send aloes right to your door, if they aren’t available locally. Everybody can enjoy little aloes no matter where they live!

Once you have your aloes, know that they will produce offsets or “pups”. This is how they reproduce in very dry climates. To keep a single tidy rosette, remove the offsets that will otherwise spread and change the shape of the overall plant as it ages. When dividing little aloes, it helps to remove them from the pot to surgically sever offsets (maintain stems or roots for better rooting). Root the offsets in a well-drained nursery pot of moistened Black Gold Cactus Mix and keep transplants in the shade until roots form. Then plant them in small pots, so they can grow through the fall before you protect them from frost.

While there are some hardier aloes, they are few and far between outside tropical and sub-tropical zones. If you live in prime time locations, grow them outside. Where there’s light frost, try pots on the patio. And in cold, rainy, totally unsuitable climates, create your own indoor collection for just $5 per plant and enjoy them year-round.

Bold Waterwise Container Plantings

Do you need a big accent container plant for the patio or garden that asks for little water? In California, designs resulting from water cutbacks are changing the way we look at potted plants. Now they are a bigger part of the landscape, nestled in the planting or set at crucial spots to please the eye. These are valuable problem-solvers for filling in spots where older plants have died. They also help to make gateways, and other focal points interesting in small spaces.

Trendy southern California water-wise gardens show you how it’s done. Bold, water-wise plantings from top gardens have been hand-picked to show great design with these plants. Note how simple and dramatic each can be in the right setting, and how little care they require. So be inspired to create your own by these four stellar examples.

The Huntington Containers

Earthy green pots planted with single Cape rushes bring needed height to the garden. (Photo by Maureen Gilmer)

Southern California’s botanical garden, library, and art center, The Huntington, shows off some of the best planting ideas for the region. Their new California Garden features pots of fine-textured reeds to define each tier of the gradual grade change. Nestled among in-ground plants, it has earthy green pots planted with single Cape rushes (Condropetalum tectorum). They provide stellar vertical elements in an otherwise low-lying planting scheme. The South African reeds are grown in summer gardens or frost-free regions to provide the dark green fine-textured appearance rare among droughty plants.

Palm Springs Container

Cascading variegated elephant bush thrives in drought and looks spectacular in pots. (Photo by Maureen Gilmer)

In Palm Springs the newest darling of succulent pots is the variegated elephant bush (Portulacaria afra ‘Variegata’). It’s a green succulent variant featuring cream-colored variegation. This gives it a light value against darker pots or backgrounds. Variegation causes this variety to be smaller, less sun resistant, and more pendulous. It’s become a favorite for nesting exotic-looking Agave.

Balboa Park Container

A simple purple wandering Jew adds bold color to a tall pot. (Photo by Maureen Gilmer)

In San Diego’s Balboa Park was a discovery for using an old-fashioned, purple, inch-plant (Tradescantia pallida ‘Purpurea’) is planted as both a house plant and an outdoor summer annual. Fast-growing, tolerant of extreme heat with a lush purple coloring and small pink flowers, this is a new trend for shaded areas of droughty gardens. Widely available at garden centers, the foliage is outstanding in this very tall turquoise pot. Over the summer the long purple tendrils will cascade down the pot edges for a delightfully Art Nouveau feel. Where there’s frost, dig and move them indoors for winter house plants.

California Home Container

A minimalist blue-on-blue pot brings cool elegance to an apartment patio. (Photo by Maureen Gilmer)

For apartment dwellers, another container find along the California coast resulted in an all-blue creation. Blue chalk sticks (Senecio serpens), a lovely cool-hued succulent, makes the perfect companion for this blue Delft-style pot. True blues are rare in the drought-resistant garden, but with the cobalt glaze as an anchor, this blue plant is all you need for eye-popping beauty.

Every one of these containers can be created in a day for instant upgrades to outdoor spaces and for lighting subjects.

Planting Waterwise Containers

To maximize water retention, use Black Gold Waterhold Potting Mix for planting a rush pot provided the container is very well-drained. This reduces watering frequency and leaves moisture deeper down for the reeds. When planting succulents, including the purple Tradescantia, variegated Portulacaria, and blue chalk sticks, use Black Gold Cactus Mix to ensure adequate drainage. For very deep pots, don’t hesitate to keep your plant in a nursery pot and drop it inside the bigger one for quick seasonal changes.

Hot pots can be made any time because they’re not dependent on flowers. Instead, they are beautiful and useful on day one for that party, gathering, or special event. Above all, they ask for little water while flourishing through the heat of the summer happy as clams.

Pots of fine-textured Cape rushes define each tier of The Huntington’s California Garden. (Image care of The Huntington)


Sansevieria Reconsidered

Extreme South African drought consumed everything except curious green, sword-like plants rising from the barren ground beneath giraffe-pruned trees. They survived because they are succulents. While browsers struggled to find food, they did not touch the swords, which contained unpalatable toxins.

This is Sansevieria trifasciata, the old fashioned mother-in-law’s-tongue or sword plant. Its resilience shows why it is a no-brainer house plant; it’s tough as well as attractive. Take it outdoors for the summer, and it’s a game changer on porch or patio.

New Popularity

Succulents are the perfect match for Sanseveria because both demand similar watering conditions.

The rediscovery of this Victorian drawing room house plant by lovers of the mid-century modern aesthetic has brought Sanseveria into the limelight again. Sansevieria trifasciata and its close kin are usually sold in the house plant department because they are cold-tender succulent house plants, until now. Where patios are quite shady, this is one drought resistant house plant that you can bring outdoors every summer.

Drought is also demanding new plants and varieties that don’t need much water. Sanseverias are not fond of hot western sun, so they prefer sheltered living spaces outdoors. Where lack of light precludes many less resilient species, these are real problem solvers.

Potting Sanseverias

A Sanseveria busts out of a red clay pot repaired with wire. (Frida Khalo’s garden in Coyoacan, Mexico)

Sanseverias are slow spreaders, much like Iris with their thick fleshy rhizomes that grow into colonies. Green shoots are produced along the roots. These roots are so strong they can crack a pot if too crowded, which is why they are best grown in 1-gallon nursery pots that can be cut away with pruners when it’s time to divide them. When pot bound, simply remove the root ball, separate it into manageable sections, let the root ends dry out for a few days, then replant in Black Gold Cactus Mix. As succulents, they appreciate a porous soil mix.

For a fresh idea, put your nursery sword plant in its plastic pot into a bigger pot of Black Gold All Purpose Potting Soil, so its rim sits an inch above the soil surface. Then plant around it with other seasonal plants or succulents that grow under the same light exposure. This will give your sword plant a more well-drained root zone than its companions in the same pot. If just planting companion succulents, use only Black Gold Cactus Mix to maximize drainage.

Foliage Variations

Sansevieria can come onto a veranda in spring, then moved inside before frost.

Sansevieria varieties are all similar in form, but they have different leaf patterns. This allows you to brighten or darken a setting, depending on the color value of a certain variety. Unfortunately, varieties aren’t always properly labeled, so be sure to select by eye to ensure you get what you need for the space you have in mind. With forms just inches tall to 4 feet in height, size should also be considered when purchasing. Since these were grown in greenhouses, give them some time to adapt to the location at your house before repotting or dividing.

A plant this neutral is a chameleon, altering its overall feel and character depending on the setting. When grown as a house plant, there is no better vertical plant to play off a white wall. Add greenery to a hot zone in the house or apartment, knowing that if you forget to water, it’ll be just fine. If Sanseveria can survive an epic African drought, even the busiest mom can enjoy this oxygen-producing house plant. And, the most harried career woman will come home to a little bit of nature every day.

No matter where you live, bring sword plants out for summer, to try a whole new way to garden with them, knowing they’ll come back inside with you at frost to wait out the cold winter days.