Articles

Starting Perfect Homegrown Plants from Seed

Those new to indoor seed growing should start with annuals such as zinnias, cosmos, basil, and gloriosa daisies.

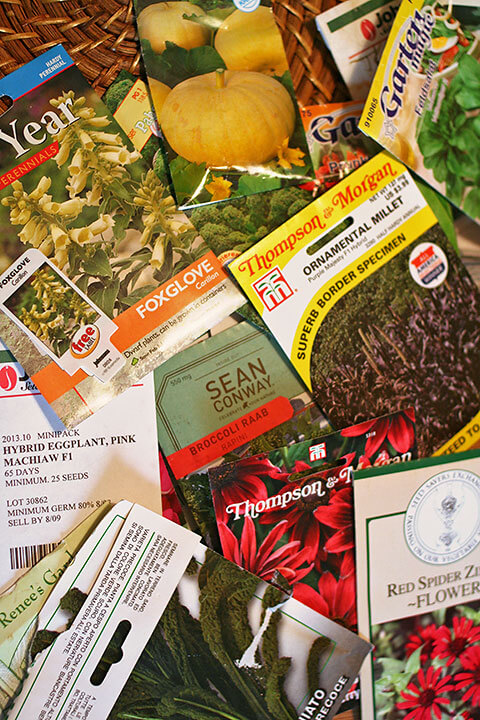
The seed-starting season is upon us. Soon loads of colorful and alluring seed catalogs will be populating mailboxes (and inboxes) nationwide. Raising plants from seed has huge benefits. One can grow unique varieties not found in garden centers for less money, and it’s fun. The process takes fortitude and patience. But, if you do everything right, your plants should be as robust as nursery-grown stock.

Homegrown Plants from Seed: Homegrown Cabbage Seedlings
These newly planted homegrown cabbage seedlings are healthy and robust!

The key to happy seedlings is maintaining the right balance of light, temperature, soil, nutrition, and water, it’s just a matter of getting the balance right. Truth-be-told, most new seed growers fail one or more growing steps (often poor light or improper water) and produce leggy, pale, weak plantlets rather than stout, multi-stemmed, green ones. This matters because weak seedlings have a higher mortality rate and are slow to establish, while robust seedlings look better, fill out faster, and yield more flowers and fruits sooner.

Light

Homegrown Plants from Seed: Seedlings Placement
For best growth place seedlings 2 to 3 inches from high-intensity fluorescent bulbs.

Good light is essential for seed starting because too little causes seedling etiolation (long, spindly, pale growth), while too much can cause leaf burn. Gardeners lacking a sunny conservatory or greenhouse should choose the next best thing, a light table. And for high-grade seedlings refrain from window-growing; even south-facing-window-light is rarely uniform or strong enough for robust growth. A growing table fitted with broad-spectrum shop lights will do a much better job.

Here are four growing table “dos” to abide by:


1. Do choose the right location and table.

A warm, sunny room is ideal. Prefabricated grow tables (sold by many seed vendors) are handy but expensive. Standard 4-level utility shelves (sold at home improvement centers) fitted with shop lights are just as effective and much cheaper.

2. Do choose the right fixture and bulbs.

Standard 48-inch shop lights fitted with high-intensity fluorescent bulbs are the best, most cost-effective choice. Choose fluorescent bulbs that are specially designed for plant growing and cover much of the light spectrum. In general, fluorescent bulbs are not very strong, so they must be placed just inches above plants for best light reception and growth.

3. Do place your seeds and seedlings the right distance from the light.

Pots and seedlings should be kept 2-to-3-inches from fluorescent bulbs. The light fixtures should be hung from chains for easy height adjustment.

4. Do acclimate sun-loving seedlings to natural light before outdoor planting.

Sunlight is stronger than artificial light and can burn tender seedlings. Over seven to ten days, slowly move seedlings from indirect outdoor light to full exposure—increasing exposure every couple of days.

How to Plant Seeds

Be careful to space out very small seeds.

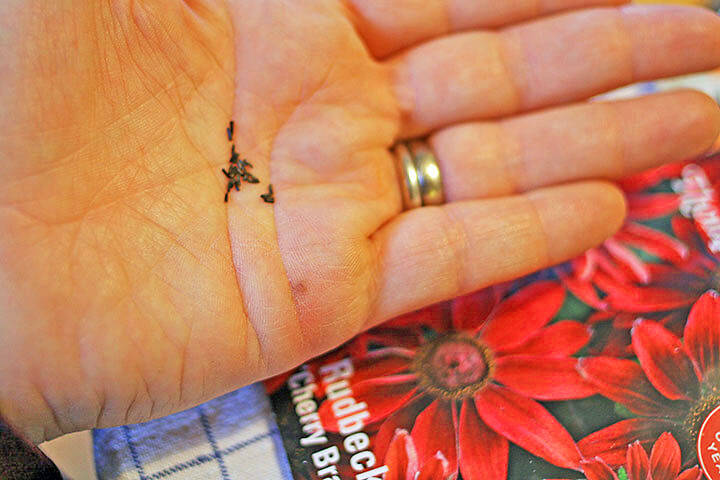
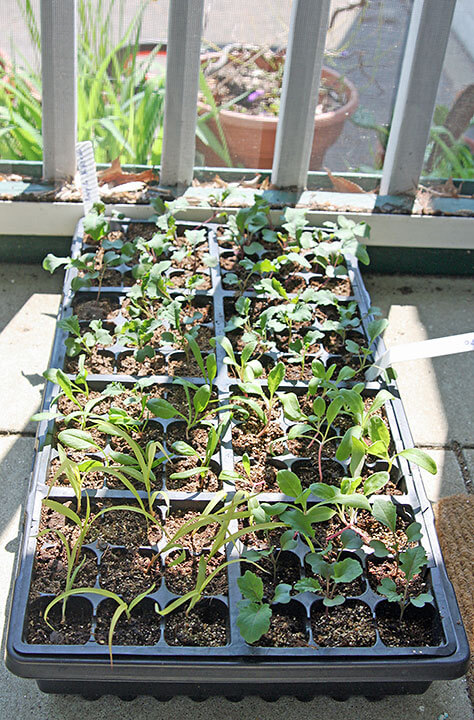
Containers and growing medium are the planting essentials. Standard six-cell, six-pack growing flats with non-draining trays are perfect for most seedlings, and Black Gold Seedling Mix, with its blend of high-grade Canadian Sphagnum peat moss and perlite, is the best choice for seeds and seedlings. Our mix is also easily wetted and uniformly fine for light seed coverage. Light coverage is essential because most seeds naturally germinate on or close to the soil’s surface, so when planting seeds, stick to the mantra “lighter coverage for lighter seeds and greater coverage for greater seeds.” Dust-like seeds can simply be sprinkled on the top of the medium, and large seeds rarely need to be planted deeper than 1/2 inch—despite what some seed-starting guides advise. Seeds can also be lightly covered with fine perlite or vermiculite instead of mix. Coverage with either can reduce damping off, a common fungal disease of seedlings that causes wilting and death. Using fresh mix and sterilizing planting containers will also reduce damping-off (click here to learn how).

Temperature

Homegrown Plants from Seed: Happy Seedlings
Happy seedlings are green and are not leggy.

Optimal temperature needs vary from seed to seed and plant to plant. Some like it cool and others like it warm, but most thrive at room temperature (68 degrees Fahrenheit). Warm-season plants, like tomatoes, peppers, and zinnias, germinate and grow faster with warmer temperatures.  Seedling heat mats, which are commonly available at garden centers, will hasten germination and growth for these and other summer growers.

Watering

Left: A plastic bottle with holes punched in the top makes a perfect seed waterer! Right: Be sure to allow only one seedling per planting cell for best success.

Good watering technique will make or break growing success. The key is remembering that overwatering is worse than underwatering. Too much water encourages fungal disease and root and stem rot and invites pests, like fungus gnats, whose larvae feed on seedlings, and shore flies, whose excrement damages seedlings. Once these problems are established, they are hard to get rid of. (Click here to watch a video about fungus gnats.)

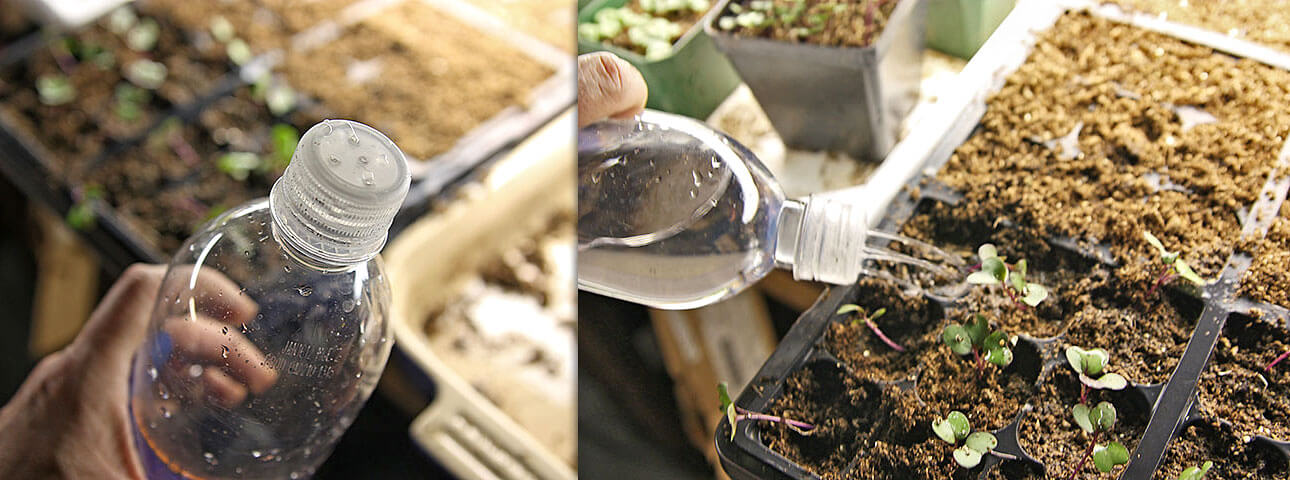
To avoid overwatering seeds and seedlings: (1) water gently and (2) water until the mix is moist then allow it to dry slightly before watering again. These two steps are most important before and right after seeds germinate because seeds and seedlings use less water and are easily drowned. A plastic water bottle with five holes poked into top makes a great gentle seed and seedling waterer (see photo). Bottom watering with a self-watering capillary mat is also recommended. Just be sure that no standing water remains at the tray base at any time.

Properly grown seedlings should have healthy roots to the bottom of the pot.

Once plants develop multiple leaves, more water can be applied. The amount ultimately depends on how quickly plants are growing and using water. It’s wise to check fast-growing seedlings twice daily to assess their water needs. If you think you may be watering too much, err on the side of less water. Slight wilting is better than rot and ruin.

Nutrition

Homegrown Plants from Seed: Homegrown Fennel Plantlets
Homegrown plantlets, like these fennel, should only be planted in the garden after they have hardened off.

Nutrition is not a factor until plants develop their “true leaves” (sometimes called their second leaves). In fact, fertilizer can actually inhibit seed germination and burn new seedlings, which is why good seed-starting mixes are always fertilizer free. Once seedlings have reached two inches or so, a feather-light sprinkle of starter & transplant fertilizer will keep them pot-healthy until planting day.

Harding Off

When the threat of frost has passed, incrementally introduce your flats of plantlets to the great outdoors. Incremental exposure allows tender plants to healthfully acclimate to the high light, wind and temperature changes of the garden. Start by placing them in a protected location with diffuse light and slowly move them into a more open spot with higher light. After seven to ten days your plants should be garden-ready, and if you follow this guide they should look like those grown by the pros!

Exposure to dappled sunlight can help seedlings adjust to natural sunlight more quickly.
There’s a reason why seed-starting is popular. Gardeners can grow cooler plants, for less.

Growing Common Figs in the Garden

Figs may ripen to green, maroon, or brown, depending on the variety.

Figs (Ficus carica) have yet to become commonplace in American gardens, although they are surprisingly easy to grow and even easier to eat. Some consider them frost-tender and finicky, but this is far from true. The tough, fruitful shrubs are exceptionally drought tolerant, due to their Middle Eastern and Mediterranean roots, and many cultivated varieties are remarkably hardy, even in more northern landscapes. Figs are also relatively self-sustaining, requiring little supplemental care once established. Truly earthy, sweet figs are perfect starter fruits for budding food gardeners with space and inclination.

Fig Origins

A late-season fig ready for harvest.

Figs were one of the first domesticated fruits (along with olives, dates, and grapes) originating from the dry lands of the Middle East. Very early on, they were brought as far West as Portugal, and today wild shrubs freely grow across southern Europe and northern Africa as well as the Middle East, where they populate lowland stream and lakesides. In North America, they have become a lucrative crop, particularly in California and Texas. And here too, figs have escaped cultivation and are considered invasive in the southeastern United States and California, though seedless cultivars are available.

The small trees or large shrubs reach an average of 20 feet, and they are deep-rooted, though relatively tender. Their fleshy, sweet, teardrop-shaped fruits are called syconia (singular syconium) and are only pollinated by tiny fig wasps.

Fig Types

Cultivated figs have four standard fruiting types: Common, Smyrna, San Pedro. and Caprifigs. Each type has its own flowering and fruiting characteristics, but this piece will focus on Common figs because they are the most popular in North American gardens. This is because they don’t require cross-pollination, many cultivars are hardy, and some even have seedless fruits.

Contained Figs - Jessie Keith
Contained figs often maintain a smaller stature.

Common figs set fruit parthenocarpically, which means “without a pollinator”, so a single plant will set fruit. The fruits vary widely in size, color, sweetness, and flavor – some are eaten fresh while others taste best dried. In mild climates, plants may appear to produce fruits continuously through the growing season, but more commonly they produce crops in two flushes—once in spring and again in fall. The first spring crop is called the “breba crop” and produces fruit on last season’s growth; the fall crop is called the “main crop” and produces fruit on the current season’s new growth.

Fruit quality and shrub hardiness vary widely among Common figs. For this reason, they are further subdivided into several cultivar types, the commonest being Brown Turkey and Mission types.

Brown Turkey Figs

Delectably sweet ‘Bordeaux’ figs have strawberry-colored inner flesh.

Brown Turkey-type figs are by far the hardiest but are not the most flavorful. Their brown to green fruits are earthy and less sweet, but a few cultivars are remarkably tasty. The small-fruited, sugar fig ‘Celeste’ (USDA Hardiness Zone 7-10) is deliciously sweet and produces loads of small, squat, purplish-brown fruits on second-year wood. And the French ‘Blanche’ fig (aka. ‘Marseilles’, USDA Hardiness Zone 8-10) is an old, green-fruited variety brought to the Americas by Thomas Jefferson and grown at his Virginia estate, Monticello. Jefferson described the sweet fruits as, “unquestionably superior to any fig I have ever seen.” They are also excellent for drying.


Mission Figs

Mission-type figs are dark-skinned with rosy pink flesh and are by far the most popular for eating, fresh or dried. Many varieties are cold-tender, but a few will handle colder winters. The relatively compact and hardy ‘Black Jack’ (USDA Hardiness Zone 7-10) produces many sweet, purple-black fruits and reaches an average of 12 feet but can be pruned to a productive height of 6 feet. For many growers, the equally compact and hardy ‘Bordeaux’ (aka. ‘Violette de Bordeaux’, USDA Hardiness Zone 7-10) has the best-tasting fruit of all. The super sweet purplish black fruits have strawberry-colored inner flesh. Both ‘Bordeaux’ and ‘Black Jack’ grow well in large containers if regularly pruned and maintained.

Figs Sucker from the Base - Jessie Keith
Figs tend to sucker from the base. Remove suckers if you want plants to maintain a single stem.

Growing Figs

Figs grow best in full to partial sun and average, slightly alkaline soil with good drainage. Avoid high nitrogen fertilizers that will encourage leafy growth and reduce fruit production. Any quality fruit tree fertilizer would be perfect for figs and should be administered once a year in late winter or spring.

Mulch the roots with at least 3 inches of mulch to protect the roots in winter, and amend the soil with Black Gold Garden Compost Blend, as needed. Container-grown specimens grow beautifully in Black Gold Natural and Organic Potting Soil and can be overwintered in a conservatory, garage or basement if provided cool temperatures and very little water while dormant or semi-dormant.

Though self-sustaining once established, figs will become unproductive if left unpruned for too long. Removal of the oldest, largest stems in spring keeps shrubs more compact, manageable and fruitful. Dead wood can also become a problem. Specimens planted in the coldest zones often die to the ground, with new branches arising from the living roots in the spring; all dead wood should be pruned back before new shoots emerge.

So, plant a fig for food and fun. With so many delicious and surprisingly hardy selections, they are truly fruits for every gardener.

Good fig varieties are sweet and delicious. (Image by Eric in SF)

Can you do the Cannas Can?

The show stopping beauty of cannas is best enjoyed this time of year when many other ornamentals are flagging. Their bold, tropical foliage lights up the garden even when not in flower and showy blooms are icing on the cake. Keeping these heat-lovers happy is easy. The key is ensuring their roots are moist to wet, they have enough light, and they are well-fertilized. These steps will keep plants healthy and flowers dancing through to fall. Some canna favorites with bold leaves and flowers include the multi-colored ‘Phasion’ (Tropicanna™), and the compact ‘Striped Beauty’ with its striped foliage and bold flowers that are red in bud and open to brilliant lemon yellow. When it comes to showy flowers, nothing beats the perfect salmon pink blooms of Canna ‘Mrs P.S. Dupont’. Ooh la la!

Gardener’s Note: Several viral diseases have plagued cannas in recent years. If your well cared for cannas have yellow streaked, mottled or browning leaves or leaf veins, they are likely infected and should be dug up and disposed of away from the garden.

Canna 'Mrs P.S. Dupont' Detail - Jessie Keith

Canna ‘Mrs P.S. Dupont’ Detail

Canna 'Mrs P.S. Dupont' - Jessie Keith

Canna ‘Mrs P.S. Dupont’

Identifying and Beating Tomato Late Blight

Tomato Late Blight - Jessie Keith
LEFT: ‘Striped Roman’ tomato with tomato late blight on fruit and foliage. RIGHT: Tomato late blight lesion on ‘Striped Roman’ tomato. Photos by Jessie Keith

Tomatoes with oily patches and plants with stem lesions and browning leaves – it’s not what a tomato grower wants to see because these are the telltale signs and symptoms of late blight (Phytophthora infestans). Most commonly known for causing the Irish Potato Famine, late blight is spread by a fungus-like pathogen that survives and overwinters on infected plant material. Though it kills tomatoes more slowly than potatoes, it is equally lethal and destroys tomato fruits.

Tomato late blight is a disease that needs a live host plant from year to year, so several methods can be used to avoid it and control its spread if discovered. The first step is to plant healthy plants from reliable growers or seed suppliers. (Nothing is worse than being sold diseased plants!) In the garden, avoid moist soil by planting tomatoes in well-drained, aerated, raised beds and keep plants healthy and vigorous by feeding them with a tomato & vegetable fertilizer. It also helps to encourage air-flow by spacing plants well and keeping them pruned. Rotating crops on a three year cycle will also help keep soil disease-free. Finally, scout for infected plants and immediately remove any infected plant material far away from the garden and compost bin. Be diligent and you can beat late blight.

Keep Petunias And Calibrachoa Shining All Season

For glowing garden color, nothing beats that old standby, the Petunia. Why? Petunias, and the closely related Calibrachoa, are tough, pretty, and thrive in containers and sunny flower beds. And, for designing with annual color there’s no better choice. Happy plants bloom nonstop and come in a broad array of exciting colors — from blue to magenta and even green! The only drawback is how they dwindle in mid- to late-summer if not properly maintained.

After an early- to mid-season explosion of color, they start to look worn and peter out as the dog days of summer hit — especially container-grown plants. But, you can stop this floral decline before it begins. A few simple steps will ensure top petunia performance well into autumn.

STEP 1: Start Right

Remove damaged and spent flowers to keep plants looking fresh and attractive.

First, start big and plant right. For best success, purchase starts as larger vigorous plants in 3 to 4-inch pots, rather than small, needy plugs, or meager seed-grown specimens. This will provide you with more vigorous, prettier plants faster.

Next, be particular about amendments or container mix. If your planting beds need a boost, amend with Black Gold® Earthworm Castings or Garden Compost. Both will fortify soil and yield bigger, happier bedding plants. Containers should be filled with a light potting mix that is porous, yet moist enough to be easily irrigated. Black Gold® Natural and Organic Potting Soil Plus Fertilizer is a top-notch choice. (Bagged mixes of lesser quality are heavily pre-wetted, harder to handle, and have less aeration.) You can also increase the water-holding capacity of any medium by adding a three to one ratio of Just Coir.

Calibrachoa Superbells Dreamsicle is a warm-hued variety that thrives in sun.

Choosing the right fertilizer is essential. High phosphorus fertilizer specialized to promote blooming and rooting encourages faster root development for healthier plants and more flowers. Choose an OMRI Listed fertilizer approved for organic gardening. For best results, fertilize containers every 5 to 6 weeks.

It is generally stated that petunias and Calibrachoa need full sun for best blooming, but they will flower nearly as well in partial sun, especially where summers are very hot and humid. Overall, 6 hours of direct sunlight will suffice. Any less will yield plants that are leggy and flower poorly.

STEP 2: Maintain, Prune, Maintain!


Pruning Petunias - 2up
Prune back leggy stems. The end product may have a clipped look but never fear; in a week or so they’ll branch out again.

Consistent care and a midsummer pruning are essential to keeping petunias blooming vigorously up to frost. Regular water is crucial — especially for container specimens. Just one day of water missed can dry up a plant and leave it looking poor for weeks until nurtured back to health. During hot, dry spells twice daily watering may even be needed. Before watering, check by feeling the soil to the depth of two inches—if it feels barely moist to dry, it’s time to water again.

Calibrachoa, such as Superbells Chiffon Yellow, require little to no pruning, unlike most petunias.

Petunias need a midseason chop to bounce back to their early summer glory (ground cover petunias, like those in the Wave™ series, are an exception). Cut them back considerably by ¾ in mid-July to keep them from developing old, bloomless, leggy stems. Unlike petunias, Calibrachoa doesn’t require midsummer pruning unless they begin to look ungainly and then only a light trim is required. Follow up by giving pruned plants a boost of fertilizer, a good drink, and within a couple of weeks, they will burst forth again in glorious bloom.

Enjoy Into Fall

When it’s time to plant potted mums, asters, ornamental peppers, and colorful kales, I always work them in and around pre-existing petunia and Calibrachoa plantings. Nothing’s prettier than a raspberry red and pink Supertunia® Raspberry Blast petunia weaving itself among fall standards like steely ‘Winterbor’ kale and ivory chrysanthemums. Beautiful!

Petunia Supertunia® Royal Magenta
Petunia ‘Fame Salmon Pink’

Sowing Cut Flowers For Fall

Sowing Cut Flowers for Fall - Jessie Keith
Think it’s too late to sow easy cut flowers for fall? It’s not. Fast and easy bloomers like cosmos, zinnias, cornflowers and compact sunflowers still have plenty of time to reach flowering and shine before frosts take them for the season. Early August is the ideal time for planting fall cut-flowers. Sow them directly into beds with rich, friable soil and gently cover with a light sprinkle of Black Gold Seedling Mix to a depth no greater than ¼ of an inch. This will ensure they get light, moist cover and germinate better. By late September you should be ready to cut and arrange your colorful new blooms.

Double Digging for Flawless Root Crops

Root crops such as ‘Lunar White’ carrots will be long, straight, and easy to pull when grown in your newly double dug beds.

Root crops grow best in soil that is as fertile and deep as possible. Higher soil organic matter and tilth will yield longer, straighter carrots, heftier rutabagas and prettier parsnips. Double digging is the best technique to maximize bed depth, and early spring or midsummer are great times to prep your beds for spring or fall root crops.

The best way to maximize soil depth and quality is through double digging and ample amendment with lots of organic matter. Double digging is the process of digging deeply to ensure soil is light and porous down deep. Begin by designating a reasonable area to dig. Then with a good, sharp spade, remove the top 8 to 10 inches of soil and place it on a tarp so it can be easily returned to the garden. For the “double” stage of digging, use a hefty garden fork to work up the soil as deeply as possible along the floor of the garden where the soil was removed.

Double Digging - 3 Steps - Jessie Keith
1) Trench double digging is a faster, less arduous method of double digging. Just double dig a trench where you want to plant. 2) All double-dug soil should be friable, clump-free and amendments thoroughly worked in. 3) Double dug bed spaces will be slightly raised upon completion and should be easy to dig deeply into.

Once light and worked up, add a half and half mix of Black Gold Garden Soil and Black Gold Garden Compost Blend—one bag each for around a 5’ x 5’ garden area. Finally, work in additional bags of soil builder and compost at the same ratio into the soil on the tarp and add it back into your double dug garden.

This method is a lot of work but yields superb root vegetables for years to come. Follow up by planting rows of your favorite fall root crops, like carrots, daikon radishes, rutabagas, beets, and parsnips, and cover the seed lightly with Black Gold Seedling Mix before watering in.

Enjoying Root Vegetables - Jessie Keith
1) Kids enjoy helping harvest root vegetables and eat them too. 2) Long, straight ‘Kinko’ Carrots harvested directly from the fall garden.

Let Your Kids Play in the Dirt (It’s Healthy!)

Kids Play In The Dirt - Jessie Keith
Getting dirty is part of the garden fun!

Soil, potting medium or compost, as long as it’s dirty, kids love to play in it. And that’s a good thing. Researchers from Bristol University and University College London discovered that natural “friendly” bacteria in the soil can actually boost the mood as effectively as an anti-depressant. More research at the Sage Colleges of Troy, New York suggests that exposure to certain soil bacteria may even increase learning capabilities. Pretty cool! Then there’s the satisfying feel of squishy soil between the fingers and toes – playing in the dirt is fun.

(How many parents out there didn’t make mud pies as children at least once?)

To keep dirt play as tidy as possible at my house, I created a designated soil play area complete with little pans, wooden spoons and watering cans for soil cookery. It also helps to have an area to hose off muddy kids before entering the house and a mud room for the removal of badly-soiled clothes. As funny as it sounds, the kids like to play with different soil types as well as sand. Coco peat pies are very popular. Playing in the dirt is not something we do every day, but it is nice to let the kids break free and play in the dirt once in a while.

Cut Bedding Plant Costs with Cuttings

Coleus Plant Cuttings - Jessie Keith
Plant cuttings can turn one plant into five in just two weeks. And some bedding favorites are so easy to root, they are big money savers for those in the know. For instance, I never buy more than a few Coleus, Salvia, Lysimachia congestiflora or Agastache. A couple plants, some shears, seedling mix, rooting hormone and care are all that’s needed for loads more garden plants. (For some bedding plants, like coleus, rooting hormone is not even necessary.)

Start with a big, healthy plant — the bigger the plant, the larger the cuttings. Then fill clean, 4-inch pots or spacious seedling trays with Black Gold Seedling Mix. Lightly moisten the mix with clean water and dibble holes in the medium to hold the cuttings. Using clean, sharp shears, take 5 to 6 inch cuttings from the parent plants. Gently remove foliage from the bottom two inches of the cuttings and place them upright, like cut flowers, in a glass of cool, clean water. Before placing them in the seedling mix, dip the cuttings in powdered rooting hormone. Cutting pots should be kept in a spot with diffuse bright light and kept evenly moist, not wet. In a week or two they should have their own roots and be ready to plant wherever more summer color is needed!

Grow Gourds!

Growing Gourds - Jessie Keith
Learning to grow gourds is fun! Nothing beats beautiful, heat-tolerant, hard-skinned gourds (Lagenaria siceraria) for fall show and decorating. Growing them is fun and easy to do! They come in all shapes and sizes and are top notch garden plants for kids. In the fall they look beautiful in festive Halloween and Thanksgiving displays and for winter they can be dried and carved into everything from lidded containers to birdhouses or luminaries.

Plant these annual vines in spring after the threat of frost has passed, and provide full sun and well-drained soil fortified with a little all-purpose fertilizer for good gourd production. When temperatures heat up, the vines will start to spread, twine and ramble, so be sure to provide a strong trellis for them.