Articles

How Do I Remove Bishop’s Goutweed From My Garden?

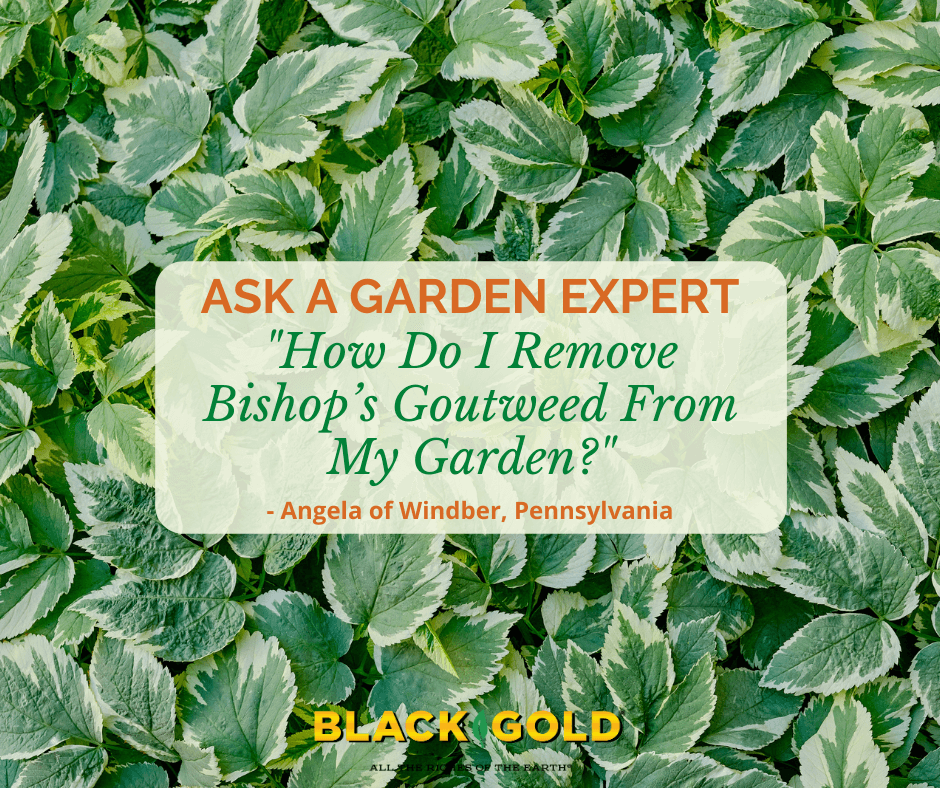
“I have, what looks to be Bishop’s vine/weed, growing in my one garden. It’s starting to choke out my tiger lilies and other items growing in the garden. I can’t seem to get rid of it. Is there a way to get rid of the bishop’s weed in my garden?” Question from Angela of Windber, Pennsylvania

ANSWER: Sadly, bishop’s goutweed (Aegopodium podagraria) is a noxious problematic plant when it is unwanted. It can be a notoriously difficult perennial weed to remove. It’s very hardy, and its dense runners spread everywhere quickly, as you have found.  It’s especially annoying when its roots become intertwined with other shrubs and perennials. Here is the four-step approach I recommend that you take to kill it. It may sound challenging, but if you do it right, it is the fastest, most effective way to remove it fast if your garden is not too large. Start the work in the spring as your plants begin to emerge from the soil. (BTY, weed killers are not particularly effective on this plant.)

Four Steps for Goutweed Removal

Goutweed roots will regrow if left in the soil, so remove them all! (image by Drahkrub)
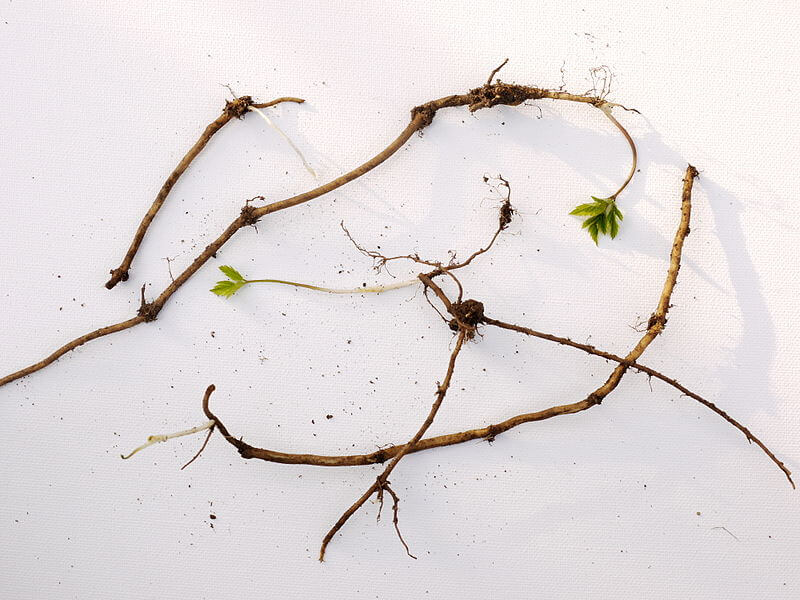
  1. Use a sharp, flat spade, skip the top 4-6 inches of soil to remove as many of the goutweed roots as possible. When digging the underground runners, gently loosen the soil around them with a trowel, following each until they are fully removed. If you keep even a small piece in the ground, it will re-root and grow. This can be a challenge when working around your garden plants, but be diligent. In some cases, you may have to dig up perennials, remove the goutweed roots from their base, and replant them.
  2. To keep underground stems from returning, consider covering the area with mulch cloth and mulching it over. After a season, all goutweed should be smothered, and you can pull up the mulch cloth and resume gardening as usual.
  3. Keep watch for any new goutweed shoots that appear and dig them out immediately.
  4. Look for goutweed that may have crept into your lawn. I recommend using a broad-weed herbicide to remove it. Organic options are available.

I hope that these tips help!

Happy gardening,

Jessie Keith

Black Gold Horticulturist

How Do I Stop Snails and Slugs from Eating My Hostas?

“How to prevent snails from eating hostas?” Question from Madelaine of Irmo, South Carolina

“How to prevent snails from eating hostas?” Question from Madelaine  of Irmo, South Carolina

Answer: There are lots of great products on the market that ward off slugs and snails. Some are even OMRI Listed for organic gardening. Here are my top three favorite slug repellents and deterrents.

  1. Pelletized Iron Phosphate Killers – These include products like Sluggo and Bonide Slug Magic.  The products are safe to use around pets and wildlife.
  2. Diatomaceous Earth – Sand-like diatomaceous earth is very sharp at the micro-level, and cuts through the tender exteriors of slugs and snails. Add a layer around your hostas before they emerge in spring, and it should really help. It is typically OMRI Listed and completely safe for pets, wildlife, and humans.
  3. Beer Traps- slugs and snails die a little less cruelly when they fall into a drunken beer stupor and pass on in beer traps. (Please click here to learn how to make one.)

Happy gardening!

Jessie Keith

Black Gold Horticulturist

How Do I Remove and Manage Mealybugs?

“What is the best way to remove ground mealybug or should I dispose of the whole plant?” Question from Erin of Conover, North Carolina

Answer: Mealybugs can be overcome. It just takes a little time and patience. The main reason is that one has to eradicate both the adults as well as the juvenile crawlers, which are almost invisible to the eye. Outdoors, ladybugs and other natural predators keep populations down, but inside the house mealybugs can take over a plant really quickly.

How To Manage Mealybugs

Here is an excerpt from my blog, Managing the Worst House Plant Pests:

Mealybugs are soft, white, and feed on the juices of plant leaves and stems, particularly in the crevices between leaves and stems. Mealybug infestations are hard to manage because these pests travel and spread as crawlers. Crawlers are the nearly invisible nymphs that hatch from the pest’s white, cottony egg masses and “crawl” several feet to quickly infest other plants. You can’t always see these crawlers, so to manage them, you have to clean plants, containers, and surrounding surfaces when you see an infestation.  They produce copious crawlers, so the sooner you notice mealybugs, the better.

At high populations, mealybugs produce lots of cottony egg masses, adult bugs, and nearly microscopic crawlers. All must be completely removed if the plant is to be saved. (Image by Alexlutor)

To remove mealybugs, start by cleaning your plant, its pot, and all surfaces surrounding the plant. Remove the top two inches of potting soil and replace it with fresh. Finally, spray the plants. One of the best mealybug sprays is a 10-25% solution of isopropyl alcohol. Fill a spray bottle with 1/4 cup of isopropyl alcohol and 2/4 cup water and shake to combine. When treating plants with this solution, keep them out of direct sunlight because it can cause leaf burn in the bright sun. You can also treat plants with insecticidal soap or Neem oil. Repeat spray treatments until plants are mealybug-free.

Another method to stop crawlers is to surround infected areas with double-sided tape traps. As the crawlers hatch and begin crawling, they will get stuck on the tape and die. You can also surround plant bases and pot edges with double-sided tape to keep crawlers from moving beyond an infected plant.

I hope that these tips help!

Happy gardening,

Jessie Keith

Black Gold Horticulturist

Mildew, Insects, and Rodents Damaged My Vegetable Garden. Help!

Mildew, Insects, and Rodents Damaged My Vegetable Garden. Help!

“My raised bed gardens were a disaster this year!  Mildew, cabbage worms, rodents – even though I thought I had great organic soil mix and high enough barriers.  What can I do this fall to get a great start next spring?” Question from Glenda of Sewell, New Jersey

Answer: I am sorry to hear that your vegetable garden was a downer this year. Different pests and diseases need to be dealt with in different ways. Here are some recommendations and resources.

Ways to Ward Off Vegetable Garden Pests and Disease

  1. Clean up. The best way to ward off pests and diseases is to remove all plant material from your vegetable garden in fall and do the same in early spring when winter weeds abound. It removes the overwintering eggs of some pests as well as plant-borne diseases.
  2. Go no-till. Each season, my no-till garden gets covered with a 2-3-inch layer of compost to stop weeds. Rodents cannot find a safe harbor in this type of mulch, unlike straw and leaf mulch. (Click here to learn how to create a no-till vegetable garden.)
  3. Plant resistant varieties. The more disease- and pest-resistant the vegetable varieties you choose, the better.
  4. Space plants and rows well. Increased airflow and space in the garden will dissuade many diseases, pests, and rodents. (Click here for more tips for tackling rodents and other mammalian pests.)
  5. Plan for pests: If your cabbages have had cabbage worms in the past, expect the worms to return. Apply pre-emptive applications of safe, OMRI Listed BT spray to stop them in their tracks. By learning the life cycles of different pests that have plagued your garden in the past, you can plan precise strikes with the correct pesticides.
  6. Give your plants a good head start. Choose (or raise) the healthiest plants you can. Large, robust seedlings have a greater chance of resisting pests and diseases and producing high yields. If growing plants from seed, be sure to give your seedlings plenty of light and room to develop stout, dense growth, and ample root systems. (Click here for seed-starting tips.)

I hope these tips help. You may also want to watch the video about overcoming powdery mildew below.

Happy vegetable gardening,

Jessie Keith

Black Gold Horticulturist

How Do I Remove Liverwort From My Garden?

“Can I get rid of Liverwort by burying it in the ground?” Question from Russ of Berkley, California

Answer: It depends on the site’s soil, soil level, and moisture level. Admittedly, I kind of like the common liverwort (Marchantia polymorpha). Sorry! But, they’re kind of cool. The funny little non-vascular plants are close relatives of mosses and a sign of a very moist, shaded, nutrient-rich garden area. With that said, I dislike it when they grow in containers, so I understand why you don’t want them in your garden. Here are some different options for liverwort removal.

Change the Soil and Soil Level

The number one way of ridding liverwort from an area is to reduce moisture and fertility, increase soil drainage and aeration, and increase light if you can. (They can’t tolerate dryness or high sunlight.) You can do this by lifting your garden soil in the area where they are causing trouble and adding aggregate to the soil to improve drainage.

Replant With the Right Plants

Another option is to dig up the liverwort, lift the soil, and plant the area with garden plants for your area that will tolerate moisture and shade. Here are a couple of options.

Wood strawberry (Fragaria californica): The California native wood strawberry produces fruit, likes shade to partial shade and grows well in moist soils. It forms an edible groundcover, which might appeal to you.

Idyllwild rock flower (Heuchera hirsutissima): Here is an upland California wildflower that can tolerate moist and dry planting areas as well as partial shade, and it’s very pretty.

Pigsqueak (Bergenia crassifolia): Though it is not native, Bergenia is a pretty evergreen perennial for the shade that produces clusters of pink flowers in late winter and early spring. It likes moist, well-drained soil.

Click here for lots more shade plant options from the California Native Plant Society.

Use Non-Toxic Chemical Methods of Removal

There are approved liverwort controls that contain vinegar, and apparently, they are very effective. (Click here for more information.) I also recommend that you click here to read an excellent overview of liverwort control in greenhouses from Oregon State University. It covers cultural controls as well as chemical ones.

I hope that these liverwort management tips help!

Happy gardening,

Jessie Keith

Black Gold Horticulturist

How Do I Remove Whiteflies?

“What can I use for whiteflies on Jatropha plants?” Question from Susan of Pembroke Pines, Florida

Answer: I recommend physical methods of removal for whiteflies followed by the use of an insecticide approved for organic gardening.

What are Whiteflies?

Whiteflies are fast-to-produce sucking insects that remove the juices from plant leaves and stems. Tiny whiteflies can be very destructive when populations are high–causing leaf drop and decline. When plants are badly infested, the undersides of leaves will become covered with clouds of tiny white flies and clusters of their small, round, white egg masses.

How to Remove Whiteflies

Start by spraying the plants off with a sharp spray of water from the hose. Focus on the undersides of leaves. Then look beneath the leaves for clusters of small, white egg masses. Leaves thickly covered with egg massed should be removed, tightly bagged, and thrown away. Next, wipe the small numbers of egg masses off of the remaining leaves. Make sure no eggs remain. Finally, spray the plants with insecticidal soap or Neem oil. (Click here for an overview of horticultural oils for organic insect control.) Continue to check for whiteflies and wipe and spray leaves as needed.

It may take a little work, but this method is effective.

Happy gardening,

Jessie Keith

Black Gold Horticulturist

Help! I Have Egg-Covered Tomato Hornworms on My Tomatoes.

“I noticed two strange-looking caterpillars with eggs on their backs in my tomato garden this year and learned these were hornworms and they are terrible for tomato plants.  I intend on moving my tomatoes elsewhere next year.” Question from Jennifer of Nesquehoning, Pennsylvania

Answer: You are in luck! You don’t need to worry about the tomato hornworms on your tomatoes because the eggs on their backs are those of parasitic wasps. They will kill a hornworm in no time, so nature has taken care of your problem!

Moving your tomatoes will not change whether you get hornworms or not. They are the caterpillars of a beautiful the five-spotted hawkmoth, which can detect tomatoes from afar and will lay eggs on your plants in the night.

The eggs may be placed on leaf tops or bottoms and are greenish, so they are very difficult to see. This means they are hard to remove before hatching.  Just look for leaf chewing damage, then look for hornworms. When you find them, physically remove the caterpillars as you see them. It’s the easiest way to get rid of them fast if they are not already parasitized.

I hope that this information helps!

Jessie Keith

Black Gold Horticulturist

How Do You Keep Spring Bulbs from Rotting?

“How do you keep spring bulbs from rotting?” Question from Pam of Fort Worth, Texas

Answer: There are several reasons your spring bulbs could be rotting. Here are a few possibilities and solutions.

Warm Zone Spring Bulbs

Your USDA Hardiness Zone 8 location is just on the edge of spring bulb-growing country. Most old-fashioned, cherished spring bulbs, like standard crocus, daffodils, hyacinths, and tulips, won’t survive in zones warmer than 8. This is because they require the chill of winter over a certain period of time to complete their life cycle. If winters are too warm and short, spring bulbs can decline and eventually rot.

Thankfully, there are some great classic spring bulbs sure to grow really well at or above Zone 8 without prechilling. These include specific tulips, like Apricot Impression Darwin hybrid tulipRed Emperor tulip, and Yellow Golden Apeldoorn tulip (click here to read more about growing and planting tulips), as well as Narcissus ‘Ziva’Peruvian scilla, Spanish bluebells, ornamental onions, and poppy flowering anemones.

Soil for Spring Bulbs

Bulb soils must be fertile, raised, and amended with quality soil amendments, like Sphagnum peat moss and compost. Larger bulbs are generally planted 6-8 inches deep, and they will not tolerate excess moisture at the root zone. Too much moisture will encourage bulb rot.

Bulb Diseases

Certain fungal and bacterial diseases will also cause bulb rot. Be sure that the bulbs you plant are firm, healthy, and show no signs of damage or rot. Cool, wet weather and saturated soils encourage these diseases.

I hope this information helps!

Happy bulb growing!

Jessie Keith

Black Gold Horticulturist


How Do I Get Rid of Squash Bugs?

“How do you get rid of squash bugs?” Question from Judy of Louisville, Mississippi

Answer: Surely these are some of the most annoying and destructive of all summer vegetable garden pests. To manage squash bugs (Anasa tristis), you need to understand their life cycle.

Squash Bug Life Cycle

These true bugs attack squash and relatives, like cucumbers, pumpkins, and zucchini. They spend their winters sheltering under garden debris, leaves, rocks, and logs. Sometimes they even enter homes for refuge.  When spring weather warms, they seek out squash plants, mate, and lay eggs on developing squash plants. The clusters of brownish-orange eggs hatch in just 5 to 10 days. Bug nymphs emerge and develop into adult squash bugs that suck the juices from squash stems, leaves, flowers and developing fruits. Badly infested plants will show signs of wilt and have poor fruit output and development.

Squash Bug Management

Squash bug eggs are brown to brownish-red.

The first thing you can do to protect your garden is to remove all infested plant material from your beds in fall. Good garden sanitation will destroy winter cover for these bugs, which will decrease their populations during the cold season. In spring, keep a lookout for their eggs. If you see any on leaves or stems, scrape them off immediately and smash them. Once you begin to see adults, remove them by hand or spray them with an OMRI Listed insecticidal spray approved for organic gardening, like insecticidal soap, neem oil, or horticultural oil. [Click here to read more about using horticultural oils.]

It also pays to plant squash-bug-resistant varieties, which include most butternut varieties, ‘Early Summer Crookneck,’ ‘Improved Green Hubbard,’ ‘Royal Acorn‘, and ‘Zucchetta Tromboncino’.

I hope this helps! Happy gardening.

Jessie Keith

Black Gold Horticulturist

How Do I Safely Kill Poison Ivy?

“What’s the best way to kill poison ivy?” -Question from Grace of Raleigh, North Carolina

Answer: It’s the age old question. The best method depends on your infestation–do you have lots of seedlings, a big vine or shrub, or all of the above? Either way, there are several consistent “dos” and “don’ts” when it comes to effective poison ivy removal. The important thing to remember is that you can get a poison ivy rash from any “dead” portion of the plant, whether it be brown leaves or an old stem or vine. The toxic oil (urushiol) that causes the rash is stable and will remain toxic for years, even on old, dead plants. For this reason, I rely on mechanical removal because it’s the safest method if you do it right. A herbicide-sprayed plant can still cause a rash and is still dangerous!

Removing Poison Ivy

Here’s my removal method: Wear thick long pants, a long thick shirt that covers your wrists and body, and wear thick rubber gloves. The tools you will need will depend on the size of your plants. But, generally, I use a sharp spade, trowel, pruners or loppers, and plastic bags for effective removal.

The key is removing the whole plant and root system. For smaller plants, I simply cut the root base with a spade, cover the plant/s with the plastic bag, and pull the plants within the bag without touching them. For lots of smaller plants, I do the same with a trowel and plastic bag. For vines growing up trees, I cut the base of the vine with pruners or loppers, remove as much of the vine from the tree as possible by cutting, not pulling (you don’t want a poison ivy vine toppling down on you!). Then I dig out the roots with a spade and put the pieces in a large plastic bag. (Once again, it’s best if you surround the plant with the bag and pick it up that way.) Then I dispose of the poison ivy pieces in the trash.

During this process, take note of everything that may have become contaminated with poison ivy oil: your tools, clothes, gloves, trashcan lid, door handle, etc. These will need to be cleaned.

It also pays to scout out any large vines that may be fruiting nearby. Birds are immune to urushiol, so they eat the fruits and spread the seeds. Simply cutting vines at the base can stop this year’s fruits.

Cleaning Up After Poison Ivy

Here’s my cleanup method: Change your gloves and wash all tools and surfaces that may have been contaminated with a coarse cloth and soap. Degreaser can be very effective. Next, remove all possibly contaminated clothing and washcloths and put them in the washer, choosing a long, hot water cycle and plenty of detergent. Finally, wash your hands and body with strong soap and a textured washcloth, using lots of friction. The combination of friction and good, strong soap will remove all the oil from your skin. (I usually wash twice!) Technu soap is specially made to remove poison ivy oil. [Here’s further information about rash prevention from the USDA.]

Here are two important poison ivy “don’ts”: Never compost poison ivy because its oils can contaminate your compost. Never burn poison ivy, because its toxic oils become airborne, causing a rash on the skin and in the lungs.

Mowing and chemical sprays can cut poison ivy back, but they will not remove it, or its dangers, completely. Take the time to carefully remove your plants, and your yard will be poison ivy free in no time.