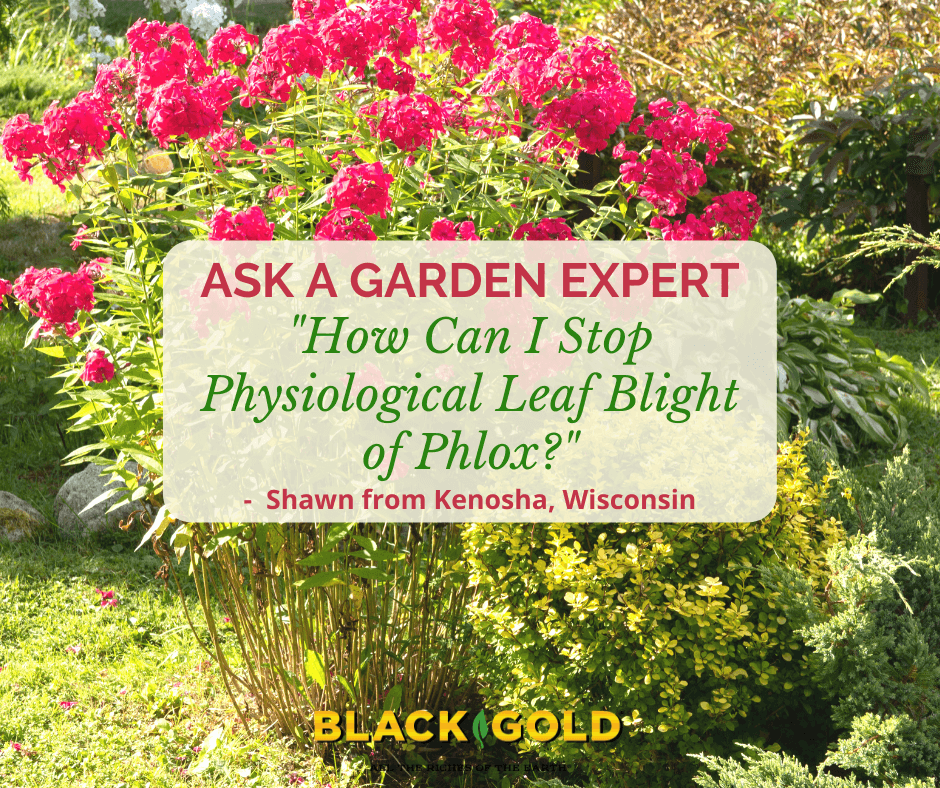
“I have phlox growing in a big container. The bottom leaves are looking mottled/veiny. I have fed them and also added iron, but it doesn’t seem to be improving. Is there something else it needs?” Shawn from Kenosha, Wisconsin
Answer: Tall phlox (Phlox paniculata) varieties are prone to a series of diseases and foliage disorders, but yours sounds like it is physiological leaf blight of Phlox. It is a physical disorder caused by a water imbalance in the plant that can occur in some tall phlox varieties. Water circulation goes haywire–causing water to bypass the older leaves and only supply water to the new shoots. Here are the symptoms and solutions for this disorder:
Physiological Leaf Blight of Phlox Symptoms
Mature clumps are most often affected.
Lower leaves become mottled with prominent green veins before they eventually shrivel and die.
New growth is not impacted.
Physiological Leaf Blight of Phlox Solutions
Cut plants back at the end of the growing season, yearly.
Mulch plants to conserve water.
Water a little bit extra–though this only works in mild cases. Sometimes the circulatory disorder simply disables older leaves from accessing water.
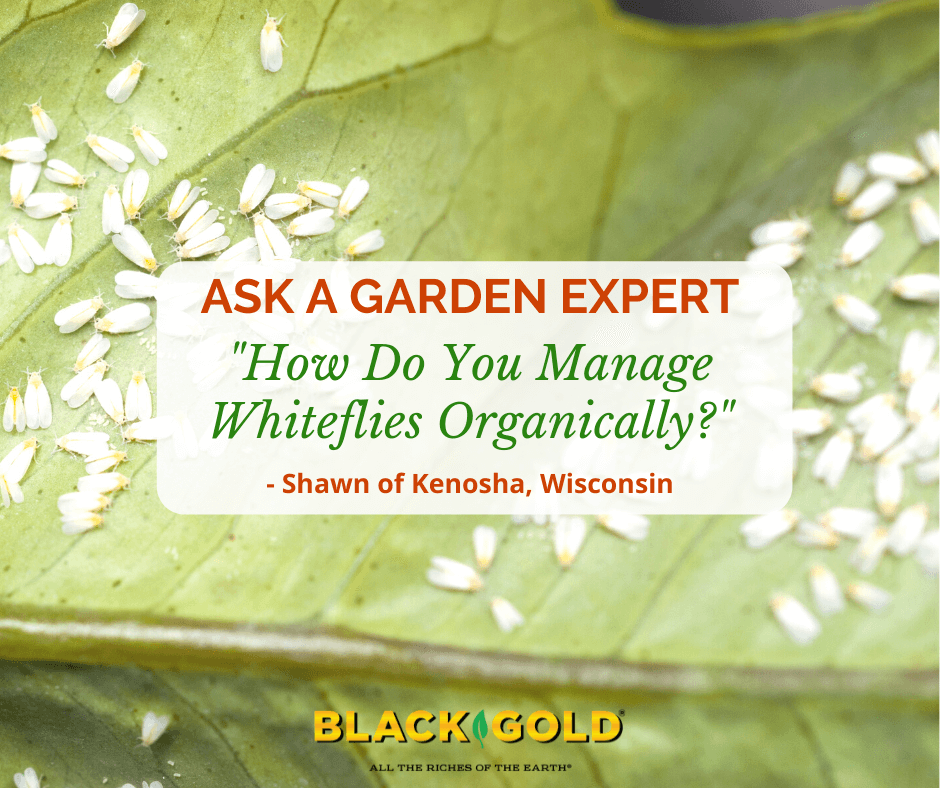
“What is the best organic way to get rid of whiteflies?” Question from Shawn of Kenosha, Wisconsin
Answer: Whiteflies can become awful pests to manage if the populations become large, but they are relatively easy to kill. Here is a little more information about these pests and some organic methods for handing them.
What Are Whiteflies?
Whiteflies are sucking insects that remove the juices from plant leaves and stems. Tiny whiteflies can be very destructive when populations are high–causing leaf drop and general plant decline. When plants are badly infested, the undersides of leaves will become covered with clouds of tiny flies that are bright white and clusters of their small, round, white egg masses.
Whiteflies breed continuously and quickly, which is a big reason why they are so problematic. According to Colorado State University: At 70º F, the greenhouse whitefly life cycle happens fast. “It takes 6-10 days for egg hatch, 3-4 days as a nymph I, 4-5 days as nymph II, 4-5 days as nymph III, 6-10 days for the pupa. Adults can live for 30 to 40 days.” Adults produce lots of eggs for ever-increasing numbers unless challenged.
How to Kill Whiteflies
Start by spraying the plants off with a sharp spray of water from a hose. Focus on the undersides of leaves. Then look beneath the leaves for clusters of clinging, small, white egg masses. Leaves thickly covered with egg masses should be removed, tightly bagged, and thrown away. Next, wipe the egg masses off of the remaining leaves. Make sure no eggs remain. Finally, spray the plants with insecticidal soap, Neem oil, or horticultural oil. (Click here for an overview of horticultural oils for organic insect control.) Continue to check for whiteflies and wipe and spray leaves as needed.
It may take a little work, but this method is effective.
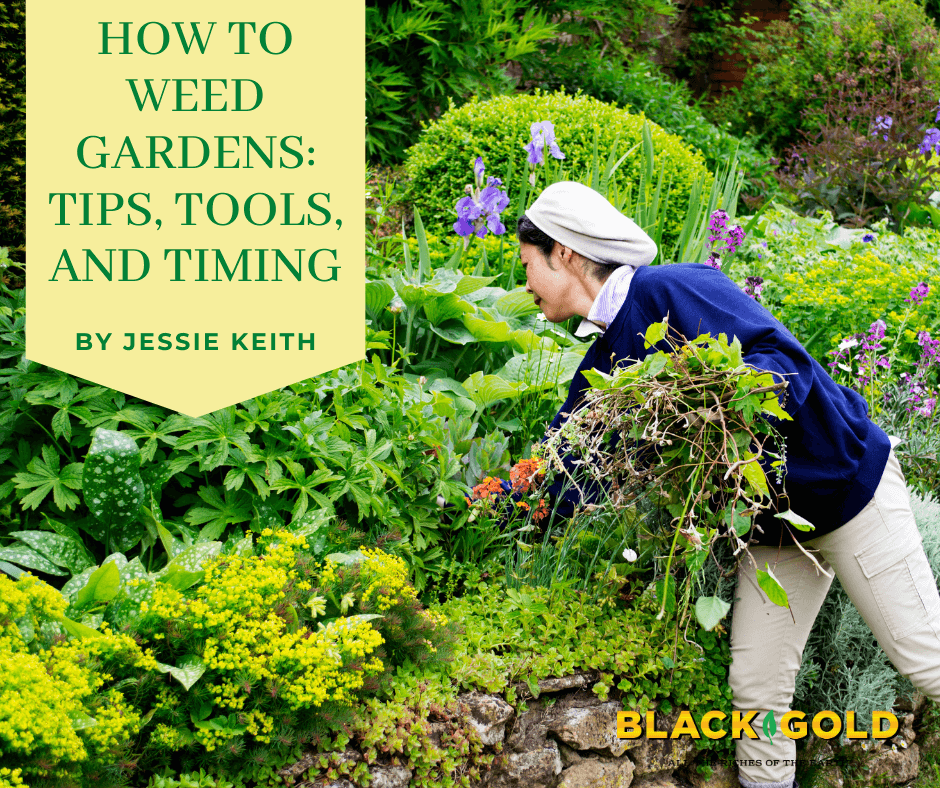
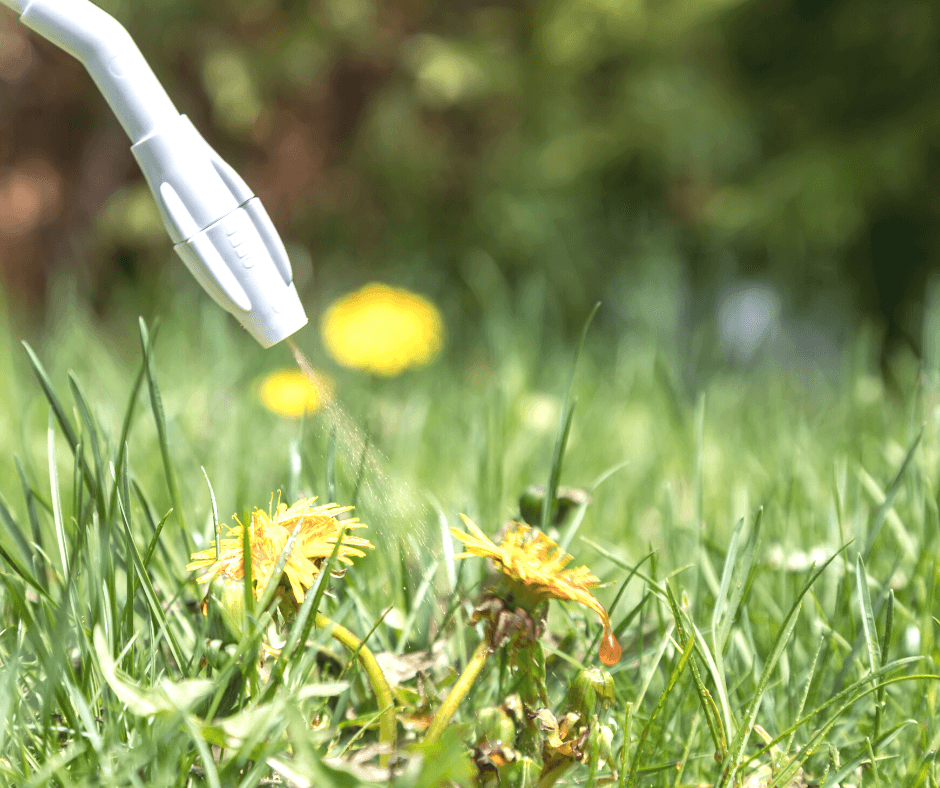
Weed competition drags gardens down in every way. Ignore your garden for just a couple of weeks, and weeds can take over in a flash–turning once tidy, pretty beds into a tangled mess of green interlopers with no room to spare. If you use the right tools, techniques, and timing necessary to stop a weed takeover, it will save you trouble and reward you with bountiful flowers, vegetables, and fruits.
Common, aggressive garden weeds spread by many means. If allowed to set seed, they will pepper the garden ground with loads of obnoxious seedlings crying to be hoed away. Some have the deepest, most far-spreading root systems that will get away from a gardener in no time if allowed to take hold. Different weeds appear at different times of the season. The most unexpected are prolific winter weeds that will happily fill your beds in late winter and set seed by late spring. Summer weeds require heat to germinate, so you can expect them to start popping up as soon as the weather becomes truly beautiful.
Knowledge is power when it comes to weeds. Here are the essentials necessary to keep your beds happy and weed-free throughout the year.
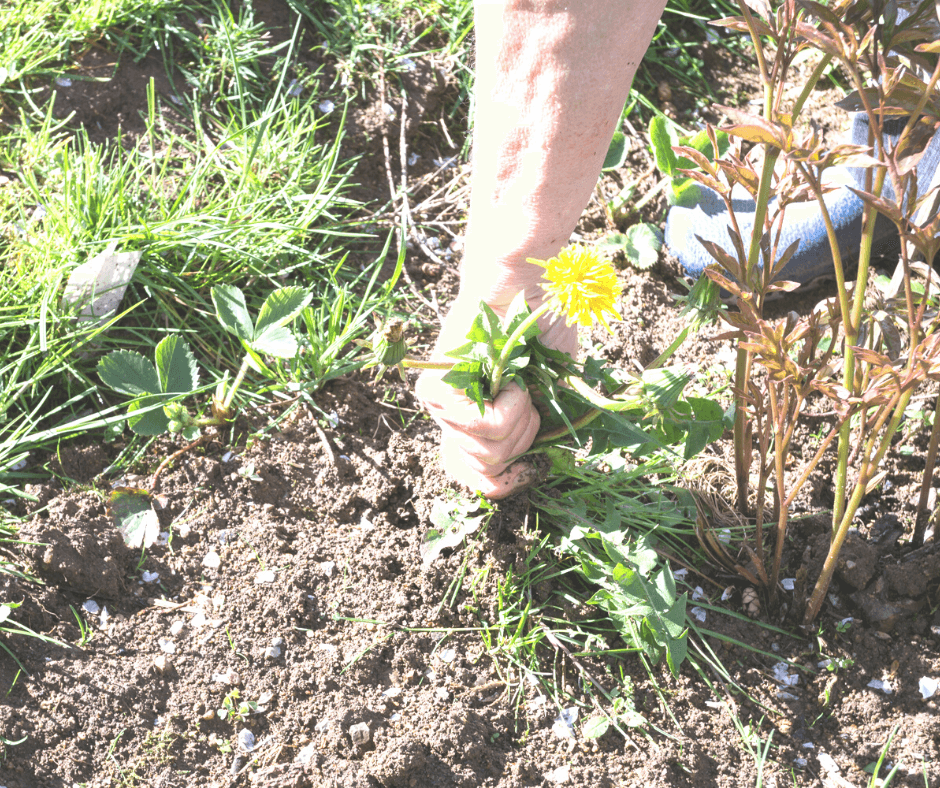
Know Your Weeds and Their Spreading Power
Don’t pull a perennial weed unless you know that you can get the whole root. Leave one little piece, and it will return!
Your worst weed enemies are perennial weeds that are deep-rooted, fast-spreading, and produce generous amounts of seeds that spread and sprout quickly. Annual weeds are also pesky, but they are generally more shallow-rooted and easier to kill by quick digging and hoeing before they set seed. Here are five of the worst perennial weeds that you may face. From there, I recommend relying on the helpful, Farmer’s Almanac Common Weed List, as well as the excellent UC Davis IPM Guide for common weeds.
Worst Perennial Weeds
Field Bindweed (Convolvulus arvensis): Here is a real monster of a spreader that’s hard to remove. The hardy perennial sets fleshy rhizomatous roots that can extend deep into the ground and many feet from the parent plant. The vine twines and strangles garden plants and then becomes covered with little, white, morning-glory-like flowers that set hundreds if not thousands of seeds. Scrape and dig the seedlings on-site and try to dig the root systems as soon as possible. Smothering and covering infested areas is also a good method, but it takes time. (Click here to learn more about bindweed removal.)
Canada Thistle (Cirsium arvense): Canada thistle (Cirsium arvense) is notoriously difficult to remove and is also a notorious spreader. Its leaves and stems are painfully prickly, and pollinated summer flowers produce loads of puffy seeds that get caught in the wind and spread everywhere. (Don’t let this go to seed anywhere near your yard or garden!) When they sprout, a single plant can become a dense colony connected by deep, rooting rhizomes that are impossible to dig out. Leave just one piece, and it will return. It is also resistant to all but the strongest herbicides.
Aside from using commercial-grade herbicides, the second-best method is to smother plants with weed cloth and mulch until they are gone. Watch out for plants that creep into the grass, once they do, a good broadleaf herbicide is your only option, unless you want to kill everything and start over.
Dandelion (Taraxicum tomentosum): Dandelions spread by seed but can be tamed, so I don’t mind them growing in the lawn. Bees and other early pollinators rely on their golden flowers for pollen and nectar, so they do some good, but they have no place in my garden where they compete with other garden flowers. The deep-rooted perennials are easy to grub out with a garden knife, as long as you remove the whole root and leave no pieces behind. The key is keeping them from setting seed. This is the source of dandelions in the garden. In the spring months, I try to mow low and often to chop off the seed heads before they release their seeds.
Ground ivy(Glechoma hederacea): The aggressive member of the mint family is a ground-covering weed with creeping stems that root and spread fast. Its spring flowers set lots of seeds, which sprout quickly. It also thrives in lawns, so you will need to rely on a broadleaf herbicide for the lawn if you want to truly get rid of it.
Thankfully, this weed is relatively easy to pull, but if you leave even the tiniest piece in the ground it will root and regrow. T manage it well, remove it from garden beds first thing every spring, and then apply a 3-inch layer of mulch, being sure to leave the crowns of garden perennials uncovered. If stray pieces emerge from the mulch, pull them on site.
Nutsedge(Cyperus esculentus): Unless you live in the desert, your garden has likely experienced nutsedge. The aggressive, moisture-loving sedge produces copious seeds in summer that sprout everywhere. Even worst, the plants have fine, spreading roots that develop small, brown nutlet tubers. Leave one tuber in the ground, and it will sprout into a whole new plant. (Quirky fact: The tasty nutlets can be harvested and eaten.)
Nutsedge is not herbicide-resistant, but its tubers are resistant. For this reason, dig out the plants rather than just pulling or spraying them and get all of the tubers. Finally, cover with a 3-inch layer of mulch, and diligently pull any small sedge sprouts as you see them. (Click here to learn everything that you need to know about removing nutsedge.)
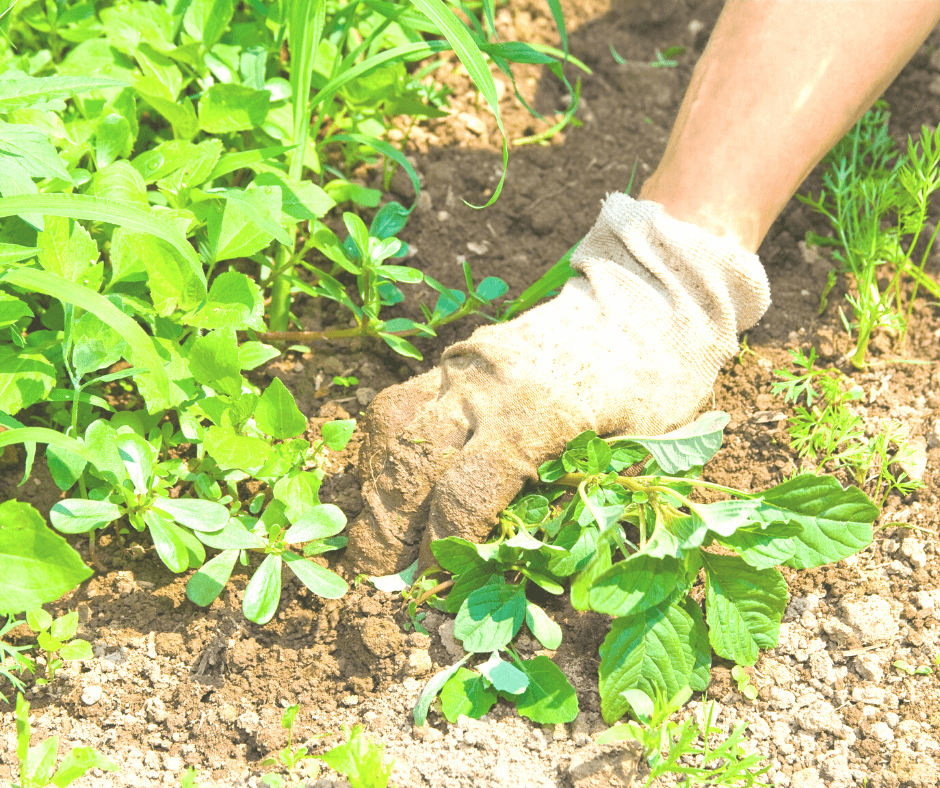
Annual weeds, like this summer purslane and pigweed, are easy to pull but prolific self-sowers that sprout in the open soil each year. A good, stout hoe will make quick work of weeds like this.
All of these weeds require good tools for thorough removal, followed up by mulch, and often herbicides or other harsher measures. Once again, annual weeds, like winter chickweed, summer purslane, pigweed, or spotted sandmat euphorbia, are very easy to dig and pull. The key is removing them before they can set seed and germinate or add to your garden’s soil weed seed bank.
Know Your Weeding Tools
Over the years I have used a number of different weeding tools. A few have stood out and become fast favorites. The three key characteristics I look for in a good gardening hand tool are 1. ease of use, 2. working power, and 3. durability. These criteria are met by the following tools:
Long-Handled Tools
Prohoe Rogue Do It All Tool and 7-inch Hoe: The hoes made by this company are wonderfully sturdy and well-made, razor-sharp, and long-handled for those of us that do not like to bend. The Do It All Tool is triangular on one side and has a raking tool on the other. It is perfect for rogueing our deep-rooted weeds. The thin, 7-inch Pro Hoe is ideal for scratching up mats of shallow weed seedlings. These hoes are so strong and sharp, the job will get done in an instant.
Pullerbear Uprooter: For big “weeds” choose a Pullerbear uprooter. In a matter of minutes, an area riddled with small weed trees can be cleaned beautifully roots and all. It works like no other tool I’ve tried. Just clench the base of the sapling or small tree and pull. Ignore the fact that it’s a bit pricey. It will pay for itself quickly in time and effort saved wrangling with hard-to-pull woody weeds.
Short-Handled Tools
Sharp cutting and sawing edges make gardening knives one of the best all-around gardening tools. (image care of the Gardeners Supply Company)
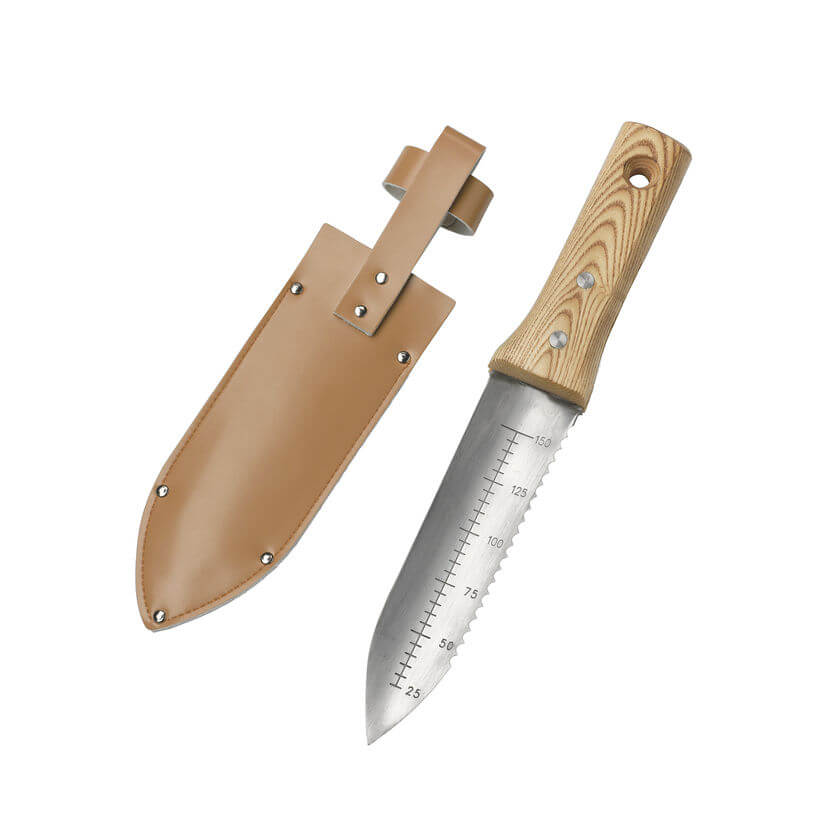
My trust garden knife (also called a soil knife or Japanese hori-hori) goes with me everywhere. It can cut into the soil to deep roots below and saw through the roots or bases of tough plants. I even use it for harvesting greens and cole crops. One side of the knife is sharp for slicing, and the other is serrated for sawing. They can easily break through the skin, so I use mine while wearing garden gloves and I store it in a leather belt sheath.
Fine-bladed hand trowels are excellent all-purpose tools for weeding and planting. They quickly cut at deep or shallow roots in no time and withstand lots of wear and tear if made well. The “rockery hand trowel” at Clarington Forge is just such a fine-bladed tool, and it’s beautifully crafted for the long haul. Its fine blade makes for easy weeding and planting–especially in heavier or pebbly soils. The narrow rockery hand trowel from Clarington Forge easily expels weeds and gets into small spaces. (image care of Clarington Forge)
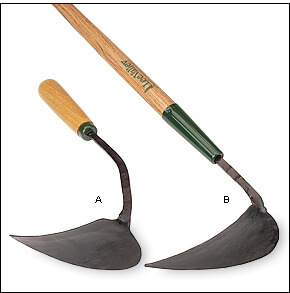
Sharp ho-mi tools will chop deeply into the soil quickly. (Image care of Lee Valley)
For super fast hand weeding nothing beats the classic ho-mi (hoe-mee), also called the Korean hand plow or cultivator. This sharp, downward-facing tool can get to the base of a dandelion root in seconds with a quick chop, chop, chop. Nothing is more effective. For smaller weeds, I use the side of the ho-mi to scratch and smooth the soil. It’s an excellent tool for lightly aerating the base of a plant or getting to the root of a tough herbaceous weed as well as planting new plugs. If well cared for, a ho-mi will last forever (if cleaned after use and oiled to prevent rust). It’s relatively cheap, too. Long-handled versions are also very useful. Just be careful when chopping away with this sharp tool. Its tip can be nasty.
Practice Timely Weeding
I weed two ways be either casually weeding as I water, harvest, and enjoy my garden, or intensively bed by bed. I do casual weeding almost daily. More intensive weeding is something I do three times a month in summer. I also try to catch weeds at various times in their life cycles.
Catching weeds before they flower and set seed is timely weeding. I write this article as the winter weeds in my vegetable garden have begun to set seed. A busy spring pushed back my weeding schedule, and I am paying for it. Had I removed these weeds just two weeks earlier, before they had begun to release seeds,
Catching weed seedlings before they become large is timely weeding. Digging or hoeing up weed seedlings before they become large and take hold will make your garden life so much easier.
Smothering beds before seeds sprout is timely weeding. Adding mulch in late winter or spring, before weed seeds really sprout is very important to keeping weeds down. Miss just one year, and you will pay for it.
Mulch Properly
Natural mulches of all types, like these hemlock needles, make weed covers.
A 2-3-inch layer of mulch, straw, leaf-mulch or compost keeps seedlings from germinating and stops weeds from taking over. It is best to apply mulch in spring after properly weeding your beds and again in fall to ward off winter weeds. (Click here to learn more about the many wonderful mulch options.)
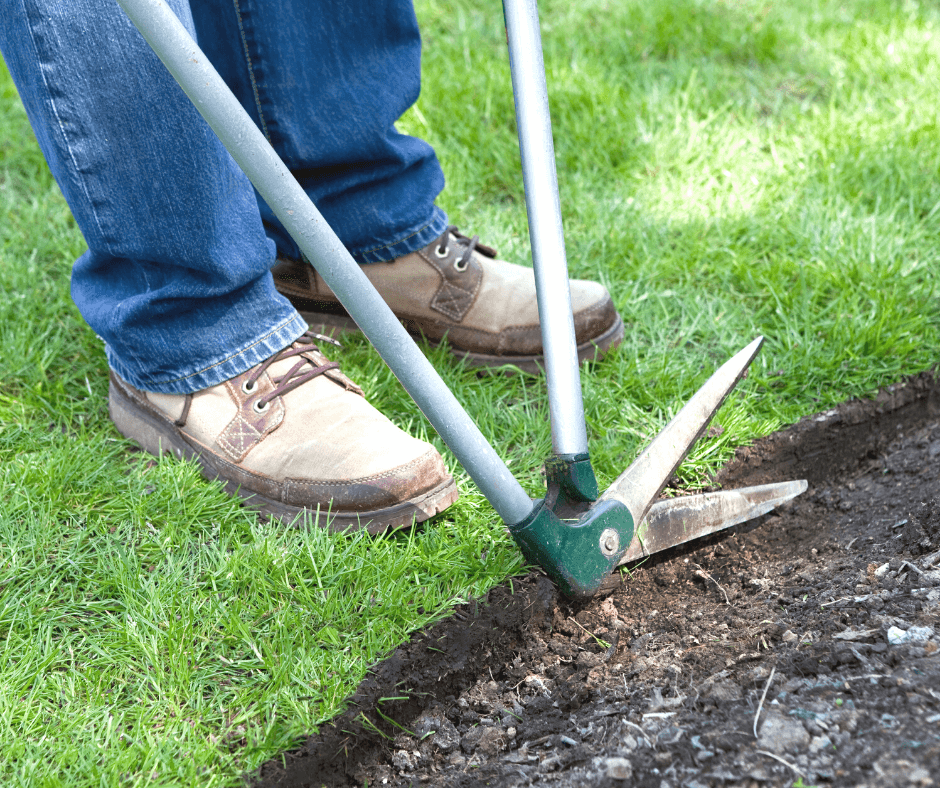
Edge Your Beds
Lots of lawn grasses and weeds like to creep into garden beds. Once in your garden, they become weeds. To stop this, it helps to edge your gardens, especially at the start of the gardening season. Edged beds also look tidier and nicer. Mowing your lawn regularly to stop weeds from flowering and setting seeds is also advisable. (Click here for a tutorial about how to edge beds.)
Consider Solarization
Soil polarization is a method of weed removal that relies on the heat of the sun to kill weeds en masse. Methods vary, but in general, it involves covering a bed area with tacked-down sheets of clear or black plastic for several weeks during the summer. When it works, the heat generated heat cooks everything below–plants, seeds, and all. Keep in mind, the method is used to revive whole beds and remove all weeds, so no desirable plants can be present. It is also less effective further north where summer temperatures rarely exceed 90 degrees F.
Use Herbicides as a Last Resort
Herbicides that really work are generally toxic and best applied by garden professionals. If you have a severe problem with one of the worst perennial weeds mentioned, like Canada thistle or field bindweed, then you may consider resorting to a professional-grade herbicide very selectively applied by a trained horticulturist. Otherwise, they are not needed. More natural means of weed removal are safer and better.
Stay on top of your weeds, and your gardens will prosper. Put aside just a little time each week and it will be a small burden to bear.
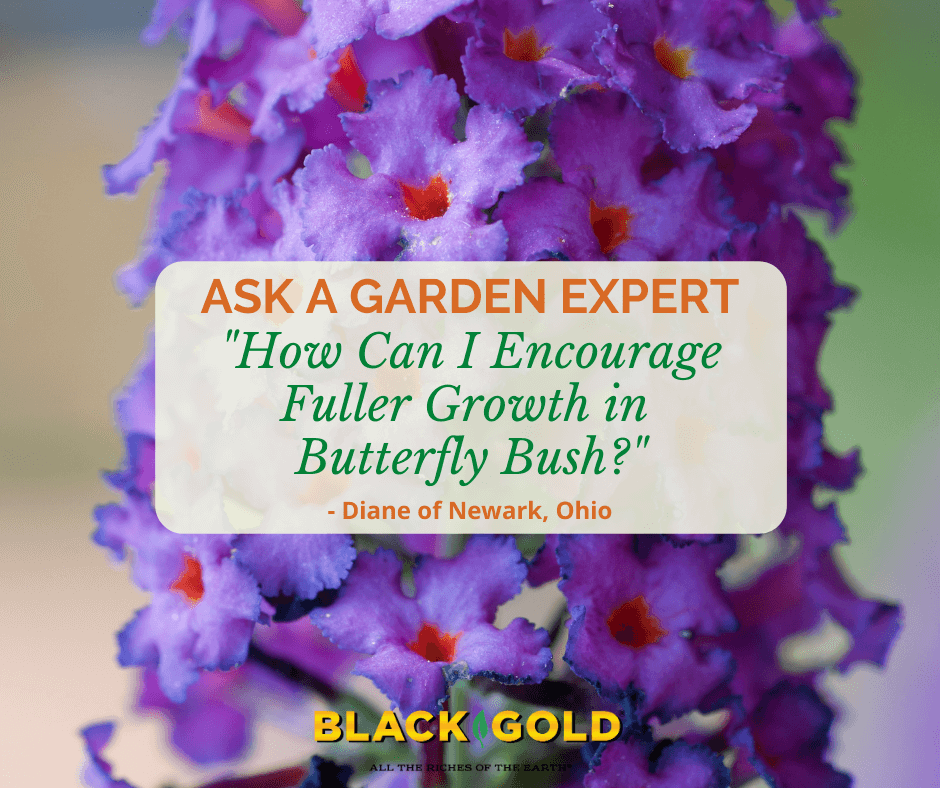
“My butterfly bush was so rangy last year. How can I get it to be fuller and to attract more butterflies?” Question from Diane of Newark, Ohio
Answer: Several things can cause butterfly bushes (Buddleia davidii, USDA Hardiness Zones 5-9) can have flowering and vigor troubles. Here are the main culprets.
Age: If your butterfly bush is an older specimen, it may be petering out. They are not the longest-lived shrubs, and as they age they often show less vigor and flowering. Many may only thrive for 10 or 20 years, or less. If it’s time to replant, I recommend that you try Proven Winner’s Lo & Behold®‘Blue Chip’ butterfly bush. It’s sterile, so it does not become invasive, and it blooms nonstop all summer with wands of purplish-blue that draw lots of butterflies. It is also more compact, at 2.5 to 3 feet high. (Click here to discover more sterile varieties.)
Light: Make sure your plants get full sun. Less light puts a damper on flowering.
Soil: Well-drained average soil is best for butterfly bushes. If your soil has drainage issues or is heavy, then you may need to move or replace your plant.
Pests: Various pests can reduce the vigor and flowering of butterfly bush. Tackling them early will help your plants perform better. (Click here to learn more about common pests.) Fortunately, butterfly bushes have few disease problems.
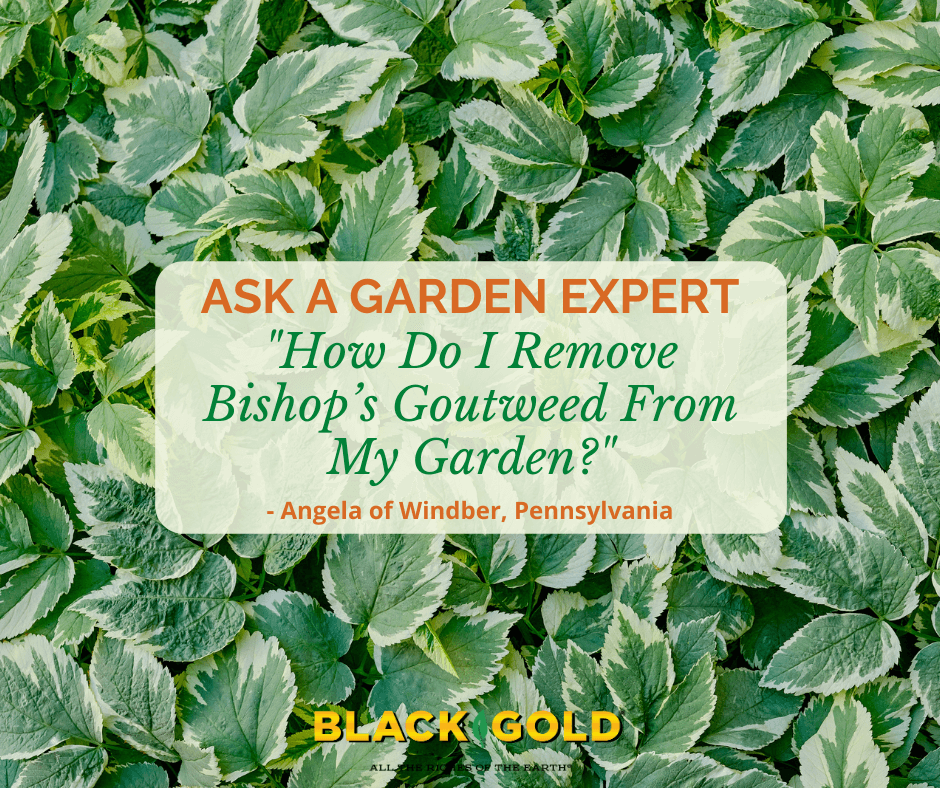
“I have, what looks to be Bishop’s vine/weed, growing in my one garden. It’s starting to choke out my tiger lilies and other items growing in the garden. I can’t seem to get rid of it. Is there a way to get rid of the bishop’s weed in my garden?” Question from Angela of Windber, Pennsylvania
ANSWER: Sadly, bishop’s goutweed (Aegopodium podagraria) is a noxious problematic plant when it is unwanted. It can be a notoriously difficult perennial weed to remove. It’s very hardy, and its dense runners spread everywhere quickly, as you have found. It’s especially annoying when its roots become intertwined with other shrubs and perennials. Here is the four-step approach I recommend that you take to kill it. It may sound challenging, but if you do it right, it is the fastest, most effective way to remove it fast if your garden is not too large. Start the work in the spring as your plants begin to emerge from the soil. (BTY, weed killers are not particularly effective on this plant.)
Four Steps for Goutweed Removal
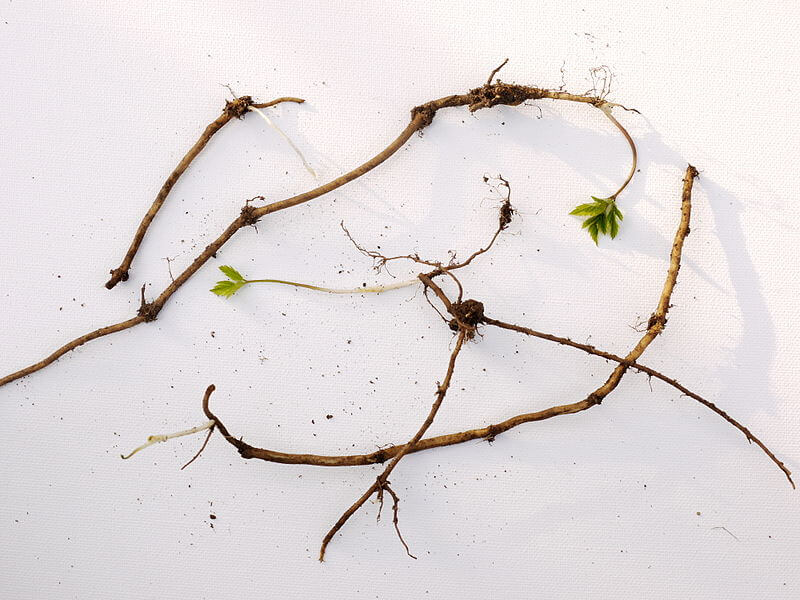
Goutweed roots will regrow if left in the soil, so remove them all! (image by Drahkrub)
Use a sharp, flat spade, skip the top 4-6 inches of soil to remove as many of the goutweed roots as possible. When digging the underground runners, gently loosen the soil around them with a trowel, following each until they are fully removed. If you keep even a small piece in the ground, it will re-root and grow. This can be a challenge when working around your garden plants, but be diligent. In some cases, you may have to dig up perennials, remove the goutweed roots from their base, and replant them.
To keep underground stems from returning, consider covering the area with mulch cloth and mulching it over. After a season, all goutweed should be smothered, and you can pull up the mulch cloth and resume gardening as usual.
Keep watch for any new goutweed shoots that appear and dig them out immediately.
Look for goutweed that may have crept into your lawn. I recommend using a broad-weed herbicide to remove it. Organic options are available.
“I have fungal diseases on my apple trees and fruits. I have tried all different sprays and had no results.” Question from Candace of Bradyville, Tennesee
Answer: Apple trees get loads of fungal diseases (Click on this link for a full list). Some cause trees serious damage while others are just disfiguring and reduce fruit set. Either way, you can reduce fungal disease problems by taking these steps.
Wet springs are sure to cause fungal disease symptoms on infected trees. There are several cultural and safe chemical means of controlling them. These include:
Applying a dormant oil fungicide spray in late fall, again in late winter before the trees leaf out, and again after they begin to leaf out in spring. If the spring is unusually wet, apply an additional copper-based fungicide spray through the spring during a dry spell. (Click here to read more about dormant oil sprays.)
Watching for leaf spotting when weather conditions are favorable, and spraying with a Bordeaux mixture fungicideof copper sulfate (CuSO4) and slaked lime (Ca(OH)2) as soon as they appear. (Note: Moist spring air between the temperatures of 40 degrees F and 86 degrees F encourages the onset of fungal diseases.)
Spraying with a Bordeaux mixture fungicide during the growing months. This fungicide is effective and approved for organic growing.
Removing badly infected or dying stems with clean shears or loppers as you see them.
Raking up all of the fallen leaves that may carry disease in fall, and bagging and disposing of them in the garbage.
Repeat treatment yearly as needed, especially in moist years, to overcome this common fungal disease of apples!
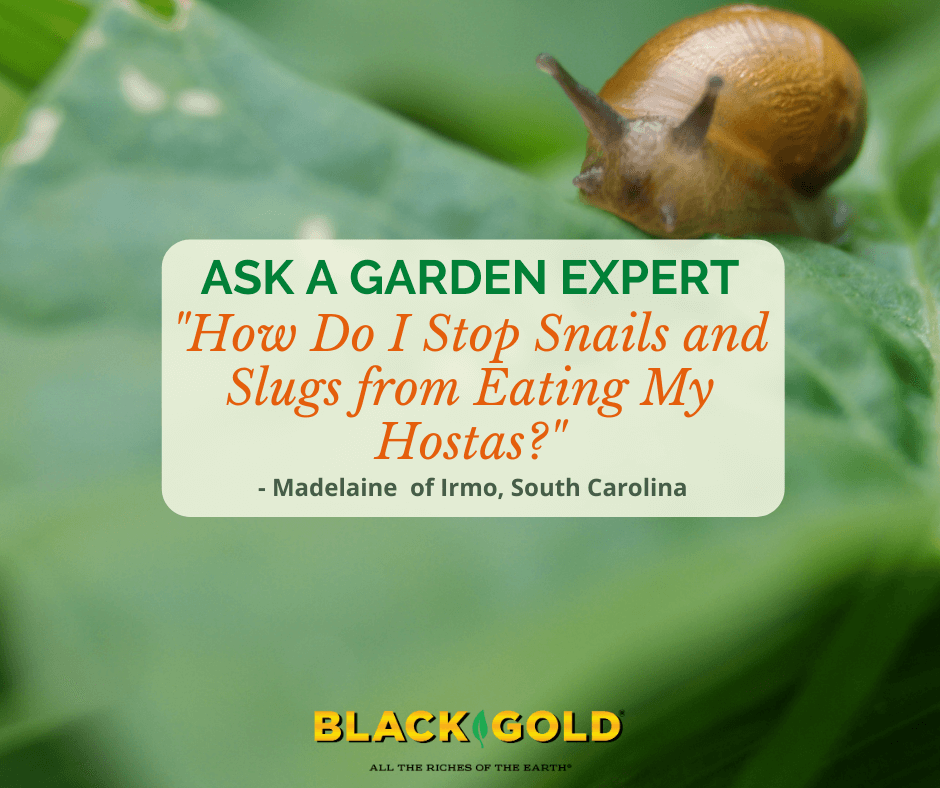
“How to prevent snails from eating hostas?” Question from Madelaine of Irmo, South Carolina
“How to prevent snails from eating hostas?” Question from Madelaine of Irmo, South Carolina
Answer: There are lots of great products on the market that ward off slugs and snails. Some are even OMRI Listed for organic gardening. Here are my top three favorite slug repellents and deterrents.
Pelletized Iron Phosphate Killers – These include products like Sluggo and Bonide Slug Magic. The products are safe to use around pets and wildlife.
Diatomaceous Earth – Sand-like diatomaceous earth is very sharp at the micro-level, and cuts through the tender exteriors of slugs and snails. Add a layer around your hostas before they emerge in spring, and it should really help. It is typically OMRI Listed and completely safe for pets, wildlife, and humans.
Beer Traps- slugs and snails die a little less cruelly when they fall into a drunken beer stupor and pass on in beer traps. (Please click here to learn how to make one.)
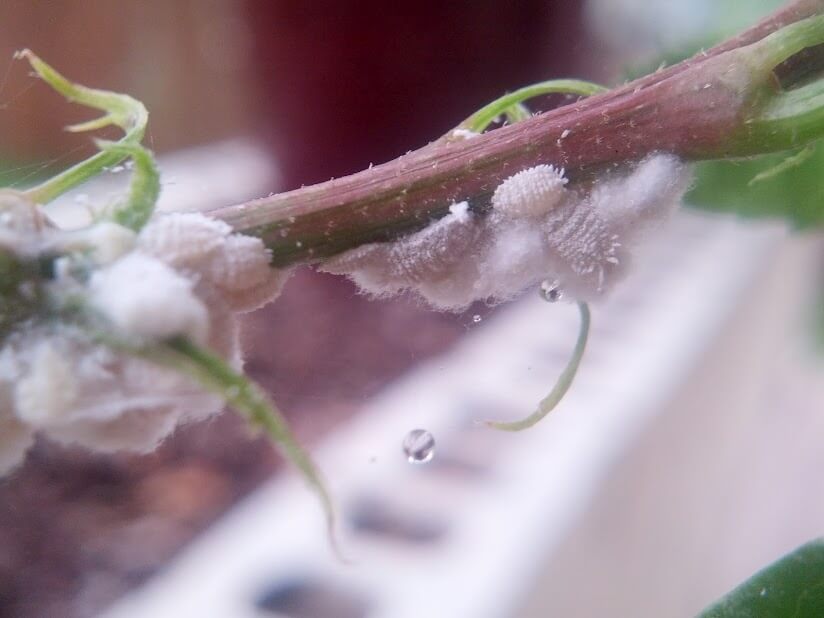
“What is the best way to remove ground mealybug or should I dispose of the whole plant?”Question from Erin of Conover, North Carolina
Answer: Mealybugs can be overcome. It just takes a little time and patience. The main reason is that one has to eradicate both the adults as well as the juvenile crawlers, which are almost invisible to the eye. Outdoors, ladybugs and other natural predators keep populations down, but inside the house mealybugs can take over a plant really quickly.
Mealybugs are soft, white, and feed on the juices of plant leaves and stems, particularly in the crevices between leaves and stems. Mealybug infestations are hard to manage because these pests travel and spread as crawlers. Crawlers are the nearly invisible nymphs that hatch from the pest’s white, cottony egg masses and “crawl” several feet to quickly infest other plants. You can’t always see these crawlers, so to manage them, you have to clean plants, containers, and surrounding surfaces when you see an infestation. They produce copious crawlers, so the sooner you notice mealybugs, the better.
At high populations, mealybugs produce lots of cottony egg masses, adult bugs, and nearly microscopic crawlers. All must be completely removed if the plant is to be saved. (Image by Alexlutor)
To remove mealybugs, start by cleaning your plant, its pot, and all surfaces surrounding the plant. Remove the top two inches of potting soil and replace it with fresh. Finally, spray the plants. One of the best mealybug sprays is a 10-25% solution of isopropyl alcohol. Fill a spray bottle with 1/4 cup of isopropyl alcohol and 2/4 cup water and shake to combine. When treating plants with this solution, keep them out of direct sunlight because it can cause leaf burn in the bright sun. You can also treat plants with insecticidal soap or Neem oil. Repeat spray treatments until plants are mealybug-free.
Another method to stop crawlers is to surround infected areas with double-sided tape traps. As the crawlers hatch and begin crawling, they will get stuck on the tape and die. You can also surround plant bases and pot edges with double-sided tape to keep crawlers from moving beyond an infected plant.
“What is best to use to be on the offensive and keep pests from coming into your garden?” Question from Marilyn of Roseburg, Oregon
Answer: You cannot keep pests from visiting, especially if you are growing their favorite foods. But, cleanliness, monitoring, and planting robust pest-resistant varieties are three excellent tools for keeping pests at bay. Planning ahead for potential pests is another tactic. Let me flesh out these tips a bit more.
Give Good Plants a Good Head Start
Stressed plants emit hormones that attract potential pests, so keeping plants happy and healthy is important. When choosing vegetable starts at your local nursery, select disease and pest-resistant varieties, pick large plants with no leaf damage, and avoid highly root-bound plants. (Bound roots have a dense, interwoven network of roots with little potting mix. Gently lift plants from their pots to see the roots.) Bound root systems must be cut and separated at planting time, which puts undue stress on transplants.
Choose (or raise) the healthiest plants you can. Large, robust seedlings have a greater chance of resisting pests and diseases and producing high yields. If growing plants from seed, be sure to give your seedlings plenty of light and room to develop stout, dense growth, and ample root systems. Planting one seedling per pot will help avoid competition. Fertilize starts lightly, so they are as strong at planting time. (Click here for seed starting tips.)
Keep Plants and Beds Clean
A clean, weed-free garden with open spaces between plants yields better fruit by increasing light exposure and airflow. Under clean, open conditions, pests and diseases are slower to take hold and easier to manage. Walkways covered with straw, leaf mulch, or compost also make is nicer and easier to walk through the garden and care for plants in all weather.
Keep plants clean! Bushy veggies, such as tomatoes, peppers, and eggplant, are especially important to clean and prune to minimize the spread of disease and pests. (Click here to learn how to prune tomatoes.) Remove dying, diseased, or infested leaves and stems or any unwieldy branches that inhibit airflow and light where it needs to reach. When pruning, clean your pruners from one plant to the next by dipping them in a 10% bleach solution to reduce the chances of any cross-contamination of potential diseases. At the end of the season, remove all garden litter and plant material from the garden soil that may harbor overwintering pests and diseases.
Plan For Pests You’ve Experienced Before
If your cabbages have had cabbage loopers or your petunias have had budworms in the past, expect them to return. Apply pre-emptive applications of OMRI Listed BT to stop them in their tracks. By learning the life cycles of different pests that have plagued your garden in the past, you can plan precise strikes with the correct pesticides. (Reach out to the Oregon State Extension Service for more information and to take advantage of their many online resources for Oregon vegetable gardeners.)
“Curious to know if anyone has figured out a way to get rid of viruses and diseases out of your soil. Mosaic, for example. Flea beetles spread it. Is my garden gone forever? I’m willing to do ANYTHING!” Question from Pam of Conroe, Texas
Answer: Different fungal, bacterial, and viral diseases of plants exist in the soil for various amounts of time. Some are not soil-borne at all, while others will remain in the soil without a host plant for several years. For example, tomato mosaic virus and tobacco mosaic virus will survive in dry soil and dead plant debris for up to two years. If the soil is moist, the diseases will only remain in the ground for a matter of months. Here are some methods of general soil health and disease removal.
How to Restore Garden Soil with Soil-Borne Diseases
Keep it Clean – Remove all diseased plant material, from the plant to fallen leaves to the roots. Do not compost infected plants. Instead, dispose of it in the trash or burn pile.
Weed and Mulch – Weeds can be carriers of common garden diseases. Their removal will help keep disease out of your garden.
Stop Insect Carriers – Many insect pests, like cucumber beetles, flea beetles, leafhoppers, whiteflies, and aphids, can carry and spread different diseases. Keeping their populations low in the garden can reduce diseases that can become soil-borne. Click here to learn how to naturally tackle the top 5 vegetable garden pests.
Plant Disease-Resistant Varieties – Plants that resist common diseases bring less disease to the soil.