Articles

African Violet Care 101

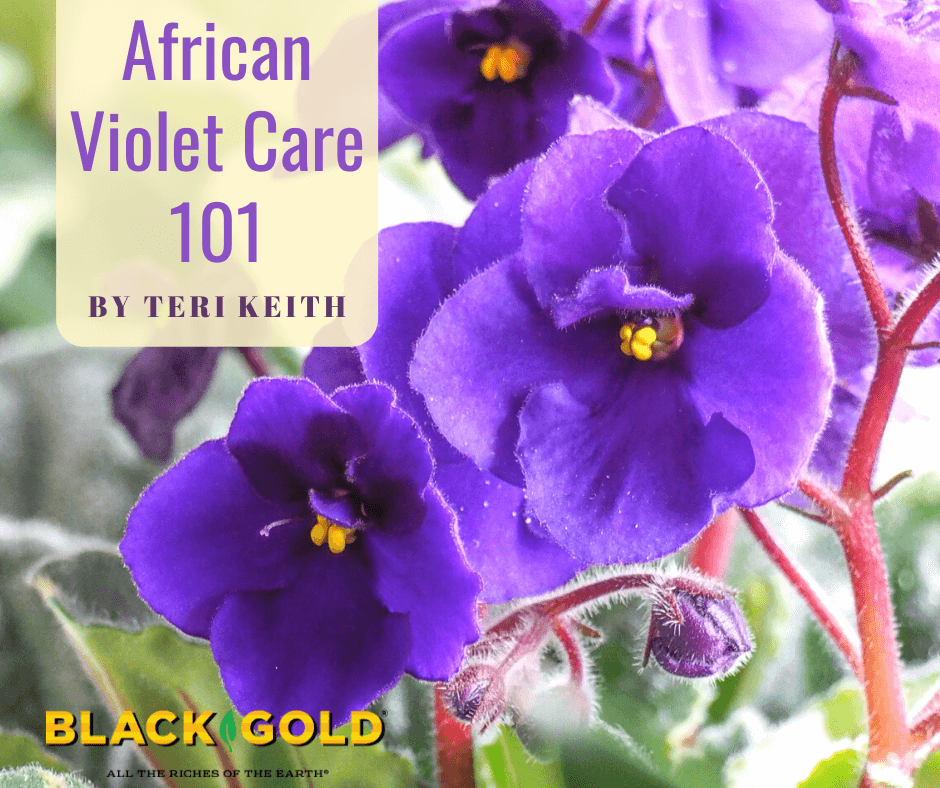
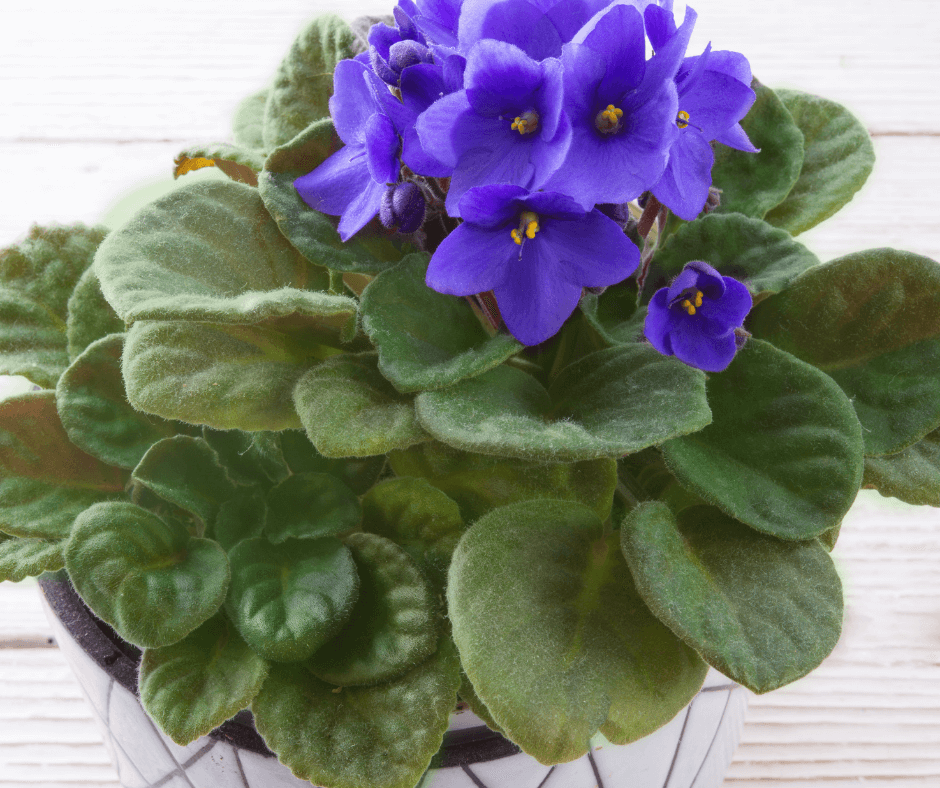
It is that time of year when I start feeling desperate for flowers. Christmas, with all the decorations and lights, is past, and there are three whole months until April, with its early daffodils and crocus. So what is a perfect, ever-blooming houseplant, to brighten things up at this time of year?  The answer is African violets, and they are easier to grow than most think.

Basic Overview of African Violets

A happy African violet will bloom off and on throughout the year.

African violets (Saintpaulia ionantha) were discovered in 1892, in tropical rain forests in Tanganyika, a small country in eastern Africa. Baron von Saint Paul, the imperial, district governor of the colonized country, found them on the forest floor. He then sent plants and seeds back to his father in Europe, and after passing through several hands they made their way to the Royal Botanical Gardens, Kew, where the first breeding to develop them into houseplants began. They came to the United States in 1894 and by 1946 were so popular that police had to be called in to help with traffic, at the first US National African Violet Show in Atlanta, Georgia. The African Violet Society of America was founded shortly afterward in the same year.

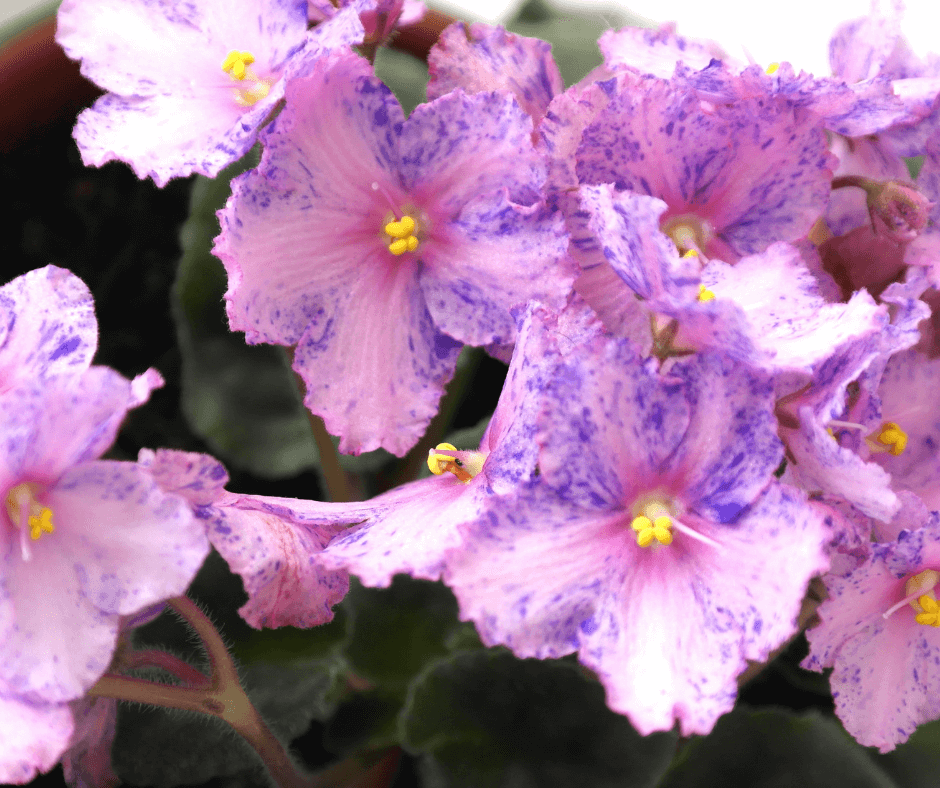
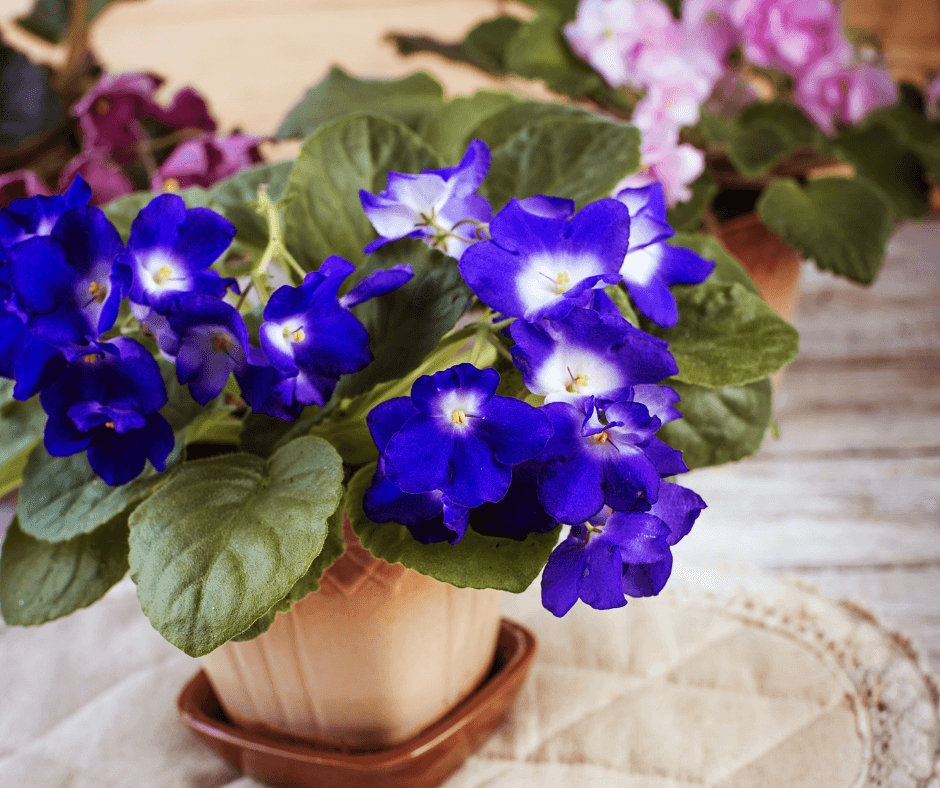
As with any new plant, developing fancy varieties took off quickly, and now with modern breeding, there are fabulous African violets available. Plants range in size from 3 to 16 inches and can have single or double flowers in shades of pink, purple, violet, rose, or white. Some have frilled edges and others are bi-colored, with contrasting edges and centers. Violets that are splashed or speckled with two or more colors are called fantasy types.  Some have variegated leaves with edges, centers, stripes, or spots of white or yellow. Other have leaves with ruffled edges, quilted puffs, or an oak-like shape that add to the beauty of the plants.

Buying African Violets

Fantasy African violets are some of the most spectacular now available.

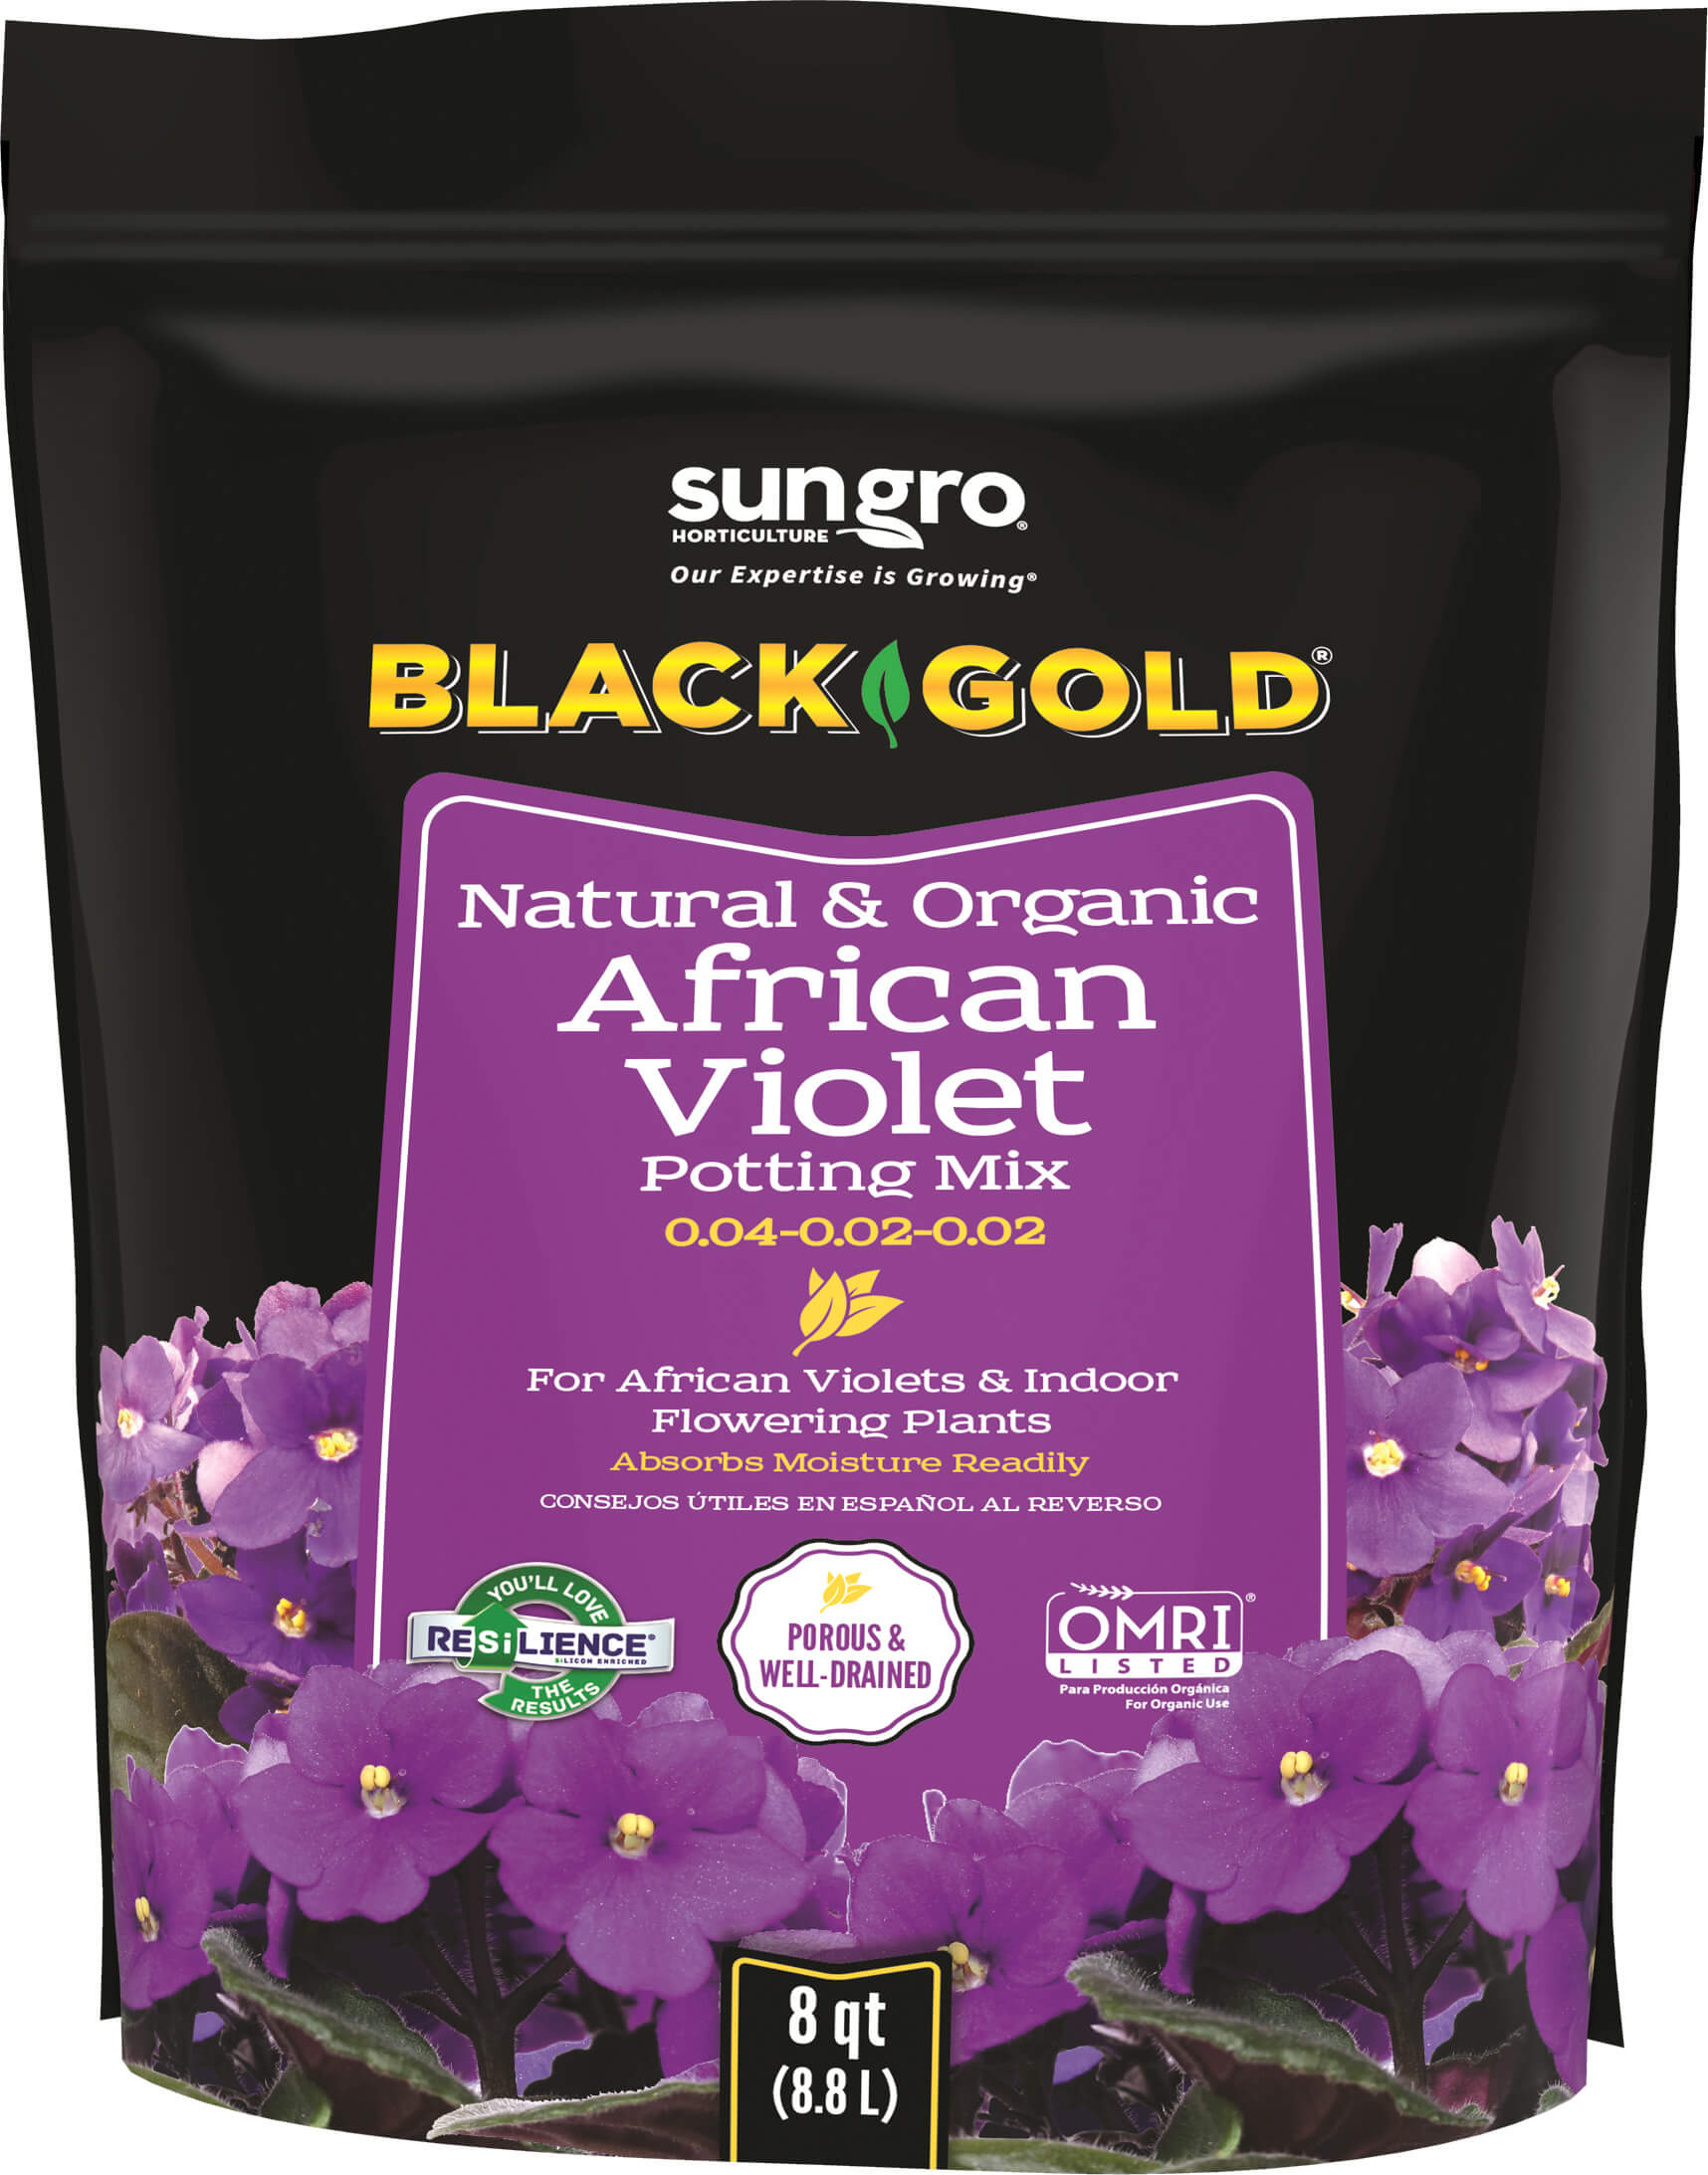
All garden centers that carry house plants should have a nice African violet selection, but specialty plants must typically be purchased online unless you have a specialty grower nearby. The Violet Barn is an outstanding online nursery for African violets, and, of course, looking at all of their wonderful varieties means that I plan to order some new African violets right away. They have an outstanding selection of unusual trailing varieties, and the fully-double, trailing-pink ‘Cirelda‘ caught my eye. The award-winning, heavy flowering, speckled-violet ‘Rob’s Boolaroo‘ looks unbelievable, as does the pretty pink-flowered ‘Ma’s Debutante‘ with its wonderfully white speckled variegated leaves. I was also attracted to some of the Saintpaulia species, such as Saintpaulia grandifolia, which is elegant and promises prolific violet-blue, butterfly-shaped blooms on long stems. Pretty African violet pots and a bag of Natural & Organic Black Gold African Violet Potting Mix are also on my to-buy list.

Growing Basics for African Violets

African violets require pots with drainage and bottom saucers.

Now, it is true that African violets have a bit of a reputation for being tricky to grow, but with a few instructions, you will easily have beautiful plants that bloom heavily and repeatedly throughout the year.

  1. Light: Providing the right amount and kind of light is important to keep plants blooming. African violets like bright, indirect light, which means putting them in a west- or east-facing window (large north-facing windows also work) and turning them every week for uniform growth. Artificial grow lights can also be used, if they provide consistent, uniform light. Keep the plants no farther than 12 inches away from the light, and provide 12 hours of light a day. If they start having fewer flowers, change the amount of light to 14 hours a day for a few weeks, and then go back to 12 hours. (Note: Grow lights really help in winter when you lack windows. This year, I brought three huge fancy geraniums in for the winter, but I lacked window space for them. I bought grow lights to keep them going until spring, and they are doing very well.)
  2. Water: Proper watering is essential for African violets. They require highly drained soil that is just moist. Room temperature water that is low in minerals is also preferred. When watering, avoid getting water on the leaves, which can cause leaf spots and damage. Instead, either bottom water or water from the top with a narrow-spouted watering can, while being careful to avoid the foliage. Allow water to stand in the bottom saucer for about 1 hour, and then pour it out. Allow the soil to dry out a little before watering again.
  3. Temperature & Humidity: The perfect humidity is 50-60% and temperatures close to 70 degrees F are just right.
  4. Fertilization: Fertilize with a specialty African violet fertilizer, which you can find online. Be sure to follow the manufacturer’s application instructions, because they may vary. I tend to feed them lightly each time I water.
  5. Soil & Drainage: Choose a specialty growing mix, such as Natural & Organic Black Gold African Violet Potting Mix, and always plant African violets in pots with drainage holes and a bottom saucer to catch water. When the plant becomes root bound, upgrade to a pot 1-2 inches larger to encourage new growth.

If your African violet stops blooming, check the number of rows of leaves. If there are 5 or more rows, cut the outside rows of leaves off at the base, back to 2 rows. Each row produces its own flowers, and the crown of leaves can take over the plant.  The most common cause of lack of flowers, however, is not enough light, so move it closer to your light source if plants stop blooming.

With new African violets on the way, I am thinking of places to put mine. My new trailing ‘Cirelda’ will look beautiful in a hanging basket. I cannot wait to see its pretty pink flowers and cascading stems. It should give me gorgeous blooms to brighten the winter and times beyond. For more information, please watch the helpful video below.

How Do You Grow Cilantro Indoors?

How Do You Grow Cilantro Indoors?

“What is the best practice to ensure a window-sill cilantro plant will thrive? I have a green thumb and can grow or rehab practically any plant/flower/herb/garden. However, each time I’ve purchased a cilantro plant, it wilts after a few months. I only water when dry. Thank you!” Question from Ann of Raleigh, North Carolina

Answer: Cilantro (Coriandrum sativum) is a short-lived annual herb that grows best in full sun and cooler temperatures between 65–70°F. That’s why it dies away after a few months after flowering. It’s just what annuals do. My recommendation is to start it from seed in pots along a sunny windowsill and keep replanting as needed.

Growing Cilantro from Seed

Cilantro seeds germinate well in Black Gold Natural & Organic Potting Mix. Sow the seeds, cover them lightly with 1/8 of an inch of soil, and water them thoroughly. Then keep the seeds lightly moist by spritzing them with water. Expect them to sprout in a week to ten days. Then keep the soil just moist by watering from the bottom. It also helps to apply an application of water-soluble fertilizer weekly after they begin to grow. Typically, you can start trimming the leaves for cooking after a few more weeks. Microgreens can be harvested earlier.

Cilantro remains leafy for only a couple of months before it starts to send up stems of white, lacy flowers. If you let it flower and set seed, you can harvest and dry the coriander seeds for pickling and cooking. If you prefer cilantro, then pull the plants as they flower, and plant seeds anew. You might even maintain a couple of pots and plant them several weeks apart to ensure you have a constant flow of cilantro.

Some cilantro varieties stay leafy longer than others. ‘Calypso‘ is one of these. It is generally ready to harvest 50 days after planting.

Happy gardening,

Jessie Keith

Black Gold Horticulturist

How to Plant and Site Trees and Shrubs

The key to successful gardening is to go (and grow) with what you’ve got. If your garden has acid soil and lots of shade, go with acid- and shade-loving plants. If sunny, dry, alkaline conditions dominate, then plan and plant accordingly. This also holds true for the garden’s aesthetic. For example, more “naturalistic” settings (such as a woodland edge) call for more informal, nature-evoking plantings. Beautiful and bountiful things happen when a garden is in harmony with its surroundings.

Understand Your Garden’s Site

Light, soil, space, garden style, and other parameters must be considered before planting a new tree or shrub.

It’s especially important to keep this in mind when choosing – and planting – the trees and shrubs that will form the framework of your garden.  Choose the right plants and get them off to a good start, and good things are almost sure to follow.

It all comes back to knowing the site’s conditions. What are the pH, nutrient-holding capacity, and other characteristics of your soil? If in doubt, you can get a definitive answer by sending soil samples to your state’s horticultural extension service (click here for a nationwide list of extension services). What is the site’s exposure to sun, wind, and water (e.g., rain and runoff)? How and when do you use your yard? Now, during the dormant season, it is a great time to assess these factors. Then, based on your site’s particulars and your preferences, compile lists of trees and shrubs that are a good fit.

Planting Trees and Shrubs

A suitably broad planting hole should be around three times as wide as the plant’s root ball.

When you get around to planting, the same precepts remain. Trying to force an ill-chosen plant into an incompatible site is a losing prospect. If the tree or shrub is a good fit, all it needs is a good root system and a suitably broad planting hole, backfilled (to the proper depth) with unamended or lightly amended soil for best establishment. Of course, planting at the proper season and providing regular post-planting care (especially watering) are also essential.

Sizing Up the Planting Hole

Adding a light application of soil amendment, such as Fafard Premium Topsoil, will give the soil extra organic matter.

Planting width requires a “suitably broad” planting hole is at least three times as wide as the plant’s root ball, although twice as wide will do in a pinch. The texture of the excavated and refilled soil differs significantly from that of the surrounding undisturbed soil; consequently, it also differs significantly in other properties such as moistness and aeration. Adding a light application of soil amendments, such as OMRI Listed Black Gold Canadian Sphagnum Peat Moss or Black Gold Garden Compost Blend, will give the soil additional organic matter for increased water-holding ability to help the establishing plant. This is of greatest importance in poor or sandy soils. If your soil is of good to average quality, this step is not needed. A wide planting hole gives the roots a relatively homogeneous environment in which to extend and establish. By the time they’ve reached the edge of the former planting hole, they’ll be more up to the job of worming their way into the undisturbed soil. Additionally, the refilled soil will settle over time to a texture closer to that of the surrounding soil, thereby easing the roots’ transition.

The planting hole should be no deeper than the root ball.

Planting depth – unlike width – can be overdone. In fact, the planting hole should be no deeper than the root ball. Most of a tree’s or shrub’s feeder roots are within a few inches of the surface. A deeper hole serves only to loosen the texture of the soil below the root ball, increasing the likelihood that it will settle and pull the roots down with it. Plants generally do not thrive in air-starved sinkholes.

Work soil in around the plant and press it down to remove any unwanted air pockets.

Shallower planting may be required in heavy clay soil. Planting holes in such soils are subject to the bathtub effect, with water percolating through the relatively coarse refill soil and pooling at the bottom of the hole. Here, dig an extra-wide hole that’s significantly shallower than the root ball, sloping the base of the hole toward its edges. Mix the excess backfill with Black Gold® Garden Soil, and mound this over the exposed root ball after planting.

Sizing Up the Tree or Shrub

Make sure plant roots have not become pot-bound. If they have, work them apart to help them grow into the soil.

Potted trees and shrubs with vigorous, relatively undisturbed roots make the best planting material. Avoid pot-bound plants whose roots have long ago filled or grown beyond their containers. Before buying a containerized plant, try to knock it out of the container to check the root system. If the root ball remains stubbornly wedged in its container even when you apply force to remove it, it’s a risky prospect. Ideally, the roots should not circle the soil ball, and abundant white feeder roots should be evident at its edge. You can plant container-grown trees and shrubs just about any time the ground is workable, but be sure to keep the root ball from drying out after planting. Most potting soils are peat-moss-based, making them coarser and more drought-sensitive than the surrounding soil. They also resist re-moistening once completely dry. Newly planted container-grown plants may need watering several times a week during summer droughts.

Unlike container-grown plants, B&B plants are often grown in heavy clay, which cracks and resists water when dry.

Bare-root and balled-and-burlapped (B&B) trees and shrubs lose much of their root systems when harvested at the nursery. They thus require more kid-glove treatment. Plant them either in early spring or in late summer/early fall to give their roots ample time to regrow before summer heat or winter cold arrives. Be sure that their roots do not dry out before planting. Unlike container-grown plants, B&B plants are often grown in heavy clay, which cracks and resists water when dry.

Be careful to plant bare-root and B&B shrubs and trees at the proper depth. For bare-root plants, partially refill the planting hole with a volcano-shaped cone of soil, spreading the roots atop the cone before backfilling. The plant’s trunk/root junction (also known as the “root flare”) should be just at or slightly above the soil surface. Stems of B&B trees and shrubs are often partly buried in their root ball; if so, remove some of the soil to expose the root flare. Also, be sure to minimize disturbance to B&B root balls as you plant, and remember to unswaddle the burlap (or wire caging) from the top and sides of the root ball before refilling the hole. Either cut and discard the unwanted wrap or pull it back and bury it at the bottom of the hole.

A two- to three-inch mulch layer will hold in soil moisture and protect against weeds.

Add a good mulch layer to buffer newly planted trees and shrubs from drought, heat, and cold, and apply an inch of Black Gold® Natural & Organic Garden Compost Blend and a couple of inches of bark mulch to the planting area. They’ll appreciate the extra pampering, and you’ll appreciate the results!