Articles

Winter Garden Tasks for a Happy Garden

January is a good time to remove old Helleborus leaves, just be sure not to accidentally snip flower stems.

December was a month of trying to get my winter garden tasks all done before the end of the year. Here it is January, and I have not completed all my December tasks. Getting everything done is something that I have never been able to do because a garden is constantly changing and evolving. With the unpredictability of weather, it seems as though there is always a new task, and I often get distracted on starting on another before completing what I am working on. So, the tasks get moved deeper into winter.

Winter Garden Tasks

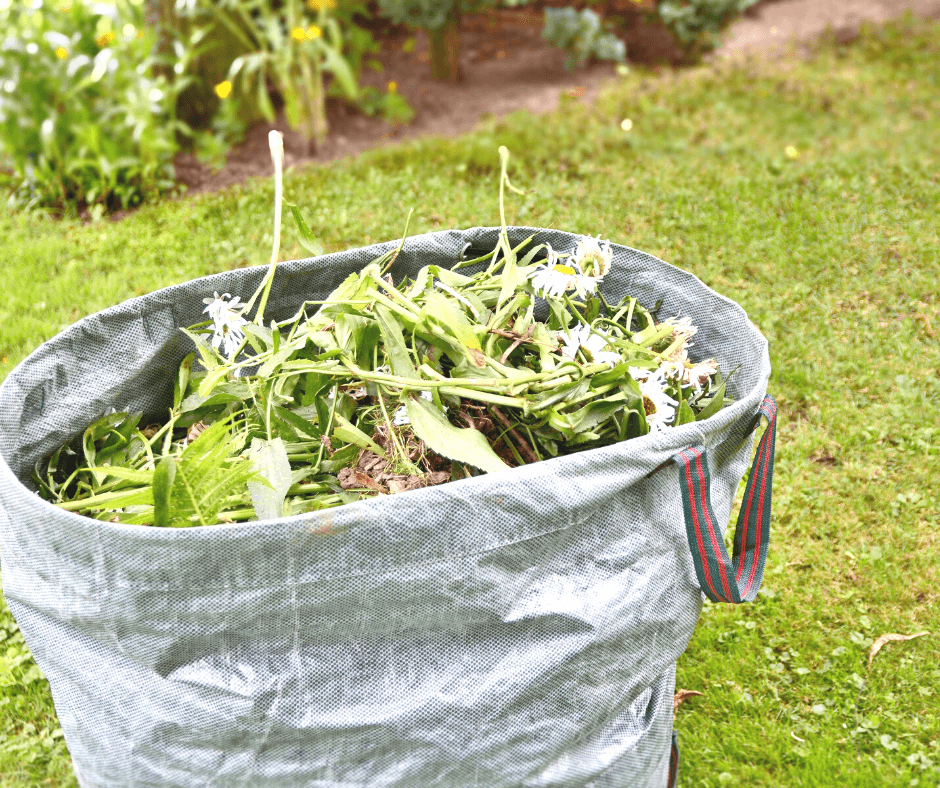
Move Hardy Perennials: I have heard some gardeners say that they can relax in January, but that is not the case with me. I consider January a good month to do some final ‘editing’ in the garden because there are always some very hardy plants that need to be moved or, in some cases, removed. This can be done in January as long as the soil can be worked and I only move very hardy perennials.

Move hardy perennials if the soil can be worked.

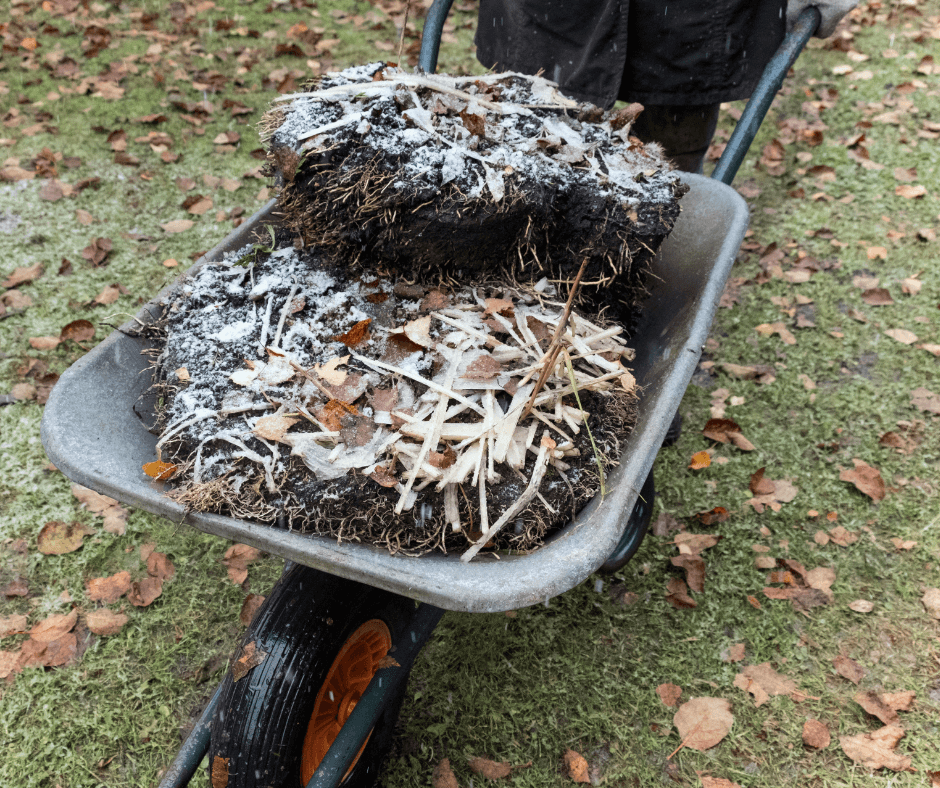
Divert Water: During this winter season, and this is just early January, we have had strong winds, some snow, freezing temperatures, and rain, lots and lots of rain. The rain was much needed, and so there are no complaints from me about it. Walking through the garden after a rain, there are some areas that have accumulated pools of water, and there are very few plants in my garden that have roots that will thrive in standing water. This is a perfect opportunity to create some diversion paths for the water and also an ideal time to add Black Gold Soil Conditioner (only available in the West) or Black Gold Natural & Organic Garden Compost Blend to help improve the drainage in low garden areas. By doing this now, I can observe what is working and what is not because we will soon have more rain, and I can see if there is still a collection of water.

Trim Back Helleborus Foliage: I spent several hours one morning cutting off the old leaves of the Hellebores. I was surprised to see new growth and flower stems beginning to break through the soil. A word of caution here, be very careful when cutting off the stems of the old leaves because it is very easy to snip off a new leaf or flower stem. Beware of early slug damage on newly emerging bulbs and on the new growth on Hellebores and treat accordingly.

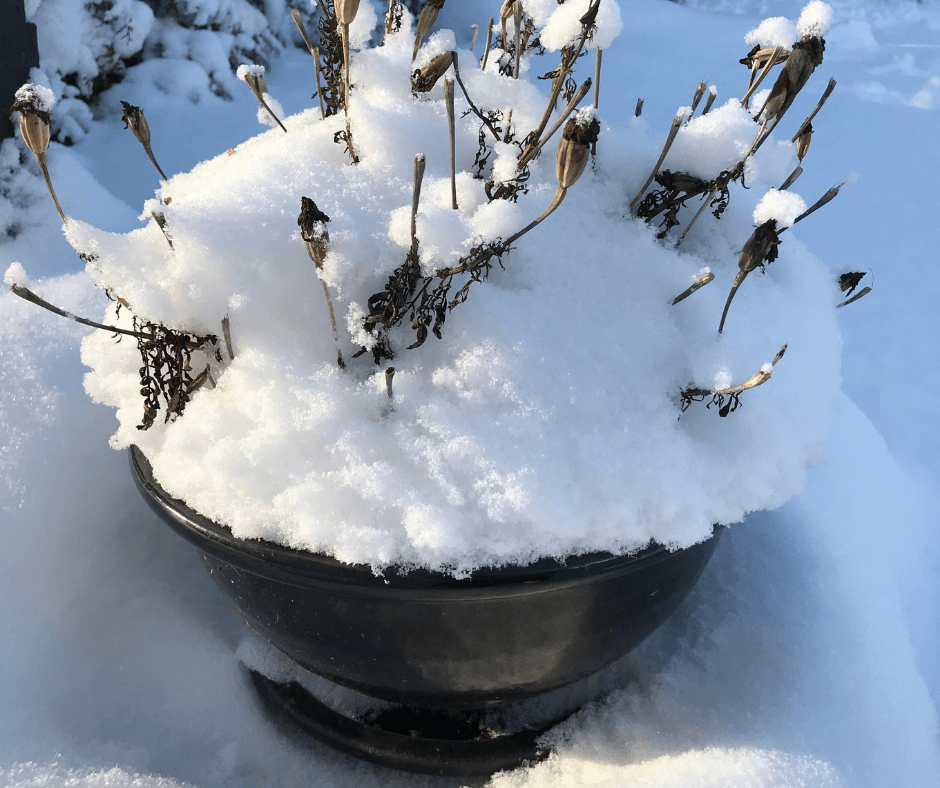
Check Outdoor Garden Pots: My garden has many pots, and I have looked at every one to make sure that the water drains through and there is no standing water. Several of my pots did have standing water, and I was able to turn the pots on their sides and poke a metal rod into the drainage holes to un-plug them. This helps heavy, ceramic pots resist cracking in the winter.

Check outdoor pots to see if they are still draining.

Treat Moss: Moss in the lawn can be treated now, unless you love the look of natural moss. It is a good idea to check if it is a re-occurring issue. Usually, it can mean there is too much shade, poor drainage, or both. There are lawn moss control products available at garden centers, and this is a good time to apply them. Many of moss control products contain ferrous sulfate monohydrate, (iron), and iron will stain shoes, cement, decks, etc., so use it with caution and follow all of the manufacturer’s warnings. These products will turn the moss black in a couple of days, and then it can be raked out. If there are large areas that have dead moss, re-seeding might be necessary but wait until spring for that.

Enjoy what still looks beautiful and do any early pruning as needed.

Do Early Pruning: Winter garden tasks always seem to involve some pruning and on deciduous shrubs, it is often easier to prune and shape the plant before new leaves appear. While the major pruning on roses is usually mid-February, I like to do some pruning now and cut the hybrid teas and grandifloras to 3-4 feet.

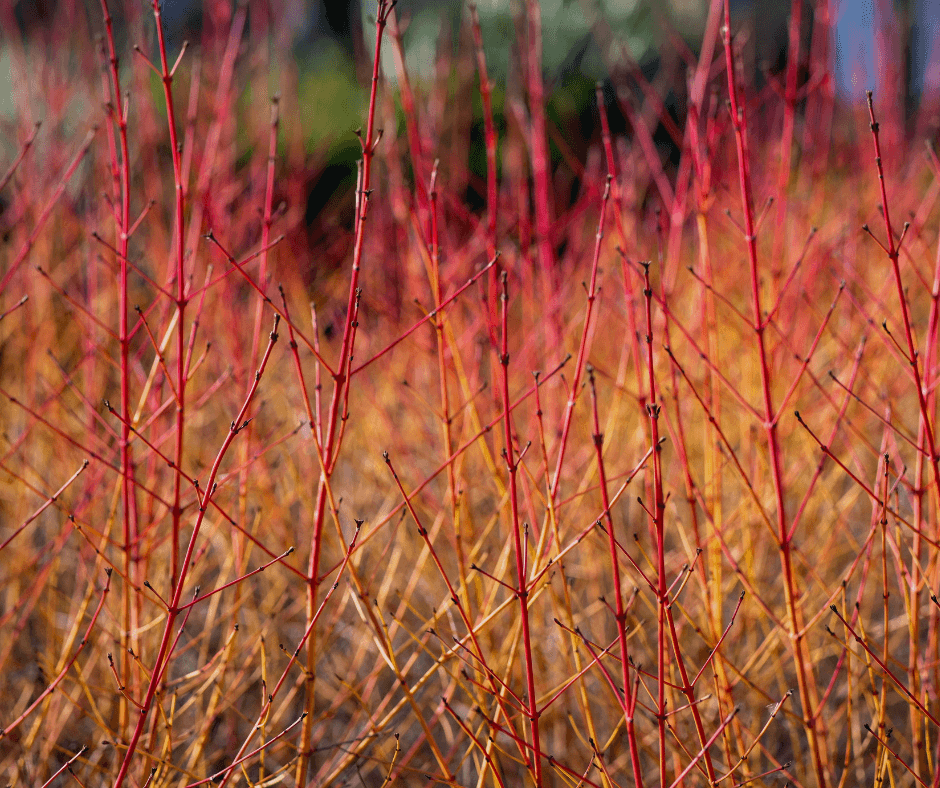
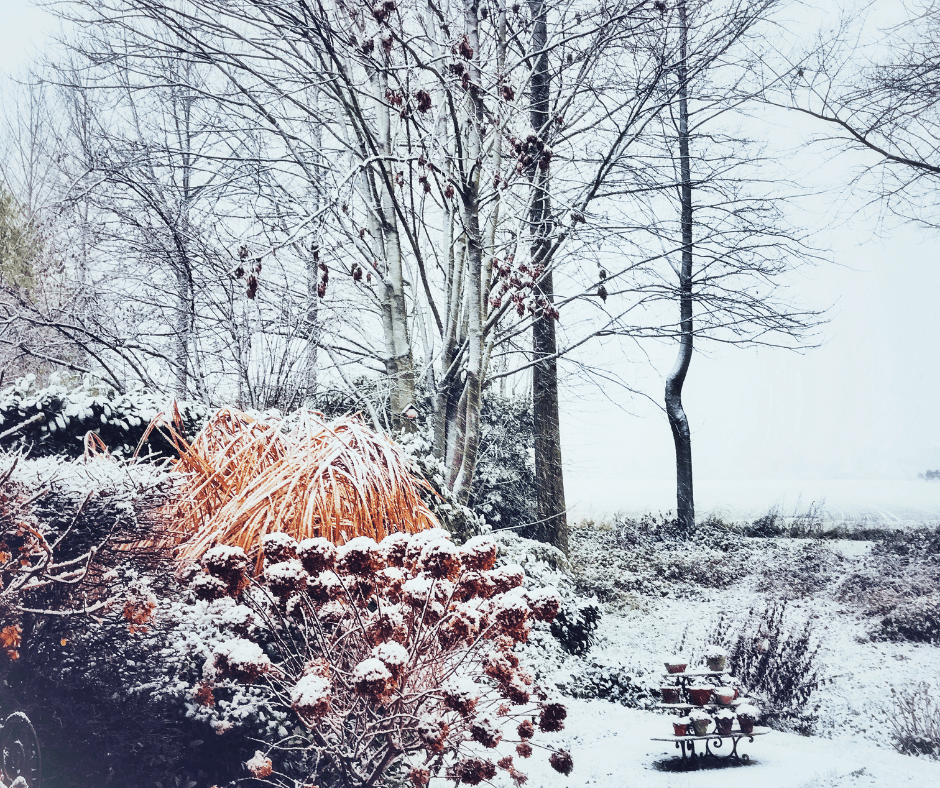
Enjoy What Looks Nice: I find that the garden is enjoyable in the winter, although the expectations are different than they are in the spring and summer. My dogwood Midwinter Fire is a bright spot with its stems of red, orange, and yellow. The twigs are also a nice addition to indoor winter arrangements. My variegated evergreen shrubs also provide winter color to dark areas in the garden and are a welcome addition to what otherwise are bare garden stems.

Even though I enjoy the winter garden, I am eagerly awaiting spring!

Winter Garden Tasks for a Happy Garden – 2021

Winter Garden Tasks for a Happy Garden – 2020

My Midwinter Fire dogwood is adding lovely color to my winter garden.

Putting Perennials To Bed In The Fall

Depending on where you live in the country, September, October, and November are the main months for putting garden beds to rest.  You may still have some warm days in these months, but once the nights and then days become chilly, it’s time to get to work. And, if you do it right, it is quite a bit of work, but more work now means less work later. Spring will be a breeze!

1. Weed

Pull as many weeds as you can in the fall to make spring gardening easier.

I have just started on the first step, which is getting all the weeds out, and it is going to take me quite a while.  Some seasons, I stay on top of weeding, and other times other priorities get in the way. This past summer was busy, so the weeds had a “field day.” It is especially important to clear weeds from right around the base of each garden plant. When weeding, it is wise to choose good tools for the job. Luckily, we have an excellent article written by my daughter, Jessie, that details the best weeding techniques, times, and tools for the job. Read it and weed! (Click here to learn how to week like a pro.)

2. Mulch

A moderate layer of mulch will protect against winter weeds, and protect perennials from the cold.

This brings us to step two, putting down fresh triple-shredded bark mulch, my preferred garden mulch, which I purchase in bulk by the yard or occasionally by the bag when only a small amount is needed. (Click here to learn about different mulch options.) Not only will mulch stop weeds, but it will also keep the soil moist, and protect your plants from big temperature swings. In addition, mulch breaks down over time, adding organic matter to the soil. Areas I have mulched for years have slowly turned into rich garden soil.  Put down around 3 inches of mulch, being careful not to cover the plant. (Not sure how much mulch to get? Click here for guidelines to calculate how much your garden will need.)

There are four rules to mulch application, particularly when it comes to mulching around plants: 1) leaf space around plants, 2) don’t mulch too thickly, 3) don’t apply mulch against the trunks of trees or shrubs, and 4) apply mulch when the soil is moist to make post-application irrigation easier. Leave a  3- to 4-inch gap between the base of the plant and the mulch, to avoid smothering the plant and causing crown rot. This is especially true of evergreen perennials and perennials with surface rhizomes, like bearded iris (Iris germanica hybrids). Peonies are also sensitive to excess mulch. One year, I mulched my peonies thoroughly in the fall and was so pleased with myself for getting it done early, but the following spring two of my prize peonies did not show up.  I had mulched too thickly and killed them. Also, do not mulch low, spreading, evergreen to semi-evergreen perennials, including Heuchera, Dianthus, ground cover sedums, such as ‘Angelina’. Mulching them commonly causes crown rot and death.

3. Cut Back Perennials

When frost takes your perennials, such as these hostas, it is time to cut them back. Semi-evergreen lamium (foreground) should be left alone until spring.

Wait until the frost has killed the leaves of herbaceous perennials before cutting them back and removing the old stalks and leaves.  This is especially important with hostas, one of my favorite perennials (I have hundreds!).  Unlike other perennials, if the leaves are removed while green, the plant will put up next year’s growth prematurely, and the following spring will have just a few scrawny leaves, so cut back hostas to 2-3 inches after the frost has taken them.

Evergreen perennials, such as Lenten rose (Helleborus spp.), myrtle euphorbia (Euphorbia myrsinites), and candytuft (Iberis sempervirens), can be left alone until spring, and semi-evergreen perennials, like coral bells (Heuchera spp.), dead nettle (Lamium maculatum), and certain daylilies, can also be left to trim back until the spring.

Some plants that add winter beauty to the garden should also be left alone.  Ornamental grasses, with pretty seed heads, gently wave in the wind, coneflowers (Echinacea spp.), black-eyed Susans (Rudbeckia spp.), and perennial sunflowers (Helianthus spp.) set seeds that songbirds like to eat in winter, so I leave them alone until the spring. Fall bloomers, such as chrysanthemums and asters, can also be trimmed in the spring. The protective stems of chrysanthemums sometimes help the tender perennials overwinter, which is nice if you like to keep them from year to year.

Another tip is to meticulously cut back perennials that are highly susceptible to leaf fungal diseases, particularly bee balm (Monarda spp.) and tall garden phlox (Phlox paniculata). Cut them back low, thoroughly, and be sure to completely remove the old leaves from the surrounding area. They should not enter the compost pile. Certain diseases can persist in the soil, even composted soil.

4. Divide and Plant

Divide large perennial clumps and spread them around in the garden to add more summer flower color where needed.

Mid-fall is the best time to divide and move hardy perennials, such as hostas, daylilies, monarda, rudbeckia, and coneflowers. If you live in USDA Hardiness Zones 3-5, or colder, divide and replant perennials earlier in the season, and only move those that are reliably hardy in your zone.  If you live in warmer zones, then you have a little more flexibility time-wise.

When dividing perennials, I typically use a sharp spade to neatly cut away a section of the plant. It is essential that each chunk has a nice portion of the crown with lots of buds on the top and roots beneath. Then I move and plant them in locations that have the right site conditions and need the color. Some falls are dry where I live in Indiana, so I am sure to irrigate my new divisions well when the weather does not bring rain. Adding Black Gold Garden Soil to the bottom of each hole adds needed fertility and a boost of fertilizer, which all plants appreciate.

So, I must get going to finish my fall garden cleanup, while the going is good (and so should you)! Then, I can spend the winter focusing on next year’s garden, worry-free.

Does Moss Make a Good Groundcover?

“Even though moss dries out in summers, will it make a good ground cover for dirt that is largely dark clay?” Question from Susan of Junction City, Oregon

Answer: If you live in an area with consistent moisture and lots of shade, then it can make a good ground cover, though we recommend amending any clay soils first. There are lots of different moss species that are sold by specialty moss nurseries, or mosseries. (Moss Acres is one and Mountain Moss is another.) Most mosses grow best in moist, fertile soil that holds water well and is more acidic (pH 5.0 to 6.0), though some mosses will tolerate some sunshine. (Click here for a list of shade-loving mosses and click here for sun-tolerant moss options.)

Steps for Growing Garden Moss

Here are five steps to getting moss to grow in your yard or garden.

  1. Work up shaded lawn or garden areas that are bare.
  2. Apply fertile amendments, such as Black Gold Natural & Organic Garden Compost Blend or Black Gold Canadian Sphagnum Peat Moss, into at least the top three inches of soil.
  3. Apply moss as sheets or fragments purchased from a quality mossery. Make sure that they are the right species for your area.
  4. Water in the new moss and keep it moist. Follow the care steps as provided by the mossery.
  5. Keep your moss moist during the hottest, driest times in summer.

It’s that simple! If you like the look of mossy rocks, you can even apply moss starts to rocks to get that lush, green, mossy look.

Happy gardening!

Jessie Keith

Black Gold Horticulturist

How Do I Revive Strawberry Plants?

“My strawberries were awesome until the neighbor’s chickens got into my bed and scratched them up. Since then the berries are really small and hardly worth picking. Do I need to buy new plants or will pumping up the soil be enough to bring them back to their formal glory? I am including a picture of the crop I used to get and now I can barely fill up a cereal bowl when I pick.” Question from Sylvia of Belle Plaine, Minnesota

Answer: It sounds like the chickens caused your strawberries a lot of stress, but plant age may also be an issue. Many gardeners don’t know that strawberries are a three-year crop. The parent plants only produce well for three years before declining. In the second year, it is often good to nurture one good runner from each parent plant as a replacement. Then in the third year, the parent plants should be removed. It is the cycle for keeping strawberry patches producing at no additional cost.

Nurturing the soil will certainly boost growth as will fertilization, but old strawberry plants are not revivable. To learn everything that you need to know about making the most of strawberry plants, please reach the articles below and watch the video. Oh, and some chicken wire will help keep feathered beasts from scratching them up!

WHAT ARE SOME GOOD COMPANION PLANTS FOR STRAWBERRIES?

GROWING STRAWBERRIES WITH SUCCESS

Happy strawberry growing!

Jessie Keith

Black Gold Horticulturist

How Can I Encourage Fuller Growth in Butterfly Bush?

“My butterfly bush was so rangy last year. How can I get it to be fuller and to attract more butterflies?” Question from Diane of Newark, Ohio

Answer: Several things can cause butterfly bushes (Buddleia davidii, USDA Hardiness Zones 5-9) can have flowering and vigor troubles. Here are the main culprets.

  1. Age: If your butterfly bush is an older specimen, it may be petering out. They are not the longest-lived shrubs, and as they age they often show less vigor and flowering. Many may only thrive for 10 or 20 years, or less. If it’s time to replant, I recommend that you try Proven Winner’s Lo & Behold® ‘Blue Chip’ butterfly bush. It’s sterile, so it does not become invasive, and it blooms nonstop all summer with wands of purplish-blue that draw lots of butterflies. It is also more compact, at 2.5 to 3 feet high. (Click here to discover more sterile varieties.)
  2. Light: Make sure your plants get full sun. Less light puts a damper on flowering.
  3. Soil: Well-drained average soil is best for butterfly bushes. If your soil has drainage issues or is heavy, then you may need to move or replace your plant.
  4. Pests: Various pests can reduce the vigor and flowering of butterfly bush. Tackling them early will help your plants perform better. (Click here to learn more about common pests.) Fortunately, butterfly bushes have few disease problems.

From there, click on this link to learn more about pruning and spring care. 

Happy gardening,

Jessie Keith

Black Gold Horticulturist

How Do I Get My Cymbidium Orchid to Rebloom?

“I have an orchid plant that I have had for 8 years; it grows and duplicates (I had to get another container to separate it) but won’t grow the stalk to bloom. It hasn’t bloomed since the first year I got it. It isn’t the typical large rubbery leaf kind. I believe Cymbidium Orchid. When I got it, it had green flowers. It grows long leaves beautifully, but I would like to get some blooms. I have tried reducing water, changed organic potting, tried using orchid fertilizer… I even put them outside one year to try to cold shock it into bloom…After so many years you would think I would have done something right, but I have helped it grow and thrive so there is some hope. Do you have any suggestions?” Question from Amy of Chandler, Texas

Answer: As with any orchid, Cymbidiums require certain criteria to be met to flower. Timing and temperature must be managed to achieve blooming. Here are the recommended steps to take.

Flower spike initiation takes place in spring or summer when plants will get good light and a drop between warm daytime and cool nighttime temperatures. Placing the plants outside in spring after the threat of frost has passed will help, so that they can experience the warm days and cool nights for flower spike initiation. Once they have begun to set spikes, keep the plants cool (59-65 degrees F) until they begin to flower. Warmer temperatures and dry air and soil can cause the spikes to wither. Once flowering has begun, you can take your Cymbidium to a warmer spot where they can be enjoyed, if you desire. The spikes can become quite large and heavy, so support them with small wooden or bamboo stakes and soft plant ties. The long-lasting flowers can bloom for up to eight weeks. Cut them back to the base once they have stopped. (Click here for an excellent reference for Cymbidium care.) Semi-terrestrial orchids like these grow beautifully in Black Gold Orchid Mix!

Happy gardening!

Jessie Keith

Black Gold Horticulturist

Getting Phalaenopsis and Oncidium to Rebloom

Moth orchids, or Phalaenopsis, are the most commonly sold orchids and easiest to grow.

I think that most of us have walked into a grocery store or the houseplant section of a garden center and seen colorful displays of colorful blooming orchid plants. With their unique and beautiful flowers, it can be difficult not to buy one. Once purchased, it is easy to get hooked on these them because they are easy-care and their flowers can last for weeks, sometimes even months. But, getting them to bloom year after year can take a little more know-how. And, if you are not willing to try on your own, offer your plants to orchid-growing friends.

The Story of Nancy, the ‘Orchid Lady’

If you have lots of plant friends, you can always find someone willing to take an unwanted orchid.

Some indoor gardeners are ‘buy and toss’ types when it comes to orchids. My wife was one of these gardeners. She would buy an orchid plant for our entryway, nurture its blooms, and then throw it out when the flower stems stopped. Each year, I was amazed at the length of time the plant stayed in bloom. When one flower faded, another would soon appear and bloom for many weeks. After a plant had performed so well, it seems a shame to just throw it away because the flowers were gone.

Luckily for us, one day our friend Nancy Klein was visiting, and she noticed one of our flowerless orchid plants headed for the compost pile. I mentioned to Nancy how sad I felt throwing them out, and she offered to take it to see if she could get it to re-bloom. “Yes!” I replied, “of course, you can take it, and let me know if you have success.”

Well, Nancy had success with that plant and many more over the years. She has become our orchid recycle person, and her home is rarely without at least one orchid blooming. We are not the only household that she rescues orchids from, and she has gained a reputation as the ‘orchid lady.’

Nancy’s Five Growing Tips for Phalaenopsis and Oncidium

Smaller-flowered Oncidium is the second most commonly sold orchid available.

The two most commonly sold orchids are moth orchids (Phalaenopsis hybrids) and dancing lady orchids (Oncidium hybrids). Of the two, Phalaenopsis is the easiest to grow and rebloom.  I recently talked with Nancy about her orchid success, and here are some of her tips for getting orchids to thrive and rebloom. She has had much better success with getting Phaelenopsis to rebloom as compared to Oncidium, but she still has some success with Oncidium. It can just take a little more work.

1. Provide Bright, Indirect Light: Nancy does have a sunroom in her house, which has proven to be ideal for growing orchids. She said that she notices that people often put a blooming orchid in a dark corner and orchids need plenty of light to survive and bloom.

2. Trim Off Old Blooms: When someone brings her a Phalaenopsis that is through blooming, Nancy trims off the flower stem to the lowest node or bud below where the last flower was. A new flower stem will appear from this node and a new blooming stem will often appear in about three months.

Each time Nancy waters her orchids, she includes diluted fertilizer formulated for orchids.

3. Plant Orchids in the Right Mix: Nancy uses medium-sized orchid bark as a growing medium, which is best suited for growing moth and dancing lady orchids. (If you grow ground, or terrestrial, orchids, plant them in finer Black Gold Orchid Mix). She repots her orchids every 3-4 years with new orchid bark. She keeps her potted plants in a tray with pea gravel and a small amount of water over the pea gravel to give the plants added humidity.

4. Water Properly. Nancy is lucky. She has low-mineral tap water for irrigating orchids, but most homeowners have hard, mineral-rich tap water which can damage and even kill sensitive orchids. If you have hard water, then watering orchids with distilled water is a better option. Water plants about once a week. She cautions that many people water too often, so once-weekly water is sufficient if you can maintain the humidity around your orchids. Each time she waters, she adds diluted orchid fertilizer.

4. Read About New Orchids and Their Care: Getting the Oncidium to bloom on a regular basis has been a challenge and they have not been nearly as reliable as the annual-blooming Phaelenopsis. This is partly due to the Oncidium genus being very diverse in nature as its habitat can be found from the tropics to areas of high elevation with growing conditions being obviously quite different. Nancy recommends checking the label for specific information. (Click here for The American Orchid Society’s helpful page on Oncidium care, and click here for their definitive page on Phalaenopsis care.)

You will know that it’s time to upgrade an orchid when the fleshy roots fill the pot. Provide it with a slightly larger, well-drained pot, gently release the roots and place them in new bark. Then water thoroughly.

5. Give Orchid Care a Try: After your orchid plant has finished blooming, instead of throwing it away, try holding it over and see if you can get a rebloom. For starters, I would suggest the Phalaenopsis. It can be a bit of a challenge, but the reward is great when you have new blooms coming from your plant and knowing that you were successful.

Should I Cut My Chives Back in Fall?

Should I Cut My Chives Back in Fall?

“[I] have a question regarding my chives. They have flowered. Should I cut them back now this time of year or leave them be?” Question from Jeanne of Coldwater, Michigan

Answer: The foliage of edible chives (Allium schoenoprasum) will remain attractive and clippable until the first frost causes the strappy leaves to flop. You can cut them back at this time if you wish. Otherwise, leave them up to enjoy through fall. The same goes for summer-flowering ornamental onions.

Happy gardening,

Jessie Keith

Black Gold Horticulturist

How Do I Repot and Care for My Plumeria?

My Plumeria needs repotting. What is the best soil and pot type?  What amount of sunlight is best – morning, noon? Watering schedule? Question from Jean of Diamond Bar, California

Answer: Frangipani or Plumeria (Plumeria species) shrubs are tropicals that are native to Mexico, Central America, and South America. There are many species that have been bred to create a fine array of colorful varieties–nearly 400 garden varieties are registered.

Plumeria Growing Needs

There are several things that plumerias need to grow well. They grow and flower best with full sun (6 hours or more per day) and warm temperatures (60 to 90 degrees F). Because they are susceptible to root rot, they require contains and potting soil that is slightly acid (6.4 to 6.8 pH) and drains well. Black Gold All Purpose Potting Mix with a little added Black Gold Perlite would be ideal.  There are specialty plumeria flower fertilizers on the market or you can choose, or you can simply use a fertilizer formulated for flowering shrubs.

How to Repot a Plumaria

Repot your plumeria every two to three years. A new pot should be at least three inches larger than the last. Plumerias emit a milky latex when damaged, which can be irritating to the skin and eyes, so wear garden gloves and long sleeves when repotting them.

Cover the bottom of the pot with a shallow layer of mix. Then gently lift your plumeria out of its old pot. Adjust and center the root ball in the new pot. Add new soil to the base as needed. Once planted, there should be 2 inches of headspace at the top for watering. If the roots are intertwined, or pot-bound, then gently tease them apart along the bottom and sides to increase establishment and water and nutrient uptake.

Add fresh mix along the sides and work it down firmly to increase soil-to-root contact and remove air pockets. Water in your new plant until water runs from the bottom of the pot. Fill in any receded spots along the sides and water in again. Begin to fertilize a week or two after planting. Follow the manufacturer’s recommendations.

Happy plumeria planting!

Jessie Keith

Black Gold Horticulturist


How Do I Care for Creeping Charlie (Pilea nummulariifolia)?

How Do I Care for Creeping Charlie (Pilea nummulariifolia)?

“I recently purchased this Creeping Charlie for indoors, and again, received not so great information (let it dry fully before adding water, etc.). It was fine one morning (there had been some brown leaves, which I was told was because I was overwatering it), but when I got home, it looked like this (image below). Water brought it back somewhat. Now only two of the groups of leaves you can see above remain. I am assuming that putting it in a larger pot will help keep more consistency in the moisture, but need to know what of your products should I use (and if possible, again, recommendations for pot size, methods, etc.). It gets mostly filtered sunlight here, with a few minutes a day of direct sunlight.” Question from Joseph

Answer: Creeping Charlie (Pilea nummulariifolia) is a tropical groundcover native to the Caribbean and areas of South America that grows beautifully as a trailing house plant. Yours needs a new home and a little care to bring it back to glory, but it is not beyond hope. It is quite easy to grow once you know what it needs.

Creeping Charlie Care

Choose a larger well-drained pot with holes at the bottom and a saucer to catch water. A 6-8” pot would suffice. Black Gold All Purpose Potting Mix would be perfect for its needs. Creeping Charlie (Pilea nummulariifolia) likes even moisture, but allow it to dry out somewhat between watering, and water it less in winter–maybe once a week or so. Give it bright, indirect light, and feed it lightly with a slow-release fertilizer formulated for house plants. When it outgrows its pot, repot in spring. Like most tropicals, it likes some ambient humidity, so avoid planting it near vents or fans where it will be subjected to dry air.

Consider bringing it outdoors in summer to encourage more vigorous growth. Just be sure to clean it before bringing it inside for winter (click here to learn how to clean your plants before bringing them indoors for winter).

I hope that these tips help!

Jessie Keith

Black Gold Horticulturist