Articles

How Much Light Does Ponytail Palm Need Indoors?

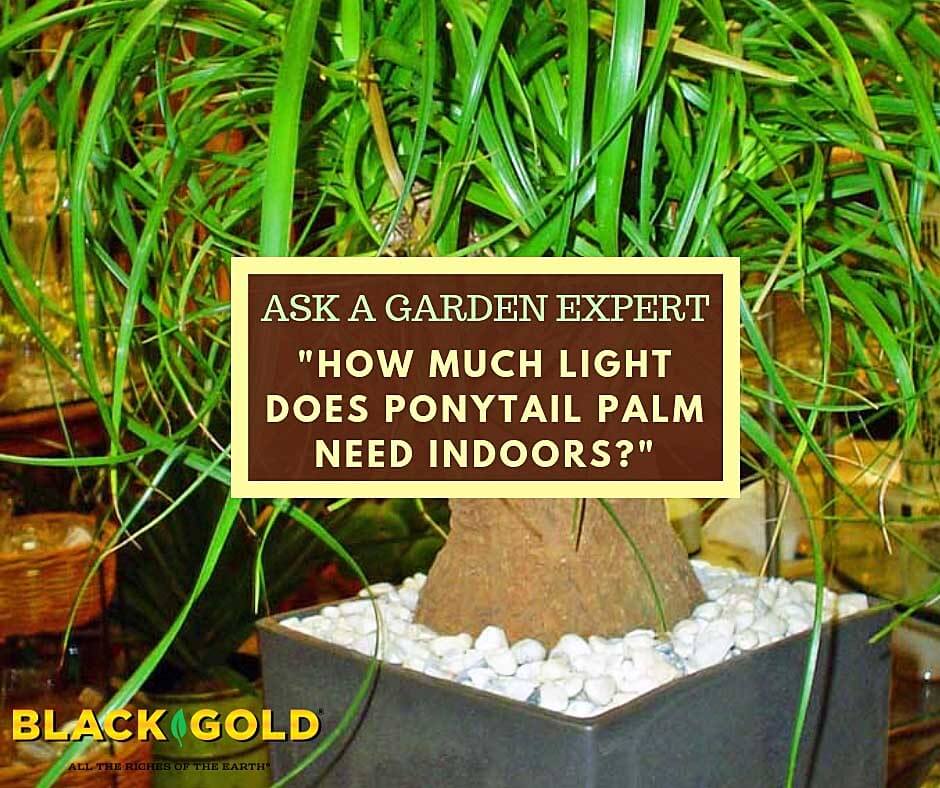
“I just fell in love with the ponytail palm plant. I would like it in my dining room that gets some afternoon light. How much light does it need?” Question from Ann of Lookout Mountain, Georgia.

Answer: I have a ponytail palm, too, and just love it! Ponytail palm (Beucarnia recurvata) is native to arid regions of Mexico and needs low water, especially in the winter months, and high sunlight. It can withstand partial sun in winter, if necessary, but if you want your specimen to really thrive, I recommend bringing it outdoors in summer.

Don’t take it outdoors in spring until the threat of frost has passed and days have warmed up. Then let it soak up the sun in a slightly covered area that won’t get inundated with heavy rain. It is fine to give it moderate water outdoors in the summer, especially when days are very hot and dry. To ensure fast soil drainage and protect roots from rotting, I recommend planting it in Black Gold Cactus Mix.

In mid-fall, bring it indoors into your partially sunny dining room. Clean it before bringing it inside as a house plant. (Click here for tips on cleaning plants before bringing them indoors.) Once inside, you can water less. Then in November, give it very little water until the following spring.

(Click here to learn a lot more about growing ponytail palm indoors and out!)

I hope that these growing tips help.

Happy gardening,

Jessie Keith

Black Gold Horticulturist

How Do I Keep My Coleus Looking Its Best?

“I always grow coleus in containers in the summer.  They are beautiful and usually do wonderfully well. This year I have wide-leaf coleus in my large, rectangular containers.  I have two questions.  1) How often do you recommend fertilizing them?  2) They are producing large purple flowers.  Should I clip the flowers to make the plant grow better, or is it okay to leave the flowers alone to enjoy their beauty?  Many thanks for the help!” Question from Diane of Neward, Ohio

Answer: Coleus are truly foliar plants. Their wands of lavender-blue flowers can be appealing, but if you allow the plants to flower and set seed, the leaves will wane and become smaller and less robust and beautiful. This is because the plants are putting energy into flower and seed production rather than leaf growth. For this reason, gardeners must deadhead coleus plants to keep their foliage looking lush and lovely. Simply pinch off all of the buds as you see them to stop flowering.

Nitrogen is the chief nutrient that encourages healthy foliar growth. To encourage leafier growth, choose a fertilizer that is high in nitrogen, such as Foliage Pro.  Follow the manufacturer’s instructions for feeding, because feeding times differ from product to product. You will also get less flowering if you grow your coleus in full to partial shade.

It also pays to use a quality potting mix or garden amendment that’s rich in organic matter and has a boost of fertilizer. I recommend Black Gold® All Purpose Potting Mix for potted specimens and Black Gold® Garden Soil for in-ground plantings.

I hope that these tips help and keep your coleus looking their best this season! As an aside, the image above is one of my container coleus plants, which has been pinched back and kept in partial shade to encourage super lush foliage!

Happy gardening,

Jessie Keith

What is the Best Method for Growing Potatoes?

“Can I grow potatoes in a 4’X4′ raised bed or do I need something deeper like a garbage can with holes in it? Thanks!” Question from Patricia Froehner or Newton, New Jersey

Answer: Absolutely! Large, soil-filled cans and tubs are convenient for growing potatoes in small-space gardens, but they are not necessary at all. The key to growing really nice potatoes is providing rich, lightweight, porous soil with some depth. That is very easy to provide in a raised bed. If you already have soil in the bed, it is always good to amend it each year with a quality compost to lighten it and add fresh organic matter.  Potatoes are also heavy feeders, so be sure to add a quality fertilizer formulated for vegetable growing.

There is one other thing that you need to know about growing potatoes. They are prone to a very destructive insect called the Colorado Potato Beetle. If you grow potatoes, these pests are almost certain to show up. If left unmanaged, they can absolutely destroy a potato crop in no time. Here is more about managing these pests.

Colorado Potato Beetle IPM

IMG_0943

Colorado potato beetles mating on top of a potato plant.

The surest way to attract Colorado potato beetles to your garden is to plant potatoes. The fat, striped adult beetles emerge from the soil in late spring to feed on emerging potatoes and then lay clusters of orange-yellow eggs on the leaf undersides. The eggs yield highly destructive little orange larvae that eat foliage nonstop and grow very quickly. You can kill the insects at any stage, but it’s easiest to pick off the adults and eggs. (Click here to view the full life cycle of these beetles.) The beetles can complete up to three life cycles in a single season, so once you have them, you generally have to fight them all summer.

IMG_0983

Colorado potato beetle larvae (left) on tomato.

These pests are highly resistant to insecticides, so it pays to choose non-chemical methods of control. Time and time again, well-timed cultural control, and good fall cleanup (removing old plant pieces and leaves) have proven to be the best means of battling them. Cultural control is essentially “picking”off the adults, eggs, and larvae and/or pruning off egg- and larval-covered leaves and stems. I generally smash the beetles as I pick them off, but you can also drown them in a bucket of water. Good picking should start in mid to late spring and continue until all signs of these pests are gone. (To learn everything there is to know about Colorado Potato Beetles, visit potatobeetle.org.)

I hope that these tips help!

Happy Gardening,

Jessie Keith

Black Gold Horticulturist

What Soil Do You Recommend for Avocado Seedlings?

“What type of Black Gold soil is recommended for potting avocado seedlings?” Question from Rusty of San Diego, California

Answer: Excellent drainage is one of the most important attributes of soil for avocado growing. They cannot endure wet soil for any period of time without being subjected to root rot. This means planting them in very well-draining pots as well as planting them in a porous mix that drains well while holding enough moisture for good growth.

Robust avocado seedlings grow quickly, so there is no need for a fine, seed-starting mix. Avocados also prefer soil with a near-neutral to slightly acid pH of 6 and 6.5. Based on these needs, I would recommend growing your avocado seedlings in Black Gold Natural & Organic Potting Mix. It is OMRI Listed for organic gardening, fast draining and fertile, and it maintains the correct pH for your avocados. Follow up with a good fertilizer formulated for avocados and you should be set.

Happy gardening!

Jessie Keith

Black Gold Horticulturist

Can I Grow Palm Trees in Georgia?

“Can I grow Palm trees in Georgia?” Question from Debbie of Norcross, Georgia

Answer: Yes! There are several palms and palmettos that will grow well in your USDA Hardiness Zone 7 to 8 location. Most won’t reach the grand heights of palms grown in truly tropical regions, but all will add interest to your landscape. I opted to include palms in my list rather than scrubby palmettos.

Five Hardy Palms

Pindo Palm Tree (Butia capitata): This slow-growing palm bears edible fruit that can be used to make jelly. Mature specimens can reach 15 feet.

Windmill Palm (Trachycarpus fortunei ‘Bulgaria’ or ‘Columbus’): If you are looking for a more classic looking palm, plant windmill palm, which is hardy up to Zone 7. Average specimens reach 25 feet.

Sago Palm Tree (Cycas revoluta): Though not a true palm, this cycad is hardy in Zones 7b-11 and has elegant, palm-like good looks.

Blue European Fan Palm (Chamaerops humilis v. cerifera): This very hardy palm reaches a maximum of 10 feet and is hardy up to Zone 7a.

Mexican Fan Palm (Washingtonia robusta): This large palm can reach 70ft – 100ft, but its Zone 8 hardiness puts it just on the edge of hardiness where you live. But, if you have a protected sunny location near your home, try planting one!

Good sources for these and other hardy palms include Plant Delights and Palmco. If planting your palms in large pots, make sure your mix drains well and has a slightly acid to neutral pH between 6.2 and 7.6. Black Gold® Natural & Organic Potting Mix with added perlite is a good mix choice.

Happy palm growing!

Jessie Keith

Black Gold Horticulturist

How Do You Start Raspberries from Canes?

How do you start raspberries from canes? Question from Deborah of Los Lunas, New Mexico

Answer: Raspberries are one of the easiest fruits to propagate from canes or cuttings because they readily root, even without the help of rooting hormone. In fact, if you let canes naturally weep to the ground in your garden, they will root as they touch the ground. In time a single plant can become a brambly thicket of rooted canes, which is why these plants need to be pruned and maintained each season.

If you have rooted canes, all you need to do is cut at least a foot of top growth from the rooted segment, dig up the root ball, and replant the berry wherever you wish. If you want to root cane cuttings, here’s what you need to do:

Rooting Raspberry Cuttings

Materials

  • Sharp bypass pruners
  • 1-gallon pots
  • Rooting hormone with added fungicide
  • Quality potting soil, such as Black Gold Natural & Organic Potting Mix
  • Raspberry cane cuttings (these can be dormant or actively growing)

Method

Use your pruners to take tip cuttings from your raspberries. Make sure they are about 1-foot long and cut from fresh, healthy stem tips. If you like, you can hasten rooting and protect the cuttings from rot by dipping them in rooting hormone with added fungicide. Place the cuttings about 3 inches down in 1-gallon pots filled with OMRI Listed potting mix formulated for organic growing. You can add up to three cuttings per pot. Water the pots in, keep them moist, place them in a cool spot with filtered light, and the cuttings will root in a matter of weeks.

I usually wait for two weeks, and then give the cuttings a small tug to see if they are rooted. If they resist being pulled out, they have set roots. Once new leaves start to appear on your cuttings, and they have clearly rooted, you can separate the rooted cuttings from the pot and plant them where you like.

To learn more about growing happy raspberries and other brambles, click here to read an article about growing them. Be sure to amend the soil where you plant them. I suggest OMRI Listed Black Gold Garden Compost Blend as the best all-around garden amendment.

Happy raspberry growing!

Jessie Keith

Black Gold horticulturist

Gro Your Own: Growing and Harvesting Perfect Melons

Ever wonder how to grow great watermelons, cantaloupe, honeydew and other melons? Or are you unsure when to harvest them? These melon growing tips will help you make the most of your melon growing.

View the Step-By-Step PDF here

Melon Growing Problems

‘Little Baby’ Flower is super early and high yielding. (My kids love them!)

“Second year trying to grow melons. Can’t seem to get fruit, and if I get one it’s too late for the growing season. Is it a lack of pollination…I always plant them early. Thanks!” Question by Chris of Orange, Connecticut

Answer: It’s so frustrating when you get lots of vine and no fruit. Several factors could be at play, whether you are growing watermelons or muskmelons. Let’s start with the essentials for good melon growth. Melons need:

1. At least 8 hours of full sun

2. Warm summer weather

3. Fertile, well-drained soil with excellent drainage

4. Quality fertilizer formulated for fruiting veggies

5. Reliable pollination

6. Plenty of space

7. Good variety selection for a given region

First, choose early fruiting varieties that will yield fast to ensure you get a reliable crop. ‘Early Granite‘ is a super early-to-ripen muskmelon to try, and ‘Little Baby Flower‘ is very early and my favorite ice-box-sized watermelon. Both are also high yielding.

Next, make sure you are meeting all of the cultural requirements. Planting melons in well-amended mounds (I amend with OMRI Listed Black Gold Garden Compost Blend) that are well-fertilized really helps. Sun and warmth are essential.

Finally, make sure they are getting pollinated. Melons have two flower types, male and female, and they are strictly bee pollinated. The male flowers (these have no underdeveloped melons at the base) are produced first, followed by the female blooms (these have underdeveloped fruits at the base). If you see female blooms on your plants, and no bees, lack of pollinators could be the problem.

Without pollination, the developing fruits just shrivel. You can try a hand-pollinating method, if you think this is the problem. Simply use a small brush to move pollen from a newly opened male flower to a newly opened female flower. It’s fast, easy, and will yield melons!

I also recommend you watch our recent video about melon growing! Happy Gardening, Jessie Keith