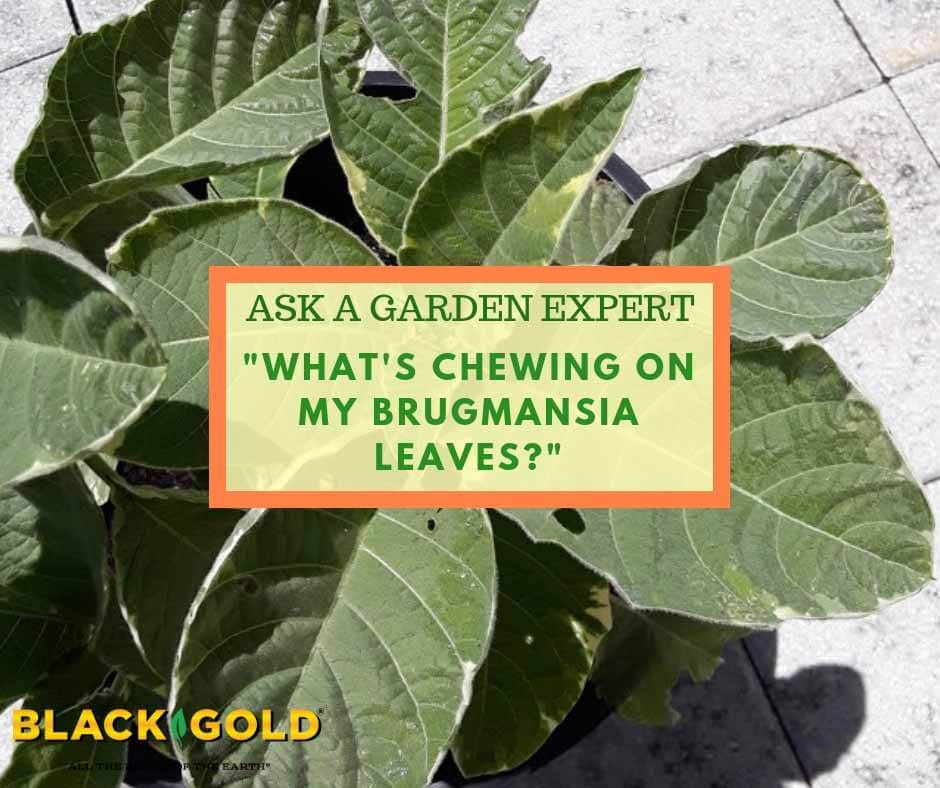
“I have a Brugmansia, and something is eating at the leaves. I have tried soapy water with oil, and I have tried broad-spectrum herbicides. Please Help!” Question from Lizzy of Ocala, Florida
Answer: Your pictures came through! The damage is caused by chewing pests and there are several that will attack Brugmansia. Cabbage moth caterpillars (cabbage loopers), snails, and slugs will all chew on Brugmansia. Tomato hornworms will too, but this looks more like slug or cabbage looper damage.
Cabbage Looper Inspection and Management
Start by checking the plants from top to bottom for little green caterpillars. If you find them, these are cabbage loopers. You might also see little white moths flittering around your plants. These are cabbage looper moths. The easiest way to get rid of loopers is to simply remove them by hand and put them in soapy water. If you find loopers, also check for clusters of small, round, yellowish eggs on the bottom of leaves. These are looper eggs and must be scraped off. To further manage loopers, you can sprinkle the plants with BT, which is approved for organic gardening and only harms the caterpillars chewing on your plants.
Slug or Snail Inspection and Management
Slugs or snails like to hang out beneath or just below the soil line of pots, so this is the first place to check for them. They come out at night to do their damage. There are several organic ways to keep them away from your Brugmansia. I would purchase some diatomaceous earth and sprinkle it liberally on the surface of your potting soil. To us, it feels like coarse sand, but to slugs, it is very damaging. It cuts their soft exteriors and keeps them away. You could also apply a thick layer of perlite on the top of your potting soil. Slugs don’t like it either.
Brugmansias grow so quickly that pretty soon a little chewing damage won’t do them any harm. In fact, I would upgrade your plant in a larger pot as soon as it bursts forth. In just a few months a plant can grow as much as three feet and eventually reach huge proportions (15-feet or more unless yours is a dwarf variety). I recommend planting in Black Gold® Moisture Supreme Container Mix. Also be sure to add extra flower fertilizer because they are really heavy feeders.
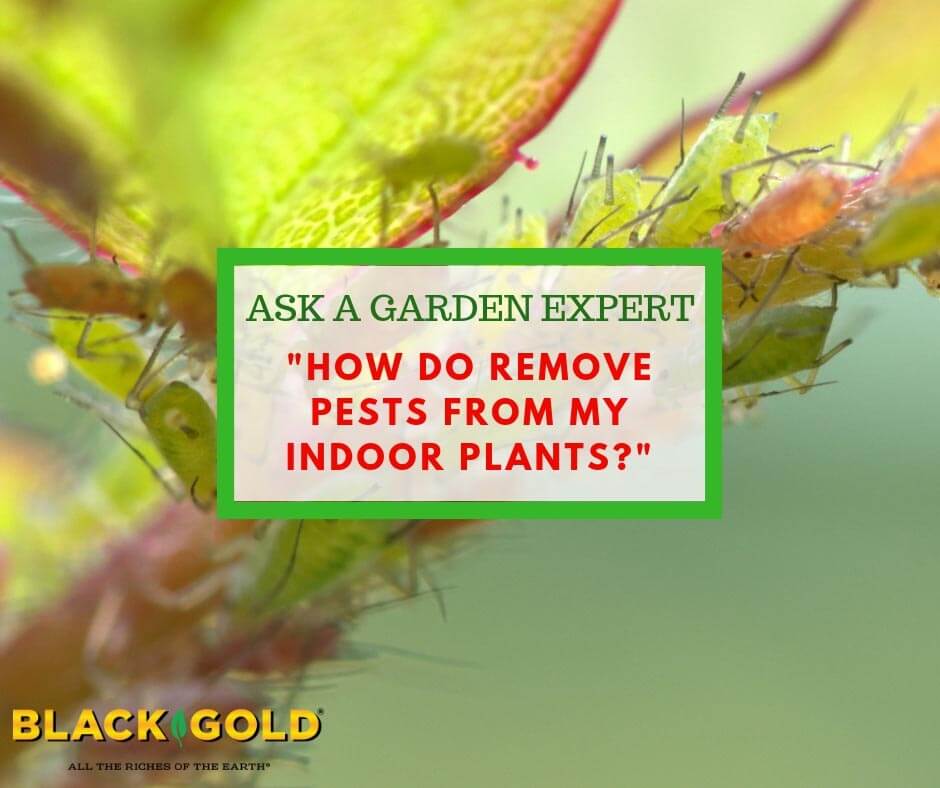
Growing house plants all together in a dense tangle encourages pests to spread and multiply!
When garden plants are outdoors, pest populations are generally lower or more diffuse due to natural predators, harsher weather, and more host plants. But, once you bring plants indoors, all of that changes. Predators are gone, climate conditions are good, and the pests that enter your home have just a few plants to feed on. This means hungry pest populations will explode on your house plants, causing damage and wreckage along the way.
It is essential to start an integrated pest management (IPM) program as soon as pests are spotted. But, each pest and its management is different. Here we detail some of the worst house plant pests and how to tackle them indoors.
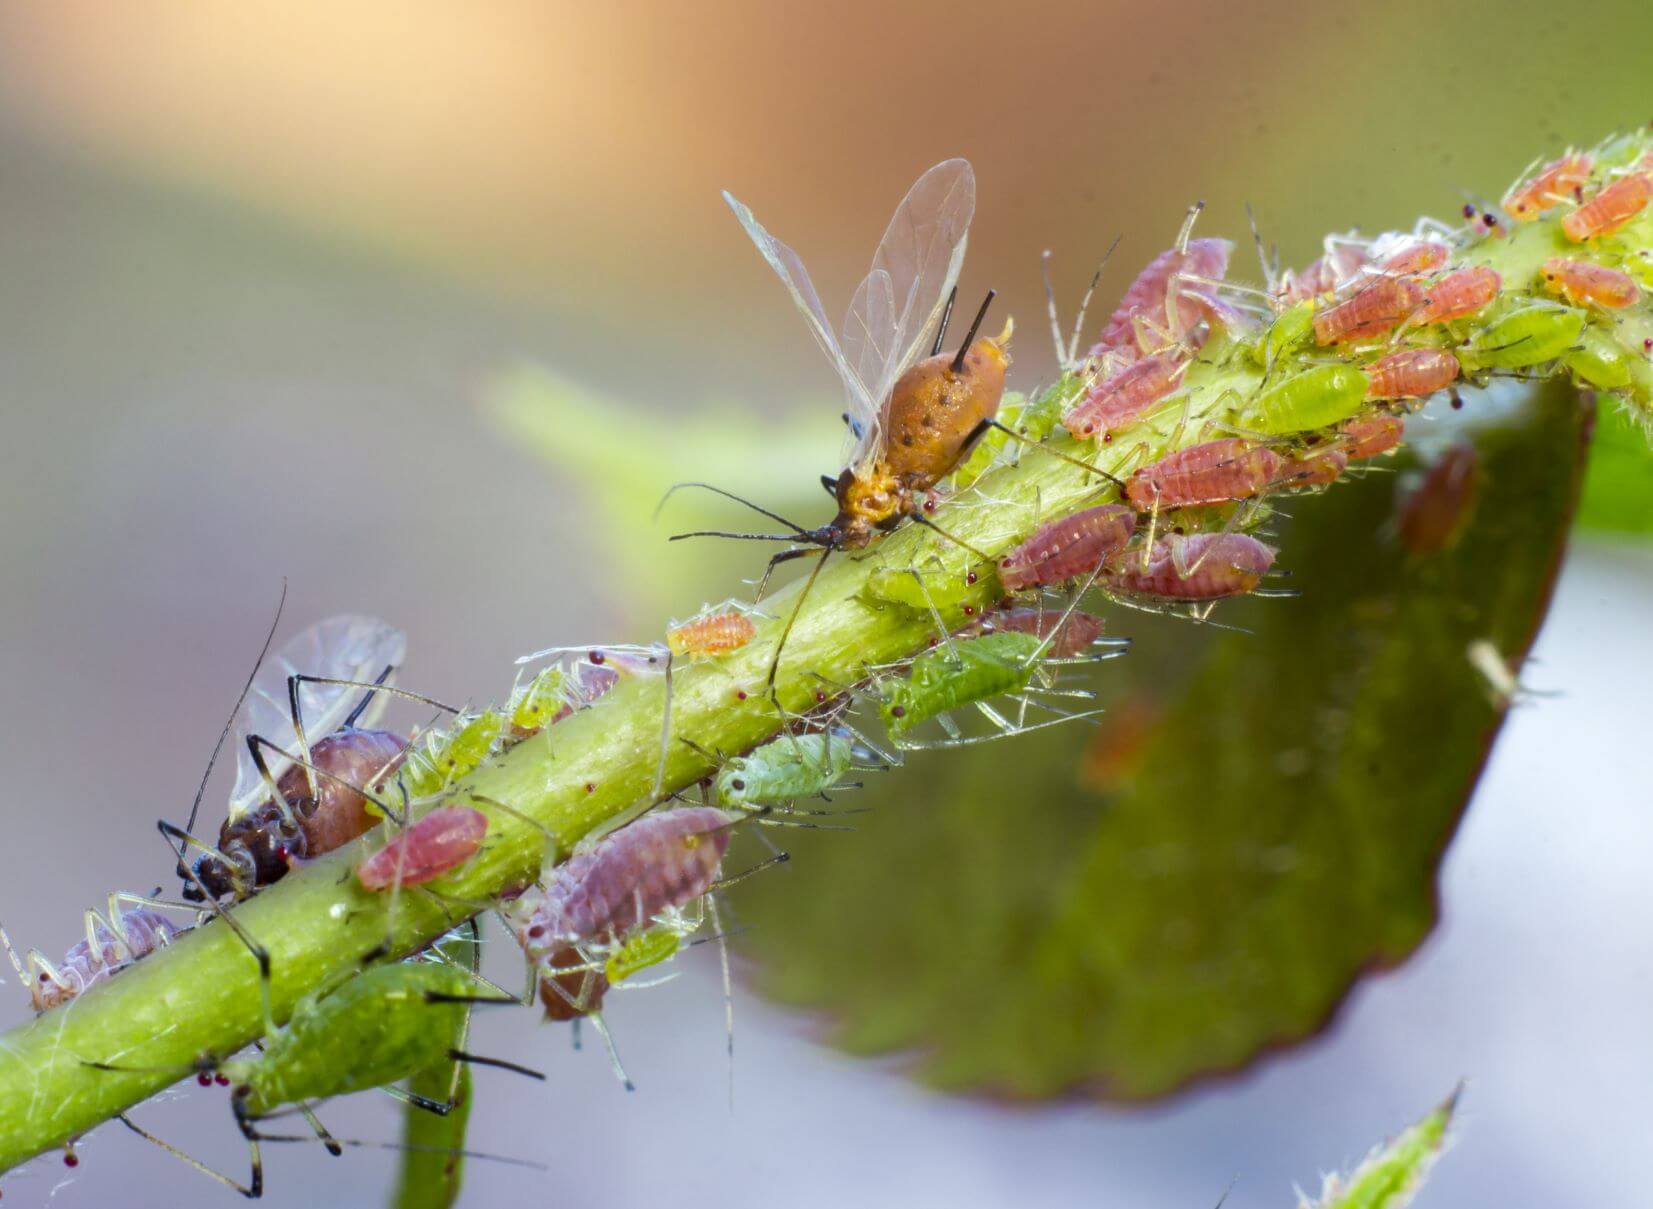
Aphids
(Photo by Jared Belson)
Aphids fly in from the outdoors or enter on infested house plants. They suck the juices from tender stems and leaves, leaving a trail of sticky honeydew that sometimes attracts ants. (Click here to learn how to manage unwanted ants in gardens.) Thankfully, they are easy to manage. Simply wash and wipe aphids away from leaves and stems with a warm, moist cloth, and then spray any remaining aphids off with tap water. Let plants dry, and then spray again with an OMRI Listed insecticidal soap. Check your pot’s topsoil to make sure any wayward aphids are not hanging out in wait to reinfest plants. Continue these practices, and your aphid problems will be gone in no time.
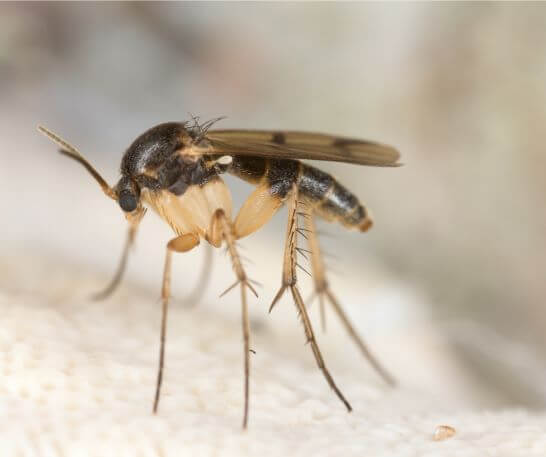
Fungus Gnats
Fungus gnats can fly into homes or enter via infested plants or open potting mix bags. They breed on moist soils and their larvae damage roots and spread plant diseases. Truly they are everywhere soil, algae, fungus, and plant material can be found. Once indoors, populations explode because most gardeners don’t understand how to stop them or how they enter the home. But, don’t despair! Follow the simple cultural guidelines in this video (click here to watch) to easily stop fungus gnats from breeding in your house plants.
White Flies
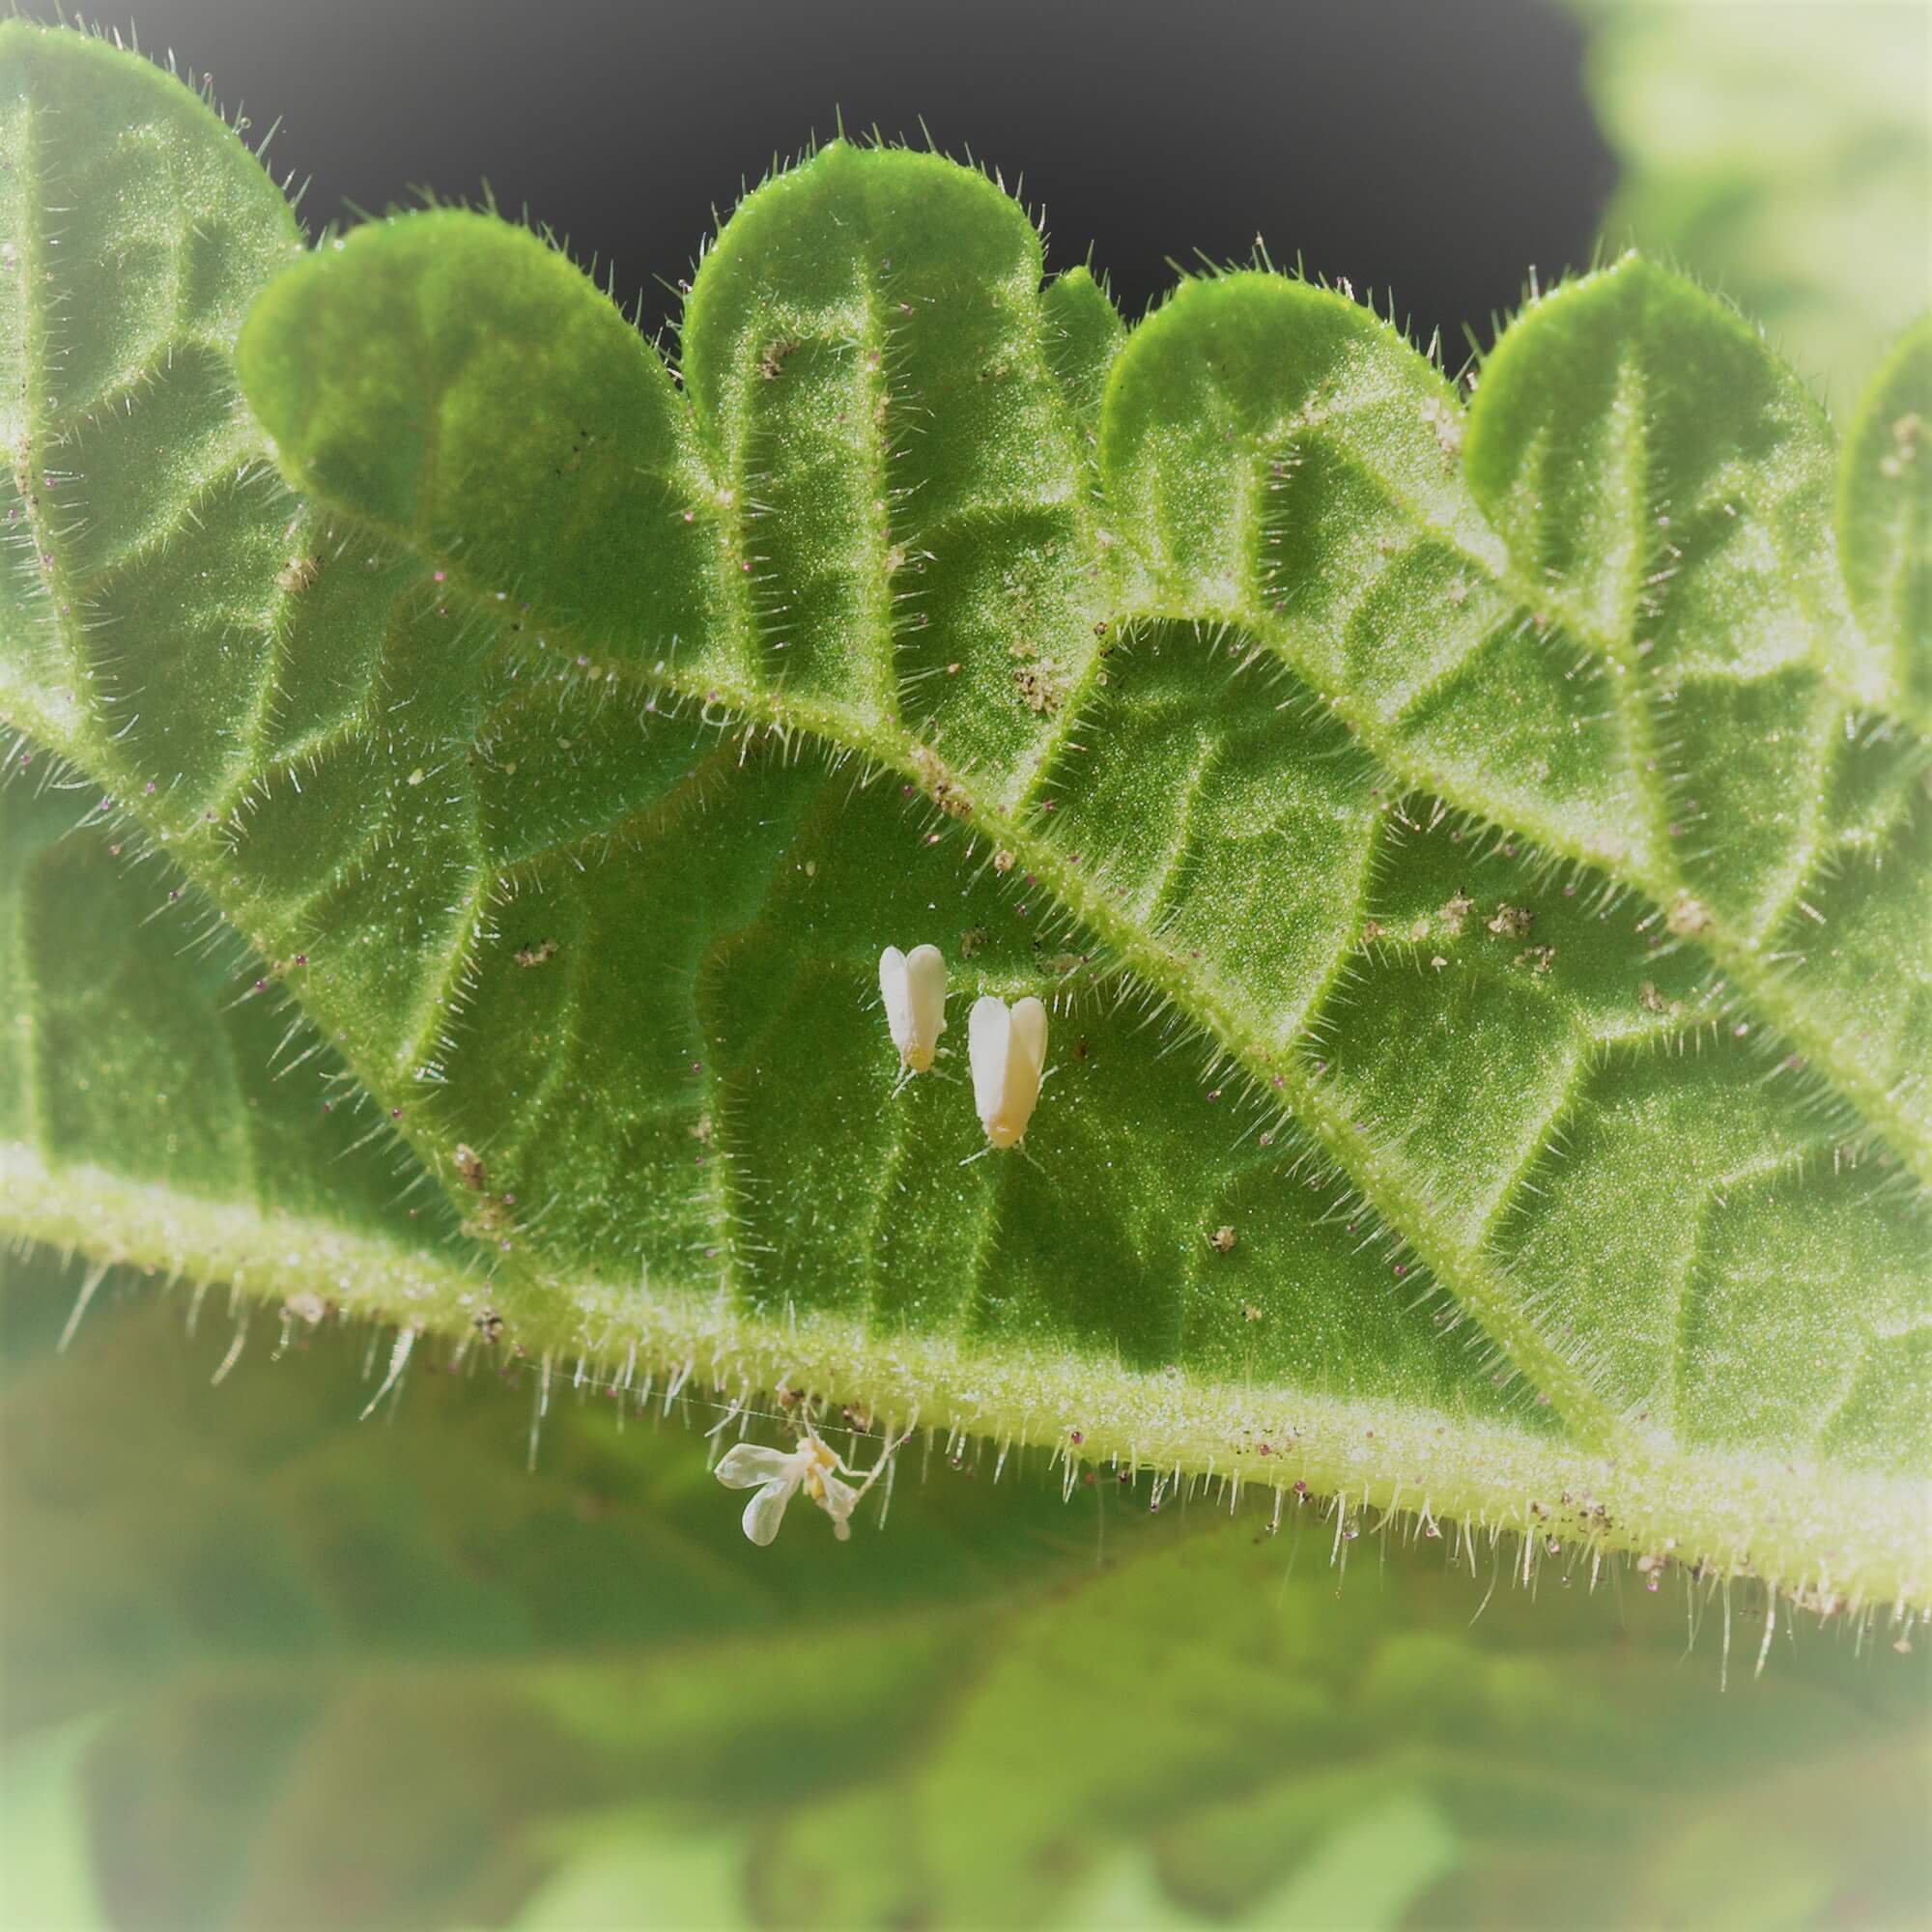
Whiteflies on a leaf underside
Whiteflies are sucking insects that remove the juices from leaves and stems. They can cause terrible damage to plants, leading to leaf drop and general decline. Without management, the undersides of leaves will become covered with clouds of tiny white flies and clusters of their small, round, white egg masses.
If you have an infestation, remove the worst of the white-fly-covered leaves, especially those with lots of egg masses, and bag them for trash disposal. Then spray, wash, and wipe the remaining stems and leaves thoroughly. Make sure no more egg masses remain. Finally, spray the plants with insecticidal soap or Neem oil. (Click here for an overview of horticultural oils for organic insect control.) Continue to check for whiteflies and wipe and spray leaves as needed.
Spider Mites
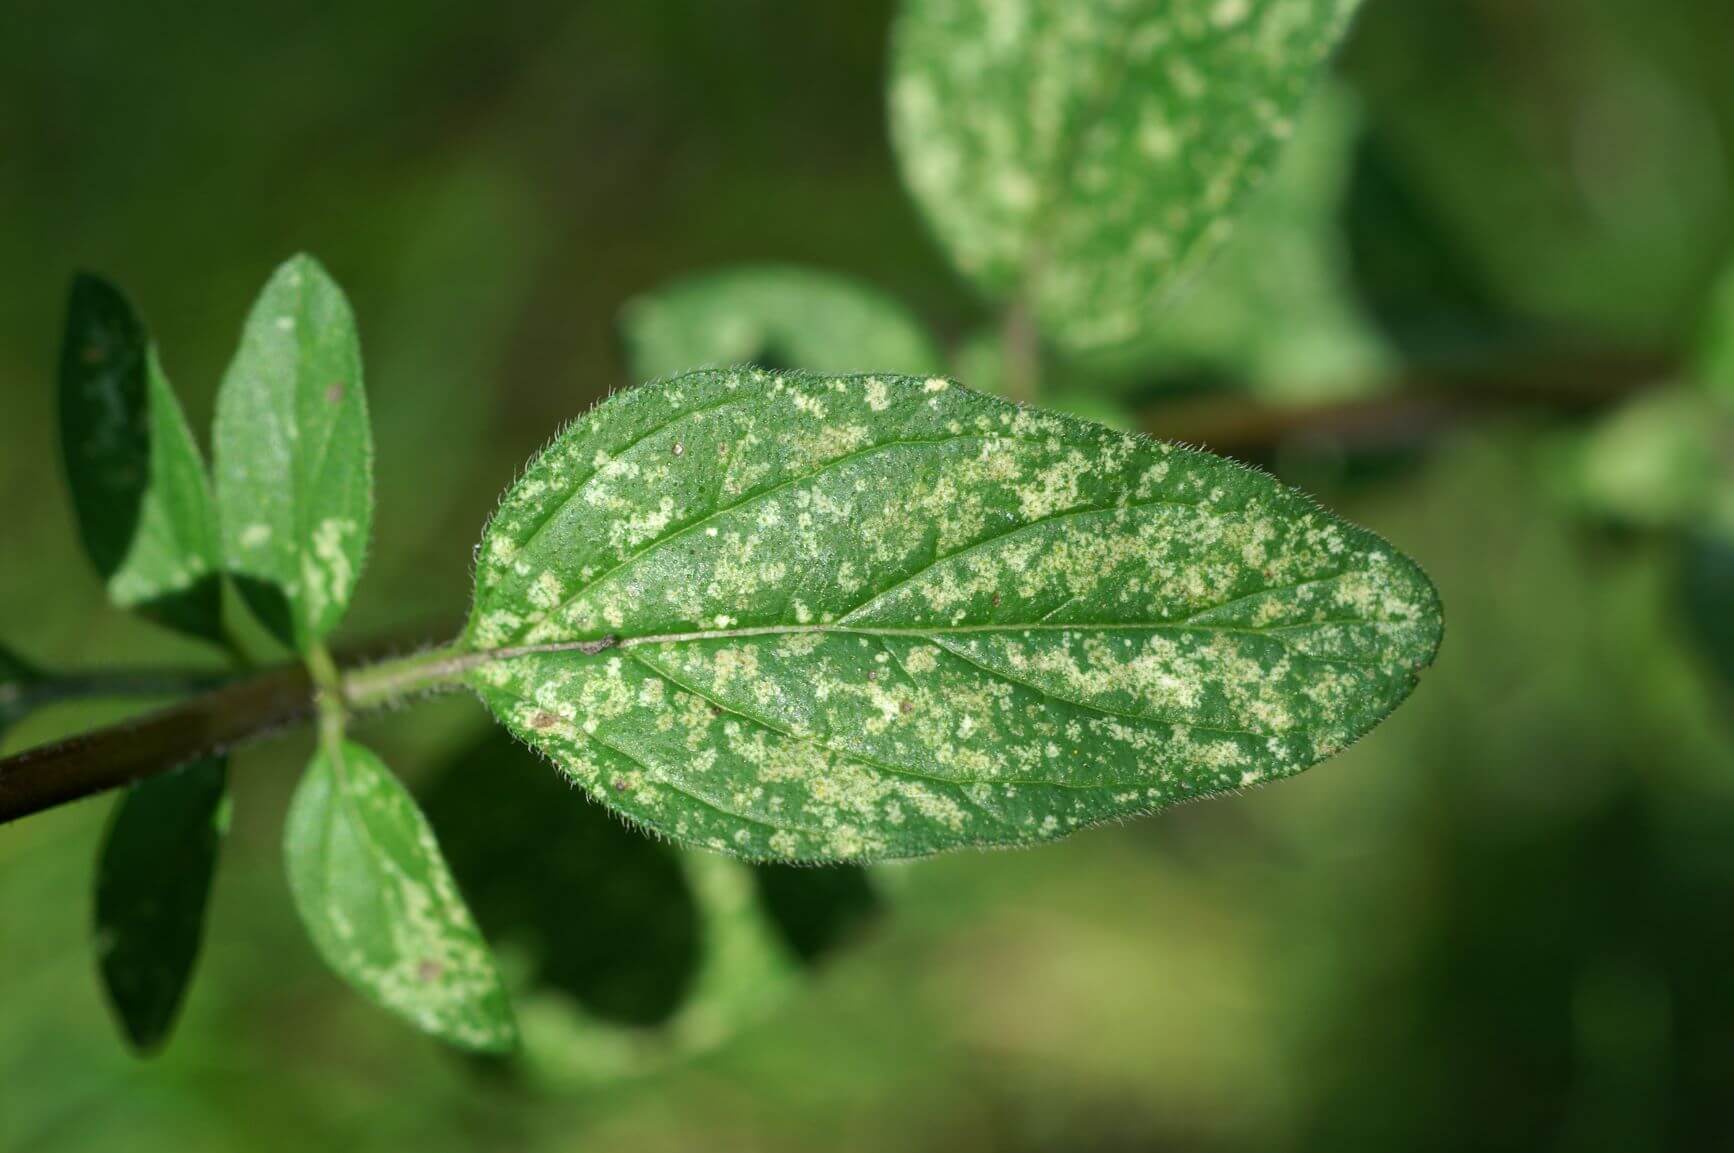
A top view of two-spotted spider mite damage.
These are tiny plant pests, and once you notice their damage, they are numerous and have already become a large problem. You will notice the damage when the tops of leaves look like they have little white spots across them. These are dead leaf cells that the mites have sucked dry. You might also see little webs on the leaves and tender stems of infected plants.
To see if you have mites, take a clean piece of white paper, hold it beneath the leaves, then tap the leaves onto the paper. If you have mites, lots of tiny specs will fall, and eventually, they will start crawling around. These are spider mites!
As with aphids and whiteflies, always clean plants before treating them. Remove the worst of the damaged leaves. Then spray, wash, and wipe the remaining stems and leaves thoroughly. Remove the top inch of potting soil and replace it with fresh. (We recommend using Black Gold All Purpose Potting Mix.) It also helps to wipe the container down, in case any mites have strayed. Finally, spray the plants with insecticidal soap or Neem oil. Continue to do the tap test and wipe and spray leaves as needed. In time you will overcome your spider mite problem.
Mealybugs
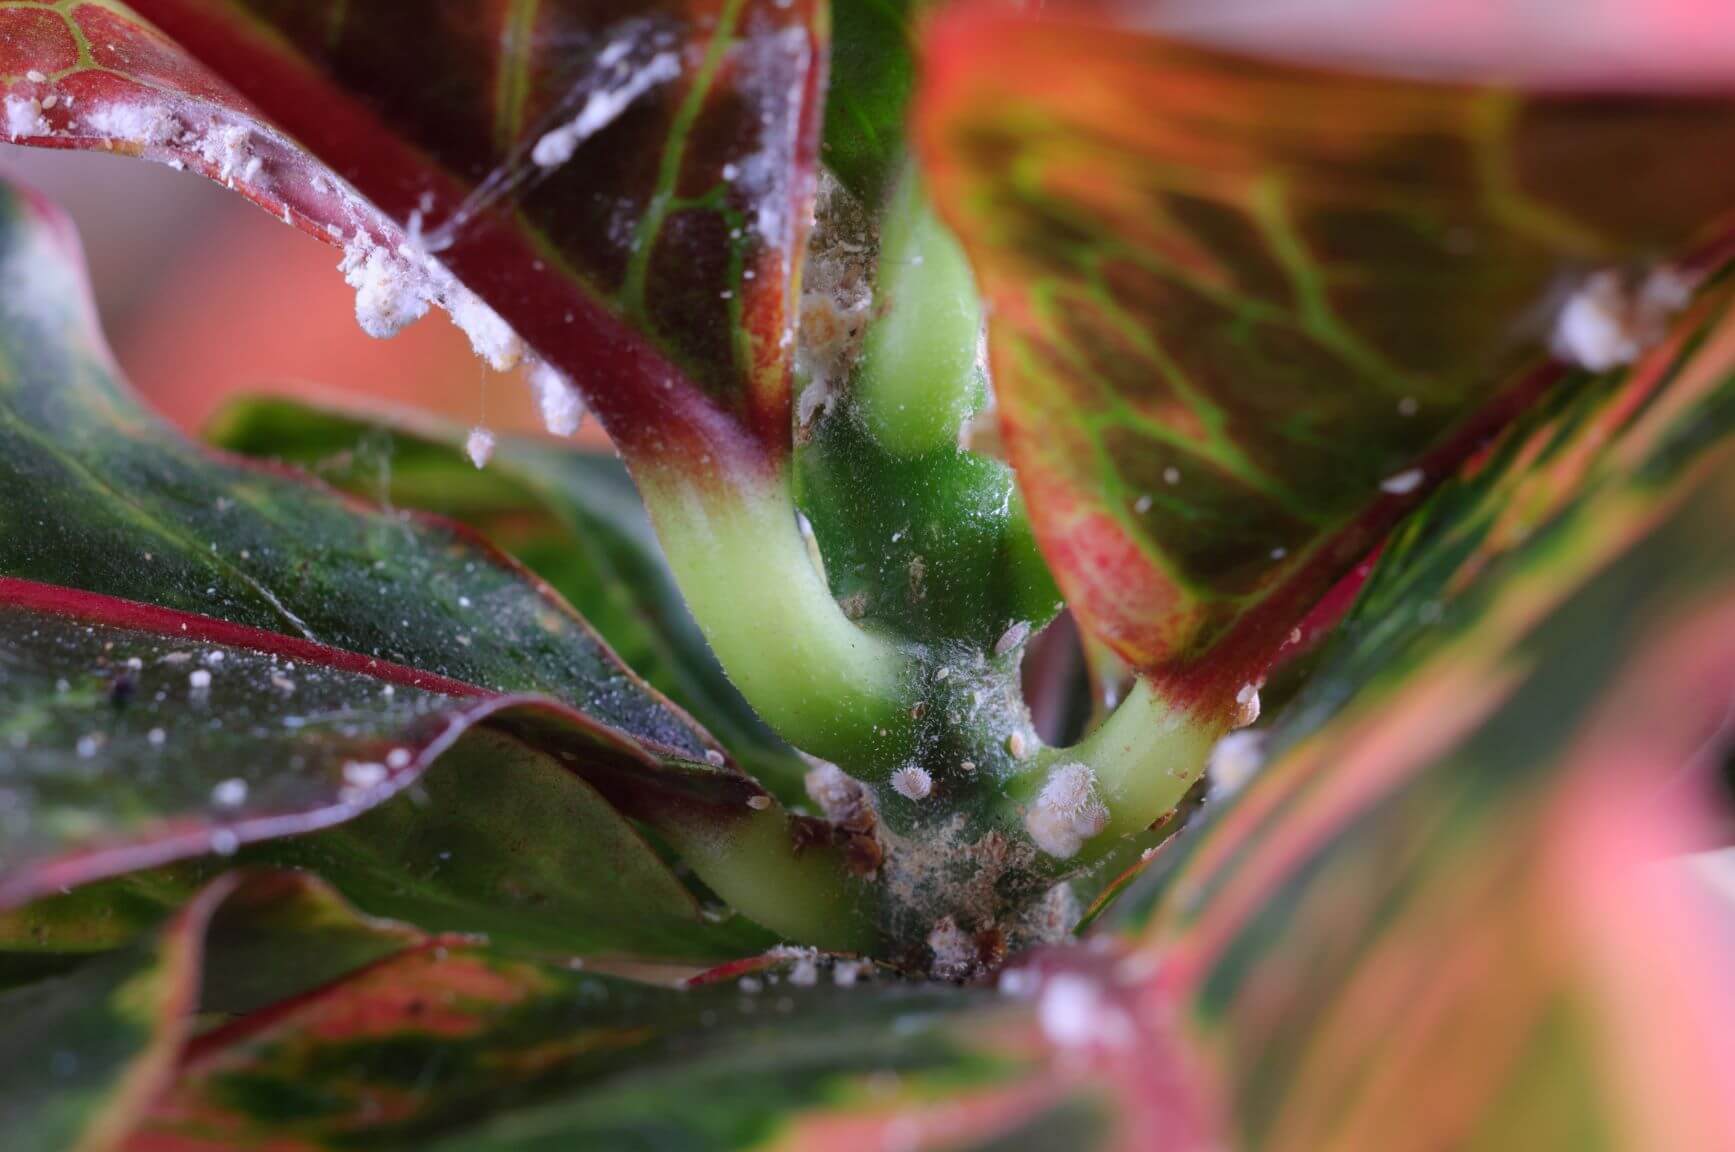
A mealybug infestation on croton.
Mealybug infestations are hard to manage because these pests travel and spread as crawlers. Crawlers are the nearly invisible nymphs that hatch from the pest’s egg masses and “crawl” several feet to quickly infest other plants. You can’t always see these crawlers, so to manage them, you have to clean plants, containers, and surrounding surfaces when you see an infestation.
Mealybugs are soft, white, and feed on the juices of plant leaves and stems, particularly in the crevices between leaves and stems. They produce copious crawlers, so the sooner you notice mealybugs, the better.
To remove mealybugs, start by cleaning your plant, its pot, and all surfaces surrounding the plant. Remove the top two inches of potting soil and replace it with fresh. Finally, spray the plants. One of the best mealybug sprays is a 10-25% solution of isopropyl alcohol. Fill a spray bottle with 1/4 cup of isopropyl alcohol and 2/4 cup water and shake to combine. When treating plants with this solution, keep them out of direct sunlight because it can cause leaf burn in the bright sun. You can also treat plants with insecticidal soap or Neem oil. Repeat spray treatments until plants are mealybug-free.
Another method to stop crawlers is to loop stems surrounding infected areas with double-sided tape traps. As the crawlers hatch and begin crawling, they will get stuck on the tape and die. You can also surround pot edges with double-sided tape to keep crawlers from moving beyond an infected plant.
Armored Scale
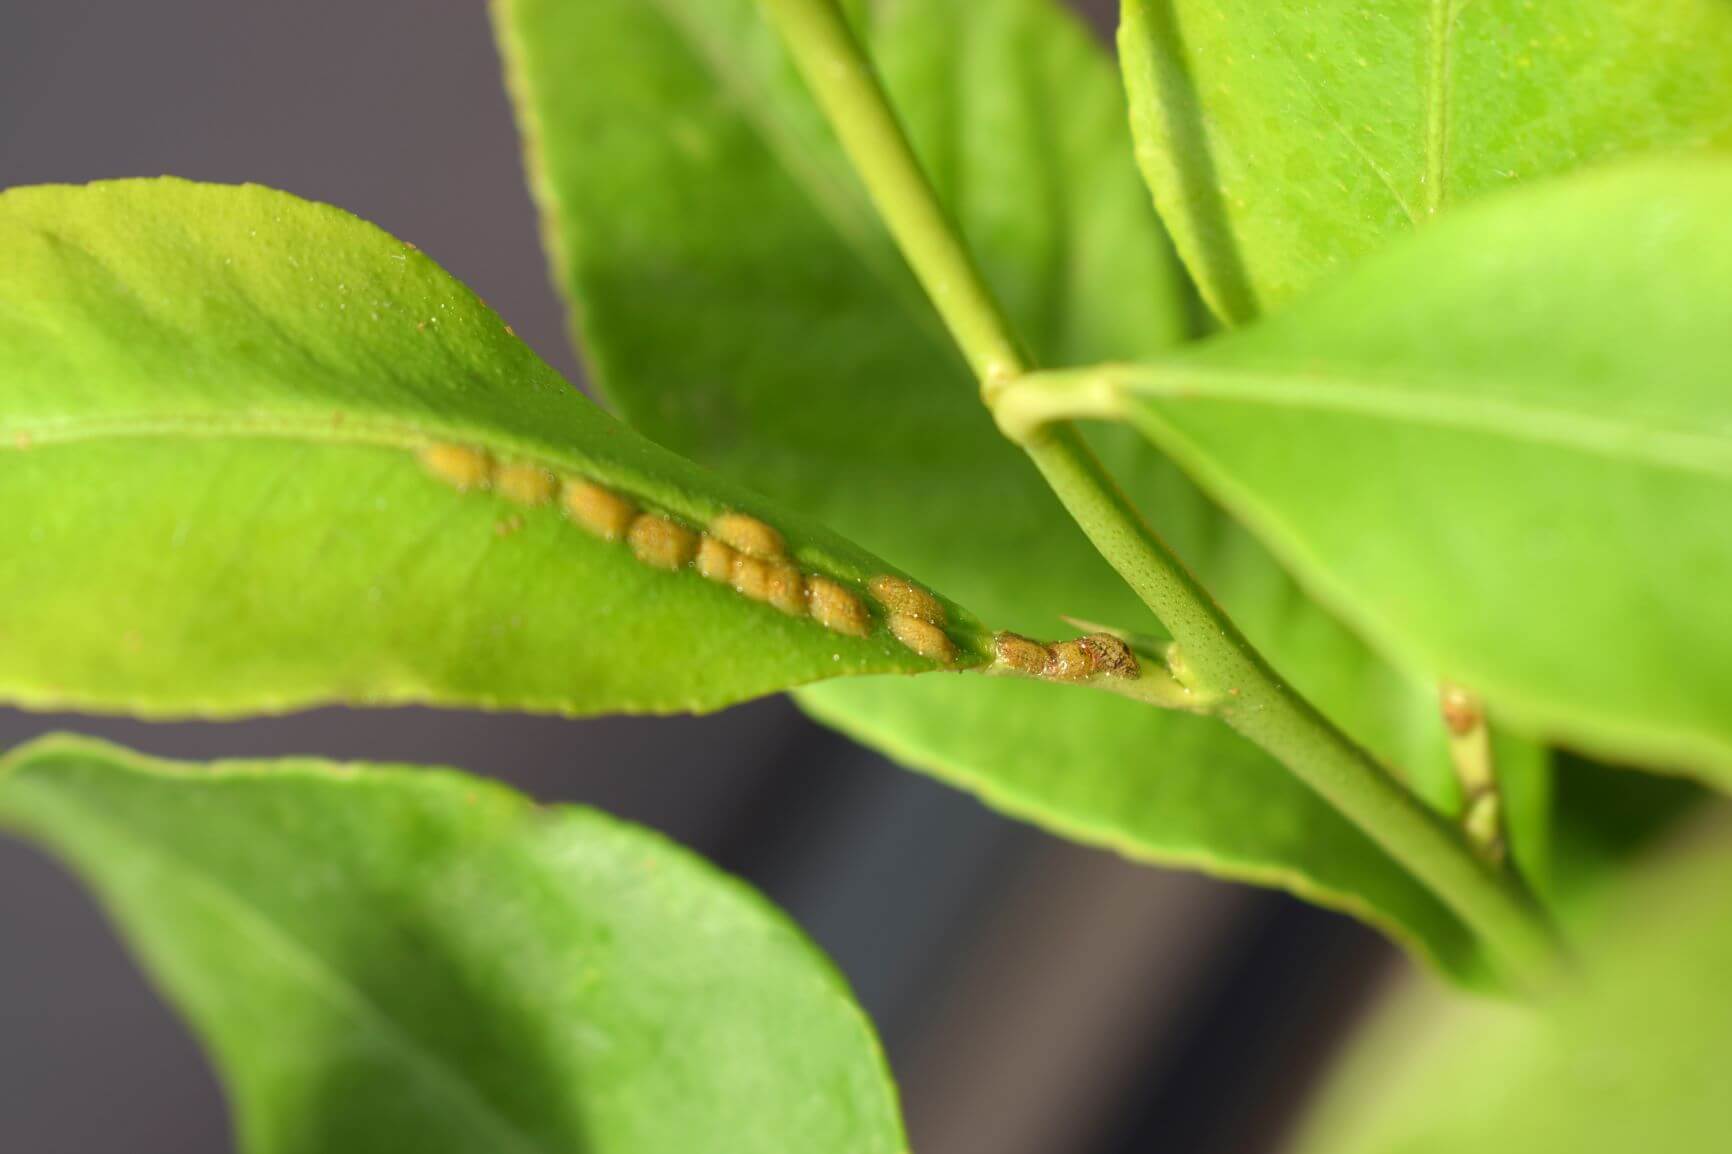
Citrus scale on an indoor orange tree.
Armored scale is tough, a pain to remove, and many different species attack many different plants. Like mealybugs, they are sucking insects that produce crawlers. Their chief damage is the removal of water and nutrients from stems and leaves, which will slow growth and cause general decline. Severe infestations can even kill a plant.
Armored scale insects have tough, plate-like coverings to protect the insects underneath. Most have several generations a year when plants are actively growing. Simply washing or spraying these tough, slow-moving pests won’t do a lot of damage. What helps is to scrape or pick them off, without doing damage to stems. Badly infected stems should be completely cut off. Then wash plants down with insecticidal soap.
It also helps to spray plants with dormant oil spray in late winter or early spring, and then again in early summer, when crawlers are most active. Double-sided tape traps should also be applied, as suggested with mealybugs. Monitor your plants regularly to stay on top of any scale infestation and repeat management steps as needed.
Monitoring Pests with Sticky Traps
Flying indoor plant pests are attracted to yellow sticky traps, which can be purchased at most garden centers. Placing them around house plants is a great way to determine pest types and population numbers in the home. They also capture flying adults. It’s just one more way to stay on top of difficult house plant pests.
“How can I keep the bugs from eating my plants inside?” Question from Wanda of Franklin Furnace, Ohio.
Answer: To make sure your houseplants are pest free, start by washing their leaves and then spray them with insecticidal soap. This will take care of common foliar pests like spider mites, white flies, and aphids. It also helps to remove and replenish the top two inches of potting soil to catch any pests hanging out in the upper soil layers. I recommend topping your pots with Black Gold All Purpose Potting Mix. Here is the full process:
Step-by-Step House Plant Cleaning
Wash all your plant’s leaves well. Start by spraying them all over with a strong stream of water from a spray nozzle, and wipe the leaves and stems down well. Sometimes it helps to wipe them down again with a gentle moist cloth dotted with mild soap and then double rinse and dry them again. Finally, thoroughly spray all leaves and stems with insecticidal soap. (You can also cut off any dead leaves or unhealthy looking growth at this time.)
Remove and replenish the top 2 inches of potting soil to catch any pests hanging out in the upper soil layer.
Wash the plant’s saucer and pot exterior well.
Give your plants the correct moisture, light, and fertilizer to help them resist any potential pests, and keep a lookout for any lingering pests, especially in the first month after treatment. Use more insecticidal soap, as needed.
“I’d like some info on why my pumpkin seeds didn’t produce pumpkins. There were lots of leaves and flowers, but no pumpkins. I planted them plenty early enough, and there wasn’t any frost. The leaves just started dying out by mid-September.” Question from Kimberly of Vancouver, Washington
Answer: Sorry to hear your pumpkin vines did not produce pumpkins! First, make sure that all of their growing requirements are met. Pumpkins need to be planted in spring, after the threat of frost has passed, for fall harvest. Full sun, summer warmth, and space (a 12’ x 12′ to 15 x 15’ patch) are essential for vining varieties. It pays to plant them on berms (click here to read all about berming) amended with lots of organic matter. Feed them with a fertilizer formulated for vegetables, and be sure they get plenty of moisture (probably not a problem in Vancouver).
If all their growing requirements were met, there are four more possible reasons why your pumpkins did not develop.
1. Lack of pollinators
Pumpkins have two flower types, male and female, and these are bee-pollinated. The male flowers are produced first, followed by the female blooms, which have small, underdeveloped pumpkins at the base of each flower. If you see female blooms on your plants, and no bees, this could be the problem. Without pollination, the developing fruits just shrivel and drop. If you think this is the cause of your troubles, try a hand-pollination method. Simply use a small brush to move pollen from a newly opened male flower to a newly opened female flower. It’s fast, easy, and will yield pumpkins!
2. Time
Lots of pumpkin varieties require good growing conditions for more than 100 days to produce. Early pumpkins are a good choice for those living further north. The varieties ‘Flatso‘ (85 days to harvest), ‘Chucky‘ (85 days to harvest), and ‘Cinnamon Girl‘ (85 days to harvest) are all early to produce.
These pests bore into the stems of pumpkins and other squash and cause whole vines to die back because they are cut off their water. Usually, with vining pumpkins, some of the vines survive because they root along the ground and survive, so this is often less of a problem. Nonetheless, click here to read a great Q&A about squash vine borers to determine if this is your problem.
“The last couple of years that we have planted zucchini, a worm of some sort has eaten to roots and caused the plants to die. We try to use as little chemicals as possible but don’t know what else to do. We have tried 7 dust, diatomaceous earth and this year we even tilled several times before planting but yet our plants still died because of this insect. It doesn’t bother other plants just the zucchini.” Question from Michelle of Copperas Cove, Texas
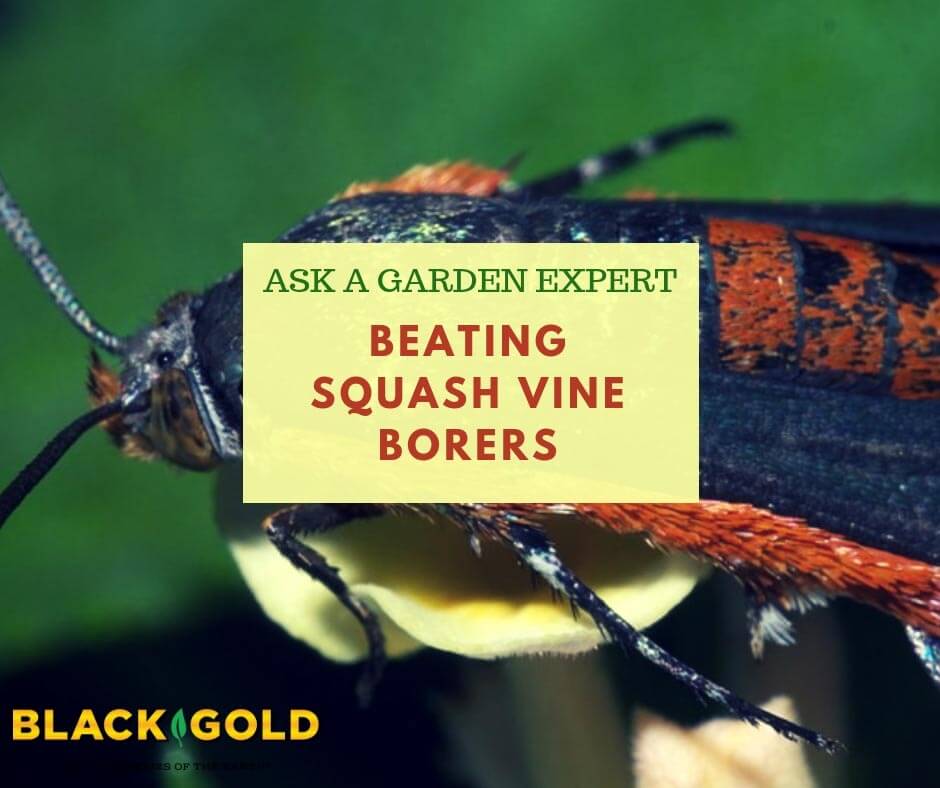
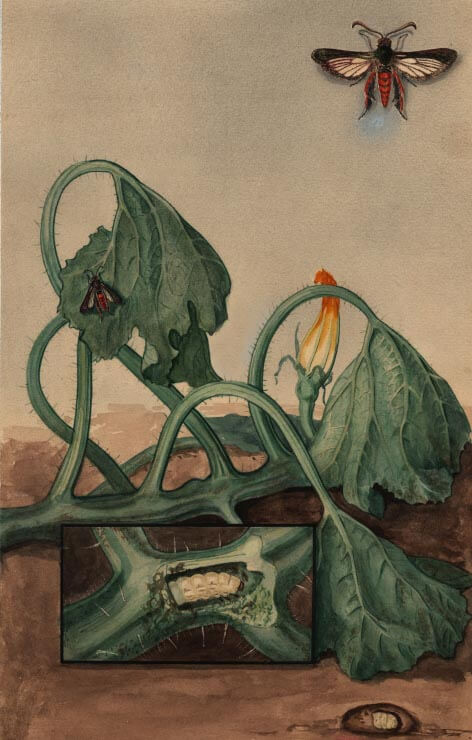
Answer: You have squash vine borers! These moth pests lay their eggs at the base of zucchini and squash vines. Then their larvae hatch and bore into the base of the squash, eating away at the stem interiors until the vines wilt and die due to lack of food and water. Bush zucchini and squash are most susceptible because they have just one stem supporting the whole plant.
There are several things you can do to keep borers and bay, and none require pesticides.
Tackle Borers Early
The key is getting to the borers before they get to your squash. The half-inch-long moths are gray with orange-red bodies dotted with black. They buzz like wasps and reproduce just once a year. Look for them early in the summer, when they are ready to lay clusters of tiny, flat, brown eggs at the base of squash stems or lower leaves. The eggs take just one week to hatch.
Keep a lookout for adults and egg clusters after you plant your squash. If you find the eggs, gently scrape them away. Continuous checking and egg removal will keep the borers at bay. The moths are also attracted to the color yellow, so another method is laying yellow sticky traps at the base of the stems.
Some gardeners also find success placing floating row covers over squash up until midsummer. You just have to secure the row cover edges to keep insects from getting inside until the borer threat has passed. Then remove the covers to ensure your zucchini flowers get pollinated.
Remove Borers
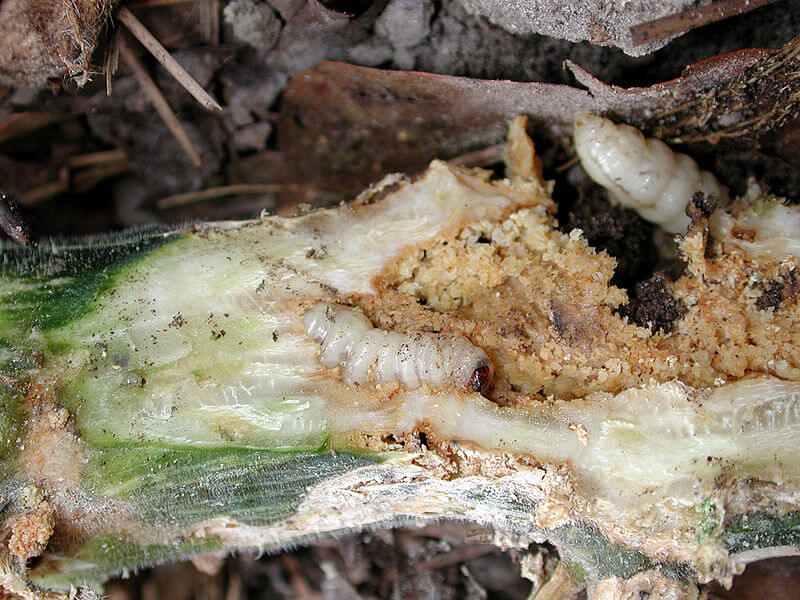
Here’s what an active borer looks like in a squash stem (cross-wise cut). Look for the tan, gravelly frass at the stem base!
If borers do infiltrate your zucchini stems, you can actually remove them! Look for holes filled with tan, gravelly frass (insect droppings) at the stem base. As soon as you see these borer signs, gently slice open the stem lengthwise, doing as little damage as possible, and remove the yucky borers. This process is a lot easier than you might think.
Plant Zucchini Later in the Season
Lots of bush zucchini will produce fruit in as little as 45 to 50 harvest days. So, if you plant new plants in midsummer, after the squash borers have stopped reproducing, you can worry less about borers.
Plant Borer-Resistant Zucchini
Vining squash and zucchini types require more space, but their stems root along the ground, making them resistant to borers. If one stem is attacked, the others will support the growing vine. Two great resistant varieties to try include ‘Cocozella Di Napoli‘ and ‘Costata Romanesco‘.
I hope this information helps!
Happy zucchini growing,
Jessie Keith
Squash vine borer drawing by author Mary Foley Benson.
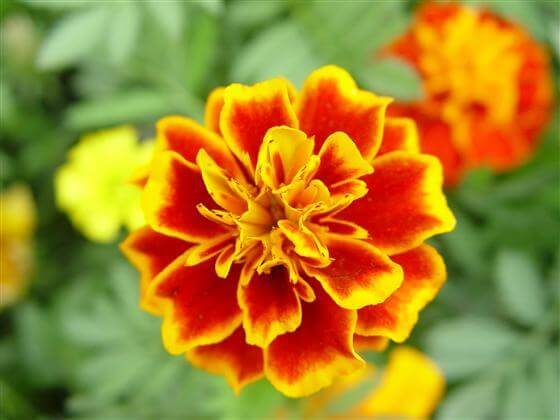
The marigold that combats root knot nematodes best is the French Marigold.
A single flower crops up time and again in vegetable gardens, old and new. Our grandparents may not have known why they were included, but they carried on this tradition “to keep bugs out”. But marigolds don’t control pests that bedevil foliage, so why did this practice become so ingrained in the home garden? Agricultural studies have finally revealed the reasons for marigold planting in organic vegetable gardens and how they actually contribute to plant health. Continue reading “Mighty Marigolds for Organic Gardening”
The more you can do to make plants healthy and avoid stressful conditions, the likelier they are to thrive.
In many of these web articles, I have often stressed the importance of soil health. Whenever we plant something in the ground it offers an opportunity to amend the soil around and below the root zone. At no other time can one easily add compost or fertilizer to the soil around and below the roots. The same thing is also true when we plant something in a container, except that in a container we have more control over the actual soil.
Health guidelines for people stress that maintaining a good diet and lifestyle will help keep our bodies healthy. This same principle is true for plants. The more we can do to make a plant healthy and avoid stressful conditions, the likelier that plant will thrive. Of course there are some exceptions to this, and roses are a good example. Some roses will get black spot on their leaves regardless of overall plant health. Even in the case of roses, there are techniques we can do to lessen the effect of damaging diseases or insects. I have always had some rose bushes in my garden, and over the years I have removed those rose plants that are susceptible to black spot and replaced them with new varieties that are disease resistant.
When I look at my own garden, I have learned that by providing the best gardening practices will greatly reduce stressful conditions for plants. I continually add Black Gold amendments whenever I am planting something new. I mix fertilizer into the existing soil and add Black Gold Garden Compost Blend. In the many containers that I have on my deck and throughout the garden, I perform a similar treatment. I use either Black Gold All Purpose Potting Soil or Black Gold Natural & Organic Potting Soil. At this time, I also add some quality all-purpose fertilizer, and then I know I am providing my plants with what they will need for an excellent beginning.
Choosing disease-resistant roses really pays off.
One thing that I find many beginning gardeners (and experienced gardeners too!) tend to overlook is the right environment for their particular plant. By environment, I mean determining whether it is a plant that needs sun, partial sun or full sun. If a shade-loving plant is placed in a very sunny location, there is no amount of fertilizer, water or proper soil that is going to keep that plant from getting stressed. Always check the plant label and ask your local garden center personnel about the proper planting location for the plant you are selecting.
Another major factor is watering. Here in the Pacific Northwest, we have recently had some very hot weather. Even plants that thrive in the sun may wilt because they are losing more water than they can absorb. On particularly hot days, after an early morning soil drench, I like to actually spray wilted plants with water as I have found that this will usually revive them. Of course this is a temporary course of action, but it does work. Another solution is to add a mulch around the root base using Black Gold® Garden Compost Blend as this is excellent water retentive material for plants both in the ground and in containers.
Plant potted plants in the best mix and caring for them well will keep them healthy and thriving.
There are many plants in containers in my garden that are in the sun, and I find that sometimes I may need to water them twice a day, especially later in the season as the plant roots fill the container. As a plant grows, the roots may soon fill the container, and this will make the pot become drier much faster than it would have earlier in the summer when the new roots are just beginning to grow.
I do not think many people like to use chemical sprays and in their gardens; I have not used any insecticides or fungicides for many years. I have many birds and encourage them as I find that they can keep many insects under control. There are times when spraying is necessary, but do some research before you do. A good rule to follow is to check with your extension service or local garden center to learn what is the least toxic chemical option available.
Gardening should be fun and relaxing, and you can help make it that way by providing your plants with the best possible materials for them to grow and thrive. Yes, there will always be some failures, but that is how we learn. We don’t give up. We try again!
Marigolds (Tagetes erecta) include both the small French and the big African marigolds. These common flowers originated with a wildflower from Mexico developed in the Mediterranean region just after the Conquest. Ever since, the marigold has been grown in food gardens as a natural insect repellent. That’s because marigolds repel pests for more efficient organic gardening!
This annual flower species bears a strong, pungent scent that will drive bugs away from other plants close by in the garden. Underground, marigold roots repel microscopic worms called nematodes which attack food plants. Plant your marigolds all around the organic kitchen garden to drive away undesirable pests without hurting important beneficial predators such as praying mantids and ladybugs.
Marigolds are annuals, and for all annual plantings we recommend organic fertilizer formulated for flowers. A seasonal application will keep them happy and blooming throughout the growing season!


 Health guidelines for people stress that maintaining a good diet and lifestyle will help keep our bodies healthy. This same principle is true for plants. The more we can do to make a plant healthy and avoid stressful conditions, the likelier that plant will thrive. Of course there are some exceptions to this, and roses are a good example. Some roses will get black spot on their leaves regardless of overall plant health. Even in the case of roses, there are techniques we can do to lessen the effect of damaging diseases or insects. I have always had some rose bushes in my garden, and over the years I have removed those rose plants that are susceptible to black spot and replaced them with new varieties that are disease resistant.

