

Your once beautiful house plant has begun to look stressed. Maybe it’s lost some leaves, quit growing, needs more frequent watering, and has visible roots on the soil surface. Then you remember that it’s been three years since you repotted it…That means it’s time to upgrade its container home to improve better growth and overall appearance.
General House Plant Repotting Notes
Different plants have different potting needs–cacti need excellent drainage, most orchids grow best in bark, and hanging baskets like moisture-holding mixes–but there are also a lot of general requirements. Unless you are growing aquatic plants, all potted plants need pots and soils that drain well. Good light is required, so know a plant’s light needs before you try to grow it in your home to make sure that you can support its needs. Supplemental light is an option, but it is never as good as natural light. All potted plants require fertilization at different levels with different foods. When growth ramps up, all plants need more water, and when growth slows down, all plants need less water.
Finally, repotting is best done in spring, before house plants do most of their active growing, or in late summer to fall when they can grow a little before winter. I find that most house plants grow best if brought outdoors in summer. Just be sure to clean them up well before bringing them back inside before frost. (Click here to learn how to clean plants before bringing them indoors.)
Repotting House Plants in Six Steps
Good repotting technique is done in six easy steps. You just need a new pot, fresh potting soil, fertilizer, water, gloves, and pruning shears.
- Pick Your Pot: Select something beautiful that you will want in your home for the long haul. There is no reason to have plain plastic pots when you can have elegant ceramic ones. Pick pots that are 2 to 6 inches bigger than the original. Small, slow-growing plants need pots that are just a bit bigger, and large, fast-growing plants need larger pots. Deep-rooted plants need deeper pots and shallow-rooted plants need shallow pots. All containers should have good drainage holes unless you are growing an aquatic plant. (Click here to learn how to plant potted water lilies.) Fast drainage encourages water flow and aeration, which roots need. Pick a sturdy saucer to catch water. Water-impermeable pots, like resin, grazed ceramic, or stone, hold water better. Pots made of TerraCotta and cement are porous and lose water more quickly. If you inherit a pot with no drainage holes, drill holes in the bottom with a pointed drill bit. (Be sure to wear gloves and safety goggles.)
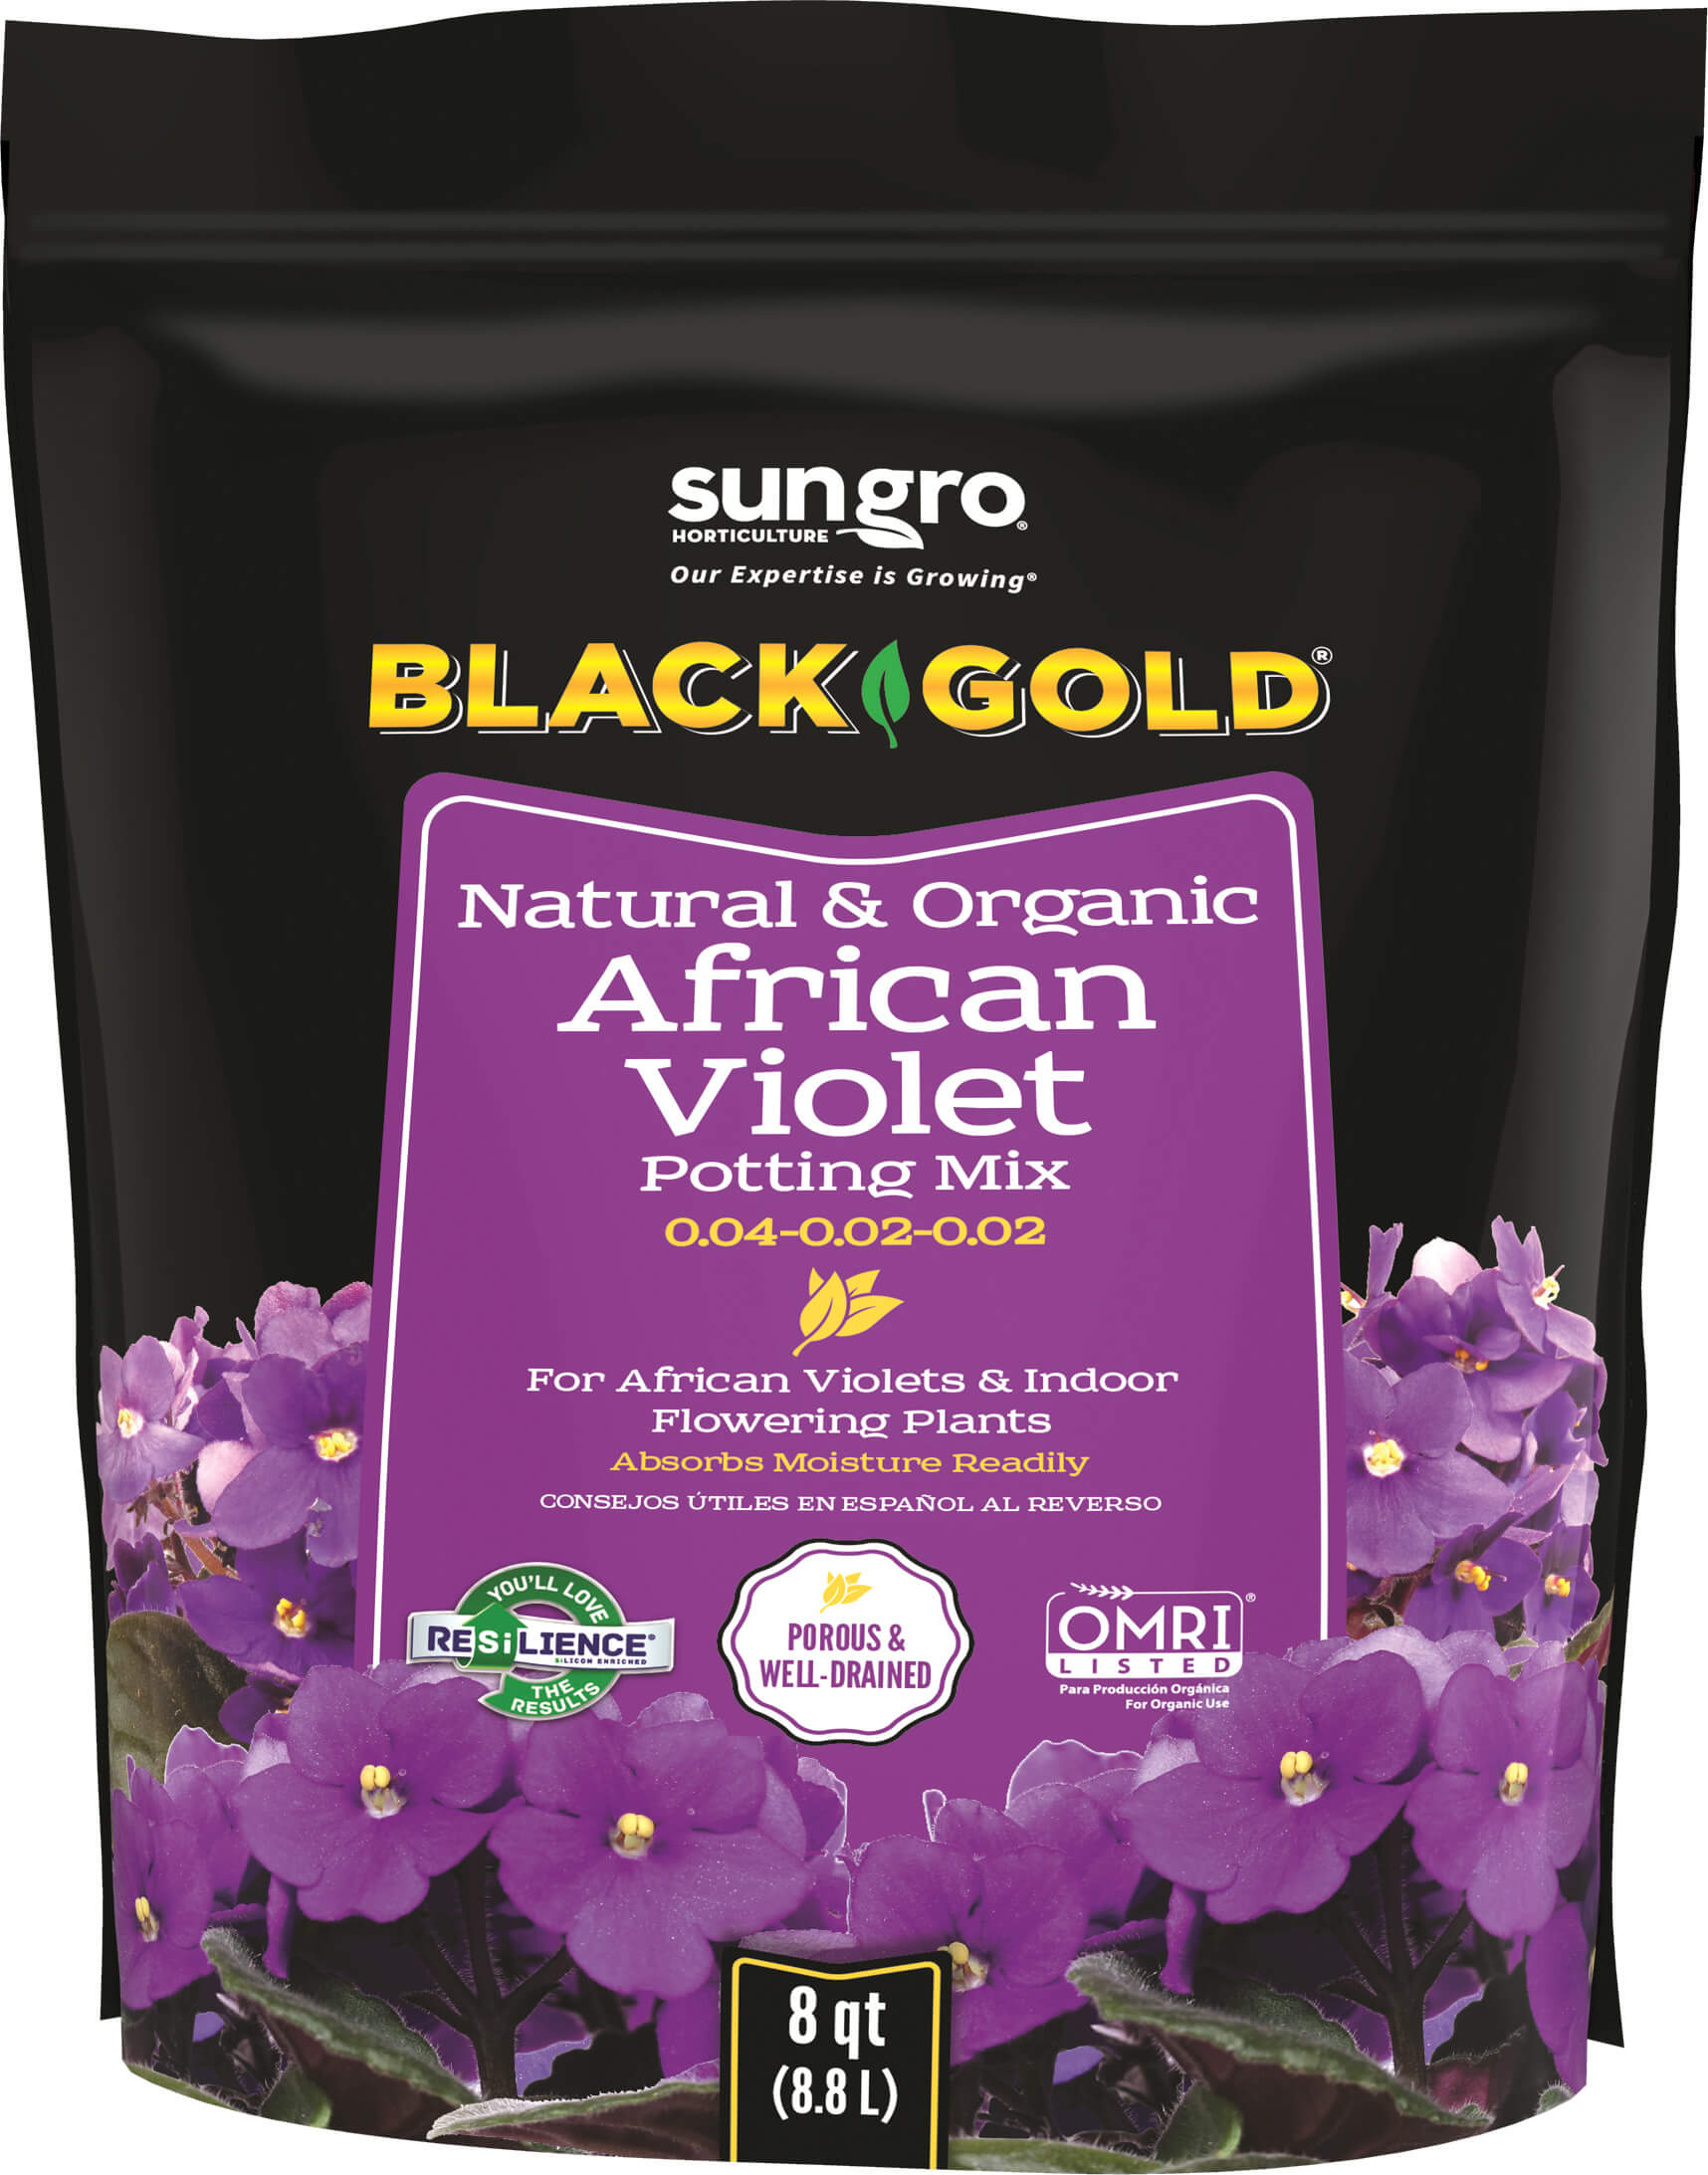
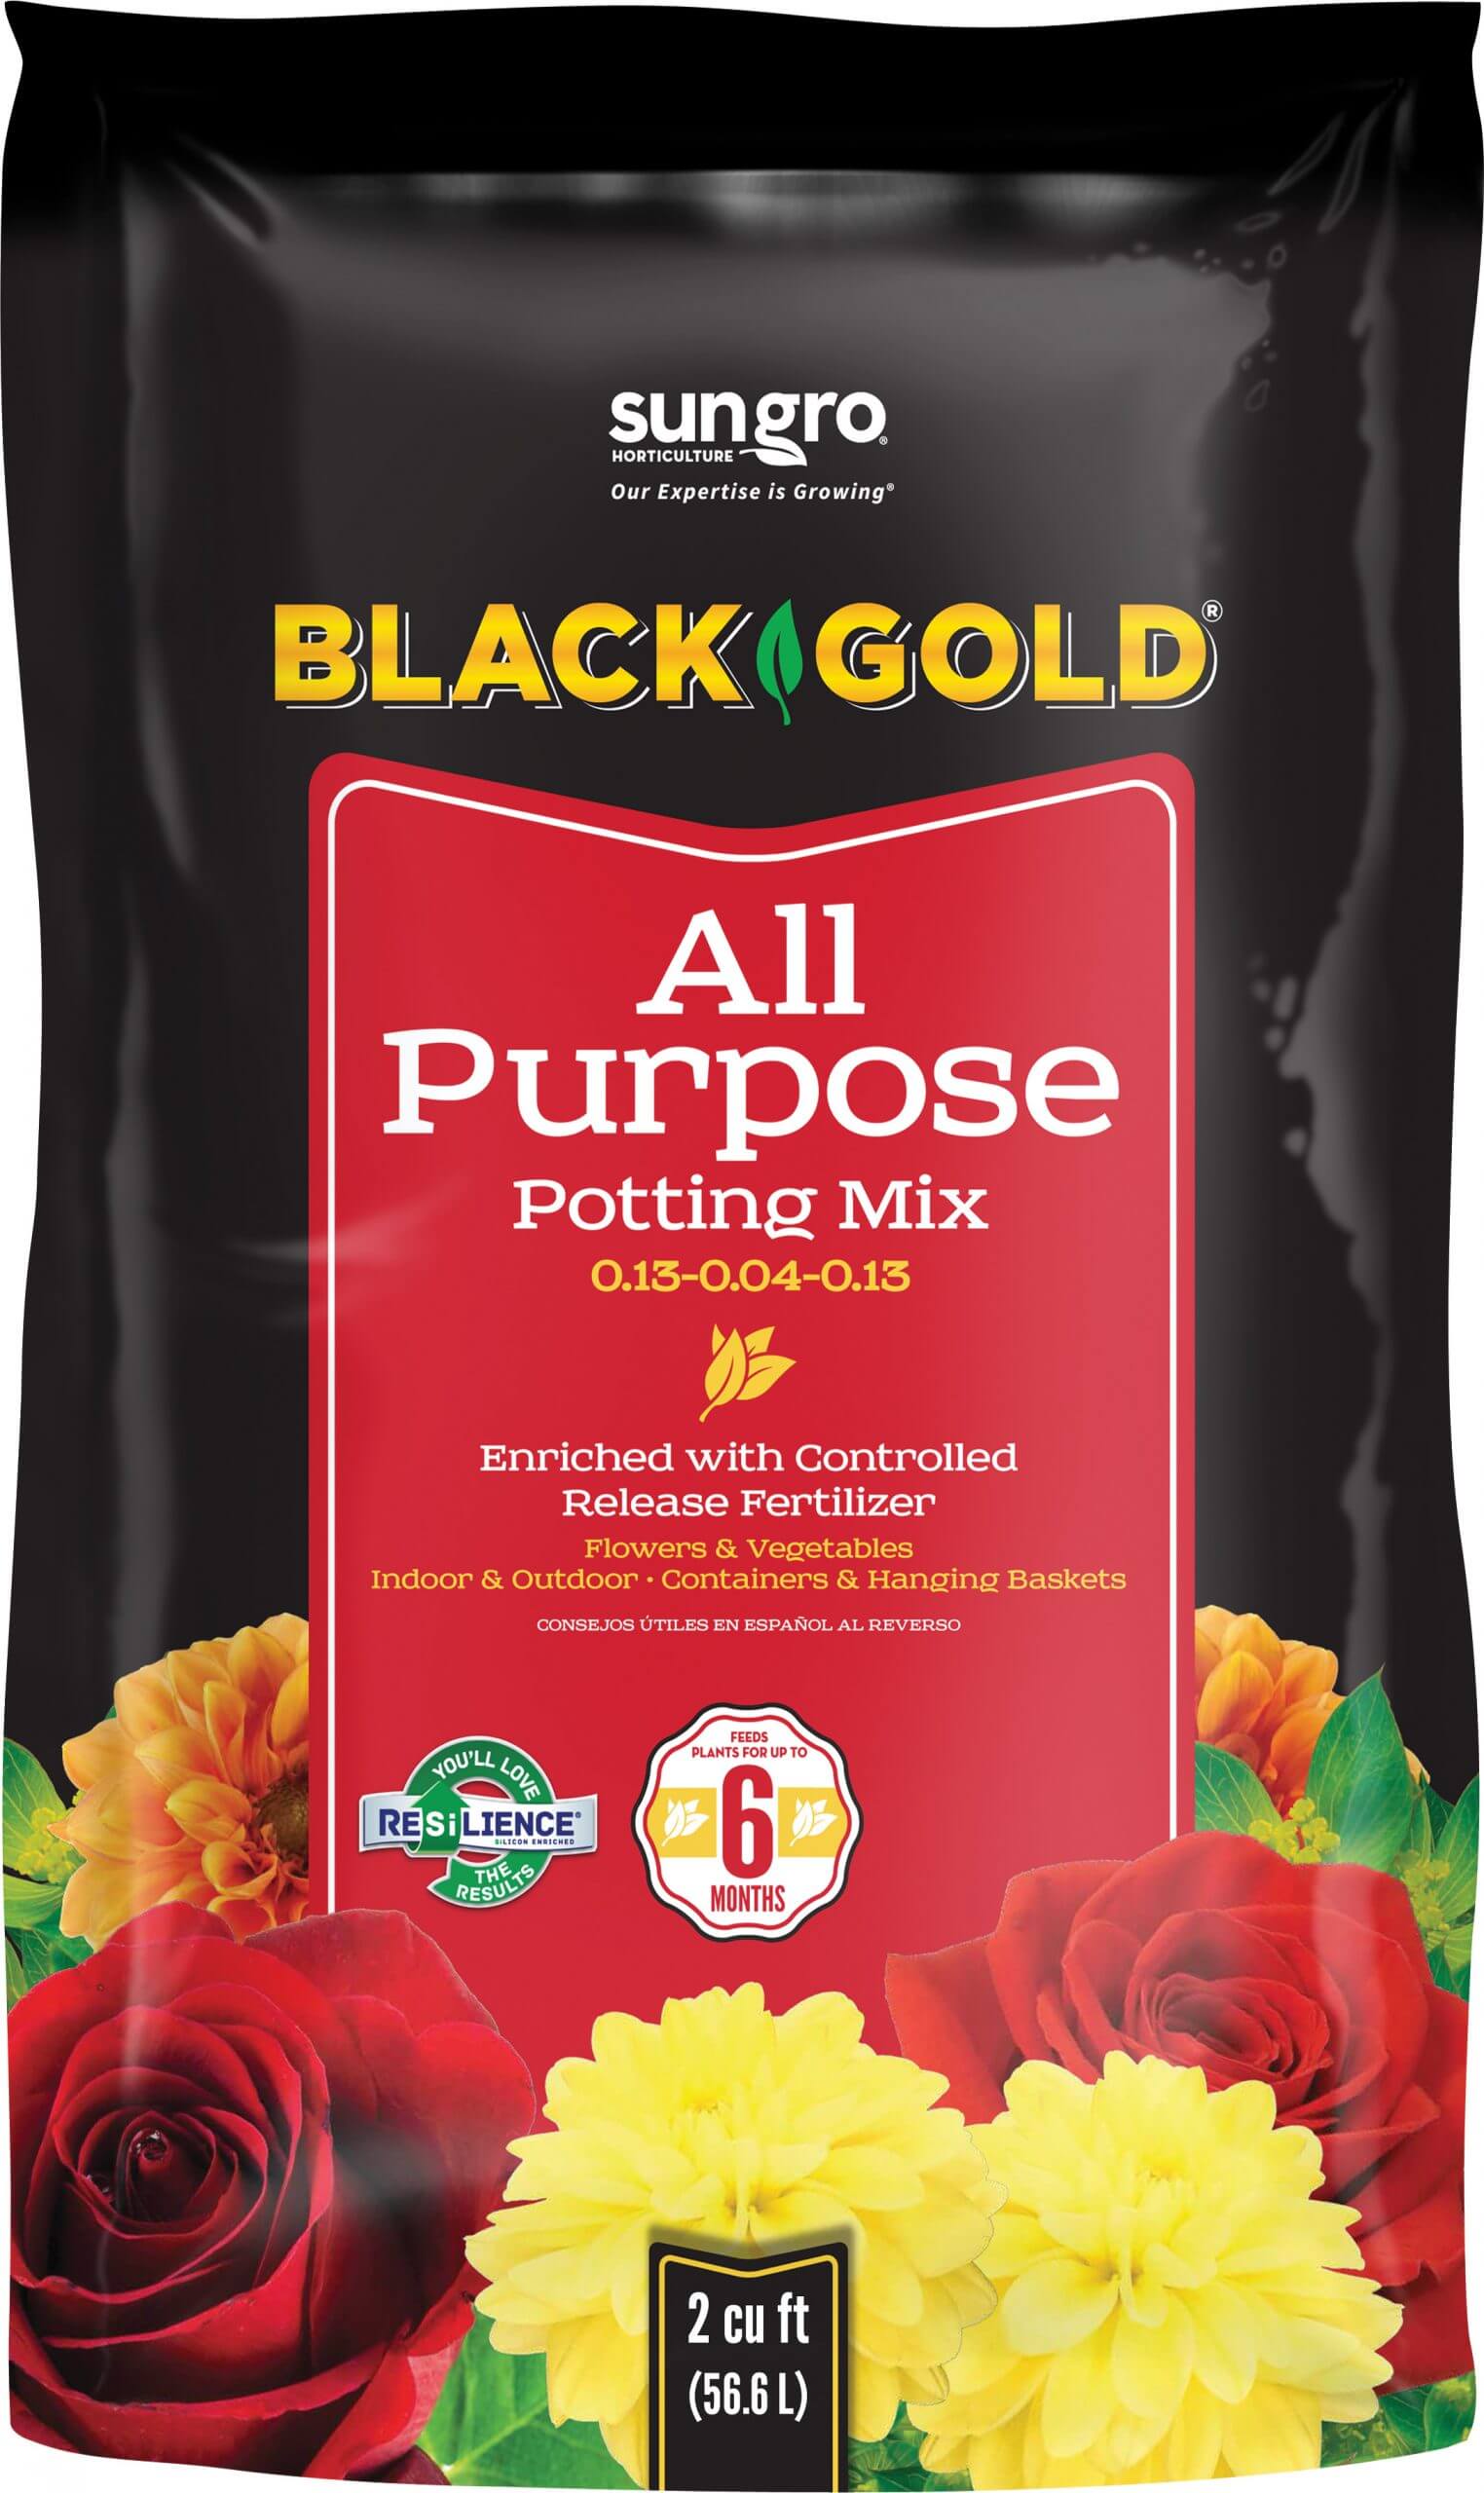
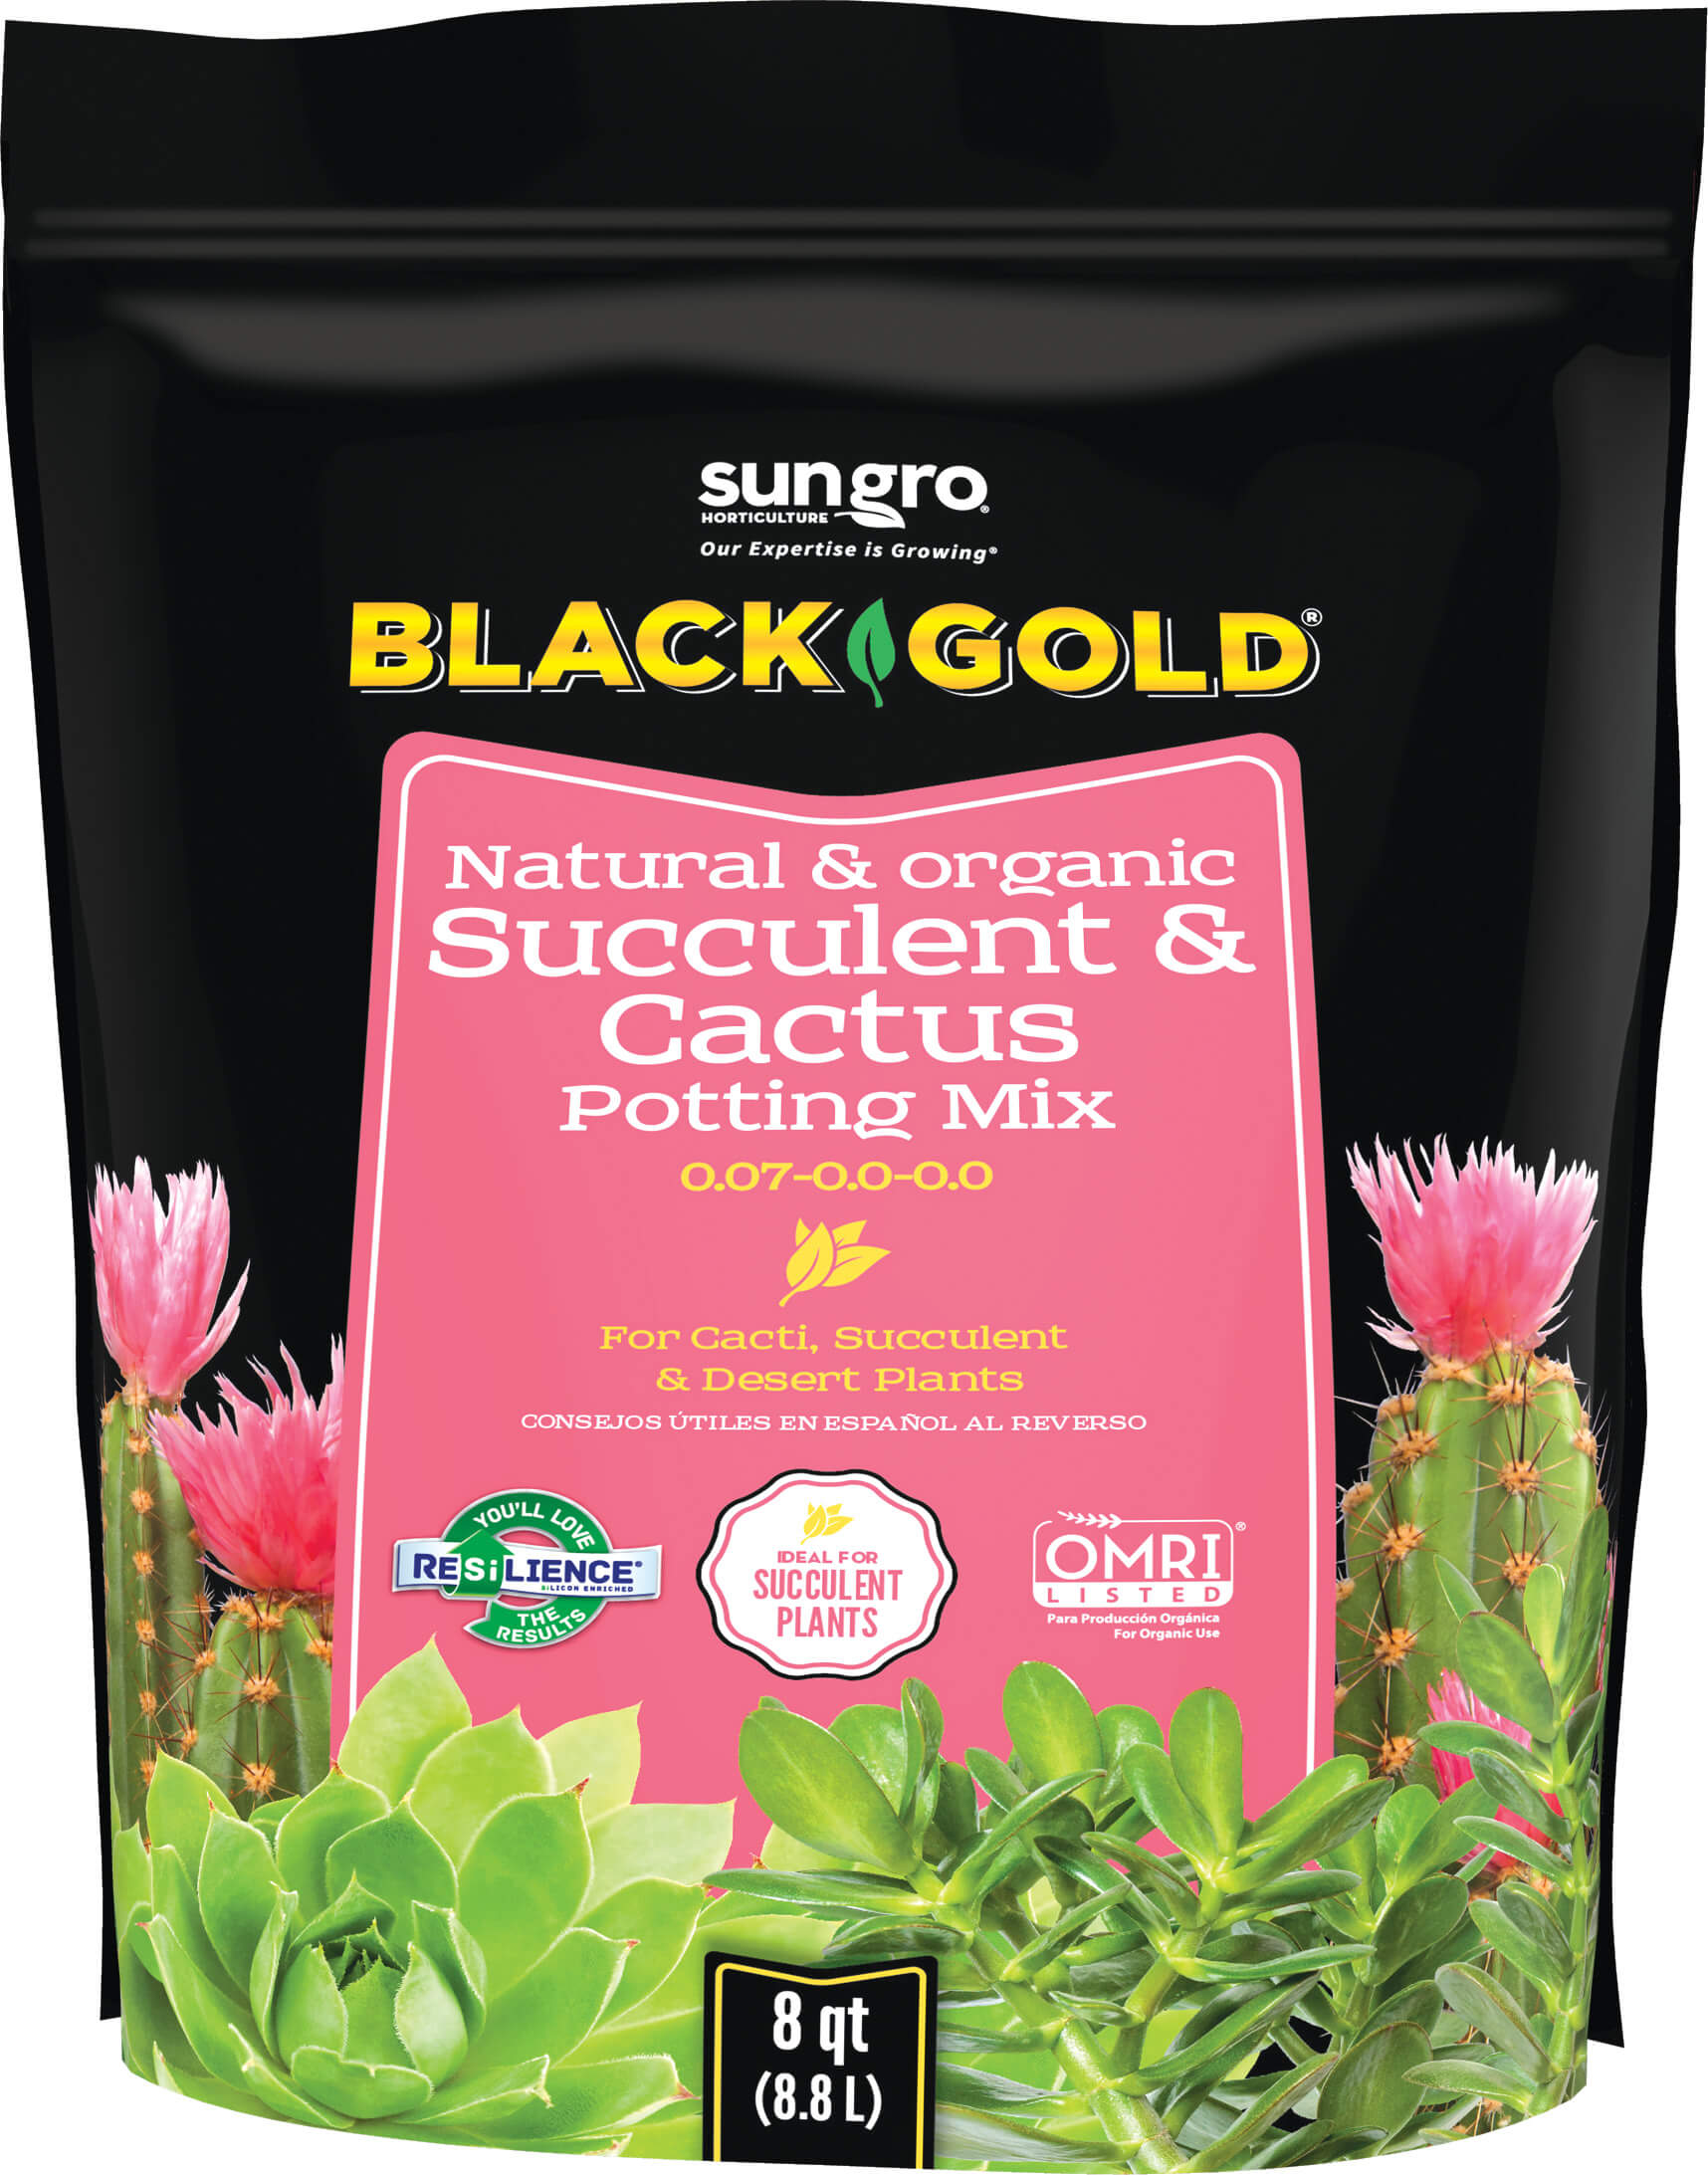
- Pick Your Soil: Common house plants grow well in any good-quality, all-purpose potting mix, such as Black Gold All Purpose Potting Mix or Natural & Organic Potting Mix. Some plants, like African violets, cacti & succulents, or terrestrial orchids need specialty mixes with different levels of drainage and water-holding capacity. That’s why we make Black Gold African Violet, Cactus and Succulent, and Orchid Mix. Hanging baskets need extra moisture, so we recommend mixes with high water retention, like Black Gold Natural & Organic Ultra Coir or Waterhold Cocoblend. All of our soils are natural & organic, and many are OMRI Listed for organic gardening.
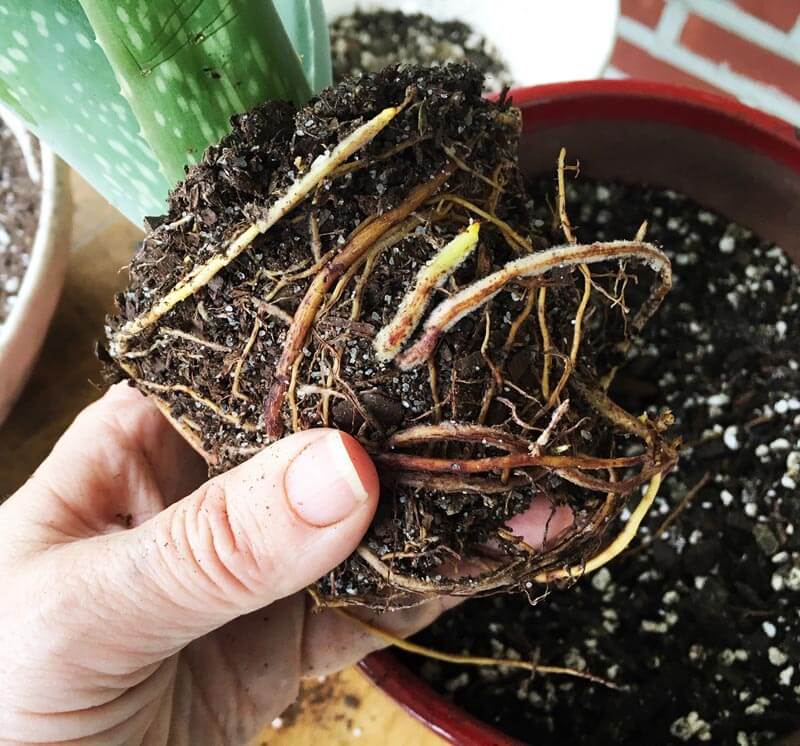
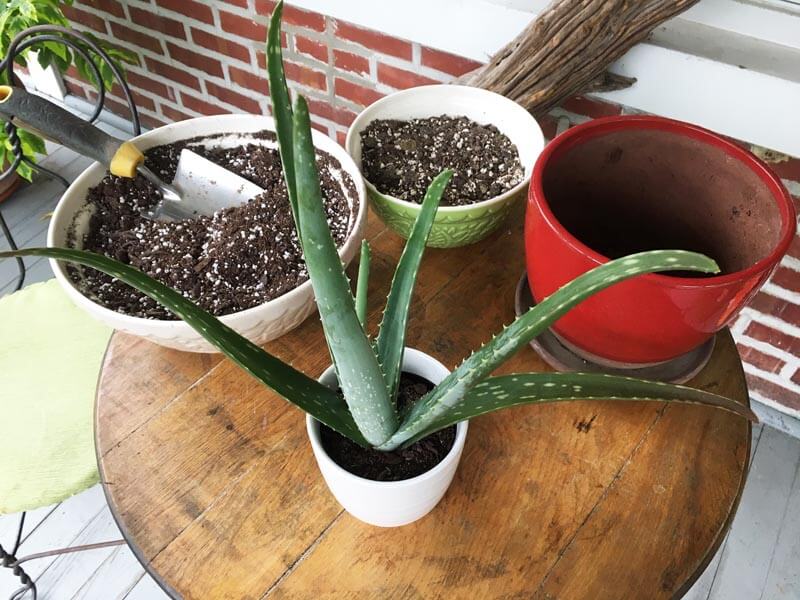
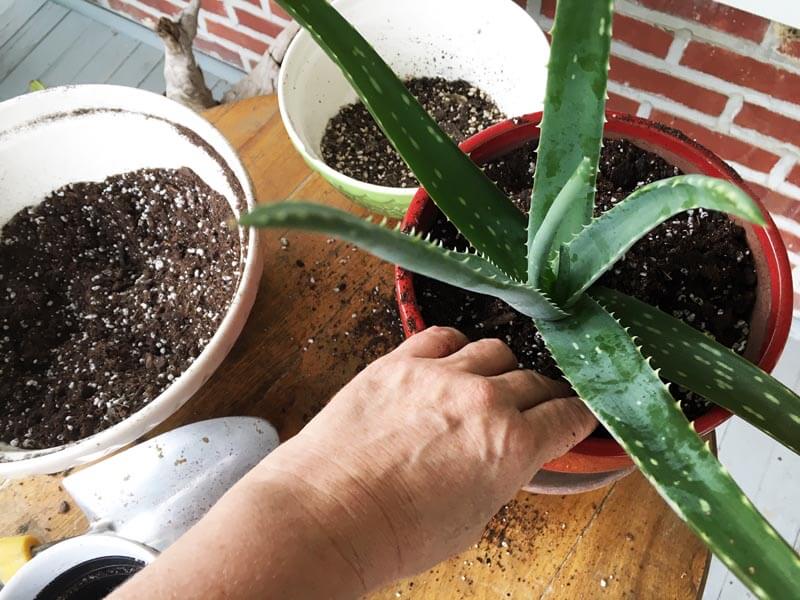
The roots of this Aloe were pot-bound but have been slightly loosened for better growth in the new pot. (Image by Jessie Keith) - Prune Shoots and Unbind Roots: Remove any dead or unwanted stems and loosen any intertwined (pot-bound) roots, so they will grow well into the new pot and mix. Gently tease tightly-bound roots apart. If they are very dense, make cuts along the base and loosen the roots along the cuts. If your plants look good and their roots are not tightly bound, then bypass this step.
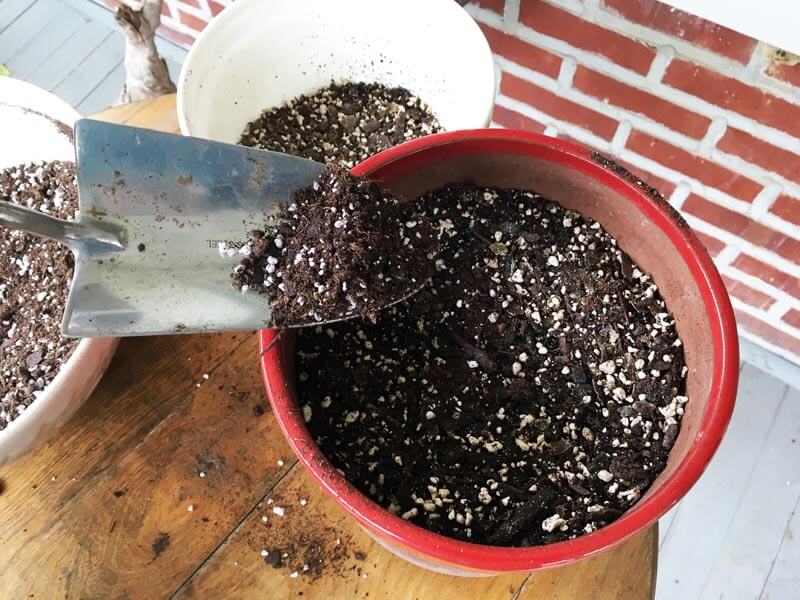
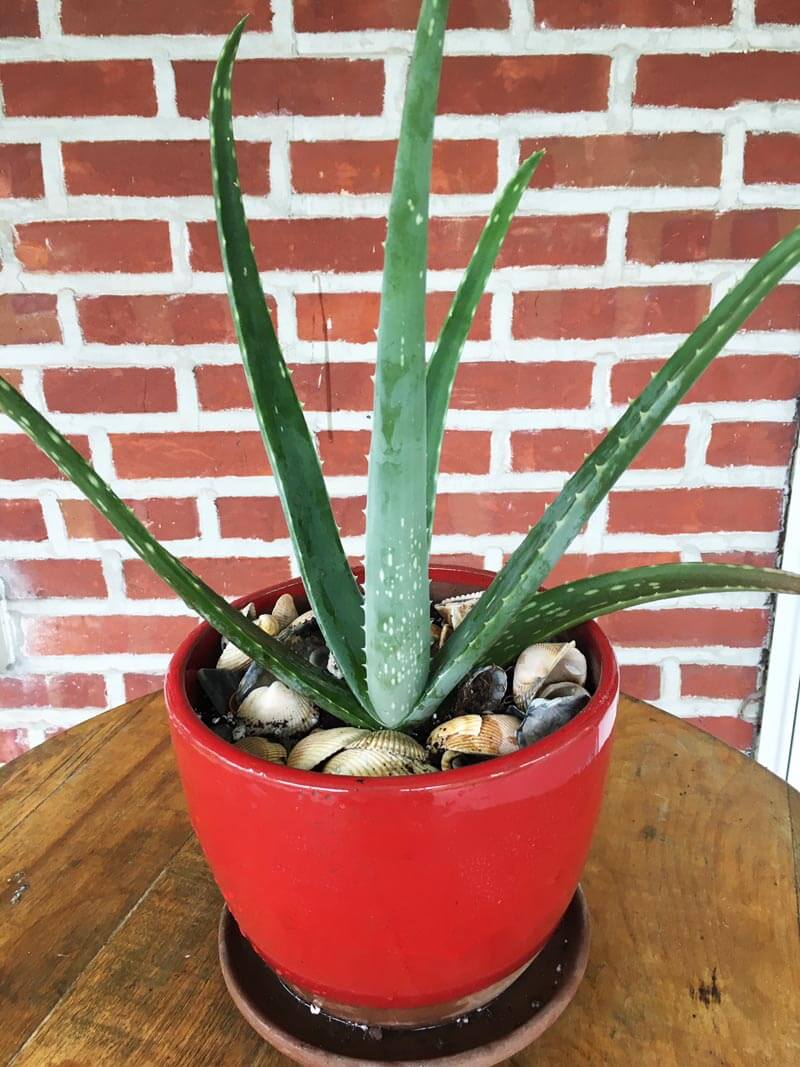
The aloe is being planted in 1/2 Black Gold Cactus Mix and 1/2 Black Gold Natural & Organic Potting Mix. Provide enough soil to leave a 1-2 inch space at the top for watering. (Image by Jessie Keith) - Repot: Remind yourself to leave at least 1-2 inches at the top for water. Place screen or a few pebbles over the bottom holes to hold soil (not necessary for my red pot with a built-in saucer and side drainage holes). Then add a layer of soil at the bottom. Place the plant in the pot and center it. Make sure it is not too high or low. Add mix to the sides and gently pack it in for good root-to-soil contact. Make sure there are no holes in the soil. Level the top, and add any decorative pebbles, moss, or shells along the soil, if you like.
Lightly pack the soil along the sides. This is a good time to add slow-release fertilizer. (Image by Jessie Keith) - Water: Use a watering can to gently water until all the soil is saturated and water fills the bottom saucer. In general, rewater when the soil is dry down to a knuckle’s depth. (Click here for a detailed article about how to water house plants.)
- Fertilize: Pick a fertilizer that’s well-matched to your plant. There are many specialty types for orchids, succulents, and foliage plants. Be sure to follow the product instructions. I like using slow-release fertilizer, such as Proven Winners Continuous Release Plant Food.
Newly potted house plants will not produce new top growth until they set new roots, so give them extra good care and a little time. Very soon they will be growing happily as if they had never had a problem in the first place.