January is a good time to remove old Helleborus leaves, just be sure not to accidentally snip flower stems.
December was a month of trying to get my winter garden tasks all done before the end of the year. Here it is January, and I have not completed all my December tasks. Getting everything done is something that I have never been able to do because a garden is constantly changing and evolving. With the unpredictability of weather, it seems as though there is always a new task, and I often get distracted on starting on another before completing what I am working on. So, the tasks get moved deeper into winter.
Winter Garden Tasks
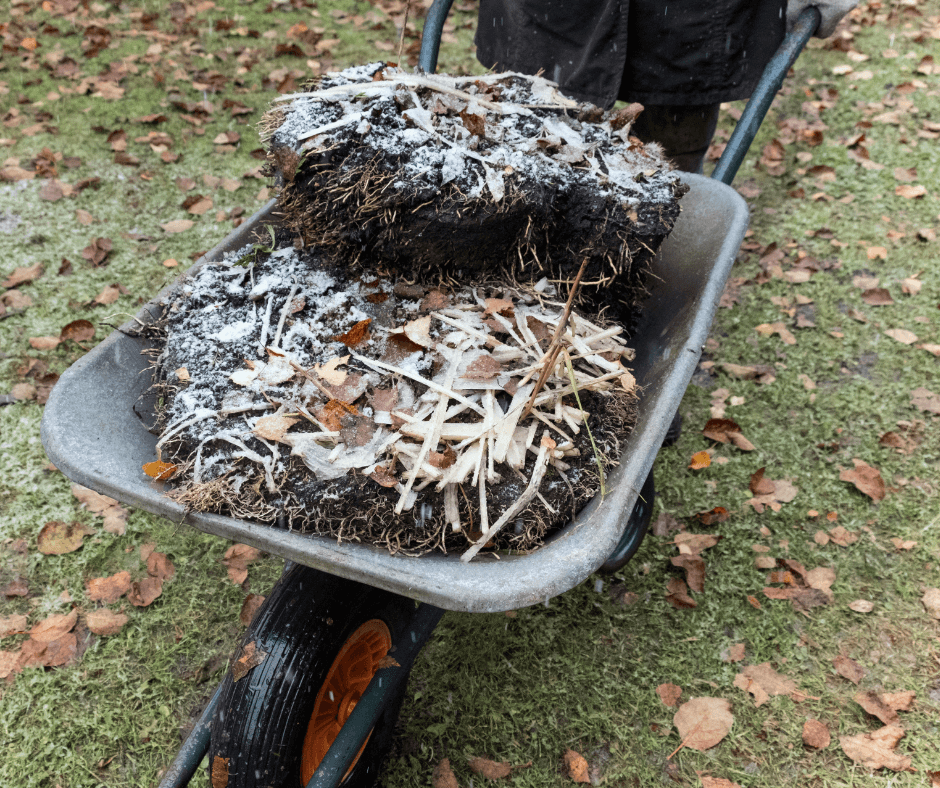
Move Hardy Perennials: I have heard some gardeners say that they can relax in January, but that is not the case with me. I consider January a good month to do some final ‘editing’ in the garden because there are always some very hardy plants that need to be moved or, in some cases, removed. This can be done in January as long as the soil can be worked and I only move very hardy perennials.
Move hardy perennials if the soil can be worked.
Divert Water: During this winter season, and this is just early January, we have had strong winds, some snow, freezing temperatures, and rain, lots and lots of rain. The rain was much needed, and so there are no complaints from me about it. Walking through the garden after a rain, there are some areas that have accumulated pools of water, and there are very few plants in my garden that have roots that will thrive in standing water. This is a perfect opportunity to create some diversion paths for the water and also an ideal time to add Black Gold Soil Conditioner (only available in the West) or Black Gold Natural & Organic Garden Compost Blend to help improve the drainage in low garden areas. By doing this now, I can observe what is working and what is not because we will soon have more rain, and I can see if there is still a collection of water.
Trim Back Helleborus Foliage: I spent several hours one morning cutting off the old leaves of the Hellebores. I was surprised to see new growth and flower stems beginning to break through the soil. A word of caution here, be very careful when cutting off the stems of the old leaves because it is very easy to snip off a new leaf or flower stem. Beware of early slug damage on newly emerging bulbs and on the new growth on Hellebores and treat accordingly.
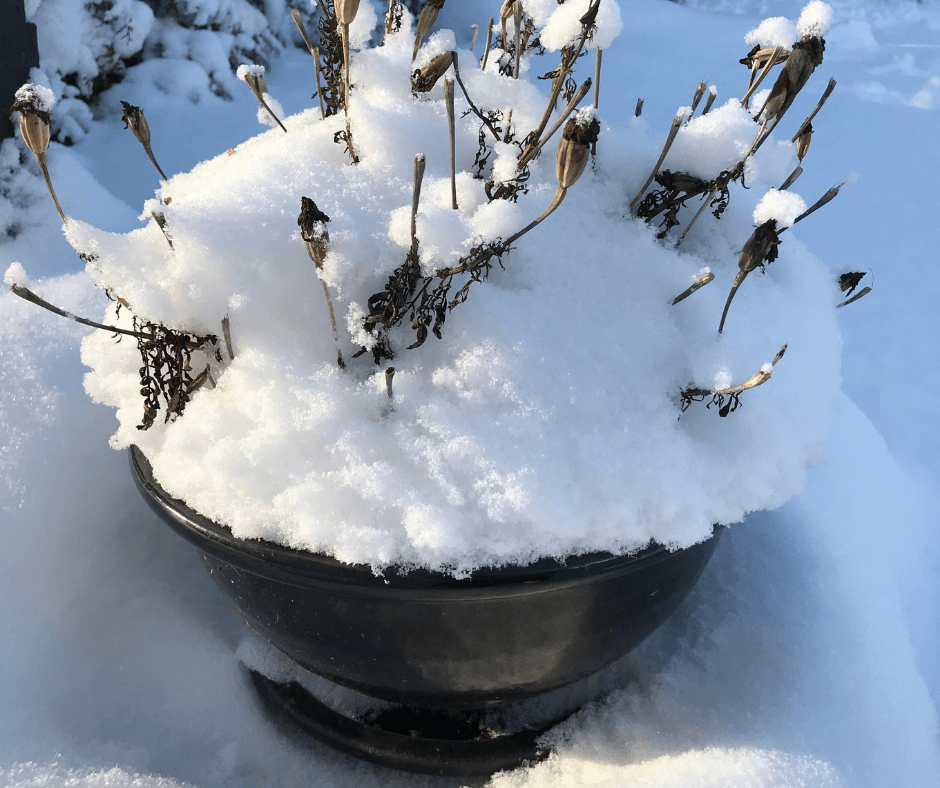
Check Outdoor Garden Pots: My garden has many pots, and I have looked at every one to make sure that the water drains through and there is no standing water. Several of my pots did have standing water, and I was able to turn the pots on their sides and poke a metal rod into the drainage holes to un-plug them. This helps heavy, ceramic pots resist cracking in the winter.
Check outdoor pots to see if they are still draining.
Treat Moss: Moss in the lawn can be treated now, unless you love the look of natural moss. It is a good idea to check if it is a re-occurring issue. Usually, it can mean there is too much shade, poor drainage, or both. There are lawn moss control products available at garden centers, and this is a good time to apply them. Many of moss control products contain ferrous sulfate monohydrate, (iron), and iron will stain shoes, cement, decks, etc., so use it with caution and follow all of the manufacturer’s warnings. These products will turn the moss black in a couple of days, and then it can be raked out. If there are large areas that have dead moss, re-seeding might be necessary but wait until spring for that.
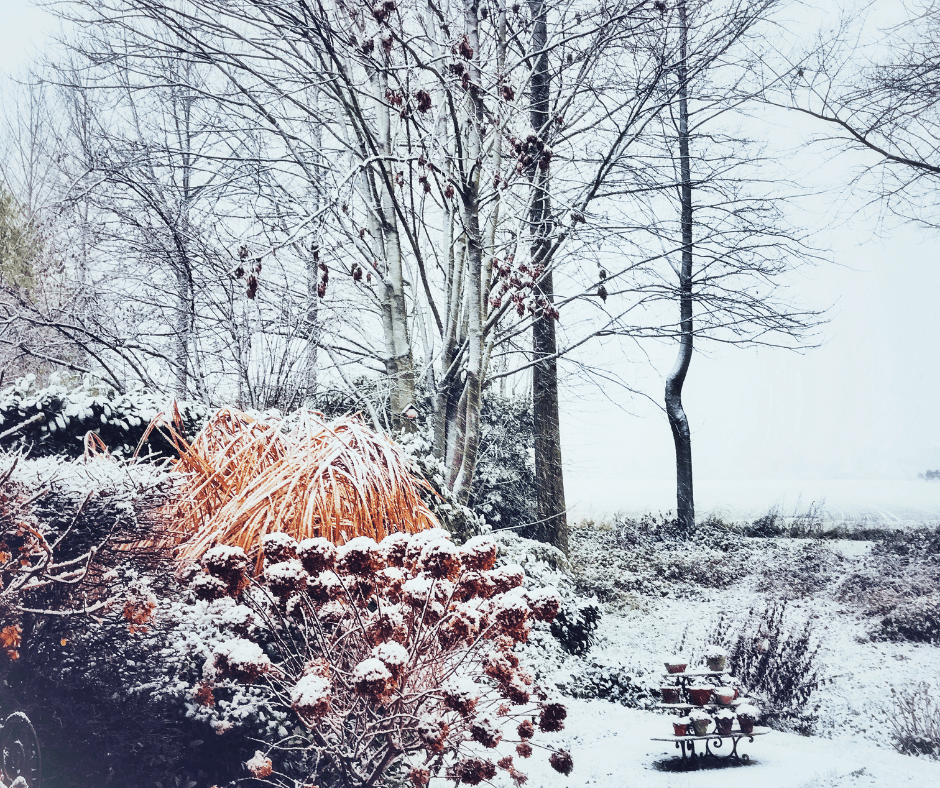
Enjoy what still looks beautiful and do any early pruning as needed.
Do Early Pruning: Winter garden tasks always seem to involve some pruning and on deciduous shrubs, it is often easier to prune and shape the plant before new leaves appear. While the major pruning on roses is usually mid-February, I like to do some pruning now and cut the hybrid teas and grandifloras to 3-4 feet.
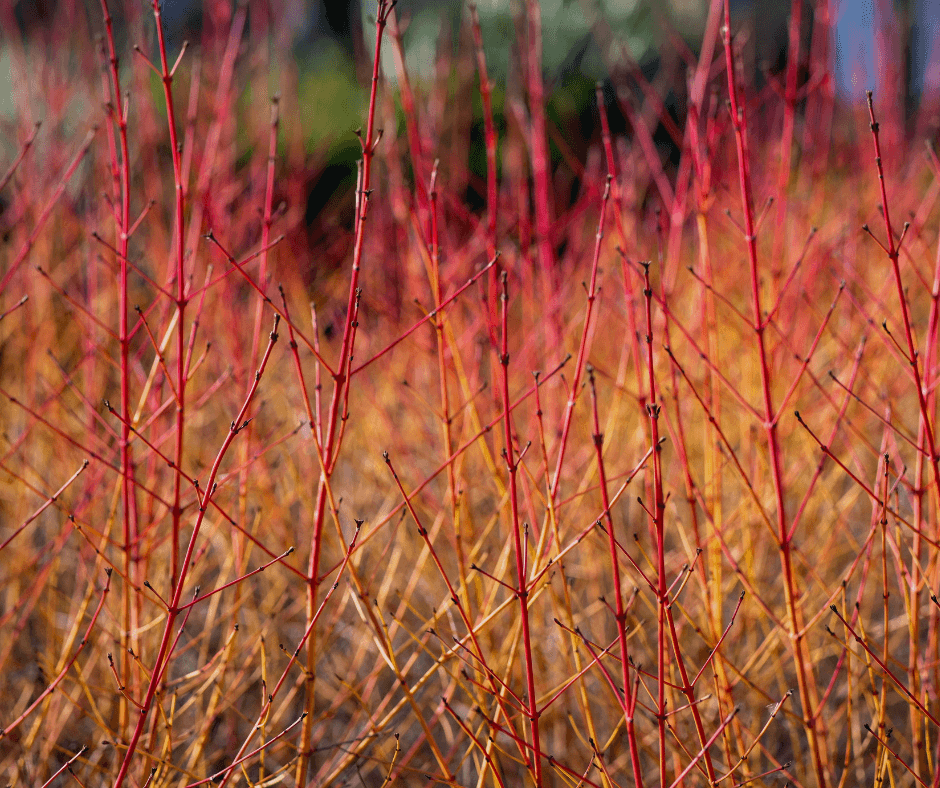
Enjoy What Looks Nice: I find that the garden is enjoyable in the winter, although the expectations are different than they are in the spring and summer. My dogwood Midwinter Fire is a bright spot with its stems of red, orange, and yellow. The twigs are also a nice addition to indoor winter arrangements. My variegated evergreen shrubs also provide winter color to dark areas in the garden and are a welcome addition to what otherwise are bare garden stems.
Even though I enjoy the winter garden, I am eagerly awaiting spring!
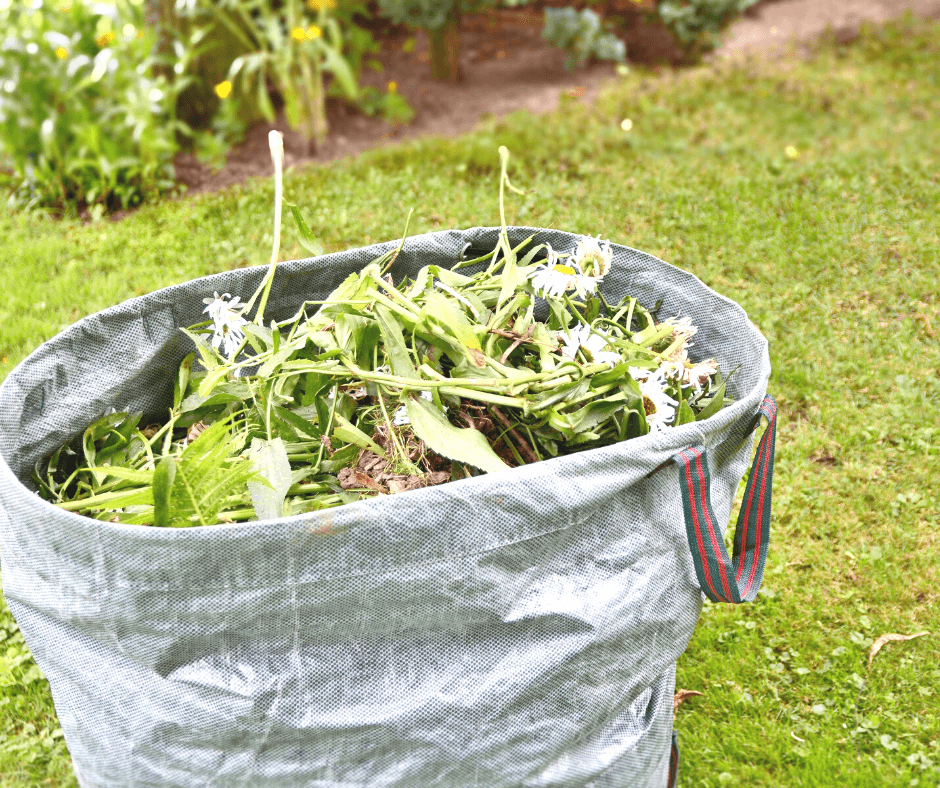
Autumn leaves drifting by your window are telling you that fall is here and it is time to put the garden to bed for the winter. For us, it is a very busy time, almost as busy as spring if one sees it as a not particularly enjoyable task and has not done their necessary work the previous fall. I plead guilty to this almost every year so I will list what needs to be done, starting with the most laborious:
Cleanup This requires cutting back and cleaning up the flowerbeds. I do not realize how many flowers I have until I have to take them out. Old plant material must be cut off and removed leaving minimal dead material on the ground surface. This is important for iris as the borers which plague them will winter over in old vegetation left behind. Roses need the same treatment to discourage black spot the following spring. I often do my removal in stages: first cut the peonies back to 3 inches then the coneflowers to the base. The Helianthus (perennial sunflowers), both single and double are cut back as well. Next will be the hostas whose leaves are changing color even without frost. All annuals should be removed as well (although some are still so pretty I am waiting for frost). This old material should be bagged and disposed of. We do not compost this material for fear of aiding and abetting garden pests.
Plant new perennials Many nurseries encourage planting new perennials in the fall. I am always leery of doing so as plants from some mail order companies are so small I would prefer to give them a whole season to grow. The exceptions are peonies, hostas and daylilies. To maximize your planting success, amend the soil with Black Gold® Natural & Organic Potting Mix, Natural & Organic Cocoblend Potting Mix or Natural & Organic Just Coir.
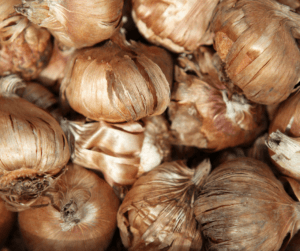
Plant Bulbs. This is the time of year to plant bulbs for next spring. There are a couple of new things I learned about bulbs that I did not know before. Wait to plant your bulbs until the weather is cool and after the first frost has the soil around 55 degrees F., but before it has frozen. Be sure to plant at the recommended depth. If you want to make this job much easier go to GardenersEdge.com and look for the “Bulb Bopper”. Do not add fertilize to the hole as that can encourage root rot. Fertilize on the top of the ground (1) when you plant, (2) when you see the first foliage poking its leaves up and (3) when the plant starts to die back. Use a food that is just for bulbs. Mulch over the bulbs lightly and remove the mulch in the spring when the plants start to come up. Another surprising piece of information is that some of the gorgeous tulips you see in stores everywhere this time of year should be considered annuals. The first year after planting they will send up beautiful blooms. The next year only a few spindly ones and the year after that only leaves. However, some tulips will not only bloom every year but also naturalize over time. These include the species, Kaufmanniana and Gregii, and giant Darwin tulips. Give them at least 6 hours of sun a day and with all bulbs let the leaves die back on their own as they are building up the plants for next spring.
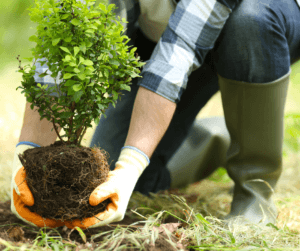
Planting trees and shrubs They do not have the stress of summer heat and will expand their roots over the winter. It is very important to be aware of the minimum distance from the house that shrubs and trees should be planted. It is so common to see plants smashed against the house. Small shrubs ought to be 3 to 4 feet away from the house, big shrubs such as lilacs 6 ft. and small trees such as Japanese maples 10 feet. Anything larger goes out in the yard. Be SURE you know the amount of sun required for each plant. Shade for rhododendrons and sun for Beauty Bush.
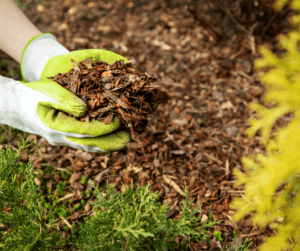
Mulch. Fall is the time to mulch, not so much to protect from the cold of winter, but because it is just too much to do in spring with everything else to do. I previously mulched in the spring but now I can see the advantage of getting it over in the fall. We use bark mulch from local sources. The mulch should be 3 to 4 inches deep. The most important thing to remember while mulching is to keep the mulch 3 inches away from the base of each perennial and 5 inches from shrubs and trees. Mulching right up to plants will cause them to rot.
After the weather clears I will go outside and practice what I preach. Happy Gardening.
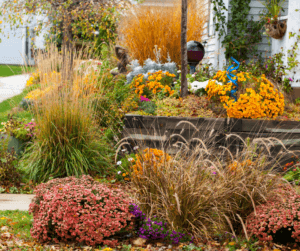
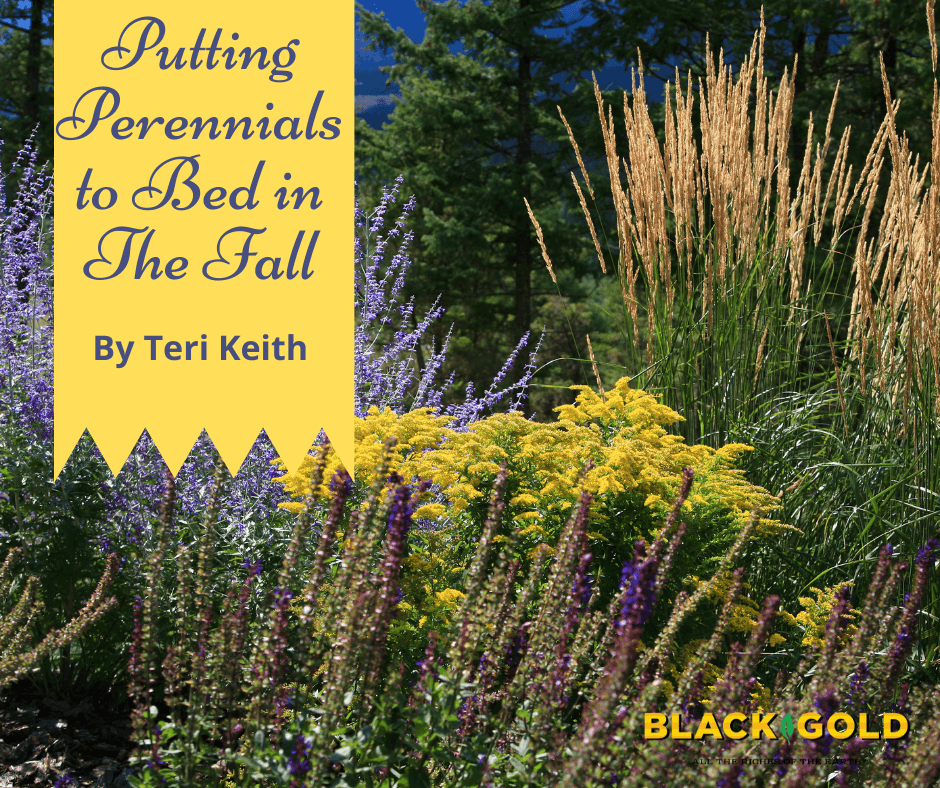
Depending on where you live in the country, September, October, and November are the main months for putting garden beds to rest. You may still have some warm days in these months, but once the nights and then days become chilly, it’s time to get to work. And, if you do it right, it is quite a bit of work, but more work now means less work later. Spring will be a breeze!
1. Weed
Pull as many weeds as you can in the fall to make spring gardening easier.
I have just started on the first step, which is getting all the weeds out, and it is going to take me quite a while. Some seasons, I stay on top of weeding, and other times other priorities get in the way. This past summer was busy, so the weeds had a “field day.” It is especially important to clear weeds from right around the base of each garden plant. When weeding, it is wise to choose good tools for the job. Luckily, we have an excellent article written by my daughter, Jessie, that details the best weeding techniques, times, and tools for the job. Read it and weed! (Click here to learn how to week like a pro.)
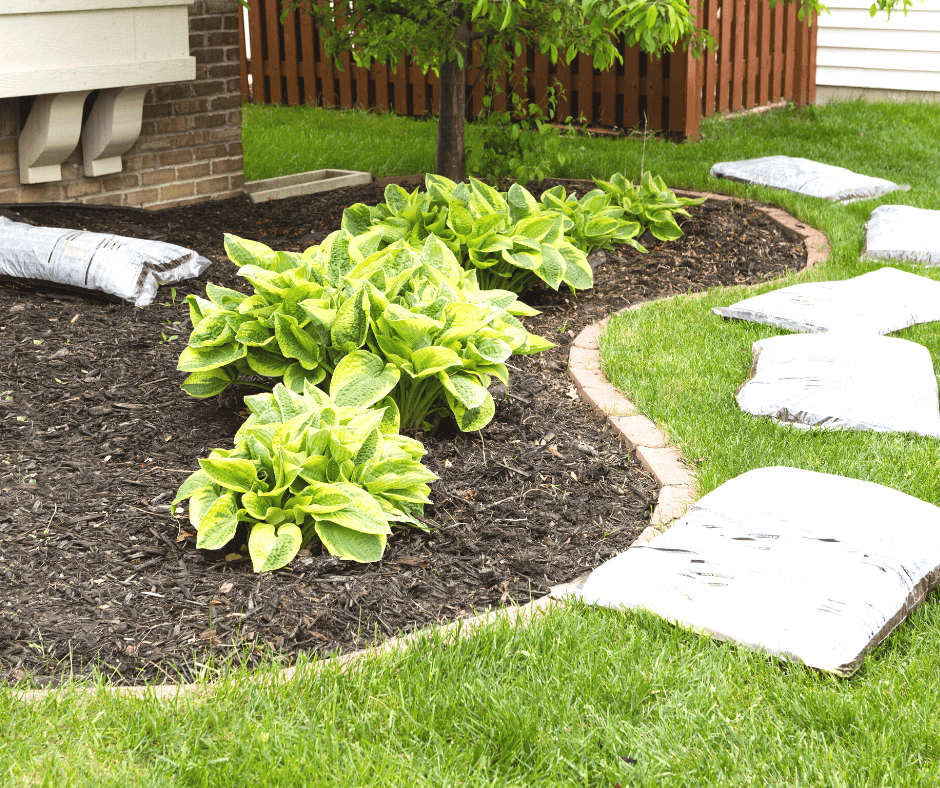
2. Mulch
A moderate layer of mulch will protect against winter weeds, and protect perennials from the cold.
This brings us to step two, putting down fresh triple-shredded bark mulch, my preferred garden mulch, which I purchase in bulk by the yard or occasionally by the bag when only a small amount is needed. (Click here to learn about different mulch options.) Not only will mulch stop weeds, but it will also keep the soil moist, and protect your plants from big temperature swings. In addition, mulch breaks down over time, adding organic matter to the soil. Areas I have mulched for years have slowly turned into rich garden soil. Put down around 3 inches of mulch, being careful not to cover the plant. (Not sure how much mulch to get? Click here for guidelines to calculate how much your garden will need.)
There are four rules to mulch application, particularly when it comes to mulching around plants: 1) leaf space around plants, 2) don’t mulch too thickly, 3) don’t apply mulch against the trunks of trees or shrubs, and 4) apply mulch when the soil is moist to make post-application irrigation easier. Leave a 3- to 4-inch gap between the base of the plant and the mulch, to avoid smothering the plant and causing crown rot. This is especially true of evergreen perennials and perennials with surface rhizomes, like bearded iris (Iris germanica hybrids). Peonies are also sensitive to excess mulch. One year, I mulched my peonies thoroughly in the fall and was so pleased with myself for getting it done early, but the following spring two of my prize peonies did not show up. I had mulched too thickly and killed them. Also, do not mulch low, spreading, evergreen to semi-evergreen perennials, including Heuchera, Dianthus, ground cover sedums, such as ‘Angelina’. Mulching them commonly causes crown rot and death.
3. Cut Back Perennials
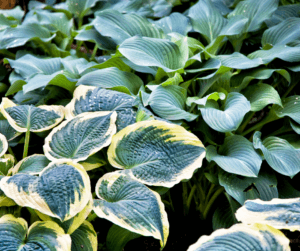
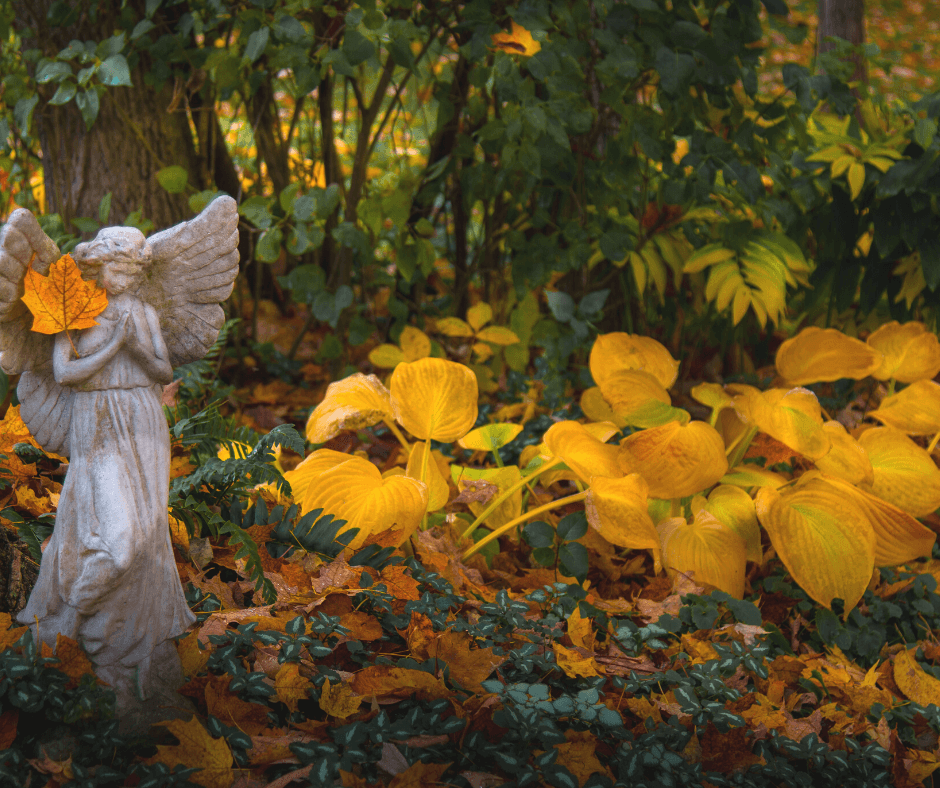
When frost takes your perennials, such as these hostas, it is time to cut them back. Semi-evergreen lamium (foreground) should be left alone until spring.
Wait until the frost has killed the leaves of herbaceous perennials before cutting them back and removing the old stalks and leaves. This is especially important with hostas, one of my favorite perennials (I have hundreds!). Unlike other perennials, if the leaves are removed while green, the plant will put up next year’s growth prematurely, and the following spring will have just a few scrawny leaves, so cut back hostas to 2-3 inches after the frost has taken them.
Evergreen perennials, such as Lenten rose (Helleborus spp.), myrtle euphorbia (Euphorbia myrsinites), and candytuft (Iberis sempervirens), can be left alone until spring, and semi-evergreen perennials, like coral bells (Heuchera spp.), dead nettle (Lamium maculatum), and certain daylilies, can also be left to trim back until the spring.
Some plants that add winter beauty to the garden should also be left alone. Ornamental grasses, with pretty seed heads, gently wave in the wind, coneflowers (Echinacea spp.), black-eyed Susans (Rudbeckia spp.), and perennial sunflowers (Helianthus spp.) set seeds that songbirds like to eat in winter, so I leave them alone until the spring. Fall bloomers, such as chrysanthemums and asters, can also be trimmed in the spring. The protective stems of chrysanthemums sometimes help the tender perennials overwinter, which is nice if you like to keep them from year to year.
Another tip is to meticulously cut back perennials that are highly susceptible to leaf fungal diseases, particularly bee balm (Monarda spp.) and tall garden phlox (Phlox paniculata). Cut them back low, thoroughly, and be sure to completely remove the old leaves from the surrounding area. They should not enter the compost pile. Certain diseases can persist in the soil, even composted soil.
4. Divide and Plant
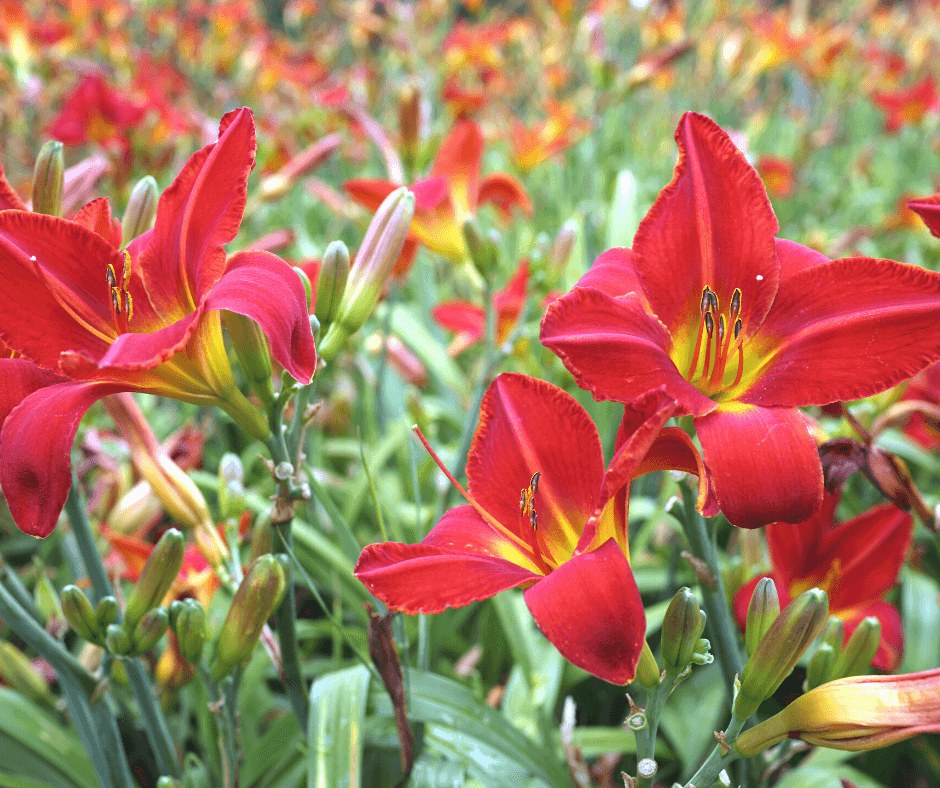
Divide large perennial clumps and spread them around in the garden to add more summer flower color where needed.
Mid-fall is the best time to divide and move hardy perennials, such as hostas, daylilies, monarda, rudbeckia, and coneflowers. If you live in USDA Hardiness Zones 3-5, or colder, divide and replant perennials earlier in the season, and only move those that are reliably hardy in your zone. If you live in warmer zones, then you have a little more flexibility time-wise.
When dividing perennials, I typically use a sharp spade to neatly cut away a section of the plant. It is essential that each chunk has a nice portion of the crown with lots of buds on the top and roots beneath. Then I move and plant them in locations that have the right site conditions and need the color. Some falls are dry where I live in Indiana, so I am sure to irrigate my new divisions well when the weather does not bring rain. Adding Black Gold Garden Soil to the bottom of each hole adds needed fertility and a boost of fertilizer, which all plants appreciate.
So, I must get going to finish my fall garden cleanup, while the going is good (and so should you)! Then, I can spend the winter focusing on next year’s garden, worry-free.
As potted annuals and vegetables die back, it is time to clean them up for the season. Mike Darcy’s Fall Garden Tasks For a Happy Garden
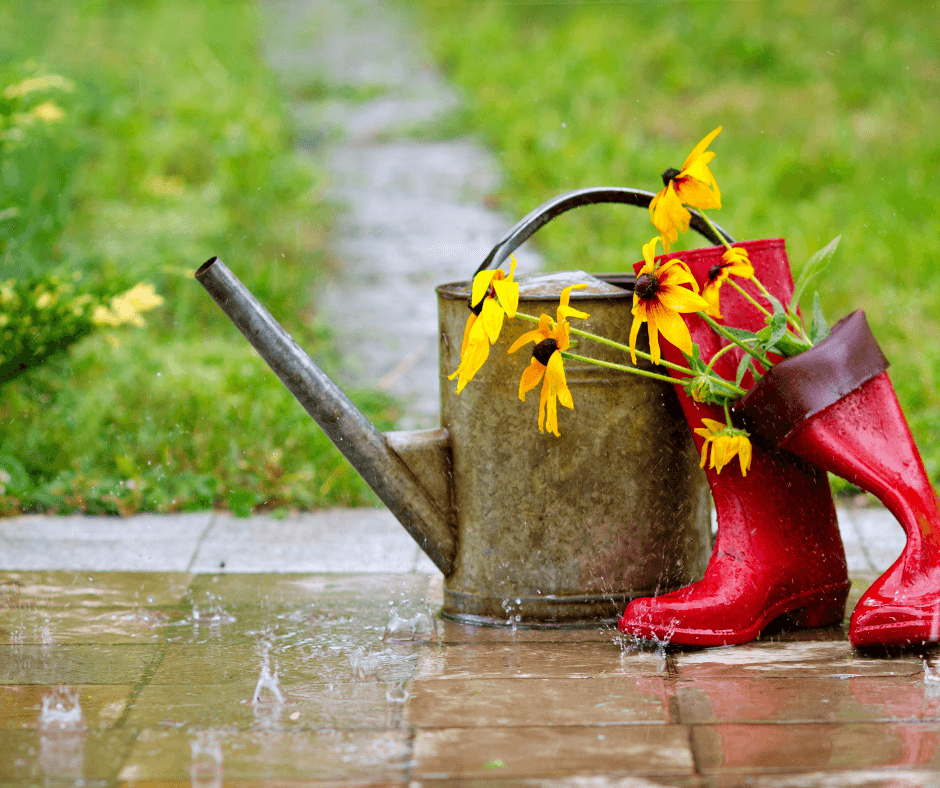
RAIN! We actually had rain. Not just rain but enough to clean the dust off of the leaves, wet the soil, and make both gardeners and plants happy. I was thrilled to see such heavy rainfall. Downtown Portland, Oregon actually received a record rainfall on September 17, 2021, of 1.80 inches. While our average rainfall for the year is still down, this was certainly a boost, especially coming after a very hot and dry summer.
Healing From The Hot, Dry Summer
Fall rains are lifting the spirits of those that suffered unseasonably hot, dry summers.
It has been a rough summer for many gardeners with the record-breaking temperatures, and if that was not enough, the lack of rain in what is normally a moist-summer region was unprecedented. Many gardeners, including myself, had a difficult time keeping plants hydrated. I could water plants one day and on the next, they might be wilting as though they had not been watered in weeks. Some plants were badly scorched from the intense heat, and there was little we could do to prevent it. We all learned some lessons from this and realized that we can expect repeated high temperatures. This year’s summer weather was not just a one-time occurrence. Future garden preparations are in order. [Click here for some good tips that can help save summer plants during extreme heat spells.]
Amending Soil for Heat and Drought
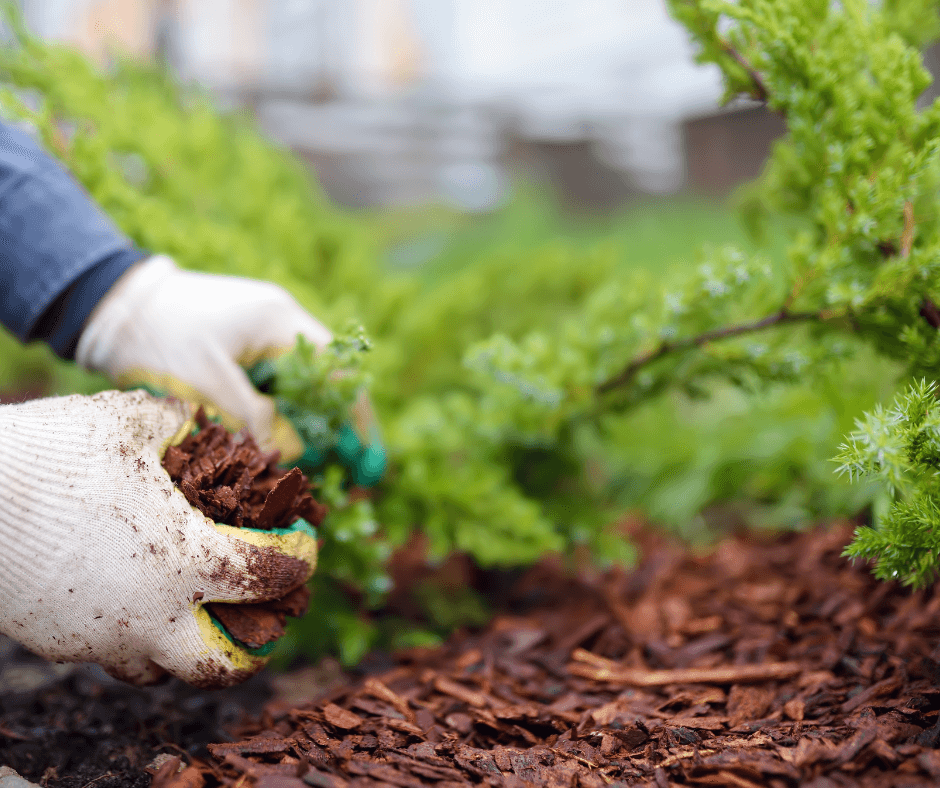
Mulch, such as these fine bark chips, is an important tool that helps retain water and protect plant roots from cold and heat.
One lesson to be learned is the need to increase and protect soil moisture. Even though there is no universal rule that says plants need to be mulched, mulching does reliably hold soil moisture and helps keep roots cooler when temperatures rise. There are a variety of mulches that help reduce soil evaporation, these include fertile compost, quality triple-shredded bark mulch, shredded leaf compost, and fine bark chips. Soil additives that naturally increase water-holding capacity include Black Gold Just Coir Coconut Coir, Canadian Sphagnum Peat Moss, and Natural & Organic Garden Compost Blend. All are OMRI Listed for organic gardening and hold lots of water to keep plant roots refreshed. [Click here to learn how to calculate mulch and amendment application rates for your garden.]
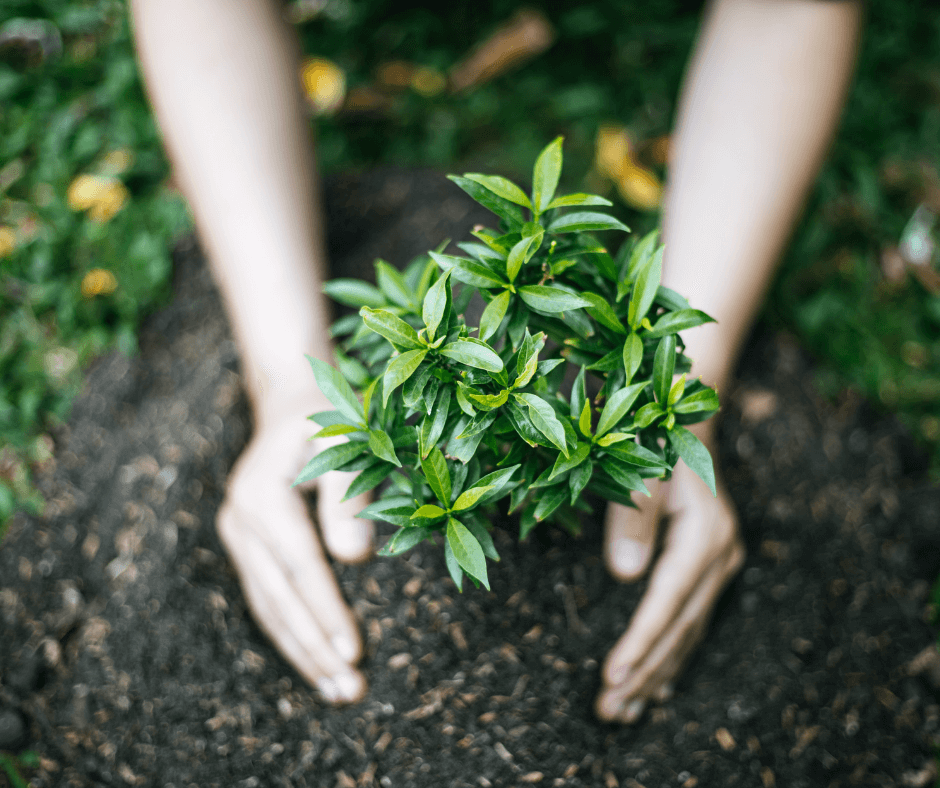
Relocate more sun-sensitive shrubs and perennials to shadier spots.
October is an excellent time to plant and transplant many trees and shrubs. Before planting or moving plants, I walk through our garden and take a good look at the plants that suffered in summer. Perhaps they are not in the best location and would perform and thrive much better if they were moved. Since we have had predictably harsher summers during the previous years, I think that many of us, including myself, have stretched the “zone” where some of these shade-loving plants are planted. Moving partial-shade lovers to shadier locations seems safer these days, and if something does need transplanting, fall is an ideal time to do it in the Pacific Northwest. Gardeners with shorter seasons living elsewhere may be better off waiting until spring to move plants.
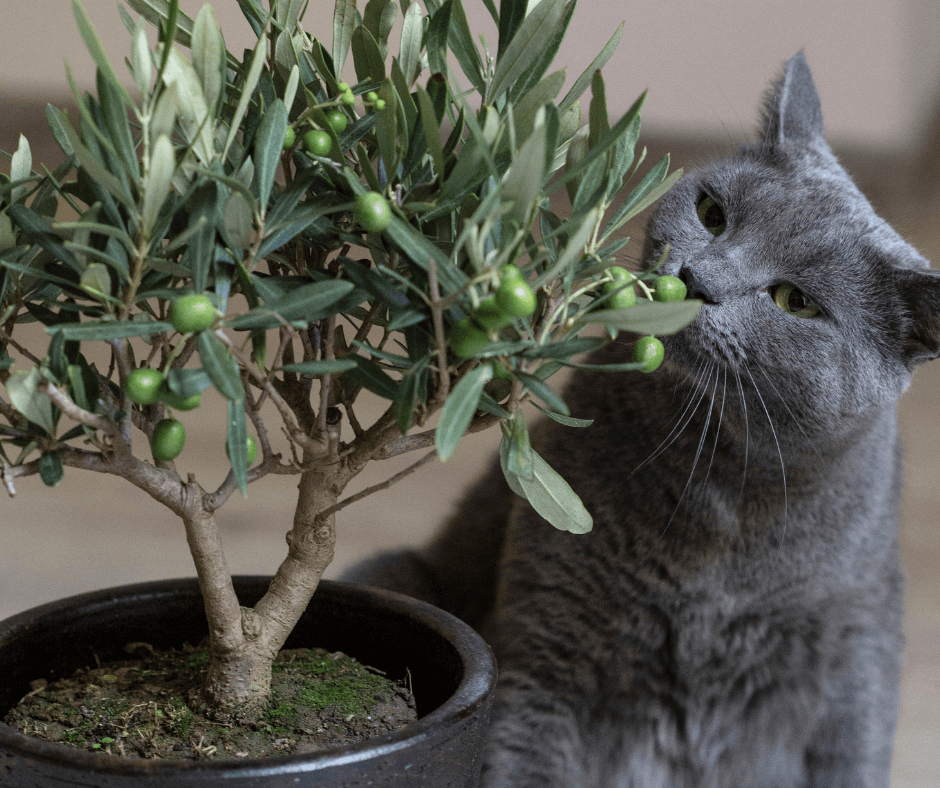
Plant drought- and heat-tolerant plants, like hardy olives.
Over the years, I have been choosing more plants for drought. In my garden, I have three fruiting olive trees, (Olea europaea ‘Arbequina’, USDA Hardiness Zones 7-11), that are planted in an area that gets intense summer sun. These trees received no supplemental water, and they show no sign of any stress. Through summer, I checked the leaves daily for any sign of scorching and there was none. On the opposite end of the spectrum, my hydrangeas and rhododendrons in sunnier locations did not fare so well, so I have decided to relocate them to a garden space that gets more shade. Transplanting them now, while the soil is still warm, will encourage root development, and fall and winter rains will provide the moisture they need. Back to soil amendment: this is the one opportunity that you have to amend the soil around the roots of your transplants. It is also essential to make sure that they do not get too dry after planting, even in fall. [Click here for a great overview of how to plant and site trees and shrubs.]
If you grow rhubarb and notice the stems seem to be getting smaller, it may be time to dig and divide the clump. Dividing rhubarb needs to be done every 3-4 years. Rhubarb develops a large root system and likes soil rich in compost or organic matter. Many gardeners grow rhubarb as an ornamental rather than as a food crop. Some varieties have red stalks that can be quite showy.
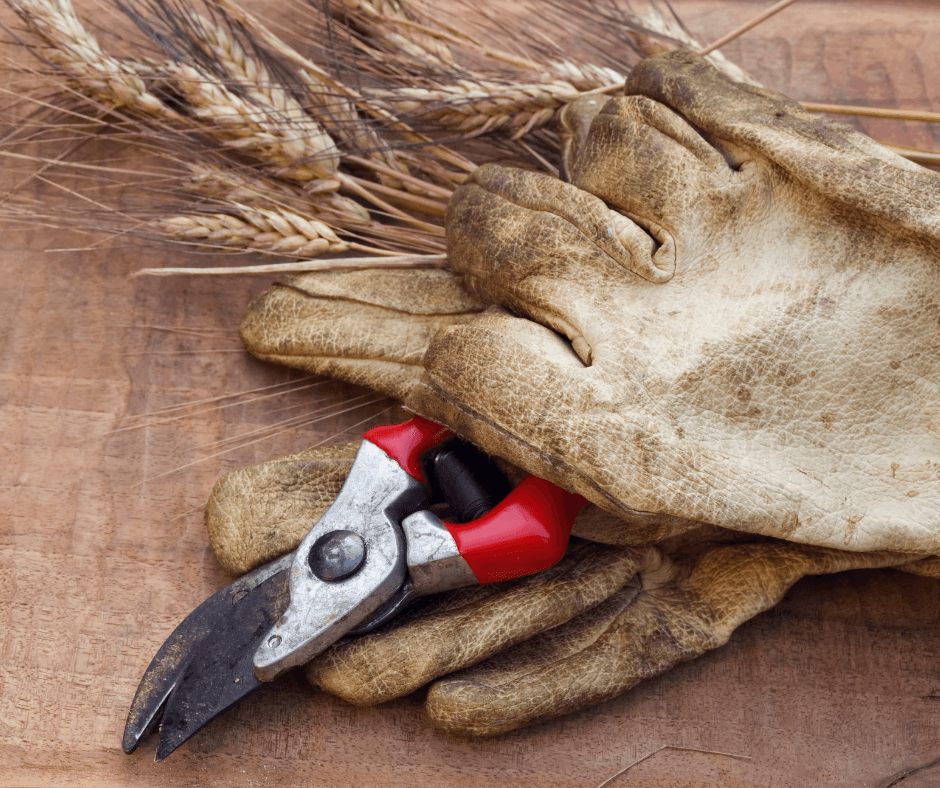
Sharpening and Cleaning Garden Tools
If you clean and tend to your garden tools, they will last for years!
While it is easy to forget to take care of the garden tools that we use, pruners, pruning saws, mowers, etc., this is a good time to clean and oil them so they will be ready for spring. Rakes, shovels, and hoes should also be cleaned and sharpened. I like to take my mower for a tune-up in the fall or winter, so I know it will be ready in the spring. [Click here for a great how-to for cleaning and maintaining bypass pruners.]
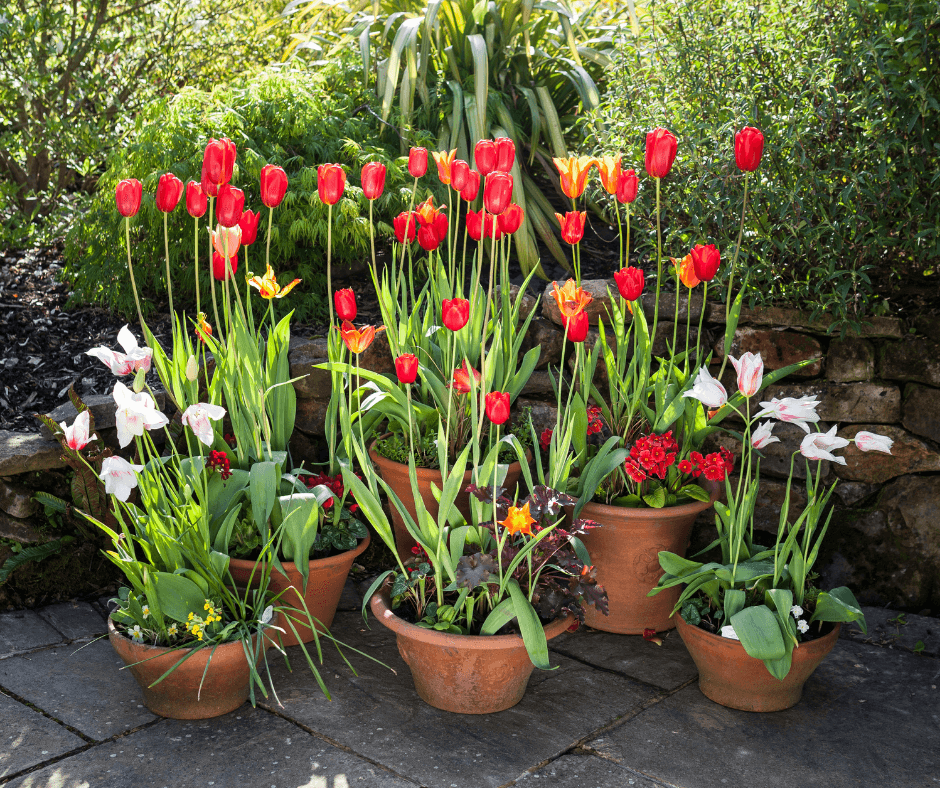
Planting Spring Flower Bulbs
Plant up layered bulb pots now for the spring show!
There is much to do in the garden during autumn before we have a killing frost. If the weather stays warm and sunny, many plants like fuchsias, salvia, geraniums, etc, will continue flowering. Enjoy them as long as you can.
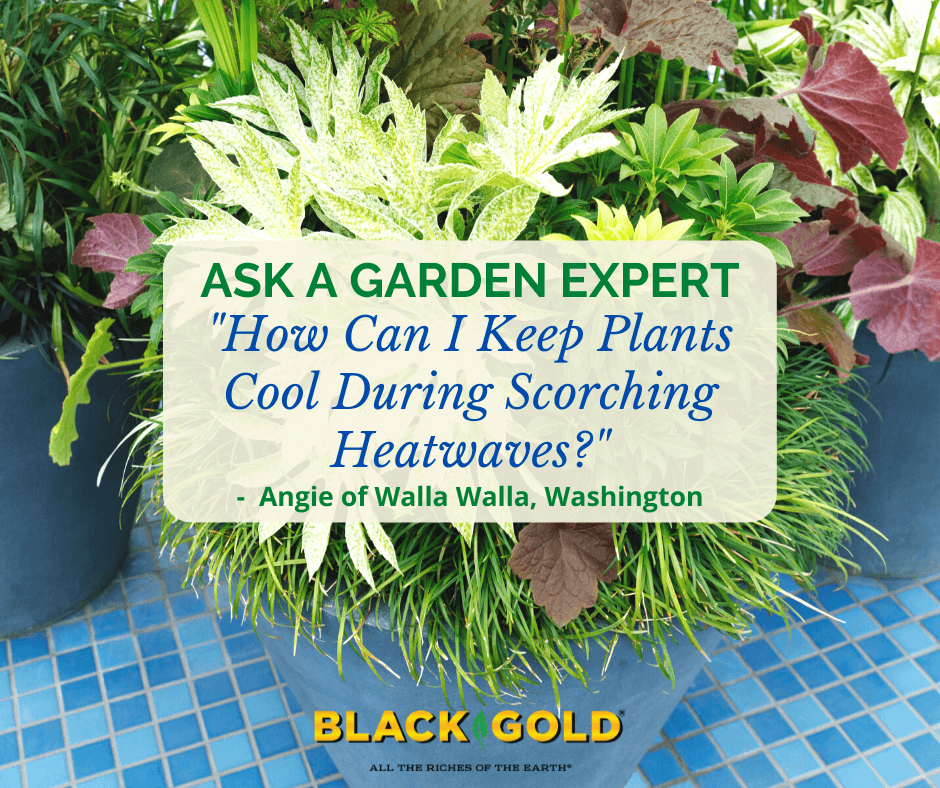
Move potted plants to cooler locations during the most dangerous periods of a heatwave.
“It has been hotter than it’s ever been on record. How can I protect my plants from the severe heat?” Angie of Walla Walla, Washington
Answer: It’s scary when you live in an area that typically has mild summer temperatures, and you unexpectedly experience super high heat. Your tender plants are as used to it as you are, which means they’re going to struggle. From what I have read, your average June temperatures have highs around 80 degrees F. Being faced with temperatures well over 100 and even 110 degrees F must be really awful. Here are some ways to help protect your plants, especially those that are less heat tolerant. Specimens planted in full sunlight during the hottest times of the day (around 2:00 pm to 4:00 pm) need the most protection.
Four Ways to Cool Plants in High Heat
Irrigate plants very well in the early morning. If temperatures exceed 100 degrees F, water again in the evening after the sun has fallen.
Protect plants that are in full sunlight with floating row covers fitted with white shade cloth. These covers are easily placed over plants and removed. You can also simply purchase shade cloth and drape it over highly exposed plants. Both methods help. Gardeners in your area have also informed me that they have been moving patio umbrellas around their yards to shade their most prized plants. (One even said that her neighbor did not, and it resulted in some substantially fried rhododendrons and hostas.)
Move containers into shaded areas or indoors during the most dangerous heat and water twice daily.
I also want to note that pets and wildlife also feel the stress. Leave water out for the animals and keep your pets from going outdoors for extended periods of time and walking on hot surfaces (grass only!). I also recommend that you read the following two garden articles for more helpful tips.
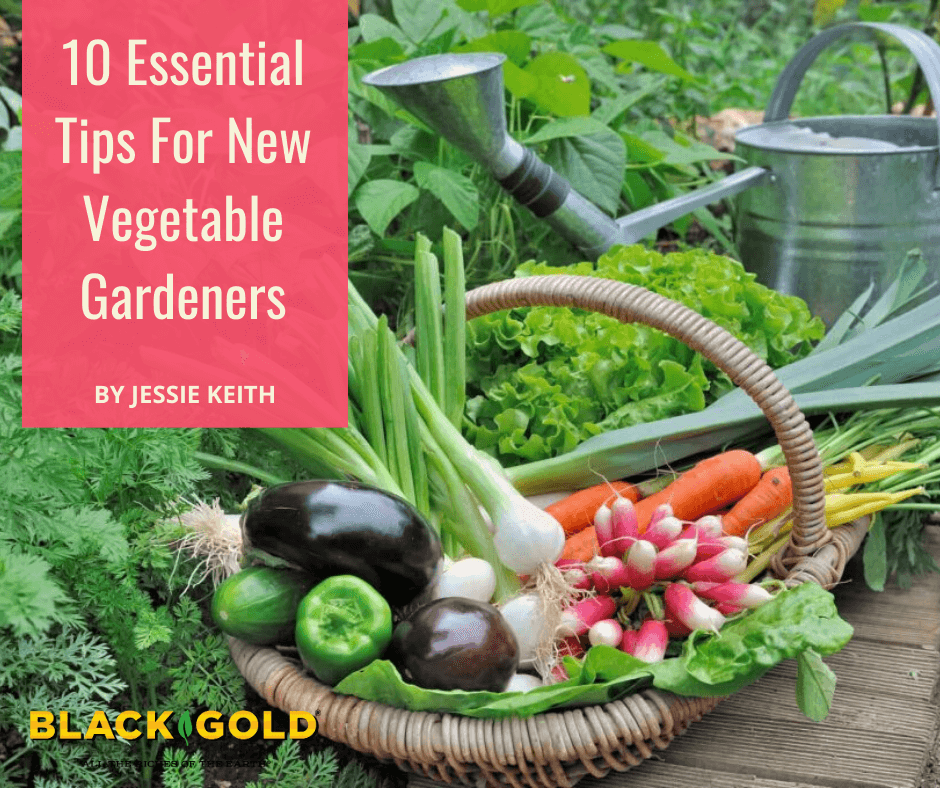
The new vegetable gardener will succeed if given the right information from the beginning.
With decades of vegetable gardening experience under my belt, it’s easy to take the years of knowledge for granted. It’s like riding a bike. I garden on cruise control and react or learn quickly when faced with a new challenge. In turn, years of teaching new gardeners have kept me in touch with the challenges they face. Sound, step-by-step advice is invaluable–potentially averting years of mistakes and poor yields. Getting the big picture of a new garden venture from the start will set the wheelbarrow rolling in the right direction. The new vegetable gardener will be quickly rewarded if modest goals are established from the beginning and time is set aside for the project.
Planning your garden on paper will help you visualize and plan for the project.
Plan Ahead: Determine your garden’s location, size, and crops before you break ground. Vegetable gardens require full sun (8-hours or more per day) and soil that drains well. Gardening is a commitment that often takes more time and labor than anticipated. If you have never gardened before, plan small in the first year to keep it enjoyable and manageable. It will help you succeed from the start and determine how to grow your garden in future years. (Click here for a good article about planning a garden, and click here for an article about rotating crops through the season.)
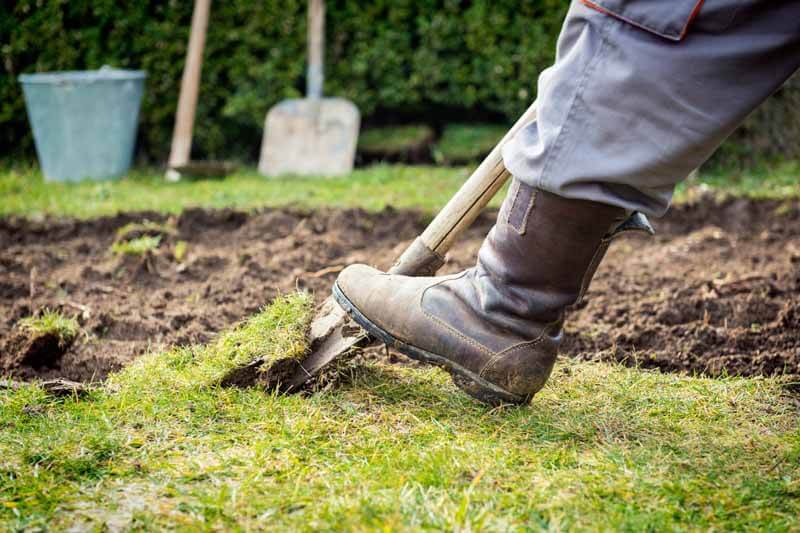
Sod removal takes work but is worth the effort.
Start Clean: Remove all of the turf from your soon-to-be garden bed. That means manually skimming off the sod with a sharp spade or using an automated sod cutter, which can be rented. I recommend the latter if you have planned a large garden. The bed should be small enough for you to reach into from all sides or large enough to add a walkway for easy access. Square or rectangular beds are easiest to mow around and manage.
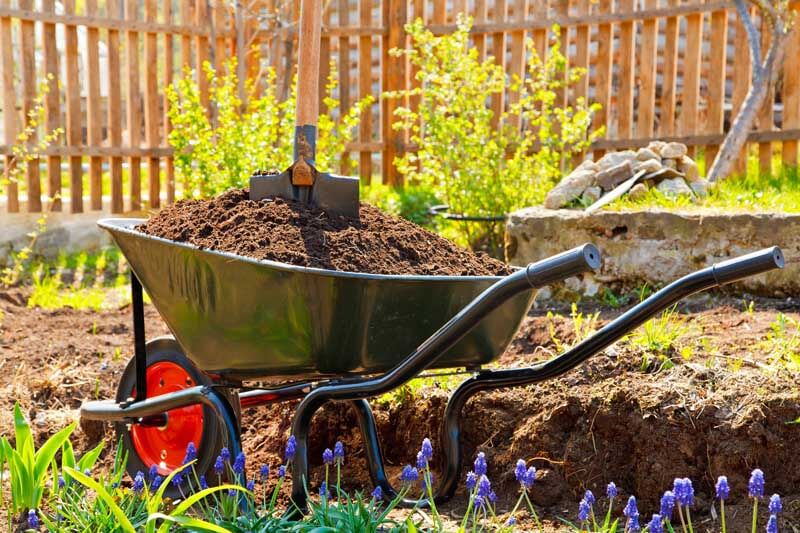
Enrich your soil from the beginning!
Don’t Skimp on Soil: Your garden is as good as its soil. When siting it, choose a well-drained spot. If low ground is a problem in your yard, opt for a raised bed (Click here to learn more about preparing a raised bed garden, and click here for a raised bed plan). For garden success in year one, liberally feed your soil with organic matter, such as Black Gold Canadian Sphagnum Peat Moss, Garden Soil, and Garden Compost Blend, especially if your soil is rich in clay or sandy. Add at least 3 inches of the amendment to the soil surface, and till it to a depth of at least 8 inches. Use the amendment application formula below to determine the amount you will need.
Amendment Application Formula
([area to cover] ft2 x [depth in inches desired] x 0.0031 = ___ yd3).
Example: If you wanted to cover a 20 square foot area with 2 inches of compost, the result would be: 20 ft2 x 2 inches of compost x 0.0031 = 2.48 yd3.
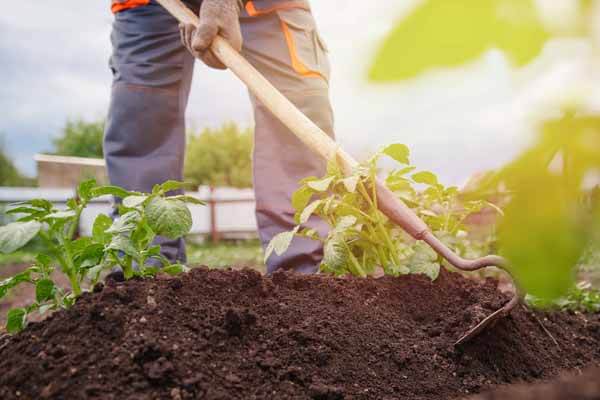
Berming planting areas and covering with compost and straw will save weeding time and boost crops.
Raise and Cover: Tilling and adding lots of fresh organic material will loosen and lift your soil to enhance drainage and aeration for better root growth. To take it one step further, I always rake or hoe soil up into berms to maximize drainage and keep beds light for better root growth. Berming is especially helpful for root crops, like carrots, potatoes, and beets, and deep-rooted plants, like tomatoes. Finally, I add mulches appropriate for vegetable gardens, like seed-free straw, compost, mushroom soil, grass clippings, or leaf mulch, to keep weeds down. I generally put straw along walkways I’ve established in my garden and compost on the planting areas. Avoid bark mulch of any kind in vegetable gardens because it binds nitrogen, which is detrimental to heavy-feeding vegetables.
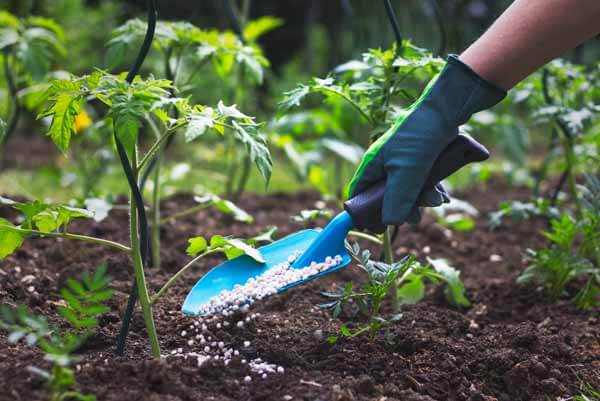
A little fertilizer will go a long way.
Fertilize: Good fertilizer formulated for vegetable growing is essential for bumper crops. Any all-purpose granular or slow-release vegetable fertilizer will do, though I recommend feeding tomatoes with a food specially formulated for their needs. Tomatoes are very heavy feeders that require a wide variety of nutrients to perform their best. Follow the product instructions to keep them well fed.
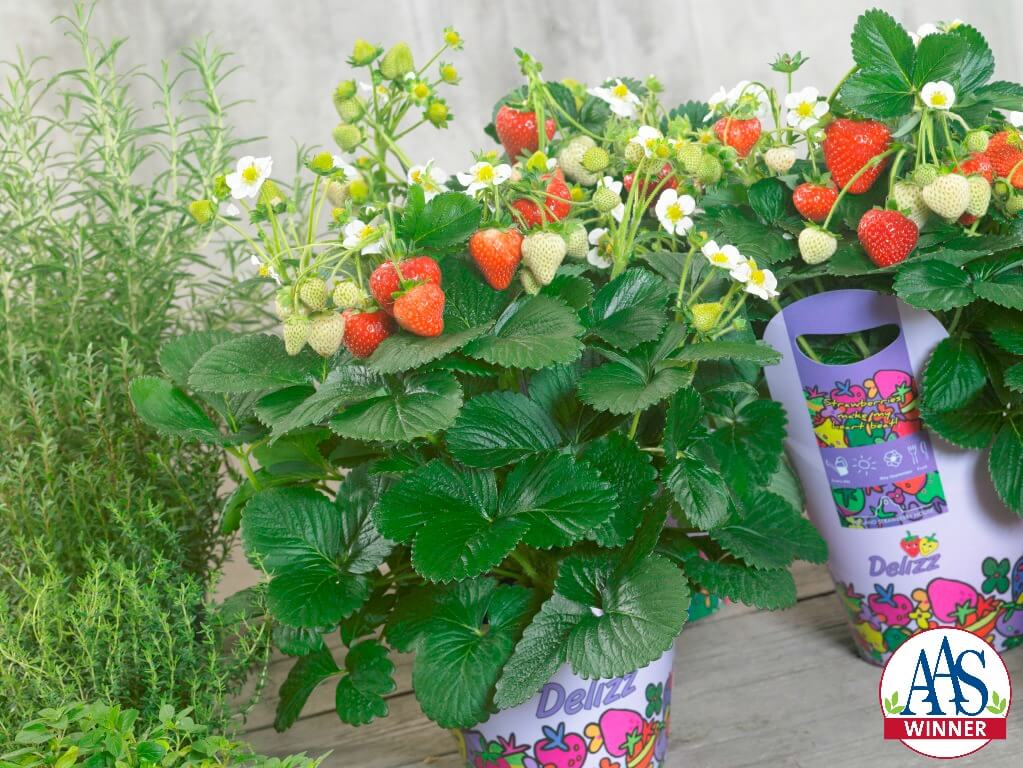
Choose Good Varieties: Don’t pick just any old tomato, pepper, or bean for your garden. Do your research and pick the best when it comes to yields, performance, and flavor. If you are not certain, always select award-winning plants, such as All America Selections Winners. These tend to be as full-proof as you can get. It is also wise to choose disease-resistant varieties, so keep a lookout for these as well. (Click on the links to discover our favorite sauce tomatoes, lettuce, green beans, mini vegetables, carrots, and fast-growing vegetables.)
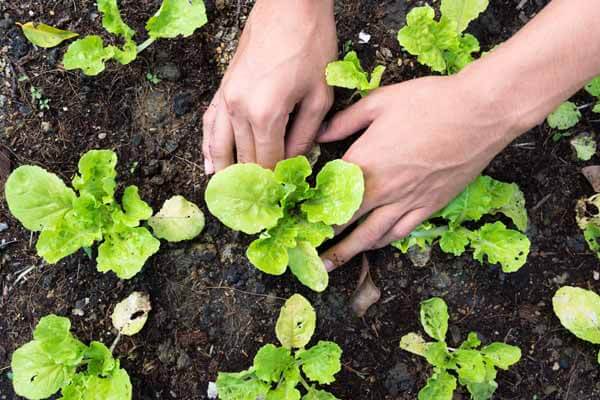
Lettuce is an easy spring vegetable that needs cool weather.
Know Planting Times: It is essential to know when you can plant a vegetable, what temperature it likes best, and how long it will take to produce. Vegetables are broken down into cool-season and warm-season types, though some will grow well from spring to fall. Cool-season vegetables, like cabbage, lettuce, peas, and radishes, grow best in cool spring or fall weather, while warm-season crops, such as corn, okra, peppers, tomatoes, and squash, need the heat of summer to yield. Some grow very quickly, and others take months to produce. For example, radishes can be ready to harvest in as little as 20 days, but some pumpkins can take 120 days to produce fruit. So, knowing a crop’s days to harvest is important. Finally, you need to know your last frost date (click here for yours) to determine when it is safe to plant tender vegetables and fruits outdoors.
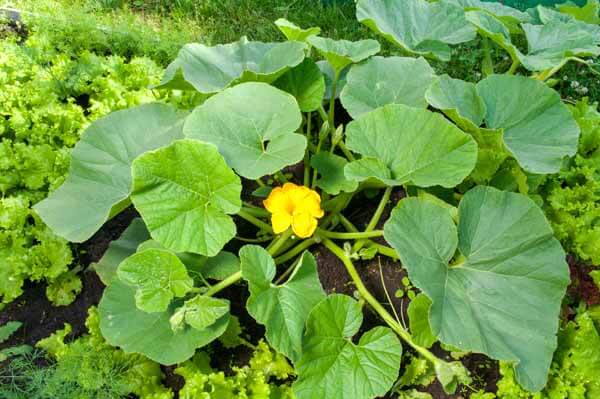
Some pumpkin plants can grow to 20′ across!
Know Plant Needs and Sizes: Identify each plant’s height and width to determine its garden footprint. You also need to know if supports, like tomato cages or bean and cucumber trellises, will be needed. One important tip for tomato growers is that bush (determinate) tomatoes only reach 1-3 feet and need small cages or stakes, but vining (indeterminate) tomatoes can reach 6-8-feet high and wide, so tall, strong cages are required. Follow spacing guidelines to give your vegetable the space they need to blossom.
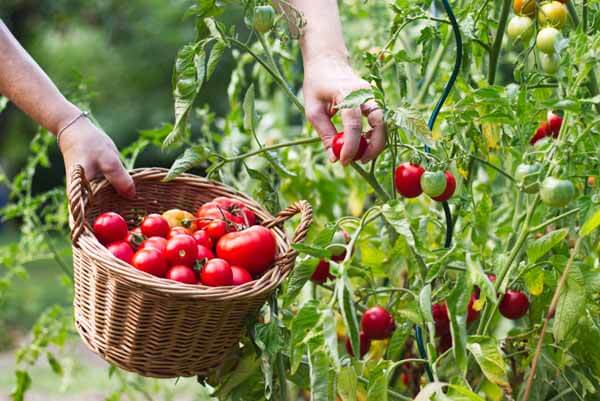
When ripe, tomatoes are fully colored and give slightly when pressed.
Know When to Harvest: When is it ripe? Tomatoes and peppers will be fully colored when ready to pick. Beans should be plump and reach the advertised length. Zucchini and summer squash are best harvested small but firm. And, you will know when beets, carrots, and radishes are ready to harvest when their bulbous tops become visible along the soil surface. If you are not sure when to harvest a crop, ask us through our free horticultural advice service, Ask a Garden Expert.
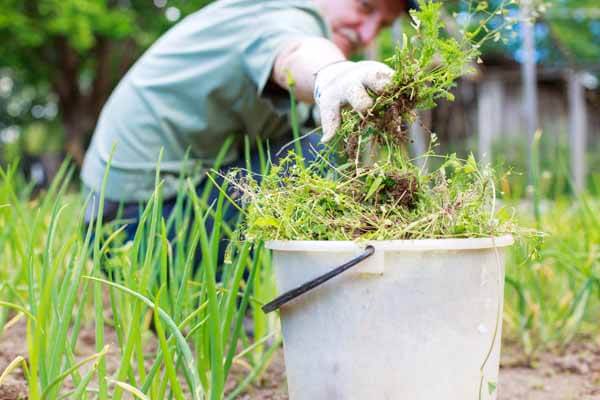
Removing weeds as you see them will keep them from taking over.
Keep It Clean: Weed, weed, and weed some more. Even when you mulch your beds, they will arise. Weeds compete with vegetables for resources and can quickly overwhelm a garden if ignored. They may also harbor diseases and attract pests. Pull or hoe weeds as you see them. Even if you weed every few days or even every week, you will have few to no weed problems, which will give you more time to focus on plant care and harvest. Investing in good weeding tools makes the task lighter. I am never without my weeding knife (Hori Hori), strong hoe (Prohoes are the best), and Korean hand plow (Ho-Mi).
Reach out to friends, family, books, and online references when you have gardening questions. There’s always more to learn and new plants to discover. And, if you can’t find an answer, ask us a gardening question for free at Ask a Garden Expert. You can also search the hundreds of questions we have already answered. It’s our goal to help gardeners succeed.
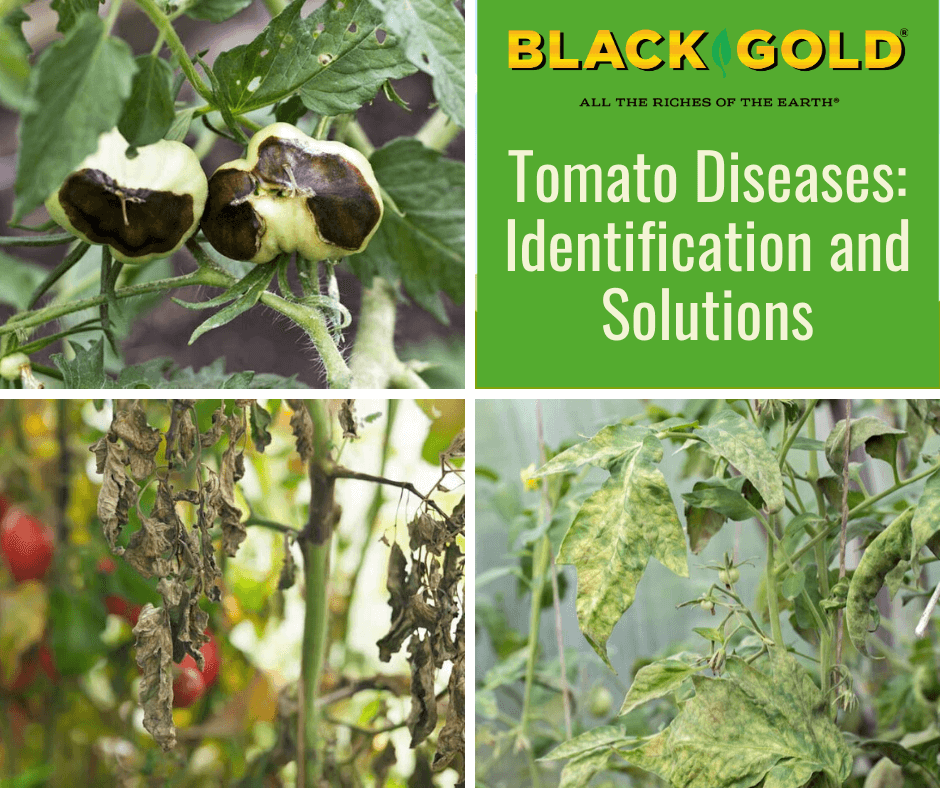
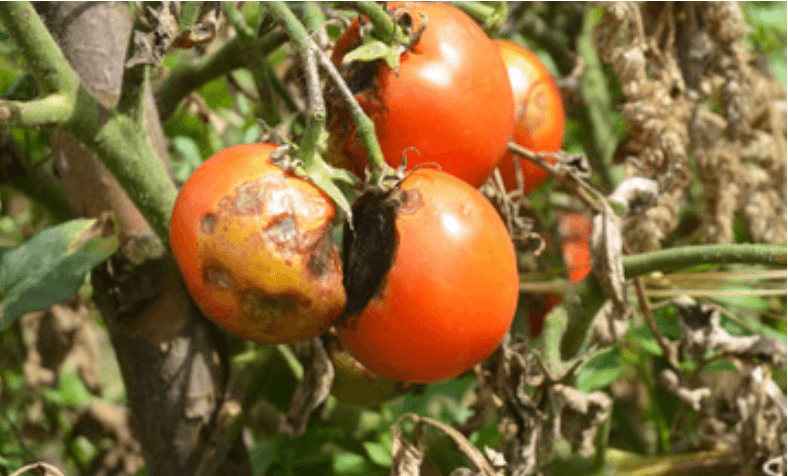
From upper left: blossom end rot, late blight, and tobacco mosaic virus.
Tomatoes are the roses of vegetables–everything attacks them. So, gardeners can count on experiencing any number of tomato diseases in their growing experience. It pays to grow disease-resistant tomatoes, but lots of the best heirlooms don’t fall into this category. That’s why tomato growers need to be armed with knowledge and IPM (integrated pest management) tools to keep harvests high. Learning how to spot the most common tomato diseases is a start.
Plant diseases are typically either fungal, bacterial, or viral. Some cause quick plant death, but others can be managed–allowing gardeners to eke out a harvest until the end of the season. But avoidance is the best starting point.
The four keys to avoiding tomato diseases are:
Start with healthy plants.
Choose a disease-resistant variety.
Plant them in disease-free soil.
Give them the best care.
Starting with healthy plants, a healthy environment, and keeping plants stress-free will help keep them disease-free, but pests or diseased weeds, or even wind can still bring disease into the garden. People can, too. Gardeners need to stay watchful.
If you have never experienced serious tomato diseases in your garden, you can feel confident planting heirlooms or family favorites with less resistance. But, always choose disease-resistant varieties if you have experienced diseases in the recent past. You might also consider growing tomatoes in containers to ensure that soil-borne diseases are not a problem. (Click here to learn how to grow tomatoes in containers.)
Top Disease-Resistant Tomatoes
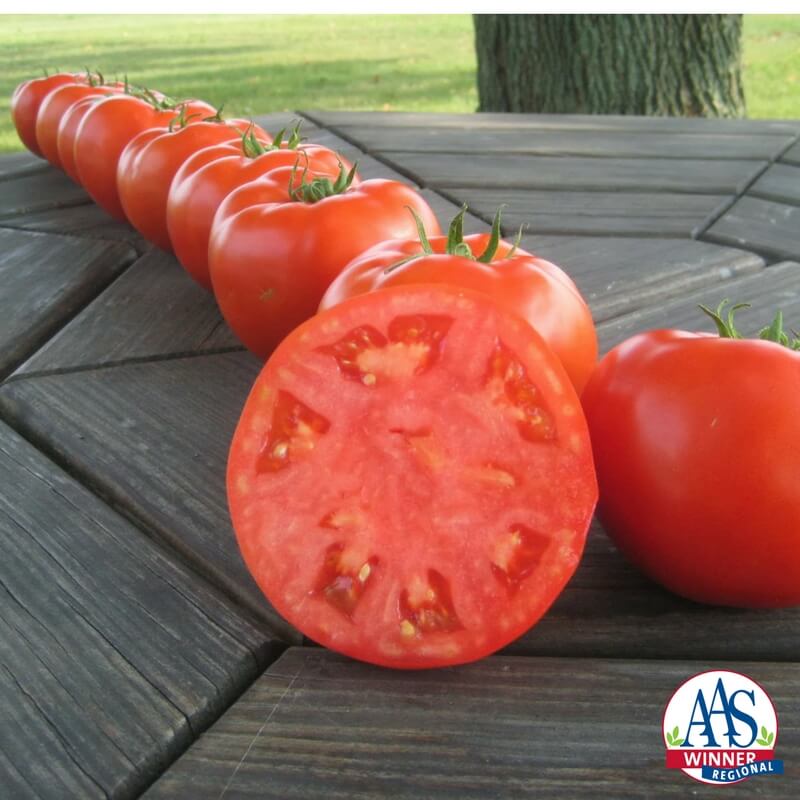
Mountain Merit is an All-America Selections Winner that resists five common diseases. (Image care of AAS)
Before reading the depressing litany of common tomato diseases, feel encouraged by the power of super disease-resistant tomatoes. Plant breeders constantly work hard to create new and wonderful tomato varieties able to beat diseases and produce high yields of delicious tomatoes. When identifying a disease-resistant tomato, refer to the Tomato Disease Resistance Code list below to better understand the code system. Here is an example of five good, tough tomatoes that resist multiple diseases.
‘Galahad’ (F3, GLS, LB, N, TSWV): The new, 2020 All-America Selections Winner ‘Galahad’ is a big, red, slicing tomato with excellent flavor that resists five diseases!
‘Granadero’ (F2, PM, TMV, V, N, TSWV): Sauce tomato lovers should try this super disease-resistant paste tomato with uniform, red, well-flavored fruits. It is also an AAS award winner.
‘Mountain Merit‘ (F3, LB, N, TSWV, V): Lots of large, red tomatoes with good, sweet flavor are produced on this compact bush tomato.
‘Toronjina’ (F2, LM, TMV): Highly disease-resistant plants produce lots of sweet and tart, orange cherry tomatoes on shorter indeterminate vines.
‘Sakura‘ (F2, LM, TMV, N): Red cherry tomatoes are produced early and in abundance on this long-vined, highly disease-resistant tomato.
Good cultural practices will also help tomatoes fight disease. Plant them in very well-drained, aerated, raised beds amended with Black Gold Garden Soil, and keep plants strong and vigorous by feeding them with a tomato & vegetable fertilizer. It also helps to encourage air-flow by spacing plants well (3 to 4 feet apart, or wide enough to walk around) and keeping them pruned (click here for a tomato pruning tutorial). Drip irrigation helps keep plants drier up top, which can reduce the spread of diseases. Remove and discard infected plants as you see them, and at the end of the season, clean all plant material from your vegetable garden for good measure. Then at planting time, mulch tomatoes with a layer of straw or Black Gold Garden Compost Blend to help keep disease-carrying weeds at bay. (Click here for more tips on how to grow robust tomato plants from seed to harvest.)
Tomato Disease Resistance Codes
Tomato late blight (Phytophthora infestans) damages foliage, causes stem cankers, and destroys fruits.
When seeking out a disease-resistant tomato, you will see these codes indicating resistance. The most common diseases are covered in this piece. (Adapted from Johnny’s Seeds Growers’ Library)
HR = High Resistance IR = Intermediate Resistance
A | Anthracnose | Fungus
AS | Alternaria Stem Canker | Fungus | Alternaria alternata f. sp. lycopersici
V | Verticillium Wilt | Fungus | Verticillium albo–atrum
Tomato Foliage Diseases
These are the first tomato diseases that you will see and experience. All leaf spot diseases start from the bottom up–beginning with older leaves. Here are the top 5 most common types that you will see.
Bacterial Leaf Spot
Bacterial leaf spots are small, brown, and dry.
The common leaf spot (Xanthomonas spp.) results in spots that are small, dry, brown, and often surrounded by yellow halos. It disease intensifies and spreads further with excess rain, overhead watering, and when plants are planted too close together. As it progresses, it can also cause spotting on fruits and cankers on stems.
You cannot get rid of bacterial leaf spot once you have it, but you can slow its damage. To reduce its proliferation, increase airflow by pruning off unnecessary and badly infected branches. Keep it from taking hold in the first place by spacing plants well to encourage airflow. Cleaning up your garden yearly is also essential. The disease is maintained from year to year on infected crops and weeds in the tomato family.
Early Blight and Late Blight
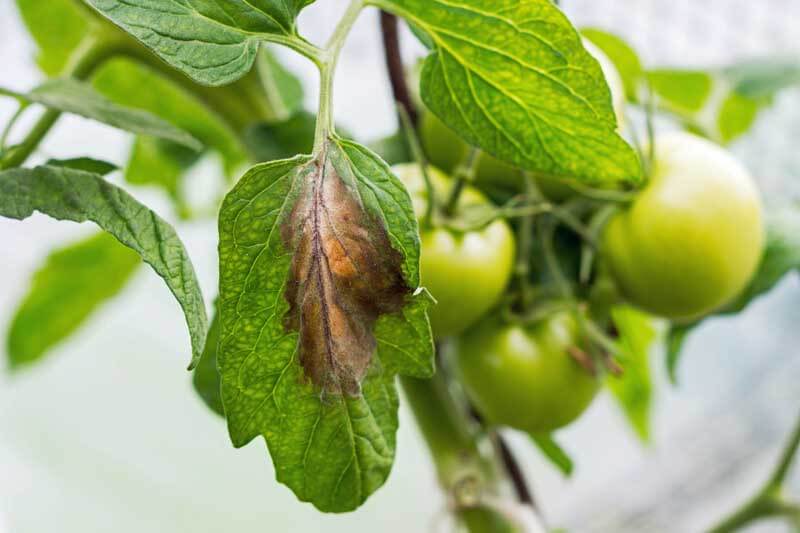
Late blighted leaves show large brown blotches.
These two blights are the most common diseases of tomatoes.
Early Blight (Alternaria tomatophila and Alternaria solani): The leaf spots are pretty distinctive; circular lesions appear, reaching up to a half an inch in diameter with dark concentric circles inside. Early blight can occur at the seedling stage by causing seedling rot (damping-off). At later stages, it causes leaf blight on older leaves, stem cankers, and black fruit rot.
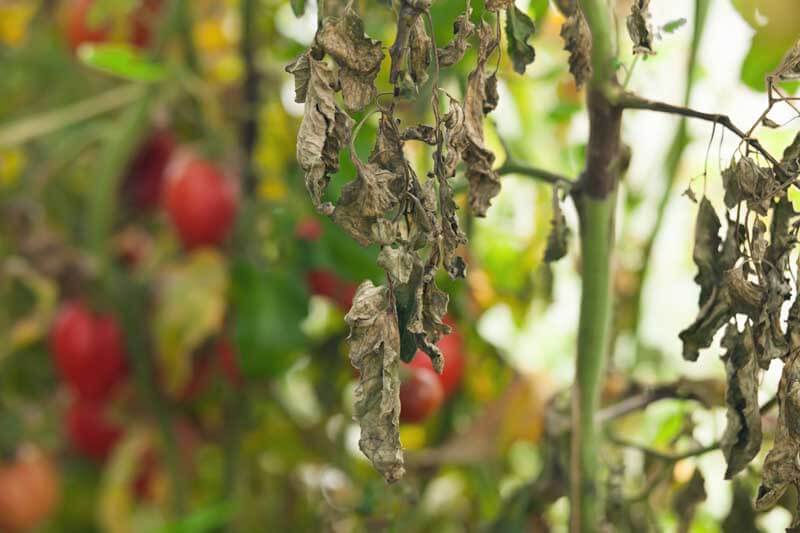
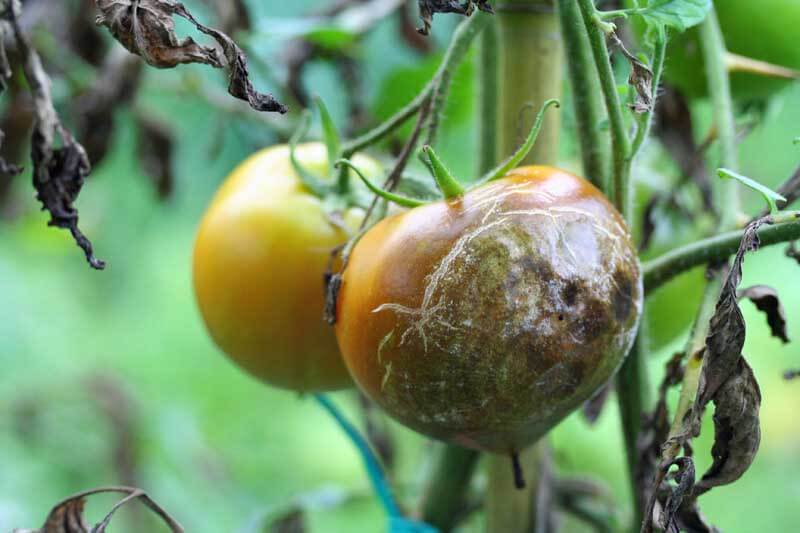
Late Blight (Phytophthora infestans): The deadly disease first causes large brown leaf spots on older leaves, followed by stem lesions, and discolored, oily patches on fruits. It’s the noxious disease that caused the Irish Potato Famine, which is a testament to its severity. It kills tomatoes more slowly, but it destroys fruits and will eventually kill whole plants. Tomatoes subjected to drought stress will die more quickly.
Late blight gives diseased tomatoes an ugly oily look.
Both early and late blight diseases are controlled by avoidance, cleanliness, and rotation. The blights survive and overwinter on infected plant material or in the soil. To prevent tomato blight, plant only healthy plants that you have grown from seed or purchased from a reliable grower. Also, plant only blight-resistant varieties (check out this list from Cornell University). If you find diseased plants, immediately remove them from the garden, and keep them from the compost bin. Bag and toss them instead. Keep beds weeded to remove weedy tomato relatives that can get blight, like nightshade and ground cherry. Next, rotate crops on a three-year cycle to help keep soil disease-free where you experienced blight. That means planting your tomatoes in a new spot each year and allowing three years to pass before planting them in the same spot. The soil should be rid of the disease after this time.
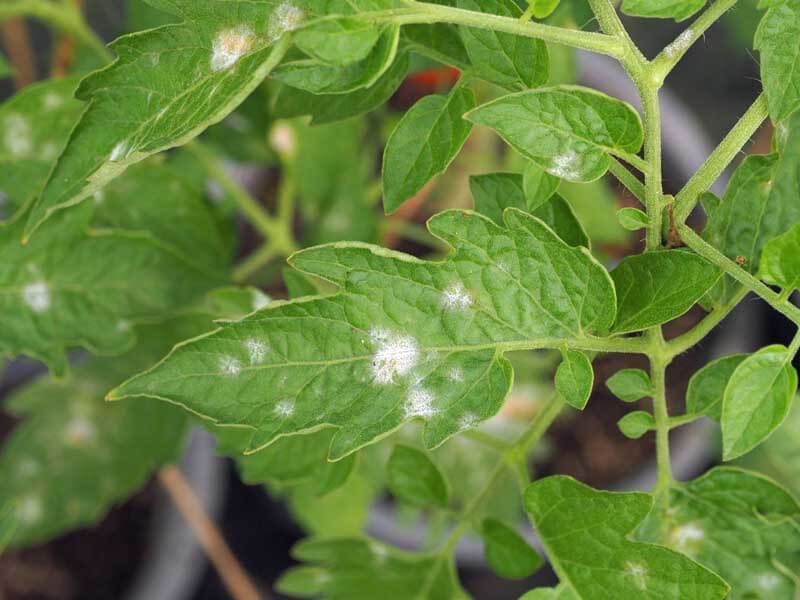
Powdery Mildew
Powdery mildew starts as white, dusty spots on leaves.
Powdery mildew (Erysiphales fungi): The easy-to-identify powdery mildew is a common fungal infection that attacks leaves, causing white, powdery looking surfaces and blotches, particularly from mid to late summer. It is not deadly, but it will cause plants to decline more quickly and put a stop to good fruit production.
To stop powdery mildew, give plants plenty of sun, water, and airflow. Prune off diseased stems as you see them (clean your pruners well after cutting any diseased plant). Finally, apply the organic fungicide Green Cure, which quickly stops powdery mildew. Apply it, at first sight, to stop the disease in its tracks.
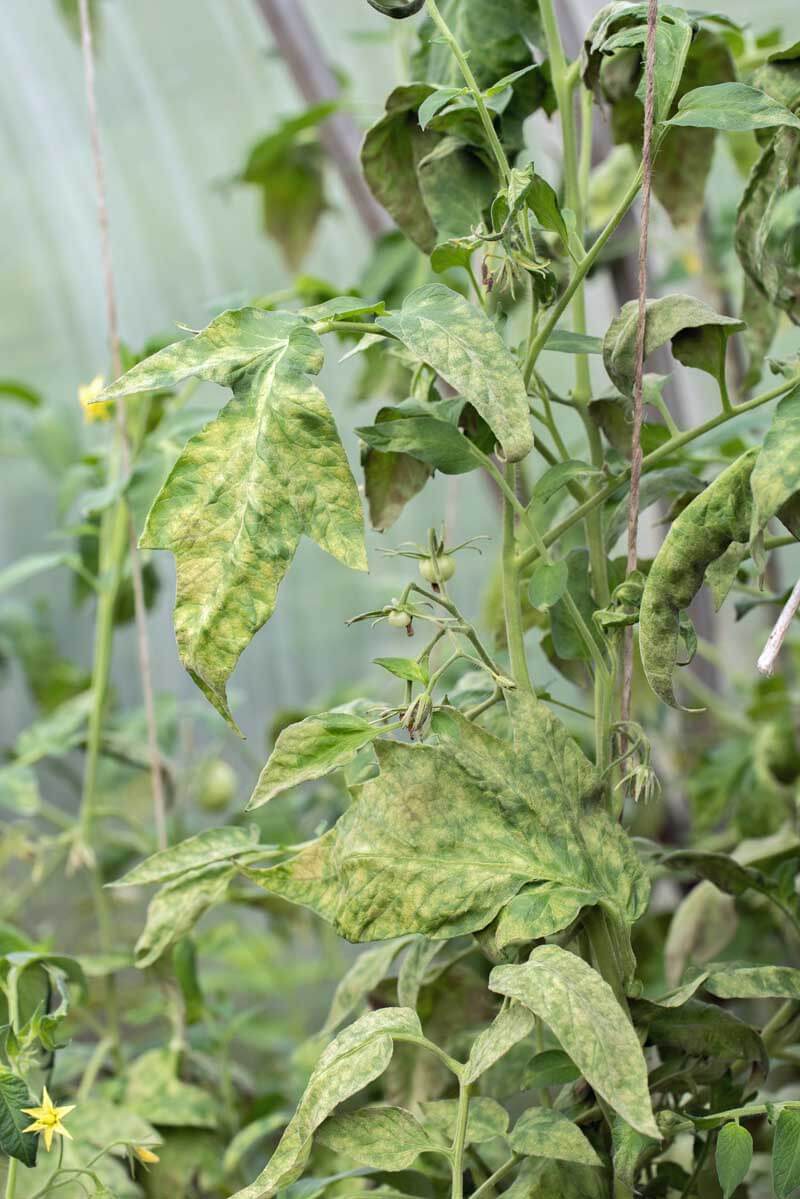
Tobacco Mosaic Virus
Tobacco mosaic virus causes leaves to become disfigured and discolored.
When tomatoes contract tobacco mosaic virus, they develop yellow mosaic patterns across the foliage and leaves often become elongated and almost ferny. Once you have it, or any other virus, the only thing that you can do is quickly remove and dispose of the plants and then rotate your crops. The best means of control is prevention. Grow resistant tomatoes, and make sure you buy seed or purchase plants that are certified to be disease-free.
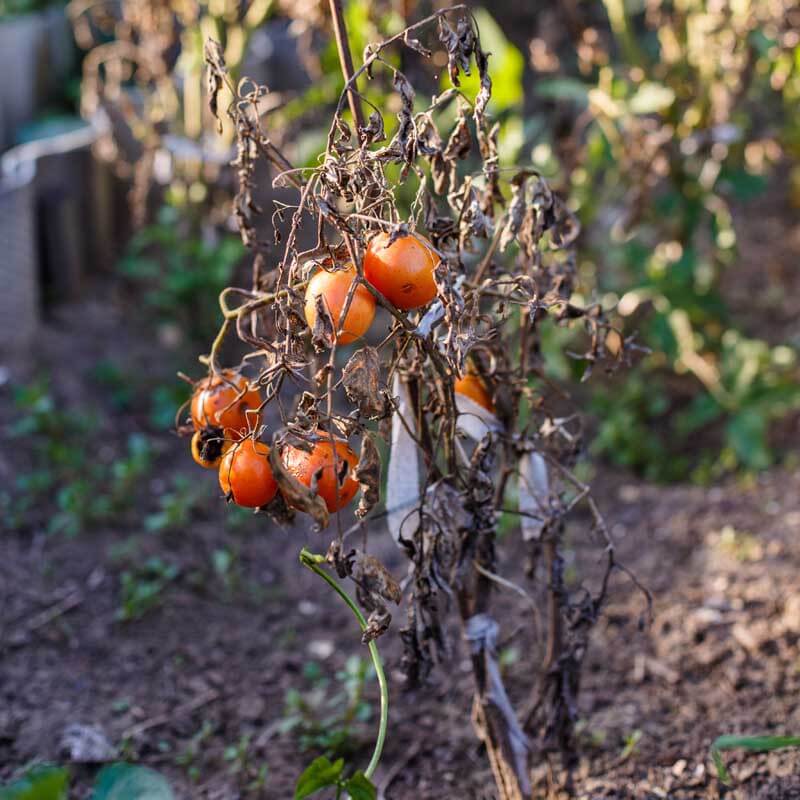
Tomato Wilts
Fruit wilts can kill susceptible plants quickly.
These affect the whole plant causing overall wilt and decline. Both diseases exist in the soil. The best means of beating them is to plant resistant varieties. When susceptible plants become infected, it’s a death sentence. Plants must be removed from the garden.
Fusarium Wilt (F)
Fusarium wilt (Fusarium oxysporum sp. lycopersici) is the most common tomato wilt. At its first signs, older leaves wilt, turn yellow, then brown, and then fall. The stunted plants will eventually die. To beat it, look for resistant varieties, discard diseased plant material, and rotate on a three-year cycle.
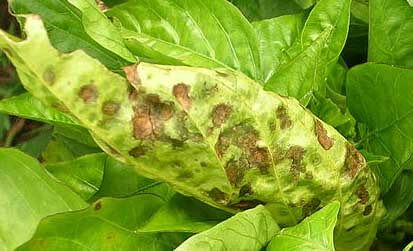
Verticillium Wilt (V)
Verticillium wilt (Verticillium albo–atrum) is less common than fusarium wilt and is typically seen late in the season when soils are cooler. Its first symptoms are v-shaped blotches on the lower leaves, followed by browning veins and blotches. Symptoms then spread upwards, causing wilting and leaf damage. If you were to cut into the stem, the internal veins would be brown and discolored from the ground up to 12 inches. Treat it as you would fusarium wilt.
Tomato Fruit Diseases
Aside from the ugly oily patches caused by late blight (above) and the common black-based fruits caused by blossom end rot or irregular bases caused by cat-facing (see below), most other tomato fruit problems are fungal or bacterial.
Anthracnose Tomato Spot (A)
Anthracnose spot has damaged this ripe tomato.
Anthracnose tomato spot is a fungal disease that appears as sunken bull’s-eye marks on ripe fruits. Several steps can be taken to reduce the disease on developing fruit. Refrain from overwatering, which will reduce moisture on the leaves and the spread of the disease. Remove and dispose of damaged fruit, and prune to increase airflow can keep fruits from developing this disease on the vine.
Various Fruit Rots
Various fruit spots and rots can attack fruits.
There is a whole suite of fungal and other fruit rots that can damage good, ripe fruit on the vine. You can always identify a fungal spot on fruit by its bull’s-eye appearance. The center of the eye is where the fungal spore took hold, and the radiating circles show its progressive cycle of infection. The treatment of these diseases is the same as for Anthracnose tomato spot. Good airflow is always key in keeping fungal diseases at bay.
Bacterial Spot and Bacterial Canker
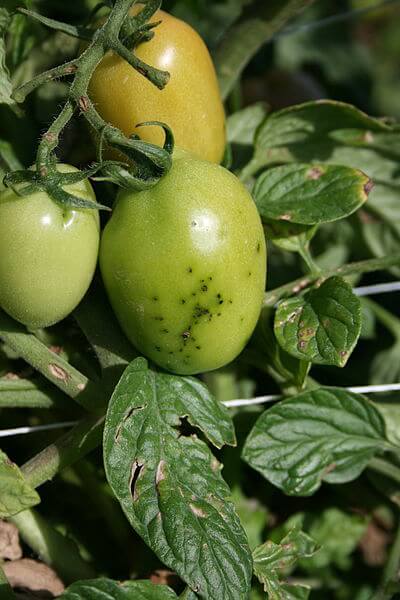
This shows bacterial speck on developing fruit. (Image by Chris Smart)
Some bacterial spot diseases of leaves can impact fruits. Bacterial fruit spots are smaller than those caused by fungal diseases, brown or black towards the center, and often surrounded by rings of yellow or green. In the case of bacterial canker, the spots are ringed in white with a green or dark-brown center. Sometimes the spots are raised. When fruits have bacterial spots, this means that it is time to remove and dispose of the whole plant.
Tomato Disorders
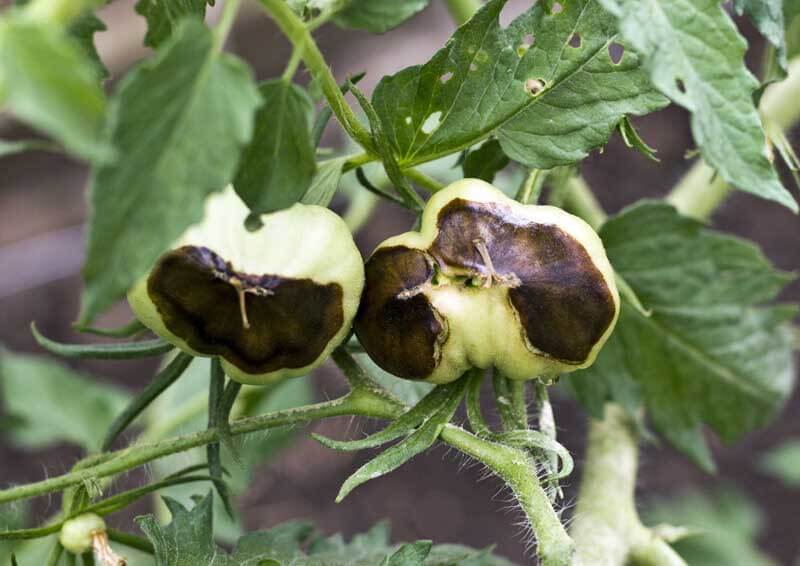
Blossom end rot is a common fruit disorder caused by a calcium deficiency.
Disorders often look like diseases, but they are caused by either nutrient deficiencies or adverse weather conditions rather than disease-causing fungi, bacteria, or viruses. Even better, they can be cured.
Fruit blossom end rot (caused by calcium deficiency), splitting or cracking (caused by excessive water or temperature fluctuations), fruit toughness, cat-facing, and reduced productivity (caused by cool temperatures) are the most common disorders of tomato fruit. Leaves with nutrient deficiencies can show all manner of yellowing or poor pigmentation, but if you feed your tomatoes well with a tomato fertilizer all season, your plants shouldn’t suffer any nutrient deficiencies (unless you have soil with severely acid or basic soil pH). Problem solved. Generally, if you plant your tomatoes in warm conditions, feed and care for them well, you can avoid most tomato disorders.
Can’t find your tomato problem here? Then ask our garden experts on our Ask a Garden Expert page and upload a photo of your plant! We will help you identify the problem and gprovide solutions.
“My crepe myrtles don’t bloom. I’ve added “blossom booster,” but still no blooms. Any suggestions?” Question from Carol of Douglasville, Georgia
Answer: How frustrating! You plant one of these glorious flowering shrubs/trees and…no flowers. There are a few possible reasons why yours won’t bloom for you.
Light – One of the most common reasons is too little light. Crepe myrtles (Lagerstroemia indica) are sun lovers that need high light to bloom well. If yours gets a good bit of shade, little to no blooming can result.
Foodand Soil – Well-drained soil enriched with organic matter (peat moss or compost) will also encourage good growth and blooming. Fertilizer is also important. I would choose a slow-release fertilizer formulated for flowering. Work it in around the root zone at the beginning of each season.
Heat and Water – Parched summers that are extra hot can put a strain on these plants and reduce flowering. Does yours look otherwise healthy? If not, I would provide it with additional water when the summer weather is at its worst. Likewise, prolonged excess moisture can cause poor growth and root rot.
Disease – Several crepe myrtle diseases can put a damper on health and flowering. Powdery mildew, which appears like a whitish powdery dust on leaf surfaces, stresses plants and negatively impacts flowering. Likewise, Cercospora leaf spot, which results in spotty leaves that fall prematurely, can reduce flowering. If you suspect mildew, look into the effective fungicide, GreenCure. For leaf spot, try a copper-based fungicide spray. To reduce the impact of both diseases, prune out dense, internal branches to encourage airflow, and be sure to clean up fallen leaves in autumn.
Variety – Consider the variety. Some are more reliable than others. If yours just won’t flower well, then choose a tough, reliable variety with excellent flowering performance. I recommend three vigorous, disease-resistant varieties: the deep-red flowered Dynamite®, brilliant pink ‘Hopi’ and lavender-violet ‘Zuni’.
I also recommend that you contact your local UGA Extension Agent to get more tips for your growing area.