Articles

Pruning The Garden in Winter


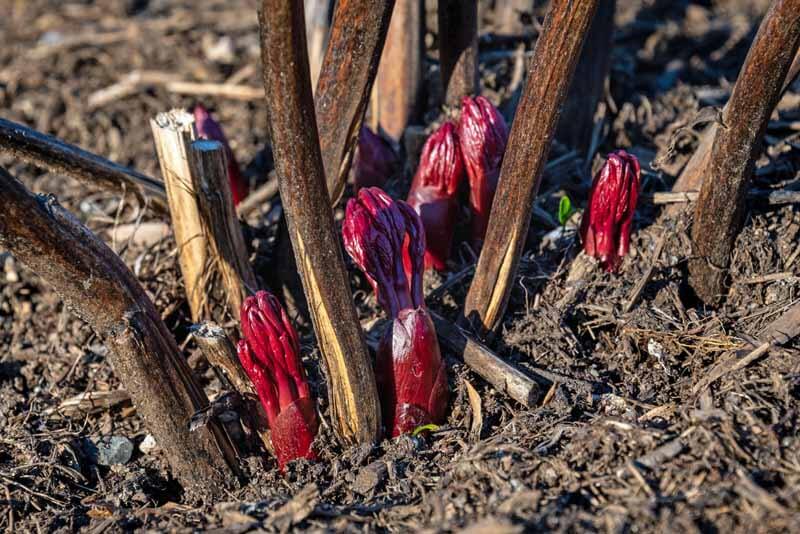
As for me, I believe that pruning is without doubt the biggest (dreadfulest) but most important job in the winter garden.  Young trees and shrubs need pruning then while the branches are bare.  The rules for pruning flowering shrubs depends on when they bloom.  Spring blooming shrubs (i.e. quince and viburnums that bloom on last year’s wood should never be cut in winter. But only after they bloom.  Summer and fall blooming shrubs such as Hydrangeas will bloom on new wood and can then be cut to the ground in winter.

General Pruning Rules

Be sure to use the right pruning tools for the job. Small pruning saws are best for larger branches.

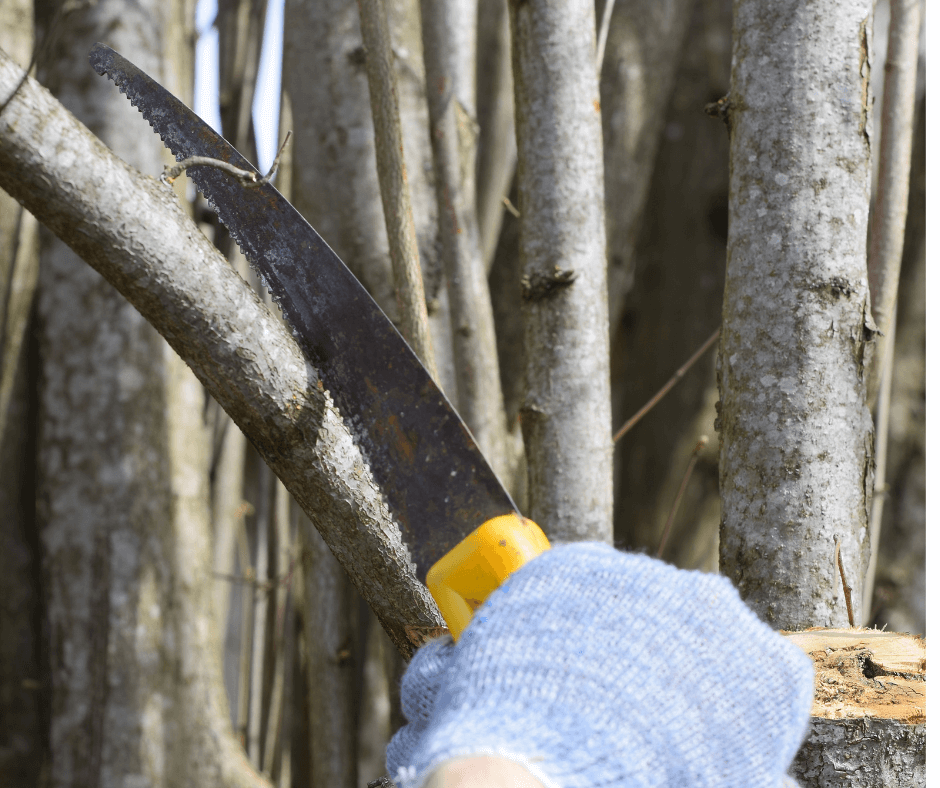
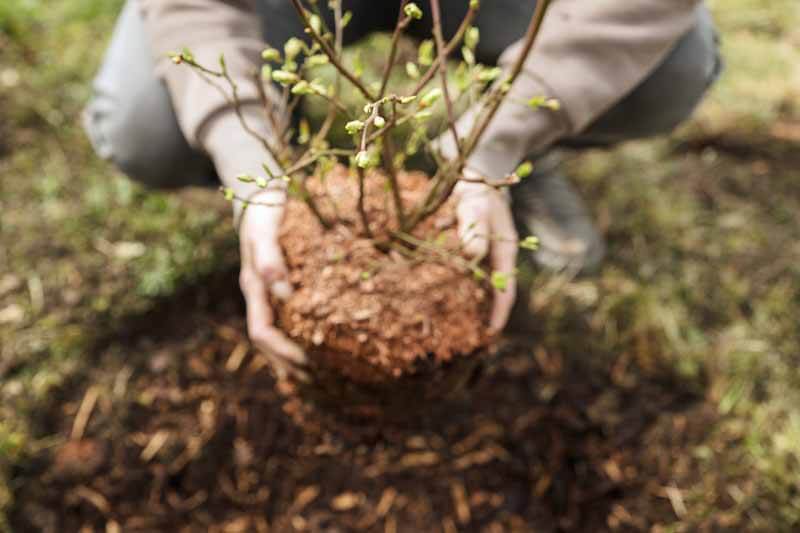
The first step is to remove all dead wood at its base.  Then look to see if any branches are crossing and rubbing together. If you find crossing branches, cut one off leaving the best branch to grow.  The next step for almost all non-evergreen shrubs is to cut one-third of the oldest branches to the ground every three years.  This will ensure a new crop of younger shoots each year and help to eliminate pests that often attack the old wood first. A perfect example of this is the lilac.  A common mistake I have seen is to cut some shrubs into forms that are unnatural to their basic shape.  The worst offenders try to prune forsythia into shapes such as globes or rectangles.  There again, give forsythias room to spread and follow the three-year cycle.  If you have a small area buy a small shrub to fill it.  There are a few slow-growing shrubs that do not need pruning at all, as far as its shape is concerned.  The most common plant in our area is the Star Magnolia (Magnolia stellata).  Except for dead wood and rubbing branches leave it alone.

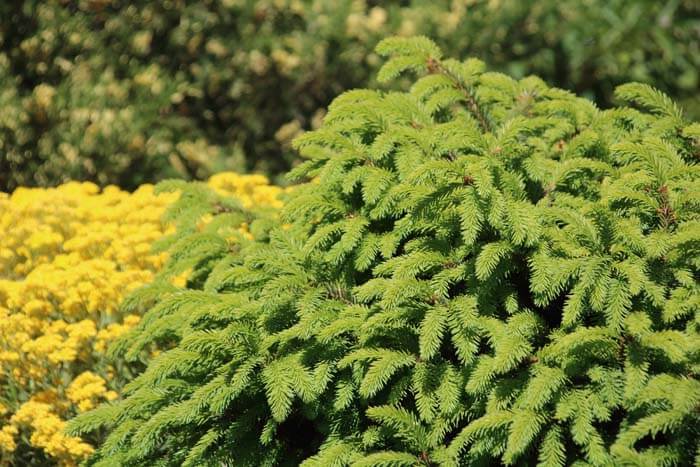
Pruning Winter Evergreens

Rhododendrons are and azalea

Pruning rhododendrons and azaleas and is a whole different story.  There is a difference between them relating to pruning, other than flower, leaf, and shrub size.   The difference is where the flower buds are located on the branch and when to prune.  Rhododendron flowers are found just above the leaf rosette and pruning consists of removing the old flowers, after spring blooming, while not hurting the leaf rosette just below it. That is where next year’s buds will form. Aside from removing dead wood, never prune them in winter for fear of removing their spring flowers.

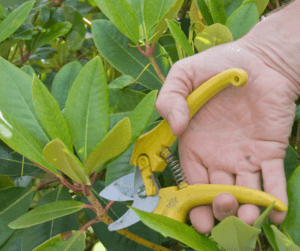
Azaleas, on the other hand, form new buds all along the branch, so they will tolerate some light winter pruning.  Just remove any out-of-place branches, but not all the way back. Then you will have new flowers next spring.

Remember both plants require acidic soil.  If your plants start to look weak or yellow you need a soil additive. Copperas (hydrated ferrous sulfate) an inexpensive powder comes in small bags. Follow the instructions and add to a liquid mix for acid-loving plants.
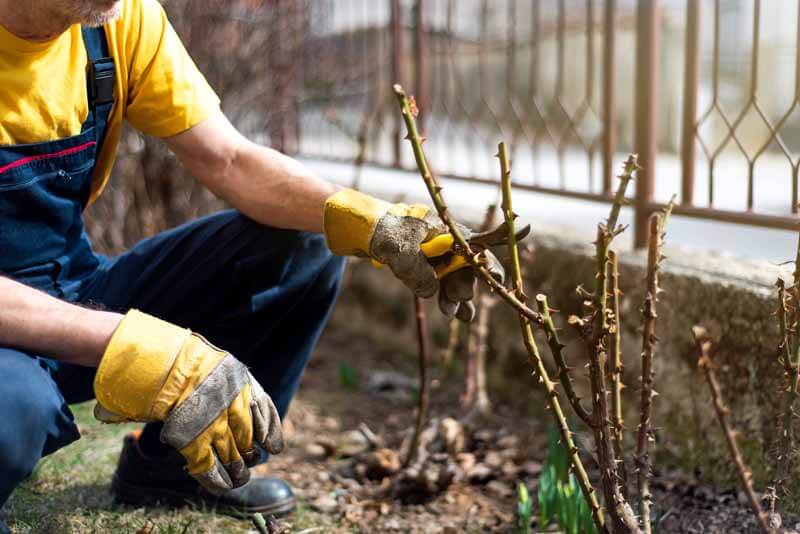
Pruning Roses

Be sure to remove any dead or dying branches before you really start pruning living branches.

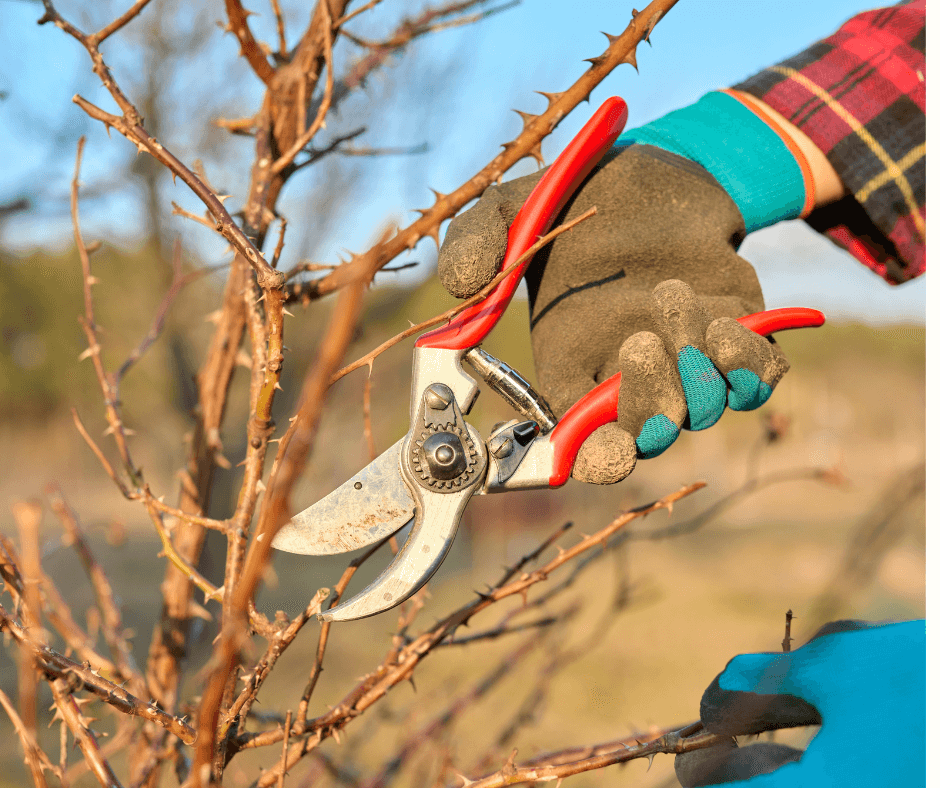
Roses are in a group by themselves. The main rule is to get rid of the old wood to discourage pests and encourage new growth (= more roses).  There are two groups of roses, one that blooms on last year’s wood and one that blooms on this year’s new growth. With both groups remove the oldest and weakest canes.  The oldest canes tend to be dark brown and woody. They need to go. The new-growth roses should have one-third of all old branches cut to the ground to keep the plant from pouring energy into maintaining old growth, and it should be done in the very early spring just when the buds begin to swell.  For a fuller-looking plant cut some of the inward-growing branches to open up the center.  For roses that bloom only on one-year-old wood (and I do not think there are many of these left) look at the stems.  They should be brownish-green.  Leave them and cut out anything older, but be sure to let new growth come along for next year. (Article: When is the Best Time to Prune Roses)

I also caution against the dreaded rose rosette virus.  (Article: Best Diseases-Resistant Roses) If you see any misshapen or oddly colored growth dig up the plant and burn it or put it into a large plastic bag to put in the trash. Even if everything looks okay douse your pruners with 70% Isopropyl Alcohol between each rose.  I encourage everyone to go online and see what bad growth looks like.

I also recommend going online to see the gorgeous new varieties of all the plants I have talked about, for example, Hydrangea paniculata images and a world of gorgeous shrubs will appear.

I hope I have given you enough work to keep you out of trouble and I haven’t even gotten to young trees.  So get going and happy gardening.

About Teri Keith


Garden columnist, Teri Keith, has gardened for over 50 years in her home state of Indiana. She served as a longtime IGC nursery manager specializing in annuals and perennials in Bloomington, Indiana and still gardens with passion. Each year she plants and maintains over 50 flower containers, many gardens, and a large collection of lilacs.

Cold Frame Salad Gardening

Cold frames are like outdoor mini glasshouses for winter vegetable and herb growing.

Garden-fresh eating does not have to end in the fall. The onset of chilly weather means it’s time to enjoy cold-frame salad gardens filled with easy, cool-season greens, root vegetables, and annual herbs. These crops are fast to germinate and grow, and they will tolerate serious cold weather if your frame garden is properly placed, prepared, and maintained.

What is a Cold Frame?

In 2012 I co-wrote an article with John Everard about how to build your own cold frame. This is the cold frame that he designed! (See building details in the linked article below.) (Image by Jessie Keith)

A cold frame is a cross between a raised bed and a small, sunken, covered greenhouse. It is lowered into the ground to reduce winter freezing of cold-tolerant greens, herbs, and root vegetables. Most cold frames are designed with sturdy sides of either wood, stone, or brick, and they are topped with framed glass or plexiglass lids that can be lifted on unseasonably warm fall and winter days.

Cold frames were first popularized in Europe, where winter growing conditions are generally mild, but they are also useful for American gardeners. You can build your own cold frame or purchase a premade one. Building your own has its advantages because you can create something more for less, if you know what you are doing. For a great step-by-step building guide, please click here to read this article that I co-wrote with biologist and builder John Everard for Wilder Quarterly in 2012. John created a very useful design that can be sunk into the ground in our USDA Hardiness Zone 7 area.

Cold Frame Siting

Cold frames further south can be shallower because it’s warmer.

All cold frames should be placed in a somewhat elevated location with full sun and soil that drains well–standing water and vegetable cultivation do not go hand in hand. Some steps regarding cold-frame gardening depend on one’s location and climate. In the north, a cold frame should be placed in a sunny, south-facing spot close to the home. If you can, sink the frame a few inches below the soil level. The reflective heat from the home will provide a little extra winter protection, the south-facing sun will help heat the cold frame all winter long, and the added depth will reduce the chances of freezing on cold nights. Further south, you can choose a spot away from the home, and sinking the frame is not necessary. No matter where you live, be sure to be watchful of your cold frame on uncommonly warm winter days. Prop the tops open during the day to keep the internal temperature from getting too hot and stressing your greens.

Cold Frame Soil

Rich, dark soil is best for cold frame gardens.

Dark, lofty, highly amended soil that holds water well will yield the best vegetables. Start by amending the ground soil in the frame with good compost, like Black Gold Natural & Organic Garden Compost Blend. A 1:2 ratio of soil to compost is recommended, especially if the soil is high in clay or sand. Another option is to fill the bed with Black Gold Natural & Organic Raised Bed and Planting Mix. Adding a layer of compost as a protective mulch is also important and can serve as further insulation. (Click here to learn more about creating the best soil for raised beds.)

Cold Frame Salad Crops

Rather than harvesting whole lettuce heads, I recommend snipping away leaves for cut-and-come-again salads.

It is essential to grow cool-season, frost-resistant crops. These are largely cool-season greens, herbs, and root crops. There are lots of greens for the job such as mâche, kale, lettuce, mizuna, spinach, and Swiss chard. Any lettuce will do, but small, fast varieties are most favorable. Salanova baby lettuces (55 days from seed) produce sweet and crunchy heads of green and purple very quickly, and the looseleaf lettuce Baby Leaf Mix is a reliable cut-and-come-again mix. Spinach thrives in cool weather and may have smooth or savoyed (puckered) leaves. I recommend both the 1925 heirloom ‘Bloomsdale’, which has large, savoyed leaves and is slower to bolt than most, and the smooth-leaved ‘Corvair’, which is resistant to the fungal disease, downy mildew. Arugula cultivars vary in leaf shape, color and heat. The popular ‘Wasabi’ is an easy-to-grow selection with leaves that truly taste like hot wasabi, and the newer ‘Dragon’s Tongue’ is a visually pretty, finely cut variant with purple-red venation.

In the deep winter, cool-season root vegetables bulb up more slowly.

The best root crops include winter carrots and radishes. Radishes are by far the fastest, and my favorite variety for crisp, sweet flavor is the French breakfast radish D’Avignon. Click the following link to learn more about growing winter root crops and click this link to learn more about growing cool-season greens.

For delicate cool-season herbs, try cilantro, dill, and parsley. Cilantro likes it cool and may produce leaves throughout winter. When the weather heats up, it will produce starts stems of white flowers and bulbous seed heads that can be dried and crushed to make the spice coriander. Dill will bear ferny leaves that taste great in salads, spreads, and fish dishes. Lush clumps of curly or flatleaf parsley will also flourish in cold frames all winter long.

All of these plants can be directly sown into the frame from seed. They sprout fastest in the fall when germination temperatures are more moderate–between 70 and 40 degrees F. Some need to be sown on the soil surface, particularly the small seeds of lettuce, which need light to germinate. At sowing time, start by wetting the soil, and then gently sow and pat the seeds down. Follow up with a little more water to wet the seeds. Be sure to label all seed rows with labels showing the plant names and sowing dates.

Harvest salad leaves, herbs, and roots as needed through winter–I tend to use shears to trim off what I need on a given day. By early spring, the cold frame garden will begin to look tired. Feel free to clean it out and begin planting new vegetables for spring.

Winter Garden Tasks for a Happy Garden

Winter Garden Tasks for a Happy Garden

Here we are in January at the start of the New Year. Now is always an exciting time in the garden to be thinking of what new plants to add, what plants to remove or move, what container gardens to create, and what new garden art to add. A garden is ever-changing and never stays quite the same even though we, as gardeners, might not have made any changes. Nature makes its own decisions. When I look at pictures of my garden during the cold winter months, sometimes I am astonished at the differences that I see each year. Visualizing my gardens in years past also helps me determine what needs to be done–from now through to spring–to make them flourish.

Feed Wild Birds

One of the first garden tasks that I recommend is to feed the birds. So many of their natural habitats have been destroyed. I believe that we as gardeners can offer them a haven that is safe and supplied with food and water. More and more gardeners are also buying more plants that provide a natural source of food and shelter for not only birds but insects as well. (Click here to learn more about feeding birds naturally.) Many garden centers now create displays of wildlife plants, so their customers can be informed and plant landscapes specimens for wildlife. Still, without such plants, well-stocked bird feeders can provide nourishment for the birds and pleasure to the gardener. (Have your bird ID book on hand and mark off the different types for winter fun.)

Control Slugs Early

Removing slug eggs early can help save lots of plant damage and frustration.

Here in the Pacific Northwest, where I garden, we have, thus far, had a very mild winter. In my own garden, we have yet to have a real killing frost. If the weather continues like this it will probably mean that we’ll have a proliferation of slugs in the spring. To reduce slug populations, check your garden for slug eggs. Look under any boards, nursery containers, and other debris and destroy the small, round, translucent eggs on sight. It is much easier to control them now rather than waiting until the growing season.

Grow Primroses Indoors and Outdoors

Polyanthus primroses come in virtually all colors of the rainbow!

Colorful displays of English primrose (Primula Polyanthus group, USDA Hardiness Zones 3-9) are in many garden centers now and can give a feeling of spring with their vibrant colors and fragrance. These primroses are available in almost every color and sometimes blends of different colors. Most garden centers will have plants in bloom, and I suggest selecting those covered in flower buds because they will remain in bloom longer. English primroses also make excellent outdoor potted plants that provide early spring color to an entryway. I always like to have several primrose pots around our entryway, which will remain in flower well into the spring, especially in a protected area. I plant them in humus-rich Black Gold Natural & Organic Potting Mix. While English primroses are technically perennials, many gardeners treat them as early-season annuals, but this is a waste. They are very hardy and can be planted in the ground for long-term enjoyment.

Plant Winter-Blooming Shrubs

Camellia ‘Yuletide’ has small, bright red flowers that bloom early.

Perhaps you have noticed an area in your garden where some winter color would be welcome. If our weather stays mild, January can be a good month to plant winter-blooming shrubs. Some good examples are winter witch hazels (Hamamelis x intermedia, mollis, and vernalis hybrids, Zones 5-8) and sasanqua camellia (Camellia sasanqua, Zones 7-9), which perform well in our Pacific Northwest climate as well as other parts of the country.  Witch hazels are large shrubs to small deciduous trees with flowers that have many narrow, crumpled petals that appear before the leaves. Flowers are fragrant and most varieties also exhibit beautiful fall leaf color. Sasanqua camellia generally has smaller flowers than the more familiar Japanese camellia (Camellia japonica), but it usually blooms earlier, from late fall to early winter. One of the most popular varieties is ‘Yuletide’ because of the bright red flowers with yellow anthers; the plants are often in bloom during the Christmas season. These camellias make excellent container plants, and I would suggest using Black Gold Natural & Organic Ultra Coir in which to plant them. When planting in the garden, these shrubs like full to partial sunlight and highly organic soil. (Click here for planting instructions.) Amending it with Black Gold Garden Compost Blend or peat moss is a good idea. (Click here to learn about more winter-blooming shrubs.)

Buy Seeds Early

Seeds are hot! Be sure to buy yours early this year.

Vegetable gardening and starting plants from seed have become very popular, so it is wise to purchase your seeds from seed catalogs and online seed sellers as early as possible. You don’t want to miss out on being able to get all of the seeds that you want. (Click here to learn how to grow plants from seed.)

With the continuing restrictions due to COVID-19, it can be a challenge to visit other gardens. This places limits on us seeing what plants are blooming in other gardens, but I’ve found that just walking around local neighborhoods can be an inspiration. My garden has been my ‘go-to’ place for some calmness in life and having some color makes it all even better.

Late-Winter Garden Tasks for a Happy Garden

Clean off any debris that has collected on the lawn over the winter.

Take a Garden Stroll

With a steaming cup of coffee in my hand, I walk out into my garden this February morning and delight in seeing the nodding, bell-shaped white flowers of snowdrops (Galanthus nivalis) (Click here to learn more about other early spring bulbs like snowdrops). I have a bed of these early-blooming winter flowers that have naturalized in a shady area of the garden. They are among the first blooming plants of the year. I see a few weeds here and there and pulling them will be a task for later in the morning.

Stop and enjoy your earliest garden flowers and weed around them along the way.

Just beyond the snowdrops is a mass of hellebores (Helleborus hybrids) that have, over the seasons, re-seeded and naturalized (Click here to learn more about Helleborus). They are now in full bloom and make quite a showing in the winter garden. I thought that I had groomed them all in fall but realize that there is still more grooming to be done. The old leaves need to be cut off. It can be a delicate job because it is easy to cut a new flower stem or emerging leaf. It is just another task to complete before the month is over, and spring actually arrives.

Beds and plants need cleaning up, tools need care, and the lawn requires tidying. Here are all of the late-winter garden tasks that I undertake to get my garden space into gear for the coming spring.

Prepare Your Garden Tools

Sharpen, clean, and oil garden tools for the coming season.

There are a few, what I call “general preparative maintenance tasks” yet to be completed in late winter that I plan on doing soon. These include things such as getting the lawnmower tuned up, and the pruning shears and spades sharpened, cleaned, and oiled; it is nothing very exciting and rather mundane tasks to me, but once completed I will feel that I am ready to begin to garden.

Prune Roses

Prune your roses before they bud out.

Not that I believe that roses know the day of the month or when we celebrate certain holidays, but in the Pacific Northwest President’s Day has been the traditional time to prune roses. For hybrid tea roses, this is the time to remove any dead or dying canes. I like to thin my roses by taking out small and weak canes, so I am left with a bush that is about 18 inches tall with 4-5 sturdy canes. I also take off all of the old leaves on the ground and remove them from the area. The debris can harbor insects or diseases from the previous year, so it is important to remove all old plant material. It is also a good time to remove any weeds around the roses. (Click here to learn more about pruning shrub roses.)

Plant New Roses or Shrubs

Plant new shrubs. Make sure they are dormant or just breaking bud, like the other shrubs in your yard.

If you have some roses that have not performed well or perhaps were disease-prone, it is a good time to replace them. You can replace them with new choice shrubs or more disease-resistant roses. New bare-root roses start arriving at garden centers at this time, and the selection of varieties is probably better now than at any other time of year. Check the tags on roses as to their disease resistance properties. Since many of the new varieties have been bred to be disease resistant, this should be noted on the label. At planting time, be sure to amend the soil with Black Gold Peat Moss. (Click here to learn more about organic rose care and planting.)

Cut Back Old Perennials

Cut back the stems from last year’s perennials, such as peonies, making sure not to damage any newly emerging stems.

If you have not cut your herbaceous peonies back to ground level, do it now, and be very careful not to accidentally cut any of the new stems that are emerging from the ground. Remove the old stems and any leaves left from last year as old peony leaves can carry several diseases that can infect new growth in the spring. Keep the area around peonies free from any debris. This cutting-back process should be done with all other perennials that have old, dead leaf material from the previous year.

Prune, Clean, Plan New Plantings

Prune, clean, and prepare a tidy space for spring flowers to emerge and new plants to be planted.

You may have heard many gardeners say that a garden is never complete because there is always something else that needs to be done. In my garden, I can certainly attest to this. As I look around, I see some shrubs and small trees that need some additional pruning. Then there are the pathways in the garden that need to be re-defined and the brick edging that should be re-worked. I also like to take this time to think about what plants need to be removed or transplanted. Some gardeners refer to this as ‘editing’ because there is always something that is in the wrong place or has grown too large and needs to be divided. For most plants, February is still a good time to transplant.

As I gaze over my garden, I am already thinking of what new plants I will be buying in the spring and what new combinations I will have in my many pots. We have recently had some much-needed rain, and I am thrilled that my soil is having rain penetrate into the root zone of many plants. While I am not quite ready for spring, I will welcome its arrival and will hopefully have my late-winter tasks completed.

Late-Winter Garden Task List:

  1. Clean and sharpen spades, pruners, and other tools
  2. Cut back old perennials
  3. Divide and move perennials that have grown too large
  4. Get lawnmowers and other gas-powered equipment serviced
  5. Plant shrubs
  6. Prune roses, shrubs, and trees
  7. Rake up any leaves and debris that have blown into the lawn
  8. Remove winter weeds
  9. Repair heaved or damaged garden walkways
  10. Stop and admire your emerging garden

Dwarf Conifers for All-Season Beauty

A dwarf white spruce shows off its winter cones.

Dwarf conifers are often overlooked as both landscape or container plants.  In recent years there have been many new cultivars of dwarf conifers that have been developed to be super compact and slow growing. These make superb garden specimens that will shine all year long, especially in the winter months.

Dwarf Conifers Defined

There are lots of different dwarf conifers available at nurseries these days.

There has been some confusion, for both the retailer and the consumer, regarding the true definition of a dwarf conifer.  To help eliminate this confusion, and to establish some parameters for growth that a homeowner would understand, the American Conifer Society has established two size categories, dwarf and intermediate.  Dwarf conifers grow very slowly to a final height of 1-2 feet in ten years.  Intermediate conifers, while not technically a dwarf,  are compact and can easily be worked into landscapes or containers without becoming large trees.  An intermediate conifer will grow up to 12 inches annually and can be selectively pruned to maintain a smaller shape.

Dwarf Conifer Care

In my own garden, I have many containers with dwarf conifers, and they have become an important part of my patio display.  They provide an evergreen appearance throughout the year and tolerate our summer and winter conditions.  Most grow best in full to partial sun, however, read plant tag information regarding sun/shade requirements whenever you purchase a new conifer, so it Black Gold Natural & Organic Potting Mix.  I have found that it provides the fertility and good drainage that most conifers need.

Favorite Dwarf Conifers

It is always difficult to make a list of favorite plants, but I have carefully chosen select dwarf conifers for my garden. Here are some of my garden favorites along with a few other garden-worthy selections.

Korean Fir

Korean fir (Abies koreana ‘Horstmann’s Silberlocke’) is one of my favorite dwarf conifers. (Image by Mike Darcy)

Two of my favorites are Korean firs (Abies koreana).  The first is the conical golden Korean fir (Abies koreana ‘Aurea’), which has needles that are lemon yellow and quite attractive when in a bed with a background of green foliage. This intermediate conifer grows very slowy but can reach a final height of 8 feet or more. The second is the silver dwarf Korean fir (Abies koreana ‘Horstmann’s Silberlocke’), which has needles that slightly curl around the stem to reveal blue-green needles with silver-white undersides.  It is also an intermediate conifer but is easily kept small by pruning. I have to admit that the ‘Horstmann’s Silberlocke’ is my favorite. It gets many comments from garden visitors.

Japanese Plum Yew

Spreading Japanese plum yew is one of the best compact conifers for low coverage in beds. (Image by Jessie Keith)

A conifer with beautiful upturned needles and a low, spreading habit is spreading Japanese plum yew (Cephalotaxus harringtonia ‘Prostrata’). It creates perfect evergreen cover where a low grower is needed, and it performs best when given afternoon shade. Another choice variety is ‘Korean Gold’, with its beautiful lemon-yellow needles with dark green undersides. It is a real attention getter in the garden

Hinoki Cypress

Dwarf Hinoki cypress (Chamaecyparis obtusa ‘Nana Gracilis’) always looks good in a sunny garden spot.

Dwarf Hinoki cypress (Chamaecyparis obtusa ‘Nana Gracilis’) has dense, lush, green fans of foliage and a very compact habit (3-6 feet when mature). Another cultivar that provides an interesting contrast of colors is the white tipped dwarf Hinoki cypress (Chamaecyparis obtusa ‘Snowkist’).  This is considered a dwarf conifer, and its outstanding feature is dark green foliage with creamy white variegated tips.  It has a globe shape and will not get much larger than 3-4 feet.

Hemlocks

For something with a weeping shape, consider weeping western hemlock (Tsuga heterophylia ‘Thorsen’s Weeping’).  It is very small and slow growing; in only 10 years it will reach just 1 foot.  It has a weeping shape and can be staked to form a fountain effect or left alone to weep over the side of a pot.

Spruces

The classic bird’s nest spruce (Picea abies ‘Nidiformis’) always remains low and tidy.

There are many compact spruces (Picea spp.) available that are perfect for containers and small spaces. The classic bird’s nest spruce (Picea abies ‘Nidiformis’) is a low grower that has a tidy nest-like habit. It grows very slowly, reaching 2-feet high and several feet wide in 10 years. The bushy dwarf Norway spruce (Picea abies ‘Pumila’) is comparable but is rounded and does not spread. Another to try is the conical Daisy’s White spruce (Picea glauca ‘Daisy’s White’), a gem with creamy white new growth that darkens to blue-green by summer. It is very slow growing and gets to just 3 feet after 10 years.

Due to smaller lot sizes and with more people living in apartments and condominiums, many garden centers have increased their selection of dwarf conifers.  Check with your local garden center and you may be very surprised at the choices available.