Plants are the lens Jessie views the world through because they’re all-sustaining. (“They feed, clothe, house and heal us. They produce the air we breathe and even make us smell pretty.”) She’s a garden writer and photographer with degrees in both horticulture and plant biology from Purdue and Michigan State Universities. Her degrees were bolstered by internships at Longwood Gardens and the American Horticultural Society. She has since worked for many horticultural institutions and companies and now manages communications for Sun Gro Horticulture, the parent company of Black Gold. Her joy is sharing all things green and lovely with her two daughters.
“When planting, is it good to mix potting soil with earth soil?” Question from Pamela of Richmond, Indiana.
Answer: Don’t waste potting mix on in-ground plantings. Add products created to be garden amendments instead. These contain the ingredients that gardens need, while leaving out unecessary components, like perlite, vermiculite, and other additives, that don’t benefit garden soils. Potting mixes are also typically more expensive when purchased in quantity.
The best ground soil additives for long-term fertility include compost, earthworm castings, fortified garden soil, and Canadian sphagnum peat moss, among others. All of these additives lighten the soil, increase organic matter, water-holding ability, increase drainage, and up plant performance. Some, like earthworm castings, also add natural nutrients and beneficial microbes.
Beneficial fungi, called mycorrhizae, are another good soil additive. They work beneficially with plant roots to help them take up more water and nutrients for better performance.
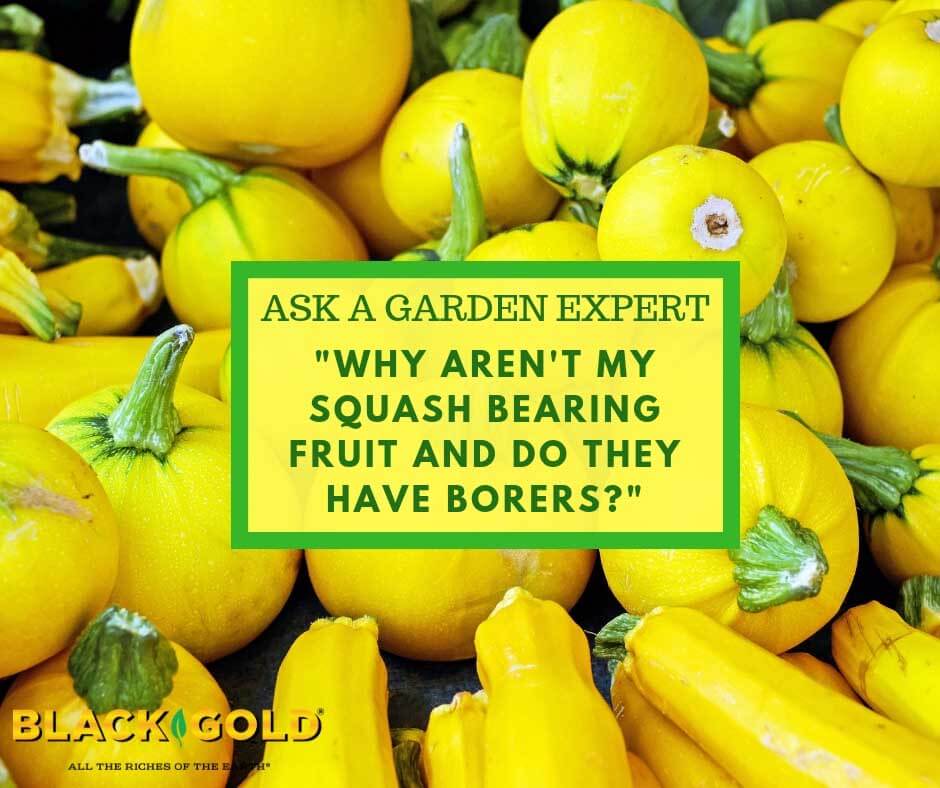
“How can I determine if a squash plant in my raised bed is just “doing bad,” or if it’s “doing bad because a squash vine borer might have gotten it?” And does one bad squash plant ruin all the rest in the same bed? Nothing seems to be bearing fruit now.” Question from Cat of Horse Shoe, North Carolina.”
Answer: You are in luck! Most of these common questions for squash growers have already been answered for Ask a Garden Expert inquirers. The answers are below. But, you also ask a question has not been addressed. This is about the idea of one squash plant damaging another.
One squash plant can only damage another if it is carrying a disease that can easily be spread. Do you see badly wilting leaves without the evidence of holes or damage on the stems (see the vine borer piece, which shows stem borer images.). Do you see white, dusty mold (powdery nildew) on the leaves or brown or yellow spots? If so, your plants likely have a disease. There are many that attack squash. Some, like powdery mildew, can be managed, while others are deadly. (Click here for a detailed article on all squash diseases.)
“What can I plant now – mid-July – to avoid having empty sections in my garden?” Question from Glenda of Sewell, New Jersey.
Answer: Choose cool-season vegetables and flowers that look good until frost. These perform the best as fall temperatures drop. Most even withstand frost. You probably won’t start to see frosts until mid to late October, depending on the year, so these should color your garden for a while. Here are my suggestions.
Flowers
There are quite a few high-performing flowers that shine fall. Some are commonly known, like pansies, chrysanthemums, and other common nursery fare. But, there are others that you can plant now to fill open spaces now for fall.
Dahlias are a great choice. They can tolerate hot summers but really bloom gangbusters in fall. Plant a few tall or compact specimens in empy garden areas now, and you will be rewarded.
Spike celosia: These colorful, upright bloomers will look beautiful until frost.
Marigolds: Most marigolds will continue flowering until fall.
Salvias: Lots of salvias bloom and continue to feed hummingbirds until frost.
All of the flowers and vegetables mentioned prefer full sun and fertile soil. Good yields and successful flowers will grow best in beds amended with Black Gold Garden Compost Blend and good, all-purpose fertilizer. Container plants really thrive in Black Gold Natural & Organic Potting Mix.
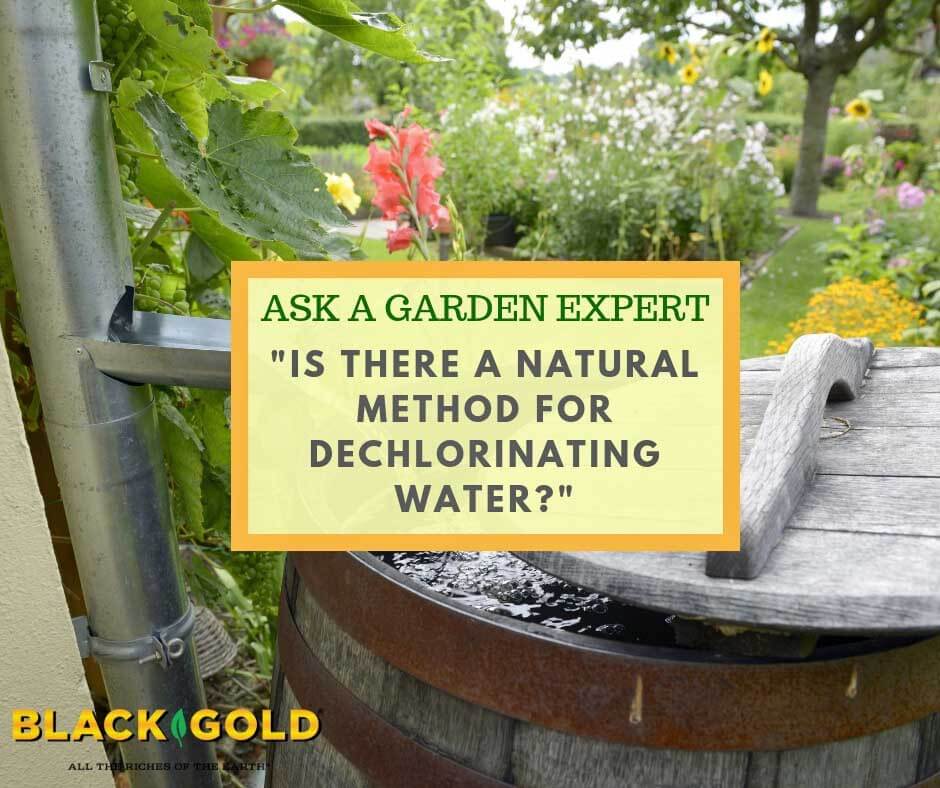
“I was wondering what’s a cheap and effective way for the home organic grower to remove chlorine and, more importantly, chloramine without using expensive reverse osmosis filters. Can you recommend a product that is inexpensive and effective at making water safe for all the organic goodies we work so hard to cultivate?” Question from Stephen of Elizabethtown, Kentucky.
Answer: There are several inexpensive solutions that can help you. Here are three of the best, easiest, and cheapest solutions for water dechlorination for organic growers like you.
Chlorine Evaporation
Chlorine is a gas that evaporates from irrigation water over a short period of time. To encourage evaporation, irrigation water must be exposed to the air. The more open-air coverage, the faster the evaporation. Ultraviolet rays from sunlight and added aeration will help hasten the process. I recommend using a broad, open tub covering with a screen (to keep insects and animals out) that is kept in the open air and sun for irrigation water. A small pond aerator with also hasten the process. These water sources can also collect rainwater.
Chlorine evaporation time depends on the concentration. In general, it takes chlorine a few days for the standard concentration to evaporate from 10 gallons of standing water. I suggest investing in a small chlorine tester to ensure your water is chlorine-free before irrigating.
Carbon Filtration for Chloramine
Chloramine is a little tougher to remove from water. The easiest method is via carbon filtration. For small businesses, there are small, reasonably priced, carbon filtration systems that will remove sediment, chlorine, and chloramine from water. Here are some options.
Rain Water Collection
Water collection is an age-old way of gathering fresh, chlorine-free water for growing. Whether you choose to fill rain barrels or cisterns, rainwater is free to collect and (mostly) chemical-free. Of course. (Here is an article that covers some methods of rainwater collection.)
“How can I prevent damping off when I sow seeds? That is my problem.” Question from Bev of Philadelphia, Pennsylvania
Answer: This is a problem that I have faced many times starting seeds in university greenhouses, professional greenhouses, and at home. Thankfully, the solution is pretty simple, and it all involves keeping everything clean. Let’s start by covering the sources of damping off disease.
What is Damping Off?
Damping-off is a disease of sprouting seeds and seedlings that is primarily caused by two soilborne fungi, Pythium and Phytophthora spp. They cause rot and death in developing seeds and seedlings, usually at the roots or base of tender developing stems. Damping-off is a problem when growers keep the soil too moist and the disease is present.
To keep damping-off from taking hold you need to start with good soil, clean pots, and follow up with smart care.
Sterilizing Mix and Pots
Disease-carrying mix is the biggest concern. I used to work in large-scale greenhouses where they used big heater/steamers to sterilize mix at a temperature just high enough to kill any soilborne diseases (around 180°F). This is essential for growers that reuse mix, but careful growers sterilize new mix, too. Why? Because the airborne spores of damping-off fungi can be practically anywhere –especially in places where plants are being grown.
Additionally, unused seed-starting mix, like Black Gold Seedling Mix, is typically produced in clean facilities and bagged pathogen-free. But, if bags tear in transport and/or bags are not stored properly, Pythium and Phytophthora spores can infiltrate. Bags of seedling mix should be lightweight (meaning no water from the outside has seeped into the bag) and without tears. Improperly stored open bags at home can also be a danger. If you are not certain of your mix’s cleanliness, then it’s time for home sterilization.
I sterilize seed-starting mix using this fast and easy method.
Ingredients: Seed-starting mix, a 9″ x 13″ cake pan, 1/2 cup water, aluminum foil, and an oven.
Directions: Preheat your oven to 180°F, fill your pan with seedling mix, sprinkle it with the water, cover the pan with the foil, and bake it for 30 minutes. After baking, remove the pan from the oven and allow the mix to cool before using.
These diseases can also hang out on dirty old pots, so in the greenhouse, we’d also wash used pots and trays really well in hot water with good dishwashing liquid and sometimes a dash of bleach. I do this at home as well.
Seed and Seedling Care
Aside from starting with clean soil and pots, it is essential to discourage wet soils when starting and growing seedlings. I generally keep newly planted seeds gently sprinkled with a bottle waterer (see video below), so the soil is never over saturated. Once my seedlings pop up, I bottom water by adding 1/4 to 1/2 inch of water to the water-holding trays every two to four days, depending on seedling size. It also helps to encourage airflow, to help soil surfaces dry more quickly, and keep trays warm with a heat mat.
These cultural practices will definitely kick your damping-off problem away for life!
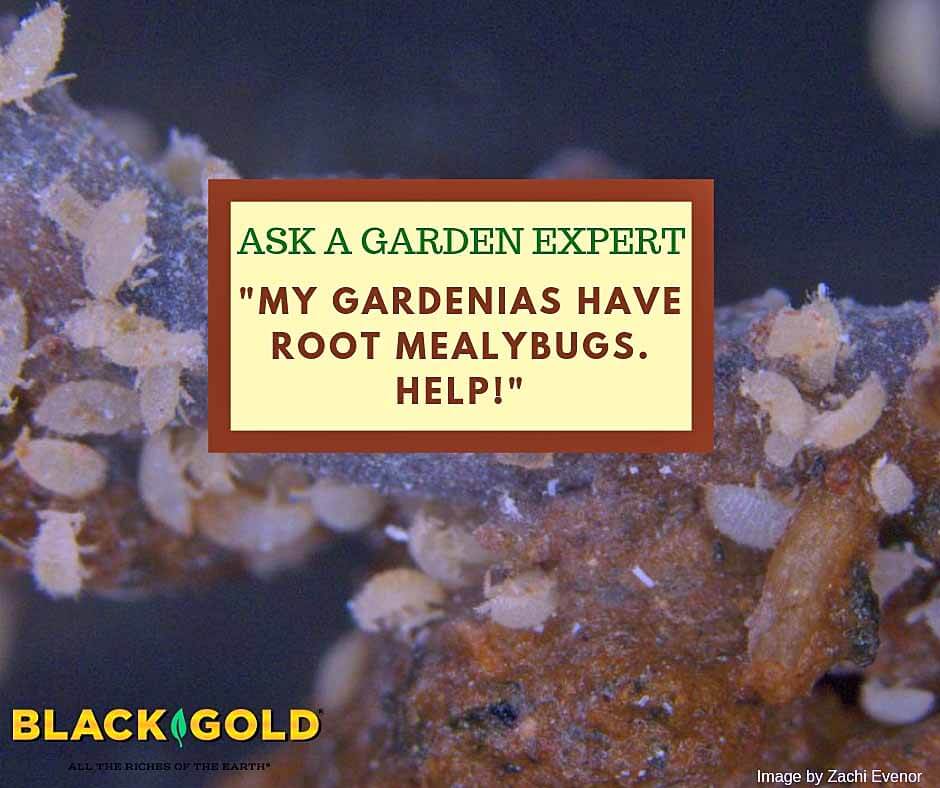
“I have tried growing gardenias, but they always die. When I pull them up there are white bugs all over the roots. What are these and how do I get rid of them?” Question from Sheila of Tampa, Florida.
Answer: There are several pests and diseases that will attack gardenia roots. I am glad that we narrowed yours down to root or ground mealybugs (Rhizoecus spp.) in our email communications. Here is a little more about these pests.
About Root Mealybugs
Root mealybugs also feed on the roots of African violets, grasses, palms, citrus, pineapple, mangoes, and other plants. The sucking insects suck the life out of the roots. This eventually will kill a plant. These pests will live for 27 to 57 days on a host plant, but cannot live off of a host for long. The females lay eggs and live young, called crawlers, hatch in just one day. Crawlers are microscopic but can travel several feet in search of a plant to feed on.
Root mealybugs are certainly a serious pest to manage, but there are some safe management practices that will enable you to get rid of them. Here are some cultural and organic treatment methods for their removal.
Cultural Controls
1. Remove all infected and surrounding plants and dispose of them far from the garden.
2. Do not replant gardenias where you had them previously planted without allowing the soil to remain unplanted for at least several weeks.
3. Check the roots of all new potted gardenia or other plants that you bring into the garden. Ants like to feed on the sugary dew created by mealybugs, so you will often see ants in infected pots or around infected plants.
Organic Treatment Methods
These pests are REALLY difficult to control, as you have already discovered. Here are some methods that are approved for organic gardening and have been shown to work. All products need to be applied as drenches.
1. Insecticidal soap drench: Apply insecticidal soap as a drench, being sure to apply enough to reach all of the infected plant’s roots. Be sure to follow the manufacturer’s recommendations.
2. Standard soap root drench for potted or uprooted specimens: Mix one teaspoon of Ivory liquid into 1 quart of water and drench the roots. This can kill the mealybugs at all stages. Repeat every couple of weeks until the problem appears to be gone.
2. Pyrethrin drench: Apply standard pyrethrin as a soil drench rather than a spray. Be sure to follow the manufacturer’s recommendations.
Some advocate digging up plants, treating their roots with a bowl/tub of drench, and replanting them elsewhere.
I hope that these tips help you tackle destructive root mealybugs.
“What veggies can I plant now [in midsummer] and grow into fall? [I live in Georgia.]” Question from Vesta of Fort Oglethorpe, Georgia.
Answer: When you are thinking about growing fall crops, think cool-season vegetables. These are the veggies that will perform the best as the temperatures become more moderate, and most will even withstand frost. In your southern climate, you can certainly grow these crops even longer because, according to your regional frost maps, your area does not see frosts until late October to mid-November, depending on the year.
Fall Vegetables for Northeastern Georgia
Here are some dependable fall vegetables that I would consider for where you live.
Root Vegetables
Cool-season root vegetables are so easy to grow and include beets, carrots, leeks, radishes, rutabagas, and turnips. Choose varieties with high ratings or those that are award-winning. Two include the AAS-winning carrot ‘Purple Haze‘ and ‘Avalanche‘ beet. If you like leeks and rutabagas, they must be planted earlier (now!) because it takes the plants a while to develop large roots. (Click here to learn more about growing fall root crops.)
Flowering Cole Crops
These crops include favorites like broccoli, cauliflower, and broccoli raab. All of these delicious cool-season vegetables taste slightly sweeter if harvested just after the first light frost. This is especially nice for fast-growing broccoli raab, which loses some of its bitterness after frost. Early-to-produce, heat-tolerant varieties of broccoli and cauliflower will be best for your fall garden. Try Belstar Broccoli and Amazing Cauliflower. (Click here to learn more about growing broccoli and cauliflower.)
Greens
Kale is so nutritious, and Mediterranean varieties, such as ‘Tronchuda Biera’ Portuguese kale and ‘Black Magic’ Italian kale, are great greens for southern autumns. You also live in collard country, so try any collard sold at local garden centers. Other recommended greens include cabbage, lettuce, and Swiss chard. Two good super late-season greens are arugula and corn salad. Both can continue to produce well after frosts have begun to hit. (Click here to learn more about growing some of these greens.)
Planting Cool-Season Vegetables
All of these vegetables grow best in full sun and rich garden soil. To ensure your soil will produce good yields amend it with Black Gold Garden Compost Blend and Black Gold Canadian Sphagnum Peat Moss—working both deeply into the soil. If your soil is not of good quality deep down, I recommend double digging. This is especially needed for long, tapered root vegetables like carrots. This ensures amendments are incorporated deeply into the soil. (Learn how to double dig your beds here!)
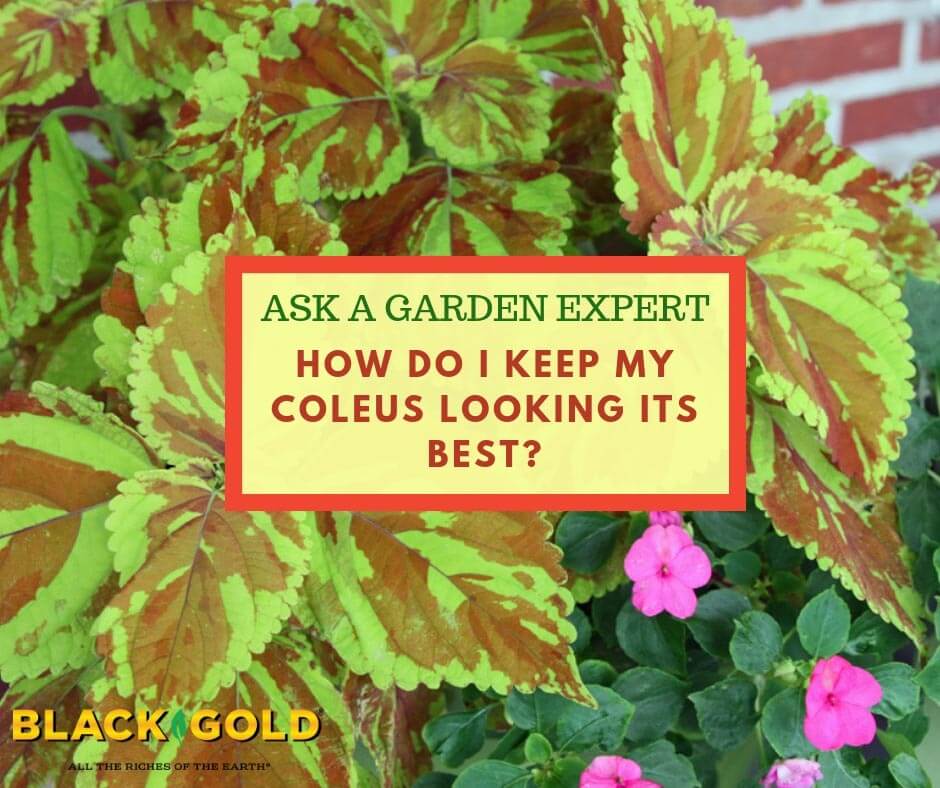
“I always grow coleus in containers in the summer. They are beautiful and usually do wonderfully well. This year I have wide-leaf coleus in my large, rectangular containers. I have two questions. 1) How often do you recommend fertilizing them? 2) They are producing large purple flowers. Should I clip the flowers to make the plant grow better, or is it okay to leave the flowers alone to enjoy their beauty? Many thanks for the help!” Question from Diane of Neward, Ohio
Answer: Coleus are truly foliar plants. Their wands of lavender-blue flowers can be appealing, but if you allow the plants to flower and set seed, the leaves will wane and become smaller and less robust and beautiful. This is because the plants are putting energy into flower and seed production rather than leaf growth. For this reason, gardeners must deadhead coleus plants to keep their foliage looking lush and lovely. Simply pinch off all of the buds as you see them to stop flowering.
Nitrogen is the chief nutrient that encourages healthy foliar growth. To encourage leafier growth, choose a fertilizer that is high in nitrogen, such as Foliage Pro. Follow the manufacturer’s instructions for feeding, because feeding times differ from product to product. You will also get less flowering if you grow your coleus in full to partial shade.
It also pays to use a quality potting mix or garden amendment that’s rich in organic matter and has a boost of fertilizer. I recommend Black Gold® All Purpose Potting Mix for potted specimens and Black Gold® Garden Soil for in-ground plantings.
I hope that these tips help and keep your coleus looking their best this season! As an aside, the image above is one of my container coleus plants, which has been pinched back and kept in partial shade to encourage super lush foliage!
There are certain design and planting features that will greatly reduce summer heat in a garden, and they go way beyond just providing shade. By tapping into the power of the air, water, stones, shade, and cooling plants, you can create a pleasing outdoor garden space that will help temper the high heat of summer.
Here are some of the best tools in the design toolbox for creating cool (and cooling) garden spaces.
Increased Airflow
Leave open spaces along garden edges to encourage airflow.
Keeping areas of your garden open, to facilitate airflow and catch prevailing winds, will not only cool your garden but dissuade flying insect pests, like mosquitoes. Allowing for some open spaces around your garden for welcome breezes is also pleasing to the senses. You can even plant a few fragrant plants, such as gardenias (Gardenia jasminoides), pots of sweet alyssum (Lobularia maritima), jasmine tobacco (Nicotiana alata), and fragrant roses, upwind for the additional pleasure of natural aroma.
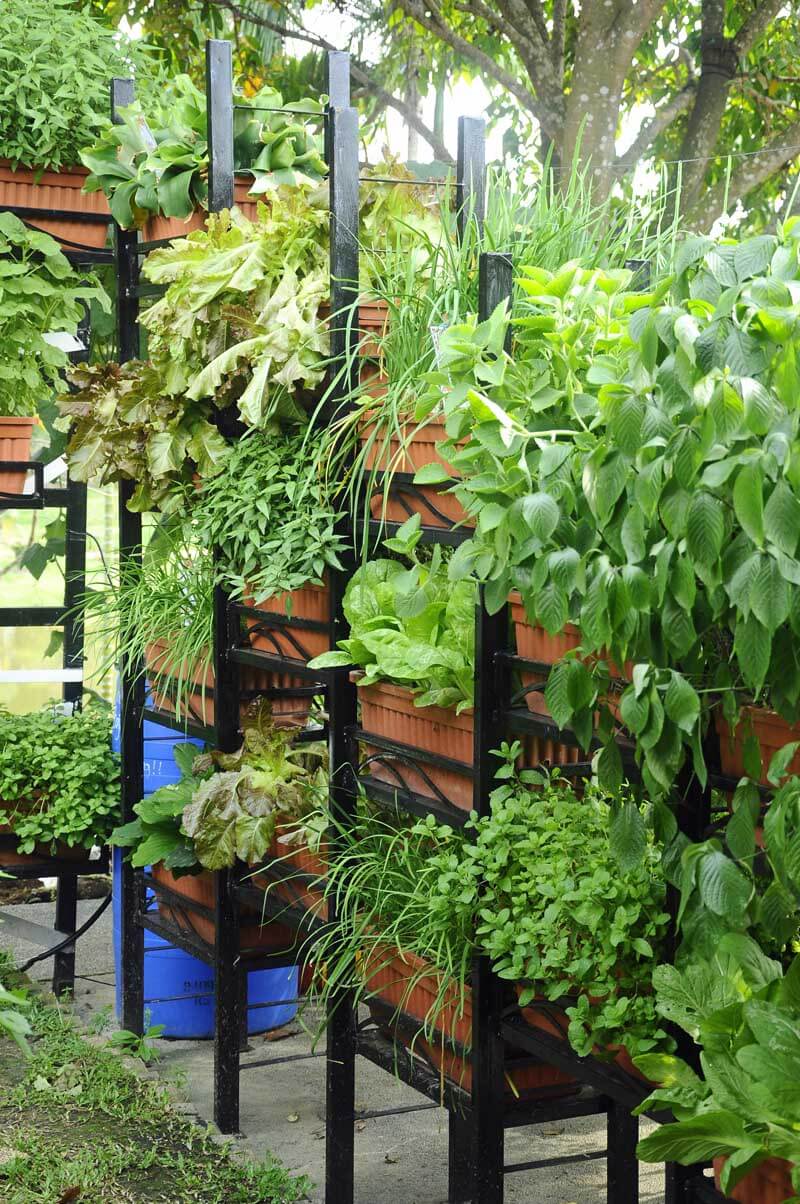
Cooling Walls
These outdoor standing planter walls offer airflow while also creating an herb-filled cooling enclosure for a patio.
If an enclosed garden is what you have (or want) then green walls and/or shaded stone walls don’t radiate heat. Trellised or clambering vines, like climbing roses, golden-flowered Carolina jessamine (Gelsemiumsempervirens), scarlet honeysuckle (Lonicera sempervirens), or espaliered fruit trees, cool sun-drenched fences, or hardscaped walls because they don’t absorb and release heat. They also look lovely. (Click here to read more about great garden honeysuckles.)
Plantable green planter or pocket walls will also do the trick, and these can be filled with herbs and edibles for culinary gardeners. Water-permeable, felted wall pockets on a freestanding support make this very easy. Florafelt living wall systems are easy-care, quality options that help homeowners install plantable walls in no time. Tall, outdoor planter shelves or freestanding trellis walls are two other options. Both also facilitate airflow.
Shaded stone walls or patio stones are also greatly cooling because they hold the lower temperature of the night and emanate it during the day, which effectively reduces the temperature of any shaded patio.
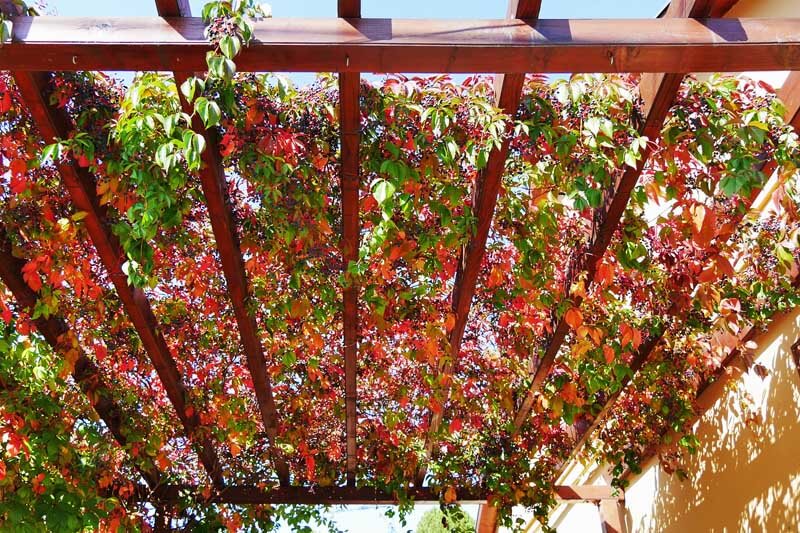
Green Canopies
Virginia creeper (Parthenocissus quinquefolia) is a fast-growing vine for pergolas that turns brilliant red in fall.
Pergolas, arbors, or arbored tunnels covered with vines will stave off the summer heat because they don’t absorb heat, and they release cooling moisture into the air. Grapes (Vitis spp.) are one of the best vines for the job. Not only do they produce fruit, but they are long vining, tolerant of a wide array of weather conditions, and have very large leaves that provide good cover. Other good long-vined candidates include brewer’s hops (Humulus lupulus), if you make your own homebrew, as well as native Boston ivy (Parthenocissus tricuspidata) and Virginia creeper (Parthenocissus quinquefolia), which both turn brilliant hot colors in fall.
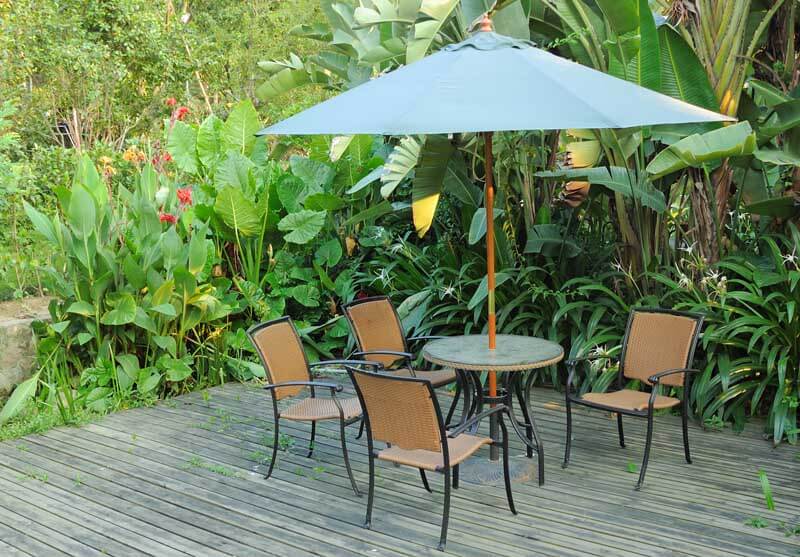
Large-Leaved Tropical Plants
This decked outdoor room has the benefits of a partially open border of large-leaved tropical plants and a shading umbrella.
Whether grown in pots or the garden, invite a few very large-leaved tropical plants into your outdoor space. The best are rainforest plants that take up and release moisture in high amounts, which makes them perfect for hot patios or deck sides. Tender varieties for large pots or garden spaces are elephant ears (Colocasia esculenta), giant elephant ear (Alocasia spp.), and false banana (Enseteventricosum ‘Maurelii’). The hardy to semi-hardy Sichuan hardy banana (Musa basjoo, USDA Hardiness Zones 7-10), which can reach 20 feet, is an in-ground option that will live from year to year in southern zones. For potted specimens, choose a potting soil that holds extra water, such as Black Gold® Moisture Supreme Container Mix and Black Gold® Waterhold Cocoblend Potting Mix.
UV Blocking Patio Umbrellas
Obvious cooling features in the garden are umbrellas and canopies that provide cooling shade, but they are even more effective if they block UV rays. Those designed for UV protection are more reflective. Light-colored canopies also absorb less heat, which increases their cooling ability.
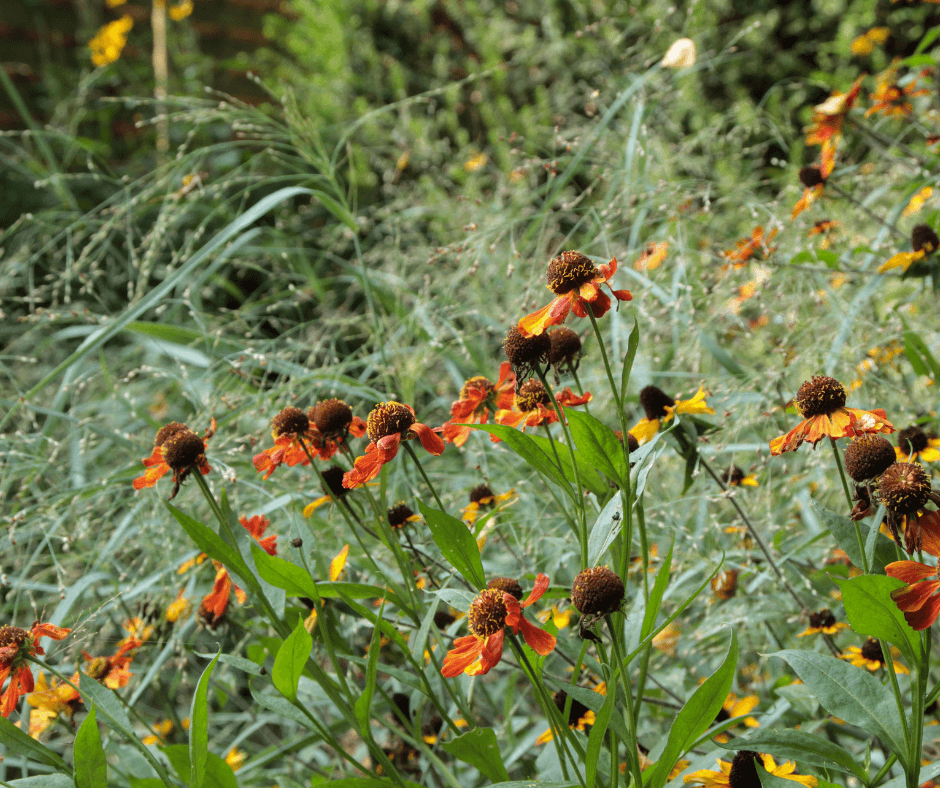
Airy Green Borders
Tall, airy borders of switchgrass allow breezes to pass and pair well with other tall garden plants like this sneezeweed (Helenium autumnale).
Some shrubs and tall, airy plants are less dense, allowing them to facilitate more airflow, while also providing pleasing garden borders. Low, airy shrubs, like the 4-foot Longwood Blue bluebeard (Caryopteris cladonensis ‘Longwood Blue’ (expect it to self-sow)) and Grand Cascade butterfly bush (Buddleia davidii ‘Grand Cascade’), with its 6-foot habit and large purple flowers that lure butterflies, are ideal.
Tall grassy garden borders are also pleasingly airy and attractive. Three excellent options include the plumy, 6-foot Cloud Nine switchgrass (Panicum virgatum ‘Cloud Nine) with its blue-green foliage, or the 5-foot ‘Northwind’ with its large seedheads and olive-green blades. The impressive 6-foot Windwalker® Big Bluestem is another beauty with linear clumps of blue-grey foliage, maroon floral plumes, and maroon fall foliage. It’s a real showstopper that flows in the breeze.
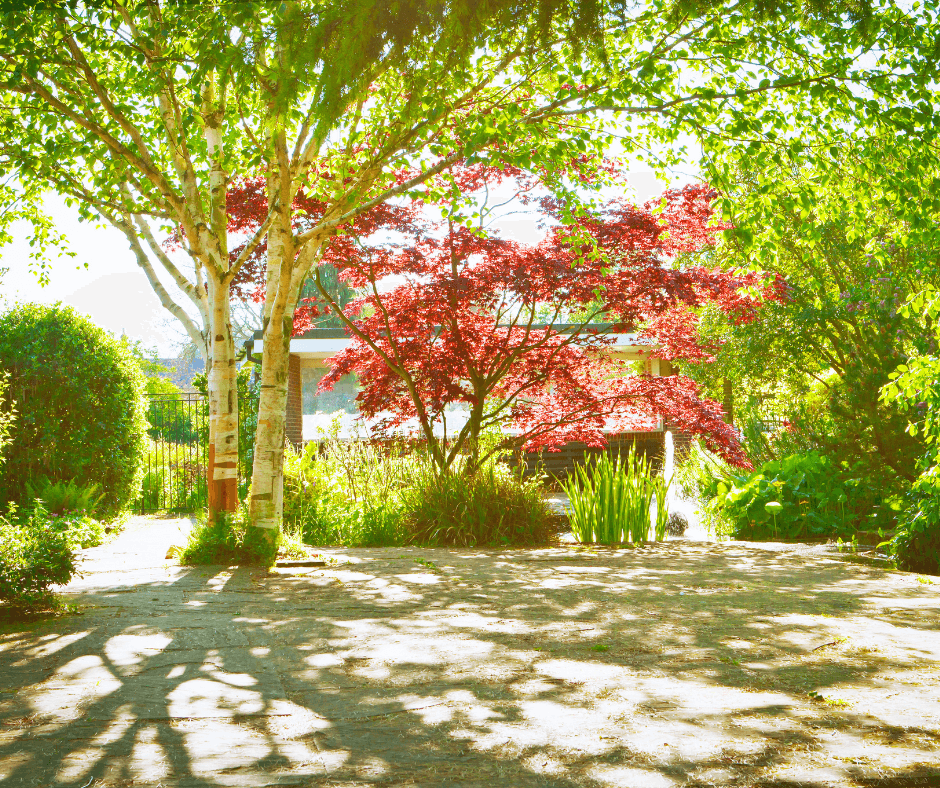
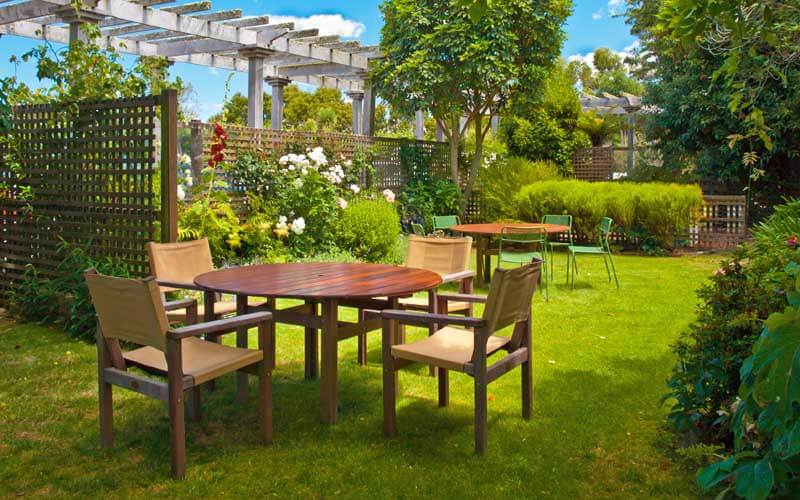
Effective Tree Cover
This garden design has multiple cooling features such as open, freestanding trellis walls, partial tree cover, and a pergola just waiting for ample ornamental vines.
High tree canopies make for breezier shaded spaces, but trees offer far more than just shade. They are also natural air conditioners because trees draw up water from the soil and release it from their leaves as fine mist. This process is called transpiration. Broad-leaved, deciduous trees with larger leaves transpire more for more cooling power. During a growing season, a leaf will transpire many times more water than its own weight. In fact, a large oak tree can transpire up to 40,000 gallons (151,000 liters) of water per year!
Water Features
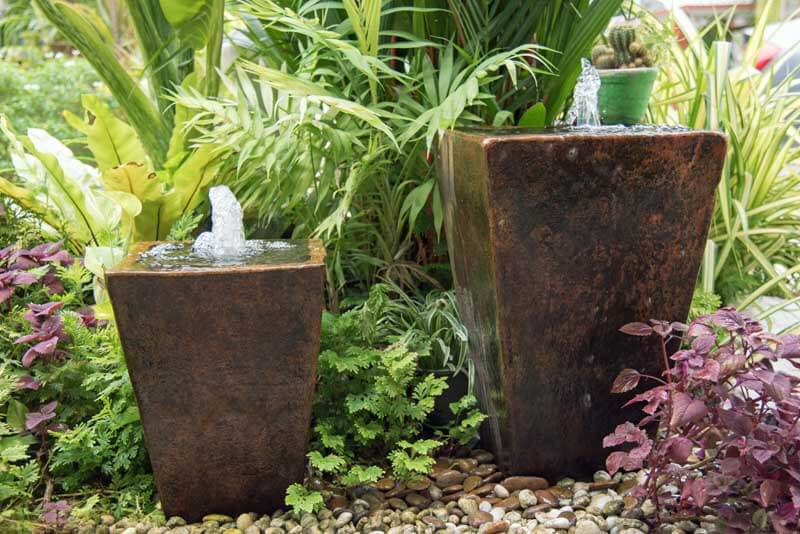
Small fountains are soothing and cooling and have too much movement for mosquito development.
Moving water in the garden is pleasing to the senses and really cools garden spaces. Whether you install a small fountain, a bubbling pool, or a small fish pond, these serene features will improve your outdoor living space. One key consideration is to only install features with moving water or fish to avoid creating mosquito breeding ground.
Mosquito Control
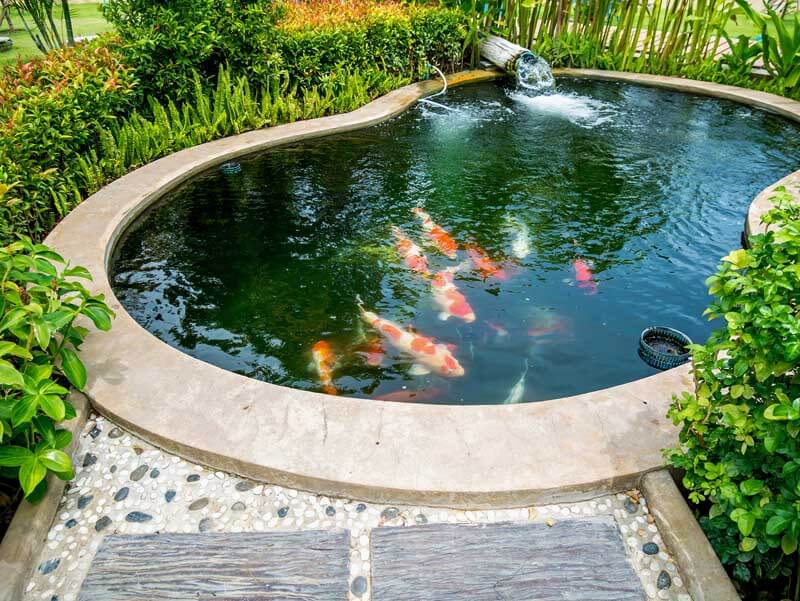
This koi pond is a perfect water feature that won’t invite developing mosquitoes because it has a constant flow of moving water and fish to eat the larvae.
Some of the cooling options mentioned can invite mosquitoes due to increased moisture and shade cover. Here are some solutions that can really help.
If you add a water feature to your garden, remember that still or stagnant water creates the perfect mosquito breeding ground. Moving water does not. Fish ponds, however, are acceptable because fish consume mosquito larvae. You also need to beware of birdbaths–refreshing their water every few days will wash away any developing mosquitoes.
Full sun is not favored by mosquitoes, but shaded gardens invite them. Several non-chemical means of keeping mosquitoes away include the use of citronella candles and burning tikis. Newer options include electronic mosquito repellers, which create a 15-foot deet-free cloud of repellent across an area. Several plants also help to repel mosquitoes. Those for more shaded locations include lemon balm (Melissa officinalis), which emits a lemony scent and will grow in partial shade. The equally citrusy lemon verbena (Aloysia citriodora) will tolerate light shade. (Click here to discover more mosquito repelling plants.)
A mix of these garden design features will help naturally cool your favorite garden enclaves and outdoor spaces, even on the hottest days.
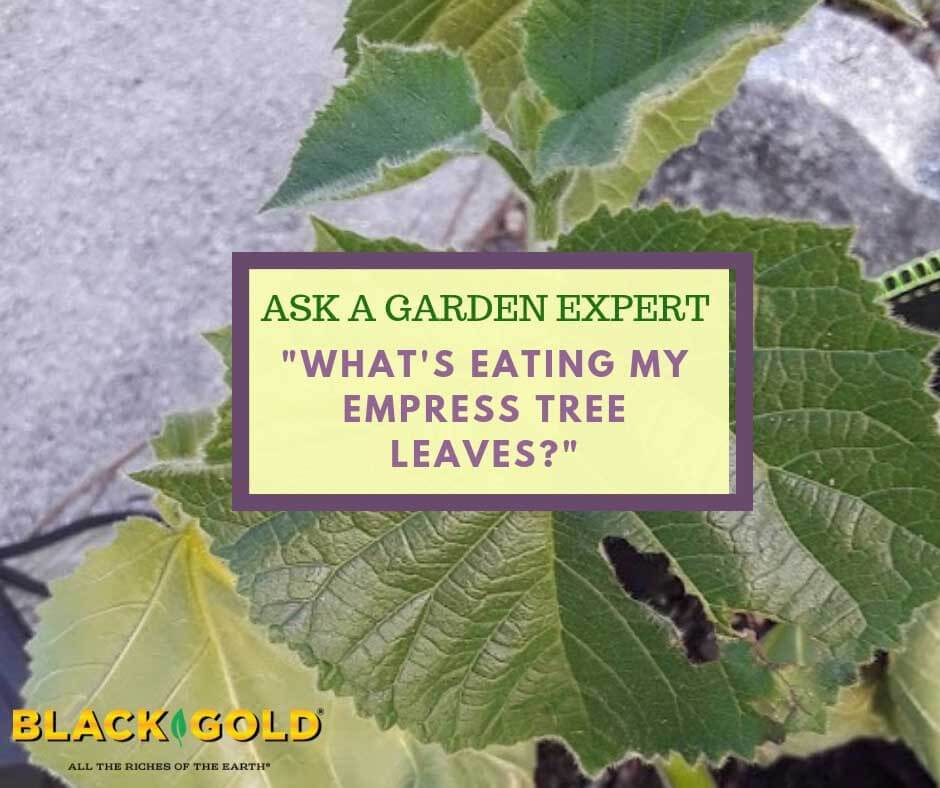
“I have two baby royal empress trees, something is eating at the leaves. Any tips on how I can kick start these for maxim growth each season?” Question from Lizzy of Ocala, Florida.
Answer: Empress tree (Paulownia tomentosa) is a fast-growing tree from China with lovely violet-purple flowers in spring. Surprisingly it does not have any serious known pests here in the United States, but there are a few that can cause limited damage. The only pests you may have to worry about when trees are at the young stage are slugs, snails, and possibly rabbits. Your damage looks like slug or snail damage, but it does not look bad. The new growth appears to be healthy and thriving. If you are really concerned, you can try putting down some of the organic slug control, Sluggo (follow manufacturer’s instructions). I would also check the bottom of the pots or pot edges for slugs, remove the pests on sight, and keep the plants in full sun. Once the trees are large enough, be sure to plant them in the yard.
Once your trees start to flower and set fruit, they will self-sow pretty aggressively. Be sure to remove any seedlings that pop up. This tree is listed as invasive in Florida and can really become a problem in your yard and beyond.