Plants are the lens Jessie views the world through because they’re all-sustaining. (“They feed, clothe, house and heal us. They produce the air we breathe and even make us smell pretty.”) She’s a garden writer and photographer with degrees in both horticulture and plant biology from Purdue and Michigan State Universities. Her degrees were bolstered by internships at Longwood Gardens and the American Horticultural Society. She has since worked for many horticultural institutions and companies and now manages communications for Sun Gro Horticulture, the parent company of Black Gold. Her joy is sharing all things green and lovely with her two daughters.
“Which is the best medium for potting orchids – orchid bark or sphagnum peat moss?” Question from Susan from Pembroke Pines, Florida.
Answer: Good question! It depends on the type of orchid that you are growing and how it naturally grows in the wild.
Epiphytic orchids grow in trees in the tropics and subtropics. Their large roots cling to bark and tree crevices, so these orchids grow best in a bark-based medium. Some prefer coarse bark and others fine bark; sometimes a top dressing of coarse sphagnum peat moss may be applied to hold in a little extra moisture and improve the pot’s appearance. These orchids require special water-soluble fertilizer for their unique growing needs. (Click here to learn more about potting and transplanting epiphytic orchids.)
Terrestrial orchids grow in the ground like other perennials. Their soil needs vary from species to species. Some naturally grow in bogs and appreciate a sphagnum peat moss mix, while others grow in varying soil types. It is important to research the specific soil needs of the particular orchid you are growing. Black Gold Orchid Mix, which contains both bark and peat moss, is a great option for many potted terrestrial orchids. (Click here to learn more about growing hardy terrestrial orchids.)
Semi-epiphytic orchids or semi-terrestrial orchids spend part of their life cycles has epiphytes or ground-dwelling orchids. These also grow well in Black Gold Orchid Mix.
To learn more about the growing needs of orchids, visit The American Orchid Society‘s website. They offer lots of free educational materials and expert advice on orchid growing.
“If you plant your veggie garden and the weather calls for freezing what is the best thing to cover your plants with?” Question from Donna or Newberry, South Carolina.
Answer: There are several ways to protect veggies from unexpected spring freezes. Here are the best options:
1. Floating row covers: Frost cloth is readily available at most garden centers or online garden sources, and it will protect vegetables from hard frosts if applied the day before frost is expected. You can simply cover vegetables with the cloth like a blanket and hold down the edges with pins or rocks. Proper application is important. Cover plants or garden areas completely and close all openings along the edge to hold in warmth. You can also drape row tunnels or hoops with frost cloth or greenhouse plastic sheeting if your plants are a bit taller. Tunnels or hoops are a bit more expensive, but if you plant a vegetable garden yearly they may be worth the money.
2. Frost protectors for individual plants: If you are trying to protect larger, single plants you can either cover them with frost cloth (a tomato cage makes a great structure to cover) or you can invest in frost protectors, such as plastic teepees. Glass or plastic cloches or bell jars are more old-fashioned options for covering small plants, but they are also pricy. Some gardeners make their own “free” plastic cloches by cutting the bottoms off of 2-liter soda bottles.
Keep plants covered until the threat of frost has passed. These covers will hold warmth along the ground for some time, though they are only effective if temperatures don’t dip below 25 degrees F.
“I have red spider lilies that have never bloomed. How can I get them to bloom?” Question from Teresa of Rincon, Georgia
Answer: Late-summer-blooming red spider lilies (Lycoris radiata) are really lovely with their bare scapes of spidery red flowers. Do yours produce nice, lush foliage early in the season, and have they been in the ground for long? Either way, there are several reasons why they may not be blooming.
1. Not Enough Time to Establish: These bulbs are finicky and don’t like to be transplanted, so it can take several years after planting for them to bloom in full glory. If you planted them within the last couple of years, give them more time.
2. Planting Depth: If your spider lilies are planted too deep, they may not flower. The necks of the bulbs should be just below the soil surface. Any lower and they may not bloom well for you.
3. Leaf Health: Damage to the leaves after they emerge in fall, too much shade (planted under evergreens, for example), or too much nitrogen could also keep plants from flowering.
4. Cold Days: Have your winters been warmer? You are right on the cusp of the right southerly hardiness zone for these flowers. Some list them as being hardy within USDA Hardiness Zones 6-10, and others list them as being hardy within Zones 6-9. If these days don’t get enough chilling days in winter, then this can keep them from flowering properly.
It’s also important to know their planting preferences. Site them in a location with full to partial sun and fertile, humus-rich amended with good compost, such as Black Gold Garden Compost Blend, or Peat Moss. Be sure to feed them with a fertilizer formulated for bulbs to encourage best growth and flowering.
I hope these tips help! Please feel free to follow up with any additional questions or comments.
“I live in Kitsap County, Washington (state); is it too late to prune my roses?” Question from Jennifer of Silverdale, Washington
Answer: It’s not too late! Many gardeners advocate pruning roses when they are dormant, usually in late winter, but you can prune them at any time. Whether you have a shrub rose, climber, or hybrid tea, you can make strategic cuts throughout the growing season.
I recommend using very sharp bypass secateurs (pruners) or loppers. The best cross at the cutting junction like scissors. Just be sure to clean your pruning tools between roses to avoid spreading any potential diseases from rose to rose. I recommend cleaning them in a 10% bleach solution with a drop of washing liquid.
Please watch the video below created by Mike Darcy of Portland, Oregon. It highlights rose pruning in your area.
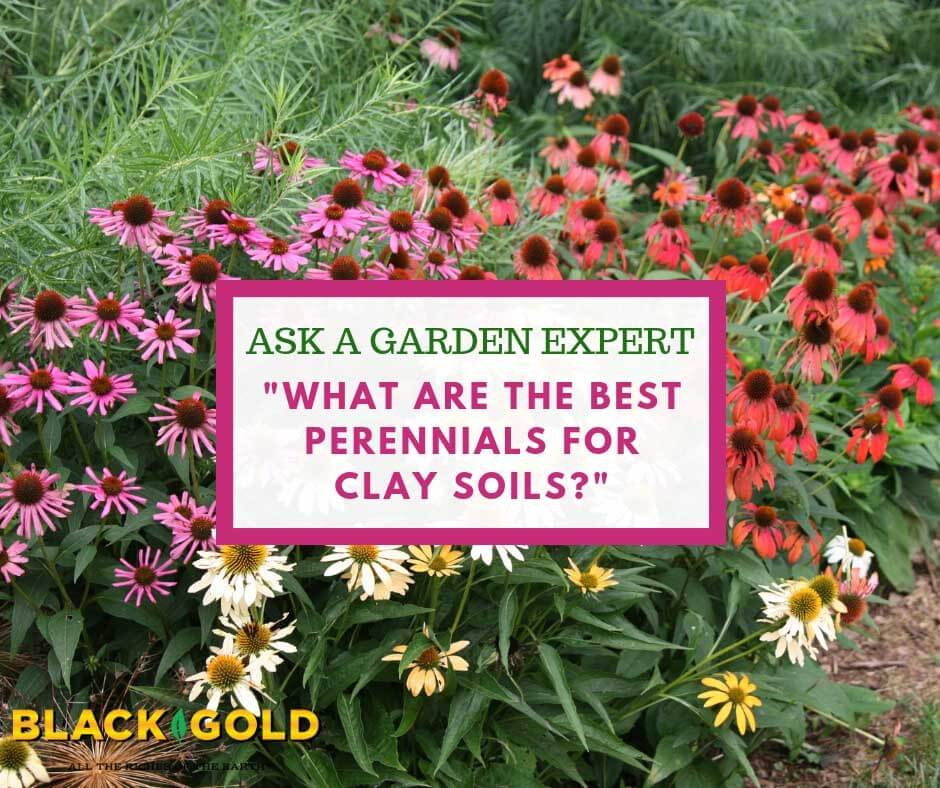
Coneflowers of all types grow well in clay soils and look beautiful in summer. (Image by Jessie Keith)
“What are the best perennials for clay-based soils? Thanks!” Question from Trish of Newton, New Jersey
Answer: There are lots of exceptional perennials adapted to clay soils, and many of the best are regional natives. Here are nine perennials that are beautiful, native, and well-adapted to clay soils in the Mid-Atlantic. I’ve included different plants that look attractive in the garden from early summer to fall.
Nine Hardy Perennials for Clay Soils
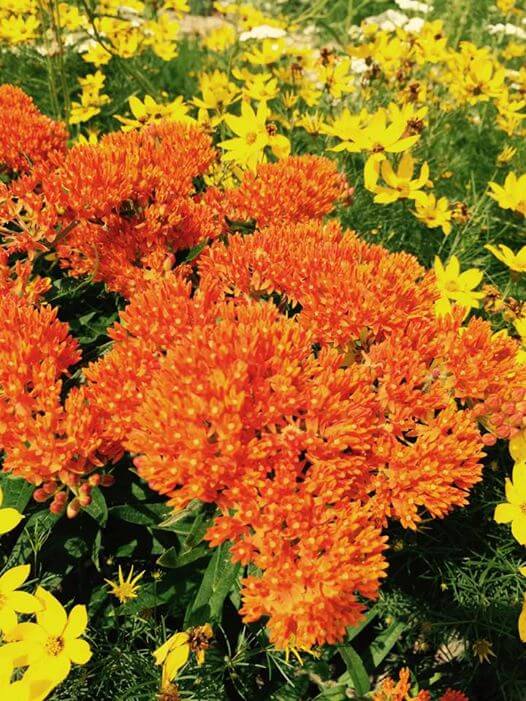
1. Orange Butterflyweed (Asclepias tuberosa): In my opinion, this is the prettiest of the butterfly weeds, which are the star plants for monarch butterflies. Its bright orange flowers appear from early to midsummer. Clip back the flowers after their first bloom, and they will rebloom later in the summer. (Click here to learn more about growing butterfly weed.)
butterflyweed
2. False Indigo (Baptisia hybrids): There are so many wonderful cultivars of this tall, bushy perennial available at garden centers these days. Their deep roots cut through clay soils, and their spires of early summer blooms come in shades of violet-blue, purple, white, or yellow.
3. Pink Turtlehead (Chelone lyonii): In late summer, this pretty perennial produces upright stems of rosy pink flowers that look much like turtle’s heads. It grows well in moist, clay-rich soils and tolerates partial shade.
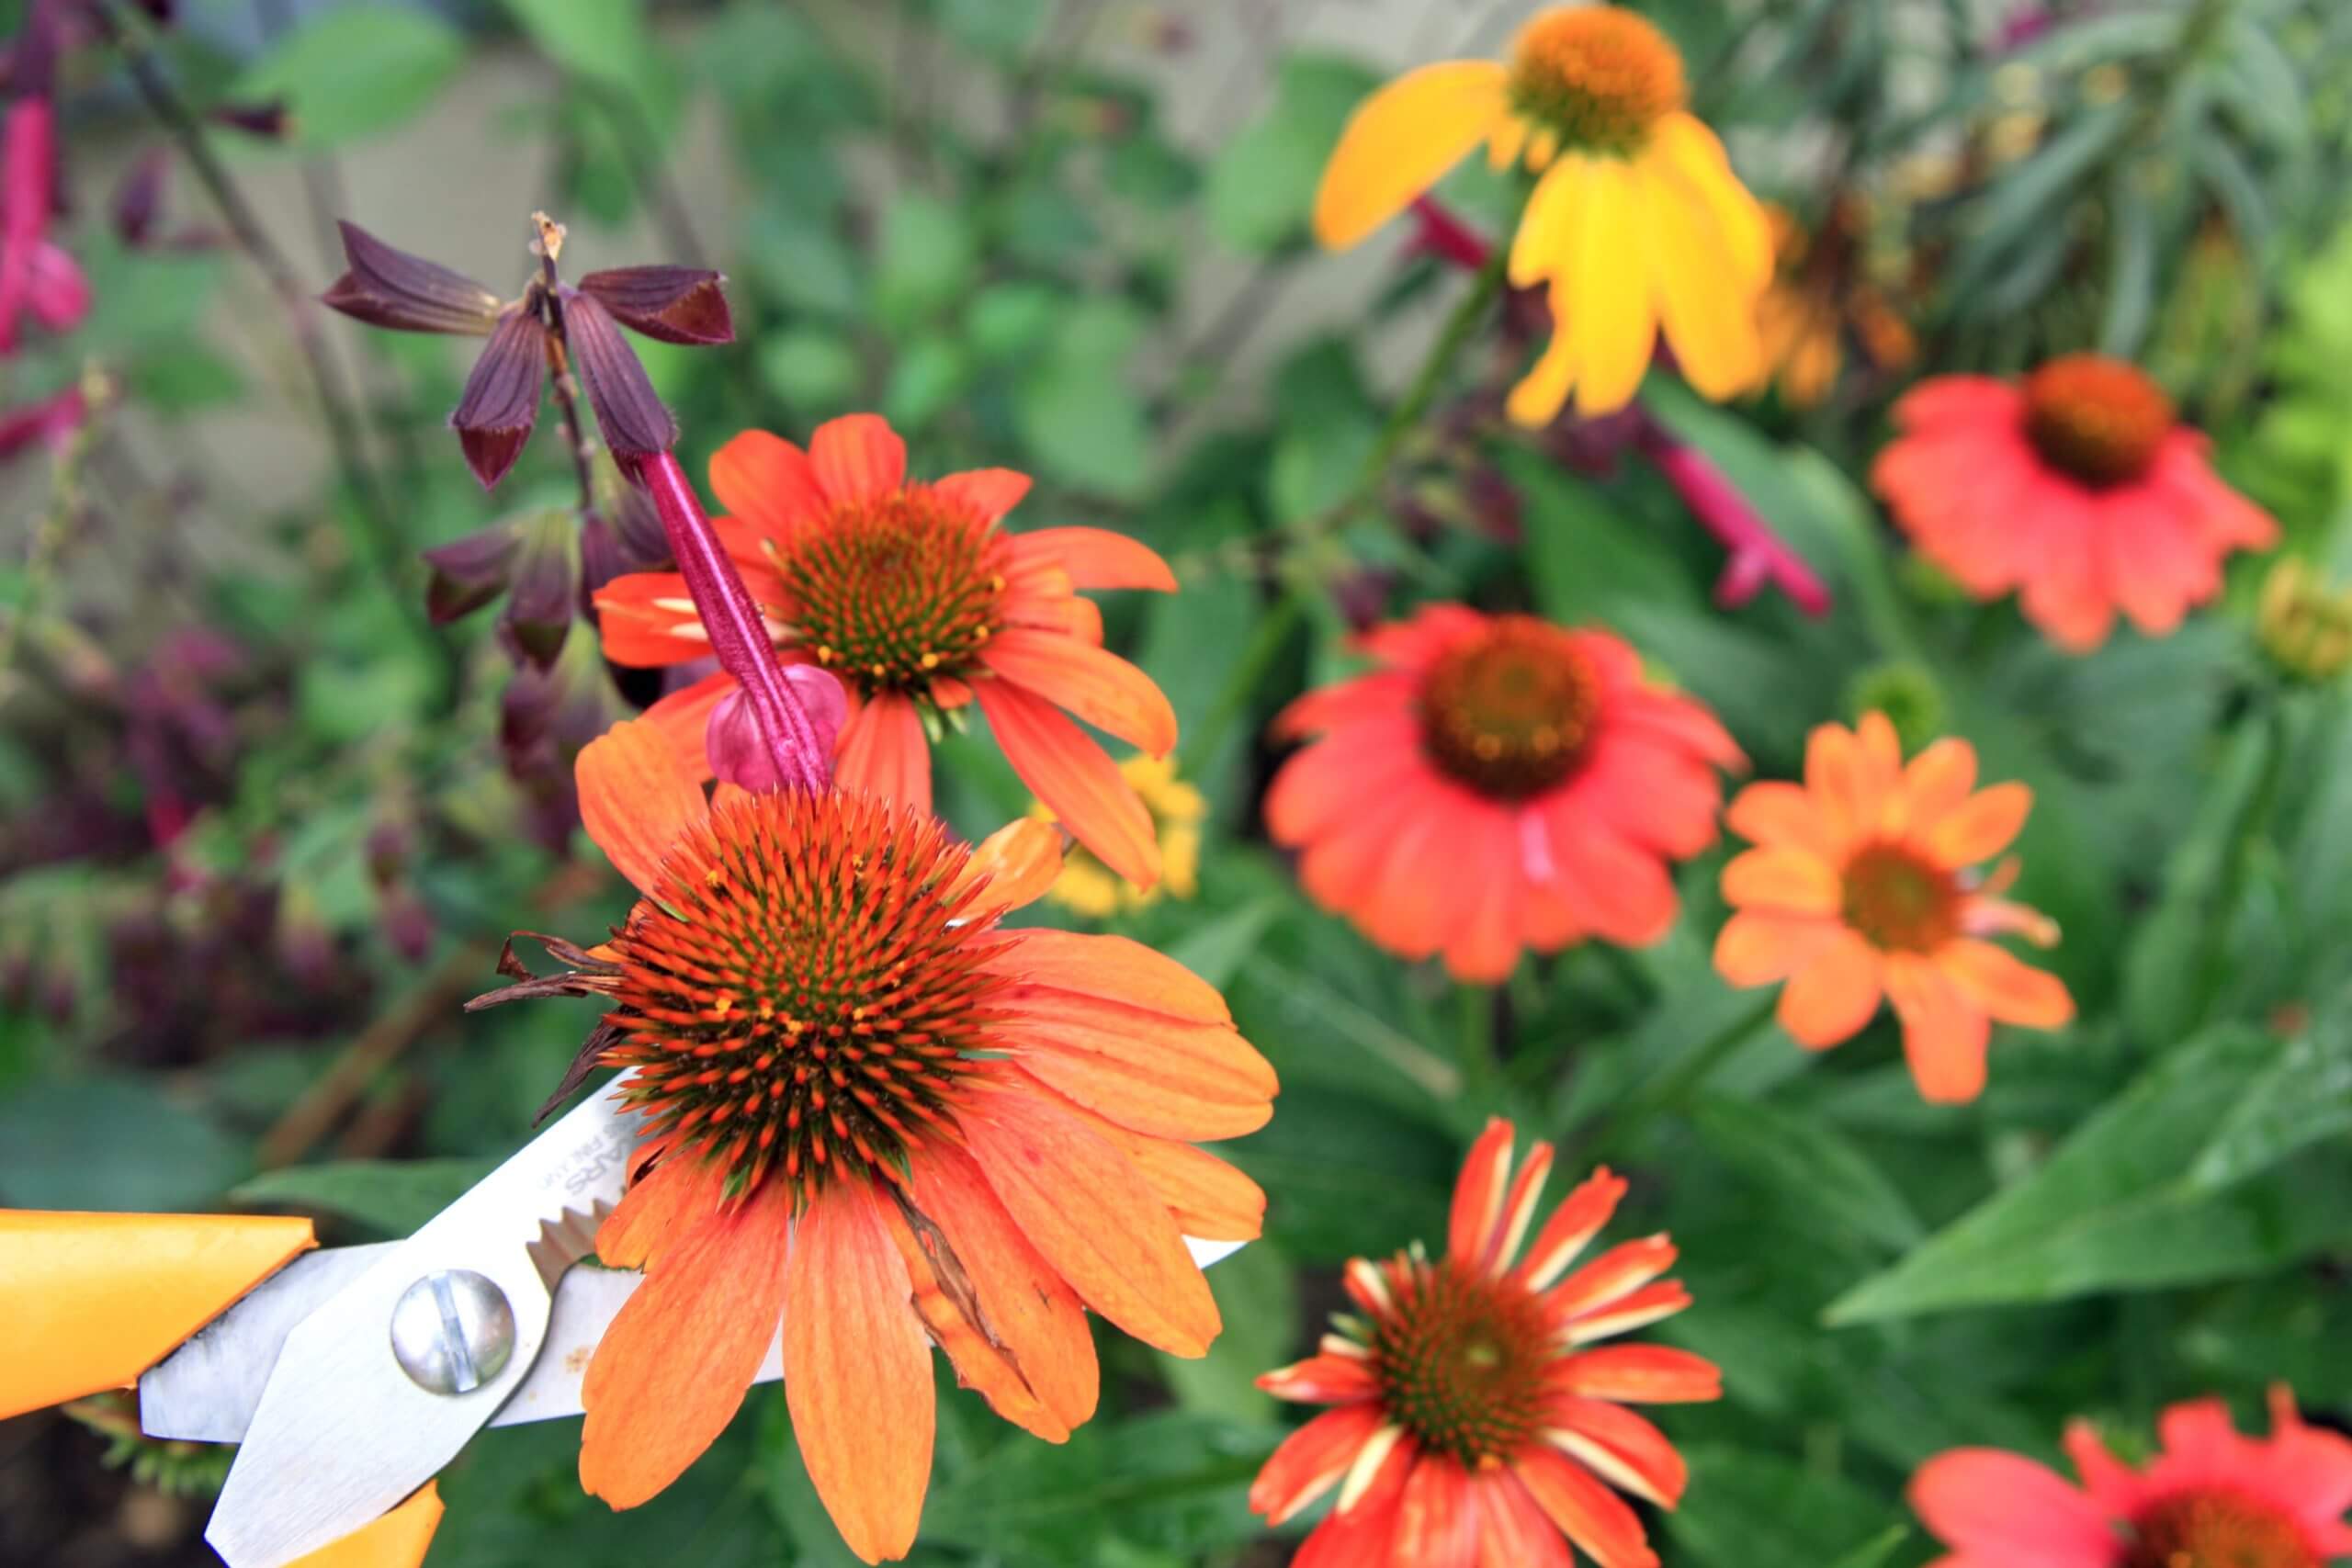
coneflowers
4. Coneflowers (Echinacea hybrids): Everyone loves the large, colorful, summer blooms of coneflower. There are lots of hybrids that come in shades of pink, rosy purple, orange, apricot, yellow and white. They bloom in summer and attract bees and butterflies. Cut the old blooms back and plants will continue flowering into fall.
5. Miss Manners Obedient Plant (Physostegiavirginiana ‘Miss Manners’): There are many obedient plants, but most varieties are fast-spreading and can become a little weedy. ‘Miss Manners’ is a white-flowered variety that refrains from spreading and looks very pretty in the late-summer garden.
Black-eyed-Susans
6. Black-eyed Susans (Rudbeckia spp.): Most Black-eyed-Susans are well-adapted to sun and clay soils. Their sunny summer and fall blooms will brighten any garden and attract bees and butterflies.
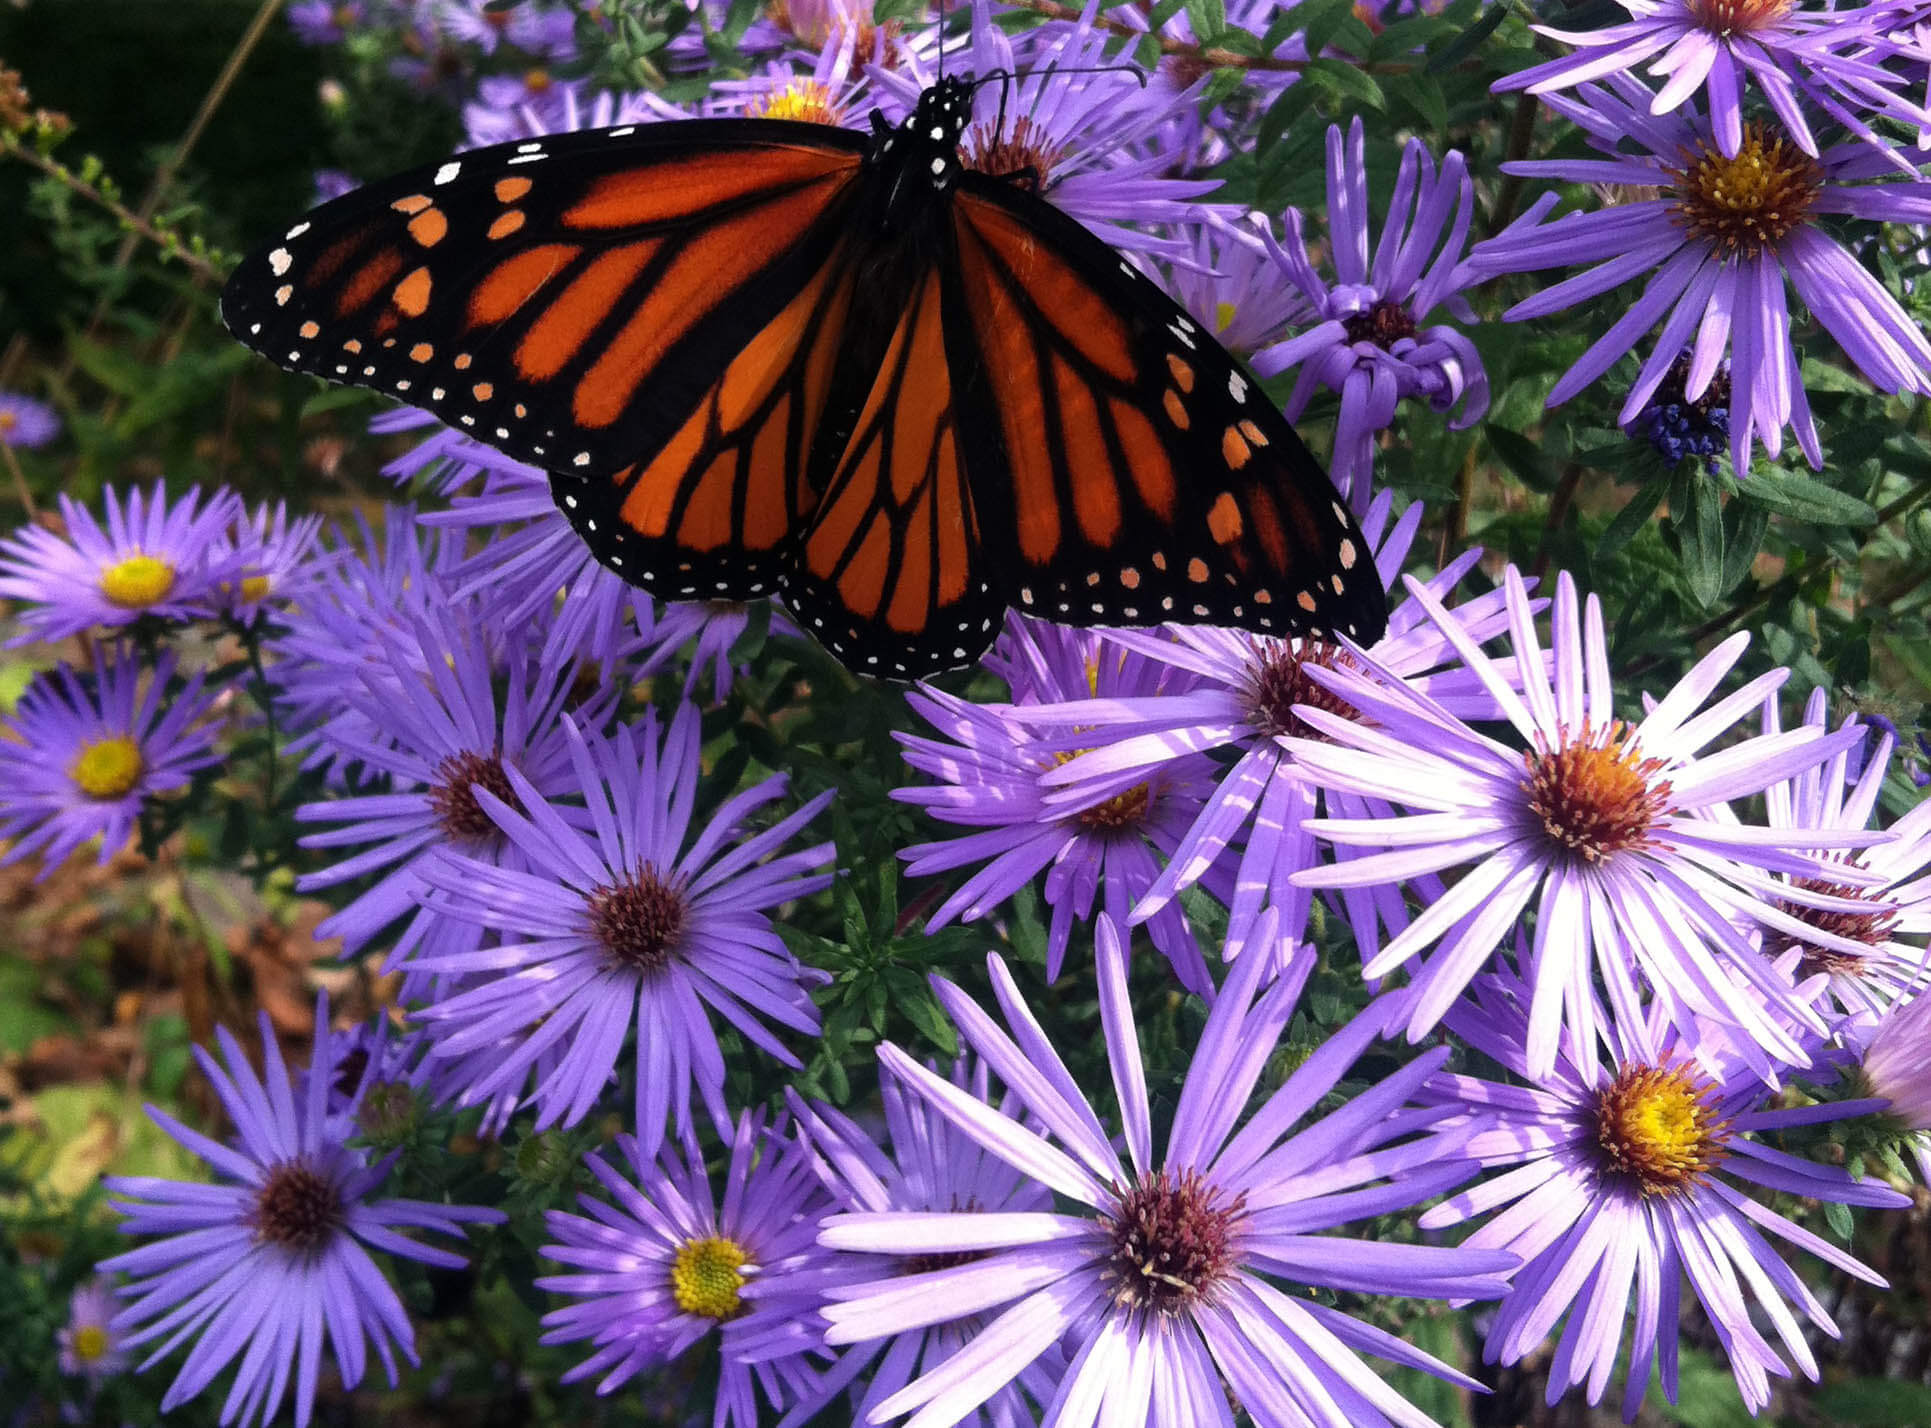
8. New York Aster (Symphyotrichum novi-belgii): For a reliable fall-bloomer for clay, try one of the many varieties of New York asters. Their violet-purple or pinkish flowers add needed color to fall gardens and are a favorite of late-season pollinators. (Click here to read more about growing asters.)
Asters
9. Switchgrass (Panicum virginicum): It’s always nice to add perennial grasses to the garden for height and texture. There are many exceptional varieties of switchgrass, and all will grow beautifully in clay soils.
Growing flowers from seed with your kids is a lesson in biology, but it’s also fun and a great snow day project. It’s best when the flowers you choose are really colorful, easy to grow, and great for pollinators and bouquets.
Garden stone is a longterm cover that must be applied correctly from the start.
Mulches define a garden’s character. Organic options give landscapes different looks, and all break down to help feed the soil. Others have more permanency. Either way, organic and decorative garden top dressings add beauty and distinction to plantings. Some take outdoor spaces to new visual heights, while others are simply functional in their weed-covering ability. Either way, gardeners have lots of options from which to choose.
Organic Mulches
These are the mulches that most gardeners rely on. Of course, shredded bark mulch is the standard that’s most available at nurseries and garden centers, but there is more to organic mulch than popular bark and shredded-wood options.
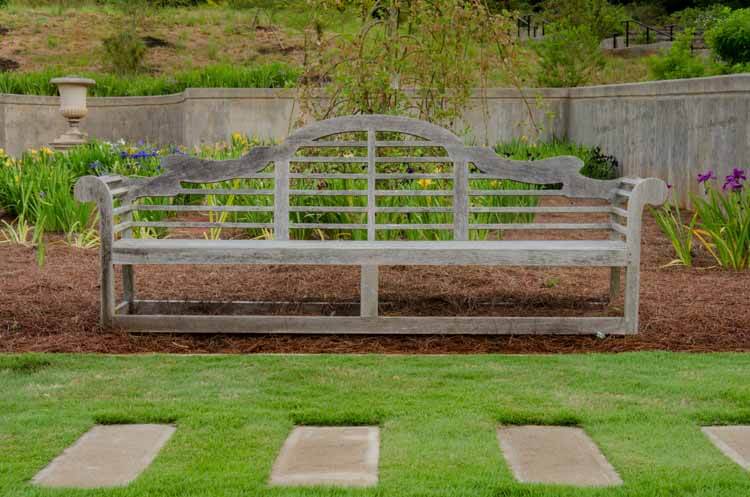
Pine Straw
Pine straw protects beds and looks clean and attractive.
This attractive mulch typically comes in bales and consists of the dried needles of the southeastern longleaf pine (Pinus palustris), a favorite in the logging industry. Its textural needles create an attractive reddish-brown mat that almost looks grassy when blanketing the ground among beds with small trees, shrubs, and perennials. It also resists washing away, making it suitable for sloped beds. As is breaks down, it slightly acidifies the soil, making it a good mulch for acid-loving rhododendrons, azaleas, and camellias. It effectively crowds out weeds and holds soil moisture, if applied at a depth of 2-3-inches.
Though not readily available for purchase, white pine straw (Pinus strobus) is softer and finer than that of longleaf pine. Gardeners with white pines should consider collecting the needles for garden mulch. They hold water well, stop weeds, and are equally suited to acid-loving plantings.
Cocoa Shell Mulch
This sweet, chocolaty smelling mulch is a byproduct of the chocolate industry. It creates a good cover for small bed spaces and containers and breaks down slowly. Apply it at a depth of 2 inches (deeper applications may mold along the soil surface). One caveat of this mulch is that dogs may try to consume it, so keep it away from gardens where dogs may venture.
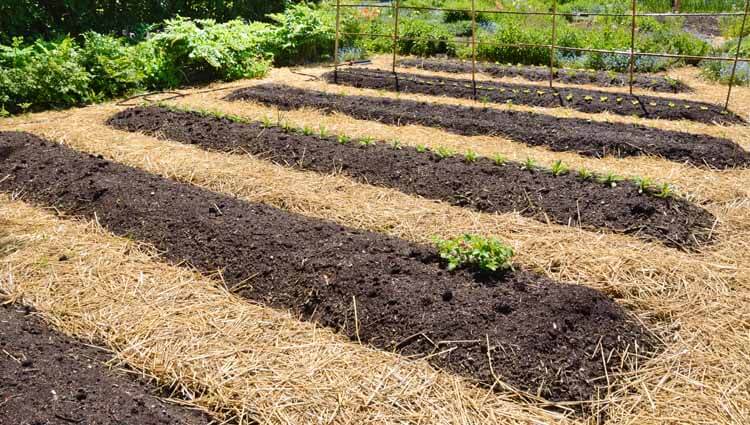
Compost
A combination of compost and thick straw keeps vegetable gardens fertile and tidy.
If your garden soil needs extra organic matter quickly, this is the mulch you need. Compost looks neat and tidy, and if applied at a depth of 3 inches, it will effectively crowd out weed seeds. One downside is that it breaks down quickly and needs to be applied in both spring and fall, but your garden plants will thank you. If you don’t compost your own leaves and vegetable scraps at home, try Black Gold® Garden Compost Blend. It’s OMRI Listed for organic gardening.
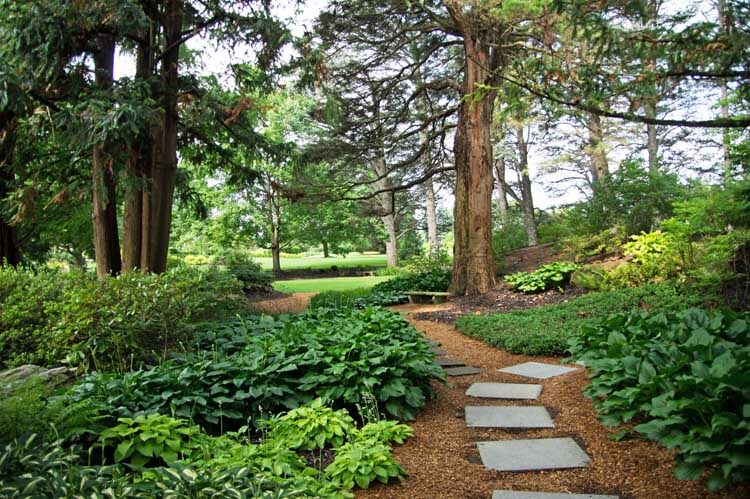
Leaf Mulch
Shredded leaves from last year’s landscape make an attractive mulch that is essentially free if you have lots of trees in your yard. They hold water, are excellent at stopping weeds, and break down fairly quickly to add needed organic matter to soils. To create this mulch, gather your fall leaves, and shred them with a leaf blower/shredder. Pile the leaves and let them overwinter. By spring, they will be partially composted and ready to apply to beds and borders.
Shredded leaf mulch is ideal for naturalistic and woodland gardens.
Straw, Hay, or Glass Clippings
Vegetable gardens deserve an application of sweet-smelling straw or hay to keep weeds down and retain moisture. Lining vegetable garden walkways with either will allow gardeners to harvest on wet days without getting their feet muddy. The difference between straw and hay is that hay is relatively seed-free and more desirable, while straw is derived from cereal crops, like wheat or oats, and always contains a little seed that will germinate in summer. Straw bales are easier to come by at nurseries or home and garden stores. Just pulls up any seedlings as they arise in the garden. Grass clippings are a free option that does the same job as hay or straw, just be sure to cut grass that is seed free.
Inorganic Mulches and Decorative Covers
Most inorganic options have a higher level of permanency because they are heavier, more time intensive to apply, and harder to remove. Gardeners must have a real dedication to stone, glass, or lava rock options when applying them to planting spaces.
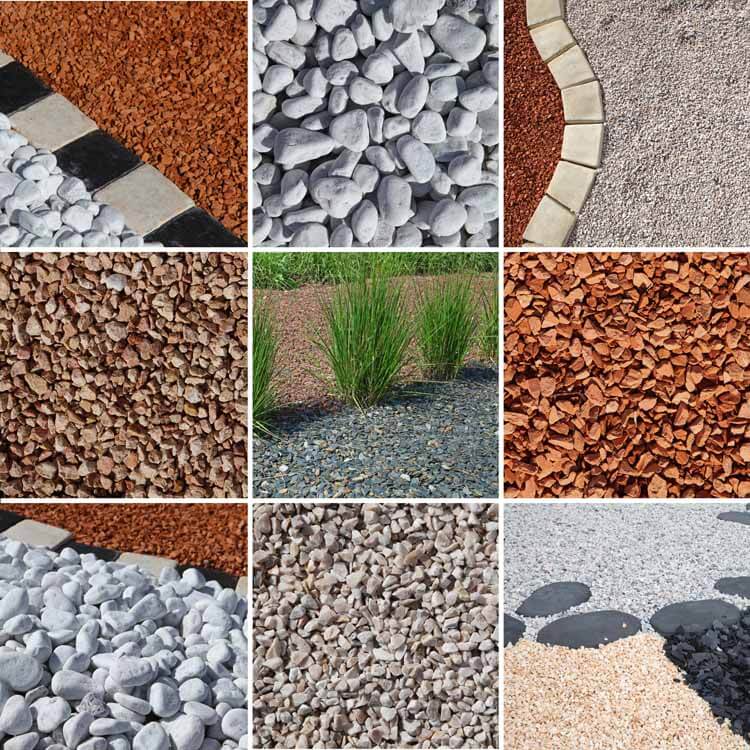
Landscape Gravel, Pebbles, or Stones
Stone and pebble are best for succulent gardens, rock gardens, or shrub borders.
Stones create a more permanent landscape mulch that is typically applied atop a layer landscape fabric and edged with metal or cut-stone edging. If applied correctly, decorative stones are low-maintenance and look clean. They come in a variety of colors, sizes, and shapes from large, rounded river rock to edgy crushed stone or pea gravel. River rock is favored for large landscape applications while pea gravel is a good choice for succulent garden beds or walkways. Before choosing stone for your landscape, be sure it’s truly what you want because it is both costly and labor intensive to apply and remove.
Decorative Container Gravel
Decorative pebbles in tan and white enhance the look of this succulent terrarium. (Image by Jessie Keith)
There are many decorative gravels for use in succulent containers, terrariums, and intricate potted plantings like fairy gardens. These fine gravels and come in many colors to enhance potted gardens.
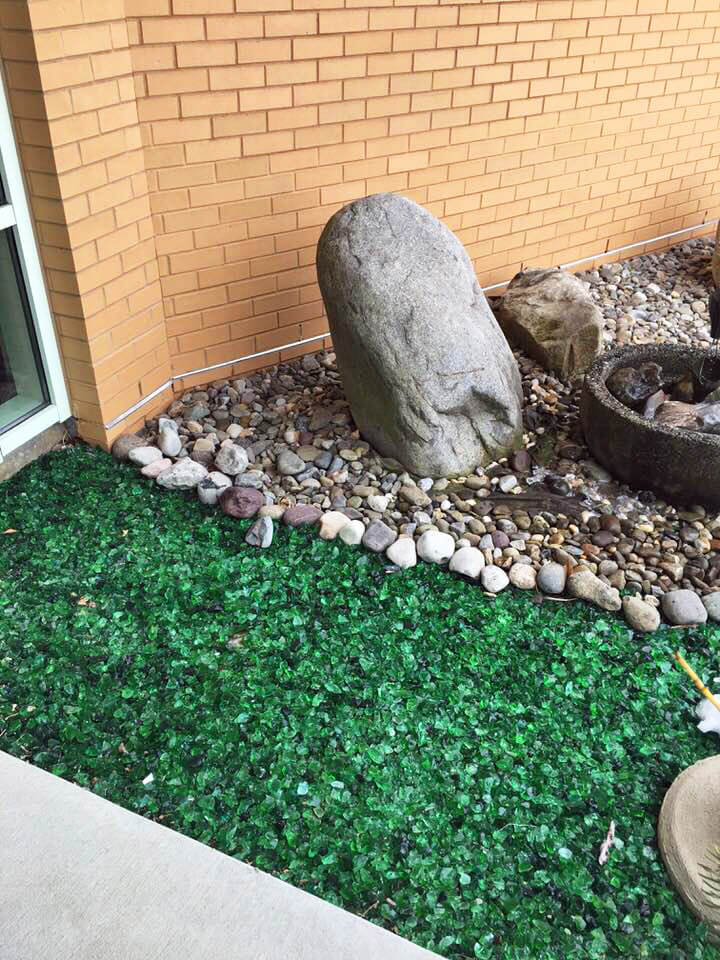
Glass Mulch
Large chunks of tumbled glass, fine frosted sea glass, or colorful glass gems have a variety of uses in landscape or container gardens. Large tumbled glass mulch in oceanic colors is an elegant choice for seaside gardens, rock gardens, or western plantings. A base of light-colored mulch cloth will keep the colors vibrant while helping to manage weeds. Terrariums or succulent containers benefit from the sleek look of sea glass or glass gems.
Tumbled, decorative glass can add an unusual, crystalline look to landscapes and containers.
Crushed Shells
Oceanside gardens are often decorated with a base of natural shells, crushed or whole. Their bright looks are just at home along the waterside, and they are free if simply collected on the beach over a period of time. They look especially pretty arranged in grassy or succulent containers.
Lava Rock
Landscape rock comes in all sizes, colors, and textures.
The benefit of lava rock is that it is lightweight and holds water. This porous, volcanic rock typically comes in natural shades of rust-red, brown, gray, or black. (Keep in mind that black lava rock heats up and is not recommended for hot climates.) The neutral-colored brown, gray, and black options are easier for designers to work with because they don’t stand out. Red lava rock can look almost garish without the right plantings, so be careful when choosing it. Its looks can be softened by billowy shrubs, blue-gray plants, and white or gray decorative boulders.
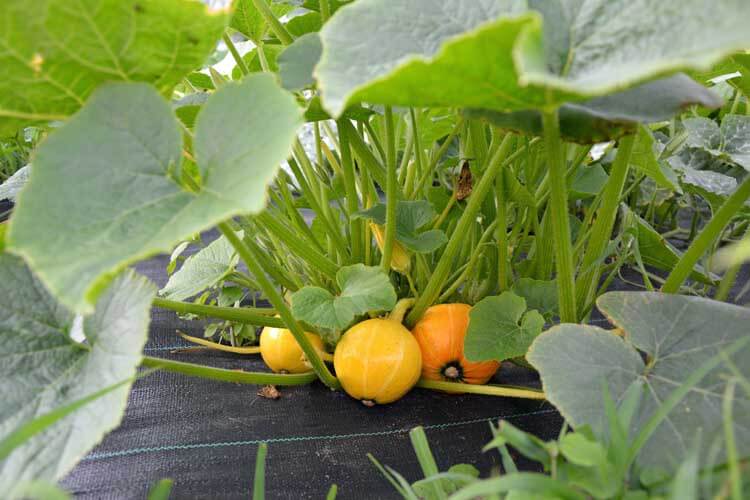
Landscape Fabric and Plastic
This winter squash is protected by plastic landscape fabric.
These are functional ground coverings for vegetable and fruit growing. They protect the ground from weeds, hold in moisture, and keep fruits on the ground clean. Holes are punched in the fabric or plastic for plants to grow through. These “mulches” are not pretty but they do the job.
Mulch to Avoid
Colored Mulch
Colored mulch is rarely attractive in home landscapes because it’s visually overpowering. The mulch, not the plantings, takes center stage. Some even consider it tacky. It looks better suited to a parking lot landscape than a home landscape.
Fresh Bark Mulch
Never cover your beds with fresh bark mulch. If the mulch still smells of a fresh tree, it is not ready for the landscape. Why? Because freshly cut mulch binds soil nitrogen and is actually detrimental to plants. Let fresh mulch compost and break down for a while before using it.
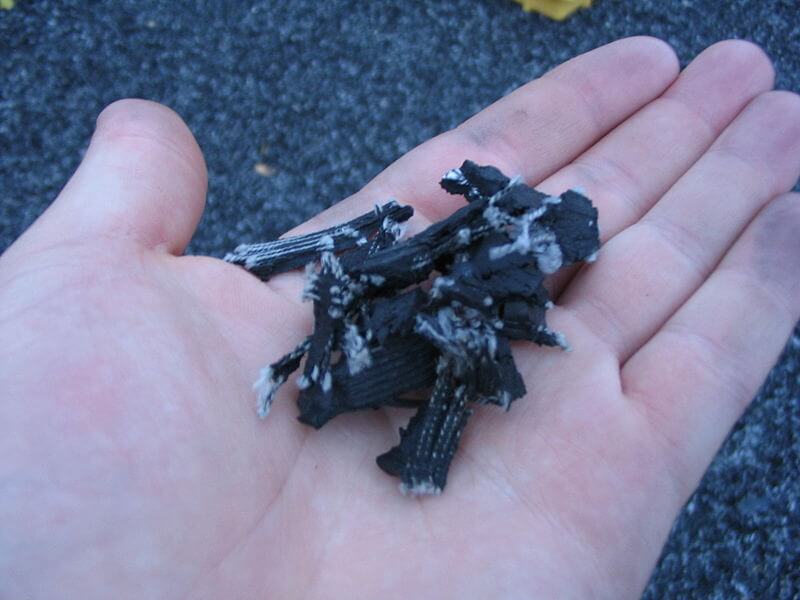
Shredded Rubber Mulch
Shredded rubber mulch often comes from old tires.
Some will tell you that this is the best mulch for playgrounds, but shredded rubber mulch is never a good thing for the environment. It gets hot, smells as it heats up, never breaks down, and works its way into the soil to remain an annoyance forever.
Choose a garden cover that best supports your garden and personal aesthetic. May sure it blends well with your plantings and helps your plantings grow and look their best.
“Do pansies have seedlings that you can save for the next year?” Question from April of Dresden, Tennessee
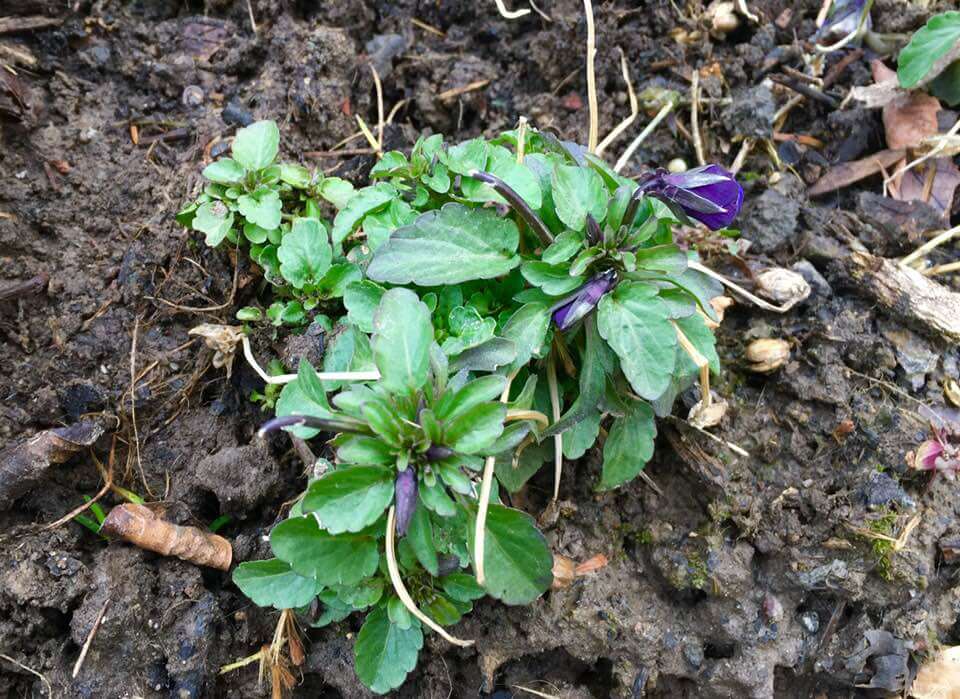
Answer: Yes! Pansies (Viola x wittrockiana, USDA Hardiness Zones 7-10) often self sow in the garden, and their seedlings always produce pretty flowers. At least that has been my experience. Down in Tennessee, your pansy seedlings should overwinter in your garden. I live in USDA Hardiness Zone 7 like you, and my pansies always self sow in fall and live through the winter. I let them be and then move them where I want them in spring. Sometimes mine even sow themselves in the lawn, which is always a surprise! Below is a photo of some of my pansy starts that made it through the winter.
Pansies grow and flower best during the cool seasons of spring and fall. They need full to partial sunlight and really fertile garden soil that’s slightly acid. I like to amend my soil with Black Gold Garden Compost Blend at planting time or plant them in pots filled with Black Gold All Purpose Potting Mix. They always look best planted along garden edges alongside spring bulbs or in colorful containers!
“Any idea what kind of plant this is? It was given to my mom and looks pretty bad. We were also wondering if it’s ok to cut all of the brownish leaves off. Will It come back with new regrowth?” Question from Donna of West Chester, Pennsylvania
Answer: You have a Japanese Sago Palm (Cycas revoluta). It looks like it is struggling. Definitely remove the brown or dying leaves.
It will regrow with good care! These prickly cycads require lots of sunlight and very well-drained soil. During the winter months, they should be watered very little. Leaf browning can be caused by underwatering or overwatering–most often overwatering. If you are watering it a lot, give it a rest for at least three weeks. It should also be in a pot with drainage holes and a bottom saucer to catch water. Good potting mix will also help keep it happy. I recommend repotting it in Black Gold All Purpose Potting Mix amended with added Perlite for drainage, if your mix looks old and depleted.
The drying leaves may also be caused by spider mites, a common pest of these cycads. Spider mites are tiny plant pests, and once you notice their damage, they are already numerous and a problem. The tops of leaves will look like they have little white spots across them. These are dead leaf cells that the mites have sucked dry. You might also see little webs on the leaves and stems of infected plants. To make sure you have mites, and to get an idea of population levels, take a clean piece of white paper, hold it beneath the leaves, then tap the leaves onto the paper. If you have mites, lots of tiny specs will fall. Eventually, they will start crawling around. These are spider mites!
If you think you have mites, remove the worst of the damaged leaves. Then spray, wash, and wipe the remaining stems and leaves thoroughly. Remove the top inch of potting soil and replace it with fresh. It also helps to wipe the container down, in case any mites have strayed. Finally, spray the plants with insecticidal soap or Neem oil. Continue to do the tap test and wipe and spray leaves as needed. In time you will overcome your mite problem.
“How do you recommend dealing with Japanese beetles?” Question from Debbie of Lapeer, Michigan
Answer: I know that Japanese beetles (Popillia japonica) are a chronic seasonal problem in Michigan, laying in wait to devastate roses, hibiscus, and many other ornamentals in the summer months. These voracious eaters are known to feed on over 300 plant species. They skeletonize leaves and flowers, weakening plants, and making beautiful specimens look terrible in no time. The key to their management is understanding their life cycle and how to tackle them at different stages of development.
Japanese Beetle Life Cycle
You will begin to see the metallic bronzy green adult beetles from late spring to summer when their underground grubs pupate and emerge to begin their destructive adult period of the cycle. This is when the beetles chomp on leaves and flowers and mate. By midsummer, female beetles will lay between 40 to 60 eggs in the ground. These will hatch into translucent, white, burrowing grubs/larvae that feed on plant roots. Turfgrass roots are a common food source, and the grubs can do significant damage to heavily infested lawns. Larvae develop for around 10 months until the following year when they emerge as adults once again.
Japanese Beetle Management
Integrated pest management (IPM) guidelines for homeowners set by the USDA’s Agricultural Research Service and Animal and Plant Health Inspection Service (APHIS) are the most proven management methods. They’re backed by years of research, and though there is no perfect Japanese beetle cure for infested areas, these steps will limit their destruction.
Beetle Management
Traps– There are several traps designed to attract and capture Japanese beetles. These generally use sex pheromones or floral lures to draw in the beetles. These are effective, but be careful where you place them. Hang traps away from susceptible flowers and shrubs to help lure them away from (not towards) your garden.
Foliage controls– Use caution when using strong chemical controls for adult beetles because most will kill almost anything they come into contact with, including beneficial bees, butterflies, and ladybugs. Spraying plants with OMRI Listed® neem oil is the recommended solution for organic gardeners. It repels Japanese beetles while not harming birds, pets, people, or beneficial pollinators. Bacillus thuringiensis (Bt) is another organic option that will just harm the grubs and beetles chewing on your beloved plants. New Bt products for adult beetles, such as beetleGONE!®, are very useful.
Manual removal-Adults are slow-moving and easy to catch and drown in jars of water or smash on the ground. If you have a minor infestation, this can be a useful method of removal. Japanese beetles are not a big problem where I live, so this is what I do to control them.
Parasites– There are several commercially available parasitic wasps that will attack Japanese beetles as well as desirable beetle species.
Grub Management
Treating the ground for Japanese Beetle grubs in fall or early to mid-spring will also keep populations in your yard down, though this may not be super helpful if your neighbors don’t treat their lawns, too. The favored organic control is milky spore, a fungal bio-control treatment that will kill underground grubs. grubGone® is Bt from grubs and is also very useful!
Plant Resistant Plants
A final method of control is planting landscape and garden ornamentals that Japanese beetles don’t like. Here are a few flowers they dislike: ageratum, begonia, coreopsis, coral bells, hosta, sedum, nasturtium, poppies, and pansies. Trees and shrubs that Japanese Beetles won’t consume include red maple, boxwood, redbud, holly, dogwood, magnolias, and evergreens. (Amending your soil with Black Gold Garden Soil will help all of these plants perform better in the yard and garden.)


 Terrestrial orchids grow in the ground like other perennials. Their soil needs vary from species to species. Some naturally grow in bogs and appreciate a sphagnum peat moss mix, while others grow in varying soil types. It is important to research the specific soil needs of the particular orchid you are growing. Black Gold Orchid Mix, which contains both bark and peat moss, is a great option for many potted terrestrial orchids. (Click here to learn more about growing hardy terrestrial orchids.)


 “How do you recommend dealing with Japanese beetles?” Question from Debbie of Lapeer, Michigan
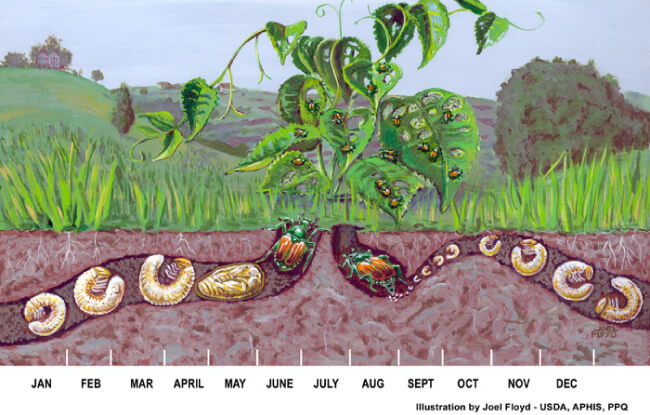 Integrated pest management (IPM) guidelines for homeowners set by the USDA’s Agricultural Research Service and Animal and Plant Health Inspection Service (APHIS) are the most proven management methods. They’re backed by years of research, and though there is no perfect Japanese beetle cure for infested areas, these steps will limit their destruction.
 Plant Resistant Plants