Plants are the lens Jessie views the world through because they’re all-sustaining. (“They feed, clothe, house and heal us. They produce the air we breathe and even make us smell pretty.”) She’s a garden writer and photographer with degrees in both horticulture and plant biology from Purdue and Michigan State Universities. Her degrees were bolstered by internships at Longwood Gardens and the American Horticultural Society. She has since worked for many horticultural institutions and companies and now manages communications for Sun Gro Horticulture, the parent company of Black Gold. Her joy is sharing all things green and lovely with her two daughters.
“If weather promises to be uncompromisingly unpredictable in years to come, choose tomato varieties that will be resilient to unexpected weather.”
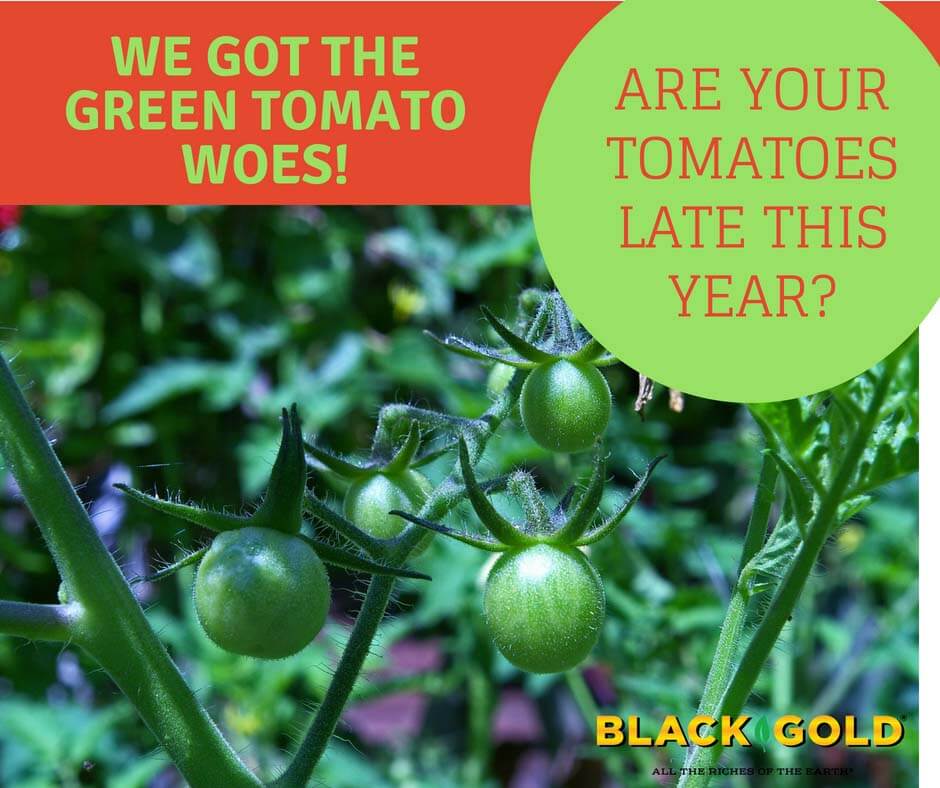
It’s early August and most of my 15 tomato vines—beefsteaks, paste, and salad types—still have green fruit. Two lean-to-ripen cherry tomatoes are the only yielders, so far.
For loads of the Mid-Atlantic gardeners, it’s the same story. The summer of 2018’s tomatoes are a month late in ripening. Plants that “always” bear in early July are still hanging green on the vine in August. I’ve spoken with so many frustrated gardeners in my community garden with green-tomato woes. So, what’s the cause?
What Tomatoes Need to Thrive
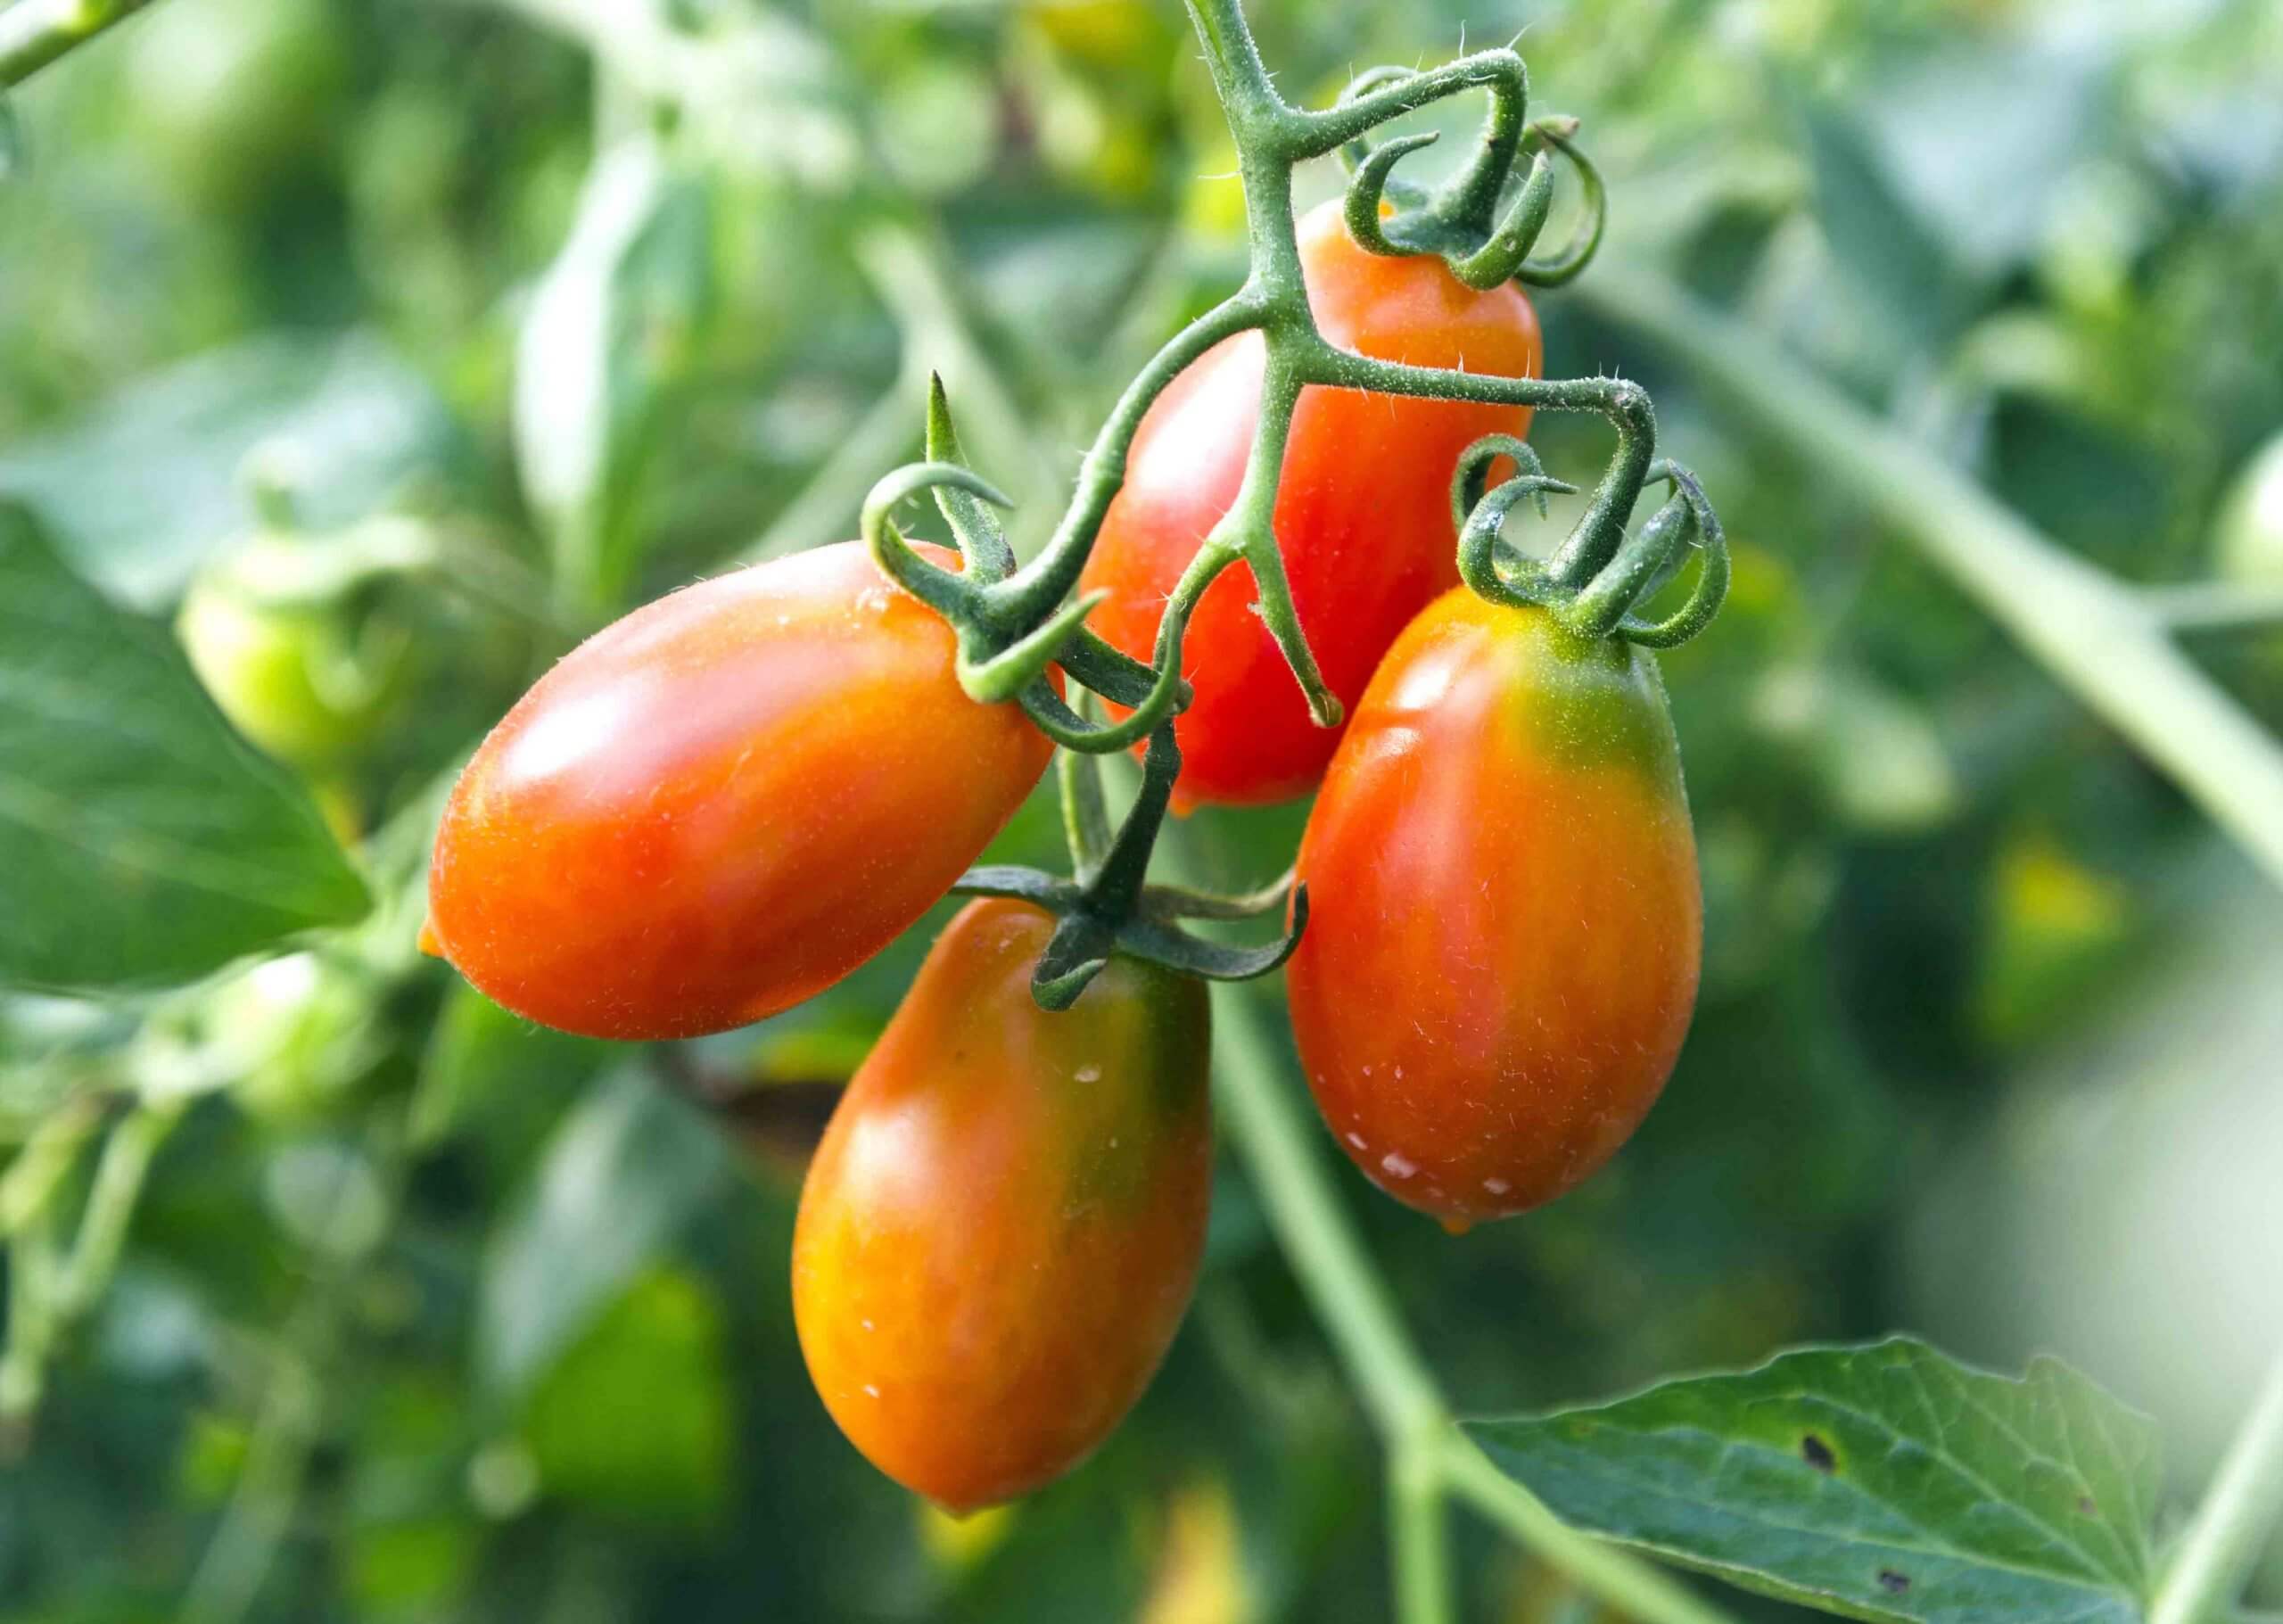
Happy, well-colored tomatoes.
Let’s start with what tomatoes need to grow and produce super fruit by late June or early July. Most average gardeners start by planting large, vigorous plants after the last frost date (link to Frost Dates By Location). From there, tomatoes need:
Consistent warm day (70-85 degrees F) and night temperatures (65-75 degrees F)
Fertile raised soil that drains well
Good fertilizer
Regular water
Protection from pests and diseases
Good support and pruning makes harvest easier
What Keeps Tomatoes from Greening?
Cold, wet conditions are often the heart of the problem. Not only does cold and excess moisture slow tomato fruit development, but they reduce the flavorful sugars in the fruits, and encourage a suite of disease problems on plants and fruit. Fruit size may also be impacted, and cold causes tomatoes to develop tougher skins. Then if a few tomatoes to manage to color up, they crack from too much water.
What’s Keeping Tomatoes From Greening in My Area?
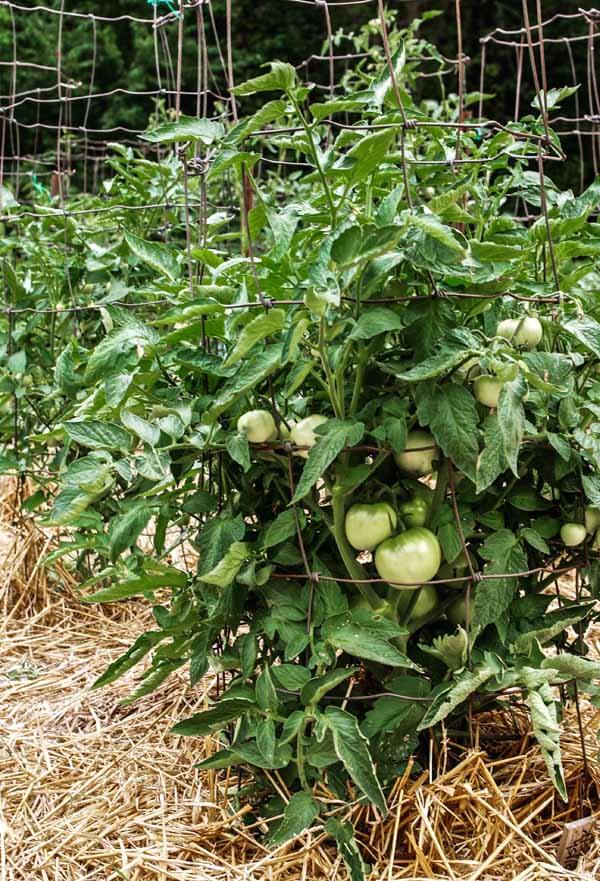
This tomato has everything it needs except heat and less rainwater…
Endless drizzly cool days are the core of this year’s tomato lateness. Even early in the season, it was cold and wet. The months of March, April, May, and even early June were unseasonably cold and rainy, making bed prep and planting difficult.
We managed to get our large, strong tomato plants into the ground by mid-May—making sure to raise and fortify planting rows with OMRI Listed Black Gold Garden Compost Blend and plenty of quality tomato fertilizer. Then we mulched them with straw and leaf mulch to reduce weeds and make harvest less muddy. The plants grew, but the fruits that appeared hung green and underdevelopment on lush vines.
The month of July burst forward with a week or two of sunny, hot, dry days, giving gardeners a ray of hope, but wet weather and cool days quickly returned. The last week of July was a rainy mess, causing a few low-lying neighboring plots in our community garden to pool with water, resulting in total tomato rot.
The first week of August has started sunny and warm, but the fruit on most vines are still green or just beginning to blush with color. Most of the colored cherry tomatoes cracked in last week’s rain fest. If dry, warm days remain, we should finally get good tomato harvests! If the days get too hot, it will keep tomatoes from producing satisfactorily due to excess heat. It’s all a balance.
Can You make a Bad Tomato Year Better?
My mid-July tomato harvest last year.
Yes! Aside from hoping and doing ritualistic dances to the elusive Gods of sun and heat, there are a few things that can help. Here are a few tips that can be implemented this year and next.
Prune: Remove any wild excess stems with tiny fruit. This will increase air flow to dissuade fungal or bacterial diseases and encourage the plant to put its energy towards supporting the development of larger fruits on the vine.
Plant tomatoes high: Planting tomatoes in raised beds, deep pots, or raised rows will save them from excess moisture and rot at the root zone. It can even protect against fruit crack.
Let them dry: Let the garden dry for several days—even a week—before manually watering after heavy rains. Not only will this help slow any fungal or bacterial diseases, but it will help intensify the sugar development in your ripening tomatoes.
Plan for the future: If weather promises to be uncompromisingly unpredictable in years to come, choose tomato varieties that will be resilient to unexpected weather. Choosing early, high yielding, disease resistant tomato varieties will always increase your chances of success. It’s also wise to choose a tomato or two bred for cooler growing conditions or one or two bred for hot growing conditions.
Two good varieties for cool growing conditions include ‘Aurora‘, which bears loads of tasty, medium-sized, red tomatoes fast and early, and ‘Alaska‘, which quickly produces red salad tomatoes on short vines in cool weather. Two good varieties for high heat includes the large-red-fruited ‘Heatmaster‘, which can take the high heat of the South, and disease and heat-resistant ‘Heatwave II‘, which bears deep red tomatoes with good flavor.
We’d love to hear your tomato stories and answer any tomato questions you might have! Visit Ask a Garden Expert to learn more!
“When is the best time to plant Lavender in southeastern Wisconsin?” Question by Janet of Elkhorn, Wisconsin.
Answer: There are several lavenders that will survive winters in USDA Hardiness Zone 5, which is your local hardiness zone. The hardiest lavender for your climate is English lavender (Lavandula angustifolia). I suggest the varieties ‘Munstead’, which is quite compact, and ‘Hidcote’, a taller variety with deep lavender-blue flowers. The new lavender ‘Phenomenal’ is also remarkably hardy, vigorous and beautiful.
Plant your lavender in perfectly drained ground in spring, as soon as the threat of frost has past. This will give them a full season to set deep roots, which will help them survive your winters. If you can plant them in a sunny, protected spot, their chance of survival will increase even further.
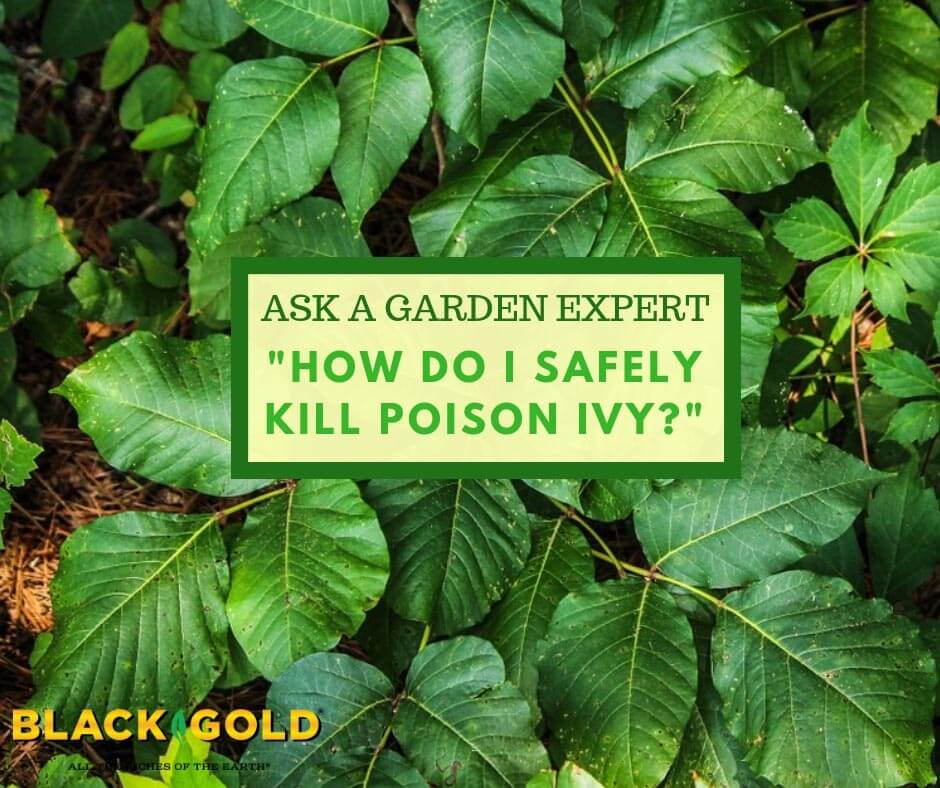
“What’s the best way to kill poison ivy?” -Question from Grace of Raleigh, North Carolina
Answer: It’s the age old question. The best method depends on your infestation–do you have lots of seedlings, a big vine or shrub, or all of the above? Either way, there are several consistent “dos” and “don’ts” when it comes to effective poison ivy removal. The important thing to remember is that you can get a poison ivy rash from any “dead” portion of the plant, whether it be brown leaves or an old stem or vine. The toxic oil (urushiol) that causes the rash is stable and will remain toxic for years, even on old, dead plants.For this reason, I rely on mechanical removal because it’s the safest method if you do it right. A herbicide-sprayed plant can still cause a rash and is still dangerous!
Removing Poison Ivy
Here’s my removal method: Wear thick long pants, a long thick shirt that covers your wrists and body, and wear thick rubber gloves. The tools you will need will depend on the size of your plants. But, generally, I use a sharp spade, trowel, pruners or loppers, and plastic bags for effective removal.
The key is removing the whole plant and root system. For smaller plants, I simply cut the root base with a spade, cover the plant/s with the plastic bag, and pull the plants within the bag without touching them. For lots of smaller plants, I do the same with a trowel and plastic bag. For vines growing up trees, I cut the base of the vine with pruners or loppers, remove as much of the vine from the tree as possible by cutting, not pulling (you don’t want a poison ivy vine toppling down on you!). Then I dig out the roots with a spade and put the pieces in a large plastic bag. (Once again, it’s best if you surround the plant with the bag and pick it up that way.) Then I dispose of the poison ivy pieces in the trash.
During this process, take note of everything that may have become contaminated with poison ivy oil: your tools, clothes, gloves, trashcan lid, door handle, etc. These will need to be cleaned.
It also pays to scout out any large vines that may be fruiting nearby. Birds are immune to urushiol, so they eat the fruits and spread the seeds. Simply cutting vines at the base can stop this year’s fruits.
Cleaning Up After Poison Ivy
Here’s my cleanup method: Change your gloves and wash all tools and surfaces that may have been contaminated with a coarse cloth and soap. Degreaser can be very effective. Next, remove all possibly contaminated clothing and washcloths and put them in the washer, choosing a long, hot water cycle and plenty of detergent. Finally, wash your hands and body with strong soap and a textured washcloth, using lots of friction. The combination of friction and good, strong soap will remove all the oil from your skin. (I usually wash twice!) Technu soap is specially made to remove poison ivy oil. [Here’s further information about rash prevention from the USDA.]
Here are two important poison ivy “don’ts”: Never compost poison ivy because its oils can contaminate your compost. Never burn poison ivy, because its toxic oils become airborne, causing a rash on the skin and in the lungs.
Mowing and chemical sprays can cut poison ivy back, but they will not remove it, or its dangers, completely. Take the time to carefully remove your plants, and your yard will be poison ivy free in no time.
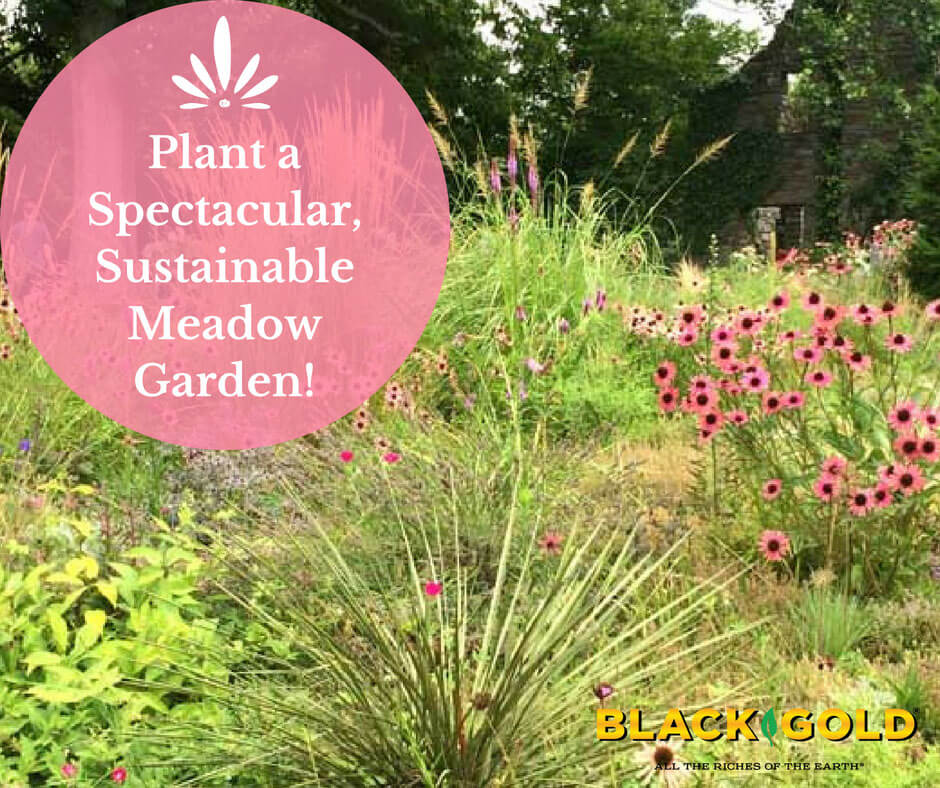
Nature favors carefree meadow gardens, and once established, they’re effortless—allowing gardeners to simply sit back and enjoy. Their airy flowers and grasses blow in the wind, creating ambiance and habitat for a suite of welcome pollinators and wildlife. And, their untamed nature does not mean they have to be untidy. Well-placed meadow plantings defined by mowed edges or pathways can be garden showpieces.
Meadows Gardens Gain Popularity
Public gardens have embraced meadow gardening, making well-designed meadow plantings a more common garden feature in American landscapes. Longwood Gardens designed an expansive, ecologically sound, 86-acre meadow garden that has inspired many visitors. Likewise, Chanticleer garden has created a jewel of a meadow planting near their elegant house garden (image below) as well as dry meadow plantings in their Gravel Garden and along their Elevated Walkway. New York’s Highline offers and elegant merging of industrial urban infrastructure and American prairie. And, the American Horticultural Society has maintained the André Bluemel Meadow garden since 2004 (a garden that I had the honor to help plant!). These inspirational, carefree gardens are more than meadow-in-a-can plantings and take design work and time to plant to perfection.
The noted Pennsylvania landscape designer, Larry Weaner, has also been a champion of naturalistic perennial meadow design, having created over 100 perennial meadows across the country for both commercial and private clients. Noted landscape designer, Piet Oudolf, and the landscape architect firm, Oehme, van Sweden, have also dedicated themselves to meadow design and elevated the creation of a simple meadow garden into an art form.
Despite their beauty, meadow gardens may not be welcome in neighborhoods with grass-height limits, but you may find space for one in a more concealed enclave of your backyard. Or, you can simply plant garden beds with pretty meadow plants for a more traditional landscape look.
What Makes a Meadow?
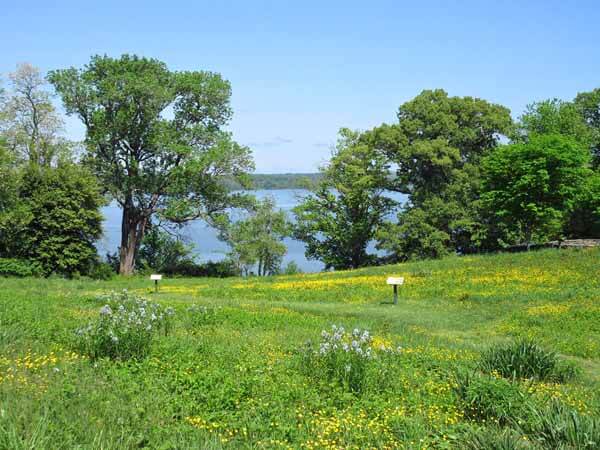
The American Horticultural Society’s André Bluemel Meadow overlooks the Potomac River and is filled with grasses and seasonal forbs for wildlife. (Image thanks to AHS)
Your meadow garden should contain plants fit for your yard and region. Mid-westerners favor prairie meadows, while those with wet lawn patches may plant a wetland meadow. You can even plant meadows that favor specific pollinators, like bees, butterflies, or hummingbirds.
All meadow plantings have two key elements: 1. native grasses, sedges or rushes, and 2. forbs (flowering meadow plants). The forbs are what give meadows big color and high wildlife value, while the grasses provide height, airy visual appeal, and wildlife cover. The grass-to-forb ratio may vary from design to design, but it is generally safe to create meadows using a 1:1 or 2:1 ratio of grasses to forbs–that’s 50% grasses and 50% forbs or 66% grasses and 33% forbs.
Prairie Meadow Gardens
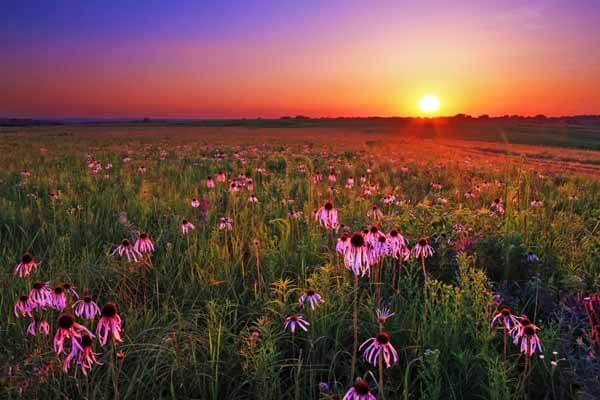
Pale purple coneflowers glow in the twilight of this prairie planting.
Unlike other grasslands, a prairie is a specific grassland ecosystem that exists across the Great Plains of North America. Prairies were home to herds of buffalo, and their grasses and forbs varied depending on whether they were dry shortgrass prairies, common tallgrass prairies, or wet prairies. But, prairie grasses and flowers are beautiful and at home in many temperate gardens in the US.
Shortgrass prairie plantings are often a better fit for home plantings. Favorite dryland perennial shortgrasses include sideoats gramma grass (Bouteloua curtipendula, 1.5-2′), tufted hairgrass (Deschampsia cespitosa, 2-3′), switchgrass (Panicum virgatum, 3-6′), little bluestem (Schizachyrium scoparium, 1.5-2′), and Prairie dropseed (Sporobolus heterolepis, 2-3′). Vanilla sweet grass (Hierochloe odorata, 1-2′) and Bicknell’s sedge (Carex bicknellii, 1-3′) are good choices for wet prairie gardens.
Prairie forbs are often long-stemmed, colorful, and supported by the grasses they grow among. All attract pollinators with their bright blooms. Some of the most garden-worthy and colorful upland perennial prairie plants include:
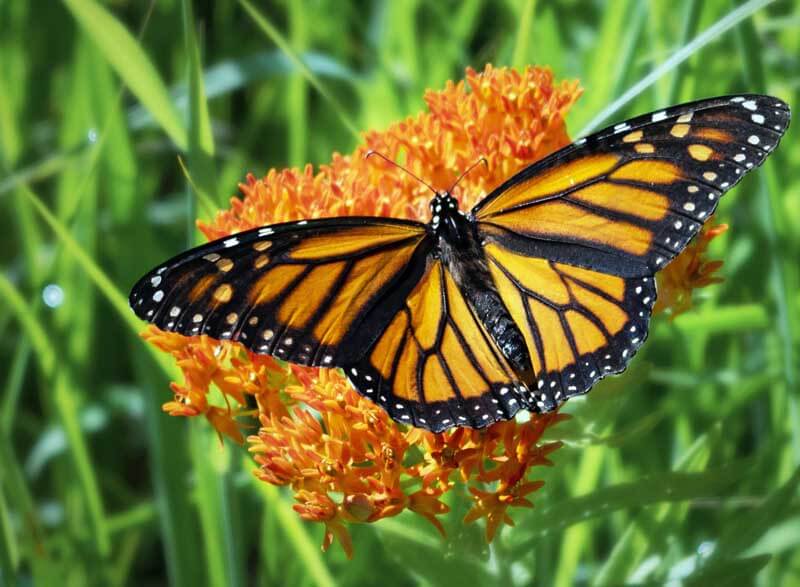
Butterfly Weed (Asclepias tuberosa)
This summer bloomer reaches 1.5 to 2 feet high and attracts butterflies.
Purple Prairie Clover* (Dalea purpurea)
This summer bloomer reaches 1 to 1.5 feet high and attracts bees and butterflies.
Coneflowers (Echinacea spp.)
These summer and fall bloomers reach 2 to 4 feet high and attract bees, butterflies, and songbirds eat the seeds.
Prairie Blazing Star (Liatris spp.)
Blazing stars are summer bloomers that reach 2 to 4 feet high, attracts bees and butterflies, and its seeds feed songbirds.
Prairie Sunflower* (Helianthus maximiliani)
This bold late-season bloomer reaches 4 to 8 feet and attracts, bees, butterflies, and seed-eating songbirds.
Beebalm (Monarda fistulosa)
This midsummer and fall bloomer reaches 2 to 4 feet high and attracts bees, butterflies, and hummingbirds.
Oswego Tea** (Monarda didyma)
The red flowers of this summer bloomer attract hummingbirds, and plants reach 3 to 4 feet.
Grayhead Coneflower (Ratibida pinnata)
This midsummer blooming daisy is loved by bees and butterflies and reaches 3 to 5 feet.
Black-Eyed Susans (Rudbeckia spp.)
These 2 to 5 foot midsummer- to fall-blooming daisies are loved by bees and butterflies and seed-eating songbirds.
For moist prairie plantings or wetland meadows, try planting:
Joe-Pye Weed (Eutrochium maculatum)
Blooming in late summer, this 5- to 7-foot, moist meadow bloomer is visited by bees and butterflies.
Queen-of-the-Prairie*** (Filipendula rubra)
This 4 to 5 foot early to midsummer bloomer attracts bees and butterflies.
Rose Mallow (Hibiscus moscheutos)
This 4- to 6-foot summer and fall bloomer bears huge bee- and hummer-pollinated blooms of white, pink or rose red.
Cardinal Flower (Lobelia cardinalis)
4- to 5-foot-tall spikes of red flowers that attract hummingbirds are produced in summer.
White Boneset (Eupatorium perfoliatum)
This free-flowering fall bloomer reaches 4 to 5 feet and has clouds of flowers that draw bees and butterflies.
Pollinator Meadows
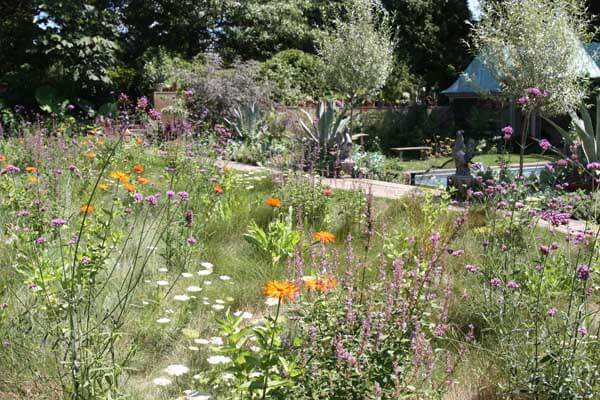
Chanticleer’s house meadow garden has neatly mowed edges and contains a suite of perennial and annual forbs for bees and butterflies. (Image by Jessie Keith)
Choose local grasses and wildflowers as well as any one of the plants listed above that appeal to general or specific pollinators when planning your meadow. You might also add native or non-invasive annuals with big color and pollinator impact. Some of the best options are colorful, warm-hued annual sunflowers [click here to learn all about growing sunflowers], purple cosmos (Cosmos bipinnatus), or colorful tall zinnias (Zinnia elegans). All of these flowers appeal to bees, butterflies, and seed-eating songbirds.
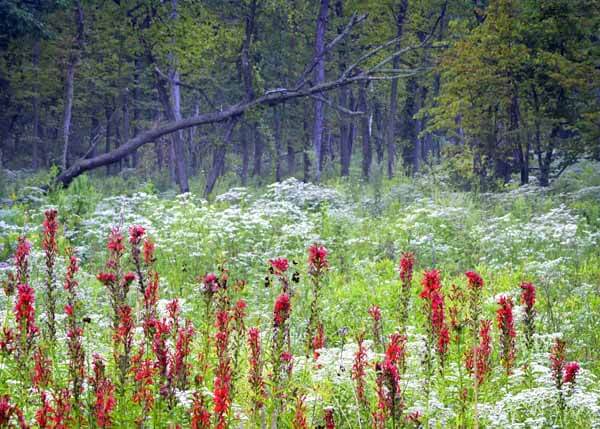
Wetland Meadows
Sometimes nature can lend the best design help. This natural wet meadow shows spikes of cardinal flower rising from clouds of white boneset.
Low spots in the yard are hard to mow, so they are great contenders for moist meadow plantings. Plant any of the moist prairie plants listed, or any sedges or wetland flowers native to your area. The best time to plant moist meadows is in spring. The cool grasses and attractive flowers of a moist meadow look much nicer than muddy grass, and mowing or edging the perimeter will keep it looking garden-like and tidy.
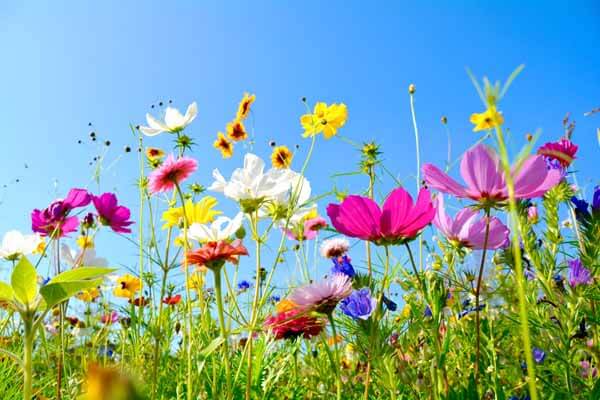
Avoid Canned Meadows
Most canned meadow seed mixes contain native and non-native annuals that won’t return year after year.
Canned meadow seed mixes usually contain native and non-native annuals that will look great for a season or two before disappearing. Most lack the grasses and lasting perennials needed to make a meadow sustainable for any length of time. Investing in a good suite of meadow plants that will return each year will save you time and pay off in the end.
Planting a Meadow
A full-sun site is required for your meadow. When it comes to planting, it is smart to start with grass and forb plugs/seedling starts as opposed to seeds. This will result in faster, better establishment and allow you to lay out a more precise design. Starts can be purchased directly, or you can grow your own indoors in spring in OMRI Listed®Black Gold®Seedling Mix. [Click here to learn more about growing flowers from seed.]
Direct sowing is a less expensive and less time consuming for some species, but germination is also less reliable. Some forbs, like sunflowers, black-eyed Susans, and grayhead coneflower are your best bet for outdoor seed starting, so you may opt to plant a mix of plugs and easy-to-start seeds, depending on your time and budget.
To prepare the site, clear the ground of existing lawn and weeds from 50 to 75%. This can be done by weed whacking the area, lightly tilling, and then raking the loosened weeds and grass away. Smooth out the area and add a light topdressing of 1:1 ratio of OMRI Listed®Black Gold® Garden Compost Blend and Black Gold® Garden Soil to ensure better establishment. (Two 2-cubic-foot bags of compost and two 2-cubic-foot bags of garden soil will add 1 inch of amendment to 100 square foot or a 10′ x 10′ area.)
Meadow plants can be naturalistically interspersed or planted in colorful blocks or sweeps. It’s up to you. Keep final plant size and spacing needs in mind when designing your meadow, and be sure to include lots of different forbs that will bloom from summer to fall. Finally, don’t be afraid to add more forbs and select grasses to an established meadow to give it more color and interest as it progresses.
Keep your meadow watered and lightly weeded in the beginning while it gets established, and it will become a lovely, natural feature in your landscape in no time!
*Images by US Park Service, ** Image by JM Schneid, ***Image by Bruce Marlin
“I planted hens and chicks (Sempervivum spp.) in the front planter against my house last year. It gets a lot of sun, and I have had portulaca flowers there too, because nothing seemed to grow there. The three hens and chicks are thriving, however they are growing strangely. They are growing vertically. They didn’t grow like that last year. Obviously there is something wrong?” –Question from Adorée of Toronto, Canada.
ANSWER: No worries! Your hens and chicks are getting ready to bloom! Older “hen” rosettes grow vertically, bud and bloom, and then die. Their unusual clusters of flowers are starry and rosy pink (see image below). They kind of look like Martian flowers to me, but they pretty in their own right!
Thankfully, the dying hen rosette will send out new “chick” rosettes that will fill in after the hens have completed flowering and senesce. Don’t do a thing. Your plants are really happy!
“My blueberry plants have yellow leaves. Why is this happening and what can I do?” -Question from Emily of Columbus, Ohio
ANSWER: Your blueberries have chlorosis. This is caused by a soil pH problem. Blueberries like acid soils between 4.5 and 5.5. When soils are too alkaline (have a higher pH) blueberry plants cannot access necessary nutrients, and their leaves start to turn yellow. Thankfully, this problem is easy to fix.
First, it helps to determine the pH of your soil. Take a soil sample to your local Ohio State University Extension Service (click here for instructions). Once you get the results, you will know how much you need to lower your soil’s pH for your berries.
You can lower soil pH by amending with Canadian Sphagnum Peat Moss and adding a soil acidifying fertilizer around the base of the plants. Aluminum sulfate will quickly lower soil pH; there are also other brands of soil acidifiers and acid fertilizers specialized for crops like blueberries. Follow the instructions on the packaging to adjust the pH around your blueberries, and they should bounce back in no time!
“This tree is growing in my new yard. What is it? It has huge green thorns and white flowers that bloomed in spring.” –Question by Betty in Charleston, South Carolina
ANSWER: This is the hardy orange (Poncirus trifoliata). Later in the summer it will develop inedible orange fruits. It is grown as an ornamental, though this tree is not for everyone. Some people like the striking look of its enormous green thorns, white flowers, and showy fruits, and its green stems add winter interest. It also has three-lobed leaves that turn yellow in fall. But, the thorns are not child-friendly, and heavy duty gloves are required to prune it. Otherwise, it is trouble free. If you like its looks, and can avoid its thorns, consider keeping it for its ornamental value.
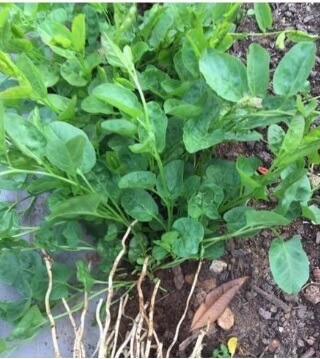
“Can you tell me what this is and how to kill it? I thought I dug it out already, but it keeps coming back. Its roots run really deep.” -Question from Natalie of Oregon
ANSWER: Sadly, your garden has a field bindweed (Convolvulus arvensis) infestation. This is one of the most notoriously difficult perennial weeds to remove. The vine tightly twines up anything, producing little white flowers that look like tiny morning glories and produce lots of seeds.
Its fast-spreading white-rooted runners spread deep and wide, making them a challenge to dig and collect, especially when they become intertwined with the roots of your shrubs and perennials. Here is the three-stage approach I take to kill it. (BTY, weed killers won’t touch this weed, so put them away!)
Dig out as much of the root system as possible, and remove any vining stems that may have seed developing. When digging white underground runners, gently loosen the soil around each with a trowel, following each until it is fully removed. If you keep even a small piece in the ground, it will re-root and grow. This can be a challenge when working around your garden plants, but be diligent. In some cases, you may have to dig up perennials, remove the bindweed roots from their base, and replant them. Keep watch for any new bindweed shoots that appear and dig them out immediately.
To keep underground stems from returning in really infested areas, cover the area with mulch cloth and mulch it over. After a season, all parts should be smothered, and you can pull up the mulch cloth and resume gardening as usual.
Keep an eye out for nearby bindweed outside of your yard, and at best try to keep it from flowering and moving back into your yard. Talk to your neighbors, if need be.
“Is this poison ivy?” -Question by Summer of Indianapolis, Indiana
ANSWER: Yes! Leaves of three, let it be! And, it looks like the vine is creeping though your fence from your neighbor’s yard! Remove the poison ivy (Toxicodendron radicans) and any seedlings as soon as possible!
The best way to remove poison ivy is to put on long sleeves and disposable gloves, then grab a large trash bag and cover the whole plant. Loosen the roots with a spade, and pull the whole plant within the bag. Then tie and toss it.
The leaf toxin that causes itchy rash is a stable oil, so wash your hands and clothes in heavy dish soap and detergent after handling. Clean any tools used to remove it with rubbing alcohol, detergent, and lots of water. Never try to compost or burn poison ivy. It’s toxic oils are so stable, they enter the air through smoke and can even stay soil borne.
“My tomato leaves are turning brown and fruits don’t look good. They have weird spots on them. What is going on?” -Question from Andy in Macon, Georgia
ANSWER: A photo would confirm it, but it sounds like your tomatoes have been stricken with late blight. Late blight is caused by a fungus-like disease that overwinters on infected plant material on or in soils. Sometimes plants sold carrying the disease.
The symptoms of tomato late blight are tomatoes with oily patches, and plants with stem lesions, and browning leaves. (See the image of the late-blighted ‘Speckled Roman’ tomato above.) Sadly, late blight (Phytophthora infestans) is a deadly disease–in fact it is the disease that caused the Irish Potato Famine. It kills tomatoes more slowly than potatoes, but it is equally lethal and destroys tomato fruits.
There are several things that you can do to protect your beds and future tomato plantings from this disease. Please read this Black Gold article about tomato late blight to learn more: Click here to read more about tomato late blight.


 We managed to get our large, strong tomato plants into the ground by mid-May—making sure to raise and fortify planting rows with OMRI Listed Black Gold Garden Compost Blend and plenty of quality tomato fertilizer. Then we mulched them with straw and leaf mulch to reduce weeds and make harvest less muddy. The plants grew, but the fruits that appeared hung green and underdevelopment on lush vines.
 We’d love to hear your tomato stories and answer any tomato questions you might have! Visit Ask a Garden Expert to learn more!
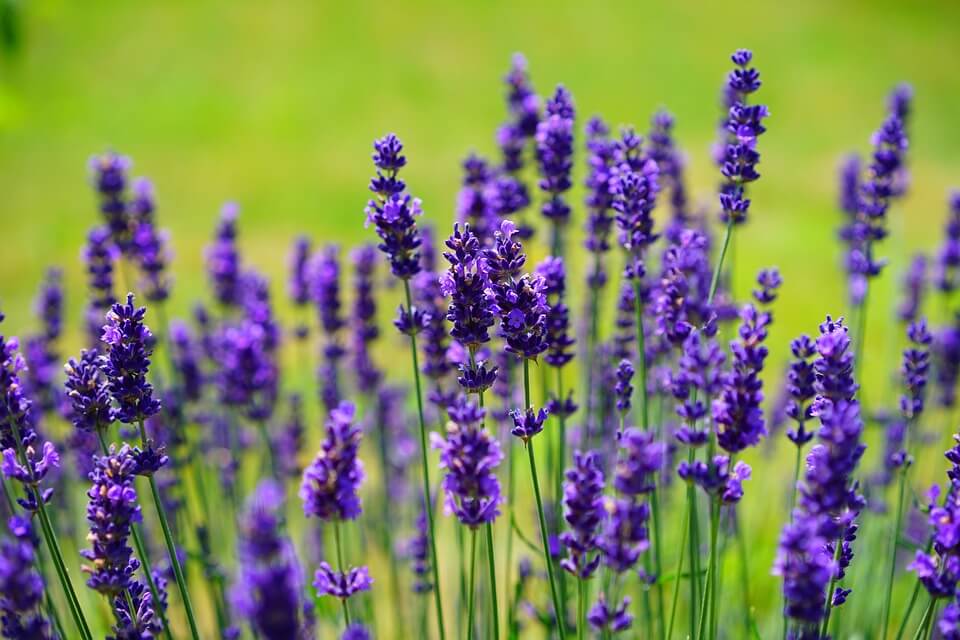
 Butterfly Weed (Asclepias tuberosa)
 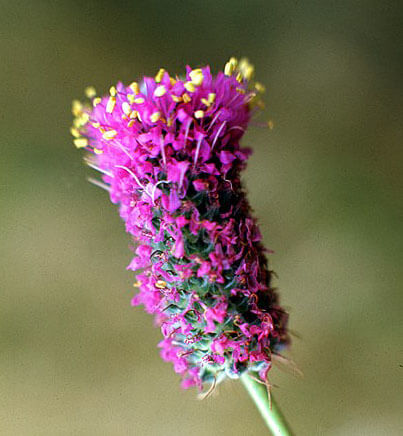 Purple Prairie Clover* (
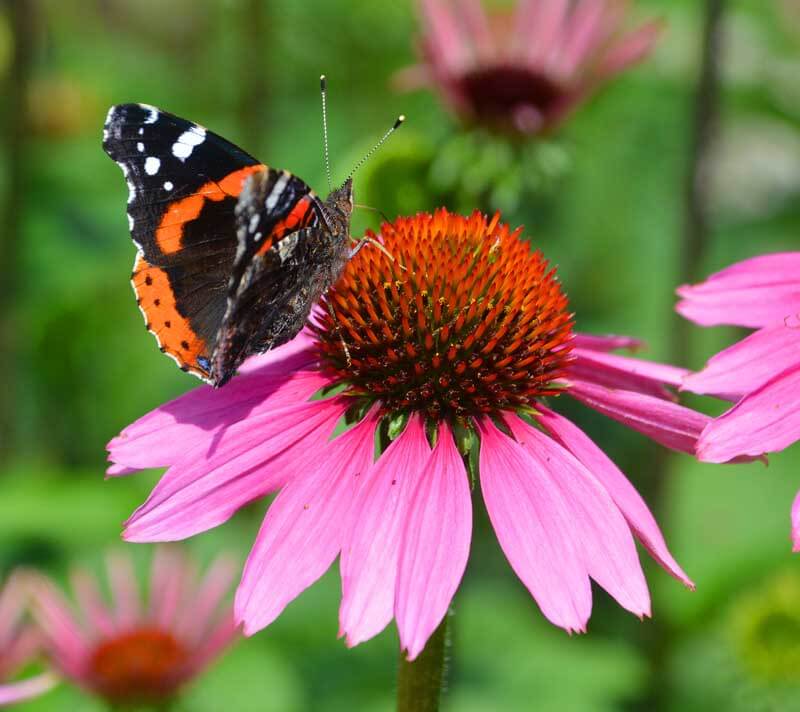 Coneflowers (Echinacea spp.)
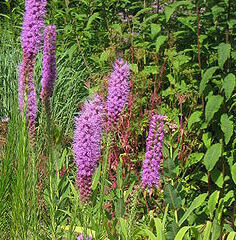 Prairie Blazing Star (
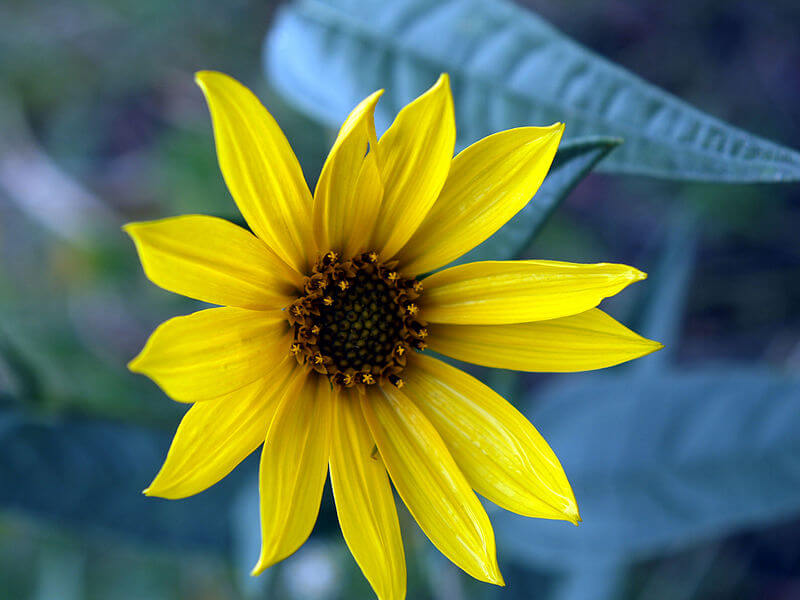 Prairie Sunflower* (Helianthus maximiliani)
 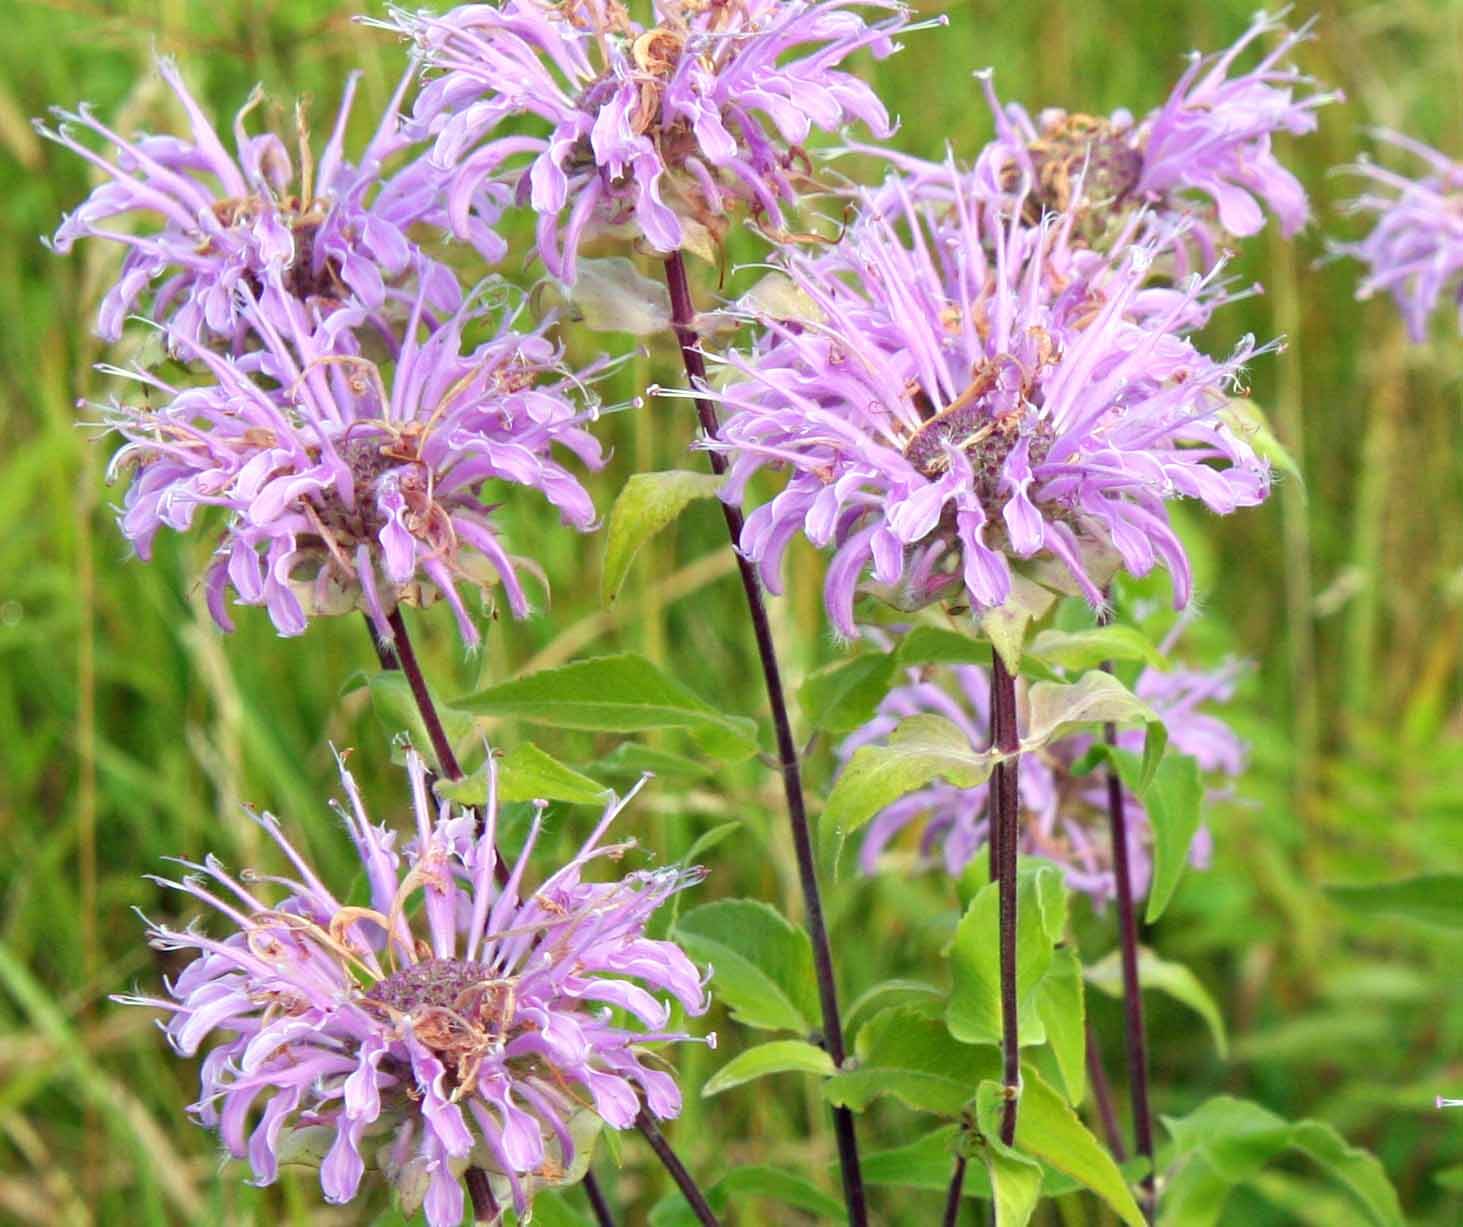 Beebalm (Monarda fistulosa)
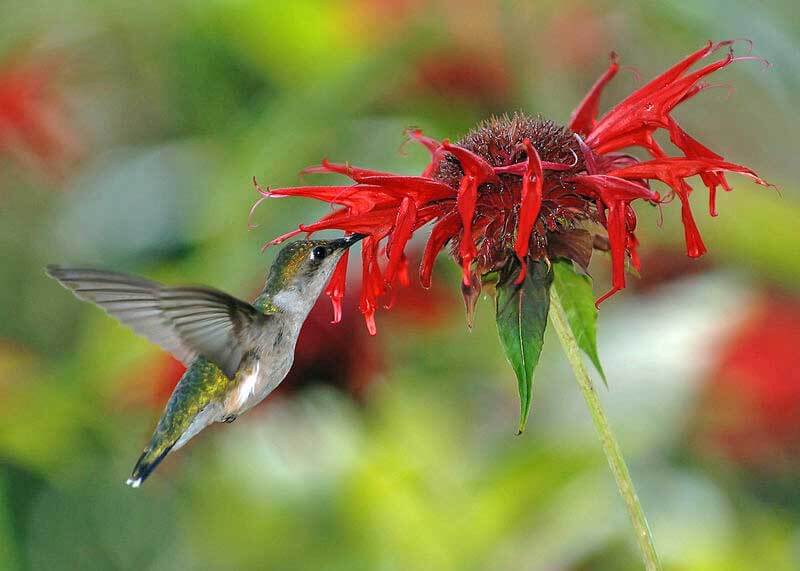 Oswego Tea** (Monarda didyma)
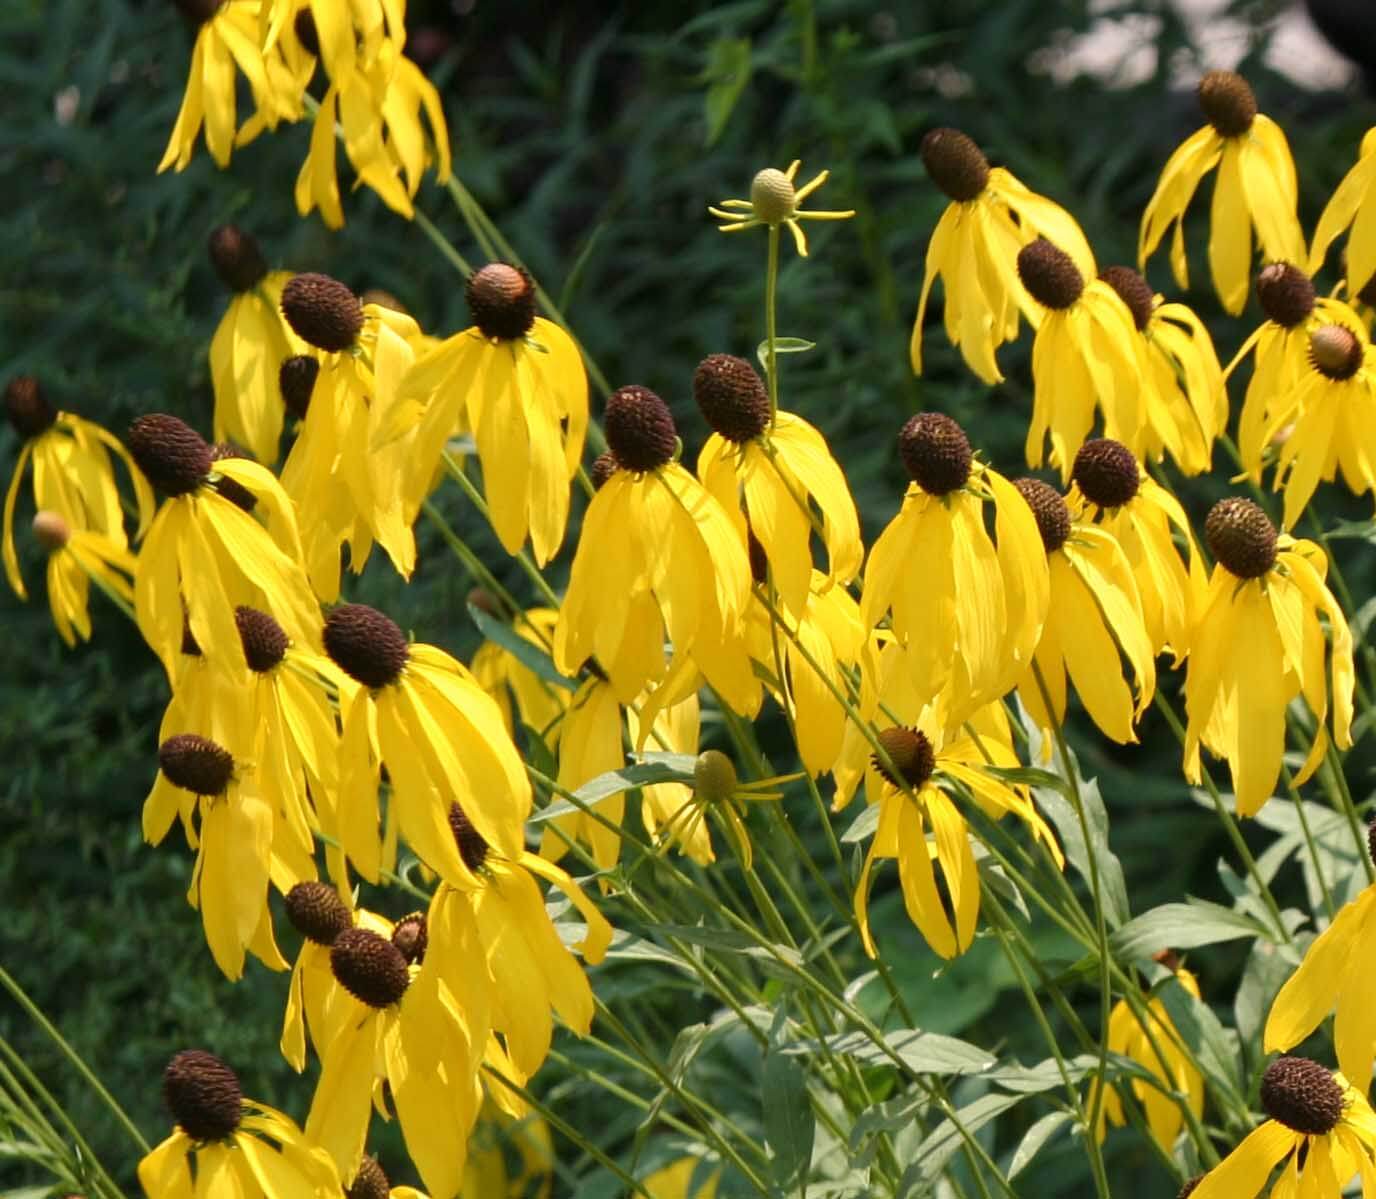 Grayhead Coneflower (Ratibida pinnata)
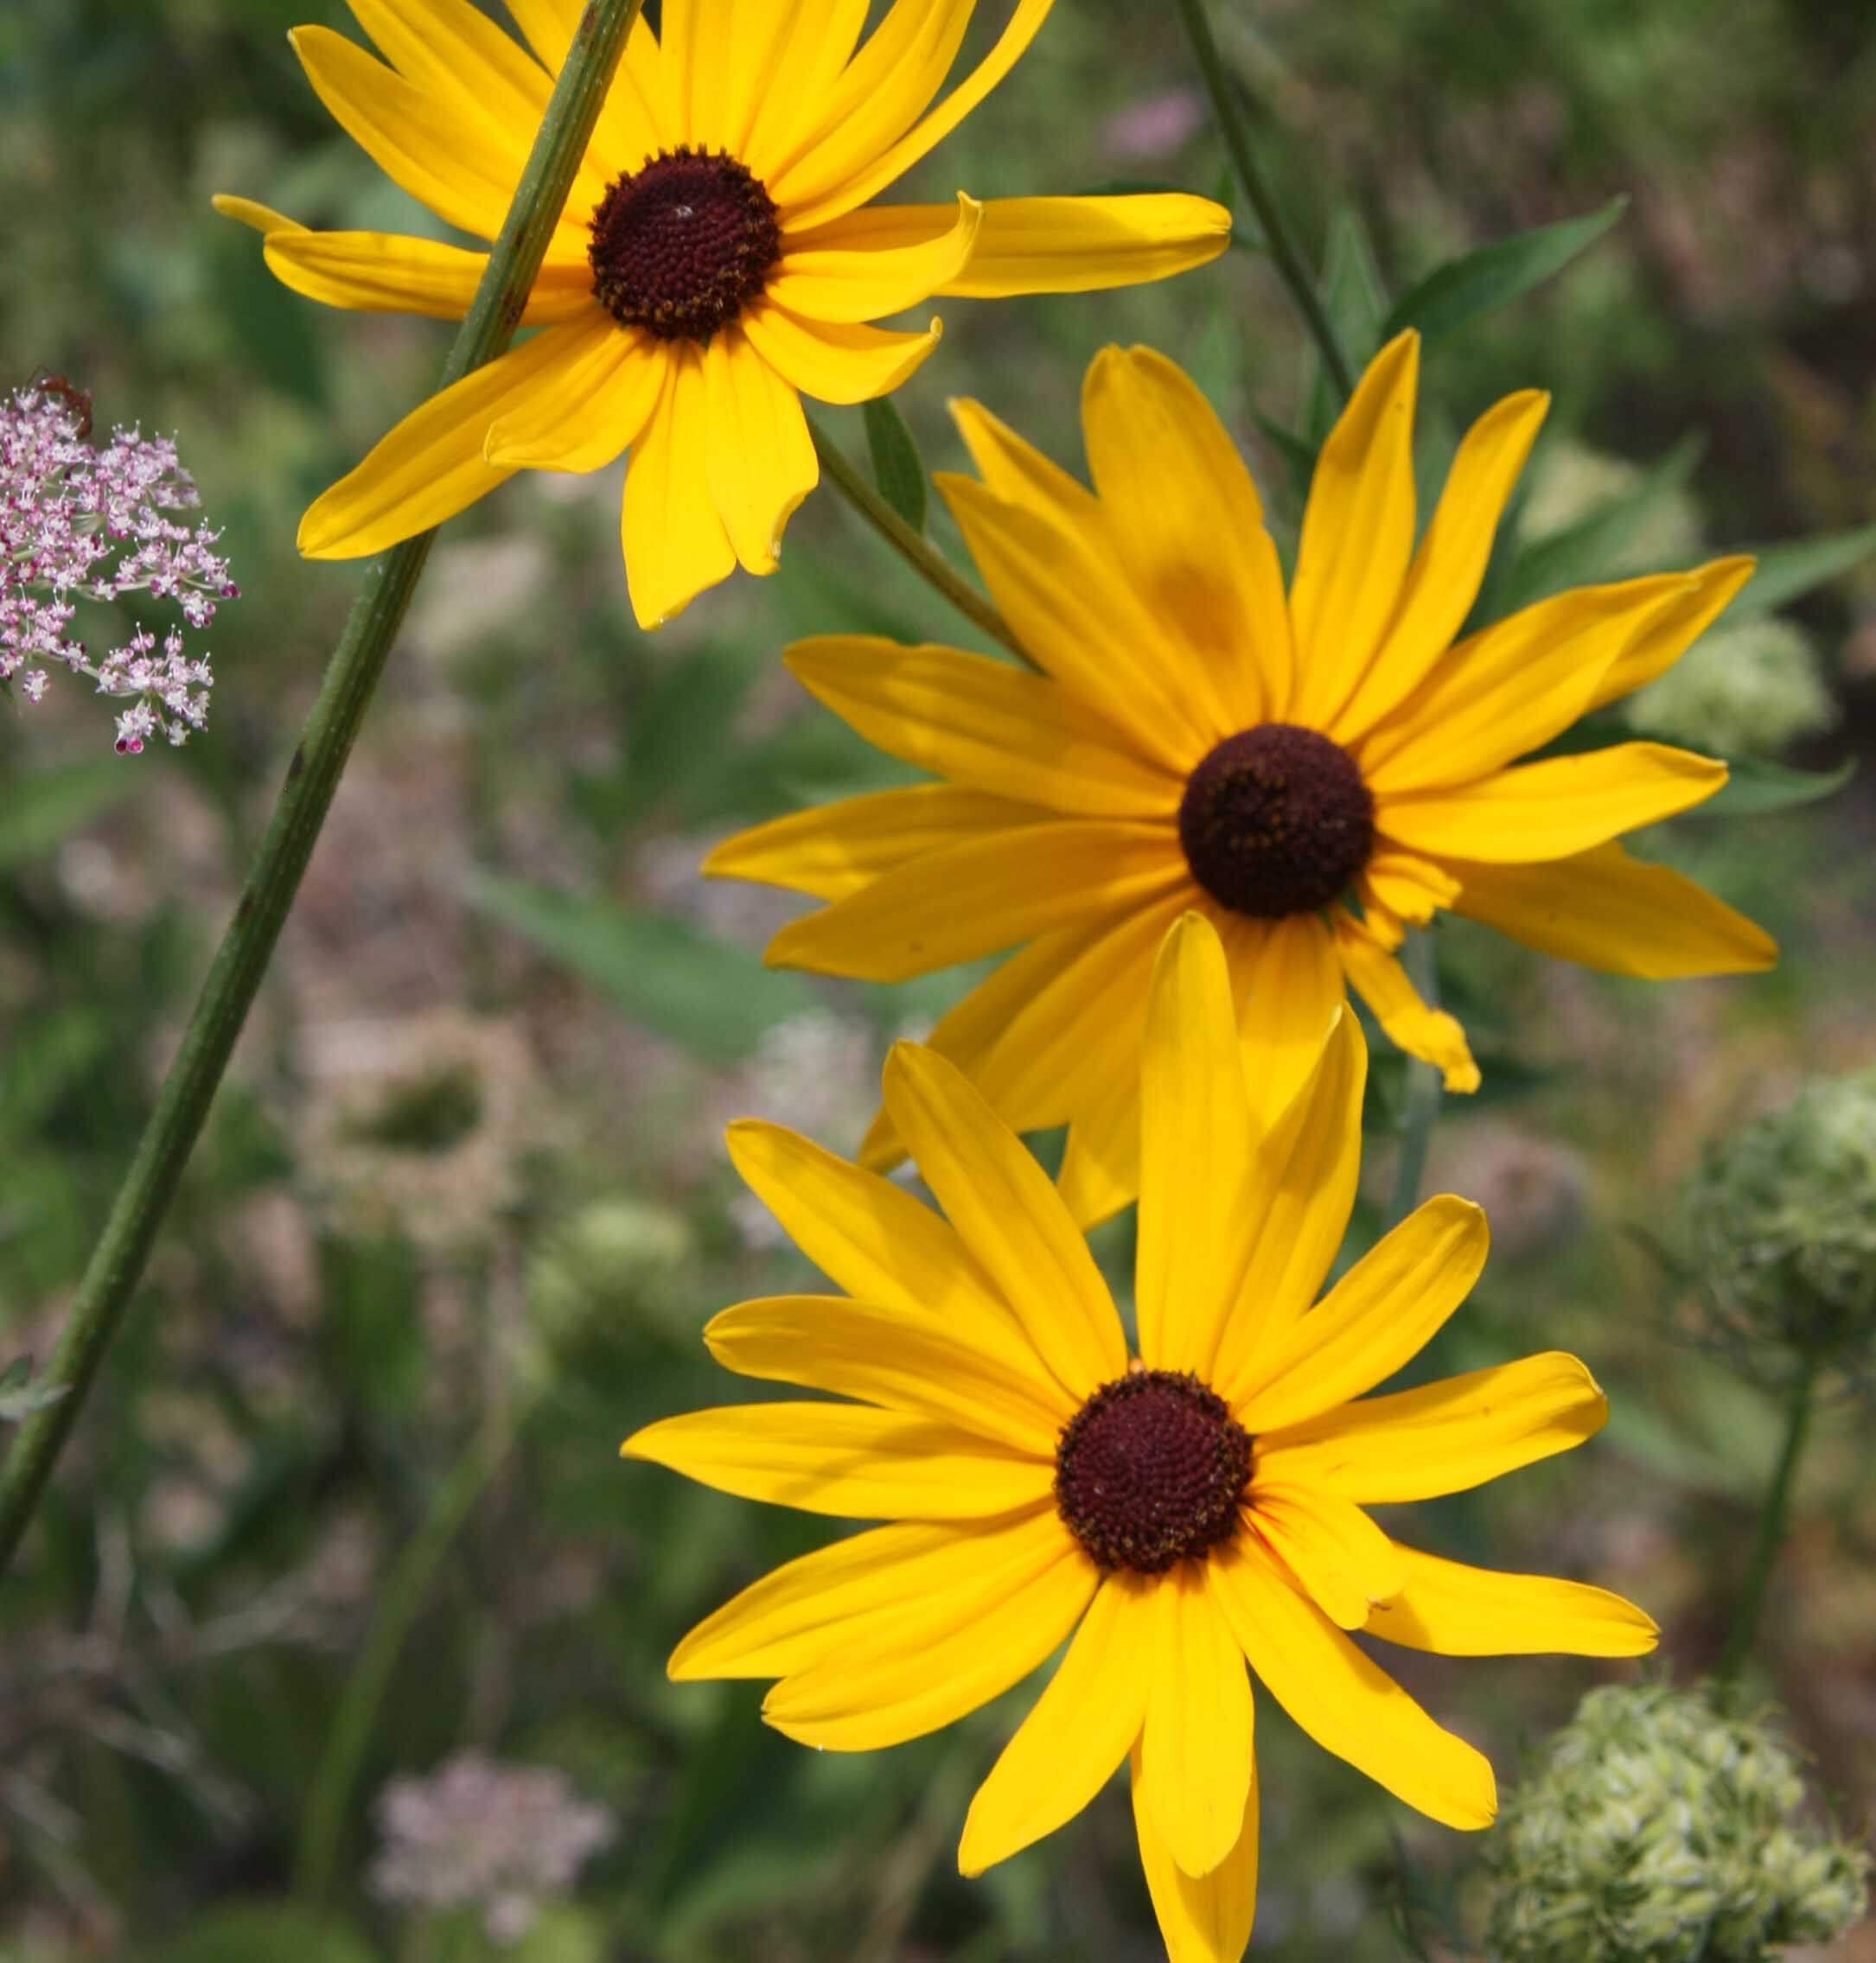 Black-Eyed Susans (Rudbeckia spp.)
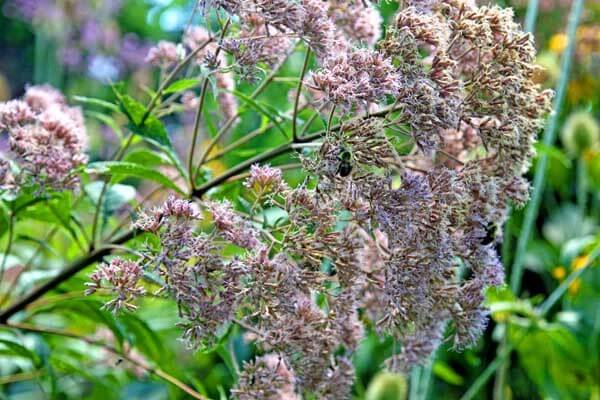 Joe-Pye Weed (
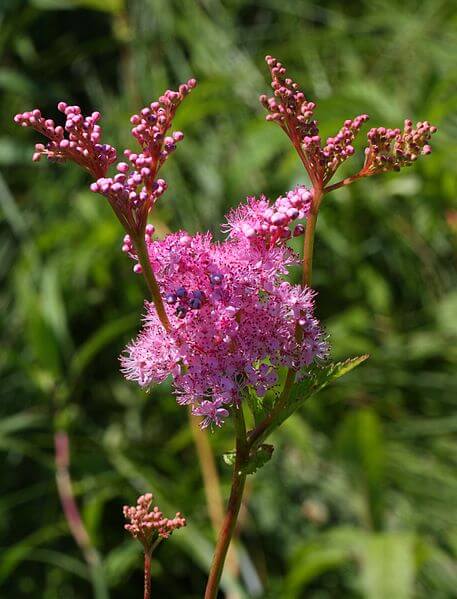 Queen-of-the-Prairie*** (Filipendula rubra)
 Rose Mallow (
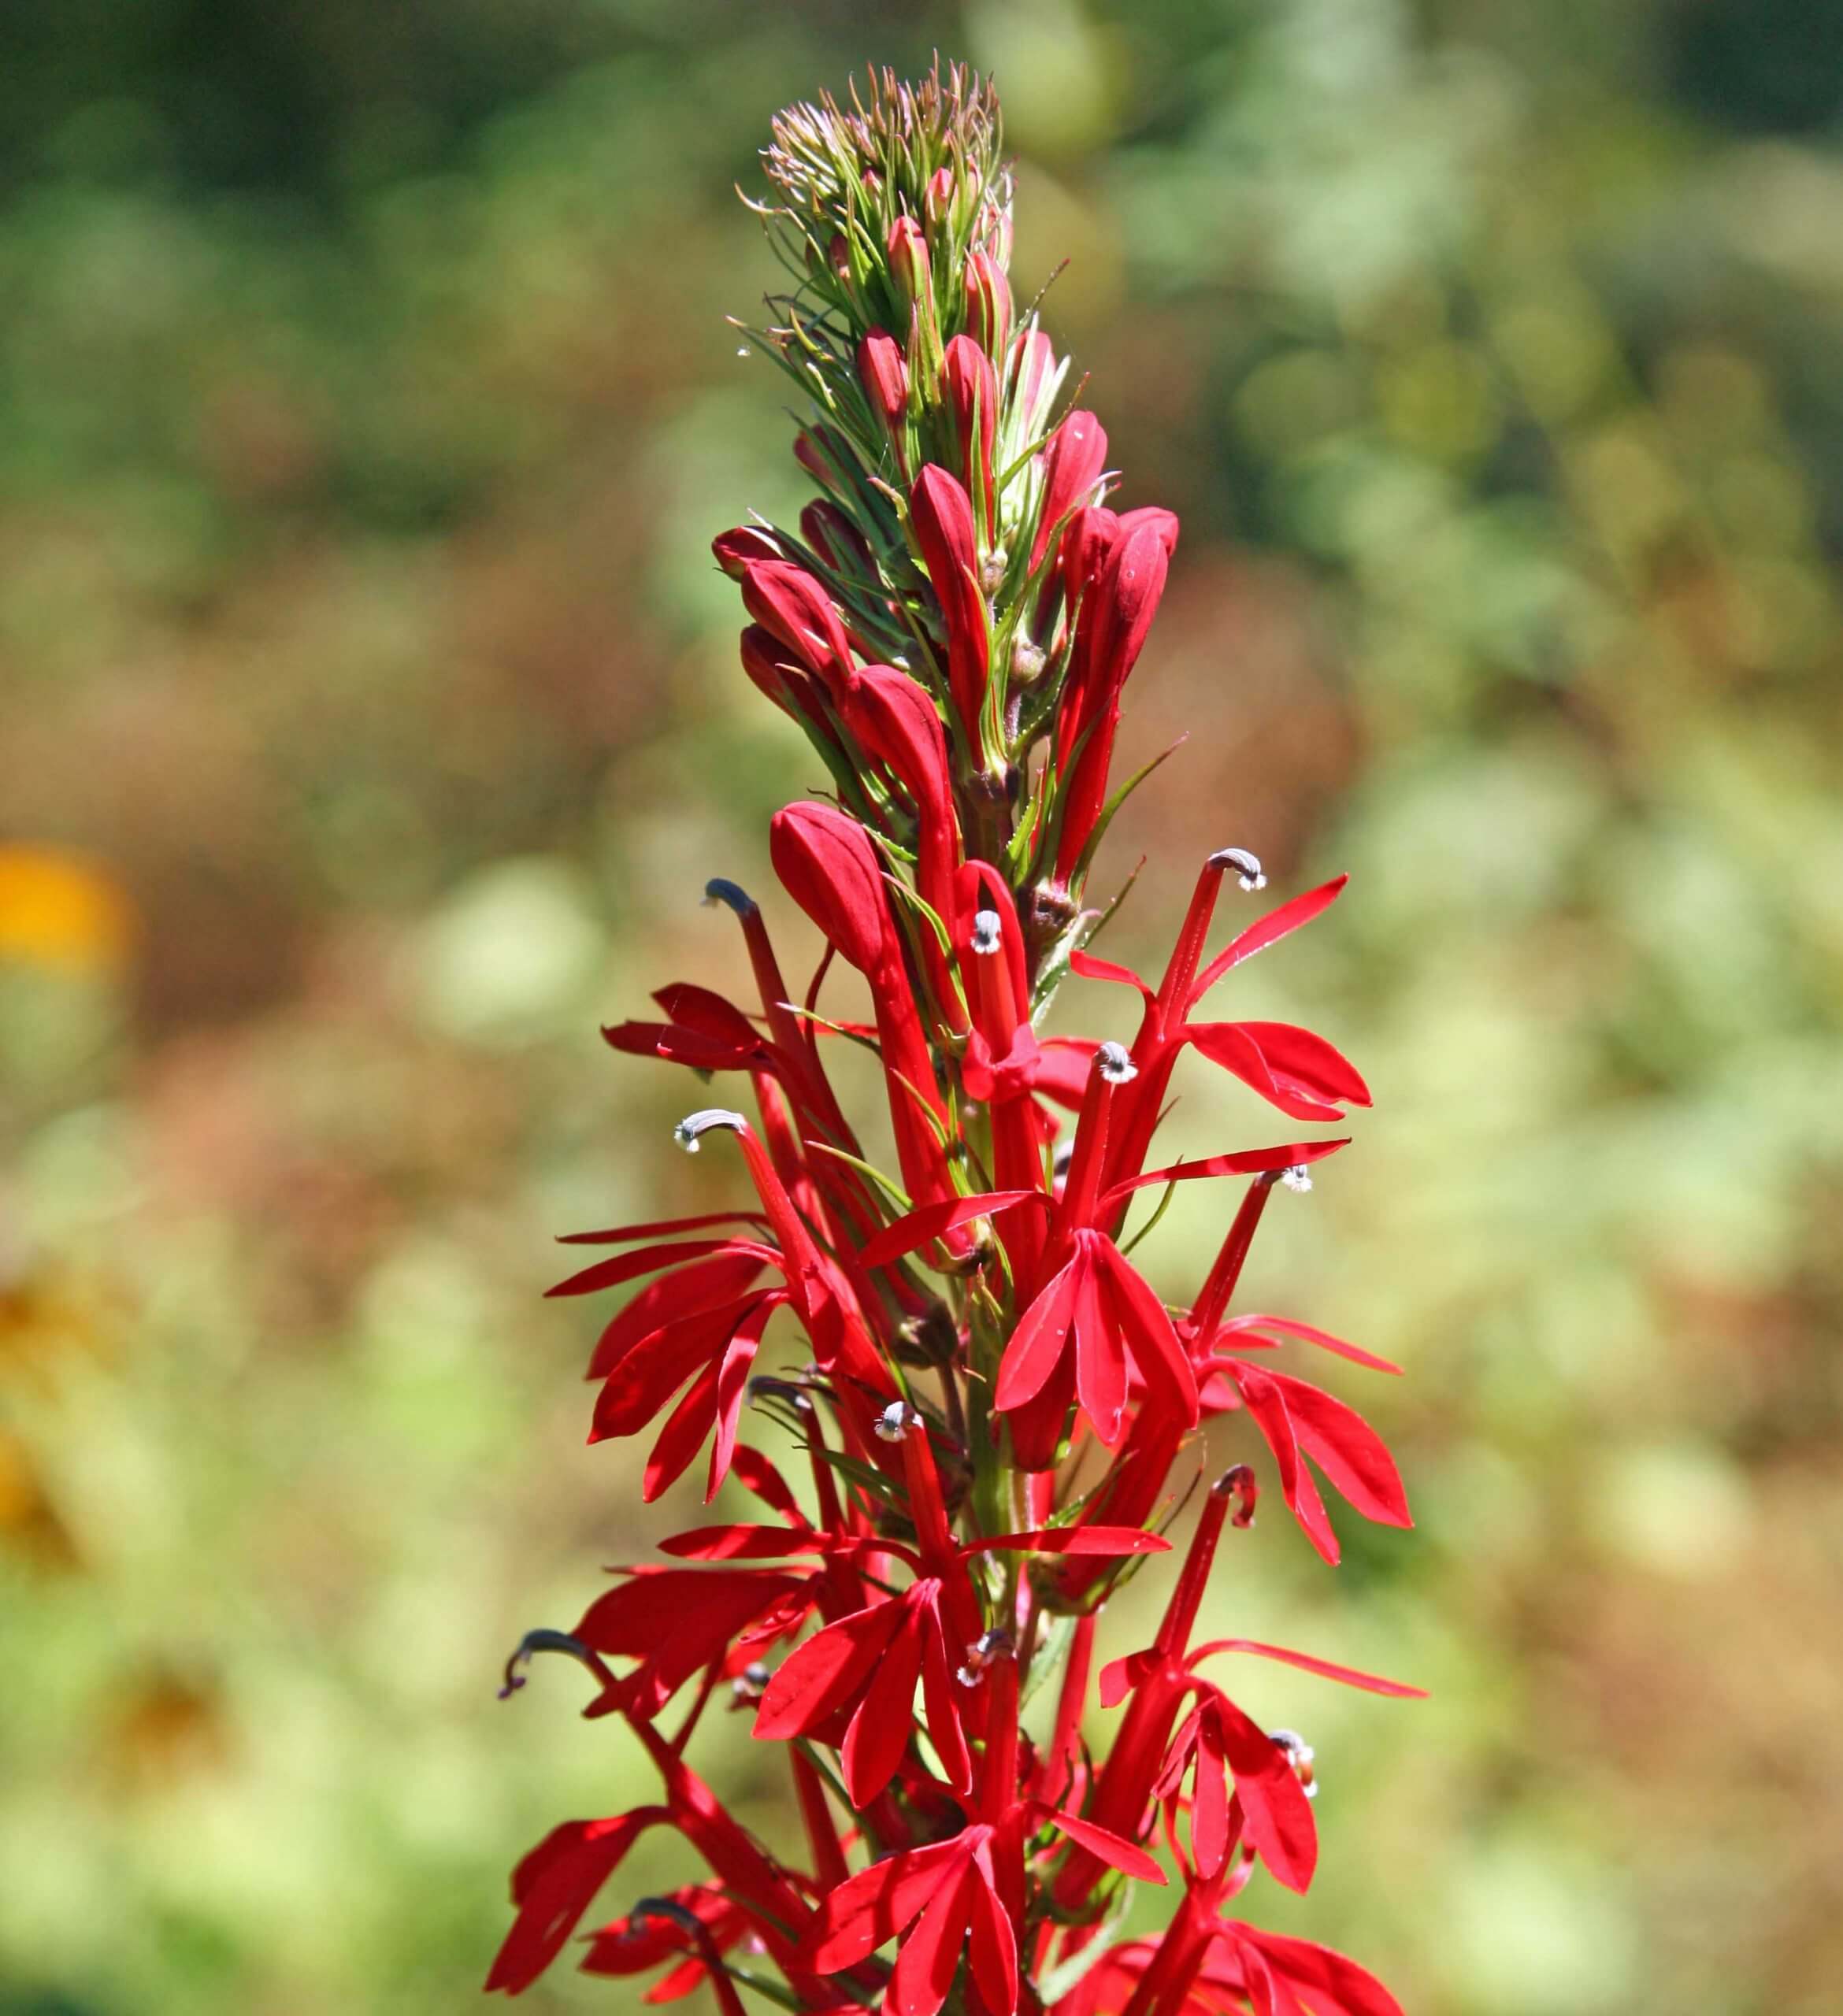 Cardinal Flower (Lobelia cardinalis)
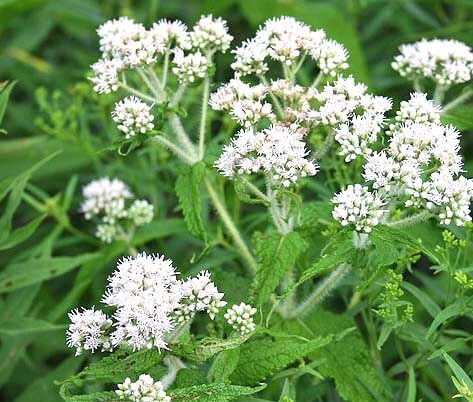 White Boneset (