Articles

Aloe Vera Culture and Benefits

Aloe is so easy to grow and so useful.

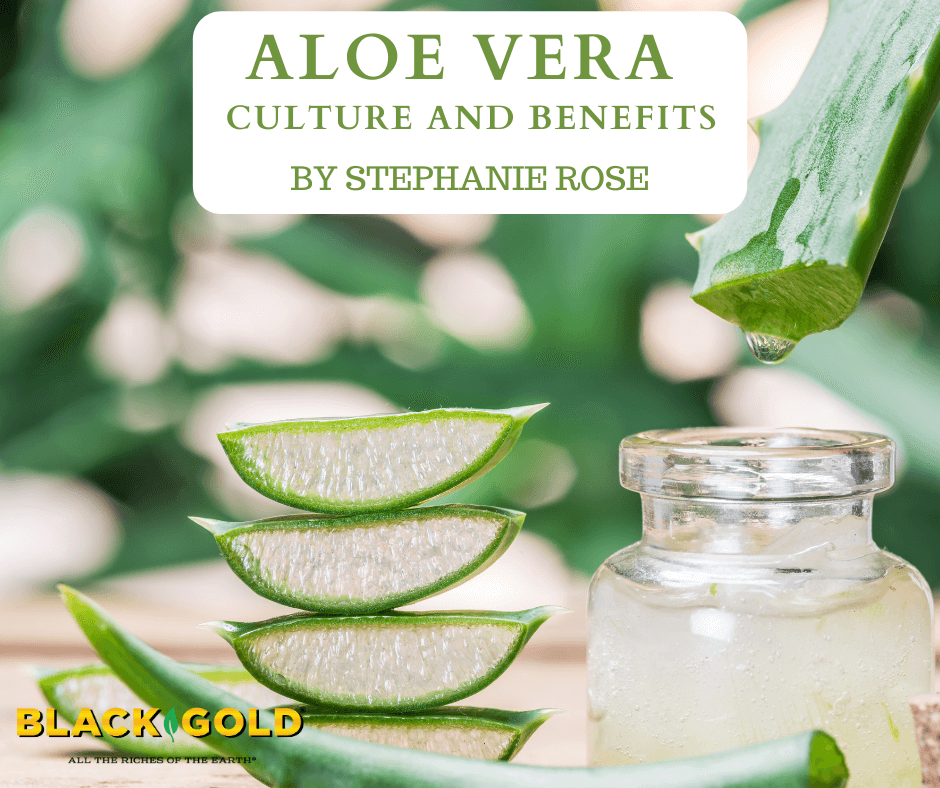
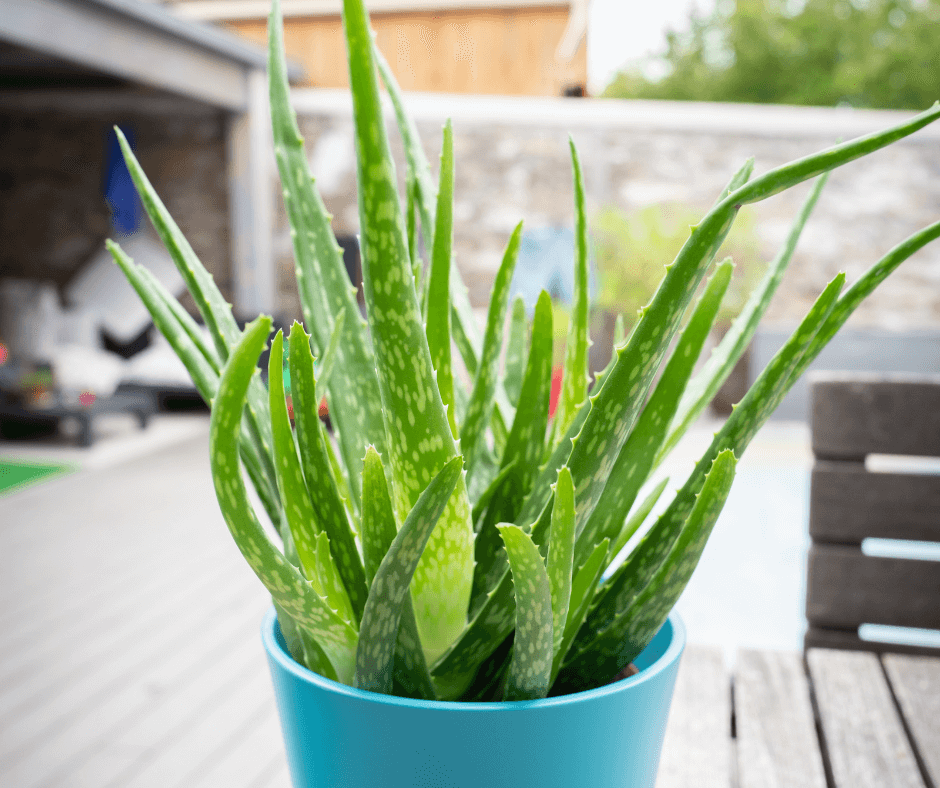
With gorgeous thick leaves and sparsely spiny edges, the aloe vera plant (Aloe vera, USDA Hardiness Zone 9-11) is renowned for its healing properties. Native to eastern and southern Africa, it is one of the oldest-known healing plants used by humans. Aloe grows wonderfully in dry regions because its succulent leaves hold moisture and make it incredibly drought-tolerant.

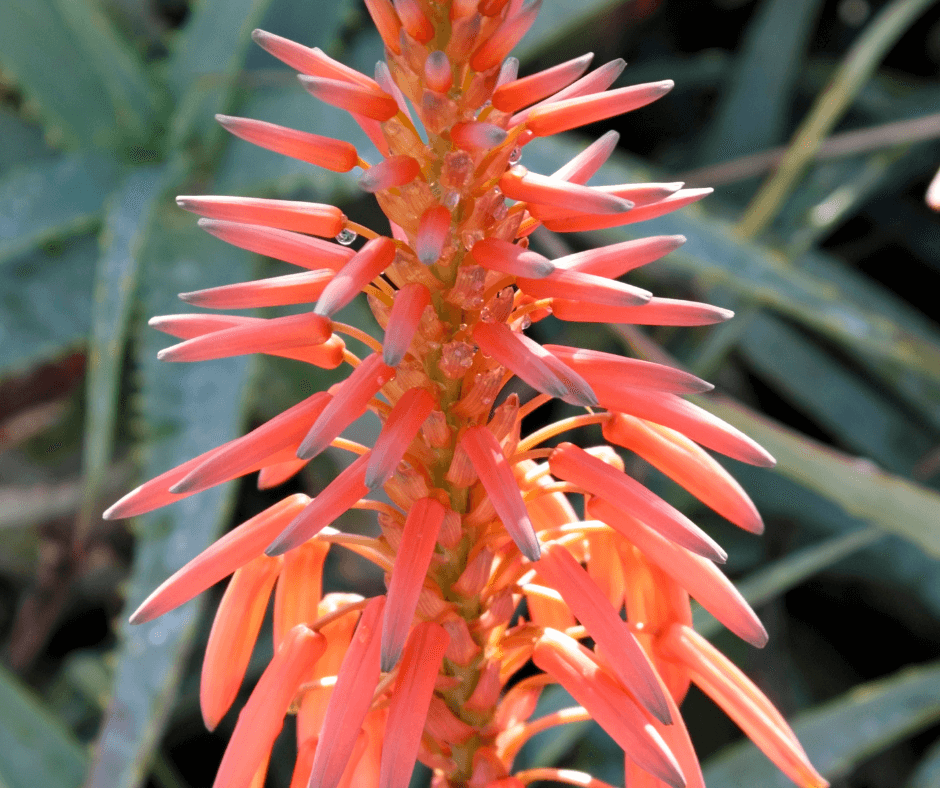
In temperate regions, many households, including mine, contain potted aloe vera as a house plant. It’s attractive as an indoor plant and very handy for the quick topical skin treatment of burns and scrapes. During the warm months, it is nice to bring it outdoors in a partially sunny spot where it can thrive in the fresh air and brighten a porch or patio. Southwestern gardeners have the advantage of being able to grow it outdoors as a landscape specimen. In warmer climates, the plants form robust clumps that produce spikes of reddish-orange, tubular flowers that attract hummingbirds.

One of the best things about the plant is how easy it is to grow and use medicinally. Aloe’s healing, anti-inflammatory properties are most potent when they come directly from the plant. No need to make a tincture or steep some tea in order to get treatment.

How to Care for Aloe Vera Plants

Pots and potting soil must drain well to encourage good.

Aloe vera is a succulent in the lily family (Liliaceae) that is easy to maintain. In fact, too much attention and watering will result in an unhappy aloe. Imagine the spare water that they receive in arid, tropical Africa. They don’t need too much. (Pro growing tip: only water your Aloe vera when the soil is completely dried out. I recommend watering every two weeks or so, but this can change based on the season and growing conditions. Outdoor plants typically need more water, especially in dry climates.)

When planting, pot them up in very well-drained soil–Black Gold Cactus Mix is an ideal choice. Good pot drainage is also a necessity. Place your potted plant in a spot where it can receive bright, indirect sunlight. Aloe is one of the more low-light tolerant succulents out there, but it should still get some sunshine to keep the leaves strong and robust. Plants receiving too much sunlight tend to take on a purplish color. Too little light results in thin, floppy leaves.

Aloe Vera Benefits

When grown outdoors in the American Southwest, Aloe vera will produce beautiful spikes of orange-red flowers.

The anti-inflammatory properties of Aloe vera are especially helpful for healing skin. Most know it for treating sunburns, but it also can help with frostbite, wounds, dermatitis, and other skin issues. It will also reduce redness, inflammation, and even itchiness caused by bug bites and poison ivy. (Cautionary note: It is very rare, but some people can be allergic to aloe. Test a little on your skin, and wait an hour or so to check for a reaction if you have never used it before.)

Aloe vera contains antiseptics and anti-bacterial properties, making it beneficial for treating small wounds. You can also apply it after a wound has healed to promote skin tissue repair and prevent scarring.

Outside of the skin, Aloe can be digested and work as a laxative. (Fair warning: it’s a strong laxative so use it sparingly.) Some new drinks on the market even contain Aloe vera juice, which can aid with digestion. Some studies even show the juice can help to prevent and reduce the size of kidney stones.

How to Treat a Sunburn with Aloe Vera

Let cut aloe leaves sit for 10 minutes before using them for first aid.

As a child, I loved playing outside and was very prone to sunburns. Obviously, it was not a great combination for summer fun. In those days, sunscreen was not available like it is today. My sunburns oftentimes kept me cooped up inside when I would rather be out playing. That was until the day my grandmother brought out the Aloe vera plant.

Placed on my sunburnt and freckled shoulders, the aloe brought my sunburn quick relief. I also saw the sunburns fade much quicker. Here are four steps to getting sunburn relief from an Aloe plant.

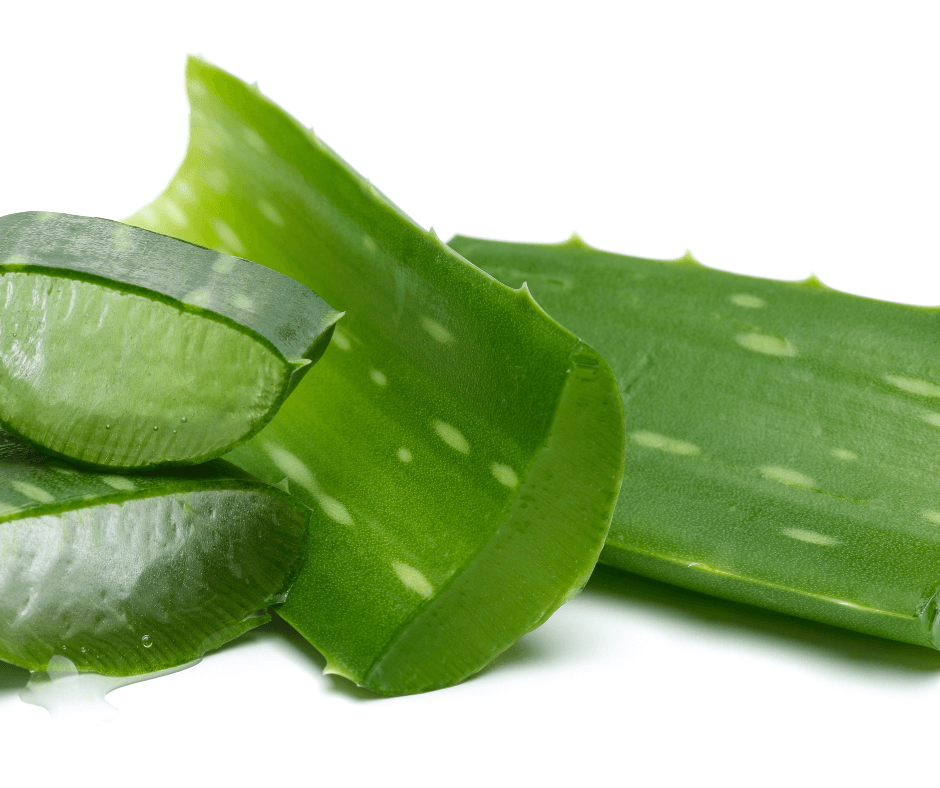
  1. Using a sharp knife, remove a portion of an aloe leaf. Depending on how much you need, this can be as big as a whole leaf or as small as the tip of the plant.
  2. Place the leaf on a paper towel and let it sit for ten minutes. This helps the dark, yellow latex to drain from the leaves. The latex can stain clothes or rarely cause reactions for people with sensitive skin.
  3. Wipe the sides of the cut to remove the remaining latex. Next, take your knife and cut the leaf down the center to get more gel.
  4. Apply the leaf directly to the skin. If your sunburn is hot and irritating, you can place the leaf in the fridge beforehand. The cold gel is extra soothing! Once you’re all done, compost the leaves.

Recipes for Using Aloe Vera in Homemade Skin Care Products

Aloe vera can be used in lots of useful skincare products.

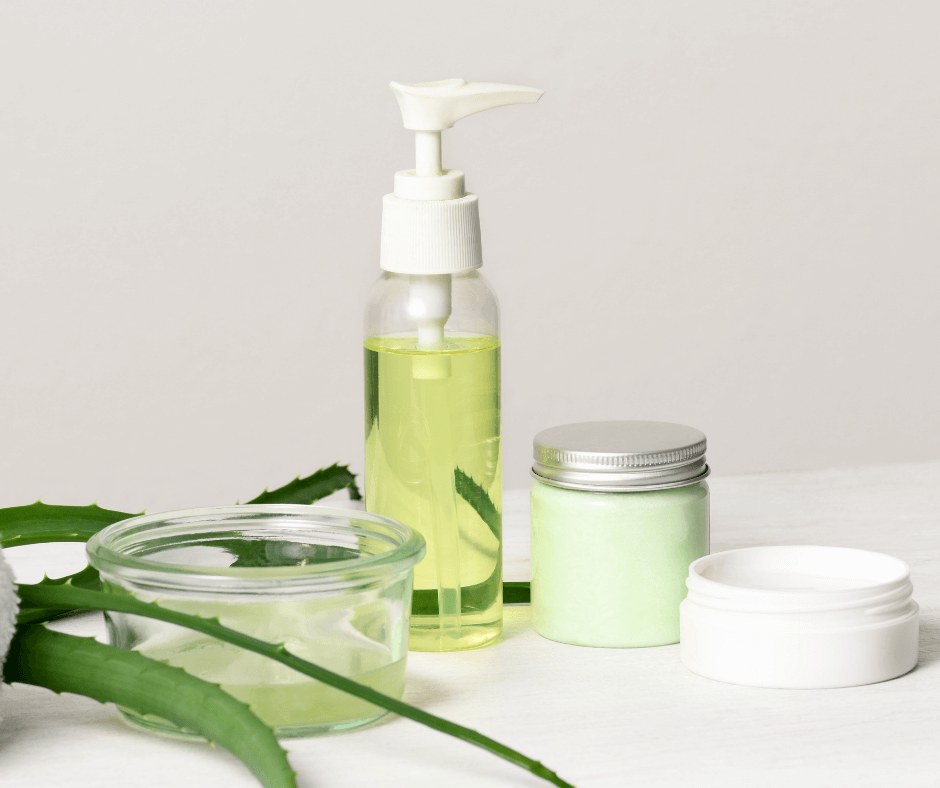
If you have healthy Aloe vera plants, then these recipes are a great way to use some of the wonderful properties on your skin.

Aloe vera liquid soap: With hand washing being essential around the globe these days, this healing aloe soap will also help repair skin.

Aloe vera hand sanitizer: When you can’t be near a sink, this healing sanitizer cleans hands on the go.

Aloe vera after-sun salve: When the summer sun gets the best of you, this salve is a great option for cooling the skin and helping with sunburn relief.


Herb Crafting: Three Herbs to Grow and Ways to Use Them

You don’t need a huge garden to make an abundance of herb crafts to benefit your home, garden, and artistic inclinations. Starting with just a few common and versatile herbs is an easy way to get your hands dirty and feel the magic of plants. I’ve chosen three herbs that are perfect for herb crafting because you can turn them into all sorts of potions, lotions, recipes, and garden crafts. Wait until you see all that you can create with these three familiar garden herbs: lavender, rosemary, and calendula.

English Lavender (Lavandula spp.)

Homemade lavender soap leaves one fragrant and refreshed.

Lavender is my all-time favorite scent. It’s light, floral, and soothing, but even more, it has helpful herbal properties that can be used in your home, garden, on your skin, and also in the kitchen. The scent of lavender has a balance of sweetness and spice that makes it appetizing and appropriate for baking, tea, soda-flavoring, and all kinds of body care recipes. The scent promotes relaxation and exudes cleanliness, which makes it ideal for scentings linens and clothing. And its antiseptic and antibacterial properties make it a perfect aroma to freshen the air, your skin, and your home.

Grow

English lavender (Lavandula angustifolia, USDA Hardiness Zones 5-8) is native to the Mediterranean, so it loves climates with hot, dry summers and cool winters. It is drought-resistant and thrives in well-drained soil with some organic matter and a neutral to slightly alkaline pH (6.4 to 8.2). Plant English lavender in full sun and prune in both early spring and late summer to keep a neat and productive plant. Cut it back up to one-third while pruning and reserve the unopened flower buds and leaves to use in recipes around the house. (For a more detailed growing guide, read more here.)

Harvest

Harvest Lavandula angustifolia when it has visible purple buds but before the flowers open.

For dried flowers, harvest Lavandula angustifolia when it has visible purple buds but before the flowers open; buds retain better color and fragrance. Harvest the stems in the morning when the oil content of the leaves and flowers is the highest. Use sharp, clean pruners. (Leave some of the shorter bud stems on the plant for bees.) Gather the harvested stems into a bundle, tie them together with twine, and hang the bundle upside down to dry in a cool place away from direct sunlight.

When dry, roll the stems between your palms over a plate to catch the buds. You can also remove the leaves to infuse the oil, vinegar, and make tea. Store the dried flowers and leaves separately in airtight containers for up to one year.

Make

  • Fill small muslin drawstring bags with dried lavender buds for sweet-smelling sachets. Tuck them into your pillow, linen closet, sock drawer, or anywhere that could use a little refreshing.
  • Make a lavender eye pillow with unpopped popcorn or flax seeds and lavender buds.
  • Add dried lavender to homemade bath salts, homemade soap recipes, bombs, melts, and other tub-time goodies.
  • Infuse simple syrup with lavender and add it to lemonade, soda, or your favorite cocktail.
  • Make a decorative lavender wreath that adds fragrance and beauty to the indoors.
  • Add dried lavender buds to your favorite herbal tea blend for a floral flavor and soothing effect that can help with insomnia. It pairs wonderfully with chamomile and rose.

Rosemary (Rosmarinus officinalis)

Homemade rosemary lemon salt is delicious and easy to make.

Rosemary has long been prized for its antiseptic and antibacterial properties. It is excellent for deodorizing and cleaning; the scent is purported to help focus and memory. In ancient times, scholars wore crowns of rosemary when studying for exams, so imagine how it can help you perk up in the morning shower! Did you know that rosemary is also well known to be THE herb for healthy hair? It stimulates hair growth and adds shine.

Most of all, rosemary is beloved for its delicious flavor in recipes. It ramps up a roast and cooked root vegetables and adds an earthy punch to soups and stews. Whether you are freshening up your home, trying to wake up or adding oomph to hearty recipes. Rosemary can’t be beat!

Grow

Rosemary cultivars have variable hardiness. Most overwinter in USDA Hardiness Zones 8-10, but some hardier varieties, like ‘Arp’, may survive in Zones 6 or 7. Otherwise, grow rosemary in a pot that you can bring indoors in fall or grow it as an annual. It likes well-drained soil and full sun. Rosemary does well in dry conditions, so be careful not to overwater it. Overwatering rosemary can commonly lead to root rot.

Harvest

Cut rosemary springs and dry them as you would lavender.

Cut sprigs of rosemary to use fresh or tie them up in a bundle to dry, the same way you would with lavender. When dry, remove the leaves by pinching the top of the stem with your finger and thumb and running it along the stem to the bottom. The leaves will pop right off. Keep dried rosemary sealed in an airtight container for up to one year.

Make

  • Make rosemary sachets to deodorize any place in your home that needs it, like gym bags and stinky shoes.
  • Add the leaves to homemade soap recipes or a morning salt scrub for exfoliating skin treatment and energizing scent that will help you start the day with a spring in your step.
  • Make a rosemary hair rinse by infusing three fresh new stems of rosemary in one cup of apple cider vinegar for 2-3 weeks. Apply to the scalp, massage in, and rinse thoroughly to add shine and softness. Here are a few more rosemary hair care recipes.
  • Whip up a batch of this rosemary lemon sea salt and sprinkle it on EVERYTHING. Yum.
  • Chew a rosemary leaf for an instant breath-freshener.

Calendula, Pot Marigold (Calendula officinalis)

Calendula tea is healthful and effortless to produce and store.

Many people view calendula as an annual garden flower, but with so many healing properties and beneficial uses, herb nerds see it more as a versatile garden herb. It’s been used for thousands of years to help heal minor wounds and inflammations, has a bright and sunny personality that attracts a host of beneficial insects to the garden, and it could not be easier to grow. Include calendula in your herb garden this year for some pops of color and fun herbal crafts.

Grow

Calendula is an annual that grows easily from seed either sown directly in the garden or indoors. Begin seeds indoors about eight weeks before transplanting calendula in the garden. Plant your calendula somewhere in the garden with good soil amended with fertilizer-boosted Black Gold Earthworm Castings that gets a lot of light but isn’t extremely hot. Deadhead and harvest the flowers liberally throughout the season, and you’ll have continual blooms to pick from spring to fall.

Harvest

Harvest calendula flowers when they are freshly open.

Harvest the full flower heads from new blooms and spread them out in a single layer in a drying screen (which can be as simple as using a window screen) or setting them in one layer in a shallow basket. Leave the flowers in a well-ventilated area that is cool, dry, and away from direct sunlight. After a few days, test for dryness. The petals should sound crunchy and not feel cool to the touch. Store the dried flowers in an airtight container for up to one year.

Make

  • Use fresh calendula petals to decorate cakes or other desserts. The bright orange and yellow ray florets are a festive natural way to add color that is appealing on sweet treats.
  • Calendula petals have a mildly spicy taste that pairs with savory foods as well. When entertaining, add them to salads and pizza for a fresh summer presentation that also helps to aid in digestion. They also make a soothing, healing tea.
  • Add dried petals to bath salts for natural colors and a spa-bathing experience amongst floating flowers.
  • Infuse your favorite oil with calendula petals and then add it to any skincare recipe that calls for oil.
  • Make a healing salve for minor cuts, bruises, and scrapes.