How Do I Care for Creeping Charlie (Pilea nummulariifolia)?
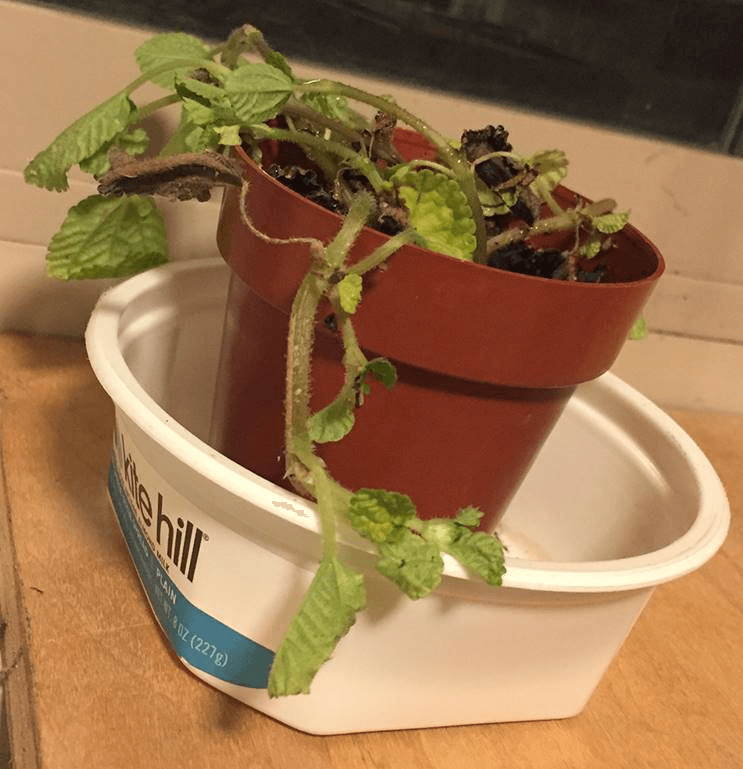
“I recently purchased this Creeping Charlie for indoors, and again, received not so great information (let it dry fully before adding water, etc.). It was fine one morning (there had been some brown leaves, which I was told was because I was overwatering it), but when I got home, it looked like this (image below). Water brought it back somewhat. Now only two of the groups of leaves you can see above remain. I am assuming that putting it in a larger pot will help keep more consistency in the moisture, but need to know what of your products should I use (and if possible, again, recommendations for pot size, methods, etc.). It gets mostly filtered sunlight here, with a few minutes a day of direct sunlight.” Question from Joseph
Answer: Creeping Charlie (Pilea nummulariifolia) is a tropical groundcover native to the Caribbean and areas of South America that grows beautifully as a trailing house plant. Yours needs a new home and a little care to bring it back to glory, but it is not beyond hope. It is quite easy to grow once you know what it needs.
Creeping Charlie Care
Choose a larger well-drained pot with holes at the bottom and a saucer to catch water. A 6-8” pot would suffice. Black Gold All Purpose Potting Mix would be perfect for its needs. Creeping Charlie (Pilea nummulariifolia) likes even moisture, but allow it to dry out somewhat between watering, and water it less in winter–maybe once a week or so. Give it bright, indirect light, and feed it lightly with a slow-release fertilizer formulated for house plants. When it outgrows its pot, repot in spring. Like most tropicals, it likes some ambient humidity, so avoid planting it near vents or fans where it will be subjected to dry air.
Create an easy fairy garden filled with tender succulents that will look great through summer and winter. We used a bowl-shaped planter filled with Black Gold Cactus Mix and lots of beautiful succulents from Mountain Crest Gardens. Product links are below.
“I recently purchased a few house plants and would like to know what soil is best for them that you sell. What are the best soils for my house plants?” Question from Amanda of Leduc, Alberta, Canada
Answer: Here are our potting soil recommendations for each plant.
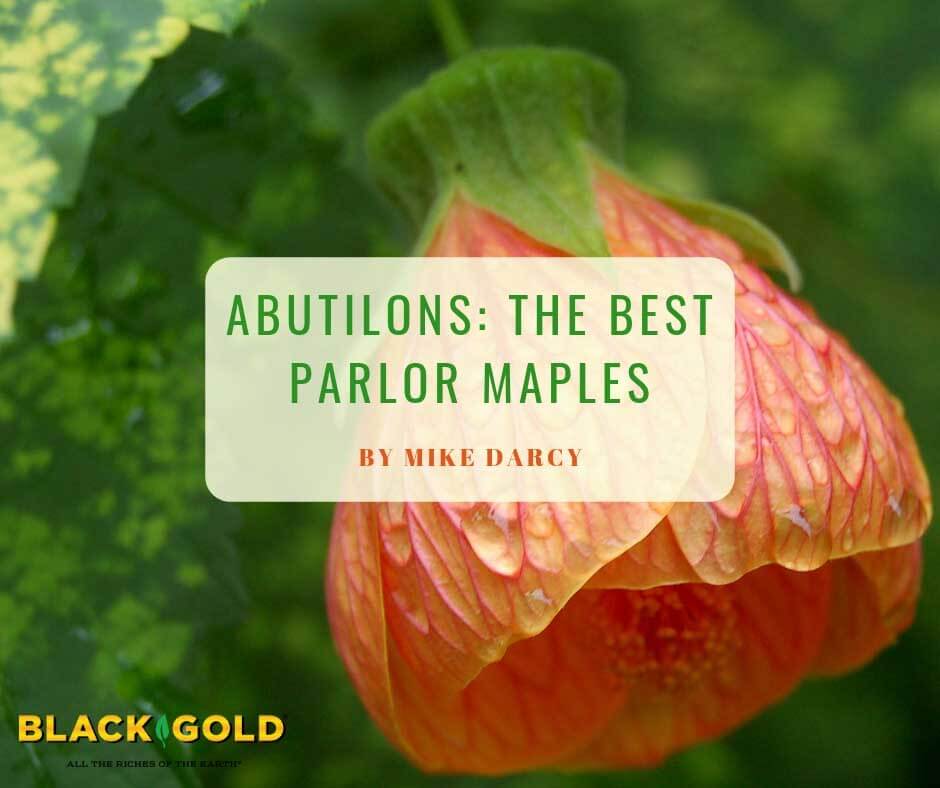
“What time of year do you prune an Abutilon?” Question from Angie of Fort Bragg, California
Answer: Parlor maples or Indian mallows (Abutilon hybrids) are tropical to subtropical plants that can be pruned to shape at any time. Cultivated forms do, however, bloom on new wood, so late-winter or spring pruning is recommended. Especially if you plan to trim your plant just once a year. These shrubs can be cut back quite a bit and rebound beautifully. Another option is to carefully thin overgrown stems back to main or central branches or remove smaller tip branches. It depends on how large you want your shrub to grow. Shearing is not advisable.
Dead, diseased, or winter-damaged stems should always be cut off.
“I just fell in love with the ponytail palm plant. I would like it in my dining room that gets some afternoon light. How much light does it need?” Question from Ann of Lookout Mountain, Georgia.
Answer: I have a ponytail palm, too, and just love it! Ponytail palm (Beucarnia recurvata) is native to arid regions of Mexico and needs low water, especially in the winter months, and high sunlight. It can withstand partial sun in winter, if necessary, but if you want your specimen to really thrive, I recommend bringing it outdoors in summer.
Don’t take it outdoors in spring until the threat of frost has passed and days have warmed up. Then let it soak up the sun in a slightly covered area that won’t get inundated with heavy rain. It is fine to give it moderate water outdoors in the summer, especially when days are very hot and dry. To ensure fast soil drainage and protect roots from rotting, I recommend planting it in Black Gold Cactus Mix.
In mid-fall, bring it indoors into your partially sunny dining room. Clean it before bringing it inside as a house plant. (Click here for tips on cleaning plants before bringing them indoors.) Once inside, you can water less. Then in November, give it very little water until the following spring.
What is the best way to plant Cyclamen? Question from Melba of Texas
Answer: It depends on whether you are planting tender, greenhouse-grown Cyclamen in pots or hardy Cyclamen in the ground. I’ll cover the planting details for both and how to get them to bloom beautifully.
Potted Cyclamen
Cyclamen grow best in well-drained potting mix that is kept just moist, never wet. Water them just from the base or bottom water them, by filling the pot’s saucer with water, to avoid getting the flowers and foliage wet. Plant them in a pot that’s several inches larger than the old, and gently work the plant’s roots if they are pot bound. Place several inches of Black Gold All-Purpose Potting Mix at the base of the pot, and fill in around the edges, while being sure to leave at least an inch or two at the top for watering.
Indoor cyclamen like cool indoor temperatures and bright indirect light. Feeding them with an all-purpose slow-release fertilizer will keep them flowering well.
Hardy Cyclamen
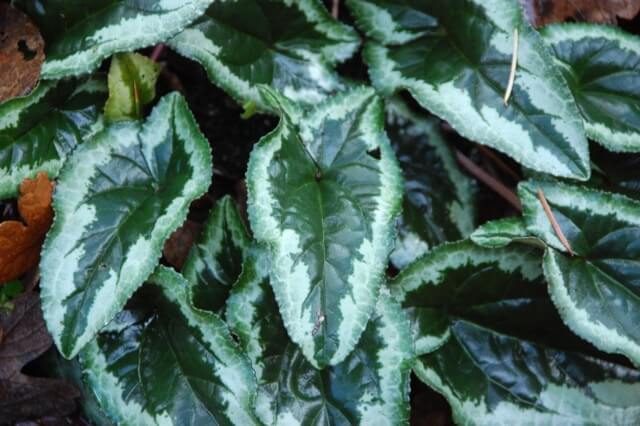
There are several hardy cyclamen that will grow well in your Texas garden. These include the shade-loving Cyclamen hederifolium ‘Silver Arrow’ (USDA Hardiness Zones 4-8), which has pink spring flowers that appear without the foliage and silver foliage that pops up in fall. Cyclamen mirabile (USDA Hardiness Zones 6-8), is another pretty hardy cyclamen for partial sun to shade with pale pink flowers that bloom from September through December above leaves that have silver and green patterns. Both of these plants appreciate soil with high organic matter and excellent drainage. I suggest raising their planting areas and amending with Black Gold Garden Compost Blend before planting. Provide them with moderate moisture during the growing season.
Growing house plants all together in a dense tangle encourages pests to spread and multiply!
When garden plants are outdoors, pest populations are generally lower or more diffuse due to natural predators, harsher weather, and more host plants. But, once you bring plants indoors, all of that changes. Predators are gone, climate conditions are good, and the pests that enter your home have just a few plants to feed on. This means hungry pest populations will explode on your house plants, causing damage and wreckage along the way.
It is essential to start an integrated pest management (IPM) program as soon as pests are spotted. But, each pest and its management is different. Here we detail some of the worst house plant pests and how to tackle them indoors.
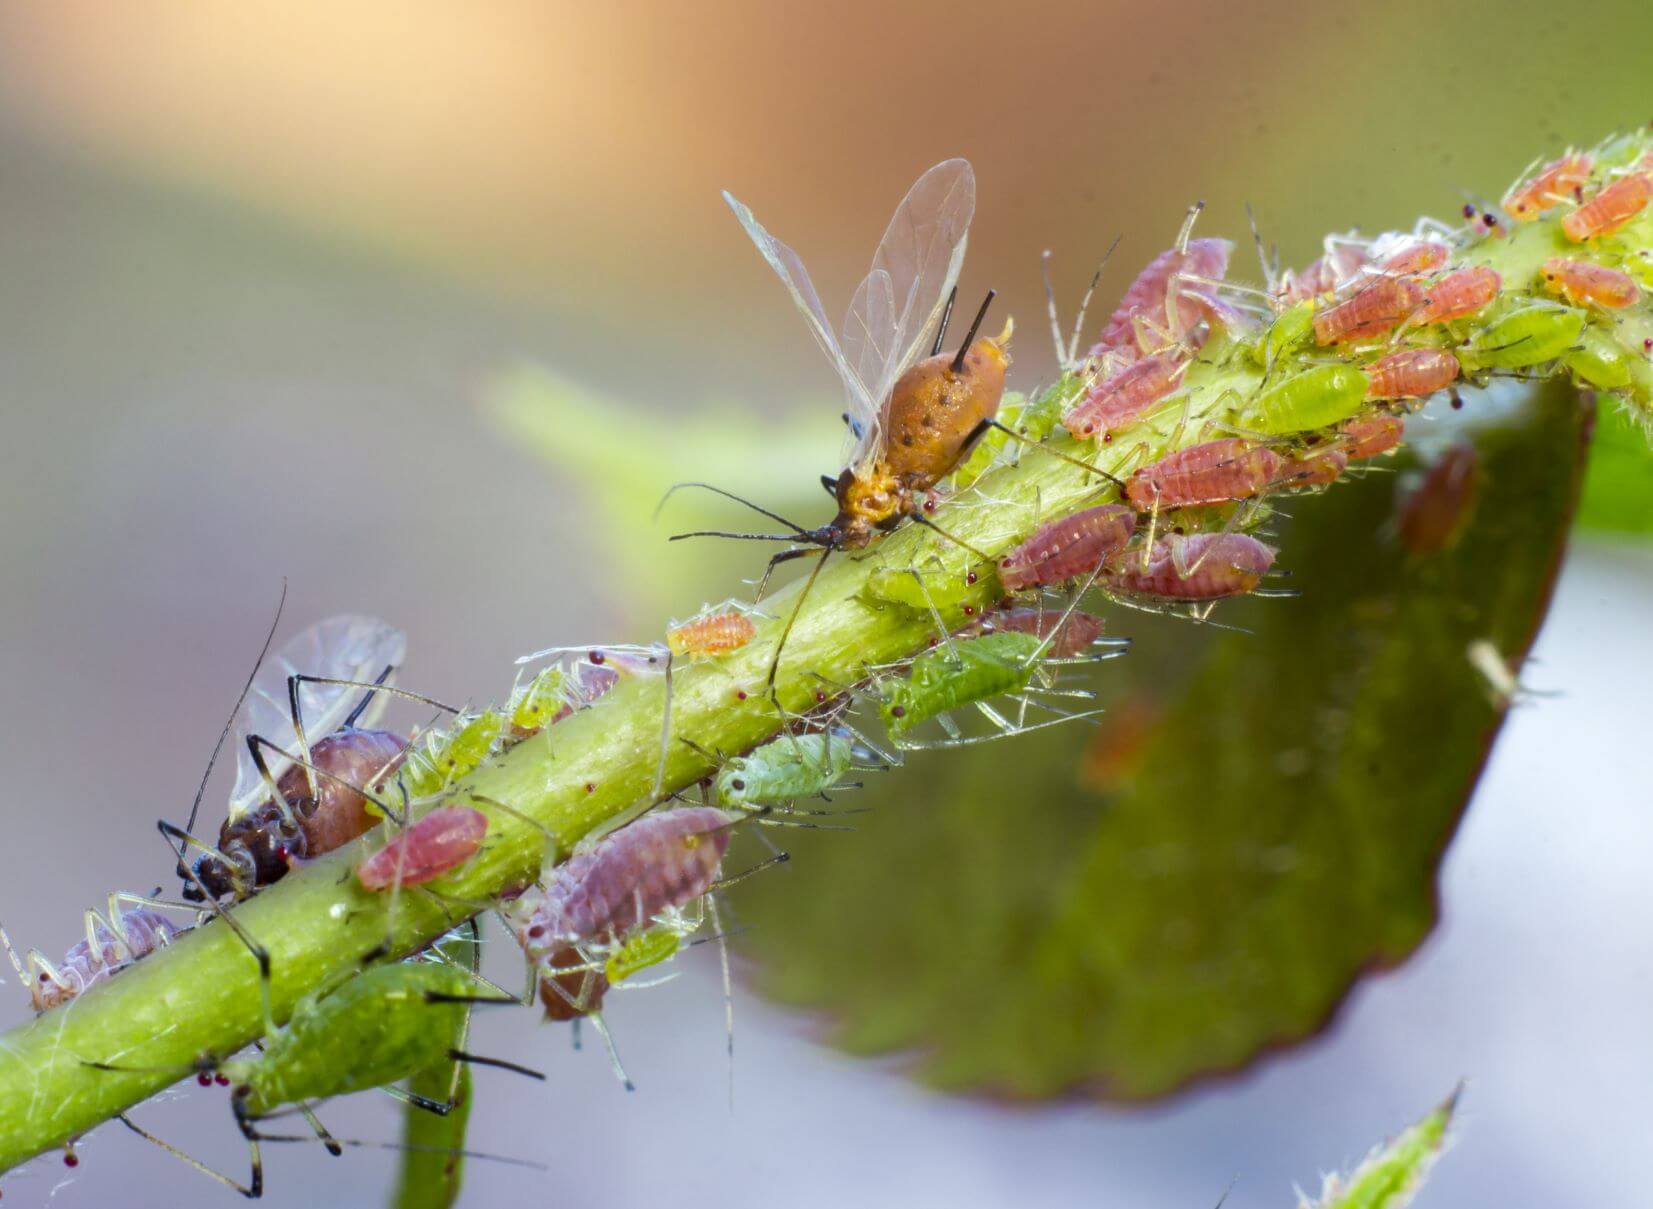
Aphids
(Photo by Jared Belson)
Aphids fly in from the outdoors or enter on infested house plants. They suck the juices from tender stems and leaves, leaving a trail of sticky honeydew that sometimes attracts ants. (Click here to learn how to manage unwanted ants in gardens.) Thankfully, they are easy to manage. Simply wash and wipe aphids away from leaves and stems with a warm, moist cloth, and then spray any remaining aphids off with tap water. Let plants dry, and then spray again with an OMRI Listed insecticidal soap. Check your pot’s topsoil to make sure any wayward aphids are not hanging out in wait to reinfest plants. Continue these practices, and your aphid problems will be gone in no time.
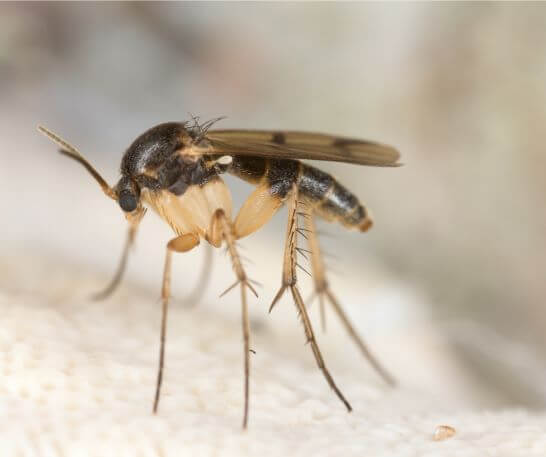
Fungus Gnats
Fungus gnats can fly into homes or enter via infested plants or open potting mix bags. They breed on moist soils and their larvae damage roots and spread plant diseases. Truly they are everywhere soil, algae, fungus, and plant material can be found. Once indoors, populations explode because most gardeners don’t understand how to stop them or how they enter the home. But, don’t despair! Follow the simple cultural guidelines in this video (click here to watch) to easily stop fungus gnats from breeding in your house plants.
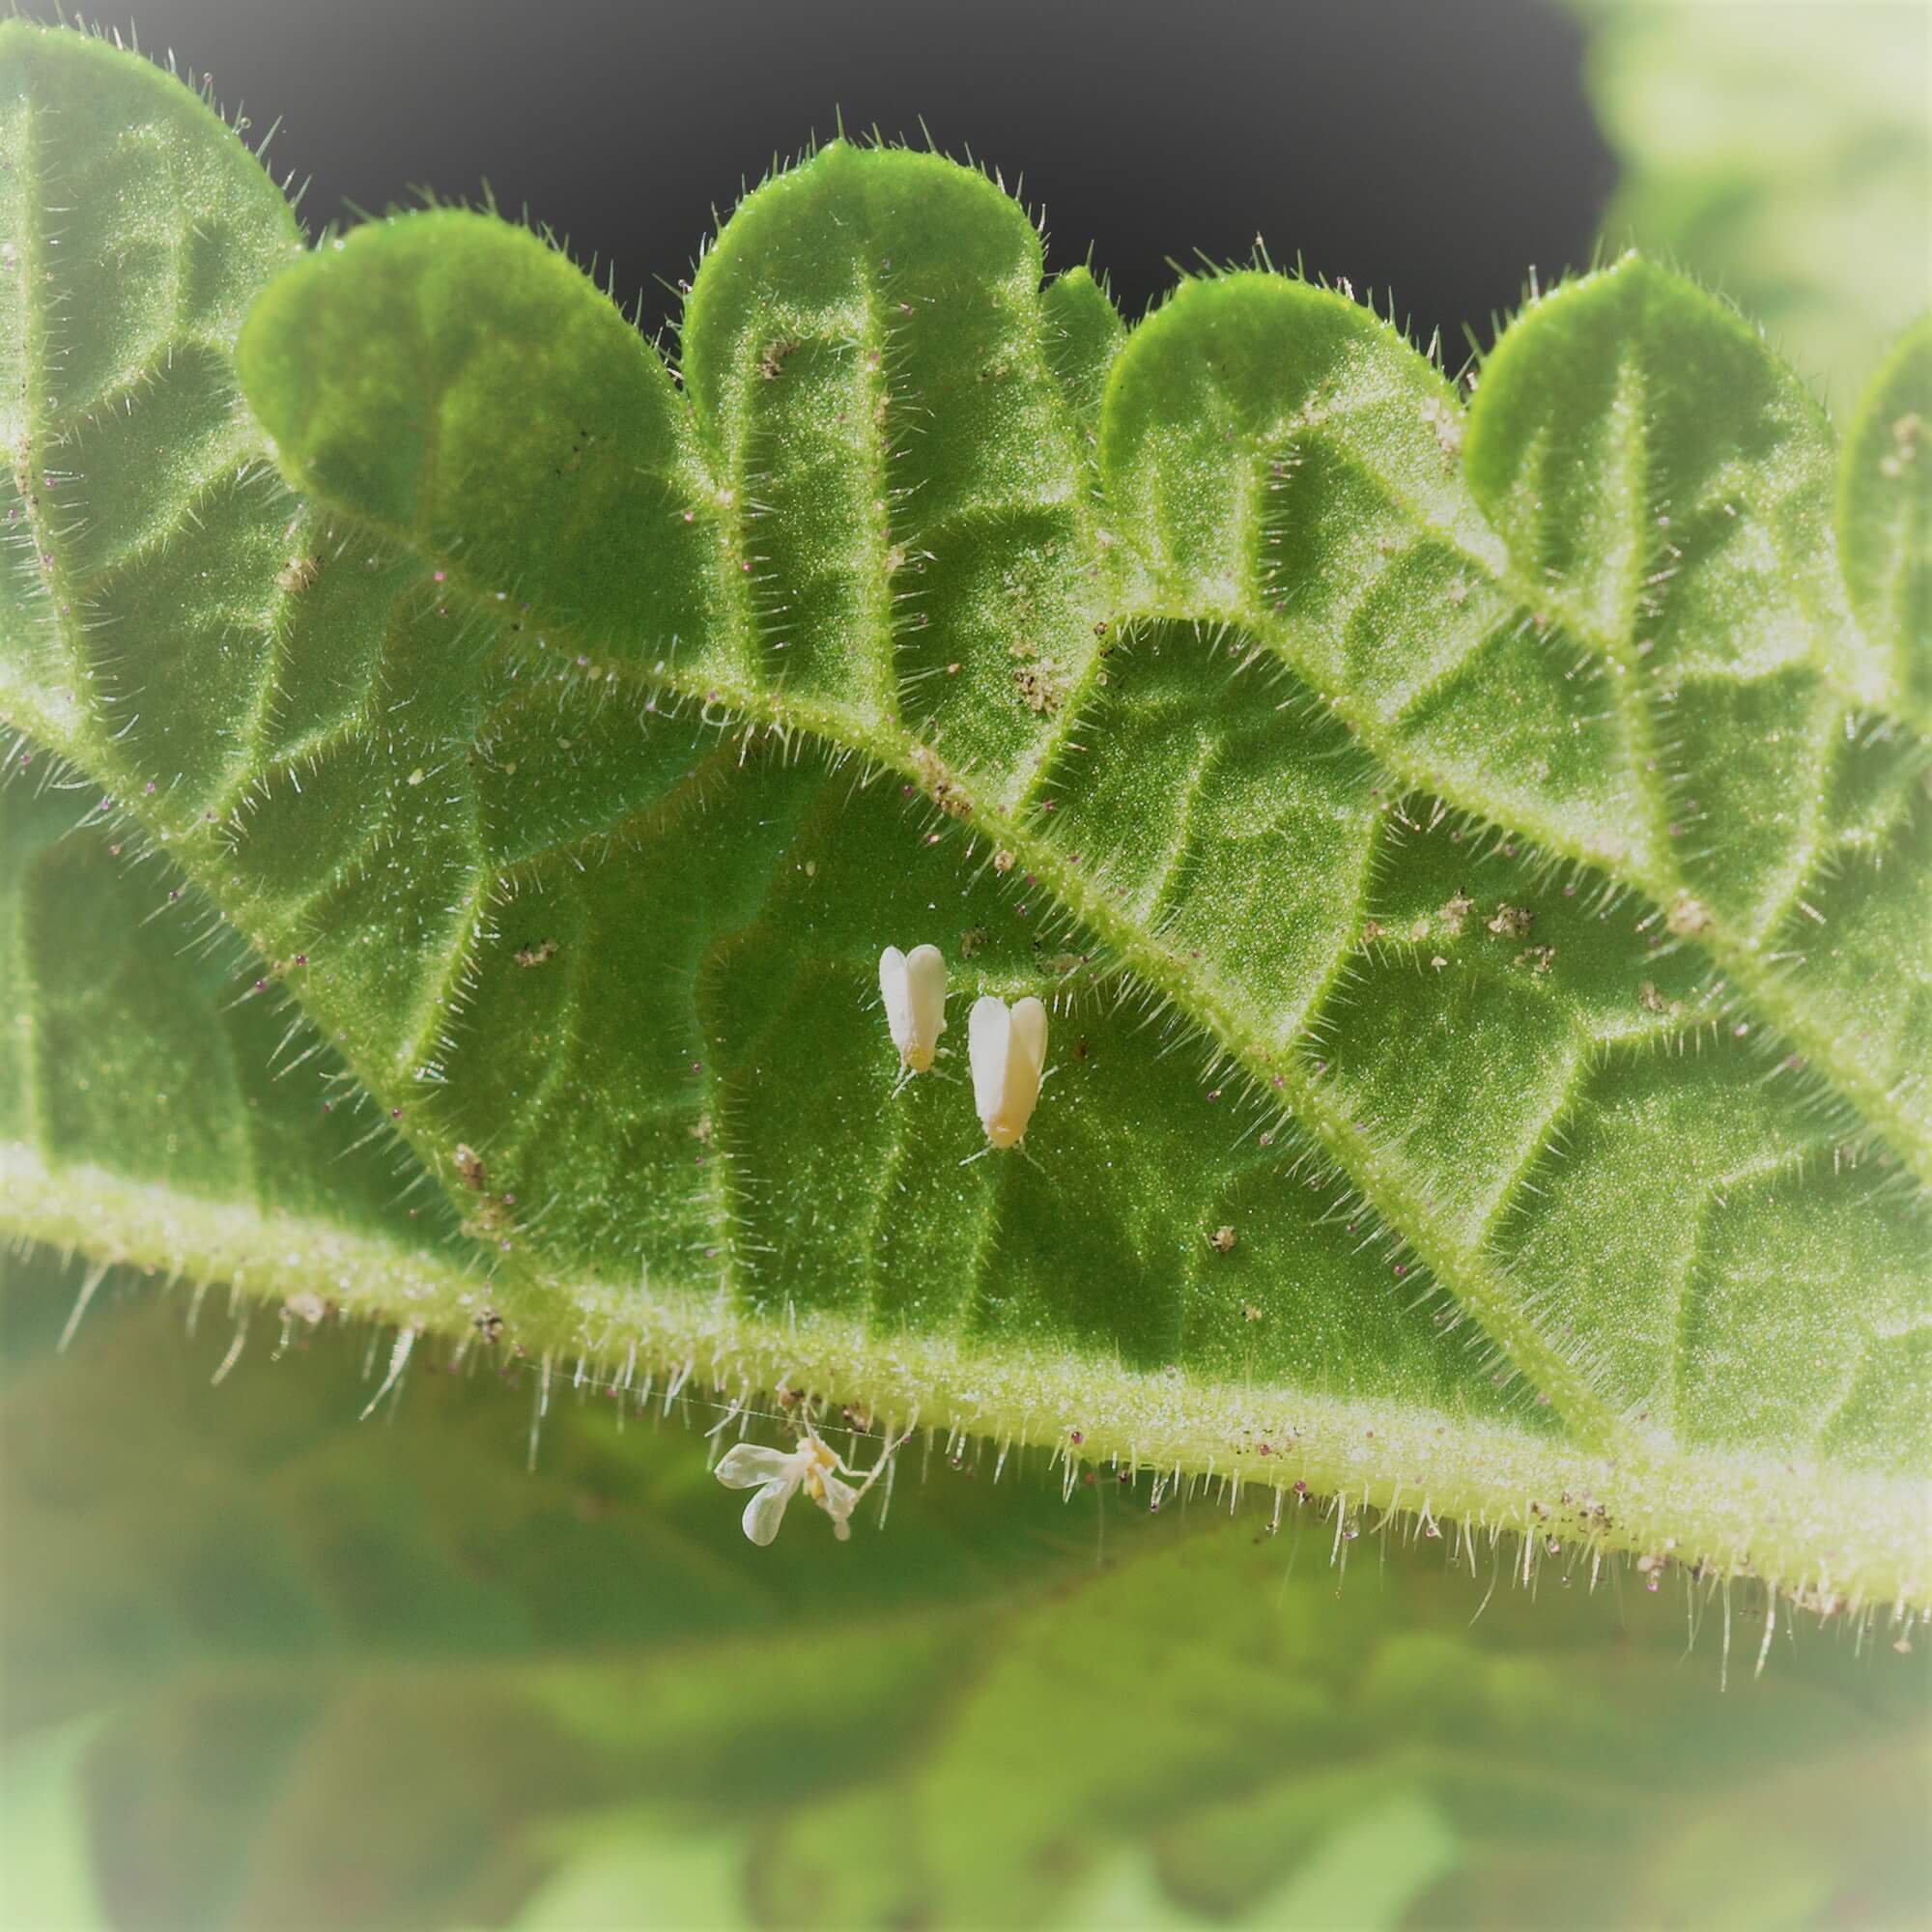
White Flies
Whiteflies on a leaf underside
Whiteflies are sucking insects that remove the juices from leaves and stems. They can cause terrible damage to plants, leading to leaf drop and general decline. Without management, the undersides of leaves will become covered with clouds of tiny white flies and clusters of their small, round, white egg masses.
If you have an infestation, remove the worst of the white-fly-covered leaves, especially those with lots of egg masses, and bag them for trash disposal. Then spray, wash, and wipe the remaining stems and leaves thoroughly. Make sure no more egg masses remain. Finally, spray the plants with insecticidal soap or Neem oil. (Click here for an overview of horticultural oils for organic insect control.) Continue to check for whiteflies and wipe and spray leaves as needed.
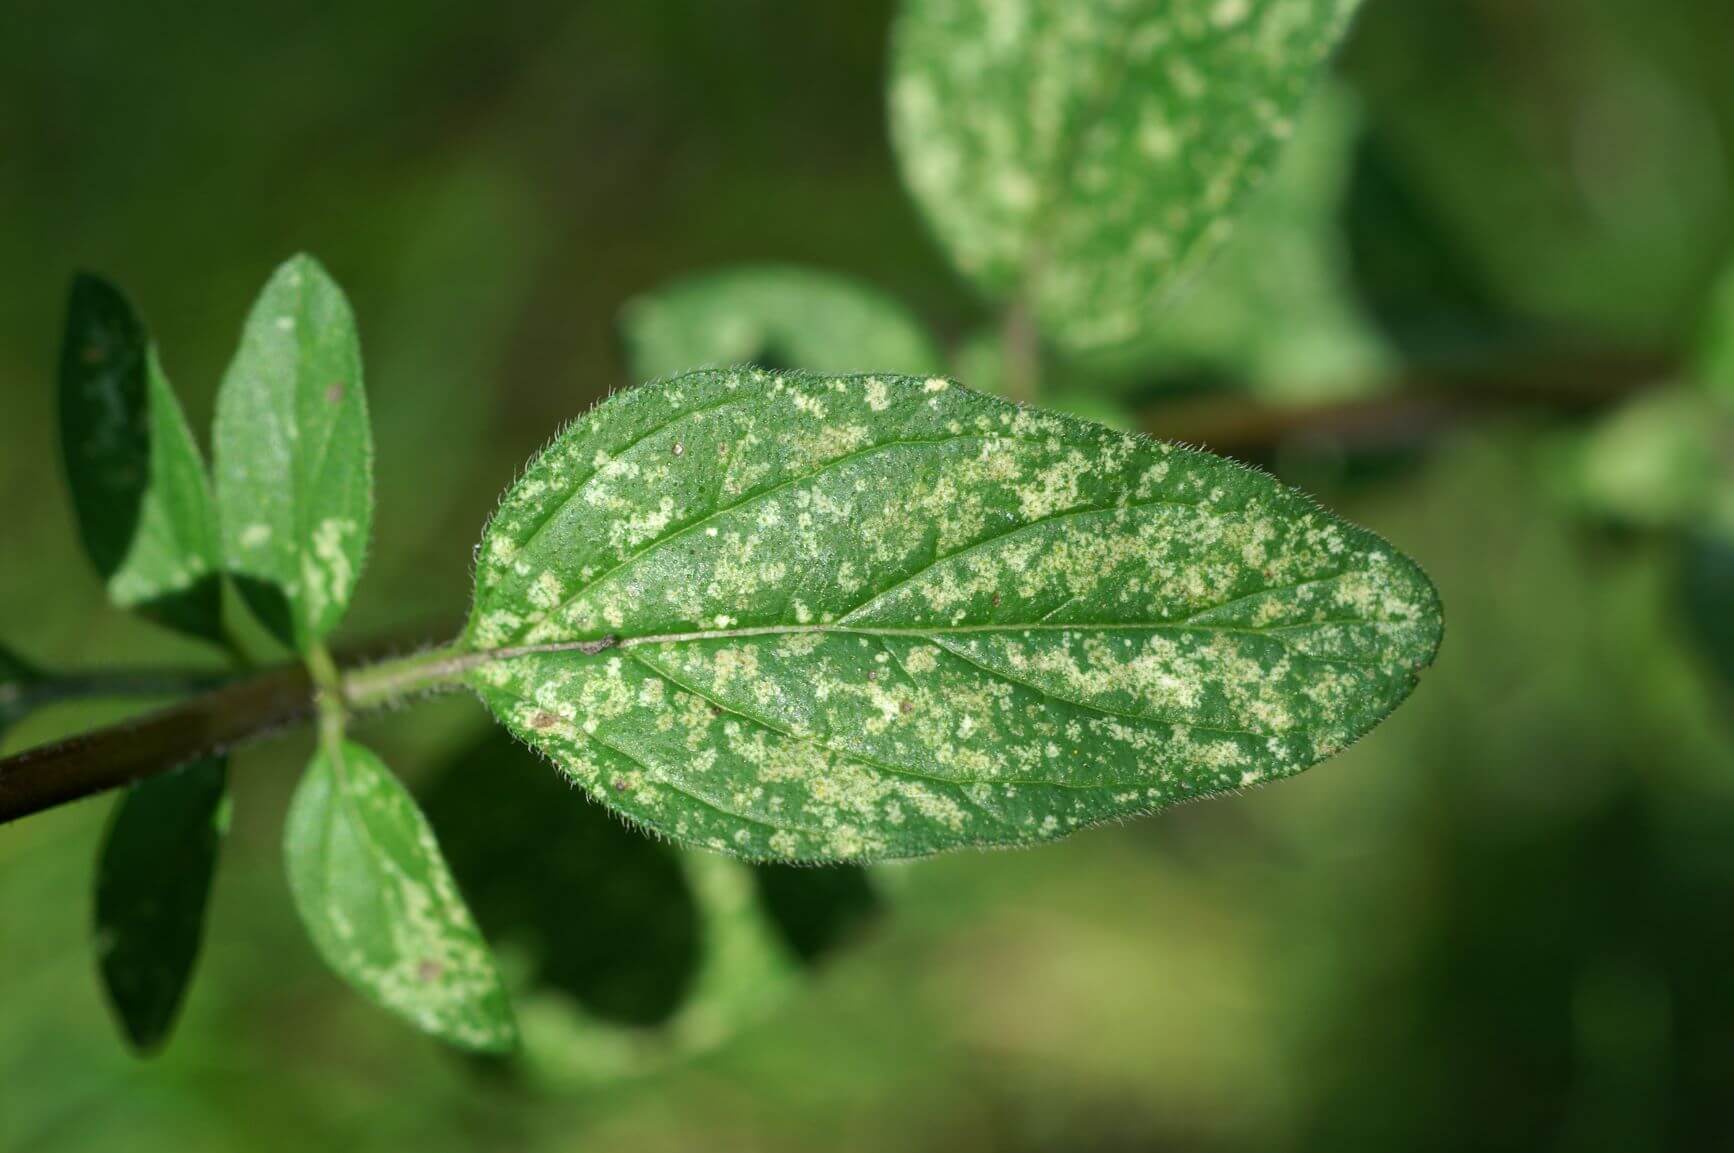
Spider Mites
A top view of two-spotted spider mite damage.
These are tiny plant pests, and once you notice their damage, they are numerous and have already become a large problem. You will notice the damage when the tops of leaves look like they have little white spots across them. These are dead leaf cells that the mites have sucked dry. You might also see little webs on the leaves and tender stems of infected plants.
To see if you have mites, take a clean piece of white paper, hold it beneath the leaves, then tap the leaves onto the paper. If you have mites, lots of tiny specs will fall, and eventually, they will start crawling around. These are spider mites!
As with aphids and whiteflies, always clean plants before treating them. Remove the worst of the damaged leaves. Then spray, wash, and wipe the remaining stems and leaves thoroughly. Remove the top inch of potting soil and replace it with fresh. (We recommend using Black Gold All Purpose Potting Mix.) It also helps to wipe the container down, in case any mites have strayed. Finally, spray the plants with insecticidal soap or Neem oil. Continue to do the tap test and wipe and spray leaves as needed. In time you will overcome your spider mite problem.
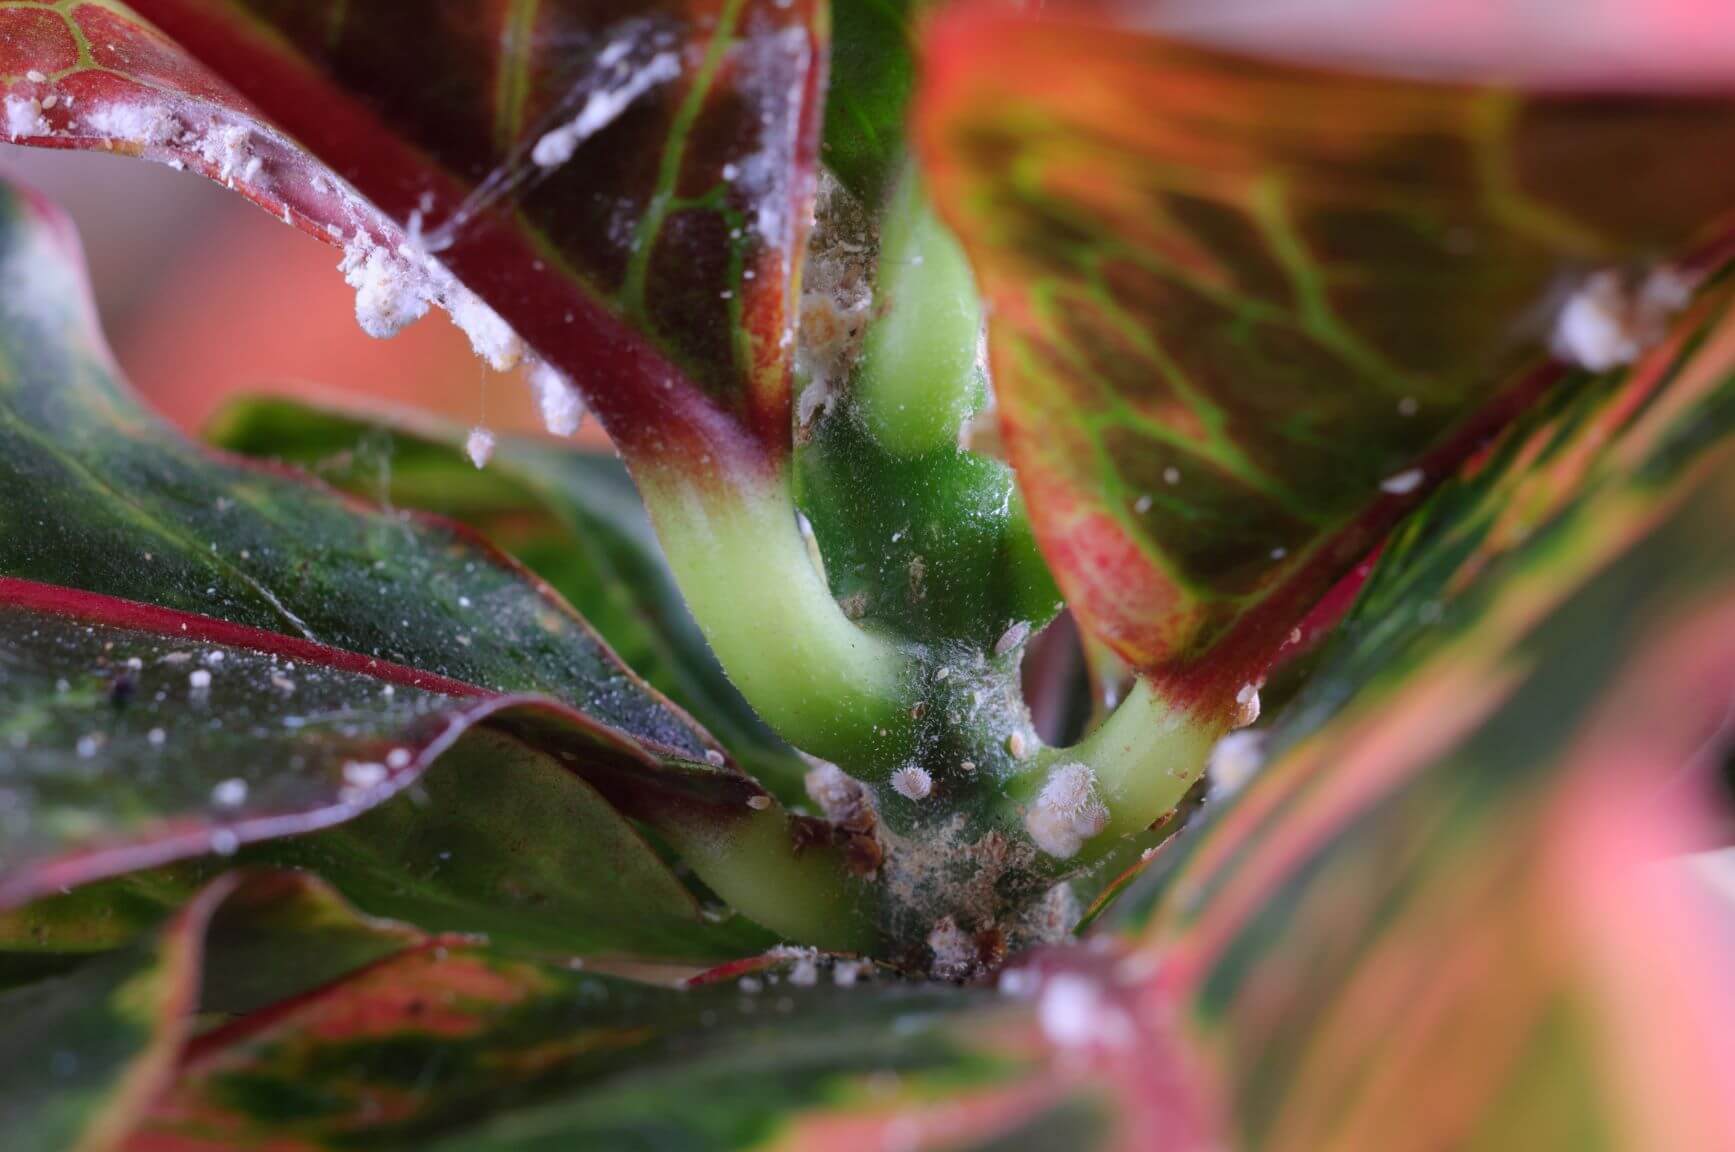
Mealybugs
A mealybug infestation on croton.
Mealybug infestations are hard to manage because these pests travel and spread as crawlers. Crawlers are the nearly invisible nymphs that hatch from the pest’s egg masses and “crawl” several feet to quickly infest other plants. You can’t always see these crawlers, so to manage them, you have to clean plants, containers, and surrounding surfaces when you see an infestation.
Mealybugs are soft, white, and feed on the juices of plant leaves and stems, particularly in the crevices between leaves and stems. They produce copious crawlers, so the sooner you notice mealybugs, the better.
To remove mealybugs, start by cleaning your plant, its pot, and all surfaces surrounding the plant. Remove the top two inches of potting soil and replace it with fresh. Finally, spray the plants. One of the best mealybug sprays is a 10-25% solution of isopropyl alcohol. Fill a spray bottle with 1/4 cup of isopropyl alcohol and 2/4 cup water and shake to combine. When treating plants with this solution, keep them out of direct sunlight because it can cause leaf burn in the bright sun. You can also treat plants with insecticidal soap or Neem oil. Repeat spray treatments until plants are mealybug-free.
Another method to stop crawlers is to loop stems surrounding infected areas with double-sided tape traps. As the crawlers hatch and begin crawling, they will get stuck on the tape and die. You can also surround pot edges with double-sided tape to keep crawlers from moving beyond an infected plant.
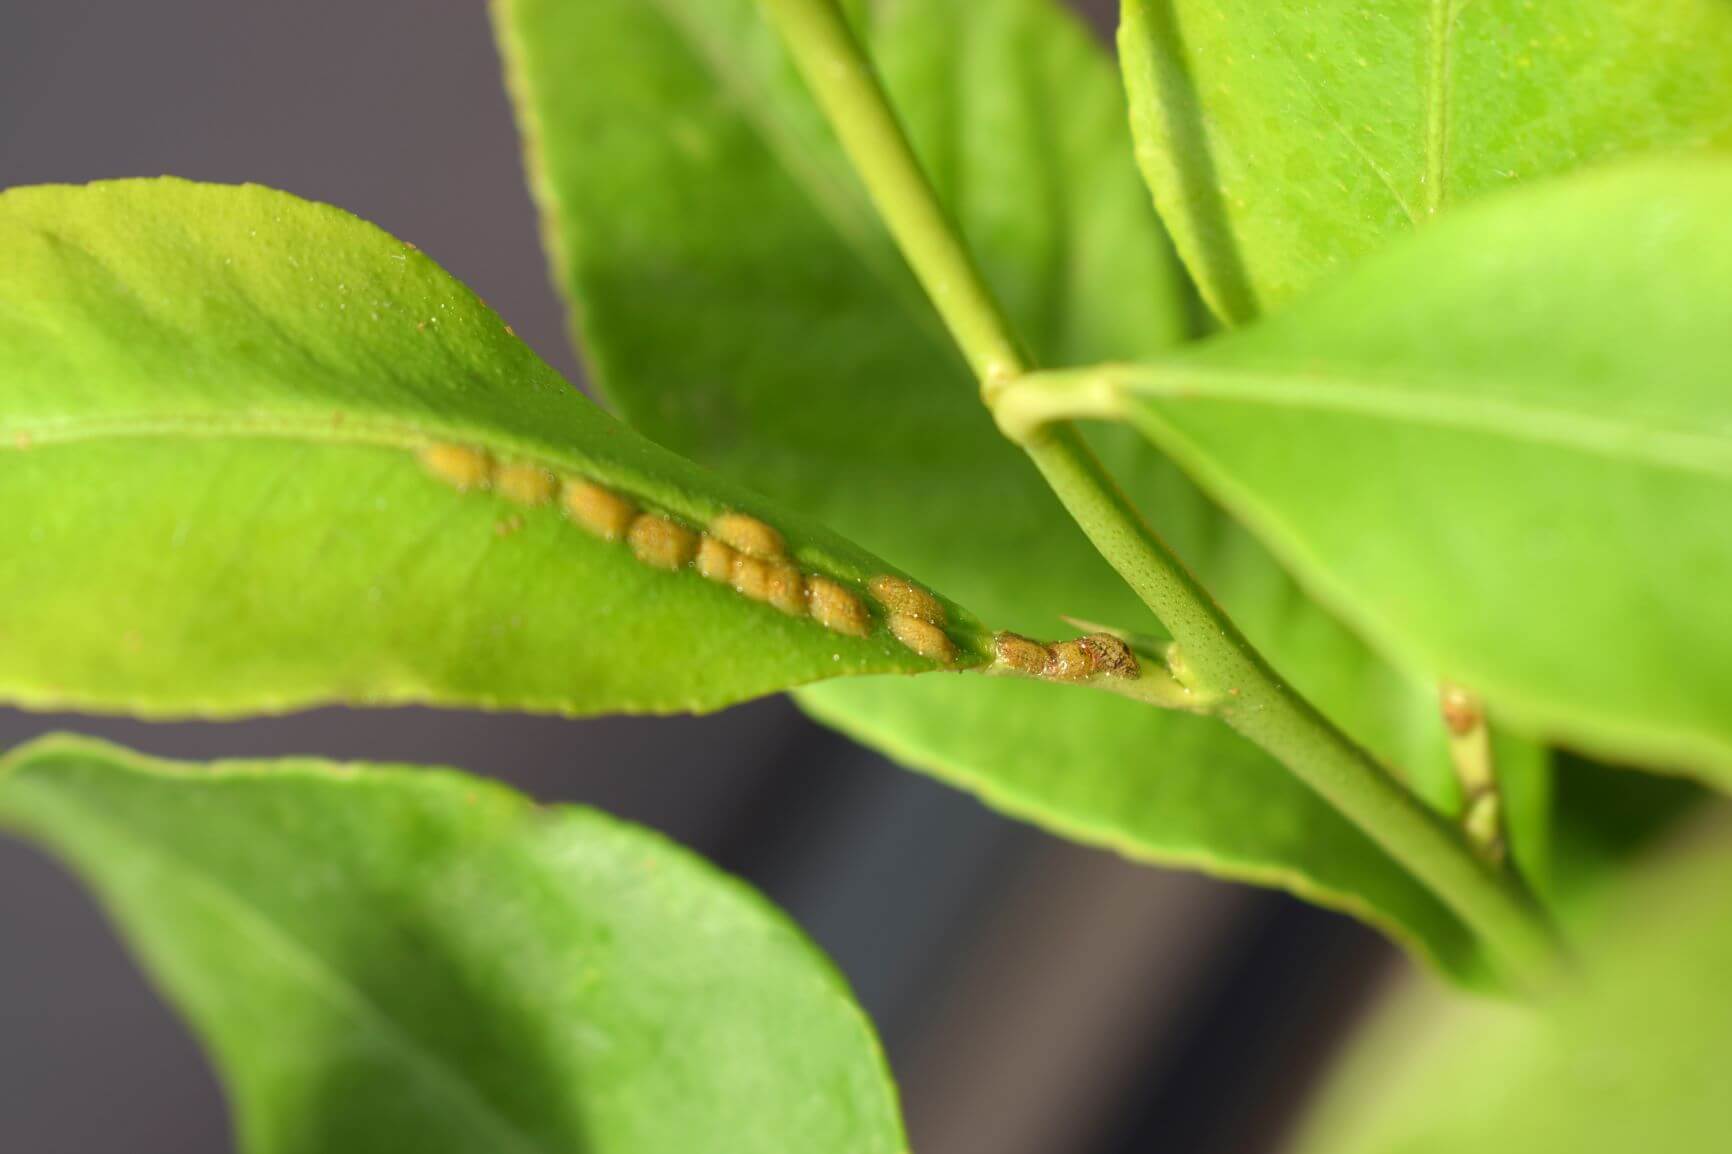
Armored Scale
Citrus scale on an indoor orange tree.
Armored scale is tough, a pain to remove, and many different species attack many different plants. Like mealybugs, they are sucking insects that produce crawlers. Their chief damage is the removal of water and nutrients from stems and leaves, which will slow growth and cause general decline. Severe infestations can even kill a plant.
Armored scale insects have tough, plate-like coverings to protect the insects underneath. Most have several generations a year when plants are actively growing. Simply washing or spraying these tough, slow-moving pests won’t do a lot of damage. What helps is to scrape or pick them off, without doing damage to stems. Badly infected stems should be completely cut off. Then wash plants down with insecticidal soap.
It also helps to spray plants with dormant oil spray in late winter or early spring, and then again in early summer, when crawlers are most active. Double-sided tape traps should also be applied, as suggested with mealybugs. Monitor your plants regularly to stay on top of any scale infestation and repeat management steps as needed.
Monitoring Pests with Sticky Traps
Flying indoor plant pests are attracted to yellow sticky traps, which can be purchased at most garden centers. Placing them around house plants is a great way to determine pest types and population numbers in the home. They also capture flying adults. It’s just one more way to stay on top of difficult house plant pests.
“Do you have any idea what kind of house plant this is?” Question from Donna of Cape May, New Jersey
Answer: Yes! It’s a variegated rubber tree (Ficus elastica ‘Variegata’). It grows best in a great potting mix, like Black Gold All Purpose Potting Mix. Give it bright indirect light or partial shade. Water its soil regularly from spring to fall and reduce watering in winter. It is very tough but cannot withstand overwatering. To keep it looking its best, clean its leaves with a soft cloth moistened with warm water when they get dusty.
“I have a lemon tree that’s five, or six, years old. I was wondering how old they have to be to produce fruit, and if there has to be two of them, or is cross-pollination not necessary?” Question from Royce of Texas
Answer: A lemon tree should be fruitful by five years of age. Most lemons are self-fruitful and do not require cross-pollination, but they do require bright sunlight and good care to flowering and fruiting. Has your tree begun to flower? If so, give it good care and it should begin fruiting for you. For care instructions, I recommend you read our article titled Growing Lemons, Oranges and Other Citrus Indoors (click here to view the article). It will give you all the information you need to encourage your indoor lemon to fruit.
“I have some large peace lilies that the leaves sprout up like crazy but then start to turn completely brown, they are been doing this for over a year. What is causing this?” Question from Mary of Huntington, West Virginia
Answer: Several problems may be at play regarding your peace lily (Spathiphyllum spp.). Over watering, under watering, planting too deep, and fungal diseases can all cause leaf decline in newly emerging foliage or existing foliage. So, let’s start with what these plants need to grow well.
1. Bright, filtered sunlight or partial shade (never direct sunlight);
5. Warmth (temperature between 65 and 80 degrees Fahrenheit (18-26 degrees Centigrade).
Here are factors that can cause decline and eventual plant death:
1. Over watering;
2. Deeply planted plants;
3. The fungal diseases Cylindrocladium spathiphylli and Phytophthora parasitica, which both cause foliar decline and root rot disease (both are encouraged by over watering and deep planting).
4. Under watering
I recommend starting fresh and repotting your plant. Start by removing your peace lily from its current pot and discard the old planting mix. Next, remove any dead or dying leaf or root tissue. Clean the planting pot in hot, soapy water and refill it with fresh potting mix (Black Gold All Purpose Potting Mix or Black Gold Natural & Organic Potting Mix are great choices). When replanting, make sure your peace lily’s upper roots are close to the surface. Then water it well and place it in a location with bright, indirect light. Allow the soil to dry quite well between watering.