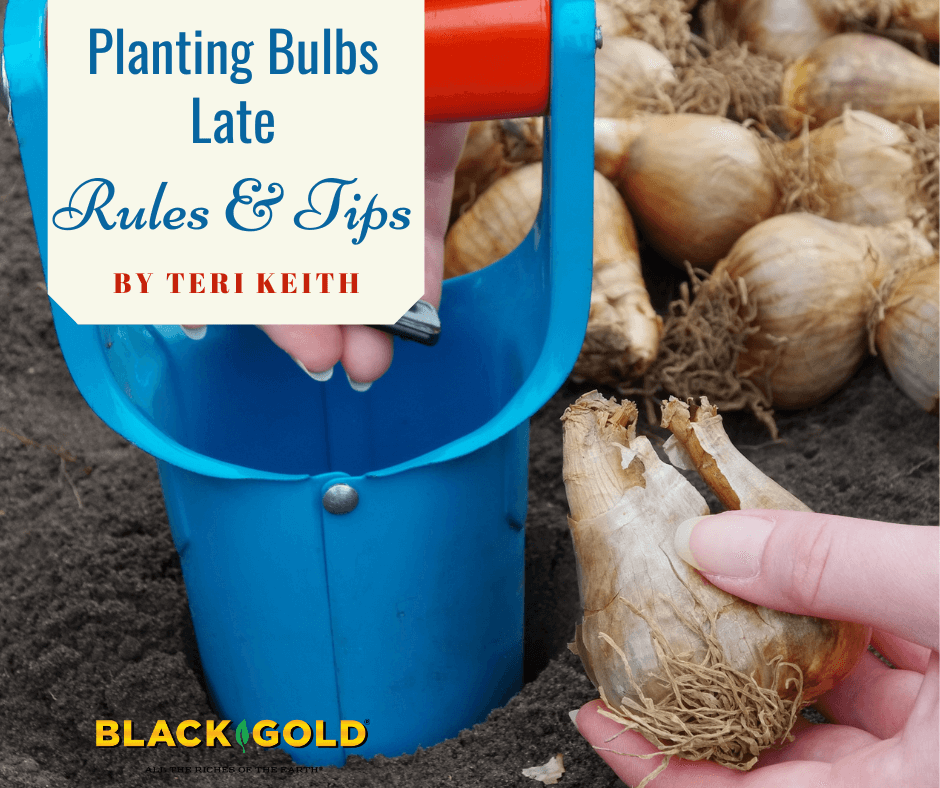
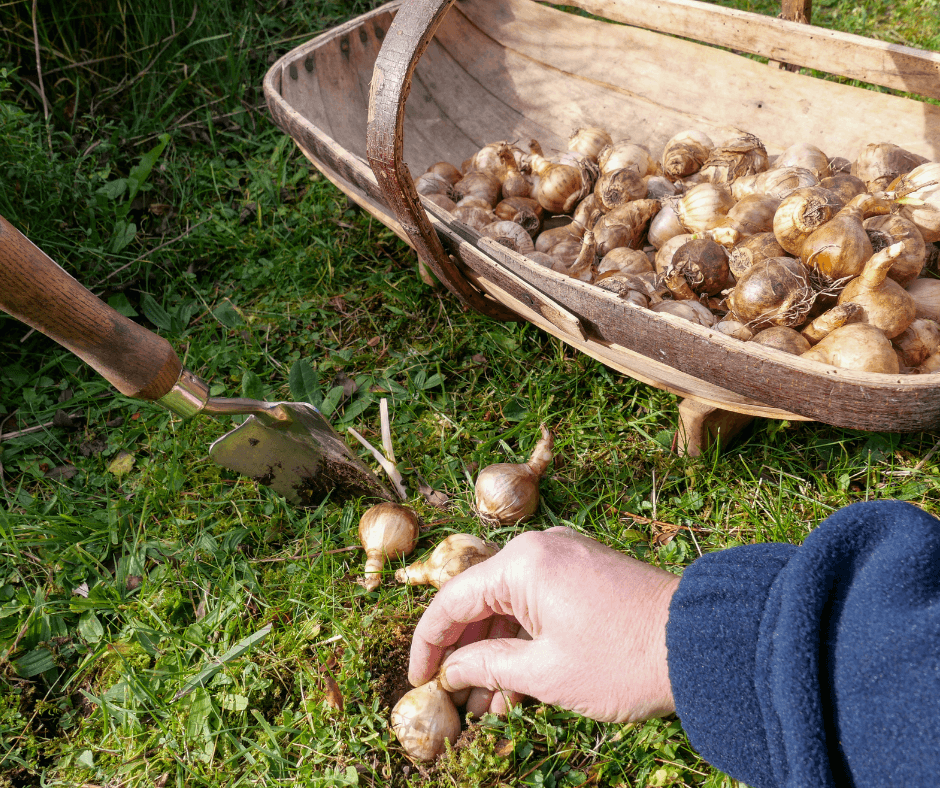
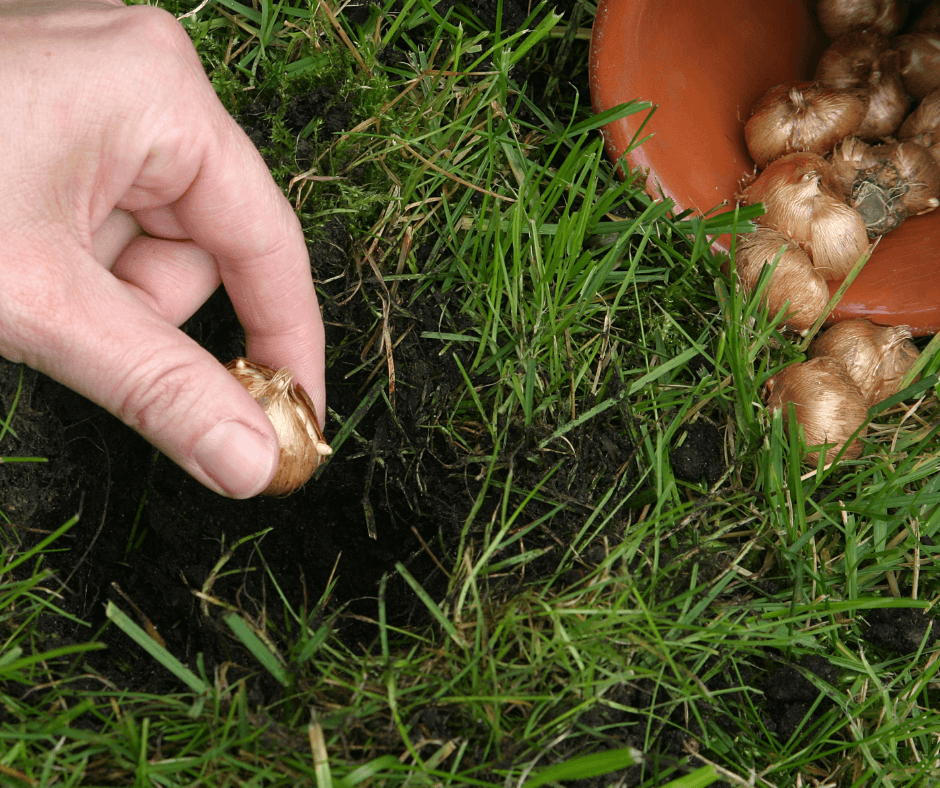
You can tell the health of daffodil bulbs by squeezing them. Healthy bulbs are firm. Planting these bulbs a little late is not a problem.
If your spring-blooming bulbs are sitting around somewhere, like mine, or you have not even bought them yet, you will be glad to know that it is not too late. Bulbs can be planted as late as November or December, as long as the soil has not frozen solid, and the bulbs are alive and healthy. You can even take advantage of sales in October or November, and save a little money.
How to Choose Healthy Bulbs
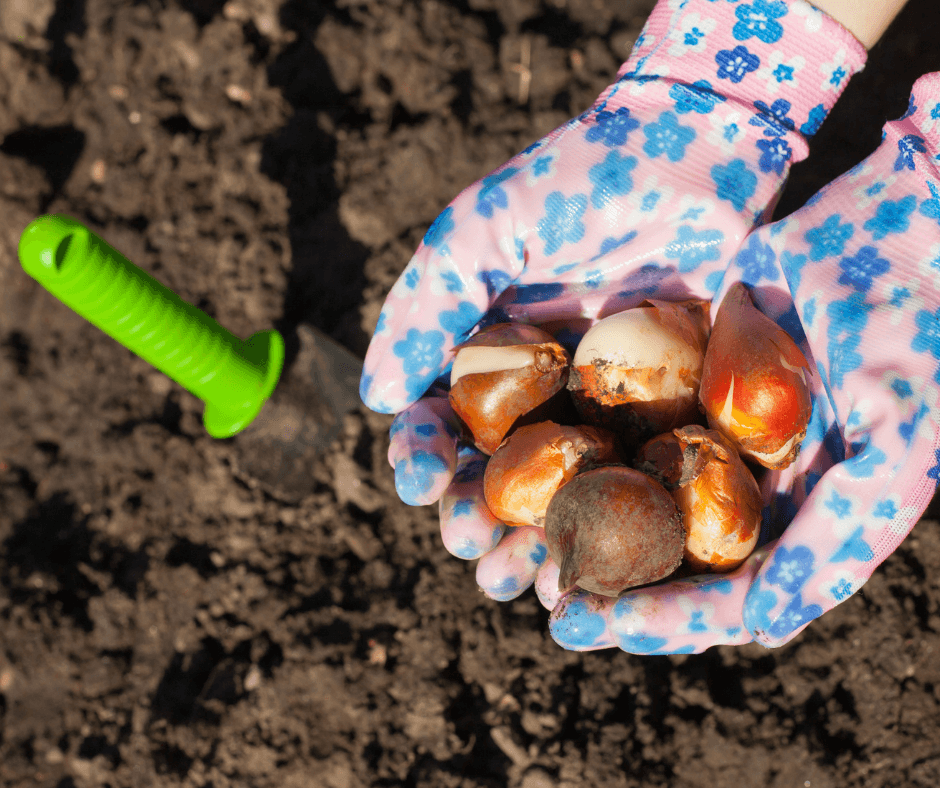
These tulip bulbs show a little discoloration at the tip and along the sides, but overall they are firm, healthy, and will survive.
First, check any bulbs for good health before purchasing them. How can you tell when a bulb is healthy and alive or not? Healthy bulbs should be ivory, firm, and have papery coverings. (If you cannot see the flesh, just squeeze to make sure that they are firm.) It is especially important that the bottoms, where the roots are, remain firm and blemish- or mold-free. Dying or diseased bulbs have drying brown areas, brown or blue-green spots, or may even be soft and flakey. Never purchase bulbs with these traits. If one or two out of the bag appears to be in poor shape, it’s not a problem. Otherwise, you are wasting your money. For more bulb troubleshooting information read How Do You Keep Spring Bulbs from Rotting?
General Bulb-Planting Information
All bulbs like sunlight. Early bulbs can be planted beneath deciduous trees that often don’t leaf out until the spring bloomers have stopped flowering. All bulbs require well-drained soil. It helps to amend beds before planting bulbs with Black Gold Garden Soil or Garden Compost Blend. Be sure to have a sharp trowel, planting knife, or bulb planter on hand for fast, easy planting. Fertilization is also important. Throw a little Dutch bulb fertilizer or bone meal into each hole to promote better growth and flowering in spring. (Click here to learn more about the benefits of bone meal.) As soon as bulbs are planted, they begin to establish roots for the coming spring.
Planting Tips for Specific Bulbs
There are many different bulbs that you can plant and each requires different care. Here are my favorites.
Species tulip bulbs are often a little smaller but have similar papery chestnut-colored exteriors.
Tulip (Tulipa hybrids, USDA Hardiness Zones 3-8) bulbs should be planted 7 to 8 inches deep, with the pointed tops facing upwards. Ideally, they need to be planted by early November to flower on time in spring. You can plant them a bit later, into early December, but they will likely bloom a little later as a consequence. Unfortunately, most hybrid tulips die away in just a couple of years, but some reliably return as perennials. These include species tulips, such as Tulipa praestans ‘Shogun’, which has sunny orange flowers, as well as Tulipa clusiana hybrids with their colorful, linear flowers and bulbs that naturalize over time. Also, tall hybrid Darwin Tulips look like most standard hybrids, but they will come back for years. They are a cross between old Darwin tulip and Tulipa fosteriana hybrids. Check out ‘World Peace’, which has deep-rose flowers furled with yellow, or ‘Cosmopolitan’ with its stately pink blooms and burgundy-striped leaves.
Bulbs are breakfast, lunch, and dinner to voles, mice, squirrels, and deer while being poisonous to humans, and, for whatever reason, cats (when would a cat ever eat a tulip?). (Click here to learn more about tulip toxicity.) These bright-colored flowers are among the most beautiful and varied in the spring garden, so they must be planted in pest-free areas or have some protection. I have two very large trees with wide roots that I like to plant bulbs around. The protective roots keep the voles from tunneling. The rest of my garden is a different matter, so I put thorny leaves or cat litter in the hole, to deter pests. When it comes to protecting the actual plants from deer or rodents, I’ve found that Plantskydd is an excellent repellent. It does not smell nice, but it works.
Daffodil bulbs can be planted in beds or in lawns where they can naturalize and bloom before the grass grows long.
Daffodils (Narcissus hybrids, Zones 4-8) are another story. They are poisonous enough so that voles or deer will not eat them. One daffodil will form a clump in just a few years and over decades will naturalize. They do not die, which is why you will see them blooming in front of old, abandoned houses. They can be planted up to December so long as the ground is not frozen. Daffodils come in many sizes, shapes, and colors. They bloom in early, mid, or late spring, depending on the variety. Premium bulbs often have multiple offsets while standard bulbs are single. Plant them 7 to 8 inches deep.
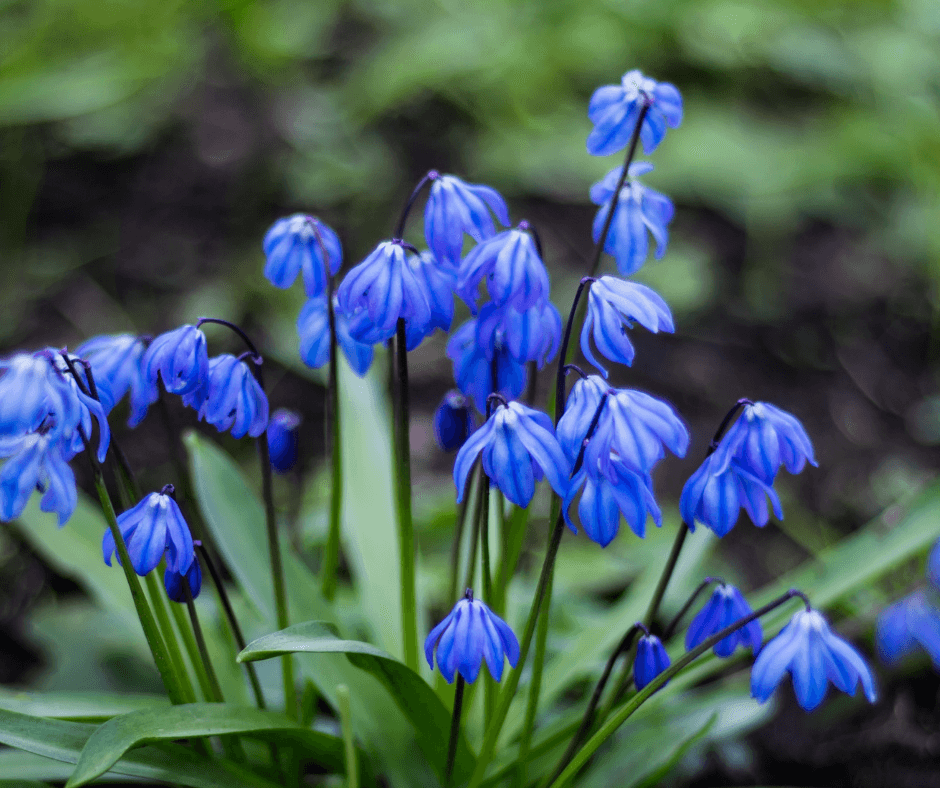
Tiny Siberian squill bulbs are planted just 3-4 inches down and blanket gardens in blue in early spring.
Siberian squill (Scilla siberica, Zones 2-8) is one of my favorite early spring flowers. The small plants only reach 4 to 6 inches tall with bell-shaped flowers of the most intense blue. They spread gently among beds, under shrubs, and even into lawns. By the time it is time to start mowing the grass, they are already dormant. Siberian squill are pest resistant and poisonous to humans, so do not grow them where children play. Plant them 3 to 4 inches deep as late as December. Those planted a bit late may emerge later in the first year.
Small crocus bulbs look pretty naturalized in beds or lawns.
Crocus (Crocus hybrids, Zones 3-8) are a sure sign that spring is just around the corner. Some even push up through the snow. You can plant them in 4-inch holes after a hard frost while the soil is still workable. Crocuses require a long cooling period, so don’t plant them past late November. They make excellent additions to lawns, small garden corners, and rock gardens. A single crocus will form a clump over several years and then spread to other spots in the garden.
So, don’t fear planting spring bulbs late, if you lost track of time or want to take advantage of seasonal bargains. You may see them emerge a little later in the first season but without detriment to their long-term success.
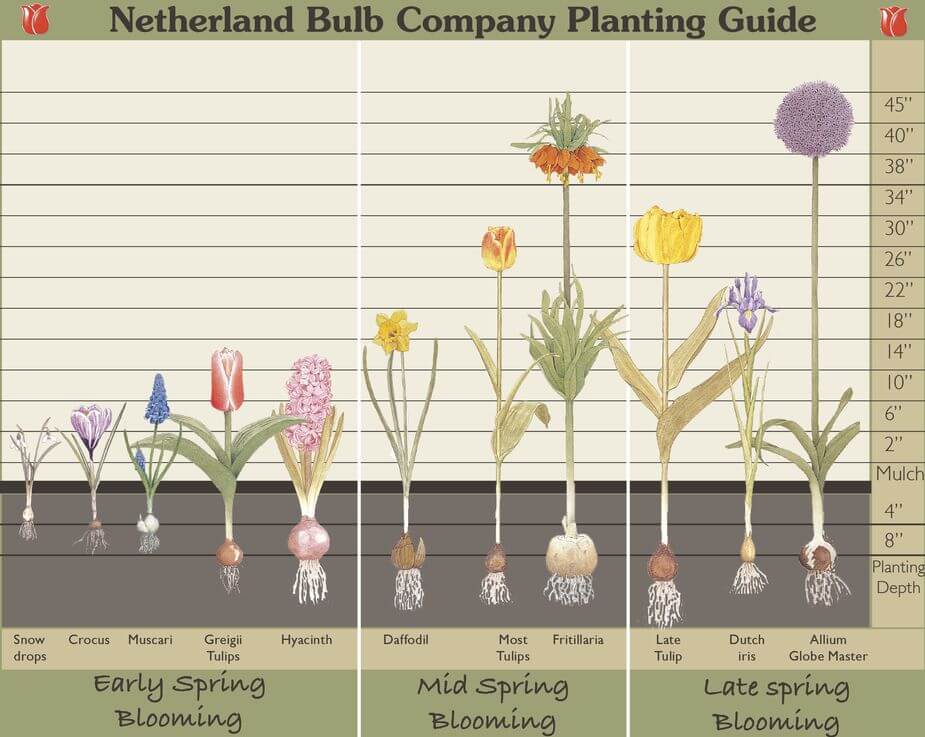
For bulb planting-depth information, I love this bulb planting guide care of the Netherland Bulb Company.
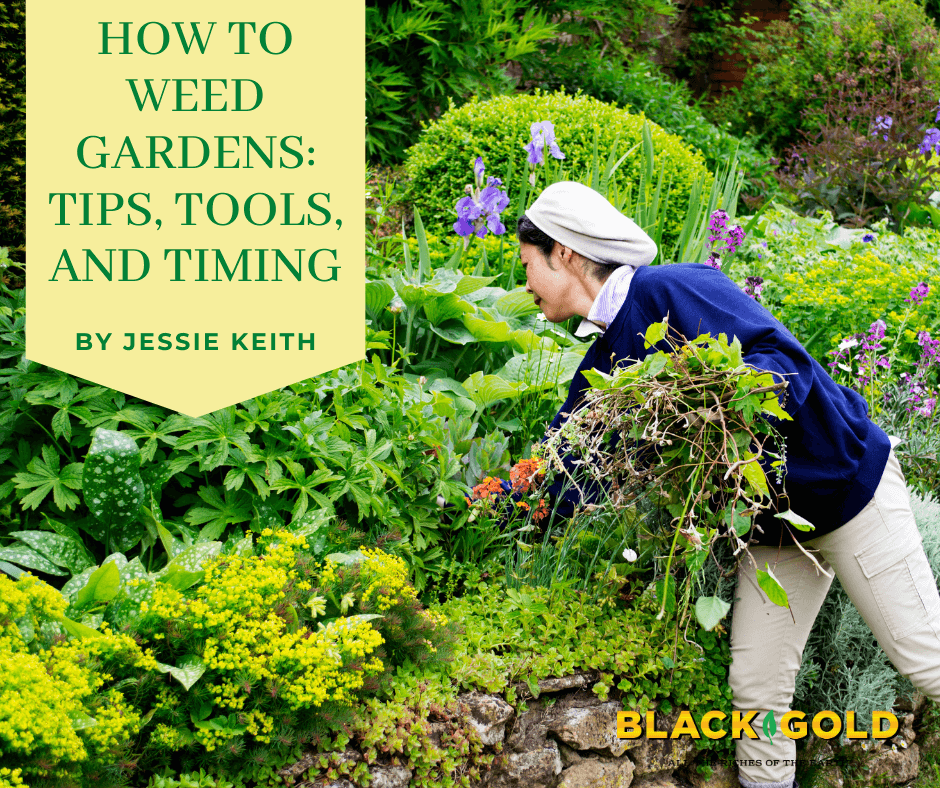
Weed competition drags gardens down in every way. Ignore your garden for just a couple of weeks, and weeds can take over in a flash–turning once tidy, pretty beds into a tangled mess of green interlopers with no room to spare. If you use the right tools, techniques, and timing necessary to stop a weed takeover, it will save you trouble and reward you with bountiful flowers, vegetables, and fruits.
Common, aggressive garden weeds spread by many means. If allowed to set seed, they will pepper the garden ground with loads of obnoxious seedlings crying to be hoed away. Some have the deepest, most far-spreading root systems that will get away from a gardener in no time if allowed to take hold. Different weeds appear at different times of the season. The most unexpected are prolific winter weeds that will happily fill your beds in late winter and set seed by late spring. Summer weeds require heat to germinate, so you can expect them to start popping up as soon as the weather becomes truly beautiful.
Knowledge is power when it comes to weeds. Here are the essentials necessary to keep your beds happy and weed-free throughout the year.
Know Your Weeds and Their Spreading Power
Don’t pull a perennial weed unless you know that you can get the whole root. Leave one little piece, and it will return!
Your worst weed enemies are perennial weeds that are deep-rooted, fast-spreading, and produce generous amounts of seeds that spread and sprout quickly. Annual weeds are also pesky, but they are generally more shallow-rooted and easier to kill by quick digging and hoeing before they set seed. Here are five of the worst perennial weeds that you may face. From there, I recommend relying on the helpful, Farmer’s Almanac Common Weed List, as well as the excellent UC Davis IPM Guide for common weeds.
Worst Perennial Weeds
Field Bindweed (Convolvulus arvensis): Here is a real monster of a spreader that’s hard to remove. The hardy perennial sets fleshy rhizomatous roots that can extend deep into the ground and many feet from the parent plant. The vine twines and strangles garden plants and then becomes covered with little, white, morning-glory-like flowers that set hundreds if not thousands of seeds. Scrape and dig the seedlings on-site and try to dig the root systems as soon as possible. Smothering and covering infested areas is also a good method, but it takes time. (Click here to learn more about bindweed removal.)
Canada Thistle (Cirsium arvense): Canada thistle (Cirsium arvense) is notoriously difficult to remove and is also a notorious spreader. Its leaves and stems are painfully prickly, and pollinated summer flowers produce loads of puffy seeds that get caught in the wind and spread everywhere. (Don’t let this go to seed anywhere near your yard or garden!) When they sprout, a single plant can become a dense colony connected by deep, rooting rhizomes that are impossible to dig out. Leave just one piece, and it will return. It is also resistant to all but the strongest herbicides.
Aside from using commercial-grade herbicides, the second-best method is to smother plants with weed cloth and mulch until they are gone. Watch out for plants that creep into the grass, once they do, a good broadleaf herbicide is your only option, unless you want to kill everything and start over.
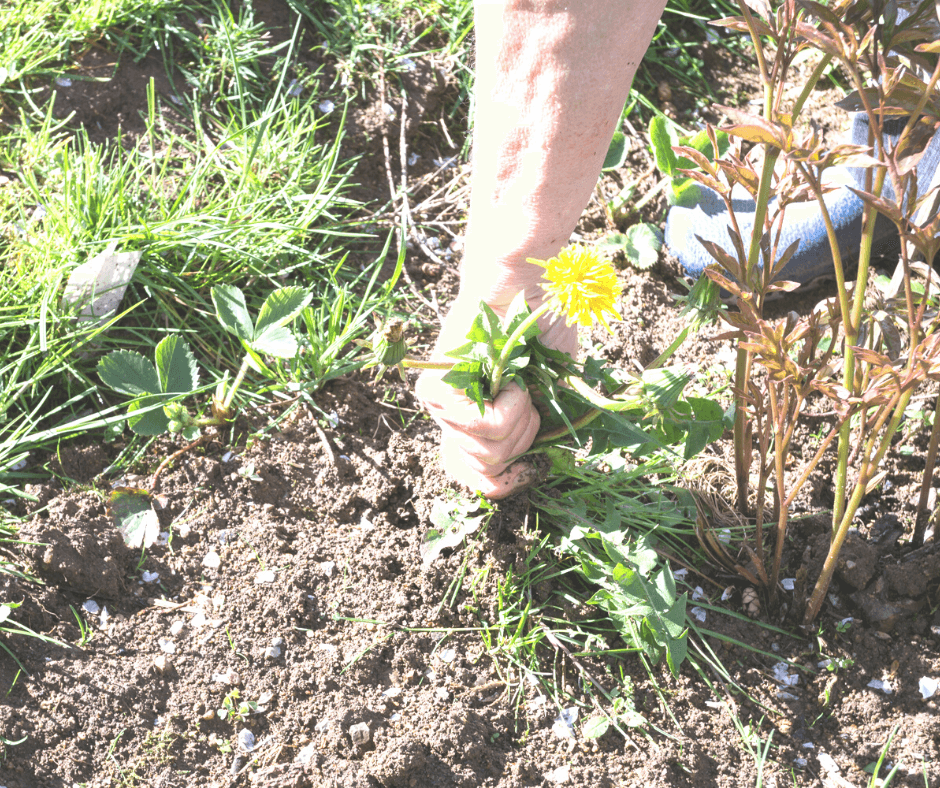
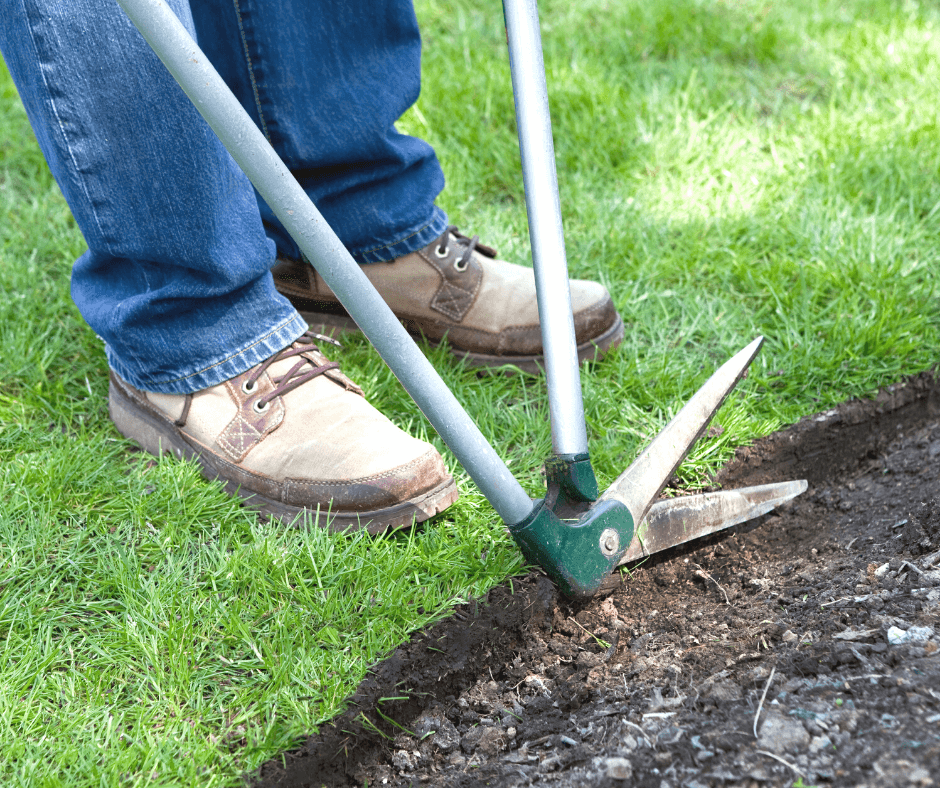
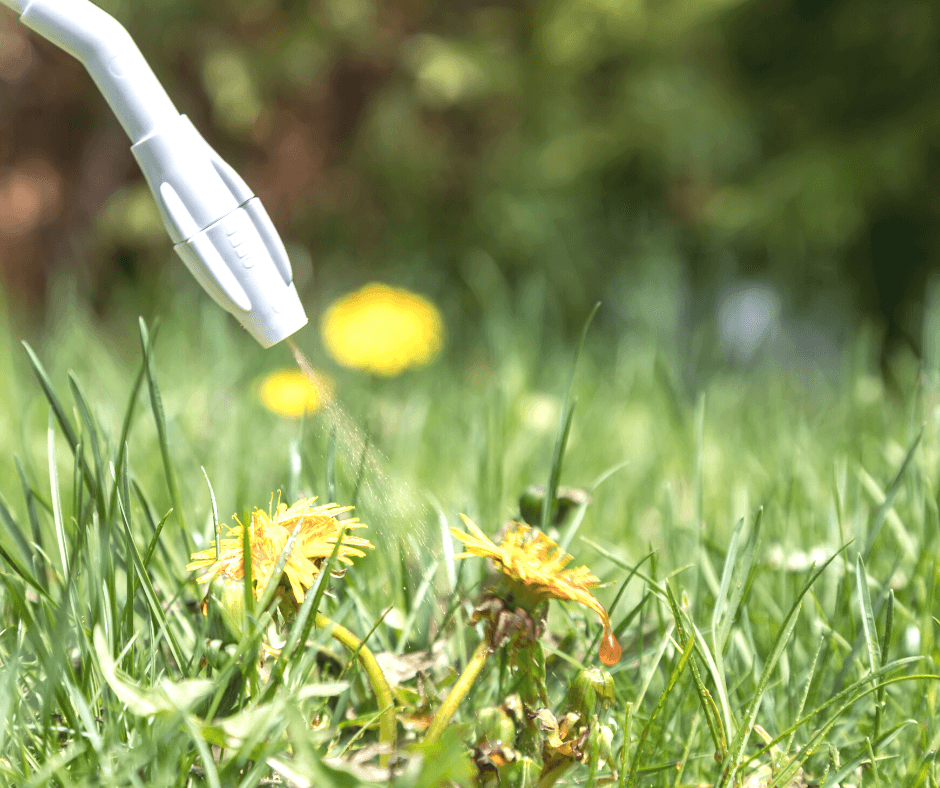
Dandelion (Taraxicum tomentosum): Dandelions spread by seed but can be tamed, so I don’t mind them growing in the lawn. Bees and other early pollinators rely on their golden flowers for pollen and nectar, so they do some good, but they have no place in my garden where they compete with other garden flowers. The deep-rooted perennials are easy to grub out with a garden knife, as long as you remove the whole root and leave no pieces behind. The key is keeping them from setting seed. This is the source of dandelions in the garden. In the spring months, I try to mow low and often to chop off the seed heads before they release their seeds.
Ground ivy(Glechoma hederacea): The aggressive member of the mint family is a ground-covering weed with creeping stems that root and spread fast. Its spring flowers set lots of seeds, which sprout quickly. It also thrives in lawns, so you will need to rely on a broadleaf herbicide for the lawn if you want to truly get rid of it.
Thankfully, this weed is relatively easy to pull, but if you leave even the tiniest piece in the ground it will root and regrow. T manage it well, remove it from garden beds first thing every spring, and then apply a 3-inch layer of mulch, being sure to leave the crowns of garden perennials uncovered. If stray pieces emerge from the mulch, pull them on site.
Nutsedge(Cyperus esculentus): Unless you live in the desert, your garden has likely experienced nutsedge. The aggressive, moisture-loving sedge produces copious seeds in summer that sprout everywhere. Even worst, the plants have fine, spreading roots that develop small, brown nutlet tubers. Leave one tuber in the ground, and it will sprout into a whole new plant. (Quirky fact: The tasty nutlets can be harvested and eaten.)
Nutsedge is not herbicide-resistant, but its tubers are resistant. For this reason, dig out the plants rather than just pulling or spraying them and get all of the tubers. Finally, cover with a 3-inch layer of mulch, and diligently pull any small sedge sprouts as you see them. (Click here to learn everything that you need to know about removing nutsedge.)
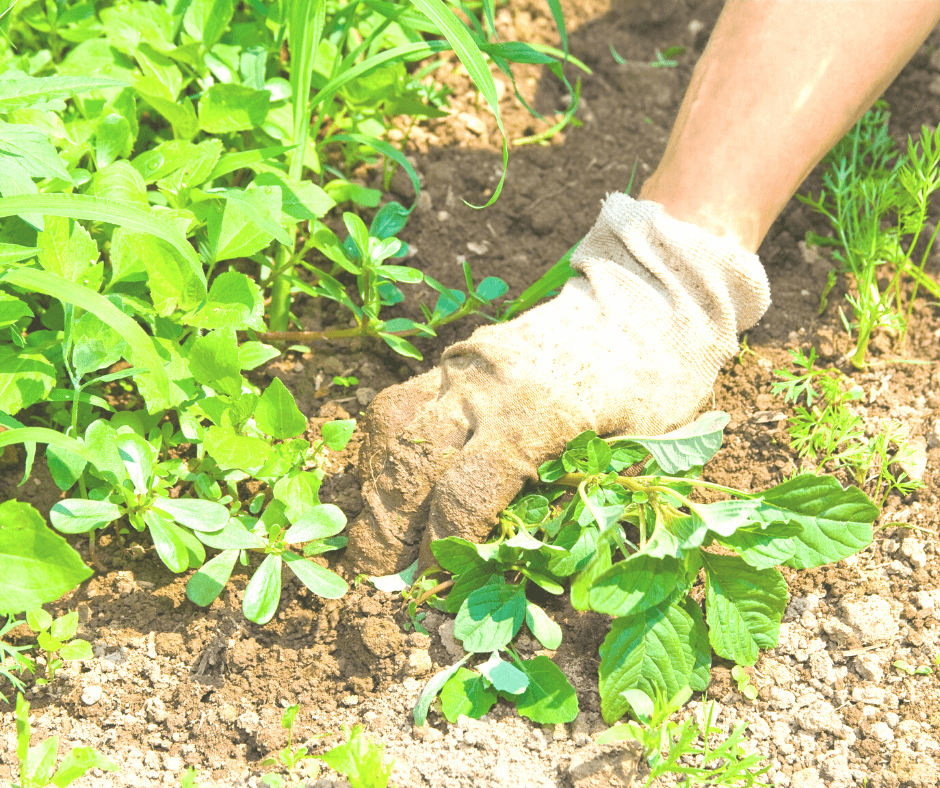
Annual weeds, like this summer purslane and pigweed, are easy to pull but prolific self-sowers that sprout in the open soil each year. A good, stout hoe will make quick work of weeds like this.
All of these weeds require good tools for thorough removal, followed up by mulch, and often herbicides or other harsher measures. Once again, annual weeds, like winter chickweed, summer purslane, pigweed, or spotted sandmat euphorbia, are very easy to dig and pull. The key is removing them before they can set seed and germinate or add to your garden’s soil weed seed bank.
Know Your Weeding Tools
Over the years I have used a number of different weeding tools. A few have stood out and become fast favorites. The three key characteristics I look for in a good gardening hand tool are 1. ease of use, 2. working power, and 3. durability. These criteria are met by the following tools:
Long-Handled Tools
Prohoe Rogue Do It All Tool and 7-inch Hoe: The hoes made by this company are wonderfully sturdy and well-made, razor-sharp, and long-handled for those of us that do not like to bend. The Do It All Tool is triangular on one side and has a raking tool on the other. It is perfect for rogueing our deep-rooted weeds. The thin, 7-inch Pro Hoe is ideal for scratching up mats of shallow weed seedlings. These hoes are so strong and sharp, the job will get done in an instant.
Pullerbear Uprooter: For big “weeds” choose a Pullerbear uprooter. In a matter of minutes, an area riddled with small weed trees can be cleaned beautifully roots and all. It works like no other tool I’ve tried. Just clench the base of the sapling or small tree and pull. Ignore the fact that it’s a bit pricey. It will pay for itself quickly in time and effort saved wrangling with hard-to-pull woody weeds.
Short-Handled Tools
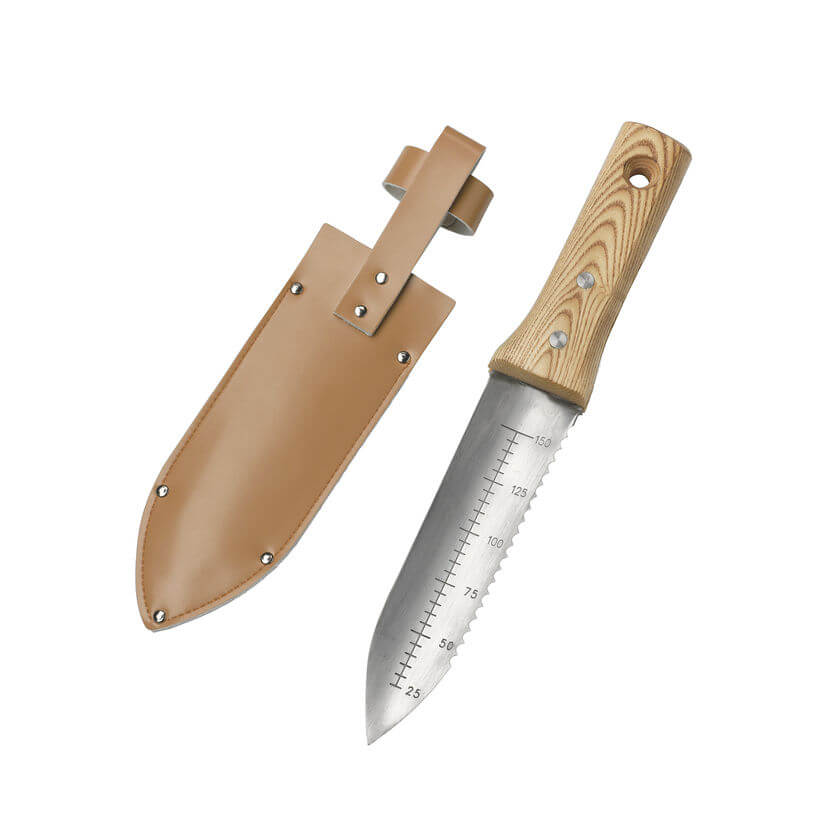
Sharp cutting and sawing edges make gardening knives one of the best all-around gardening tools. (image care of the Gardeners Supply Company)
My trust garden knife (also called a soil knife or Japanese hori-hori) goes with me everywhere. It can cut into the soil to deep roots below and saw through the roots or bases of tough plants. I even use it for harvesting greens and cole crops. One side of the knife is sharp for slicing, and the other is serrated for sawing. They can easily break through the skin, so I use mine while wearing garden gloves and I store it in a leather belt sheath.
Fine-bladed hand trowels are excellent all-purpose tools for weeding and planting. They quickly cut at deep or shallow roots in no time and withstand lots of wear and tear if made well. The “rockery hand trowel” at Clarington Forge is just such a fine-bladed tool, and it’s beautifully crafted for the long haul. Its fine blade makes for easy weeding and planting–especially in heavier or pebbly soils. The narrow rockery hand trowel from Clarington Forge easily expels weeds and gets into small spaces. (image care of Clarington Forge)
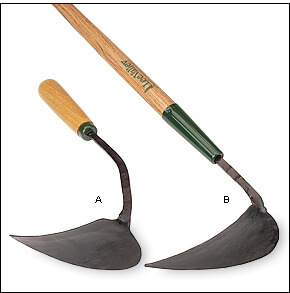
Sharp ho-mi tools will chop deeply into the soil quickly. (Image care of Lee Valley)
For super fast hand weeding nothing beats the classic ho-mi (hoe-mee), also called the Korean hand plow or cultivator. This sharp, downward-facing tool can get to the base of a dandelion root in seconds with a quick chop, chop, chop. Nothing is more effective. For smaller weeds, I use the side of the ho-mi to scratch and smooth the soil. It’s an excellent tool for lightly aerating the base of a plant or getting to the root of a tough herbaceous weed as well as planting new plugs. If well cared for, a ho-mi will last forever (if cleaned after use and oiled to prevent rust). It’s relatively cheap, too. Long-handled versions are also very useful. Just be careful when chopping away with this sharp tool. Its tip can be nasty.
Practice Timely Weeding
I weed two ways be either casually weeding as I water, harvest, and enjoy my garden, or intensively bed by bed. I do casual weeding almost daily. More intensive weeding is something I do three times a month in summer. I also try to catch weeds at various times in their life cycles.
Catching weeds before they flower and set seed is timely weeding. I write this article as the winter weeds in my vegetable garden have begun to set seed. A busy spring pushed back my weeding schedule, and I am paying for it. Had I removed these weeds just two weeks earlier, before they had begun to release seeds,
Catching weed seedlings before they become large is timely weeding. Digging or hoeing up weed seedlings before they become large and take hold will make your garden life so much easier.
Smothering beds before seeds sprout is timely weeding. Adding mulch in late winter or spring, before weed seeds really sprout is very important to keeping weeds down. Miss just one year, and you will pay for it.
Mulch Properly
Natural mulches of all types, like these hemlock needles, make weed covers.
A 2-3-inch layer of mulch, straw, leaf-mulch or compost keeps seedlings from germinating and stops weeds from taking over. It is best to apply mulch in spring after properly weeding your beds and again in fall to ward off winter weeds. (Click here to learn more about the many wonderful mulch options.)
Edge Your Beds
Lots of lawn grasses and weeds like to creep into garden beds. Once in your garden, they become weeds. To stop this, it helps to edge your gardens, especially at the start of the gardening season. Edged beds also look tidier and nicer. Mowing your lawn regularly to stop weeds from flowering and setting seeds is also advisable. (Click here for a tutorial about how to edge beds.)
Consider Solarization
Soil polarization is a method of weed removal that relies on the heat of the sun to kill weeds en masse. Methods vary, but in general, it involves covering a bed area with tacked-down sheets of clear or black plastic for several weeks during the summer. When it works, the heat generated heat cooks everything below–plants, seeds, and all. Keep in mind, the method is used to revive whole beds and remove all weeds, so no desirable plants can be present. It is also less effective further north where summer temperatures rarely exceed 90 degrees F.
Use Herbicides as a Last Resort
Herbicides that really work are generally toxic and best applied by garden professionals. If you have a severe problem with one of the worst perennial weeds mentioned, like Canada thistle or field bindweed, then you may consider resorting to a professional-grade herbicide very selectively applied by a trained horticulturist. Otherwise, they are not needed. More natural means of weed removal are safer and better.
Stay on top of your weeds, and your gardens will prosper. Put aside just a little time each week and it will be a small burden to bear.
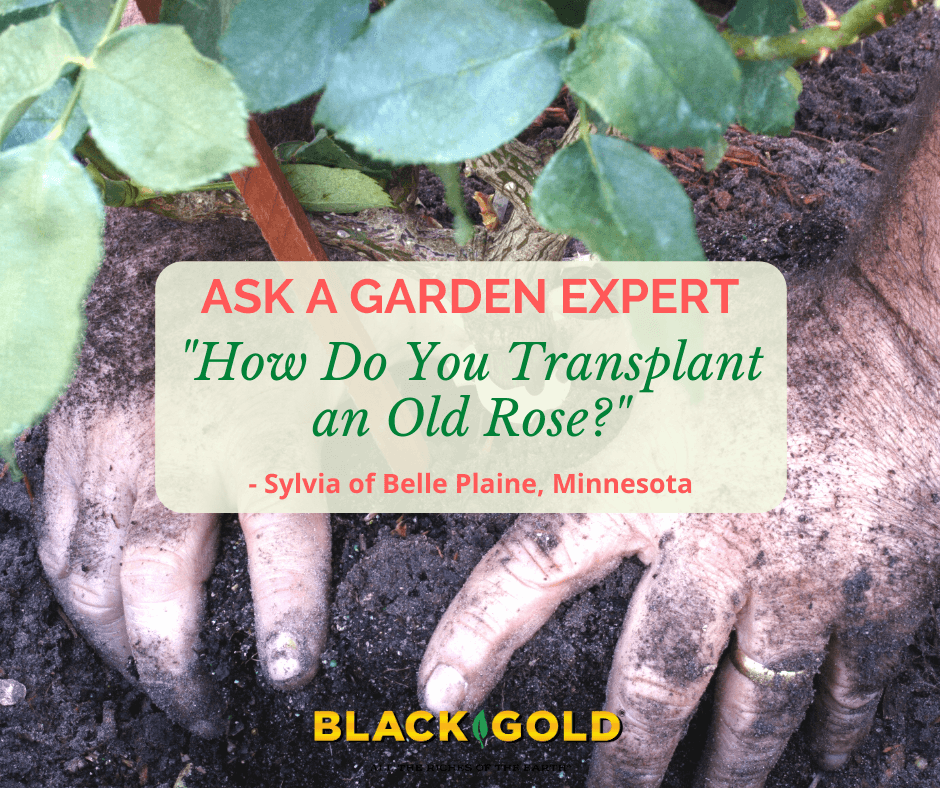
“I have a 40-year-old rose bush that used to be a foot away from the foundation of my home that has gradually moved all the way up to the foundation and sends shoots up under the siding. I have tried to dig it out and pull it out but it refuses to give up and comes back every year. What can I do about it?” Question from Sylvia of Belle Plaine, Minnesota
Answer: Roses can be quite easy to transplant, with a little strength and elbow grease, and good tools. Spring is the best time to move them. Once yours is moved, I recommend planting it in a garden bed away from your home. Here are the tools and steps that I recommend for its transplant.
Tools: Sharp, flat spade, sharp pruners and/or loppers, burlap sheet and tarp, and wheelbarrow.
Steps:
Prune back the shrub to approximately 12″ stems all around. (It will spring back quickly from its strong root system)
Cut a rootball approximately 6-8 inches around the base of the plant. Make clean cuts all the way down with your sharp spade.
Remove excess soil from one side of the excavated rootball, and place the soil on the tarp.
Cut out around the rootball to a depth of around 12 inches, maybe more. Work hard to keep the soil ball and roots intact. This will help the plant better withstand transplant shock.
Wrap the rootball with burlap and roll it into the wheelbarrow turned to its side. Right the barrow, and take it to its new garden spot.
Black Gold Garden Soil is an excellent amendment for newly planted roses. We also recommend feeding your rose with alfalfa meal to keep it blooming at its best.
Of course, there is a chance that you may not want the rose. If this is the case, dig it out, and dispose of it. Just be sure to fill the spots with quality soil and backfill before planting a new shrub in its place.
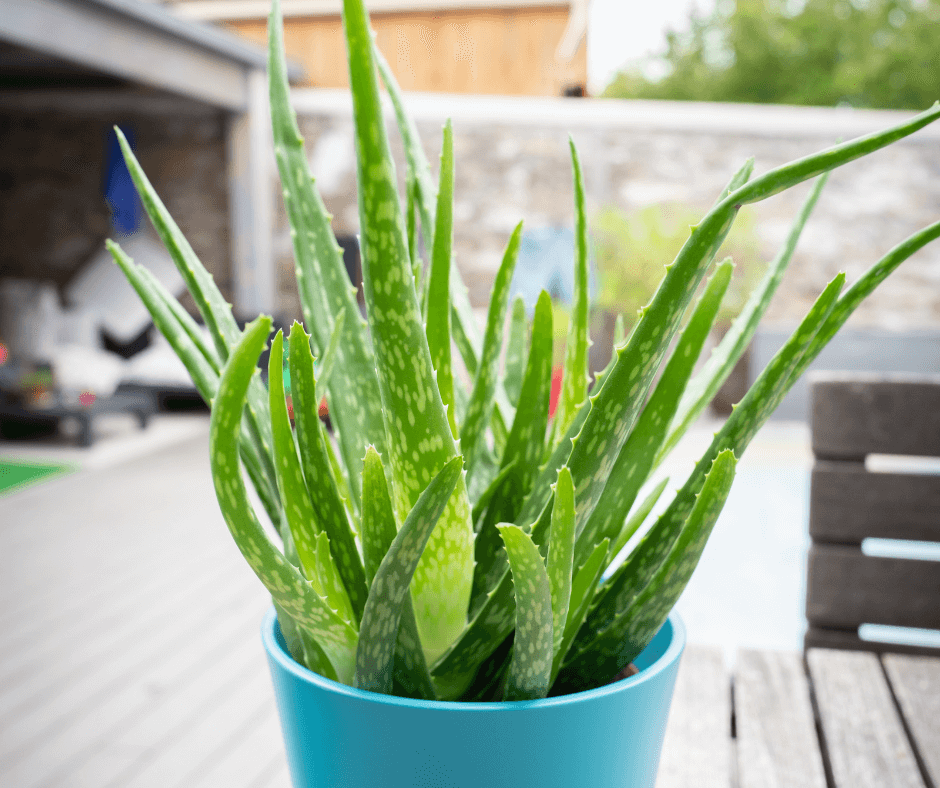
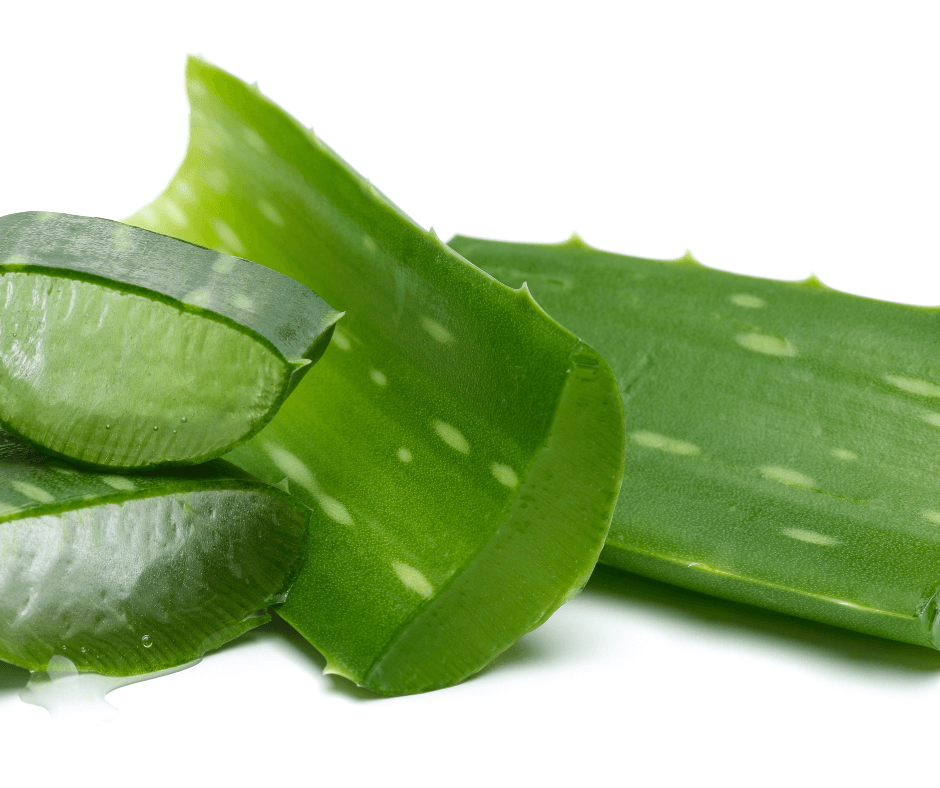
With gorgeous thick leaves and sparsely spiny edges, the aloe vera plant (Aloe vera, USDA Hardiness Zone 9-11) is renowned for its healing properties. Native to eastern and southern Africa, it is one of the oldest-known healing plants used by humans. Aloe grows wonderfully in dry regions because its succulent leaves hold moisture and make it incredibly drought-tolerant.
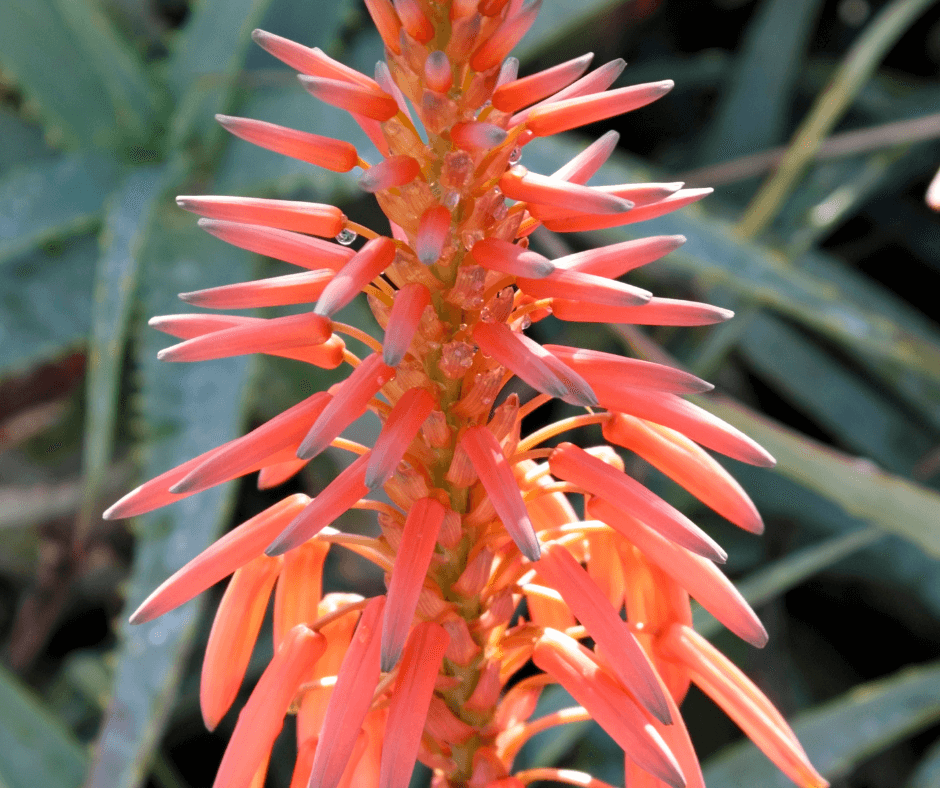
In temperate regions, many households, including mine, contain potted aloe vera as a house plant. It’s attractive as an indoor plant and very handy for the quick topical skin treatment of burns and scrapes. During the warm months, it is nice to bring it outdoors in a partially sunny spot where it can thrive in the fresh air and brighten a porch or patio. Southwestern gardeners have the advantage of being able to grow it outdoors as a landscape specimen. In warmer climates, the plants form robust clumps that produce spikes of reddish-orange, tubular flowers that attract hummingbirds.
One of the best things about the plant is how easy it is to grow and use medicinally. Aloe’s healing, anti-inflammatory properties are most potent when they come directly from the plant. No need to make a tincture or steep some tea in order to get treatment.
How to Care for Aloe Vera Plants
Pots and potting soil must drain well to encourage good.
Aloe vera is a succulent in the lily family (Liliaceae) that is easy to maintain. In fact, too much attention and watering will result in an unhappy aloe. Imagine the spare water that they receive in arid, tropical Africa. They don’t need too much. (Pro growing tip: only water your Aloe vera when the soil is completely dried out. I recommend watering every two weeks or so, but this can change based on the season and growing conditions. Outdoor plants typically need more water, especially in dry climates.)
When planting, pot them up in very well-drained soil–Black Gold Cactus Mix is an ideal choice. Good pot drainage is also a necessity. Place your potted plant in a spot where it can receive bright, indirect sunlight. Aloe is one of the more low-light tolerant succulents out there, but it should still get some sunshine to keep the leaves strong and robust. Plants receiving too much sunlight tend to take on a purplish color. Too little light results in thin, floppy leaves.
Aloe Vera Benefits
When grown outdoors in the American Southwest, Aloe vera will produce beautiful spikes of orange-red flowers.
The anti-inflammatory properties of Aloe vera are especially helpful for healing skin. Most know it for treating sunburns, but it also can help with frostbite, wounds, dermatitis, and other skin issues. It will also reduce redness, inflammation, and even itchiness caused by bug bites and poison ivy. (Cautionary note: It is very rare, but some people can be allergic to aloe. Test a little on your skin, and wait an hour or so to check for a reaction if you have never used it before.)
Aloe vera contains antiseptics and anti-bacterial properties, making it beneficial for treating small wounds. You can also apply it after a wound has healed to promote skin tissue repair and prevent scarring.
Outside of the skin, Aloe can be digested and work as a laxative. (Fair warning: it’s a strong laxative so use it sparingly.) Some new drinks on the market even contain Aloe vera juice, which can aid with digestion. Some studies even show the juice can help to prevent and reduce the size of kidney stones.
How to Treat a Sunburn with Aloe Vera
Let cut aloe leaves sit for 10 minutes before using them for first aid.
As a child, I loved playing outside and was very prone to sunburns. Obviously, it was not a great combination for summer fun. In those days, sunscreen was not available like it is today. My sunburns oftentimes kept me cooped up inside when I would rather be out playing. That was until the day my grandmother brought out the Aloe vera plant.
Placed on my sunburnt and freckled shoulders, the aloe brought my sunburn quick relief. I also saw the sunburns fade much quicker. Here are four steps to getting sunburn relief from an Aloe plant.
Using a sharp knife, remove a portion of an aloe leaf. Depending on how much you need, this can be as big as a whole leaf or as small as the tip of the plant.
Place the leaf on a paper towel and let it sit for ten minutes. This helps the dark, yellow latex to drain from the leaves. The latex can stain clothes or rarely cause reactions for people with sensitive skin.
Wipe the sides of the cut to remove the remaining latex. Next, take your knife and cut the leaf down the center to get more gel.
Apply the leaf directly to the skin. If your sunburn is hot and irritating, you can place the leaf in the fridge beforehand. The cold gel is extra soothing! Once you’re all done, compost the leaves.
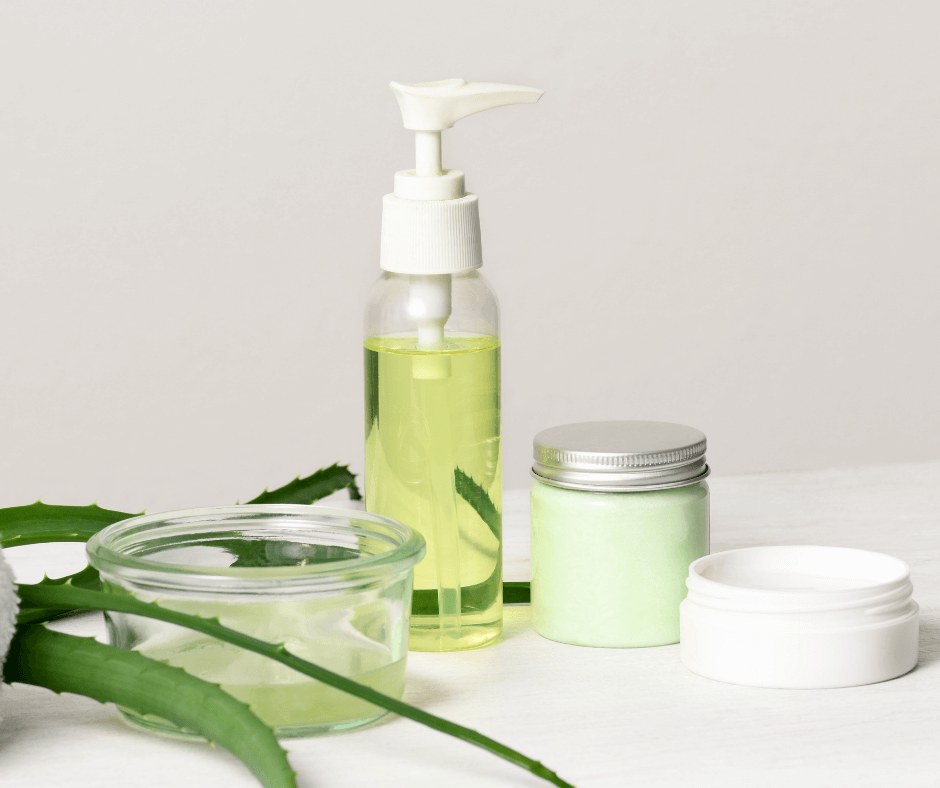
Recipes for Using Aloe Vera in Homemade Skin Care Products
Aloe vera can be used in lots of useful skincare products.
If you have healthy Aloe vera plants, then these recipes are a great way to use some of the wonderful properties on your skin.
Aloe vera liquid soap:With hand washing being essential around the globe these days, this healing aloe soap will also help repair skin.
Aloe vera hand sanitizer: When you can’t be near a sink, this healing sanitizer cleans hands on the go.
Aloe vera after-sun salve: When the summer sun gets the best of you, this salve is a great option for cooling the skin and helping with sunburn relief.
“I have an orchid plant that I have had for 8 years; it grows and duplicates (I had to get another container to separate it) but won’t grow the stalk to bloom. It hasn’t bloomed since the first year I got it. It isn’t the typical large rubbery leaf kind. I believe Cymbidium Orchid. When I got it, it had green flowers. It grows long leaves beautifully, but I would like to get some blooms. I have tried reducing water, changed organic potting, tried using orchid fertilizer… I even put them outside one year to try to cold shock it into bloom…After so many years you would think I would have done something right, but I have helped it grow and thrive so there is some hope. Do you have any suggestions?” Question from Amy of Chandler, Texas
Answer: As with any orchid, Cymbidiums require certain criteria to be met to flower. Timing and temperature must be managed to achieve blooming. Here are the recommended steps to take.
Flower spike initiation takes place in spring or summer when plants will get good light and a drop between warm daytime and cool nighttime temperatures. Placing the plants outside in spring after the threat of frost has passed will help, so that they can experience the warm days and cool nights for flower spike initiation. Once they have begun to set spikes, keep the plants cool (59-65 degrees F) until they begin to flower. Warmer temperatures and dry air and soil can cause the spikes to wither. Once flowering has begun, you can take your Cymbidium to a warmer spot where they can be enjoyed, if you desire. The spikes can become quite large and heavy, so support them with small wooden or bamboo stakes and soft plant ties. The long-lasting flowers can bloom for up to eight weeks. Cut them back to the base once they have stopped. (Click here for an excellent reference for Cymbidium care.) Semi-terrestrial orchids like these grow beautifully in Black Gold Orchid Mix!
“When is the best/latest date I can cut back roses?” Question from Joseph or Milwaukie, Oregon
Answer: Late winter is an excellent time to prune reblooming roses, but you can also safely prune them at other times–including now. I recommend that you read our blog about pruning roses in spring (click here to view it). I also encourage you to watch our rose-pruning video with West Coast Rosarian, Rich Baer. It provides a useful, hands-on overview of how to prune roses and covers everything from needed pruning tools to the proper pruning height.
“Is it possible to grow any vegetables indoors in a sunny room with a grow light? I live in NE PA and we have long cold winters. I would love to grow veggies over the winter. I have a room that I think would work.” Question from Melanie or Susquehanna, Pennsylvania
Answer: What a nice space! You can certainly grow container vegetables in your bright, sunny room. It offers so much natural sunlight that only some supplemental grow lights will be needed, if any. Vegetables will grow best in the sunniest window. A south-facing exposure is optimal.
Supplemental light may only be needed if you grow fruiting vegetables that need extra sunlight, like tomatoes and peppers. Greens and herbs should not need supplemental light; your bright windows and skylights should be enough. As far as grow light options, if you need to supplement choose a tall, adjustable grow light (click here for an example). (Click here for more information about different grow light types and options.)
From there, I recommend that you watch the video and read the article below. They should give you all the details that you need to grow vegetables inside.
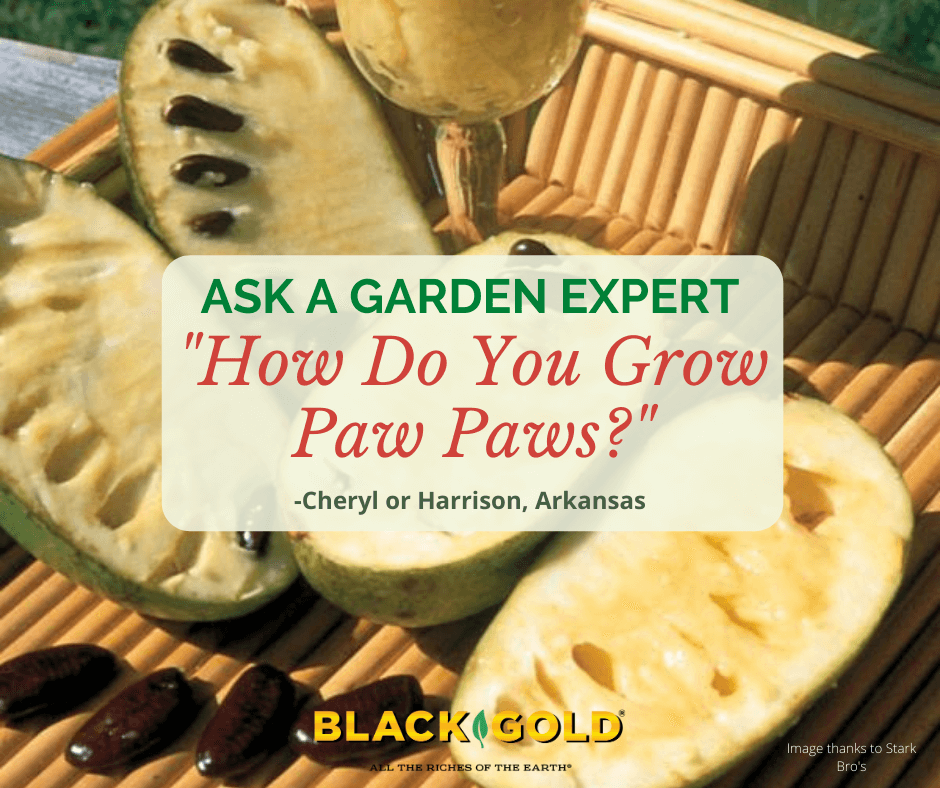
How Do You Grow Paw Paws? (Image thanks to Stark Bro’s)
“I have heard that it is almost impossible to grow a pawpaw tree. Is it possible for someone that is not a master gardener to grow this tree? I would love to have a few.” Question from Cheryl or Harrison, Arkansas
Answer: You are in luck! Pawpaws (Asimina triloba, USDA Hardiness Zone 5-9), also called custard apples, are easy to grow. Some varieties are self-fruiting, but most require cross-pollination, so you will need more than one tree for fruit development. Pawpaws are also growing in popularity, so there are more and more varieties with great tasting fruit from which to choose.
Pawpaws are native across eastern North America and look great as small specimen trees (15 to 30 feet) in sunny locations. In spring, the tidy, attractive trees produce unique, three-petaled purplish-maroon flowers, and in fall the large leaves turn shades of golden yellow. Pawpaw fruits are oval, greenish-yellow on the outside, and custardy, sweet and yellow on the inside with large black seeds. The fruits are ready to harvest by late summer or fall, depending on the variety. Wild fruits are sweet and taste somewhat like a ripe banana when mature, but new varieties have been selected for their improved flavor.
Five Great Paw Paw Varieties
‘Mango‘: The late-to-ripen fruits have extra flavorful, orange flesh.
These trees look very nice when planted in open, sunny lawns as specimen trees. They grow best in fertile soil with average drainage and a slightly acid to slightly alkaline pH of 5.5 to 7.5. At planting time, amend the soil with a little Black Gold Canadian Sphagnum Peat Moss. (Click here for more details about how to plant trees.) Keep the trees well irrigated in the late spring and summer of the first year, especially during hot spells. Fertilize with a granular fertilizer at planting time. Space the trees at least 20 feet apart in anticipation of their mature size.
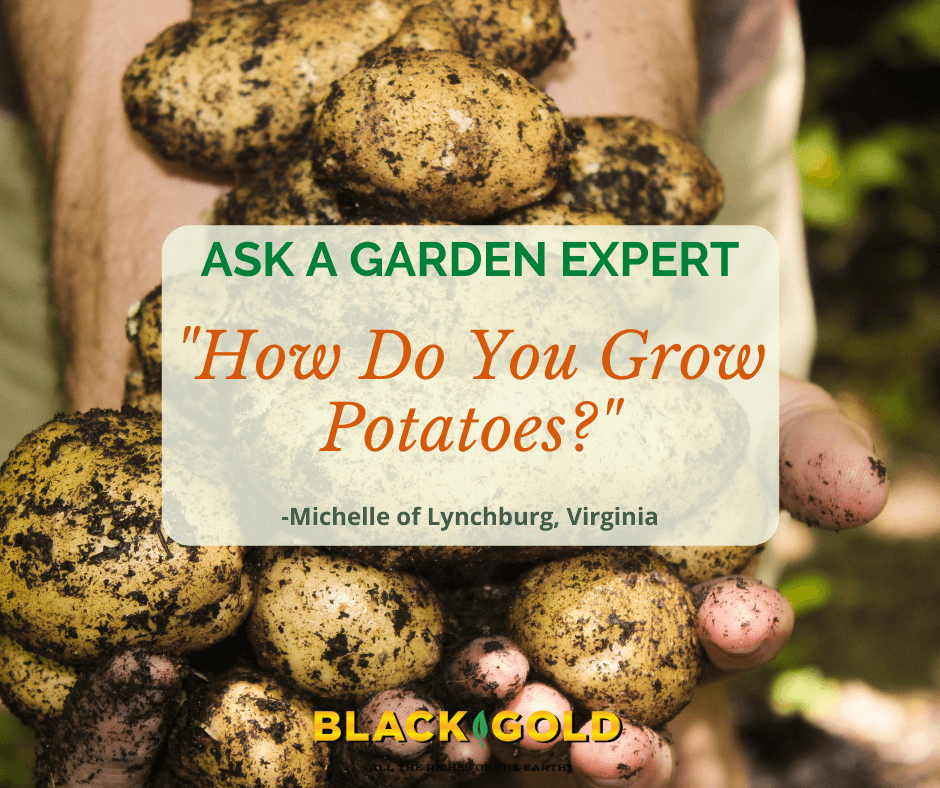
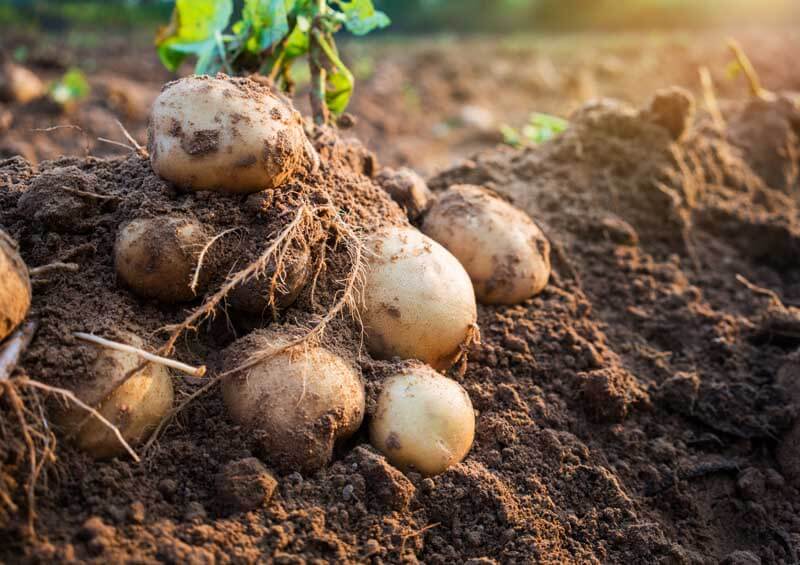
“I grew potatoes this summer. I planted them the correct way and they started to grow. I kept covering the leaves with dirt (leaving the top leaves uncovered.) The vines grew like weeds. It kept covering them but a few days later they would be out of control again. I had them in containers. Eventually, I had no way to build up the sides of the containers and I had to stop covering them. When I stopped covering them the covered vines were about 4-5 feet tall. I went to harvest them a few days ago and I had three minuscule potatoes. It was a lot of work for very little reward. I just wonder why they grew so fast. Obviously I did something wrong.” Question from Michelle of Lynchburg, Virginia
Answer: It sounds as though your potatoes put all of their energy into leaf and stem growth and hardly any energy into developing storage tubers, or potatoes. The plants should have died back before harvest. That is the indicator that they are ready to dig.
There are several reasons why your potato harvest was unsuccessful. Let me provide an overview of how to grow potatoes and increase tuber development to help you troubleshoot.
How to Grow Potatoes
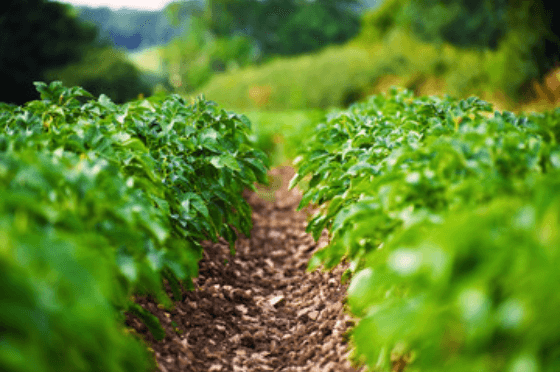
Place straw of leaf mulch between berms for easy weed care and walking.
Potatoes need full sun, fertilizer, average water, cool, and then warm growing conditions to produce well. Grow a known potato variety, so you can determine when to harvest. Some produce potatoes early, midseason, or late. ‘Yukon Gold’ is a good mid-to early-season yellow variety to try, ‘Carola’ is a good late yellow variety, and ‘Dark Red Norland’ is an excellent mid-to early-season red-skinned type. Knowing the variety gives you information about expected performance, yields, and harvest time.
Start beds as soon as the soil is workable–often a month or more before the last frost date. Till the soil and work in lots of organic matter, like Black Gold Garden Compost Blend and peat moss. Finally, create a 3-inch furrow down each row for planting the potatoes.
Four Steps to potato planting.
Plant potatoes in furrows five to six weeks before the last frost date of the season. Place robust seed potatoes in furrows 6 to 12 inches apart in rows 3 feet apart. Sprinkle in a fertilizer formulated for potatoes, and them berm soil over them to a height of 12-18 inches. (The berming process reduces the hilling process.)
After several weeks, potato shoots should rise from the berms. Once they are 8-10 inches tall, start hilling. Cover the stem bases with 3-6 inches of soil. Do this twice. (This is also the time to manage Colorado Potato Beetles. Click here to learn more about managing potato beetles naturally.)
If conditions are dry, irrigate moderately, as needed, until the potato plants flower. Keep beds hoed and weeded. It helps to place straw or leaf mulch between the rows to reduce weeds.
Once the plants flower, let them be and withhold water. Within a couple of weeks, the tops should turn yellow, die, and dry out.
How and When to Harvest Potatoes
At harvest time, you should have lots of potatoes to fork up from your planting mounds.
New Potatoes can be harvested as soon as the plants begin to bloom. Wait for larger potatoes. These can be harvested after the plants have fully died away. You can harvest all of your potatoes at this time for storage, or just harvest them as needed. Be sure to get them all out of the ground shortly after the first frost of the season. Otherwise, they will develop an unpleasant sweet flavor.
If you are growing potatoes in a container, adapt these growing principals to your potted garden situation. If I were to harbor a guess, I would say that you kept watering and nurturing your plants, which caused them to look robust and happy but discouraged tuber development.
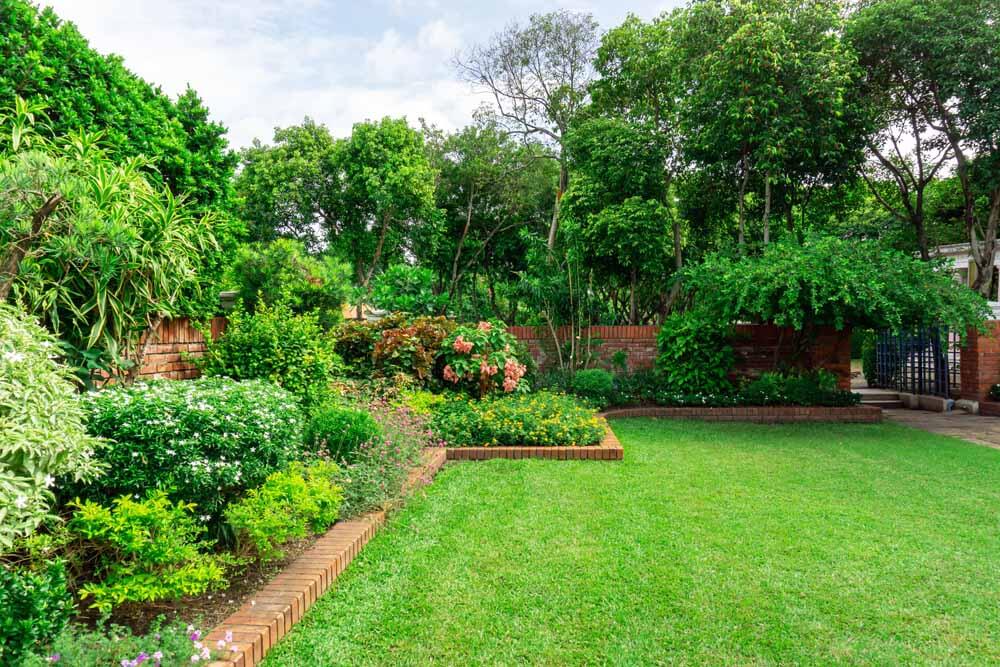
The key to successful gardening is to go (and grow) with what you’ve got. If your garden has acid soil and lots of shade, go with acid- and shade-loving plants. If sunny, dry, alkaline conditions dominate, then plan and plant accordingly. This also holds true for the garden’s aesthetic. For example, more “naturalistic” settings (such as a woodland edge) call for more informal, nature-evoking plantings. Beautiful and bountiful things happen when a garden is in harmony with its surroundings.
Understand Your Garden’s Site
Light, soil, space, garden style, and other parameters must be considered before planting a new tree or shrub.
It’s especially important to keep this in mind when choosing – and planting – the trees and shrubs that will form the framework of your garden. Choose the right plants and get them off to a good start, and good things are almost sure to follow.
It all comes back to knowing the site’s conditions. What are the pH, nutrient-holding capacity, and other characteristics of your soil? If in doubt, you can get a definitive answer by sending soil samples to your state’s horticultural extension service (click here for a nationwide list of extension services). What is the site’s exposure to sun, wind, and water (e.g., rain and runoff)? How and when do you use your yard? Now, during the dormant season, it is a great time to assess these factors. Then, based on your site’s particulars and your preferences, compile lists of trees and shrubs that are a good fit.
Planting Trees and Shrubs
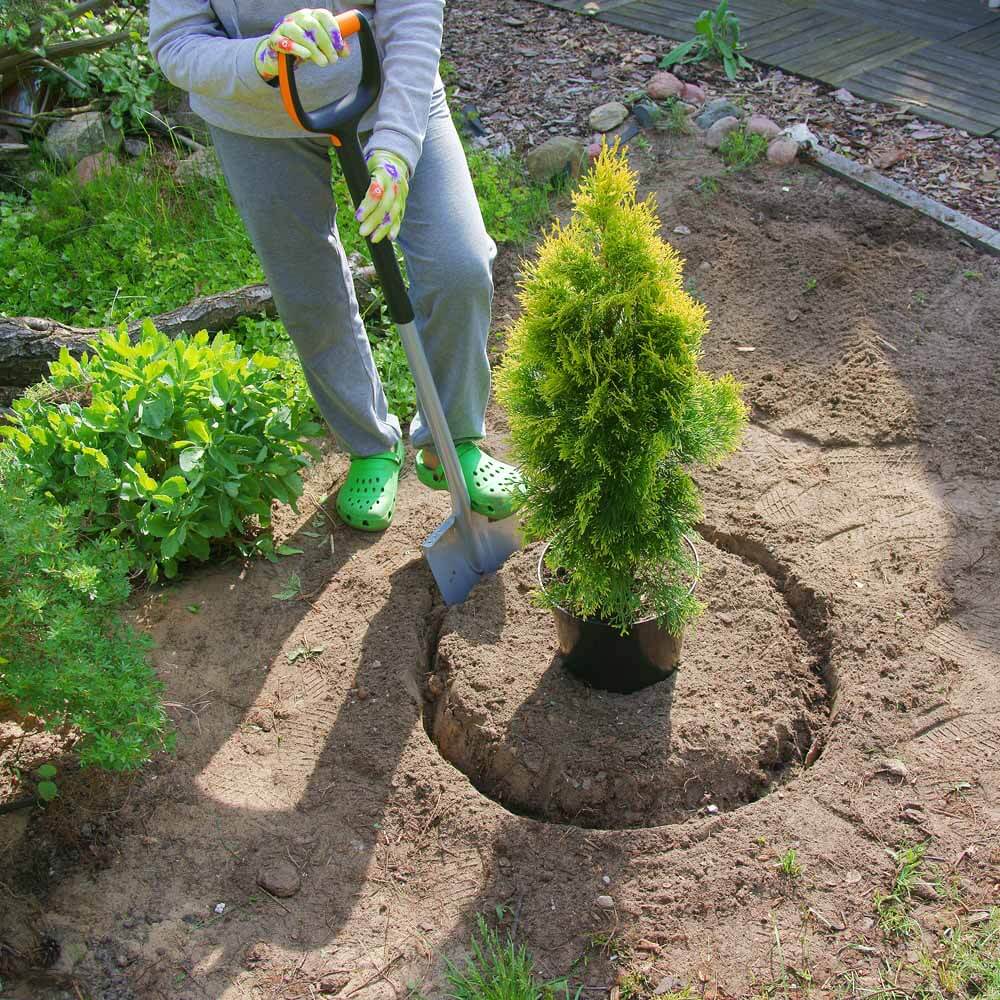
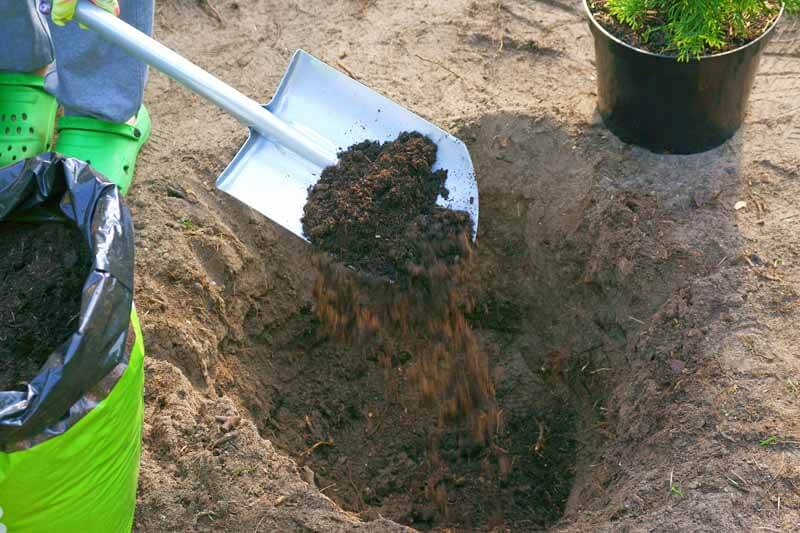
A suitably broad planting hole should be around three times as wide as the plant’s root ball.
When you get around to planting, the same precepts remain. Trying to force an ill-chosen plant into an incompatible site is a losing prospect. If the tree or shrub is a good fit, all it needs is a good root system and a suitably broad planting hole, backfilled (to the proper depth) with unamended or lightly amended soil for best establishment. Of course, planting at the proper season and providing regular post-planting care (especially watering) are also essential.
Sizing Up the Planting Hole
Adding a light application of soil amendment, such as Fafard Premium Topsoil, will give the soil extra organic matter.
Planting width requires a “suitably broad” planting hole is at least three times as wide as the plant’s root ball, although twice as wide will do in a pinch. The texture of the excavated and refilled soil differs significantly from that of the surrounding undisturbed soil; consequently, it also differs significantly in other properties such as moistness and aeration. Adding a light application of soil amendments, such as OMRI Listed Black Gold Canadian Sphagnum Peat Moss or Black Gold Garden Compost Blend, will give the soil additional organic matter for increased water-holding ability to help the establishing plant. This is of greatest importance in poor or sandy soils. If your soil is of good to average quality, this step is not needed. A wide planting hole gives the roots a relatively homogeneous environment in which to extend and establish. By the time they’ve reached the edge of the former planting hole, they’ll be more up to the job of worming their way into the undisturbed soil. Additionally, the refilled soil will settle over time to a texture closer to that of the surrounding soil, thereby easing the roots’ transition.
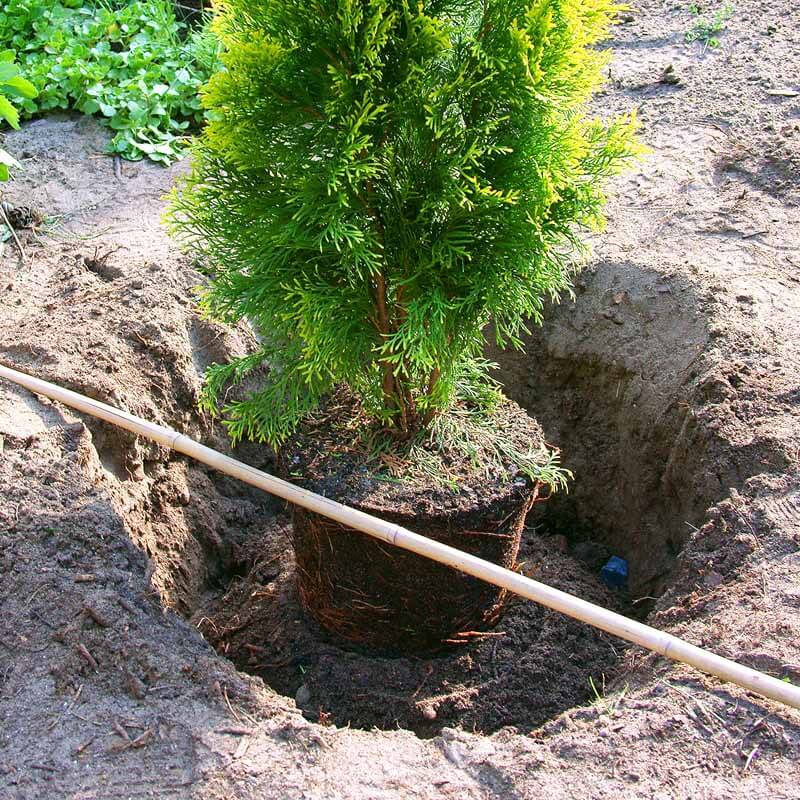
The planting hole should be no deeper than the root ball.
Planting depth – unlike width – can be overdone. In fact, the planting hole should be no deeper than the root ball. Most of a tree’s or shrub’s feeder roots are within a few inches of the surface. A deeper hole serves only to loosen the texture of the soil below the root ball, increasing the likelihood that it will settle and pull the roots down with it. Plants generally do not thrive in air-starved sinkholes.
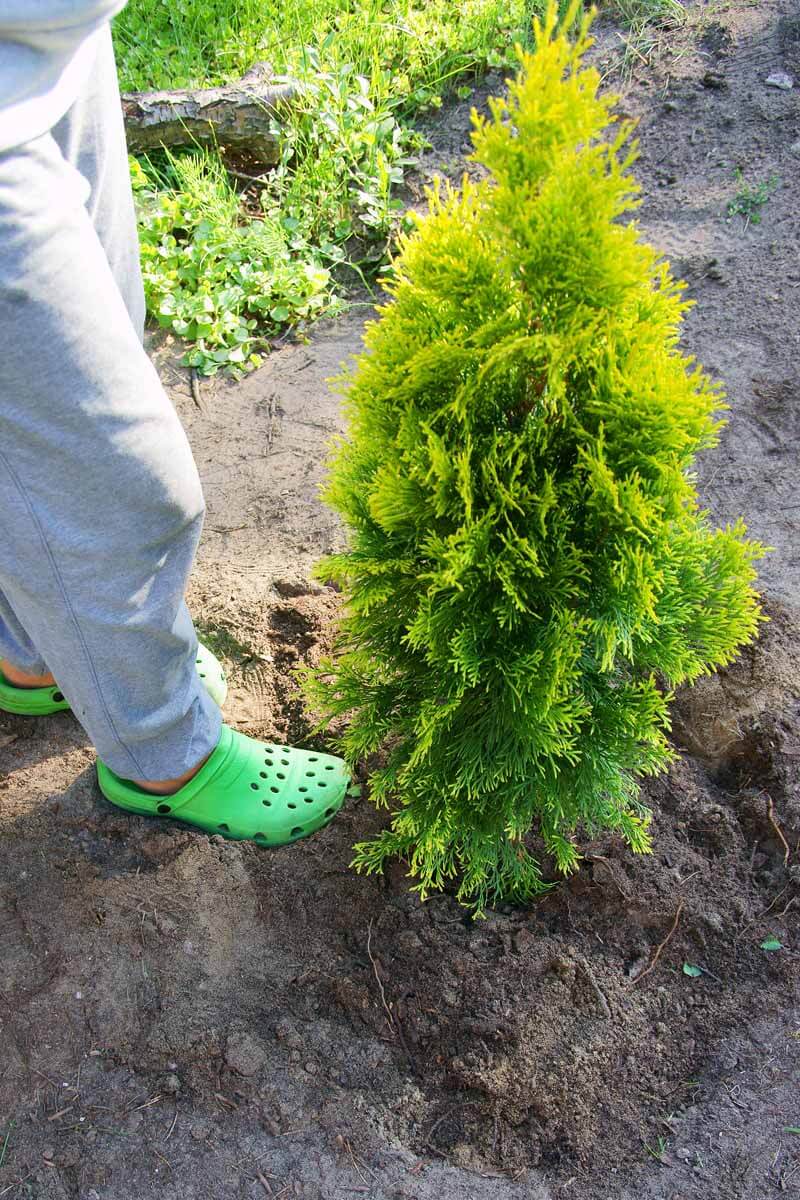
Work soil in around the plant and press it down to remove any unwanted air pockets.
Shallower planting may be required in heavy clay soil. Planting holes in such soils are subject to the bathtub effect, with water percolating through the relatively coarse refill soil and pooling at the bottom of the hole. Here, dig an extra-wide hole that’s significantly shallower than the root ball, sloping the base of the hole toward its edges. Mix the excess backfill with Black Gold® Garden Soil, and mound this over the exposed root ball after planting.
Sizing Up the Tree or Shrub
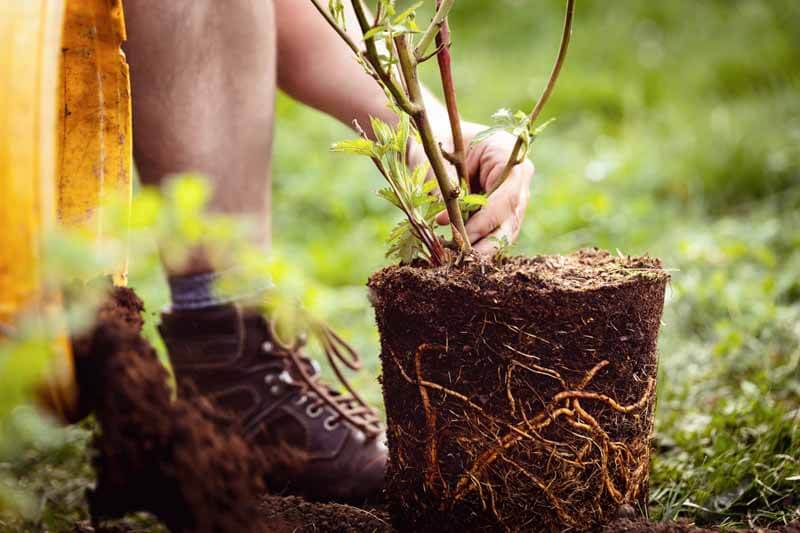
Make sure plant roots have not become pot-bound. If they have, work them apart to help them grow into the soil.
Potted trees and shrubs with vigorous, relatively undisturbed roots make the best planting material. Avoid pot-bound plants whose roots have long ago filled or grown beyond their containers. Before buying a containerized plant, try to knock it out of the container to check the root system. If the root ball remains stubbornly wedged in its container even when you apply force to remove it, it’s a risky prospect. Ideally, the roots should not circle the soil ball, and abundant white feeder roots should be evident at its edge. You can plant container-grown trees and shrubs just about any time the ground is workable, but be sure to keep the root ball from drying out after planting. Most potting soils are peat-moss-based, making them coarser and more drought-sensitive than the surrounding soil. They also resist re-moistening once completely dry. Newly planted container-grown plants may need watering several times a week during summer droughts.
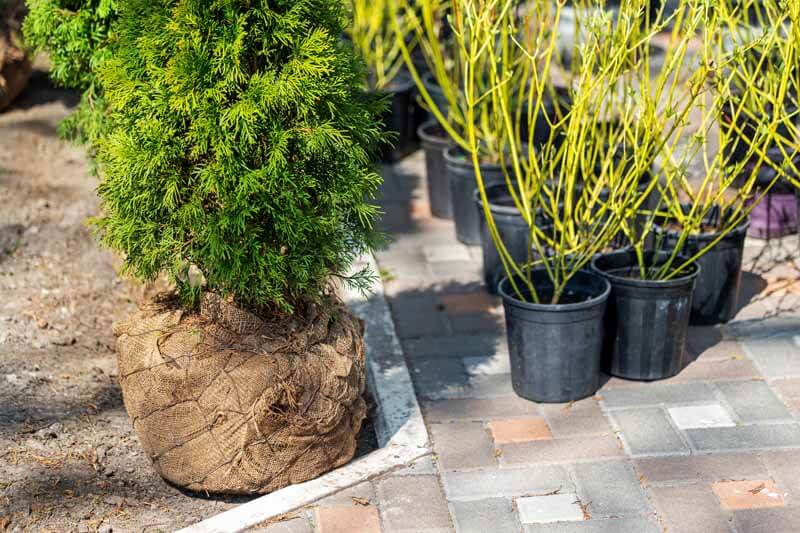
Unlike container-grown plants, B&B plants are often grown in heavy clay, which cracks and resists water when dry.
Bare-root and balled-and-burlapped (B&B) trees and shrubs lose much of their root systems when harvested at the nursery. They thus require more kid-glove treatment. Plant them either in early spring or in late summer/early fall to give their roots ample time to regrow before summer heat or winter cold arrives. Be sure that their roots do not dry out before planting. Unlike container-grown plants, B&B plants are often grown in heavy clay, which cracks and resists water when dry.
Be careful to plant bare-root and B&B shrubs and trees at the proper depth. For bare-root plants, partially refill the planting hole with a volcano-shaped cone of soil, spreading the roots atop the cone before backfilling. The plant’s trunk/root junction (also known as the “root flare”) should be just at or slightly above the soil surface. Stems of B&B trees and shrubs are often partly buried in their root ball; if so, remove some of the soil to expose the root flare. Also, be sure to minimize disturbance to B&B root balls as you plant, and remember to unswaddle the burlap (or wire caging) from the top and sides of the root ball before refilling the hole. Either cut and discard the unwanted wrap or pull it back and bury it at the bottom of the hole.
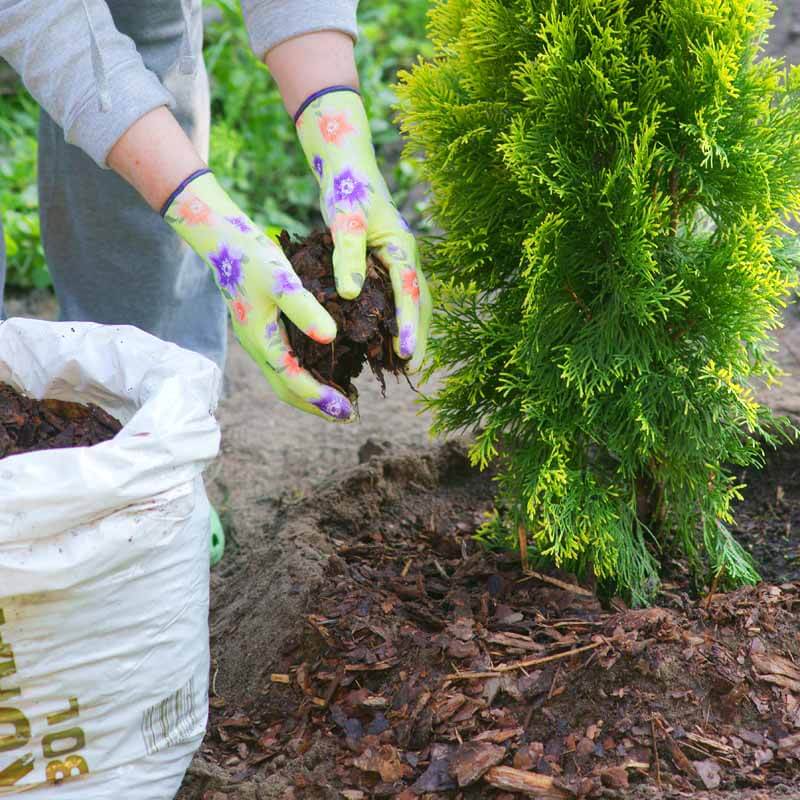
A two- to three-inch mulch layer will hold in soil moisture and protect against weeds.
Add a good mulch layer to buffer newly planted trees and shrubs from drought, heat, and cold, and apply an inch of Black Gold® Natural & Organic Garden Compost Blend and a couple of inches of bark mulch to the planting area. They’ll appreciate the extra pampering, and you’ll appreciate the results!