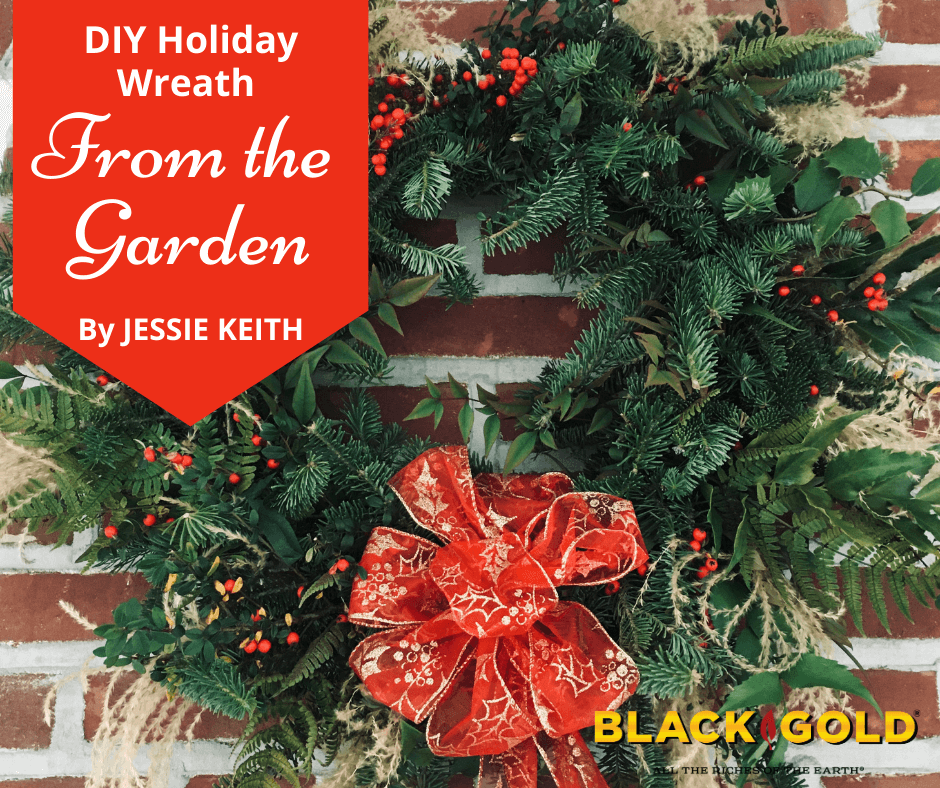
Homemade wreath making can be expensive if you invest in pricy greens, berried branches, premium pinecones, and premade bows and baubles. But, wreath making can also be inexpensive, which is especially welcome during tough economic times when money is tight. Harvest ornamental branches and clippings from the garden, ask your local tree-yard for free evergreen branches, and you can create outstanding wreaths for very little. Learn to make your own festive bows, and your wreath will be a little less than the final cost of a wreath frame, florist’s wire, ribbon, and a little elbow grease and creative inspiration.
I like to gather wreath materials from my garden and use trimmed branches from my Christmas tree, but not all readers may have this advantage. Thankfully, many tree yards offer inexpensive or free greens, cones, and other decorations for wreath-making. Garden centers also sell a variety of greens and berries–some pricy and some reasonable. It is easy to err on the frugal side and still have materials to create something pretty and testing. Either way, making your own wreath is far cheaper than purchasing pre-made wreaths, and you end up with custom-made creations with personality.
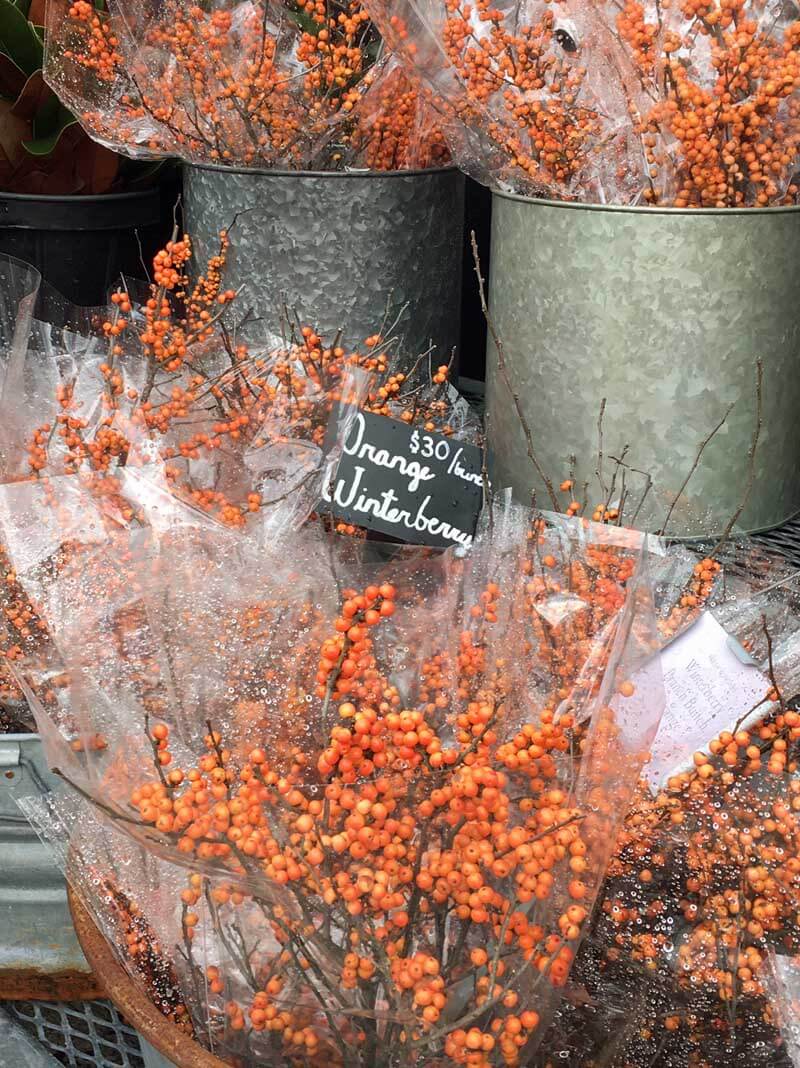
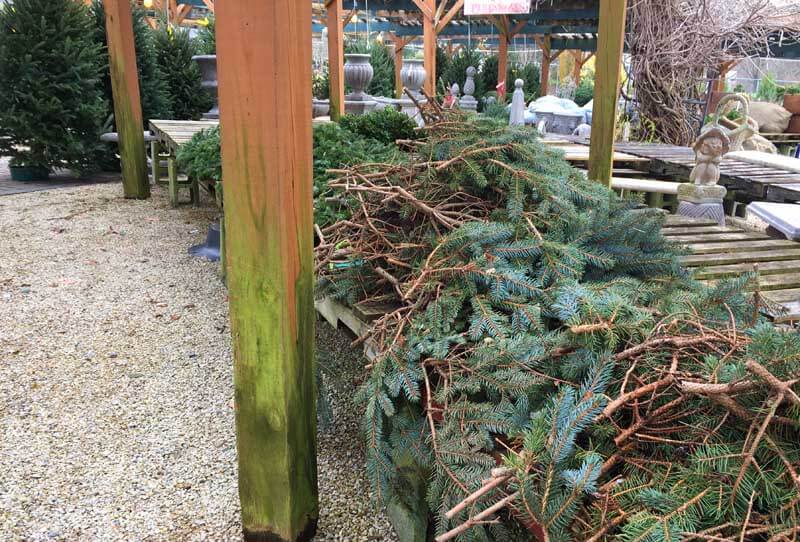
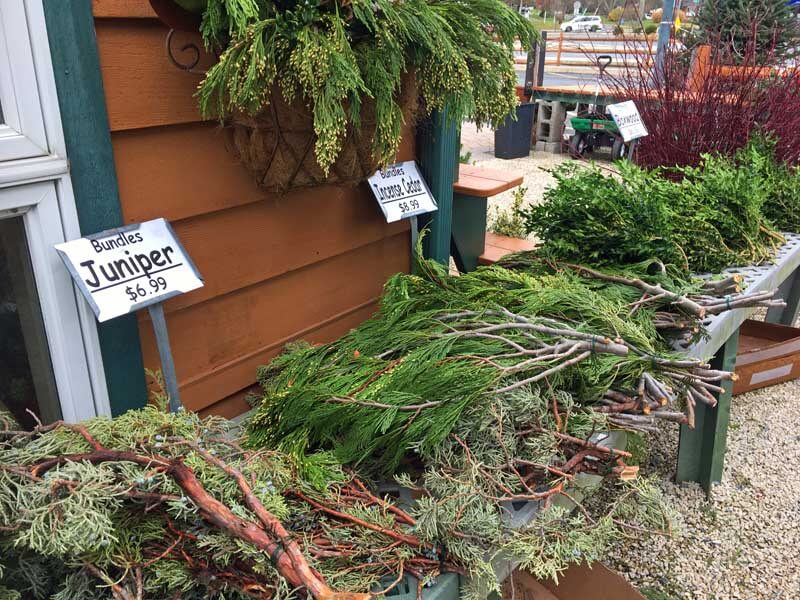
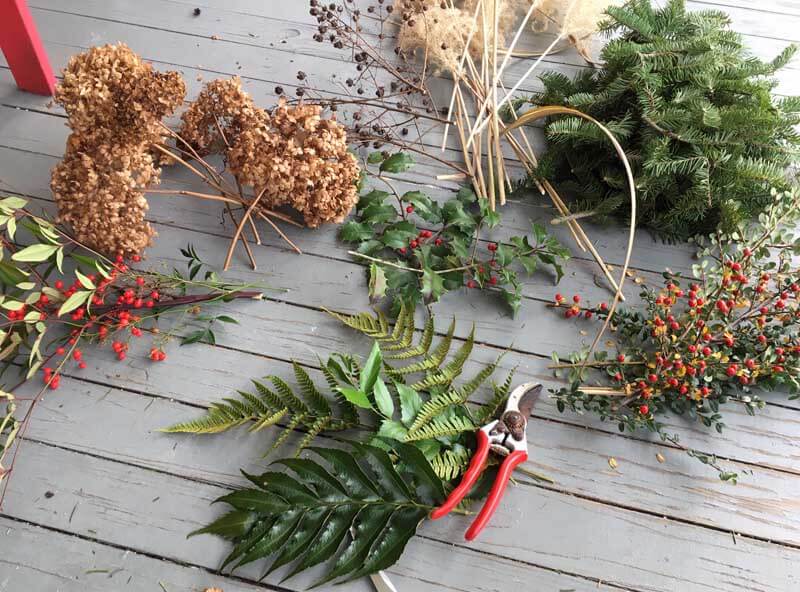
Choice greens and berries, like these orange winterberries for $30 a bundle, can be very pricy! That’s why I like to grow and collect mine for free in the garden.Cuttings from Christmas-tree yards are often free for the taking. If not, choose a tree that has extra branches at the bottom that need to be trimmed. (These were the source of balsam fir for my wreath.)Inexpensive specialty bundles of greens can often be bought at garden centers for wreath making.
DIY Garden Wreath Components
After gathering greens, berries, and dried flowers and grass plumes from the garden, cut them to size (~6 inches).
My favorite wreath components include evergreen branches, pine cones, dried flower heads, berried branches, dried grasses, and festive embellishments, such as metallic spray paint, a touch of glitter, and a bow. If I am feeling really frugal, I will even reuse a wreath frame by deconstructing my wreath creations yearly at the end of the season.
In addition to extra Frasier or balsam fir branches from my Chrismas trees, here are wreath components that I have in my yard:
Evergreen Ferns
Miscanthis Grass Plumes
Dried Hydrangea Flowers (I did not add these to this year’s wreath)
White pine cones (I refrained from adding these to my wreath this year.)
Here are the extra materials I use for wreath making:
Metal or grapevine wreath frame
Heavy-duty shears
A paddle of florist’s wire
Decorative florist’s ribbon for the holidays or winter
DIY Wreath Technique
Here are the steps I took to put my wreath together. The process is easy, and the basic principles can be used to create lots of different wreath creations at different times of the year. Just be sure to use fresh plant materials that are long-lasting. Happy wreath making!
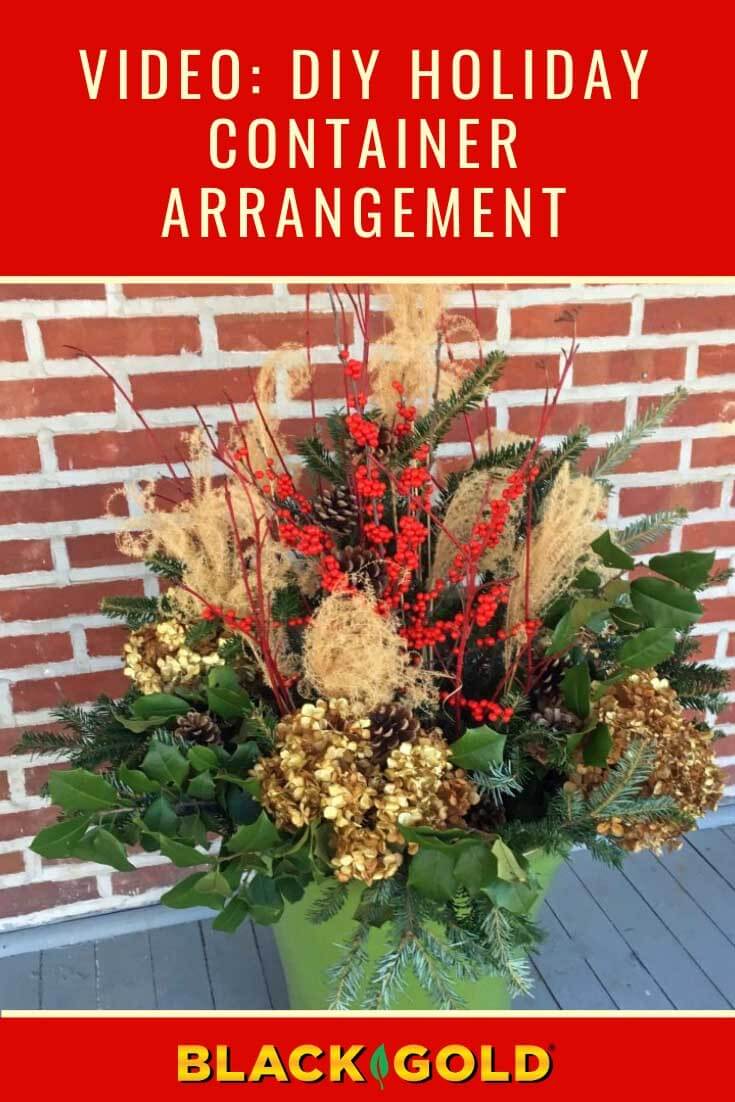
To make your porch look even more festive, make these holiday containers. They look wintery and pretty up until spring when you can dismantle them to make way for spring containers.
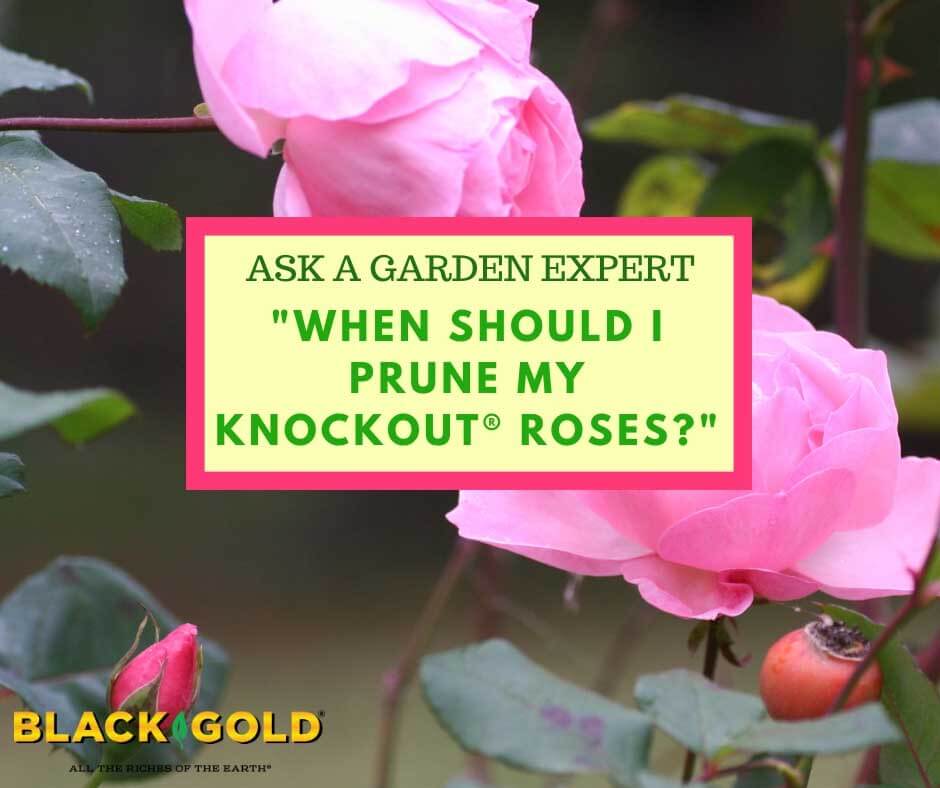
“When is the best/latest date I can cut back roses?” Question from Joseph or Milwaukie, Oregon
Answer: Late winter is an excellent time to prune reblooming roses, but you can also safely prune them at other times–including now. I recommend that you read our blog about pruning roses in spring (click here to view it). I also encourage you to watch our rose-pruning video with West Coast Rosarian, Rich Baer. It provides a useful, hands-on overview of how to prune roses and covers everything from needed pruning tools to the proper pruning height.
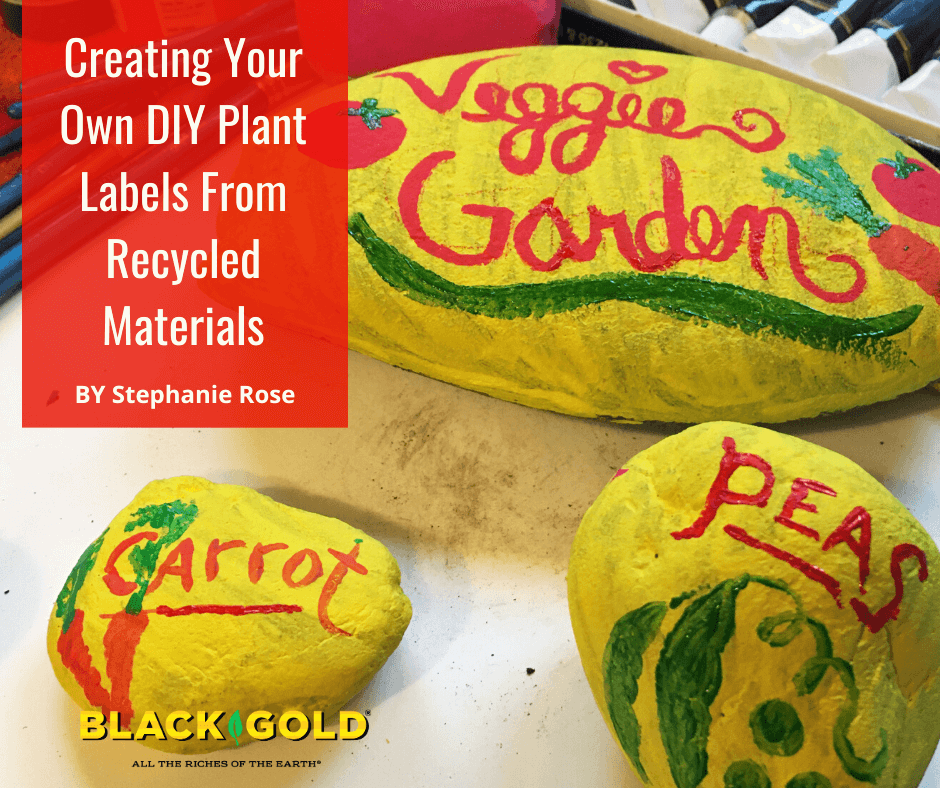
Creating painted rocks is a fun family activity, and they look beautiful in the garden. (Image by Jessie Keith)
Making your own plant markers can be a fun way to repurpose used items and put a touch of personality into your garden. They are a useful and fun activity for a rainy day, humdrum weekend, or when you have extra time on your hands.
Here are some of my favorite ideas for DIY plant markers, all are easy projects for those who love to craft, garden, and be green! These plant markers are fun to make and will help keep your garden beds in order. No matter what your style, skill level, or budget, you will find the perfect DIY plant label for you in this list of seven easy-to-make plant labels using materials that you may already have around the house.
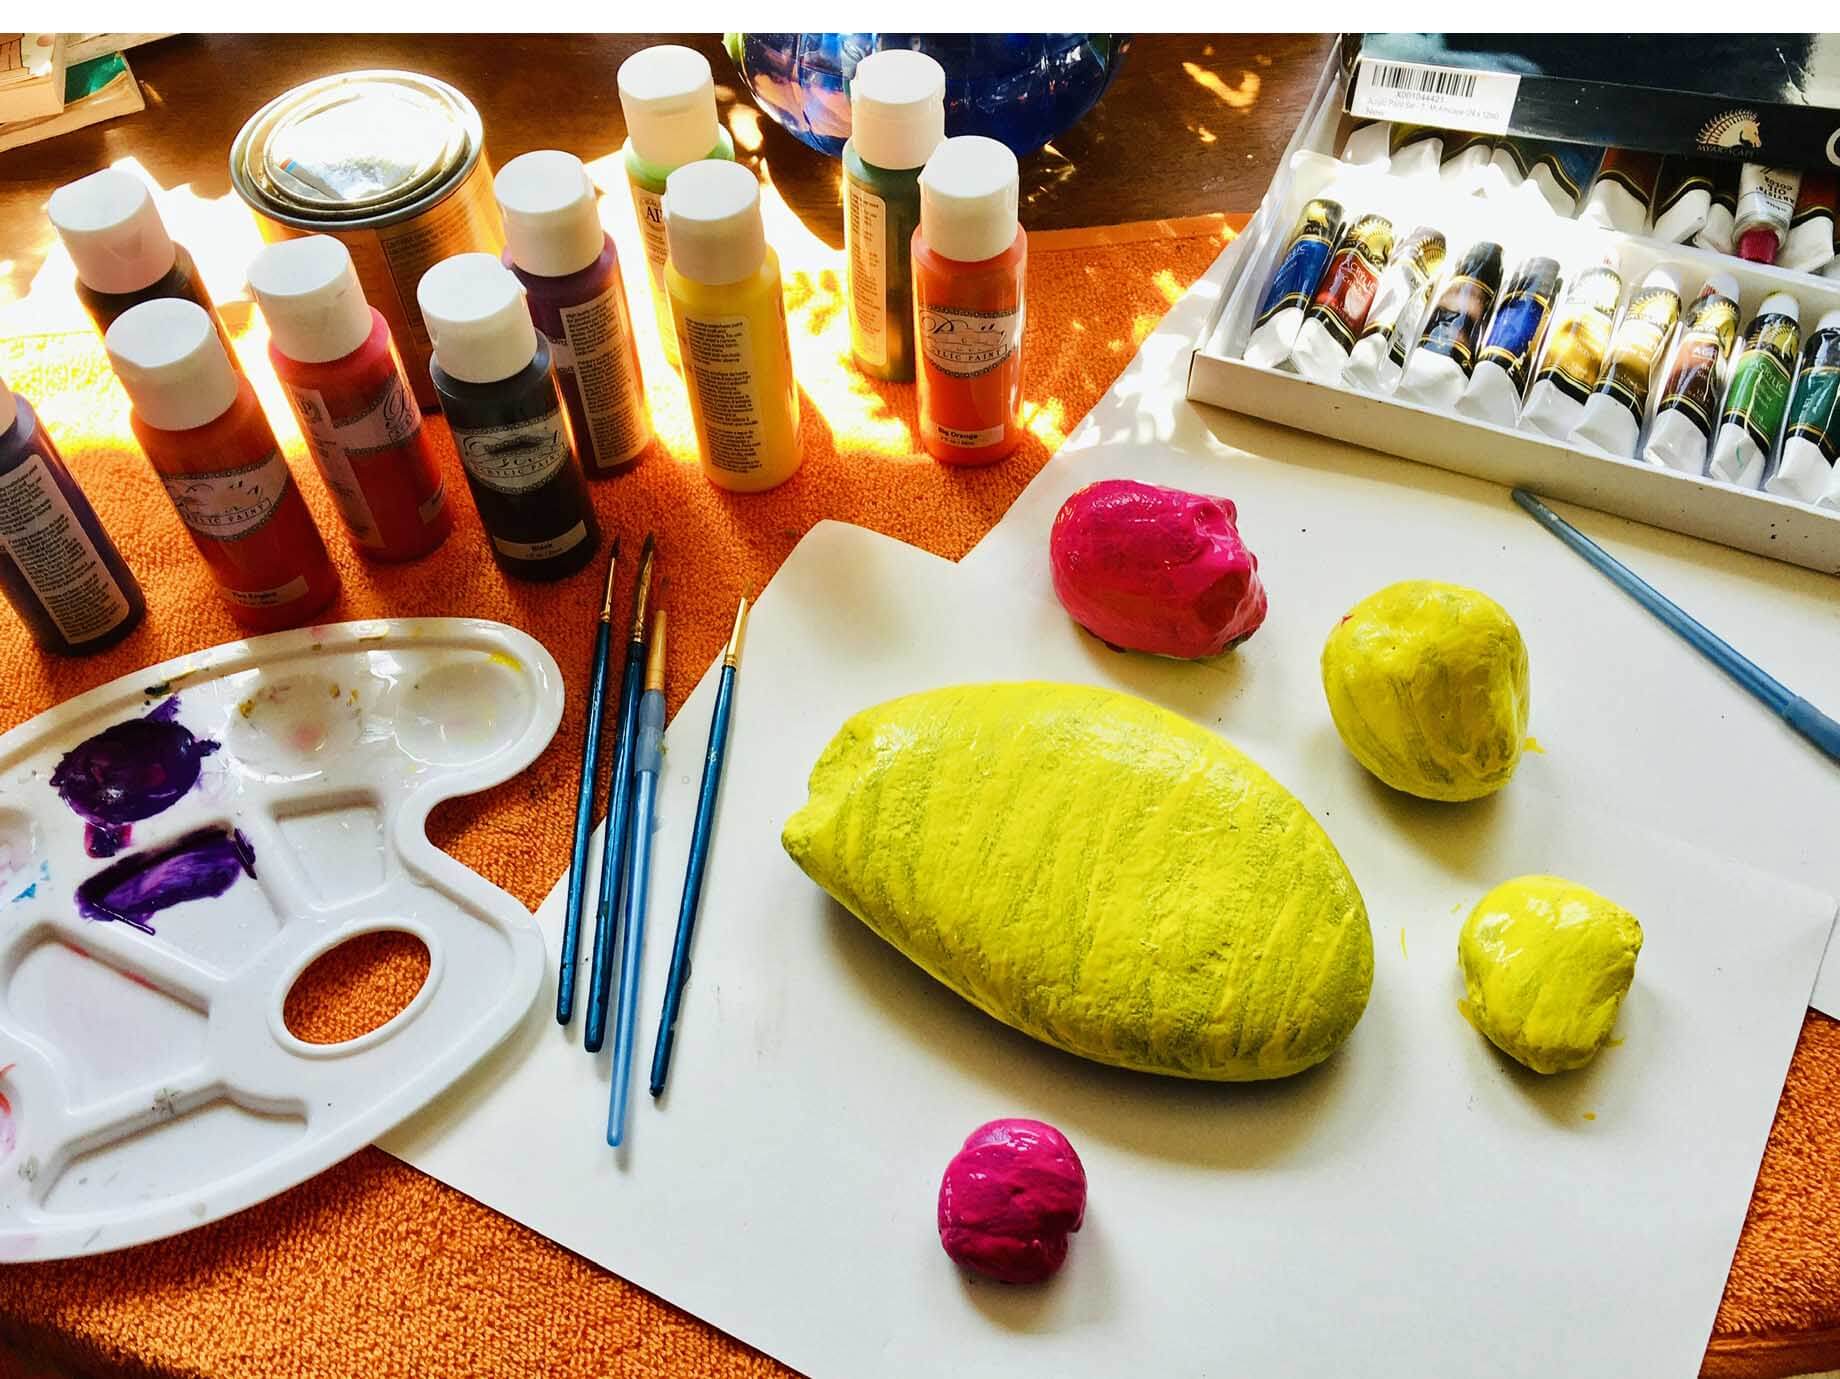
1. Painted Rocks
Materials needed for making painted rocks include smooth, clean rocks, non-toxic acrylic paints, water, paint brushes, and creativity.
Being a naturally occurring material, stones are easy to obtain and place among your garden plants. Rocks are generally excellent plant markers because they are sure to outlast the winds and rains typical during springtime planting. This is also a fun craft project you can do with kids!
The key to creating a long-lasting rock plant marker is all in the paint. Look for non-toxic acrylic paint to decorate the rock and use an outdoor clear sealer like Mod Podge to protect it from the elements. Speak with the staff at your local craft or hardware store if you’re uncertain about sealer options available to you locally. See the steps to make them here.
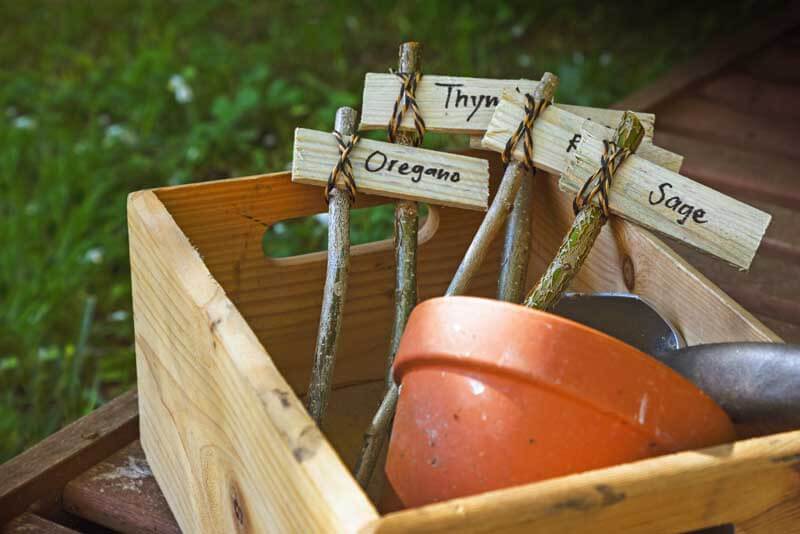
2. Twig and Stick Markers
Take some twigs, a bit of twine and wood, and put them together to make attractive garden markers.
When you are out doing a bit of pruning, be sure to hold on to those sticks and twigs to use as garden markers! There are several ways to do this, simply or using bits of string or wood from around the house. Both start with sticks that are similar in size and shape that have been cut to equal lengths
For the whittled stick method, pare away the bark of the stick to expose the raw wood underneath. You can do this with either a potato peeler or a small sharp knife (a pocket knife will do). Be sure to wear protective gloves. Expose just enough of the stick to be able to write the name of your plant on the raw wood. You can use a permanent marker with a clear coat of sealer, or even a wood-burning pen to get a permanent etch.
Another way is to use the sticks as stakes for more elaborate wooden markers of your creation. Any small, flat piece of wood or bark can be affixed to the twigs with twine and/or strong glue. Then label them as desired.
Once complete, place the stick plant markers into your garden, which may involve using soft mallet hammer if the soil is hard. At the end of the season, simply pop the plant markers in the compost bin and start anew next year.
3. Wood-Burning Tool
Speaking of wood-burning pens, you can also use pyrography to create charming plant markers with inexpensive wooden spoons, popsicle sticks, or other stakable wooden odds and ends decorated with a wood-burning tool with a pen tip attachment. Draw your label and decorations onto the wood in pencil first, and then go over it with the wood-burning pen. Wood-burning tools are both fun and easy to use, as long as you keep your fingers clear of the tip (youch!).
As for the design, get creative! You can use your wood-burning tool for anything that is wood so practice a bit before you get started. Then try it out on wooden spoons, clothespins, tiny signs from your local craft store, or wood scraps leftover from your last project. Click here to see how to make elaborate wooden spoon markers.
4. Clay Plant Markers
Clay markers are fun for kids to make.
Use oven-bake clay and rubber stamps, cookie cutters, a knife, or ravioli roller to make stylish garden markers for your herb or vegetable garden. Simply roll out the clay with a rolling pin to a 1/4 inch thickness, cut into strips (or circles and shapes for hanging labels), and curl up one end for a decorative topper. Use rubber stamps or toothpicks to imprint or carve the names of the plants before baking. Be sure to put holes at the tops of the circular labels for hanging. Follow the baking instructions on the clay package, and you’re done!
5. Metal Stamped Spoons
Hammer-struck hardware letter stamp sets can be purchased for as little as $20, but they can be used over and over again. There are many ideas available for recycled metal plant markers involving anything metal like frozen juice lids, metal washers, soda cans, and copper sheets. Yet, a simple metal plant marker can be made with just an old spoon, small hammer, two pieces of wood, and a stamping set.
To create a metal stamped spoon label, first select your spoon to create into a marker, and place upside down between two flat pieces of wood. Strike the wood with a hammer until the spoon becomes flat. Remove the top piece of wood, and continue to hammer until the spoon is completely flat. Hammer the name of the plant you want to label, then, color in each letter with a dark permanent marker to make them stand out. Use steel wool to scuff off excess color from the marker.
The spoon shape is ideal for a plant marker, with the handle making insertion into the soil easy. These also are a fun way to label a plant as a gift, or bundle a few together with common herb names as a gift idea.
6. Wine Corks on a Stick
One of my favorite recycled plant label ideas comes from my favorite beverage, wine! It can be as simple drinking saving the corks, adding them to the tops of bamboo skewers, and labeling with a permanent marker. If you need a lot of plant labels, you can always get bags of used corks at a local winery.
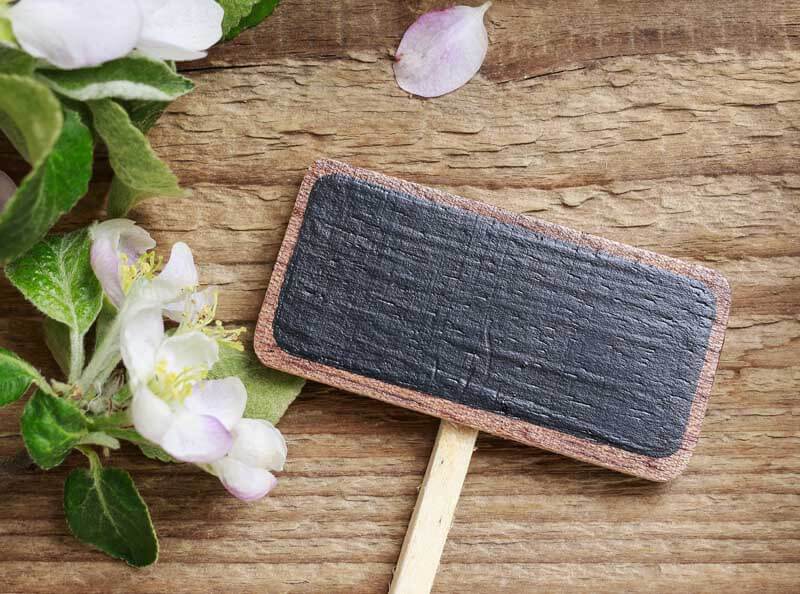
7. Chalkboard Paint
You can paint practically anything with chalkboard paint to make an easy label.
These super easy markers are surprisingly long-lasting and look great. They are especially useful for vegetable gardens because they can be erased and reused once the plants are grown in enough that you no longer need a label to help identify them. Just dip paint stirrers, popsicle sticks, or any wooden label in chalkboard paint, let it dry, and write your labels with a liquid or oil-based chalk pen that will look clean and last for a whole season, even through rain and watering. Click here to see my step-by-step paint stirrer labels.
Hopefully, these projects inspire you to create your own eco-friendly plant markers, which will make organizing your garden both prettier and greener.
“I live in South Louisiana. When should I prune my Knockout roses?” Question from Deborah of Saint Amant, Louisiana
Answer: Many growers advocate you that prune shrub roses in late winter or spring before they have leafed out, but some rosarians disagree (see our Black Gold video on pruning hybrid tea roses below.). Either way, I like to prune mine at this time because it’s easier to make cuts on bare branches, and there’s less trouble with pests and diseases. But, Knockouts are everblooming and fast-growing, so you can be pretty carefree about when you prune them, especially down South. (Click here to read more about rose pruning.) Just be sure you use sterile pruning shears or loppers. To keep shears clean and reduce the chance of potentially moving pests or diseases from plant to plant, I dip mine in a 10% bleach solution between roses.
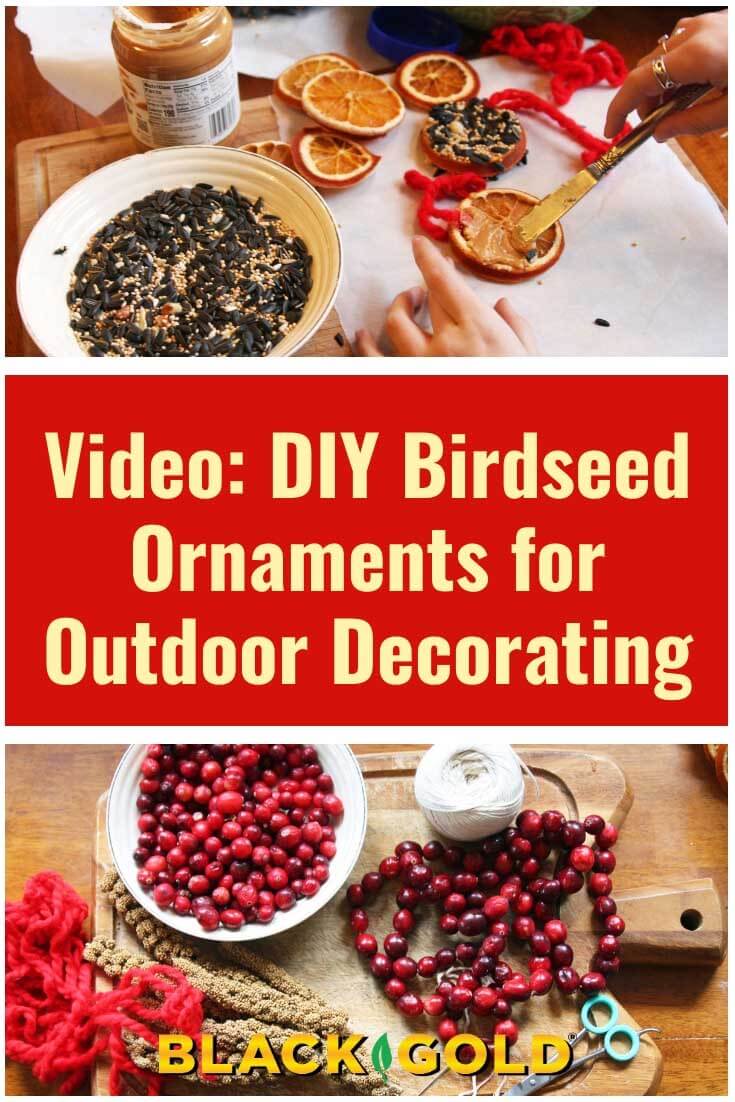
Bring living beauty to your winter garden with these three do-it-yourself birdseed ornaments for outdoors. Each project is a great activity for kids. Some wild birds just eat seeds, while others rely more on berries, and some need fat, like suet, to survive winter. Our different ornaments have ingredients to satisfy almost all wild winter birds. These ornaments fulfill the diets of many different birds.
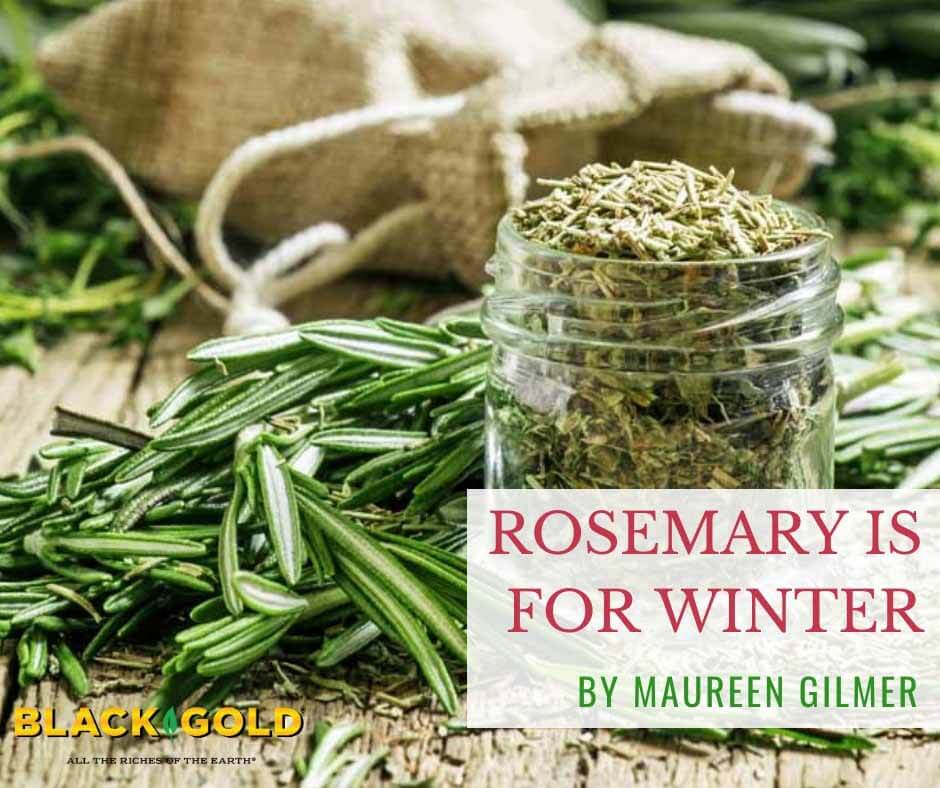
Fill pretty, recycled jars with freshly-dried rosemary for holiday gifts for foodies (and pet lovers too, see below).
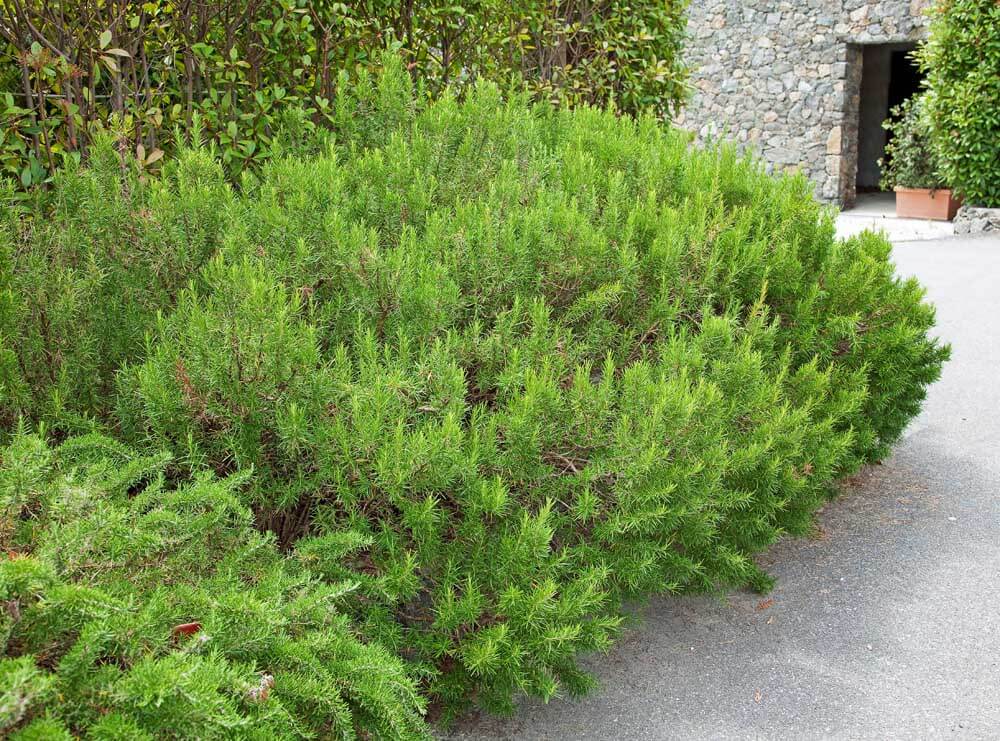
When I first came to the Southern California desert, I was shocked at how well traditional rosemary (Rosmarinus officinalis, USDA Hardiness Zones 8-10) shrubs survived through 120ᵒ F summer days. When provided good drainage and some water, these plants thrive in dry, mild-winter locations and reach mammoth proportions. If fragrant, culinary rosemary is able to thrive in low-desert heat and naturalize along the West Coast, it should grow well in practically every garden where it’s hardy. There isn’t a more useful plant for arid-zone landscaping, but rosemary also fares well as a potted plant where winters are cold.
Rosemary History and Uses
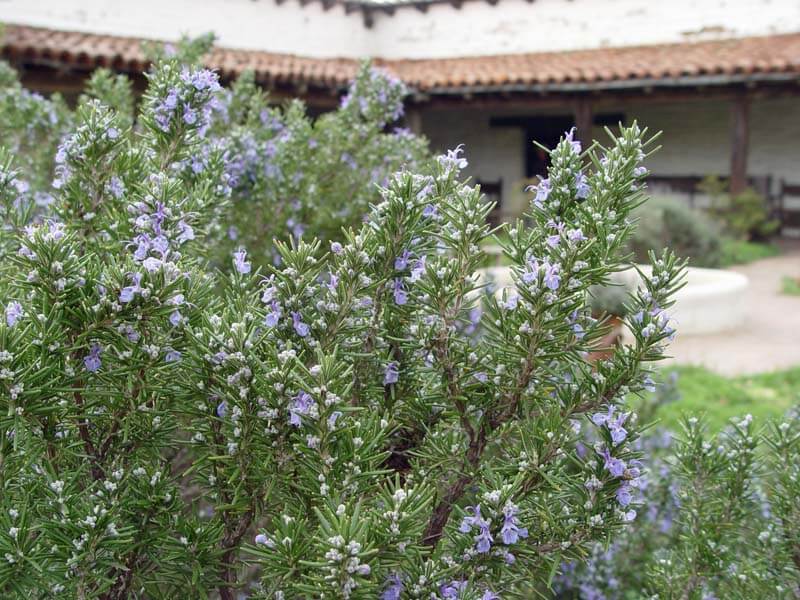
When in bloom, rosemary is showy and attracts bees. (Image by Maureen Gilmer)
Rosemary is native to the Mediterranean and parts of Asia. It has a long history of use and cultivation going back thousands of years. Grown wherever possible outdoors in mild areas, whether as an ornamental or herbal plant, it has also been traditionally cultivated in pots in colder winter regions and brought indoors to shelter. As a house plant, rosemary can be clipped with scissors to release its scent, just as the Romans did to perfume their courtyards naturally. Greeks believed wearing sprigs of rosemary in the hair while studying assisted with memory, hence the plant’s perpetual association with remembrance. And, during the plague years, rosemary was burned as a disinfectant much like white sage smudge sticks have been used in the Americas for purification.
The sheer range of uses for rosemary should make everyone want to grow this easy and willing plant. It is above all a culinary herb, and foodies often use the straight twigs for savory beef or lamb kebab sticks or sprigs to naturally flavor roasts. As the leaves are heated, they release their plant oils. Rosemary may also be used to flavor olive oil, teas, and is an essential ingredient in many classic herbal mixes, such as Herbe’s de Provence, a provincial herbal mix from southern France. (Click here for a Herbe’s de Provence recipe and to learn more about classic French herbs.)
Rosemary has also been traditionally valued as a hair tonic. The Romans, being largely dark-haired, used it to create a hair rinse brewed with water and then cooled. It was poured on dark hair to cut residual soap accumulation and left hair shiny and beautiful. Blondes used the same technique with Roman chamomile (Anthemis nobilis).
Rosemary Types
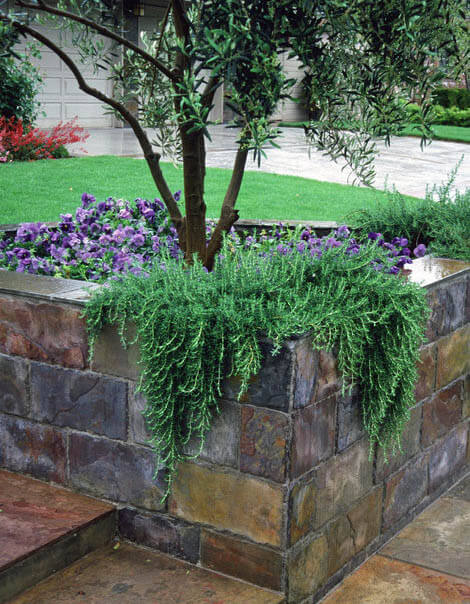
Creeping rosemary loves to dangle off the edges of raised beds. (Image by Maureen Gilmer)
Rosemary averages 4 feet at maturity but can reach 6 feet tall in its natural, rocky, sunny habitat in the Mediterranean. Its narrow leaves become more silvery and needle-like in dry weather and greener and broader when rain is plentiful. Pale violet-blue flowers that attract bees may appear from midwinter to spring.
There are two basic forms. The standard or “official” form from the old herbals is Rosmarinus officinalis. Hardy to 10 or 20° F, it’s a long-lived evergreen shrub for mild-winter regions and often used for landscaping. The shorter variety, Rosmarinus officinalis ‘Prostratus’, develops a low mat of graceful, cascading foliage. Growing to about 1 foot tall, with almost an infinite spread, there is no better cascading plant for pot, slope, cliff, or wall. Its dark tresses are incredibly tough and prefer more shade than the upright type. It works well as a house plant due to having a shorter stature. There are named varieties of rosemary of varying sizes and flower colors, some are even hardier (the variety ‘Arp’ is touted as being hardy to Zone 6), so there’s one for all different sunny gardens. Everyone else can treat it as a house plant that comes outdoors for the summer.
Growing Rosemary
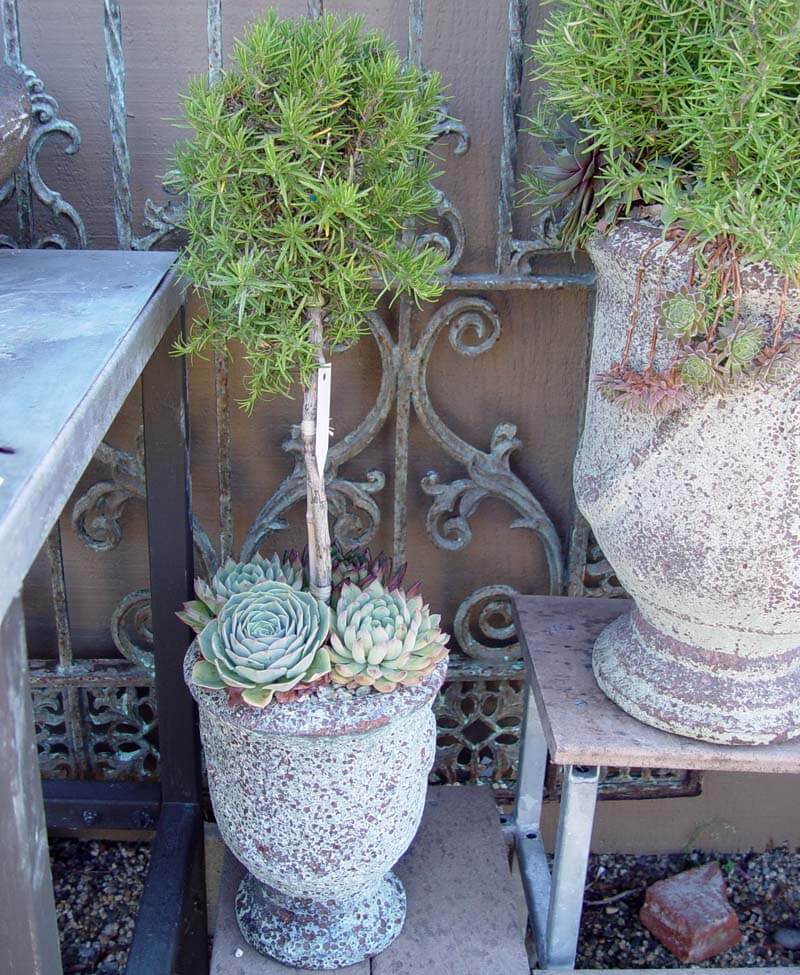
Rosemary makes fine topiary standards, often sold at florists in the city or by special order. (Image by Maureen Gilmer)
Grow potted rosemary in a mixture of equal parts Black Gold Natural & Organic Potting Mix and Black Gold Cactus Mix to avoid overly damp conditions that cause root rot in arid-zone hill plants like these. Make sure there’s a big drainage hole or many small ones because rosemary must have fast drainage to avoid fungal infections that also plague lavenders, which like the same growing conditions.
There is no easier drought-resistant, long-lived herb, shrub, or useful plant to grow for home and garden that will make you feel like a pioneer woman. Rosemary is one plant that can teach you much about the cultivation of useful herbs. From a woman with a self-sufficient, pioneering attitude, a novice can learn hands-on how to harvest and prepare herbal material to use in the household and to make really fragrant gifts for family and friends.
Eight Simple DIY Rosemary Crafts
Decorate a freshly wrapped gift with aromatic rosemary sprigs tucked into the ribbon.
Put freshly dried rosemary into tied cheesecloth bundles to season soups and stews.
Place sachets filled with rosemary into drawers to scent linens and clothes. (Rosemary’s non-floral scent makes men’s clothing smell pleasantly herbal.)
Fill pretty, recycled jars with freshly-dried leaves for holiday gifts for foodies (and pet lovers too, see idea 8).
Stud pomanders with short rosemary sprigs and place them on a mantel or tree for scent and beauty.
Create small wreaths or herbal swags with creeping rosemary sprigs for hanging indoors or out. (Once the leaves are dry, collect them for cooking.)
Decorate a freshly wrapped gift with aromatic sprigs tucked into the ribbon.
Infuse olive oil or fine vinegar with fresh-cut rosemary sprigs for a culinary gift.
Grind dried rosemary leaves and scatter in pet beds to battle odors and discourage ticks and fleas.
If you live where rosemary does not thrive year-round, buy a rosemary topiary to grow indoors, or invest in a potted 1-gallon rosemary to decorate for the holidays. Both will provide super fresh culinary clippings. Enjoy the indoor plants through the new year, then move them outdoors when temperatures warm up. And, where it’s mild year-round, plant your garden with lots of rosemary, so you have plenty of “mother” plants to snip and clip for the rest of your life.
Rosemary averages 4 feet at maturity but can reach 6 feet tall in its natural, rocky, sunny habitat in the Mediterranean.
Don’t leave your patio ceramic containers empty during the holidays, Christmas, or winter! Fill them with beautiful evergreens, bright berried branches, and other festive outdoor decorations for a real front door showstopper.
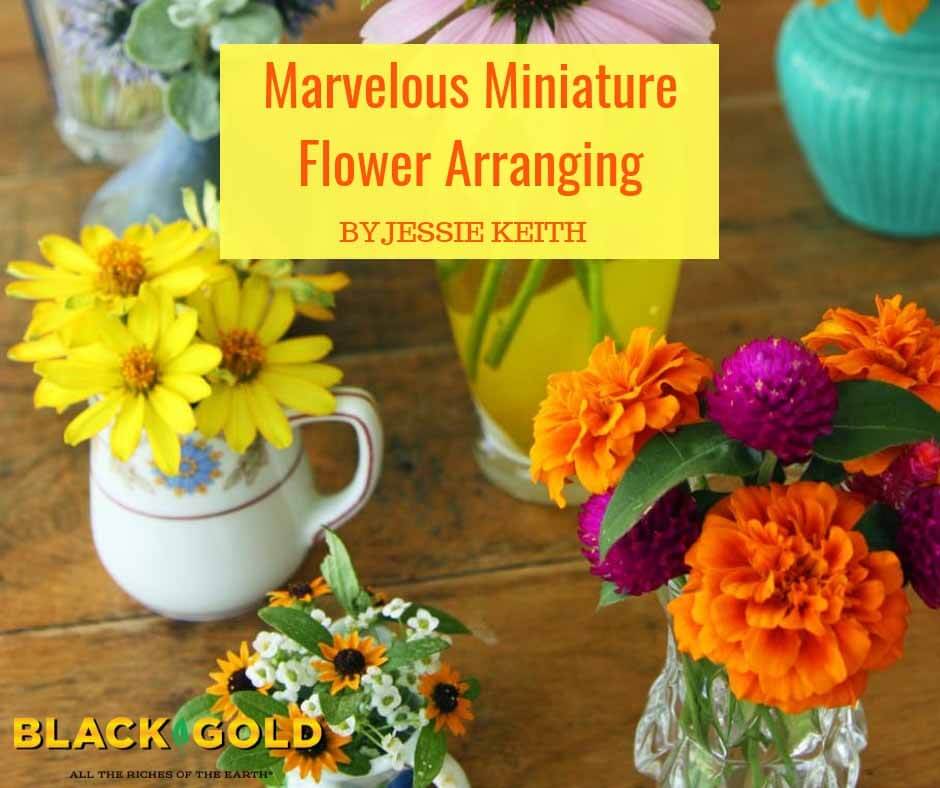
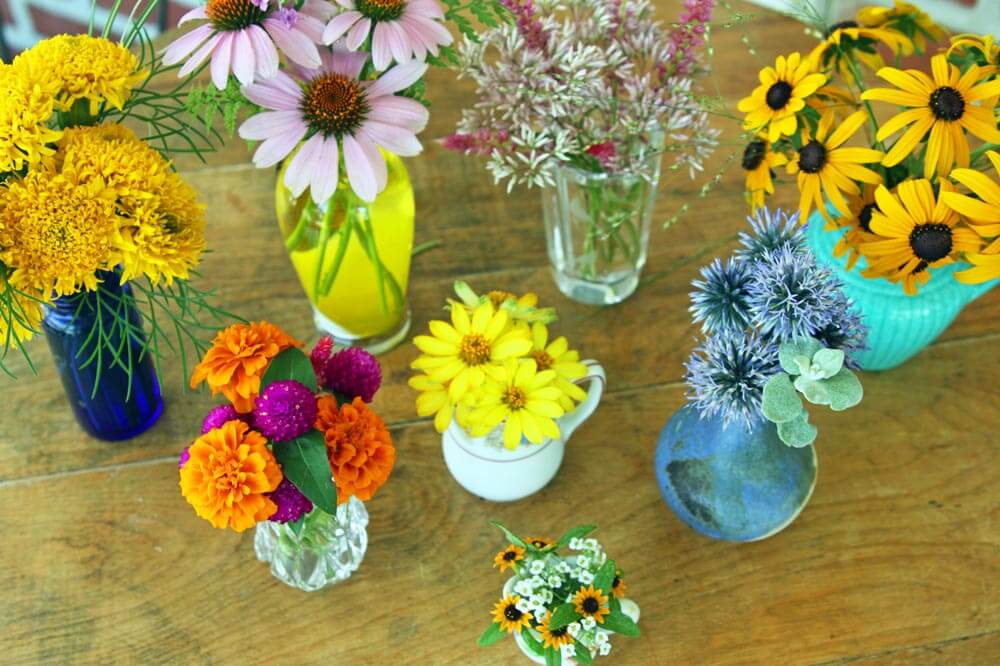
Small is sweet, especially when it comes to flowers and gardens. Miniature and fairy gardens have gained huge popularity, but miniature flower arrangements are just gaining attention. These tiny floral gems give crafty gardeners reason to collect the sweetest miniature vases (second-hand shops are a great source) and create small works of art that look best when presented in sets. Children are also thrilled to devise their own delicate mini flower creations.
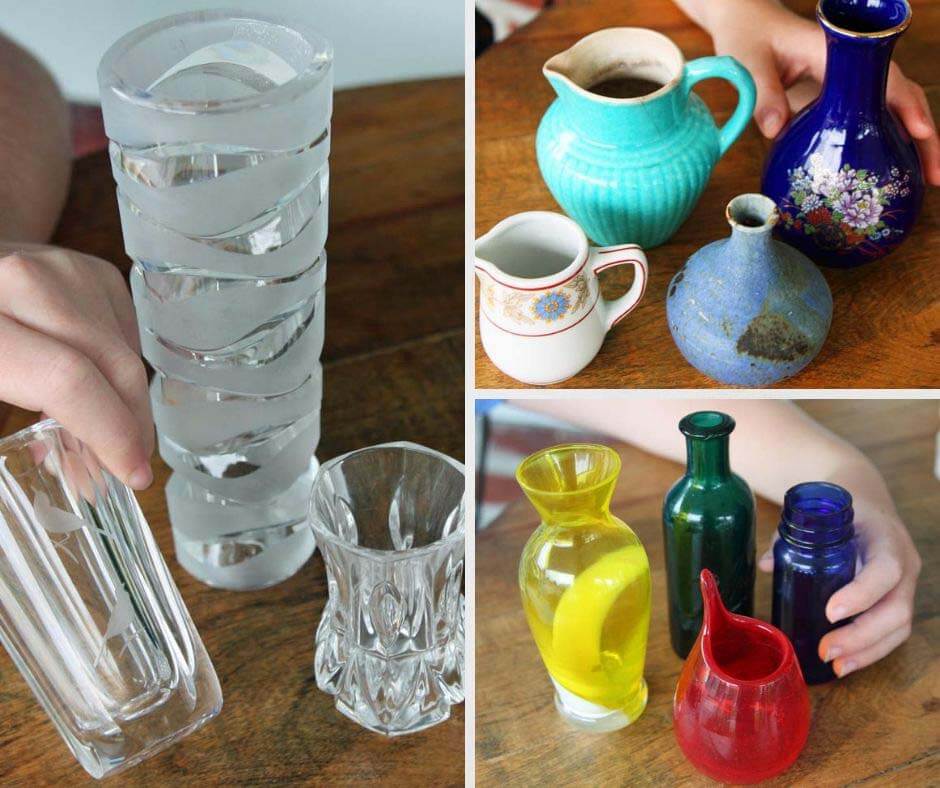
Vases
We have gathered cute, tiny vases that are made of crystal, colored glass, and ceramic.
Rule one: your vases must be very little. Vase size, color, and personality can set the stage for your floral creation. Rounded vases are designed for radial views—or table centers. Square or rectangular vessels can hold front-facing floral arrangements to be placed against walls, or not. Brightly or wildly colored vases lend themselves to simpler floral color schemes for contrast, while simple, neutral vases can hold anything.
Basic Design Tenets
This simple arrangement maintains a monochrome color scheme of pink and balances two textures–an airy, mounded base of Joe-pye blooms and spiky celosia.
Formal floral design embodies many design tenets for good arranging. Here I will define six.
Line: This is the arrangement’s path that draws the eye. The overall direction of an arrangement’s focal point—whether primarily vertical, horizontal, symmetrical, asymmetrical or angled—defines the line.
Form: Flower placement defines form with respect to flower height, arrangement width, and depth.
Space: Flower spacing is what enables each flower to be visually appreciated.
Texture: This refers to the coarseness or fineness of arrangement components. A textural theme can be dominant (all fine or bold flowers and foliage) or mixed/balanced.
Flower size: Central, dominating flowers are the biggest and boldest while smaller flowers and foliage accentuate the showpiece blooms like ladies in waiting.
Color (scent can also be considered): For easy arranging, choose flowers with complementary contrasting colors, a beautiful bright or pastel hodgepodge, or flowers of all one type or color.
Or you can throw away the rules. The carefree gardener need not apply themselves to any rules and still create something beautiful. Wild and free arrangements have their own charm. This approach is often a default for kids unless you have a disciplined child wanting to design within set parameters.
Some Tiny Flowers
There are many mini flowers that are probably already in your garden! Here are some good ones.
All good cut flowers last longer in the vase. Choose small specimens with good longevity. Sometimes these can be smaller side blooms on plants with larger blooms (like purple coneflower, black-eyed-Susan, and Joe-pye-weed) white others are tiny from the getgo. All need to be placed in water just after cutting.
Alyssum (Lobularia maritima): These tiny, sweet-smelling blooms are white, pink, or purple.
Spike Celosia (Celosia spicata): These form papery spikes that last a long time. Choose small side blooms.
Gomphrena (Gomphrena globosa): The tiny papery globes come in pretty shades of red, pink, purple, and white.
Small Pinks (Dianthus spp.): The long-stemmed blooms may be white, pink, lavender, red, purple, and burgundy and look like little pincushion flowers.
French and Signet Marigolds (Tagetes patula and Tagetes tenuifolia): Everyone knows and loves these yellow, gold, and/or orange flowers.
Violas and violets (Viola spp.): These flat-faced, fragrant flowers prefer cool weather. Violets are just spring bloomers.
Jeana Tall Phlox (Phlox paniculata ‘Jeana’): This tall phlox has clusters of teeny weeny lavender-pink flowers.
Brown-eyed Susan (Rudbeckia triloba): This airy perennial becomes covered with lots of tiny black-eyed golden blooms in late summer.
Miniature Roses (Rosa spp.): Everyone loves roses and miniature rose flowers are exquisite.
Small Salvias (I like Salvia farinacea and Salvia greggii): Almost all salvias–blue, pink, red, or white–work well.
Creeping Zinnia (Sanvitalia procumbens): The flowers of this creeping annual look like the tiniest black-eyed-Susans. So cute!
Small-flowered Zinnias (Zinna Profusion series and Zinnia angustifolia): Small-flowered zinnias come in many bright shades and last long in the vase.
Complement any of these blooms with attractive foliage from any appealing garden plant. (Click here for a list of additional fast-growing cut flowers for fall.)
All of these flowers grow best in garden beds amendment with Black Gold Garden Compost Blend. The annuals thrive in pots of Black Gold All Purpose Potting Mix.
Designs
This suite of tiny arrangements shows the diversity of pretty bouquets you can bring together in the garden.
Each vase of flowers should embody the maker. Go for the style or design scheme that pleases you the most. Here are a few that I created with my girls.
A collection of different miniature arrangements—coordinated or every which way—can make quite a statement. Line them up along a window ledge or as a collective on a shelf or table.
My girls love to create their own intermittently to decorate the dinner table. This idea could also work at a dinner party. A personalized mini floral creation at each table setting would also look impressive.
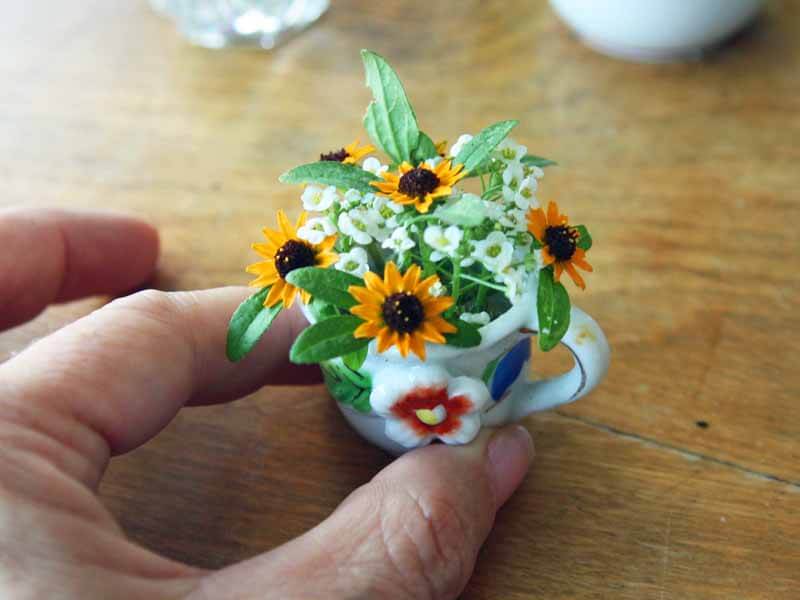
The tiniest of the tiny arrangements are the cutest!
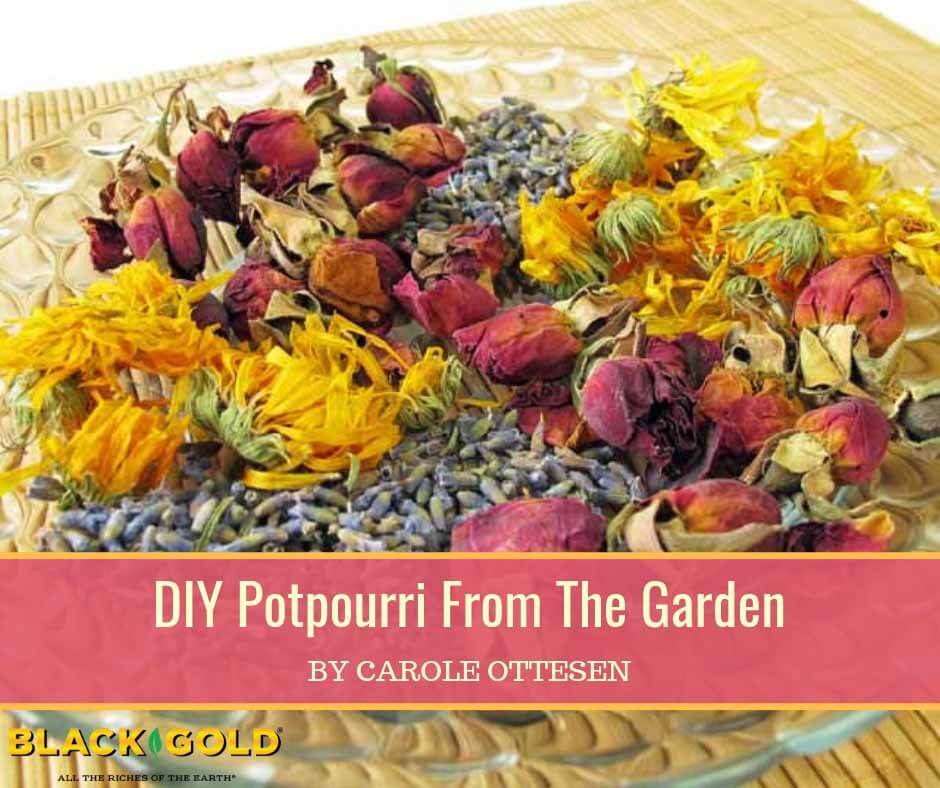
Potpourri is a mixture of aromatic plant parts that captures the essence of the growing season for yearlong enjoyment. To create your own, gather leaves and petals that are attractive as well as fragrant. Preserve them by thorough drying, and mix them to heighten their aroma and looks.
Potpourri Plants
Dried rose buds add scent and beauty to summer potpourri.
Some classic dried potpourri additions with exceptional fragrance include lavender flowers and leaves, rose buds and petals, and elderflowers. Pot marigold petals are also a favorite for orange-yellow color.
A lavender that performs well in almost any climate is Phenomenal™ (Lavandula x intermedia Phenomenal™, 2-3 feet high), a true hybrid hedge lavender. French lavender (Lavandula stoechas, 1-3 feet high) is another easy-to-grow species with its showy tufted flowers, strong scent, and good drought tolerance. This one is a little more tender, surviving to USDA Hardiness Zones 7-10. (Click here to learn how to grow your own lavender.)
Roses with fragrance and pretty color include the easy-care, reblooming, peach-colored shrub rose At Last® or the bi-colored (strawberry and cream) hybrid tea Double Delight™. These roses yield both small buds and petals. Cut small tight buds and harvest rose petals by gripping the full-blown flowers, pulling gently, and catching nicely separated petals. Keep the petals whole. (Click here to discover more tough, fragrant roses.)
Tiny elderflower blooms also dry nicely and add a sweet, summery scent to potpourri. There are many ornamental elderberries for the garden with nice flowers or you can pick the flowers from native elderberries along roadsides.
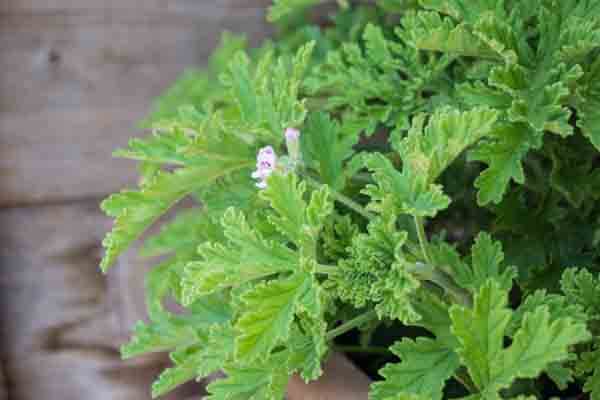
Scented geraniums are another essential ingredient with aromatic leaves that retain their scent. Different species and cultivars have different scents including rose, citrus, and mint as well as those with the subtle smells of fruits and chocolate. (Click here to learn more about growing scented geraniums.)
Mints and lemony herbs of all sorts will also offer bright flavor to potpourri. Some of the more pungent than others. Lasting options include lemon verbena and lemon balm. (Click here to learn more about lemony herbs.)
Growing Potpourri Plants
Scented geraniums grow well in pots and offer a variety of pleasing scents.
Most of the summer plants for potpourri are common garden plants that thrive in full sun and well-drained, fertile garden soil. In-ground soils should be fortified with quality compost for best performance. Tender potpourri plants, such as scented geraniums, grow very well in containers. For these, a porous potting mix, such as Black Gold Natural & Organic Potting Mix, is a good choice.
Drying Potpourri Plants
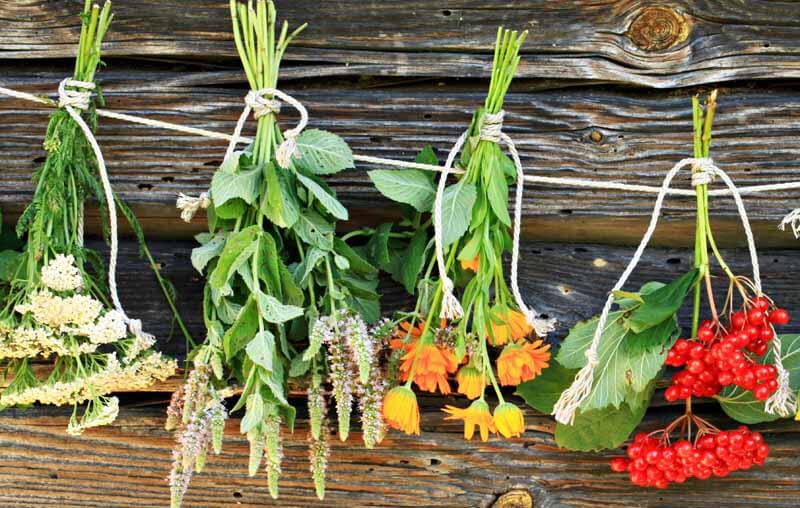
Hanging is one of many ways to dry plants for potpourri.
Thorough drying is absolutely crucial for the creation of a potpourri. Moisture in leaves or petals may cause mold and put a damper on their scent quality. Adding drops of essential oil (lavender, rose, etc.) can help fix a stronger fragrance.
You cannot make potpourri until all plant parts are thoroughly dry. There are several drying methods to try. Here are four:
Hang herbs in a cool, dry place until fully dry.
Spread the plant parts on newspaper or paper towels on a tray in a single layer. Allow all to dry completely in a cool dark place. This can take anywhere from a few days to a couple of weeks.
Dry materials in an oven set at 180 degrees F for about two hours or until the various plant parts are completely dry. Larger, thicker material takes longer to dry. Check frequently and remove the plants as they become slightly brittle.
Use a food dehydrator for fast, efficient drying.
Potpourri possibilities are endless and depend upon personal preference and what plants are available in your yard and garden for harvesting. Here are two reliable, wonderfully fragrant recipes. They can be used for linen or drawer sachets or home aromatherapy.
Classic Summer Potpourri
Mix ingredients gently to keep them intact and looking beautiful.
Ingredients:
½ cup dried rose petals
½ cup dried lavender flowers
1/3 cup dried small rose buds
1/3 cup dried scented geranium leaves
one orange peel, cut into thin slices and dried
¼ teaspoon ground cinnamon
2-3 drops of lavender or rose essential oil or both, mixed with a teaspoon of water.
Preparation:
Mix all of the plant parts together in a bowl (make sure they are thoroughly dry).
Sprinkle or spray dried plant parts with the cinnamon and essential oil and water mixture and mix gently.
Seal the potpourri in a glass jar for at least a week to allow the fragrances to combine.
When the potpourri is strongly fragrant it is ready to use!
Holiday Potpourri
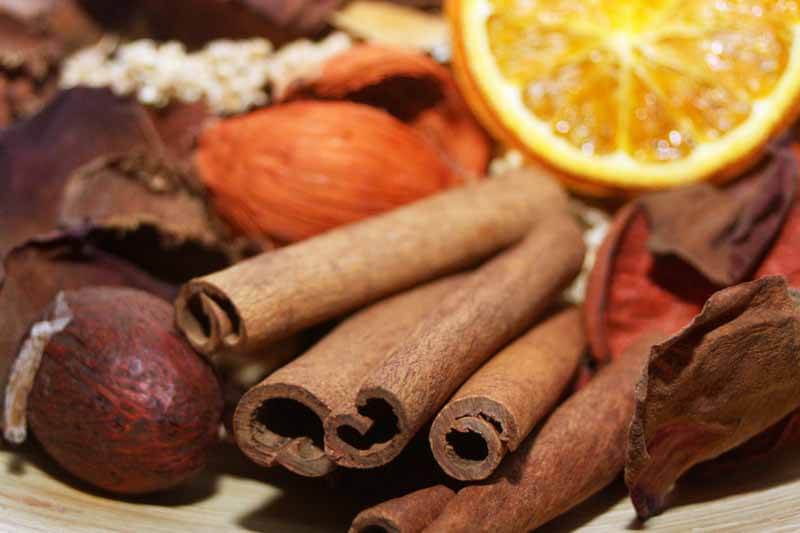
Evergreen needles, bayberries, and rose hips are just some of the winter potpourri ingredients that can come from the garden.
Many landscape evergreens—pines, spruces, junipers, and Japanese cedars—give off spicy, resinous scents that evoke the spirit of the holiday season. Let these be the base of your winter potpourri.
Ingredients:
1 cup of dried evergreen needles or greens
1 cup of dried bayberry leaves or berries
1 tablespoon of whole cloves
1 cinnamon stick, broken into pieces
1 orange rind cut into narrow strips and dried (orange slices also work)
½ teaspoon cardamom
½ teaspoon nutmeg
10 drops cedar essential oil mixed with a tablespoon of water.
(You can also add the dried berries of holly, beautyberry, or pyracantha as well as rose hips and small pinecones for interest.)
Preparation:
Mix all of the plant parts together in a bowl (make sure they are thoroughly dry).
Spray or sprinkle them with the mixture of the cedar essential oil and water.
Seal the potpourri in a glass jar to fix the fragrance.
Set it out in bowls to scent your rooms.
These are two of many potpourri recipes to try. You may even create your own to suit your senses. The key is growing your own components for freshness and longer lasting scent.
Make the most of your summer garden flowers with this satisfyingly easy flower arrangement technique. Create a quick, effortless, professional-looking arrangement for your summer table. The arrangement was created by Jennie Love of Love ‘n Fresh Flowers.