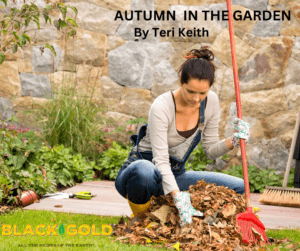
Autumn leaves drifting by your window are telling you that fall is here and it is time to put the garden to bed for the winter. For us, it is a very busy time, almost as busy as spring if one sees it as a not particularly enjoyable task and has not done their necessary work the previous fall. I plead guilty to this almost every year so I will list what needs to be done, starting with the most laborious:
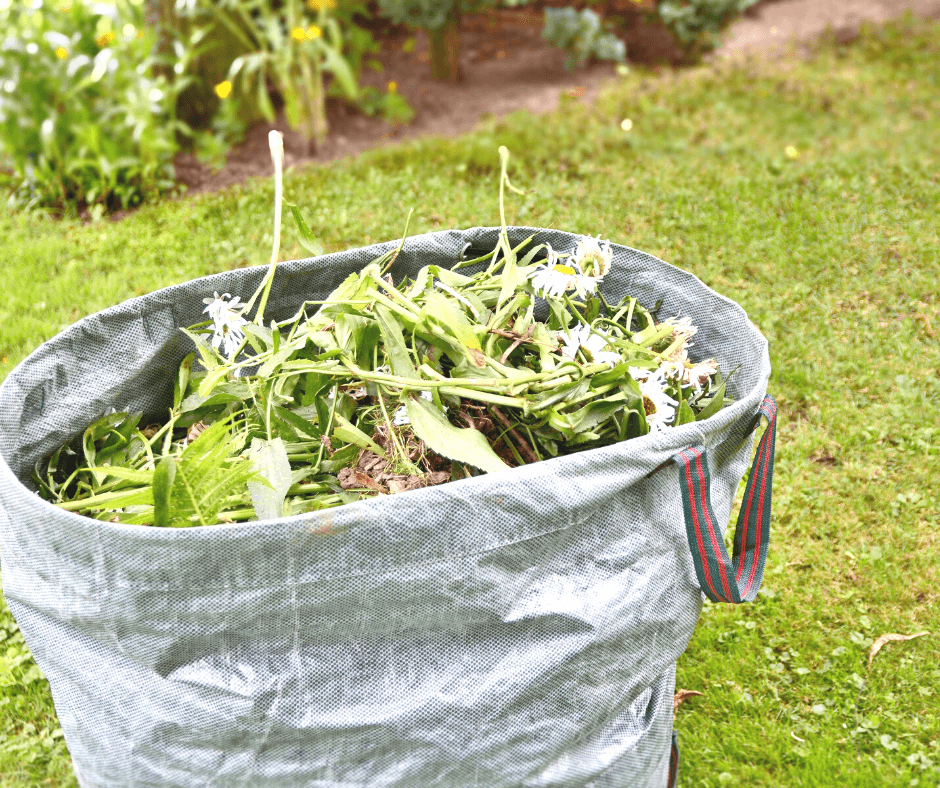
Cleanup This requires cutting back and cleaning up the flowerbeds. I do not realize how many flowers I have until I have to take them out. Old plant material must be cut off and removed leaving minimal dead material on the ground surface. This is important for iris as the borers which plague them will winter over in old vegetation left behind. Roses need the same treatment to discourage black spot the following spring. I often do my removal in stages: first cut the peonies back to 3 inches then the coneflowers to the base. The Helianthus (perennial sunflowers), both single and double are cut back as well. Next will be the hostas whose leaves are changing color even without frost. All annuals should be removed as well (although some are still so pretty I am waiting for frost). This old material should be bagged and disposed of. We do not compost this material for fear of aiding and abetting garden pests.
Plant new perennials Many nurseries encourage planting new perennials in the fall. I am always leery of doing so as plants from some mail order companies are so small I would prefer to give them a whole season to grow. The exceptions are peonies, hostas and daylilies. To maximize your planting success, amend the soil with Black Gold® Natural & Organic Potting Mix, Natural & Organic Cocoblend Potting Mix or Natural & Organic Just Coir.
Plant Bulbs. This is the time of year to plant bulbs for next spring. There are a couple of new things I learned about bulbs that I did not know before. Wait to plant your bulbs until the weather is cool and after the first frost has the soil around 55 degrees F., but before it has frozen. Be sure to plant at the recommended depth. If you want to make this job much easier go to GardenersEdge.com and look for the “Bulb Bopper”. Do not add fertilize to the hole as that can encourage root rot. Fertilize on the top of the ground (1) when you plant, (2) when you see the first foliage poking its leaves up and (3) when the plant starts to die back. Use a food that is just for bulbs. Mulch over the bulbs lightly and remove the mulch in the spring when the plants start to come up. Another surprising piece of information is that some of the gorgeous tulips you see in stores everywhere this time of year should be considered annuals. The first year after planting they will send up beautiful blooms. The next year only a few spindly ones and the year after that only leaves. However, some tulips will not only bloom every year but also naturalize over time. These include the species, Kaufmanniana and Gregii, and giant Darwin tulips. Give them at least 6 hours of sun a day and with all bulbs let the leaves die back on their own as they are building up the plants for next spring.
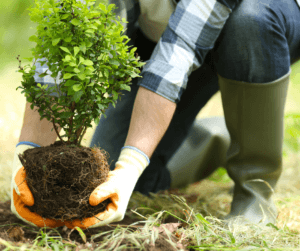
Planting trees and shrubs They do not have the stress of summer heat and will expand their roots over the winter. It is very important to be aware of the minimum distance from the house that shrubs and trees should be planted. It is so common to see plants smashed against the house. Small shrubs ought to be 3 to 4 feet away from the house, big shrubs such as lilacs 6 ft. and small trees such as Japanese maples 10 feet. Anything larger goes out in the yard. Be SURE you know the amount of sun required for each plant. Shade for rhododendrons and sun for Beauty Bush.
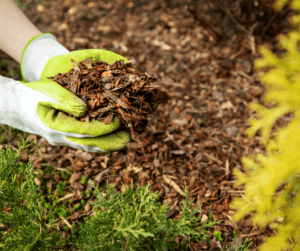
Mulch. Fall is the time to mulch, not so much to protect from the cold of winter, but because it is just too much to do in spring with everything else to do. I previously mulched in the spring but now I can see the advantage of getting it over in the fall. We use bark mulch from local sources. The mulch should be 3 to 4 inches deep. The most important thing to remember while mulching is to keep the mulch 3 inches away from the base of each perennial and 5 inches from shrubs and trees. Mulching right up to plants will cause them to rot.
After the weather clears I will go outside and practice what I preach. Happy Gardening.
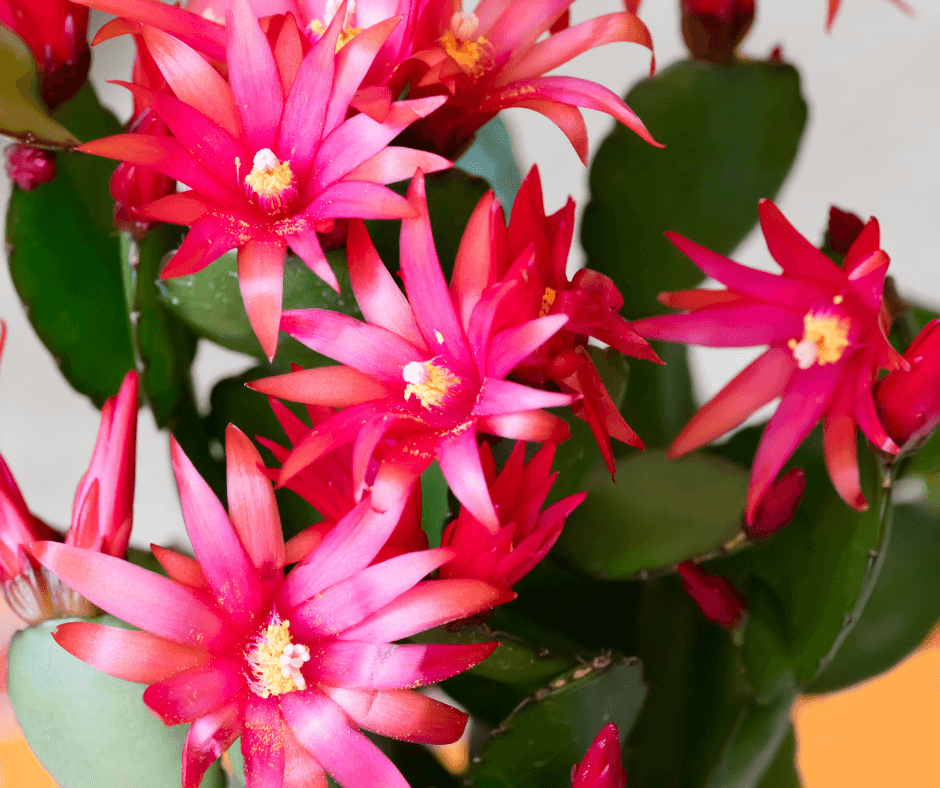
Spring holiday cactus varieties come in many colorful shades including orange.
Every year, holiday-house-plant lovers enjoy the sensational fall and winter blooms of crab or Thanksgiving (Schlumbergera truncata) cactus and winter or holiday cactus (Schlumbergera x buckleyi), but it does not have to end there. There are other Schlumbergera that bloom at different times of the year, particularly in the mid to late spring, making them outstanding house plants to color homes through many months of the year.
A Short History of Common Holiday Cacti
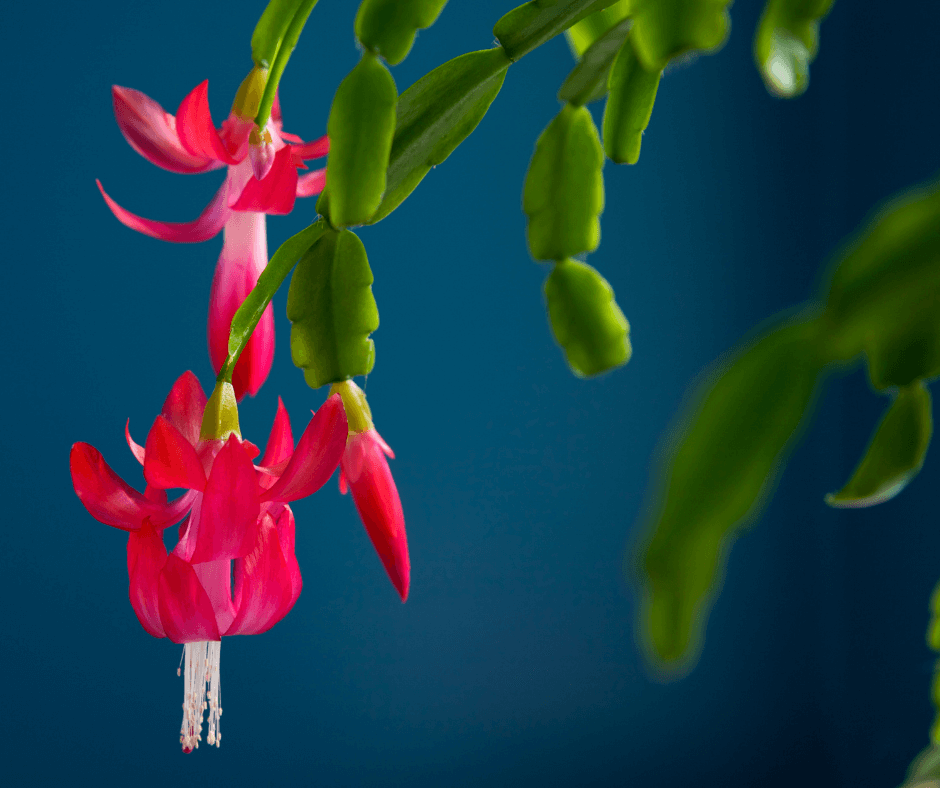
Holiday cacti are Brazilian natives, and several common cultivated species and hybrid groups exist. The popular Thanksgiving cactus (Schlumbergera truncata) tends to bloom in November and early December. It has joined stem parts (technically called cladodes) that have pointed edges, and its brilliantly colored, long, multipetaled flowers have bilateral symmetry. When viewed head-on, the blooms look almost crab-like, which explains one of its common names, crab cactus. It is the most commonly sold species and new colors are always being bred in shades of pink, magenta, red, orange, salmon, apricot, and white. The true holiday or Christmas cactus is Schlumbergera × buckleyi, and it tends to bloom in December or early January. It has flowers in shades of red and pink that are more radial, and its cladodes have rounded edges. Oddly, it is harder to find, despite its wide appeal and beauty. Easter or spring holiday cacti are mostly comprised of two species with radial, multipetaled blooms in shades of orange, pink, red, and white, Rhipsalidopsis gaertneri (syn. Schumbergera gaertneri) and Rhipsalidopsis × graeseri (syn. Schlumbergera × graeseri). These plants have smooth cladodes, and their hybrids are less often sold but very beautiful with cheerful blooms that appear from March to June, depending on the variety.
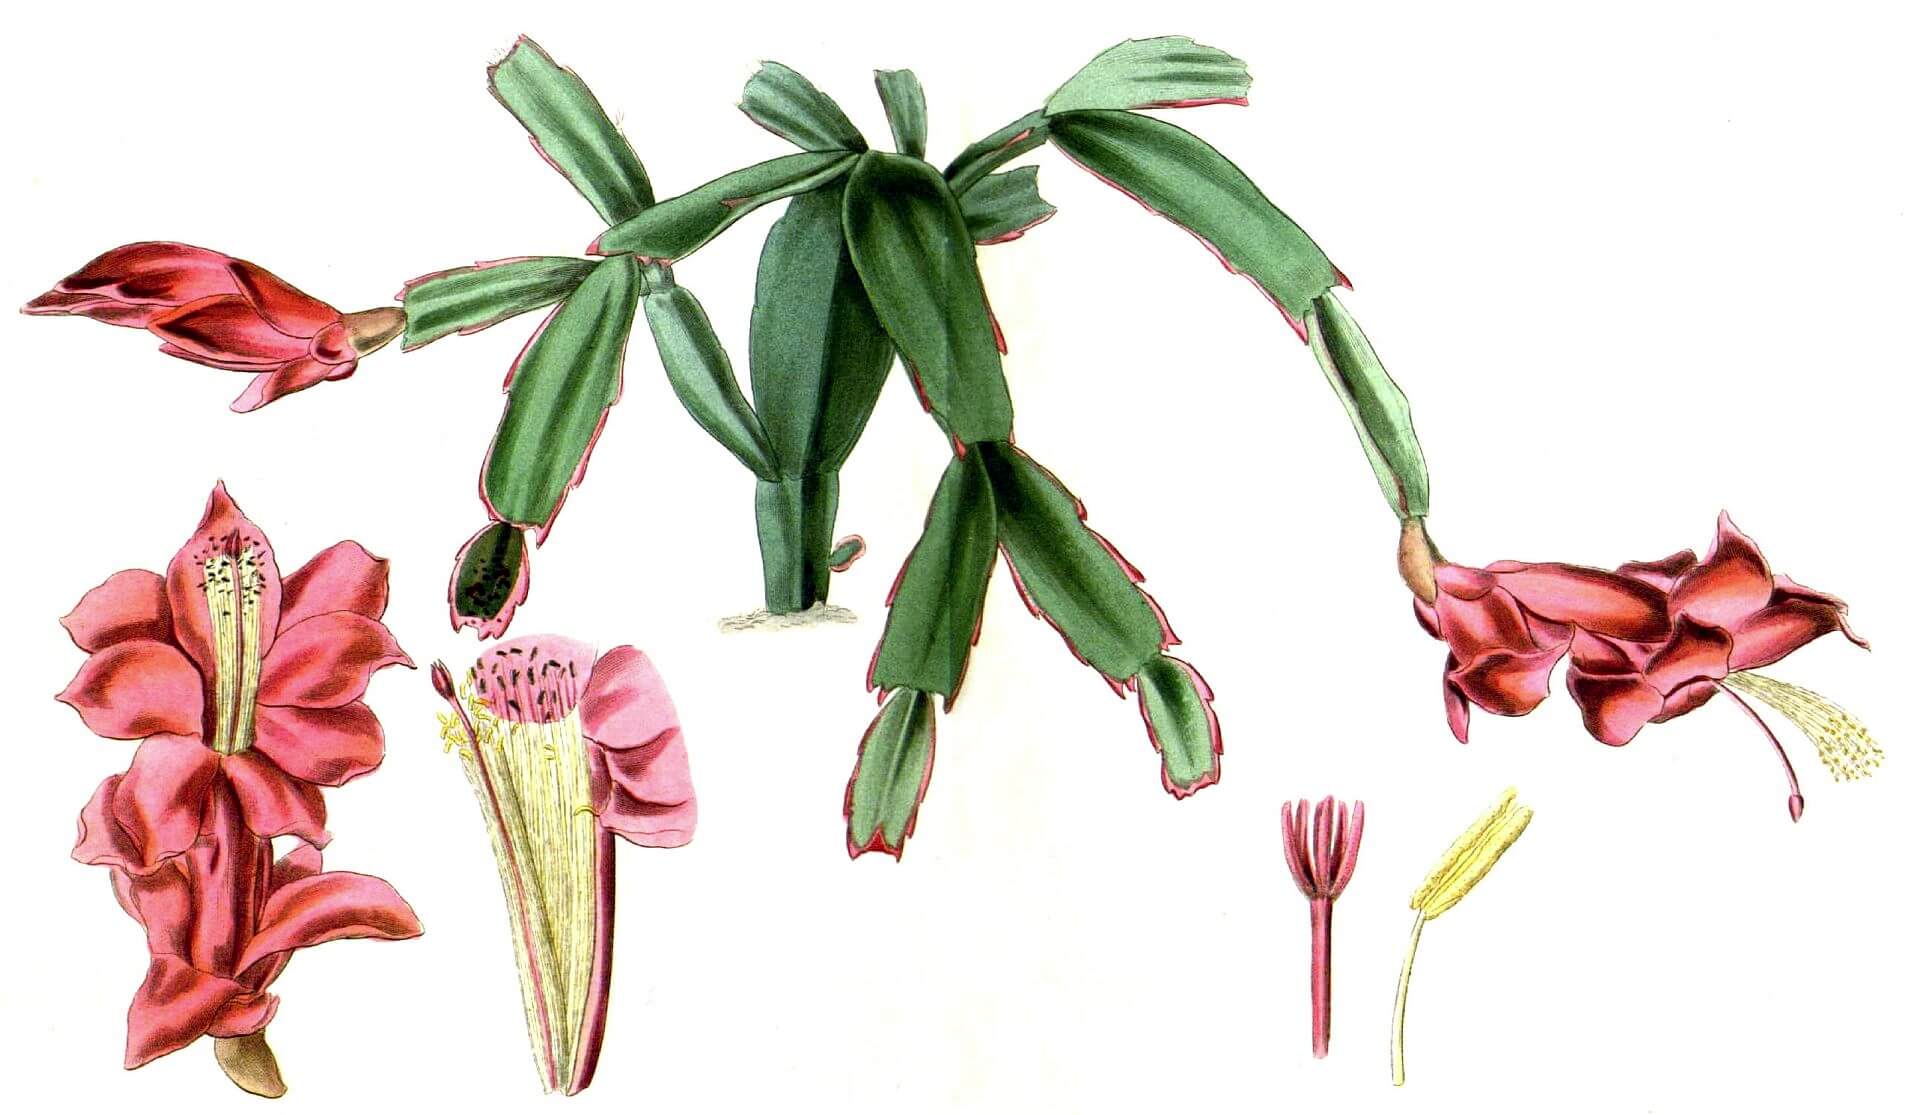
Schlumbergera truncata was one of the first species brought into cultivation in the nineteenth century. (Botanical Image Plate by Hooker, William Jackson (1823–1827))
These cacti naturally grow in the mountainous rainforests of Brazil. Most are epiphytic, which means that they grow in the branches of trees. Their seasonal blooms are pollinated by hummingbirds, which explains why they are tubular and come in bright colors, particularly shades of red.
Schlumbergera truncata was the first species brought into cultivation in Europe and America in the early 1800s (~1817 to 1839). Their regularity of bloom, ease of growth, and great beauty made them popular house plants and conservatory specimens in no time. Schlumbergera x buckleyi started to appear around the 1850s in Victorian England and was popularized in the US and Europe a bit later. It fast became the official Christmas cactus due to its consistent December bloom time. The spring holiday or Easter cactus (Rhipsalidopsis gaertneri) was the last to hit the scene. It was brought into cultivation in the late 1800s, and is surprisingly less popular than its winter-blooming cousins.
One great trait of all Schlumbergera is that they are wonderfully long-lived. This explains why many are passed down from generation to generation. Lots of home gardeners proudly grow the same holiday cactus raised by their grandparents or even great grandparents. It’s a nice thing to consider when purchasing one for the first time. It’s a long-term investment. If you grow one for each season, you can then enjoy their showy blooms through much of the year.
Fall, Thanksgiving, or Crab Cactus
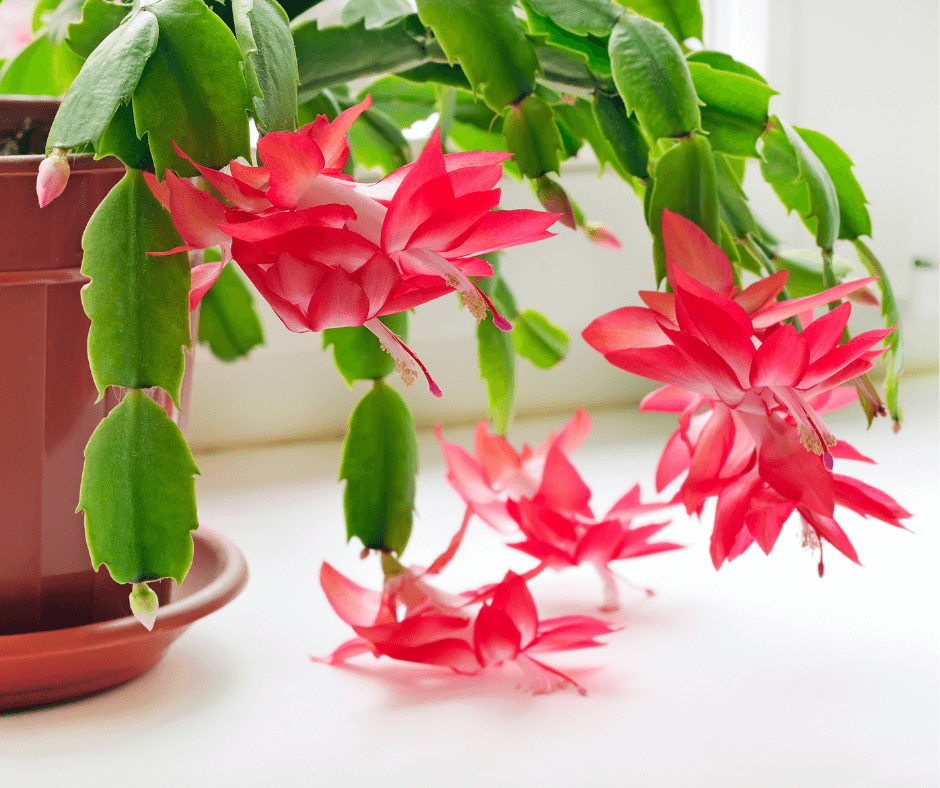
Schlumbergera truncata has bilateral, tubular flowers, pointed teeth along the stem, and blooms around November. (‘Dark Marie’ shown)
Thanksgiving cactus (Schlumbergera truncata and hybrids) is the number one selling holiday cactus, so most growers likely already have one. Some exceptional varieties are available.
One of the prettiest pinks is the profuse, reliable bloomer, ‘Cristen’. The large flowers of this truncata hybrid have pale-pink petals edged in darker pink. The effortless November bloomer ‘Dark Marie‘ is similar but its flowers are edged in scarlet. Some varieties have a more weeping habit and are better suited for pedestal planters or hanging baskets. The November-blooming, golden-apricot-flowered ‘Christmas Flame‘ has a beautiful weeping habit and reliably blooms annually. The unusual ‘Aspen‘ is another to seek out. Its extra-large, frilly, white flowers are spectacular.
Winter, Christmas, or Holiday Cactus
Schlumbergera in the buckleyi hybrid group have radial, tubular flowers, rounded stems (cladodes), and bloom around December.
True holiday or Christmas cactus bloom about a couple of weeks to a month later than the Thanksgiving type. The plants can become quite large with age and tend to weep, making them extra appealing when placed on a sturdy pedestal. There are few cultivars of this true December bloomer and even the standard form is a challenge to find. Look to Etsy and other specialty sellers to find the real deal.
Spring, Spring Holiday, or Easter Cactus
Easter cacti have totally smooth-edged stems and totally radial multipetaled blooms.
Spring cacti (Rhipsalidopsis gaertneri and hybrids) have many colorful petals in shades of pink, magenta, red, orange, white, and other related color variants. There are several pretty varieties that are readily available including the pure-white ‘Sirius‘, which has golden centers and is a reliable bloomer from May to June. The brilliant-red-flowered ‘Scorpious‘ generally flowers a bit earlier in the spring, from March to April, and will bloom for weeks. If you like bright orange flowers, try ‘Colomba‘, which blooms along with ‘Scorpious’.
Growing Holiday Cactus
There are several general growing requirements for holiday cacti. Provide the following for good growth.
Place them in bright, indirect light. Full sun stresses them out and turns their stems shades of purple and red.
Water regularly during the growing months. Apply less water before they start to set bud and average water while they are budded and flowering. Too little or too much watering can kill a holiday cactus.
Provide light fertilization during the growing months, from spring to fall.
Take them outdoors in the summer to soak up the heat and indirect light.
To learn more about winter-blooming holiday cacti, watch this useful video.
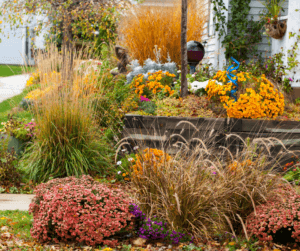
Depending on where you live in the country, September, October, and November are the main months for putting garden beds to rest. You may still have some warm days in these months, but once the nights and then days become chilly, it’s time to get to work. And, if you do it right, it is quite a bit of work, but more work now means less work later. Spring will be a breeze!
1. Weed
Pull as many weeds as you can in the fall to make spring gardening easier.
I have just started on the first step, which is getting all the weeds out, and it is going to take me quite a while. Some seasons, I stay on top of weeding, and other times other priorities get in the way. This past summer was busy, so the weeds had a “field day.” It is especially important to clear weeds from right around the base of each garden plant. When weeding, it is wise to choose good tools for the job. Luckily, we have an excellent article written by my daughter, Jessie, that details the best weeding techniques, times, and tools for the job. Read it and weed! (Click here to learn how to week like a pro.)
2. Mulch
A moderate layer of mulch will protect against winter weeds, and protect perennials from the cold.
This brings us to step two, putting down fresh triple-shredded bark mulch, my preferred garden mulch, which I purchase in bulk by the yard or occasionally by the bag when only a small amount is needed. (Click here to learn about different mulch options.) Not only will mulch stop weeds, but it will also keep the soil moist, and protect your plants from big temperature swings. In addition, mulch breaks down over time, adding organic matter to the soil. Areas I have mulched for years have slowly turned into rich garden soil. Put down around 3 inches of mulch, being careful not to cover the plant. (Not sure how much mulch to get? Click here for guidelines to calculate how much your garden will need.)
There are four rules to mulch application, particularly when it comes to mulching around plants: 1) leaf space around plants, 2) don’t mulch too thickly, 3) don’t apply mulch against the trunks of trees or shrubs, and 4) apply mulch when the soil is moist to make post-application irrigation easier. Leave a 3- to 4-inch gap between the base of the plant and the mulch, to avoid smothering the plant and causing crown rot. This is especially true of evergreen perennials and perennials with surface rhizomes, like bearded iris (Iris germanica hybrids). Peonies are also sensitive to excess mulch. One year, I mulched my peonies thoroughly in the fall and was so pleased with myself for getting it done early, but the following spring two of my prize peonies did not show up. I had mulched too thickly and killed them. Also, do not mulch low, spreading, evergreen to semi-evergreen perennials, including Heuchera, Dianthus, ground cover sedums, such as ‘Angelina’. Mulching them commonly causes crown rot and death.
3. Cut Back Perennials
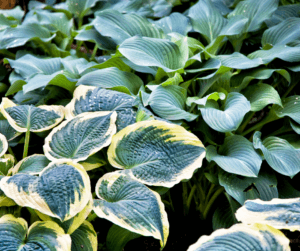
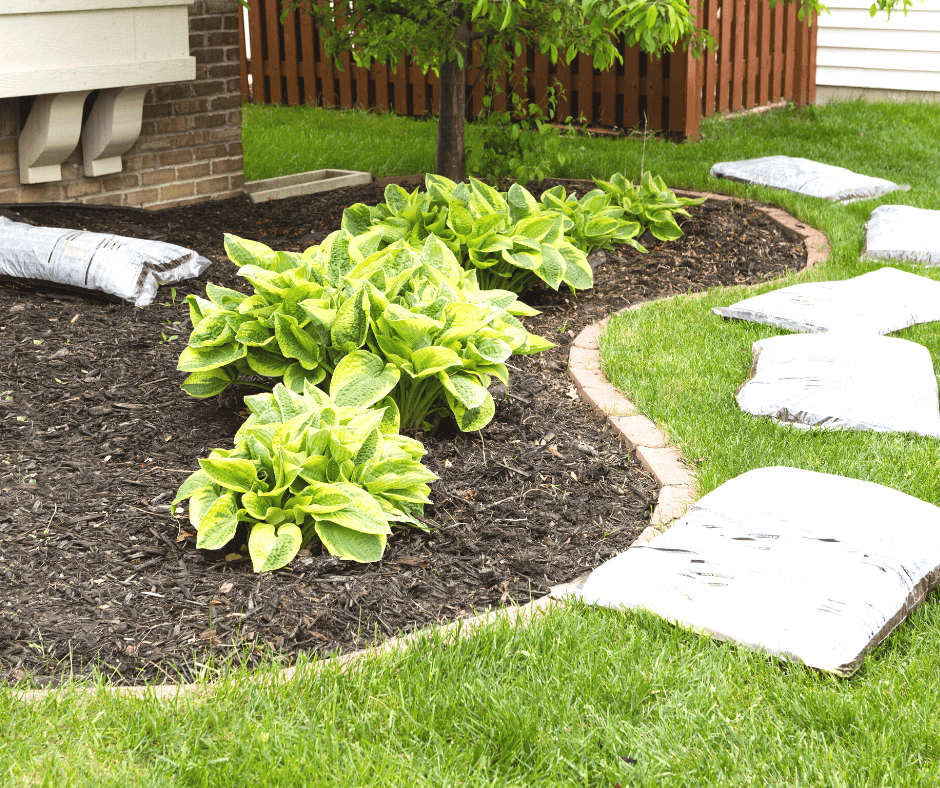
When frost takes your perennials, such as these hostas, it is time to cut them back. Semi-evergreen lamium (foreground) should be left alone until spring.
Wait until the frost has killed the leaves of herbaceous perennials before cutting them back and removing the old stalks and leaves. This is especially important with hostas, one of my favorite perennials (I have hundreds!). Unlike other perennials, if the leaves are removed while green, the plant will put up next year’s growth prematurely, and the following spring will have just a few scrawny leaves, so cut back hostas to 2-3 inches after the frost has taken them.
Evergreen perennials, such as Lenten rose (Helleborus spp.), myrtle euphorbia (Euphorbia myrsinites), and candytuft (Iberis sempervirens), can be left alone until spring, and semi-evergreen perennials, like coral bells (Heuchera spp.), dead nettle (Lamium maculatum), and certain daylilies, can also be left to trim back until the spring.
Some plants that add winter beauty to the garden should also be left alone. Ornamental grasses, with pretty seed heads, gently wave in the wind, coneflowers (Echinacea spp.), black-eyed Susans (Rudbeckia spp.), and perennial sunflowers (Helianthus spp.) set seeds that songbirds like to eat in winter, so I leave them alone until the spring. Fall bloomers, such as chrysanthemums and asters, can also be trimmed in the spring. The protective stems of chrysanthemums sometimes help the tender perennials overwinter, which is nice if you like to keep them from year to year.
Another tip is to meticulously cut back perennials that are highly susceptible to leaf fungal diseases, particularly bee balm (Monarda spp.) and tall garden phlox (Phlox paniculata). Cut them back low, thoroughly, and be sure to completely remove the old leaves from the surrounding area. They should not enter the compost pile. Certain diseases can persist in the soil, even composted soil.
4. Divide and Plant
Divide large perennial clumps and spread them around in the garden to add more summer flower color where needed.
Mid-fall is the best time to divide and move hardy perennials, such as hostas, daylilies, monarda, rudbeckia, and coneflowers. If you live in USDA Hardiness Zones 3-5, or colder, divide and replant perennials earlier in the season, and only move those that are reliably hardy in your zone. If you live in warmer zones, then you have a little more flexibility time-wise.
When dividing perennials, I typically use a sharp spade to neatly cut away a section of the plant. It is essential that each chunk has a nice portion of the crown with lots of buds on the top and roots beneath. Then I move and plant them in locations that have the right site conditions and need the color. Some falls are dry where I live in Indiana, so I am sure to irrigate my new divisions well when the weather does not bring rain. Adding Black Gold Garden Soil to the bottom of each hole adds needed fertility and a boost of fertilizer, which all plants appreciate.
So, I must get going to finish my fall garden cleanup, while the going is good (and so should you)! Then, I can spend the winter focusing on next year’s garden, worry-free.
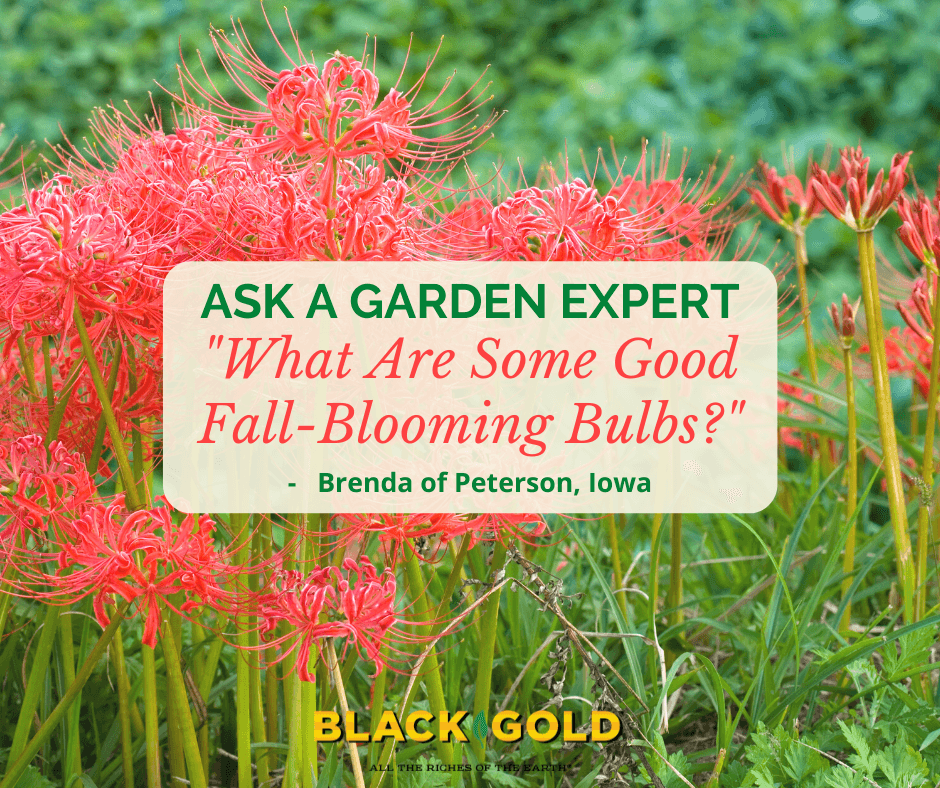
Red Spider Lily (Lycoris radiata) is a very pretty bulb the blooms in late summer and fall.
“What are some good fall-blooming bulbs? I can never seem to find any that bloom in the fall. Thanks.” Question from Brenda of Peterson, Iowa
Answer: There are quite a few fall bulbs that will grow well in your USDA Hardiness Zone 5a garden. Here are some of the best. Follow the links on each plant name for good bulb sources!
Fall Bulbs for Midwestern Gardens (Zone 5)
Red Spider Lily (Lycoris radiata) and Yellow Spider Lily (Lycoris aurea) are two South African surprise lilies that bloom from late summer to fall and are hardy to zone 5. They look really lovely together and bloom on tall naked stems that give them a striking look in the garden.
Fall Crocus (Crocus spp.) come in all different colors and forms and look very much like their spring counterparts. Most are very hardy and some, such as Crocus kotschyanus, naturalize or spread in beds and lawns. One that I highly recommend is the saffron crocus(Crocus sativus) from which you can collect your own saffron! (Click here to learn more about growing saffron.)
Colchicum(Colchicum spp.) comes in lovely shades of pink, white, and lavender, and most are quite hardy. They look very much like giant crocuses, but they are surprisingly unrelated. The double-flowered ‘Waterlily‘ is especially pretty. The only downside is that these plants are toxic, so refrain from planting them if you have small children or pets that might handle or consume them. (Click here to learn more about Colchicum toxicity.)
Fall Snowflakes (Leucojum autumnale (Acis autumalis)) is a rare but wonderful fall-blooming bulb from the Iberian peninsula that is hardy to your zone. Its white, bell-shaped flowers look very springy and mingle well with other perennials.
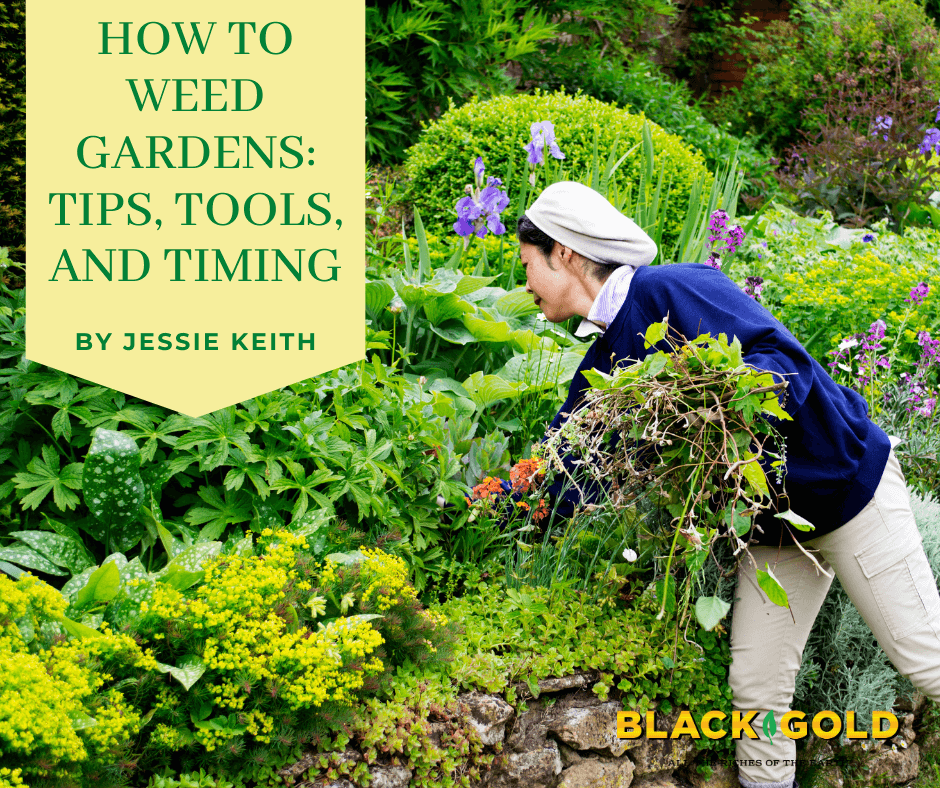
Weed competition drags gardens down in every way. Ignore your garden for just a couple of weeks, and weeds can take over in a flash–turning once tidy, pretty beds into a tangled mess of green interlopers with no room to spare. If you use the right tools, techniques, and timing necessary to stop a weed takeover, it will save you trouble and reward you with bountiful flowers, vegetables, and fruits.
Common, aggressive garden weeds spread by many means. If allowed to set seed, they will pepper the garden ground with loads of obnoxious seedlings crying to be hoed away. Some have the deepest, most far-spreading root systems that will get away from a gardener in no time if allowed to take hold. Different weeds appear at different times of the season. The most unexpected are prolific winter weeds that will happily fill your beds in late winter and set seed by late spring. Summer weeds require heat to germinate, so you can expect them to start popping up as soon as the weather becomes truly beautiful.
Knowledge is power when it comes to weeds. Here are the essentials necessary to keep your beds happy and weed-free throughout the year.
Know Your Weeds and Their Spreading Power
Don’t pull a perennial weed unless you know that you can get the whole root. Leave one little piece, and it will return!
Your worst weed enemies are perennial weeds that are deep-rooted, fast-spreading, and produce generous amounts of seeds that spread and sprout quickly. Annual weeds are also pesky, but they are generally more shallow-rooted and easier to kill by quick digging and hoeing before they set seed. Here are five of the worst perennial weeds that you may face. From there, I recommend relying on the helpful, Farmer’s Almanac Common Weed List, as well as the excellent UC Davis IPM Guide for common weeds.
Worst Perennial Weeds
Field Bindweed (Convolvulus arvensis): Here is a real monster of a spreader that’s hard to remove. The hardy perennial sets fleshy rhizomatous roots that can extend deep into the ground and many feet from the parent plant. The vine twines and strangles garden plants and then becomes covered with little, white, morning-glory-like flowers that set hundreds if not thousands of seeds. Scrape and dig the seedlings on-site and try to dig the root systems as soon as possible. Smothering and covering infested areas is also a good method, but it takes time. (Click here to learn more about bindweed removal.)
Canada Thistle (Cirsium arvense): Canada thistle (Cirsium arvense) is notoriously difficult to remove and is also a notorious spreader. Its leaves and stems are painfully prickly, and pollinated summer flowers produce loads of puffy seeds that get caught in the wind and spread everywhere. (Don’t let this go to seed anywhere near your yard or garden!) When they sprout, a single plant can become a dense colony connected by deep, rooting rhizomes that are impossible to dig out. Leave just one piece, and it will return. It is also resistant to all but the strongest herbicides.
Aside from using commercial-grade herbicides, the second-best method is to smother plants with weed cloth and mulch until they are gone. Watch out for plants that creep into the grass, once they do, a good broadleaf herbicide is your only option, unless you want to kill everything and start over.
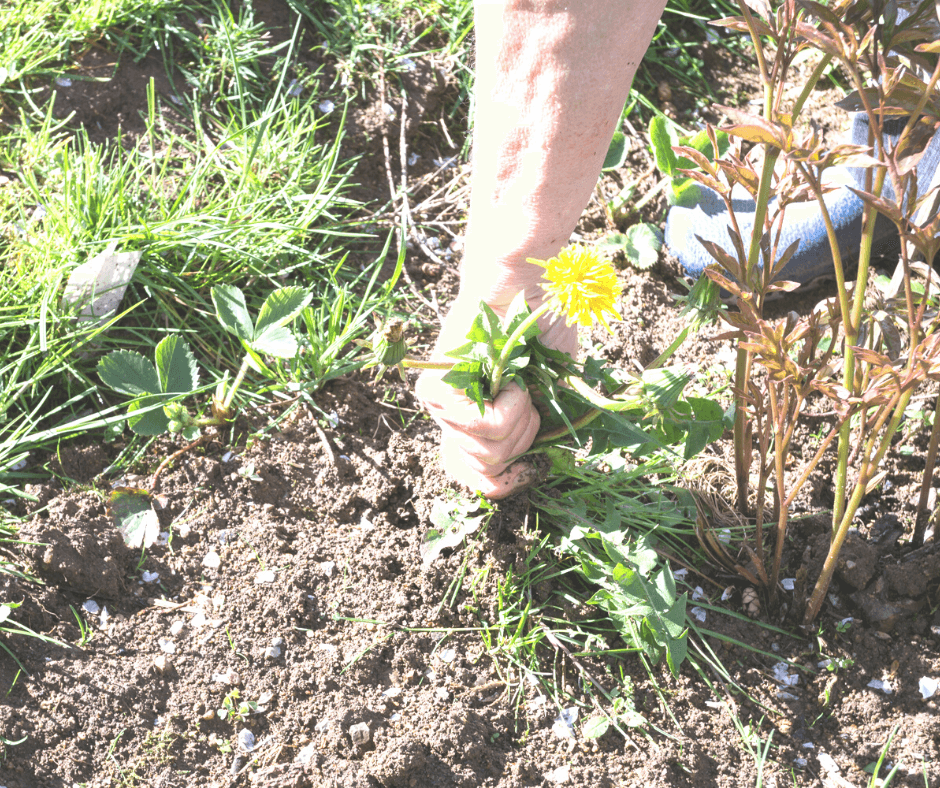
Dandelion (Taraxicum tomentosum): Dandelions spread by seed but can be tamed, so I don’t mind them growing in the lawn. Bees and other early pollinators rely on their golden flowers for pollen and nectar, so they do some good, but they have no place in my garden where they compete with other garden flowers. The deep-rooted perennials are easy to grub out with a garden knife, as long as you remove the whole root and leave no pieces behind. The key is keeping them from setting seed. This is the source of dandelions in the garden. In the spring months, I try to mow low and often to chop off the seed heads before they release their seeds.
Ground ivy(Glechoma hederacea): The aggressive member of the mint family is a ground-covering weed with creeping stems that root and spread fast. Its spring flowers set lots of seeds, which sprout quickly. It also thrives in lawns, so you will need to rely on a broadleaf herbicide for the lawn if you want to truly get rid of it.
Thankfully, this weed is relatively easy to pull, but if you leave even the tiniest piece in the ground it will root and regrow. T manage it well, remove it from garden beds first thing every spring, and then apply a 3-inch layer of mulch, being sure to leave the crowns of garden perennials uncovered. If stray pieces emerge from the mulch, pull them on site.
Nutsedge(Cyperus esculentus): Unless you live in the desert, your garden has likely experienced nutsedge. The aggressive, moisture-loving sedge produces copious seeds in summer that sprout everywhere. Even worst, the plants have fine, spreading roots that develop small, brown nutlet tubers. Leave one tuber in the ground, and it will sprout into a whole new plant. (Quirky fact: The tasty nutlets can be harvested and eaten.)
Nutsedge is not herbicide-resistant, but its tubers are resistant. For this reason, dig out the plants rather than just pulling or spraying them and get all of the tubers. Finally, cover with a 3-inch layer of mulch, and diligently pull any small sedge sprouts as you see them. (Click here to learn everything that you need to know about removing nutsedge.)
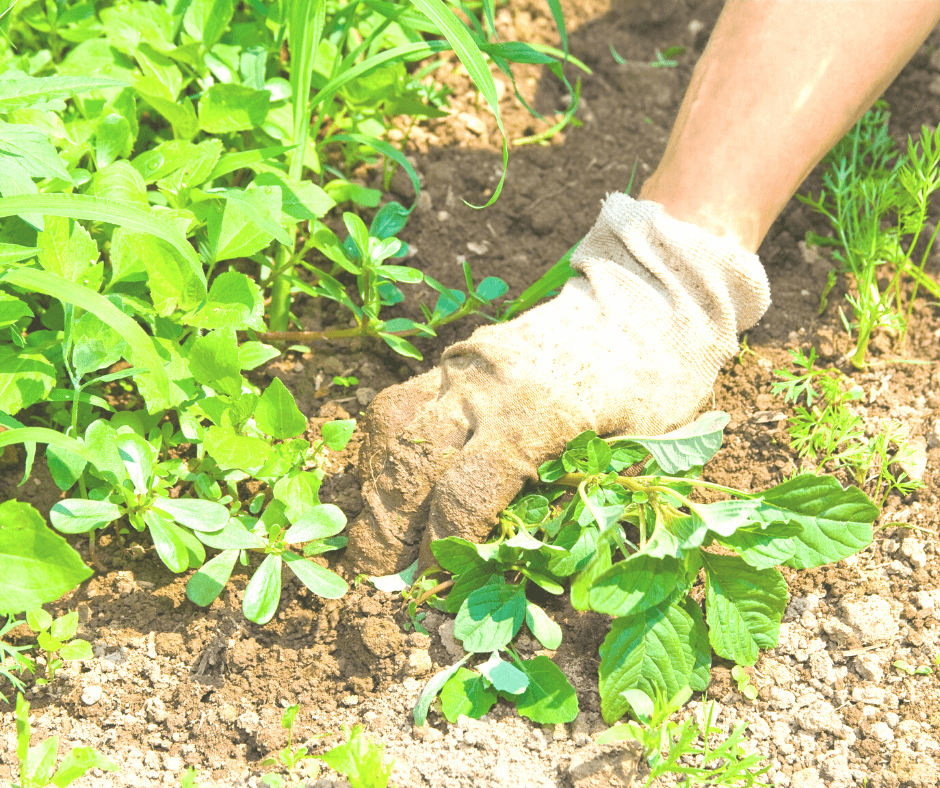
Annual weeds, like this summer purslane and pigweed, are easy to pull but prolific self-sowers that sprout in the open soil each year. A good, stout hoe will make quick work of weeds like this.
All of these weeds require good tools for thorough removal, followed up by mulch, and often herbicides or other harsher measures. Once again, annual weeds, like winter chickweed, summer purslane, pigweed, or spotted sandmat euphorbia, are very easy to dig and pull. The key is removing them before they can set seed and germinate or add to your garden’s soil weed seed bank.
Know Your Weeding Tools
Over the years I have used a number of different weeding tools. A few have stood out and become fast favorites. The three key characteristics I look for in a good gardening hand tool are 1. ease of use, 2. working power, and 3. durability. These criteria are met by the following tools:
Long-Handled Tools
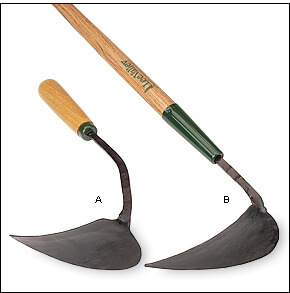
Prohoe Rogue Do It All Tool and 7-inch Hoe: The hoes made by this company are wonderfully sturdy and well-made, razor-sharp, and long-handled for those of us that do not like to bend. The Do It All Tool is triangular on one side and has a raking tool on the other. It is perfect for rogueing our deep-rooted weeds. The thin, 7-inch Pro Hoe is ideal for scratching up mats of shallow weed seedlings. These hoes are so strong and sharp, the job will get done in an instant.
Pullerbear Uprooter: For big “weeds” choose a Pullerbear uprooter. In a matter of minutes, an area riddled with small weed trees can be cleaned beautifully roots and all. It works like no other tool I’ve tried. Just clench the base of the sapling or small tree and pull. Ignore the fact that it’s a bit pricey. It will pay for itself quickly in time and effort saved wrangling with hard-to-pull woody weeds.
Short-Handled Tools
Sharp cutting and sawing edges make gardening knives one of the best all-around gardening tools. (image care of the Gardeners Supply Company)
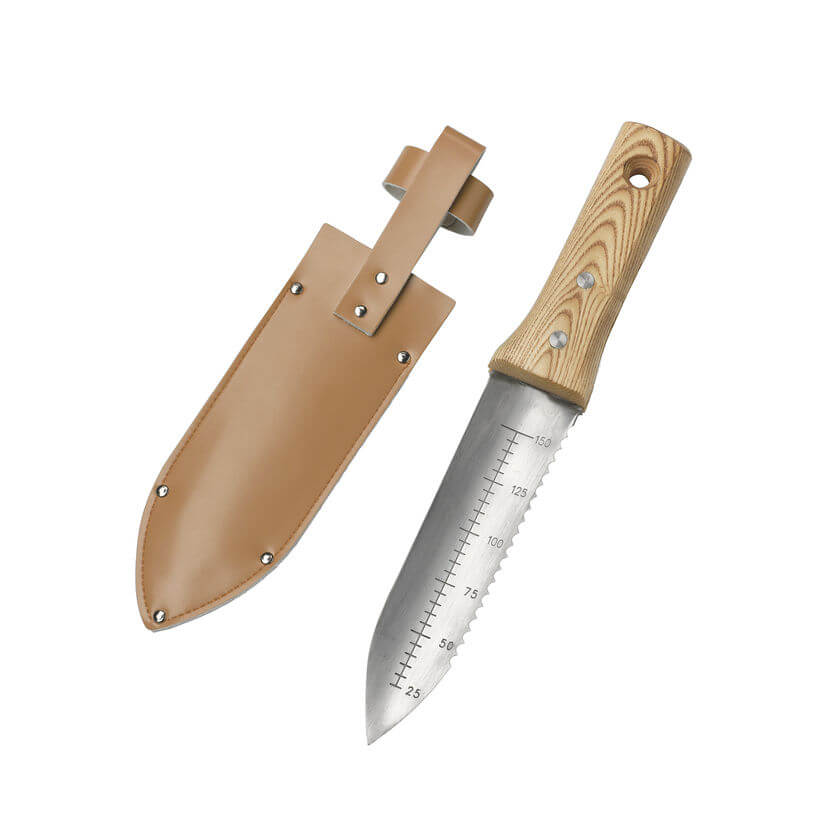
My trust garden knife (also called a soil knife or Japanese hori-hori) goes with me everywhere. It can cut into the soil to deep roots below and saw through the roots or bases of tough plants. I even use it for harvesting greens and cole crops. One side of the knife is sharp for slicing, and the other is serrated for sawing. They can easily break through the skin, so I use mine while wearing garden gloves and I store it in a leather belt sheath.
Fine-bladed hand trowels are excellent all-purpose tools for weeding and planting. They quickly cut at deep or shallow roots in no time and withstand lots of wear and tear if made well. The “rockery hand trowel” at Clarington Forge is just such a fine-bladed tool, and it’s beautifully crafted for the long haul. Its fine blade makes for easy weeding and planting–especially in heavier or pebbly soils. The narrow rockery hand trowel from Clarington Forge easily expels weeds and gets into small spaces. (image care of Clarington Forge)
Sharp ho-mi tools will chop deeply into the soil quickly. (Image care of Lee Valley)
For super fast hand weeding nothing beats the classic ho-mi (hoe-mee), also called the Korean hand plow or cultivator. This sharp, downward-facing tool can get to the base of a dandelion root in seconds with a quick chop, chop, chop. Nothing is more effective. For smaller weeds, I use the side of the ho-mi to scratch and smooth the soil. It’s an excellent tool for lightly aerating the base of a plant or getting to the root of a tough herbaceous weed as well as planting new plugs. If well cared for, a ho-mi will last forever (if cleaned after use and oiled to prevent rust). It’s relatively cheap, too. Long-handled versions are also very useful. Just be careful when chopping away with this sharp tool. Its tip can be nasty.
Practice Timely Weeding
I weed two ways be either casually weeding as I water, harvest, and enjoy my garden, or intensively bed by bed. I do casual weeding almost daily. More intensive weeding is something I do three times a month in summer. I also try to catch weeds at various times in their life cycles.
Catching weeds before they flower and set seed is timely weeding. I write this article as the winter weeds in my vegetable garden have begun to set seed. A busy spring pushed back my weeding schedule, and I am paying for it. Had I removed these weeds just two weeks earlier, before they had begun to release seeds,
Catching weed seedlings before they become large is timely weeding. Digging or hoeing up weed seedlings before they become large and take hold will make your garden life so much easier.
Smothering beds before seeds sprout is timely weeding. Adding mulch in late winter or spring, before weed seeds really sprout is very important to keeping weeds down. Miss just one year, and you will pay for it.
Mulch Properly
Natural mulches of all types, like these hemlock needles, make weed covers.
A 2-3-inch layer of mulch, straw, leaf-mulch or compost keeps seedlings from germinating and stops weeds from taking over. It is best to apply mulch in spring after properly weeding your beds and again in fall to ward off winter weeds. (Click here to learn more about the many wonderful mulch options.)
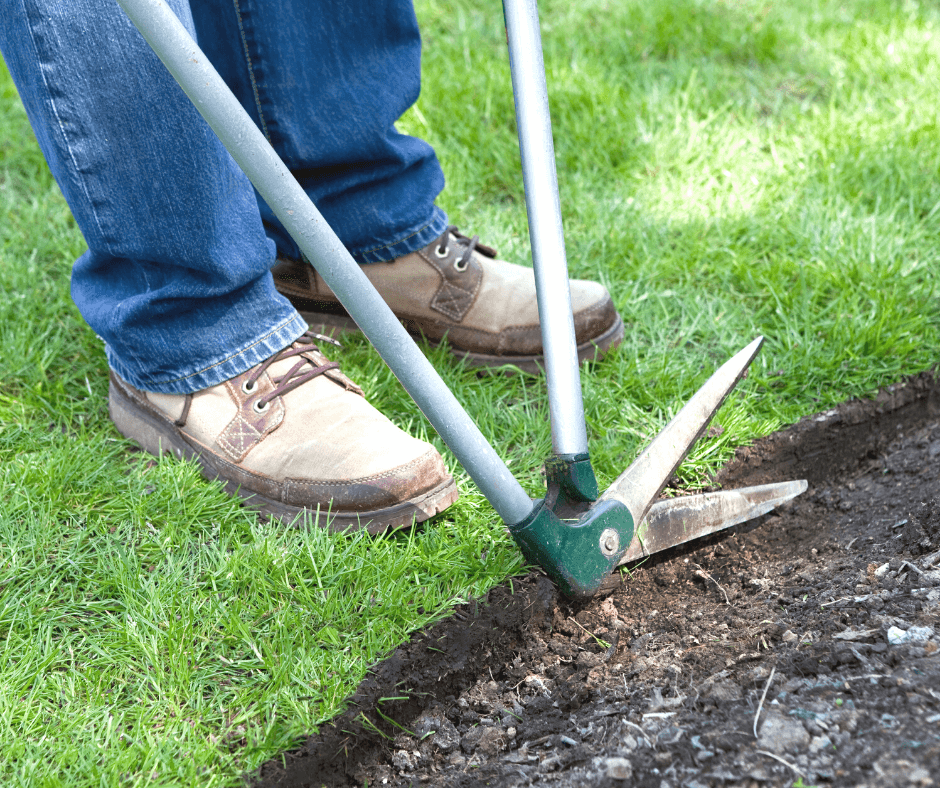
Edge Your Beds
Lots of lawn grasses and weeds like to creep into garden beds. Once in your garden, they become weeds. To stop this, it helps to edge your gardens, especially at the start of the gardening season. Edged beds also look tidier and nicer. Mowing your lawn regularly to stop weeds from flowering and setting seeds is also advisable. (Click here for a tutorial about how to edge beds.)
Consider Solarization
Soil polarization is a method of weed removal that relies on the heat of the sun to kill weeds en masse. Methods vary, but in general, it involves covering a bed area with tacked-down sheets of clear or black plastic for several weeks during the summer. When it works, the heat generated heat cooks everything below–plants, seeds, and all. Keep in mind, the method is used to revive whole beds and remove all weeds, so no desirable plants can be present. It is also less effective further north where summer temperatures rarely exceed 90 degrees F.
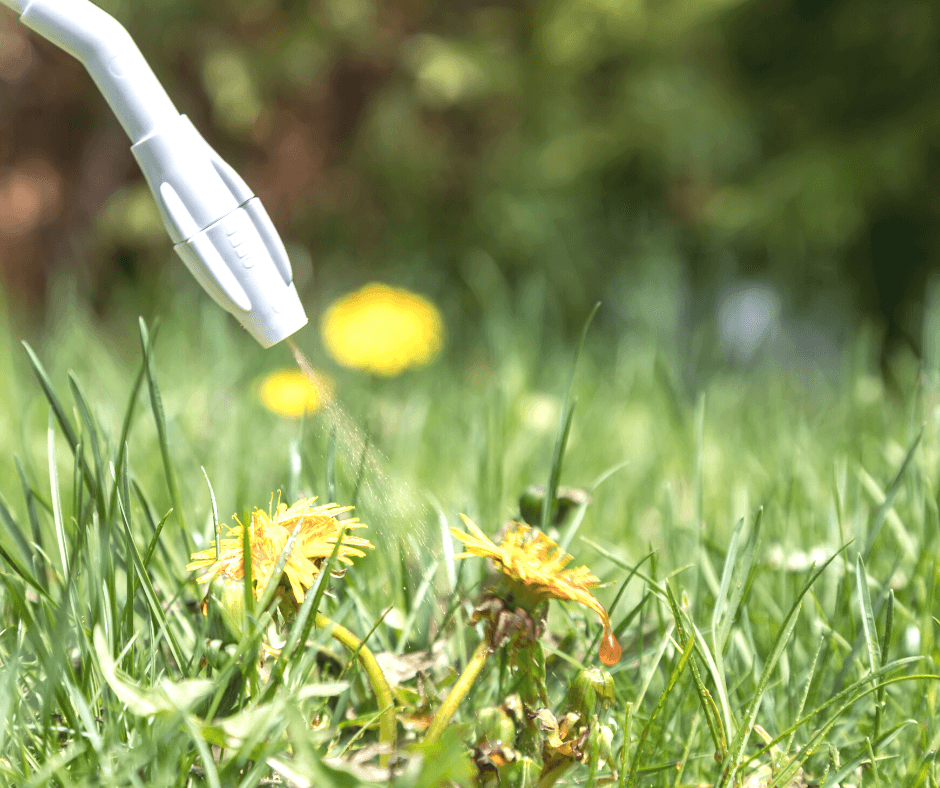
Use Herbicides as a Last Resort
Herbicides that really work are generally toxic and best applied by garden professionals. If you have a severe problem with one of the worst perennial weeds mentioned, like Canada thistle or field bindweed, then you may consider resorting to a professional-grade herbicide very selectively applied by a trained horticulturist. Otherwise, they are not needed. More natural means of weed removal are safer and better.
Stay on top of your weeds, and your gardens will prosper. Put aside just a little time each week and it will be a small burden to bear.
“What do you do with strawberry plants in the winter?” Question from Jacklyn or Portland, Oregon
Answer: In mild areas like yours, strawberries (Fragaria spp., USDA Zones 4-9) are very hardy, so no special overwintering measures need to be taken. You can, however, clean them up and thin clumps that are over 3 years of age to encourage strong fruiting. Central plants that are three or more years old start to produce less and less fruit. If you replace the main plants with one of the plant’s newer offshoots, you will get more strawberries the following year.
Start by weeding around your strawberry plants. You can also protect them with light straw or leaf mulch around the base of the plants. If you have older strawberries that need to be thinned and replaced, remove the central plant, and plant in its place one of the larger offshoots that have rooted. Fertilize your new strawberry plants with an all-purpose slow-release fertilizer to encourage good rooting and growth through fall and again late winter. Feed once more in early to mid-spring.
From there, I encourage you to watch our video about everything that you need to know about growing strawberries.
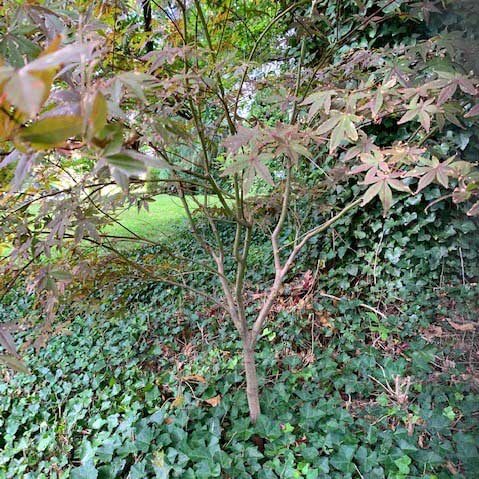
“I recently bought a house in Long Island, NY, and found a 2-foot tall Japanese maple tree (I believe it is a Red Emperor Maple) growing under a much larger tree. The maple apparently sprouted naturally. I would like to transplant it to a more open space. When is the best time to transplant the tree? See pictures of the tree and proposed a new planting spot. This open location will get much more sun, will that be a problem? Any advice on transplanting (size of root ball; conditioning soil) are welcome. From my reading it seems that it is best to transplant the tree before the first frost in autumn, the root ball should be the diameter of the drip line, and the new soil should be well-draining and mixed with lots of organic matter.” Question from Ron of New York, New York
Answer: The tree looks healthy, and the planting spot looks just fine, but seedling trees like this little Japanese maple (Acer palmatum, USDA Hardiness Zones 5-8) have one flaw relative to nursery stock. Their fine, spreading roots are not as dense as those of potted trees, so they do not transplant as well. There is one way to increase root density for better establishment, root pruning. If you prune the roots in fall, the tree will be ready to plant before it leafs out in spring. Here’s how.
How to Root Prune a Tree Before Transplant
You will need a sharp flat spade (King of Spades is best), gloves, and probably some pruning shears to cut away the ivy. Trim the ivy away, clear the area to begin digging. Shoot for a root ball with a circumference of 8-10 inches around the tree. Using your sharp spade, make clean, slightly angeled cuts down to the full length of the spade. You may run into competing tree roots from the larger tree. Cut around them as best you can. Once you have made the cuts all around, leave the tree until spring. Where you made the cuts, new feeder roots will grow over the winter to help the tree become well established when you move it in spring, so you don’t need to cut along the drip line.
In spring, pull away the mulch, and dig a hole that is several inches beyond the height and width of your tree’s root ball. Break up some of the backfill to help plant the tree, and reserve the rest to fill in the hole you will create by digging up the tree.
Next, gently dig around your maple along the lines and cuts you made in fall. You will have to dig a bit beyond the cuts to get any roots that you missed towards the bottom. You should see new root growth along the cuts. Wrap the root ball in plastic or burlap to keep it together. If it breaks apart a little, your tree should still make it. From there, I recommend that you click on this link to follow Russell Stafford’s guidelines for planting a new tree.
As to the variety of your Asian-native Japanese maple, it is difficult to say. These maples seed in from planted landscape specimens, and the seedlings are not necessarily true to parent. With that said, it should still be a fine tree. They can reach a maximum height of 25 feet, so it will provide some shade in your front yard.
“Is it too late to start turnips from seed in zone 7?” Question from Patricia of Warrenton, North Carolina
Answer: It depends on your weather and the turnip. On average, they take around 40-50 days to yield roots from seed. If your Novembers remain reliably mild, then plant them. Another option is to build a cold-frame for growing winter root vegetables and greens. (Click here for Tips for Cold Frame Gardening)
Good Turnip Varieties
If you want to give them a try, here are four excellent varieties:
Old-fashioned ‘Purple Top White Globe’ (50 days) is a classic turnip with white roots, purple tops, and good flavor. The young leaves are favored in the South for turnip greens.
Red-rooted ‘Scarlet Ohno Revival’ (50 days) is pretty and delicious fresh or cooked.
White-rooted ‘Tokyo Market’ (35 days) grows very fast and has a fruity, sweet flavor, making it good for fresh eating.
The purple-skinned ‘Nagasaki Akari Kabu‘ (50 days) is very flavorful and colorful.
“[I] have a question regarding my chives. They have flowered. Should I cut them back now this time of year or leave them be?” Question from Jeanne of Coldwater, Michigan
Answer: The foliage of edible chives (Allium schoenoprasum) will remain attractive and clippable until the first frost causes the strappy leaves to flop. You can cut them back at this time if you wish. Otherwise, leave them up to enjoy through fall. The same goes for summer-flowering ornamental onions.
“Hello, I just moved to a place this year that had semi-raised beds for gardening. I planted several “crops” and the yields were not great. I don’t know if it was the seeds I used or if it is the soil itself. I waited until the ground was warm enough, and I watered regularly and planted as directed, but my yields were about 50% for everything but radishes! I am thinking of adding some more soil this fall and let it sit over the winter..any ideas?” Thank you. Question from Lucinda of Pittston, Maine
Answer: There are lots of ways to build up your soil for vegetable growing success. Here are four recommendations that will increase your success next season.
1. Feed Your Soil
Good soil is the key to gardening success. Feed it liberally feed it with organic matter, such as Black Gold Earthworm Castings, Canadian Sphagnum Peat Moss, and Garden Compost Blend, especially if your soil is rich in clay or sandy. The addition of high-quality, screened topsoil is also recommended. Add at least 3 inches of amendments to the soil surface, and till it to a depth of at least 8 inches. Tilling in amendments will increase water-holding capacity and aeration for better root growth. Use the amendment application formula below to determine the amount you will need.
Amendment Application Formula
([area to cover] ft2 x [depth in inches desired] x 0.0031 = ___ yd3).
Example: If you wanted to cover a 20 square foot area with 2 inches of compost, the result would be: 20 ft2 x 2 inches of compost x 0.0031 = 2.48 yd3.
Vegetables perform better with regular fertilization, especially heavy feeders like tomatoes. Most veggies will deplete the soil of nutrients over time, so replenishment is necessary. There are many organic vegetable fertilizers on the market. Alfalfa, blood, bone, feather, fish, kelp, and shrimp meals are all common natural components of non-chemical fertilizers. Earthworm castings are also a good source of nitrogen and beneficial microbes. Adding mycorrhizae to the soil is also useful because it helps plants take up water and nutrients better. Black Gold Natural & Organic Ultra Coir is another of our organic-rich amendments that also contains our proprietary blend of endomycorrhizae. We recommend that you research top-rated organic fertilizers to find the best for your needs.
3. Rotate Your Crops with Legumes
Vegetables, especially tomatoes, should be rotated on a three-year cycle. For example, tomatoes one year and other vegetables in the next two years. Legumes, like beans and peas, are excellent rotation crops because they naturally fortify soils with nitrogen. For more rotation tips, I encourage you to read Spring to Fall Vegetable Rotation: Planting for Non-stop Garden Produce. It will provide all of the information you need to effectively rotate your crops, whether container- or garden-grown.
4. Clean Up and Cover
Weed your beds with quality weeding tools (I am never without my weeding knife (Hori Hori), strong hoe (Prohoes are the best), and Korean hand plow (Ho-Mi)), and then plant them with a green manure crop. Johnny’s Seeds’ Fall Green Manure Mix or annual rye are good cover crops that can be tilled under in spring. They stop winter weeds and add natural organic matter and nutrients to beds for better vegetable production.