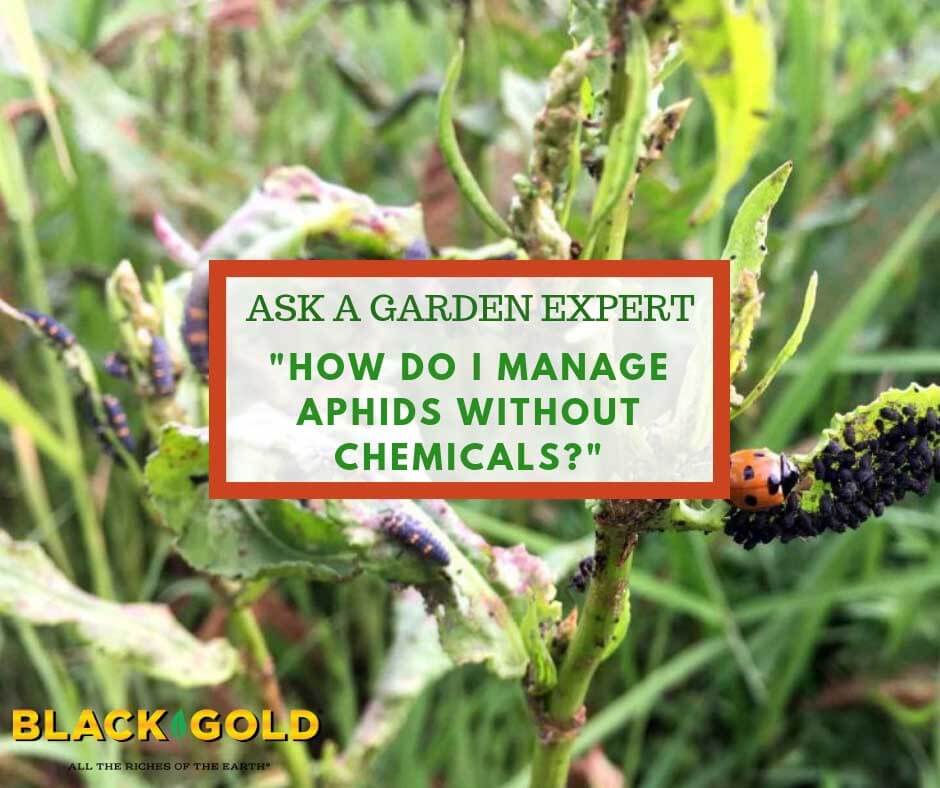
“How to keep aphids away each gardening season without chemicals?” Question from Steven of New England
Answer: Aphids are delicate pests and quite easy to manage, believe it or not. When I have an infestation, I use these four pesticide-free methods of removal.
1. Spray them off with a sharp stream from your hose. This actually removes them fast and will kill quite a few. It’s a good first step for management.
2. Prune off really badly infested flowers or stems and place them in soapy water. This will remove damaged parts of the plant and greatly reduce aphid populations.
3. Spray plants with OMRI Listed insecticidal soap to tackle any lingering aphids. This mild product is approved for organic gardening and will kill aphids fast. If you are worried about it harming other insects, you can rinse off plants a few hours after application.
4. Nurture ladybugs, and other beneficial insects that comsume aphids, in your garden. Refrain from using any harsh pesticides, and the beneficials will come. (Click here to read more about beneficial insects.)
I hope these tips help you better manage your aphid problems. They are annoying insects, but they won’t stand a chance if you continue with these methods.
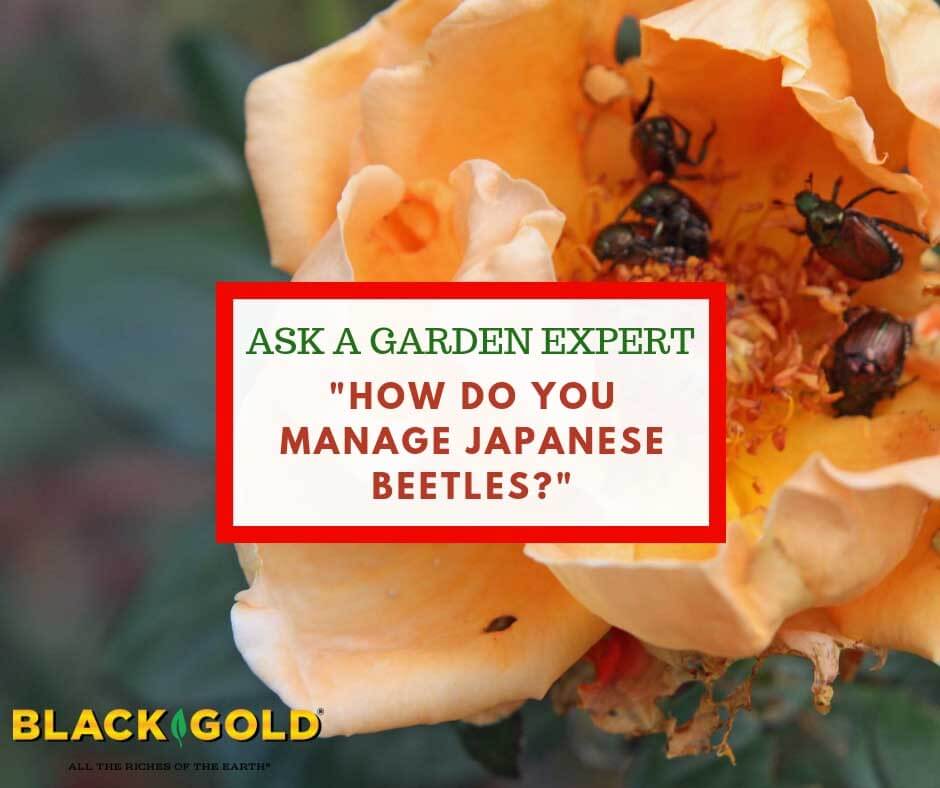
“How do you recommend dealing with Japanese beetles?” Question from Debbie of Lapeer, Michigan
Answer: I know that Japanese beetles (Popillia japonica) are a chronic seasonal problem in Michigan, laying in wait to devastate roses, hibiscus, and many other ornamentals in the summer months. These voracious eaters are known to feed on over 300 plant species. They skeletonize leaves and flowers, weakening plants, and making beautiful specimens look terrible in no time. The key to their management is understanding their life cycle and how to tackle them at different stages of development.
Japanese Beetle Life Cycle
You will begin to see the metallic bronzy green adult beetles from late spring to summer when their underground grubs pupate and emerge to begin their destructive adult period of the cycle. This is when the beetles chomp on leaves and flowers and mate. By midsummer, female beetles will lay between 40 to 60 eggs in the ground. These will hatch into translucent, white, burrowing grubs/larvae that feed on plant roots. Turfgrass roots are a common food source, and the grubs can do significant damage to heavily infested lawns. Larvae develop for around 10 months until the following year when they emerge as adults once again.
Japanese Beetle Management
Integrated pest management (IPM) guidelines for homeowners set by the USDA’s Agricultural Research Service and Animal and Plant Health Inspection Service (APHIS) are the most proven management methods. They’re backed by years of research, and though there is no perfect Japanese beetle cure for infested areas, these steps will limit their destruction.
Beetle Management
Traps– There are several traps designed to attract and capture Japanese beetles. These generally use sex pheromones or floral lures to draw in the beetles. These are effective, but be careful where you place them. Hang traps away from susceptible flowers and shrubs to help lure them away from (not towards) your garden.
Foliage controls– Use caution when using strong chemical controls for adult beetles because most will kill almost anything they come into contact with, including beneficial bees, butterflies, and ladybugs. Spraying plants with OMRI Listed® neem oil is the recommended solution for organic gardeners. It repels Japanese beetles while not harming birds, pets, people, or beneficial pollinators. Bacillus thuringiensis (Bt) is another organic option that will just harm the grubs and beetles chewing on your beloved plants. New Bt products for adult beetles, such as beetleGONE!®, are very useful.
Manual removal-Adults are slow-moving and easy to catch and drown in jars of water or smash on the ground. If you have a minor infestation, this can be a useful method of removal. Japanese beetles are not a big problem where I live, so this is what I do to control them.
Parasites– There are several commercially available parasitic wasps that will attack Japanese beetles as well as desirable beetle species.
Grub Management
Treating the ground for Japanese Beetle grubs in fall or early to mid-spring will also keep populations in your yard down, though this may not be super helpful if your neighbors don’t treat their lawns, too. The favored organic control is milky spore, a fungal bio-control treatment that will kill underground grubs. grubGone® is Bt from grubs and is also very useful!
Plant Resistant Plants
A final method of control is planting landscape and garden ornamentals that Japanese beetles don’t like. Here are a few flowers they dislike: ageratum, begonia, coreopsis, coral bells, hosta, sedum, nasturtium, poppies, and pansies. Trees and shrubs that Japanese Beetles won’t consume include red maple, boxwood, redbud, holly, dogwood, magnolias, and evergreens. (Amending your soil with Black Gold Garden Soil will help all of these plants perform better in the yard and garden.)
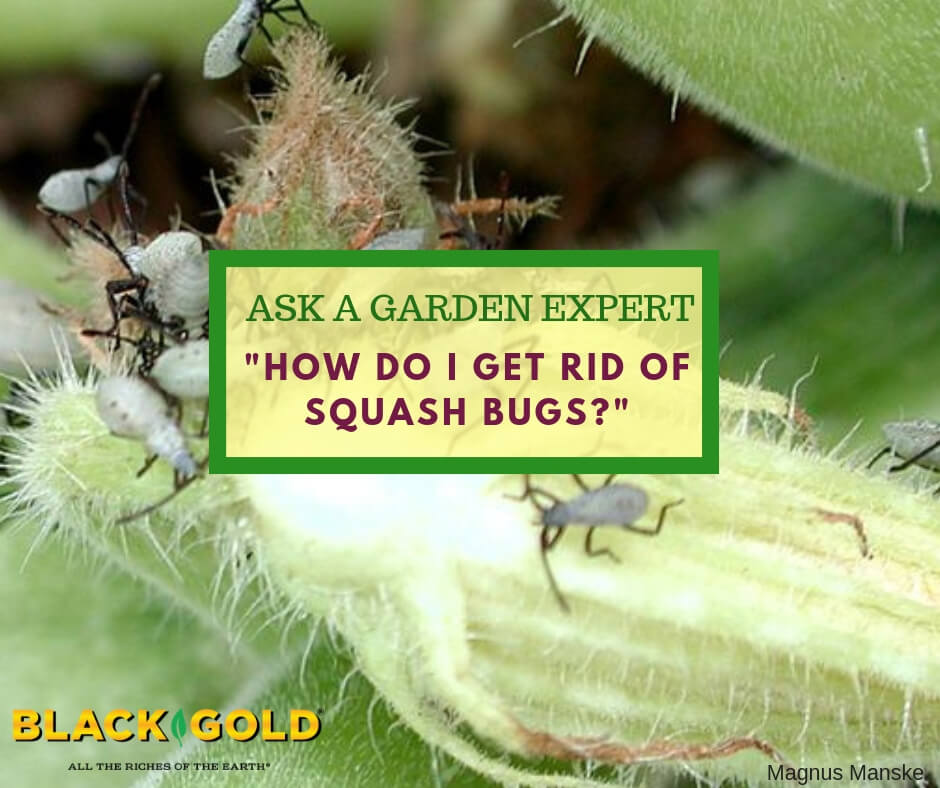
“How do you get rid of squash bugs?” Question from Judy of Louisville, Mississippi
Answer: Surely these are some of the most annoying and destructive of all summer vegetable garden pests. To manage squash bugs (Anasa tristis), you need to understand their life cycle.
Squash Bug Life Cycle
These true bugs attack squash and relatives, like cucumbers, pumpkins, and zucchini. They spend their winters sheltering under garden debris, leaves, rocks, and logs. Sometimes they even enter homes for refuge. When spring weather warms, they seek out squash plants, mate, and lay eggs on developing squash plants. The clusters of brownish-orange eggs hatch in just 5 to 10 days. Bug nymphs emerge and develop into adult squash bugs that suck the juices from squash stems, leaves, flowers and developing fruits. Badly infested plants will show signs of wilt and have poor fruit output and development.
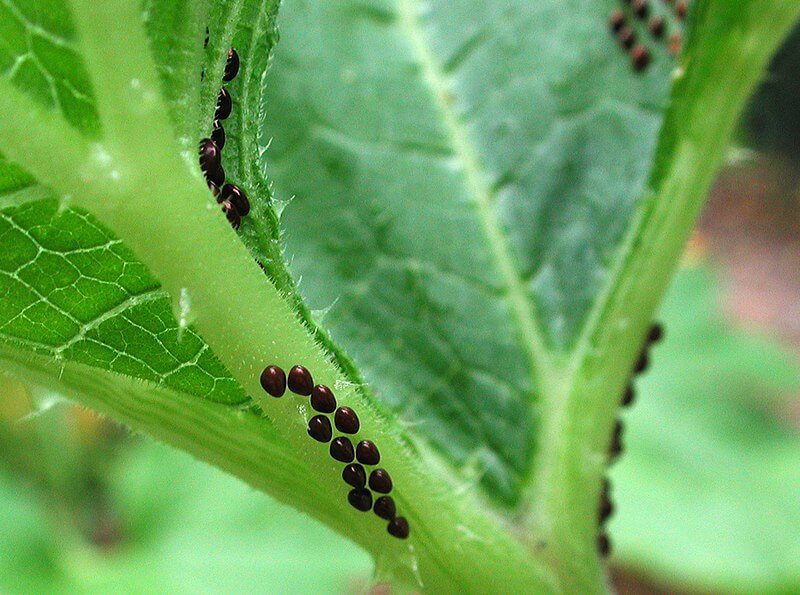
Squash Bug Management
Squash bug eggs are brown to brownish-red.
The first thing you can do to protect your garden is to remove all infested plant material from your beds in fall. Good garden sanitation will destroy winter cover for these bugs, which will decrease their populations during the cold season. In spring, keep a lookout for their eggs. If you see any on leaves or stems, scrape them off immediately and smash them. Once you begin to see adults, remove them by hand or spray them with an OMRI Listed insecticidal spray approved for organic gardening, like insecticidal soap, neem oil, or horticultural oil. [Click here to read more about using horticultural oils.]
It also pays to plant squash-bug-resistant varieties, which include most butternut varieties, ‘Early Summer Crookneck,’ ‘Improved Green Hubbard,’ ‘Royal Acorn‘, and ‘Zucchetta Tromboncino’.
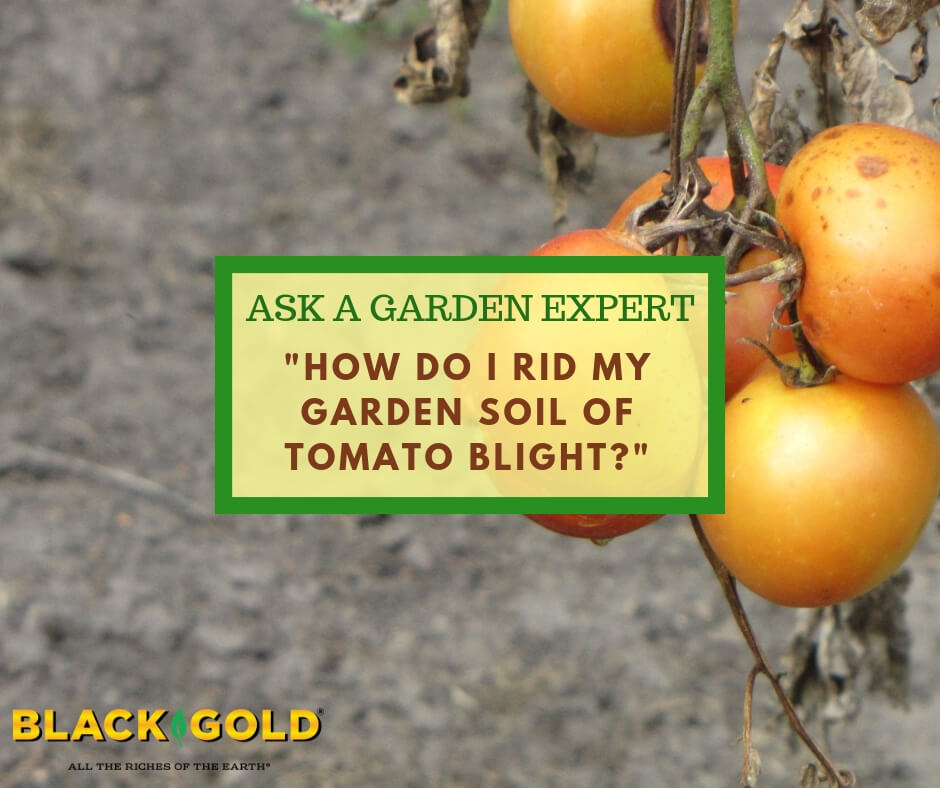
“How do I get rid of blight (early and late) spores in my tomato garden soil?” Question from Thomas of Maineville, Ohio
Answer: Tomato early blight and late blight are terrible soil-borne diseases that all tomato growers fear. Thankfully, you can manage them once they get into your soil. I’ll provide an overview of each disease and its management.
Tomato Early Blight
Early blight (Alternaria tomatophila and Alternaria solani) can appear early in the life cycle of the tomato by causing seedling damping off (rot). At later stages it can cause stem cankers, leaf blight, and black fruit rot. You know your tomatoes have early blight when you start to see leaves with circular lesions, reaching up to 0.5 inches in diameter, with dark concentric circles inside.
Tomato Late Blight
Tomatoes with oily patches and plants with stem lesions and browning leaves – it’s not what a tomato grower wants to see because these are the telltale signs and symptoms of late blight (Phytophthora infestans). Most commonly known for causing the Irish Potato Famine, late blight is spread by a pathogen that survives and overwinters on infected plant material. Though it kills tomatoes more slowly than potatoes, it is equally lethal and destroys tomato fruits. If the plants are subjected to drought stress, the disease takes them more quickly.
Managing Tomato Blight
There are several methods for controlling and avoiding both blight diseases. If you have had blighted tomatoes in the past, rotate crops on a three-year cycle to help keep soil disease-free. This means rotating where you plant your tomatoes and allowing three years to pass before planting them in the same spot. The absence of live plants should rid the soil of the disease in this time. Also, scout for infected plants and immediately take them far away from the garden and compost bin. Bag and toss them instead. Finally, keep a lookout for and remove weedy tomato relatives that can harbor blight. These include nightshade and ground cherry.
To prevent further tomato blight from entering your garden, plant only healthy plants that you have grown from seed or purchased from a reliable grower. (Nothing is worse than being sold diseased plants!) Also, plant only blight-resistant varieties (check out this list from Cornell University).
In the garden, avoid moist soil by planting tomatoes in well-drained, aerated, raised beds amended with Black Gold Garden Soil and keep plants strong and vigorous by feeding them with a tomato & vegetable fertilizer. It also helps to encourage air-flow by spacing plants well and keeping them pruned (click below for a tomato pruning tutorial). Finally, drip irrigation helps keep plants drier to reduce disease spread. At the end of the season, clean all plant material from your garden for good measure.
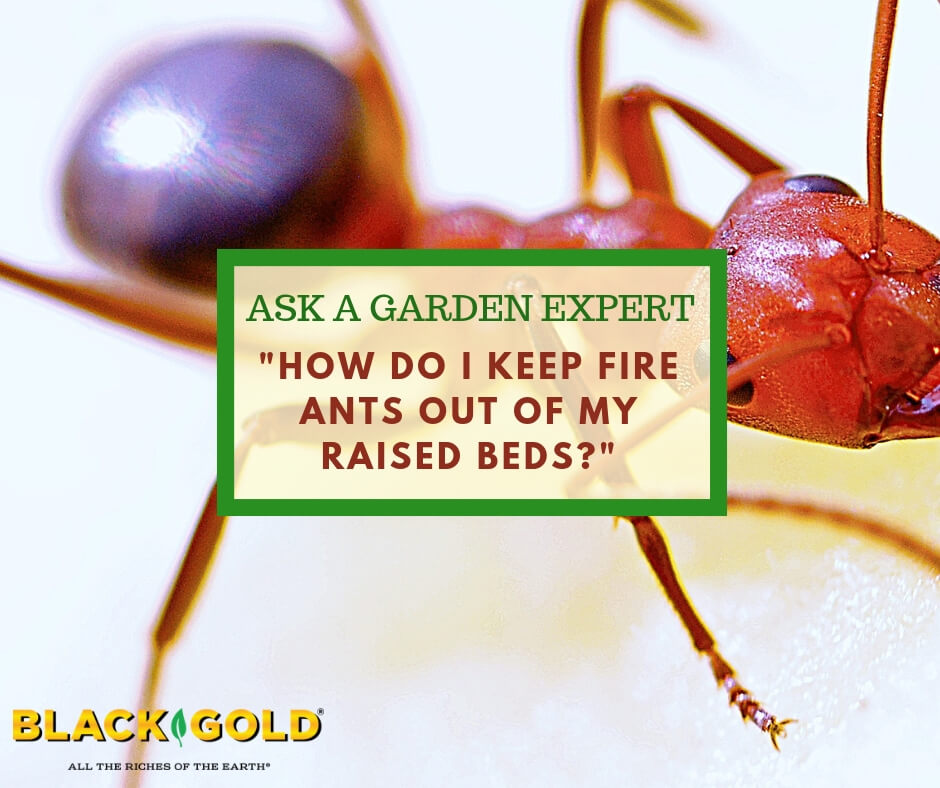
“How do I keep fire ants OUT of my raised beds? I’m in Texas, and those buggers are devastating! I hate to poison my food … any advice would be appreciated.” Question from Amy of Terrell, Texas
Answer: The red fire ant (Solenopsis invicta) is an introduced species that’s a painful problem down South, and gardeners with fire ant problems really pay the price. Thankfully, there are organic ways to manage them.
About Fire Ants
Let’s start with an overview of these pests. Fire ants create large mounds that can reach a foot and a half in height. A big colony may contain up to 200,000 worker ants and queens can lay up to 800 eggs a day. These pests thrive in southern climates and start causing troubles as soon as the soil warms up in spring. They are small, brownish orange, and have painful, venom-injected stings that hurt like fire. They like to feed on young plants and seeds, so they are attracted to gardens.
Organic Fire Ant Control
If you know where they are nesting in your raised bed, start with this simple method as early in the season as possible, before you start planting. Pour boiling water over their nests, being sure to cover the full nest area deeply. This will immediately kill nests in your beds.
Once you have weeded and turned your beds for the season, spray any ants you see with OMRI Listed spinosad, a natural bacterium that is toxic to insects like ants and approved for organic gardening. You can also buy spinosad ant bait traps for your garden, which won’t harm other insects. Follow the manufacturer’s instructions.
Bait traps that container borax are another option. Borax is a natural ingredient that is non-toxic to us. TERRO® Liquid Ant Baits work very well.
If more colonies appear, you can also cover them with diatomaceous earth (food grade). This has been proven to ward off ant colonies naturally. It also would not hurt to put rings of diatomaceous earth around your favorite plants.
Finally, another safe spray to use that’s effective in repelling fire ants is D-limonene (Orange Guard). It is OMRI Listed for organic gardening and is made from the extract of citrus peels. It really keeps ants away. Follow the manufacturer’s application guidelines.
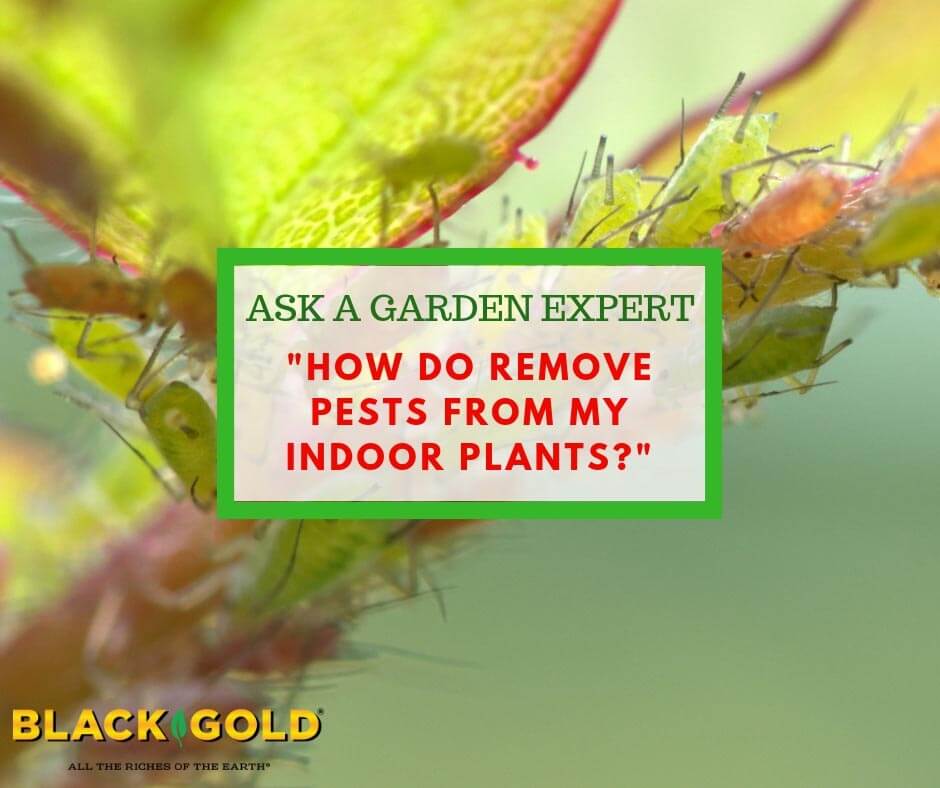
“How can I keep the bugs from eating my plants inside?” Question from Wanda of Franklin Furnace, Ohio.
Answer: To make sure your houseplants are pest free, start by washing their leaves and then spray them with insecticidal soap. This will take care of common foliar pests like spider mites, white flies, and aphids. It also helps to remove and replenish the top two inches of potting soil to catch any pests hanging out in the upper soil layers. I recommend topping your pots with Black Gold All Purpose Potting Mix. Here is the full process:
Step-by-Step House Plant Cleaning
Wash all your plant’s leaves well. Start by spraying them all over with a strong stream of water from a spray nozzle, and wipe the leaves and stems down well. Sometimes it helps to wipe them down again with a gentle moist cloth dotted with mild soap and then double rinse and dry them again. Finally, thoroughly spray all leaves and stems with insecticidal soap. (You can also cut off any dead leaves or unhealthy looking growth at this time.)
Remove and replenish the top 2 inches of potting soil to catch any pests hanging out in the upper soil layer.
Wash the plant’s saucer and pot exterior well.
Give your plants the correct moisture, light, and fertilizer to help them resist any potential pests, and keep a lookout for any lingering pests, especially in the first month after treatment. Use more insecticidal soap, as needed.
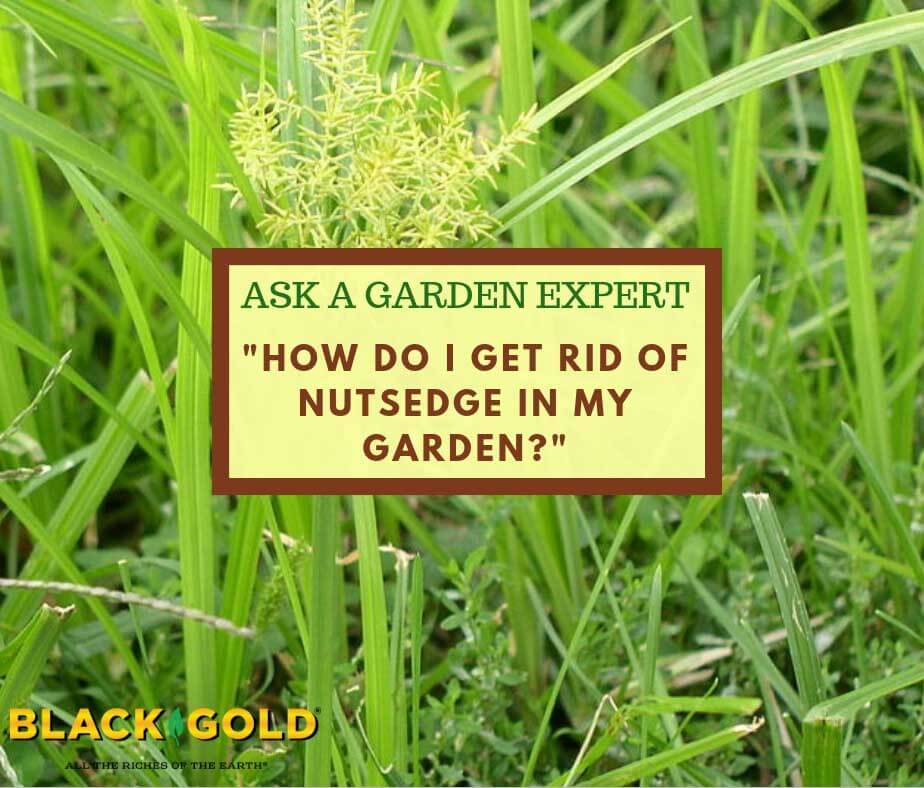
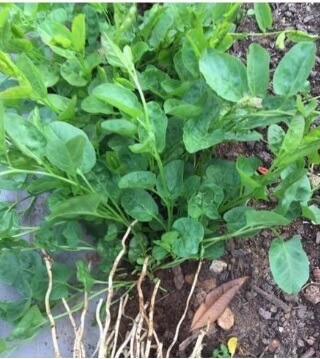
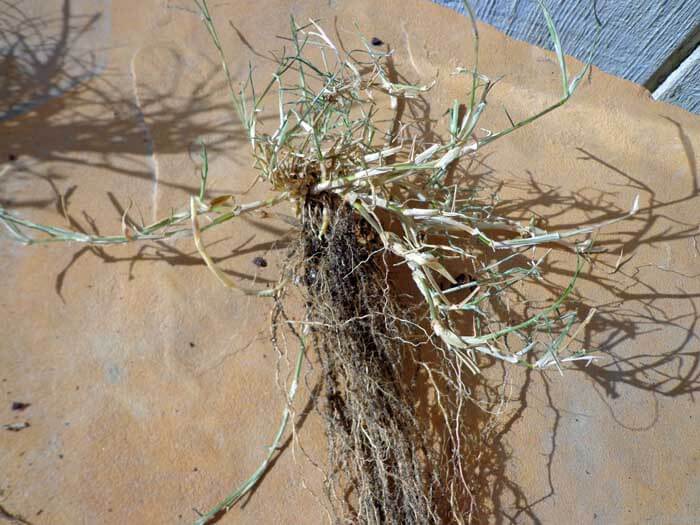
“How can you get rid of nutgrass (aka. yellow nutsedge)? Question from Michael of California.
Answer: What a pain of a weed! Huh? You pull it up, and it just seems to return again and again and again. Here’s why. Nutgrass or yellow nutsedge (Cyperus esculentus) is given its name for the little “nutlet” tubers it produces underground. These nutlets are kind of like little weed bombs because each one will develop into a whole new plant if left in the ground. It’s a devious way for the plants to be foraged or pulled and still remain in the soil ready to reroot, reshoot and grow as if never removed. This is also why foliar weed killers rarely touch it. Nutsedge grows best in moist soil but can tough it out almost everywhere. [As a side note, nutsedge nutlets are also edible and eaten in many cultures. Click here to read more.] We encourage you to view the nutlets and more images for ID on this Washington State webpage before starting the removal process.
Here are some truly effective ways to remove nutsedge without using chemicals.
For small garden infestations, dig up plants to a depth of 10 inches, place weeds and soil on a tarp, and gather up all plant parts, making sure you remove all the nutlets. Nutlets need to be fairly close to the soil surface to sprout and can survive in the soil for 2 to 4 years, so after eradicating most of the sedge from an area, opt for a no-till strategy to keep any deep nutlets from being brought too close to the surface. Then keep a lookout for newly sprouted sedges and just pull or lightly hoe them when they are tiny. Adding a thick layer of organic mulch is also wise.
For large garden infestations, dig it up plants as completely as you can, and then smother the area with weed cloth covered with an additional layer of mulch or leaf compost (for ornamental beds) or straw (for vegetable beds) to keep seedlings and nutlets from resprouting. After a few years, the residual nutlets should be gone and the weed cloth can be removed.
For both cases, keep a lookout for newly sprouted sedges and remove them on sight. Never let them get large enough to set seed.
Star thistle is one of the worst of all western weeds.
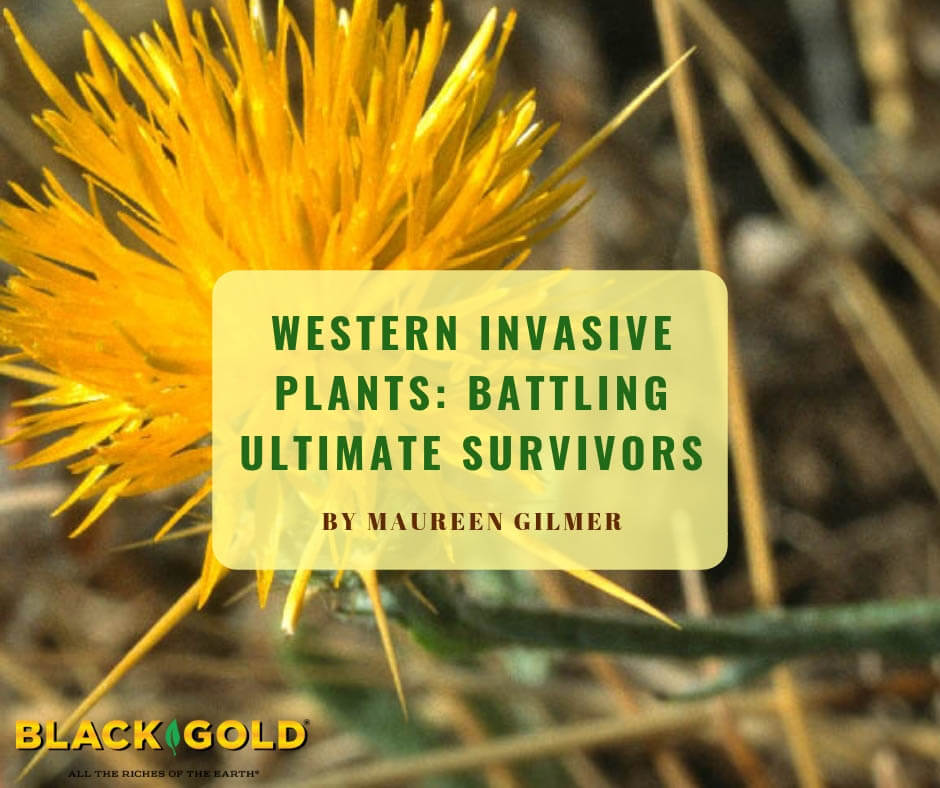
The empire of plants is expansionist and certainly colonial. Immigrant plants are designed by nature to be incredibly self-sustaining through droughts, floods, and wildfires in their place of nativity, and beyond. They must be able to survive Earth-shattering asteroids and volcanoes without becoming extinct. The most competitive immigrants are from droughty climates where it takes hardcore adaptability to survive. Put them in more genteel circumstances, and they not only hang around but start an aggressive expansion into new territory.
These invasives freak out ecologists and botanists who like their plants segregated into long-established, ecologically harmonious North American native plant communities. But, the landscape has changed. The nature of colonization is more like the Oklahoma Land Rush, with expansionist plants trying to find a place to put down roots, often with displacing effects.
Some Common Invasive Western Weeds
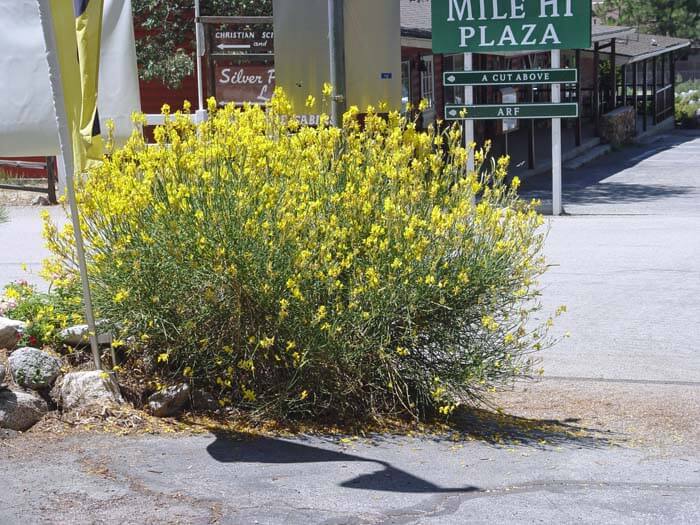
Scotch broom, introduced during the Goldrush, has displaced chaparral species in mountains and foothills. (Image by Maureen Gilmer)
For example, Eurasian yellow star thistle (Centaurea solstitialis), which was introduced in the 1800s via contaminated imported seed, can rapidly displace acres of our favorite native wildflowers in just a couple of years. It is also unpalatable to livestock and can damage the eyes of grazers, making it a nightmare for ranchers. For gardeners, this weed is no less unpleasant.
In the forest and chaparral arises Scotch broom (Cytisus scoparius), originally introduced in the west in the 1800s as packing material for the Irish whiskey trade. Broom is still present in the goldfields, everywhere whiskey crates were opened in the western mining camps. When it pops up in the garden, you have to learn how to tackle it fast before it takes hold.
Spanish sheep herds sowed manure enriched with invasive seed all over early California, introducing familiar pernicious species of the old world such as teasel (Dipsacus fullonum, US introduction in 1800s) and field bindweed (Convolvulusarvensis, US introduction in 1800s) as well livestock-unfriendly grasses such as medusahead (Taeniatherum caput-medusae, US introduction in 1887) and Bermuda grass(Cynodon dactylon). The exotic weeds and grasses proved so much more adaptable than the nutritious local native grasses that they were soon the dominant species. They are also a pain in the garden.
When unwanted plants become expansionist, only the strongest survive, and they play to mine the scant moisture underground with deep, aggressive roots. They also bring down the utility and value of farmland, both for livestock and crops, natural lands, and they can take over gardens in a blink of an eye.
Invasive Plant Designation
Field bindweed is one of the most notorious invasive plants in the US.
The designation of plants as invasive is often misunderstood. It’s really a local issue relative to the soil and climate around your land and home. In arid-zone southern California, for example, artichokes are invasive. Decades ago edible artichokes escaped the fields and naturalized on the hills along the coast. Due to frost tenderness of this perennial, the invasiveness is limited to the coastal foothills, while it burns back or dies inland when exposed to frost. Therefore concern for its invasiveness is only in a small coastal strip, not all of California unless future climate change forces it to die out or expand and flourish.
Bermuda grass is a pernicious species with deep, fine roots and coarse, fast-growing surface rhizomes that rapidly spread. (Image by Maureen Gilmer)
Each invasive is managed differently. For example, Scotch broom spreads by producing large quantities of seed that germinates and establishes quickly. Just removing adults doesn’t fix the problem because there’s so much dormant seed in the ground just ready to sprout. A no-till situation and thick mulch application can keep seedlings in check.
In contrast, Bermuda grass spreads by the most aggressive root system you’ll ever see, and removal it tough. Typically sprouts emerge from tiny root pieces to start whole new plants, no matter how carefully dug out. Covering invaded areas with a black plastic cover for a month or two is one way to eradicate any leftover pieces. For the further management of many western invasive plant species, UC Davis has an excellent Invasive Plants IPM website.
We are learning that certain communities are best left as-is in perpetuity, but when invasive, expansionist plants decide that they have a right to displace native plant communities by force, it becomes an invasion. Sadly, many areas are so infested with these pernicious species that takes a war to root them out, and even then there will be casualties on both sides.
Before you dream up next year’s changes to your garden, use these dark winter days to study invasive plant information online for your immediate area. Get to know these plants, so you can recognize them in the wild, in your garden, and in the garden center and root them out as you see them.
“I would very much appreciate an answer to my question… specifically… which of your Black Gold soil products contain perlite/vermiculite as I have learned this is best [for fungus gnat problems]. I am also aware that organic soil may perpetuate the fungus gnat problem as well. Since I have been having a terrible problem with fungus gnats as a result of having many plants, I need soil which would not promote these flies. I have eliminated all with the use of sand but must soon do replanting and am apprehensive about purchasing the wrong type of soil. After having read that peat moss is not the best for this problem, I would like to know which of your soils you would recommend.” Question from Barbara
Answer: Fungus gnats are so annoying with their root-eating larvae and pesky adults! They are a common problem that most indoor gardeners experience. They come in through open windows or doors, open potting soil packages, or newly potted plants.
Fungus gnat management is a cultural matter and not soil dependent. All potting soils must contain organic matter, be porous, and hold water well for effective root growth, and any soil that’s moist and high in organic matter will attract fungus gnats. But, don’t despair! Follow these simple cultural guidelines, and you can easily stop fungus gnats from breeding on the surface of your potting soils.
Fungus Gnat Deterrents
First, you need to know what deters fungus gnats:
Dry soils;
Fast-draining soils with inorganic additives, like perlite, vermiculite, and sand;
Inorganic soil covers, like pebbles, coarse sand, chicken grit, or diatomaceous earth (Some swear by the gnat-killing power of diatomaceous earth!);
Pyrethrin sprays approved for organic gardening.
Fungus Gnats Management
Now that you know what fungus gnats dislike, let’s talk management. The yucky larvae feed on plant roots and soil surface algae only in the first 1 to 1.5 inches of surface soil, so this is your management target area. They also breed quickly, going from eggs to adults in as fast as 17 days, depending on the temperature (they like warmth). Follow these home integrated pest management (IPM) steps, and you should see results quickly:


 “How do you recommend dealing with Japanese beetles?” Question from Debbie of Lapeer, Michigan
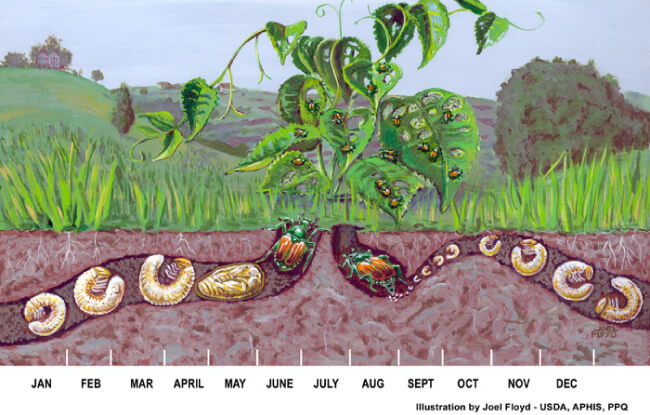 Integrated pest management (IPM) guidelines for homeowners set by the USDA’s Agricultural Research Service and Animal and Plant Health Inspection Service (APHIS) are the most proven management methods. They’re backed by years of research, and though there is no perfect Japanese beetle cure for infested areas, these steps will limit their destruction.
 Plant Resistant Plants