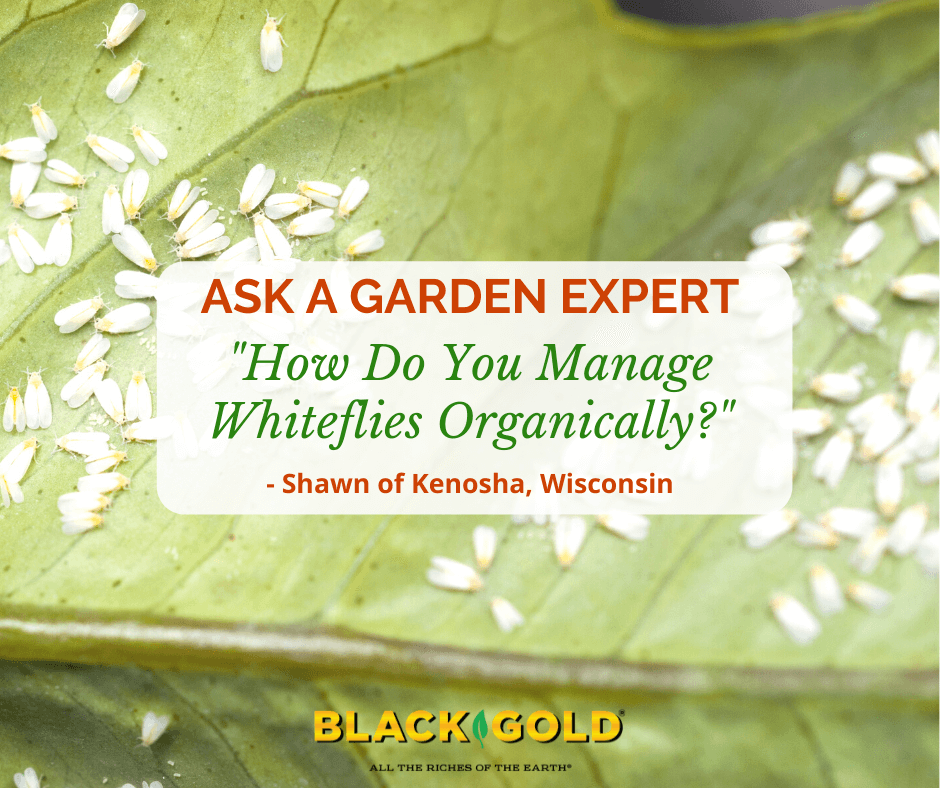
“What is the best organic way to get rid of whiteflies?” Question from Shawn of Kenosha, Wisconsin
Answer: Whiteflies can become awful pests to manage if the populations become large, but they are relatively easy to kill. Here is a little more information about these pests and some organic methods for handing them.
What Are Whiteflies?
Whiteflies are sucking insects that remove the juices from plant leaves and stems. Tiny whiteflies can be very destructive when populations are high–causing leaf drop and general plant decline. When plants are badly infested, the undersides of leaves will become covered with clouds of tiny flies that are bright white and clusters of their small, round, white egg masses.
Whiteflies breed continuously and quickly, which is a big reason why they are so problematic. According to Colorado State University: At 70º F, the greenhouse whitefly life cycle happens fast. “It takes 6-10 days for egg hatch, 3-4 days as a nymph I, 4-5 days as nymph II, 4-5 days as nymph III, 6-10 days for the pupa. Adults can live for 30 to 40 days.” Adults produce lots of eggs for ever-increasing numbers unless challenged.
How to Kill Whiteflies
Start by spraying the plants off with a sharp spray of water from a hose. Focus on the undersides of leaves. Then look beneath the leaves for clusters of clinging, small, white egg masses. Leaves thickly covered with egg masses should be removed, tightly bagged, and thrown away. Next, wipe the egg masses off of the remaining leaves. Make sure no eggs remain. Finally, spray the plants with insecticidal soap, Neem oil, or horticultural oil. (Click here for an overview of horticultural oils for organic insect control.) Continue to check for whiteflies and wipe and spray leaves as needed.
It may take a little work, but this method is effective.
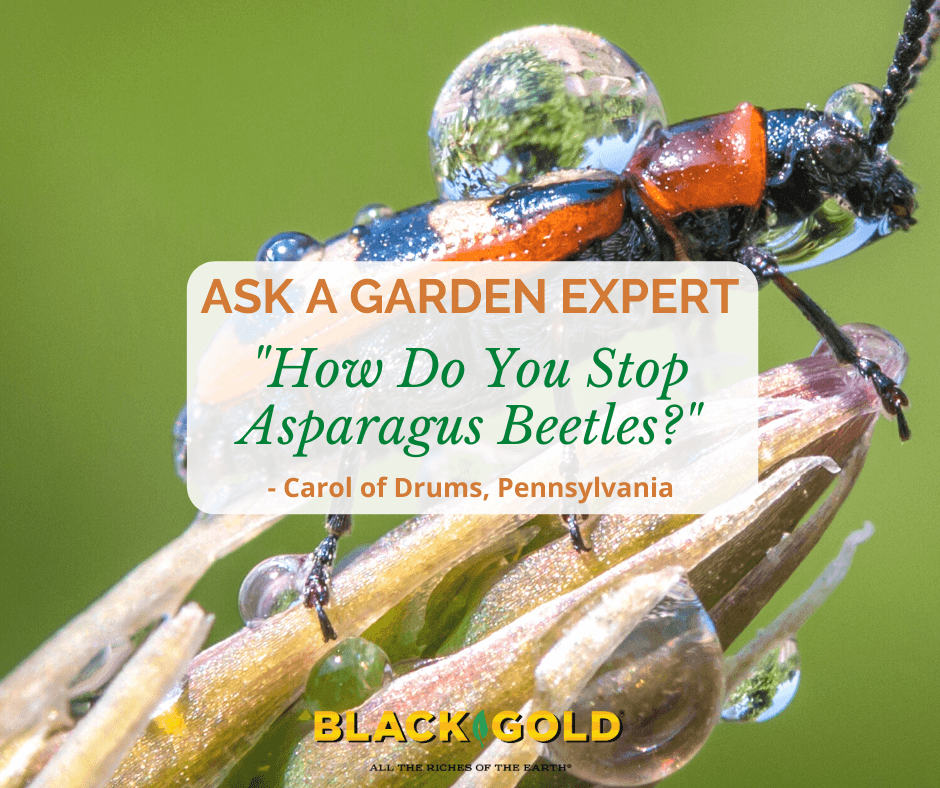
“How can I prevent asparagus beetles from attacking and how can I get rid of them?” Question from Carol of Drums, Pennsylvania
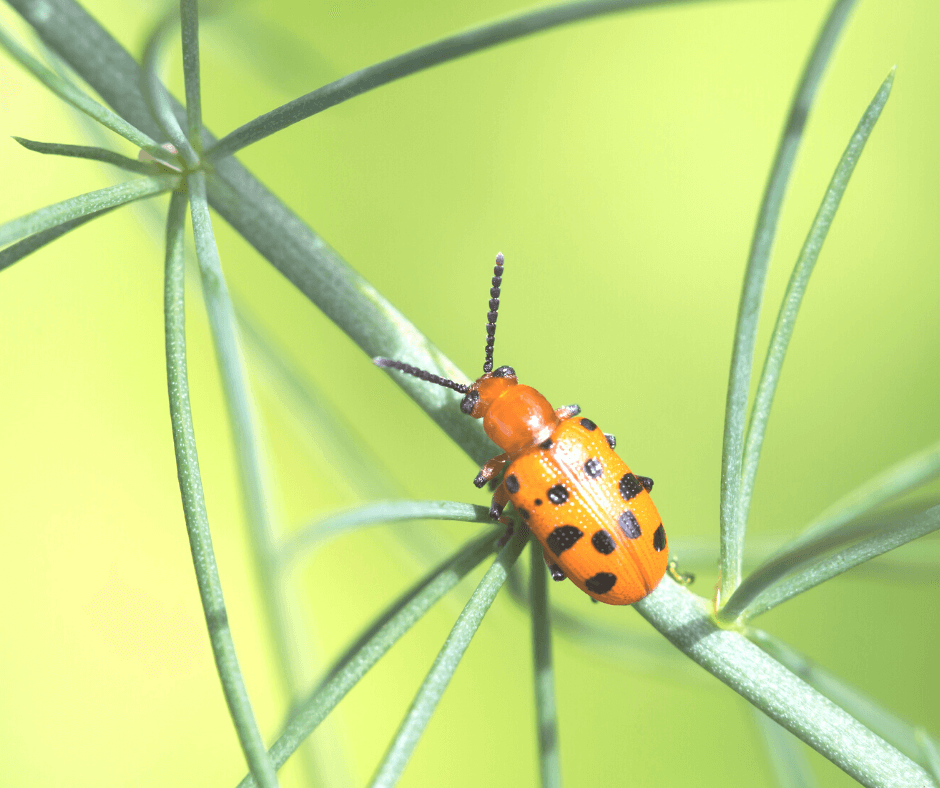
Answer: There are several cultural things that you can do to manage asparagus beetles. There are two types with similar habits and damage, the black and white adult common asparagus beetle (Crioceris asparagi) and orangish-red spotted asparagus beetle (Crioceris duodecimpunctata). First, it is important to understand their life cycles.
Asparagus Beetle Life Cycle
In early to mid-spring, as spears break ground, adult asparagus beetles emerge from sheltered areas along the ground and in trees.
The beetles mate and the females lay spare rows of dark brown, oval-shaped eggs on spears of asparagus plants.
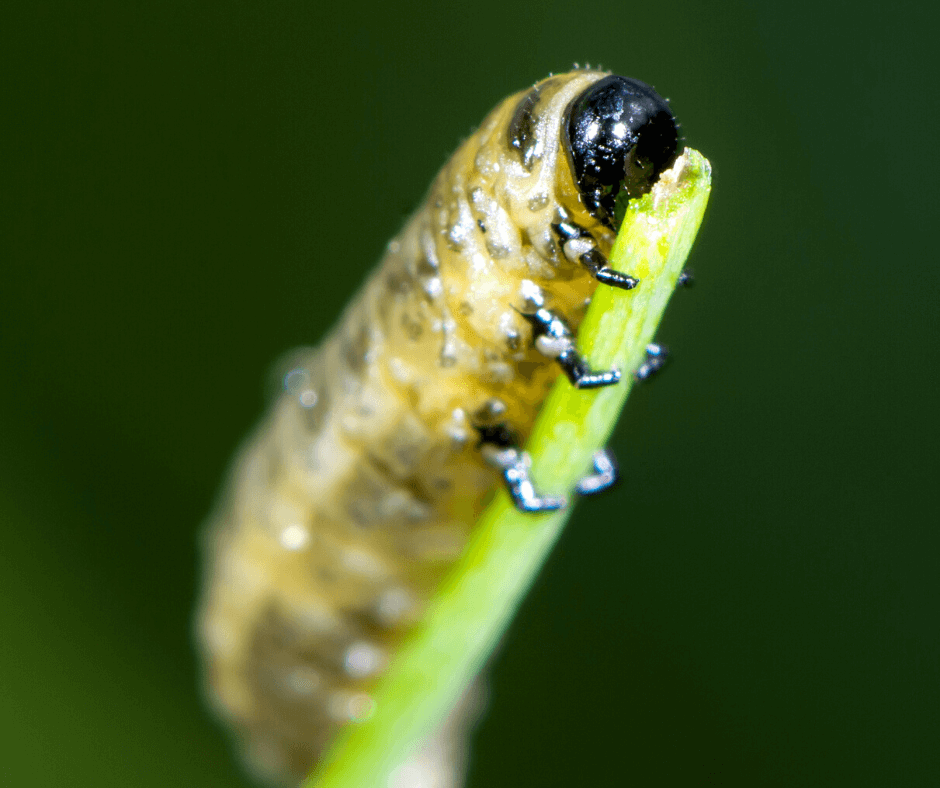
Beetle eggs hatch in around a week and the small, translucent larvae start chewing on spears and foliage.
The larvae feed for around two weeks before pupating in the soil below the plants.
Pupation takes just a week, then the new adults emerge to start a new cycle. Cycles can last all season long.
Asparagus Beetle Damage
Spotted asparagus beetle (Crioceris duodecimpunctata) first emerges in early spring.
When adult beetles feed on spears, the spears turn brownish-green and the tips bend and look hook-like. Scarring will occur along the asparagus spears from larval chewing. The larvae and adults will continue to feed on the foliage all season long, weakening the plants and increasing beetle populations. The damage also weakens an asparagus plant’s immunity, making it more susceptible to fungal disease.
Managing Asparagus Beetles
Asparagus beetle larvae are very destructive chewers.
Good timing and dedication are needed to remove these pests from your garden. Here are the removal steps that I recommend.
Look for eggs and beetles early in the season and daily as soon as the spears start to emerge and during harvest season.
Scrape off and smash the eggs, and pick off the larvae and adults and place drown them in a dish of soapy water.
Time your pest search well. Asparagus beetles are most active in warm, afternoon weather, while the best time to look for new eggs is in the morning.
Large asparagus beetle populations might need the addition of a pesticide. Neem oil is approved for organic gardening and has been shown to be effective on plants for several days.
Finally, harvest spears as soon as you can and snap them all the way to the ground to keep beetle food sources down.
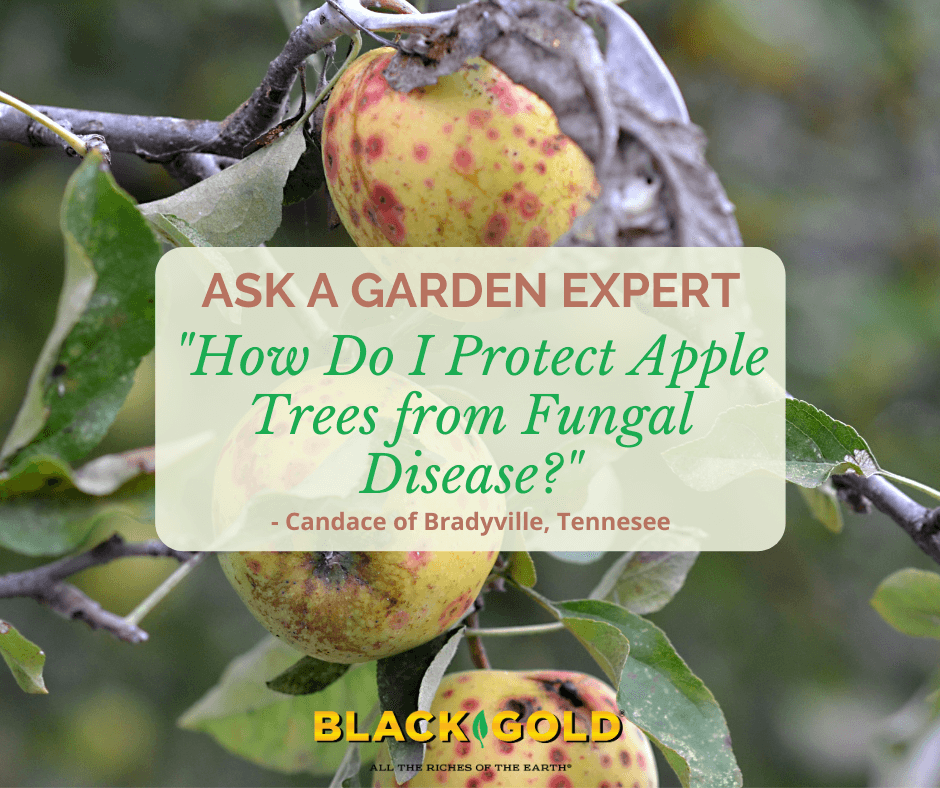
“I have fungal diseases on my apple trees and fruits. I have tried all different sprays and had no results.” Question from Candace of Bradyville, Tennesee
Answer: Apple trees get loads of fungal diseases (Click on this link for a full list). Some cause trees serious damage while others are just disfiguring and reduce fruit set. Either way, you can reduce fungal disease problems by taking these steps.
Wet springs are sure to cause fungal disease symptoms on infected trees. There are several cultural and safe chemical means of controlling them. These include:
Applying a dormant oil fungicide spray in late fall, again in late winter before the trees leaf out, and again after they begin to leaf out in spring. If the spring is unusually wet, apply an additional copper-based fungicide spray through the spring during a dry spell. (Click here to read more about dormant oil sprays.)
Watching for leaf spotting when weather conditions are favorable, and spraying with a Bordeaux mixture fungicideof copper sulfate (CuSO4) and slaked lime (Ca(OH)2) as soon as they appear. (Note: Moist spring air between the temperatures of 40 degrees F and 86 degrees F encourages the onset of fungal diseases.)
Spraying with a Bordeaux mixture fungicide during the growing months. This fungicide is effective and approved for organic growing.
Removing badly infected or dying stems with clean shears or loppers as you see them.
Raking up all of the fallen leaves that may carry disease in fall, and bagging and disposing of them in the garbage.
Repeat treatment yearly as needed, especially in moist years, to overcome this common fungal disease of apples!
“What is the best way to remove ground mealybug or should I dispose of the whole plant?”Question from Erin of Conover, North Carolina
Answer: Mealybugs can be overcome. It just takes a little time and patience. The main reason is that one has to eradicate both the adults as well as the juvenile crawlers, which are almost invisible to the eye. Outdoors, ladybugs and other natural predators keep populations down, but inside the house mealybugs can take over a plant really quickly.
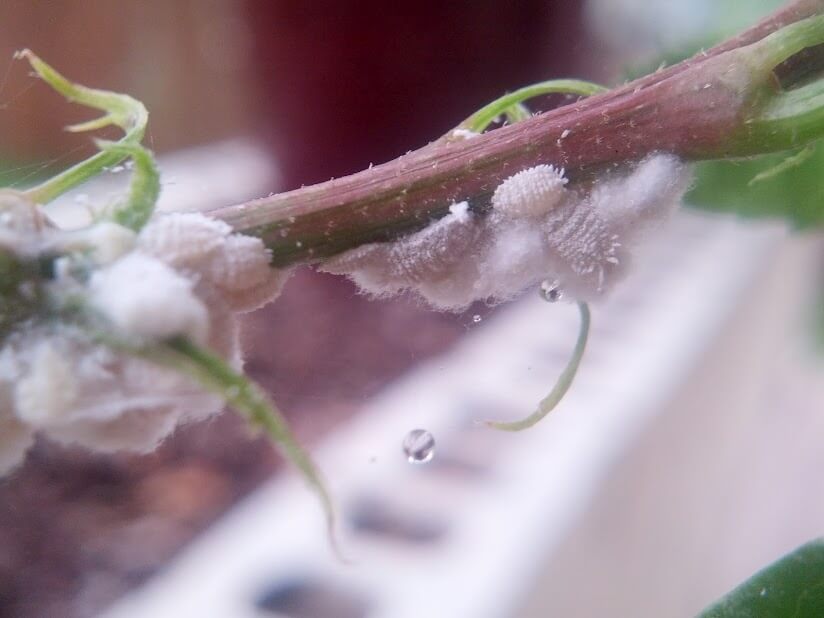
Mealybugs are soft, white, and feed on the juices of plant leaves and stems, particularly in the crevices between leaves and stems. Mealybug infestations are hard to manage because these pests travel and spread as crawlers. Crawlers are the nearly invisible nymphs that hatch from the pest’s white, cottony egg masses and “crawl” several feet to quickly infest other plants. You can’t always see these crawlers, so to manage them, you have to clean plants, containers, and surrounding surfaces when you see an infestation. They produce copious crawlers, so the sooner you notice mealybugs, the better.
At high populations, mealybugs produce lots of cottony egg masses, adult bugs, and nearly microscopic crawlers. All must be completely removed if the plant is to be saved. (Image by Alexlutor)
To remove mealybugs, start by cleaning your plant, its pot, and all surfaces surrounding the plant. Remove the top two inches of potting soil and replace it with fresh. Finally, spray the plants. One of the best mealybug sprays is a 10-25% solution of isopropyl alcohol. Fill a spray bottle with 1/4 cup of isopropyl alcohol and 2/4 cup water and shake to combine. When treating plants with this solution, keep them out of direct sunlight because it can cause leaf burn in the bright sun. You can also treat plants with insecticidal soap or Neem oil. Repeat spray treatments until plants are mealybug-free.
Another method to stop crawlers is to surround infected areas with double-sided tape traps. As the crawlers hatch and begin crawling, they will get stuck on the tape and die. You can also surround plant bases and pot edges with double-sided tape to keep crawlers from moving beyond an infected plant.
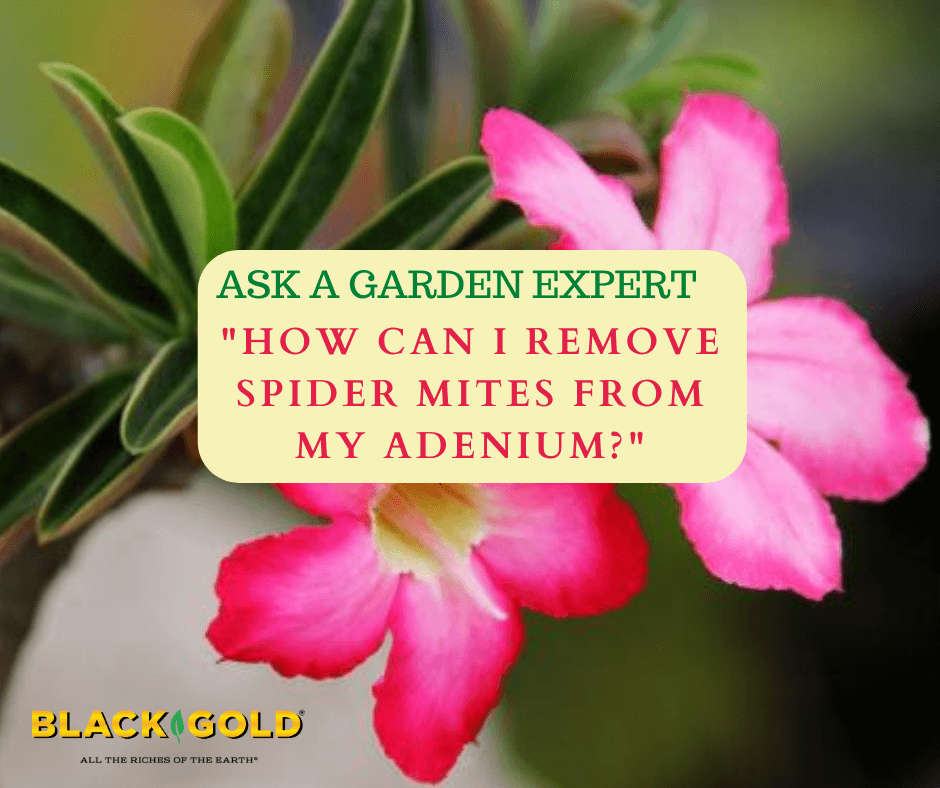
“Help! My 4-year-old Adenium has always thrived. Last year it put out 6 seed pods and this year the blooms were massive overpowering any green. When the blooms finally stopped all the older leaves turned yellow and dropped. But new ones were coming out. Now the new ones are all curling and while green on the top the bottoms have brown spots. It’s in the sun all day long and while we had a wet spring (before the blooms) the summer has been dry and hot. When the leaves started turning yellow (over a month ago) I noticed spider mites so I sprayed them with an insecticide soap for 2 weeks and they are gone but now the leaves are all curled and brown spots on the underside only. How can I save this plant?” Question from Julie of McKinney Texas
Answer: The good thing is the succulents like Adeniums have lots of stored energy, so once you totally rid them of the spider mites, they will bounce back quickly. To truly eradicate the mites, you will have to spray more than just the foliage.
How to Treat Plants for Spider Mites
Here are the steps I would take to completely remove spider mites from an Adenium.
Remove damaged, yellowing leaves.
Wipe down the base of the plant and stems.
Wipe down the pot.
Remove the top 2 inches of potting mix, and replace it with a quality cactus mix, such as Black Gold Cactus Mix.
Fertilize with a water-soluble fertilizer formulated for flowering plants.
Spray all plant parts with insecticidal soap or Neem oil.
The white-paper test is my favorite way to further test for mites. Take a clean piece of white paper, hold it beneath the leaves, then tap the leaves onto the paper. If you have mites, tiny specs will fall, and eventually, they will start crawling around. These are spider mites. Continue to do the tap test and gently wipe down leaves and stems and spray them until healthy new growth appears and remains undamaged. It may take time, but you can overcome spider mites.
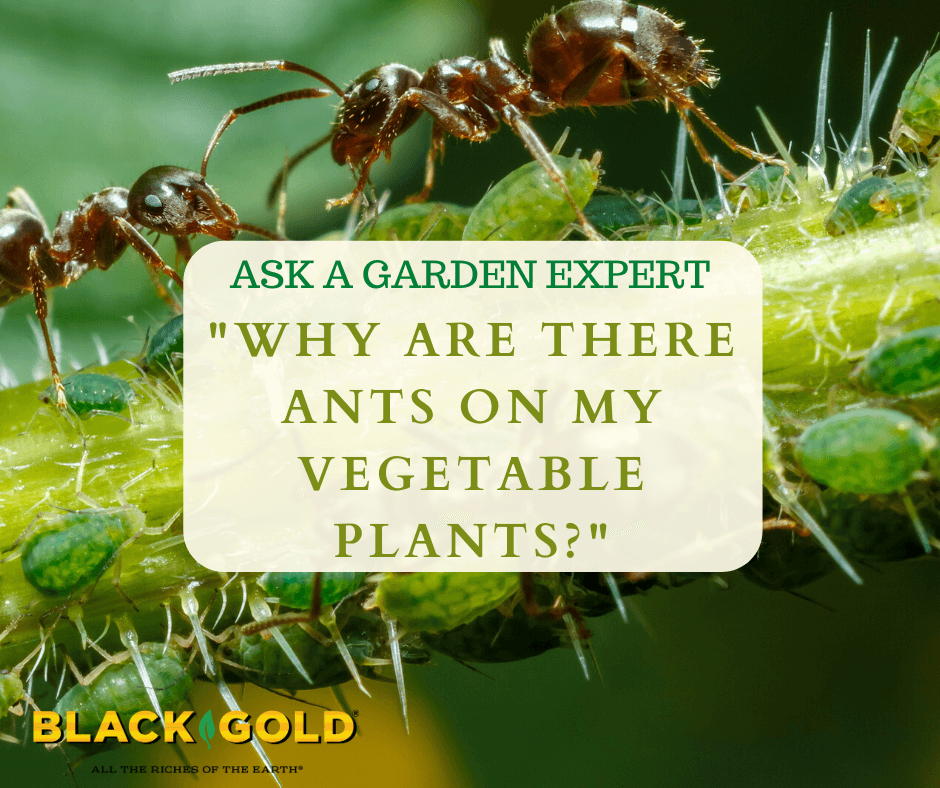
“I have ants in my garden, and they are eating my veggie plants. What is the best product to use on a vegetable garden that is safe for us to eat vegetables from?” Question from Jill of Pleasant Prairie, Wisconsin
Answer: Ants are not vegetable garden pests. They may be attracted to the sweet juices of a split tomato or strawberry or drink the nectar from a sweet flower, but their peskiness ends there. But, that does not mean they aren’t a sign of a garden problem. Ants herd aphids like cattle so they can eat the sweet honeydew they produce, and aphids are a very obnoxious plant pest. If you get rid of the aphids, the ants will leave, and you don’t even need to use heavy chemicals.
Managing Aphids in the Garden
Aphids are delicate pests and quite easy to remove, believe it or not. When I have an infestation, I use these four methods of removal.
1. Spray them off with a sharp stream from the hose. This actually removes them fast and will kill quite a few. It’s a good first step for management.
2. Prune off really badly infested flowers or stems and spray the others with lightly soapy water (fill a spray bottle with water and add just a drop of dishwashing liquid). This will remove damaged parts of the plant and greatly reduce aphid populations.
3. If the two previous steps don’t get rid of your aphids, spray plants with OMRI Listed insecticidal soap to tackle any lingerers. The mild product is approved for organic gardening and works. If you are worried about it harming other insects, you can rinse off plants a few hours after application.
4. Nurture ladybugs and other beneficial insects that consume aphids. Refrain from using any harsh pesticides, and the beneficials will come. (Click here to read more about beneficial insects.)
I hope these tips help you better manage your aphid problems. They are annoying insects, but they won’t stand a chance if you continue with these methods.
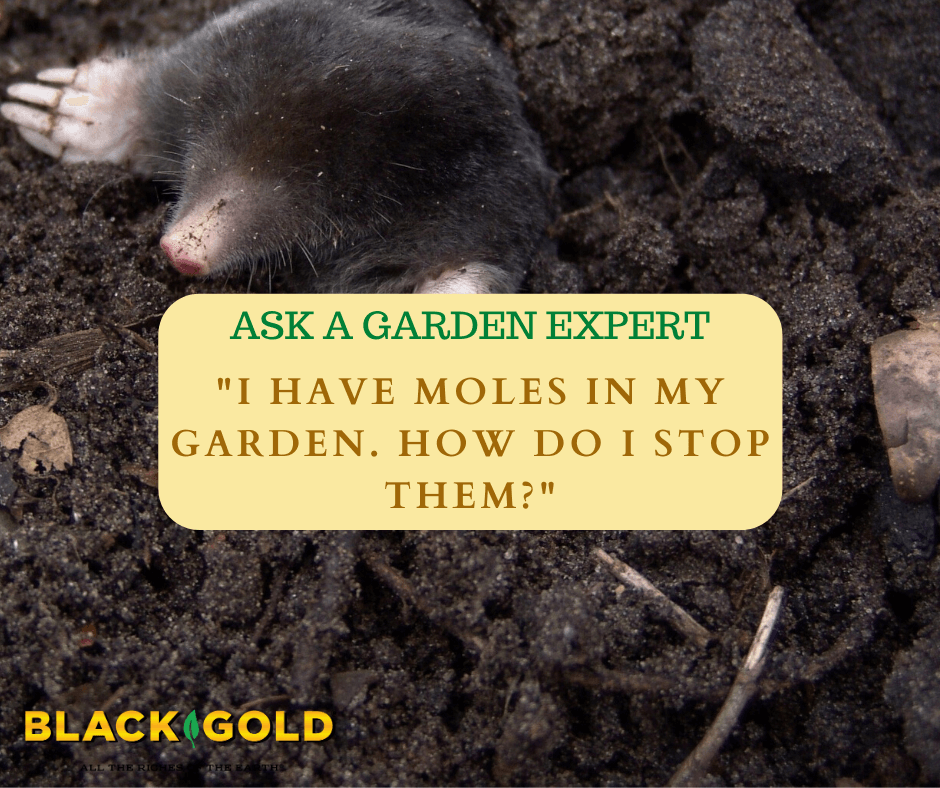
When a gardener says, “I have moles in my garden.” I always let them know that moles do not harm garden plants.
“I have moles in my garden. How do I stop moles from eating the roots of my flowers. I have tried everything, and they still keep coming in my yard!” Question from Lisa of Agawam, Massachusetts
Answer: Moles in the garden can be confusing. Here’s why. They are carnivores that just feed on grubs, worms, and other underground invertebrates. In fact, they consume grubs that feed on the roots of perennials, so they’re actually beneficial. The problem is that other creatures, like voles and fieldmice, will find the holes and use them to access tasty roots below.
Some mole repellants do work, and there are quite a few on the market. Castor oil (Nature’s Mace Mole Repellant) seems to be the favorite. Bonide Mole and Vole Repellent Granules also get high marks. Some garden flowers are also supposed to repel moles. These include daffodils, strong-smelling alliums, easy-to-grow marigolds, and fritillarias, which have bulbs that smell like skunk.
Sonic mole repellers are another option, but from what I have read, they are only somewhat reliable but worth a try if you have a severe mole problem.
Mole tunnels and mounds are annoying to step on, but they aerate the lawn and are easily dug out, raked, and/or pushed down. Try several of these mole-repelling approaches, and see if they put a damper on your problem.
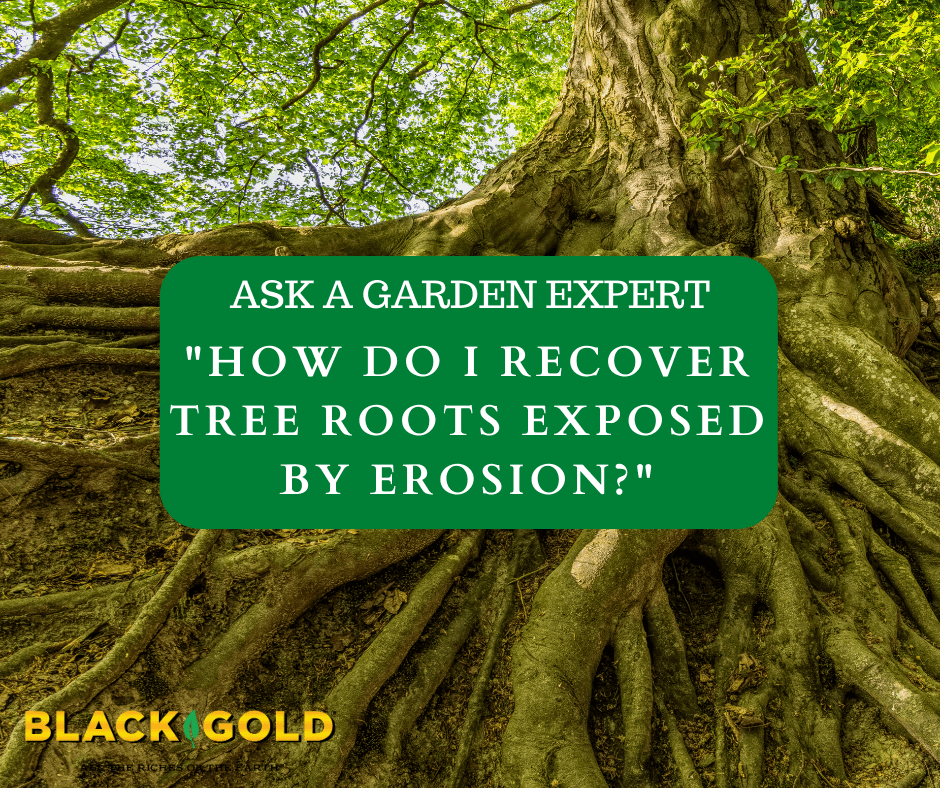
“I have tree roots that have been exposed near the ground because of soil erosion. Should I try to recover with soil or leave it be? Will it kill the tree? I think they are the roots of a very large willow oak. There is also a very large poplar tree close by, too.” Question from Richard of Winston Salem, North Carolina
Answer: Extensive root exposure can be damaging to trees, so I recommend restoring the eroded area. Exposed, large woody roots are not a problem, but the broad exposure of smaller feeder roots can cause trouble and indicates a severe erosion problem.
Different trees can tolerate different levels of root-soil cover. Willow oak (Quercus phellos) has a shallow root zone and should not be covered with a thick layer of soil. Two to three inches of soil over the layer of smaller roots should be enough. Poplars have large, extensive root systems and are less prone to damage from high levels of erosion. Still, erosion is always troublesome in the landscape and should be stopped. It can also cause tree instability and make them far more prone to falling during storms.
Here are my recommendations for managing your erosion and tree-root exposure problem.
Identify and attempt to stop the source of erosion. If you can identify the water source, you can often divert the water. Your method of diversion would depend on the source. Feel free to provide more information regarding the source, so I can provide specific solutions.
Cover the exposed feeder roots with at least 2 to 3 inches of topsoil and press it down. We also recommend mixing a good organic amendment into the topsoil, such as Black Gold Canadian Sphagnum Peat Moss.
Apply a straw mat or burlap erosion mat to keep the soil in place.
Plant plugs of groundcover for dry shade between the matting. A good groundcover layer will hold the soil in place as it becomes established (list below).
Keep the plugs watered and cared for until they begin to really grow and spread–around two to three months.
There are lots of good groundcovers for dry shade that reduce or stop erosion. These include creeping wire vine (Muehlenbeckia axillaris ‘Nana’, light shade, Zones 6-10), evergreen vinca (Vinca minor, shade, Zones 4-9), dwarf mondo grass (Ophiopogon japonicus ‘Nana’, shade, Zones 6-11), golden sweet flag (Acorus gramineus ‘Ogon’, shade to part shade, Zones 5-11), and the evergreen creeping plum yew (Cephalotaxus harringtonia ‘Prostrata’, Zones 6-9), which I highly recommend.
If you like native groundcovers, consider wild ginger (Asarum canadense, shade, Zones 3-8), Allegheny spurge (Pachysandra procumbens, shade, Zones 4-9), and the pretty green-and-gold (Chrysogonum virginianum, part sun to shade, Zones 5-8).
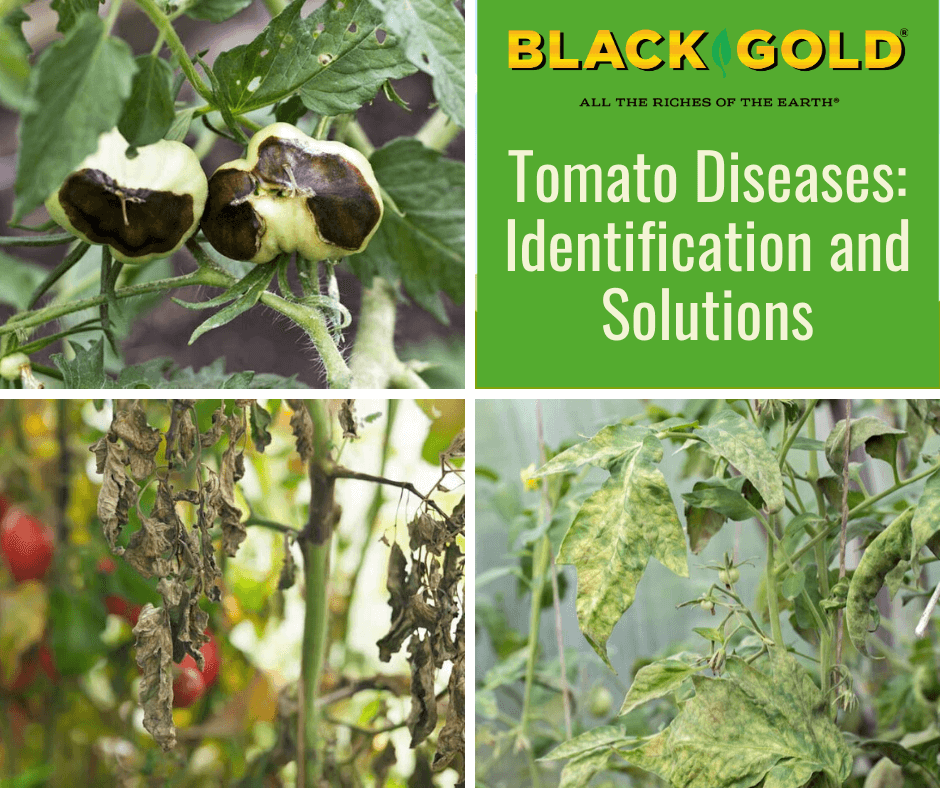
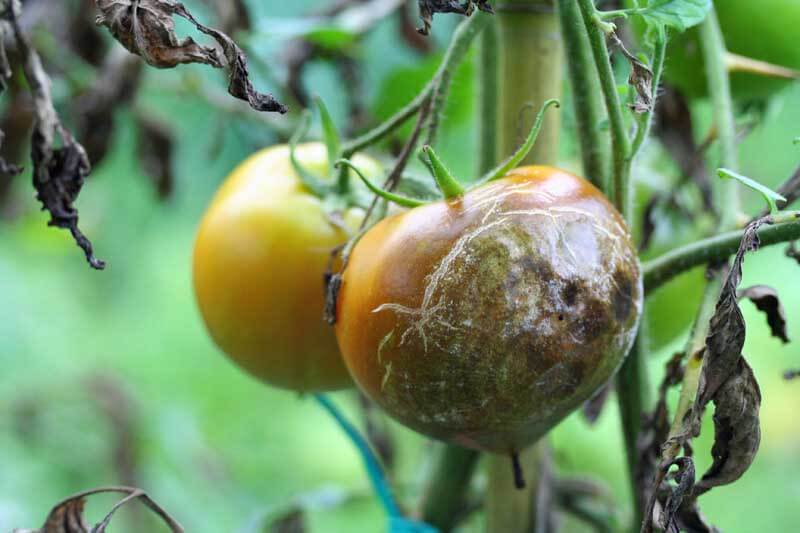
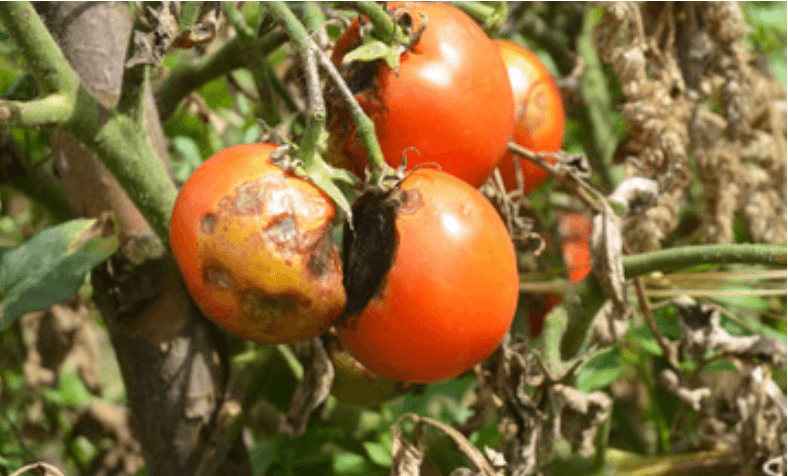
From upper left: blossom end rot, late blight, and tobacco mosaic virus.
Tomatoes are the roses of vegetables–everything attacks them. So, gardeners can count on experiencing any number of tomato diseases in their growing experience. It pays to grow disease-resistant tomatoes, but lots of the best heirlooms don’t fall into this category. That’s why tomato growers need to be armed with knowledge and IPM (integrated pest management) tools to keep harvests high. Learning how to spot the most common tomato diseases is a start.
Plant diseases are typically either fungal, bacterial, or viral. Some cause quick plant death, but others can be managed–allowing gardeners to eke out a harvest until the end of the season. But avoidance is the best starting point.
The four keys to avoiding tomato diseases are:
Start with healthy plants.
Choose a disease-resistant variety.
Plant them in disease-free soil.
Give them the best care.
Starting with healthy plants, a healthy environment, and keeping plants stress-free will help keep them disease-free, but pests or diseased weeds, or even wind can still bring disease into the garden. People can, too. Gardeners need to stay watchful.
If you have never experienced serious tomato diseases in your garden, you can feel confident planting heirlooms or family favorites with less resistance. But, always choose disease-resistant varieties if you have experienced diseases in the recent past. You might also consider growing tomatoes in containers to ensure that soil-borne diseases are not a problem. (Click here to learn how to grow tomatoes in containers.)
Top Disease-Resistant Tomatoes
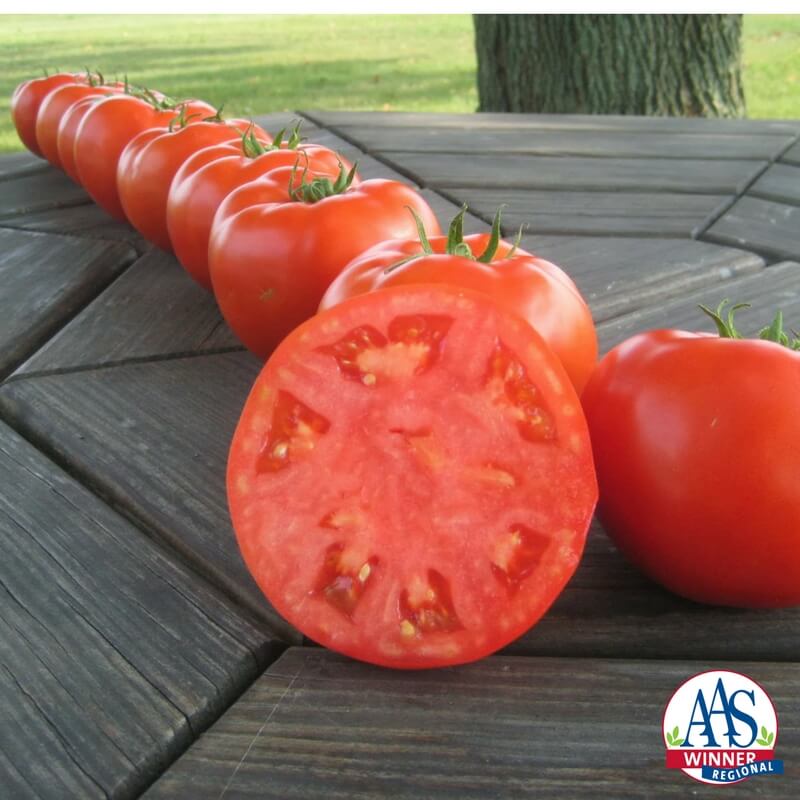
Mountain Merit is an All-America Selections Winner that resists five common diseases. (Image care of AAS)
Before reading the depressing litany of common tomato diseases, feel encouraged by the power of super disease-resistant tomatoes. Plant breeders constantly work hard to create new and wonderful tomato varieties able to beat diseases and produce high yields of delicious tomatoes. When identifying a disease-resistant tomato, refer to the Tomato Disease Resistance Code list below to better understand the code system. Here is an example of five good, tough tomatoes that resist multiple diseases.
‘Galahad’ (F3, GLS, LB, N, TSWV): The new, 2020 All-America Selections Winner ‘Galahad’ is a big, red, slicing tomato with excellent flavor that resists five diseases!
‘Granadero’ (F2, PM, TMV, V, N, TSWV): Sauce tomato lovers should try this super disease-resistant paste tomato with uniform, red, well-flavored fruits. It is also an AAS award winner.
‘Mountain Merit‘ (F3, LB, N, TSWV, V): Lots of large, red tomatoes with good, sweet flavor are produced on this compact bush tomato.
‘Toronjina’ (F2, LM, TMV): Highly disease-resistant plants produce lots of sweet and tart, orange cherry tomatoes on shorter indeterminate vines.
‘Sakura‘ (F2, LM, TMV, N): Red cherry tomatoes are produced early and in abundance on this long-vined, highly disease-resistant tomato.
Good cultural practices will also help tomatoes fight disease. Plant them in very well-drained, aerated, raised beds amended with Black Gold Garden Soil, and keep plants strong and vigorous by feeding them with a tomato & vegetable fertilizer. It also helps to encourage air-flow by spacing plants well (3 to 4 feet apart, or wide enough to walk around) and keeping them pruned (click here for a tomato pruning tutorial). Drip irrigation helps keep plants drier up top, which can reduce the spread of diseases. Remove and discard infected plants as you see them, and at the end of the season, clean all plant material from your vegetable garden for good measure. Then at planting time, mulch tomatoes with a layer of straw or Black Gold Garden Compost Blend to help keep disease-carrying weeds at bay. (Click here for more tips on how to grow robust tomato plants from seed to harvest.)
Tomato Disease Resistance Codes
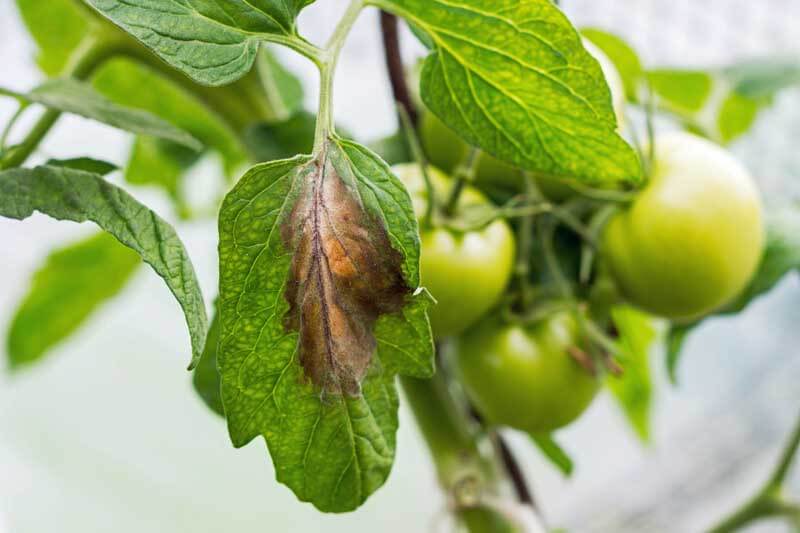
Tomato late blight (Phytophthora infestans) damages foliage, causes stem cankers, and destroys fruits.
When seeking out a disease-resistant tomato, you will see these codes indicating resistance. The most common diseases are covered in this piece. (Adapted from Johnny’s Seeds Growers’ Library)
HR = High Resistance IR = Intermediate Resistance
A | Anthracnose | Fungus
AS | Alternaria Stem Canker | Fungus | Alternaria alternata f. sp. lycopersici
V | Verticillium Wilt | Fungus | Verticillium albo–atrum
Tomato Foliage Diseases
These are the first tomato diseases that you will see and experience. All leaf spot diseases start from the bottom up–beginning with older leaves. Here are the top 5 most common types that you will see.
Bacterial Leaf Spot
Bacterial leaf spots are small, brown, and dry.
The common leaf spot (Xanthomonas spp.) results in spots that are small, dry, brown, and often surrounded by yellow halos. It disease intensifies and spreads further with excess rain, overhead watering, and when plants are planted too close together. As it progresses, it can also cause spotting on fruits and cankers on stems.
You cannot get rid of bacterial leaf spot once you have it, but you can slow its damage. To reduce its proliferation, increase airflow by pruning off unnecessary and badly infected branches. Keep it from taking hold in the first place by spacing plants well to encourage airflow. Cleaning up your garden yearly is also essential. The disease is maintained from year to year on infected crops and weeds in the tomato family.
Early Blight and Late Blight
Late blighted leaves show large brown blotches.
These two blights are the most common diseases of tomatoes.
Early Blight (Alternaria tomatophila and Alternaria solani): The leaf spots are pretty distinctive; circular lesions appear, reaching up to a half an inch in diameter with dark concentric circles inside. Early blight can occur at the seedling stage by causing seedling rot (damping-off). At later stages, it causes leaf blight on older leaves, stem cankers, and black fruit rot.
Late Blight (Phytophthora infestans): The deadly disease first causes large brown leaf spots on older leaves, followed by stem lesions, and discolored, oily patches on fruits. It’s the noxious disease that caused the Irish Potato Famine, which is a testament to its severity. It kills tomatoes more slowly, but it destroys fruits and will eventually kill whole plants. Tomatoes subjected to drought stress will die more quickly.
Late blight gives diseased tomatoes an ugly oily look.
Both early and late blight diseases are controlled by avoidance, cleanliness, and rotation. The blights survive and overwinter on infected plant material or in the soil. To prevent tomato blight, plant only healthy plants that you have grown from seed or purchased from a reliable grower. Also, plant only blight-resistant varieties (check out this list from Cornell University). If you find diseased plants, immediately remove them from the garden, and keep them from the compost bin. Bag and toss them instead. Keep beds weeded to remove weedy tomato relatives that can get blight, like nightshade and ground cherry. Next, rotate crops on a three-year cycle to help keep soil disease-free where you experienced blight. That means planting your tomatoes in a new spot each year and allowing three years to pass before planting them in the same spot. The soil should be rid of the disease after this time.
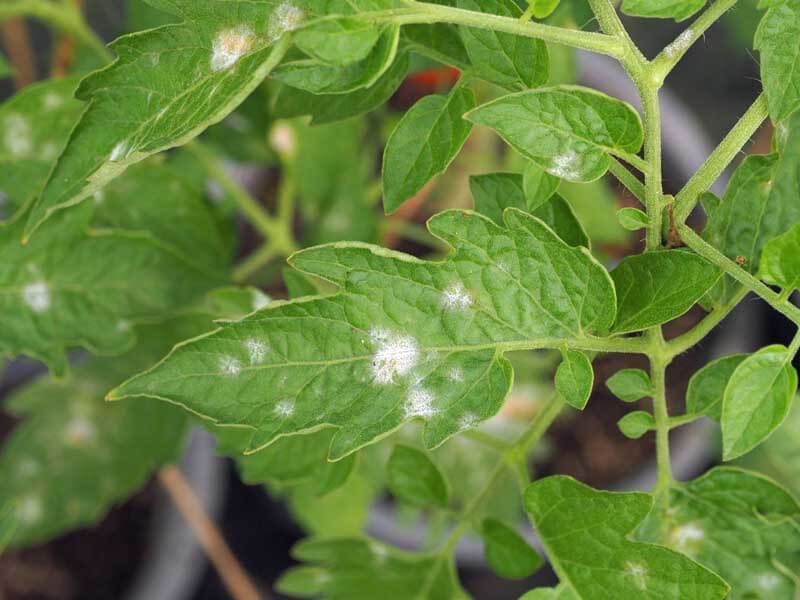
Powdery Mildew
Powdery mildew starts as white, dusty spots on leaves.
Powdery mildew (Erysiphales fungi): The easy-to-identify powdery mildew is a common fungal infection that attacks leaves, causing white, powdery looking surfaces and blotches, particularly from mid to late summer. It is not deadly, but it will cause plants to decline more quickly and put a stop to good fruit production.
To stop powdery mildew, give plants plenty of sun, water, and airflow. Prune off diseased stems as you see them (clean your pruners well after cutting any diseased plant). Finally, apply the organic fungicide Green Cure, which quickly stops powdery mildew. Apply it, at first sight, to stop the disease in its tracks.
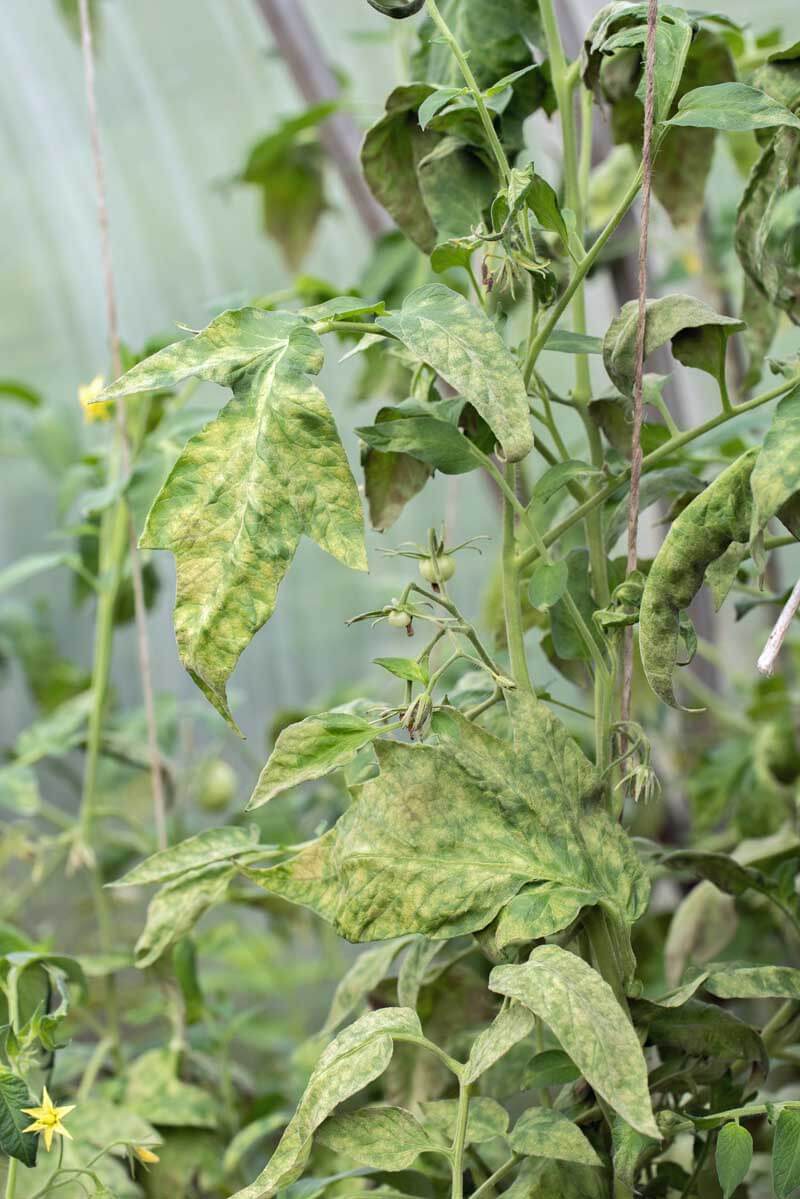
Tobacco Mosaic Virus
Tobacco mosaic virus causes leaves to become disfigured and discolored.
When tomatoes contract tobacco mosaic virus, they develop yellow mosaic patterns across the foliage and leaves often become elongated and almost ferny. Once you have it, or any other virus, the only thing that you can do is quickly remove and dispose of the plants and then rotate your crops. The best means of control is prevention. Grow resistant tomatoes, and make sure you buy seed or purchase plants that are certified to be disease-free.
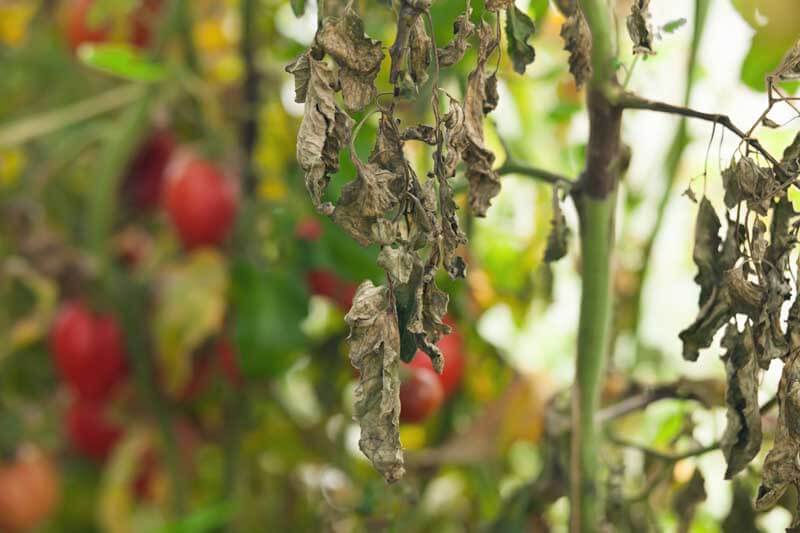
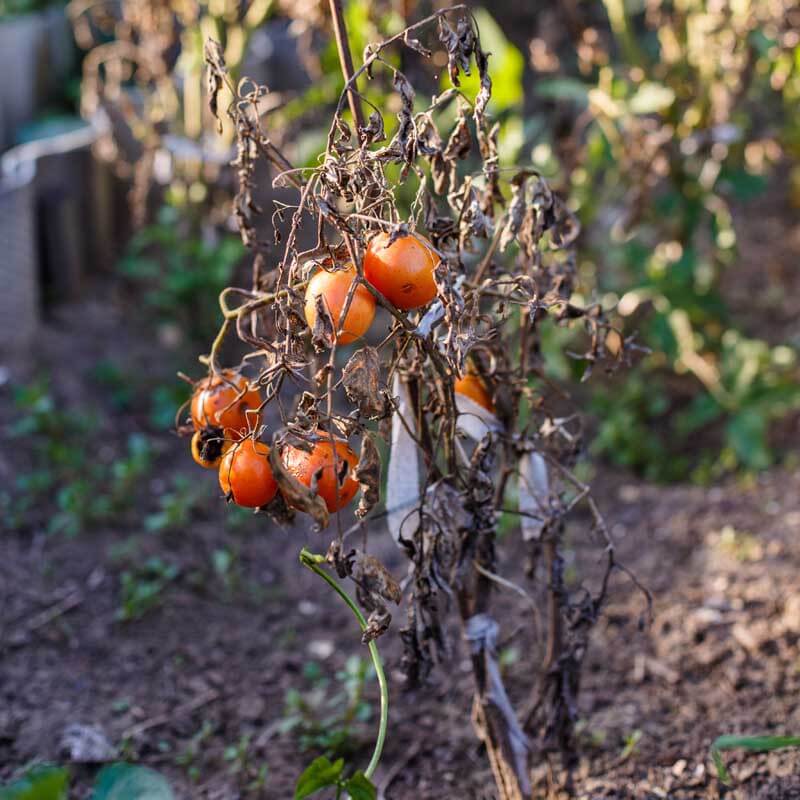
Tomato Wilts
Fruit wilts can kill susceptible plants quickly.
These affect the whole plant causing overall wilt and decline. Both diseases exist in the soil. The best means of beating them is to plant resistant varieties. When susceptible plants become infected, it’s a death sentence. Plants must be removed from the garden.
Fusarium Wilt (F)
Fusarium wilt (Fusarium oxysporum sp. lycopersici) is the most common tomato wilt. At its first signs, older leaves wilt, turn yellow, then brown, and then fall. The stunted plants will eventually die. To beat it, look for resistant varieties, discard diseased plant material, and rotate on a three-year cycle.
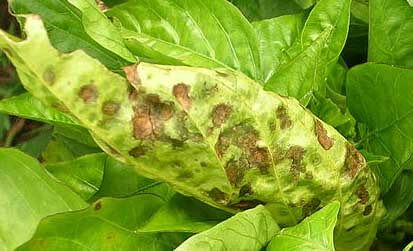
Verticillium Wilt (V)
Verticillium wilt (Verticillium albo–atrum) is less common than fusarium wilt and is typically seen late in the season when soils are cooler. Its first symptoms are v-shaped blotches on the lower leaves, followed by browning veins and blotches. Symptoms then spread upwards, causing wilting and leaf damage. If you were to cut into the stem, the internal veins would be brown and discolored from the ground up to 12 inches. Treat it as you would fusarium wilt.
Tomato Fruit Diseases
Aside from the ugly oily patches caused by late blight (above) and the common black-based fruits caused by blossom end rot or irregular bases caused by cat-facing (see below), most other tomato fruit problems are fungal or bacterial.
Anthracnose Tomato Spot (A)
Anthracnose spot has damaged this ripe tomato.
Anthracnose tomato spot is a fungal disease that appears as sunken bull’s-eye marks on ripe fruits. Several steps can be taken to reduce the disease on developing fruit. Refrain from overwatering, which will reduce moisture on the leaves and the spread of the disease. Remove and dispose of damaged fruit, and prune to increase airflow can keep fruits from developing this disease on the vine.
Various Fruit Rots
Various fruit spots and rots can attack fruits.
There is a whole suite of fungal and other fruit rots that can damage good, ripe fruit on the vine. You can always identify a fungal spot on fruit by its bull’s-eye appearance. The center of the eye is where the fungal spore took hold, and the radiating circles show its progressive cycle of infection. The treatment of these diseases is the same as for Anthracnose tomato spot. Good airflow is always key in keeping fungal diseases at bay.
Bacterial Spot and Bacterial Canker
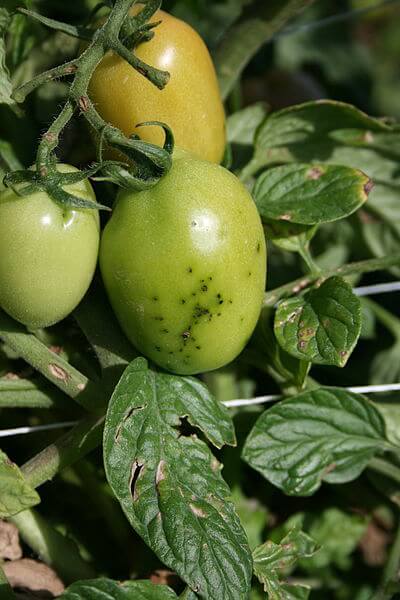
This shows bacterial speck on developing fruit. (Image by Chris Smart)
Some bacterial spot diseases of leaves can impact fruits. Bacterial fruit spots are smaller than those caused by fungal diseases, brown or black towards the center, and often surrounded by rings of yellow or green. In the case of bacterial canker, the spots are ringed in white with a green or dark-brown center. Sometimes the spots are raised. When fruits have bacterial spots, this means that it is time to remove and dispose of the whole plant.
Tomato Disorders
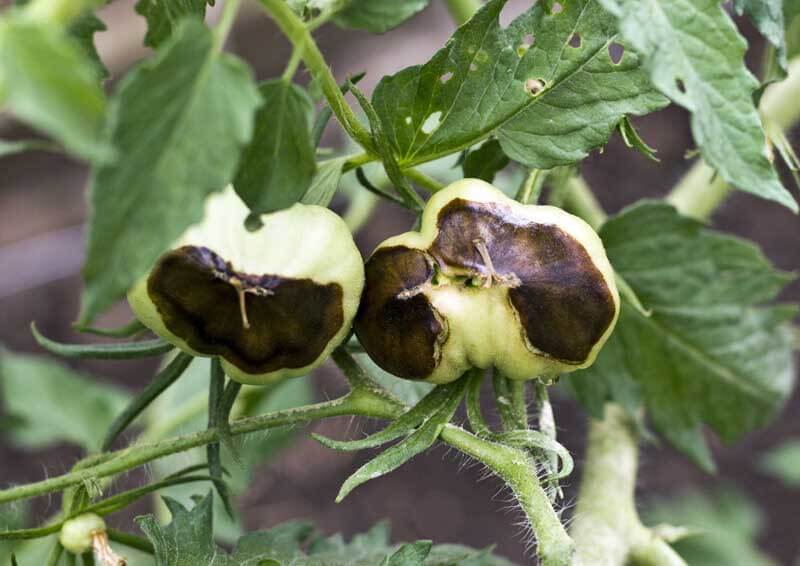
Blossom end rot is a common fruit disorder caused by a calcium deficiency.
Disorders often look like diseases, but they are caused by either nutrient deficiencies or adverse weather conditions rather than disease-causing fungi, bacteria, or viruses. Even better, they can be cured.
Fruit blossom end rot (caused by calcium deficiency), splitting or cracking (caused by excessive water or temperature fluctuations), fruit toughness, cat-facing, and reduced productivity (caused by cool temperatures) are the most common disorders of tomato fruit. Leaves with nutrient deficiencies can show all manner of yellowing or poor pigmentation, but if you feed your tomatoes well with a tomato fertilizer all season, your plants shouldn’t suffer any nutrient deficiencies (unless you have soil with severely acid or basic soil pH). Problem solved. Generally, if you plant your tomatoes in warm conditions, feed and care for them well, you can avoid most tomato disorders.
Can’t find your tomato problem here? Then ask our garden experts on our Ask a Garden Expert page and upload a photo of your plant! We will help you identify the problem and gprovide solutions.
“Chickweed is on the attack! Help!” Question from Judy of Louisville, Mississippi
Answer: Winterweeds like chickweed (Stellaria spp.) are such a pain because they sprout and take over our gardens while we are enjoying a respite from outdoor gardening. Sneaky! You will be glad to learn that they are easy to tackle. Here are five good ways to wage war on chickweed.
Mulch beds in fall with a 2-3-inch layer of composted bark mulch, mushroom soil, or straight compost, like Black Gold Garden Compost Blend. Chickweed sprouts along the soil surface on warm winter days but is smothered by compost or mulch, so you can just apply it and smile.
Apply an organic pre-emergent, like corn gluten, in fall to keep weed seeds from sprouting. Pre-emergents stop weed seeds from germinating.
Hoe and scratch up those seedlings in winter as soon as they begin to sprout! If the soil is warm enough to hoe, get out there and tackle chickweed at the seedling stage. It’s easier to manage when small.
Till them under before they set seed. If plants have had time to become large, till them under, dig them up, or weed them out by hand before they set seed.
Mulch again in spring to keep that weed seed layer covered and in check.