Orchids will add a touch of glamour to those winter blue periods when you start counting the days until spring just for something to do. Most people have had only a passing acquaintance with an orchid, possibly as part of a corsage worn by you or your date to the high school prom or maybe a wedding party.
Their exotic coloration and growth habits add a whole new level of cool to the household. And orchids are cosmopolitan. They can be found in most terrestrial habitats of the world except glaciers. But the tropics harbor most of the known species (28,000+). Most tropical orchid species are epiphytes. That is they grow on tall plants like trees and vines to gain access to sunlight, a scarce commodity in a dense rainforest. But they do not get water or nutrients from them. Orchids from higher latitudes are rooted in soil. And all orchids are often incredibly picky in their habitat preferences. On top of that, European and American horticulturists have produced some 1,000,000 hybrids and cultivars since the 19th Century.
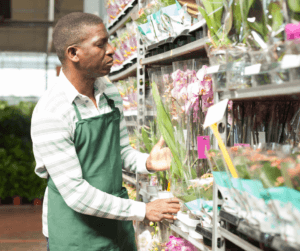
I suggest that you buy one or more orchids from a reputable dealer and raise them indoors. It will be good for the merchants, good for the orchids, and good for you as you embark on a brand new hobby. Everybody wins!
Popular Orchids to Buy
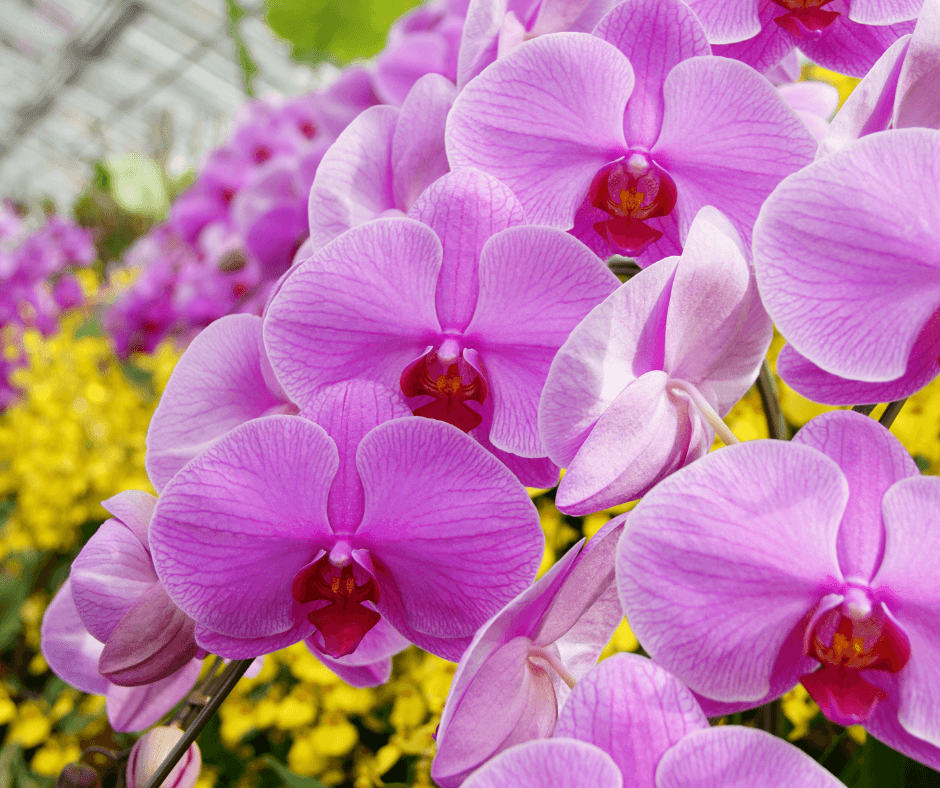
Phalaenopsis (foreground) are the most available orchid at stores in addition to Oncidium (background).
At this point, we have to dive into the practical aspects of orchids and orchid care. Unless you live in or near a big population center abounding with specialty stores, you should order online from a reputable dealer. I recommend going for a big show and buying tropical epiphytes. They are more glamorous and rewarding to grow. Temperate zone natives tend to do better outdoors where they get picked by the neighbor’s kids or chomped by chipmunks or mice.
Best bets for purchase include corsage orchids (Cattelya spp.), boat orchid (Cymbidium spp.), moth orchid (Phalaenopsis spp.), tropical slipper orchids, (Paphiopedilum spp.) and dancing ladies (Oncidium spp.). Epiphytes such as these may be potted in wood chips or secured to a piece of tree branch or piece of bark that mimics their forest habitat. Epiphytic aerial roots collect water and nutrients from air, rainwater, and organic debris that collects around the plant. Despite the multiplicity of exotic forms, patterns, and colors, most orchids have no discernible scent.
You should buy mature plants that have blooms and/or live buds. They should be shipped in 4 or 5-inch pots on a wood chip substrate. Barring a shipping disaster they should provide you with instant orchids.
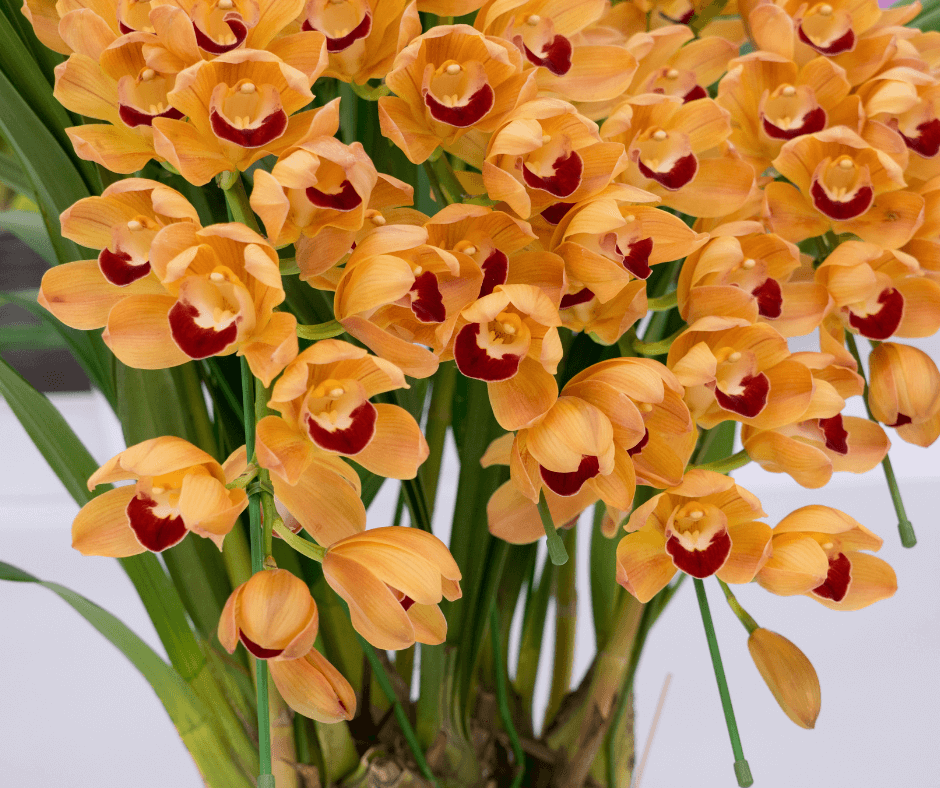
Cymbidium orchids come in shades of ivory, green, orange, pink, purple, and yellow.
Requirements for Home Orchid Care:
Position your plants on a bright windowsill facing east or west.
Most orchids require water once a week. When the orchid arrives, water thoroughly, then routinely as indicated above thereafter. Do not disturb the planting medium the plant comes in the first year or those first buds/flowers will not bloom!
Unless stated otherwise, Indoor air temperature should be no less than 60 degrees F. at night and no more than 90 degrees F. during the day.
Unless stated otherwise, Indoor relative humidity should range from 40% to 70%’
Feed weekly with a liquid fertilizer designed for orchids. We recommend a 10-10-10 formulation
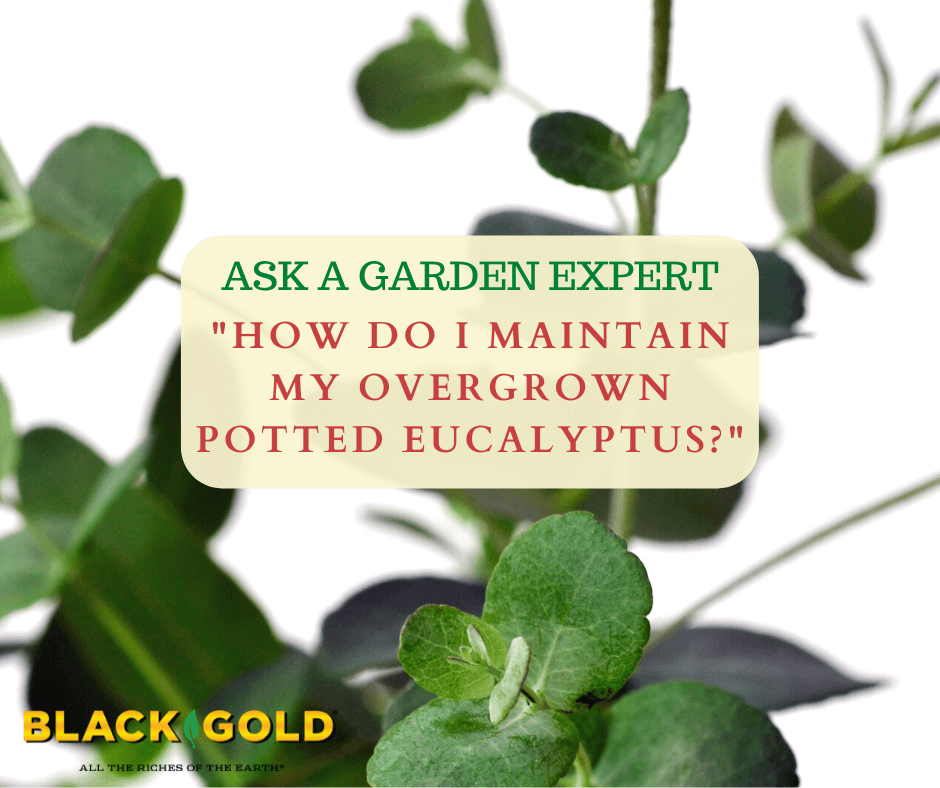
“Our Eucalyptus tree is at least 25 feet tall with no sign of slowing down. Could we lovingly remove it to maybe a better area? It is cold outside, and she just grows in all weather and doesn’t intend to be stopped. She is as high as our two-story home, and can’t support her upper branches.” Question from Philip of Lancaster, Alabama
Dear Philip,
You have two options. First, you can try finding a beautiful spot where it can be planted. It should be a beautiful tree if it will survive in your climate, and it sounds as though it will. Many eucalypts will grow well down South. Clearly yours is one. In general, they are tolerant of many different types of soil as long as they drain well. Full sun is a requirement.
Another option is to cut it back severely to encourage shrubby growth to reduce its size and upgrade its pot. This will allow it to remain as a container plant for a while longer. We recommend a very large pot because these trees need space. Fill the pot with a quality, fast-draining mix, such as Black Gold Natural & Organic Garden Soil or Black Gold Natural & Organic Potting Mix combined with quality topsoil at a 1:1 ratio. Cut back the dominant branches to the base of the trunk to lighten the branch load, and cut medium branches back by half. The best time to prune Eucalyptus is in the summer. They will drip some sap, but they heal faster when it is warm. I hope that these tips help!
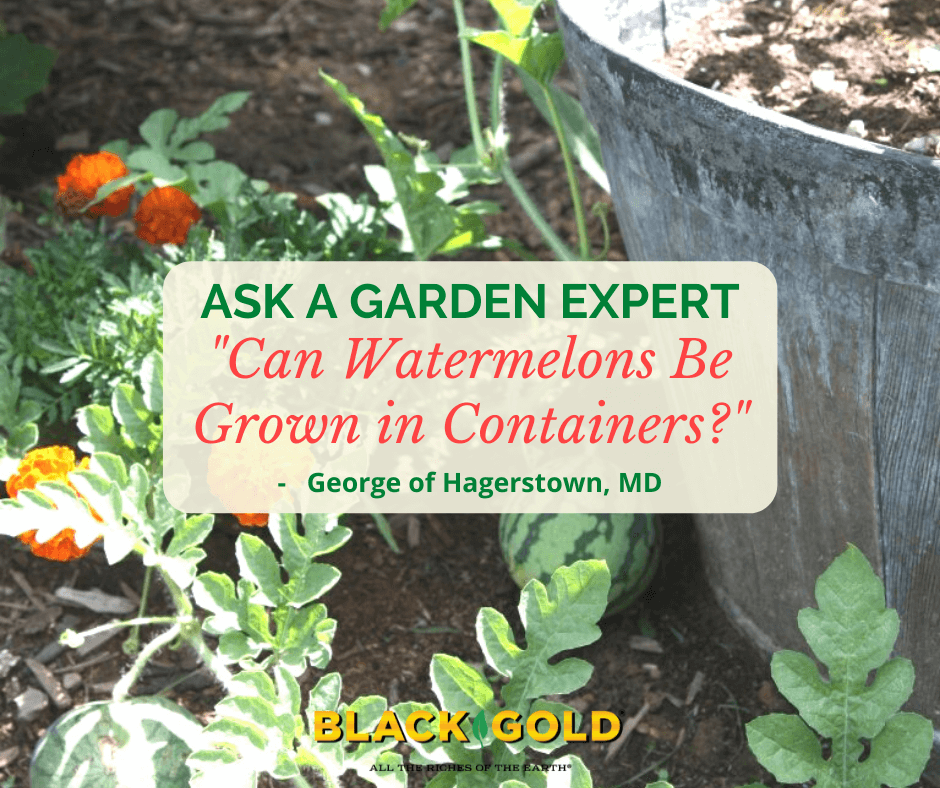
Here is a watermelon that I grew in a pot a couple of years ago.
“Can watermelon vines be grown in containers?” Question from George of Hagerstown, MD
Answer: Watermelons can be grown in large containers if you choose a compact variety. Here are my recommendations regarding potted watermelon culture.
Growing Potted Watermelons
First, choose a more compact, short-vine watermelon variety suited for container growing. ‘Cal Sweet Bush‘, a 2019 AAS award winner, has excellent melons and vines that do not take over, and ‘Bush Sugar Baby‘ is another small-vined type with tasty melons. Next, choose a large container that’s between 18 to 24 inches. There must be holes at the bottom for drainage. Plastic or glazed containers hold water better in the heat of summer. Fill the pot with quality, porous potting soil that holds water well. I would choose Black Gold Natural & Organic Raised Bed & Potting Mix. Place the pot in a spot where it gets full sun, and the vining stems can hang down and spread a little. Patios or open garden areas work well for large potted vegetables like this.
Plant one or two watermelons in the pot in spring after the threat of frost has passed. Keep the soil moist. When the vines have reached a good size in summer, water daily in the absence of rain. Fertilizer well from the beginning. A good slow-release fertilizer formulated for vegetables is ideal. Be sure to follow the manufacturer’s application instructions.
Melons should start to appear by late July or August.
“I’m in a complex where we can only plant in containers outside…and there’s a lot of shade to complicate matters…any idea for some plants that would do well contained without a lot of sun? Thank you…also someone told me the ivy I did plant in a pot can be brought inside for a houseplant when it gets too cold outside true or not?” Question from Kim of Orangeburg, New York
Answer: There are lots and lots of wonderful annuals that thrive in shady locations. The perennial vine, English Ivy (Hedera helix), can grow in pots inside or out, and it will take shade, but there are many better options for shade containers. Here are some of my favorite shade-loving annual garden flowers for summer potted gardens.
Annuals for Shady Container Gardens
Begonias: You can’t go wrong with begonias, as long as you provide them with good moisture, especially through the hottest summer days. Two showy high performers are Bossa Nova®RedBegonia and Illumination®Golden Picotee tuberous begonia. Classic wax begonias that you can purchase in flats at every garden center are also inexpensive and excellent.
Classic Impatiens (Impatiens walleriana): Pick up a flat of colorful impatiens at your favorite garden center, and plant them in shady pots for summer-long color. (Impatiens are also easy to start from seed! Click here to learn more.)
New Guinea Impatiens (Impatiens hybrids): These impatiens are generally taller and tolerant of a little more sun than classic impatiens. the tangerine-orange Infinity®Orange is especially pretty as is the crimson-pink and pale pink Infinity®Blushing Crimson.
Torenia (Torenia hybrids): You cannot go wrong with any of the spreading torenia in the Summer Wave Series. They spread and bloom all summer long. Summer Wave®Large Blueis really lovely.
Large pots and vertical gardens allow one to grow more in a small space.
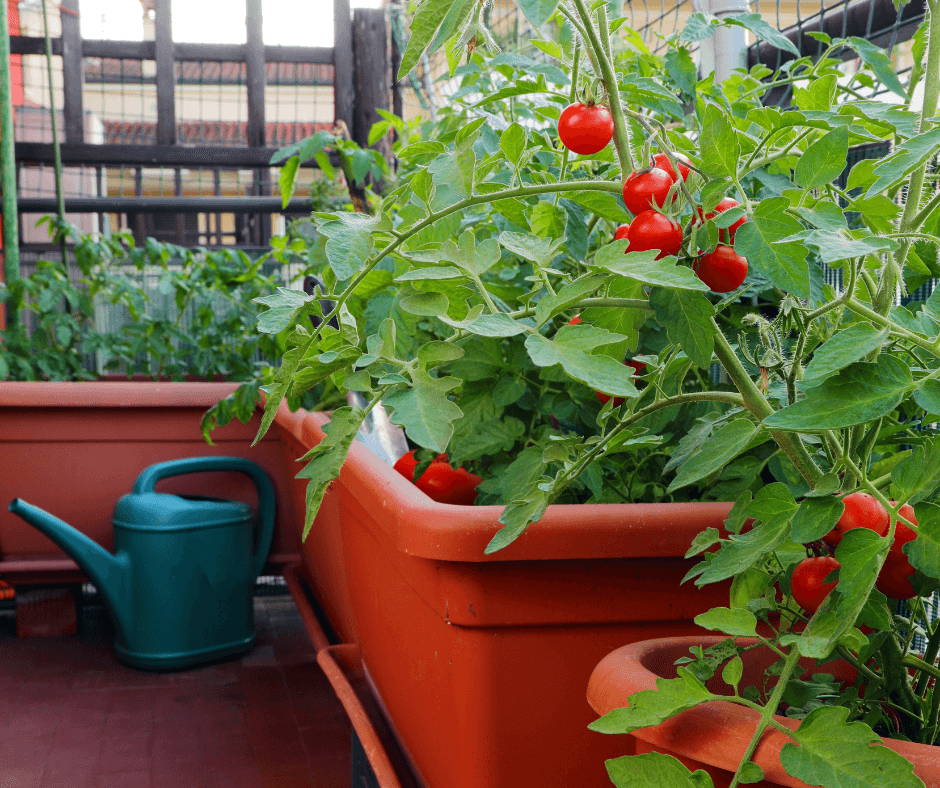
Vegetable gardening is on the rise. Gardeners of all experience levels and backgrounds are growing their own food, whether they live in urban environments or spacious suburbs and countrysides. Those living where space is limited have extra challenges, which means that they must garden differently to produce enough food to enjoy all season. Here are some of the ways that we have used to grow fresh food where space and sunshine are at a premium.
Plant in Spacious Pots
Spacious, deep containers let gardeners grow more in small spaces, like this balcony garden.
If you have a sunny balcony or patio with just enough space for a couple of pots, choose the largest, deepest pots that will fill the space. Large containers (22 to 24 inches minimum) Let gardeners grow more produce, and they have deeper reservoirs for soil and water to encourage more root growth and reduce the need to water as often. The pots must have good drainage and be filled with a quality mix, such as Black Gold® Natural and Organic Raised Bed & Potting Mix. A couple of large pots, or one long, deep raised pot, will be vastly more productive than several smaller ones, so go big! (Click here for more tips on growing potted vegetables.)
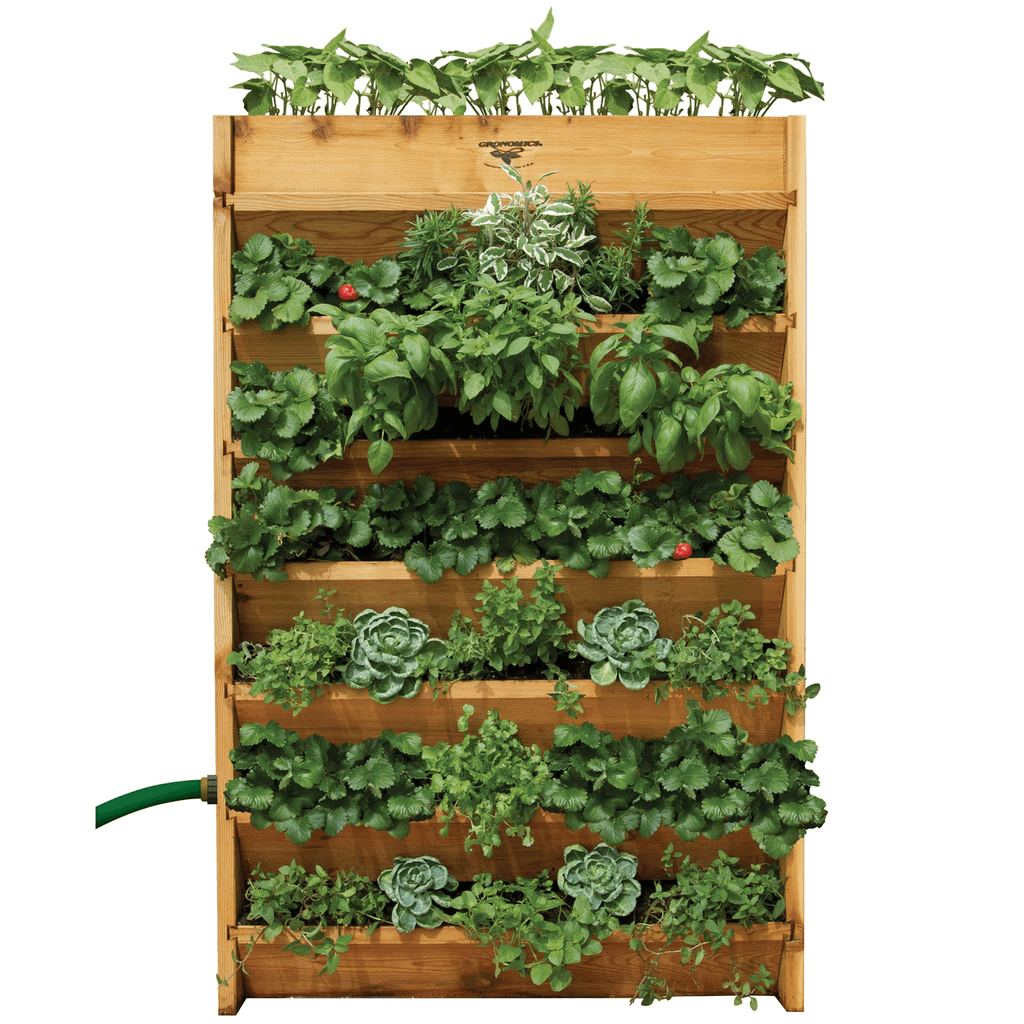
Garden Vertically
Some vertical gardening systems, like the Gronomics Cedar Vertical Planter, are very sturdy and made to last.
Gardeners with a little more space, like a small, sunny rear patio or yard, should consider growing one or more vertical gardens. Clever vertical planters are being designed to allow lots of vegetables to be grown in a small space. There are also plenty of DIY vertical garden designs to consider if you are the creative type. Whether you choose a premade product or go for a less expensive make-your-own vertical garden, make sure that the design allows for easy irrigation, holds enough soil for plants to grow well, and will last for a long time.
Tempting Tomatoes® Patio Sunshine is a true dwarf cherry tomato that’s perfect for pots and hanging baskets. (Image by Proven Winners®)
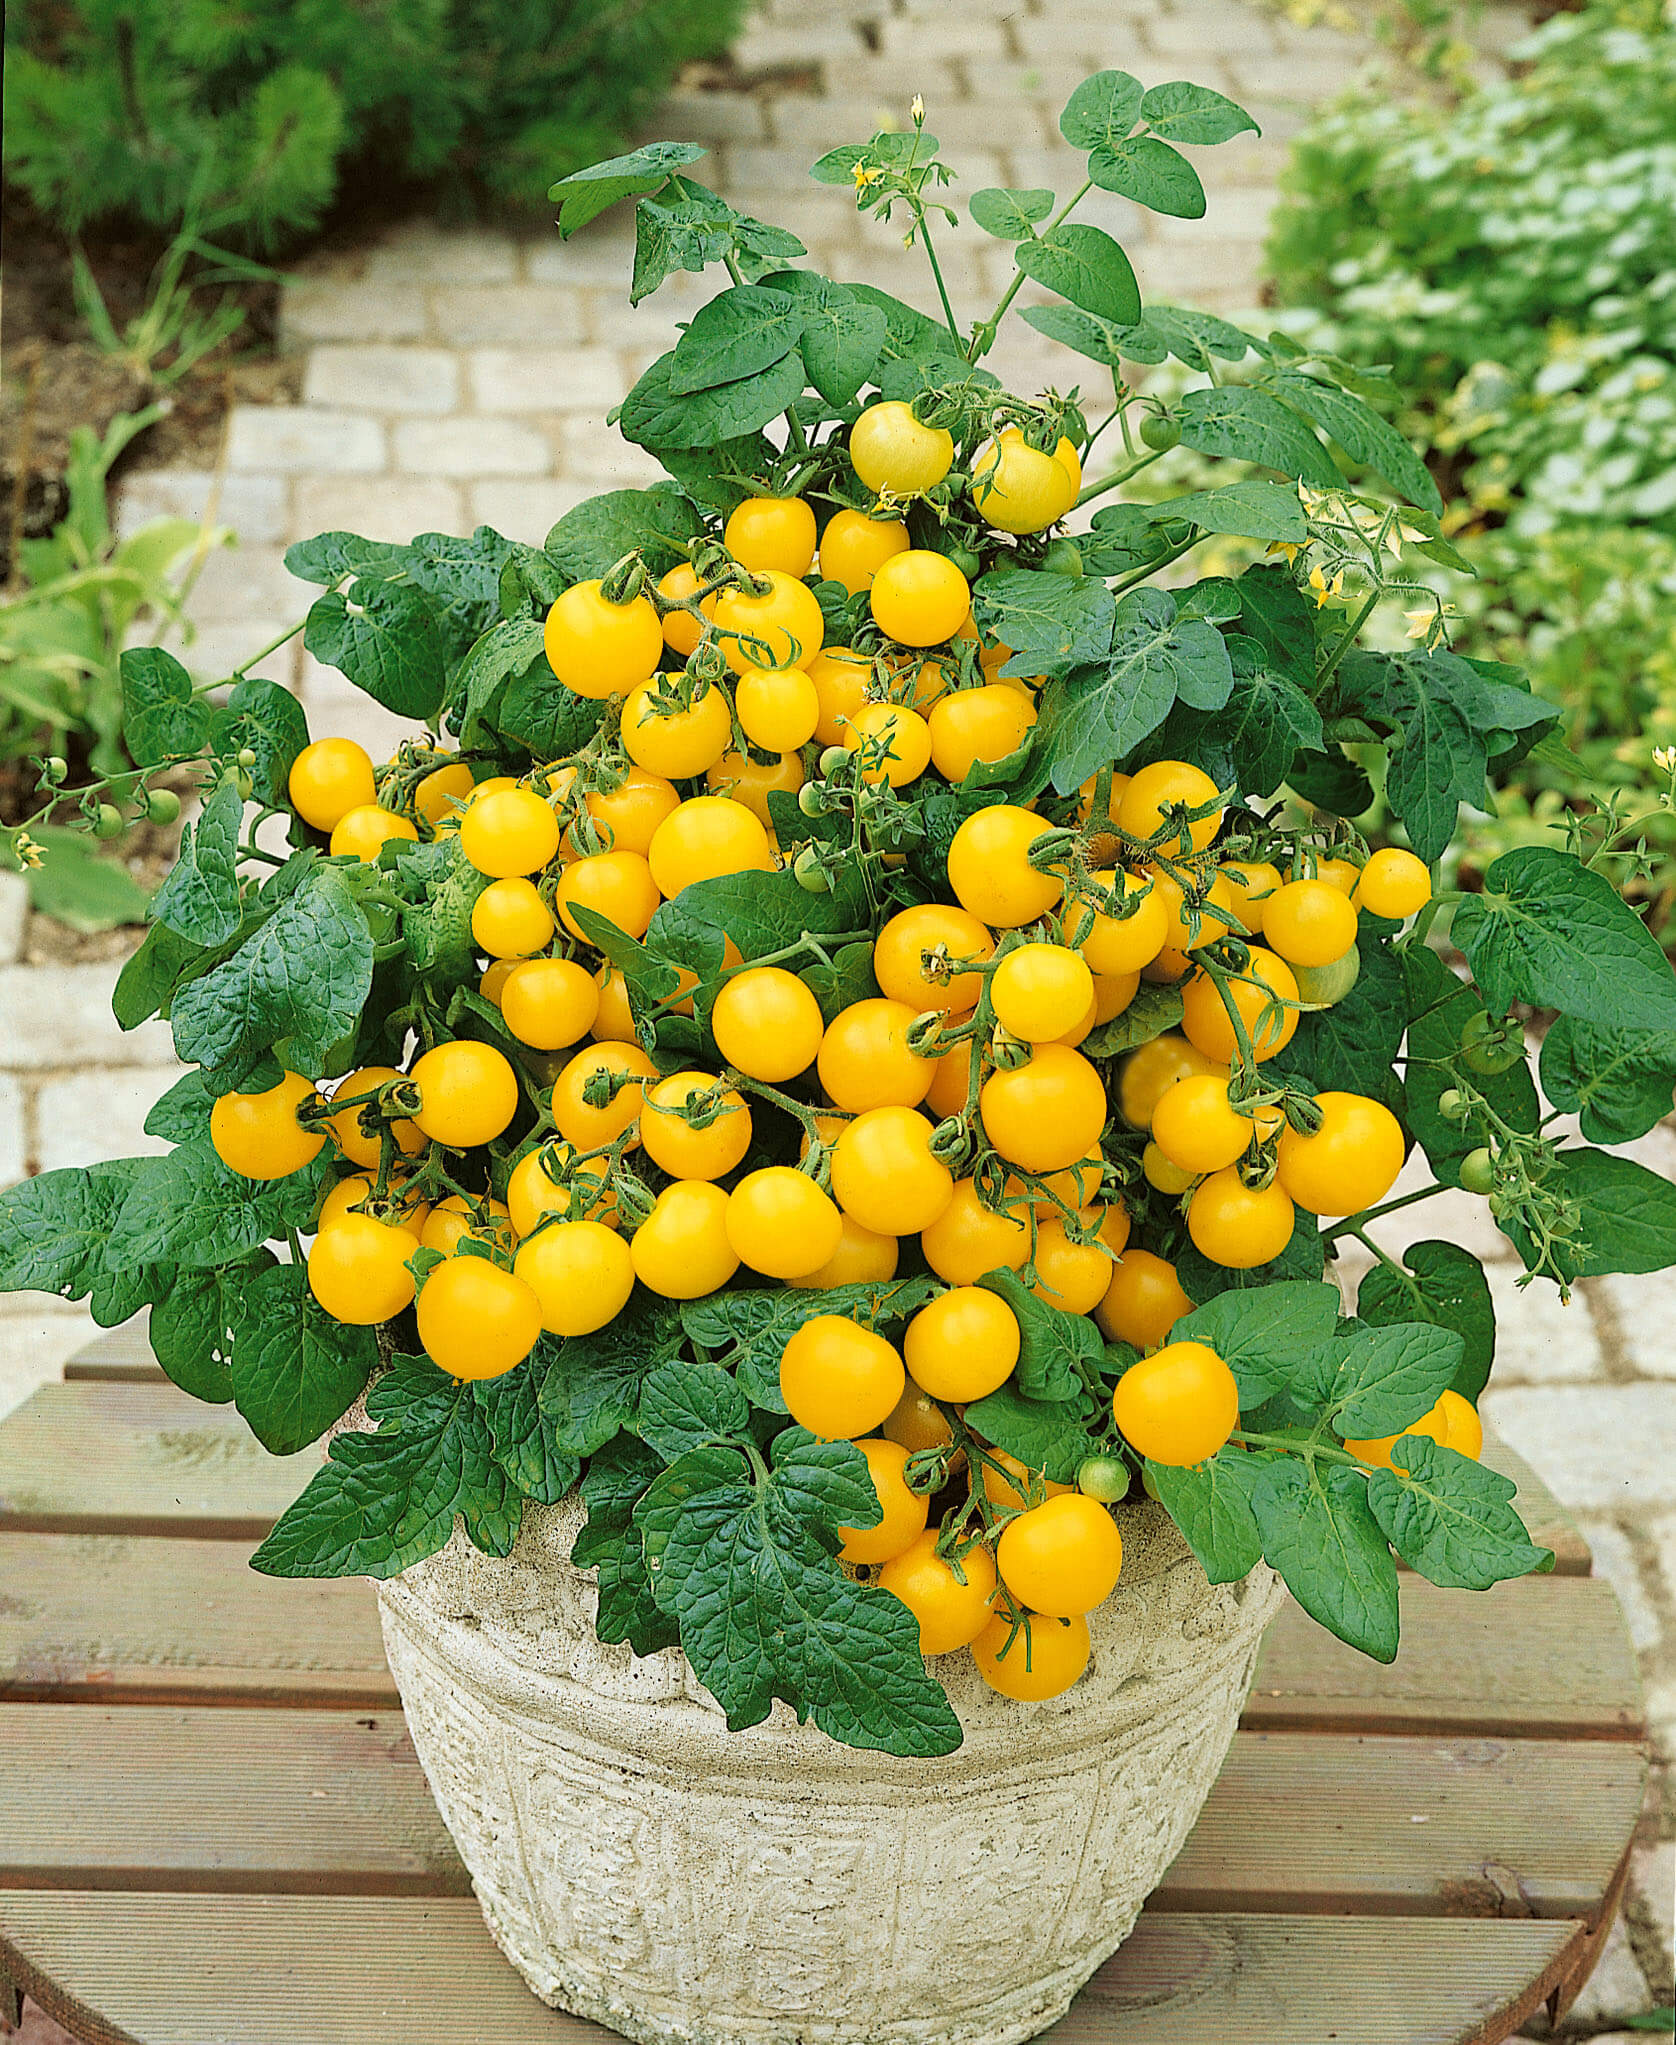
Smaller vegetables and fruits are made for container growing, so choose varieties better suited to pot culture. This includes non-vining bush tomatoes, such as ‘Mountain Merit‘ and ‘Celebrity‘, both AAS winners. The tiny, cute cherry tomato Tempting Tomatoes® Patio Sunshine is another excellent choice. These are just a few of the many quality little tomatoes available. Tiny bush basils are fun to grow at the base of potted tomatoes. Windowbox Mini from Renee’s Garden Seeds is a superior little basil that’s very easy to start from seed.
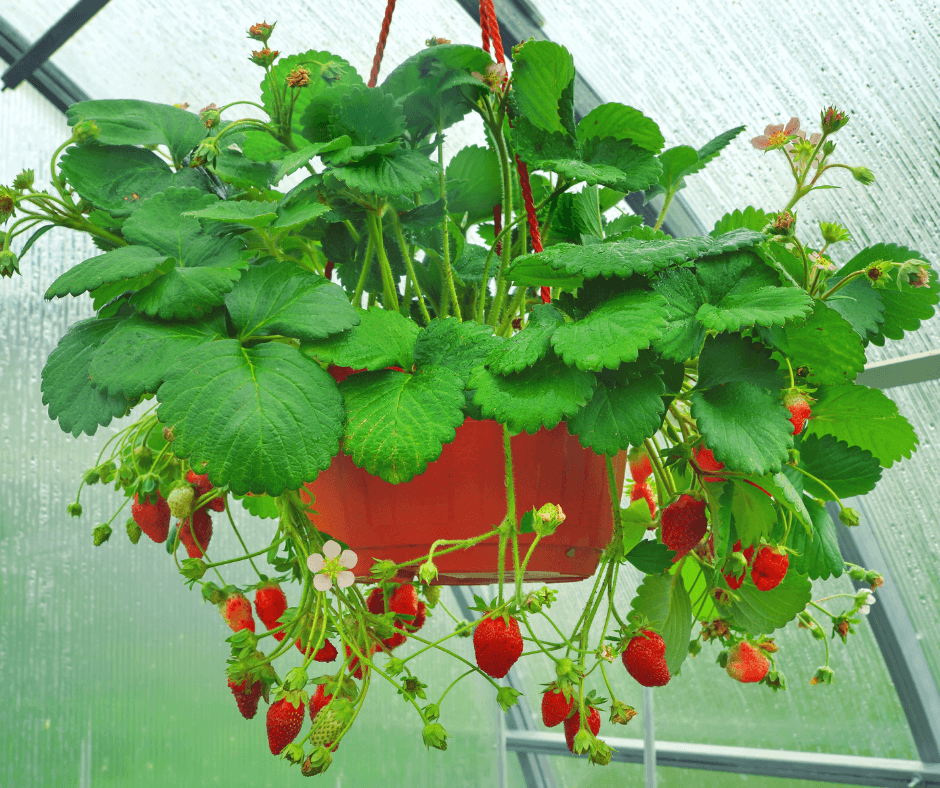
There are plenty of other compact bush vegetables, such as ‘Bush Pickle‘ cucumber, the little butternut ‘Butterbush‘, and compact zucchini ‘Fordhook‘. If you like melons, the compact ‘Minnesota Midget‘ cantaloupe and short-vined watermelon ‘Bush Sugar Baby‘ both grow well sprawling from a large pot. Strawberries of all types are great for pots. The beautiful Berried Treasure® strawberries, with their double pink, red, or white blossoms, also yield delicious sweet berries through summer.
Strawberries grow beautifully in hanging baskets and are easy to harvest from them.
Some vegetables and fruits grow beautifully in large hanging baskets. As with the pots, go big to minimize watering and maximize performance. The best vegetables for hanging are cascaders, such as compact tomatoes, strawberries, dwarf cucumbers, and peppers. The new, compact Pot-a-Peño jalapeño pepper is ideal for hanging baskets. This variety is also a 2021 AAS award winner, so it is sure to perform well.
Rotate Potted Vegetables
Potted greens and spring herbs are great cool-season potted edibles to start the season with.
Vegetable gardening is a dynamic process. Gardeners have to shift from cool-season spring vegetables to warm-season summer vegetables back to cool-weather crops. In between, smart gardeners rotate their crops to continue the harvest and encourage garden health. Plan to harvest and plant, harvest and plant until fall to boost your garden’s yields and diversity of crops. Seasonal planting and rotation keep soil diseases and pests from taking hold. (Click here to learn more about rotating vegetables.)
Maintain to Maximize Production
Place containers and gardens where they get maximum sunlight. Eight hours a day or more is recommended. Start with great soil that holds water well, has ample air space, and drains well. Black Gold®Natural & Organic Potting Mix is ideal for growing all types of vegetables in containers and it is OMRI Listed® for organic gardening. It’s wise to add a little Black Gold Earthworm Castings Blend 0.8-0.0-0.0, which is rich in nitrogen, to pots with greens and herbs. Change a pot’s soil every two to three years because peat-based potting mixes break down, lose structure, and acidify over time.
Fertilize regularly to encourage the best growth and production. Lots of vegetables are “heavy feeders”, which means they deplete nutrients from the soil fast. Apply a slow-release fertilizer formulated for vegetable gardening at the start of the season. For heavy feeders, like tomatoes, follow up with applications of a water-soluble fertilizer formulated for vegetables. This is especially important to do just before the fruits develop.
Lack of water is the main cause of container vegetable failure. During the hottest days of summer, daily water will likely be needed, especially if your pots are in the full, hot sun. At watering time, water until its starts to run out of the pot drain holes. This indicates that the container is saturated. Thorough watering encourages deeper root development and stronger, more stable plants.
If your time is limited, consider investing in drip irrigation for pots. It also helps to add an extra layer of porous organic mulch to keep surface water from evaporating. Leaf mulch, straw, or grass clippings are all great options for pots that break down quickly while providing a little extra protection. (Click here to read about the 8 best watering strategies for plants.)
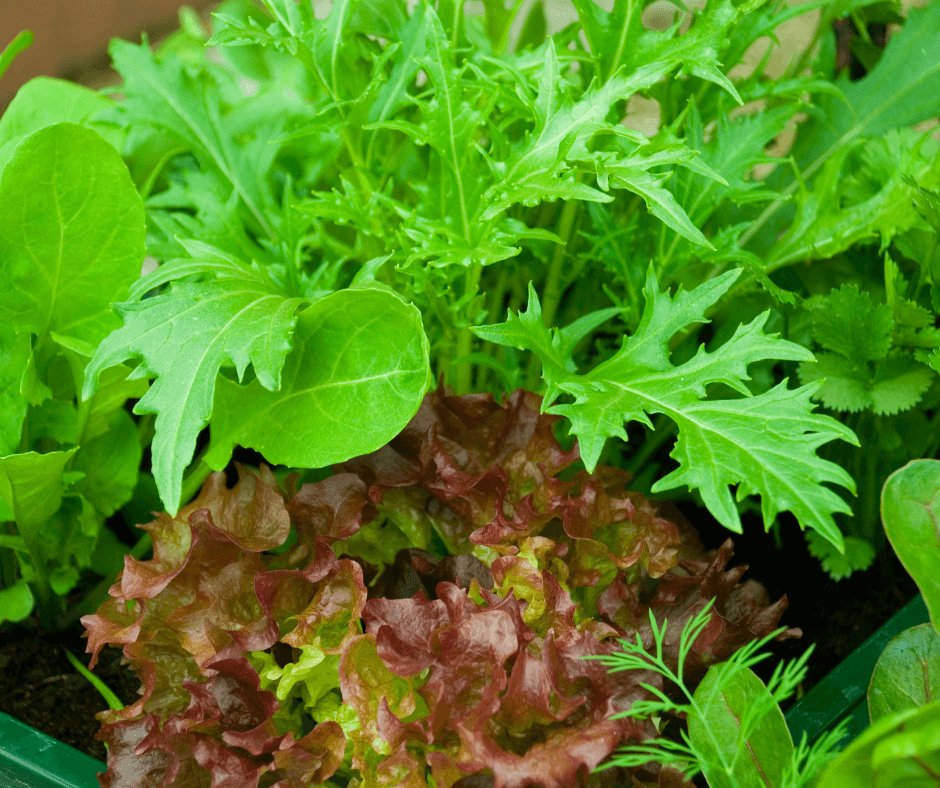
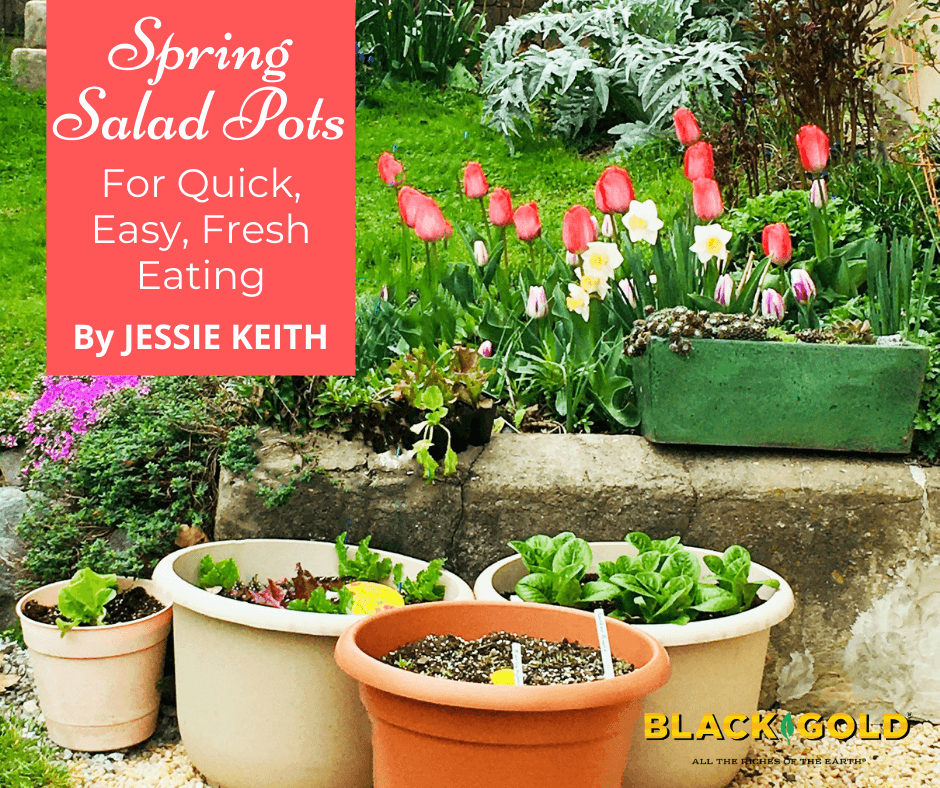
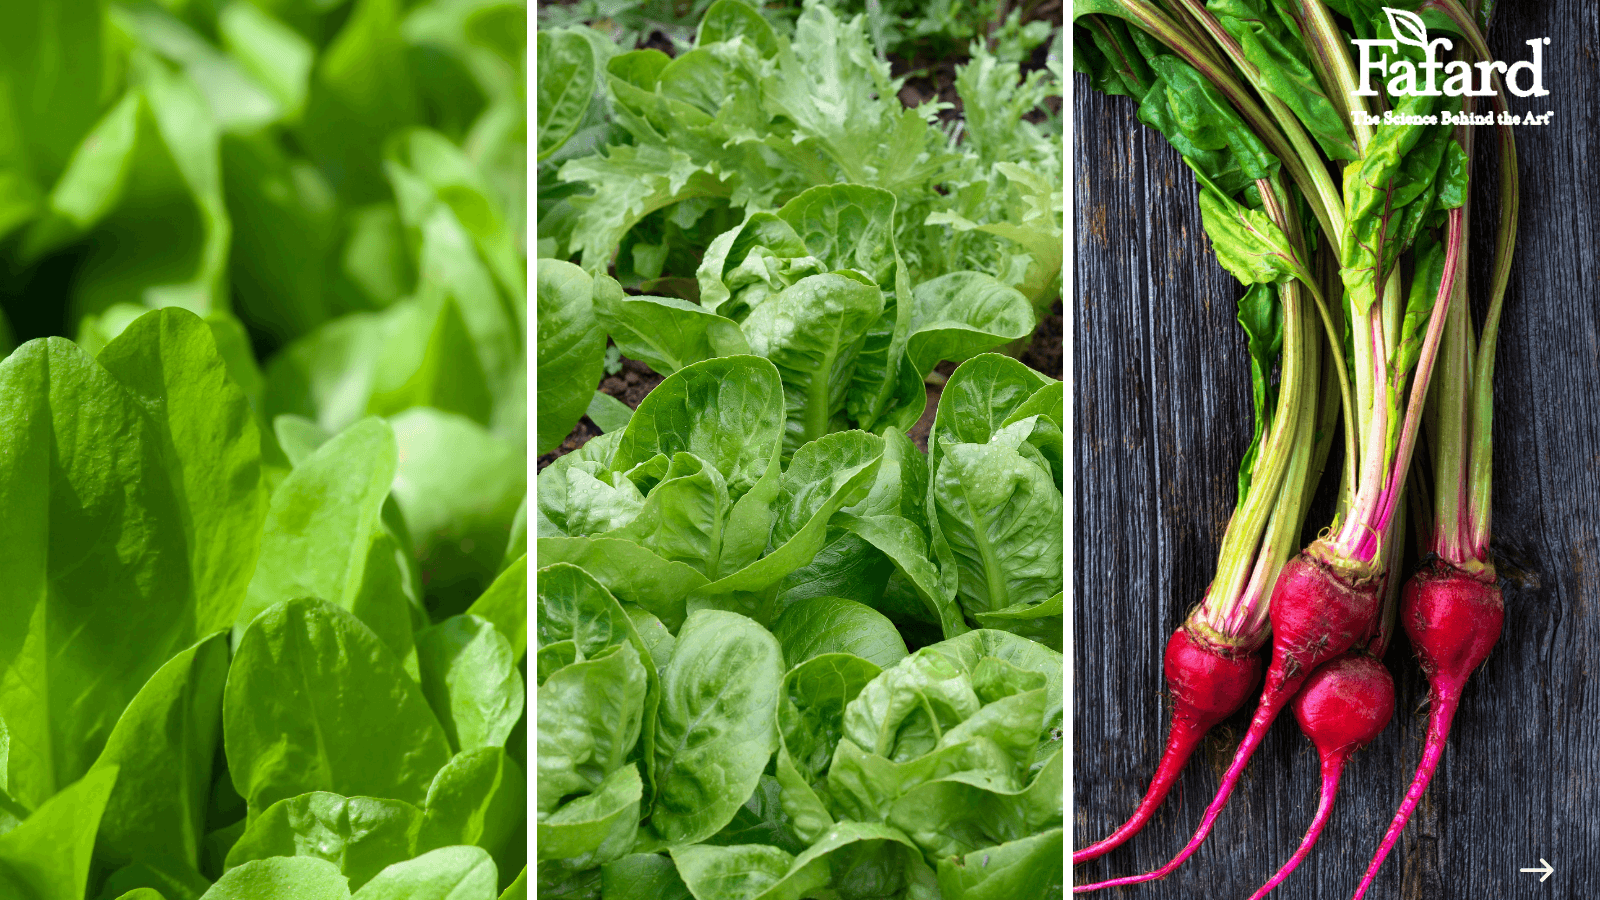
Last year I experimented with salad pots with great results. This shows some of the pots just after planting. They contain mixed lettuce, bok choi, and beets. Another pot contained six large Romaine lettuce plants.
My first spring salad pots were grown in large, inexpensive plastic containers that I bought from the garden center. I filled them with some Black Gold Natural & Organic Potting Mix and added a little fertilizer. They performed so well that I couldn’t believe it. Just a few pots provided delicious salads through spring, so this year I decided to redo this year’s salad containers with a little more flair.
I took it up a notch by creating suites of well-paired greens and herbs for custom-made salad containers–one with an Asian theme, another French, and the last for the Italian palate. Large (18″ or 24″) pots are ideal for these plantings. This will ensure that you can plant enough vegetables in each pot to make several spring salad bowls. As I said, I planted mine in Black Gold Natural & Organic Potting Mix, but this year I plan to try Black Gold Raised Bed & Planting Mix. Both mixes are OMRI Listed for organic gardening. My plant food of choice is a slow-release fertilizer for vegetable growing, though I often hit my plants with some water-soluble fertilizer a week after planting to help them take off.
Asian Salad Pot
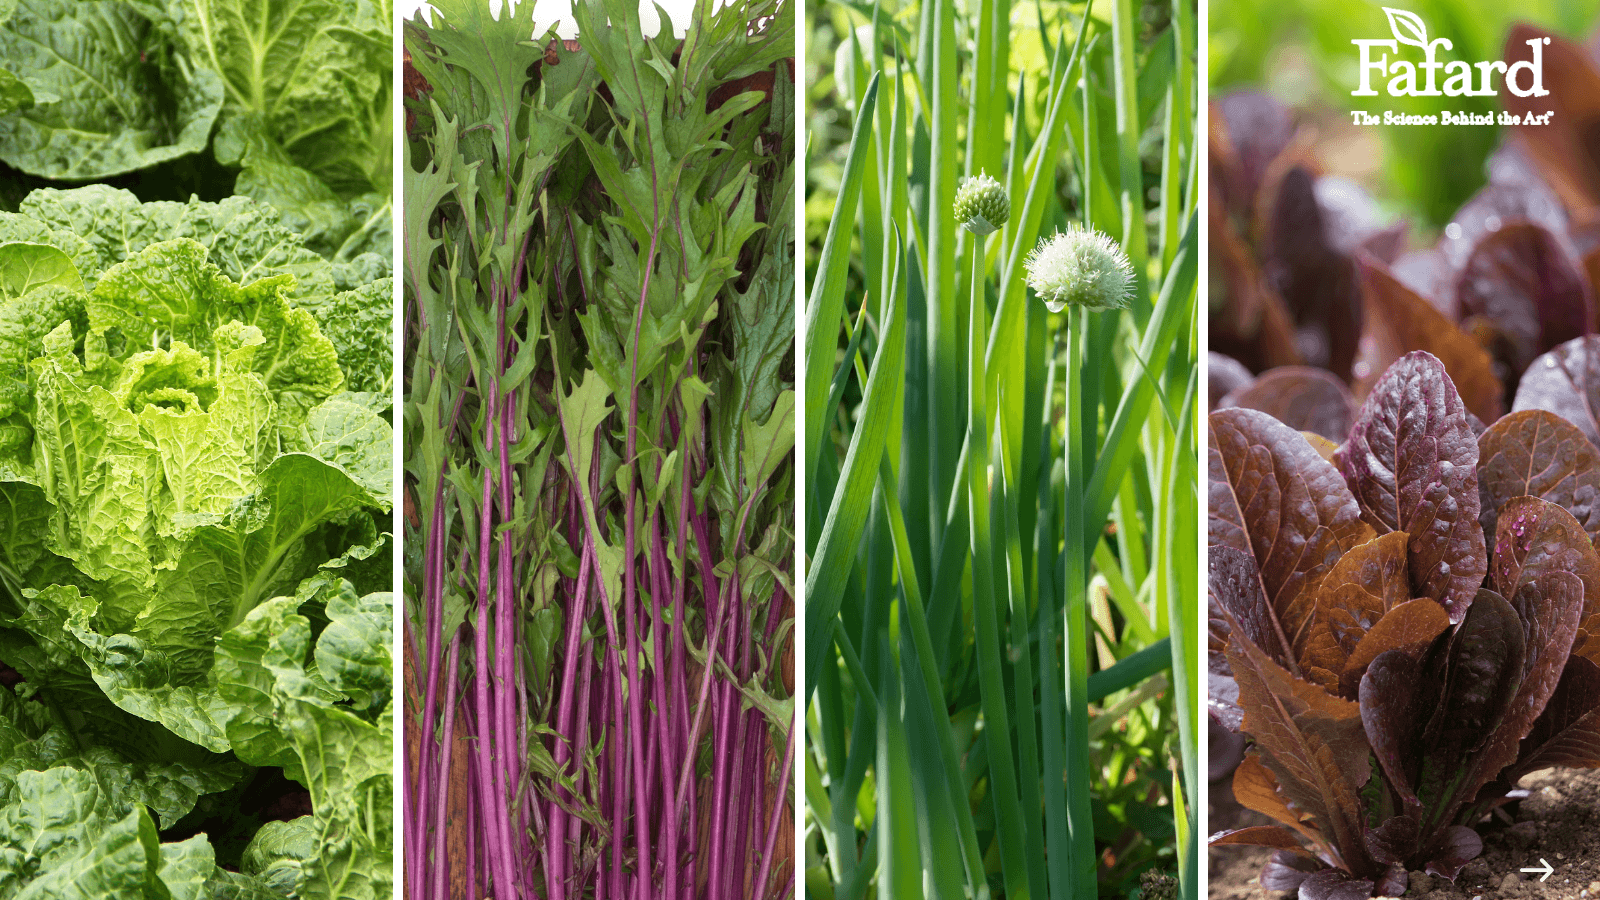
There are many varieties of Chinese cabbage, mizuna, scallions, and romaine to try.
About the blend – This is a two-pot salad mix because Chinese cabbages are bulky. I am confident that the outcome will be worthy of a very tasty sesame salad dressing. The crisp, flavorful Chinese cabbage will combine nicely with the mustardy kick of the mizuna, the mild green-onion flavor of the bunching scallions along with the crunchy, sweet taste and bright color of the red romaine.
Planting tips– I recommend filling one pot with three Chinese cabbage heads with a sprinkling of mizuna around the exterior. Another pot can contain the romaine with scallions planted along the side. Be sure to space the scallions 2-3 inches apart. I always start cabbage, scallions, and lettuce plants indoors several weeks before planting outdoors. I start the seeds in 4-inch pots under grow lights. (Click here for growing tips.) Then I acclimate my seedlings to cool spring temperatures in my enclosed back porch. Scallions are often tender and slender at planting time, so be gentle with them and don’t plant their bulbs too deeply. One-half inch is perfect. The mizuna is a mustard green that can directly be sown in the pots at the time when you plant your seedlings–generally in late March or early April in my USDA Hardiness Zone 7 garden.
This spacing is approximate, depending on the varieties you choose. Just be certain to thin your scallions properly.
French Salad Pot
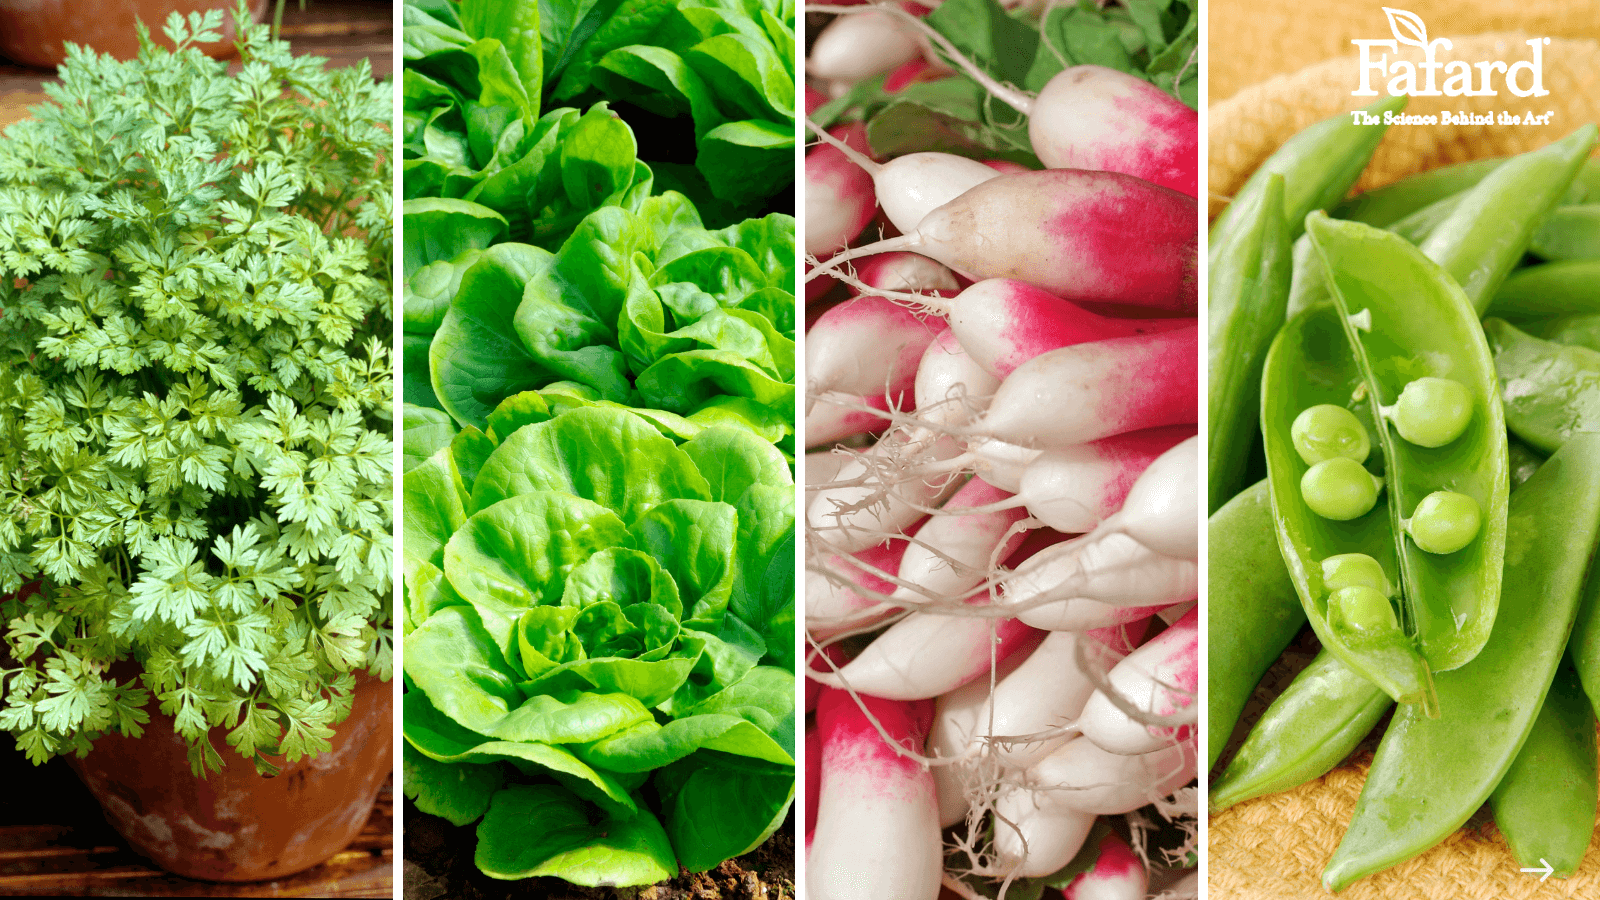
Chervil, butterhead lettuce, French radishes, and crunchy snap peas are a taste of France in a bowl.
About the blend -The sweetness of the snap peas and butter lettuce blend well with the slight heat of the fresh French breakfast radishes. Chervil is added to provide a fresh, slightly anise flavor–much like the flavor of fennel. Together they taste very excellent with a classic French dijon vinegarette. If you are not partial to uncooked snap peas, try blanching them for a minute and then immersing them in an ice-water bath.
Planting tips– I recommend three large pots for this salad blend–one for the peas (a tomato cage makes an easy pea trellis), one for the radishes, and one for the butter lettuce with two chervil plants on the side. It is best to start the chervil and lettuce indoors under grow lights, as recommended for the greens above. The radishes and peas can be directly sown in the pots. Surface-sow the radish seeds and cover them with 1/8 inch of potting mix. Plant them in circular rows 6 inches apart and then thin them to 3 inches apart after they have sprouted. The peas should be planted in a circle at a distance of 3 inches apart and 1 inch below the soil surface. Time everything well, keeping in mind that the peas and greens need more time than the fast-growing radishes.
This spacing is approximate, depending on the varieties you choose. Just be certain to thin your radishes properly.
Italian Salad Pot
A salad of fresh chicory, romaine, and roasted Chioggia baby beets taste great with a fresh balsamic dressing and a touch of Parmesan cheese.
About the blend – The bitter bite of the chicory tastes nice with the sweet crunch of the romaine lettuce and sweetness of the baby beets. Chioggia beets are candy-striped with red and white bands inside, so they are as beautiful as they are delicious. The three taste very good with honey balsamic vinegarette and shaving of Parmesan cheese.
Planting tips– Two large pots are sufficient for this salad blend–one for the chicory and romaine lettuce, and one for the beets. The lettuce and chicory can be started as seedlings indoors, using the same recommendations for the two previous gardens. The beets should be directly sown in the pots. Keep in mind that the beets may germinate more slowly in cool weather, so you may want to plant them a week earlier than recommended on the packet.
This spacing is approximate, depending on the varieties you choose. Just be certain to thin your beets properly.
To learn more about great lettuce varieties, please watch this helpful video!
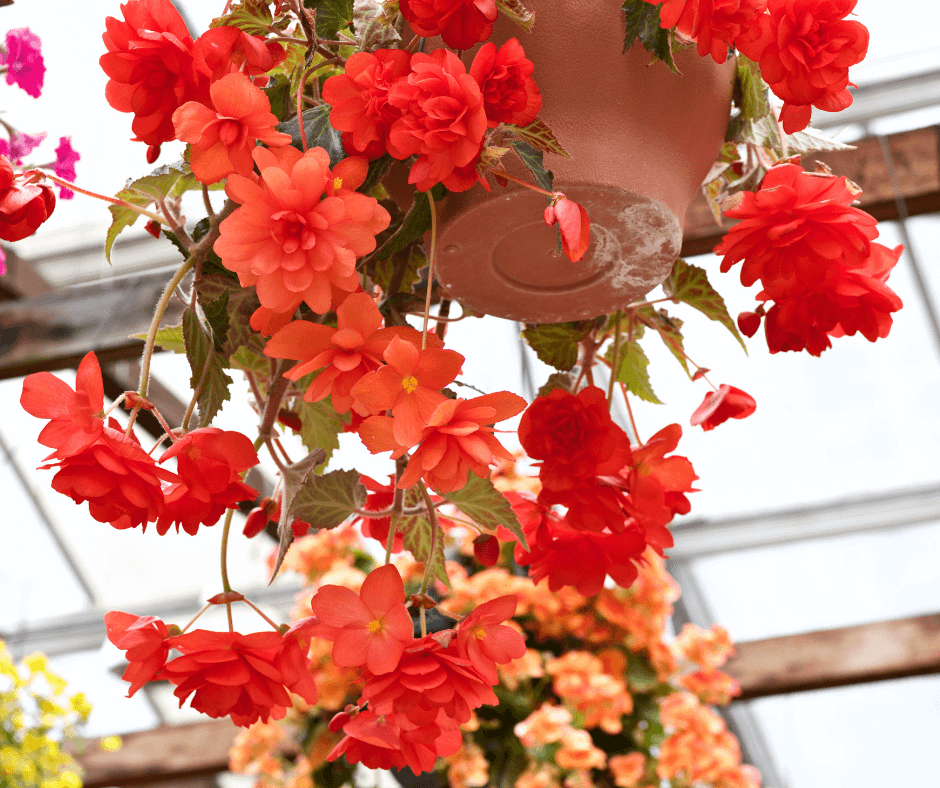
The Belgian ‘Double Apricot’ pendulous begonia is a showstopper.
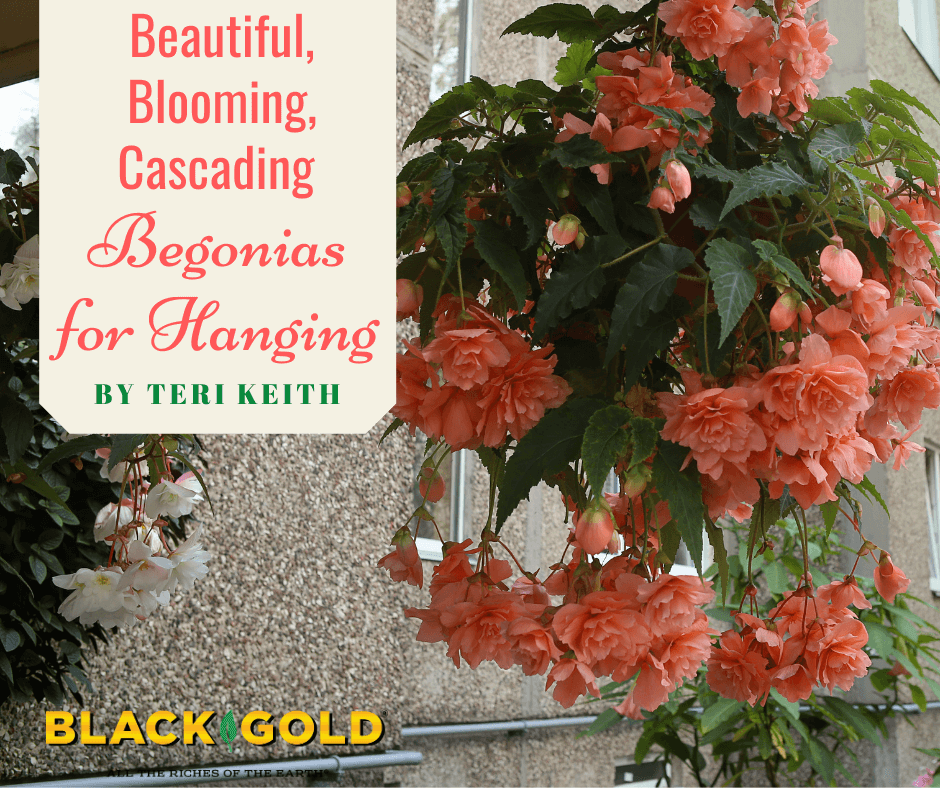
By February, I am longing for some beauty when I look out of the window. It’s the worst month of the year here in the Midwest, with its dead and bleak outdoors. So, now’s the time I start dreaming of the flower beds and containers for the coming year. This year I plan to focus on cascading Begonias for my shade pots, window boxes, and hanging baskets, and there are several excellent choices.
Cascading begonias are derived from several different species and begonia groups, but all of them have one thing in common, cascading habits and beautiful flowers. The tender plants have succulent foliage and thrive if given regular water, well-drained soil, and season-long fertilization. Here are those that I plan to grow at my own home this year.
Angel-Wing Begonias
‘My Special Angel’ is a new angel wing begonia offered by White Flower Farm. (Image thanks to White Flower Farm)
Angel-wing begonias have both beautiful leaves and flowers. The leaf size depends on the variety, but all of them have a telltale wing shape. They are hybrids of the Brazilian begonia (Begonia aconitifolia) and the Lucerna scarlet begonia (B. coccinea ‘Lucerna’), which were first bred by Eva Kenworthy Gray in 1926. The progeny and descendants have since been called angel wing begonias. Many hundreds of varieties exist today. (Click here for a full account of angel wing begonia history.)
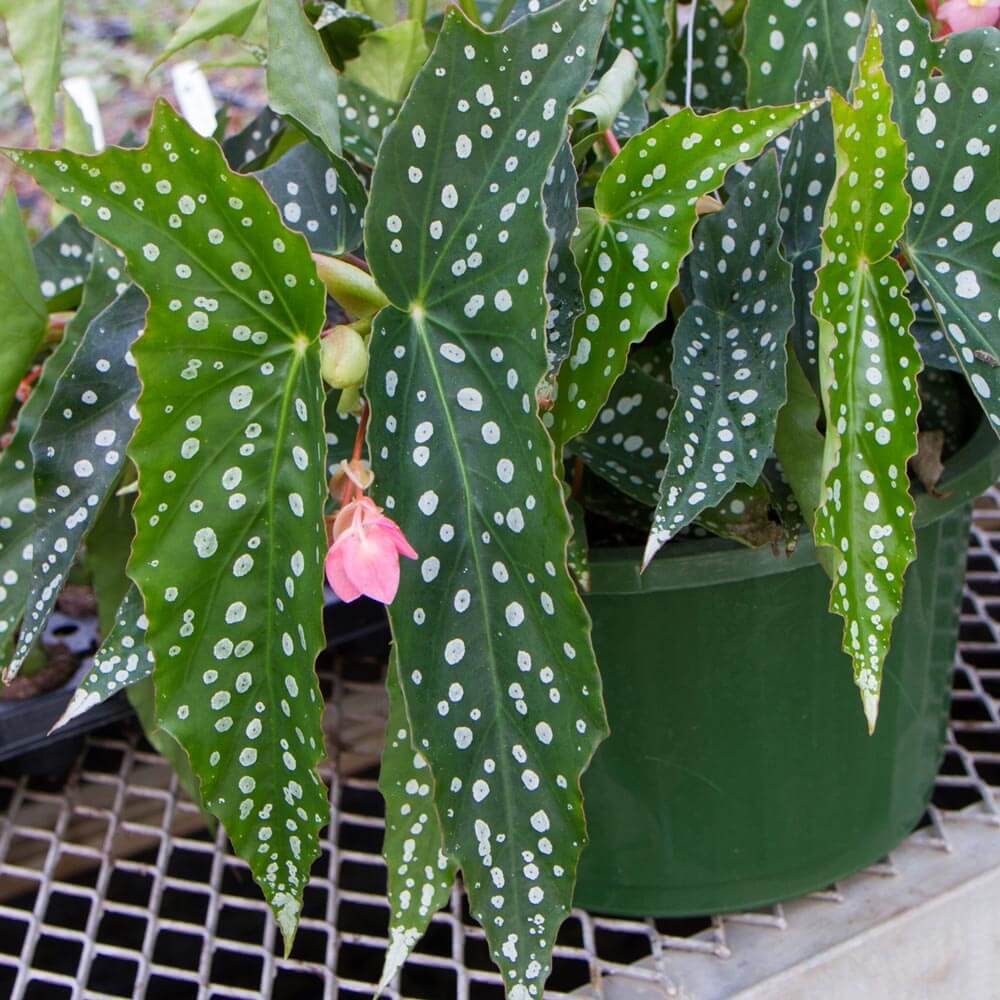
Angel wings are cane-type begonias, which means that they develop tough, almost bamboo-like stems called canes (click here to learn more about cane begonias). Their pretty wing-shaped leaves may be green, bronze, silver, or deep rose, and some are marked with lighted dots or stripes. The flowers appear in clusters over the leaves and come in shades of white, pink, orange, or red. Standard angel wing begonias can become quite tall (4 feet or more), without pruning, and are best reserved for large containers. To prune, cut back any tall or leggy stems at a leaf node.
The new variety called ‘My Special Angel‘ looks especially promising with its pink flower clusters and bold, beautifully speckled leaves. ‘Whimsy‘ is similar but has darker speckled leaves. Expect both to reach between 1 to 3 feet without pruning. Another exceptional variety is the bold, large-leaved, salmon-flowered ‘Snow Cap‘, whose leaves are olive-green and speckled heavily with silver.
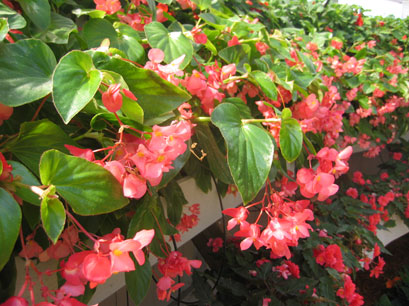
Dragon Wing Begonias
Dragon Wing Pink begonias bloom all summer long. (Image by Proven Winners®)
Dragon wing begonias are also cane-types, but they are shorter, more compact, and better for hanging baskets. Most will cascade to 30 inches or less. Their leaves and flowers are equally as showy and diverse but often smaller. I have been wondering what to put in my large shaded baskets, and a dragon wing, such as Proven Winners® Dragon Wing® Red or Dragon Wing® Pink, would be perfect. Each has glossy green leaves and colorful, drooping flower clusters. They will look gorgeous. The plants are self-cleaning and should not require pruning.
Pendulous Tuberous Begonias
Illumination Orange Begonia is very pretty and can be grown from seed.
My favorite cascading begonias are pendulous begonias (Begonia pendula hybrids). They are best known for large, spectacular, single or double flowers, in many shades of red, rose, pink, yellow, ivory, and apricot, which cascade to 15 inches or more. Most reach 8 to 12 inches high. The double flowers look like roses! The plants are so impressive that I have ordered three this year, so my shade containers are going to be all begonias this year. One of the prettiest is the outstanding Belgian hybrid, ‘Double Apricot’. You can also try the beautiful varieties in the Illumination® Series, which can be grown from seed. (Always start begonia seeds as early as January to get them to planting size by May.) Illumination® White and Orange are especially resplendent.
Pendulous begonias are tuberous, so you can most commonly buy them as easy-to-plant tubers or as plants. Often the plants sold at garden centers are small, so you can put three of them in one large basket or pot.
Bolivian Begonias
Santa Cruz® is an exceptional Bolivian begonia variety with orange-red flowers. (Image thanks to Proven Winners)
Hummingbird-pollinated Bolivian begonias (Begoniaboliviensis hybrids) have entirely different flowers than most other begonias. Each has five long petals, which form a single elongated flower. The green leaves are narrow and pointed. The stems hang at least 20 inches over the side of the container and can stand 1-3 feet high, depending on the variety. These are most commonly sold as plants, but they may also be purchased as tubers. Santa Cruz® is an exceptional form with orange-red flowers. Several pretty hybrid mixes with many-colored flowers are also available. This is a small taste of the numerous varieties out there.
Planting Cascading Begonias
Begonias do best in shade but will tolerate partial sun–between 2-4 hours per day. As stated above, these begonias may be tuberous or have fibrous roots. Tubers need to be planted root-side down (often with the hollow-side up) and only 1.5 inches deep. If small, pink buds are already emerging from the tubers, take care not to damage them, and plant with them facing upwards. Apply a continuous-release fertilizer at planting time. Begonias like organic-rich soil that is well-drained, such as Black Gold Ultra Coir Potting Soil. Be cautious not to overwater pots because this can lead to tuber or root rot. You can start growing them indoors to give them a head start for planting outside in late spring.
These begonias have gotten me excited about my potted flower garden plans. Now I’m really looking forward to spring!
“I live in Southwest Florida (Englewood, FL) to be exact. I bought 3 Pomegranate Wonderful trees and planted them about 3 years ago. They’re really not doing much of anything. They just exist. They refuse to flower, they barely have grown at all, and one just clings to life and is constantly yellow. I planted them with storebought soil at the base, and fertilize with 6-8-6. They are in almost full sun, get plenty of rain this time of year…but they just don’t do anything.” Question from Nikki of Port Charlotte, Florida
Answer: Pomegranates are Mediterranean and Middle Eastern fruits adapted to cooler winters and hot, dry summers. Florida is not their ideal climate. They need heat, dry weather, and rocky, well-drained soils. As horticulturist Maureen Gilmer wrote: “So long as the local climate is within the cold tolerance range (USDA Hardiness Zones 8-11) and summers are not humid and rainy, pomegranates should thrive. Untimely rains in the fruit’s late-summer and fall ripening season can also cause rinds to crack open prematurely, spoiling the contents.” (Click here to read the full article.) They also like a soil pH range of 5.5 to 7.2. If your soil is more acid or more alkaline, then they will struggle to get the nutrients they need, which may explain the leaf yellowing. Excess water can also cause leaf yellowing and encourage fungal disease.
Growing Pomegranates in Pots
You can create sandy, rocky mounds for your trees, but your better bet is to grow them in large pots in a sunny spot under cover from the rain. Once you can control how much water they get, water them weekly after they become established. More water is needed as trees as setting roots and during very hot times.
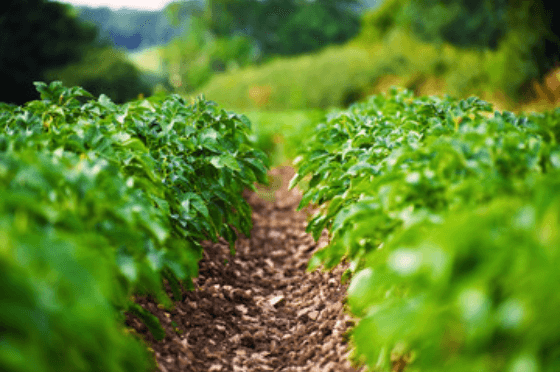
“I grew potatoes this summer. I planted them the correct way and they started to grow. I kept covering the leaves with dirt (leaving the top leaves uncovered.) The vines grew like weeds. It kept covering them but a few days later they would be out of control again. I had them in containers. Eventually, I had no way to build up the sides of the containers and I had to stop covering them. When I stopped covering them the covered vines were about 4-5 feet tall. I went to harvest them a few days ago and I had three minuscule potatoes. It was a lot of work for very little reward. I just wonder why they grew so fast. Obviously I did something wrong.” Question from Michelle of Lynchburg, Virginia
Answer: It sounds as though your potatoes put all of their energy into leaf and stem growth and hardly any energy into developing storage tubers, or potatoes. The plants should have died back before harvest. That is the indicator that they are ready to dig.
There are several reasons why your potato harvest was unsuccessful. Let me provide an overview of how to grow potatoes and increase tuber development to help you troubleshoot.
How to Grow Potatoes
Place straw of leaf mulch between berms for easy weed care and walking.
Potatoes need full sun, fertilizer, average water, cool, and then warm growing conditions to produce well. Grow a known potato variety, so you can determine when to harvest. Some produce potatoes early, midseason, or late. ‘Yukon Gold’ is a good mid-to early-season yellow variety to try, ‘Carola’ is a good late yellow variety, and ‘Dark Red Norland’ is an excellent mid-to early-season red-skinned type. Knowing the variety gives you information about expected performance, yields, and harvest time.
Start beds as soon as the soil is workable–often a month or more before the last frost date. Till the soil and work in lots of organic matter, like Black Gold Garden Compost Blend and peat moss. Finally, create a 3-inch furrow down each row for planting the potatoes.
Four Steps to potato planting.
Plant potatoes in furrows five to six weeks before the last frost date of the season. Place robust seed potatoes in furrows 6 to 12 inches apart in rows 3 feet apart. Sprinkle in a fertilizer formulated for potatoes, and them berm soil over them to a height of 12-18 inches. (The berming process reduces the hilling process.)
After several weeks, potato shoots should rise from the berms. Once they are 8-10 inches tall, start hilling. Cover the stem bases with 3-6 inches of soil. Do this twice. (This is also the time to manage Colorado Potato Beetles. Click here to learn more about managing potato beetles naturally.)
If conditions are dry, irrigate moderately, as needed, until the potato plants flower. Keep beds hoed and weeded. It helps to place straw or leaf mulch between the rows to reduce weeds.
Once the plants flower, let them be and withhold water. Within a couple of weeks, the tops should turn yellow, die, and dry out.
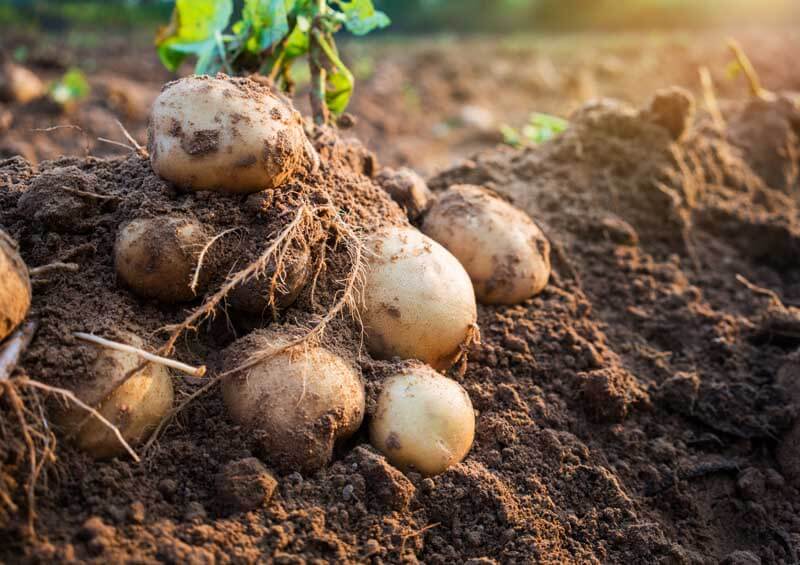
How and When to Harvest Potatoes
At harvest time, you should have lots of potatoes to fork up from your planting mounds.
New Potatoes can be harvested as soon as the plants begin to bloom. Wait for larger potatoes. These can be harvested after the plants have fully died away. You can harvest all of your potatoes at this time for storage, or just harvest them as needed. Be sure to get them all out of the ground shortly after the first frost of the season. Otherwise, they will develop an unpleasant sweet flavor.
If you are growing potatoes in a container, adapt these growing principals to your potted garden situation. If I were to harbor a guess, I would say that you kept watering and nurturing your plants, which caused them to look robust and happy but discouraged tuber development.
What Container Hydrangeas Will Grow Well in Partial Sun?
“I’m in a duplex, and I only have access to either morning sun or full evening sun for my containers. Which is best for hydrangeas in pots?” Question from Jack ofClaremore, Oklahoma
Answer: Several compact, hardy hydrangeas will grow well in both light settings in your USDA Hardiness Zone 6 garden. Here are three tiny hydrangea varieties that I know will perform very well in either situation. (All just happen to be Proven Winners varieties, because they arguably carry the best hydrangeas.)
Container Hydrangeas for Partial Sun
1.Bobo®Panicle Hydrangea: Grow this variety in the location with the most sunlight. In summer, Bobo produces loads of white, upright flower panicles that age to rosy pink before they dry to tan in late fall. It ultimately reaches 3 feet high and 4 feet wide, so it needs a large container for the longterm. A half wine barrel would be a good size.
2.Invincibelle Wee White®Smooth Hydrangea: Smooth hydrangeas can take a little more shade. Wee White is a teeny hydrangea below 3 feet with mop-type flower clusters in summer.
3. Invincibelle Mini Mauvette®Smooth Hydrangea: If you like rosy pink flowers, then plant this 3-foot beauty. Its rosy pink pompon flowers will light up a container.
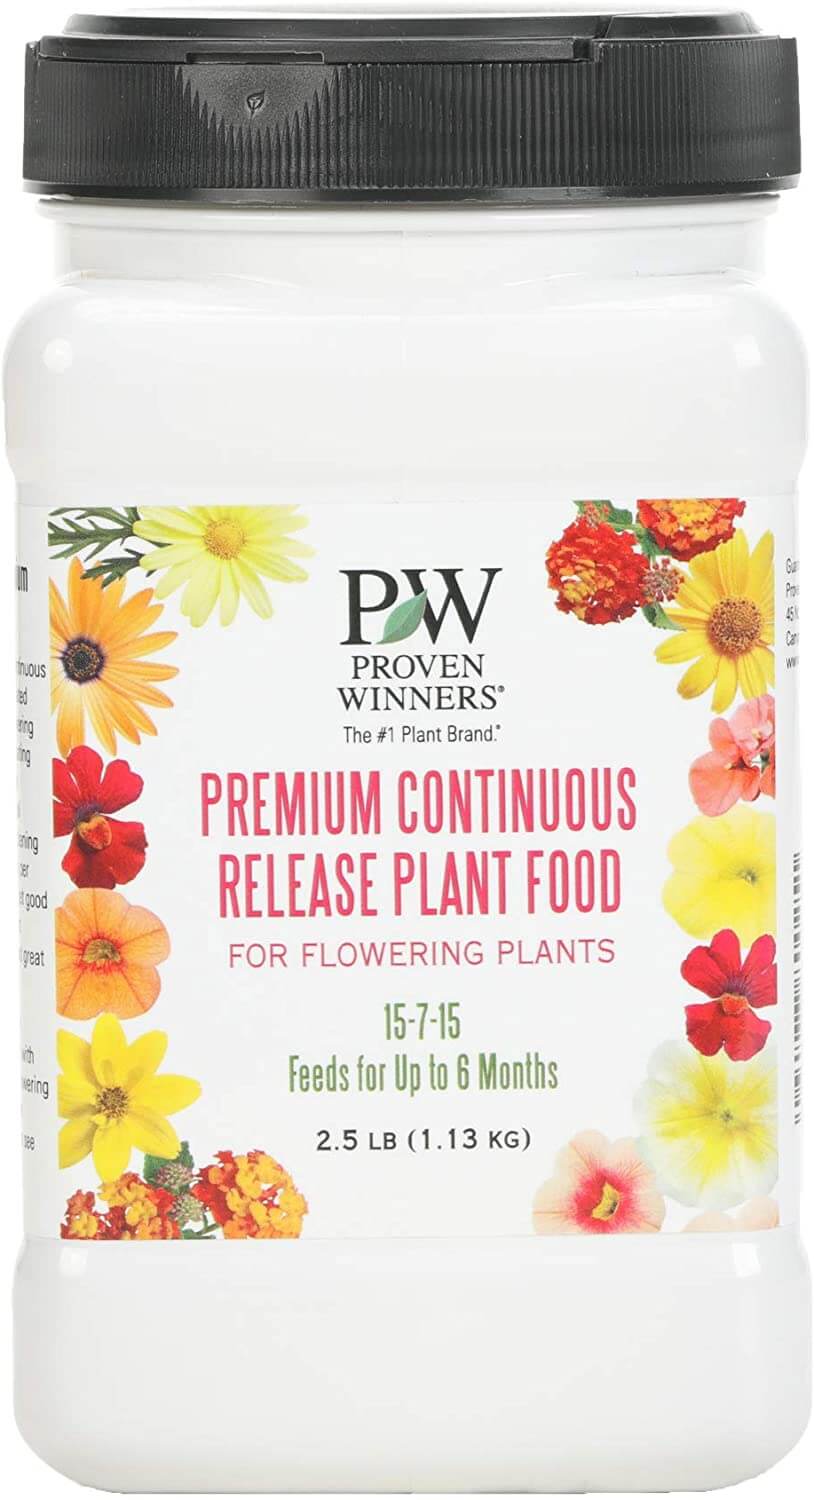
I recommend planting these in Black Gold Natural & Organic Ultra Coir, which is OMRI Listed for organic gardening. If you are planting for the longterm, I always recommend adding at least one part ground or topsoil to two parts potting soil. The combo will allow the plants to remain in the container for longer without needing to have the mix changed. Follow up by feeding with Proven Winners Continuous Release Plant Food.