Articles

String of Pearls: Living Beads for Hanging Baskets

String of pearls is delicate yet tough, low maintenance and incredibly rewarding.

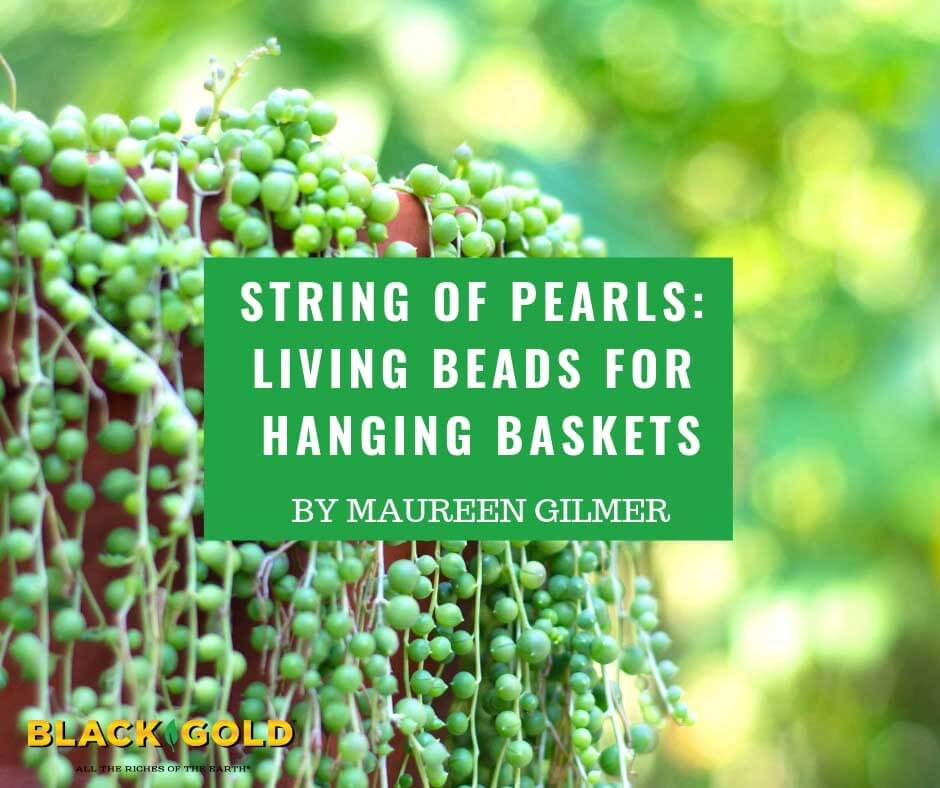
They are living jewelry no woman can resist, the most coveted house plant, string of pearls. This tender succulent is feminine looking, delicate yet tough, low maintenance and incredibly rewarding. There are two species that can transform traditional or modern spaces, indoors or out. Hang them like living necklaces to bring awe to your home.

Origins

String of pearls (Image by Maureen Gilmer)

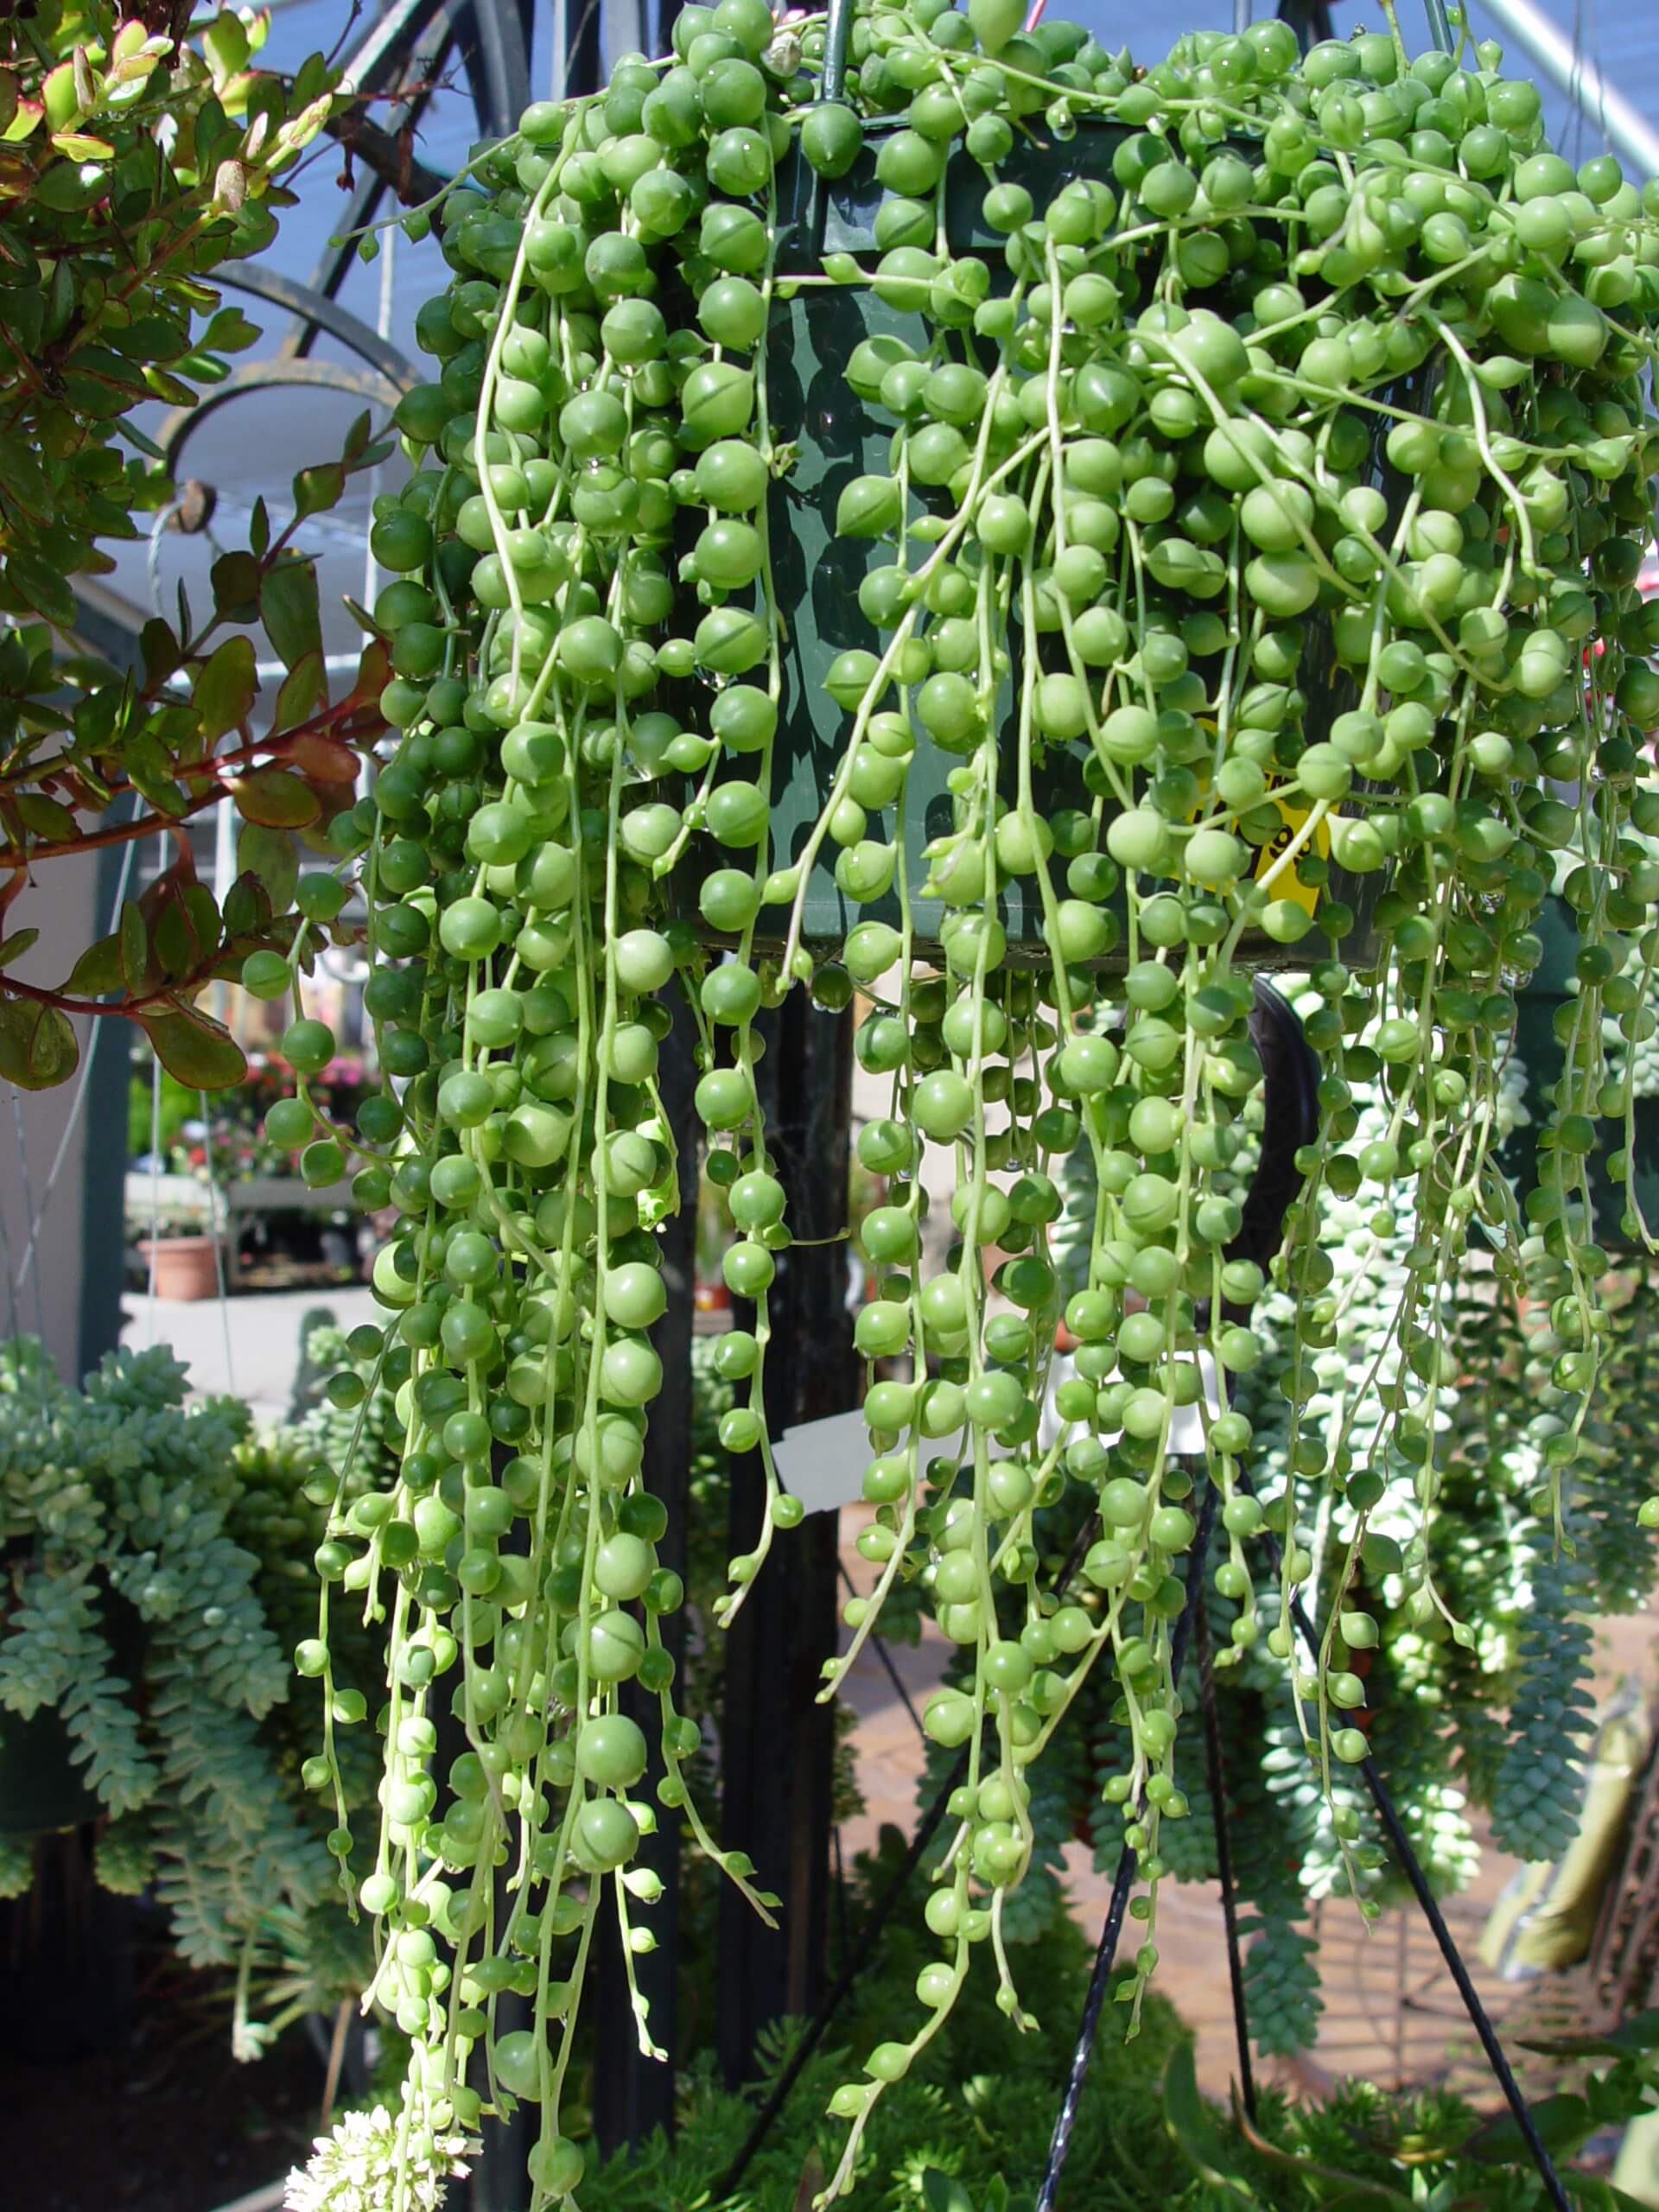
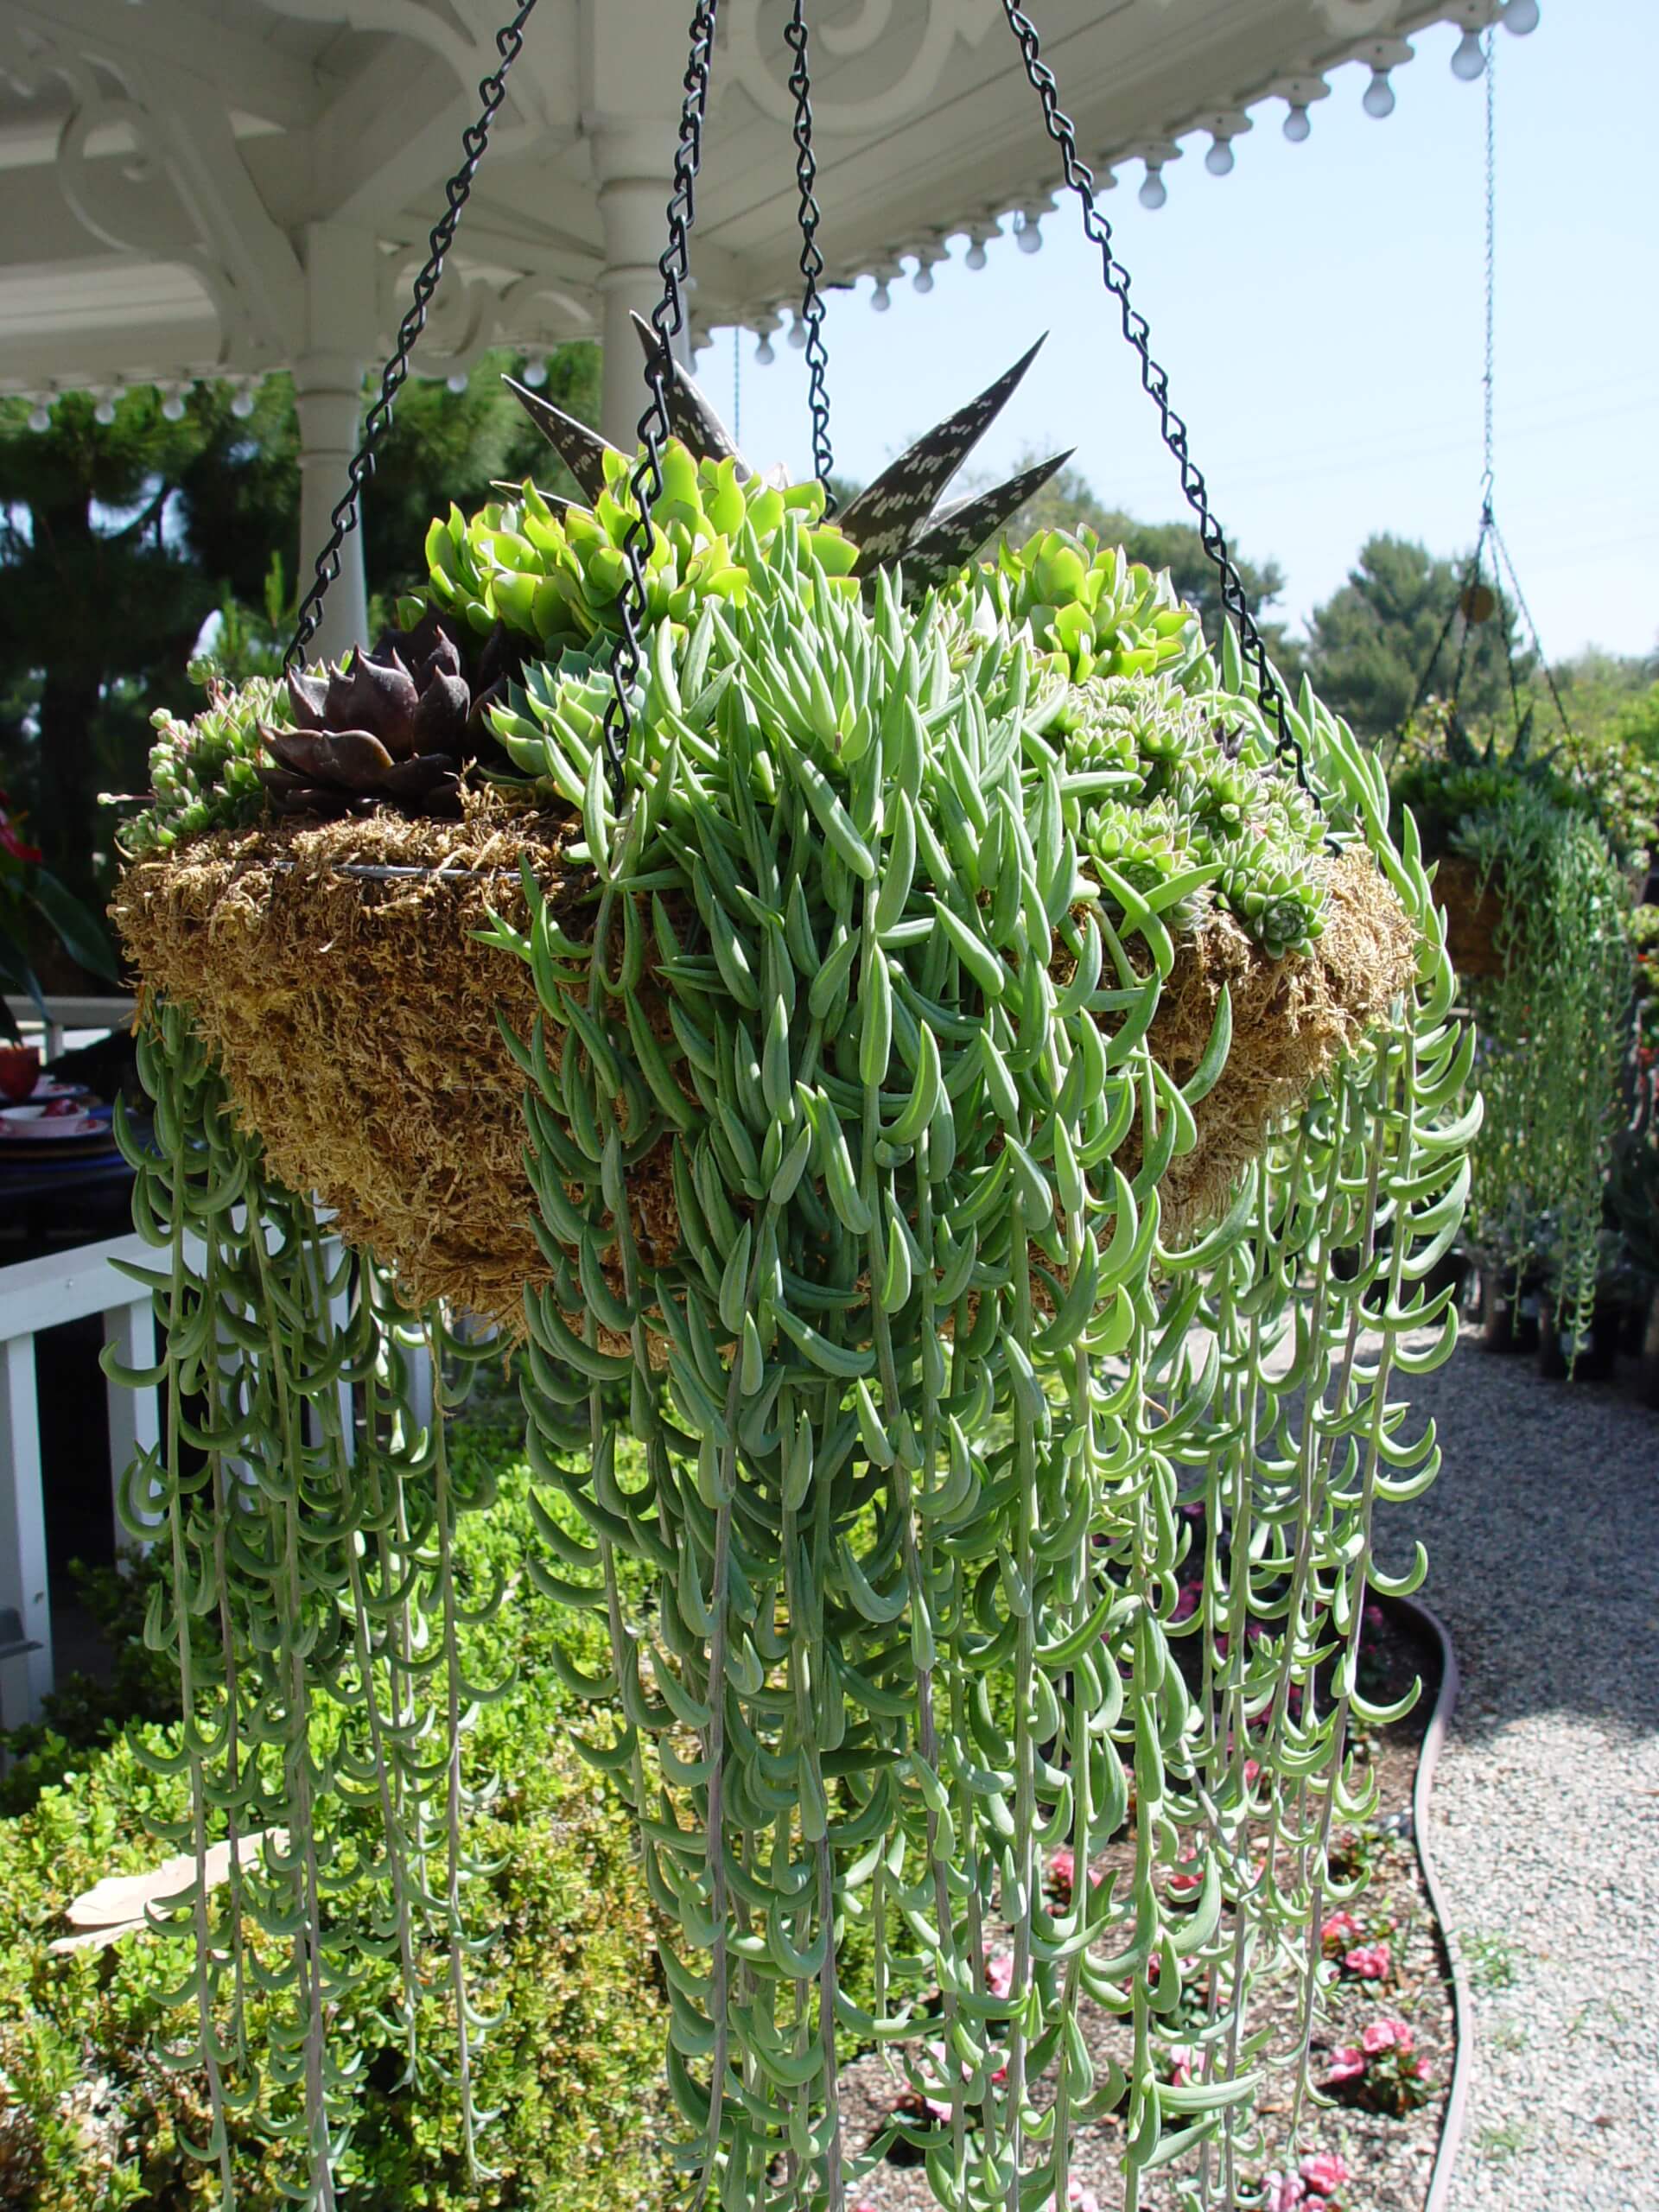
The true string of pearls is a South African native from the maritime Cape of Good Hope, so it loves the humid coast. Dubbed Senecio rowleyanus, its leaves are like tiny grey-green peas on the finest dangling stems. Its cousin from drier inland is Senecio radicans, fondly called “string of bananas” due to its sickle-shaped leaves. These do better in hot inland climates. Both make great house plants.

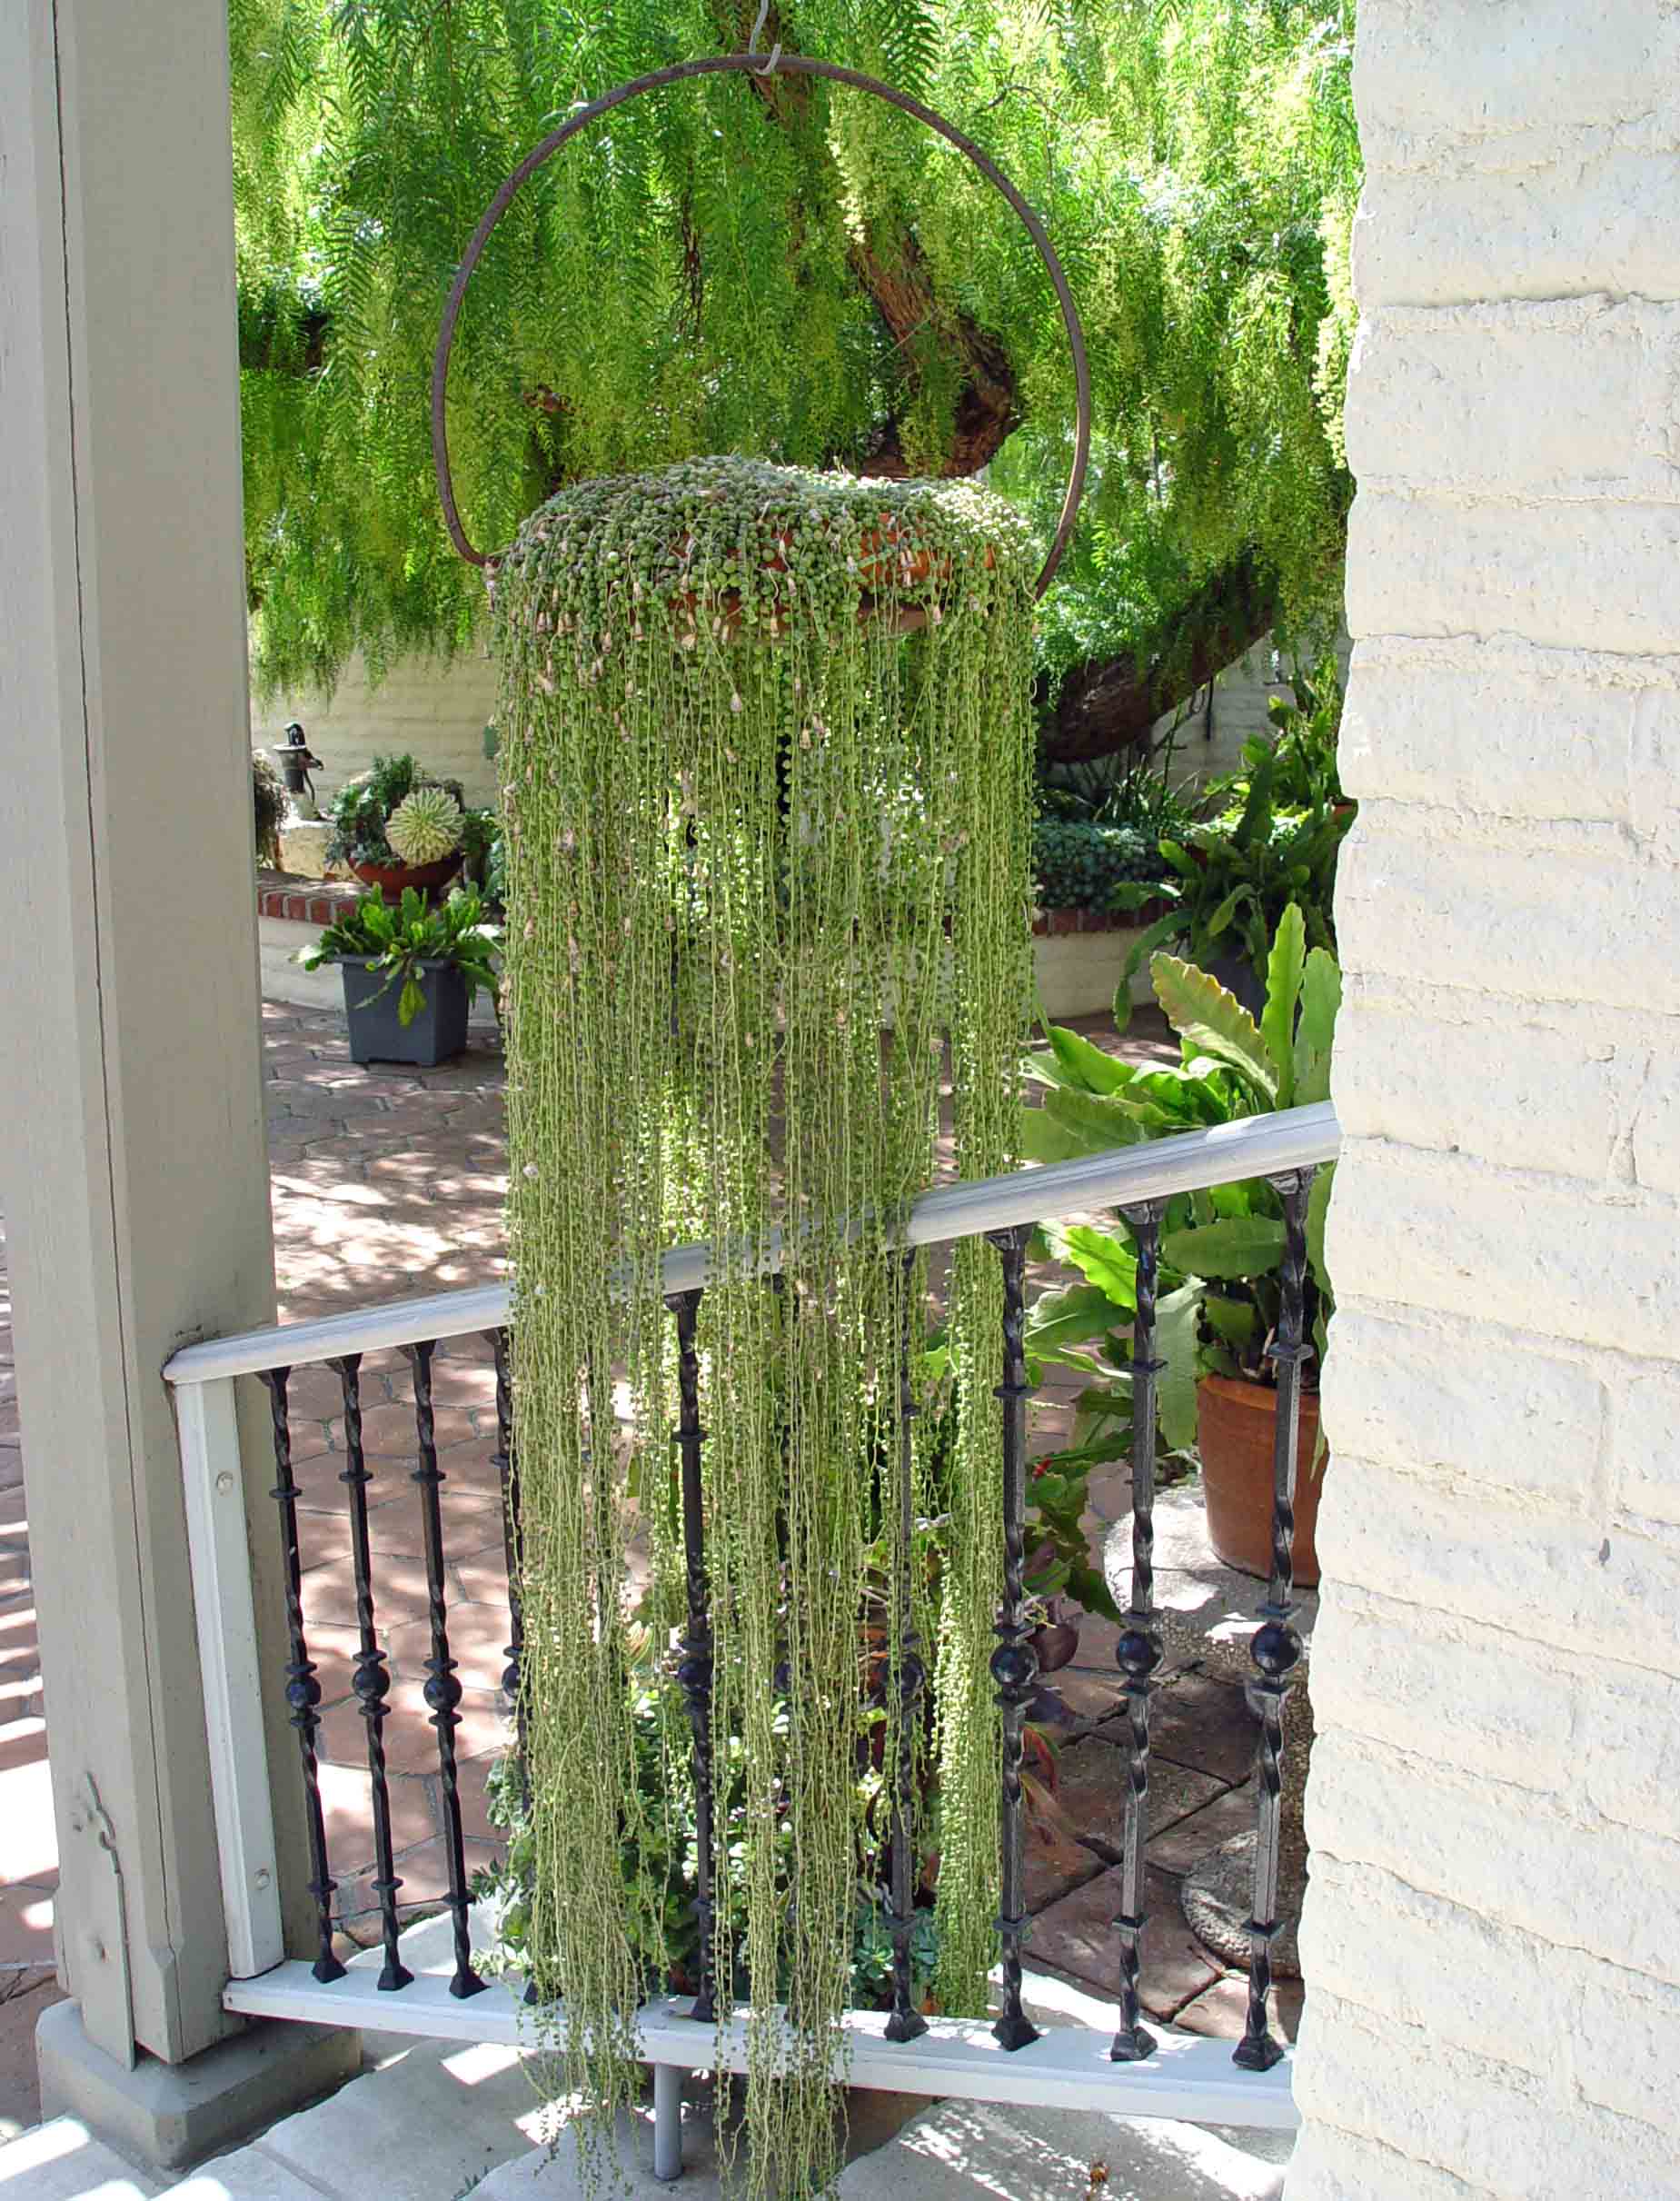
In the wild, both senecios grow as ground covers that root as they spread, so they rarely look like the hanging beauties we buy from the garden center. Yet, when planted to dangle in hanging baskets or raised pots and placed in a bright room, specimens almost look like living sculptures.

In gardens where winters are mild, these senecios can be grown outside, usually in raised pots or baskets that ensure perfect drainage. Indoors they are equally desirous of porous soils and hanging pots that are shallow and wide. Wide pots allow the ground-hugging plants to generate a lot of surface roots to hold soil tightly against the weight of their hanging strands.

Potting

String of bananas (Image by Maureen Gilmer)

A key to success is rapid drainage in your container. The best hanging pots have many holes in the bottom to ensure plants remain dry at the root zone. When creating your hanging string-of-pearls sculpture, start with the right pot—perhaps a mid-century throwback with a macramé hanger. Once you’ve found it, buy your pearls or bananas and get ‘er done.

You’ll need super well-drained potting soil to keep your plants from becoming too wet. When transplanting to your beautiful hanging pot, Black Gold Cactus Mix offers the ideal porosity. This fast-draining potting soil will make it much harder to over water your string of pearls.

When you get ready to transplant these senecios, study the root ball that comes out of the nursery pot. Gently remove any potting soil that does not have roots on the lower half of the mass. This will allow you to better fit the root ball into your shallow pot.

Set the plant, then lightly backfill with Black Gold Cactus Mix that has not been pre-moistened. If it sifts out of the drain holes, line the bottom with salvaged window screen before planting. Finally, tap the pot to help the plant settle into the potting soil, and wait to water. Allow a day or two for any damaged succulent tissues to callus over before you introduce moisture. This is essential to avoiding potential rot at the soil line.

Watering

When you do water, plug the drain of your kitchen sink, add 2 inches of water, and put the whole pot in the sink.  Let it wick up water until you can see wet soil on top.  This means it’s time to drain the sink. Leave the pot to drain for a few hours before returning it to its hanger. This watering method keeps moisture away from rot-prone stems that are the Achilles heel

A happy string of pearls can reach great lengths. (Image by Maureen Gilmer)

of these delicate succulents. As strands grow longer, be sure to lay them along the counter on the sink’s edge to keep them from getting wet.

A final key to success with all dangling succulents, particularly fine-stemmed ones like these, is avoiding the wind. Continual swaying wears down the stems along the pot edge, causing injury that limits moisture transfer to the stem tips where new growth occurs.

These senecios are easy to root, so if you find one that works well for you, propagate it.  Just take a runner and bend it up to the soil mass on top where it will root on contact quickly. Then sever it from the mother plant to start a whole new living sculpture of favorite pearls or bananas galore, without risk.

Planting a Barrel Cactus Safely

The ferocious spines of the golden barrel cactus make them very difficult to pot. (Image by Jessie Keith)

The golden barrel (Echinocactus grusonii) is America’s favorite cactus. All over the Southwest, it has become a coveted living ornament in landscapes. When backlit by the sun, the bright canary-yellow spines literally glow, creating high drama against blue agaves and succulents. A big yellow cactus potted on porch or patio becomes the quintessential year-round focal point that never loses its warm color.

Large golden barrel specimens and other large barrel cacti thrive in big, strong pots if they are planted properly. What folks don’t know is that they are darned difficult to handle, and painful, too. The challenge is transplanting the stemless ball of wickedly sharp spines. The combined soil and plant weight makes golden barrel unwieldy to carry, which complicates matters further.  Here’s how to do it safely without damage to you or the plant.

Protect Yourself

potted
This basketball-sized golden barrel is planted in a perfect-sized salvaged container to allow for future growth and easy watering.

To start, you’ll need long, thick, solid-leather gloves, because picking up pots of golden barrels is a wrist and knuckle nightmare for bare skin. Loosely wrap the cactus in a piece of carpeting, or find a cardboard box that fits over the spines tight enough to “catch”. The box is a bit better because it lets you turn the cactus upside down to stand while you carefully remove the pot. This exposes the root ball and facilitates preparation for transplanting.

When inspecting the root ball, look to see if your large cactus has been field grown and recently potted up. Field-grown cacti are cultivated on slopes that provide rapid drainage. They are dug and potted up in nursery soils that typically drain more slowly and are less suited to cacti longevity because they’re viewed as temporary. To protect your investment, inspect the bottom of the plant and remove any organic matter that may provide excess moisture. Then you will want to prepare your container for planting.

Planting Barrel Cacti

bare root
Newly dug from the grower’s field, the shallow, wide roots of the golden barrel are exposed temporarily until transplanted.

Your decorative pot must be wide enough to contain the cactus and have at least 1 inch or more free space on all sides to allow for new growth, watering space, and surface evaporation. Use a concave pottery shard to dome over the drain hole to prevent erosion. Then open a fresh bag of Black Gold Cactus Mix, a fast-draining medium containing a blend of perlite/pumice or cinders, earthworm castings, and compost. It encourages vigorous growth while ensuring ample aeration and drainage.

Use dry potting soil right out of the bag when potting up your golden barrel cactus. Place a layer of soil at the base of the pot, then set the top of the cactus root ball about 1-2 inches below the pot’s edge, and hold it there while you pour in the mix around the sides. Allow the mix to filter down and lightly pack it to create a porous yet solid base.

BG_CACTUSMIX_1CF-FRONTDo not water the cactus directly after planting, and put it in a partially shaded location. Wait a couple of days before watering, so any injuries to roots during the planting process have had time to heal themselves. Then water in thoroughly. Add more potting soil where settling or pockets occur.

For more visual interest, try adding a surface layer of gravel, glazed tile shards, or tumbled glass. Place in full sun.

Finally, try raising the bottom of the pot up with broken tile shards to create a gap between the drain hole and saucer. This facilitates rapid drainage to create the perfect conditions for cacti and succulents. It also protects decks and paving from what can become a very heavy, beautiful and ferocious plant in your garden.

Rehab Raised Beds Inside and Out

Raised-bed hoops and row covers can help you protect crops from harsh growing conditions and winter cold.

Second gardens are always better than first gardens.  When those first gardens were your raised beds, then maybe it’s time to raise the bar.  Bigger, better, and more prolific are garden characteristics that all gardeners want, so perhaps it’s time to rehab and expand in preparation for next year’s summer garden.

So many raised beds were at first experimental or created with the kids as a family project without long-term planning and smart design.  That’s why they often don’t last as long as they should.  Earth-to-wood contact (something forbidden in house building) introduces wood rot and invites pests, such as termites. You need to know what you are doing to get more life from your raised bed.

Choosing the Best Raised Bed Building Materials

layers
Redwood ties are naturally rot resistant and great for raised bed building.

Early on, wooden railroad tie beds [read more about railroad tie beds] became popular and kept the rot problem at bay, but ties are made from heavily treated wood. They contain dangerous heavy metals and creosote, which can leach into the soil and be taken up by edible plants. Pressure treated wood has the same problem. It is treated with fungicides and other compounds to reduce rot that can leach into the soil.

Untreated woods are not all the same. Many break down fast, resulting in short-lived raised beds. If you want long-lasting beds, avoid soft or rustic reclaimed woods certain to rot quickly. Instead, choose long-lasting red cedar or redwood. Both decompose slowly and are the most recommended for beautiful frames that resist rot. Trex, and other polymer/wood alternatives, also last forever and look great. All of the rot-resistant options are initially more expensive but worth it if you plan to garden for years.

Rehabbing Your Raised Bed

coir
Just Coir creates a good organic base layer for raised bed gardens.

If you already have raised beds made with fast-to-decompose wood, you may already be experiencing the unfortunate and very common results. They are rotting, bowing, or breaking open at the seams due to decomposing edges weakened by the weight of soil, plants, and mulch.  This means it is either time to rebuild or refurbish the frames.

Moreover, if you have had your beds for a while, the soil will be low and in need of replacement. Like all garden beds, soil volume falls as microbes consume the fine humus, and nutrients are depleted by garden plants. Poor garden soil will produce poor garden plants.

Fall is the best time to replenish raised bed soil and fix repairs. Take advantage of the fabulous fall weather to replace all rotting or bowing boards or edges, and revive sad, tired soil.  Here’s the five-step process in a nutshell:

  1. Remove existing soil, if it’s degraded to mostly woody matter and perlite.  Stockpile the old soil material for future use as summer mulch, or layer it into the compost heap.
  2. Inspect the newly exposed sidewalls by stabbing questionable spots with a screwdriver.  If the metal penetrates the wood,  then there’s rot, and they need to be replaced.  Also, check and reinforce loose corners.
  3. Make repairs to sidewalls using Trex or long-lasting, untreated wood boards. Consider adding more height if you would like to grow plants with deeper root systems. Not only should you use strong, quality wood, but investing in heavy hardware will add to the longevity of your beds. Choose heavy wood screws tightened with an electric screwdriver to keep beds from loosening with the seasonal shrink and swell of the wood.
  4. Replace the soil in stages.  Black Gold Just Coir creates a 100% organic matter barrier that holds water and repels root-knot nematodes.  The heart of the raised bed should contain a rich mix of local topsoil amended with Black Gold Garden Compost Blend and a soilless potting mix, such as Black Gold Natural and Organic Potting Soil. The combination depends on the quality of your local soil; great topsoil requires fewer amendments. In general, an even mix of 2 parts topsoil to 1 part compost and 1 part soilless potting mix will yield great results. If drought is a problem in your area, adding a mulching layer of Black Gold Just Coir or Garden Compost Blend will reduce surface water loss.
  5. Add an all-purpose fertilizer, at the manufacturer’s prescribed application, to help drive explosive growth.

Irrigate and Sow

irrigation
Inline drip tubing that invisibly waters your garden without ugly surface tubes and emitters.

Gently water your raised beds to allow them to settle and marry over the winter months.  If you don’t already have it, drip irrigation is highly recommended for effortless raised bed gardening.  Try soaker hoses or buried underground inline drip tubing that invisibly waters your garden without ugly surface tubes and emitters.  If you want to expand next year, put in a new bed close to the old one and share the irrigation.

While watering your rehabbed raised beds, throw in some seeds for beets, radishes, turnips, and other root crops that germinate at temps down to 40 degrees F.  The addition of row covers will protect cool-season crops well into winter.  Harvest the leaves, eat the sweet roots, and enjoy long winter yields as your refreshed raised beds do all of the work for you.

Mounding Garden Beds For Succulents Out West

These linear plantings of agave and cacti are aligned perpendicular to the slope to check the speed of runoff.

Love succulents but hate your clay soil?  Solve it by creating a simple mound of quality soil that ensures your finicky succulents will be happy with perfect drainage.  Under these conditions, your plants won’t suffer waterlogged roots, and rotting will be a thing of the past if you irrigate with a slow drip system.

A mound with all the mistakes: Pointed top, steep sides and dry sandy soil with no cohesiveness that will melt in the first hard rain.
A mound with all the mistakes: Pointed top, steep sides and dry sandy soil that will melt in the first hard rain.

Incorrectly constructed mounds become failures for a variety of reasons.  Most importantly, the soil won’t stay put and soak in when you water, and improper irrigation can leave conditions way too dry, even for succulents.  These problems are due to the shape of the mound; if made too steep on the sides, the water runs off before it can penetrate. Effective succulent mounds need to rise up gradually, provide that flat place on top, and drop down just as gently on the other side.

Sizing Your Mound With Math

A mound is composed of three plains: The upslope, a level zone along the top, and the downslope on the other side.  How high you go is dictated by how much space is available.  The slope is governed by the angle of repose, which for traditional plants must be no more than 30% if the water is to penetrate.  That’s a one-foot “rise” in elevation for every three feet of length or “run”.

Example:  6′ upslope distance + 3′ top of mound + 6′ downslope distance = 15 linear feet

diversity
To create a standout succulent mound, use a wide range of colors, sizes, and textures to give it endless visual appeal.

This equation limits the width of your hypothetical mound to 2 feet in height. Once you calculate its dimensions, do the same for the length.  Then use length x width x height to find the overall volume of the proposed mound in cubic feet. The largest bag of Black Gold Moisture Supreme Container Mix contains 2 cubic feet of material, so either make the whole mound out of this mix or blend it 50-50 with natural soil. Aggregate can be added to increase drainage.

Grading Your Mound

Where soils aren’t heavy clay, the container mix is an extender and to better integrate local soil flora into the mound.  Mix very well with a tiller or fork, then gently grade the mound into a graceful shape without broken curves or undulations. When grading out your mound, keep the soil damp and lightly compact the surface so it holds together.  Use boulders where conditions are irregular or create fields of smaller attractive pebbles to hold ground or control runoff.

Succulent Planting Strategy

angle of repose
Planting on this slope features larger agaves and masses of small succulents to hold soil against erosion.

Water flows downhill picking up soil particles with speed. To keep this from happening plant against the direction of the water flow.  (This is what wheat farmers do to minimize erosion; they align their planting rows perpendicular to the natural flow of water.)  Use small, densely planted succulents for steeper spots then irrigate with micro-spray irrigation to allow roots to create a network better able to hold the slope.  Larger succulents, like aloes, further guide runoff away from more vulnerable locations with a single drip emitter.

A mound for succulents doesn’t need to be as high as those for plants with deeper root systems.  In most cases, they are fine with just one foot of elevation to keep plants and root crowns high and dry.  When the mound is in and fully planted, finish it off with a fine layer of stone or pebble that blends in with your cobbles and boulders for a perfectly designed display garden you’ll be proud of.

Cool Grasses for Container Garden Simplicity

hair grass2
Dynamic pots of Mexican hair grass had a simple yet striking accent to this patio garden.

“In character, in manner, in style, in all things, the supreme excellence is simplicity.”  Longfellow penned this well over a century ago, yet it’s more relevant than ever today.  If the stark white room with its Spartan decor and tactile organic accents seems like heaven to you, then perhaps its time to take it all outside.  Blend the new look of minimal organic contemporary or country with just the right plants to create the ultimate experience – not of color – but of texture.  Eschew big and bold for fine-textured foliage that is not only carefree but incredibly dramatic.  Explore the animated character of the grasses and reeds that come alive in a breeze and speak in the language of spiky shadow when lighted after dark. Continue reading “Cool Grasses for Container Garden Simplicity”

Swanky Succulent Container Gardens


Succulents - Maureen Gilmer - Feature Image
Succulents: Elegant pedestal urns feature rounded mounds of succulent plants topped with a crown of spiky leaves.

Nestled into opulent coastal southern California is a nursery where I go to find out what’s hot in the world of container gardening. Decades ago Rogers Gardens was founded on flower-filled hanging color baskets so fabulous they draw tour buses daily. I worked there in the early 80s and today I return to see how they display every hot trend in container gardening. Most of what I see can be recreated using Black Gold specialty potting soils to make your home garden just as exciting this year.

Mesclun - Maureen Gilmer
Mesclun: Integrating colorful lettuce into pots and gardens makes more opportunity to snip for dinner.

GREENS

Edible greens are proving to be one of the most interesting plants for both ornamental and food gardens. At Rogers they are displayed in glorious color from purple kale to pastel mesclun mixes of curious gourmet lettuce and greens. Potting them into decorative containers is easy when you use Black Gold Natural & Organic Potting Soil. Blend these with edible flowers and culinary herbs for beauty you can snip and pinch into salads, soups and as decorative garish.

Flax - Maureen Gilmer
Flax: Latest looks include dark burgundy Aeonium and bright red striped Phormium combine in terra cotta.

SUCCULENTS

Growing succulents in containers demands fast draining Black Gold Cactus Mix. Such porosity allows you to cram dozens of colorful rosettes into the same pot without concern for rot setting in. The latest look is combining vivid autumn colored foliage plants such as New Zealand flax hybrids with gobs of succulents for perfect compatibility.

Mediterranean - Maureen Gilmer
Mediterranean: Woody rosemary topiary sits atop high-contrast succulents.

MEDITERRANEANS

Demand for drought resistant plants and popularity of Spanish inspired architecture puts Mediterranean species front and center. The creation of topiaries from rosemary and fruitless olive provides excellent form and fragrance with other less European selections. Fruitless olive and its dwarf cousin ‘Little Ollie’ are hot right now to accent Mediterranean inspired architecture. Blend them with succulents or low profile herbs in traditional terra cotta pots for focal points on patio and terrace. Use Waterhold Cocoa Blend Potting Soil to retain moisture and reduce the need to water often, making these creations even more water conservative than Mother Nature planned.

Herb Box - Maureen Gilmer
Herb Box: Old boxes repurposed at Rogers for a small space herb garden or a super gift idea.

HERBS

Every foodie needs an herb garden filled with the best culinary species. At Rogers this year they’ve used old wood crates to create rustic herb gardens perfect for an apartment balcony, a condo courtyard or even a small roof garden. It’s truly amazing how useful they are when ganged together like this, offering lots to pinch and pluck. Since so many herbs come from arid climates that lack summer rainfall, try Hy Porosity Natural and Organic Potting Soil which helps them stay high and dry during rainy summers.

During my years at Rogers I learned that one potting soil doesn’t fit all plants. That’s why Black Gold offers so many options. Use the right ones so you can be just as successful with your succulents, Mediterraneans, edibles and herbs no matter where you live.

Reusing Old Potting Soil is Bad

1-DSC_0169Reusing old potting soil is a bad idea. Would you risk your crop to save $25? Of course not, so why would you reuse growing media that may prove less than ideal for your valuable plants? This is the question every grower weighs after harvest: Whether to replace the growing media or reuse it another time.

If you’re still not sure, consider the triple threat: Three very important reasons why fresh Sunshine Advanced soilless media will always perform.

Continue reading “Reusing Old Potting Soil is Bad”

Build Organic Garden Soil with Black Gold

Building organic garden soil is the same as working the soil for any other kind of garden except for one thing: you must feed the soil with OMRI Listed products for organic gardening. The ground below your feet is not just dirt but a whole living breathing universe unto itself. Within those soil mineral particles are populations of microscopic bacteria, fungi, yeasts, protozoa and algae. They are collectively known as microbes, which feed on the remnants of dead plants, also known as organic matter. Organic gardens depend on high microbe populations to make plants grow strong naturally, resist pests and diseases, and produce a bumper crop of food or flowers.

Continue reading “Build Organic Garden Soil with Black Gold”

Better Results All Season Long with Black Gold®

Black Gold All Purpose with Multicote Potting SoilWith the advent of Black Gold® All Purpose, you are now able to enjoy the benefits of a premium quality potting soil with a fertilizer that will feed your plants for up to six months. Sun Gro sells this same fertilizer product to professional growers. By incorporating Multicote® into your potting soil, your plants will have a consistent supply of nutrients throughout the entire season.

Multicote®, a controlled release fertilizer, has been coated with a polymer that slowly breaks down to release the nutrients over time. Unlike other controlled release fertilizers in the marketplace, Multicote® will not release excessive nutrients in higher temperatures, thus ensuring your plant will thrive no matter what the weather. This baseline of fertilizer allows your plants to grow all season long, not just when you remember to fertilize. Additional fertilizations with a liquid fertilizer, starting a couple weeks after planting, will ensure your plants get all the nutrients they need, particularly if your plants are heavy feeders.

Ideal for all types of plants, Black Gold® All Purpose with Multicote® is a great choice for house plants, patio containers and hanging baskets. Canadian Sphagnum Peat Moss with earthworm castings, forest humus, compost and pumice combine to provide your plants with both moisture retention and good drainage. Since this potting soil has a higher amount of peat moss, it is ideal for gardeners looking to reduce their fertilizer and water usage.

Think of all the benefits – you start with a premium potting soil; add a controlled release fertilizer that will lessen the frequency of fertilizing; and you get improved plant performance by using Black Gold® All Purpose Potting Soil with Multicote®.

Fresh Potting Soil is Better

Everything is better fresh, whether you’re talking about donuts, cut flowers for your dinner table, or the potting soil for your patio container. That’s why we sell only fresh potting soils at Black Gold. After potting soils or amendments are manufactured they become a living entity. The fertilizers and wetting agent start to react in their moist organic media environment. As part of our commitment to quality we put a date of manufacture on all Black Gold® potting soils, amendments and peat moss. The products are stamped with production codes.