Articles

Bold Aroids for Big Summer Color

The colorful, pink, red, and green leaves of ‘Caroline Whorton’ will brighten up any shade bed.

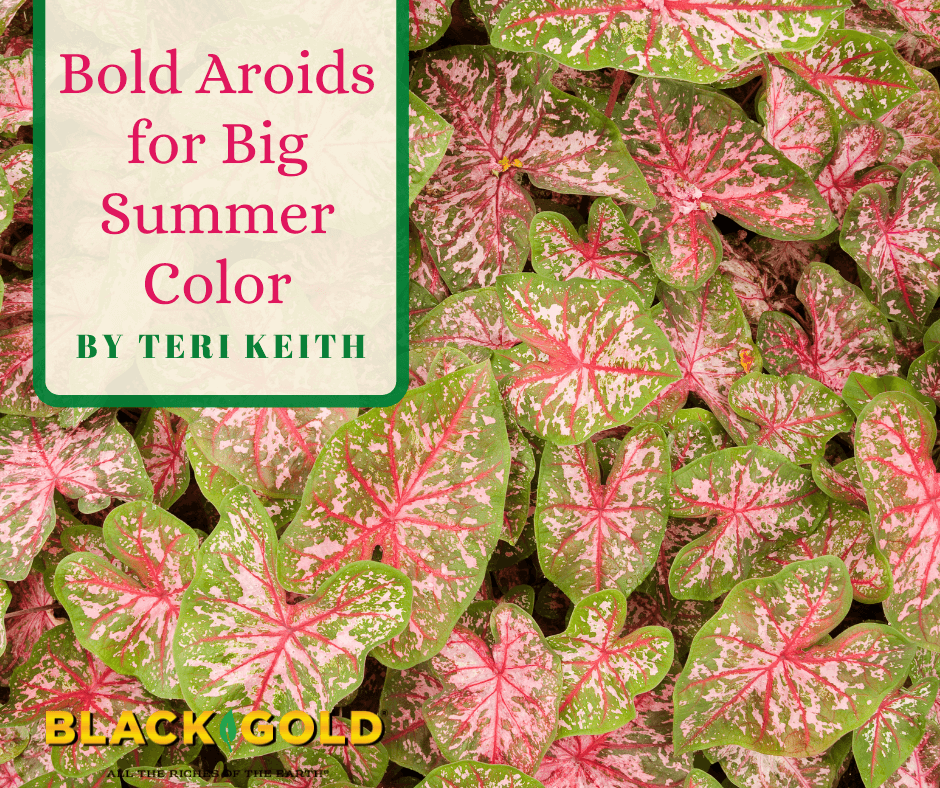
Summer is almost upon us, so it is time to start thinking about what beautiful plants we want to fill our gardens and containers with this year. Usually, I think of flowers, but I am also going to get some beautiful aroids for foliage as well.  All are tropical members of the Arum family (Araceae), which is the same family as the eastern native wildflower Jack-in-the-Pulpit, but their show is in their impressive leaves rather than their unusual flowers.

Growing Preferences for Garden Aroids

These aroids grow best in full to part shade, and they like warmth and humidity. This is because many originate from tropical rain forests from around the world, particularly in the Americas. Those mentioned in this article have impressive leaves and rarely flower in temperate regions. The blooms, if they do appear, consist of a single, large petal-like spathe that surrounds a column of flowers called a spadix. (Click here to see a spathe and spadix bloom.)

The plants require constant moisture, without saturation, and loose, well-drained soil. If your soil has low fertility, adding an amendment is recommended. Working ample amounts of Black Gold Canadian Sphagnum Peat Moss into your garden soil will increase its organic matter, helping it drain more quickly but stay moist. Peat also slightly reduces soil pH, which the aroids mentioned here prefer (6.0-7 pH). For container-grown aroids, Black Gold All Purpose Potting Mix is the perfect option.

Caladiums

Bottlerocket is a brilliant Sun or Shade Caladium from Proven Winners. (Image thanks to Proven Winners)

About Caladiums

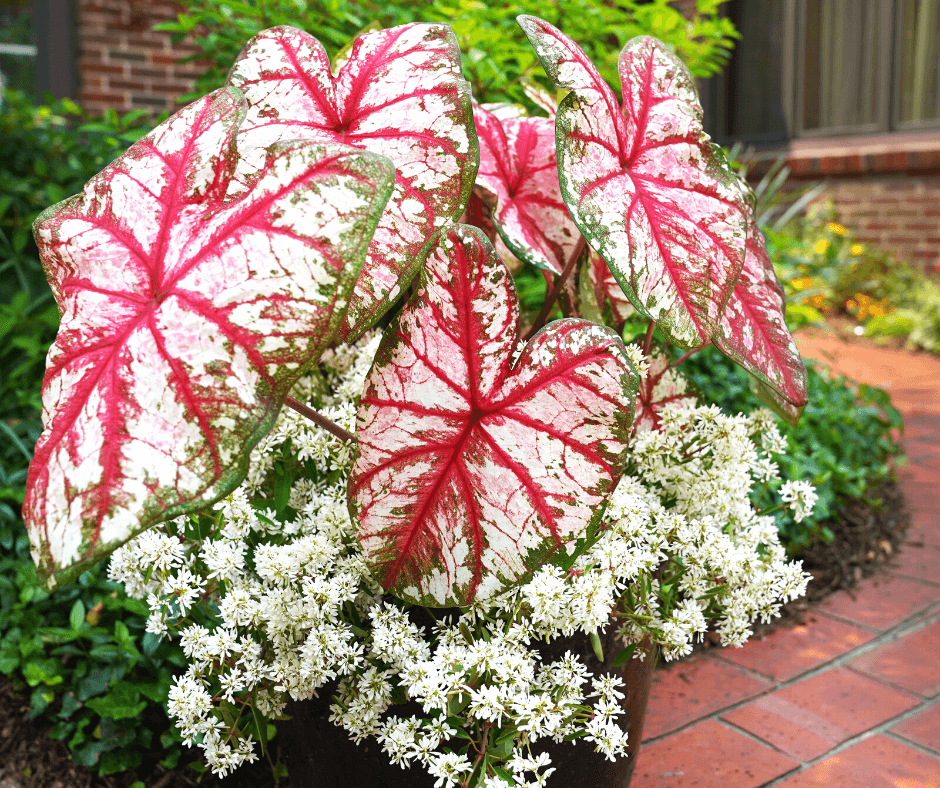
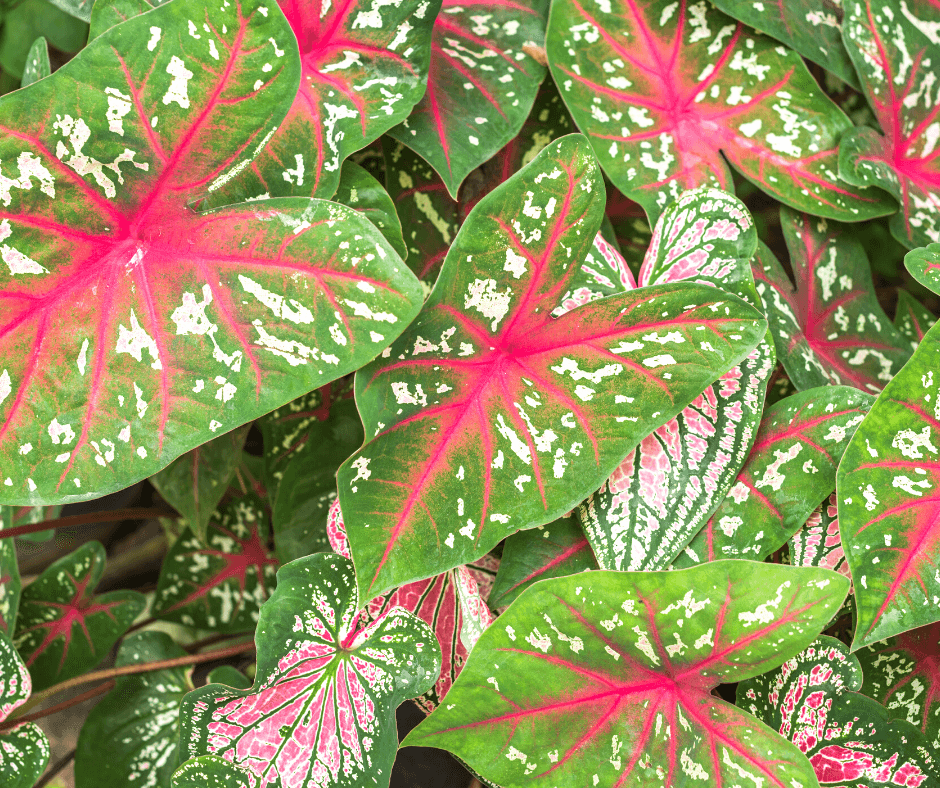
For me, the top aroids on the list are caladiums (Caladium hybrids, Zones 9-11), also called angel’s wings. They love full to part shade (more shade is needed in hotter climates) and provide a lot of color to low-light gardens. They range in size from 1 foot to 2.5 feet tall and have 6- to 12-inch leaves. The gorgeous plants have big, heart-shaped, or strap-shaped leaves that come in shades of white, pink, red, and green, most often in a dazzling mix of bright colors on each leaf. Thousands of varieties have been developed since the late 1700s when they were first introduced from South America to Asia, Europe, and the Americas. They are popular garden plants worldwide.

Growing Caladiums

Caladiums are often grown as annuals in the north. This is because they are a challenge to dig and overwinter indoors. They have tuberous roots, somewhat like potatoes, only much smaller. In winter storage, the fleshy roots often die from fungal rot, both tuber rot (Fusarium solani) and root rot (Pythium myriotylum). Despite these challenges, I have read that with special treatment and care the tubers can be overwintered. The key is keeping them warm and lightly moist. An application of copper sulfate fungicide before they go into storage can also help. With this information in hand, I am going to treat mine with fungicide and store them properly this winter to see if I cannot get them to survive until early spring when they can be planted again. In tropical to subtropical areas, Caladiums winter over in the ground and have a short dormant period.

‘Red Flash’ Caladium and the strap-leaved ‘Pink Symphony’ are just two of hundreds of lovely Caladium to buy.

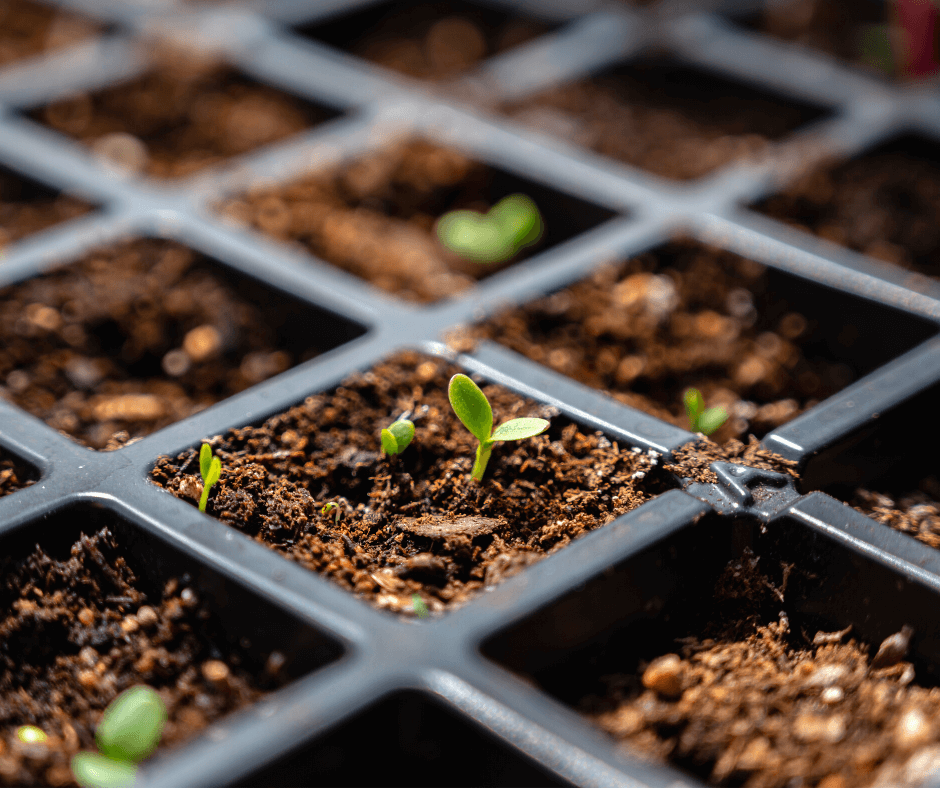
When planting Caladium tubers in the spring, start them indoors in a fresh potting mix. Plant them no more than 2-3 inches deep and 6 inches apart.  To encourage more large leaves, remove the large central bud from the tuber while leaving the smaller outside buds to send up leaves. This gives the smaller buds more food from the start, which helps them get bigger faster. After planting them, fertilize with Proven Winners Continuous-Release Plant Food because they are heavy feeders. The 6-month formulation feeds plants throughout the growing season with only one application.

They require warm temperatures of 65-75 degrees F and good humidity. Before planting them outdoors, the days and nights should be warm. This may mean waiting until early June to plant them in northern zones.  Tubers that are directly planted in the cold, spring ground will often rot and die.

Caladium Varieties

There are so many wonderful Caladiums to grow! Some excellent varieties include the white ‘Fiesta’ with red veins, dark green ‘Red Flash’ with red veins, and green-faced white ‘June Bride’. The especially colorful ‘Carolyn Whorton’ has light green leaves with splotches of pink and red veins. Some newer varieties have been bred to grow well in the full sun or shade. The best of these are Sun or Shade Caladiums by Proven Winners. The celebratory Sun or Shade Bottle Rocket, with its brilliant red, pink, white, and green leaves, is especially pretty.

Good sources for every Caladium you might want are Caladium World, Caladiums Florida, and Fancy Plants Farm. They are all based in Florida where Caladiums are cultivated, so you know that you will be getting the freshest tubers available. No rot here.

Elephant Ears

The leaves of true taro (Colocasia esculenta) are beautiful in their own right.

About Elephant Ears

There are two other genera of common garden plants related to Caladium that have big, beautiful leaves. They are the elephant ears, Alocasia and Colocasia. One layman’s way to tell them apart is that many common garden Alocasia have leaves that point up and Colocasia have leaves that point down, though this is not always the case. Both have fleshy root structures that are either bulbs, rhizomes, or tubers, depending on the species. The plants naturally spread as they grow and can be separated and replanted each season. They are also nice to share with friends.

Growing Elephant Ears

Unlike Caladiums, elephant ears will generally tolerate more sun, and many like moist or even wet soil. When you plant them outdoors in the warmth of the late spring, mix Black Gold Canadian Sphagnum Peat Moss or Natural & Organic Garden Compost Blend into the soil to increase fertility. Water plants in the ground 2 to 3 times a week and containers daily in the absence of rain. An application of continuous-release plant food will help them take off quickly and feed them through summer.

Like Caladium, before planting elephant ears outdoors, the soil needs to be at least 65 degrees Fahrenheit.  To get them going earlier, start them in pots indoors in a warm spot with bright, indirect light. Plan for garden space because elephant ears can get very large. Be sure to use the spacing guidelines provided. Potted elephant ears need large containers; half whisky barrels work well.

Water them well. Do not let the soil dry out, and water when it becomes dry about 1 inch down. Plant the large bulbs 4 to 6 inches deep. In the fall, the bulbs can be dug and overwintered in a cool, dry place. In warmer zones, cut back the leaves, cover the crowns with mulch, and leave the tubers in the ground to overwinter. They should come back next spring.

Elephant Ear Varieties

Giant taro is commonly sold as huge bulbs in the spring. Plant them outdoors once the soil warms and give them space.

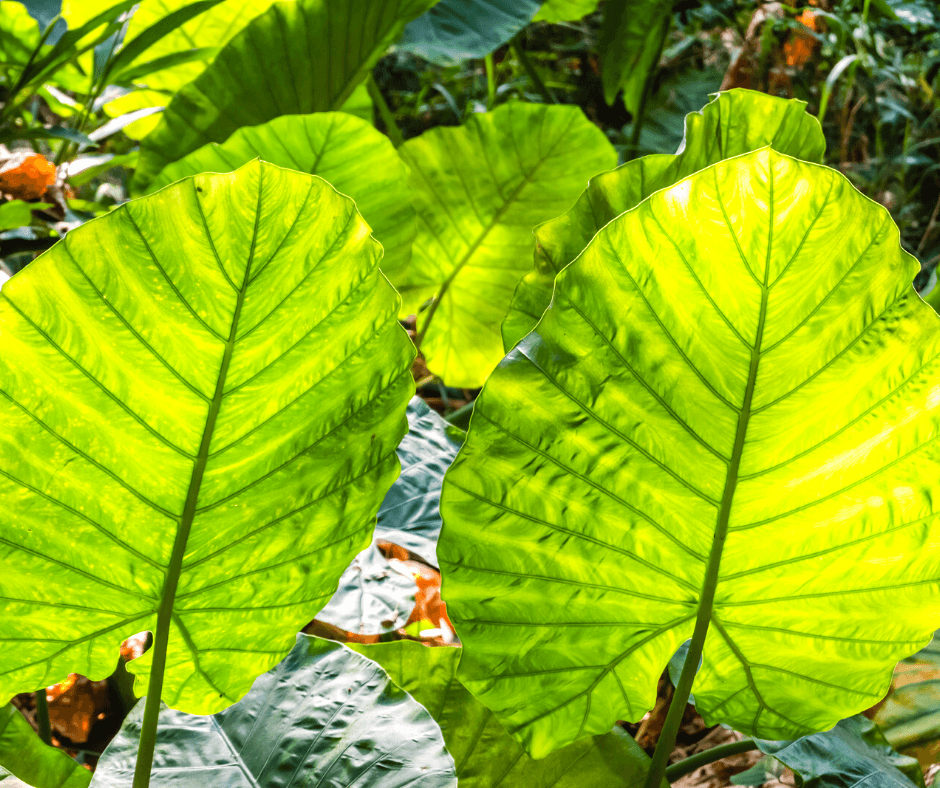
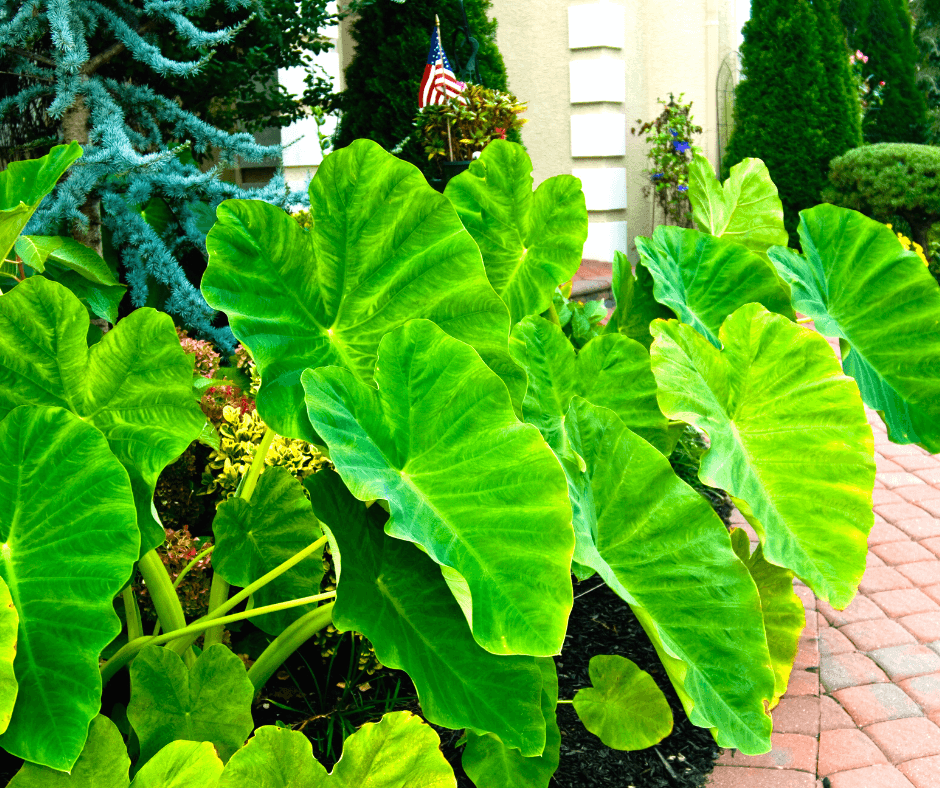
Giant taro (Alocasia macrorrhizos, Zones 9-11) is cultivated across tropical Asia and has huge green leaves that point upwards. The plants can reach 6-15 feet, depending on the size of the bulb and whether it is being grown in a temperate or tropical climate. Give it a lot of space, water, and care, and you will be rewarded with an impressive garden specimen. Dig and overwinter the bulbs in cold-winter climates.

Portora giant elephant ear (Alocasia ‘Portora’, Zones 7-10) is a hardier and slightly shorter plant that reaches 4-8 feet. It has striking, large, upright green leaves with wavy edges. Grow it like giant taro. Consider protecting it with a layer of mulch in the fall to help it overwinter where hardy.

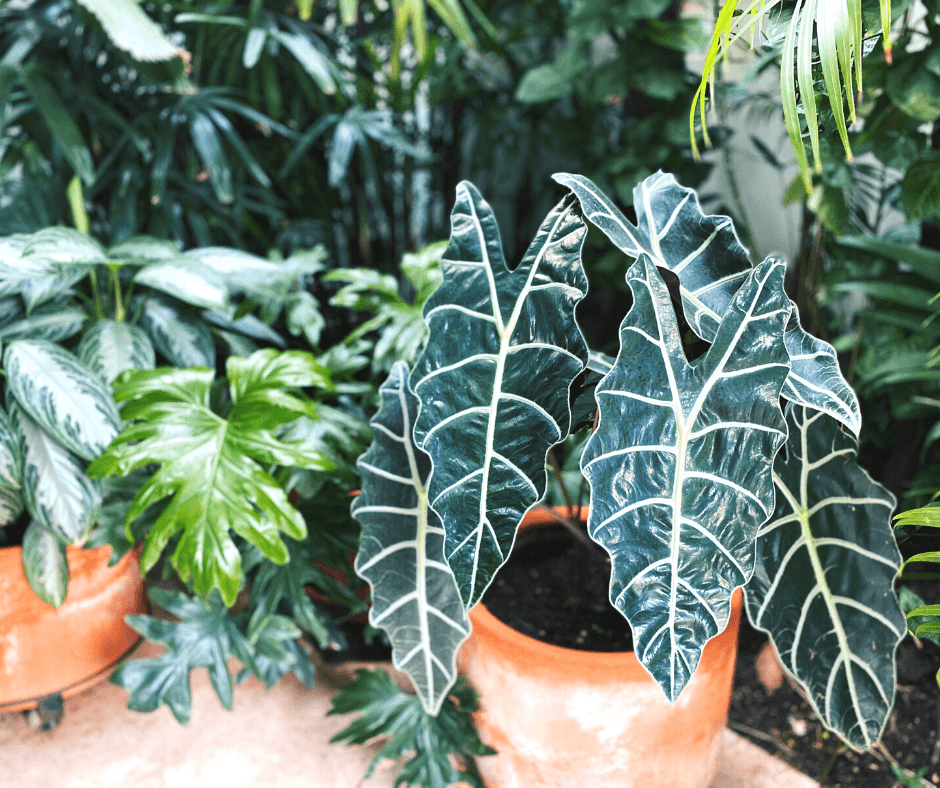
Polly African mask (Alocasia ‘Polly’, Zones 10-12) is a more compact plant with narrow dark green leaves that have striking white veins and scalloped edges. It looks especially beautiful in containers and also grows well as a house plant.

Black Velvet elephant ear (Alocasia reginula ‘Black Velvet’) is a compact form that reaches just 20 inches tall. It has large, dark leaves with prominent white veins. Each feels like velvet. Grow these in outdoor containers and pot them up as houseplants in the fall. They pair well with colorful begonias. (Click here to read my article about cascading begonias.)

Polly African mask is one of many smaller elephant ears that grow well indoors and outdoors.

True taro or elephant ear (Colocasia esculenta, Zones 8-10) is the most common of all the elephant ears. It likes full sun to shade and all moist soils, even clay. During dry times, don’t forget to give it 3 to 4 inches of water every week. Mulching also helps to keep in the moisture. Where not hardy, dig them before frost. Lift the bulbs and store them in dry peat moss, in a cool, dark area indoor area. There are lots of very pretty varieties including the purple dappled ‘Mojito‘, bold, upright ‘Coffee Cups’ with its cup-shaped leaves with dark purple veins, and the classic ‘Illustris‘, which has elegant leaves of darkest purple and green veins. ‘Jack’s Giant‘ has all of the looks of the standard taro but it’s really big!

Thai Giant elephant ear (Colocasia gigantea ‘Thai Giant’, Zones 8-10) can get really large, so leave plenty of room outside if you want one. (I plan to grow one this year in a damp spot of the garden.) Mature specimens can reach 9 feet tall with leaf blades that are 5 feet tall and 4 feet wide. It can have scented white flowers as well, but these are less common in temperate climates.

Any of these beautiful aroids will add impressive beauty to the garden. I hope this article has given some gardeners the desire to plant one of these bold, unusual plants.  I am buying ‘Thai Giant’ today!

Special Note: There are toxic irritants in the leaves of most aroids, so wear gloves when cutting them. Refrain from planting them if you have pets or small children that might ingest them. Visit the ASPCA to learn more about their toxicity to animals. If someone ingests some, be sure to contact Poison Control.

Favorite Flowering Ground Covers

‘Shell’Pink’ and ‘Orchid Frost’ lamiums look lovely side-by-side.

If you have a garden area that needs filling in, whether along a slope, between plants, or beside stone steps or rocky retaining walls, there are many beautiful perennial groundcovers for the job. They range from ones that do well in hot, dry areas to others that like moist shade.  I have chosen groundcovers that have beautiful leaves as well as flowers, which do not overwhelm surrounding plants and are easy to grow.

Flowering Groundcovers for Full to Partial Shade

‘Orchid Frost’ is one of many pretty deadnettles for shady gardens.

Spotted Deadnettle (Lamium maculatum, Zones 3-8): One of my favorites for shade is named spotted deadnettle, or simply deadnettle, even though it has no prickly nettles.  I have had several varieties in my shade garden for years. The early summer flower stalks are about 7 inches tall, rising over 4-inch-tall plants that spread several feet across. There are lots of varieties with variously spotted leaves and blooms of purple, pink, or white that are visited by bees. My favorite varieties include ‘Orchid Frost’ with lavender flowers and beautiful silver leaves, ‘Aureum‘ with bright pink flowers and white-striped gold leaves, Shell Pink‘ with palest pink blooms, and ‘White Nancy’, which has white flowers and silvery leaves. Lamium is deer-resistant, spreads gently, and is easily divided and transplanted. Plant it along shaded bed edges or allow it to cascade from the side of a shaded container garden. Lamium likes full to partial shade, and moist, well-drained soil.

Fragrant sweet woodruff flowers and plants look attractive in shaded gardens.

Sweet Woodruff (Galium odoratum, Zones 4-8): Another partial- to full-shade groundcover is European sweet woodruff, which also has the benefit of being an herbal plant used to flavor May wine in Europe. It has clusters of starry white flowers in the spring and whorled, star-shaped leaves; both are fragrant, but it’s the flowers that are used to flavor the wine. (Click here for a May wine recipe.) Sweet woodruff is about 8 inches tall and gently spreads around trees and shrubs.  It likes moist, well-drained soil and is deer resistant!

Wild ginger creates mats of attractive foliage through the growing season.

Wild Gingers (Asarum spp., Zones vary): There are many wild gingers with lovely ground-covering foliage and interesting beetle-pollinated spring flowers. The popular native species is Canadian wild ginger (Asarum canadensis, Zones 2-8). Its medium-green, heart-shaped leaves look very pretty on bed edges or to hold shaded garden banks. Chinese wild ginger (Asarum splendens, Zones 6-8) is more ornamental with its pointed, green leaves that have spectacular silver markings.  ‘Quick Silver‘ is the best variety. Small, three-petaled, purple flowers appear around the base of the plants in spring. It also does well in full to part shade.  Most Asarum reach 6 to 8 inches, like average well-drained soil, and are deer resistant.

‘Cutting Edge’ Tiarella has attractive spring flowers and lovely leaves. (Image thanks to Proven Winners)

Foamflower (Tiarella spp.): These pretty native perennials have attractive, lobed foliage and spires of foamy flowers that appear in late spring. The flowers may be ivory or pink and attract both bees and butterflies. The pretty clumps of ornate leaves spread over time. Try the new Proven Winners variety ‘Cutting Edge’, which has spectacular green, maple-shaped leaves with red venation. Provide foamflower with full to part shade, and moist, well-drained soil amended with fertile organic matter, such as Black Gold Natural & Organic Garden Compost Blend. In fact, this amendment will create a good soil foundation for all of the shade-loving groundcovers mentioned.

Flowering Groundcovers for Full to Partial Sun

Creeping thyme doubles as an herb and groundcover.

Creeping Speedwell (Veronica prostata, Zones 4-8): Grow this creeping groundcover along a border edge or in a rock garden. The stunning variety, ‘Aztec Gold’, has gold leaves with violet-blue flowers in the early summer.  It reaches 6 inches tall, is heat tolerant, and needs moderate moisture. Deer don’t like it but bees and butterflies do.

Creeping Thyme (Thymus serpyllum, Zones 4-8): This easy garden herb is one of my favorites. It does well between paving stones or cascading down rock walls. The fragrant leaves are tiny plants reach 2-inches-high. The spreading mats have little summer flowers of purple, bright pink, or lavender, depending on the variety you buy. Bees love the blooms! Check out ‘Elfin’ with purple flowers, ‘Annie Hall’ with pink flowers, and ‘Silver Posie’, which has white-edged leaves and lavender flowers. The fragrant leaves can be used in cooking. Thyme needs full sun, very well-drained soil, and is drought-tolerant once established. Like most plants in the mint family, it is also deer resistant.

Creeping phlox is perfect for garden edges and slopes (‘Emerald Blue’ is at the far left, and ‘Candy Stripe’ is at the far right)

Stonecrop (Sedum spp., Zones vary): For hot, dry, sunny, areas nothing can beat, low-spreading stonecrops.  Many have beautiful, succulent leaves, as well as starry flowers that attract bees and butterflies. It is very easy to pull up a piece and replant it to help fill in an area quickly. Some good varieties are the 2-3 inches tall ‘John Creech’ (Sedum spurium ‘John Creech, Zones 3-9) with pink, summer flowers, SunSparkler® Wildfire (Zones 4-9) that has red leaves edged in rose as well as pink flowers in the late-summer, and ‘White Diamond’ (Sedum pachyclados ‘White Diamond’, Zones 5-9) with blue-green rose-shaped leaves and white summer flowers.  The broad-spreading ‘Angelina’ (Sedum rupestre ‘Angelina’, Zones 5-9) is a popular variety with gold spiky foliage and yellow summer blooms.  Sedums are drought-tolerant once established.

Creeping Phlox (Phlox subulata, Zones 3-9): This has some of the most beautiful flowers of all the groundcovers and blooms for up to 4 weeks in the spring.  It averages 5 inches tall and spreads quickly. Plant creeping phlox in open, sunny areas along slopes or retaining walls, in front of shrubs, or in rock gardens where they will get full sun and well-drained soil.  Look for the colorful varieties ‘Scarlet Flame’ with red-eyed rose-pink flowers, ‘Emerald Blue’ with pale lilac-blue flowers, and ‘Candy Stripe’, which has pink flowers edged in white.  Creeping phlox is deer resistant.

Snow-in-Summer can take heat and drought!

Snow-in-Summer (Cerastium tomentosum, Zones 3-7): gardeners with hot, dry, sunny spots that need a flowering groundcover should grow snow-in-summer. It creates a broad, spreading mat of silver leaves that erupt with cascades of white flowers in the summer. Try the more compact variety, ‘Yo Yo‘. It is beautiful! Site it as you would creeping phlox. Bees and butterflies love the flowers!

These easy groundcovers will help to provide needed in sweeps across your garden. Buy a few to fill in bare areas, and you will be glad you did.

Groundcovers to Avoid

It is important to note that there are some popular groundcovers to avoid because they are invasive and have become an ecological problem in wild areas. These include groundcover periwinkle (Vinca minor and Vinca major), wintercreeper (Euonymus fortunei), Bugleweed (Ajuga reptans), Japanese spurge (Pachysandra procumbens), and worst of all, English Ivy (Hedera helix). English ivy is a tree-killer in zone 7 or warmer (click here to learn more). The evergreen types are truly the worst because they smother native spring ephemerals and other natives along the forest floor. Avoid planting them, if you can.

Growing Perennials From Seed

Coneflowers, catmint, rudbeckia, and butterfly weed (top left, clockwise) are all easy to start from seed.

Spring will be here before you know it, and this means it is time to buy this year’s perennials, whether old favorites or new ones you haven’t tried before.  The problem is how much they cost. To plant a modest new bed of perennials, you can expect to pay over $100 for just eight to ten plants. Growing them from seed is much more cost-effective if you know what to grow and how to grow them.

As a lifelong gardener and former perennial nursery manager, I am sensitive to the cost of these garden staples. Perennial plants seem to get more expensive year after year. For example, I planned to buy several butterfly weeds (Asclepias tuberosa) this season to help the struggling Monarch butterflies. But, even small pots are $8 to $10 per plant or more. Most designers recommend planting garden flowers in groups of three or more, so that is a minimum of $30.00 for just three plants, and more is always better. That is a lot of money! In turn, butterfly weed seeds are usually no more than $3.50 for a packet of 50 seeds. Wouldn’t it be nicer if you could grow them from seed and save a fortune?  Here’s how to do it.

Perennial Seed-Starting Materials

Full-spectrum grow lights encourage denser shoot growth in indoor-grown seedlings.

There are a few essentials that home growers need if they are not fortunate enough to own their own greenhouse, conservatory, or sunroom. The items are low-cost and most can be used year after year. I do not recommend windowsill seed starting if you intend to grow seedlings to planting-sized plants because even south-facing windows don’t provide enough uniform light to keep seedlings from stretching and becoming spindly. Fancy seed starting racks or systems can be purchased, but I have always found the following materials to work just fine for all of my seed starting needs, and I’ve been doing this for nearly 50 years.

Grow Lights and Fixtures

First of all, you need to buy grow lights.  Plants require most wavelengths of light to feed themselves and grow, so the more full-spectrum the bulb the better. Four-foot-long shop light fixtures fitted with fluorescent grow bulbs is the most economical option, though other bulb and fixture options exist. (Click here to learn more about different grow bulbs, and Click here to learn the difference between shop light bulbs and grow light bulbs.)  The best prices I have found online are for the AntLux 4ft Full Spectrum LED Shop Lights and Fixture, and the Durolux 4Ft Full Spectrum Fluorescent Lights and Fixture.

 Seed Starting Trays and Labels

Then you will need special seed starter trays. It is a small investment, but quality starter trays can be washed and reused for many years.  I recommend Delxo Seed Starting Kits with trays that have 48 individual planting cells for lots of seedlings and a watertight base tray. The kits also come with plastic covers with air vents at the top to control temperature and humidity, plus small tools, to help plant the seeds, and remove the seedlings. The kit even comes with its own labels, though I always like to have extra wooden planting labels because they are always handy.

If you reuse your trays or labels from year to year, be sure to scrub them out with hot water, dish soap, and a little bleach before using them again. Remember to rinse them well to remove any bleach residue.

Seed Starting Mix, Fertilizer, and Waterer

And lastly, you need a special seed starting mix, such as Black Gold Seedling Mix, which is extra fine for small or large seeds and lacks added fertilizer or salts, which can inhibit sprouting in some seeds. Our OMRI Listed Black Gold Seedling Mix also has an added organic wetting agent, to keep it from repelling water when dry, and it contains RESiLIENCE, a special silicon additive that is believed to promote better root growth, denser branching, and faster recovery should you forget to water.

Once seedlings start to put out their true leaves, you can start fertilizing them. I always choose quality, all-purpose, water-soluble fertilizer, such as Proven Winners Water Soluble Plant Food. Seedlings need gently water from the top in addition to bottom watering. Misters or small watering cans are very useful for seed starting.

Perennial Seeds

You can buy seeds or try collecting perennial seeds from the garden for growing, such as these Milkweed, Pulsatilla, Baptisia, and Allium (upper left, clockwise).

Before addressing what to grow, there are two sources for perennial seeds that I always use and highly recommend.  The first is Park Seed (visit their website to request a catalog). They have a huge collection of seeds, and I have been buying from them since the early 1970s. Their seeds are always fresh, well packaged, and germinate well. The other perennial source I adore is Select Seeds.  They are the only company I know of that has heirloom flower seeds, some going back to the 1600s. Their packets are filled with many seeds, and they always do well for me. Swallowtail Seeds has lots of varieties and comes highly recommended. Finally, my oldest daughter grows lots of native perennials and has recommended Prairie Moon Nursery to me on many occasions for their quality seeds. You might also try your hand at seed collecting from year to year, if you feel adventurous.

Perennial Seed-Starting Steps

Start by reading your seed packets from cover to cover.

Read Your Seed Packets

Start by reading your seed packets from cover to cover. Some perennial seeds can be planted with no preparation, but some need to be nicked or chilled in the refrigerator for several weeks to properly germinate. Those that I highlight below are not challenging to start, but It is good to know that some seeds need a little more attention.

Gather Your Materials and Prepare Seedling Area

Next, gather all of your materials. Make sure to hang your lights and prepare your growing area. I like to put down a plastic table cloth to protect any tables from leakage and for easy cleaning. Fill up your watering cans and misters, and get going.

Prepare Your Planting Trays

Wash your hands before starting, to avoid any contamination. Put the seedling mix into a bowl, and wet it until uniformly moist. Fill the cells in the trays with the moistened seed starting mix, and be sure to leave a little space at the top for large-seeded perennials.  (After reading the back of your seed packets, you will know if the seeds need to be covered or not.) I like to determine how big seeds are before I start planting. Some seeds are dust-like (Begonia seeds), while others are very large (perennial sunflower seeds), so some are simply sprinkled on the soil surface while others must be covered.

Sow Your Seeds

There should be just one seedling per cell. Extras can be moved or pinched out.

I like to sow two seeds per cell to make sure I get at least one seeding per cell. When working with small to medium seeds, I sprinkle two into the cell, making sure that they are separated, and then gently press the seeds down into the mix. (If both seedlings pop up, I either remove the weakest seedling after the seedlings have grown a bit, or I gently move one of the seedlings to an empty cell.)

Label, Water, Cover

Label the cells, either as groups or individually, marking each different flower you are growing and the date planted. Mist the seeds, but make sure that the soil is moist, not saturated. Saturated soil will cause seeds and seedlings to rot before they get a chance to grow. Put the cover on the tray, and lower the lights as close to the tray as possible. The plastic cover keeps the mix from getting dry, but aeration is also important. Sometimes I lift the cover for several hours in the day to let things dry out a little.

Seedling Care

Seedlings for fast-growing perennials may need to be upgraded into 4-inch pots. Consider this at planting time with respect to space.

Once the seedlings have all popped up, remove the lid entirely. Too much moisture will cause damping off, or seedling rot. When you have removed the lid, keep the grow lights just inches above the small plants. This will encourage the densest growth and keep plants from becoming leggy. This is also the time to start feeding the seedlings weekly with a 1/2 strength solution of fertilizer. Fast-growing perennials may need to be upgraded into larger, 4-inch pots, some won’t. They will also require a little more water, so make sure you don’t let them get dry. Lightly moist soil is recommended. When your seedling is large enough to plant, usually 5-8 inches, and the spring weather allows, it is time to harden them off and get them planted.

Harden Seedlings Off

When the threat of frost has passed, it’s time to move the seedlings outdoors for hardening off, which reduces shock and helps perennials acclimate them to a sunny, outdoor environment. Start by bringing the trays outside, starting with a couple of hours, and increasing it until they are well adapted to the light, wind, and temperatures of the outdoors.  After a week or so of hardening off, you can plant your perennials in the garden!

Planting

New plants always grow best in a prepared bed (OMRI Listed® Black Gold® Garden Compost Blend will increase organic matter and drainage) or container filled with quality potting soil. Be sure to plant your seedlings in locations with the right sun and soil for their needs.

At planting time, be careful with your little perennials. When removing one from a cell never pull it out from the top. Instead, tip the tray partway over and push up from the bottom to release the roots. A butter knife can also be used to lift small plants from cells or loosen perennials from a 4-inch pot.  fertilize time-released fertilizer for easy summer feeding.

What Perennials to Grow from Seed

Coneflowers are the easiest and most satisfying perennials to grow.

There are lots of easy perennials that will bloom in the first year from seed. I have grown and enjoyed ‘Gay Butterflies’ butterfly weed, black-eyed Susans (Rudbeckia spp.), phlox, catmint (Nepeta spp.), asters (Symphyotrichum spp.), perennial geraniums, salvias, blanket flower (Gaillardia x grandiflora), and many other wonderful, easy perennials from seed. Over the years, they have brought me much joy and saved me lots of money! Here are growing details for a few of these.

Purple Coneflower (Echinacea purpurea)

Purple Coneflower
Image by Jessie Keith

First, I recommend growing varieties of coneflower (Echinacea spp), which is one of the easiest perennials to grow from seed. I especially recommend the AAS award-winners, ‘Pow Wow Wildberry‘, which has large, bright pink flowers, and ‘Cheyenne Spirit‘ with its mixed coneflowers in lovely sunset colors. Both will sprout in no time and bloom in the first summer. Bees and butterflies will cover the blooms. (Click here to see more varieties.)

Seed Starting: Cover seeds lightly with seed starter, and keep them lightly moist. average room temperatures between 65º and 70º F encourage good germination. Seeds should sprout within three weeks.

Blanket Flower (Gaillardia x grandiflora)

IMG_3284
Image by Jessie Keith

This tough, North American native blooms through summer with deadheading and can take the heat. Perennial blanket flower is also very easy to start from seed. There are lots of pretty varieties available, just be sure that the ones you choose are G. x grandiflora cultivars because most others are annuals. The sunny peach-flowered ‘Mesa Peach‘ is a very pretty one to try as is the red and gold ‘Arizona Sun‘.

Seed Starting: Cover seeds with a little seed starter, keep lightly moist, and maintain a fairly warm room temperature. Germination often takes one to two weeks.

Salvia (Salvia nemorosa)

IMG_3268
Image by Jessie Keith

Purplish salvia flowers line the upright stems of this salvia through summer with deadheading deadheaded.  If plants are started in February or March, they should bloom in the first year. (Click here to see lots of seed options!)

Seed Starting: Lightly cover the seeds with seed starting mix and keep slightly moist. Place seed pots 4 inches from grow lights for best results. A heat mat can also be useful. Germination should take three weeks or more.


Click here for an article about how to grow Lavender from seed.

Click here for an article about growing milkweed from seed.

Click here for an article about growing award-winning annuals from seed.

African Violet Care 101

It is that time of year when I start feeling desperate for flowers. Christmas, with all the decorations and lights, is past, and there are three whole months until April, with its early daffodils and crocus. So what is a perfect, ever-blooming houseplant, to brighten things up at this time of year?  The answer is African violets, and they are easier to grow than most think.

Basic Overview of African Violets

A happy African violet will bloom off and on throughout the year.

African violets (Saintpaulia ionantha) were discovered in 1892, in tropical rain forests in Tanganyika, a small country in eastern Africa. Baron von Saint Paul, the imperial, district governor of the colonized country, found them on the forest floor. He then sent plants and seeds back to his father in Europe, and after passing through several hands they made their way to the Royal Botanical Gardens, Kew, where the first breeding to develop them into houseplants began. They came to the United States in 1894 and by 1946 were so popular that police had to be called in to help with traffic, at the first US National African Violet Show in Atlanta, Georgia. The African Violet Society of America was founded shortly afterward in the same year.

As with any new plant, developing fancy varieties took off quickly, and now with modern breeding, there are fabulous African violets available. Plants range in size from 3 to 16 inches and can have single or double flowers in shades of pink, purple, violet, rose, or white. Some have frilled edges and others are bi-colored, with contrasting edges and centers. Violets that are splashed or speckled with two or more colors are called fantasy types.  Some have variegated leaves with edges, centers, stripes, or spots of white or yellow. Other have leaves with ruffled edges, quilted puffs, or an oak-like shape that add to the beauty of the plants.

Buying African Violets

Fantasy African violets are some of the most spectacular now available.

All garden centers that carry house plants should have a nice African violet selection, but specialty plants must typically be purchased online unless you have a specialty grower nearby. The Violet Barn is an outstanding online nursery for African violets, and, of course, looking at all of their wonderful varieties means that I plan to order some new African violets right away. They have an outstanding selection of unusual trailing varieties, and the fully-double, trailing-pink ‘Cirelda‘ caught my eye. The award-winning, heavy flowering, speckled-violet ‘Rob’s Boolaroo‘ looks unbelievable, as does the pretty pink-flowered ‘Ma’s Debutante‘ with its wonderfully white speckled variegated leaves. I was also attracted to some of the Saintpaulia species, such as Saintpaulia grandifolia, which is elegant and promises prolific violet-blue, butterfly-shaped blooms on long stems. Pretty African violet pots and a bag of Natural & Organic Black Gold African Violet Potting Mix are also on my to-buy list.

Growing Basics for African Violets

African violets require pots with drainage and bottom saucers.

Now, it is true that African violets have a bit of a reputation for being tricky to grow, but with a few instructions, you will easily have beautiful plants that bloom heavily and repeatedly throughout the year.

  1. Light: Providing the right amount and kind of light is important to keep plants blooming. African violets like bright, indirect light, which means putting them in a west- or east-facing window (large north-facing windows also work) and turning them every week for uniform growth. Artificial grow lights can also be used, if they provide consistent, uniform light. Keep the plants no farther than 12 inches away from the light, and provide 12 hours of light a day. If they start having fewer flowers, change the amount of light to 14 hours a day for a few weeks, and then go back to 12 hours. (Note: Grow lights really help in winter when you lack windows. This year, I brought three huge fancy geraniums in for the winter, but I lacked window space for them. I bought grow lights to keep them going until spring, and they are doing very well.)
  2. Water: Proper watering is essential for African violets. They require highly drained soil that is just moist. Room temperature water that is low in minerals is also preferred. When watering, avoid getting water on the leaves, which can cause leaf spots and damage. Instead, either bottom water or water from the top with a narrow-spouted watering can, while being careful to avoid the foliage. Allow water to stand in the bottom saucer for about 1 hour, and then pour it out. Allow the soil to dry out a little before watering again.
  3. Temperature & Humidity: The perfect humidity is 50-60% and temperatures close to 70 degrees F are just right.
  4. Fertilization: Fertilize with a specialty African violet fertilizer, which you can find online. Be sure to follow the manufacturer’s application instructions, because they may vary. I tend to feed them lightly each time I water.
  5. Soil & Drainage: Choose a specialty growing mix, such as Natural & Organic Black Gold African Violet Potting Mix, and always plant African violets in pots with drainage holes and a bottom saucer to catch water. When the plant becomes root bound, upgrade to a pot 1-2 inches larger to encourage new growth.

If your African violet stops blooming, check the number of rows of leaves. If there are 5 or more rows, cut the outside rows of leaves off at the base, back to 2 rows. Each row produces its own flowers, and the crown of leaves can take over the plant.  The most common cause of lack of flowers, however, is not enough light, so move it closer to your light source if plants stop blooming.

With new African violets on the way, I am thinking of places to put mine. My new trailing ‘Cirelda’ will look beautiful in a hanging basket. I cannot wait to see its pretty pink flowers and cascading stems. It should give me gorgeous blooms to brighten the winter and times beyond. For more information, please watch the helpful video below.

Spruce Up Your Holidays With Festive Branches

Hollies and evergreens of all types brighten winter decorating!

The gardening season is over by November for most in the country. Instead of looking out of my kitchen window and seeing roses, daylilies, and other perennials, I now look upon colorful, textural trees and shrubs with winter interest. Their festive berries, seedheads, and evergreen foliage add needed beauty to the garden in the drab winter months. Even better, their branches can be cut and brought indoors to spruce up decor for the holidays.

My winter-interest plants have been in the ground for some years, so I can now freely harvest branches from them. I recommend every gardener plant a few if they have the space. Not only are they lovely plants, but they are money-saving because fresh holiday branches are expensive when purchased at garden centers and tree yards. Here are a few of my favorites for the winter garden and winter-branch decorating.

Hydrangeas

Dried Hydrangea arrangements continue to look pretty past the holidays.

Hydrangea flowers of all kinds can be easily dried and will stay beautiful for months. My favorites are the panicle hydrangeas (Hydrangea paniculata, Zones 3-8) with their huge, cone-shaped flowers in hues of white, green, and even rose-red. The cultivar Firelight®, from Proven Winners, reaches 6 feet tall and has flowers that start out white, age to bright pink, and finally turn soft red. It is hardy and needs full to partial sunlight and well-drained soil. When dried, the flowers maintain a rosy-tan hue. Bigleaf hydrangeas (Hydrangea macrophylla, Zones 5-9), with their intense blue or pink flowers, can also be dried and saved in the same way.

To dry hydrangea blooms, cut the stems to the length you want when the bracted blossoms begin to feel papery. Strip the leaves off from the stems and then put them in a container with 2 inches of water. Place them away from direct sunlight to help maintain their color. Allow them to dry for one to two weeks. Spraying them with aerosol hair spray at the beginning of the process will give the dry blooms added durability.

Hollies


Harvest your own holly branches, greens, and pine cones for DIY wreath making (tutorial below).

Of course, one of my favorite classic Christmas plants is evergreen holly. I could not always find holly branches for sale, so years ago I planted two blue hollies (Ilex x meserveae, Zones 5-7) in my backyard. Now I have all I want at Christmastime. In order to get berries, I planted both a male and female plant. Only females produce berries and a male plant is needed to fertilize the lady. The blue holly varieties that I chose were China Girl and China Boy, which have shiny green leaves and the females provide profuse red berries. The shrubs get 6 to 8 feet wide and 8 to 10 feet tall, unless pruned. Planting them close to one another encourages cross-pollination and heavy berry production. Cut branches off as needed for indoor color.

Blue hollies like average, well-drained soil, and full to partial sun. They are also great landscape shrubs because they are deer resistant, and the birds like to eat the berries and make nests in them for protection from predators. If you must prune, the best time is just after flowering because these blue hollies only bloom on second-year wood.

Winterberries

Winterberry branches are expensive, so why not grow your own?

These deciduous hollies lose their leaves in the fall, leaving bare branches packed with berries. There are lots of bushy, colorful winterberries from which to choose. Like other hollies, one male shrub is needed to pollinate the berry-producing females. Proven Winners’ Berry Heavy and Berry Heavy Gold bear copious branches laden with bright red and gold berries. Plant Mr. Poppins® winterberry as the pollenizing male shrub. If you are looking for a shorter, more compact winterberry that bears large, abundant, bright, red berries, you might consider Little Goblin® Red (4 x 4 ft.). Plant at least one Little Goblin® Guy as a pollenizer–one male shrub can supply pollen to up to five females. Winterberries tolerate moist soil and produce the most berries if planted in the full sun, though they can tolerate partial sun. Cut off their festive branches for long-lasting indoor color.

Evergreens

Evergreen branches of all types look beautiful in indoor and outdoor arrangements. (Image by Jessie Keith)

Evergreens from my garden are essential for my Christmas decorations because every year I accent my manger scene on top of my old upright piano with evergreen branches and pine cones. I choose branches from many wonderful conifers in my garden, including Nootka cedar (Chamaecyparis nootkatensis, Zones 3-8, 60-90 ft.), which has soft, evergreen branches, much like arborvitae, prickly silvery-blue spruce (Picea pungens, Zones 2-7, 30-60 ft.) boughs, and the soft branches of white pine (Pinus strobus, Zones 3-8, 50-150 ft.). All of these trees need space and make beautiful specimens if you have a sizable yard. One potential concern with growing blue spruce is the fungal needle disease called Rhizosphaera, which has slowly been killing them off, so disease management may be required (click here to learn more). Another comparable tree with no disease problems is the white fir (Abies concolor, Zones 3-7, 40-70 ft.). I also like white fir because its waxy blue-green needles are not prickly.

When decorating my manger scene with evergreens, I first put down artificial snow blankets, then the manger scene in the middle, a miniature church at one end, and an old piece of driftwood on the other. Evergreen branches and pine cones of all types and sizes are placed behind the whole scene with a chain of tiny rice lights twined through them. Finally, I sprinkle artificial, glittery snow over it all. In addition to greens from my yard, I also like to snip off some of the lower branches from my balsam fir Christmas tree to add fragrance to the display. My manger scene is one of the last things I take down after the holidays.

I also like to add evergreen branches around candles, in holiday flower arrangements, and to decorate outdoor pots (see the video above). Another perfect use is to make your own wreaths from them. Metal wreath forms are available to buy and make DIY wreath making a snap.  I also recommend sticking in a few winterberries or holly branches for color (see the video below).

Consider spending some time this season making your own decorations and displays from the garden. Or, you can plan to plant your garden up with hollies and evergreens next year if it lacks them. Happy holidays!

Putting Perennials To Bed In The Fall

Depending on where you live in the country, September, October, and November are the main months for putting garden beds to rest.  You may still have some warm days in these months, but once the nights and then days become chilly, it’s time to get to work. And, if you do it right, it is quite a bit of work, but more work now means less work later. Spring will be a breeze!

1. Weed

Pull as many weeds as you can in the fall to make spring gardening easier.

I have just started on the first step, which is getting all the weeds out, and it is going to take me quite a while.  Some seasons, I stay on top of weeding, and other times other priorities get in the way. This past summer was busy, so the weeds had a “field day.” It is especially important to clear weeds from right around the base of each garden plant. When weeding, it is wise to choose good tools for the job. Luckily, we have an excellent article written by my daughter, Jessie, that details the best weeding techniques, times, and tools for the job. Read it and weed! (Click here to learn how to week like a pro.)

2. Mulch

A moderate layer of mulch will protect against winter weeds, and protect perennials from the cold.

This brings us to step two, putting down fresh triple-shredded bark mulch, my preferred garden mulch, which I purchase in bulk by the yard or occasionally by the bag when only a small amount is needed. (Click here to learn about different mulch options.) Not only will mulch stop weeds, but it will also keep the soil moist, and protect your plants from big temperature swings. In addition, mulch breaks down over time, adding organic matter to the soil. Areas I have mulched for years have slowly turned into rich garden soil.  Put down around 3 inches of mulch, being careful not to cover the plant. (Not sure how much mulch to get? Click here for guidelines to calculate how much your garden will need.)

There are four rules to mulch application, particularly when it comes to mulching around plants: 1) leaf space around plants, 2) don’t mulch too thickly, 3) don’t apply mulch against the trunks of trees or shrubs, and 4) apply mulch when the soil is moist to make post-application irrigation easier. Leave a  3- to 4-inch gap between the base of the plant and the mulch, to avoid smothering the plant and causing crown rot. This is especially true of evergreen perennials and perennials with surface rhizomes, like bearded iris (Iris germanica hybrids). Peonies are also sensitive to excess mulch. One year, I mulched my peonies thoroughly in the fall and was so pleased with myself for getting it done early, but the following spring two of my prize peonies did not show up.  I had mulched too thickly and killed them. Also, do not mulch low, spreading, evergreen to semi-evergreen perennials, including Heuchera, Dianthus, ground cover sedums, such as ‘Angelina’. Mulching them commonly causes crown rot and death.

3. Cut Back Perennials

When frost takes your perennials, such as these hostas, it is time to cut them back. Semi-evergreen lamium (foreground) should be left alone until spring.

Wait until the frost has killed the leaves of herbaceous perennials before cutting them back and removing the old stalks and leaves.  This is especially important with hostas, one of my favorite perennials (I have hundreds!).  Unlike other perennials, if the leaves are removed while green, the plant will put up next year’s growth prematurely, and the following spring will have just a few scrawny leaves, so cut back hostas to 2-3 inches after the frost has taken them.

Evergreen perennials, such as Lenten rose (Helleborus spp.), myrtle euphorbia (Euphorbia myrsinites), and candytuft (Iberis sempervirens), can be left alone until spring, and semi-evergreen perennials, like coral bells (Heuchera spp.), dead nettle (Lamium maculatum), and certain daylilies, can also be left to trim back until the spring.

Some plants that add winter beauty to the garden should also be left alone.  Ornamental grasses, with pretty seed heads, gently wave in the wind, coneflowers (Echinacea spp.), black-eyed Susans (Rudbeckia spp.), and perennial sunflowers (Helianthus spp.) set seeds that songbirds like to eat in winter, so I leave them alone until the spring. Fall bloomers, such as chrysanthemums and asters, can also be trimmed in the spring. The protective stems of chrysanthemums sometimes help the tender perennials overwinter, which is nice if you like to keep them from year to year.

Another tip is to meticulously cut back perennials that are highly susceptible to leaf fungal diseases, particularly bee balm (Monarda spp.) and tall garden phlox (Phlox paniculata). Cut them back low, thoroughly, and be sure to completely remove the old leaves from the surrounding area. They should not enter the compost pile. Certain diseases can persist in the soil, even composted soil.

4. Divide and Plant

Divide large perennial clumps and spread them around in the garden to add more summer flower color where needed.

Mid-fall is the best time to divide and move hardy perennials, such as hostas, daylilies, monarda, rudbeckia, and coneflowers. If you live in USDA Hardiness Zones 3-5, or colder, divide and replant perennials earlier in the season, and only move those that are reliably hardy in your zone.  If you live in warmer zones, then you have a little more flexibility time-wise.

When dividing perennials, I typically use a sharp spade to neatly cut away a section of the plant. It is essential that each chunk has a nice portion of the crown with lots of buds on the top and roots beneath. Then I move and plant them in locations that have the right site conditions and need the color. Some falls are dry where I live in Indiana, so I am sure to irrigate my new divisions well when the weather does not bring rain. Adding Black Gold Garden Soil to the bottom of each hole adds needed fertility and a boost of fertilizer, which all plants appreciate.

So, I must get going to finish my fall garden cleanup, while the going is good (and so should you)! Then, I can spend the winter focusing on next year’s garden, worry-free.

Planting Spring Bulbs Late: Rules and Tips

You can tell the health of daffodil bulbs by squeezing them. Healthy bulbs are firm. Planting these bulbs a little late is not a problem.

If your spring-blooming bulbs are sitting around somewhere, like mine, or you have not even bought them yet, you will be glad to know that it is not too late. Bulbs can be planted as late as November or December, as long as the soil has not frozen solid, and the bulbs are alive and healthy. You can even take advantage of sales in October or November, and save a little money.

How to Choose Healthy Bulbs

These tulip bulbs show a little discoloration at the tip and along the sides, but overall they are firm, healthy, and will survive.

First, check any bulbs for good health before purchasing them. How can you tell when a bulb is healthy and alive or not? Healthy bulbs should be ivory, firm, and have papery coverings. (If you cannot see the flesh, just squeeze to make sure that they are firm.) It is especially important that the bottoms, where the roots are, remain firm and blemish- or mold-free. Dying or diseased bulbs have drying brown areas, brown or blue-green spots, or may even be soft and flakey. Never purchase bulbs with these traits. If one or two out of the bag appears to be in poor shape, it’s not a problem. Otherwise, you are wasting your money. For more bulb troubleshooting information read How Do You Keep Spring Bulbs from Rotting?

General Bulb-Planting Information

All bulbs like sunlight. Early bulbs can be planted beneath deciduous trees that often don’t leaf out until the spring bloomers have stopped flowering. All bulbs require well-drained soil. It helps to amend beds before planting bulbs with Black Gold Garden Soil or Garden Compost Blend. Be sure to have a sharp trowel, planting knife, or bulb planter on hand for fast, easy planting. Fertilization is also important. Throw a little Dutch bulb fertilizer or bone meal into each hole to promote better growth and flowering in spring.  (Click here to learn more about the benefits of bone meal.) As soon as bulbs are planted, they begin to establish roots for the coming spring.

Planting Tips for Specific Bulbs

There are many different bulbs that you can plant and each requires different care. Here are my favorites.

Species tulip bulbs are often a little smaller but have similar papery chestnut-colored exteriors.

Tulip (Tulipa hybrids, USDA Hardiness Zones 3-8) bulbs should be planted 7 to 8 inches deep, with the pointed tops facing upwards. Ideally, they need to be planted by early November to flower on time in spring. You can plant them a bit later, into early December, but they will likely bloom a little later as a consequence. Unfortunately, most hybrid tulips die away in just a couple of years, but some reliably return as perennials. These include species tulips, such as Tulipa praestans ‘Shogun’, which has sunny orange flowers, as well as Tulipa clusiana hybrids with their colorful, linear flowers and bulbs that naturalize over time. Also, tall hybrid Darwin Tulips look like most standard hybrids, but they will come back for years. They are a cross between old Darwin tulip and Tulipa fosteriana hybrids. Check out ‘World Peace’, which has deep-rose flowers furled with yellow, or ‘Cosmopolitan’ with its stately pink blooms and burgundy-striped leaves.

Bulbs are breakfast, lunch, and dinner to voles, mice, squirrels, and deer while being poisonous to humans, and, for whatever reason, cats (when would a cat ever eat a tulip?). (Click here to learn more about tulip toxicity.) These bright-colored flowers are among the most beautiful and varied in the spring garden, so they must be planted in pest-free areas or have some protection. I have two very large trees with wide roots that I like to plant bulbs around. The protective roots keep the voles from tunneling. The rest of my garden is a different matter, so I put thorny leaves or cat litter in the hole, to deter pests. When it comes to protecting the actual plants from deer or rodents, I’ve found that Plantskydd is an excellent repellent. It does not smell nice, but it works.

Daffodil bulbs can be planted in beds or in lawns where they can naturalize and bloom before the grass grows long.

Daffodils (Narcissus hybrids, Zones 4-8) are another story.  They are poisonous enough so that voles or deer will not eat them. One daffodil will form a clump in just a few years and over decades will naturalize. They do not die, which is why you will see them blooming in front of old, abandoned houses. They can be planted up to December so long as the ground is not frozen. Daffodils come in many sizes, shapes, and colors.  They bloom in early, mid, or late spring, depending on the variety. Premium bulbs often have multiple offsets while standard bulbs are single. Plant them 7 to 8 inches deep.

Tiny Siberian squill bulbs are planted just 3-4 inches down and blanket gardens in blue in early spring.

Siberian squill (Scilla siberica, Zones 2-8) is one of my favorite early spring flowers. The small plants only reach 4 to 6 inches tall with bell-shaped flowers of the most intense blue. They spread gently among beds, under shrubs, and even into lawns.  By the time it is time to start mowing the grass, they are already dormant. Siberian squill are pest resistant and poisonous to humans, so do not grow them where children play. Plant them 3 to 4 inches deep as late as December. Those planted a bit late may emerge later in the first year.

Small crocus bulbs look pretty naturalized in beds or lawns.

Crocus (Crocus hybrids, Zones 3-8) are a sure sign that spring is just around the corner. Some even push up through the snow. You can plant them in 4-inch holes after a hard frost while the soil is still workable. Crocuses require a long cooling period, so don’t plant them past late November. They make excellent additions to lawns, small garden corners, and rock gardens. A single crocus will form a clump over several years and then spread to other spots in the garden.

(For more bulb ideas, read What Spring Bulbs are Good for Bees and Hummingbirds?, Blooms in the Ice: The Joy of Late Winter Bulbs, and Flamboyant Parrot Tulips for a Fabulous Spring.)

So, don’t fear planting spring bulbs late,  if you lost track of time or want to take advantage of seasonal bargains. You may see them emerge a little later in the first season but without detriment to their long-term success.


For bulb planting-depth information, I love this bulb planting guide care of the Netherland Bulb Company.


Pretty Perennial Ornamental Grasses For Late Summer

Blue fescues are lovely, steely blue grasses that form tidy clumps.

It’s August and here in Indiana we often have days in the 90s.  Many summer perennials, such as daylilies, salvias, and Shasta daisies, are past their prime or have disappeared until next year. Perennial garden grasses, however, are still colorful with their bold plumes and blades. There are many species and varieties available to fit practically any garden.

Perennial grasses range from the diminutive (1-foot or less) to big and bold (6-8 feet or more). Some are dense and colorful while others are airy and textural. Most require full sun, but some will grow well in partial shade. I only grow perennial grasses, so I do not have to fuss with planting new ones every spring. Here are some of my favorites for your consideration.

Sterile Chinese Maiden Grasses

Maiden grasses (Miscanthus sinensis, Zones 5-9) are beautiful, but gardeners need to exercise caution when choosing one. Many of these Asian-native grasses are invasive to North America, so it is best to choose varieties with low or no seed set. One of my favorites Miscanthus is the 6-foot-tall ‘Zebra Grass’, which has an unusual pattern of horizontal-striped bands of yellow across the green blades, but it is not sterile. Thankfully, they have come out with the smaller 3-foot-tall ‘Bandwidth‘, which has all of the good looks while being infertile. In late summer it sends up feathery, golden-brown plumes that produce no fluffy seeds.

Another beautiful, yet invasive, variety is the 6-foot-tall, graceful ‘Morning Light’ with its narrow, green blades with white edges and midveins. The clump reflects light, giving the plant a shiny appearance. The reliably sterile My Fair Maidenis a good replacement. It reaches a whopping 6-8 feet and has very showy plumes that glisten in the sun.

Maiden grasses do best in full sun and need regular water since they don’t like dry soil. Give them plenty of space to grow. These clump-forming grasses widen with age. If you want a tall hedge but don’t want to wait around for slow-growing shrubs or trees, plant maiden grasses instead. They are fast-growing and dense. Wear long-cuffed gardening gloves when you cut the old clumps back to 18 inches in early spring.

Switchgrass

Cheyenne Sky has blades that turn shades of red. (Image thanks to Proven Winners)

A simply gorgeous native switchgrass (Panicum virgatum, Zones 4-9) variety from Proven Winners is Cheyenne Sky. The deer-resistant grass forms a tight, upright clump of blue-green leaves that turn wine-red in early summer and stay that way until frost. It needs full sun and is drought-tolerant once established. At only 3 feet tall, it looks beautiful in large containers as well as in the garden. The clumps spread over time. Leave the dry blades and airy panicles for winter beauty and cut them back in late winter before they begin growing again.

Muhly Grass

Muhly grass has pink plumes that are wonderfully showy.

An unusual and extra-beautiful grass for fall color is the pink muhly grass (Muhlenbergia capillaris, Zones 5-9), or pink hair grass, which is native to barrens and prairies of the eastern United States. In fall, it sends up large, 12-inch, frothy, panicles that look like bright pink clouds. These can last from September to November.  The leaves are very narrow and shiny. Pink hair grass reaches up to 3 feet tall, likes well-drained soil, and is drought tolerant once established. It looks best when planted in groups and grows best in full sun but will tolerate more shade than other grasses. Regal Mist® is an extra showy variety to try.

Blue Fescue

Blue fescue is semi-evergreen, so it continues to look outstanding in winter.

Blue fescue (Fescue glauca, Zones 4-11) is a wonderful compact ornamental grass for the front of the flower garden. It is round clump-forming grass with straight, narrow, blue blades. At only 8-12 inches tall (foliage) it is one of the shortest ornamental grasses.  It is drought tolerant and does well in rock gardens or any other dry-soil area.  Blue fescue sends up its flower heads in late spring–by summer they turn tan. Two excellent varieties are ‘Elijah Blue’ and ‘Boulder Blue’. Old specimens plant sometimes die back in the center. At this time, divide them to rejuvenated clumps, and replant them elsewhere.

Red Hood Sedge

For interest, I decided to add one sedge to the list–sedges being close relatives of grasses. Red hood sedge (Uncinia rubra, Zones 7-10) is a stunning evergreen sedge species from New Zealand that is so tempting to me. The beautiful, cascading, 1-foot mounds have bright, glossy, red blades. Red Hood Sedge will grow in full sun or full shade, so you can tuck them in among your hostas. It grows well but does not require, very wet soil, so it can be planted where other grasses would probably not make it. Choose a spot or pot with moist, rich soil, and do not let it get too dry.  An excellent variety is ‘Everflame’, which has undulating red blades.

Growing Gorgeous Gladiolus

There is nothing more beautiful in the summer than sword lilies (Gladiolus hybrid) in a vase or the garden. Their stately stalks of glowing, fragrant flowers come in an array of colors that just can’t be beat! Most gardeners grow them for cut flowers, but glads can also be carefully worked into summer flower borders for floral impact. There are also compact types suitable for border edges and even containers!

A Short History of Garden Gladiolus

Gladioli have bulbous root structures called corms that can easily be dug in fall for winter storage where they are not hardy.

Though Gladiolus species exist across much of the Old World, most garden gladioli originate from complex hybrids of numerous South African species–South Africa being the world center of Gladiolus diversity. World travelers and collectors brought the first South African specimens to Europe in the mid-1700s, and the earliest hybrids appeared by the early- to mid-1800s. Commercial nurseries continued developing their own hybrids (and do to this day), and the flower took off in popularity. By Victorian times, when meanings were attached to every flower, red gladiolus flowers signified love and passion, while pink ones meant femininity and motherly love.

Planting and Caring for Gladiolus

Byzantine sword lily is a beautiful species that is quite hardy.

Start planting gladioli a week after one’s last frost date (click here to determine your last frost date). Choose a sunny spot with fertile, well-drained soil that’s high in organic matter. To keep waves of these short-season flowers blooming from early summer on, plant more corms in two-week intervals until late June. Gladiolus have bulbous root structures called corms that need to be planted in 5- to 6-inch holes.  I always put some fertile, OMRI Listed Black Gold Natural & Organic Garden Soil and bulb fertilizer in the bottom of the hole to ensure good growth. Plant corms in rows 6 to 8 inches apart in a cutting garden or more closely in small groups of 5 to 9 corms mixed in with tall, bushy perennials to provide upright patches of bright color. Water evenly. Gladiolus do not like wet feet or parched soil conditions.

Glads are one of the most long-lasting cut flowers for bouquets, which is why commercial florists love them. They can last for a week or two in a vase. Pick them when the stems just start blooming and remove the lower leaves. Cut the stems diagonally with sharp shears, and put them in water fortified with cut-flower food. A tablespoon of fully sugared lemon-lime soda to a quart of water also works.

Some gladiolus are hardy but most are tender. Gently dig the corms of tender types up in fall when their leaves turn yellow.  You will find new, small cormlets attached to the main corm. Keep them all to grow new plants, though the cormlets will take a full second season to reach flowering size. Put the corms in a warm, dry place for 2 weeks until they are dry. For storage, hang them in mesh bags in a cool, dry place through winter.

Gladiolus to Grow in Gardens

Unsupported tall glads tend to fall over, which is why caging or staking is recommended.

There are several types of gladiolus for gardeners to grow.

Standard sword lily (Gladiolus hybrids, Zones 8-10) range in height from 3 to 6 feet tall and may have up to thirty 5- to 6-inch flowers on each stem. There are hundreds of exciting varieties. A festive choice is ‘Frizzled Coral Lace‘ with lacy coral-pink flowers that fit the name. The rose and peach ‘Guinea‘ is a very pretty extra tall one, and the breathtaking ‘Zizanie’ has large blooms in broken shards of red and white. When planting taller glads like these, choose a location with low wind and surround the plants with perennial or tomato cages to keep them upright. Staking also helps. Planting corms an inch deeper may also assist with stabilizing the plants.

Hooded sword lily (Gladiolus primulinus hybrids (syn. G. dalenii), Zones 8-10) are shorter (2-4 feet) and have an unusual floral shape, with the top petal of the flower hanging over the rest.  They have large blooms, often with ruffled edges, that come in lots of color variations. An extra pretty one is ‘Las Vegas‘ with its primrose-yellow flowers edged in scarlet. The bright red ‘Mirella‘ is another choice selection.

Dwarf sword lily (Gladiolus nanus hybrids, Zones 7-10) reach only 1.5 feet tall. They have large flowers in many colors, including lots of bicolors.  Some of the blooms are white with a rose teardrop on every petal.  Dwarf glads are hardier, so more gardeners can grow them as perennials. Try the super-compact varieties in the Glamini® Series. They are less hardy (Zones 8-10) but perfect for containers or summer borders.

Exceptional Gladiolus species are offered by some bulb companies. One of the best is the hardy Byzantine sword lily (Gladiolus communis subsp. byzantinus, Zones 6-10) with its upright swords of smaller, pink flowers. It is an heirloom that makes a fine addition to old-fashioned perennial gardens. Another to try is the large-flowered branched sword lily (Gladiolus ramosus, Zones 8-10). The brilliant pink, purple, and red ‘Vulcano‘ is spectacular! The hardiest of them all is the butterfly sword lily (Gladiolus papilio, Zones 3-6). Try the bold, deepest-red ‘Ruby‘ with its striking, butterfly-like blooms on 30-inch stems.

More Gladiolus Notes

Hooded gladioli have top petals that create a hood over the bloom.

About leaving corms in the ground, I have some standard red hybrid sword lilies that I did not get around to digging up last fall in my USDA Hardiness Zone 6 garden.  Imagine my surprise when they came up hale and hearty this spring.  I was really surprised! I have read that planting them in 7- to 8-inch holes will increase the chance of them coming back ni northern gardens. Some mulch over the top also helps.

Two excellent companies I recommend for buying glads are Brent and Becky’s Bulbs, and K. van Bourgondien. Glads are blooming bountifully now, but their corms are only sold in the spring, so look for them in March to have the pick of the best varieties. Gladiolus are some of the most gorgeous flowers in the summer garden, so plan to plant some in yours.

The Best Disease-Resistant Roses

Knock Out roses of all colors are everblooming and resist common rose diseases.

Roses are among the most beautiful flowers on the planet, but they are also prone to some of the nastiest foliar diseases as well.  The three worst of these are rose black spot (Diplocarpon rosae), powdery mildew (order Erysiphales), and rose rust (Phragmidium spp.), but new roses are challenging their damage. Many of the largest rose growers and breeders have developed gorgeous disease-resistant roses that are absolutely outstanding.

Most of the finest disease-resistant roses are shrub roses, but there are a few other forms on the list. All these roses bloom from late spring until frost. Here are a few favorites to consider.

Best Disease-Resistant Roses

Shrub Roses

Crazy Love is a beautiful shrub rose bred by Kordes. (Image thanks to Kordes.)

The grandiflora shrub rose Crazy Love™ Sunbelt® (USDA Hardiness Zones 5-9, 5′ x 3′)  has unusual, orange and yellow, cup-shaped flowers that are fully double and very fragrant. It is generally resistant to common foliar diseases of roses and a vigorous nonstop bloomer.

Nicole® (Zones 6-10, 4′ x 3′) is a beautiful floribunda shrub rose that I am buying this year for my front border. It has 4-inch wide blooms that are snow-white with deep rose edges.  The stunning shrub rose is remarkably disease resistant.

Nicole is a remarkably beautiful shrub rose that I will be planting in my garden this year. (Image by Garitzko)

One favorite new yellow-flowered rose is the floribunda shrub rose Golden Fairy Tale® (Zones 5-9, 4′ x 4′). It’s another that I have added to my must-buy list this year. The award-winner has bright golden-yellow double blooms that are very fragrant and flower in abundance. Notable disease resistance makes it an effortless variety for the garden. Think seriously about this one.

The compact floribunda rose, ‘Brilliant Veranda’ (Zones 5-9, 2′ x 3′) is brilliant red and just the right size for a flower-filled veranda, as the name suggests. Its blooms almost glow, and the plants show very good disease resistance.  Plant it in front of beds with taller plants behind it to light up the garden.

Shrub roses in the Knock Out® Series are possibly too familiar, since everywhere I go in my hometown of Bloomington, Indiana, they are planted outside practically every landscaped business front.  But there is a reason for that. The classic Double Knock Out® rose has gorgeous, double, cherry red flowers on shrubby plants that are very tough and easy to maintain. There are many other colors in the series, including those in the shades of yellow, apricot, and pink.

The new flowers of ‘Princess Ann’ are deepest pink, fading to pure rich pink. It is named for Her Royal Highness, the Princess Royal. (Image thanks to David Austin Roses)

English garden roses of all kinds are sold at David Austin Roses, the most famous rose-breeding company in the world. David Austin has produced the most beautiful English roses that bloom the whole season through. He also bred for disease resistance and fragrance. I have picked out two of my favorites that you will love forever.

The fragrant ‘Olivia Rose Austin’ (Zones 4-11, 4′ x 3′) is a classic English rose of pale pink that has cupped, double flowers with a dense rosette of petals in the center.  The flowers have a fruity fragrance. The darkest pink ‘Princess Anne’ (Zones 4-11, 4′ x 4′) has highly fragrant clusters of fluffy double flowers that lighten a bit as they get older.  These are held upright over disease-resistant leaves.

At Last® shrub roses are everbloomers with a light, sweet fragrance. (Image thanks to Proven Winners®)

Finally, Proven Winners® has a variety of tough, disease-resistant roses. Of these, At Last® (Zones 5-9, 3′ x 3′) is a fragrant beauty that will bloom nonstop through summer and into fall. The shrubs have glossy foliage and pale amber-orange flowers that are fully double and sweetly fragrant.

Other Roses

From miniatures to climbers, there are many other roses that defy diseases. The disease-resistant hybrid tea rose Gypsy Soul Eleganza® (Zones 5-9, 3.5′ x 2.5′) has deep violet-red flowers with long upright canes that are perfect for cutting long-stemmed roses. Petite Knock Out® (Zones 5-10, 18″) is a brand new miniature rose that has all of the traits of the classic double red Knockout® (mentioned above) but in truly miniature form. The climbing rose ‘Climbing Pinkie‘ (Zones 6-11, 8-12’) is one of the few disease-resistant climbers. The flowers are rose-pink and hang in clusters over the leaves.  It can be trained along a fence or wall, or if you want to be really English, around your front door.

Spring is the best time to plant roses. Feeding the soil and fertilizing your shrubs at planting time will give them a great start. For more details about how to grow and plant shrub roses organically, please watch the video below by my daughter, Jessie.