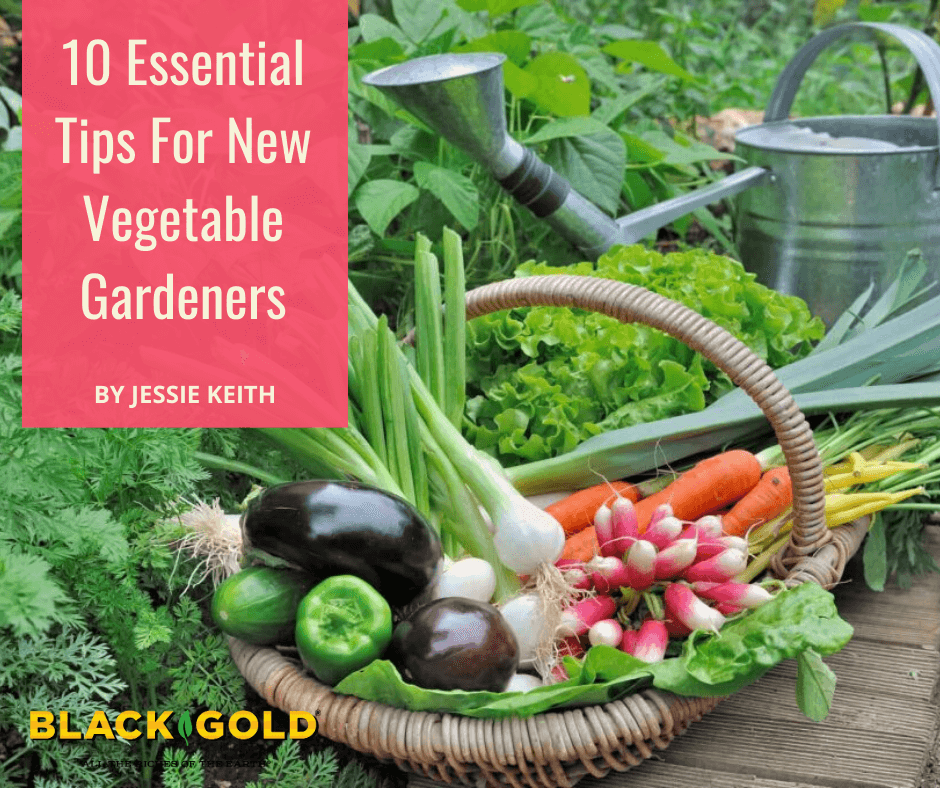
How Do I Organically Feed My Vegetable Garden Soil for Fall?
“I’m getting ready to prep my raised beds for the fall crop. What is best to amend the soil with since I do not use chemical fertilizers?” Question from Randal of Chiply, Florida.
Answer: There are lots of things that you can do to feed your soil for fall and winter crops. Here are some of easy options.
Feed Your Soil
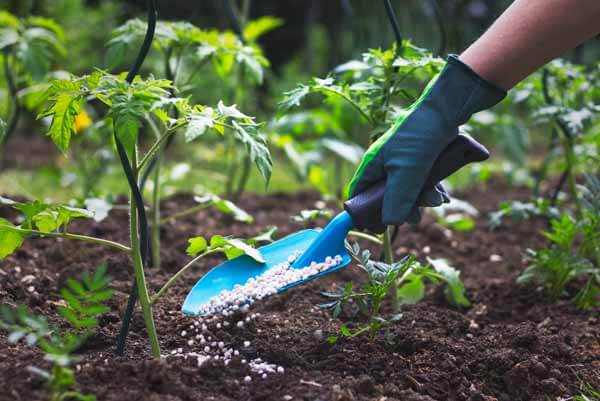
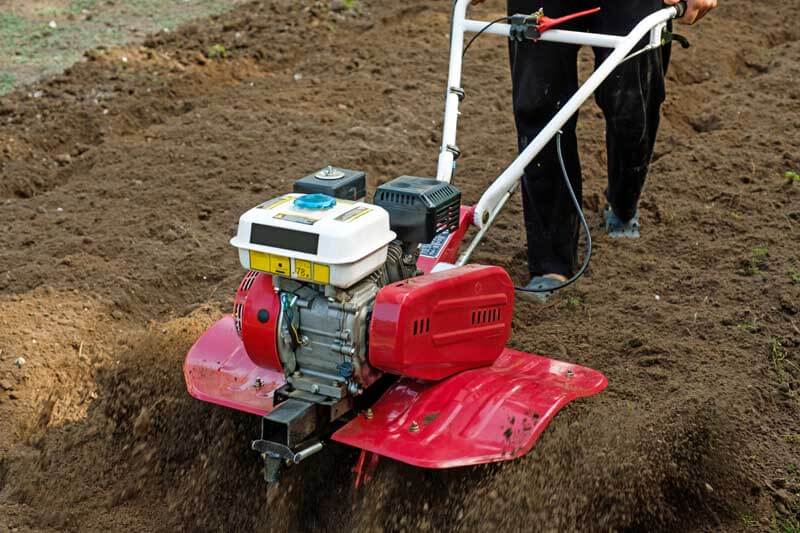
Your garden is as good as its soil. For success, liberally feed it with organic matter, such as Black Gold Earthworm Castings, Canadian Sphagnum Peat Moss, and Garden Compost Blend, especially if your soil is rich in clay or sandy. Add at least 3 inches of the amendment to the soil surface, and till it to a depth of at least 8 inches. Tilling in amendments will increase water-holding capacity and aeration for better root growth. Use the amendment application formula below to determine the amount you will need.
Amendment Application Formula
([area to cover] ft2 x [depth in inches desired] x 0.0031 = ___ yd3).
Example: If you wanted to cover a 20 square foot area with 2 inches of compost, the result would be: 20 ft2 x 2 inches of compost x 0.0031 = 2.48 yd3.
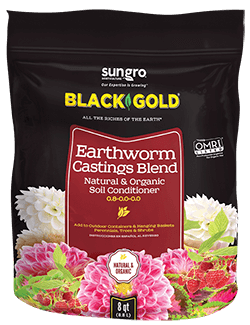
Vegetables perform better with regular fertilization, especially heavy feeders like tomatoes. In fact, most veggies will deplete the soil of nutrients over time, so replenishment is necessary. There are many organic vegetable fertilizers on the market. Alfalfa, blood, bone, feather, fish, kelp, and shrimp meals are all common natural components of non-chemical fertilizers. Earthworm castings are also a good source of nitrogen and beneficial microbes. Adding mycorrhizae to the soil is also useful because it helps plants take up water and nutrients better. Black Gold Natural & Organic Ultra Coir is another of our organic-rich amendments that also contains our proprietary blend of endomycorrhizae. We recommend that you research top-rated organic fertilizers to find the best for your needs.
Rotate Your Crops with Legumes
Vegetables, especially tomatoes, should be rotated on a three-year cycle–tomato one year and other vegetables the next two years. Legumes, like beans and peas, are excellent rotation crops because they naturally fortify soils with nitrogen. For more rotation tips, I encourage you to read Spring to Fall Vegetable Rotation: Planting for Non-stop Garden Produce. It will provide all of the information you need to effectively rotate your crops, whether container- or garden-grown.
I hope that all of this information helps! We have many more articles about gardening in Florida, click here to view them.
“I have ants in my garden, and they are eating my veggie plants. What is the best product to use on a vegetable garden that is safe for us to eat vegetables from?” Question from Jill of Pleasant Prairie, Wisconsin
Answer: Ants are not vegetable garden pests. They may be attracted to the sweet juices of a split tomato or strawberry or drink the nectar from a sweet flower, but their peskiness ends there. But, that does not mean they aren’t a sign of a garden problem. Ants herd aphids like cattle so they can eat the sweet honeydew they produce, and aphids are a very obnoxious plant pest. If you get rid of the aphids, the ants will leave, and you don’t even need to use heavy chemicals.
Managing Aphids in the Garden
Aphids are delicate pests and quite easy to remove, believe it or not. When I have an infestation, I use these four methods of removal.
1. Spray them off with a sharp stream from the hose. This actually removes them fast and will kill quite a few. It’s a good first step for management.
2. Prune off really badly infested flowers or stems and spray the others with lightly soapy water (fill a spray bottle with water and add just a drop of dishwashing liquid). This will remove damaged parts of the plant and greatly reduce aphid populations.
3. If the two previous steps don’t get rid of your aphids, spray plants with OMRI Listed insecticidal soap to tackle any lingerers. The mild product is approved for organic gardening and works. If you are worried about it harming other insects, you can rinse off plants a few hours after application.
4. Nurture ladybugs and other beneficial insects that consume aphids. Refrain from using any harsh pesticides, and the beneficials will come. (Click here to read more about beneficial insects.)
I hope these tips help you better manage your aphid problems. They are annoying insects, but they won’t stand a chance if you continue with these methods.
The new vegetable gardener will succeed if given the right information from the beginning.
With decades of vegetable gardening experience under my belt, it’s easy to take the years of knowledge for granted. It’s like riding a bike. I garden on cruise control and react or learn quickly when faced with a new challenge. In turn, years of teaching new gardeners have kept me in touch with the challenges they face. Sound, step-by-step advice is invaluable–potentially averting years of mistakes and poor yields. Getting the big picture of a new garden venture from the start will set the wheelbarrow rolling in the right direction. The new vegetable gardener will be quickly rewarded if modest goals are established from the beginning and time is set aside for the project.
Planning your garden on paper will help you visualize and plan for the project.
Plan Ahead: Determine your garden’s location, size, and crops before you break ground. Vegetable gardens require full sun (8-hours or more per day) and soil that drains well. Gardening is a commitment that often takes more time and labor than anticipated. If you have never gardened before, plan small in the first year to keep it enjoyable and manageable. It will help you succeed from the start and determine how to grow your garden in future years. (Click here for a good article about planning a garden, and click here for an article about rotating crops through the season.)
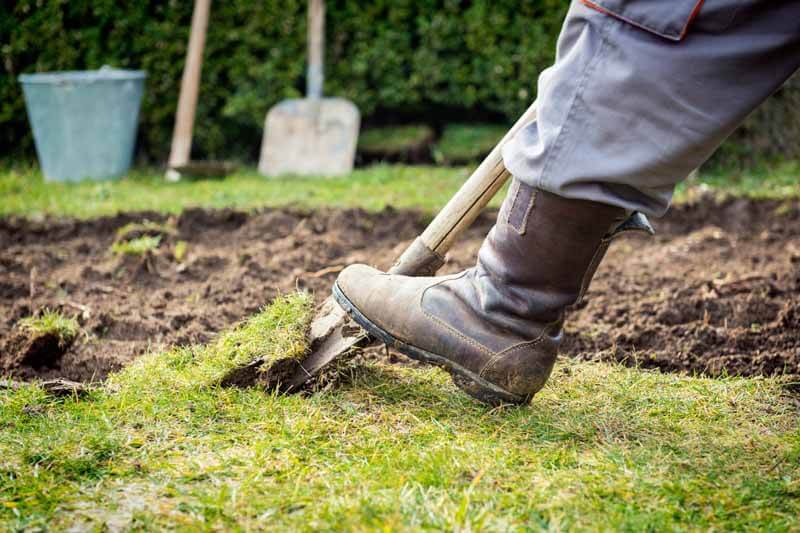
Sod removal takes work but is worth the effort.
Start Clean: Remove all of the turf from your soon-to-be garden bed. That means manually skimming off the sod with a sharp spade or using an automated sod cutter, which can be rented. I recommend the latter if you have planned a large garden. The bed should be small enough for you to reach into from all sides or large enough to add a walkway for easy access. Square or rectangular beds are easiest to mow around and manage.
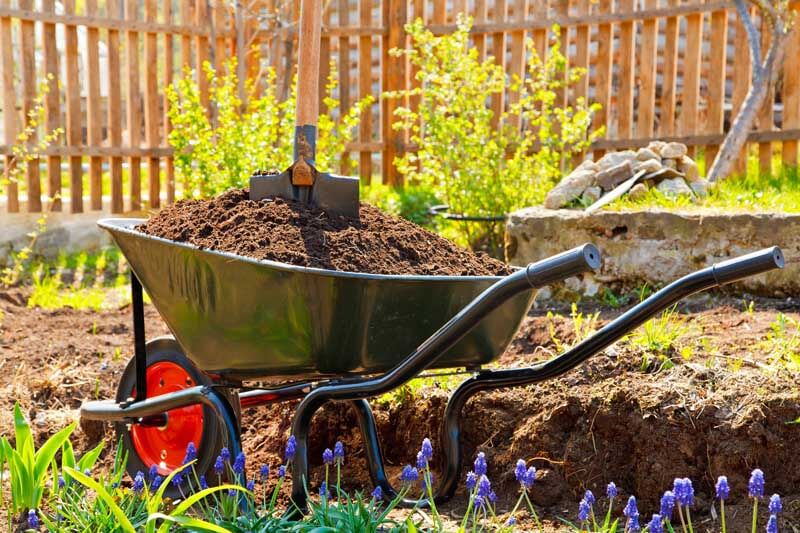
Enrich your soil from the beginning!
Don’t Skimp on Soil: Your garden is as good as its soil. When siting it, choose a well-drained spot. If low ground is a problem in your yard, opt for a raised bed (Click here to learn more about preparing a raised bed garden, and click here for a raised bed plan). For garden success in year one, liberally feed your soil with organic matter, such as Black Gold Canadian Sphagnum Peat Moss, Garden Soil, and Garden Compost Blend, especially if your soil is rich in clay or sandy. Add at least 3 inches of the amendment to the soil surface, and till it to a depth of at least 8 inches. Use the amendment application formula below to determine the amount you will need.
Amendment Application Formula
([area to cover] ft2 x [depth in inches desired] x 0.0031 = ___ yd3).
Example: If you wanted to cover a 20 square foot area with 2 inches of compost, the result would be: 20 ft2 x 2 inches of compost x 0.0031 = 2.48 yd3.
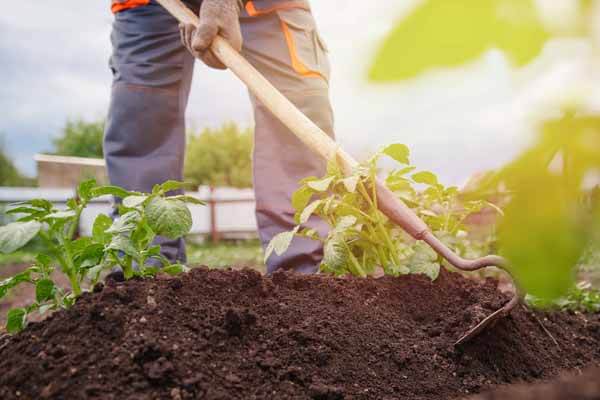
Berming planting areas and covering with compost and straw will save weeding time and boost crops.
Raise and Cover: Tilling and adding lots of fresh organic material will loosen and lift your soil to enhance drainage and aeration for better root growth. To take it one step further, I always rake or hoe soil up into berms to maximize drainage and keep beds light for better root growth. Berming is especially helpful for root crops, like carrots, potatoes, and beets, and deep-rooted plants, like tomatoes. Finally, I add mulches appropriate for vegetable gardens, like seed-free straw, compost, mushroom soil, grass clippings, or leaf mulch, to keep weeds down. I generally put straw along walkways I’ve established in my garden and compost on the planting areas. Avoid bark mulch of any kind in vegetable gardens because it binds nitrogen, which is detrimental to heavy-feeding vegetables.
A little fertilizer will go a long way.
Fertilize: Good fertilizer formulated for vegetable growing is essential for bumper crops. Any all-purpose granular or slow-release vegetable fertilizer will do, though I recommend feeding tomatoes with a food specially formulated for their needs. Tomatoes are very heavy feeders that require a wide variety of nutrients to perform their best. Follow the product instructions to keep them well fed.
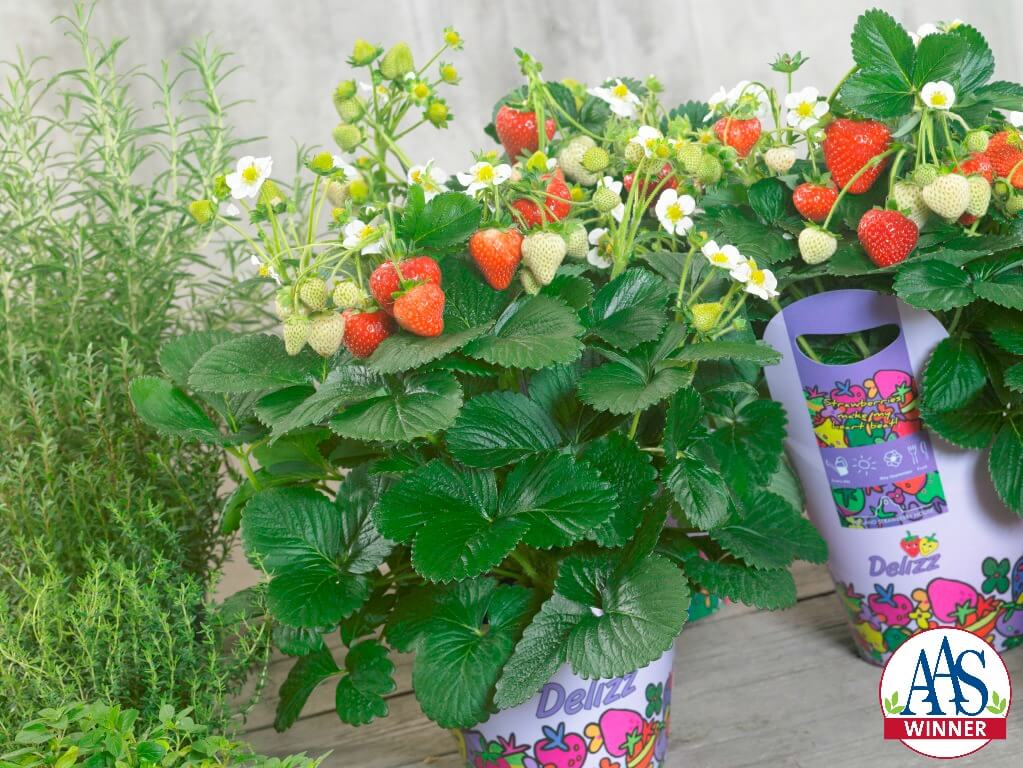
Choose Good Varieties: Don’t pick just any old tomato, pepper, or bean for your garden. Do your research and pick the best when it comes to yields, performance, and flavor. If you are not certain, always select award-winning plants, such as All America Selections Winners. These tend to be as full-proof as you can get. It is also wise to choose disease-resistant varieties, so keep a lookout for these as well. (Click on the links to discover our favorite sauce tomatoes, lettuce, green beans, mini vegetables, carrots, and fast-growing vegetables.)
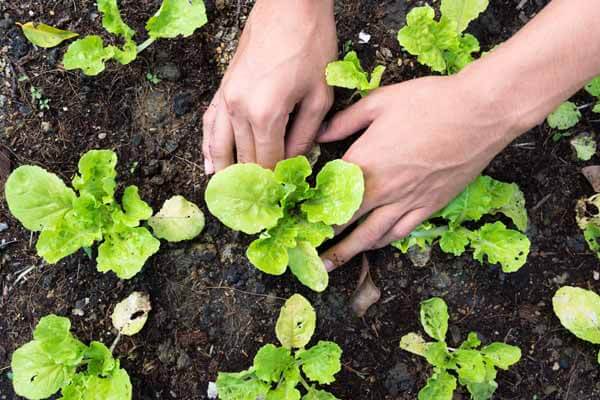
Lettuce is an easy spring vegetable that needs cool weather.
Know Planting Times: It is essential to know when you can plant a vegetable, what temperature it likes best, and how long it will take to produce. Vegetables are broken down into cool-season and warm-season types, though some will grow well from spring to fall. Cool-season vegetables, like cabbage, lettuce, peas, and radishes, grow best in cool spring or fall weather, while warm-season crops, such as corn, okra, peppers, tomatoes, and squash, need the heat of summer to yield. Some grow very quickly, and others take months to produce. For example, radishes can be ready to harvest in as little as 20 days, but some pumpkins can take 120 days to produce fruit. So, knowing a crop’s days to harvest is important. Finally, you need to know your last frost date (click here for yours) to determine when it is safe to plant tender vegetables and fruits outdoors.
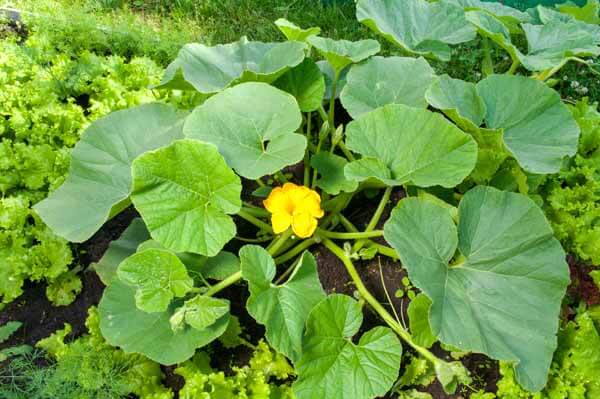
Some pumpkin plants can grow to 20′ across!
Know Plant Needs and Sizes: Identify each plant’s height and width to determine its garden footprint. You also need to know if supports, like tomato cages or bean and cucumber trellises, will be needed. One important tip for tomato growers is that bush (determinate) tomatoes only reach 1-3 feet and need small cages or stakes, but vining (indeterminate) tomatoes can reach 6-8-feet high and wide, so tall, strong cages are required. Follow spacing guidelines to give your vegetable the space they need to blossom.
When ripe, tomatoes are fully colored and give slightly when pressed.
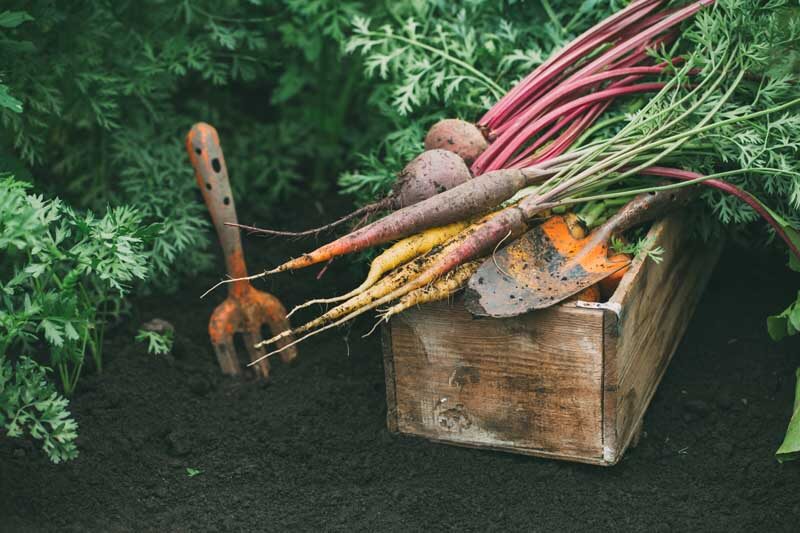
Know When to Harvest: When is it ripe? Tomatoes and peppers will be fully colored when ready to pick. Beans should be plump and reach the advertised length. Zucchini and summer squash are best harvested small but firm. And, you will know when beets, carrots, and radishes are ready to harvest when their bulbous tops become visible along the soil surface. If you are not sure when to harvest a crop, ask us through our free horticultural advice service, Ask a Garden Expert.
Removing weeds as you see them will keep them from taking over.
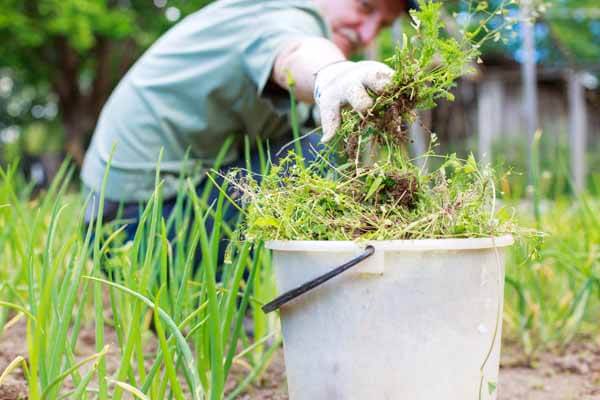
Keep It Clean: Weed, weed, and weed some more. Even when you mulch your beds, they will arise. Weeds compete with vegetables for resources and can quickly overwhelm a garden if ignored. They may also harbor diseases and attract pests. Pull or hoe weeds as you see them. Even if you weed every few days or even every week, you will have few to no weed problems, which will give you more time to focus on plant care and harvest. Investing in good weeding tools makes the task lighter. I am never without my weeding knife (Hori Hori), strong hoe (Prohoes are the best), and Korean hand plow (Ho-Mi).
Reach out to friends, family, books, and online references when you have gardening questions. There’s always more to learn and new plants to discover. And, if you can’t find an answer, ask us a gardening question for free at Ask a Garden Expert. You can also search the hundreds of questions we have already answered. It’s our goal to help gardeners succeed.
The author’s no-till garden in early spring after compost and straw have been applied. (Image by Jessie Keith)
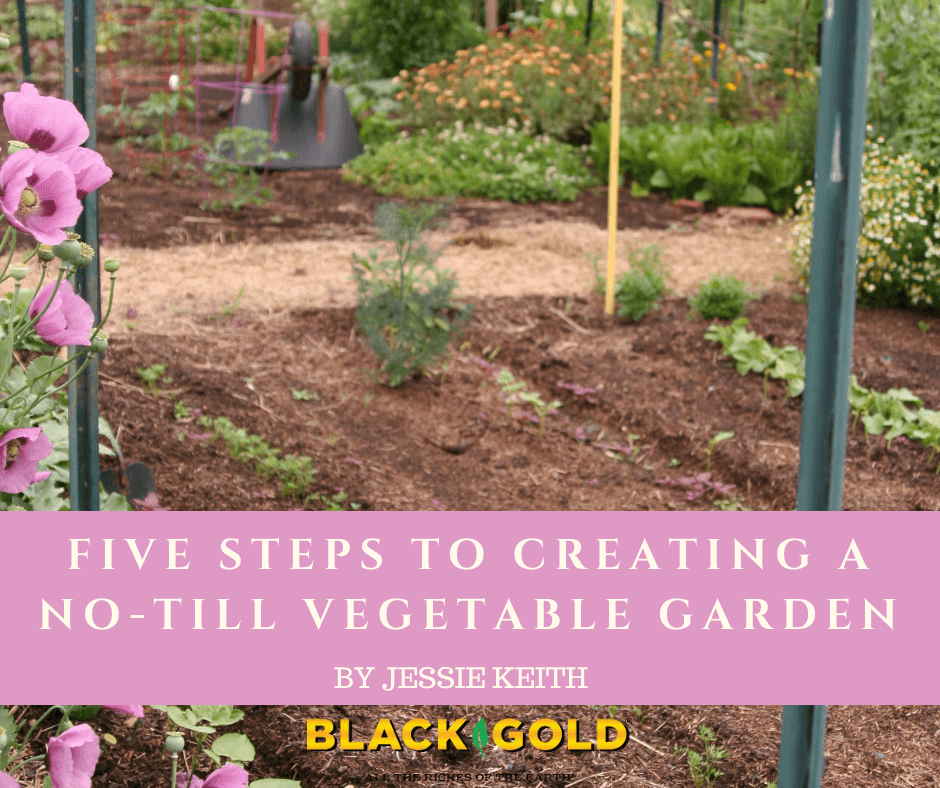
To till or not to till? Why ask this question? Tilling does good things for the soil. It increases needed aeration and porosity, allows the easy incorporation of organic amendments, and it makes all the little green weeds at the top of the soil go away. But it also has its disadvantages. Tilling draws dormant weed seeds from the soil’s subterranean seed bank to the surface, which can mean more weeds. It encourages soil erosion and disrupts all manner of beneficial creatures and microbes underground, which support healthy soils and plant roots. In time, the no-till approach can save time, money, and greatly reduce weeds. These are the reasons it is trending.
Soil Quality Determines the No-Till Approach
If you have good garden soil, starting a no-till garden is simple. Those with poorer soils need to do a bit more work.
There is more than one way to establish a no-till garden. And one’s approach is often related to soil quality and topography. Those with good garden soil can opt to simply clear weeds from the ground, add thick compost and fast-to-degrade mulches for vegetable gardening (straw, leaf mulch, etc.), fertilize, and start planting. Others with poorer clay (or sandy) soils, like me, need to feed the soil for the beforehand. It’s ironic, but my successful no-till garden needed to start with, well, tilling, in addition to double digging, and amendment. Lifting or berming the soil is also important, especially if your garden’s topography is low.
Creating a No-Till Garden
Ample soil amendments and mulches will enrich your no-till garden and keep it weed-free.
For me, creating a good no-till garden started with a big investment. I dug deep, enriched my beds to the hilt, and lifted and bermed my planting areas. For excellent no-till bed longevity, I started by lifting and aerating the soil as deeply as possible.
Materials
Tiller
Amendments, such as peat, compost, and castings (add at least a 1:4 ratio of amendments to ground-soil)
Hard rake and shovel
Straw
Mycorrhizae
Fertilizer
Tarp
Wheelbarrow (for moving mulches and amendments)
Till in amendments to at least a 1:4 ratio of amendments to ground-soil until well-combined, and airy.
Here are the five steps that I took to establish my no-till garden.
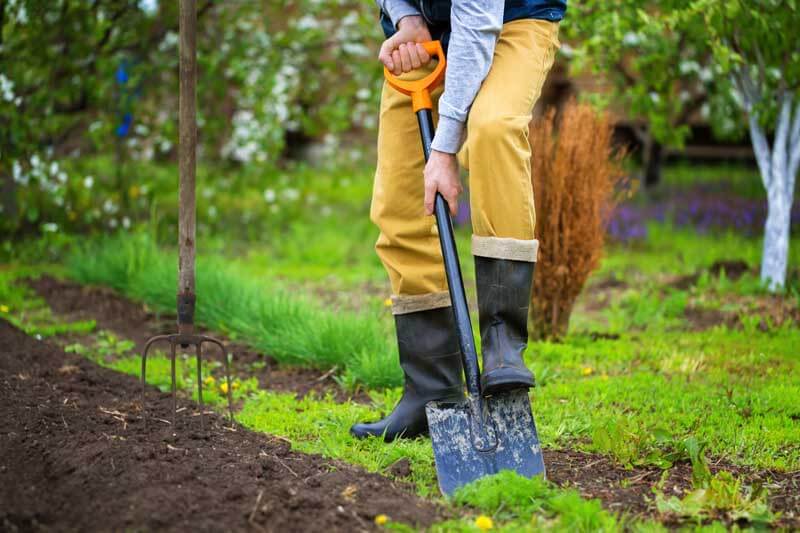
Till deeply: Creating good garden soil is all about adding air pockets, loft, and good fertility to encourage drainage and deep rooting. If you have heavy soil, you cannot accomplish this without initial tilling and amendment with lots of organic matter. Till on a day when the soil has enough moisture to sink a shovel into but is also a bit dry. I recommend double or triple tilling the new garden area to break up the soil as much as possible.
Double dig: Extra deep digging is time-intensive and should be reserved for areas where you plan to plant deep-rooting vegetables, such as carrots, parsnips, and other root crops. Move the lofty tilled topsoil onto a tarp beside the bed and dig another few inches deeper and break up the soil further. (Click here to read more about double digging.)
Amend all of your backfill: Amendments rich in organic matter and microbes are essential for the longterm health of your garden. Shovel lots of organic matter, like Black Gold compost, earthworm castings, peat moss, and even composted manure and mushroom soil, into your backfill, and till it in. I also recommend adding a granular vegetable fertilizer and an endomycorrhizal inoculant, which can be purchased in powder form. Beneficial mycorrhizal fungi help plants grow better by allowing them to more efficiently access water and nutrients.
Define pathways, fill, and berm: If you have a large or relatively large garden space, it’s nice to establish paths for easy garden access and harvest. Most gardeners choose a row or block design. I always like my pathways to stand a bit lower than my beds, so I berm up fill in the bed areas using a hard rake. This gives beds an even deeper pad of lofty soil and ensures that they will not be walked upon.
Cover: As a final step, I cover my walkways with black & white newspaper or non-waxed corrugated cardboard and cover the paper with a thick layer of seed-free grass clippings, straw, or even leaf mulch or pine straw. You can even plant nitrogen-fixing clover in the walkways. Then I add a thick layer of compost to the beds to detur weeds, and fresh straw to the pathways to stop weeds and keep them from getting muddy after rain.
Each year, I clean up and refresh the walkways, and add fresh compost as a mulch in lieu of tilling. Invest in your no-till garden like this in the beginning, and you will be wowed by the results.
Raising Beds to New Heights
Other garden types, such as raised beds, do not require tilling either.
There are other no-till options for vegetable gardening, but I prefer the freedom of a large garden bed with tidy straw walkways. Traditional raised beds, hugelkultur, strawbale gardening, even container gardening don’t require tilling. Here are articles about each gardening type, if you want to learn more.
Invest in your no-till garden from the beginning, and it will reward you in the future. Support it with fresh mulch, feed it well, and watch your harvests explode!
Double dig areas for root vegetables, and add a layer of protective compost over beds each year.
My daughter is picking off Colorado potato beetles from potato plants.
For the past 14 years, I have grown my vegetables in a community garden plot, which has provided a real education in plant pests, diseases, and weeds. Why? Because these mega veggie gardens are pest hot spots, and summer is the worst time of year for the beasties. Bad insects always attack my beans, cucumbers, tomatoes, and eggplants–threatening to destroy fruits and foliage, and sometimes spreading disease as they munch and crunch along. I must use every tool in the toolbox to fight them. And, if they beat my crops, I often start them again, if there’s time and the season allows. Sometimes beating pests is just a matter of retooling planting time.
The five most common vegetable garden pests that I battle in mid to late summer are Colorado potato beetles, striped cucumber beetles, flea beetles, Mexican bean beetles, and harlequin cabbage bugs. (Cabbage loopers and squash vine borers are also a problem. Click here to read about cabbage looper control, and click here to read about squash borer control.) Each return year after year with regularity, but some years are worse than others. The severity of the previous winter usually indicates the severity of my pest problems–the milder the winter, the harsher the pest problem.
Last winter was pretty warm, so this summer, the pests are rampant. Here are some ways that I have learned to overcome them.
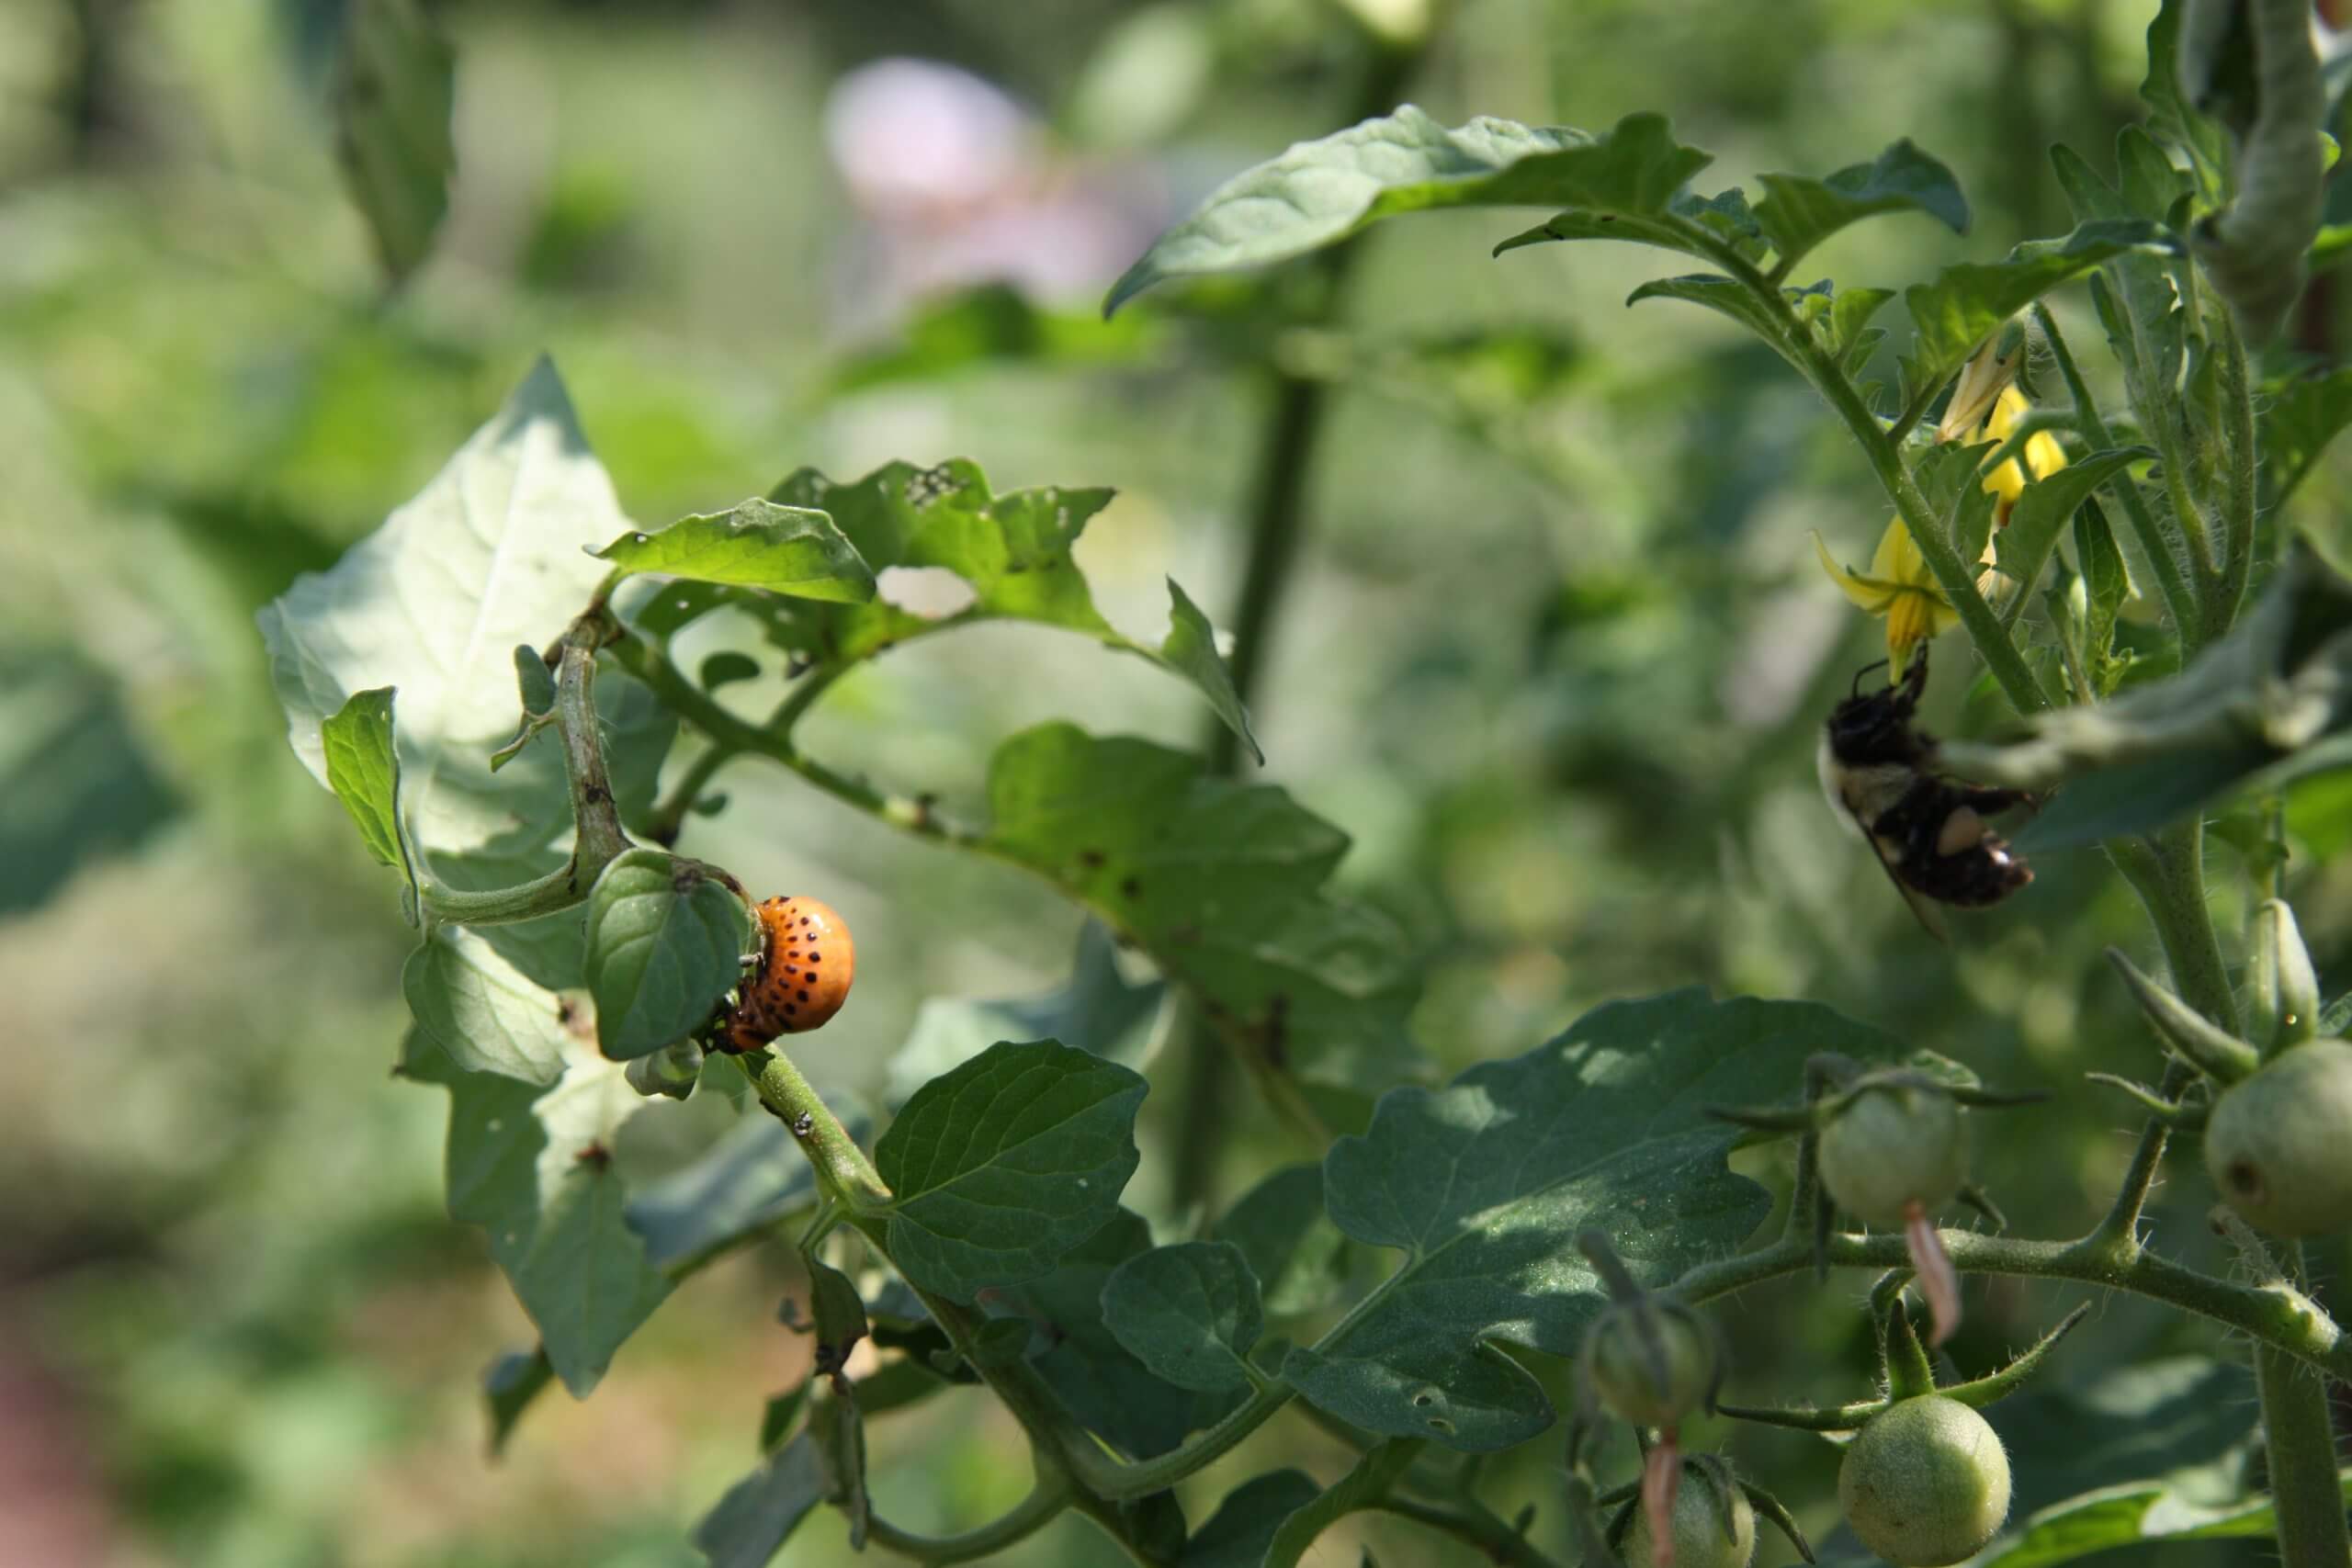
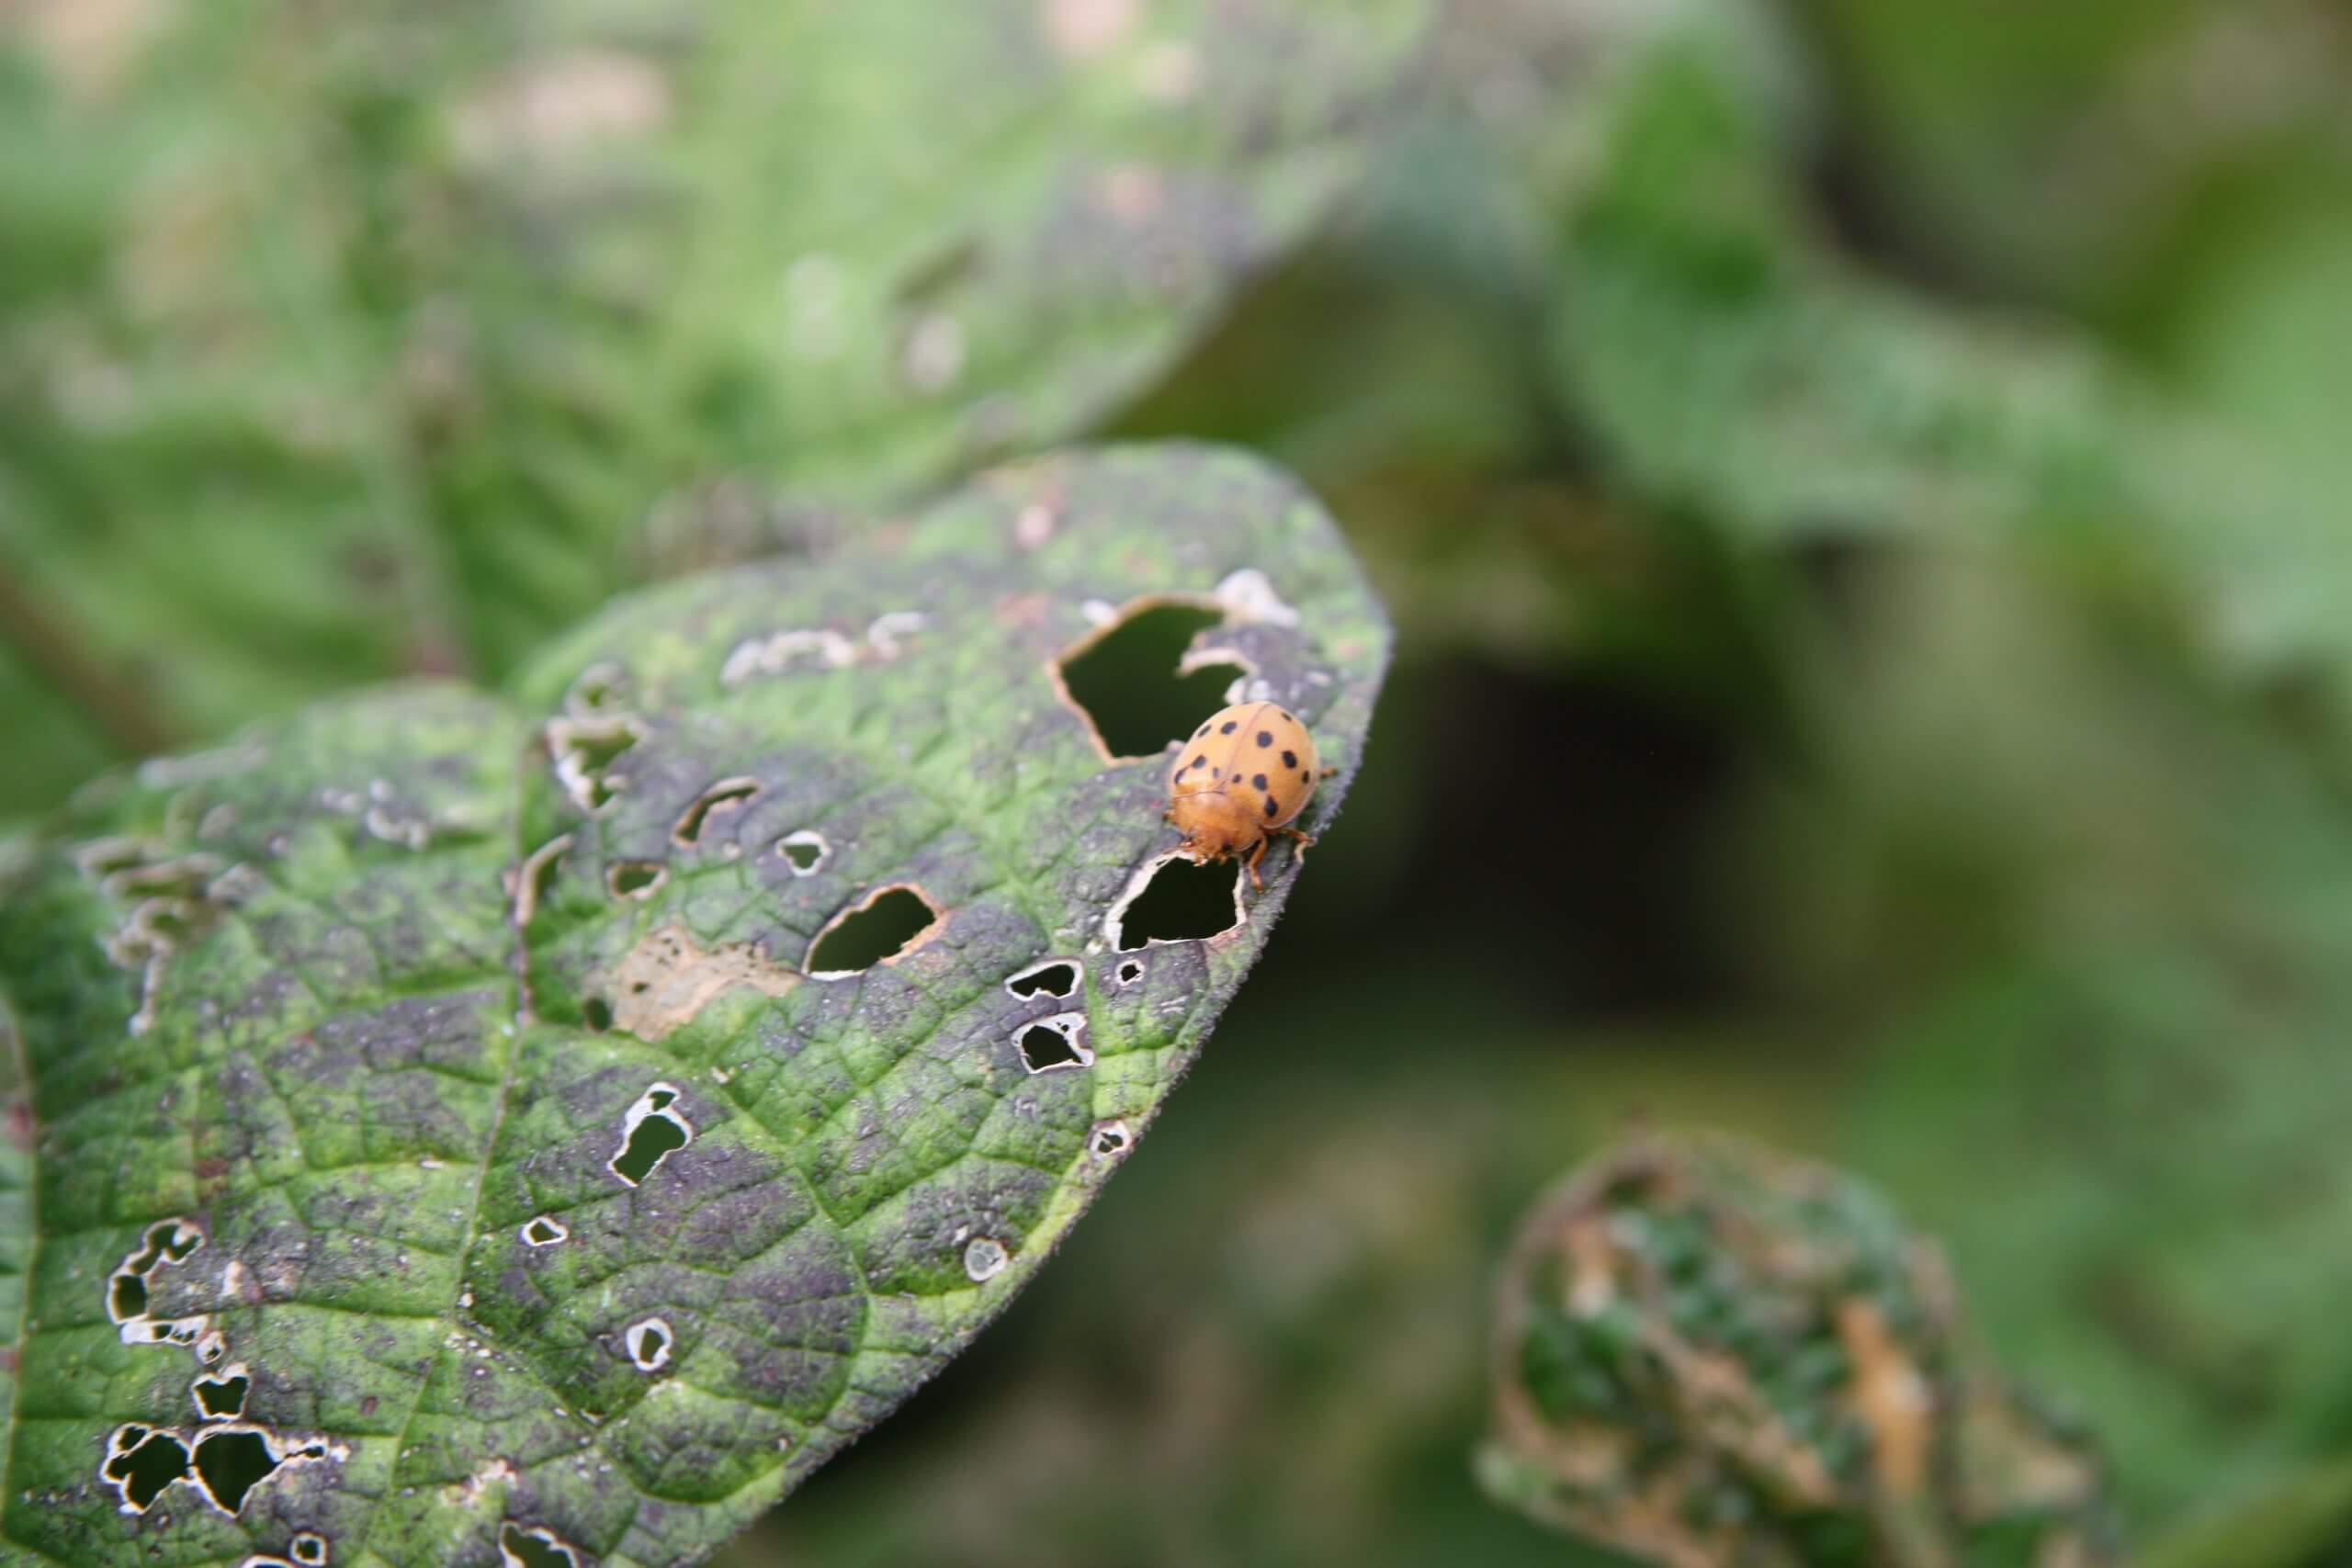
Colorado Potato Beetle
One often sees Colorado potato beetles mating on top of a potato plant.
The surest way to attract Colorado potato beetles to your garden is to plant potatoes, but if you don’t have potatoes, they will go for your tomatoes and eggplant secondarily. (Fortunately, they don’t appear to be attracted to tomatillos.) The fat, striped adult beetles emerge from the soil in late spring to feed on emerging potatoes, and then lay clusters of orange-yellow eggs on leaf undersides. They yield highly destructive little orange larvae that eat foliage nonstop and grow quickly. You can kill the insects at any stage, but it’s easiest to pick off the adults and eggs. (Click here to view the full life cycle of these beetles.) The beetles can complete up to three life cycles in a single season, so once you have them, you generally have to fight them all summer.
A Colorado potato beetle larvae eating tomato leaves.
These insects are highly resistant to insecticides, so it pays to choose non-chemical methods of control. Time and time again, I’ve found that well-timed cultural control and proper winter cleanup are the best means of battling them. Cultural control is essentially picking off the adults, eggs, and larvae and/or pruning off egg- and larval-covered leaves and branches. I generally smash picked specimens, but you can also drown them in a bucket of water. Beetle picking should start in mid to late spring and continue until all signs of these pests are gone. (To learn everything there is to know about Colorado Potato Beetles, visit potatobeetle.org.)
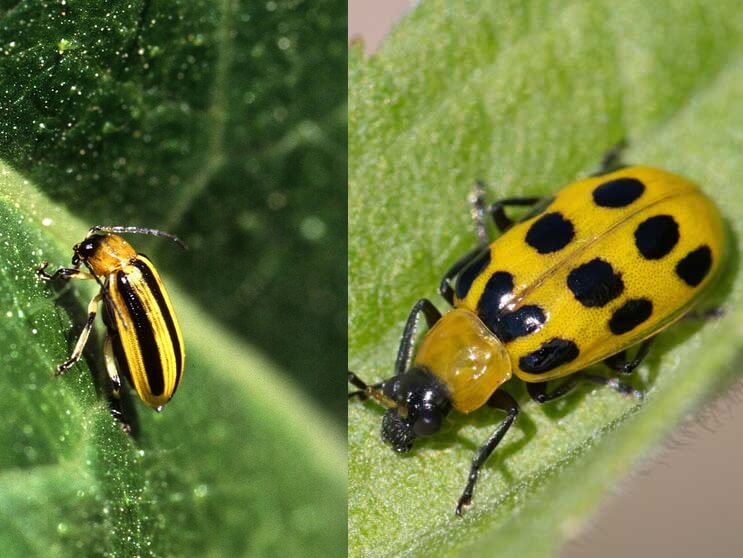
Spotted and Striped Cucumber Beetles
Here are the symptoms of bacterial wilt, which is spread by the striped cucumber beetles.
As their names suggest, striped and spotted cucumber beetles favor cucumbers, but they also attack melon vines. Small, striped or spotted cucumber beetles look so cute and innocent, but they are so destructive. Every year my cucumber crop is a crapshoot. Why? It’s not because of the damage they cause by feeding on plants and fruits. It’s the catastrophic bacterial wilt that they spread from plant to plant. Once cucumber vines get cucumber bacterial wilt, there is no turning back. The leaves will start to show droop, and eventually, whole stems will collapse, and the vine will die.
These pests may have two to three cycles in a season and are next to impossible to control, even with harsh chemical insecticides. Floating row cloth cover can keep them at bay, but it’s a hassle and does not allow pollinators to reach the plants, though some cucumbers are self-pollinating, particularly Beit-Alpha types like ‘Diva’.
Striped and spotted cucumber beetles are similar in size and color.
Tiny jet-black eggplant flea beetles are the smallest summer pests in this list, but they can devastate an eggplant in a matter of days. They attack many other veggies, like radishes, potatoes, turnips, and spinach, but with less ferocity. The small but numerous insects leave little pockmarks all over a host plant’s leaves. Badly damaged leaves barely function, resulting in poor, weak plants that produce puny fruits.
If you want to grow eggplant, you have to protect them from eggplant flea beetles. There are plenty of insecticides that will kill these insects, but only a few non-chemical cultural practices will stop them. The best method that I have found is protecting plants with summer-weight floating row covers that transmit a lot of sunlight while physically keeping insects from the plants. The key is covering plants early and then securing the row covers at the base, so the tiny beetles cannot crawl beneath them. Holding cover edges down with bricks, pins, and even mulch or compost works. The only caveat is that you may need to hand-pollinate plants for fruit set.
Good fall cleanup of infested crop plants will also keep populations down from year to year. On average, eggplant flea beetles will complete up to four generations in a single season. (Click here to learn more about these pests.)
Harlequin Cabbage Bug
Harlequin bug adults will quickly destroy broccoli, kale, cabbage, and other brassicas.
These ornamental stink bugs are the worst enemy of summer kale, broccoli, and other brassicas. They suck the juices from the leaves, causing pockmarks all over them. The most striking destruction I have ever witnessed was with enormous Portuguese kale that I had nurtured to a bold 2′ in height through spring. Once the numerous beetles started to attack in early summer, the plant had no chance.
There are a few management practices that will help stop these bugs. Floating row covers can also be used, as was suggested for the eggplant flea beetles, but harlequin cabbage bugs are big enough to pick off by hand if you have the time and can handle the slightly stinky smell they emit when disturbed. Spraying them off with a jet of water will also help knock them back. Small nymphs are also susceptible to treatment with OMRI Listed®insecticidal soap.
Two to three generations of harlequin cabbage bugs can occur each season. By late summer, they are no longer a problem, so that you can plant your fall cabbages and kales with confidence. (Click here to learn more about these pests.)
Mexican Bean Beetle
Mexican bean beetle larvae do serious damage to bean leaves.
Like Colorado potato beetles, it’s the larvae of Mexican bean beetles that do the harshest damage to bean plants. The adults emerge in late spring, but they rarely cause major problems on bean plants until midsummer. The adults are orange, black-spotted beetles that lay clusters of orange-yellow eggs below the leaves, much like the Colorado potato beetle. The unusual larvae are fuzzy, bright yellow, and devastate leaves as they feed along the leaf bottoms.
You can control these pests as you would Colorado potato beetles with one exception – destructive harvesting. Destructive harvesting is the harvest and total removal of infested plants from the garden. After picking all the beans from an infested plant, the whole plants should be pulled, bagged, and taken far from your garden. (Click here to view a YouTube video from the University of Maryland about destructive harvesting.) Beans can be replanted as late as mid-August for early fall harvest.
A Mexican bean beetle adult on a bean leaf.
In general, regular weeding, good plant care, and excellent garden clean up, in summer and fall, will help keep pest populations down. Clean the ground of all leaf litter and weeds as needed, and amend the soil with top-quality amendments for vegetables, such as Black Gold® Garden Compost Blend and Garden Soil, and your plants will be more robust to resist the many garden pests that threaten to destroy them.
Have your vining cherry tomatoes overgrown your cage or trellis? Here are a few pruning tips to get them back under control. Pruning tomatoes will also encourage air flow and discourage fungal diseases.
Growing artichokes up North is easy, if you grow the right kinds and give them the right care. Learn how to grow great artichokes if you live in USDA Hardiness Zones 7-4. You can even grow your own from seed!
Grow the best sweet potatoes in this raised garden tower that you can make yourself! It’s a great way to grow loads of sweet potatoes for fall harvest.
Vegetarian and vegan lifestyles have popularized high-protein garden vegetables. Growing a good selection of nutritious, protein-packed grains and beans means expanding upon the standard repertoire of veggies. The list may include cool-season legumes, like chickpeas and fava beans, as well as winter grains and warm-season crops, such as edamame and amaranth.
The first step of garden planning is arranging your desired crops by season. All the edibles in this article fall into three seasonal categories—winter cover crops (fall to spring), cool-season crops (spring and fall), and warm-season crops (late spring to early fall). Identifying good seed sources is also important. For lesser-grown grains and beans I recommend Salt Spring Seeds and Johnny’s Selected Seeds and for a good selection of beans I recommend Baker Creek Heirloom Seeds.
Winter Cover Crops
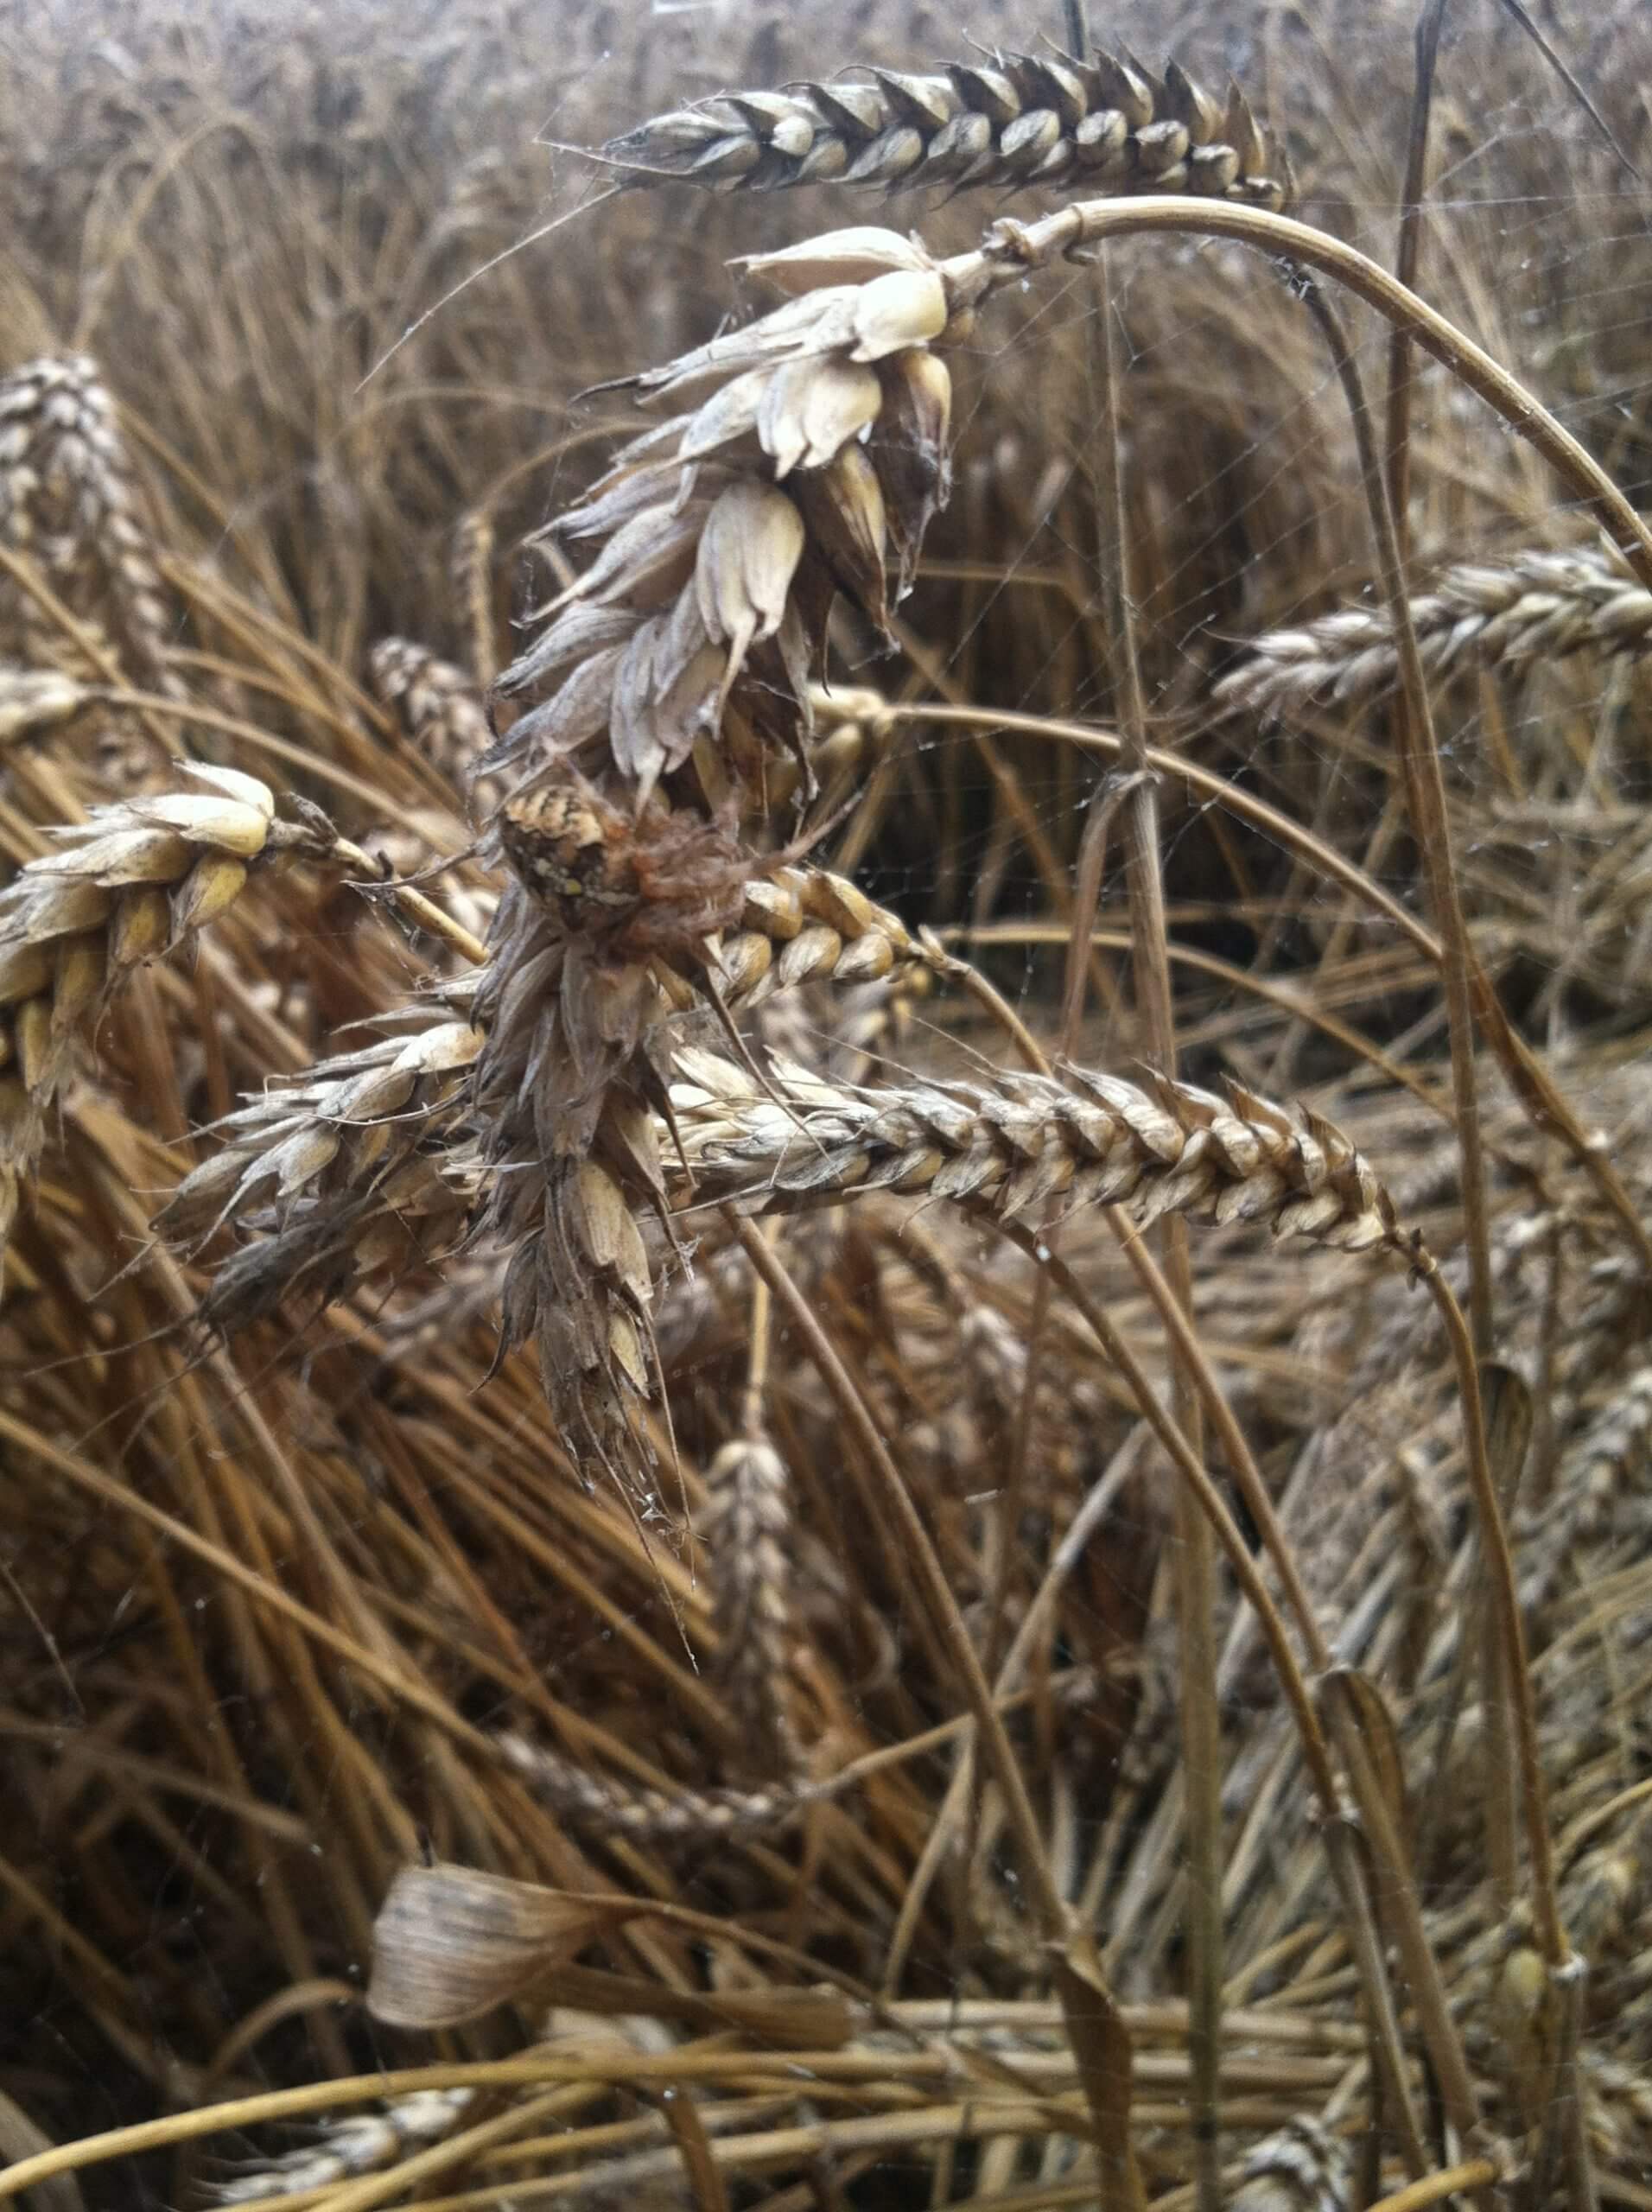
Winter wheat grows through winter and produces in late spring.
Buckwheat, winter wheat, and rye varieties serve as winter crops with high-protein seeds and grains that can be reaped in late fall or spring. As cover crops, they suppress weeds and feed and protect garden soils through winter.
Buckwheat (Fagopyrum esculentum, 19 grams protein/164 gram serving) is a legume that prefers mild sunny days and cool nights. As a cover crop, it suppresses weeds, breaks up tough soil with its dense roots, and naturally fixes nitrogen into the soil. Most gardeners plant it in midsummer for late-season cover and seeds. Lightly till the soil, broadcast seed over the area, and water it in. Germination should occur within a week or so. After several weeks, the robust plants will bear small white flowers that feed bees and produce exceptional honey. In the 10th week, clusters of dry seeds cover the plants. Gather the clusters before they shatter by cutting them into a closed bag or bowl. To separate the seed and chaff, run the clusters across an 11/64″ round steel sieve, and follow this by winnowing away any additional chaff. (Read more about growing buckwheat.)
Winter wheat and rye are hardy cover crops that can be planted in fall and bear grain in late spring to early summer. Spelt (Triticum spelta, 25 grams protein/174 gram serving), winter wheat (Triticum aestivum varieties, 24 grams protein/192 gram serving), and winter rye (Secale cereal, 25 grams protein/169 gram serving) are three good choices. In spring, plants grow quickly. They can be harvested when the plants and seedheads turn brown. Once fully dry, the chaff can be easily peeled off and winnowed away.
Cool Season High-Protein Crops
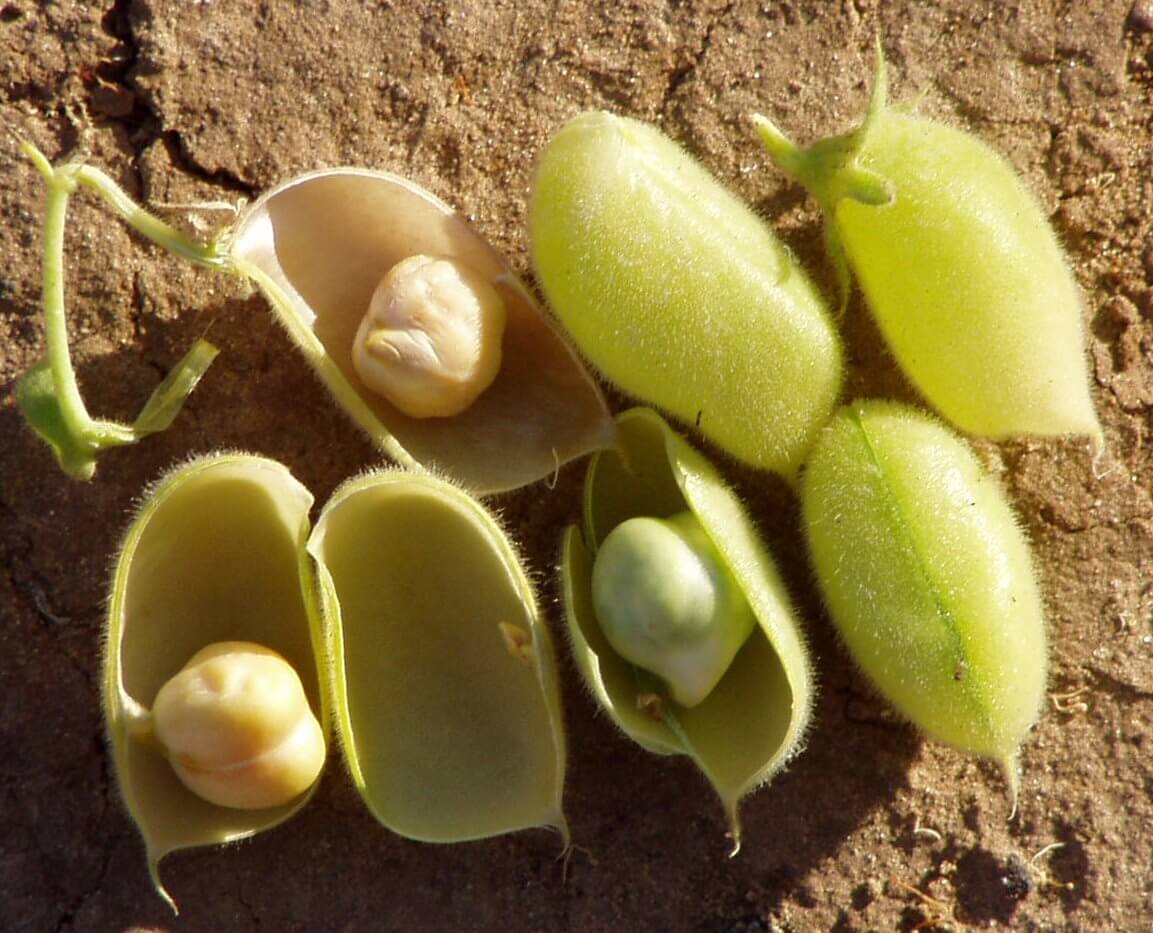
Chickpeas are Middle Eastern in origin and best grown in springtime.
A surprising number of protein-packed legumes thrive in cool spring weather—these include chickpeas, fava beans, and quinoa. Spring legumes have the added benefit of fixing nitrogen into the soil, so plant these in areas where you plan to rotate in heavy feeding summer crops, like tomatoes.
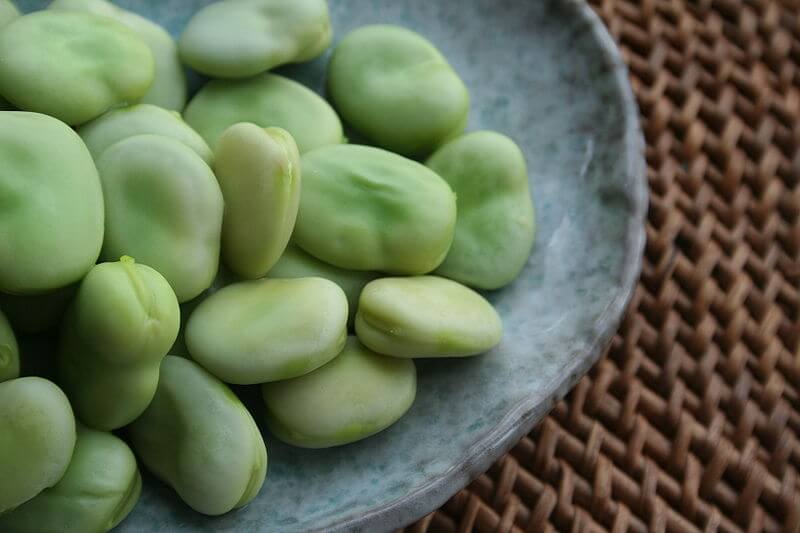
Chickpeas (Cicer arietinum, 39 grams protein/200 gram serving) and fava beans (Vicea faba, 10 grams protein/126 g serving) are both ancient crops, dating back to 7,500-8,000 years, that originate from the Middle East. Both grow best in cool conditions with no temperature extremes. Sow them in spring, at the same time peas are planted. Pre-soak the seeds and plant them in fertile, well-drained soil 1.5 inches below the soil surface. Both should begin producing beans by late spring or early summer. Hot summer weather will cause plants to decline and flowers to drop before fruit set. Harvest and enjoy both beans fresh or allow pods to become fully dry on the plant before hulling and containing them for long-term storage.
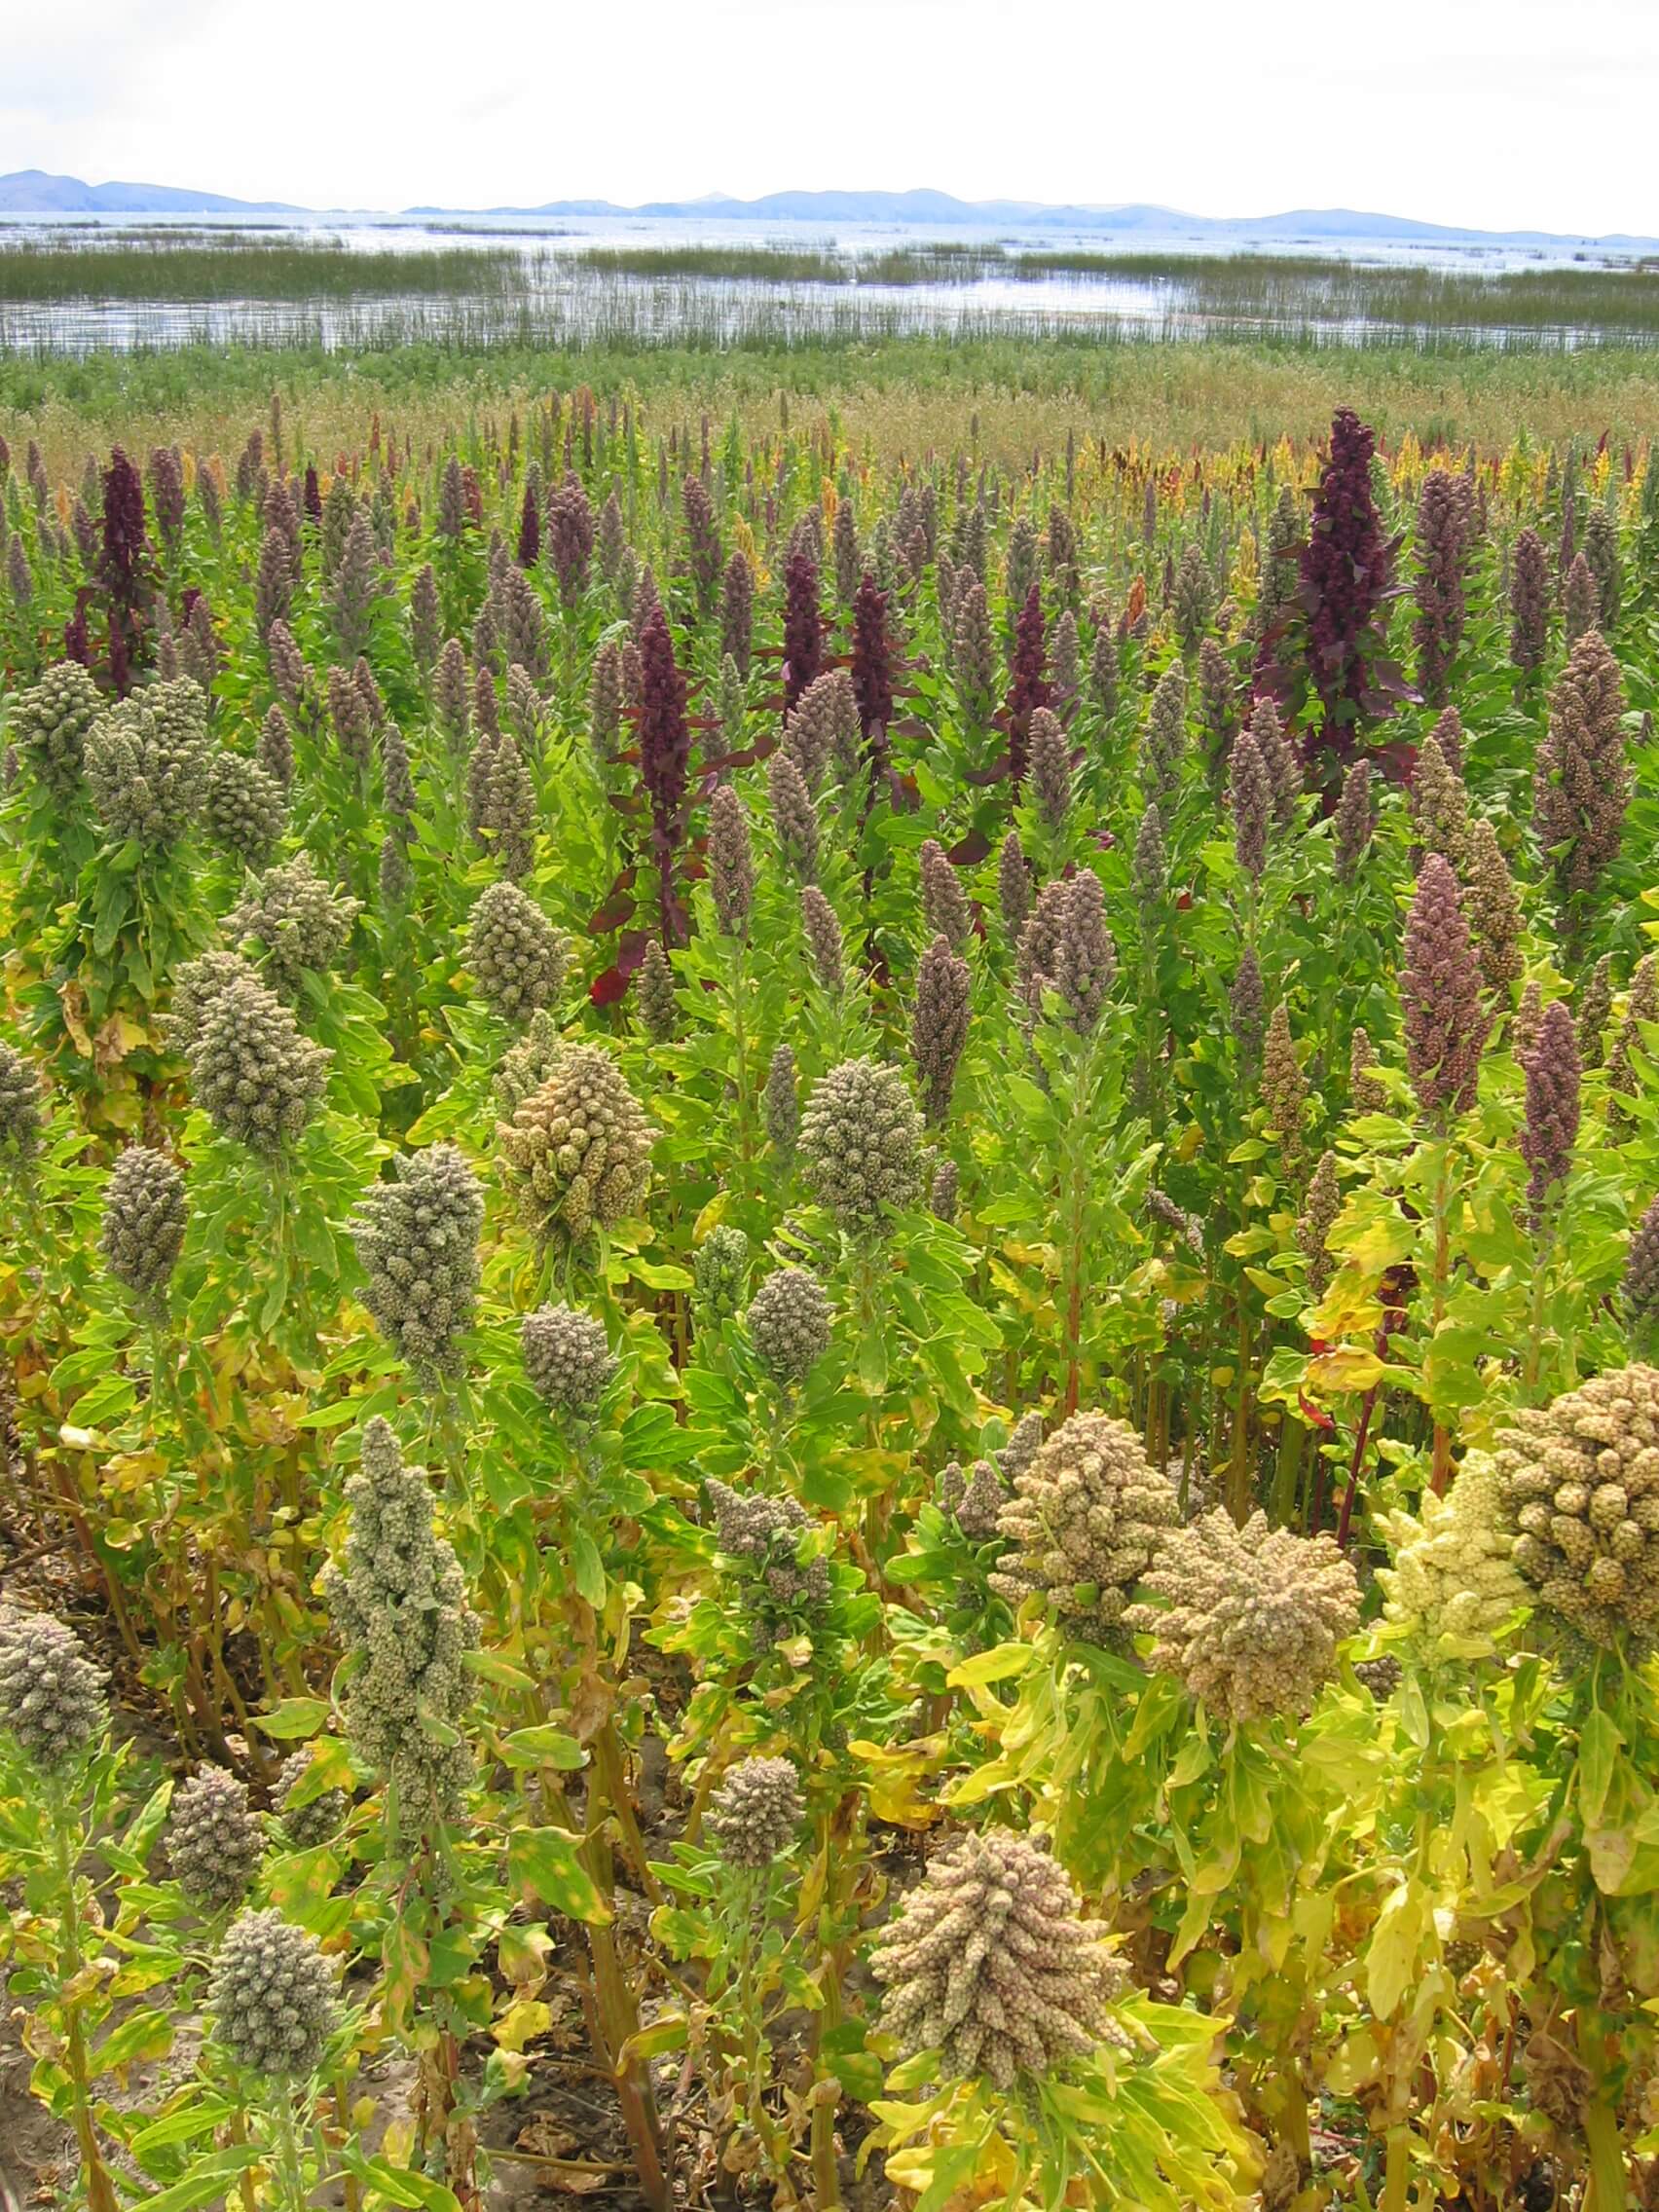
Quinoa growing in Bolivia. (image by Michael Hermann)
Quinoa (Chenopodiumquinoa, 24 grams protein/170 gram serving) is an equally ancient crop that is sown in spring and harvested in early summer when the heads are fully dry. There are several varieties of this Andean native and amaranth relative that may have red, black, or tan seeds.
To plant quinoa seeds, work up the soil and amend with Black Gold Garden Compost Blend. Then lightly broadcast the seeds over the planting area and lightly rake them over. Seed heads should be fully dry by early summer. Cut them into a closed bag or bowl, and then winnow to separate the seeds from the chaff. The millet-like seeds will self sow if allowed to fall to the ground.
Warm-Season High-Protein Crops
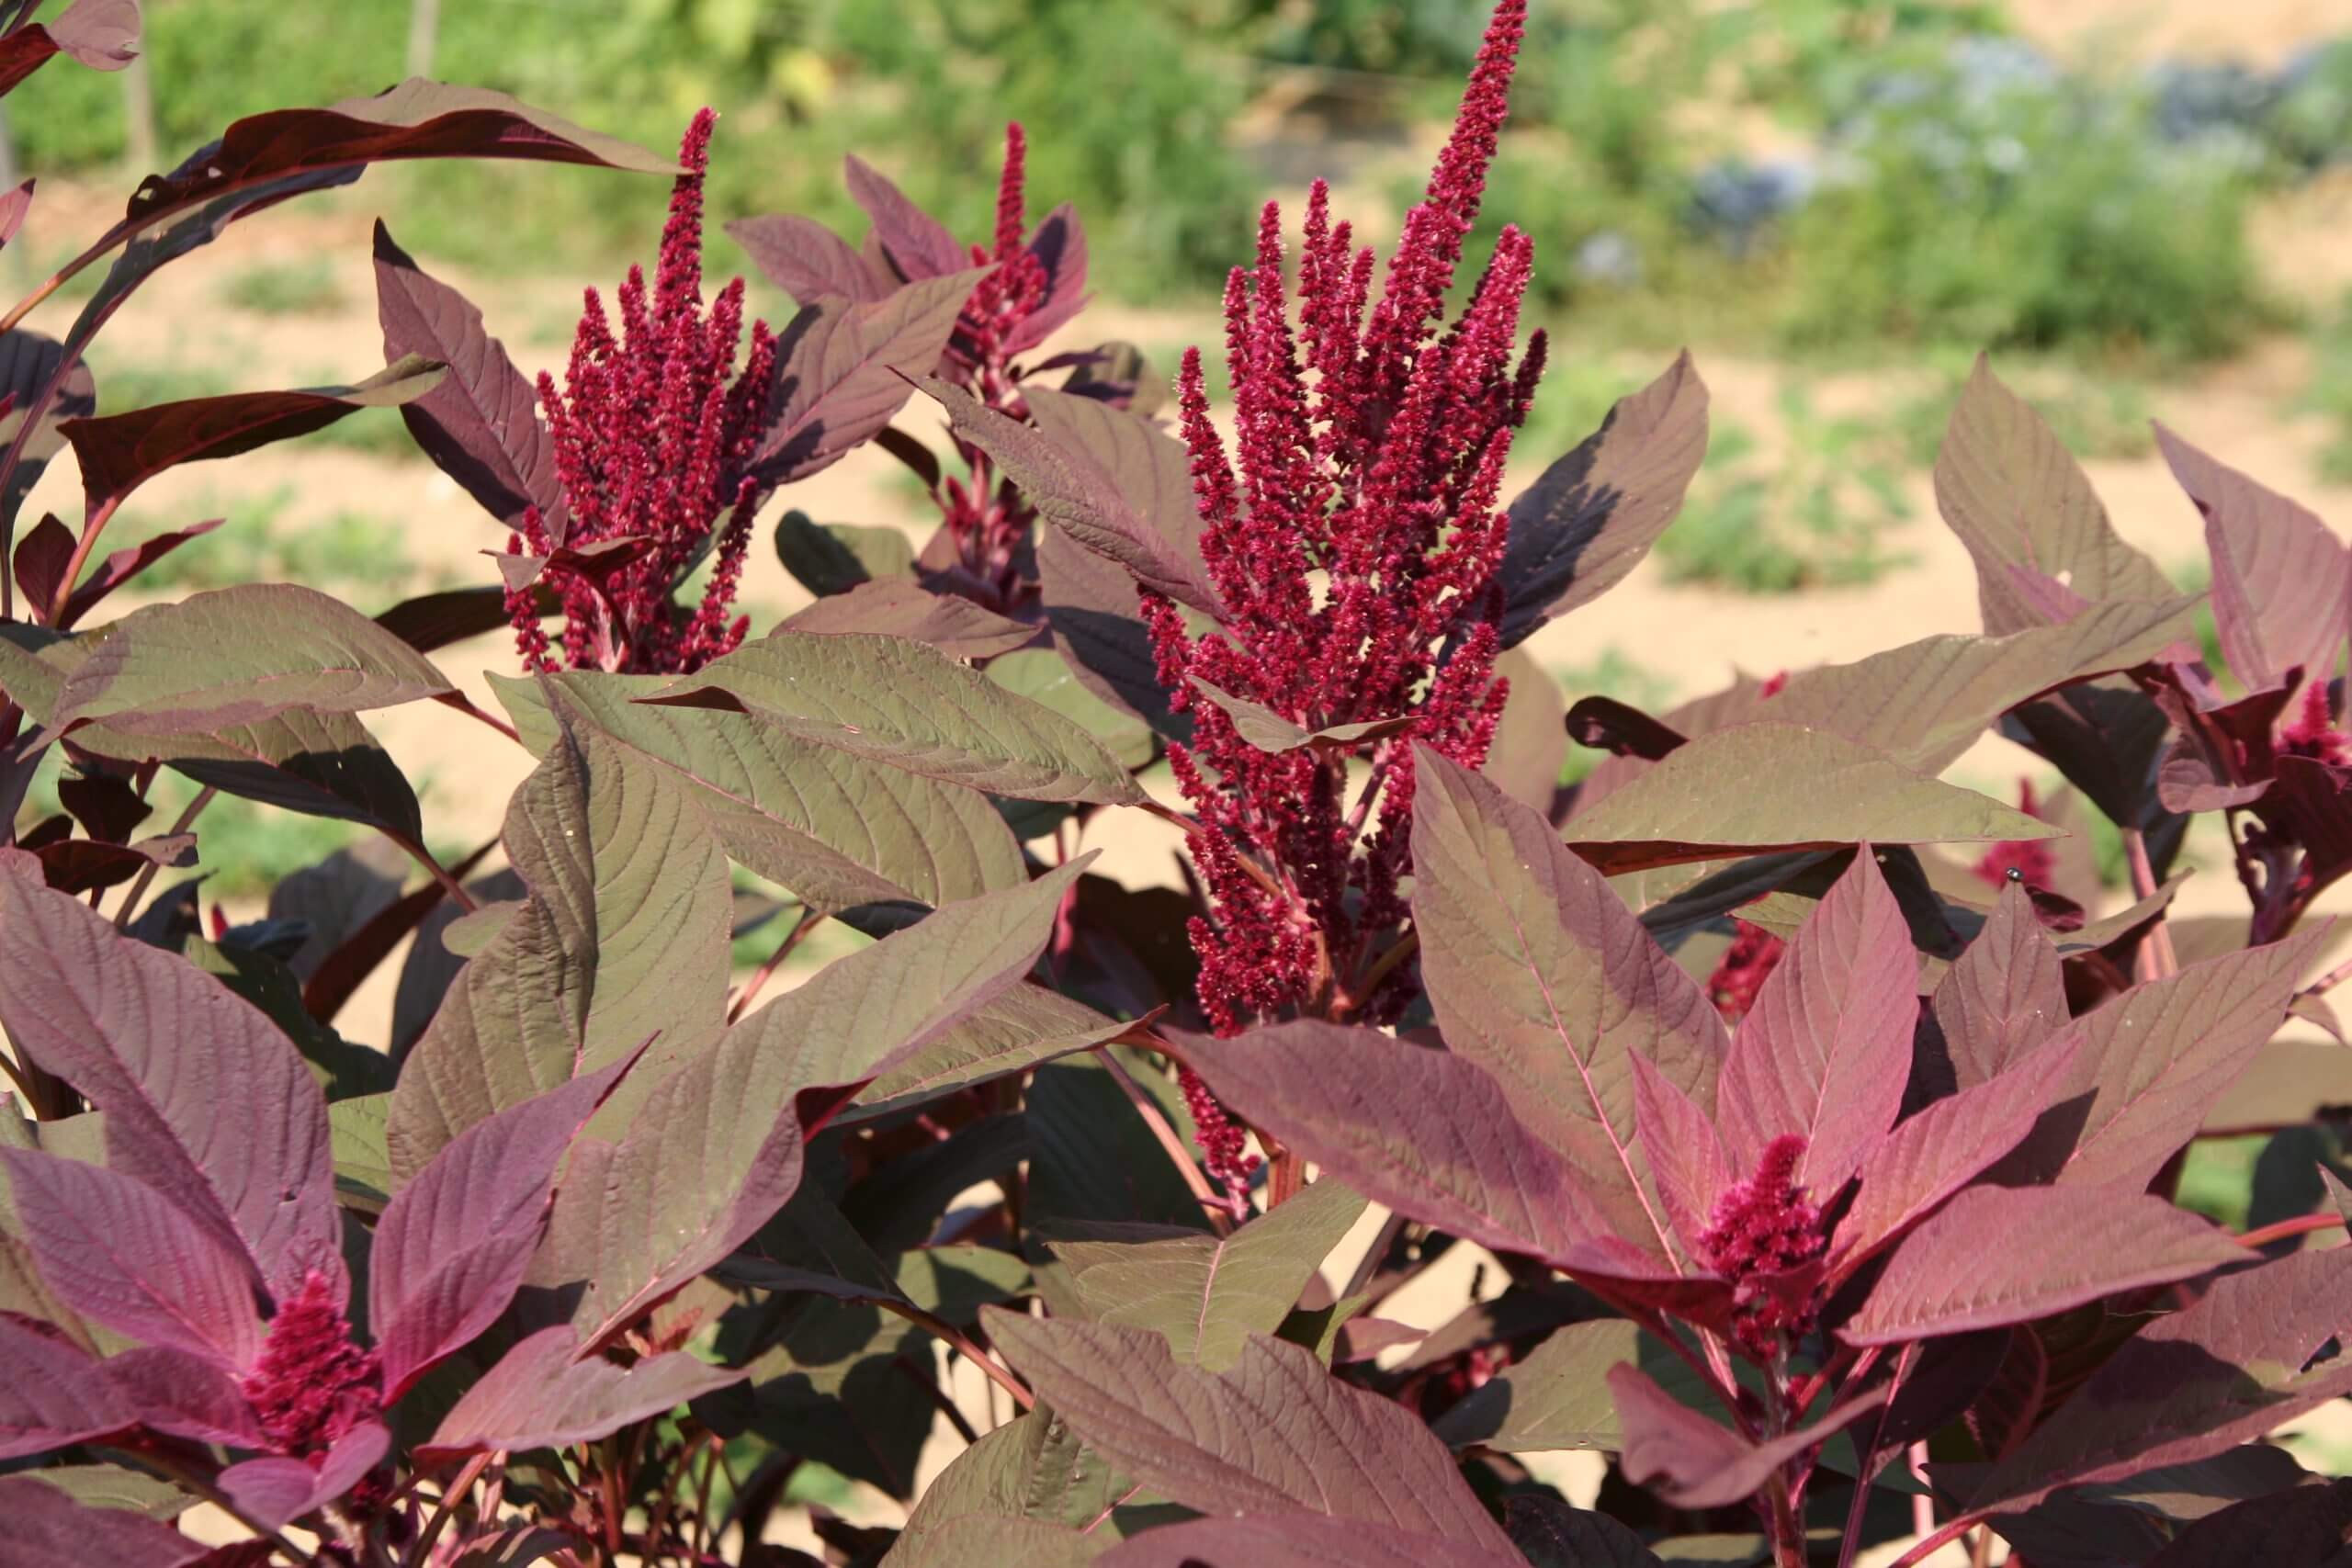
In the summertime, try growing protein-rich amaranth, chia, edamame, and various beans. All thrive in hot weather and are easy to grow.
Chia plants are pretty and their seeds are full of protein. (image by McZusatz)
Lots of protein-rich summer seed crops are also ornamentals. Tall, bold purple amaranth (Amaranthus hypochondriacus, 26grams protein/193 gram serving) has edible leaves in addition to producing loads of edible seeds. Plant it in spring after the threat of frost has passed. By summer, heat, and drought tolerant amaranths will produce large floral plumes. Harvest these in fall when they become dry; simply cut them off and shake them vigorously into a plastic bag to remove the seeds. Add the seeds to breads, muffins, or granola.
Chia seeds are produced by Salviahispanica(4 grams protein/28 gram serving), a Mexican sage grows to 3 feet and bears spikes of blue flowers in summer, so it makes a great ornamental. In fall, its tall spiky seed heads are filled with seeds to cut and gather. Add them to smoothies or toast and sprinkle them on granola.
Tall purple amaranth is attractive and produces loads of edible seeds.
Edamame (Glycine max) have become increasingly popular with gardeners as more home varieties appear in seed catalogs. Opt for productive, short-season cultivars like ‘Envy‘ and ‘Fiskeby‘. Start seeds indoors and plant them outdoors after the threat of frost has passed. The heat-loving plants will produce fresh pods by midsummer. These and summer beans of all varieties, from limas to black beans and string beans, are great high-protein summer vegetables. (Click here to grow great summer string beans.)
All of these crops can be harvested dry and stored, but those that can be enjoyed fresh offer extra appeal. Few have the chance to enjoy fresh-picked edamame, favas, and chickpeas straight from the garden!
Fava beans are a great source of protein and easy to grow in mild spring weather.
If you have a small garden, you can still grow vegetables! How? Potted vegetables, of course! For container vegetable success, it comes down to choosing the right pot, good soil, a sunny location, and keeping your plants fed and watered. Get these factors right, and you will be rewarded with lots of fresh vegetables all season long.
Container growing can be a bit more challenging, but a little mastery will bring big success. Veggie pots can be started in spring, summer, or fall, as long as you choose the correct veggies for the season.
The Right Plant and Pot Size
This tower-o-kale shows how vertical planters can maximize space. (photo by Maureen Gilmer)
Bigger is generally better when it comes to pot size. Many summer vegetable favorites, such as tomatoes, peppers, beans, and greens need big pots. Vining plants, such as cucumbers, squash, melons, and sweet potatoes, need even bigger pots to grow to full glory. Large pots hold more soil and water and provide the depth and space plants need to grow fully and stably. They also have enough space to keep growing roots cool, a must for plant health. The large, deep pot should have ample room to accommodate the stakes or cages that many vegetables need to keep from toppling in summer winds.
Half whiskey barrels, big tubs, and deep trough planters have enough space for vegetables to grow to their fullest. Terracotta is not always recommended because it can wick water away. Choose lighter-colored pots with thicker because they tend to keep roots cooler. Be sure they have plenty of holes in the bottom for ample drainage. A layer of permeable garden cloth at each pot’s bottom will keep soil from seeping out. Bottom trays are recommended.
Spacious vertical planters work well for vegetable growing, if they hold enough soil for plants to grow well. There are many great styles on the market and templates for crafty builders. Check our our vertical vegetable garden Pinterest Pin Board to view a few!
‘Mountain Merit’ is an award-winning bushy tomato that’s great for container growing. (photo by All-America Selections® Winners)
Smalleris generally better when it comes to plant size. When growing in containers, compact varieties are better suited to pot culture. Determinate, or non-vining bush tomatoes, are better than full-vining indeterminate types. Pick classic bush tomato varieties like the red slicers, ‘Mountain Merit‘ and ‘Celebrity‘, both AAS winners.
Other great bushy veggies (that are typically large vines) include little cucumbers, such as ‘Bush Pickle‘, and space-saving squash, such as the small butternut ‘Butterbush‘ and zucchini ‘Fordhook‘. A good cantaloupe to try is the very compact ‘Minnesota Midget‘, and ‘Bush Sugar Baby‘ is a short-vined watermelon suited to container culture. ‘Little Baby Flower‘ is a another somewhat compact watermelon that we are growing in a pot this season with great success!
For rooting vegetables, such as carrots, turnips, beets, and radishes, pots sizes can be slightly smaller as long as they are deep. Upright vegetables, such as peppers and eggplant, should be staked or caged to supply added support.
Good Soil and Fertilizer Quality
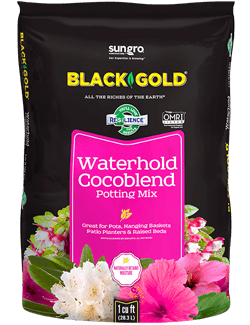
Good soil that holds water well, but also has ample air space and great drainage, is needed for successful container growing. Black Gold® Waterhold Cocoblend Potting Soil mixed with Black Gold® Garden Compost Blend is the perfect combo for vegetable gardening in containers, and these OMRI Listed® products are approved for organic gardening. For containers holding herbs and green leafy vegetables, consider adding a little Black Gold Earthworm Castings Blend 0.8-0.0-0.0, which is rich in nitrogen. Change potted media out at least every two to three years for best results because potting mixes break down, lose structure, and acidify over time.
Most vegetables are “heavy feeders”, which means they need a lot of food for good growth and development. A good slow-release fertilizer formulated for vegetable growing is best. Work the fertilizer into the root zone at planting time. For really heavy feeders, like tomatoes, it also helps to follow up with applications of a water-soluble fertilizer formulated for vegetables just at the point before fruits develop. This will help maximize fruit quality and load.
Effective Watering
Overstuffed veggie pots are not ideal because they require twice-daily water, extra food, and won’t grow to their fullest and happiest due to root competition.
Lack of regular water is one of the main causes of potted vegetable failure. The number one rule to follow when watering potted plants is to continue watering until water starts to run out of the pot drain holes. This indicates that the container is saturated. Thorough watering will result in more expansive root development and stronger, more stable plants. If you only water the upper half of pots, plants will develop shallow root systems, which will reduce stability and cause fast drying.
Daily water is needed for most pots, but large pots may require water more frequently, depending on the plants and heat and humidity levels. More effective irrigation is also helpful. Consider drip irrigation for pots. It also helps to add an extra layer of porous organic mulch to keep surface water from evaporating. Leaf mulch, straw, or grass clippings are all great options that break down quickly while providing a little extra protection. Click here to read about the 8 best watering strategies for plants.
Good Container Veggies by Season
‘Little Baby Flower’ watermelon grows well in big tubs!
Determine a plant’s growing season before planting. Vegetables are generally distinguished as being “cool season” or “warm season”. In most parts of the country, cool-season vegetables are those that you would grow in the spring or fall. Warm-season vegetables are those that grow well during the hottest months of summer.
Top cool-season vegetables for containers are lettuce, spinach, kale, bok and pak choi, miniature cabbages and cauliflowers, bush peas, beets, and mini carrots, radishes, and turnips. Warm-season vegetables are tomatoes, peppers, bush squash, eggplant, Swiss chard (cool season, too), bush cucumbers, and melons.
Even in late summer, there is time to plant vegetable containers for fall enjoyment. Start by going to a local nursery where they sell large containers, premium Black Gold potting mixes (click here to find a store with Black Gold near you), and quality vegetable starts. Give them good care for a bountiful harvest.
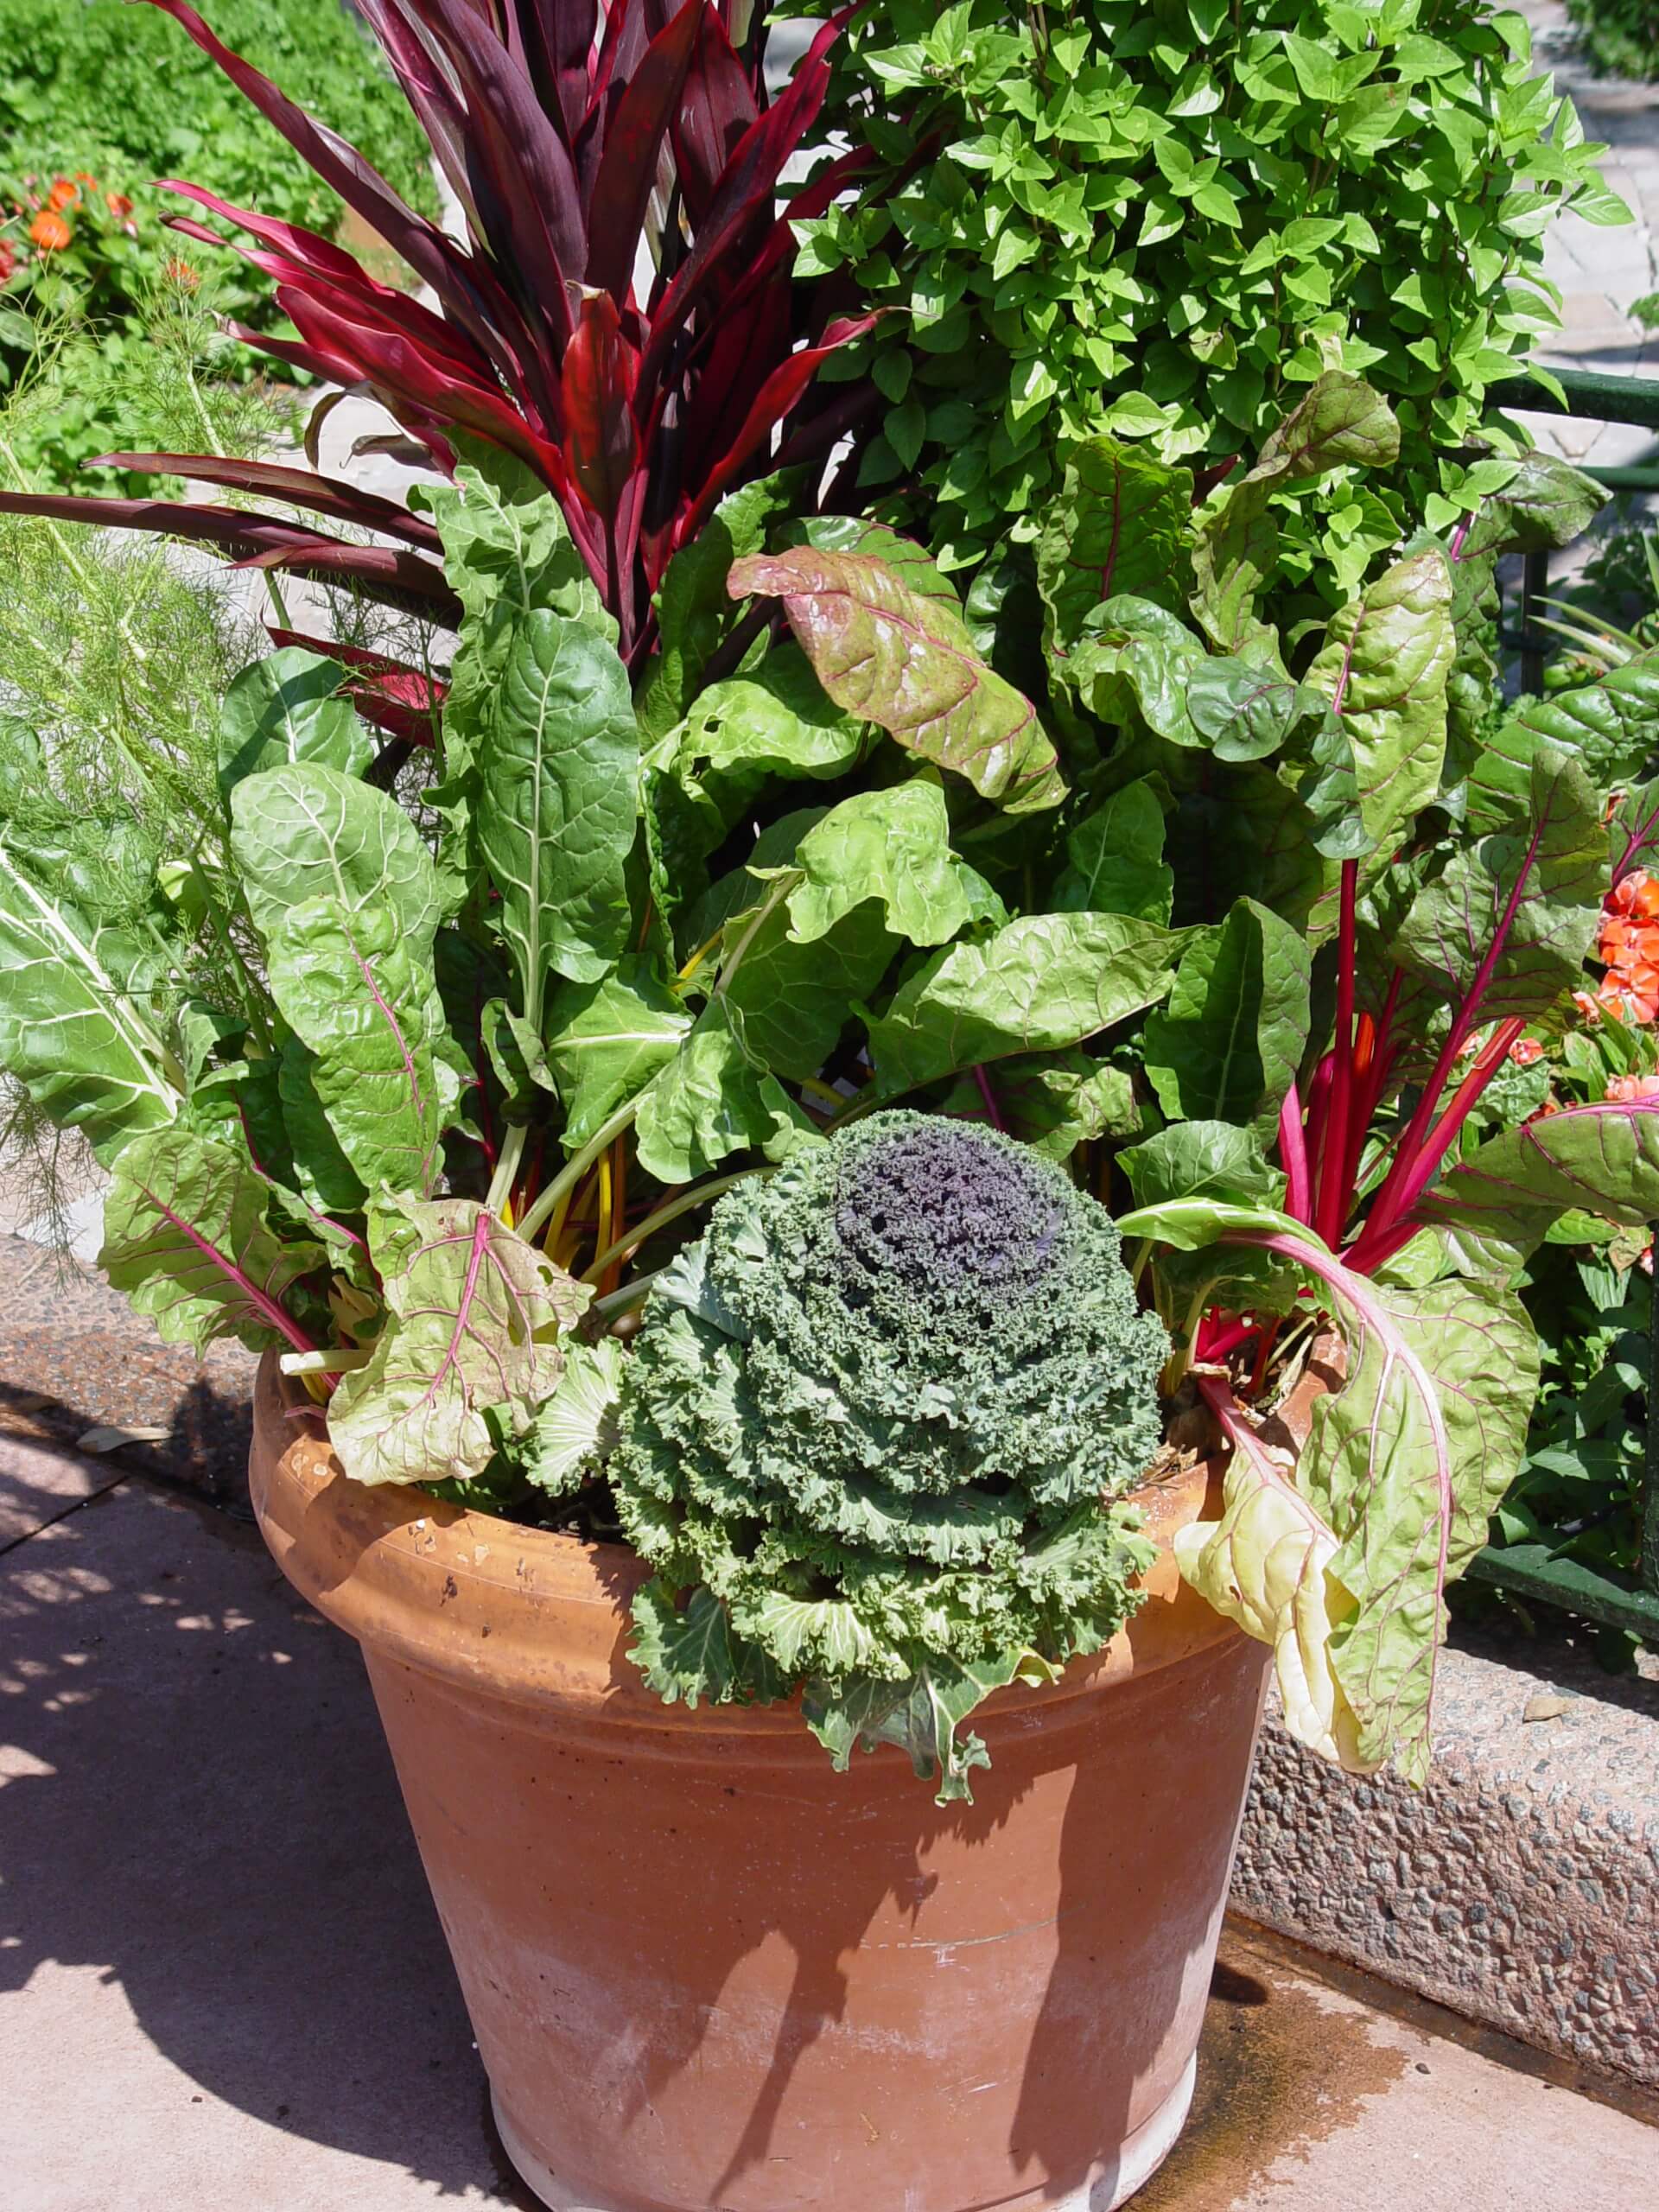
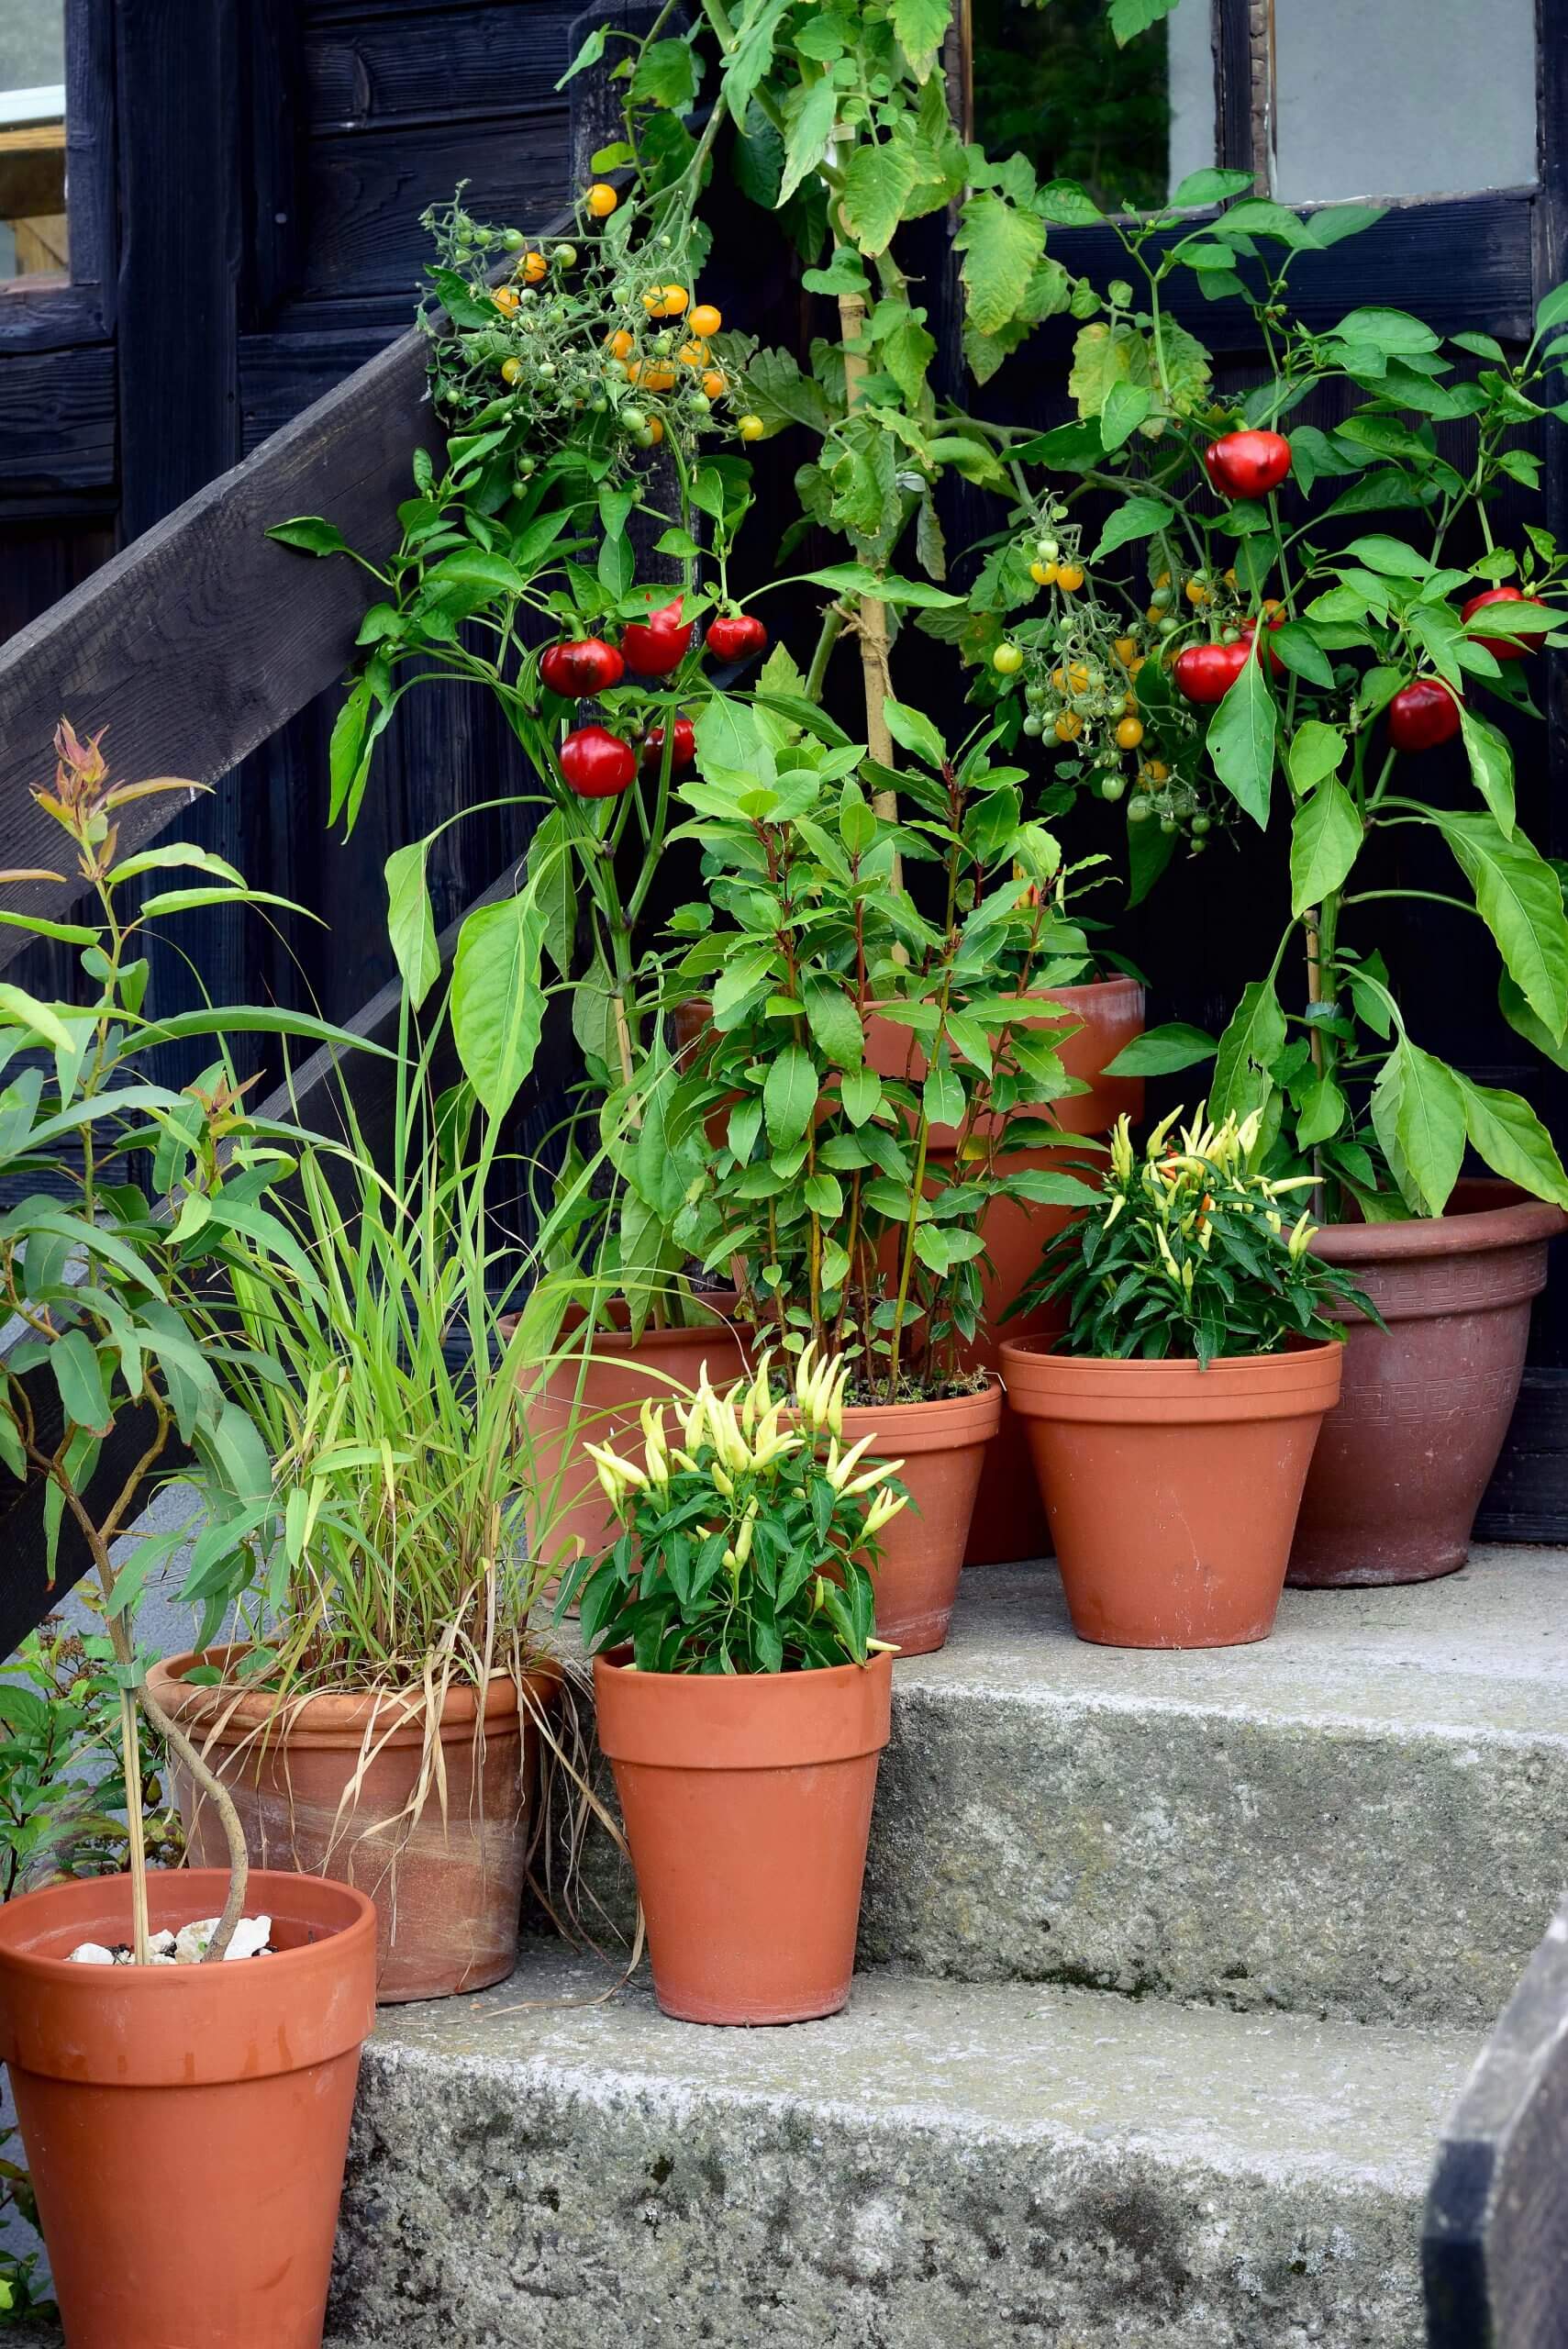
If you just have a porch steps, you can grow vegetables!


 Amend all of your backfill: Amendments rich in organic matter and microbes are essential for the longterm health of your garden. Shovel lots of organic matter, like Black Gold
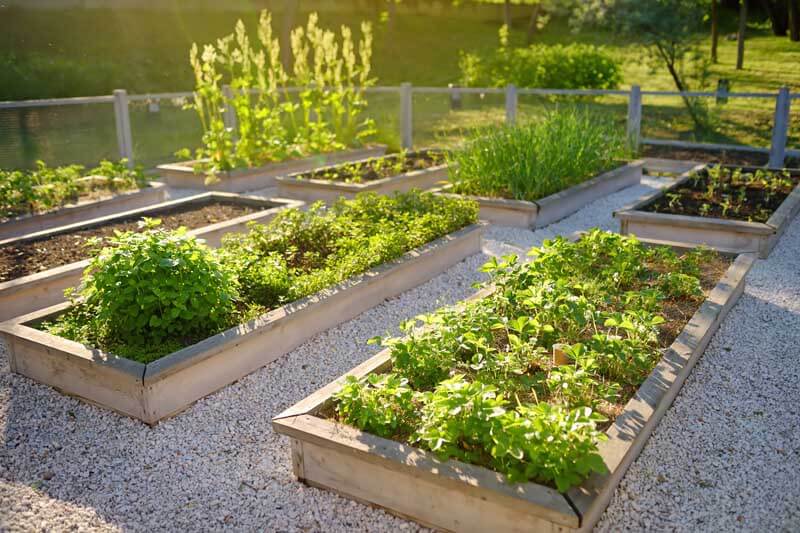


 with
with