Articles

Resistance Gardening in Five Steps

Strong vegetable starts, good opening spacing, and clean ground are three factors essential to resistant gardening.

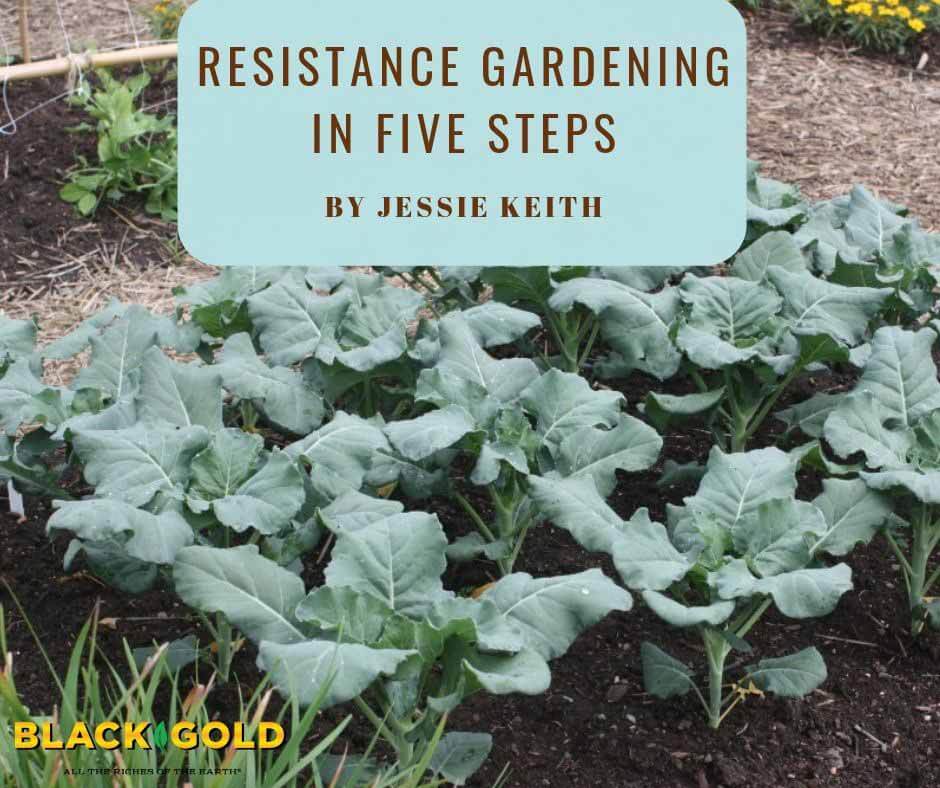
So many factors can put stress on garden plants—heat, drought, insects, disease—that’s why it’s smart to plan ahead to ward off possible garden debacles before they occur. This is done by cultivating tough, resistant crops through chemical-free preparative gardening in anticipation of heat, drought, pests, and disease with bountiful results.

Start early in the season when you choose your garden plants. Pick your plants carefully, choosing those proven to perform well while withstanding the harsh conditions you can expect in your home garden.  Here are the five steps that will put you on the road to resistance gardening:

  1. Choose Great Plants
  2. Give Plants a Good Head Start
  3. Prepare Your Soil
  4. Keep Plants & Beds Clean
  5. Rotate

Choose Reliable Plants

IMG_8392
Choose high-performing varieties known to produce good fruit under stressful conditions.

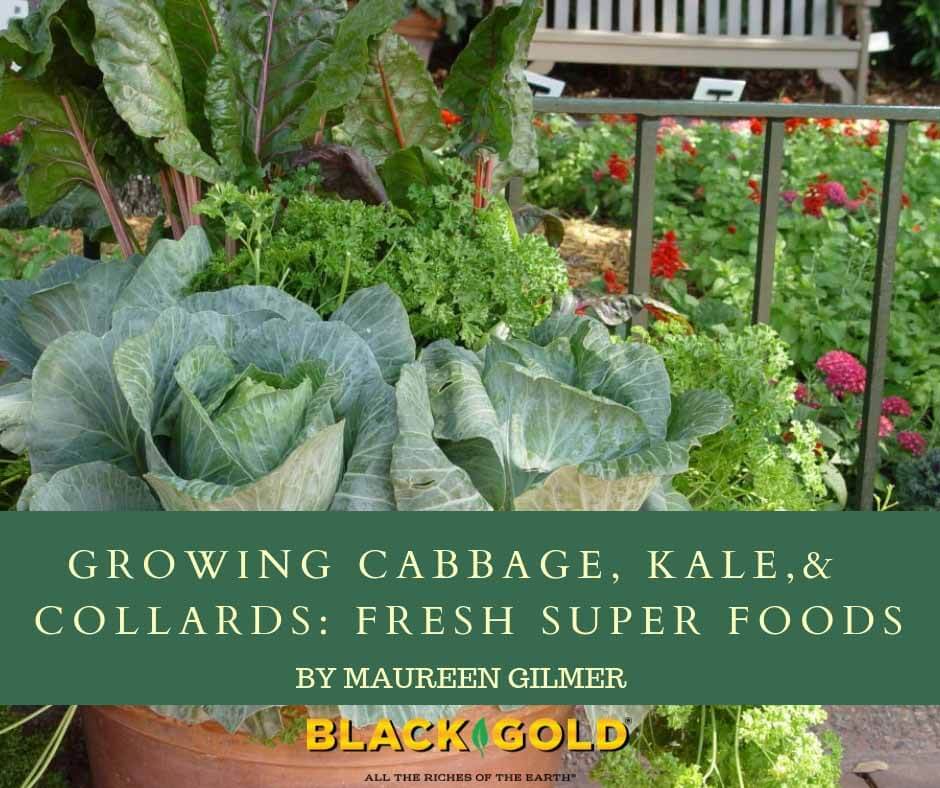
Be choosy when selecting new plant varieties for your garden. The higher performing and more resistant a plant is to diseases and other environmental stresses, the more resilient your garden will be. Plant trials are a great source of information when it comes to picking good veggies for the garden. Many plant trials are conducted at land grant universities (check out Purdue University’s yearly Midwest Vegetable Trial Bulletin Report for details) and formal trial programs, like All-America Selections, but many seed companies, such as Johnnie’s Selected Seeds, also conduct their own research and trials. Choose winning plants noted for their disease resistance and strong performance under stressful conditions.


Give Plants a Good Head Start

IMG_0639
Space plants well in anticipation of their final mature growth.

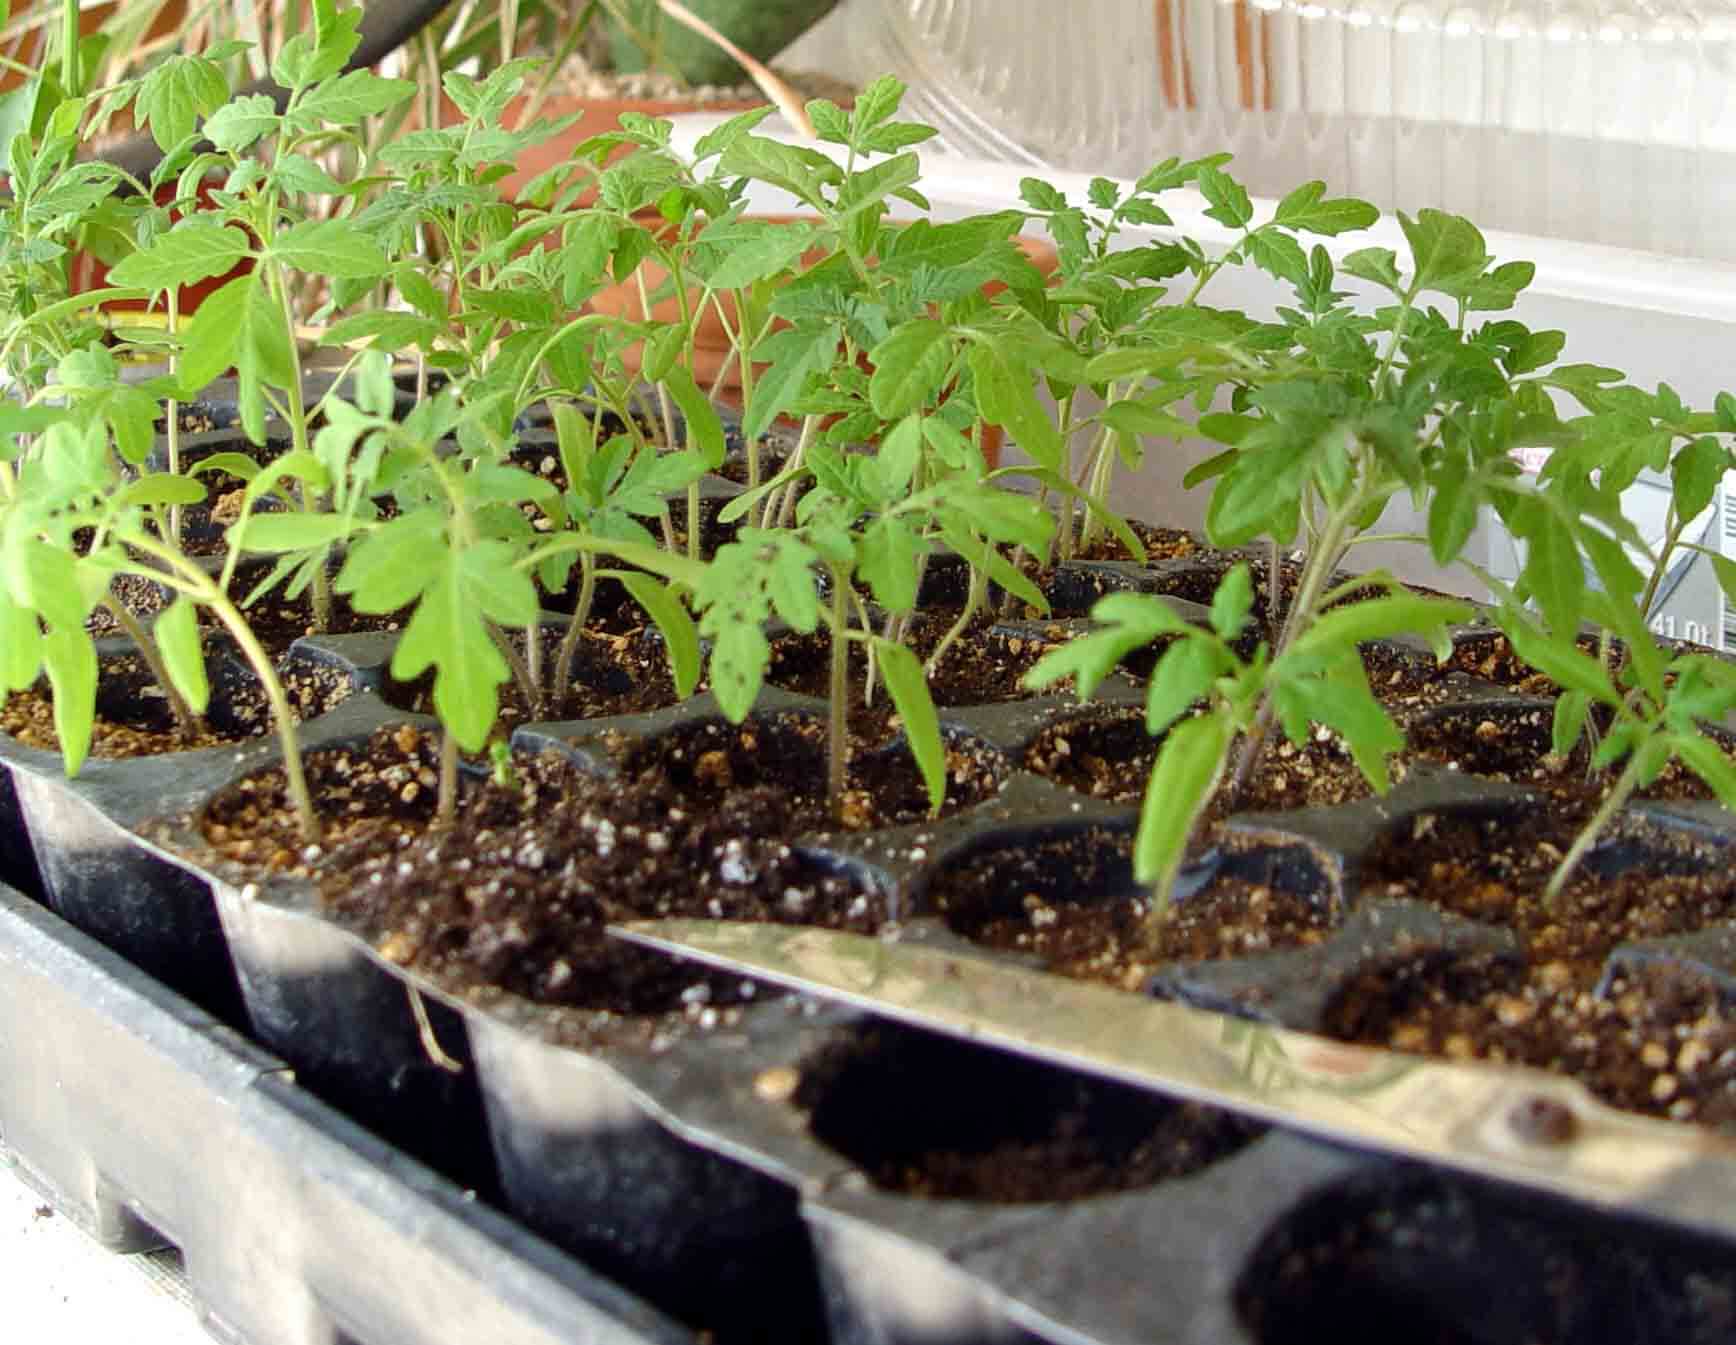
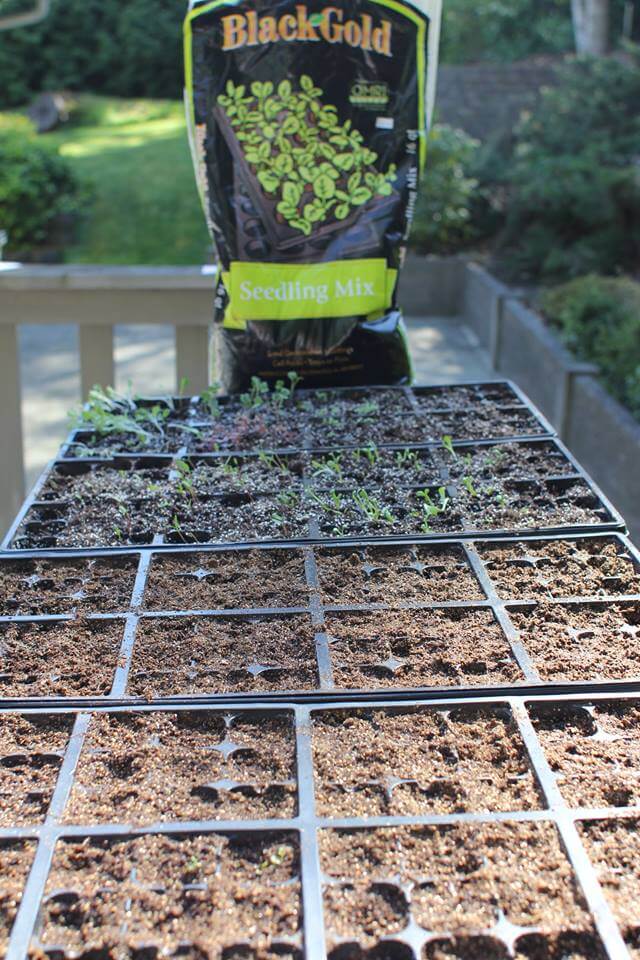
Strong starts can have a big impact on your garden’s success. If growing plants from seed, be sure to give your seedlings plenty of light and room to develop stout, dense growth and ample root systems. Planting one seedling per pot will help avoid competition. Fertilize starts lightly, so they are as strong and healthy as can be at planting time. (Click here for seed starting tips.)

If choosing vegetable starts at your local nursery, pick those with good top growth and check their roots to avoid plants that are root bound. Bound roots will show a solid, interwoven network of roots with little potting mix to see. The root systems of root-bound plants must be cut and separated at planting time, which puts undue stress on transplants.


Prepare Your Soil

010
Perfectly amended soil should have a visible mix of compost and soil.

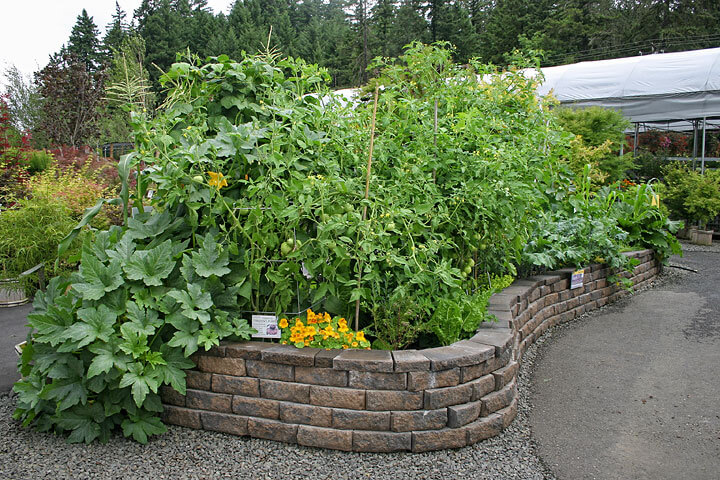
Beautifully prepared soil will make a garden flourish all season. Start with organic matter—working in as much Black Gold® Garden Compost into the soil as possible. Amendments rich in organic matter will help the soil maintain moisture as well as porosity—two things that plants need for good growth. The more deeply you improve your soil, the deeper your vegetable’s roots will grow—something that gives plants an edge in heat and drought.

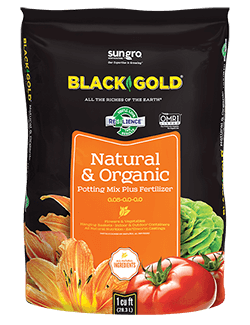
As added reinforcement, work in some Black Gold® Natural & Organic Potting Soil with RESiLIENCE® to give your plants stronger stems, improved root mass and to reduce wilting time under stress. The all-natural RESiLIENCE® additive has been approved for organic gardening and also been shown to help plants flower earlier. (Click here to learn more about RESiLIENCE®.)


Keep Plants & Beds Clean

002
Deep soil preparation and amendment will encourage deep root growth, which supports strong plant health.

A clean, weed-free garden with open spaces between plants yields better fruit by increasing light exposure and airflow. Under clean, open conditions, pests and diseases are slower to take hold and easier to manage. Walkways covered with straw, leaf mulch or compost also make is nicer and easier to walk through the garden and care for plants in all weather.

Keep plants clean! Bushy veggies, such as tomatoes, peppers, and eggplant, are especially important to clean and prune to minimize spread of disease and pests. Remove dying, diseased, or infested leaves and stems and remove any unwanted unwieldy branches that inhibit airflow or light where it needs to reach. When pruning, be sure to clean pruners between plants by dipping them in a 10% bleach solution to ward off any cross contamination of potential diseases. At the end of the season, clean all litter and plant material away from the soil for a fresh start next season.


Rotate

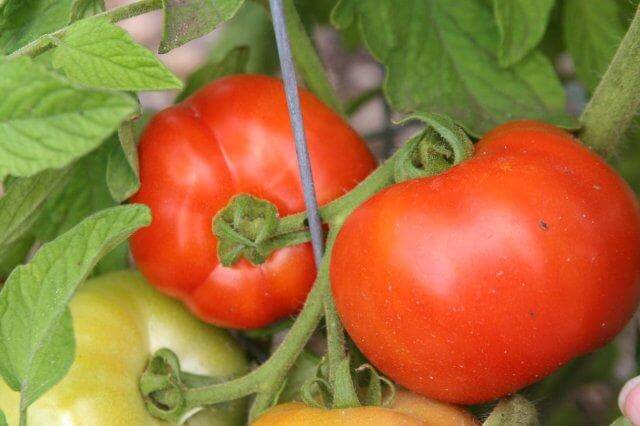
Keep your vegetable garden healthy and productive from year to year with crop rotation. This means moving vegetables to different locations in the garden each season—preferably alternating heavy feeders prone to 
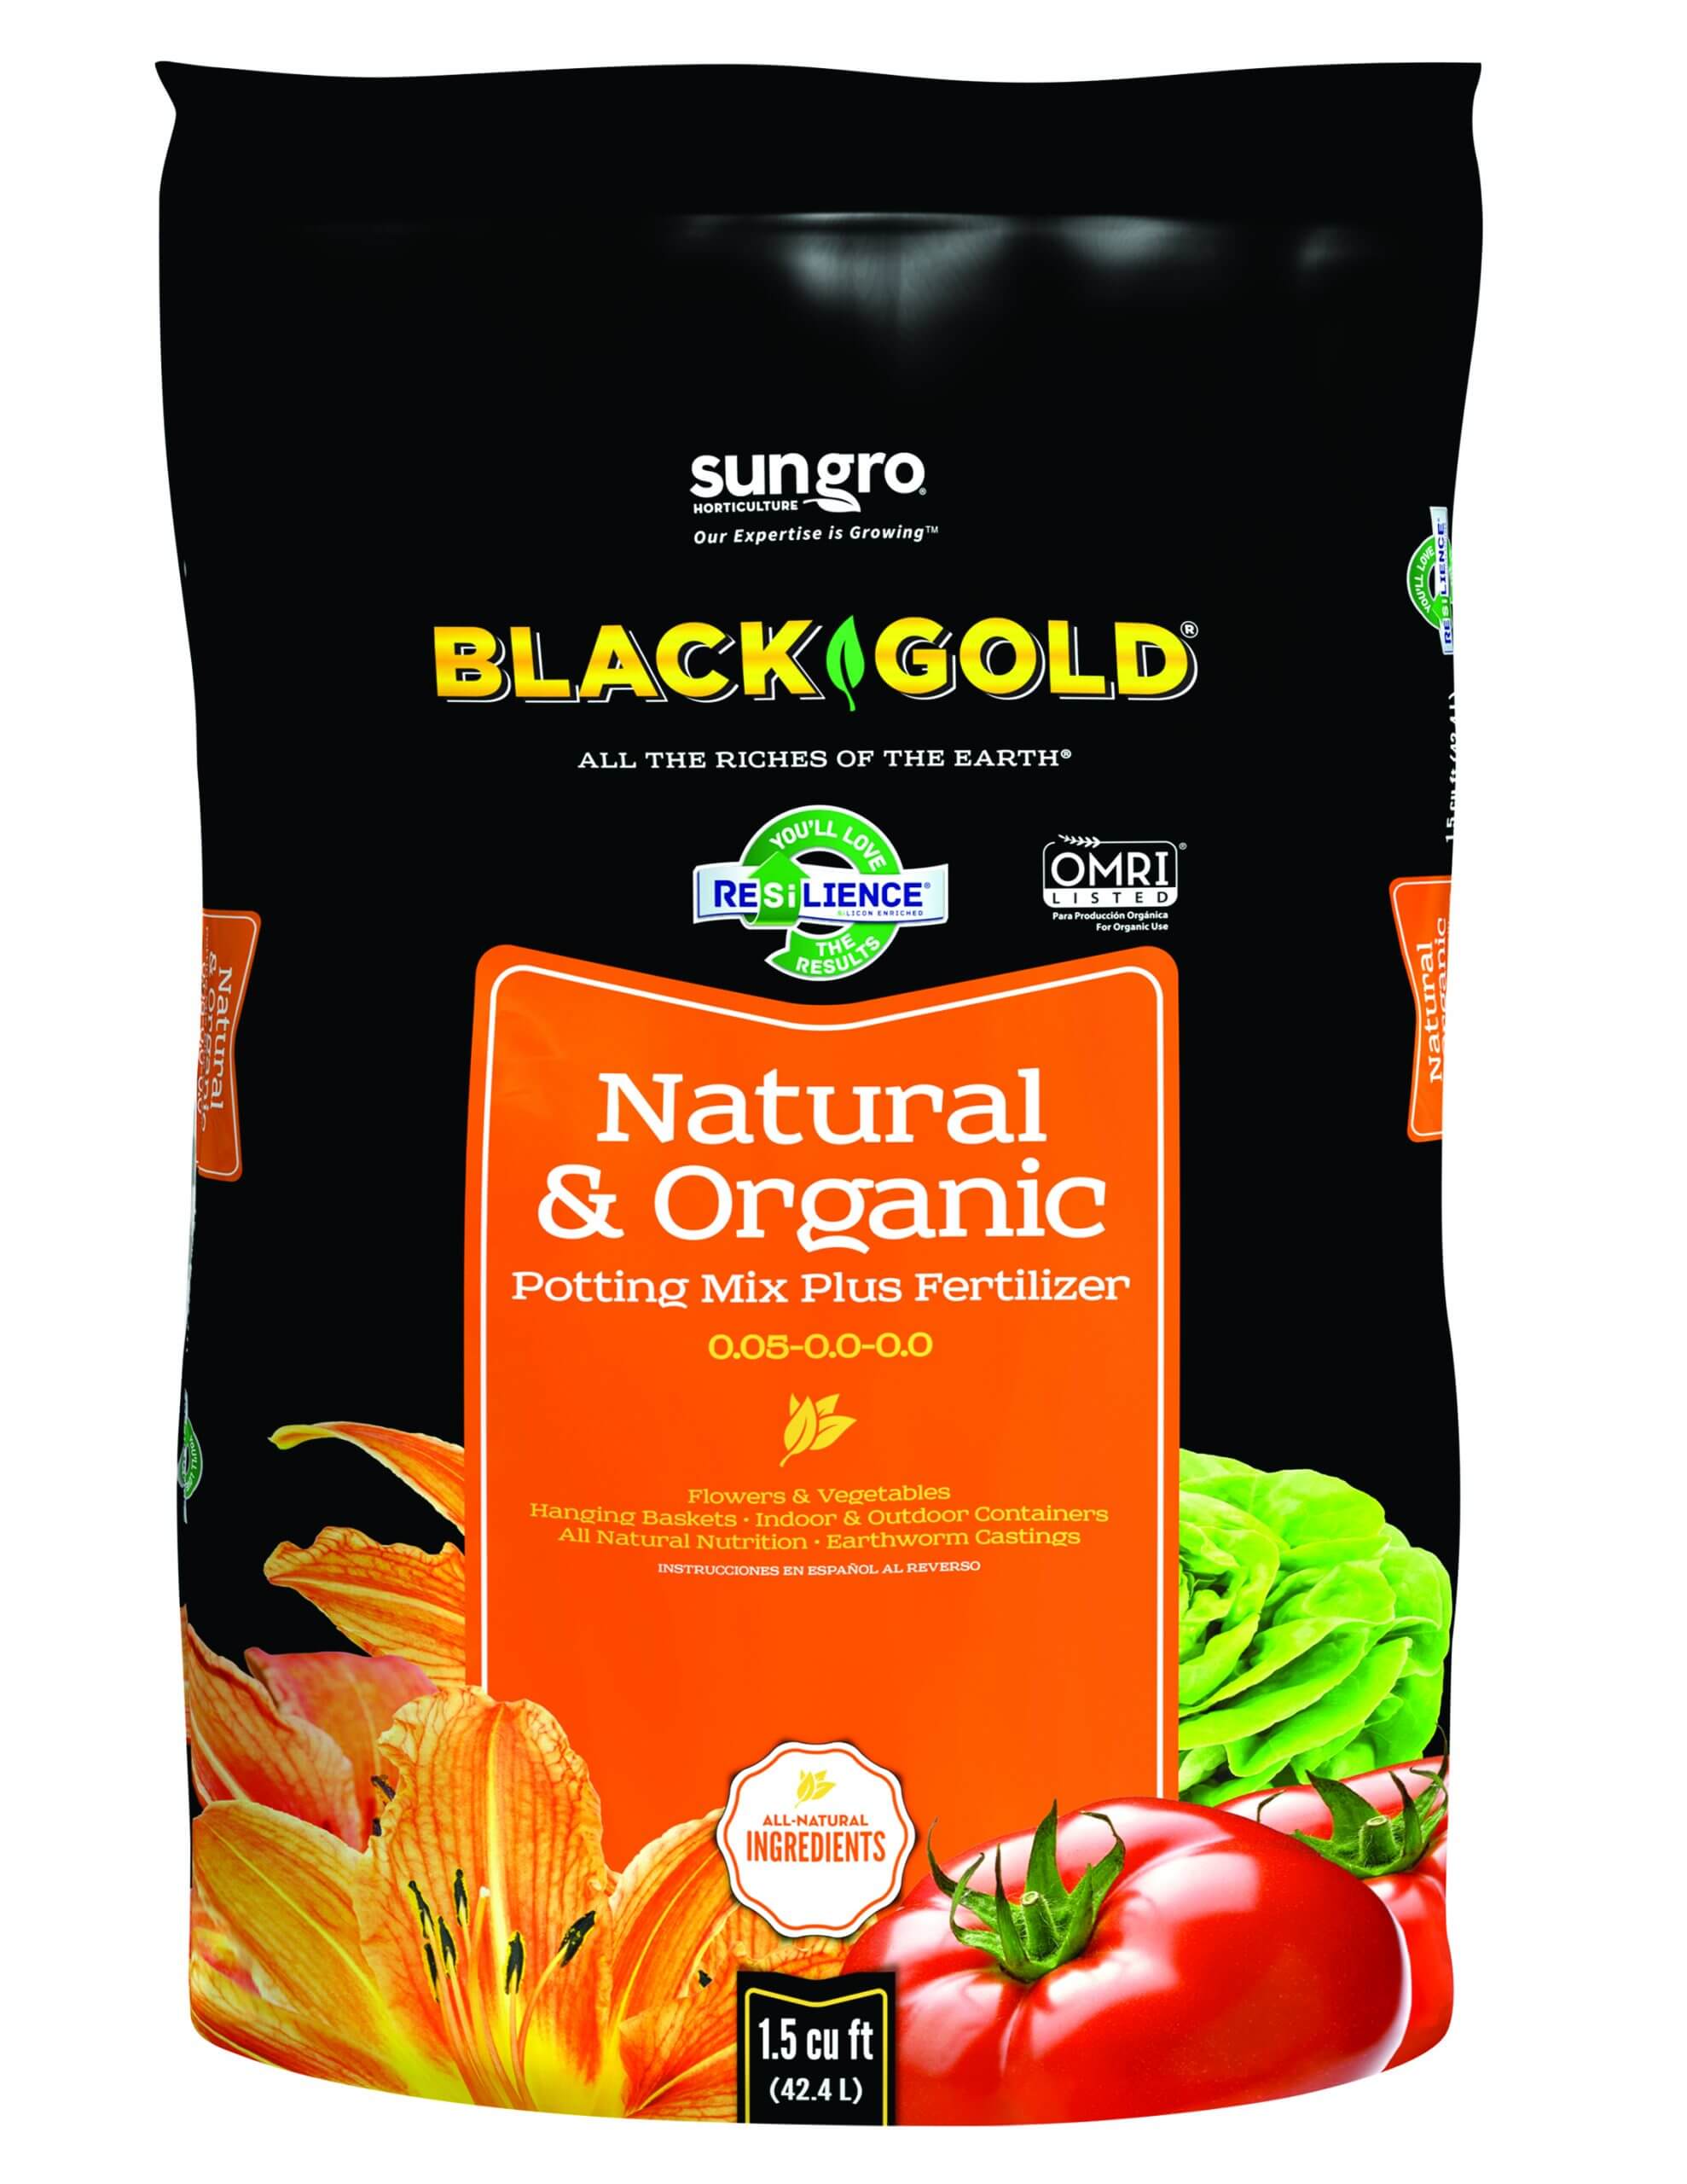
pests and diseases—such as tomatoes—with fortifying veggies, such as green beans that add nitrogen to the soil. Planting crops in the same spot year after year will increase soil-borne diseases and insects and cause real problems.

The guidelines for resilience gardening are simple. Choose your plants well, give them good care, and you should be set with fresh vegetables for the season. Chemicals aren’t needed, just a little preparation, elbow grease, and upkeep.

How to Manage Mice in Raised Planters

Young tomato seedlings in my Grow Box  – note the water-fill opening and mouse access on front.

As the heat of “dead summer”  begins its slow ebb into fall, it’s planting time in California and the Southwest.  While most folks across the US plant in spring, here the mild fall is our second growing season for food crops.  What we grow now feeds us into the holidays with roots and greens and maybe even squash or peppers with the right system and climate.  I grow many ways, in raised beds with row covers, in the greenhouse and out in the open air, depending on the season and crop.  This allows me to compare the methods for different crops at different times of the year.

mature
By June, my tomato plants were healthy and happy!

Planting Grow Boxes

Last year I tested Grow Boxes in the greenhouse attached to the south side of my home.  With such low humidity in the desert, these boxes with their 4-gallon reservoir keep plants far better hydrated than any other method.  The box is designed so plants produce long trailing roots that dangle into a large water reservoir sucking up all the moisture they need rather than being limited to watering times.  Last year I planted the boxes with tomato seedlings in February when high UV in the desert allows greenhouse growing in the high desert and year around in the low desert.

I selected ordinary tomato varieties to evaluate how well the boxes work here.  Because indeterminate tomato varieties are long blooming, I wanted to determine if my tomatoes could indeed become perennial and produce year around without frost.  I was thrilled to find the seedlings literally exploded out of the boxes and never stopped growing or producing new fruit until that sudden August decline.  The tomato plants quit taking up water, became discolored and generally failed for no particular reason.  And whenever I don’t know the reason, my mentor always advised, “dig a hole”.

Grow box Sept
Grow box with tomato roots

Managing Mice in Grow Boxes

The cause was revealed when I disassembled the boxes to take my first glimpse at the roots that should dangle down into the water reservoir.  They were gone!  I discovered this was due to a design flaw of the Grow Box: reservoir accessibility to mice in my greenhouse during our blistering desert summers when they are keen on cool, moist places.  The Grow Box opening for water access is easy for any small rodent or insect to enter.  When water was low or dry in between fill-ups, the mice entered the reservoir and literally ate all the dangling roots, explaining why my tomatoes suddenly quit taking up water.   We finally captured the mice, but there may be more in the future.  I’ll be fashioning a hardware cloth cover for the fill holes of my six Grow Boxes to keep smaller creatures out, or the very same thing will happen again in this rodent-rich desert, particularly if grown outdoors on porch or patio!

roots consumed
Grow Box with tomato roots eaten by mice

This year I upgraded and replaced the potting soil with Black Gold Moisture Supreme Container Mix with RESiLIENCE®, which I hope will enhance the wicking crucial to the function of the Grow Box.  This year I will test fall-planted vegetables in the greenhouse Grow Boxes to learn whether the fruit will ripen in November, despite cooler weather and shorter days. Only testing will prove whether plants that require pollination and long, hot days to ripen can be coaxed to fruit in the short, dark, cool winter.

Here in the desert, and everywhere else that is difficult to grow things, these quasi-hydroponic Grow Boxes are an ideal way to keep plants fully hydrated and healthy.  They are a useful solution to grow efficiently in drought.  And now with Moisture Supreme, they will be better able to take the heat, and perhaps I will finally learn whether or not indeterminate tomatoes can indeed be grown year round in my greenhouse.

Fun Fall Decorating with Pumpkins

This elaborate collection of pumpkins and gourds annually graces Lisa and Jeff Tice’s home in Greenville, SC. (Photo by Marian St Clair)

Once upon a time, pumpkins only appeared briefly as round, orange Jack-o’-lanterns for Halloween night, as the tasty main ingredient in a traditional pie at Thanksgiving, or were mentioned in passing as a potential means of transportation and affordable housing in children’s fairy tales. Today, however, pumpkins have quickly transformed into the hottest decorating item for fall.

DSC_6170 - Copy - Copy
This colorful pumpkin planter is the creation of Marian St Clair of Greenville, SC. (Photo by Marian St Clair)

Not bad for a native New World fruit (no, a pumpkin isn’t a vegetable). Pumpkins, Cucurbita pepo, and C. maxima, are members of the squash family, which includes juicy cucumbers, loofah sponges, tough-skinned winter squash, and gourds.

Carved Pumpkins

The reason for the pumpkin’s surge in popularity is its good looks and long durability, potentially lasting weeks in outdoor arrangements thanks to its colorful hardened outer skin – if it has been cured correctly. This amazing resilience, plus the wide variety of sizes, shapes, and colors now being grown for both crafters and foodies, provides homeowners and professional designers with quite a bit of inspiration.

For those who love the time-honored ritual of carving a pumpkin, there are carving kits complete with specific tools and traceable patterns, and many how-to videos will help you create something more dramatic than the simple triangular eyes and noses of the grinning jack-o’-lanterns of yesterday.

1-IMG_4824 - Copy - Copy
Master pumpkin carvers display their amazing skills at the North Carolina State Fair in Raleigh, NC each October.

Painted Pumpkins

If you have a really steady hand, a pale three-dimensional face can be artistically carved into a pumpkin. Though removing the outer skin may cause the pumpkin to deteriorate more quickly, the inner flesh is firm enough to hold up for several days to a week if outdoor temperatures are cool and you keep your work of art out of direct sunlight. Part of the fun, however, may be watching your sculpture transform into something really ghoulish as it disintegrates.

Painting pumpkins has become a recent popular trend. You can spray paint them solid black, white, or even gild them in gold, silver, and bronze to match your other porch embellishment. Stenciling designs, university logos, and your house numbers with acrylic paint onto a pumpkin should last awhile, as the pumpkin’s outer shell hasn’t been compromised. Having your children or grandchildren paint faces on several smaller pumpkins, rather than carve them, is another great way to enjoy their precious creations a little longer, too.

1-DSC_0032 - Copy - Copy
Small painted pumpkin faces for sale at the North Carolina State Farmer’s Market in Raleigh, NC.

Small painted pumpkin faces for sale at the North Carolina State Farmer’s Market in Raleigh, NC. Pumpkins can also be utilized as containers. Cutting off the top, then scooping out the seeds and most of the inner flesh provides a temporary seasonal pot for mums and pansies. Remember that if you plant directly into the fruit, moisture in the potting medium could cause the pumpkin to rot quickly; but, if you simply set an already potted plant into the open shell, it may hold up better.

Choosing Varieties

Since there are so many varieties of pumpkins on the market, grouping them in natural arrangements is another way to showcase your front door for fall. Whether you simply line pumpkins up the stairs or assemble them around your threshold, their size, shape, and color will certainly make a spectacular statement.

StateFairPumpkins
The giant pumpkins at the North Carolina State Fair in Raleigh, NC are worthy of becoming Cinderella’s coach. (Photo by Celeste Sagi)

For more inspiration, visit your local farmer’s markets, botanical gardens, and zoos where grand displays of pumpkins are popping up everywhere. If you want to try your hand at growing your own pumpkins for next fall, here are a few growing tips:

Growing Pumpkins

Pumpkins need a long growing season, often requiring over 100 growing days to transform from flattened seed to fully mature vines, producing thick-skinned fruits to cut for display.

They also require full, direct sun, and they need lots of room to sprawl, with vines easily covering an area 20-feet across. Pumpkins don’t like cold soil, so direct plant seed once the soil temps are closer to 70-75 degrees F.

Starting seed indoors can be tricky, as pumpkin seed germinates quickly and seedlings get leggy fast, so they are difficult to transplant with success.

The reasons pumpkins are traditionally planted on a hill is that mounded soil heats up quickly and drains well. Black Gold® Garden Soil would be a good choice for creating these raised planting areas in the home garden.

Pumpkins are greedy feeders, needing additional fertilizer and supplemental watering in droughty summers. Here is another reason why incorporating Black Gold® Garden Soil into the planting area would provide essential organic matter to hold moisture, while at the same time helping feed these hungry plants for up to six months.

When watering your pumpkin patch, try to keep water off of the foliage to help prevent foliar diseases, instead deliver it down to the roots where it is needed. Soaker hoses are perfect for this.

Harvesting Pumpkins

The deep color change is a pretty good indicator that your pumpkins are getting ready to harvest. Another indicator is that their supporting vines begin to turn brown, but the best test is when you can no longer easily puncture the outer skin of a pumpkin with your fingernail. (Some pumpkins are more soft-skinned, but overall this is a good test.)

You may find that you are developing impatience to pick and enjoy your pumpkin crop, feeling much like Linus waiting for the Great Pumpkin in the Peanuts comic strip, but resist the temptation to cut them too early. Pumpkins last much longer when harvested after they are fully mature. Then you will be able to enjoy them longer for all of your fall decorating needs.

Bringing in the Summer Harvest

The summer harvest has certainly arrived here in the Pacific Northwest. With our very dry and hot summer, many fruits and vegetables have ripened several weeks earlier than the norm. I have heard from many gardeners that they are harvesting heirloom tomatoes that usually do not ripen until mid to late August. Those vegetables that love the heat, and have adequate moisture, are thriving with this weather. Beans, melons, squash, and other heat-loving vegetables seem to be producing bumper yields. I had a listener call me last week on my radio program to report that her pumpkins were bright orange and looked like they were ready to be harvested. She said it looked like Halloween!

IMG_1346
The raspberry ‘Summit’ is excellent for producing a good crop in the spring and a repeat crop in fall.

Tomatoes

Often, I will caution gardeners about planting some of the large beefsteak tomatoes or other late-ripening varieties because if we have a cool and early season fall, they may not ripen. That has not been an issue this year. Last week two listeners reported that some of the heirloom tomatoes they harvested in late July were varieties such as ‘Azoychka’, ‘Black Krim’, ‘Brandywine’, ‘Brandy Boy’ and ‘Cherokee Purple’. Another listener sent a photo of his Roma ‘San Marzano’ with the notation that they were as big as red bell peppers. They also had the added benefit of organic-rich Black Gold Garden Soil to encourage their success.

In my own garden, I have a very small tomato with small fruits that have proven to be ideal for growing in a pot on our deck. It is called ‘Red Robin’ and even though the plant is small, it has been loaded with tomatoes for several weeks. This is the first year that I have planted it, and I would recommend it for someone with very limited space. I also have some of the Indigo™ series from Oregon State with fruits that turn purple (high in anthocyanins) and then red when ripe.

IMG_1360
Plum trees have bumper crops this year!

Fruits

Asian pears seem to be in abundance this summer. I recently visited a garden with several trees, and they were all loaded with fruit, much of it ripening now. This same garden had crops of plums so heavy on the branches that some limbs were cracking.

We often think of raspberries as early summer crops, though many varieties produce in June. However, everbearing varieties are ideal for a late summer crop. The raspberry ‘Summit’ is excellent for producing a good crop in the spring and a repeat crop in fall. They are excellent tasting too and manageable for row planting. If you have abundant space, consider the thornless blackberry ‘Triple Crown’. I say “abundant space” because this plant can have canes reaching 15 ft in one season. The berries are now just beginning to turn black and will be ready for picking shortly.

IMG_1357
Roma beans are a great choice for the vegetable garden.

Beans

Beans are well known in the summer vegetable garden. They are easy to start from seed and make a great plant for young children to grow as an introduction to gardening. The seeds are large, for easy handling by little hands, and they germinate quickly and grow fast. I like the Romano types which have pods that are somewhat flattened with a rich bean flavor.

When planting any vegetable or fruit-producing plant, be sure to plant something that you like. Then take a moment to consider what you will do with excess production. A row of beans can produce far more than most families can eat. Many large-scale gardeners will have a small food dryer, which is another good way to preserve your yields. When there is excess, check in with a local food bank as fresh produce is almost always welcome.

This is such a great time of year to be eating fresh produce that we and/or our neighbors have grown. A tomato picked fresh from the plant is nearly impossible to imitate from a store bought one. Check with your neighbors and see what they are growing and what they might appreciate receiving. As I was leaving a garden visit last week, the owner came out and told me they had a new rule on visitors. One could not leave without taking a zucchini!

IMG_1348
Asian pears have had a great season this year!


Growing Cabbage, Kale, & Collards: Fresh Super Foods

A single large clay pot easily supports cabbage, parsley and Swiss chard for porch or patio.

Until recently, collard greens were known only in the South and among African Americans who brought this “soul food” into northern cities during the Great Migration a century ago.  Today collards and kales are heralded as “fresh super foods” due to the high nutritional value of these large-leaved members of the cabbage family. These “pot greens” are eaten stewed, steamed, or wilted for a quick healthy meal.

kale
Curly leaf kale is actually sweeter after it’s exposed to frost making this an ideal Fall crop.

Brassica is a genus with dozens of variants, most being from the original species, Brassica oleracea.   Among them are cauliflower and broccoli, Brussels sprouts, and collard greens.  Such close relations mean virtually all of them are grown the same way in western gardens.

Let back-to-school ornamental kale and cabbage displays in the grocery store be your reminder that it is Brassica season.  August is the time to start your fall and winter garden, which can feed a family with healthy greens even after frost sets in.  If row covers are used, plants can remain productive despite significant late-fall cold inland and at higher elevations.  The key is sowing your brassicas while it’s warm enough stimulate good germination and maturation of seedlings, indoors or out.

Start Them Indoors

Brassicas can best be grown from seed sown indoors in advance while conditions are too warm to plant outdoors.  Time their indoor planting so they’re ready to plant out into the garden when temperatures cool off in September.  Seed germinates best between 65 to 75º F but will sprout at lower temperatures, though it may take more time.

collards
Collard greens are a staple of the old South that’s catching on everywhere for plentiful pot greens.

Sow the small seeds in Black Gold Seedling Mix with RESiLIENCE® to provide a clean, moisture-holding media for optimal germination.  After the seedlings germinate, carefully move them to individual pots of Black Gold Moisture Supreme Potting Soil with RESiLIENCE®.  Be careful transplanting these vegetables because damage to stems can introduce unwanted disease.

Sow Them in the Ground

Cabbage family greens also germinate nicely out in the garden while the soil is warm.  It’s an old custom to cover seedbeds in wet burlap on hot dry days to keep them moist and shaded during germination.  Some gardeners create shade covers to aid seedling development.

greens
Pick a “mess” of greens from the garden for a quick, easy and highly nutritious meal.

If you grow a “mess of greens”, it’s enough to feed a family for months since leaves are cut while the plant lives on to make more foliage.  A big pile of leaves lose a lot of volume in the cooking process, so don’t underestimate the numbers of plants needed. Err on the side of overdoing it.  Space the plants as stipulated on the seed packet since these will be very large at maturity.

Recondition soil before you introduce your Brassica seeds or seedlings into the garden.  The ground may be depleted by summer crops, so it’s important to boost fertility.  Greens depend on nitrogen, the nutrient responsible for stem and leaf development in plants.  Make sure you fork in Black Gold Garden Compost Blend before planting.

Grow Them in Pots

Flowering cabbage, yet another Brassica, is often grown in pots with annual flowers for winter gardens.  This demonstrates how well-adapted leafy greens are to pots and troughs on your porch, patio or deck.  Blend your greens with violas and calendulas, both easy-to-grow cool-season annual flowers with edible blossoms.

Too many Americans have grown up without ever tasting real “pot greens”, but when picked fresh their rich sweet flavor will soon become a family favorite. (Keep in mind that most greens actually tastes better after it’s exposed to frost!)  What’s even more surprising is it takes less than an hour to harvest and cook greens into a healthy, garden-fresh meal.  That makes it a time saver that doesn’t sacrifice nutrition.

This year, grow a wide range of these super foods in your fall and winter garden, so there’s always fresh picked fast food in your kitchen at the end of a busy day.

Three Drought Strategies for Tomatoes

irrigation
Young seedlings need only one drip emitter to start, but plan on adding more as plants grow larger and demand more moisture.

With statewide mandatory cutbacks in California water due to drought, we can’t grow vegetables the same way we used to when water was more plentiful.  In the desert, where water is precious and expensive, we’ve learned many ways to help vegetables grow in the heat with minimal irrigation. Since tomatoes are always the favorite crop of home gardeners, the goal is to help them get a really strong start for greater resilience when stressed in the dead heat of summer. Here are a few smart drought strategies for tomatoes.

Lycopersicon esculentum 'Early Girl' JaKMPM1. Increase Water-Holding Potential

Potting soils designed for dry climates have an increased ability to absorb and hold moisture for much longer than average garden soils.  When planting your tomatoes in containers, use Black Gold Waterhold Cocoblend Potting Soil or Black Gold Moisture Supreme Container Mix (with RESiLIENCE®) For planting in ground, blend equal part Black Gold Just Coir and Black Gold Garden Soil, then work a generous amount into the soil of planting area to capture and hold moisture immediately around young growing roots.

2. Train for a Larger Root System

BG-WATERHOLD_1cu-FRONTDrought-resistant plants often share large adventurous root systems to access trapped moisture far underground.  When tomatoes are planted like other crops, the root system remains relatively small.  But if you plant your tomatoes lying down in a trench, they develop prodigious roots all along the buried stem.  With a far larger root system that tomato will have much greater ability to survive heat with minimal moisture.

3. Mulch like Crazy

Perfect magazine-quality food gardens will soon be a thing of the past because thick mulches are more important than ever to conserve water. The thicker the mulch layer, the less soil moisture is lost to surface evaporation.  For larger gardens, invest in a bale of straw to cover all exposed soils, including pathways, to keep the overall soil mass evenly cool and moist.  Plan to thicken or renew mulches periodically throughout the growing season.

flowering
When vegetables begin to flower, up your irrigation rates and increase mulched area to ensure the entire root zone is protected.

Finally, be conscious of every pitcher, glass, or bottle of water you pour down the drain as well as water that runs as you’re waiting for the hot water before doing dishes or taking a bath.  Homes with a long distance from hot water heater to sink may require many gallons to pass through before you get water hot enough.  If you keep a plastic pitcher under the sink, every time there’s clean water that would otherwise be poured down the drain, dump it in the pitcher.  When full go out to your tomatoes or any other plant, and pour it on.

Growing Tomatoes from Seed to Harvest

Nothing is more gratifying than a big tomato harvest in summer!

Homegrown summer tomatoes simply taste better. That’s why they’re the most popular warm-season crop. They are inexpensive to grow and offer big payloads of delicious fruits, which are pricy at farmers’ markets and grocery stores. It pays to grow your own from seed because they are easy to start, and if you grow organically it’s the best way to know that your stock is pesticide-free. And, there are loads of wonderful tomato varieties only offered from seed.

Tomato Basics

  • Common Name: Tomato
  • Botanical Name: Lycopersicon esculentum
  • Days to Harvest: 65 to 85 days after planting, depending on the variety
  • Planting Time: After the last frost date
  • Light: Full sun
  • Soil: Rich, porous, well-drained loam
  • Water: Regular water for even moisture
  • Temperature: Fruiting is best with 78 -92ᵒ F days and 70ᵒ-80 F nights.
  • Fertilization: Quality fertilizer formulated for tomatoes
  • Pests: Tomato hornworms and Colorado potato beetles feed on foliage and fruits, causing significant damage.
  • Diseases: Plant wilt, leaf damage, fruit damage, or poor performance can be caused by many tomato diseases, including early and late blight, fusarium wilt, tomato mosaic virus, and verticillium wilt.
  • Disorders: Blossom end rot (caused by calcium deficiency), splitting/cracking (caused by excessive water or temperature fluctuations), and fruit toughness, cat-facing, and reduced productivity (caused by cool temperatures) are the most common disorders.

Days to Harvest Steps for Tomatoes

'Pomodoro' is a fantastic all-purpose tomato for fresh eating and cooking.
‘Franchi’s Italian Pear’ is a fantastic all-purpose tomato for fresh eating and cooking.

Starting Seeds

It takes around six to eight weeks to grow tomatoes from seed to ready-to-plant seedlings. Start seeds indoors for the best results. Sow seeds in cells filled with OMRI Listed Black Gold Seedling Mix and lightly sprinkle a bit on top to cover. Gently moisten the cells with water, and then place the trays right under the warmth of grow lights. Keep the mix moist but never wet. In 5 to 12 days, your tomato seeds should germinate. Germination is best when temperatures are warm  (68°-75° F (20-24° C)). A heat mat for seed starting will dramatically hasten germination. (Click here for more detailed seed-starting instructions.)

Tending Seedlings

Tomato seedlings are delicate and have two lance-shaped seed leaves when they first emerge. The true leaves, which are feathery and divided, appear in 2 to 3 days. At this point, feed seedlings with diluted, water-soluble tomato fertilizer. Keep the soil moist but not wet. Wet soil can encourage fungal diseases that cause seedlings to rot or “damp off.” To avoid leaf burn, lift grow lights up as plants get closer to the bulbs.

Tending Small Plants

Happy tomato seedlings

Tomato plants should be around 8- to 10-inches tall and garden-ready after eight weeks. Indoor grown seedlings are tender, have weak stems, and need time to adjust to full sun. If directly planted outdoors, they will develop leaf burn and may die. To avoid this, they need to be hardened off for at least a week before planting. Hardening off means acclimating seedlings from their cushy indoor growing conditions to the windy, sunny outdoors where temperatures fluctuate.

To harden seedlings off, place the potted plants in a protected spot that gets a few hours of sun per day. Each day move them to a new location where they get a little more light and wind each day. After a week or so, they should be tough enough to plant in the garden.

'Matt's Wild Cherry' is a delicious, tiny cherry tomato with big flavor.
‘Matt’s Wild Cherry’ is a delicious, tiny cherry tomato with big flavor.

Garden or Container Planting

Choose a good spot for your tomatoes. They require at least 8 hours of full sun and well-drained soil that’s fertile. Vining (indeterminate) types need caging or trellising, while bush (determinant) types need staking; both types benefit from summer pruning.

Before planting in the garden, amend beds by digging and turning the soil deeply and adding rich Black Gold Natural & Organic Compost Blend and an OMRI Listed tomato fertilizer. Plant tomatoes around 4 feet apart and mulch with another 2- to 3-inch layer of Black Gold Natural & Organic Compost Blend. Young plants can be planted deep, with only several leaves above ground–just be sure to gently remove the leaves from all stem parts that will be covered with soil. Water regularly to keep root moist. As plants grow, they will demand more water.

Tomatoes are such aggressive feeders and water hounds that you have to give serious attention to container-grown plants. Start with a really large pot. Determinant tomatoes are best, but indeterminates will also work if you keep them well caged and pruned. A good, water-holding potting soil is perfect for container culture. I recommend Black Gold® Natural & Organic Potting Mix, which also contains Resilience™ for stronger stems and better root development. Container-grown tomatoes need to be watered daily and fed more frequently, but if you give them ample attention, they should thrive and produce beautifully. (Click here to watch a video about how to grow tomatoes in containers.)

Harvest

Tomato fruits develop the best when days are warm (between 78 and 92 degrees Fahrenheit) and nights are warm (at least 70 degrees Fahrenheit). Tomatoes can be harvested green for fried green tomatoes and green tomato chutney, but they are best picked when they are fully ripe (well colored, slightly soft to the touch). Some tomatoes are naturally easy to pull from the vine when mature, while others cling. I always keep a pair of pruning sheers on hand for clingers. If you accidentally harvest a few fruits with a bit of green, let them stand on a sunny windowsill for a couple of days, and they will ripen up right away.

Pruning

Tomatoes can be cut and shaped to keep them from overtaking a trellis or container. Use sharp, clean pruners to cut whole branches back to main stems as needed. Try to maintain productive fruit and flower-laden branches, if at all possible. As a precautionary measure, it’s wise to dip pruners in a 10% bleach solution when pruning from plant to plant, just to avoid the possibility of spreading disease. Dip and wipe the pruners after pruning one plant and going to another. (Click here for a video about how to prune cherry tomatoes.)

Tomatoes to Try

'Gold Medal' is one of the best-tasting, prettiest beefsteak tomatoes.
Gold Medal’ is one of the best-tasting, prettiest beefsteak tomatoes.

Tomatoes come in all colors, shapes, and sizes and their flavors are surprisingly variable. In my garden, I always choose several slicers, sauce tomatoes, salad tomatoes, and cherries each year. Some of my favorite pickings include the heirloom red and yellow slicer ‘Gold Medal‘, the French salad tomato ‘Crimson Carmello‘, and orange beefsteak ‘Kellogg’s Orange Breakfast‘. My favorite sauce tomatoes are the Italian powerhouses ‘Red Pear‘, ‘San Marzano Redorta‘ as well as the salad-sized ‘Principe Borghese‘, which is touted as the best tomato for sun drying. My cherry tomatoes of choice are the sweet, golden ‘Sun Gold‘, tiny red ‘Matt’s Wild Cherry‘, and delectable yellow and red ‘Isis Candy‘.  All are beautiful and have exceptional flavor.

Enjoy Your Tomatoes

This is the easy part. Lavish burgers with big, hearty tomato slices, eat them fresh in salads or make homemade tomato sauce and salsa. To extend the season, freeze whole tomatoes and sauce for winter. (This generally requires at least ten healthy tomato plants to provide enough to store through winter.)

Growing tomatoes is gratifying if you follow the proper steps and give them the best care. If you do it right, you should have more than enough tomatoes to enjoy and share. I wish you the best tomato season!

Follow these instructions and you'll have enough tomatoes for storing and sharing with friends.
Follow these instructions and you’ll have enough tomatoes for storing and sharing with friends.

5-Step Vegetable Garden Planning

6 packs
It pays to save six-pack containers from store-bought plants to sow your own seeds. Just be sure to wash the packs before reuse.

The quiet of the January new year is the ideal time to start vegetable garden planning.  This is the month of contemplation when you begin to conjure up next year’s crop in all its glorious diversity.  Whether it’s just an Earth box or a huge family plot, all vegetable gardens start the same way.  Success requires early organization, the ability to assemble exactly what you need, and the ability to time it all to perfection.  In fact, it’s much like planning a holiday meal with a half dozen different dishes that all need to be ready at the same time.  You need to make lists, shop for all the ingredients, and strategize your space in the oven and stove before bringing everything to the table.
Continue reading “5-Step Vegetable Garden Planning”

Raised Bed Rotation and Rejuvination

Raised Bed - Mike Darcy
All raised beds require crop rotation and soil replenishment to avoid the accumulation of soil-borne pests and diseases.

Mothers always admonish us “not to hang out the dirty laundry”, which is code speak for keeping unpleasant family secrets out of neighborhood gossip.  This same problem is afflicting the raised bed garden world where nobody wants to hear the downside of these tiny plots of food plants.  At the heart of it is the very old concept of crop rotation. Even the ancients knew that crops grown in the same place year after year developed big problems without rotation.

Why Rotate Crops?

The science is quite simple because diseases and pests can accumulate every year you cultivate a small vegetable garden.  It may not be visible the first or even the second year, but by year three it can strike with a vengeance.  This is how long it takes for your soil to foster a killer dose of pests and pathogens.

Imagine a 4-foot-by-8-foot planting area (the size of a typical raised bed) that you grow tomatoes in year after year.  A mature tomato can occupy half that square footage, with its roots fanning out over the area underground.  To properly rotate your crops, you must not grow tomatoes in the same place you did the previous year.  In this case, the only choice is to plant on the opposite end of the raised bed.  That leaves only two possible spots for the tomatoes.

Farmers know to rotate their fields over four years to ensure healthy crops.  That’s four entirely different growing areas for crops in the course of four years; three years with the crop being grown in a different spot and a fourth year for a given growing area to lay fallow to “rest”.  But farmers have space for rotation. What about home gardeners working within the confines to small raised beds? Without sufficient space for rotation, the results can be devastating.

nematodes 062
You cannot miss the damage caused by root knot nematodes. Roots appear swollen and distorted.

For example, a microscopic pest called root-knot nematode often strikes when tomatoes are grown in the same location or very close-by year after year.  This pest is invisible to the eye and is common to most soils but present in such small numbers that it doesn’t cause serious problems.  But when tomato crops are not rotated, these nematodes multiply to fatal proportions. As a result, tomato plants begin to turn yellow and die because too many nematodes have invaded their roots.  No matter how much you water or fertilize, nothing will change this downward spiral.

You won’t know the cause until you pull up an ailing or recently deceased plant to see first hand what the roots look like.  Root-knot-nematode-infected roots look bizarrely knotted and swollen and are obviously unable to support the plant.  As tomato fruits mature and heat stimulates growth, the plants can’t keep up. There is no cure for badly infected plants, and fear of this organism is why gardeners often plant big African marigolds (Tagetes erecta) around food plants because it is known to discourages nematode populations.

Replace Old Soil

Rotation is key, but soil replacement can also work wonders towards keeping raised bed problems at bay. Replacing your garden or potting soil with fresh every other year will help discourage the accumulation of diseases and pests, such as the root-knot nematode.  Quality garden soil like Black Gold Garden Soil is rich, fertile, and fresh.  It reduces the need to rotate crops, will fortify your garden to increase yields, and rid your raised bed of “dirty laundry” that could mean the downfall of your summer garden plantings.

The more cautious your are about ensuring healthy soil for your raised garden, the better. For example, if you move into a new home with an existing raised garden, it’s best to assume its potting soil is nutritionally exhausted and that crop rotation has not occurred.  Plus, it’s just a good idea to replace the soil anyway because the removal process may give you clues to other problems, like drainage or the presence of aggressive underground grass roots.  Excavation will help you discover if there are problems lurking below.

Small gardens don’t have to be hotbeds of pests and diseases, if you know how to compensate with rotation and garden soil replenishment. Rotate your crops liberally (preferably on a 4-year cycle), replace old, spent soil, and reap the harvest!

Easy, Garden-Fresh Summer Salsa

A mix of peppers, both hot and sweet, is homemade salsa.
A mix of peppers, both hot and sweet, is recommended for really good homemade salsa.

Warm, late-summer days mean lots of tomatoes, peppers, onions, garlic and warm-season herbs for ardent gardeners and farmers market lovers. And what do these veggies all have in common? They’re the ingredients for homemade salsa—making this the best time of year for salsa making and canning. The bigger the batches you make, the more you have to enjoy through late fall and winter when summer is nothing more than a sunny memory. Continue reading “Easy, Garden-Fresh Summer Salsa”