Articles

What Plants Deter Insects from the Vegetable Garden?

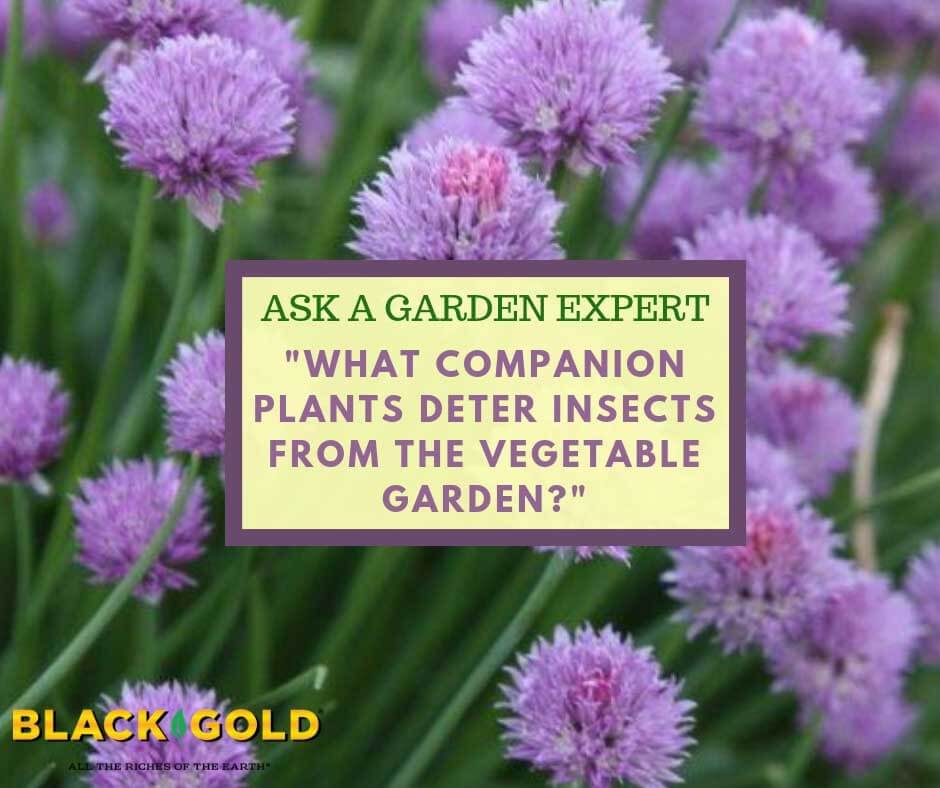
“What are the best plants and/or flowers to deter insects from a vegetable garden?” Question from Vesta of Fort Oglethorpe, Georgia

Answer: Research has shown that some companion plantings will reduce the number of insect pests that attack specific vegetable crops. These companions fall under two categories: trap crops and insect-repelling companion plants. Trap crops are plantings that attract insect pests, luring them away from favorite vegetables. These take up a lot of space and are not practical for most home gardeners, so I will just cover repellent companion plants that have been shown to really help ward off vegetable pests.

Insect-Repelling Companion Plants

These are plants that emit chemicals that deter insects. Repelling plants will never totally protect vegetables from the pests that attack them, but they can reduce pest numbers. Here are a few good examples of vegetable pests and the companion plants that repel them.

Some culinary herbs have been shown to offer repellent protection to specific veggies. For example, plantings of tall basil (Ocimum basilicum) can reduce the number of tomato hornworms on tomatoes and thrips on flowers. Plant-damaging moths, aphids, and mites may also be repelled by chives and other onion (Allium spp.) relatives. These pests attack a wide host of vegetable plants, such as brassicas (collards, cabbage, broccoli, and cauliflower), beans, and squash, so a border of chives might be really helpful in the garden. Sage (Salvia officinalis), rosemary (Rosmarinus officinalis), hyssop (Hyssop officinalis), thyme (Thymus vulgaris), dill (Anethum graveolens), and chamomile (Chamaemelum nobile) may also provide brassicas some protection against common pests.

Catnip (Nepeta cataria), wormwood (Artemisia absinthium), southernwood (Artemisia abrotanum), and tansy (Tanacetum vulgare) reduce damage by flea beetles, a pest that attacks eggplant, brassicas, tomatoes, and other common crops. One downside is to these repellent plants is that they tend to spread and become weedy. Of these, I recommend catnip the most. Just clip it back occasionally to keep it from flowering and setting seed.

A few common garden flowers also have repelling qualities. Nasturtiums (Tropaeolum majus) may help brassica crops, and marigolds help tomatoes by repelling the tomato root-knot nematode, a debilitating underground pest. (Click here to learn more about how marigolds help tomatoes.)

All of the companion herbs and flowers mentioned will flourish in soil amended with fertilizer-enriched Black Gold Garden Soil. I hope that some of these tips. When planting to protect, it is most helpful to plant a close row or ring of repelling plants near the vegetables that you want to protect.

Happy gardening!

Jessie Keith

Black Gold Horticulturist

What are the Best Raised Bed Plants for High Desert Gardens?

What are the best plants to grow in a raised bed garden in high desert regions?” Question from Jill of Greybull, Wyoming

Answer: With the dry, scorching highs of the day and cool nights, you are certainly limited in what you can grow in the high desert unless you create an enclosed garden conducive to vegetable, herb, and flower gardening. It’s all about enriching the soil (compost and coir are good, water-holding amendments), watering well, and protecting plants from the worst midday sun as well as heat, winds, and hungry wildlife. (Click here to learn more about protective vegetable gardening in the high desert.)

Here is a good list of vegetables and herbs that can take the hot sun, dry heat, and cooler nights.

Vegetables

Artichokes: Artichokes are from dry Mediterranean areas and develop deep tap roots for good water uptake. Their leaves are large, so be sure to protect them from drying winds to the best of your ability. They are perennial and generally produce one to two good crops of chokes per season.

Beans: The pole bean ‘Hopi Purple‘ string bean is a reliable grower in dry regions. For dry beans, ‘Mountain Pima Pinto‘ is delicious and perfectly suited for your area.

Corn: Western dry corn varieties are the easiest to grow in the high desert. Try the beautiful popcorn variety ‘Navajo Copper‘ or the beautiful ‘Glass Gem‘. If sweet corn is your favorite, grow the super sweet, bicolored ‘Trinity‘, which is shorter (5’) and very early to produce.

Peppers: All small-fruited hot chile peppers will grow well in hot, dry areas. Mild chiles, like poblanos, are also excellent in addition to the super flavorful and prolific frying/mole pepper ‘Holy Moly’. If you like sweets, try the small-sized Lunchbox mini bell peppers, which demand less water than those with large, blocky fruits.

Okra: Okra can take the heat and some drought. I would choose a more compact variety, like ‘Jambalaya‘, which is very small but produces early and well with lots of green okra pods.

Summer Squash: Mediterranean bush squashes are good choices for high-desert growing. The compact ‘Clarimore‘ has pale green, thin-skinned squash that tastes great.

Tomatoes: There are loads of tomatoes that are specially bred to grow well in high heat, and if provided good irrigation and fertilizer they grow well in the high desert, too. These include the hybrids Heatwave II and ‘Summer Set‘. Both are classic red tomatoes with good flavor. The heirloom, red-fruited ‘Arkansas Traveler‘ is another with excellent heat resistance in addition to the flavorful ‘Eva Purple Ball‘. A good red cherry is ‘Texas Wild Cherry‘. Tomatillos are also reliable in the west.

Winter Squash: Native American western winter squashes are the best for dryland growing. The rustic fruits of ‘Navajo Hubbard‘ and ‘Seminole‘ pumpkins grow well, but the vines require lots of space. For smaller vines, try the compact, bush ‘Delicata‘, which has some of the sweetest squash around.

Herbs

Many herbs will grow reliably in your area with adequate irrigation. The best include Thai basil, rosemary, sage, Mexican oregano, and creeping thyme.

Native American Seeds has many more varieties ideal for western raised beds.

I hope that these tips help! If you are interested in bedding and basket flowers and ornamentals for your region, you might also read our list for the high desert.

Happy raised bed growing!

Jessie Keith

Black Gold Horticulturist

What is the Best Method for Growing Potatoes?

“Can I grow potatoes in a 4’X4′ raised bed or do I need something deeper like a garbage can with holes in it? Thanks!” Question from Patricia Froehner or Newton, New Jersey

Answer: Absolutely! Large, soil-filled cans and tubs are convenient for growing potatoes in small-space gardens, but they are not necessary at all. The key to growing really nice potatoes is providing rich, lightweight, porous soil with some depth. That is very easy to provide in a raised bed. If you already have soil in the bed, it is always good to amend it each year with a quality compost to lighten it and add fresh organic matter.  Potatoes are also heavy feeders, so be sure to add a quality fertilizer formulated for vegetable growing.

There is one other thing that you need to know about growing potatoes. They are prone to a very destructive insect called the Colorado Potato Beetle. If you grow potatoes, these pests are almost certain to show up. If left unmanaged, they can absolutely destroy a potato crop in no time. Here is more about managing these pests.

Colorado Potato Beetle IPM

IMG_0943

Colorado potato beetles mating on top of a potato plant.

The surest way to attract Colorado potato beetles to your garden is to plant potatoes. The fat, striped adult beetles emerge from the soil in late spring to feed on emerging potatoes and then lay clusters of orange-yellow eggs on the leaf undersides. The eggs yield highly destructive little orange larvae that eat foliage nonstop and grow very quickly. You can kill the insects at any stage, but it’s easiest to pick off the adults and eggs. (Click here to view the full life cycle of these beetles.) The beetles can complete up to three life cycles in a single season, so once you have them, you generally have to fight them all summer.

IMG_0983

Colorado potato beetle larvae (left) on tomato.

These pests are highly resistant to insecticides, so it pays to choose non-chemical methods of control. Time and time again, well-timed cultural control, and good fall cleanup (removing old plant pieces and leaves) have proven to be the best means of battling them. Cultural control is essentially “picking”off the adults, eggs, and larvae and/or pruning off egg- and larval-covered leaves and stems. I generally smash the beetles as I pick them off, but you can also drown them in a bucket of water. Good picking should start in mid to late spring and continue until all signs of these pests are gone. (To learn everything there is to know about Colorado Potato Beetles, visit potatobeetle.org.)

I hope that these tips help!

Happy Gardening,

Jessie Keith

Black Gold Horticulturist

Can I Use 2, 4-D to Remove Weeds In My Ornamental Grasses?

“I have a pampas grass – it grows in our ditches in Iowa. Unfortunately, I have had creeping jenny find it’s way into one area of it. Can you spray the grasses with 2/4D to kill the jenny without killing the grass?” Question from Brenda of Peterson, Iowa

Answer: Pampas grass (Cortaderia selloana) survives in USDA Hardiness Zones 8 to 10, so it is not hardy in your area. I bet you are talking about either Chinese silver grass (Miscanthis sinensis), which is pictured on the photo above, or hardy pampas grass (Erianthus ravennae). Both kinds of grass are non-native and tend to become weedy in natural areas. (Let me know if either of these grasses looks like yours!)

2, 4-D will kill broadleaf weeds, but I do not recommend using it to handle your problem. Here’s why. First, these grass clumps are so dense that you probably won’t be able to reach all of the creeping Jenny invading the clump. If applied, it would kill any weeds you could access, but there is no promise it would finish the job. Secondly, 2, 4-D is pretty toxic. Protective gear is required to apply it, and it can easily drift, which can damage other broadleaf garden plants in your yard, including trees. It also isn’t good for humans or other mammals, birds, fish, etc. Here are two other management suggestion you may consider.

  1. Hand weed as much of the creeping Jenny as you can this season to keep it in check. I suggest investing in long, gauntlet gloves and a garden knife to make the process easier. Then next spring, give your grasses a low trim–6 to 8 inches above the crown. The easiest way to do this is with electric hedge clippers. Your broad-leaved weeds should start to appear before your grass really gets going. This is the best time to dig down and get those weeds at their base.
  2. Once you get your weeds in check within your grass, weed and create a mulch ring around your grass to keep new weeds from invading. Sure, birds can drop seeds into your grass clumps, but at least ground weeds will be kept from entering.
  3. Another option is to start fresh with bold, beautiful grasses that are either native or noninvasive. Starting fresh with weed-free grasses will save you time and headache in the long run if you continue to have weed problems with your current grasses. Here are three options that will pack the same punch as your tall, plumy grasses.
  • Hardy Sugar Cane: This big, bold grass has huge pinkish plumes and may reach 10 feet tall and wide. If you want a giant grass, choose this.
  • Switchgrass ‘Cloud Nine’: You will love the frothy seedheads that appear on this grass as summer wanes. It reaches 6 feet tall and turns burnished shades in fall.
  • Chinese silver grass ‘Morning Light’: This variety is said to produce very little seed, and it is very beautiful with its tall, frothy pink plumes.

I hope that these tips help!

Happy gardening,

Jessie Keith

Black Gold Horticulturist

DIY Garden Project: Edging for Professional Looking Beds

Clean, tidy garden edges frame a garden and elevate simple beds and landscapes. Clean lines show off gardens and are well worth the small effort. This video covers cutting curved garden edges. For straight edges, it can help to tie a line from one edge of the garden to the other and mark the straight line along the ground with chalk marking paint. This will help guide straight cuts.

Click Here to View the Step-By-Step PDF

Can You Help Me Learn How to Grow Herbs?

“I want to start growing my own fresh herbs. I am CLUELESS on gardening….help!” Question from Lisa of Erie, Pennsylvania

Answer: You are in luck! Herbs are some of the easiest plants you can grow. Almost all herbs require full sun, fertile soil with good drainage, and average water. Some are perennials (meaning they will survive the winter and grow each year) and others are annuals (meaning they will survive just one growing season and die). They are very easy to harvest. Just clip the leaves as you need them, being sure to leave enough to keep the plant full and healthy. Here are some great herbs to grow in your USDA Hardiness Zone 5 area.

Perennial Herbs

All of these herbs will live for at least three years in the garden. At planting time, be sure to give them good soil. If planting them in pots, they grow best in Black Gold Natural & Organic Potting Mix, which is approved for organic gardening. If growing them in a prepared, weed-free garden work some Black Gold Garden Compost Blend into the soil to ensure they perform really well. After your herbs have been initially planted, water them every other day to help them become established. After a couple of weeks, you can water garden-grown plants less unless the ground becomes very dry. Potted herbs will need to be watered every other day or even daily if the weather is very hot and windy.

Lavender: Grow this easy herb in full, hot sun and raised very well-drained soil. The fragrant, shrubby perennials have pretty flowers that are highly attractive to bees. Many are not very winter hardy, but there are a few that will survive your winters. (Click here to learn more about growing lavender up north.)

Mint: Everyone loves mint, but this aggressive herb will take over a garden in no time, so plant it in a big pot filled with good potting soil. This will keep its roots from roaming.

Oregano: Like mint, oregano is a fast spreader but not quite as aggressive as mint. It should also be planted in a large pot.

Sage: This classic, bushy herb is evergreen and continues to look nice through winter. It’s broad, dusty gray leaves smell pungent when crushed, and in early summer, stems of pretty violet-blue flowers appear. I like to harvest it in the fall for late-season dishes.

Thyme: French thyme (Thymus vulgaris) is a favorite herb for flavor with lemon thyme (Thymus citriodorus) being a close second for taste. (Click here to learn more about other lemon-scented herbs.) Plant thyme in rock gardens or south-facing beds.

Annual Herbs

Annual herbs can be grown from seed or purchased at your favorite plant nursery.

Basil: This is one of the best annual herbs for hot summer days. It can easily be grown in the garden or containers. (See the video below to learn how to care for container-grown basil.) Clip the leaves all summer to keep plants tidy and flavorful.

Cilantro: This cool-season herb grows best in spring or fall. Harvest cilantro leaves when they are lush and green. As the plants mature, they produce frilly white flowers that develop into round seed heads, which can be ground to create the spice coriander.

Dill: Dill is a cool-season herb like cilantro. Its delicate dilly leaves taste great in salads, and its seeds can be used to flavor dill pickles.

Parsley: Parsley grows and tastes best in the spring or fall. Sometimes it will survive one winter, but it is best grown as an annual. Once it has flowered, it is time to pull it from the ground and plant more.

I hope that these growing tips help!

Happy gardening,

Jessie Keith

Black Gold Horticulturist

What Soil Do You Recommend for Avocado Seedlings?

“What type of Black Gold soil is recommended for potting avocado seedlings?” Question from Rusty of San Diego, California

Answer: Excellent drainage is one of the most important attributes of soil for avocado growing. They cannot endure wet soil for any period of time without being subjected to root rot. This means planting them in very well-draining pots as well as planting them in a porous mix that drains well while holding enough moisture for good growth.

Robust avocado seedlings grow quickly, so there is no need for a fine, seed-starting mix. Avocados also prefer soil with a near-neutral to slightly acid pH of 6 and 6.5. Based on these needs, I would recommend growing your avocado seedlings in Black Gold Natural & Organic Potting Mix. It is OMRI Listed for organic gardening, fast draining and fertile, and it maintains the correct pH for your avocados. Follow up with a good fertilizer formulated for avocados and you should be set.

Happy gardening!

Jessie Keith

Black Gold Horticulturist

How Can I Protect My Ripening Strawberries From Insects?

“What can you use on strawberry plants to keep the bugs from eating the strawberries as they ripen?” Question from Sylvia of Belle Plaine, Minnesota

Answer: The simplest method, without the use of chemicals, is applying super-light floating row covers, also called garden fabric. You can also apply food-grade diatomaceous earth along the ground and on plants to ward off slugs. (You really don’t want to put chemicals on your tasty berries!)

Floating row covers are made of the finest white mesh. They allow sunlight and air to enter while keeping insects out, as long as they are applied correctly. And, cultivated strawberries are largely self-fertile, meaning they pollinate themselves, so you don’t have to worry about keeping bees out.

Applying Row Covers

As your berries begin to ripen, spray the plants with the hose to remove any lingering insects. Then sprinkle diatomaceous earth around the base of each plant to ward off slugs. You can also sprinkle it on the plants. Finally, cover your strawberries with the row covers and secure them well along the ground to ensure insects don’t get through. You can use landscape fabric pins for this. Some gardeners also put a layer of soil along the edges to make doubly sure that pests cannot enter. The covers can also protect the berries from browsing birds and other animals. Just watch out for voles, because they can tunnel underneath covers.

Once your berries start to mature, lift the covers, harvest as needed and put them back. It’s that simple.

Row covers are pretty inexpensive, so the cost is nominal. And, you will get a healthier berry crop, chemical-free!

Happy gardening,

Jessie Keith

Black Gold Horticulturist


How Do I Get Lavender to Grow Up North?

“How can I get my lavender plant to grow? I bought it last year and it’s still the same size and hasn’t flowered. I put it this spring and it’s thriving, just not growing. Does it need to be planted in the ground to be happy?” Question from Cassi of Plymouth, Minnesota

Answer: Lavender is truly an outdoor plant, though plants can be container-grown and protected indoors in winter. Despite your northern location (USDA Hardiness Zone 4b), you do have some options that will help you successfully grow lavender.

There are three things that lavenders need to grow, prosper, and bloom outdoors: all-day full sun, very well-drained soil, and summer warmth. Because your climate is so cold in winter, I suggest you grow annual lavender or try some of the hardiest lavenders available. Here are three lavenders to consider for your area:

1. ‘Munstead’ (Lavandula angustifolia ‘Munstead’): This compact lavender is just on the edge of your hardiness zone, growing in Zones 4-5, though really harsh winters will kill it in Zone 4. It is wonderfully fragrant and has lovely lavender-blue flowers.

2. ‘Hidcote’ (Lavandula angustifolia ‘Hidcote’) is equally compact and also on the edge of your hardiness zone, so it may survive. It has silvery foliage and lovely lavender flowers.

3. ‘Lady’ (Lavandula ‘Lady): This is one of the few lavenders that will bloom in the first year from seed, so it can be grown as an annual. This 1994 AAS award winner performs very well and may be the best lavender for your needs. It reaches 1-1.5 feet high.

Growing Lavenders Outdoors

Full sun and sharply drained soil are essential for success. Moist winter weather can quickly cause stem and root rot if the soil is not perfectly drained. Lavenders generally grow best in more alkaline soils that are raised and gravelly with added organic matter, such as Fafard Premium Natural & Organic Compost. Newly planted lavenders should be watered regularly for a few weeks until they become established. Once established they generally can take care of themselves.

If you try growing perennial lavenders outdoors, give them extra winter protection. Plant them in a microclimate close to the south-side of your house or a sunny stone wall. Planting lavenders among large, protective stones can also help them overwinter. Stones soak up the warmth during the day and radiate it at night, protecting more tender plants. They will also protect the roots, and if well placed they will protect the plants from winter winds.

Growing Lavenders in Pots

Another option is growing lavenders in pots and bringing them in a cool to chilly sunny space indoors to overwinter. Keep the pots very lightly moist in winter. Container-grown specimens are best planted in large pots filled with fast-draining soil like Fafard® Ultra Outdoor Planting Mix.

I hope that these tips help!

Happy gardening,

Jessie Keith

Black Gold Horticulturist


Can I Grow Vegetables in Pots in Summer and Winter?

“I am from SC. Will any veggies grow indoors in pots in the summer or winter?” Question from Donna of Newberry, South Carolina

Answer: There are lots of vegetables that are easily grown in containers. The key is choosing large containers that will give their roots enough space to grow and choosing varieties that are more compact. Providing excellent potting mix, like Black Gold Natural & Organic Potting Mix, and fertilizer formulated for vegetables is also essential. Growing container vegetables in summer is a snap because of the ample sunshine, warmth, humidity, and pollinators. (Click here to read more about growing vegetables in containers, and this article covers lots of miniature vegetables that are just right for container growing.)

Growing vegetables in containers in winter is a different story. First, you generally need lots of sunlight–at least 6 to 8 hours for good growth and production. Also, warm-season vegetables, like tomatoes and peppers, need extra warmth and moderate humidity. Greens and herbs are often the best choices for indoor growing because they need a little less light (five to six hours of sun) and are able to withstand cooler temperatures. They are great candidates for a bright, sunny, south-facing window. (Click here for a great article about growing windowsill greens in winter, and here’s an article about growing indoor herbs.)

Because you live down south, you may be able to get really cold-hardy greens to overwinter in pots as well, but this is never a sure-shot deal. Experiment with kale and collards to see if you can get them to survive your winter cold in pots.

I hope that these tips help! Growing veggies in big, tall pots is lots of fun and almost like raised bed gardening.

Happy gardening!

Jessie Keith

Black Gold Horticulturist