Articles

The ABCs of Hanging Basket Creation and Care

Dark Eyes Fuchsia is a stellar variety with glowing flowers that attract hummingbirds.

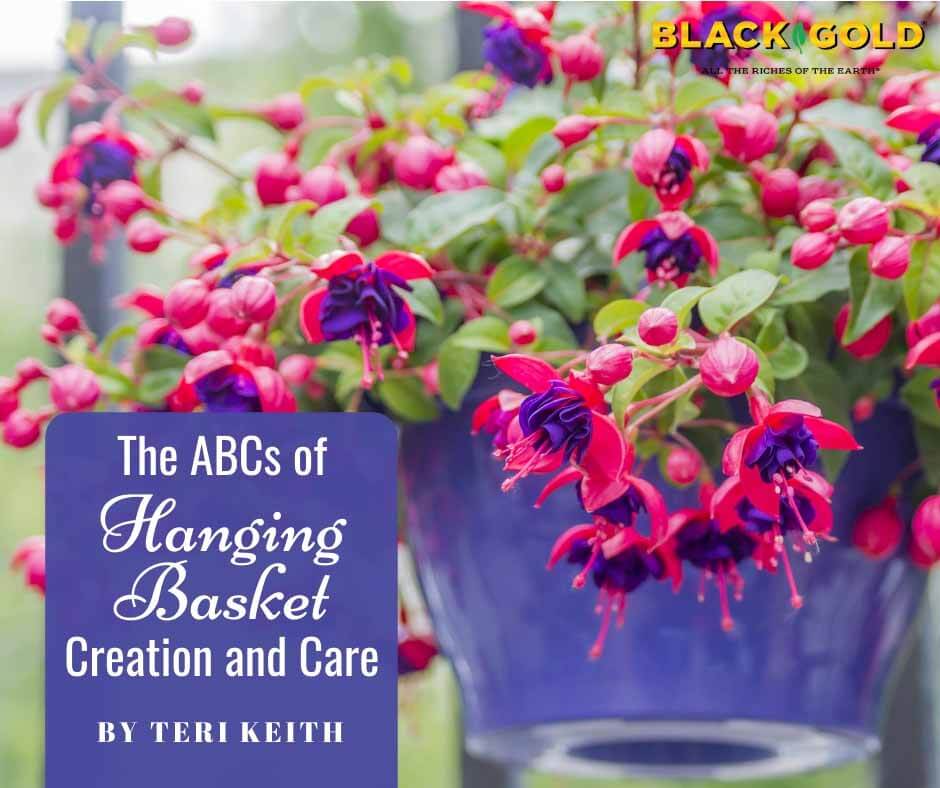
Spring is finally here, and many of us have been bitten by the Flower Bug. We are looking forward to beautiful pots on the deck and hanging baskets on the front porch full of gorgeous flowers. It is fun to make up your own hanging baskets, using last year’s baskets or new ones. The key to success is choosing the right pots, soil, and plants, and then giving them the right care. If you get everything right, you’ll have beautiful baskets all season long.

A. Choosing a Basket

There are many types of hanging baskets. Those made of natural materials are more free-draining and lose water faster.

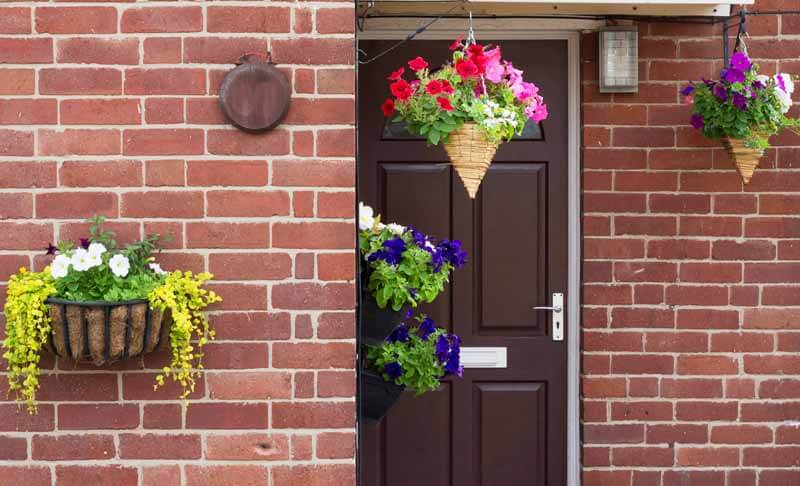
There are many types of hanging baskets made of different materials. Self-watering plastic baskets or those made of ceramic hold water the best, while coir-lined wire baskets or those made of resin rattan and wood drain freely but often lose water more readily. Solid baskets hold onto water better but lack the appealing look of the coir baskets and do not drain as well. Baskets are available at garden centers, nurseries, and big box stores. Buy large ones if you want more than one plant per basket. They will have room for both trailing and mounded plants and also require less water.

Reusing old baskets is also practical and economical. Just be sure to dump out the old soil, wash them thoroughly with soap and warm water, and let them dry in the sun before use.

B. Choosing Hanging Basket Plants

Premade mixed baskets look gorgeous at garden centers, but overpacked baskets like this one will quickly become stressed due to competition.

I like to plant up my own baskets because it is less costly and allows me to be creative. Others may prefer to buy fully grown, complete baskets. These are always lush and beautiful, but be wary before you buy. Those planted up with too many plants tend not to last because they are too crowded. They will look good in the short-term but will quickly lose their luster.

Cascading Begonia ‘Apricot’ is a strong bloomer.

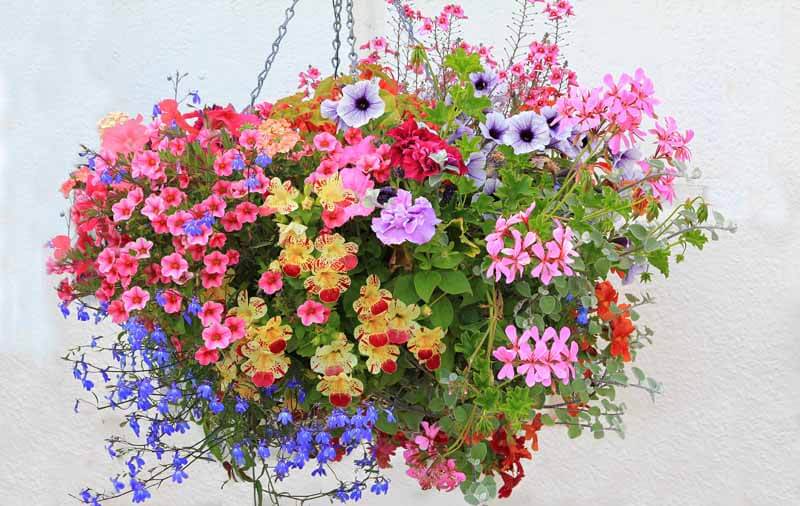
If you take the more economical approach, here are some favorite hanging basket plants that have grown well for me. As a bonus, almost all the flowers listed here are loved by bees, hummingbirds, and butterflies.

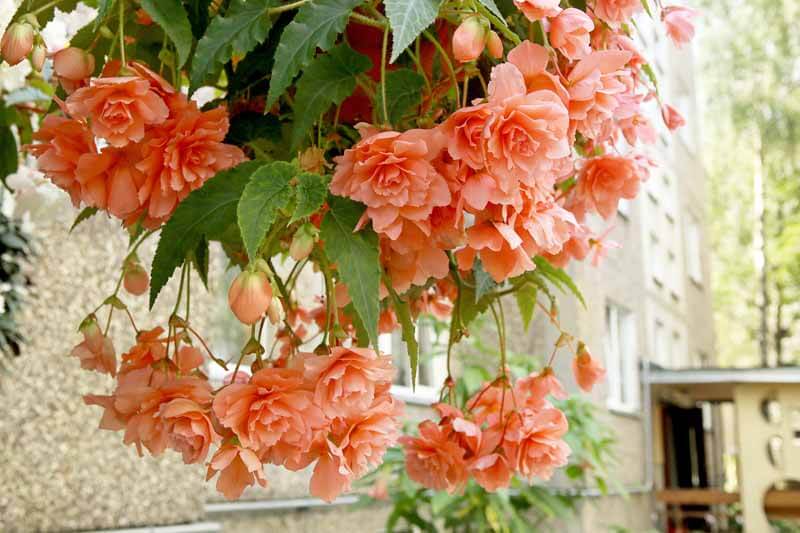
Cascading begonias (Begonia x tuberhybrida Pendula Group) like shade, especially in hot weather. Further north where summers are milder, they can be grown in partial sun, but in the Midwest and more Southern regions,  shade or filtered light will keep them looking their best. Cascading begonias have large, glowing, flowers, in shades of yellow, pink, orange, and red, and will trail up to 20 inches over the sides of the basket. A truly spectacular selection is Illumination® Rose Tuberous Begonia, which cascades beautifully with double, rose-red flowers. ‘Apricot’ is another exceptional form with double apricot blooms that truly hang downwards.

Fuchsia (Fuchsia hybrids) are among the most beautiful cascading plants with pendulous flowers that attract hummingbirds. They will grow well in full sun or partial shade, but shadier locations are preferred in areas with hot, dry summers. Fuchsias have tubular inner flowers with showy outer sepals that often curve back. Usually, the flowers are bi-colored, with blooms in differing colors or shades of

‘Balcon Royale Red’ ivy geranium is an excellent heat-tolerant option.

crimson, pink, purple, and white. Especially stunning are those with double flowers and ruffled edges. Dark Eyes trailing fuchsia is one with red sepals and a purplish inner ruffle. When buying fuchsia at garden centers, choose larger, well-established specimens for a faster summer show, and don’t allow them to get dry in the pots for any length of time.

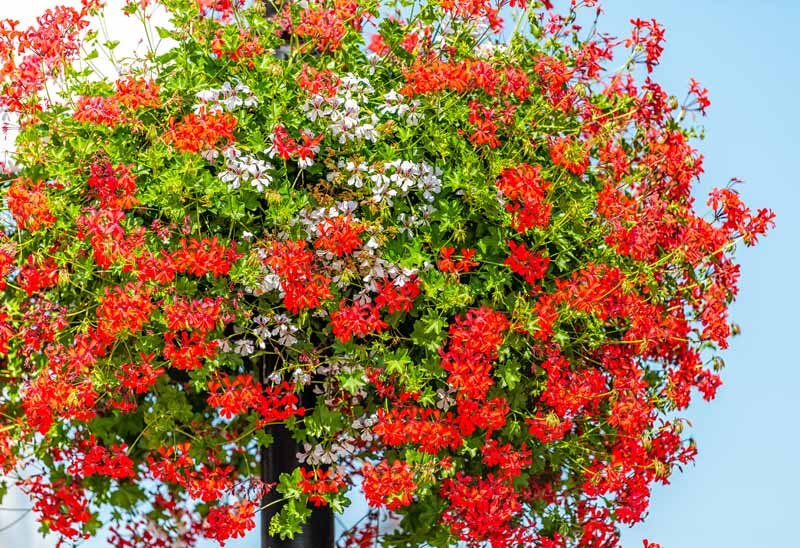
Ivy geraniums (Pelargonium peltatum) are cascading annuals that enjoy full sun and can take the heat.  They cascade up to 20 inches and are called ivy geraniums for their ivy-shaped leaves. They branch well, keeping the stems thick with flowers. Most of the flowers are single, but a few are semi-double.  They come in shades of pink, red, salmon, and white, and they like full sun. Try the classic ‘Balcon Royale Red’, a reliable form that produces loads of bright red flowers and can cascade down to 3-feet.

Petunias and calibrachoa are good container companions.

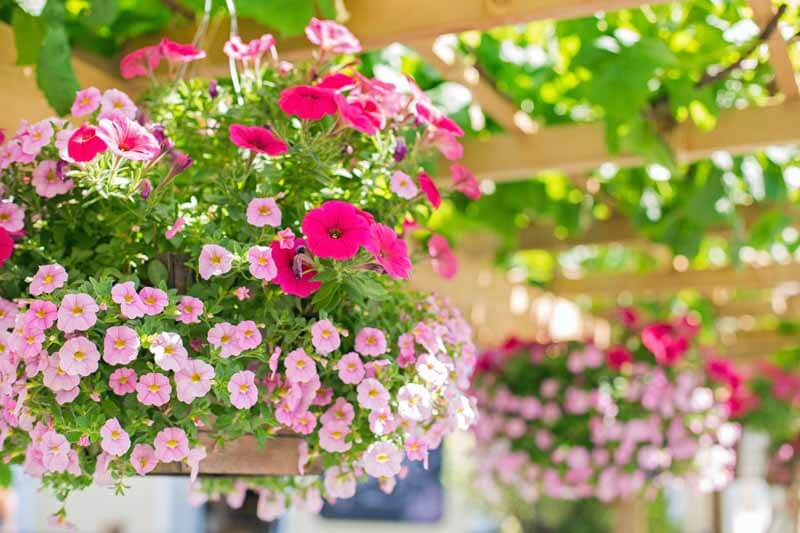
Petunias (Petunia hybrids) are old sun-loving favorites that have been bred into the most fabulous new varieties.  In particular, look for Proven Winners Supertunias.  Both the regular-sized Supertunias and Mini Vistas will mound in the center and spill over the sides of a basket. Last year I grew Supertunia® Mini Vista Violet Star, a striped purple-and-white flowered form with small, less than 1-inch-wide flowers.  It never needed deadheading or pruning and just stayed perfect until the end of the season.  These petunias come in many colors and blends.

Trailing verbenas (Verbena hybrids) tolerate heat and sun very well and will continue to bloom and perform with regular water. Keep an eye out for the Lanai Series of lantanas. They form a 10-inch tall mound that stays looking beautiful all summer and cascades 18 inches over the side. Lanai® Blue Verbena, with its pure violet-blue flowers, is very eyecatching. Proven Winners Superbenas are even more high performing and bloom nonstop all summer. The apple-blossom pink Superbena Sparkling® Rosé is my favorite.

Calibrachoa (Calibrachoa hybrids) look like very small petunias.  Of these, I

Superbells Blue Moon Punch has striking, dark-eyed flowers.

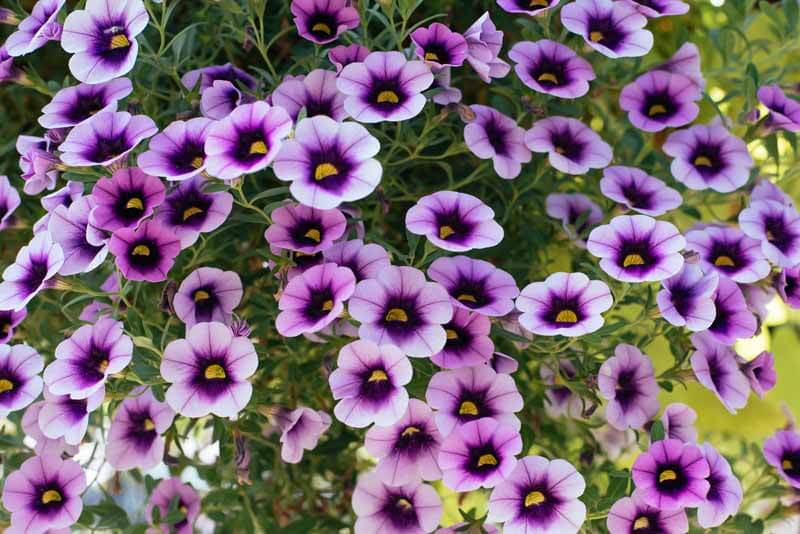
like Superbells® varieties, but Million Bells® are also reliable. They are available in many different colors with doubles and single flowers (click here to view them all).  Superbelles create a 6- to 12-inch mound in the center of the basket that cascades to 2 feet over the edges. Superbells® Blue Moon Punch  is a cool lavender with a purple eye that mixes well with pink or white Superbenas. Calibrachoa need full sun but also do well in half-day sun.

Other plant ideas for hanging baskets include the use of just foliage plants. Think beyond your average Boston fern, as pretty as they are. Ornamental sweet potato vine (Ipomoea batatas hybrids), golden moneywort (Lysimachia nummularia ‘Aurea’), dichondra (Dichondra argentea), variegated ivy (Hedera helix hybrids), and small-leafed thymes, such as wooly (Thymus pseudolanuginosis), creeping pink (Thymus serpyllum), and lemon (Thymus x citriodorus) thymes, are all easy to grow in baskets. Gardeners with very little time can even try growing the effortless succulent string-of-pearls and its relatives (click here to learn more about growing string-of-pearls.).

My list offers just a sample of what’s available, so look beyond it. I recommend checking out some of Proven Winners hanging basket recipes, as well as other online sources. There are so many wonderful hanging basket plants for sun and shade.

C. Planting and Caring for Hanging Baskets

Planting up hanging baskets is easy.

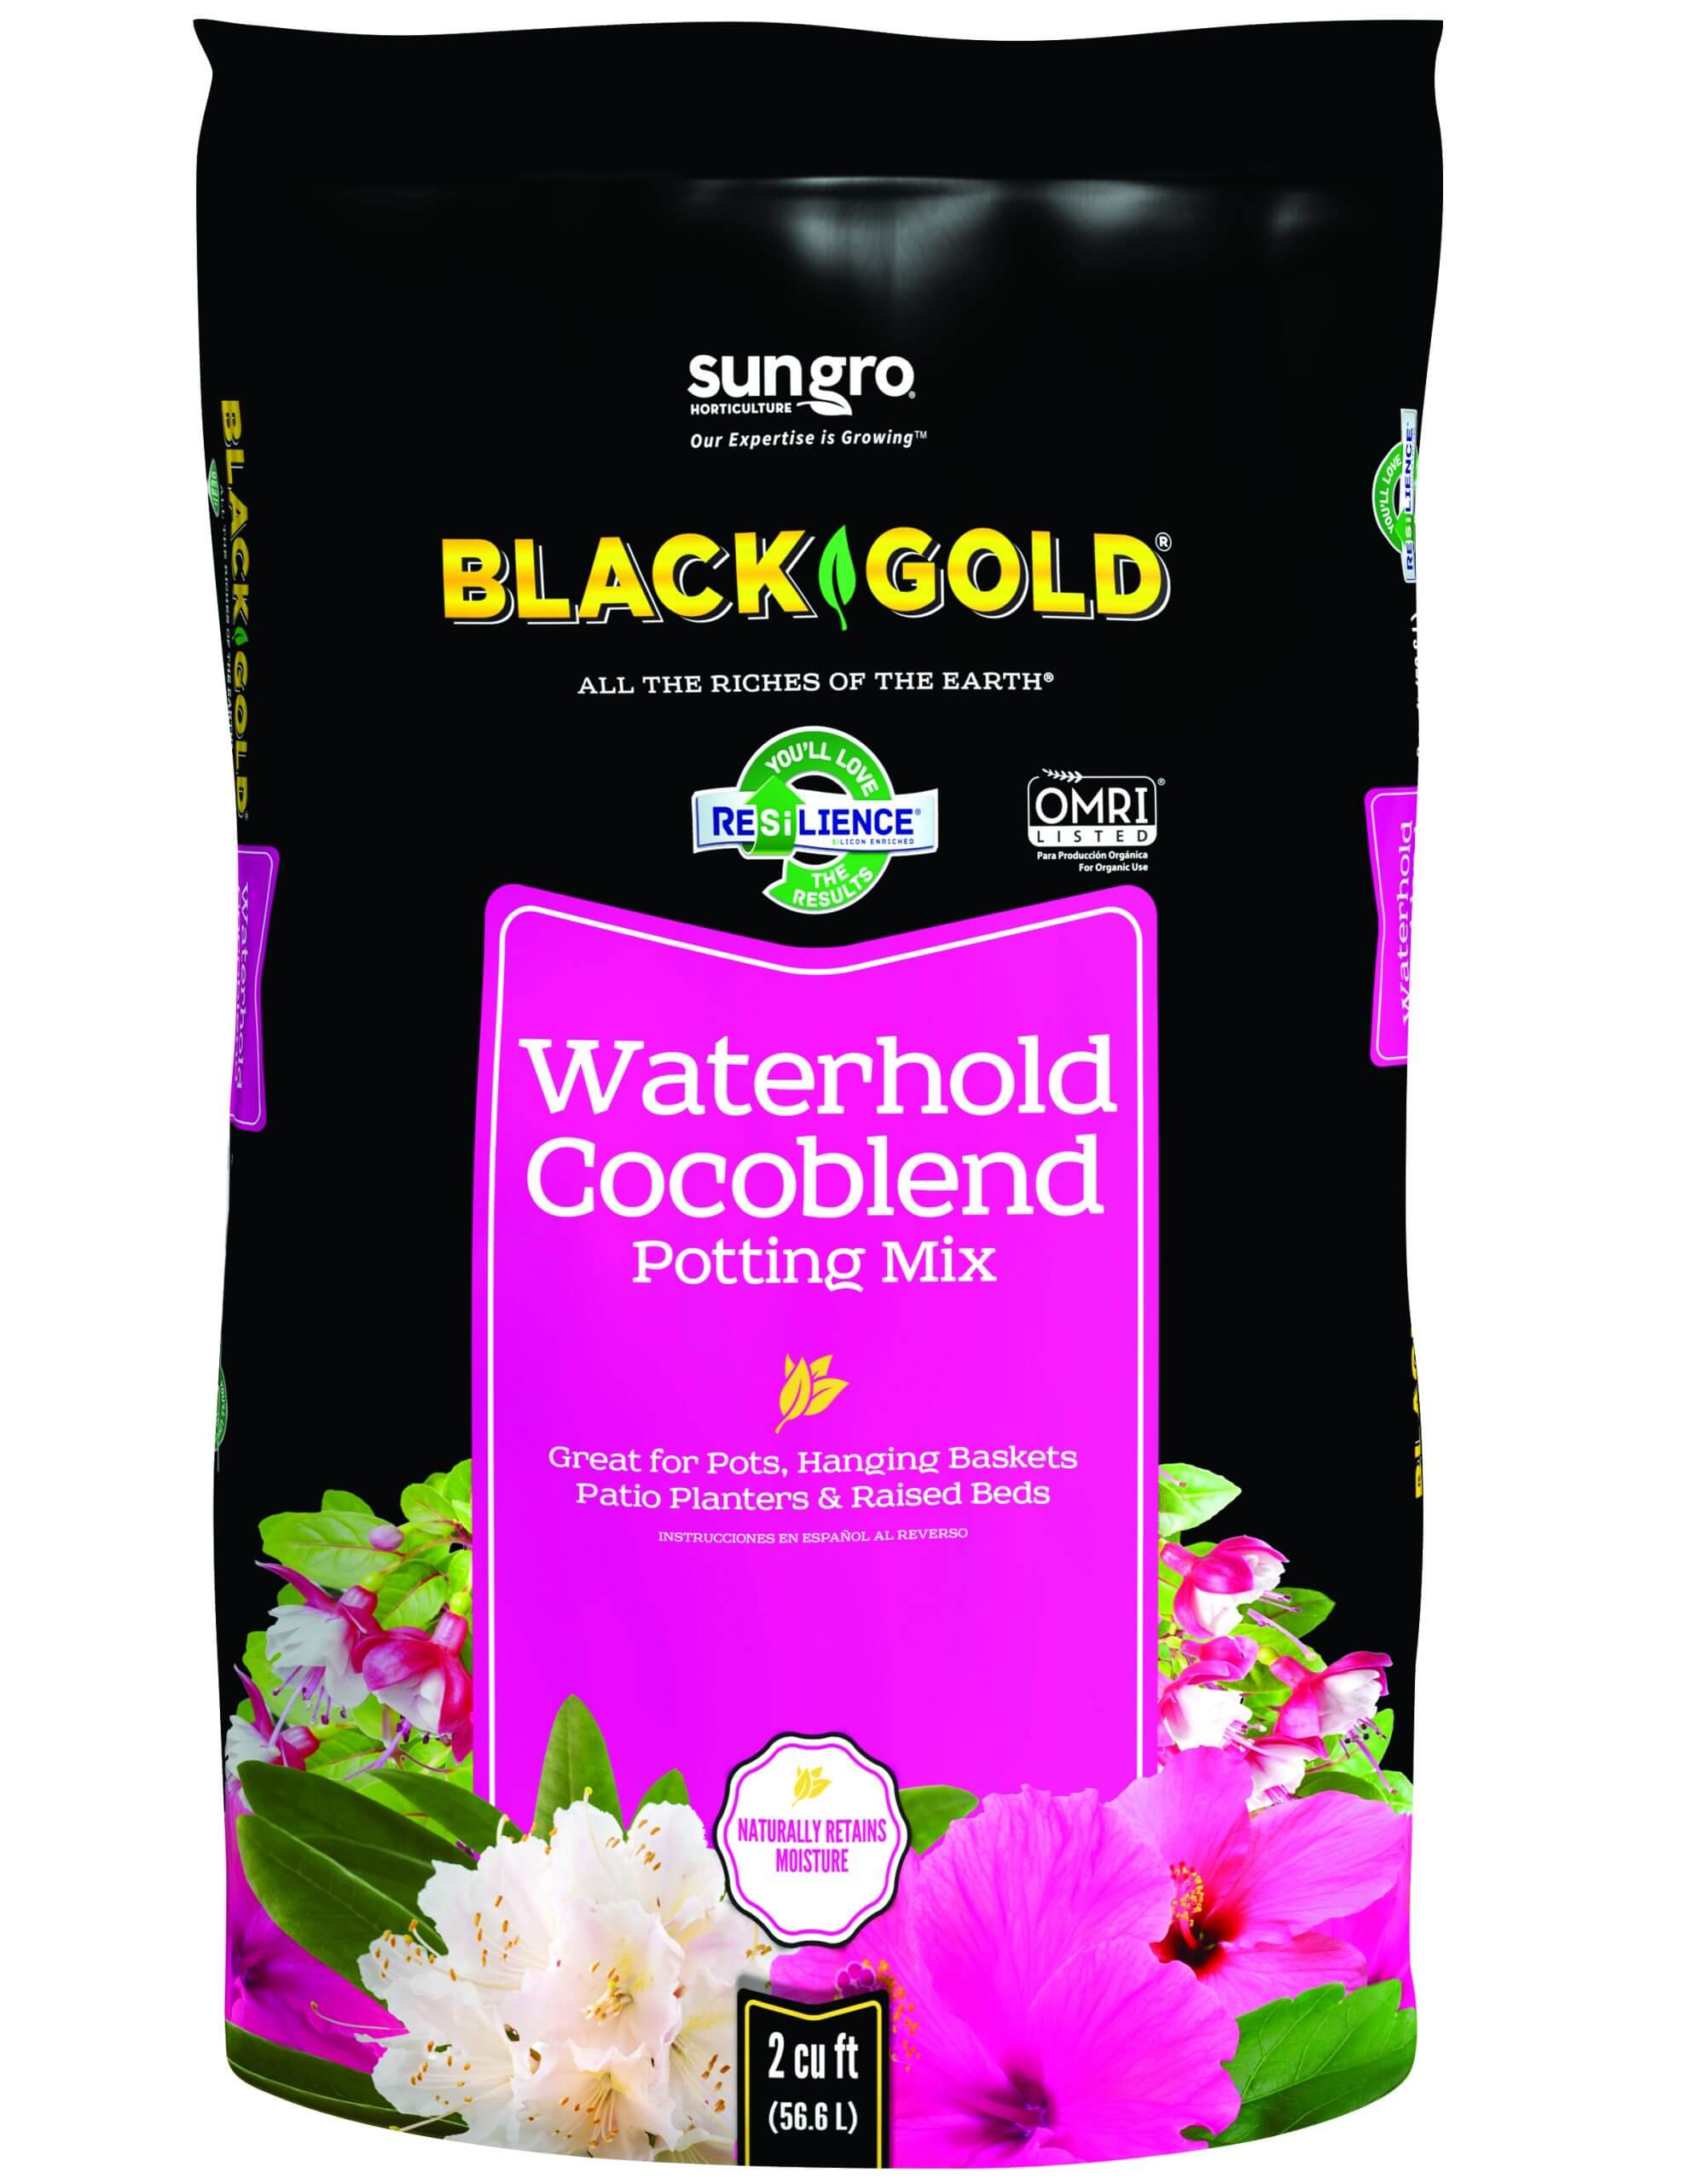
Choose soil that holds lots of water but is also aerated. Black Gold has several excellent options. Black Gold Moisture Supreme Container Mix has a very high water-holding capacity, as does Black Gold Waterhold Cocoblend, which is OMRI Listed for organic gardening. Both contain all-natural Sun-Coir, which retains water for a long time.

When deciding upon plant sizes, keep in mind that those in small cell packs take much longer to grow than fuller plants in 4-inch pots, so choose the latter if you want a faster show. Also, consider the growing needs, appearance, and mature size of each plant to make sure they will look good and grow well together. For example, a trailing fuchsia planted alongside a variegated ivy would be a good combination for shade. In many cases, however, one full plant per basket is sufficient.

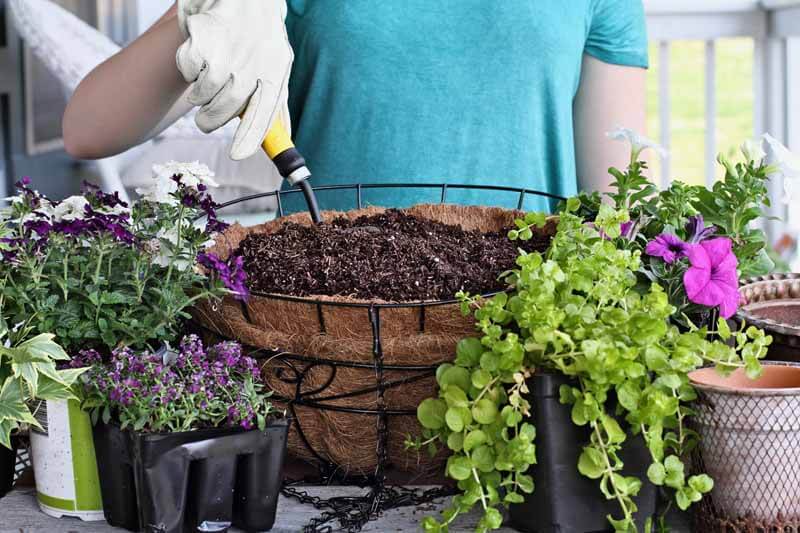
At planting time, fill the bottom of the basket with potting soil. If planting more than one plant per pot, be sure to place them several inches away from one another. Gently pull their roots apart if they are rootbound. Be sure to cover the roots and continue filling until the surface of the soil is just below the basket rim. Then feed with a time-released fertilizer, such as Proven Winners Continuous Release Plant Food, using the manufacturer’s recommendations.

Watering hanging baskets properly is the biggest challenge for many gardeners. Don’t forget that hanging baskets dry out faster than pots, window boxes, or rail planters because they are more exposed and often smaller. As the roots fill up the basket, they have less room to spread and often need watering every day. Underwatering is the most common problem with hanging baskets, but on rare occasions, shade baskets can be overwatered, resulting in root rot. Be sure you invest in a long-necked watering head to make it easier to reach the baskets.

If some of the plants should start looking ratty by midsummer, just do a light pruning when you put in the fresh fertilizer, and they will bounce back.

Nothing looks prettier than a patio or porch lined with festive hanging baskets. I hope this gets you started dreaming about summer, and the beauty that comes with it. Who knows, maybe we can go outdoors by then.

How and When Should I Prune Lavender?

“When should I prune lavender?  I tried it at the end of summer last year, but I think I might have cut too far back.” Question from Manda of Florence, Kentucky

Answer: In my experience, lavender has the best regrowth results if one waits to prune until the plants begin to produce fresh spring leaves. It simply bounces back best when it has begun to actively grow. It is a warm-season perennial, so wait until April before trimming it.

The best pruning method is to cut the shrubby top growth back by 1/3, using sharp pruning shears. Try to keep the top rounded to maintain a pleasing, bushy habit. At this time, you will also want to remove any dead or dying stems. Don’t be tempted to cut it back further. If you prune lavender back too far towards the base, it can invite fungal disease and disable the plant from fully recovering to its former glory.

Happy lavender pruning!

Jessie Keith

Black Gold Horticulturist

Growing And Enjoying Old-Fashioned Lilacs

The French heirloom double lilac ‘Montaigne’ is a very fine bloomer. (Image by Jessie Keith)

Nothing is more fragrant than classic lilacs in spring.  I am a lilac nut and have 21 different varieties growing in my yard. When they are blooming, it is hard to stay indoors, unless, of course, you pick a few to enjoy in a vase.

Lilacs (Syringa vulgaris, USDA Hardiness Zones 3-7) come from the mountains of southeastern Europe. In 1563, the Austrian Ambassador to Istanbul brought back shoots of the wild blue lilac in his luggage and introduced the rest of Europe to this shrub. They became an instant hit, especially in France. Soon after, both purple and white lilacs were found in people’s gardens, and gardeners began to actively select unique forms. Lilacs came to America in the 1600s, still with either purple or white flowers and no outstanding named selections.

Great Lilacs and Their Histories

One of my favorite lilacs is ‘Charles Joly’, with its fragrant, double, deep magenta flowers in mid-May. (Image by Jessie Keith)

In the early 1800s, Europeans began developing improved white and dark purple lilacs and new colors, such as clear rose. But it wasn’t until a French nurseryman, Victor Lemoine (1876-1927) from Nancy, France, became interested in lilacs and began breeding them that many of the most beautiful lilacs ever were developed. He bred them for much of his life and named over 153 classic varieties, many of which are still sold at garden centers today. His double-flowered varieties have never been surpassed. One of my favorites is ‘Charles Joly’, with very fragrant, double, deep magenta flowers in mid-May. It is still considered the best lilac in its color range. Other of his bests include the award-winning  ‘Miss Ellen Willmott’, a superb double bloomer with large, white flowers, ‘Montaigne’ (1907), an excellent pink and white double, and ‘Madame Charles Souchet’, a very showy variety with large florets of pale to medium lilac-blue.

The lilac ‘Primrose’ has the palest yellow flowers.

The second great breeder of lilacs was the American Father Fiala (1924-1990). In the nineteen forties, this parish priest in Ohio began working with his favorite flower as a hobby, a love inspired by the lilacs in his grandmother’s extensive garden. Father Fiala developed 50 different varieties of lilacs and was working on new ones when he died in 1990. Some of his best are ‘Marie Frances’ (8 feet), a true pink, very fragrant form, the equally fragrant ‘Blanche Sweet’ (8 feet) that has blue flowers tinged with pink, the true-blue ‘Wedgewood Blue’ (6 feet), double white-flowered ‘Avalanche’ (10 feet), and ‘Primrose’ (12 feet) with its unusual, light yellow flowers.

Fiala was also a founder of the International Lilac Society and wrote the definitive book, ‘Lilacs – the Genus Syringa’, which is still in print and an essential resource for lilac lovers.

Two-tone ‘Sensation’ is a popular variety that’s easily found at nurseries.

Other lilacs well worth mentioning include the fantastic ‘Beauty of Moscow’, whose pink buds open to gorgeous, double, white flowers. The heirloom was bred by the Russian hybridizer Leonid Kolesnikov in 1943 and is still widely sold as a garden favorite. Another that is a perennial favorite is the bicolored ‘Sensation’, with large, unique reddish-purple flowers edged in white.

Growing Lilacs

The white flower panicles of  ‘Avalanche’ have double flowers.

These are long-lived shrubs that can survive for well over 100 years, so it is important to choose the best site for a lilac. Lilacs grow in Zones 3 to 7.  Any farther south is just too warm for their survival. They like full sun, unless you live in an area with high summer temperatures, in which case afternoon shade is a good idea.

Most of all, lilacs cannot tolerate wet feet. They have to have well-drained soil at all times. Soil that is average to poor with a neutral to alkaline pH is preferred. Established plants will tolerate dry soil. However, newly planted shrubs need to be kept moist for the first year until their roots are established. Mulch is the best way to conserve moisture in summer, but be sure to leave a 4-inch, mulch-free space around the base of the plant to avoid crown rot.  In a real drought (we had ten weeks with no rain last August to November), everything needs extra water.

Lilacs reach 6 to 15 feet tall and 4 to 12 feet wide, depending on the variety, so space them accordingly. When planting any shrub or tree, I find it helpful to mix some Black Gold Garden Soil into the dug up soil for good establishment. It is rich in organic matter and feeds plants for up to six months.

Pruning Lilacs

Lilacs can be pruned and trained as large hedges or small, multi-stemmed trees.

Prune just after shrubs bloom because they only flower on last year’s branches. If you prune in the fall or spring, you will cut off next year’s flowers. Cutting back some of the old, thick, trunks by one third will help promote new growth. In cases where severe pruning is needed, lilacs will tolerate hard or renewal pruning and can be cut back to just a couple of feet and regrow.


Lilac Pests and Concerns

Lilacs are long-lasting and remain fragrant in the vase.

There are several common problems that any lilac owner can expect. They are susceptible to powdery mildew, and some may get lilac borers, but I have noticed some lilacs are more resistant to the borers than others are.  In fact, out of my 21 lilacs, only 1 has borers. For powdery mildew, an easy, all-natural fix is the use of Green Cure foliar fungicide.

There are some nurseries online with an excellent lilac selection (The International Lilac Society has a good list of sources, click here to view them), but the only problem is that the plants are usually sold as 4- to 12-inch-tall specimens. Who wants to wait? Instead, I would suggest calling local nurseries in your area to see what lilacs they have.

There are so many reasons to plant lilacs. They are deer resistant, and birds, butterflies, and bees love them. Plant some of these old-fashioned shrubs for their super spring show.

Tomato Diseases: Identification and Solutions

From upper left: blossom end rot, late blight, and tobacco mosaic virus.

Tomatoes are the roses of vegetables–everything attacks them. So, gardeners can count on experiencing any number of tomato diseases in their growing experience. It pays to grow disease-resistant tomatoes, but lots of the best heirlooms don’t fall into this category. That’s why tomato growers need to be armed with knowledge and IPM (integrated pest management) tools to keep harvests high. Learning how to spot the most common tomato diseases is a start.

Plant diseases are typically either fungal, bacterial, or viral. Some cause quick plant death, but others can be managed–allowing gardeners to eke out a harvest until the end of the season. But avoidance is the best starting point.

The four keys to avoiding tomato diseases are:

  1. Start with healthy plants.
  2. Choose a disease-resistant variety.
  3. Plant them in disease-free soil.
  4. Give them the best care.

Starting with healthy plants, a healthy environment, and keeping plants stress-free will help keep them disease-free, but pests or diseased weeds, or even wind can still bring disease into the garden. People can, too. Gardeners need to stay watchful.

If you have never experienced serious tomato diseases in your garden, you can feel confident planting heirlooms or family favorites with less resistance. But, always choose disease-resistant varieties if you have experienced diseases in the recent past. You might also consider growing tomatoes in containers to ensure that soil-borne diseases are not a problem. (Click here to learn how to grow tomatoes in containers.)

Top Disease-Resistant Tomatoes

Mountain Merit is an All-America Selections Winner that resists five common diseases. (Image care of AAS)

Before reading the depressing litany of common tomato diseases, feel encouraged by the power of super disease-resistant tomatoes. Plant breeders constantly work hard to create new and wonderful tomato varieties able to beat diseases and produce high yields of delicious tomatoes. When identifying a disease-resistant tomato, refer to the Tomato Disease Resistance Code list below to better understand the code system. Here is an example of five good, tough tomatoes that resist multiple diseases.

‘Galahad’ (F3, GLS, LB, N, TSWV): The new, 2020 All-America Selections Winner ‘Galahad’ is a big, red, slicing tomato with excellent flavor that resists five diseases!

‘Granadero’ (F2, PM, TMV, V, N, TSWV): Sauce tomato lovers should try this super disease-resistant paste tomato with uniform, red, well-flavored fruits. It is also an AAS award winner.

‘Mountain Merit (F3, LB, N, TSWV, V): Lots of large, red tomatoes with good, sweet flavor are produced on this compact bush tomato.

‘Toronjina’ (F2, LM, TMV): Highly disease-resistant plants produce lots of sweet and tart, orange cherry tomatoes on shorter indeterminate vines.

Sakura(F2, LM, TMV, N): Red cherry tomatoes are produced early and in abundance on this long-vined, highly disease-resistant tomato.

Good cultural practices will also help tomatoes fight disease. Plant them in very well-drained, aerated, raised beds amended with Black Gold Garden Soil, and keep plants strong and vigorous by feeding them with a tomato & vegetable fertilizer. It also helps to encourage air-flow by spacing plants well (3 to 4 feet apart, or wide enough to walk around) and keeping them pruned (click here for a tomato pruning tutorial). Drip irrigation helps keep plants drier up top, which can reduce the spread of diseases. Remove and discard infected plants as you see them, and at the end of the season, clean all plant material from your vegetable garden for good measure. Then at planting time, mulch tomatoes with a layer of straw or Black Gold Garden Compost Blend to help keep disease-carrying weeds at bay. (Click here for more tips on how to grow robust tomato plants from seed to harvest.)

Tomato Disease Resistance Codes

Tomato late blight (Phytophthora infestans) damages foliage, causes stem cankers, and destroys fruits.

When seeking out a disease-resistant tomato, you will see these codes indicating resistance. The most common diseases are covered in this piece. (Adapted from Johnny’s Seeds Growers’ Library)

HR = High Resistance   IR = Intermediate Resistance

  • A | Anthracnose | Fungus
  • AS | Alternaria Stem Canker | Fungus | Alternaria alternata f. sp. lycopersici 
  • CRR | Corky Root Rot | Fungus | Pyrenochaeta lycopersici
  • EB | Early Blight (Alternaria Blight) | Fungus | Alternaria solani
  • F (2, 3)| Fusarium Wilt | Fungus F. oxyporum f. sp. lycopersici
  • FOR | Fusarium Crown and Root Rot | Fungus | Fusarium oxysporum f. sp. radicis–lycopersici
  • GLS | Gray Leaf Spot | Fungus | Stemphylium solani
  • LB | Late Blight | Water Mold | Phytophthora infestans
  • LM | Leaf Mold | Fungus | Cladosporium fulvum
  • N | Roundworm | Nematode | Meloidogyne arenaria, M. incognita, M. javanica
  • PM | Powdery Mildew | Fungus Oidium lycopersicum
  • ToANV | Tomato Apex Necrosis Virus
  • ToMV | Tomato Mosaic Virus | Tobamovirus
  • TSWV | Tomato Spotted Wilt Virus | Tospovirus
  • TYLCV | Tomato Yellow Leaf Curl Virus | Begomovirus
  • V | Verticillium Wilt | Fungus | Verticillium albo–atrum

Tomato Foliage Diseases

These are the first tomato diseases that you will see and experience. All leaf spot diseases start from the bottom up–beginning with older leaves. Here are the top 5 most common types that you will see.

Bacterial Leaf Spot

Bacterial leaf spots are small, brown, and dry.

The common leaf spot (Xanthomonas spp.) results in spots that are small, dry, brown, and often surrounded by yellow halos. It disease intensifies and spreads further with excess rain, overhead watering, and when plants are planted too close together. As it progresses, it can also cause spotting on fruits and cankers on stems.

You cannot get rid of bacterial leaf spot once you have it, but you can slow its damage. To reduce its proliferation, increase airflow by pruning off unnecessary and badly infected branches. Keep it from taking hold in the first place by spacing plants well to encourage airflow. Cleaning up your garden yearly is also essential. The disease is maintained from year to year on infected crops and weeds in the tomato family.

Early Blight and Late Blight

Late blighted leaves show large brown blotches.

These two blights are the most common diseases of tomatoes.

Early Blight (Alternaria tomatophila and Alternaria solani): The leaf spots are pretty distinctive; circular lesions appear, reaching up to a half an inch in diameter with dark concentric circles inside. Early blight can occur at the seedling stage by causing seedling rot (damping-off). At later stages, it causes leaf blight on older leaves, stem cankers, and black fruit rot.

Late Blight (Phytophthora infestans): The deadly disease first causes large brown leaf spots on older leaves, followed by stem lesions, and discolored, oily patches on fruits. It’s the noxious disease that caused the Irish Potato Famine, which is a testament to its severity. It kills tomatoes more slowly, but it destroys fruits and will eventually kill whole plants. Tomatoes subjected to drought stress will die more quickly.

Late blight gives diseased tomatoes an ugly oily look.

Both early and late blight diseases are controlled by avoidance, cleanliness, and rotation. The blights survive and overwinter on infected plant material or in the soil. To prevent tomato blight, plant only healthy plants that you have grown from seed or purchased from a reliable grower. Also, plant only blight-resistant varieties (check out this list from Cornell University). If you find diseased plants, immediately remove them from the garden, and keep them from the compost bin. Bag and toss them instead. Keep beds weeded to remove weedy tomato relatives that can get blight, like nightshade and ground cherry. Next, rotate crops on a three-year cycle to help keep soil disease-free where you experienced blight. That means planting your tomatoes in a new spot each year and allowing three years to pass before planting them in the same spot. The soil should be rid of the disease after this time. 

Powdery Mildew

Powdery mildew starts as white, dusty spots on leaves.

Powdery mildew (Erysiphales fungi): The easy-to-identify powdery mildew is a common fungal infection that attacks leaves, causing white, powdery looking surfaces and blotches, particularly from mid to late summer. It is not deadly, but it will cause plants to decline more quickly and put a stop to good fruit production.

To stop powdery mildew, give plants plenty of sun, water, and airflow. Prune off diseased stems as you see them (clean your pruners well after cutting any diseased plant). Finally, apply the organic fungicide Green Cure, which quickly stops powdery mildew. Apply it, at first sight, to stop the disease in its tracks.

Tobacco Mosaic Virus

Tobacco mosaic virus causes leaves to become disfigured and discolored.

When tomatoes contract tobacco mosaic virus, they develop yellow mosaic patterns across the foliage and leaves often become elongated and almost ferny. Once you have it, or any other virus, the only thing that you can do is quickly remove and dispose of the plants and then rotate your crops. The best means of control is prevention. Grow resistant tomatoes, and make sure you buy seed or purchase plants that are certified to be disease-free.

Tomato Wilts

Fruit wilts can kill susceptible plants quickly.

These affect the whole plant causing overall wilt and decline. Both diseases exist in the soil. The best means of beating them is to plant resistant varieties. When susceptible plants become infected, it’s a death sentence. Plants must be removed from the garden.

Fusarium Wilt (F)

Fusarium wilt (Fusarium oxysporum sp. lycopersici) is the most common tomato wilt. At its first signs, older leaves wilt, turn yellow, then brown, and then fall. The stunted plants will eventually die. To beat it, look for resistant varieties, discard diseased plant material, and rotate on a three-year cycle.

Verticillium Wilt (V)

Verticillium wilt (Verticillium albo–atrum) is less common than fusarium wilt and is typically seen late in the season when soils are cooler. Its first symptoms are v-shaped blotches on the lower leaves, followed by browning veins and blotches. Symptoms then spread upwards, causing wilting and leaf damage. If you were to cut into the stem, the internal veins would be brown and discolored from the ground up to 12 inches. Treat it as you would fusarium wilt.

Tomato Fruit Diseases

Aside from the ugly oily patches caused by late blight (above) and the common black-based fruits caused by blossom end rot or irregular bases caused by cat-facing (see below), most other tomato fruit problems are fungal or bacterial.

Anthracnose Tomato Spot (A)

Anthracnose spot has damaged this ripe tomato.

Anthracnose tomato spot is a fungal disease that appears as sunken bull’s-eye marks on ripe fruits. Several steps can be taken to reduce the disease on developing fruit. Refrain from overwatering, which will reduce moisture on the leaves and the spread of the disease. Remove and dispose of damaged fruit, and prune to increase airflow can keep fruits from developing this disease on the vine.

Various Fruit Rots

Various fruit spots and rots can attack fruits.

There is a whole suite of fungal and other fruit rots that can damage good, ripe fruit on the vine. You can always identify a fungal spot on fruit by its bull’s-eye appearance. The center of the eye is where the fungal spore took hold, and the radiating circles show its progressive cycle of infection. The treatment of these diseases is the same as for Anthracnose tomato spot. Good airflow is always key in keeping fungal diseases at bay.

Bacterial Spot and Bacterial Canker

This shows bacterial speck on developing fruit. (Image by Chris Smart)

Some bacterial spot diseases of leaves can impact fruits. Bacterial fruit spots are smaller than those caused by fungal diseases, brown or black towards the center, and often surrounded by rings of yellow or green. In the case of bacterial canker, the spots are ringed in white with a green or dark-brown center. Sometimes the spots are raised. When fruits have bacterial spots, this means that it is time to remove and dispose of the whole plant.

Tomato Disorders

Blossom end rot is a common fruit disorder caused by a calcium deficiency.

Disorders often look like diseases, but they are caused by either nutrient deficiencies or adverse weather conditions rather than disease-causing fungi, bacteria, or viruses. Even better, they can be cured.

Fruit blossom end rot (caused by calcium deficiency), splitting or cracking (caused by excessive water or temperature fluctuations), fruit toughness, cat-facing, and reduced productivity (caused by cool temperatures) are the most common disorders of tomato fruit. Leaves with nutrient deficiencies can show all manner of yellowing or poor pigmentation, but if you feed your tomatoes well with a tomato fertilizer all season, your plants shouldn’t suffer any nutrient deficiencies (unless you have soil with severely acid or basic soil pH). Problem solved. Generally, if you plant your tomatoes in warm conditions, feed and care for them well, you can avoid most tomato disorders.

Can’t find your tomato problem here? Then ask our garden experts on our Ask a Garden Expert page and upload a photo of your plant! We will help you identify the problem and gprovide solutions.

How Do You Keep Peonies from Flopping in the Spring?

“What is the best way to care for peonies in the spring?  How do you keep the foliage from falling over when it rains?” Question from Diane of Newark, Ohio

Answer: Double-flowered peony (Paeonia lactiflora) blooms are so heavy that even the smallest rain can weigh them down to the ground. Thankfully, this problem is easily fixed. General spring care is simple, too.

Start by completely cutting back the old, brown stalks from last year. Then weed around the crown of the plant, work in an all-purpose slow-release fertilizer, lightly mulch or add a 2-inch layer of Black Gold Garden Compost Blend, and then place a perennial cage around the crown. Caging peonies bolsters large, heavy flower heads when rains fall.

Seek out a cage that’s wide enough to accommodate the clump. Perennial cages are sometimes sold at garden centers or online (click here for one source). You can also make your own. I like to make my own cages for perennials, dahlias, and tomatoes using rolled, galvanized steel fencing (look for a product with open squares), wire cutters, and plastic zip ties (protective gloves are also needed). Just cut the fencing to size, and zip tie it into a circle. When cutting the fence, I also cut the base of the cage so that it has prongs to secure into the ground (click here to watch a video where I make a similar (but larger) cage for sweet potatoes).

I hope that this helps!

Happy peony growing,

Jessie Keith

Black Gold Horticulturist

How Much Light Does Ponytail Palm Need Indoors?

“I just fell in love with the ponytail palm plant. I would like it in my dining room that gets some afternoon light. How much light does it need?” Question from Ann of Lookout Mountain, Georgia.

Answer: I have a ponytail palm, too, and just love it! Ponytail palm (Beucarnia recurvata) is native to arid regions of Mexico and needs low water, especially in the winter months, and high sunlight. It can withstand partial sun in winter, if necessary, but if you want your specimen to really thrive, I recommend bringing it outdoors in summer.

Don’t take it outdoors in spring until the threat of frost has passed and days have warmed up. Then let it soak up the sun in a slightly covered area that won’t get inundated with heavy rain. It is fine to give it moderate water outdoors in the summer, especially when days are very hot and dry. To ensure fast soil drainage and protect roots from rotting, I recommend planting it in Black Gold Cactus Mix.

In mid-fall, bring it indoors into your partially sunny dining room. Clean it before bringing it inside as a house plant. (Click here for tips on cleaning plants before bringing them indoors.) Once inside, you can water less. Then in November, give it very little water until the following spring.

(Click here to learn a lot more about growing ponytail palm indoors and out!)

I hope that these growing tips help.

Happy gardening,

Jessie Keith

Black Gold Horticulturist

Help! My Barbados Cherry is Dying

“I have a Barbados cherry tree that I just bought from a fast-growing tree nursery, and it’s small and dying. When I got the plant, all the leaves were gone, and it’s just not growing. I added seaweed and some fish emulsion, but it just won’t grow. There is green when I scratch the stem. What can I do to bring it back?” Question from Carol of Joaquin, Texas

Answer: This a concern because the leaves of Barbados cherry (Malpighia glabra) are evergreen, so it should have had leaves when it arrived from the nursery. But, it’s a good sign that you see green when you scratch the stem. It may still have enough life left in it to survive.

Because this subtropical shrub/tree is not reliably hardy where you live (USDA Hardiness Zone 8), I would plant it in a pot with very well-drained potting soil and keep the soil just moist. In the wild, it grows in very dry soils, so too much water will kill it. I suggest Black Gold Cactus Mix with a little added peat moss.

If your tree has enough life in it, the little guy should start putting out leaves and new growth within a couple of weeks. If it doesn’t, be sure to get a replacement. Barbados cherry makes a nice potted specimen, and I’ve never eaten the fruit, but it’s supposed to be tart and tasty.

To learn more about this South Texas native tree/shrub, check out this webpage from the Lady Bird Johnson Wildflower Center. Barbados cherry is a great wildlife plant because its delicate pink flowers feed butterflies and edible fruits feed songbirds.

Happy gardening!

Jessie Keith

Black Gold Horticulturist

Can You Identify this House Plant?

“Do you have any idea what kind of house plant this is?” Question from Donna of Cape May, New Jersey

Answer: Yes! It’s a variegated rubber tree (Ficus elastica ‘Variegata’). It grows best in a great potting mix, like Black Gold All Purpose Potting Mix. Give it bright indirect light or partial shade. Water its soil regularly from spring to fall and reduce watering in winter. It is very tough but cannot withstand overwatering. To keep it looking its best, clean its leaves with a soft cloth moistened with warm water when they get dusty.

How Do I Care for My Poinsettia?

“I would like tips for Poinsettia care.” Question from Sandra Lee of Cottage Grove, Minnesota

Answer: Place your poinsettia (Euphorbia pulcherrima) in a location with direct sun or bright filtered sunlight and give it even moisture. Refrain from keeping its soil wet, which can stress plants out. Poinsettias are tender Mexican natives that grow as large, winter-blooming shrubs in their native homeland and require good warmth, especially from spring to fall.

General Poinsettia Care

If you don’t want to toss your poinsettia away after the holidays, you can continue to grow it as a house plant. Leaf drop is common in indoor-grown poinsettias that are given too little light or kept too dry. Low humidity can also cause stress and encourage spider mites. The key is giving them plenty of light and average, consistent moisture. Also, be sure to provide fertile, well-drained soil such as OMRI Listed Black Gold® Natural & Organic Potting Soil.

Getting Poinsettias to Rebloom

Getting poinsettias to rebloom isn’t always easy because flowering is triggered by daylight changes; the short days and long nights of winter induce flower bud development. The best method is to provide plants with ample and consistent natural daylight during the warm growing months, which will encourage them to adopt their natural blooming cycle. You can even bring them outdoors in the summer. Just be sure to clean them well before bringing them back indoors to avoid any hitchhiking pests. (Click here to learn how to clean your house plants before bringing them back indoors.)

Professional greenhouse growers actually manipulate the plants to bloom for the holidays by shading them during part of the day to mimic short days. They start this process around the autumnal equinox to get them blooming by the holidays. Flower set depends on night length, so keep poinsettias in total dark from 5 pm to 8 am. If it’s done right, they should be in full flower six to eight weeks after treatment. You can do this at home by placing them in a totally dark place during these periods of the day by placing them in a dark closet or covering them with an opaque black cloth from 5 pm to 8 am until bud set occurs. Otherwise, homegrown poinsettias will naturally rebloom sometime in mid to late-winter.

I hope that this helps. Happy poinsettia growing!

Jessie Keith

Black Gold Horticulturist