Articles

How Do You Transplant an Old Rose?

“I have a 40-year-old rose bush that used to be a foot away from the foundation of my home that has gradually moved all the way up to the foundation and sends shoots up under the siding. I have tried to dig it out and pull it out but it refuses to give up and comes back every year. What can I do about it?” Question from Sylvia of Belle Plaine, Minnesota

Answer: Roses can be quite easy to transplant, with a little strength and elbow grease, and good tools. Spring is the best time to move them. Once yours is moved, I recommend planting it in a garden bed away from your home. Here are the tools and steps that I recommend for its transplant.

Tools: Sharp, flat spade, sharp pruners and/or loppers, burlap sheet and tarp, and wheelbarrow.

Steps:

  1. Prune back the shrub to approximately 12″ stems all around. (It will spring back quickly from its strong root system)
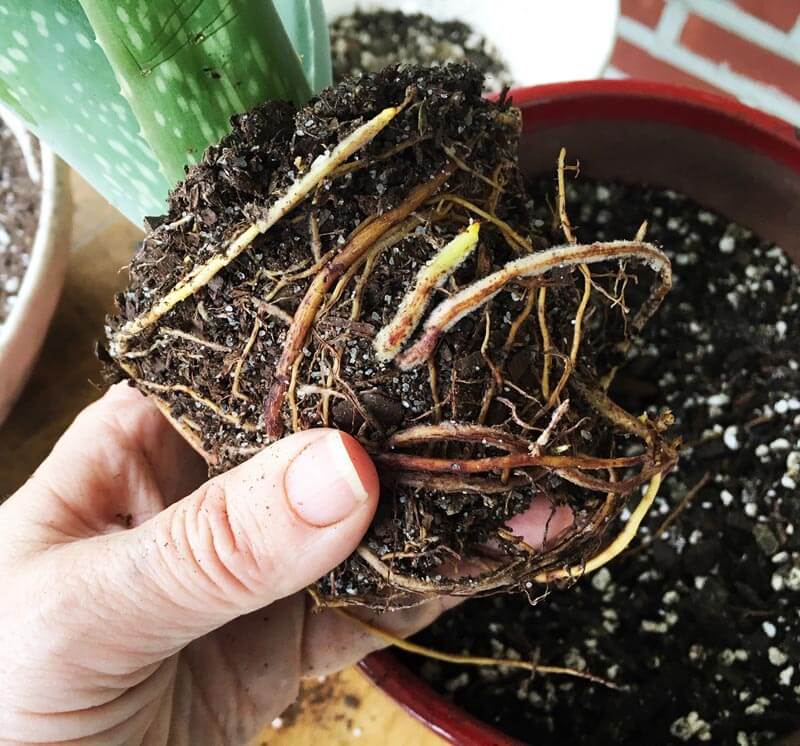
  2. Cut a rootball approximately 6-8 inches around the base of the plant. Make clean cuts all the way down with your sharp spade.
  3. Remove excess soil from one side of the excavated rootball, and place the soil on the tarp.
  4. Cut out around the rootball to a depth of around 12 inches, maybe more. Work hard to keep the soil ball and roots intact. This will help the plant better withstand transplant shock.
  5. Wrap the rootball with burlap and roll it into the wheelbarrow turned to its side. Right the barrow, and take it to its new garden spot.
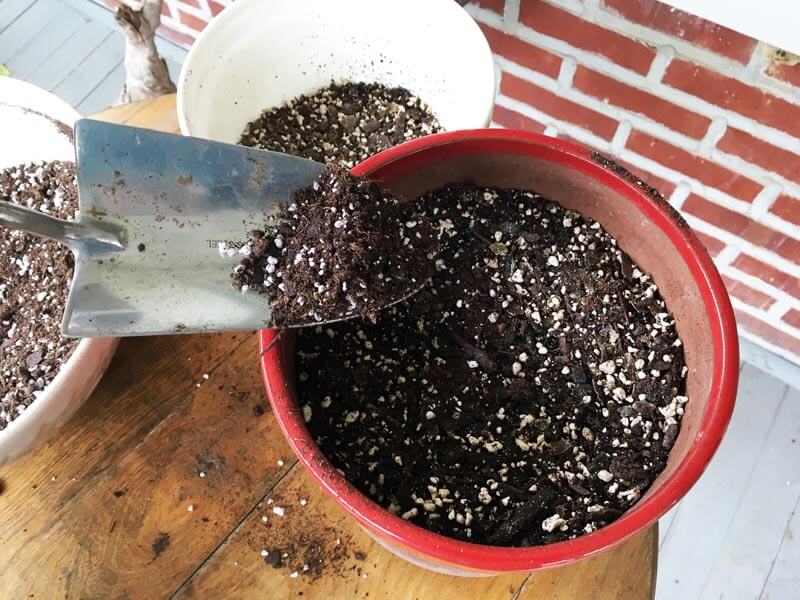
  6. Dig a hole big enough to accommodate your rose. Be sure the spot is sunny and the soil well-drained and fertile. (Click here for more details on planting and siting trees, and click here to learn about the best soil and light for roses.)

Black Gold Garden Soil is an excellent amendment for newly planted roses. We also recommend feeding your rose with alfalfa meal to keep it blooming at its best.

Of course, there is a chance that you may not want the rose. If this is the case, dig it out, and dispose of it. Just be sure to fill the spots with quality soil and backfill before planting a new shrub in its place.

I hope that these tips help.

Happy gardening,

Jessie Keith

Black Gold Horticulturist

When and How Should I Move My Peonies?

“When is the best time to move Peony plants?” Question from Carin of Fall Creek, Wisconsin

Answer: Because peonies are extraordinarily hardy, I prefer moving them in the fall, but you can also moving them after they bloom in the spring. But, there are six things that you should know before moving peonies.

Six Things to Know Before Moving Peonies

  1. Peonies have very large taproots, so you need to dig deep to capture them all.
  2. I recommend digging around the clump to maintain as much soil around the roots as possible. The less you disturb the clump, the better.
  3. Peony buds like to rest just an inch or two below the soil surface. If you cover them with too much soil, they may not bloom.
  4. Peonies should be fed with an all-purpose 10-10-10 granular fertilizer once a year. Surprisingly, overfertilizing peonies can reduce flowering.
  5. Use a long, sharp shade to dig them up and divide the clump, if needed.
  6. Small peony divisions may not have enough energy to bloom for a few years.

Peony Moving Steps

  1. Dig around the clump.
  2. Wrap the rootball with burlap to keep it intact.
  3. Place the peony in a wheelbarrow or Tubtrug to transport it to its new location.
  4. Dig a hole a bit larger than the rootball, place the backfill on a tarp or in a wheelbarrow, and mix the backfill with Black Gold Garden Compost Blend.
  5. Sprinkle some bulb fertilizer into the hole and backfill.
  6. Place the peony in the hole, and make sure the top of the plant is flush with the soil surface.
  7. Fill in the sides with backfill, and make sure that there are no air holes.
  8. Water in your peony until the soil is saturated.

I hope that these tips help!

Happy gardening,

Jessie Keith

Black Gold Horticulturist

How Do I Transplant a Japanese Maple Seedling?

How Do I Transplant a Japanese Maple Seedling?

“I recently bought a house in Long Island, NY, and found a 2-foot tall Japanese maple tree (I believe it is a Red Emperor Maple) growing under a much larger tree. The maple apparently sprouted naturally. I would like to transplant it to a more open space. When is the best time to transplant the tree?  See pictures of the tree and proposed a new planting spot. This open location will get much more sun, will that be a problem? Any advice on transplanting (size of root ball; conditioning soil) are welcome. From my reading it seems that it is best to transplant the tree before the first frost in autumn, the root ball should be the diameter of the drip line, and the new soil should be well-draining and mixed with lots of organic matter.” Question from Ron of New York, New York

Answer: The tree looks healthy, and the planting spot looks just fine, but seedling trees like this little Japanese maple (Acer palmatum, USDA Hardiness Zones 5-8) have one flaw relative to nursery stock. Their fine, spreading roots are not as dense as those of potted trees, so they do not transplant as well. There is one way to increase root density for better establishment, root pruning.  If you prune the roots in fall, the tree will be ready to plant before it leafs out in spring. Here’s how.

How to Root Prune a Tree Before Transplant

You will need a sharp flat spade (King of Spades is best), gloves, and probably some pruning shears to cut away the ivy. Trim the ivy away, clear the area to begin digging. Shoot for a root ball with a circumference of 8-10 inches around the tree. Using your sharp spade, make clean, slightly angeled cuts down to the full length of the spade. You may run into competing tree roots from the larger tree. Cut around them as best you can. Once you have made the cuts all around, leave the tree until spring. Where you made the cuts, new feeder roots will grow over the winter to help the tree become well established when you move it in spring, so you don’t need to cut along the drip line.

In spring, pull away the mulch, and dig a hole that is several inches beyond the height and width of your tree’s root ball. Break up some of the backfill to help plant the tree, and reserve the rest to fill in the hole you will create by digging up the tree.

Next, gently dig around your maple along the lines and cuts you made in fall. You will have to dig a bit beyond the cuts to get any roots that you missed towards the bottom. You should see new root growth along the cuts. Wrap the root ball in plastic or burlap to keep it together. If it breaks apart a little, your tree should still make it. From there, I recommend that you click on this link to follow Russell Stafford’s guidelines for planting a new tree.

As to the variety of your Asian-native Japanese maple, it is difficult to say. These maples seed in from planted landscape specimens, and the seedlings are not necessarily true to parent. With that said, it should still be a fine tree. They can reach a maximum height of 25 feet, so it will provide some shade in your front yard.

Happy tree planting!

Jessie Keith

Black Gold Horticulturist

How To Repot House Plants in Six Steps

Your once beautiful house plant has begun to look stressed. Maybe it’s lost some leaves, quit growing, needs more frequent watering, and has visible roots on the soil surface. Then you remember that it’s been three years since you repotted it…That means it’s time to upgrade its container home to improve better growth and overall appearance.

General House Plant Repotting Notes

All of these plants need to be repotted. To save money, I plan to pot the aloe in the red pot of the Ming fern asparagus. (Image by Jessie Keith)

Different plants have different potting needs–cacti need excellent drainage, most orchids grow best in bark, and hanging baskets like moisture-holding mixes–but there are also a lot of general requirements. Unless you are growing aquatic plants, all potted plants need pots and soils that drain well. Good light is required, so know a plant’s light needs before you try to grow it in your home to make sure that you can support its needs. Supplemental light is an option, but it is never as good as natural light. All potted plants require fertilization at different levels with different foods. When growth ramps up, all plants need more water, and when growth slows down, all plants need less water.

Pick the right-sized pot with drainage holes and a saucer to catch water. I like thick. heavy ceramic pots that last for years. (Image by Jessie Keith)

Finally, repotting is best done in spring, before house plants do most of their active growing, or in late summer to fall when they can grow a little before winter. I find that most house plants grow best if brought outdoors in summer. Just be sure to clean them up well before bringing them back inside before frost. (Click here to learn how to clean plants before bringing them indoors.)

Repotting House Plants in Six Steps

Good repotting technique is done in six easy steps. You just need a new pot, fresh potting soil, fertilizer, water, gloves, and pruning shears.

After cleaning the red pot, and preparing my potting soils, my aloe is ready to pot! (Image by Jessie Keith)
  1. Pick Your Pot: Select something beautiful that you will want in your home for the long haul. There is no reason to have plain plastic pots when you can have elegant ceramic ones Pick pots that are 2 to 6 inches bigger than the original. Small, slow-growing plants need pots that are just a bit bigger, and large, fast-growing plants need larger pots. Deep-rooted plants need deeper pots and shallow-rooted plants need shallow pots. All containers should have good drainage holes unless you are growing an aquatic plant. (Click here to learn how to plant potted water lilies.) Fast drainage encourages water flow and aeration, which roots need. Pick a sturdy saucer to catch water. Water-impermeable pots, like resin, grazed ceramic, or stone, hold water better. Pots made of TerraCotta and cement are porous and lose water more quickly. If you inherit a pot with no drainage holes, drill holes in the bottom with a pointed drill bit. (Be sure to wear gloves and safety goggles.)

  2. Pick Your Soil: Common house plants grow well in any good-quality, all-purpose potting mix, such as Black Gold All Purpose Potting Mix or Natural & Organic Potting Mix. Some plants, like African violets, cacti & succulents, or terrestrial orchids need specialty mixes with different levels of drainage and water-holding capacity.  That’s why we make Black Gold African Violet, Cactus and Succulent, and Orchid Mix. Hanging baskets need extra moisture, so we recommend mixes with high water retention, like Black Gold Natural & Organic Ultra Coir or Waterhold Cocoblend. All of our soils are natural & organic, and many are OMRI Listed for organic gardening.

    The roots of this Aloe were pot-bound but have been slightly loosened for better growth in the new pot. (Image by Jessie Keith)
  3. Prune Shoots and Unbind Roots: Remove any dead or unwanted stems and loosen any intertwined (pot-bound) roots, so they will grow well into the new pot and mix. Gently tease tightly-bound roots apart. If they are very dense, make cuts along the base and loosen the roots along the cuts. If your plants look good and their roots are not tightly bound, then bypass this step.

    The aloe is being planted in 1/2 Black Gold Cactus Mix and 1/2 Black Gold Natural & Organic Potting Mix. Provide enough soil to leave a 1-2 inch space at the top for watering. (Image by Jessie Keith)
  4. Repot: Remind yourself to leave at least 1-2 inches at the top for water. Place screen or a few pebbles over the bottom holes to hold soil (not necessary for my red pot with a built-in saucer and side drainage holes). Then add a layer of soil at the bottom. Place the plant in the pot and center it. Make sure it is not too high or low. Add mix to the sides and gently pack it in for good root-to-soil contact. Make sure there are no holes in the soil. Level the top, and add any decorative pebbles, moss, or shells along the soil, if you like.

    Lightly pack the soil along the sides. This is a good time to add slow-release fertilizer. (Image by Jessie Keith)
  5. Water: Use a watering can to gently water until all the soil is saturated and water fills the bottom saucer. In general, rewater when the soil is dry down to a knuckle’s depth. (Click here for a detailed article about how to water house plants.)
  6. Fertilize: Pick a fertilizer that’s well-matched to your plant. There are many specialty types for orchids, succulents, and foliage plants. Be sure to follow the product instructions. I like using slow-release fertilizer, such as Proven Winners Continuous Release Plant Food.
Topdress with shells of pebbles, if you like, water the plant in, and it is potted! (Image by Jessie Keith)

Newly potted house plants will not produce new top growth until they set new roots, so give them extra good care and a little time. Very soon they will be growing happily as if they had never had a problem in the first place.

How Do I Divide German Bearded Iris?

How Do I Divide German Bearded Iris?

“When dividing iris bulbs, how many should remain in the original site, which is around 2 x 2 feet? The iris’ are of the tall, bearded variety. They are a solid royal blue. I am uncertain of the exact variety, but they have to be an heirloom species as they were transplanted in 1950 from a family member’s garden that was started in the 1920s.” Question from Ann of Raleigh, North Carolina

Answer: How wonderful to have a garden German bearded iris (Iris x germanica hybrids) that is truly a family heirloom! We have peonies that were owned by my great great grandparents. Plants like these are irreplaceable and real treasures. Care must be taken when moving them.

A 2-by-2-foot iris clump can easily be divided into quarters, allowing you to leave a 1-foot clump behind and have three to share or move about your garden as you wish. Here are a few tips for dividing and transplanting German bearded iris properly.

How to Divide German Bearded Iris

German bearded iris rhizomes should be planted as they grow, with their bulbous rhizomes rising halfway from the soil. (Image by Jamain)
  1. Trim back any old flower stems or dead leaves. This makes the moving process easier.
  2. Dig beneath and gently lift the bulbous roots–removing 3/4 of the clump, in your case. Because German bearded iris roots are large, rhizomatous, and half-exposed along the soil surface, dig beneath them and break away the roots of clumps at natural breaks. Damage the roots below as little as possible. Remove any rhizomes that are sunken and damaged or dead.
  3. Fill in holes left behind with soil and compost. Fill in around your existing clump with soil and quality compost, such as Black Gold Garden Compost Blend.
  4. Pot or plant the iris divisions. Plant the rhizomes in a sunny location. Amend the garden soil with compost or peat moss, and make sure that it drains well. Plant iris rhizomes as they naturally grow–with the tops exposed to the air and light. Planting them too deeply can be deadly.

I hope that these tips help! Happy iris moving and planting.

Jessie Keith

Black Gold Horticulturist

Divide Perennials For Free Plants

echinacea-280x255 October is a fine time to dig and divide clumps of perennials that are so old they fail to bloom like they should. Lift the plant with a fork, wash it off to see the stem and root structure, then divide perennials at the natural points with a sharp knife. Soften the soil at the new planting locations with Black Gold Garden Compost Blend to make it easier for the divisions to strike new roots for bountiful displays come spring.

Rich in organics, Black Gold® Garden Compost Blend is a quality amendment that will fortify any garden. Not only will it build soil health and structure, but gardeners can be assured plants will be supplied with needed fertility for top performance.