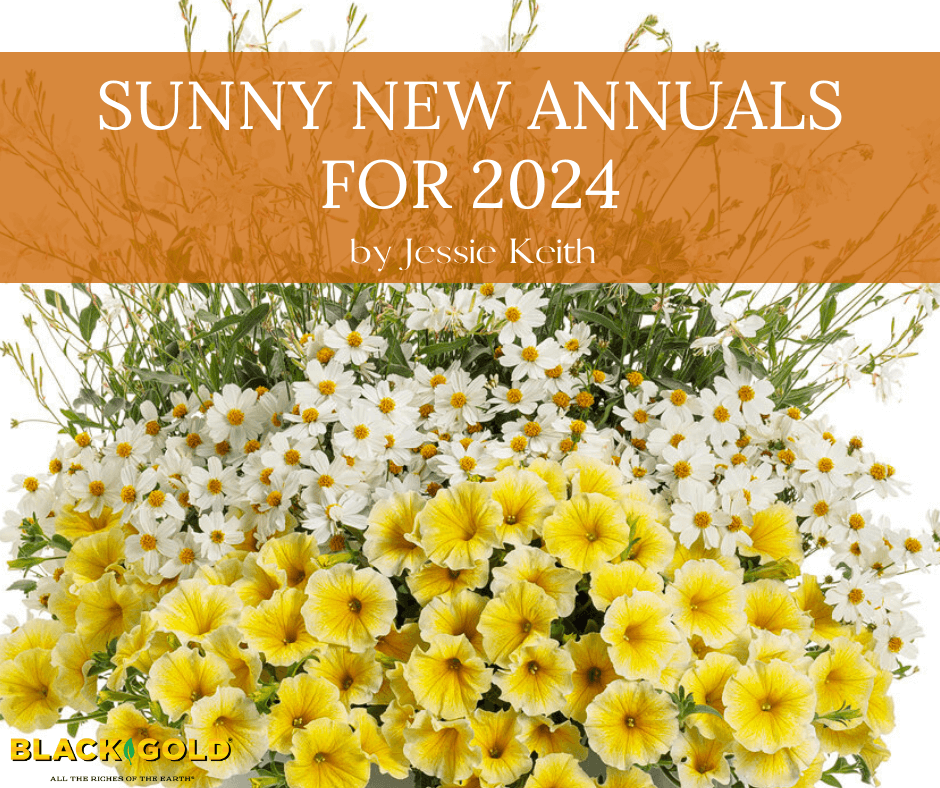
Many fine, new, sun-loving annuals will be available at garden centers or seed catalogs in 2024 (Article: Growing Homegrown Plants from Seed). My top picks have been selected for their bold color, good looks, and easy care. All are sure to bring bright season-long color to your summer garden.
Agastache
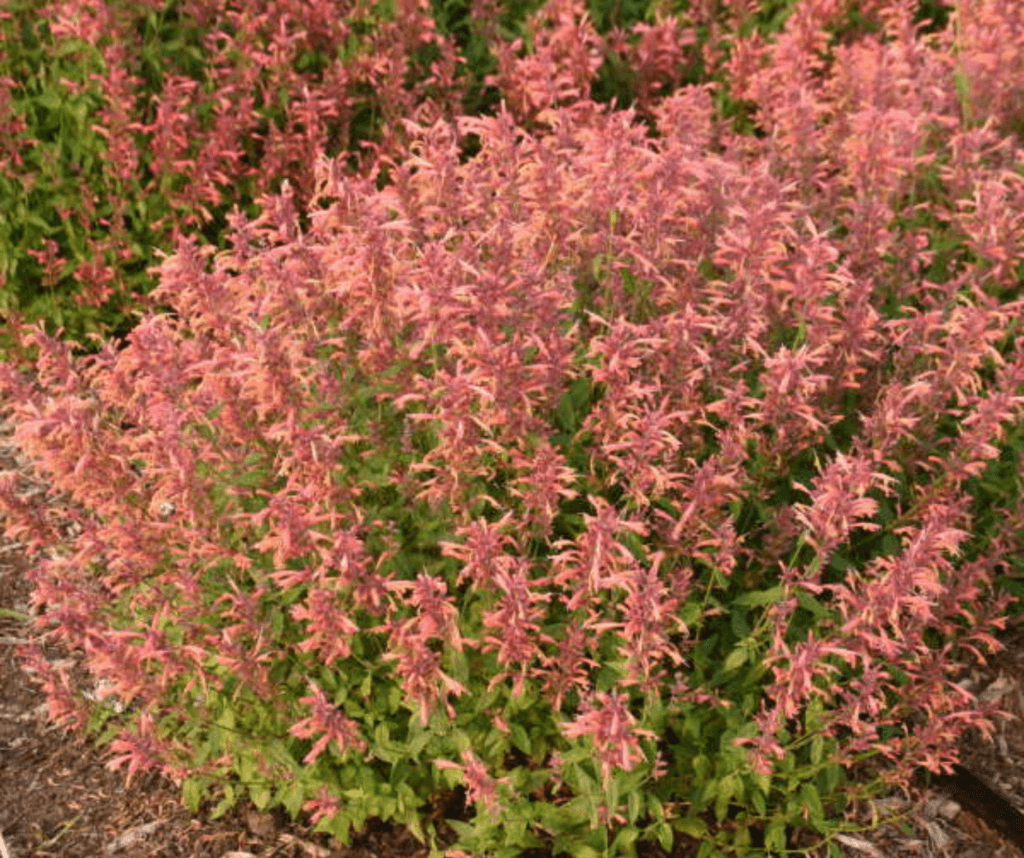
Agastaches are some of the best flowers for the sun because they bloom nonstop and tolerate heat and moderate drought. The guava-pink spikes of Agastache Guava Lava, newly introduced by Darwin Perennials and Walters Gardens, Inc., will provide continuous color to sunny summer gardens. In some areas of the country, the plant may survive as a short-lived perennial, but in cooler areas, the high-performer will bloom for only one season.
Calibrachoa and Petunias
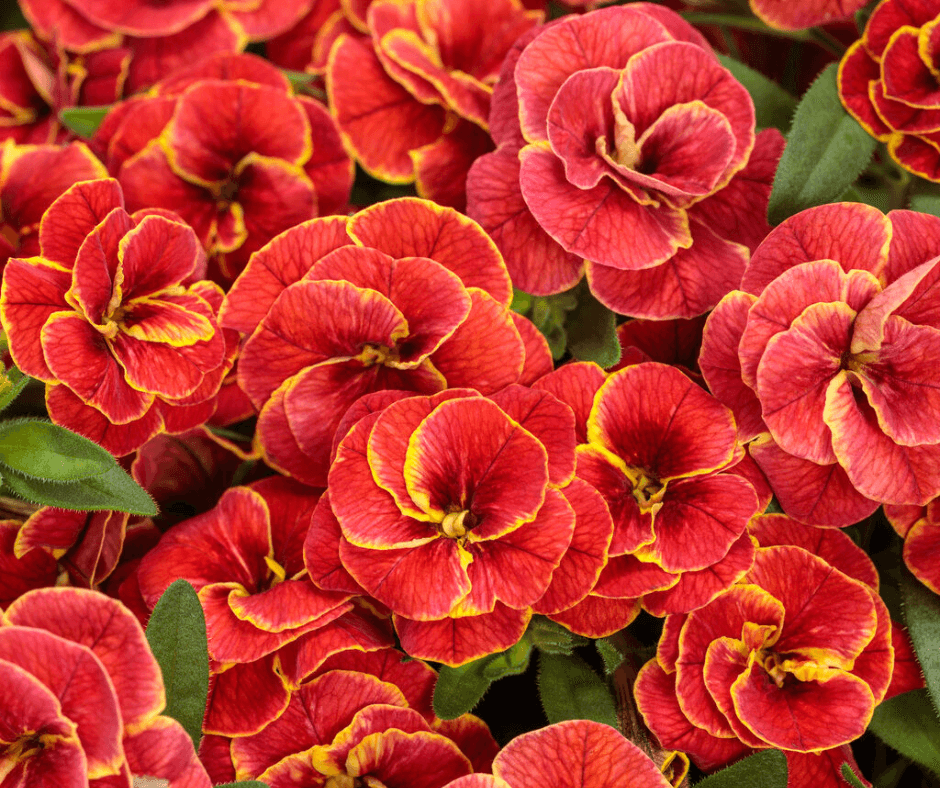
Proven Winners is offering some outstanding new petunias and calibrachoas sure to provide a cascade of summer color to containers and border edges. The intense yellow flowers of Supertunia® Saffron Finch™ bloom nonstop on compact, rounded plants and will fit almost anywhere in the garden. The petunia is a charming companion to the equally warm-colored Superbells® Double Redstone™ with its dark orange-red blooms edged in gold. The mounding calibrachoa appreciates slightly moist soil, while the petunia demands more water, so plant them in complementary side-by-side containers if you choose to pair them in pots.
For electric garden color, try the impressive Crazytunia Mayan Sunset. The hot pink and golden orange flowers are prolific and will sizzle in the summer garden. For a big burst of color, plant them along the edge of a large container on your porch or patio. (Article: Keep Petunias and Calibrachoa Shining All Season)
All of the above petunias are offered as plants. For those interested in growing gorgeous petunias from seed, try the frilly Superbissima Wine Red, offered by Park Seed at the cost of $5.95 for 10 seeds. The wine-red flowers have centers veined with dark purple, and the plants are praised as being robust and ever-blooming. To make planting easier, Park’s has pelleted the small seeds! (Article: Seed Starting on a Budget).
Coleus

Most coleus are shade annuals, but more and more varieties, such as ‘Coral Candy’ premium Sun Coleus, have been bred to grow beautifully in the full sun. The 2023 All-America Selections winner has mottled coral-orange leaves with hints of purple and green edges–beautiful! And, because the variety is seed-grown you get more for your money. Fifteen seeds cost $7.95.
Annual Blanket Flower
The pure yellow blooms of Gaillardia ‘Golden Beauty’ are fully round and produced profusely on long, airy stems ideal for cutting. Pollinators cannot get enough of the long-blooming, drought-tolerant annuals. Burpee Seeds offers these drought-tolerant beauties for just $5.95 for 50 seeds! Plant them in a cutting, pollinator, or showy flower garden.
Sunflowers
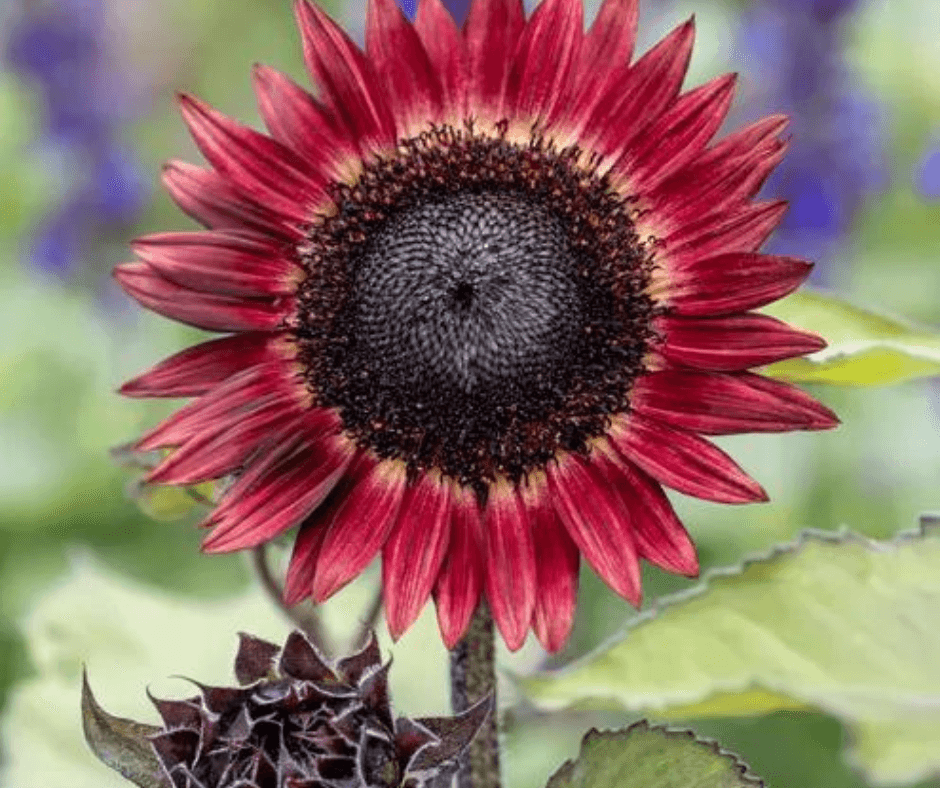
I adore sunflowers (Helianthus annuus), and several new varieties are available. Johnny’s Selected Seeds offers the 6-7′ foot tall ‘Desert Sun’ a luminous bloomer with 5-7” dark red, gold-edged flowers. The pollenless blooms don’t shed when cut and have long, strong stems. Not to be outdone, Burpee’s dwarf ‘Desire Red’ is a fully red, dark-centered sunflower, with plants reaching only 2-2.5 feet tall.
Sunflowers are a desirable choice for large flower borders, cutting gardens, and the margins of vegetable patches. They thrive in the full, hot sun, attract most pollinators (Article: Sunflowers for Bees), and are easy annuals to grow from seed. Blooming starts ~50-75 days after planting from seed, depending on the variety. After spring frosts, sow seeds outdoors in well-drained soil amended with Black Gold Garden Soil to a depth of 1-2″ or indoors on a sunny windowsill in pots of Black Gold Seedling Mix. Their blooms are long-lasting in a vase, and the seeds feed goldfinches, if you allow the heads to ripen in the warm summer sun.
Growing Sunny Annuals
All of these annuals need full sun and appreciate warm weather and average to fertile soil with good drainage. Amending the soil with Black Gold Garden Soil or Black Gold Garden Compost Blend will help facilitate deep root growth and vigor of most garden-grown annuals. Those planted in containers will thrive in bountiful pots filled with Black Gold All Purpose Planting Mix. Follow all planting and care instructions for the best results.