Articles

Repurpose Your Fountain for Vertical Gardening

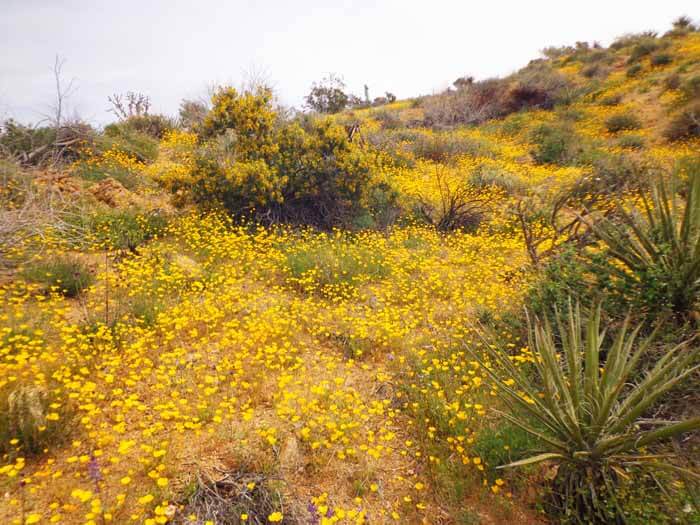
Are you tired of constantly filling your fountain all summer long? Is the submerged pump perpetually clogged with debris or algae? Maybe you’re finding that once loved water feature is becoming a real maintenance headache. If so, you’re not alone. Trend-conscious landscapers everywhere are busy repurposing beautiful, older fountains into monumental container gardens – and you can too.

Gator Fountain - Photo by Maureen Gilmore
Gator Fountain: A whimsically designed fountain drips with long strands of Senecio rowleyanus, to simulate water. (Photo by Maureen Gilmer)

Turning Fountains into Gardens

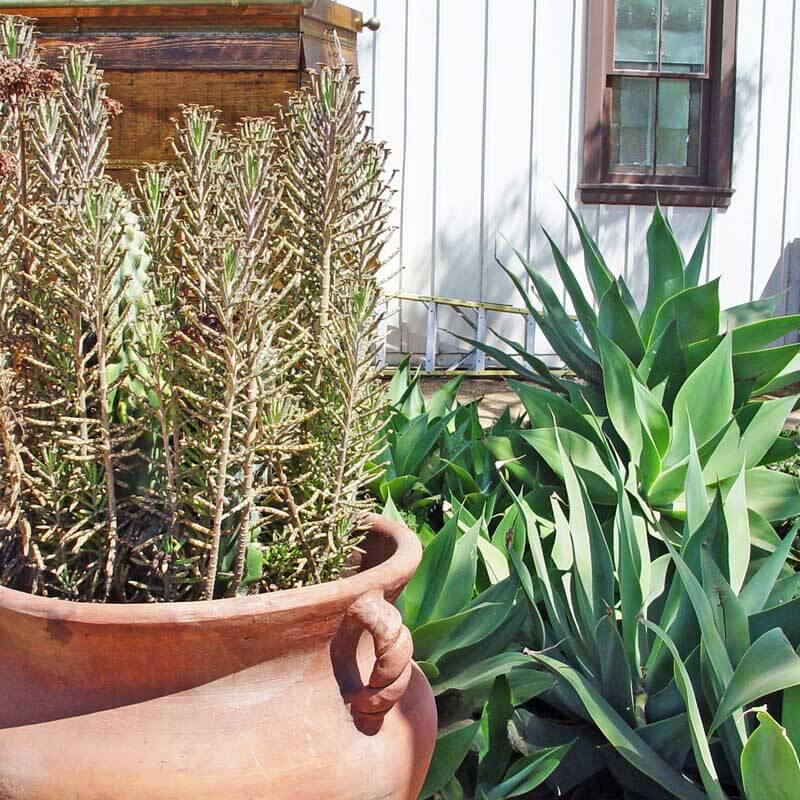
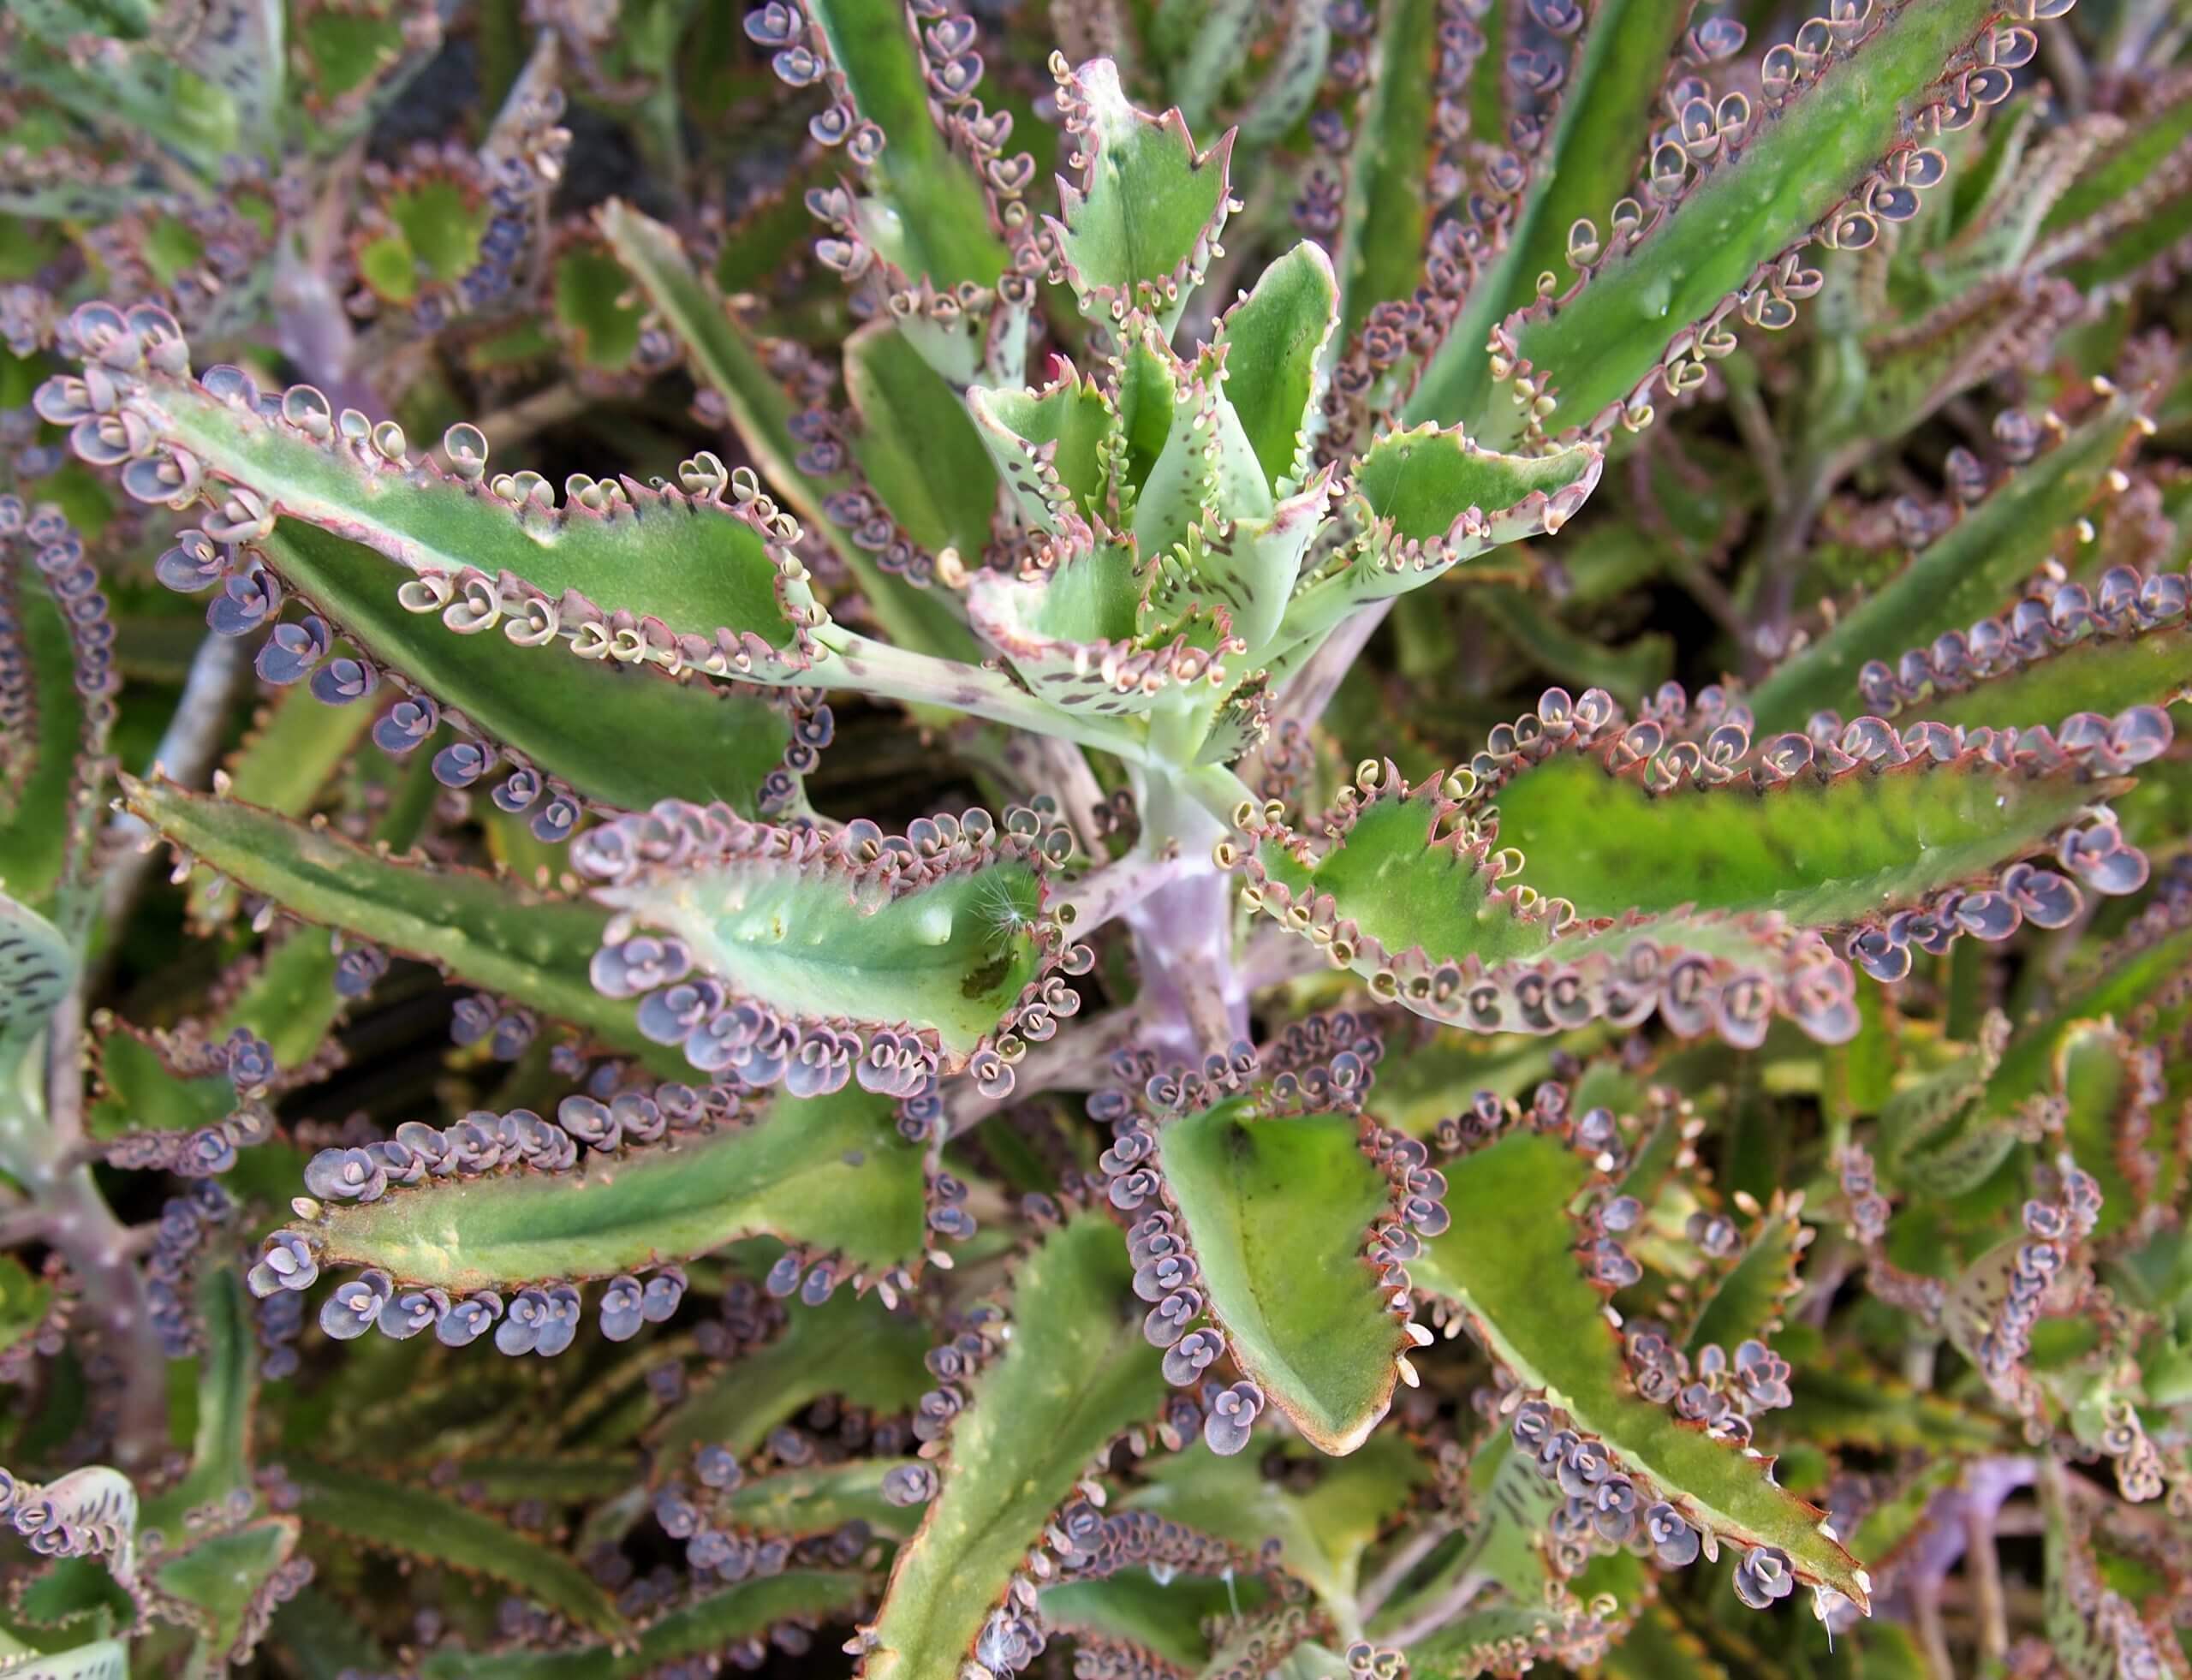
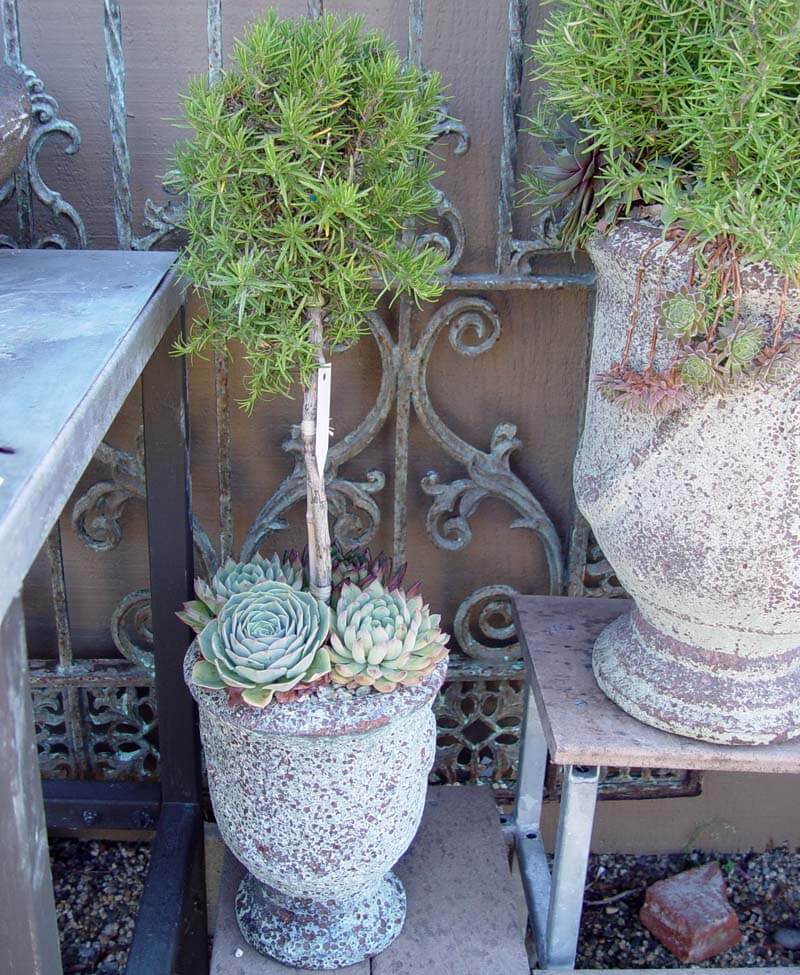
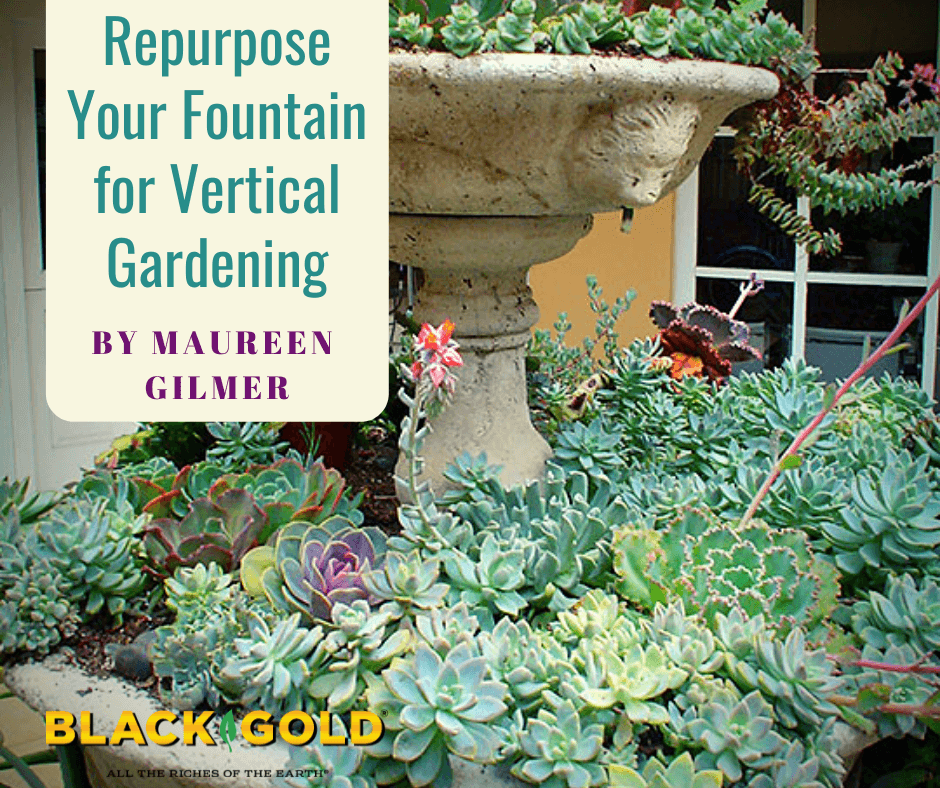
The best kind of design for this transformation is the tiered Spanish-style fountains. These feature basins that can be turned into planters by simply adding potting soil. But with such shallow root zone, the basin may not prove able to support all plants, just those with smallish root systems. The palette for these projects is often succulent plants and their close kin which require limited water and soil depth. But, if your fountain is deep enough, turn it into a cascading tower of annual color.

Preparing Fountain Planters

The key to success is removing all the drain plugs so the basins no longer hold water. This becomes your drain hole for each planter. Use a masonry bit and an electric drill to create more holes if necessary at the lowest point of the basin. Cut a square of window screen to lay over the drain holes so they don’t clog up with potting soil.

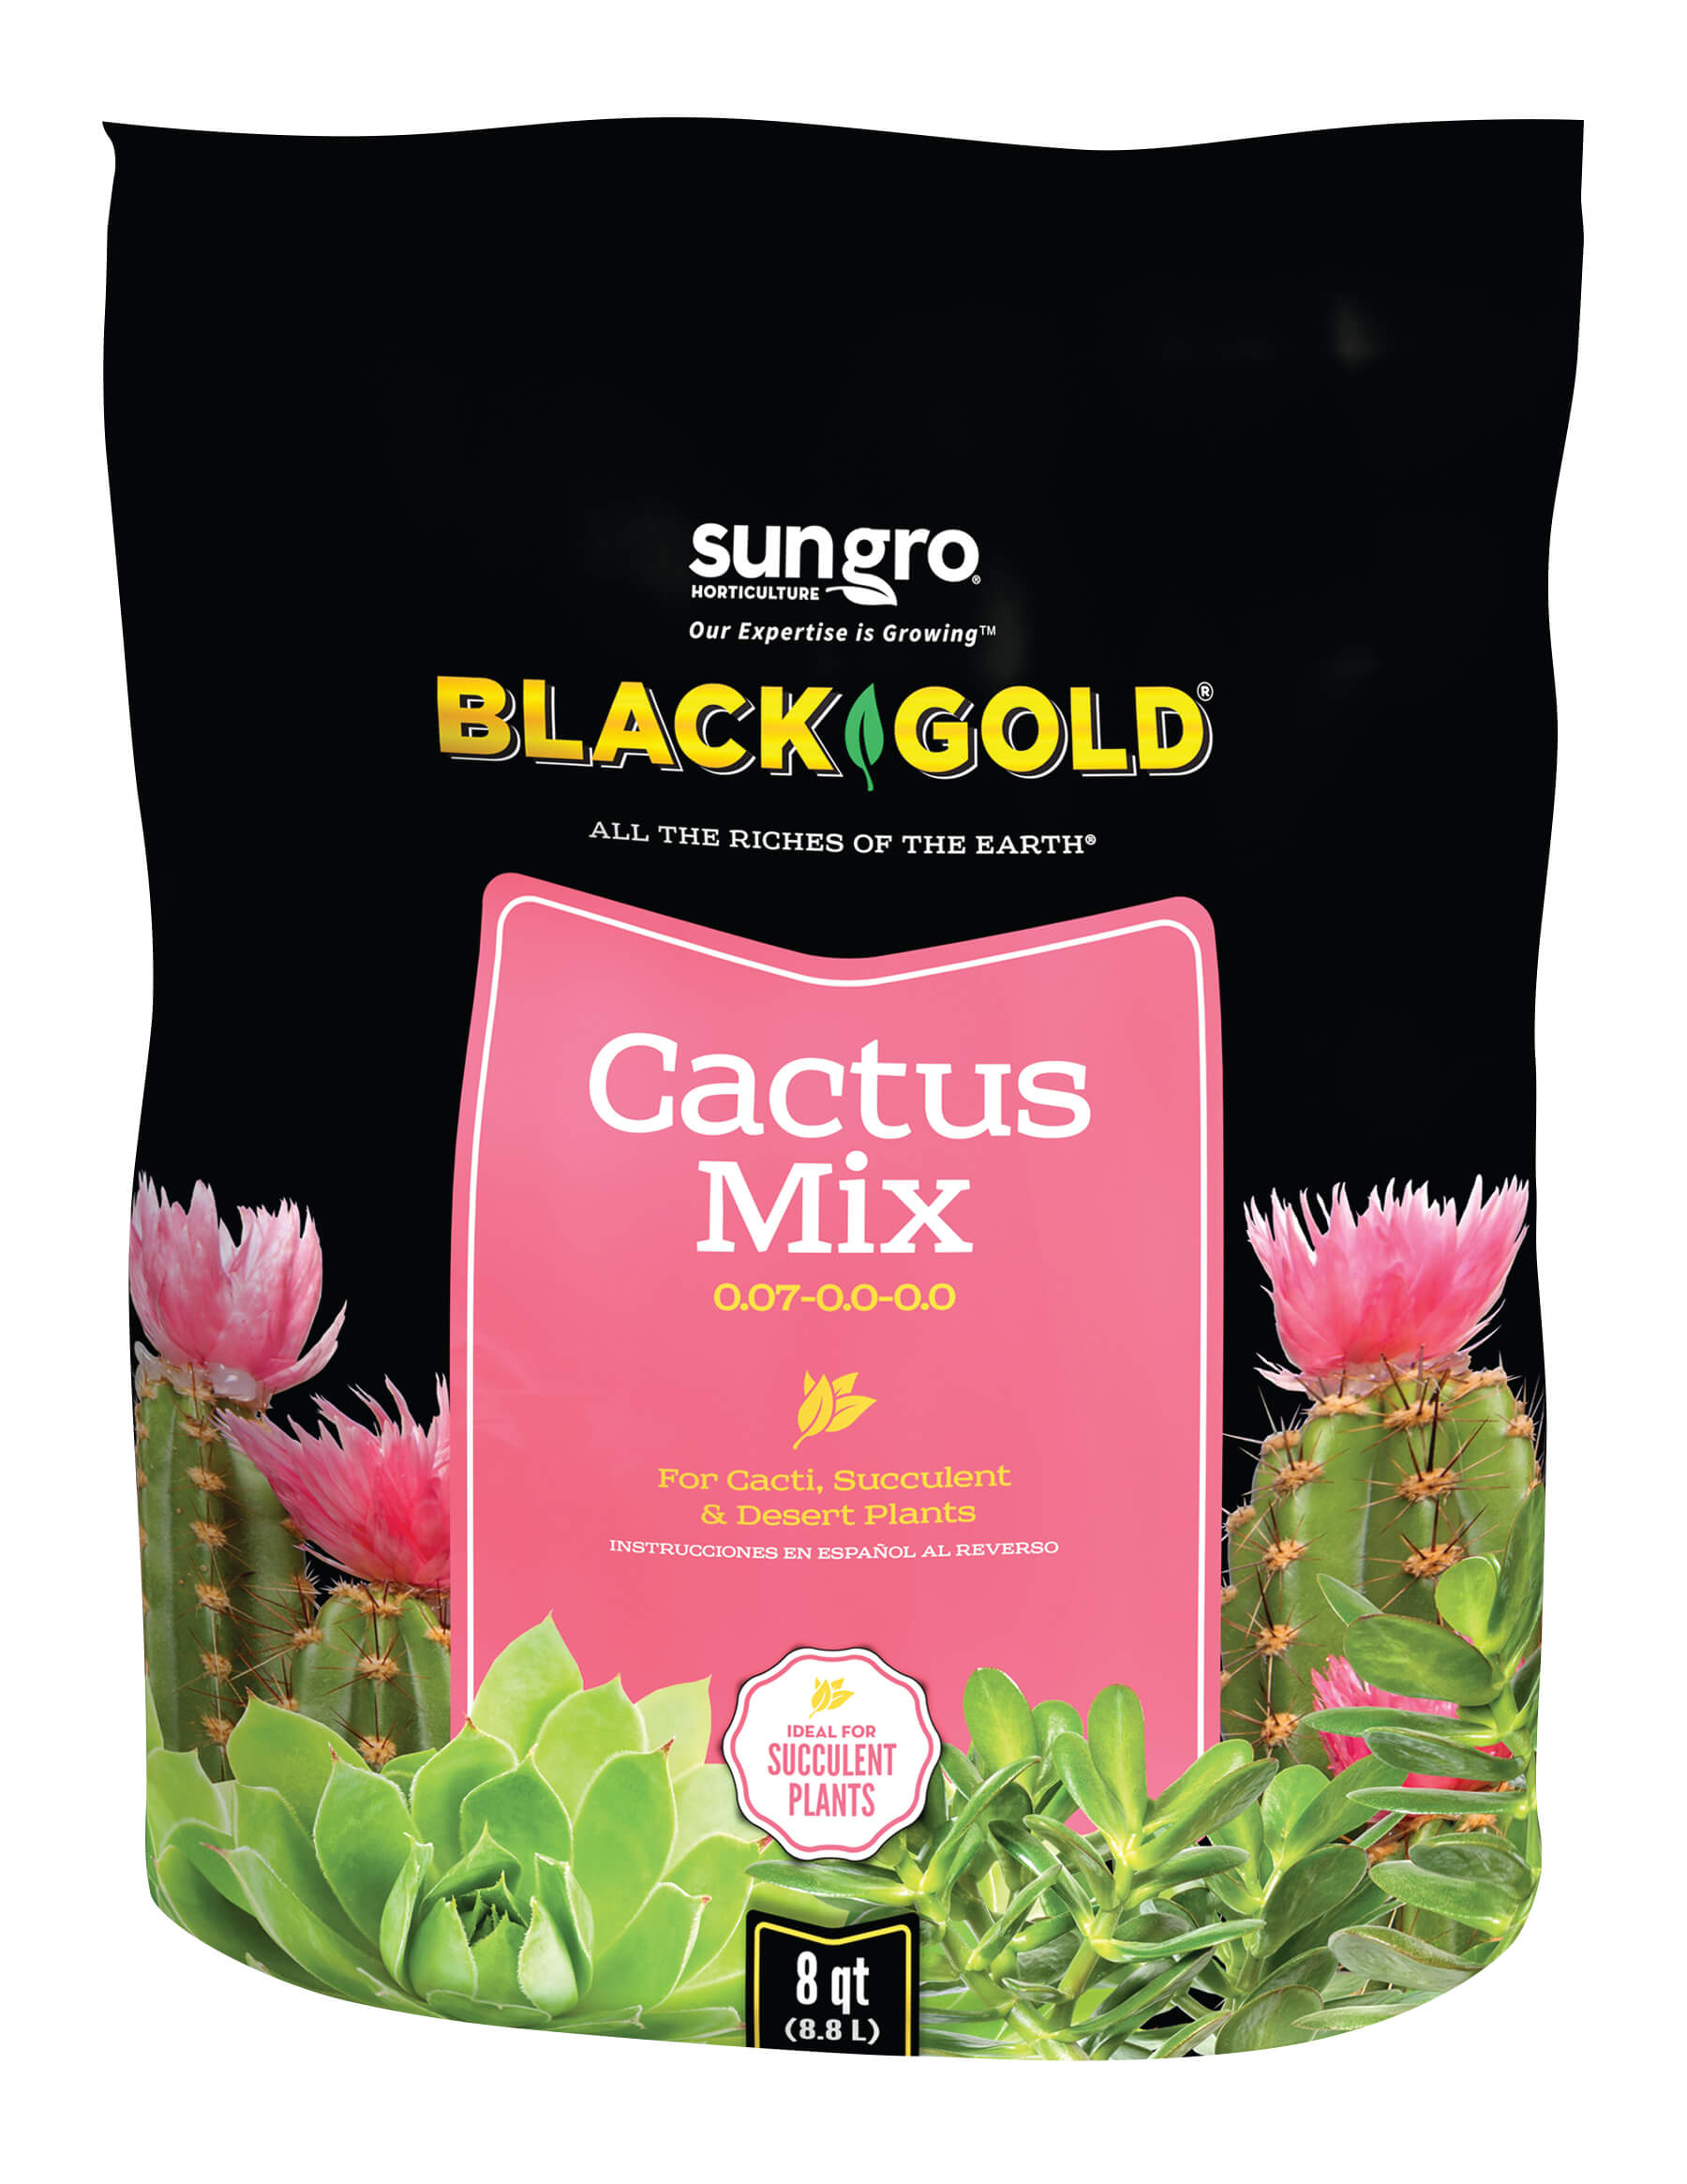
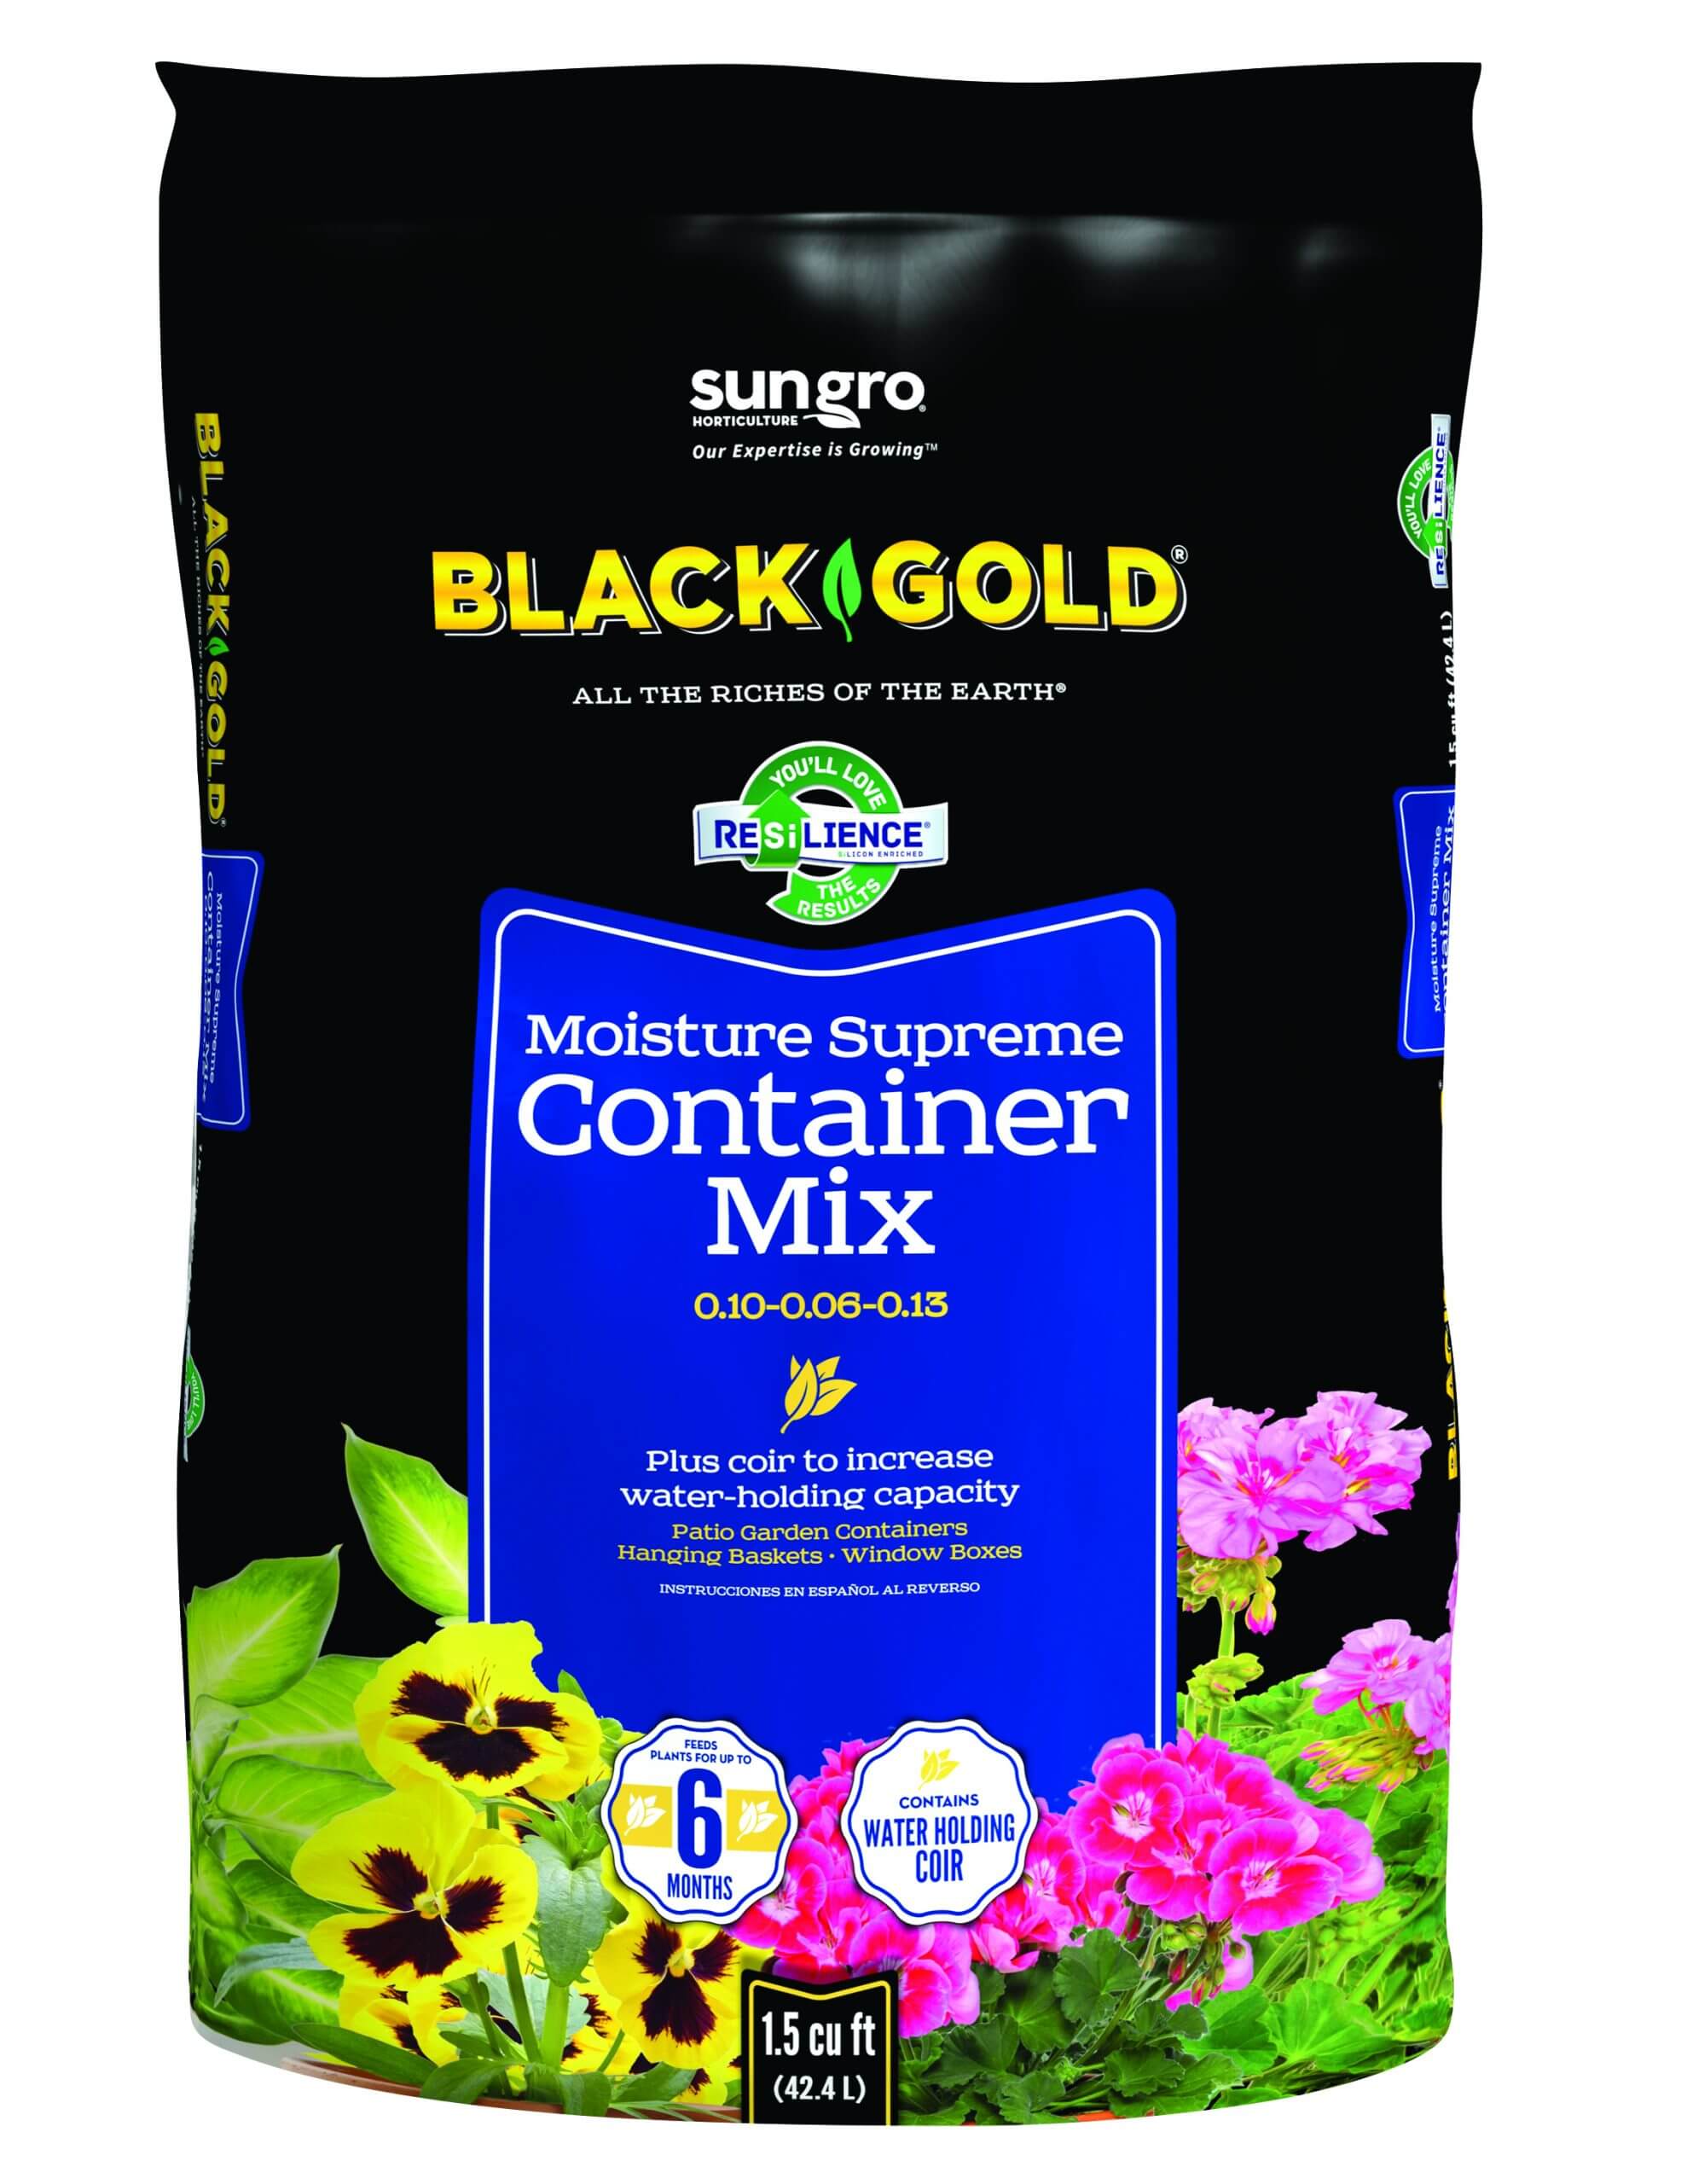
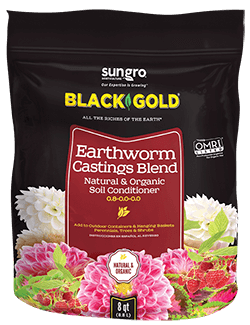
Next fill the basins with Black Gold® Natural & Organic Succulent & Cactus Potting Mix, formulated for rapid drainage and good aeration that make it downright hard to over-water. Be sure to set the soil level a few inches below the basin edge so you can flood it with water without immediately overflowing.

Planting Fountain Planters

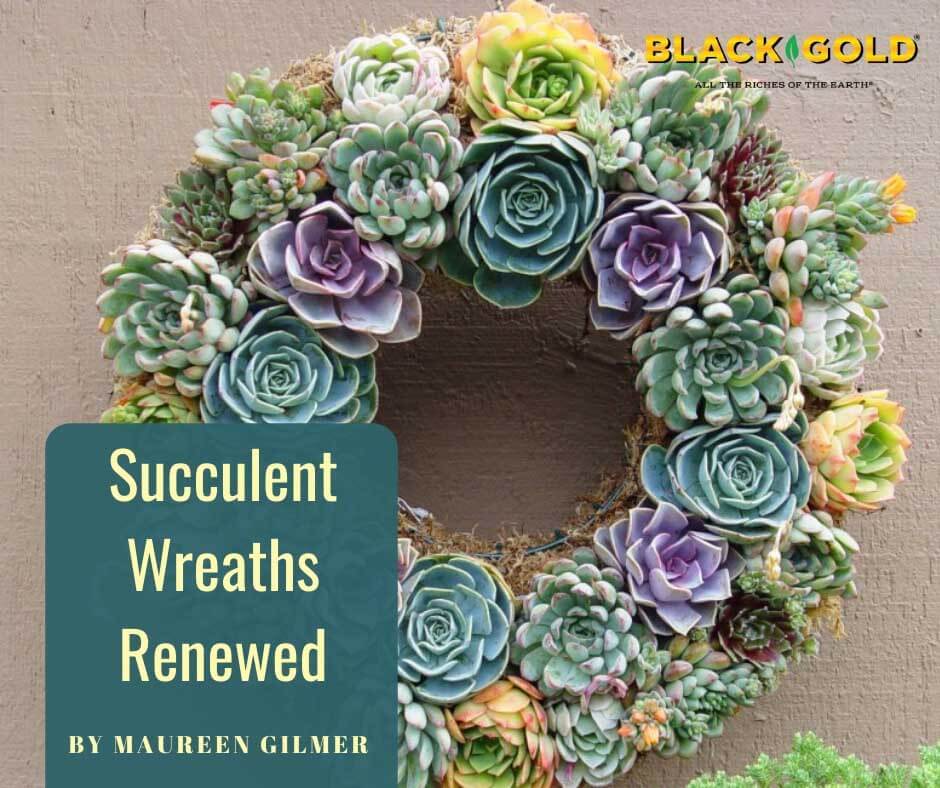
Now the fun begins. Since each tier will be smaller than the one beneath it, consider arranging your plants so that the cute little rosettes of echeverias are higher up at eye level. At the bottom use spreading plants that can be used to cover up unsightly chips, cracks, or foundational problems.

Succulent Fountain - Photo by Maureen Gilmer
Succulent Fountain: with deep tiers, this lovely fountain became an explosion of cascading, blooming succulents. (Photo by Maureen Gilmer)

In between, let your imagination run wild. Strive to use contrast, which makes each plant stand out equally. Use a variety of forms and colors against one another to enhance the visual interest.

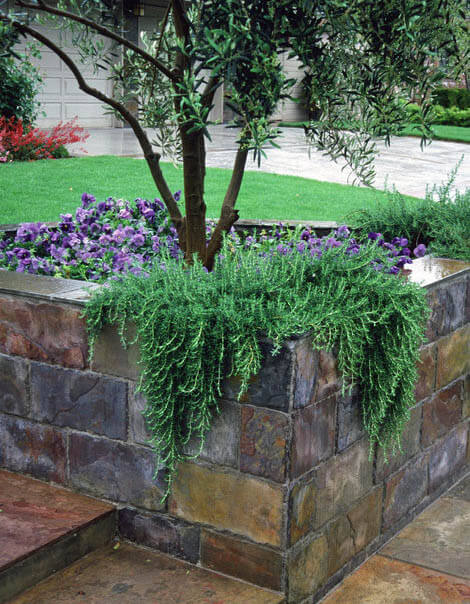
The crowing glory of these planters is the dangling plants that cascade off the edges of each basin just as water once did. Try donkey tail or the delicate string of pearls to get this look which ties the entire composition together. Miniature ivies are a more versatile alternative for the very same effect.

Maintaining Fountain Planters

This first year, while you’re waiting for younger plants to mature, stuff the nooks and crannies with interesting finds. Tidy little violas, tufts of living moss, and plants with colored leaves give your fountain great looks from day one. As temperatures heat up you can replace them with more succulents, exotics, or anything else that grows well in that exposure. In the fall, these can all be dug out and put into pots to overwinter indoors so you can enjoy them until it’s time to go out again in the spring.

Fountains are a beautiful thing, but sometimes their care is just too much for our lifestyle. Do not despair, for these concrete creations double a perfect cascading vertical gardening statement. It’s easy to do in just one weekend with lots of fun plants and Black Gold potting soils.

Cactus Fountain - Photo by Maureen Gilmore
Cactus Fountain: In the desert, more cacti are included in this densely packed planting. (Photo by Maureen Gilmer)


Out-of-Madagascar Succulent House Plants

Much like the unique plants and wildlife of Galapagos Islands that evolved in isolation, the “endemic” plants of Madagascar, an island off the east coast of Africa, are equally unique. (Endemic species are found in one place and nowhere else on Earth.) Madagascar succulent plants evolved to withstand the island’s extremely hot and often dry growing conditions and wide-ranging environments, from rain forests and dry forests to deserts. This is where some of our best succulents for easy outdoor (and indoor) cultivation originate. They overcame extremes of climate and epic drought to survive, yet they are beautiful and worthy of growing.

Madagascar succulents for growing come in dramatic sizes, shapes, and forms. Some are upright succulents with strong trunks that make good indoor trees and shrubs. These have long life spans and tend to have hard or woody stems. Larger sizes make them particularly valuable for “greening” indoor spaces where ceilings and light sources are high up. And, if it’s bright enough, some bloom. Here are three large, useful indoor or outdoor Madagascar endemics for planting.

Madagascar Palm

These large specimens of Pachypodium lamerei show its form. (Photo by Maureen Gilmer)

The Madagascar palm (Pachypodium lamerei, USDA Hardiness Zones 9-11) isn’t a palm but is often mistaken for one. It is a big succulent beloved by designers for outdoor living spaces as well as indoor drama. Its big, fat, spiny trunks are topped with clumps of leaves. Mature specimens can reach many feet in a relatively small pot (those planted in the ground can reach up to 20 feet.), and spiny trunks prevent animal damage. After several years, a mature plant may produce flowers similar to those of Hawaiian plumeria.  Put your big Madagascar palm pot onto a rolling pot platform to bring it indoors in winter and out for the summer to accent that special patio.

Mother of Thousands

Mother-of-thousands has beautiful clusters of coral-red flowers.

Mother-of-thousands (Kalanchoe daigremontiana and Kalanchoe tubiflora, Zones 9-11) is one of the easiest plants you can grow.  It’s so fast-growing and drops so many seedlings it’s a weed in succulent nurseries because of it’s “mother of thousands” reputation.  She makes babies along her leaf edges that eventually detach and root, offering you plenty of volunteers.  You’ll save every single one after you experience the plant’s enormous coral-red pompom blossom clusters. Due to shade tolerance in hot-zone gardens, mother of thousands can grow in any home or come out to the garden after the last spring frost. So long as your pot is very well-drained, and you plant it in porous Black Gold® Cactus Mix, there should be no chance of overwatering.

Pencil Tree

Firesticks are easy to find in one-gallon pots timed for sale as holiday color accents. (Image by Maureen Gilmer)

When the days grow short, the pencil tree (Euphorbia tirucalli, Zones 11-12) turns red-orange, leading to the popular name of the common, commercially-grown variety “firesticks” or ‘Sticks on Fire’.  Firesticks is sold by florists in winter for holiday color, so indulge, knowing that it will make a really good long-term house plant. This is a highly toxic species, so beware growing it if you have pets or kids. (Keep pencil tree up high and out of reach where the light is bright or refrain from growing it at all.)

Mature specimens will eventually reach a tree-like stature or become a big bush. (In the ground, they can reach 4-8 feet high.) Be careful when you prune off stems; the white sap is so toxic that it can cause temporary blindness if allowed to enter the eyes. In Africa, its sap was used as an arrow poison, so take these warnings seriously. Wear protective gloves and wash everything–tools and clothes–afterward pruning. (Click here to learn more about pencil tree toxicity.)

Planting Madagascar Succulents

Grow Kalanchoe tubiflora in lightweight pots for easy movement, unlike this heavy Mexican one. (Image by Maureen Gilmer)

These tender succulents hold water in their stems and leaves and have shallower roots so that you can plant them in smaller-than-anticipated pots. Choose low, broad containers to help keep top-heavy specimens stable. A pot just large enough for anchorage that’s not tippy will do. One that’s relatively lightweight and easily moved indoors and out with the seasons is also recommended. Modern lightweight pots, made of composition or fiberglass, are a more portable choice than heavy ceramic pots, which are almost impossible to move without breaking or damaging floors.

Invest in rolling pot platforms for each floor pot to make them easy to move. This will allow you to roll them out and hose both plants and pots down thoroughly at winter’s end to renew their appearance for summer.

Hosing also removes dust and lingering pests. For smaller potted specimens, the shower works the same way.

Succulents were considered novelty plants until western droughts became more common and severe. Then everyone went crazy over succulents in the garden. Now everyone is going crazy about house plants. So, when the two come together, consider one of these plants from Madagascar. They’re exotic, easy, impressive, and will endure the most epic drought and survive, no sweat.

Mother of thousands (Kalanchoe daigremontiana) has leaf edges covered with tiny plantlets that fall and root.


Rosemary Is For Winter and Gifting

Fill pretty, recycled jars with freshly-dried rosemary for holiday gifts for foodies (and pet lovers too, see below).

When I first came to the Southern California desert, I was shocked at how well traditional rosemary (Rosmarinus officinalis, USDA Hardiness Zones 8-10) shrubs survived through 120ᵒ F summer days. When provided good drainage and some water, these plants thrive in dry, mild-winter locations and reach mammoth proportions. If fragrant, culinary rosemary is able to thrive in low-desert heat and naturalize along the West Coast, it should grow well in practically every garden where it’s hardy. There isn’t a more useful plant for arid-zone landscaping, but rosemary also fares well as a potted plant where winters are cold.

Rosemary History and Uses

When in bloom, rosemary is showy and attracts bees. (Image by Maureen Gilmer)

Rosemary is native to the Mediterranean and parts of Asia. It has a long history of use and cultivation going back thousands of years. Grown wherever possible outdoors in mild areas, whether as an ornamental or herbal plant, it has also been traditionally cultivated in pots in colder winter regions and brought indoors to shelter. As a house plant, rosemary can be clipped with scissors to release its scent, just as the Romans did to perfume their courtyards naturally. Greeks believed wearing sprigs of rosemary in the hair while studying assisted with memory, hence the plant’s perpetual association with remembrance. And, during the plague years, rosemary was burned as a disinfectant much like white sage smudge sticks have been used in the Americas for purification.

The sheer range of uses for rosemary should make everyone want to grow this easy and willing plant. It is above all a culinary herb, and foodies often use the straight twigs for savory beef or lamb kebab sticks or sprigs to naturally flavor roasts. As the leaves are heated, they release their plant oils. Rosemary may also be used to flavor olive oil, teas, and is an essential ingredient in many classic herbal mixes, such as Herbe’s de Provence, a provincial herbal mix from southern France. (Click here for a Herbe’s de Provence recipe and to learn more about classic French herbs.)

Rosemary has also been traditionally valued as a hair tonic. The Romans, being largely dark-haired, used it to create a hair rinse brewed with water and then cooled. It was poured on dark hair to cut residual soap accumulation and left hair shiny and beautiful. Blondes used the same technique with Roman chamomile (Anthemis nobilis).

Rosemary Types

Creeping rosemary loves to dangle off the edges of raised beds. (Image by Maureen Gilmer)

Rosemary averages 4 feet at maturity but can reach 6 feet tall in its natural, rocky, sunny habitat in the Mediterranean. Its narrow leaves become more silvery and needle-like in dry weather and greener and broader when rain is plentiful. Pale violet-blue flowers that attract bees may appear from midwinter to spring.

There are two basic forms. The standard or “official” form from the old herbals is Rosmarinus officinalis. Hardy to 10 or 20° F, it’s a long-lived evergreen shrub for mild-winter regions and often used for landscaping. The shorter variety, Rosmarinus officinalis ‘Prostratus’, develops a low mat of graceful, cascading foliage. Growing to about 1 foot tall, with almost an infinite spread, there is no better cascading plant for pot, slope, cliff, or wall. Its dark tresses are incredibly tough and prefer more shade than the upright type. It works well as a house plant due to having a shorter stature. There are named varieties of rosemary of varying sizes and flower colors, some are even hardier (the variety ‘Arp’ is touted as being hardy to Zone 6), so there’s one for all different sunny gardens.  Everyone else can treat it as a house plant that comes outdoors for the summer.

Growing Rosemary

Rosemary makes fine topiary standards, often sold at florists in the city or by special order. (Image by Maureen Gilmer)

Grow potted rosemary in a mixture of equal parts Black Gold Natural & Organic Potting Mix and Black Gold Cactus Mix to avoid overly damp conditions that cause root rot in arid-zone hill plants like these. Make sure there’s a big drainage hole or many small ones because rosemary must have fast drainage to avoid fungal infections that also plague lavenders, which like the same growing conditions.

There is no easier drought-resistant, long-lived herb, shrub, or useful plant to grow for home and garden that will make you feel like a pioneer woman. Rosemary is one plant that can teach you much about the cultivation of useful herbs. From a woman with a self-sufficient, pioneering attitude, a novice can learn hands-on how to harvest and prepare herbal material to use in the household and to make really fragrant gifts for family and friends.

Eight Simple DIY Rosemary Crafts

Decorate a freshly wrapped gift with aromatic rosemary sprigs tucked into the ribbon.
  1. Put freshly dried rosemary into tied cheesecloth bundles to season soups and stews.
  2. Place sachets filled with rosemary into drawers to scent linens and clothes. (Rosemary’s non-floral scent makes men’s clothing smell pleasantly herbal.)
  3. Fill pretty, recycled jars with freshly-dried leaves for holiday gifts for foodies (and pet lovers too, see idea 8).
  4. Stud pomanders with short rosemary sprigs and place them on a mantel or tree for scent and beauty.
  5. Create small wreaths or herbal swags with creeping rosemary sprigs for hanging indoors or out. (Once the leaves are dry, collect them for cooking.)
  6. Decorate a freshly wrapped gift with aromatic sprigs tucked into the ribbon.
  7. Infuse olive oil or fine vinegar with fresh-cut rosemary sprigs for a culinary gift.
  8. Grind dried rosemary leaves and scatter in pet beds to battle odors and discourage ticks and fleas.

If you live where rosemary does not thrive year-round, buy a rosemary topiary to grow indoors, or invest in a potted 1-gallon rosemary to decorate for the holidays. Both will provide super fresh culinary clippings. Enjoy the indoor plants through the new year, then move them outdoors when temperatures warm up. And, where it’s mild year-round, plant your garden with lots of rosemary, so you have plenty of “mother” plants to snip and clip for the rest of your life.

Rosemary averages 4 feet at maturity but can reach 6 feet tall in its natural, rocky, sunny habitat in the Mediterranean.

Succulent Wreaths Renewed

This beautiful designer wreath features only rosette-shaped succulents with great color.

Succulent wreaths began in California back in the 1960s when Sunset Magazine shared this now universally popular do-it-yourself idea. Until recently, finding a pre-made one for purchase was nearly impossible. But today succulent wreaths are sold everywhere in every manifestation, from small desktop sizes at $20 to large, spectacular specimens that command as much as $150 for a designer composition. And their value extends beyond the holidays; after winter passes a whole garden full of cool succulent plants can be harvested from just one wreath.

Each wreath is composed of many seedling succulent plants pressed into a soil and moss core. Those used for a table decoration will come with a clear plastic saucer to protect furniture from water damage. If the center hole is large enough in diameter, select a fat red or white candle to stand in the middle.

Buying a wreath pays off when you compare the price to that of buying each plant as an individual.
Buying a succulent wreath pays off when you compare the price of buying each plant individually.

Succulent Wreath Reconstruction

Wreaths are always densely planted with a wide variety of the most common succulents. Some are a real mixed bag, while the swankier types may be more limited to certain forms and colors. Both can be grown indoors all winter near a sunny window then taken outside after the last frost. By this time they may have become lanky or elongated due to less-than-ideal winter light. Once outside, some may send up flower spikes while others will produce “pups” that split off from the mother plant. Your former tidy wreath will likely become a chaotic mass of succulent growth, and that’s when it’s time to take cuttings or harvest the plants for your summer garden. Here’s how to get started:

Step 1

Begin by gathering a range of small, red, clay flower pots and a bag of Black Gold Cactus Mix. It is super well-drained, so there’s less chance of overwatering your potted specimens. Use wire cutters to remove the metal frame or nylon string that binds the wreath together, so all the plant roots are released gently and without damage.

Step 2

Fill a wide bucket or plastic box half full with potting mix, then add one or two cups of water. Use both hands to mix it like you’d toss a salad, over and over until the soil mass is uniformly damp but not wet. Add a little more water if it’s too dry. When properly moistened, you won’t be able to squeeze the water out, but it will still pack down nicely around the roots.

Step 3

Gently transplant each succulent into its pot, and press the soil around the roots. Do not water the succulent right away. Wait a few days and then water. Place them in a sheltered place such as a sunny window, sun porch or on a frost-free patio where they will get plenty of light during the day.
When the weather warms up you’ll have a whole collection of different succulents to play with outdoors. Those too elongated will eventually produce new compact growth more in keeping with the plant’s natural form. Group them together or grow each alone. Spot them into a rock garden or tuck them in with your flowers.

Succulent wreaths deconstruct into a broad collection of these smaller succulent forms and hues.
Succulent wreaths deconstruct into a broad collection of plants with distinct forms and hues.

Succulent wreaths are a green choice that give a lot more for your money than holiday evergreens and poinsettias. Study your wreath all winter long to gradually learn how each succulent species within it differs in form and size. Look them up to learn their names. Then when that original holiday investment is deconstructed, you’ll be well on your way to gardening with succulents without spending another cent for summer plants you want and already love.

Overcoming Problems With Ornamental Grasses

In-ground, grasses are perfect for planting in dry stream beds and among wildflowers. (Photo by Maureen Gilmer)

When landscape grasses take on full autumn color in the western states, they are always the focal point of the late season. It is the driest part of the year when their life cycle peaks after flowers pollinate, seeds form and are finally released into the wind to repopulate the land. These annual reproductive structures are why ornamental grasses own the fall garden when few other plants bloom. Even in the early winter, the standing flower stalks offer attractive interest through the snow.

It’s the less desirable grass habits that are less understood. These influence selection, placement, and other issues you won’t hear about elsewhere. Here are some tips to help you select and design grasses into your landscaping, so they don’t become problems later on.

Grass Litter

When this Pennisetum sheds flower parts and seeds, it goes right into the pool. (Photo by Maureen Gilmer)

After pollination, grasses shed their flower parts. When the seed is released, they shed their hulls. A lot of fine litter is dispersed over a long period. If the grasses are located upwind from a swimming pool or water feature, the litter is blown directly into the water. This can make it challenging to keep pumps and equipment clear and the water quality sparkling.

Therefore, know the direction of your prevailing winds and storm winds before you decide where to plant grasses. Limit planting areas downwind or away from the pool.  However, it’s common for wind direction to change with the seasons, so if you plant them poolside, planting them downwind is not foolproof. Cutting the seedheads back may be necessary.

Invasive Grasses

Native deer grass (Muhlenbergia rigens) is quite long-lived and fairly trouble-free.

The reason you hear so much bad press about fountain grass (Pennisetum species and varieties) is that they love our climate and sprout anywhere there is enough moisture to grow. There are many ornamental species with weedy tendencies. Some garden favorites are hardy perennials, like foxtail fountain grass (Pennisetum alopecuroides), but in milder western climates tender perennial forms, like purple fountain grass (Pennisetum setaceum ‘Rubrum‘), will survive several seasons, too. Perennial forms don’t die back and are long-lived. Pennisetum such as these are displacing less aggressive native species in low, moist areas.

The same applies to your yard. If the seeds fall near irrigation heads, they sprout into weeds. It may have been open ground, but now it’s become a longterm weed problem. Such introductions are hard to stop and take a few seasons of dedicated handwork to clean out.

Runner Grasses

Runner grasses, like Japanese bloodgrass (shown) and Bermuda grass, will invade and become intertwined with perennials and other ornamental grasses.

Runner grasses spread, unlike stayput bunch grasses. The common southern lawngrass, Bermuda grass (Cynodon dactylon), is the poster child for a host of aggressive runner grasses that spread fast and invade perennials and well-behaved bunchgrasses. Another ornamental grass to add to the equation is Japanese bloodgrass (Imperata cylindrica), with its red-tipped blades and fast-spreading runners that will quickly overtake moister beds. The problem is the worst when runner grasses overtake bunch grasses. They creep unseen beneath a garden grass, and then once well rooted, the runner grass becomes nearly inextricable. If the bunchgrass is large and broad, the two grasses will forever be bound together, foliage plaited into a nest, and there’s no separation once established. Prevention is everything. Beware adding these, or any aggressive runner grass, to your yard or garden.

Short-Lived Grasses

This fine-textured Mexican hair grass in full flower and nodding in the breeze. (Photo by Maureen Gilmer)

Grasses are ephemeral plants by nature, adapted to range fires in the wild, grazing, floods, and landslides. Those that evolved with a long life span prove that they have adapted to climate change, since well before the Pleistocene, and are still super adapted for the future. The most long-lived, resilient grasses to grow in arid gardens are native deer grass (Muhlenbergia rigens) and its kin (Muhlenbergia group). But, more short-lived species, such as the windswept Mexican hair grass (Nassella tenuissima) or purple fountain grass, die out in just a few years.

Clump Splitting

These newly planted blue fescues have not suffered crown split yet.

Early in the life span of blue fescue (Festuca glauca varieties), the mounds of icy blue needles are perfect hemispheres. Like many other grasses, fescues grow too tall and heavy then split down the middle, allowing light to reach the root crown at the center of the clump. The direct sun sears those formerly shaded crown stems, causing premature aging while the rest of the plant is perfect.  Replacement is often required if the plants are depended upon to create full geometric domes. This is a natural process for fescues, so they are best planted with other species that take up the slack visually if they decide to split.

Midwinter Decline

In warm-winter climates, grasses are cut back midwinter, in colder ones, late winter. (Photo by Maureen Gilmer)

As dramatic as sweeping monocultures of grasses are, they are best used with ever-beautiful support plants due to an unattractive period in midwinter, even if not fully dormant. The grasses are routinely cut back to just a few inches to simulate a cold event. This removes dead and dormant growth as well as detritus inside the clump to make way for the renewal of foliage. To avoid the barren ground, it’s wise to choose other evergreen plants to carry this composition until green grass shoots start up again in spring. Renewal is part of grass biology, so cutting back is regenerative and makes them healthier overall.

Ornamental grasses are an important cornerstone of today’s arid-zone gardens. Those species adapted to warmer climates without summer rain offer a change in texture as well as wind-blown beauty in containers on porch or patio. They require lots of nutrition, so be sure to use Black Gold Moisture Supreme Container Mix when planting for efficient water-holding potential and water conservation. The best grass for containers and garden at higher elevations or further north are Miscanthus varieties, which ask for a bit more water. (Choose low-seeding or sterile forms, such as giant miscanthus (Miscanthus x giganteus).)

While shrubs and succulents can be inanimate, the slightest breeze begins the gentle sway of a thousand soft grass blades. The animation of the nodding flower spikes liven up a dying landscape in the dry autumn winds.


Grey and Silver Garden Plants for Arid Gardens

Cascading licorice plant, feathery Artemisia, and large-leaved silver plectranthus show textural comparisons. (Image by Maureen Gilmer)

Raising a pubescent teen can feel like being pecked to death by a duck. But it’s a lot more pleasant when it comes to plants. Here pubescence is “a covering of soft down or hairs on certain plants and insects.” It serves as a protective adaptation of some plants originating in regions with a long, dry season and can add a grey or silver appearance to leaf surfaces.

What is Leaf Pubescence?


The Mediterranean silver sage is covered with an “arachnoid” pubescence, meaning the hairs are cobweb-like.

A leaf contains thousands of tiny pores, called stomata, through which a plant respires. These openings are vulnerable portals for moisture loss. Plants have developed various strategies for reducing water loss, and one of them is pubescence.

A pubescent leaf will feel soft or fuzzy to the touch. This texture is produced by microscopic hairs (trichomes) that can form a protective layer to help plants stand up to brutally dry conditions. The hairs can come in a variety of lengths and textures: Tomentose (dense, soft, white wool), hirsute (rough, stiff hairs), or villous (long, shaggy hairs) to name just a few.

If you’ve ever experienced the hot winds of the desert, you know how quickly it can draw moisture out of your skin. It does the same to plants. Moisture loss increases with wind speed and sun exposure. Pubescent hairs help deflect air from the leaf surface. Even a minor slowing of air can have a significant effect on reducing moisture loss through stomata. Dense pubescence also helps to shade the leaf surface. Each tiny hair casts a microscopic shadow to protect the leaf’s outer layer from direct solar exposure.

Grey and Silver Garden Plants

Cold-hardy, low, spreading lambs ear is ideal for planting around flagstones. (Image by Maureen Gilmer)

Not all pubescent plants are drought tolerant, so it’s important to know the more moisture-tolerant types, such as silver spurflower (Plectranthus argentatus, USDA Hardiness Zones 10-11) and licorice plant (Helichrysum ‘Silver Mist’, Zones 7-11), which thrive in any climate, provided it’s not too drenched in the summer rain.  These are plants from areas with high-intensity sunlight where temperatures remain moderate, such as the South African coastline.

Here are some reliable perennial choices for drier climates and how to use them.

White sagebrush (Artemisia ludoviciana, Zones 4-9) is a fast-spreading perennial with 1-3 foot stems of fragrant, silver leaves that are suited to herb gardens or spacious sunny borders. It is native across North America and Mexico and is more heat and drought-resistant than some silvery garden artemisias originating from Europe, such as the fine-leaved, bushy Powis Castle silver sage (Artemisia ‘Powis Castle’, Zones 6-9), which will grow in practically any garden with full sun and good soil drainage.

The Mexican and North American white sagebrush is a reliable silver native perennial that spreads.

Tender felt bush (Kalanchoe beharensis, Zones 11-12) is a pubescent succulent ‎from Madagascar with foot-long leaves cloaked in fuzzy gray. In California, plant it in the sun on the coast and shaded inland locations. The tropical succulent makes an excellent summer patio specimen and house plant, too. For best-potted performance plant it in Black Gold Cactus Mix.

The popular lamb’s ear (Stachys byzantina, Zones 4-8) originates in the arid Mediterranean and is a low, spreading groundcover ideal for planting along the edges of paths and between rocks and flagstones in most well-drained gardens. A visually comparable, non-spreading mint with wooly white leaves is silver sage (Salvia argentea, Zones 5-8), which is at home in any rock garden or sunny, well-drained bed.

Felt bush was particularly popular in mid-twentieth century modern homes in Los Angeles. (Image by Maureen Gilmer)

Another from the Mediterranean is lavender cotton (Santolina chamaecyparissus, Zones 6-9). It forms a rounded, silver ball of highly aromatic foliage that makes a beautiful spot of silver that develops buttons of yellow flowers in summer. Use it in knot gardens due to its tolerance to shearing.

One of the brightest of the silver-grey set is shining white senecio (Senecio candicans ‘Angel Wings’, Zones 8-11) with its glowing, lightly felty leaves. Plant it in containers or sunny borders.

Designing with Grey and Silver Garden Plants

Pubescent foliage plants look elegant with deep burgundy accents, such as succulent, purple aeonium. (Image by Maureen Gilmer)

Pubescent plants are valuable tools in garden design. First off, they can truly glow under moonlight because the hairs become iridescent. They pop on a cloudy day with reds and other muted colors. Due to interest being in the foliage, they do not visually come and go but retain their fuzzy beauty all season long or nearly year-round in mild climates.

It’s great fun to experiment with contrasts. Play a glossy leaf off a pubescent one in your potting scheme. Play fine-textured needles against large fuzzy leaves. Textural differences make both plants stand out better.

Shining white senecio has some of the most luminescent foliage of all.

The neutrality of gray or silver shades means you can use them with more vivid colors for really striking compositions. Deep burgundy foliage, such as that of purple aeonium (Aeonium arboreum ‘Zwartkopf’, Zones 9-11), bronze New Zealand flax (Phormium tenax, Zones 8-11), or purple fountain grass (Pennisetum setaceum Rubrum’, Zones 9-10) looks outstanding against grey and silver leaves. Burgundy plants create vitality in otherwise subtle, cool-colored gardens in dry climates and have a light value that does not compete with gentle-colored flowers in blues, lavenders, pale pinks, and whites.

With so many silvers and greys out there to choose from, it’s possible to create the coolest perennial gardens within the arid landscape. If you’ve longed for a really elegant tool for eye-catching plantings in your droughty garden, then turn to pubescence to reflect the light. And, if you’re lucky, that other pubescent individual in your life may take notice and put down the Smartphone for a nanosecond to admire the garden fuzz.

Aromatic santolina is known as lavender cotton due to its pubescence. (Image by Maureen Gilmer)

The Dos and Don’ts of Hand Watering

Don’t get water on plant leaves in hot, direct sunlight. The droplets can act as magnifying glasses and damage leaf tissues.

Successful gardening always comes back to the basics: soil, sun, oxygen, plants, and, most of all, water.  Hand watering is the key to everything in the garden world out West.  Get it right and your garden goes crazy.  Blow it and plants languish.  Water facilitates the uptake of fertilizer and nutrients through roots, thus connecting plant to soil.  Water hydrates cells and tissues, which makes them turgid and taught. This directly provides a plant structure and support, otherwise, it wilts. Therefore, if you can water properly, everything else takes care of itself.

Six Hand-Watering Tips

Proper hand watering requires “flooding”. This means watering deeply at the root zone rather than just sprinkling the soil surface.

Here are six tips to follow this summer to keep your vegetables, herbs, and flowers happy and healthy with sufficient water, whether they are in gardens or containers.

  1. Do know your soil. Water percolates down through sandy soils instantly leaving little moisture in the root zone. Apply water very slowly and do it often to keep the soil at the root zone evenly moist.  Dense clay can refuse to absorb water, or do it slowly, so it’s hard to re-wet deep down once it’s dry. On the other hand, if too saturated, clay can take a long time to dry out.  You must analyze your soil and find the optimal application rate for efficient results and stick to it.
  2. Do add organic matter: Organic matter improves the provision of water in all soil types, whether sandy or clayey because it holds water well and better facilitates the percolation of water by providing needed aeration. This helps plant roots take up water better. The addition of Black Gold Garden Soil or Black Gold Garden Compost Blend will help better supply water to plants.
  3. Don’t just wet the surface soil. Lots of gardeners hand-water with a finger over the hose end to make it spray further with a sprinkling of water or they use the spray feature on their nozzle and water from a distance. If you do this, you’re not watering; you’re just wetting the soil surface.  Virtually no moisture reaches plant roots below the surface when watering this way.  Proper hand watering requires “flooding”. This means watering deeply in the garden to get water down to the feeder roots deep in the ground.  If watering large pots, be sure to fully wet the potting soil, so no dry pockets remain, and irrigate until water flows from the bottom of the pot.
  4. Do water deeply. Well-watered plants root much deeper and wider because their entire root zone has been regularly saturated. To promote a deep root system, concentrate water directly over the root zone.  In heavy soils, water very slowly and create a soil basin around the plant. If you fashion a soil basin around the plant it will hold lots of water that will gradually percolate down at its own speed.
  5. Don’t spray the leaves in sun. Water on plant leaves in direct sun can lead to rapid burning of the tissues, like using a magnifying glass in the sun to ignite newspaper. If you want to wash dirt, dust, or spots off of leaves wait to do it before sunrise or after sunset in the evening.  Washing the leaves of all your plants every month or two over summer helps keep leaves clean to improve light absorption.
  6. Don’t dig a hole. If your hose water pressure is too high, it can cause a common problem that I call “hose erosion”. When a strong stream hits the soil, the ground literally turns to liquid and creates a hole, which removes vital soil coverage surrounding plant roots.  When exposed to air roots quickly dehydrate and die, reducing the rate of water uptake. Always diffuse the water application with a wand or spray gun with a “shower” setting and hold it close enough to the roots to ensure deep flooding but not erosion.  When in doubt, turn down the pressure so you don’t accidentally expose surface roots or remove protective soil cover shading them from direct sun and summer heat.
  7. Don’t water arbitrarily. Wilted leaves will occur when a plant can’t get enough water to keep leaf cells fully hydrated. This most commonly happens when soil is too dry. But this problem also shows up when plants that need moderate water and good drainage are waterlogged. This makes soils hydric and anaerobic, so roots can’t get the oxygen they need. This is a common problem with house plants. In both of these watering scenarios, the surface may look and feel deceptively dry. Naturally, a gardener will want to add water, but don’t do it until you feel down in the soil and find out whether the soil is dry down under. Most potted plants prefer the soil to be lightly moist, never waterlogged. A well-draining pot will also help alleviate this problem.

Each of these rules of watering is related to the keen observation of what’s happening above and below ground.  Ask any pro, and they’ll agree that successful western gardens are all about water, and once you learn how to properly apply it successful gardening is assured.

If watering pots irrigate until water flows from the bottom of the pot.

Desert Gold Poppy: Create a Superbloom in Your Backyard

Desert poppies stay low on windy hilltops.

In the wave of Superbloom in California, a rare wildflower is making a massive appearance.  Desert gold poppy (Eschscholzia glyptosperma) is a smaller cousin of the famous California poppy (Eschscholzia californica) because it grows only in the desert. Virtually every aspect of the plant is dwarfed, a natural mechanism for greater efficiency in a very harsh, dry climate.

This year the gold poppies made their appearance upon the burned over hills of the desert, in golden swaths of color.  They clustered on the steepest hillsides, the most rugged ridge tops.  Here they are never disturbed, so seed quantity can accumulate and lay wait for years before enough rain falls to create a visible patch.  To see them close you must get up and out, perhaps do some hiking, but this year photos show their character and suitability for sowing onto very dry properties of the desert Southwest and Great Basin.

Siting Desert Gold Poppy

These poppies are in a sheltered location at the bottom of a slope.

Desert gold poppy prefers alluvial fans and dry stream beds, which are easy to duplicate in desert gardens.  It is tiny compared to its famous California poppy cousinBoth show equally well en masse but are rarely found together.

Microclimates define the desert poppy.  It is delicate and prefers to stay out of the wind by hunkering down into dry washes or clustering on lee sides of landforms.  Where it is windier, the desert poppy adjusts its height by shortening flower stems.  This drops blooms below the prevailing winds.  Big patches thrive where large yuccas provide windbreaks. Their low height also protects pollinating bees from winds.

This provides a clue to where to sow the desert poppy in home gardens. Choose a site where it’s likely to germinate and hopefully naturalize into a colony.  In most gardens scenarios the plant is twice as tall, and more widely spaced.

When sown in the fall, poppies have time overwinter, grow roots and flower by spring.  when sown in the spring, they sprout and then wither.  Some can perform as biennials or even short-lived perennials, depending on growing conditions.

Sowing Desert Gold Poppy

Poppy seed gradually filled this whole ravine resulting in a Superbloom.

Poppy seed is tiny and difficult to sow evenly.  The best way to be efficient with your introduction of poppies to your property is to blend them into a delivery material such as Black Gold®Earthworm Castings Blend.  This helps distribute the seed and provide a little organic matter to protect the seed once sown. Seeding is best done before a rain in the fall or early winter

First find a wide, shallow container and fill it half full with worm castings.  Next, sprinkle your poppy seed over the top, like you would add sprinkles to a white cake, striving for even coverage.  Once in place, use your bare hands to gently toss the castings as you would a salad, slowly blending in the seed.  Immediately sow this blend where you want it, otherwise, it will settle and lose its fluffy quality.

The more disturbed the ground, the better the poppies will row.  They don’t like competition either.  Fast-draining grainy soil, sand, or steep slopes with extreme runoff are this plant’s preference.  Open soils allow the tiny seed rootlets to easily penetrate the ground quickly after germination.

Sowing desert gold poppies will bring an annual Superbloom to your own backyard, farm, ranch, or rural cabin. Such natives will either sink or swim after the first year.  If they like your digs they’ll stay, have babies, and take up residence.  But for others, unless it’s an epic rain year, they may never return.

Garden Shrines: Dedicate Your Own Hallowed Ground

The pagans of Europe were the first to establish the notion of hallowed ground, an outdoor place set apart as holy.  Druid priests designated the very oldest oak in the ancient forest as an oracle, particularly when spring was close by. The priest would listen to the voices of the spirits in the gurgling of the spring and the whispers of the oak leaves, which they translated for their people.

This was the original church of nature where the combination of water and plants proved to be the most important elements of ancient earth-based spirituality.  Later the soaring lines and arches of great cathedrals are said to make indoor spaces more amenable to those with this outdoor tradition.

History of Nature Shrines

All over the world, pagans worshiped in the outdoors when the reasons for natural phenomena were unknown, making the outdoor holy ground essential to their beliefs. Many major religions, including Buddhism, Hinduism, and Catholicism, adopted the nature shrine after paganism died out. These tended to feature an image of a deity. The most well-known of these include the European grottoes dedicated to Christian figures and American bathtub shrines composed of old claw foot tubs planted on end to create an arched grotto for statues of the Virgin Mary. Wayside shrines of India are very different, and often associate their gods with certain trees and miraculous locations.

In the face of many environmental changes, gardeners today may benefit from the creation of an inspirational space in the garden where you can beckon nature to join you. Plants that draw wildlife bring in an important component of nature: birds, squirrels, and other wildlife. This integration of both flora and fauna into a hallowed location sets it apart for inspiration and contemplation. It is a promise from nature that many species continue to flourish despite Earth’s destructive history of comets, volcanoes, earthquakes, glaciers, continental drift, and other natural phenomena, proving we will continue, too.

Shrines to Nature

A shrine to nature can reflect your personal idea of beauty for a contemplative moody setting in the trees. If you have an old tree to use as the centerpiece, it can become a structural element. If none exists, plant a tree of importance to you or your spiritual path.

For example, Buddha attained enlightenment beneath a fig tree, so in India these are protected as bodi trees and venerated with brightly colored string and fabrics. Olives and Easter lilies are meaningful to Christians, and pomegranates, date palms, and other sacred plants are important to Jews.

Plants for Garden Shrines

If you are fortunate enough to have a property with a forested site, consider planting species well adapted to the shade and organic, acid soils there. Azaleas will your turn your special place into a bright, colorful haven before the trees fully leaf out in spring.  Evergreen rhododendrons and camellias are equally as beautiful and well adapted to wooded gardens. Another shade-loving shrub for acid soils is variegated winter daphne (Daphne odora ‘Marginata’) named for the legendary fragrance of its small white flowers.

When planting big, acid-loving shrubs, such as azaleas and rhododendron, it’s important to dig a shallow but wide hole. They are surface rooters and prefer to feed off decomposing leaves, so they don’t need a hole deeper than required to accommodate the root ball. Where soils are predominately clay, use generous amounts of Black Gold Canadian Sphagnum Peat Moss in your backfill.  This not only opens up the clay to improve drainage, but peat is also naturally acidic and perfectly tailored to these forest-floor species.

Many perennials make nice additions to these gardens. Bleeding heart (Dicentra spectabilis) is ideal for woodland sanctuary gardens.  The foliage is light, and the beautiful red, heart-shaped flowers are sentimental.  Old-fashioned coral bells (Heuchera sanguinea) or their hybrid variations with bright-colored foliage add vivid garden hues all season long. Ferns provide that primordial woodland feel, particularly potted tropical tree ferns or masses of hardy ostrich types, and ephemeral spring wildflowers help reign in the growing season.

Garden Shrine Statuary

It’s easy to integrate statues to the nature garden to focus the dedication to your personal path.  But for those who find nature itself their higher power and who want to protect her and venerate creation the woodland is an ideal sanctuary.  Once created, you’ll understand why such places were preferred for pagan shrines.  In today’s fast-paced world, time spent there with your higher power will help quell fears and renew you to face another day.


DIY Seed Starting: Seed Packets (Part 1 of 6)

Read the back of your seed packet to find details essential to successful germination.

Starting seed indoors is the best way to get your garden off to an early start. It also provides for earlier and longer harvest by extending the growing season. Not all plants are suitable to start indoors–these include large-seeded or fast-growing vegetables that produce quickly, such as beets, radishes, squash, and melons as well as zinnias and cosmos. Those warm-season vegetables that enjoy a long growing season, such as tomatoes and peppers, should be started early. They also have small seeds are hard to keep track of outdoors and easily washed away or eaten by pests when very young. Raising your slower-to-grow plants indoors where you can control growing conditions yields larger plants that thrive once moved outdoors.

Seed Packet Information

The first step is to read all of the information on the seed packet. It is your guide to growing a plant from seed. Each packet should have the following information:

Date
All seed packets are stamped with a “packed for” date, which should be the year of purchase. Like food, dates ensure fresh seed has high viability. Out of date seed is not always a bargain because they become less viabile each year, though some can remain viable for several years (click here for a seed viability list). With lettuce, for example, the seed can survive for up to five years if stored in a cool, dry place.

Depth
Each seed type is planted at a specific depth indicated on the back of the packet. If planted deeper than specified or too shallow it may fail to germinate altogether.

Time to Emerge
Seeds generally take a certain amount of time before germination. If you sow it properly, and the soil is warm enough, you can expect to see a seedling in the number of days specified on the packet. If there’s no sign of life well after the germination window, then there’s a problem.

Spacing
This indicates how much space is required between plants of the same type. Distancing plants ensures that they won’t be overcrowded. While it is not essential for indoor seed starting, it is helpful in determining the required number of seedlings for a given garden. It is also wise to provide seedlings enough space to grow well in cell packs or pots.

Days to Harvest
The days to harvest tell you how long it will take before a crop can be harvested. Days vary from cultivar to cultivar, so check them before purchase. Fast-growing vegetables are often more gratifying. Many long-duration crops can and should be started indoors.

Finally, make a record of the seeds you grew and their overall success. Keep those that work, and drop those that don’t.