Articles

Nine Water-Saving Garden Tips to Fight Drought

A combination of protective row covers, mulch, and drip hoses will dramatically reduce water loss.

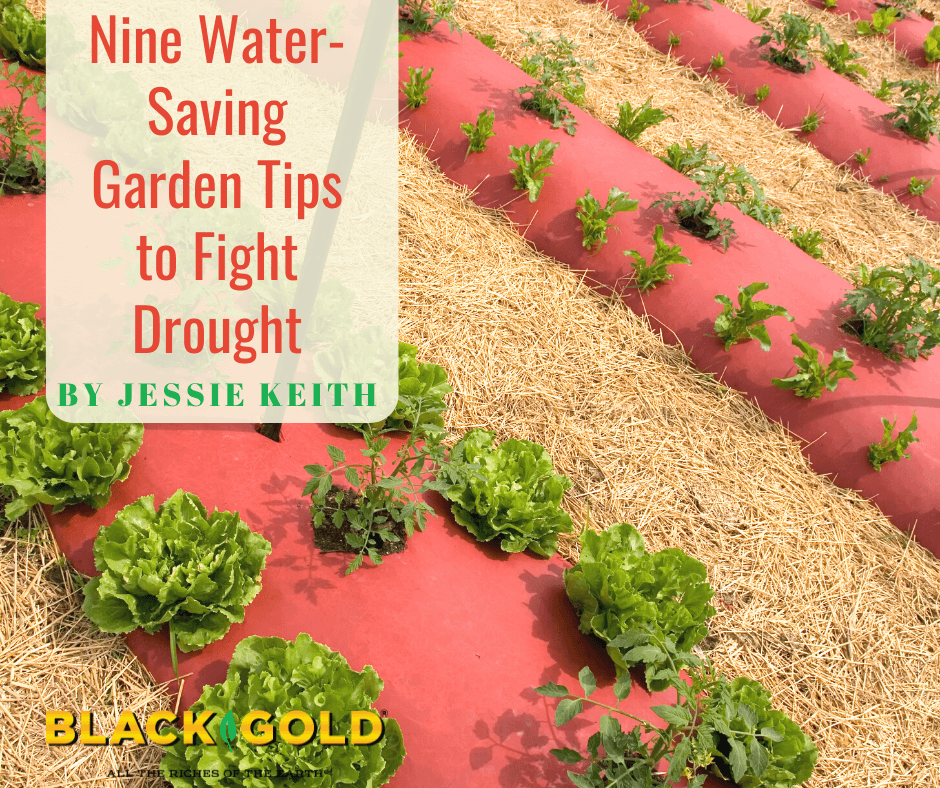
Hot weather drains garden plants dry and reduces productivity, especially when rain is scarce. More and more gardeners have had to change the way they grow because heat and drought limit the season. Rather than getting discouraged, they have learned smarter gardening techniques and how to stretch resources. Approaching the garden season with several lines of defense for drought is essential, especially where summer water restrictions are usually imposed.

US Drought Severity is Growing
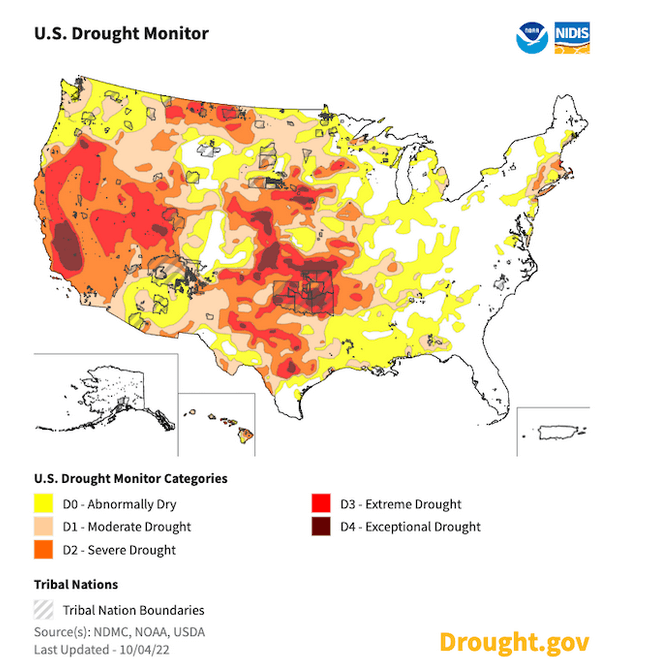
The problem is growing. In much of the West and some eastern states, summer brings seasonal drought at different levels of intensity. According to NASA’s Drought Monitor, a third of the United States was faced with drought last season (2020). They stated, “An estimated 53 million people are living in drought-affected areas.” It is a sobering number that shows no sign of decline, and it suggests that water-wise gardening has become a necessity for lots of American gardeners.

This map shows US summer-drought patterns in 2020 (Image thanks to NASA’s Drought Monitor)

Keep Water Grounded

Professional growers opt for drip irrigation because it saves water and money. Home gardeners should do the same. Cover with a little straw, and it will hold water even better!

The first tips for saving water involve keeping it in the soil, while avoiding any aerosol or evaporative water loss from sprinklers or over-exuberant hand watering.

1. Amend soil with water-holding additives. Some soil components naturally hold lots of water and act as water reservoirs that make it more available to plant roots for longer. Organic matter (peat, compost, leaf mold, and coconut coir) is on the front line of holding water in the soil. Aerated organic matter soaks water up like a sponge and easily redistributes it to plant roots, For example, processed coconut coir soaks up 90% of its weight in water. Inorganic soil additives, like water-holding crystals and vermiculite, also hold water but are better suited for container gardening.

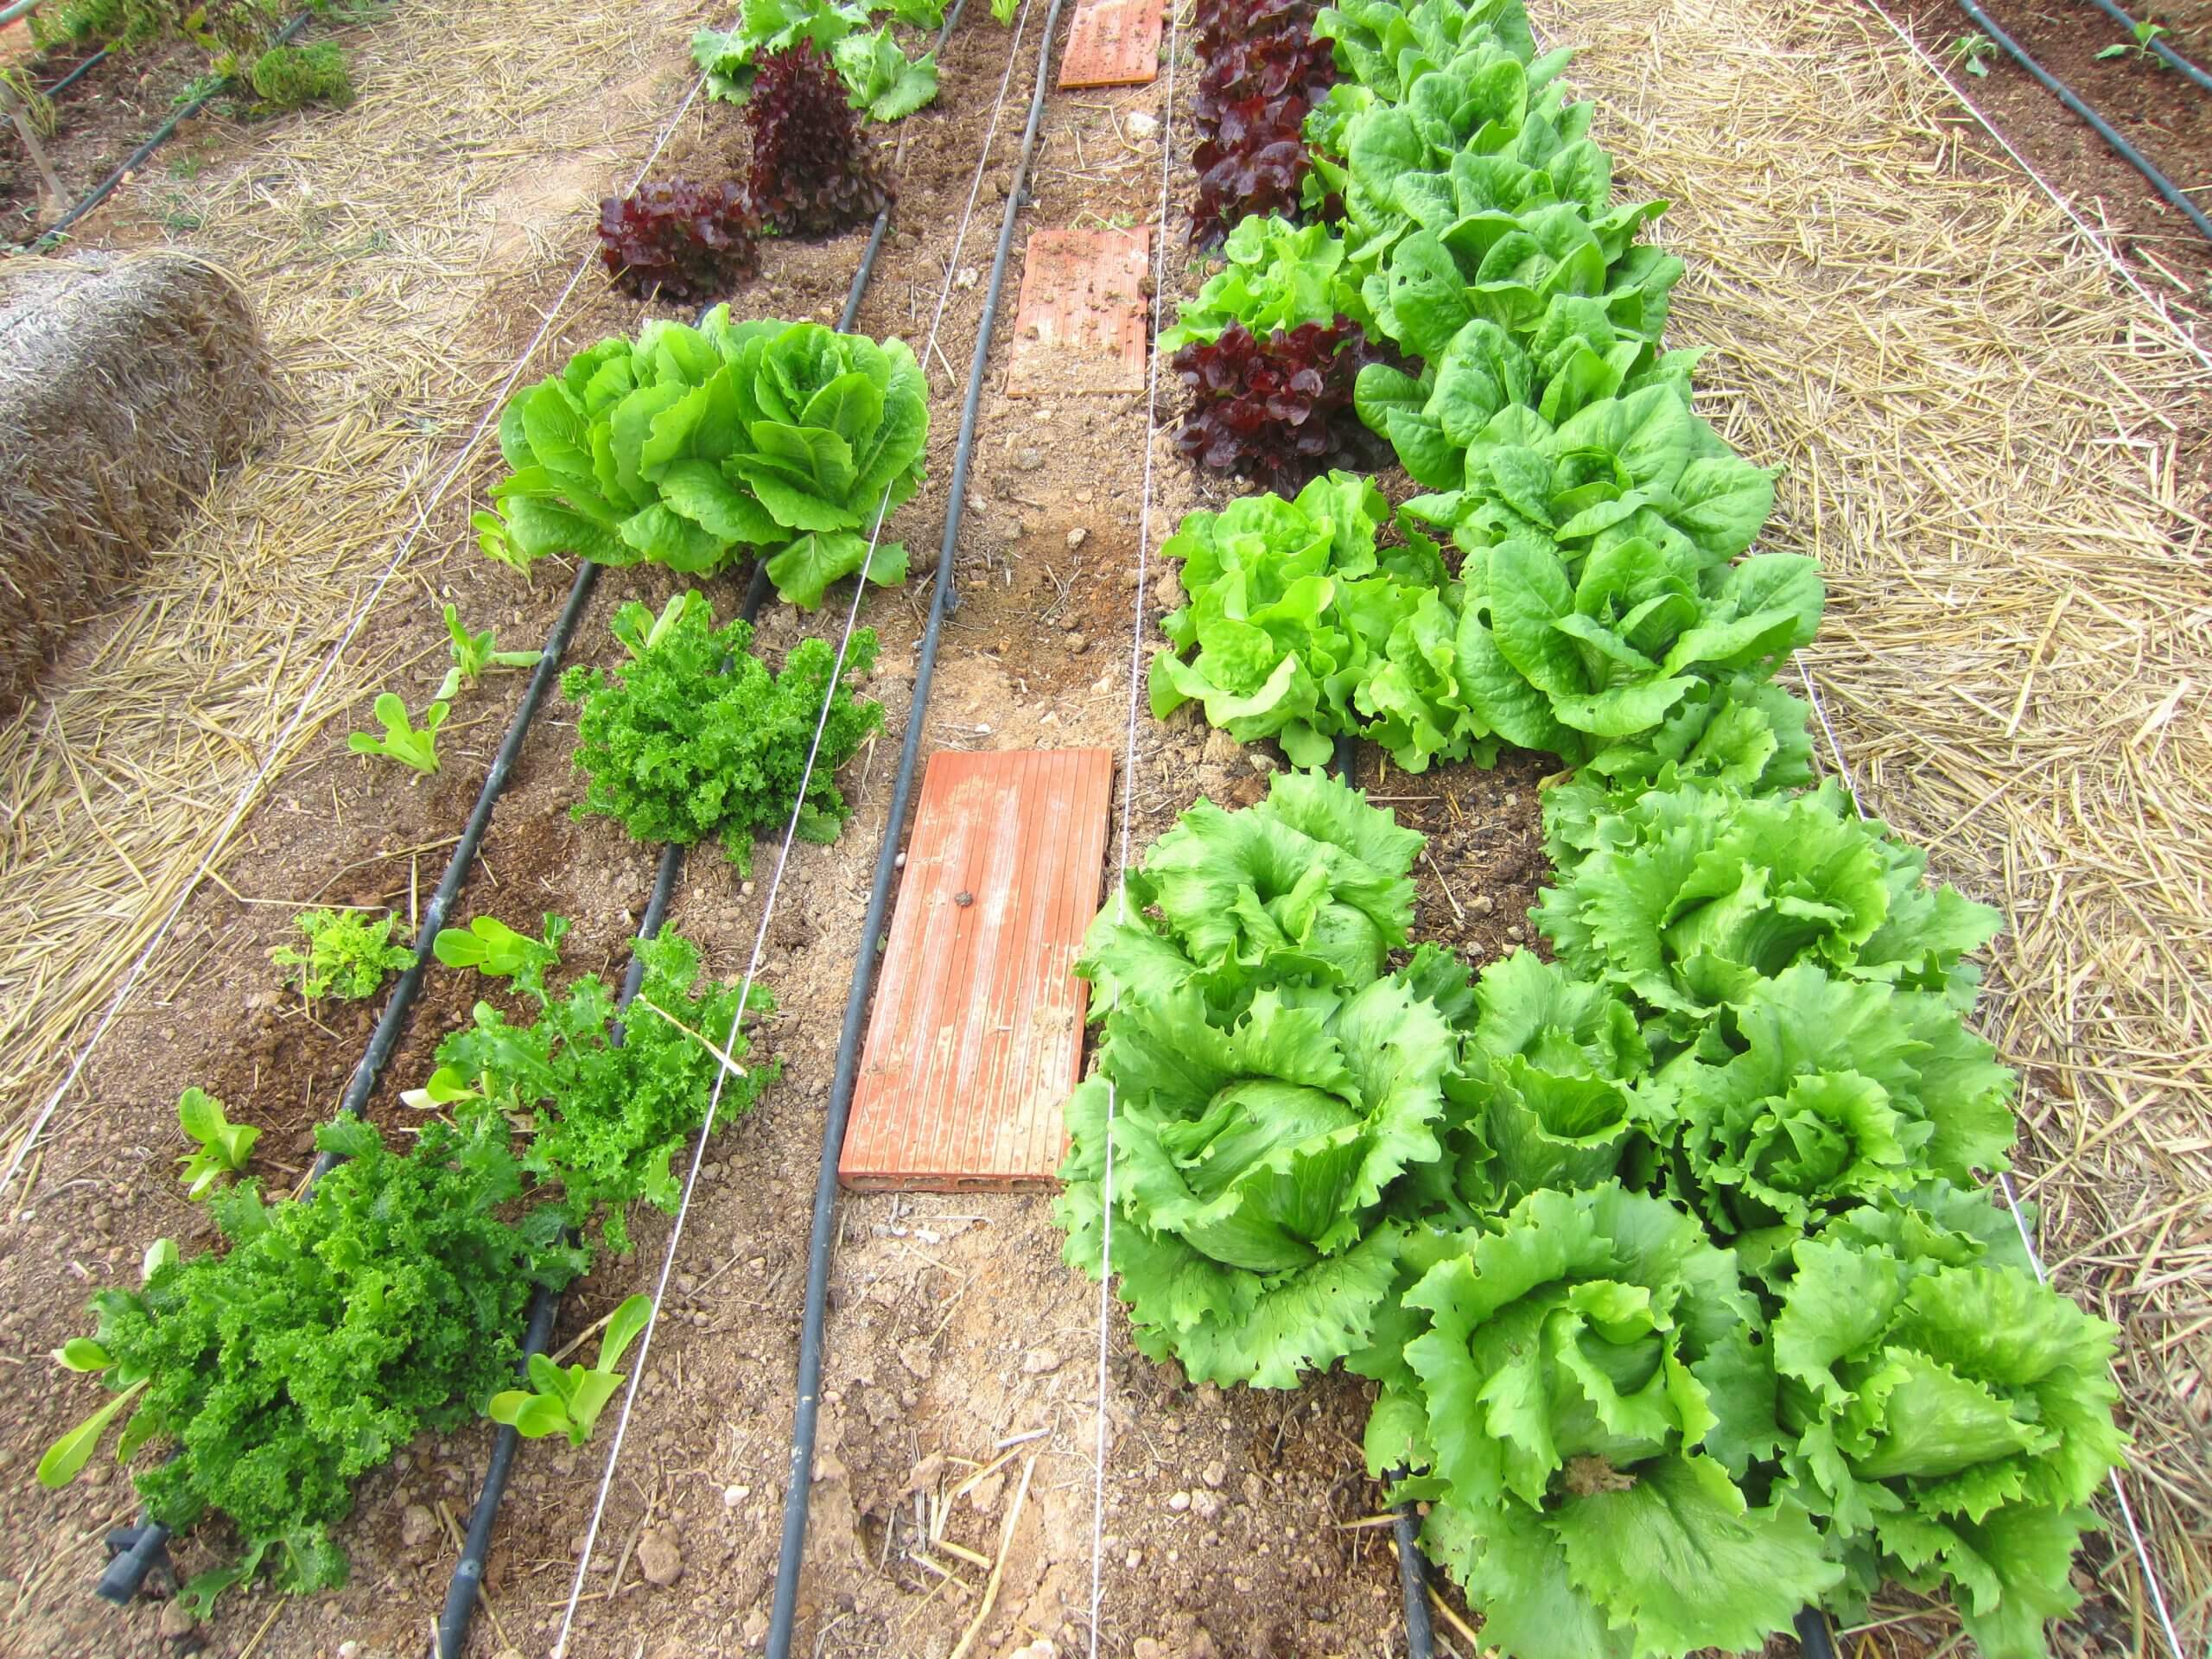
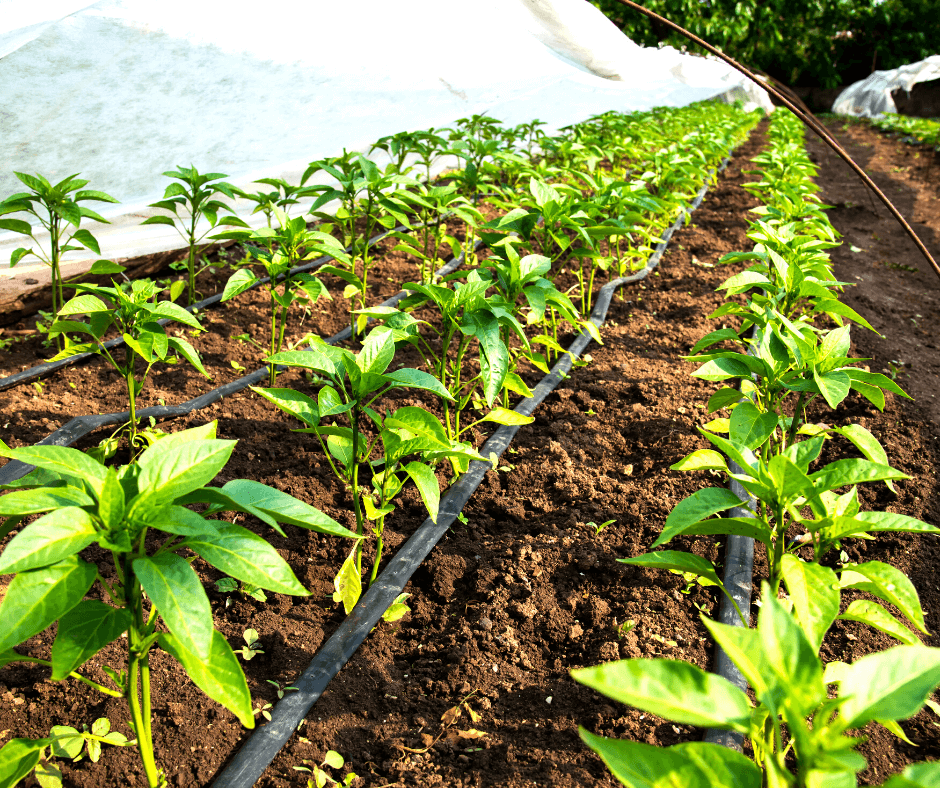
2. Use drip irrigation: Drip irrigation, in the form of drip-tubing systems for containers or drip hoses and drip tape for beds, deliver water at soil level where it quickly soaks into the ground, and is not lost by evaporation. Drip systems are the best for delivering garden water. In contrast, sprinklers lose an excessive amount of water to evaporation, and water delivery is not targeted.

3. Apply light mulches or coverings: Straw, compost, leaf mulch, or plastic row coverings hold soil water and stop surface evaporation. Use soil coverings in conjunction with drip irrigation, and soil amendment, and you will be set. (Click here to learn how a high-desert vegetable gardener used straw bales to protect her crops with great results.) (Click here for a full overview of different mulch types.)

Large, light-colored, ceramic pots hold water better and stay cooler.

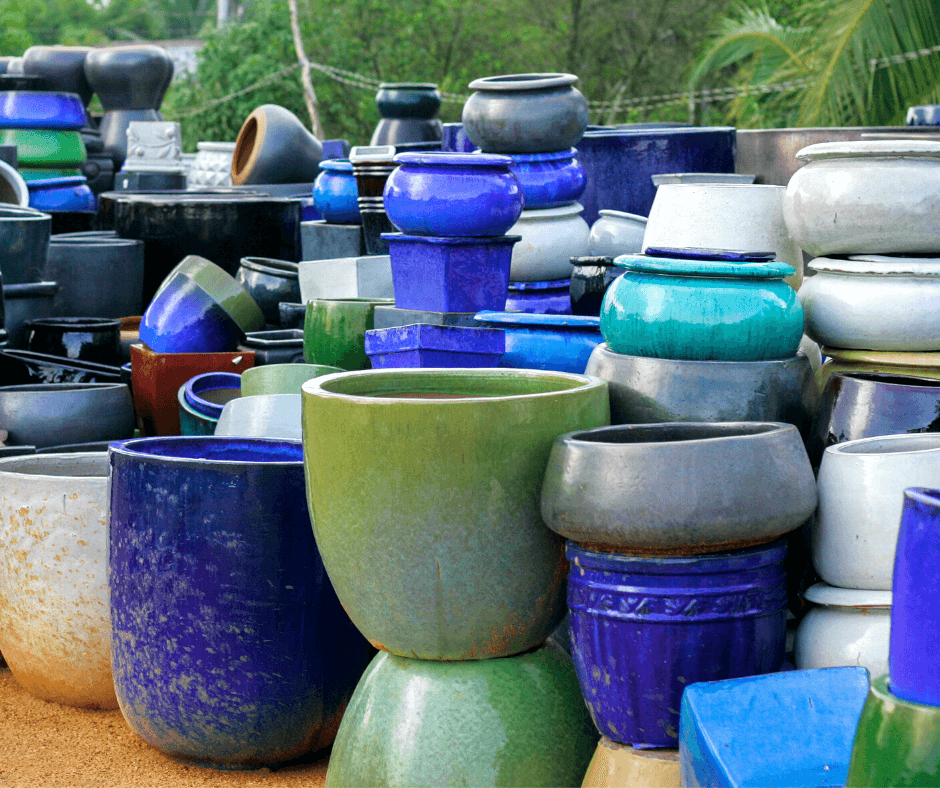
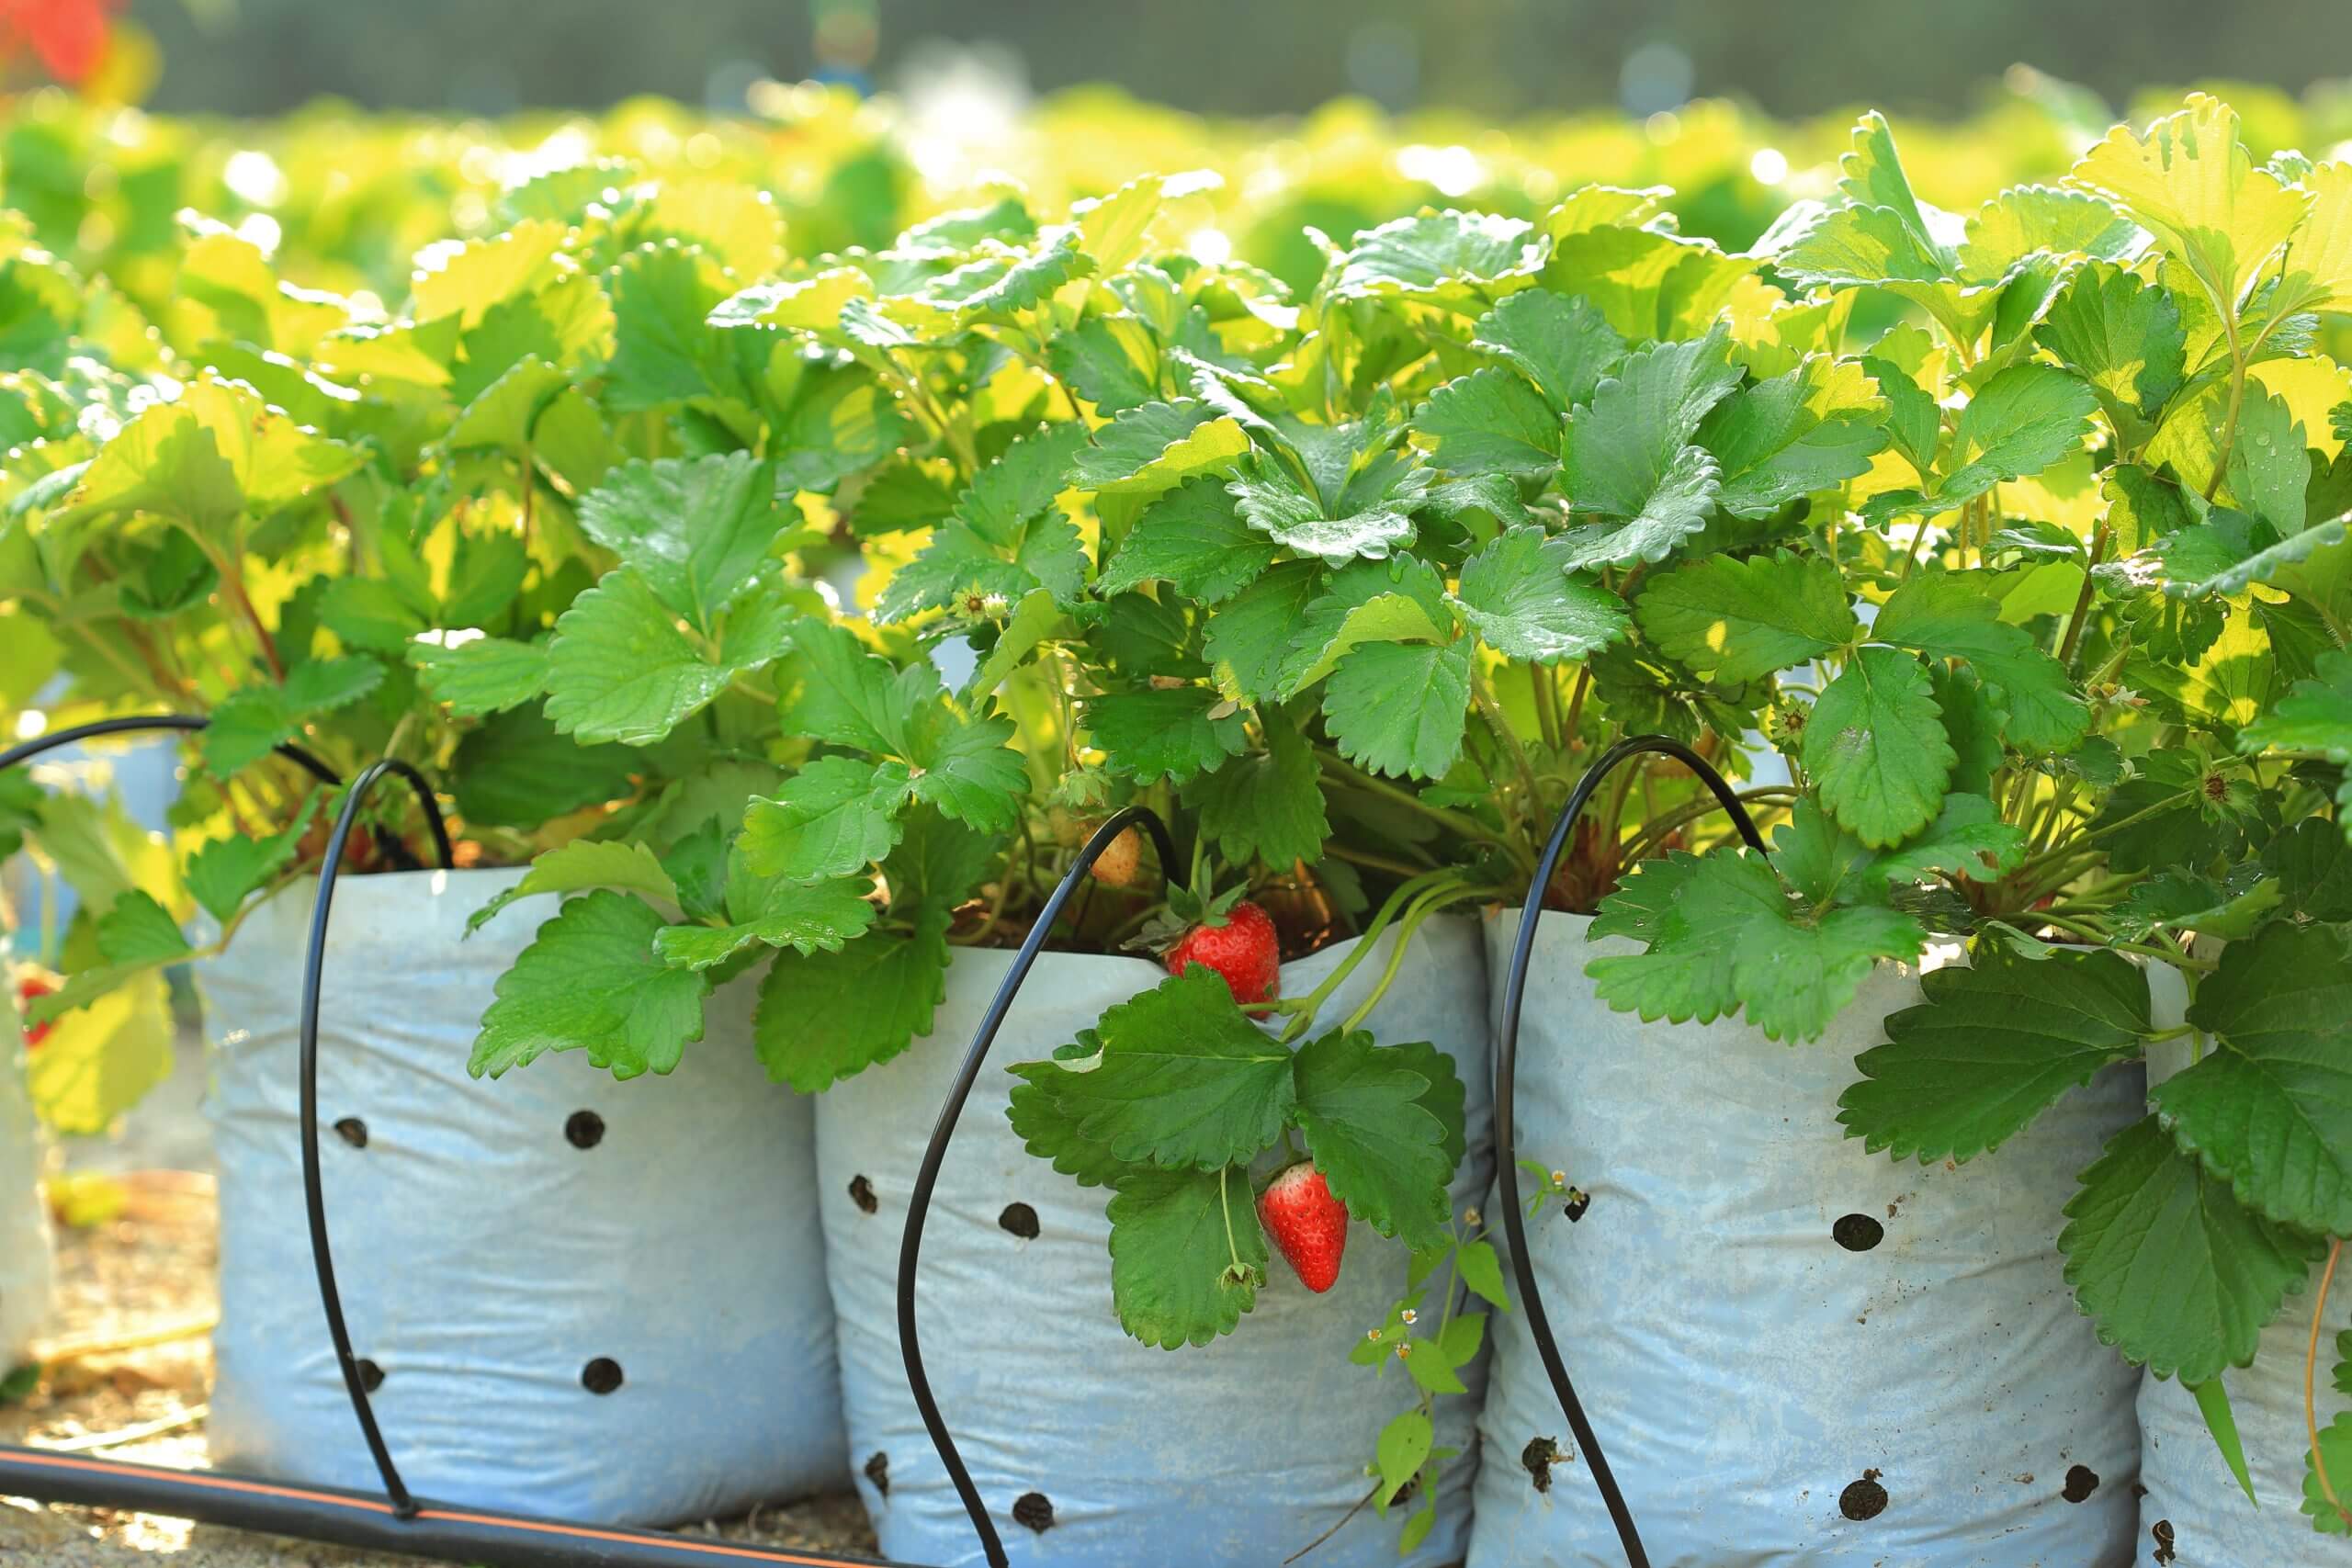
4. Choose larger pots or containers that are glazed or water-impermeable and light in color. Large planters that are light in color hold more water better. Glazed or other water-impermeable surfaces keep the water in, unlike common unglazed Terracotta, which is porous and quickly loses water from its sides. Lighter pots also reflect heat, which helps keep plant roots cooler and happier.

5. Track Watering and Water Deeply: Keep track of watering time and length to determine the general amount needed to keep your garden happy. Soil moisture meters for pots make it easy to know when it is time to water, which takes the guesswork out, though most planters need daily watering when it is really hot and dry. When it comes to garden beds, water deeply–for at least a couple of hours–to ensure that water penetrates down to the roots. Deep watering also encourages deeper rooting, which helps plants get through tough, dry weather.

Manage Light to Reduce Water Loss

Lightweight floating row cover cloth, like this, or movable hoops covered with lightweight row cloth, can really help some crops withstand high heat and drought.

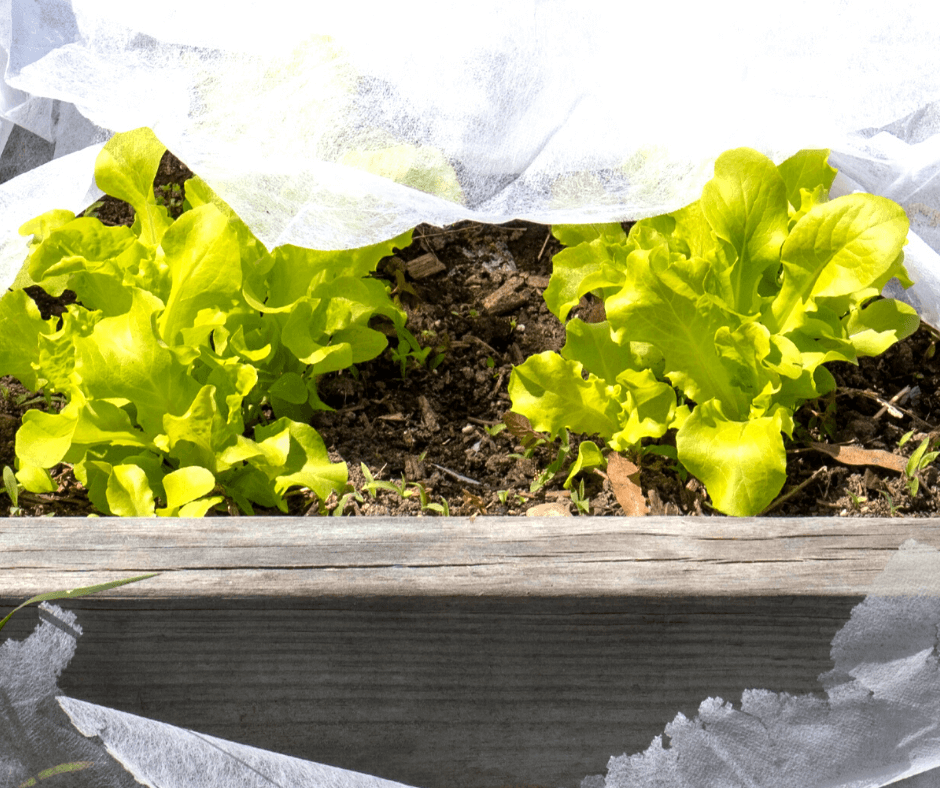
5. Reduce excess sunlight with light hoop covers. When temperatures are scorching and the sun is hot, floating hoop covers draped with lightweight row-cover cloth can be placed over small beds or low-growing garden vegetables to give them a rest and help conserve water. They will still get the light that they need, but the heat will be reduced a bit. Covers secured at both ends can also be helpful in keeping pests away. Greens, carrots, beets, turnips, and comparable crops appreciate this sort of light protection the most. (Click here for more row cover basics.)

6. Use strategic shading and timing. Plant perennials or pots in locations where they get some shade during the hottest time of the day in summer (between 2 and 4 pm). This will help them hold onto water when the weather is most extreme. Watering in the early morning, before the sun rises, will also help plants make it through hot, dry days. If you live in an area where the drought is bad, feel free to irrigate plants in the evening without fear of encouraging diseases. When it is severely hot and dry, plants need lots of moisture at the root zone to fill up with water and keep cool.

Collecting Water for Reuse

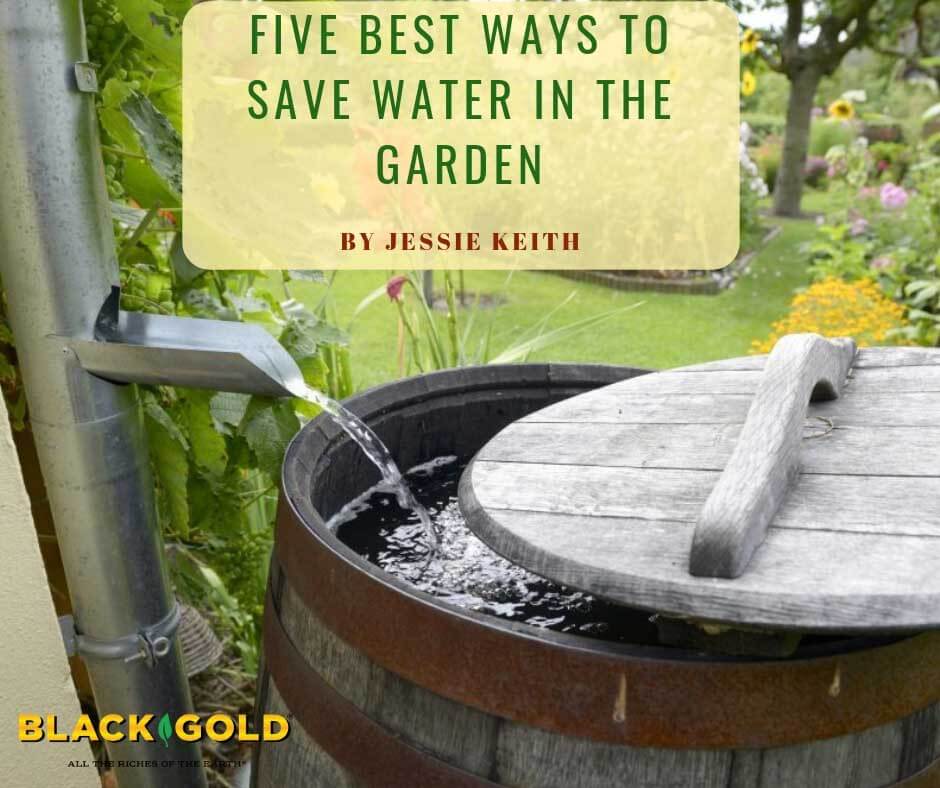
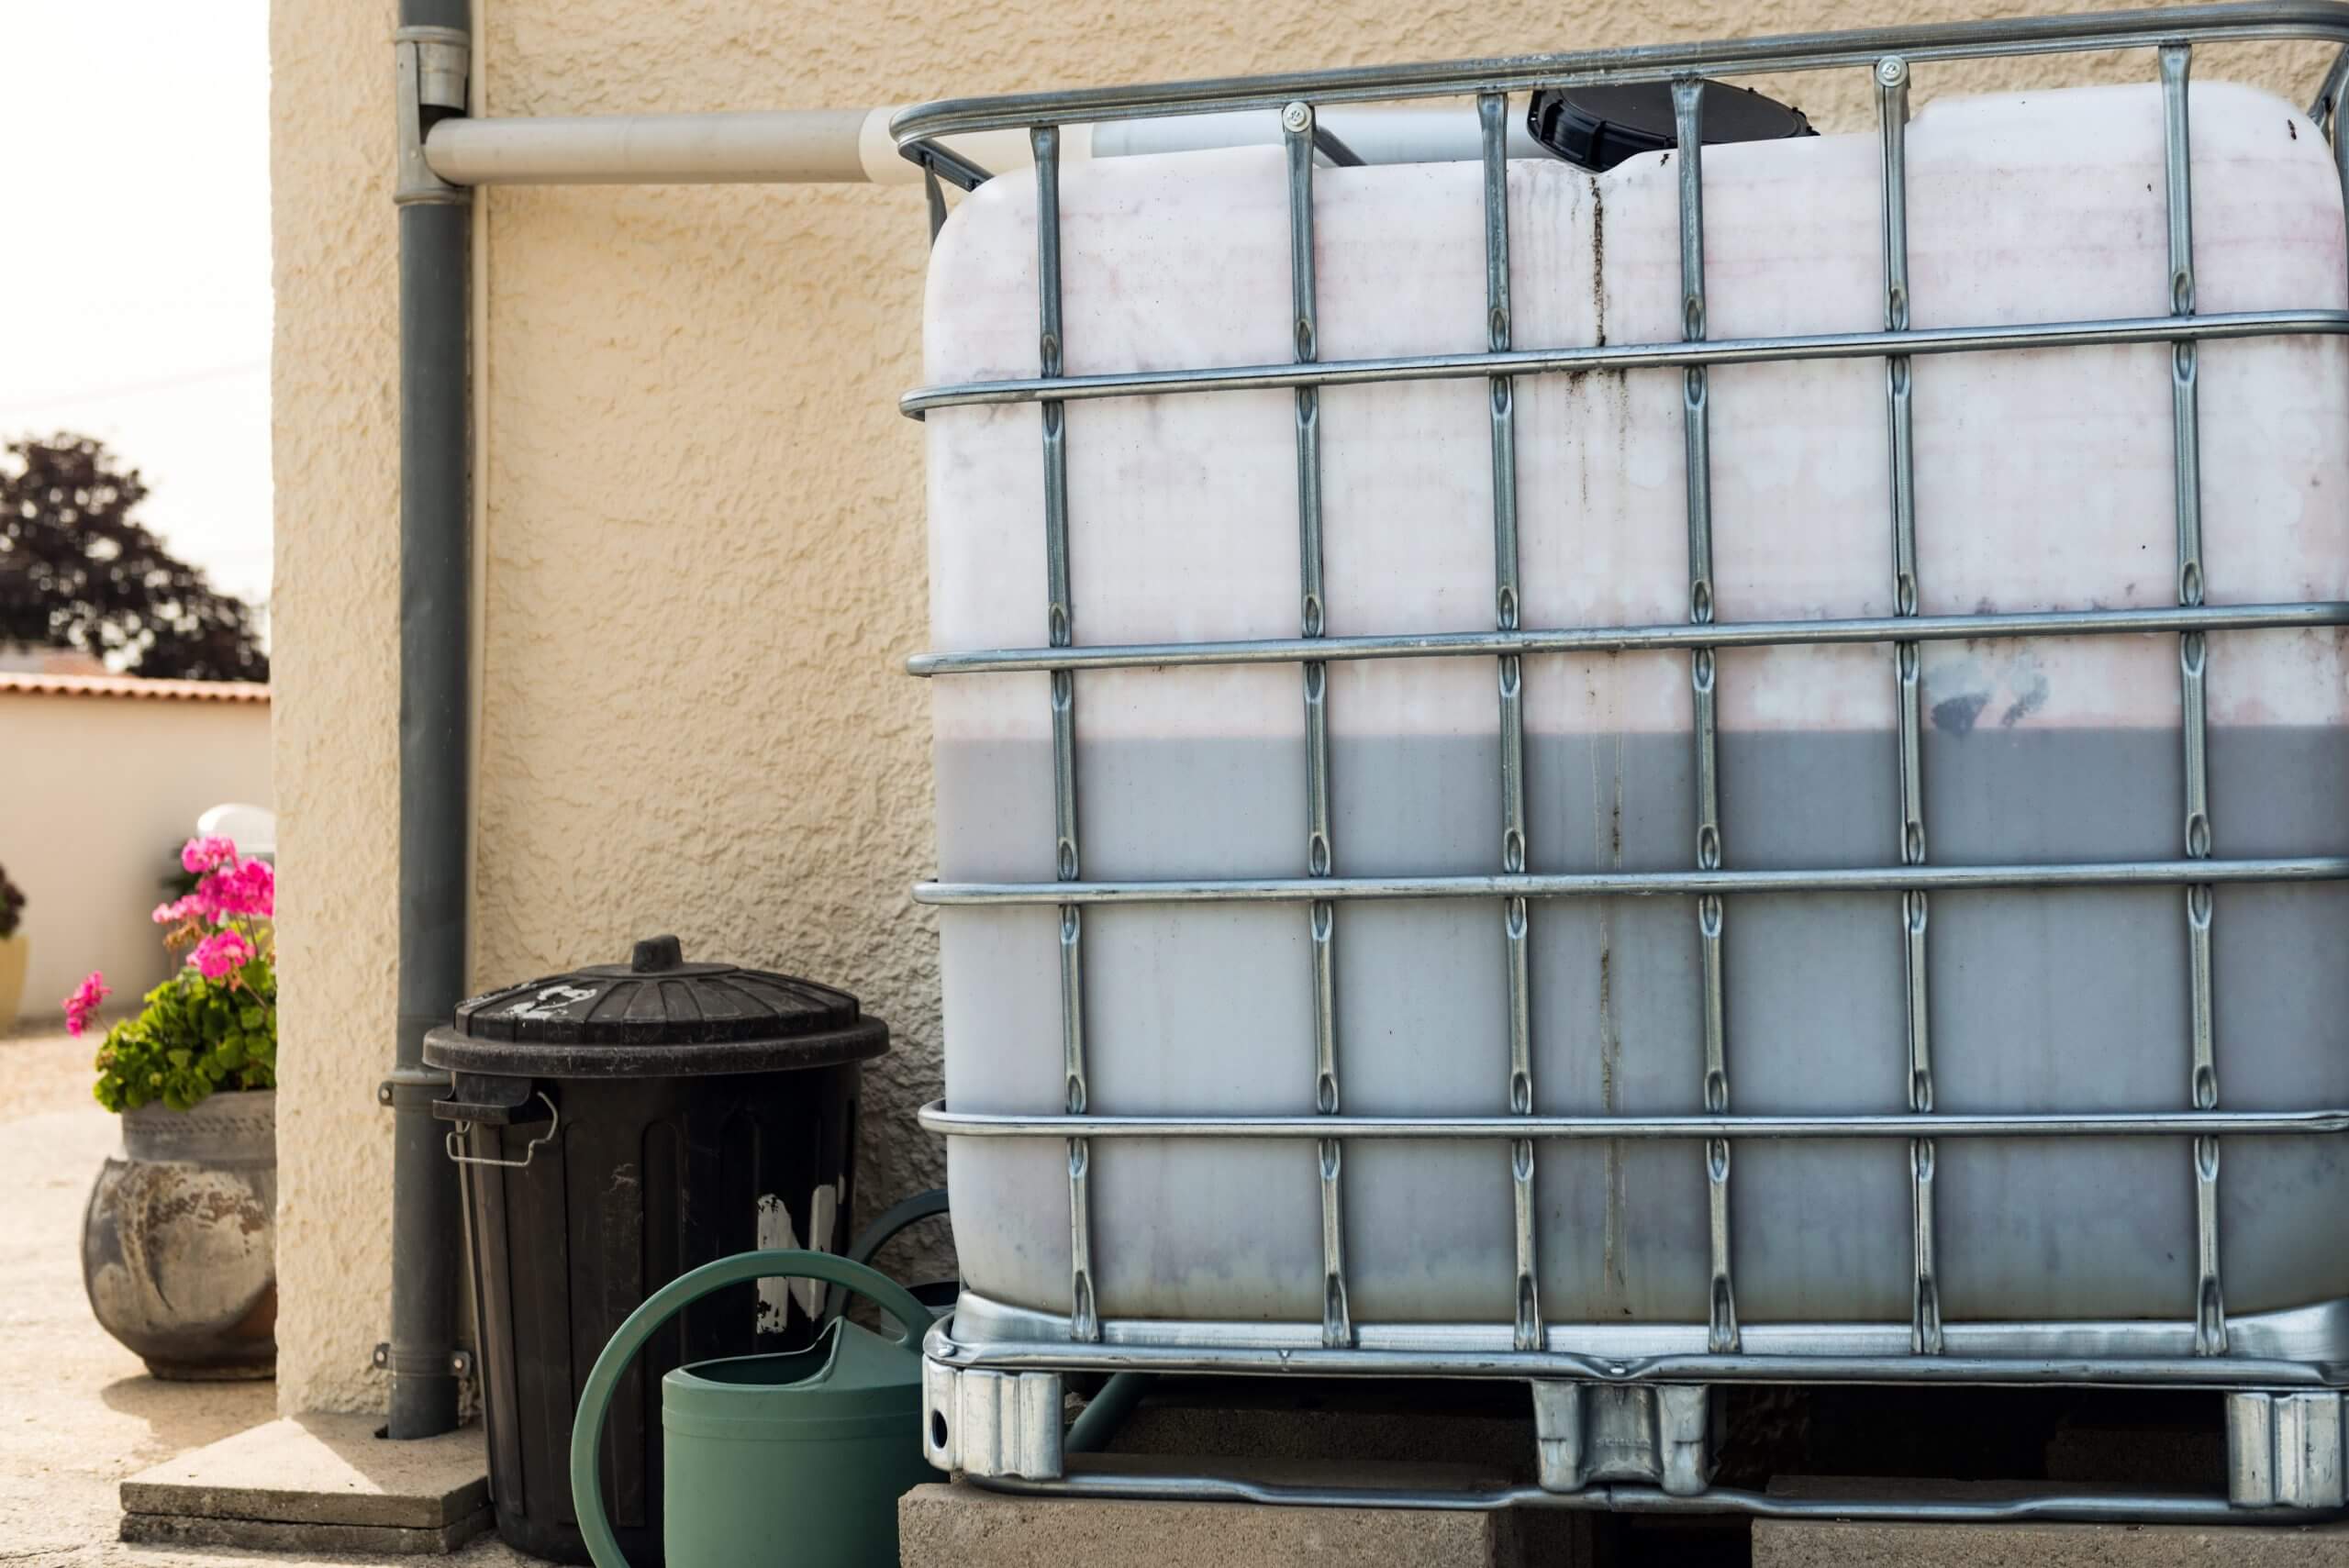
When rain does fall, it is wise to set up ways to collect runoff water–such as rain barrels or cisterns. Before doing so, one must know their roof composition beforehand because two roof types release high concentrations of dangerous heavy metals. These are roofs made of 1) uncoated galvanized metal, which releases high concentrations of zinc, and 2) treated wood shakes that release high concentrations of copper. All other roof types should be fine, according to research. Be sure to keep the tops covered to avoid mosquito breeding and possible animal drownings. Here is a little more information about these water collecting reservoirs.

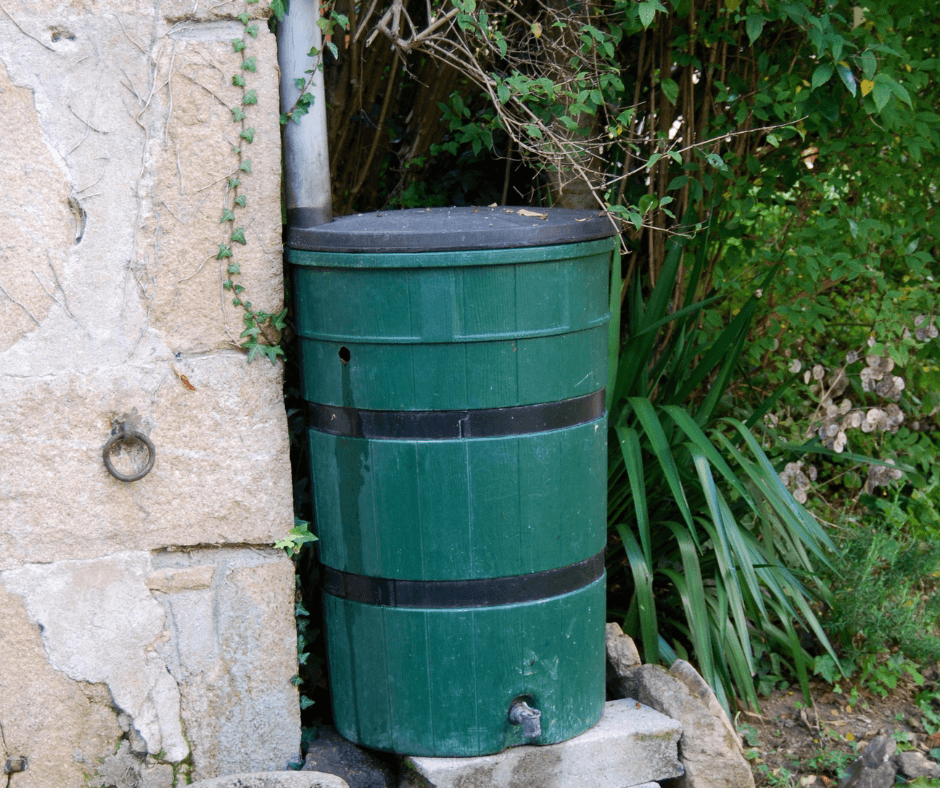
7. Collecting water in Rain Barrels or Cisterns: Rain barrels are quite inexpensive and easy to install for rainwater collection. They connect to gutter downspouts to capture roof rainwater. Not only does this reduce watering costs, but many plants prefer rainwater over tap water. I recommend placing barrels up on cinder blocks to improve water flow from the release valve at the base. It makes it easier to fill watering cans or hook up hosing for garden irrigation. Be sure to empty your rain barrel at the end of the season if you live in an area with cold winters.

Cisterns are water collectors that store more water, and they may be kept above- or below-ground. They may be designed to collect rainwater, air-conditioning condensate, or even reserves of well-water. Unlike rain barrels, they are more costly to install but recommended for areas where water is limited and restricted. If you live in a place with annual seasonal rainfall of 15-inches/year or more (click here to see US annual rainfall averages), then consider installing a rainwater cistern.

Grow Drought-Tolerant Plants

Western hyssops (Agastache spp.) are some of the most beautiful, drought-tolerant garden flowers for pollinators that you can grow,

Some plants use water more efficiently or hold onto it better when the rain stops falling.

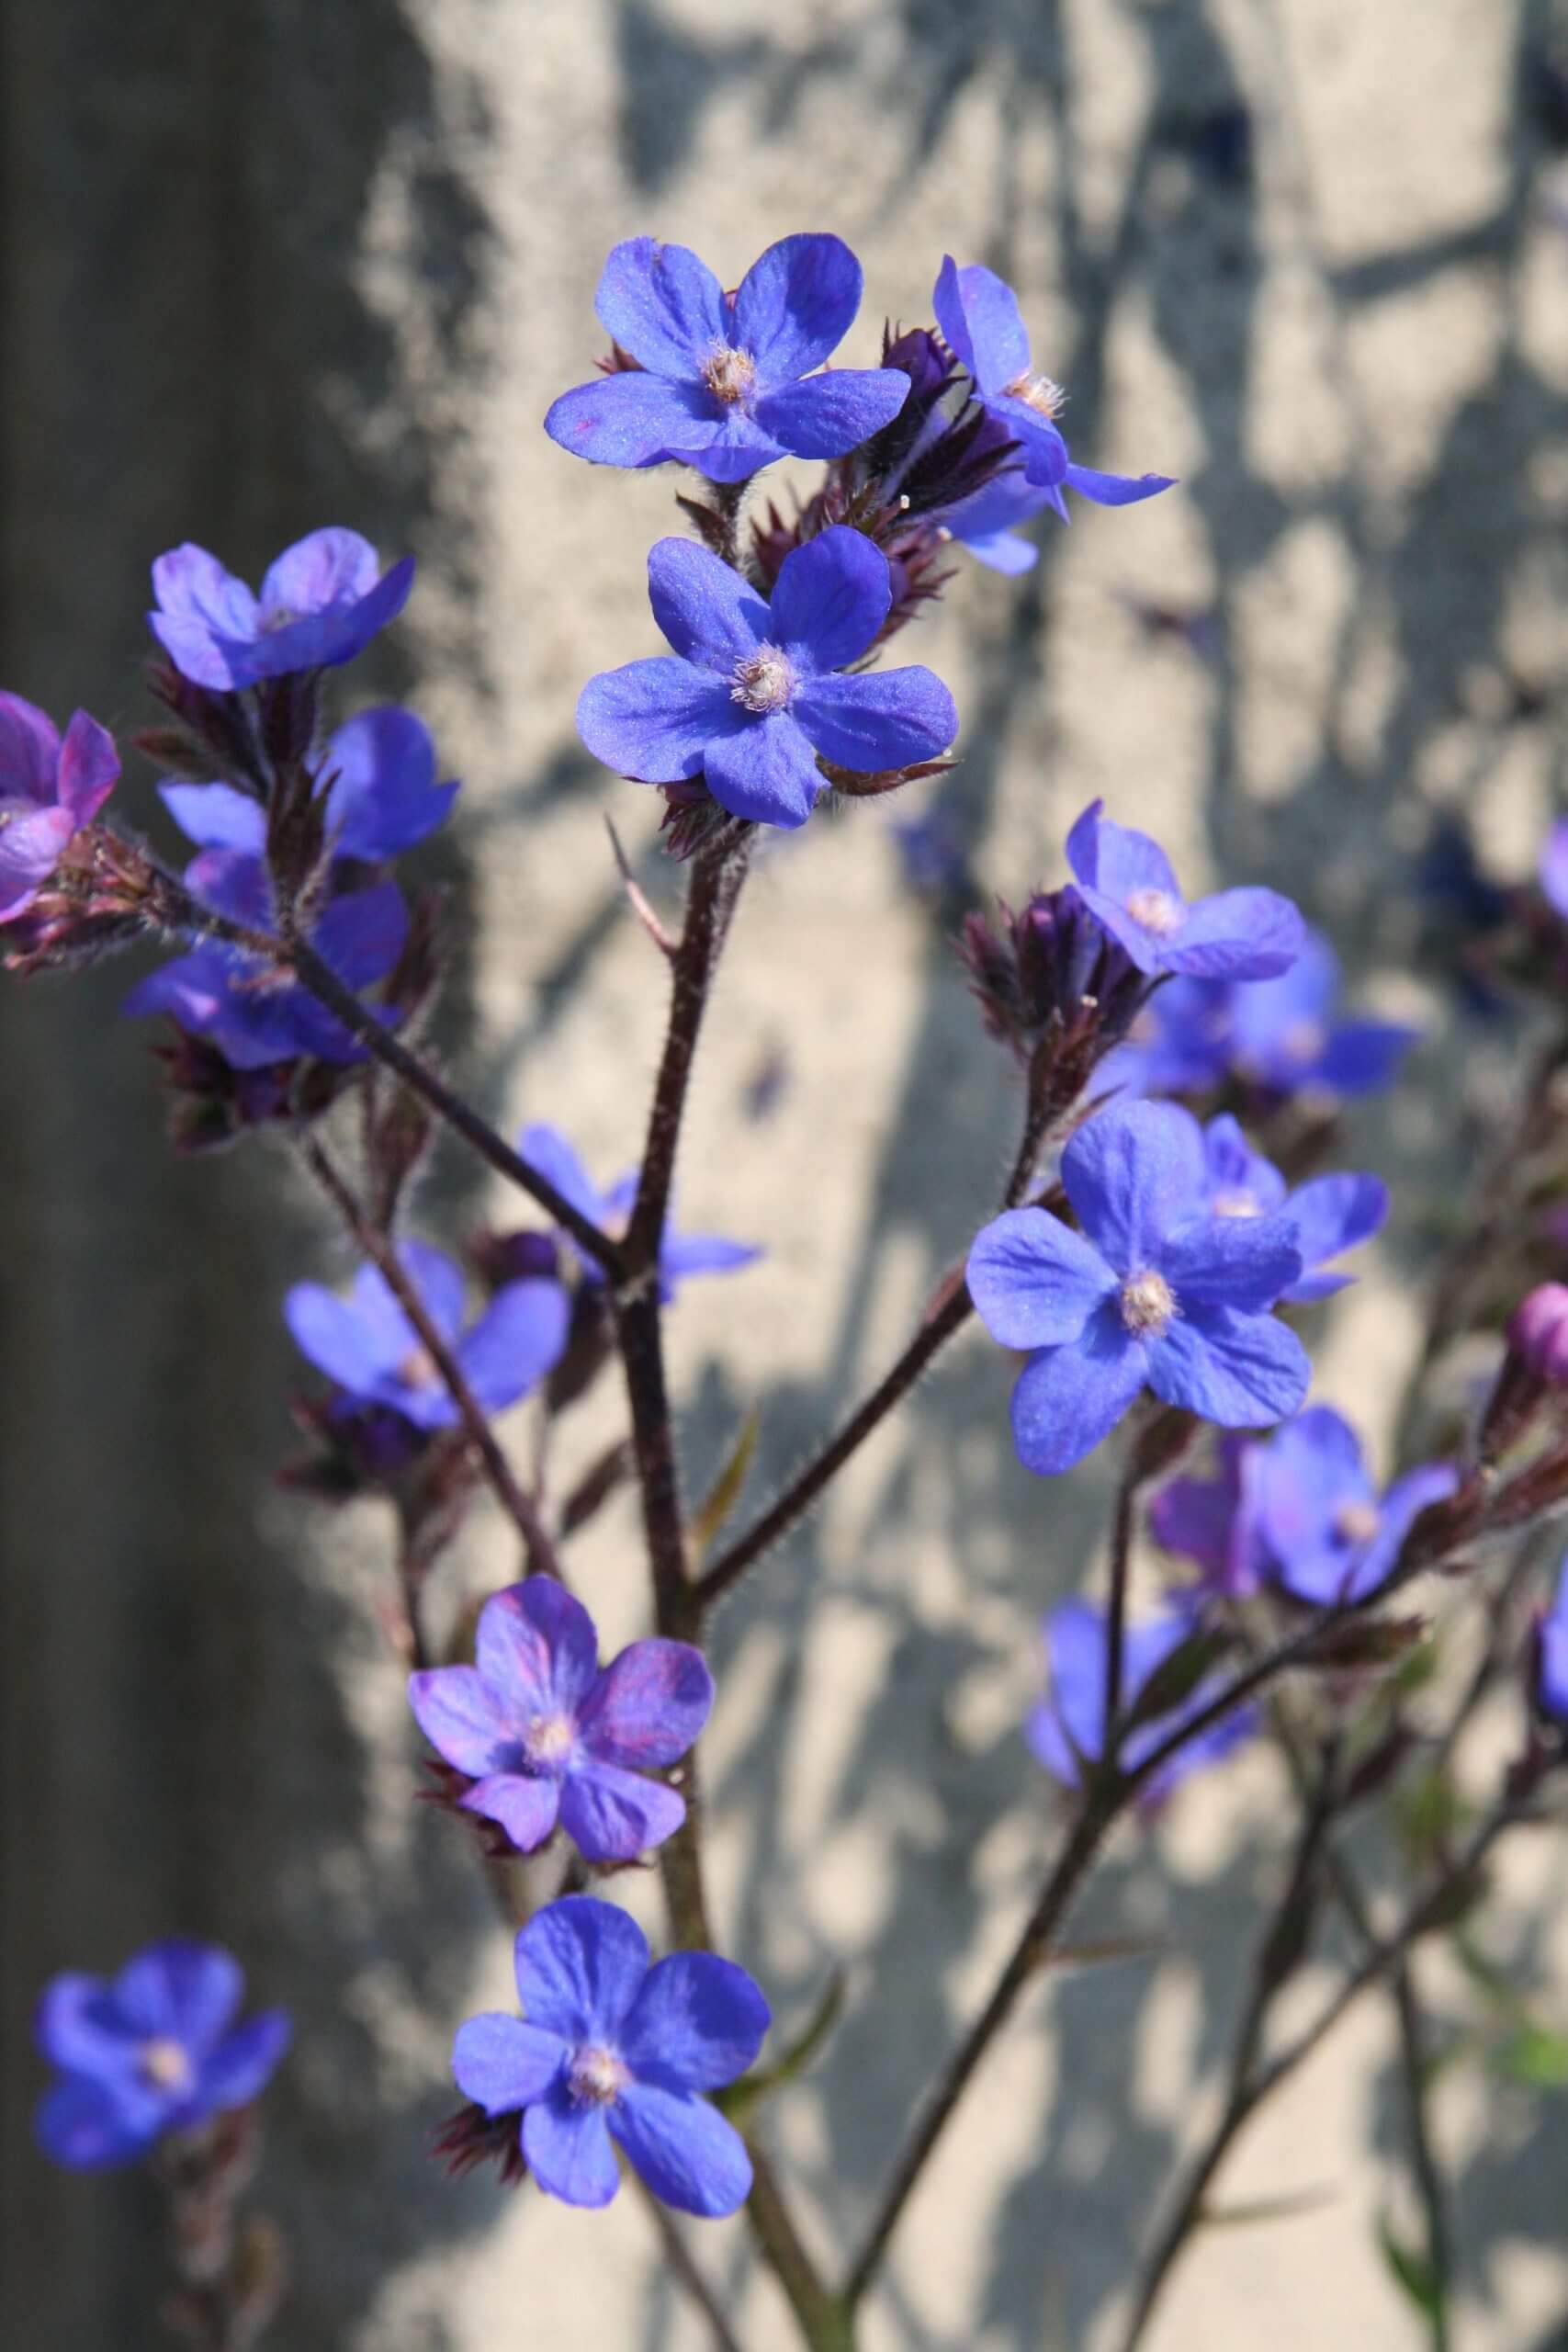
8. Grow Drought Tolerant Plants. Plants from the Mediterranean and arid West, as well as succulents, tend to shine in heat and drought. Those naturally adapted to more severe drought are often labeled as Xeric or Waterwise plants, and many specialty nurseries carry them. High Country Gardens is one great commercial online seller and Xera Plants is another. Most garden retailers these days also carry lots of drought-tolerant plants. Specialty succulent nurseries, especially those with lists of hardy plants, are also worth looking into. I like Mountain Crest Gardens.  Their plants always arrive in great shape and perform beautifully. There are many more out there! Click on the links below for more drought tolerant plant resources.

Does Corn Gluten Really Prevent Weeds?

“What is your opinion of using Cornmeal Gluten to prevent weeds starting from seeds?” Question from Kathy of Loomis, California

Answer: Corn gluten is a popular all-natural pre-emergent herbicide that will stop the germination of certain seedlings when properly applied. That means that it keeps weed seeds from sprouting. For this reason, it is important to apply it well before cool-season weed seeds get going in late winter and spring and warm-season weed seeds get going in summer.

Corn gluten is an all-natural byproduct of the corn industry. Essentially, it is comprised of corn protein. For this reason, it is not harmful to people or wildlife, while stopping some weed seeds from sprouting. With that said, there are some different opinions and studies with varying reports on its efficacy. Here are the two sides.

Corn Gluten As a Pre-Emergent Herbicide

A 1990s Iowa State University study showed that corn gluten was an effective pre-emergent herbicide for some weeds. They found that it was most effective in stopping weedy grasses, such as crabgrass, as well as some broadleaf weeds, such as chickweed and dandelions. Corn gluten also contains 10% nitrogen, so it helps feed plants as well.

Corn Gluten’s Herbicidal Short-Falls

Some studies show corn gluten, when not properly applied at the right time, can feed weeds due to its high nitrogen content. That’s because it does not negatively impact emerged weeds, so these will need to be hoed out or hand-weeded before applying any pre-emergent. It is also important to note that corn gluten does not work on all weed seeds. A Washington State Univerisity overview of corn gluten states: “Corn gluten meal is not a selective product, nor is it effective on all weed types. Several species of weeds, flowers, and vegetables are inhibited by corn gluten meal, while others are not. Effectiveness in greenhouse trials generally increases with [the] application rate (as does the cost).”

As for me, I rarely apply pre-emergents. This is because I favor various mulches and hand weeding to stop weeds in my gardens. For me, these are the two best methods to keep weeds away. Here is an article along these lines.

THE BEST GARDEN MULCHES AND DECORATIVE COVERS

10 WORST GARDEN WEEDS AND THEIR MANAGEMENT

I hope that this helps!

Happy gardening,

Jessie Keith

Black Gold Horticulturist

Can I Use Shredded Paper in the Garden?

“Any suggestions for using shredded paper in my raised beds for vegetables?  I have a home office that produces a lot of shredded paper that I would like to “recycle” if possible.” Question from Glenda of Sewell, New Jersey

Answer: Before putting any paper in the garden, make sure that the ink you use is acceptable for garden use. Almost all printer ink is non-toxic these days, but double-check your ink brand to make sure. Plant-based or soy inks are best.

A good use for shredded white paper in the vegetable garden is as a sub-layer below a straw or a compost layer. Spread the paper over your bed, wet it down, and cover it with straw or compost. It will serve as an extra protective layer to ward off weeds. I always try to find seed-free straw as vegetable-garden mulch.

The paper can also be composted. Mix in organic ingredients, such as grass clippings, vegetable waste from the kitchen, chopped leaves, and granular nitrogen to help the paper break down properly. Compost piles need to be tended, wetted, and turned to facilitate the composting process. (Please click here to learn more about how to compost at home.) Then you can add the compost to your beds to fortify all of your plantings.

I hope that these tips help!

Happy gardening,

Jessie Keith

Black Gold Horticulturist

How Do I Calculate Compost Application Rates?

“How do I calculate compost application rates to yards?  I am trying to figure how much to order.” Question from Anne of Elmdale, Kansas 

Answer: To determine how much compost, topsoil, or mulch to apply to beds, use the formula below along with a conversion table and links to other helpful sources–most notably, a great article for easily calculating the square footage of beds of various shapes.

Amendment Application Formula for Beds

For square or rectangular beds, multiply the bed’s length by its width to get square footage (L *W= ft2). If you wish to lay mulch 2-inches deep, then have a look at the table below to get the corresponding square footage covered by 1 cubic yard of compost, mulch, or peat moss. Then divide the square footage in the table that matches the 2-inch depth.

For example: If you had a 12-foot x 24-foot bed that required 2 inches of peat moss for tillage, calculate 12 feet x 24 feet = 288 square feet, then from the chart you can determine that 288 ft2/162 ft = 1.78 cubic yards of mulch. 

Square Feet to Cubic Yards Conversion Table

1 cubic yard of an amendment or mulch will cover the following square footage to each depth.

Depth of Amendment

Square Footage Covered

1”

324 ft2

2”

162 ft2

3”

108 ft2

4”

81 ft2

To calculate the square footage of other bed shapes, please click here for an excellent reference. You can also click here to view a handy mulch/amendment calculator.

Spring is the best time to liberally apply compost or mulch to gardens, but if you also plan to do significant fall planting, reapply in autumn. Organic matter breaks down over the course of the season and needs to be replenished. If you plan any winter or cold-frame gardening, apply compost as both an amendment and protective mulch.

Happy gardening,

Jessie Keith

Black Gold Horticulturist

Does Mulch Along a Home’s Foundation Attract Termites?

Does Mulch Along a Home’s Foundation Attract Termites?

“I’ve heard that its not a good idea to place mulch too close to a house’s foundation. I was also told to mulch or plant shrubs around my house’s foundation to prevent my kids from getting lead poisoning from the old chipped off paint in the soil. What should I put near my foundation, bricks? Also, how far from my foundation should I plant vetiver grass? I’m having trouble finding guidance on how far from my brick foundation it should be with its deep root system.” Veronica of Clay City, Indiana

Answer: Some speculate that termites may be attracted to or reside in bark mulch. It is true that termites can eat bark mulch, but they survive and form colonies in solid wood, so bark mulch not a terribly strong termite lure. Moreover, newer homes are generally protected from termites, and older homes should be for their longterm protection.

Either way, there are other mulch options that are certain not to harbor or attract any termites. These include pine straw, chopped leaf mulch, stone mulch, and even quality Black Gold Garden Compost Blend. (Please click here for a full overview of different mulch options.) My personal favorite is pine straw. It looks tidy and really helps to detur weeds.

The best way to keep kids away from the soil at the base of the home is to plant lawn or shrubs along your foundation (click here for some good flowering shrubs for foundations). Ornamental grasses are another option, but I would not recommend vetiver grass (Vetiveria zizanoide, Zones 7-8) because it is a warm-climate grass that will not be hardy in your Zone 5 garden, and it is weedy. Better, more beautiful, sun-loving grasses for your foundation include Karl Foerster Feather Reed Grass, Prairie Winds® ‘Apache Rose’ Switch Grass, or Little Zebra Dwarf Zebra Grass. All need sunshine and should be planted 2 to 4 feet from your foundation in a mulched bed, depending on the final height and width of the grass you choose.

I hope that these tips help!

Happy gardening,

Jessie Keith

Black Gold Horticulturist

Will Mold in Leaves and Wood Chips Harm Your Soil?

“Will the mold from decomposing leaves and wood chip piles harm your soil?” Question from Sylvia of Belle Plaine, Minnesota

Answer: The molds involved in the decomposition of dead plant material are generally not disease causing to live plants, so they should not harm your garden plants. They are distinct from disease-causing fungi.

The soil is filled with fungi of all kinds at all times, some can cause plant disease and others do not. Those fungi that are disease-causing and remain in the soil are brought on by live plants that have contracted fungal diseases and passed them into the soil. These fungal diseases are generally crop specific. Crop rotation on a three-year cycle is the best way to ensure that your different crops are protected from soil-borne fungal diseases. For example, if your tomatoes get fungal late blight, plant beans where your tomatoes grew the previous year followed by squash the next year. By the third year, the late blight should no longer be a problem where you originally planted your tomatoes, and you can plant them in that spot again.

With that said, excess mold spores in the air are not good for human health. Excess moisture encourages mold growth, so to reduce mold in your leaf and wood chip piles, keep them turned regularly to increase air flow. If you plan to use them as garden covers, the mold will dry out once the leaf mulch and wood chips are spread out. Then they won’t be a problem.

Happy gardening!

Jessie Keith

Black Gold Horticulturist

How to Amend Around Mulched Flower Beds

“On an annual rotation, what do I do with my mulch? Do I strip and reapply every year? How do I amend my soil in a flower bed that already has perennials? Do I  just topdress? Or dig around the perennials and mix with native soils?” Question from Tim of Springfield, Pennsylvania

Answer: Good questions! I am assuming that you apply bark mulch, which is generally slow to break down, especially if less processed when applied or comprised of cedar or other evergreen barks. I will also assume that you apply it at the standard depth of at least 2 to 3 inches.

You have several options for improving the soil of your mulched annual and perennial beds.

Annual Beds

  1. Switch to a mulch that feeds the soil. Bark mulch is notorious for binding essential nutrients, namely nitrogen, and breaks down too slowly to rapidly feed your soil. Mulching with composted bark, compost, or leaf mulch (all of which quickly integrate into the soil) will do the duel job of protecting against weeds and feeding your soil. (OMRI Listed Black Gold Garden Compost Blend is an excellent choice for the soil surface and as an amendment.)
  2. If you want to stick with bark mulch for your annual beds, do a soil re-haul in the spring, once your soil is warm enough to work. Neatly rake your mulch onto a tarp and generously and deeply work compost and peat moss into your beds. Work it down with a garden fork or tiller to a depth of at least 8 inches. This is also a great time to add slow-release flower fertilizer for the season. Then plant your annuals first and re-mulch afterward to avoid getting mulch into the planting holes.

Perennial Beds

  1. Once again, consider switching to a mulch type that better feeds your soil and garden plants, and be sure to fertilize your perennials yearly.
  2. If you want to stick with bark mulch, you could leave 6-inch a ring around each perennial and apply either compost or earthworm castings on the surface annually in the spring. Even when applied to the soil surface, the quick-to-decompose organic matter will feed your plants and soil microorganisms.
  3. If you are really concerned about the soil quality of your perennial beds, do a soil re-haul in the spring. Start by digging your perennials (this is also a great time to divide them and/or redesign your beds), then follow the same steps listed above. Perennials tend to set deeper roots than annuals, so it pays to amend the soil a bit deeper.

I hope that these tips are helpful!


Happy Gardening!


Jessie Keith

Black Gold Horticulturist


Five Best Ways to Save Water in the Garden

Roof rainwater trickles into a classic garden rain barrel.

Smart gardeners prepare for summer dry spells and drought. A little water can go a long way if you plan ahead with effective water conservation techniques. Implement one (or more) of our five ways to save water in the garden, and not only will your plants grow better in dry weather, but you will also spend less time and money on watering.


1. Collect and Redistribute Water

Rain barrels are the best tools for rainwater collection. They connect to gutter downspouts to capture roof runoff. Collecting rainwater reduces watering costs, and plants generally prefer rainwater to tap. Fill watering cans from rain barrels or hook hosing up to them for gentle garden irrigation.

Cisterns are larger above- or below-ground water storage units used to collect rainwater, air conditioning condensate, or even well-water reserves. They are more costly to install but useful for gardeners living where water is limited and often rationed. Roof collection cisterns are only recommended only for areas with adequate annual seasonal rainfall of 15-inches/year or more (click here to see US annual rainfall averages).

Know your roof composition before collecting roof rainwater. In a 2-year study, two roof types leached high concentrations of heavy metals; uncoated galvanized metal roofs released high concentrations of zinc, and treated wood shakes released high concentrations of copper. Refrain from roof water collection if you have these roof types.

Cisterns collect large amounts of rainwater, well-water or even air-conditioning condensate.

2. Irrigate at Soil Level

Ground-level irrigation results in less water loss. For large gardens, weave soaker hoses through beds—setting your intake nozzle closest to the hose spigot. Soaker hoses are water-permeable lines that slowly release water into the soil. They can easily be covered with straw or mulch, to keep beds looking attractive while further retaining soil moisture. Mark covered soaker hoses to keep them from getting damaged by stray trowels or spades.

Plastic drip lines release water from perforated holes or extensions of fine drip tubes. Lines of perforated drip tape are inexpensive and easily set along vegetable garden rows. Pot dripper systems work best for complexes of garden containers. Dripper systems consist of a central hose line that connects smaller lines into each container. (Dripworks makes a great deck garden drip irrigation kit.)

Plastic bottle irrigation is popular with tomato growers. Simply perforate a clean, 2-Liter plastic bottle and fully sink it alongside a newly planted tomato at planting time (leaving the top accessible). At watering time, simply fill the underground bottle with water—being sure to keep the lid on between watering. It’s an inexpensive and effective way to deeply irrigate thirsty tomatoes in the heat of summer.


Well-placed drip lines irrigate lettuce plants at the soil level.


3. Time Irrigation

Timing is everything when it comes to good irrigation. The best summer watering time is in the cool early morning when soil water retention is highest. Early moisture prepares plants for hot midday temperatures. In turn, watering at the hottest time of day—between 12 noon and 3:00 pm—is the least effective time to water because more evaporation occurs and plants take in less water in high heat and sun.

Hose timers streamline watering. There are two kinds—mechanical and digital timers. Mechanical timers are low cost and can be set for between 15 to 120 minutes, though they can’t be preset. Digital timers are more costly, but they can be preset for specific watering times.

For deep watering, set soaker or drip irrigation to low pressure, and time the irrigation to fully wet your garden plants or pots. One to two hours is often adequate, though soil quality should be considered when calculating watering time. Light, porous, organic-rich soil needs less watering time because it readily percolates and retains moisture. Dense, clay-rich soils are slower to percolate and need longer, deeper watering. Poorer quality garden soils should be amended and mulched yearly to improve water retention and porosity.

Drip irrigation systems are easily set on timers for precision watering.

4. Retain Soil Moisture

Good garden soil amendments, such as coconut coir, peat moss, and compost, improve soil porosity and moisture retention, which increases root water uptake. OMRI Listed® Black Gold® Just Coir is pure, organic, processed coconut coir that holds a lot of water to bring added moisture to garden beds and containers. Black Gold® Canadian Sphagnum Peat Moss also has a high water-holding capacity, but it also has a low pH, so apply it to more alkaline soils or where acid-loving plants will be grown. Vegetable and flower gardeners rely on OMRI Listed® Black Gold® Garden Compost Blend to add needed water-holding organic matter to the soil. Compost also makes high-quality light mulch.

Mulches are like soil blankets that hold in water. The best garden mulches include quality compost, fine leaf compost, and straw and grass clippings (for vegetable gardens). Surprisingly, large ornamental rocks hold a lot of soil water beneath them. These are all better than thick bark mulch, which is often applied so thickly that overhead water cannot percolate through to reach plant roots.

Supplement containers with coconut coir or water-holding moisture crystals. Black Gold® Moisture Supreme Container Mix and Black Gold® Waterhold Cocoblend Potting Mix are both fortified with coconut coir for natural water retention.

5. Supply Midday Shade

A little midday shade can help garden plants withhold water better.

Sun-loving plants appreciate one or two hours of protection from the hot midday sun. The hottest time window is between 12 noon and 3 pm, with 3 pm being the hottest point. A well-placed umbrella, pergola, or awning can offer just enough shade to help plants retain moisture through the worst of the day’s heat.

Anyone of these water-saving changes can help you save water while increasing the health and success of your summer plants. All are best done early in the season, allowing you to reap the rewards when summer heat and drought appear.


Mulching for Water Conservation

roses
Make roses more drought resistant by mulching well, but keep mulch clear of the woody base of each plant.

This year you’ll hear a lot of suggestions for helping your landscape make it through drought. Some are truly actionable while others may prove problematic. For example, many sources recommend relying on drip irrigation. This may be ideal for your veggie and flower gardens, but it can prove troublesome for trees and shrubs with vast root systems that don’t always respond well to poorly placed pinpoint watering.

Aside from smart irrigation, the second most effective way to help your beds and borders survive is to apply mulch. Mulching for water conservation is important. Mulch acts a lot like a sun hat on a very hot day; sun hats protect the head from direct sun exposure, keeping the body cooler and the face shaded. Mulch also reduces evaporation of water below its surface. There are many mulch options, the best being composed of partially decomposed organic material that is easily spread over the soil’s surface around plants.

Why mulch during drought?

There are three key reasons to apply mulch to beds before or during drought:

1. Mulch protects the soil surface from direct solar exposure, so the soil remains much cooler in the heat of the day.
2. Mulch acts as a moisture barrier keeping water from evaporating from the soil surface.
3. Mulch stops weeds from succeeding, which means more available soil moisture for your garden plants.

What materials make good mulches?

Black Gold Compost is a super mulch for the vegetable garden.
Black Gold Garden Compost is a super mulch for the vegetable garden.

Mulching during drought requires a thick layer of organic matter spread out over the surface of the soil. Fine bark mulch, pine straw, leaf mulch, and compost are all good organic mulching products. Knowledgeable landscapers utilize a 2-inch thick layer of mulch that’s thick enough to provide benefits but not so thick that rain or irrigation water cannot permeate the layer from above. Some forms of mulch, such as coarse bark mulch, do not break down easily, so they remain in place for a long time.

When rich, semi-decomposed soil amendments are used as mulch, they offer the additional benefit of adding quality organic matter, which increases soil fertility. Black Gold Garden Compost Blend feeds microbes in the soil while protecting plants from potential dehydration and heat when water is limited. When rains finally do return, this rich mulch can be turned under to add more benefits while the coarse bark mulches are best left on top.

How do you spread mulch?

You may be surprised to discover how much material is required for adequate mulching. Go cheap with a thin layer under 2-inches thick, and your garden will be riddled with weeds and the soil’s surface may crack from dehydration. Landscapers begin applying mulch by placing evenly spaced bags (or wheelbarrow loads) of mulching material over an entire garden area. Next, they use a shovel to stab the bags to break them open, so the contents are easily emptied when one end of the bag is picked up.( Be sure to collect and recycle the empty plastic bags.)

Remove grass in a ring around your young trees in lawns, then apply mulch to create free drainage to the tree roo
Remove grass in a ring around your young lawn trees, then apply an even 2-inch layer of mulch. Be sure not to mound mulch along the trunk!

The mulch is then spread to the correct thickness with a hard rake, being sure not to layer any over plant crowns or trees/shrub trunks. Mulch allowed to accumulate against a trunk or stem can cause crown rot. Avoid it by keeping several inches clear around the base of stems/trunks. When mulching slopes, allow more clearance on the uphill side to manage and reduce runoff and downhill accumulation. In windy areas, it helps to water and compact the mulch, if it’s fine like Black Gold Garden Compost, so it won’t blow away.

Mulching will always be the most effective way to reduce water demands without sacrificing plant health. For this year of weather extremes, don’t expect miracles because just keeping plants alive may be enough. Then when the rains return in abundance, your garden plants will spring up from that semi-dormant state more vigorous than ever.

borders
Spread mulches in and around your herbs and perennials to preserve soil moisture.