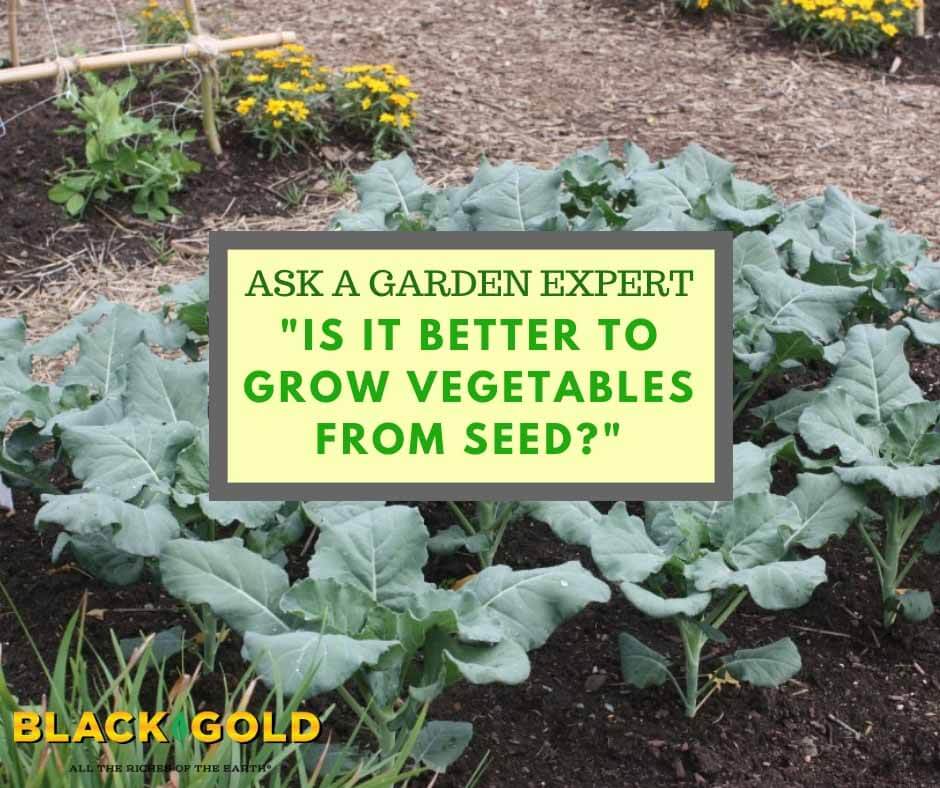
Is it really better to grow veggies from seeds or do buying big plants work just as well? Question from Donna of Newberry, South Carolina
Answer: It depends on the vegetable and your sense of adventure. Let’s start with the vegetables that should always be grown from seed.
Vegetables You Should Always Grow from Seed
Large-seeded veggies sprout and grow very quickly and are much cheaper to start from seed, so buying them as plants is a waste of money. These vegetables include cucumbers, melons, pumpkins, squash, and zucchini. I start mine in 4″ pots of Black Gold Natural & Organic Potting Mix (seedling mix is not necessary). Plant the seeds a half-inch to one inch down, depending on seed size and packet directions. Water them in, place them in a warm sunny spot outdoors, keep them moist, and they will sprout in days.
You can also plant these seeds directly in the ground, but I like the pots because I have found that this method encourages better germination, and I can protect the young plants from foraging pests. Once the seedlings are strong and have put on several new leaves, I plant them in the ground. (Check out the videos below about growing melons and cucumbers.)
Cool Vegetables You Can Only Grow from Seed
I like to grow peppers, tomatoes, squash, and other vegetables from seeds because I always want to try new and exciting varieties that aren’t sold at local garden centers and nurseries. Some of my favorite vegetable seed vendors for cool varieties are High Mowing Organic Seeds, Baker Creek Heirloom Seeds, Johnny’s Selected Seeds, and Pinetree Seeds. Trying new, wonderful varieties makes starting plants from seed worth it.
I should also mention that some vegetables, particularly tomatoes, can get common diseases in the greenhouse and plant nursery–specifically early and late blights. It doesn’t happen very often, but I have unknowingly purchased diseased tomatoes in the past. Since then, I have grown almost all of my tomatoes at home from seed.
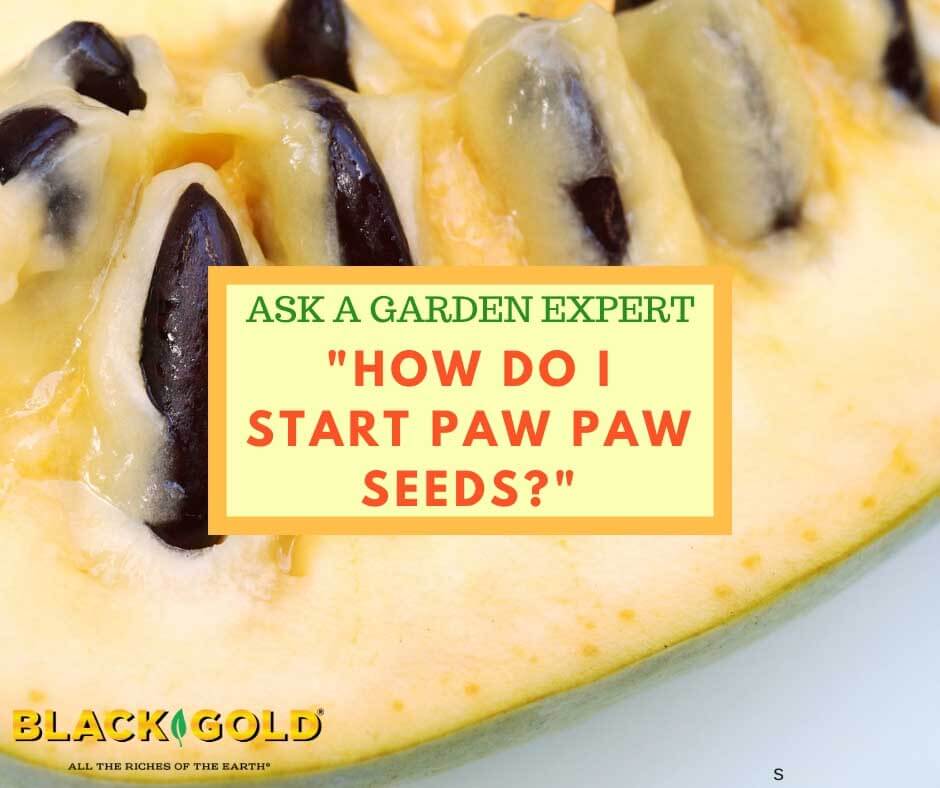
“I want to start and grow paw paw seeds. Can you give me your recommendation on a planting mix? I’m planting seeds in 4×14 containers. They’ll be in the containers for two years in the shade in hot Texas conditions before I plant them in the orchard. Pawpaws are considered tropical. The nursery that sells paw paw seed said I might want to add a 50/50 sand mix to potting mix to help pull the seed husk off the seedlings when they emerge. I’m afraid I’ll introduce a disease like damping off if I add sand to the mix. My orchard soil is all sand, so I have plenty. I’m not so sure adding my sand is a good idea. Thanks for your help!”
Question from James of Pilot Point, Texas
Answer: Thanks for your question about paw paw (Asimina triloba) seed germination. There are several things that you need to know before successfully growing paw paws from seed. First, they are temperate trees that survive in USDA Hardiness Zones 5-9, and the seeds need a moist chilling period (stratification) before germinating. Seeds need to be chilled for 100-120 days before they will sprout.
I recommend starting your seeds in smaller containers. You can either cover and chill them in a refrigerator or keep them outdoors uncovered during winter for natural chilling. Just never let the mix get dry. A super well-drained seed germination mix of 50% peat and 50% purchased sand is recommended to ward off fungal diseases, like those that cause damping-off (Pythium and Phytopthera). The better the drainage, the more difficult it is for these fungal diseases to thrive.
After the chilling period, keep the soil moist and between 70 to 75 degrees Fahrenheit for best germination. After seedlings sprout, quickly move them into your 4×14 pots containing well-drained potting soil. Fafard -2 is the Sun Gro pro mix that I recommend. It is one of our top blends for forestry. If planting in Black Gold, choose our Natural & Organic Potting Mix.
Water your trees regularly, especially during your hot, dry Texas summers. Once they are ready for orchard planting, I highly recommend amending your soil. Paw paws grow best in rich, moist, slightly acid loams. Sandy loams are fine as long as they have enough organic matter. The liberal addition of compost or peat moss will greatly increase the organic content of your sandy soil.
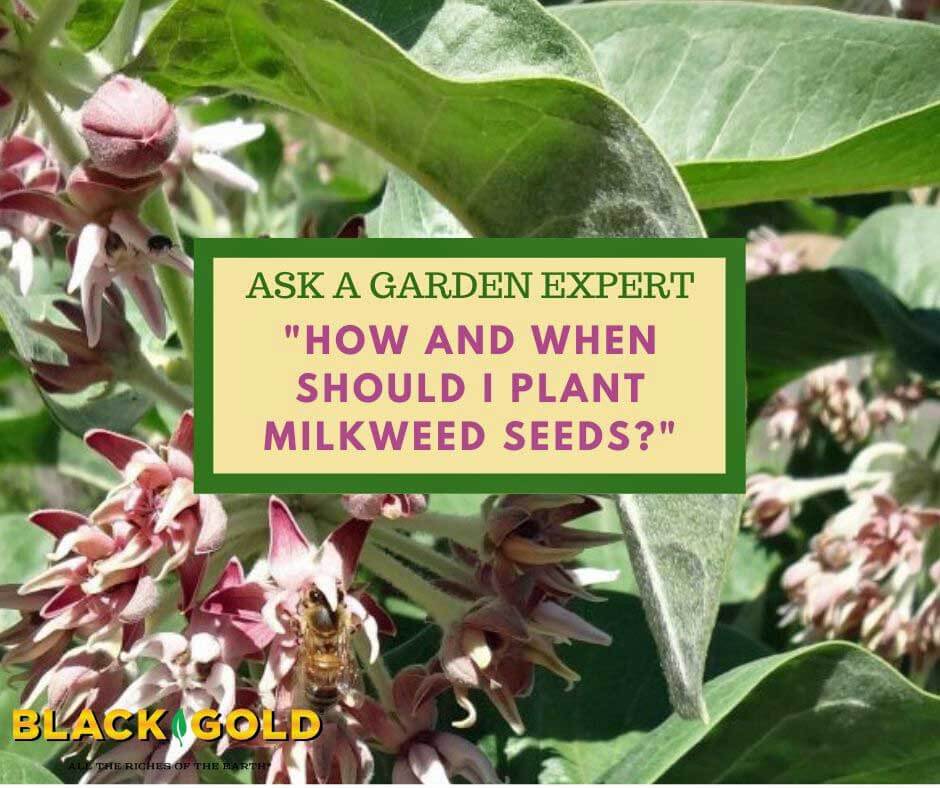
“I have some milkweed seeds and wonder when I should plant them. Should I plant now or wait until spring?” Question from Lynda of West Warwick, Rhode Island
Answer: Start milkweed (Asclepias spp.) seeds indoors in mid to late winter. The seeds of these long-lived perennials can be a little tricky to start because they require a chilling period before they will sprout. (Keep in mind that this only applies to temperate species. Tropical milkweeds, like Asclepias curassavica, don’t need stratification at all.) Here is a materials list and timeline of the steps needed to get these seeds to germinate.
Mid-Winter: Soak your seeds for half a day in lukewarm water. Sprinkle several seeds over small (4″) pots filled with moistened Black Gold Seedling Mix, and lightly cover them with additional mix. (The seeds should be placed about an inch apart. I suggest planting at least a two pots up to ensure you get at least a few seedlings.) Stick labels into each pot with the plant name and date started. Put the pots in large, sealed plastic bags, and then refrigerate them for four to six weeks. Make sure the mix remains lightly moist during this time. (This can also be done in plastic bags of lightly moist potting soil, but I find that the seeds are easier to find and manage if they are pre-potted.)
Early Spring: Remove the pots from the refrigerator, place them in water-holding trays, and lightly water them with lukewarm water. Set them in a warm, south-facing window or beneath grow lights. I prefer to start seeds beneath grow lights. (Click here for an article with an overview of starting seeds beneath grow lights.) Lightly spray the surface soil to keep it moist. The seeds should germinate within two to three weeks. Then water intermittently to keep the pots just moist.
Mid to Late Spring: Transplant the seedlings into their own small pots or into cellpacks, allow them to grow to at least several inches, harden them off, and plant them outdoors.
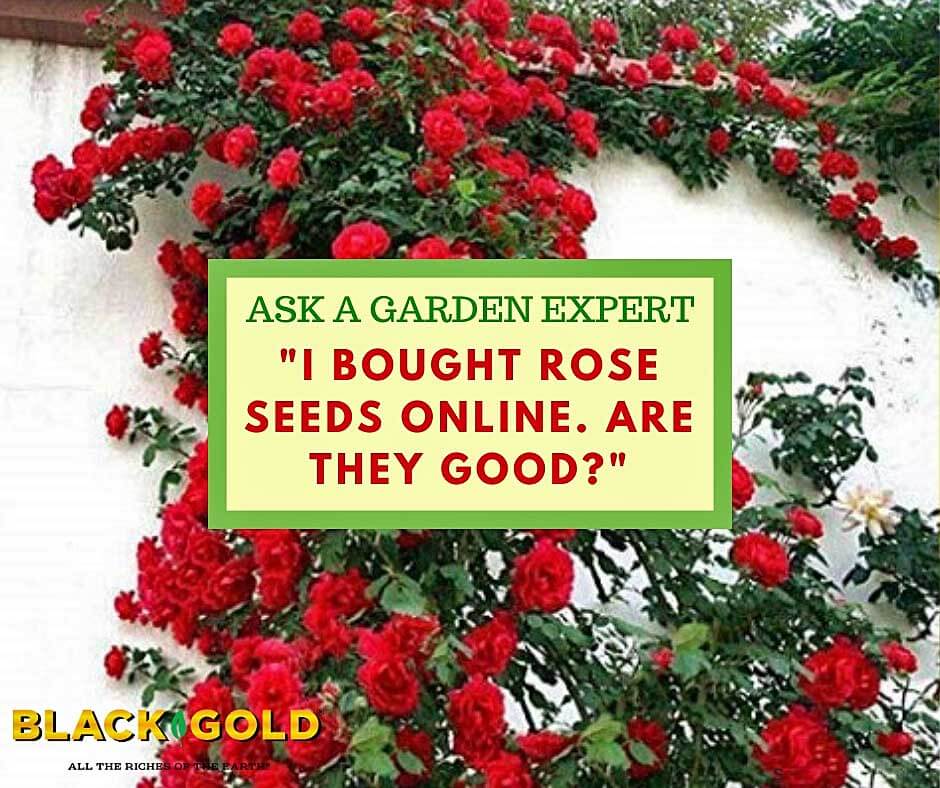
“I purchased rose seeds on [online] and didn’t know they were from China till they shipped (rose image above). I’d love it if you could tell me if they are or are not rose seeds. I’m new to roses, and knowing if these are or are not rose seeds will be very helpful. Thank you so much! :)” Question from Bradley of Cleves, Ohio
Answer: You can plant your rose seed, but they will not mature, as shown in the picture. Many misleading plants and seeds are sold online, and this is one of them. The rose shown in the advertisement is a rambling hybrid climber with beautiful double red roses. It is not seed-grown. All hybrid roses available today are specially bred varieties grown from rooted cuttings or cuttings grafted onto a rootstock (probably a bit too much technical information). To put it plainly, rose cuttings are snipped off stem tips taken from hybrid roses. These are then dipped in a hormone that helps them root, and placed in lightly moist soil until they root and can be potted up and eventually planted into the ground.
Growing roses from seed is rare unless you are a rose breeder. Seed-grown plants will be variable in appearance and take a long time to grow. There are a few reliable seed vendors that sell rose seed, such those of ‘Angel Wings’ miniature roses from Renee’s Garden Seeds, but these sources are not common. Buy full-grown plants instead. They may be a bit more expensive but well worth the investment.
Choose Reputable Companies
Buying from a trusted seed or plant source means everything. Here are my four favorite rose growers proven to provide healthy, beautiful plants.
1. David Austin Roses – This English rose company is famous for selling some of the most beautiful, vigorous, disease-resistant roses. (They are the best!!!)
2. Star Roses – If you want attractive, highly disease-resistant shrub roses, this is the go-to source.
3. Weeks Roses – Weeks is a famous American rose company with excellent varieties. You can’t go wrong with their selection and quality.
4. Jackson & Perkins – This old-American rose company has lots of wonderful varieties.
For a little extra information about choosing roses and growing them organically, watch the video below.
Starting Roses from Seed
If you want to try starting your rose seeds, they need to be chilled to enable them to sprout. Plant them in pots or a small tray of vermiculite that is just moist, not wet. Place the pots or vermiculite in a plastic bag and then chill them in the refrigerator fr 10-12 weeks. Then remove them and place them under grow lights or in a sunny window. Keep the vermiculite just moist. Ambient room temperature is ideal. They may take several weeks to sprout. Placing them on a heat mat can encourage faster germination.
“How can I prevent damping off when I sow seeds? That is my problem.” Question from Bev of Philadelphia, Pennsylvania
Answer: This is a problem that I have faced many times starting seeds in university greenhouses, professional greenhouses, and at home. Thankfully, the solution is pretty simple, and it all involves keeping everything clean. Let’s start by covering the sources of damping off disease.
What is Damping Off?
Damping-off is a disease of sprouting seeds and seedlings that is primarily caused by two soilborne fungi, Pythium and Phytophthora spp. They cause rot and death in developing seeds and seedlings, usually at the roots or base of tender developing stems. Damping-off is a problem when growers keep the soil too moist and the disease is present.
To keep damping-off from taking hold you need to start with good soil, clean pots, and follow up with smart care.
Sterilizing Mix and Pots
Disease-carrying mix is the biggest concern. I used to work in large-scale greenhouses where they used big heater/steamers to sterilize mix at a temperature just high enough to kill any soilborne diseases (around 180°F). This is essential for growers that reuse mix, but careful growers sterilize new mix, too. Why? Because the airborne spores of damping-off fungi can be practically anywhere –especially in places where plants are being grown.
Additionally, unused seed-starting mix, like Black Gold Seedling Mix, is typically produced in clean facilities and bagged pathogen-free. But, if bags tear in transport and/or bags are not stored properly, Pythium and Phytophthora spores can infiltrate. Bags of seedling mix should be lightweight (meaning no water from the outside has seeped into the bag) and without tears. Improperly stored open bags at home can also be a danger. If you are not certain of your mix’s cleanliness, then it’s time for home sterilization.
I sterilize seed-starting mix using this fast and easy method.
Ingredients: Seed-starting mix, a 9″ x 13″ cake pan, 1/2 cup water, aluminum foil, and an oven.
Directions: Preheat your oven to 180°F, fill your pan with seedling mix, sprinkle it with the water, cover the pan with the foil, and bake it for 30 minutes. After baking, remove the pan from the oven and allow the mix to cool before using.
These diseases can also hang out on dirty old pots, so in the greenhouse, we’d also wash used pots and trays really well in hot water with good dishwashing liquid and sometimes a dash of bleach. I do this at home as well.
Seed and Seedling Care
Aside from starting with clean soil and pots, it is essential to discourage wet soils when starting and growing seedlings. I generally keep newly planted seeds gently sprinkled with a bottle waterer (see video below), so the soil is never over saturated. Once my seedlings pop up, I bottom water by adding 1/4 to 1/2 inch of water to the water-holding trays every two to four days, depending on seedling size. It also helps to encourage airflow, to help soil surfaces dry more quickly, and keep trays warm with a heat mat.
These cultural practices will definitely kick your damping-off problem away for life!
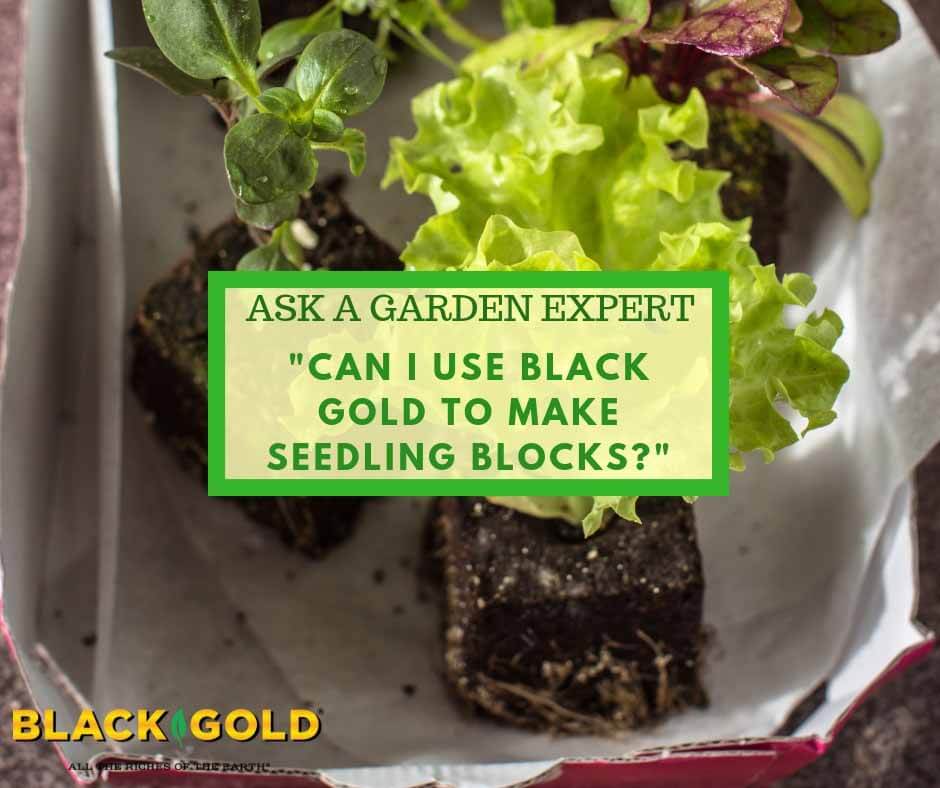
“I realize that you sell several potting soils. The one that I want to use to make soil blocks is your organic potting mix. Do I need to add anything besides water to it to act as a binder?” Ken from Washington State
Answer: Black Gold Natural & Organic Potting Mix is perfect for seedling block making. All you need to do is fully moisten the soil, gather it in a pile, and punch it down with a soil block maker. The compacted blocks should be firm and stay together when handled. Then place them in leakproof flats with no bottom drainage holes. No extra binder is needed. This method is nice because it offers a plastic-pot-free way of starting seedlings.
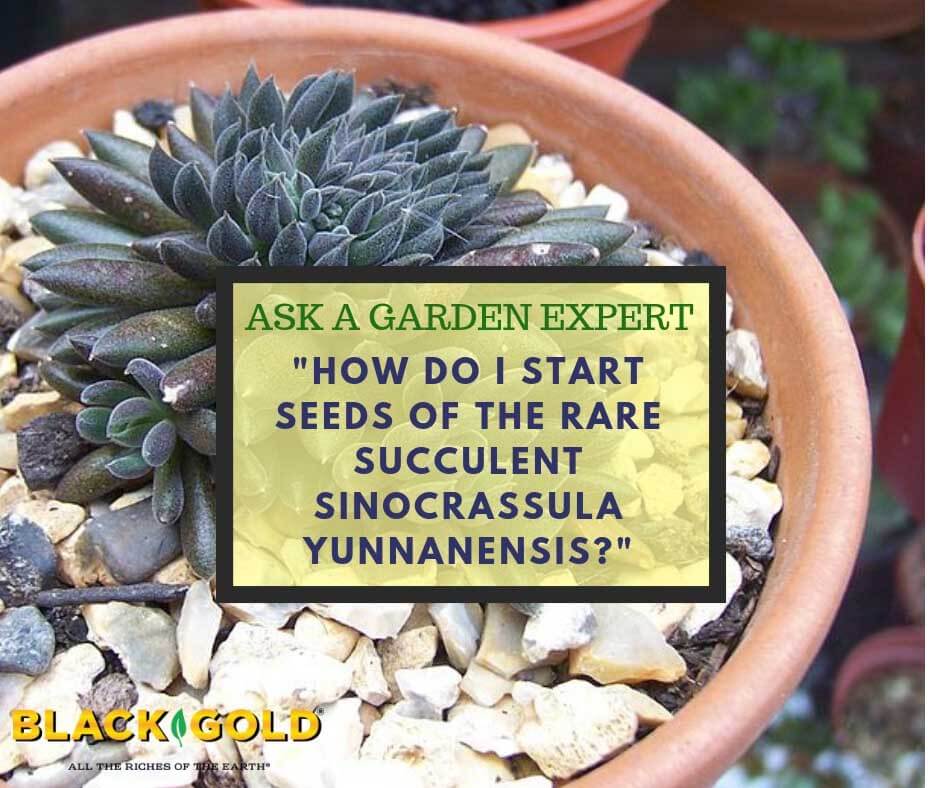
“I was gifted Sinocrassula yunnanensis seeds. What’s the best way to germinate seeds.” Question from Lizzy of Ocala, Florida
Answer: The seeds of the rare Asian succulent Sinocrassula yunnanensis need some care for effective germination. The beautiful plants have nearly black foliage and form dense, succulent clumps. Bloom time is in fall or early winter, and the flowers are ivory with red tips.
The seeds should not be covered when sown. They need to be planted in winter and kept under cool growing conditions (65 to 55 degrees F) beneath grow lights. Plant them in a well-drained Seedling Mix with lots of extra perlite. The seeds should take 2-3 months to germinate. After germination, water the seedlings very little to avoid any chance of rot. The soil should be kept just lightly moist. When they get large enough to transplant, plant them in a very well-draining potting mix, such as Black Gold Cactus Mix.
Growing flowers from seed with your kids is a lesson in biology, but it’s also fun and a great snow day project. It’s best when the flowers you choose are really colorful, easy to grow, and great for pollinators and bouquets.
Harvest and tie lavender bundles for drying. They dry best if hung in a cool, dry place.
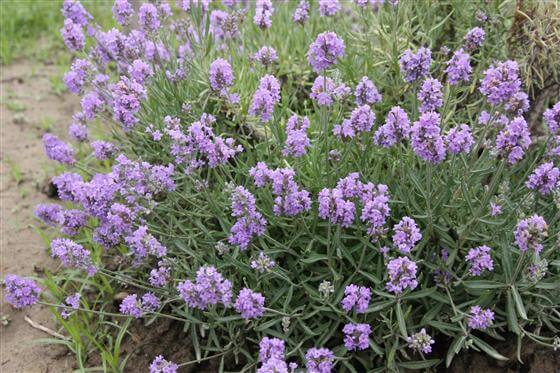
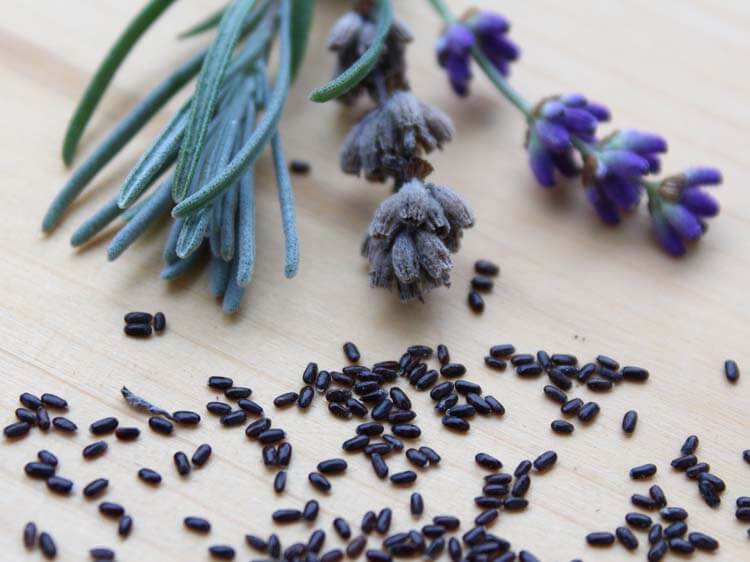
Lavender (Lavandula spp.) is a wonderful addition to any garden because it can be used as a culinary herb, a fragrant cut flower, a crafting material, or a natural-beauty ingredient. It even feeds bees! With lavender, the possibilities are endless. There are so many interesting species and varieties to try that it’s worth starting some of your lavenders by seed to get a large number of unique cultivars for the price of the seed packets, planting mix, pots, and a little time.
Lavenders are short-lived shrubby perennials, so be sure to propagate a selection of plants to replace those that have become too woody or that have succumbed to winter freeze. Then tuck the newer plants in between the older ones so they can eventually fill in space. Lavenders are such attractive, low maintenance landscaping plants when planted in swaths or hedges, and growing them from seeds makes this a much more economical endeavor.
For many years I was told that lavender was better propagated from cuttings, so I avoided seeding my own plants. When they started seeding themselves around my garden, I called hogwash on that theory and picked up some different seed varieties to try. As with all perennials, they can take a bit longer to germinate and be ready for transplant. Start them in late winter, under lights, and on heat, and you should get fair-sized transplants by the beginning of the summer. And in my experience, a neat and tidy lavender plant from seed is a great way to start. I love the way lavender plants grow delicate new stems from seed that set the tone and shape for the plant.
Another common complaint is that lavender seed doesn’t grow true-to-variety from collected seed and some purchased seed, resulting in plants with varying heights, sizes, and colors. Certainly, if you are looking for exact replicas of varieties this could be frustrating, but in most cases, it would be more of a landscape feature to have slight variations in a planting. In any case, seed companies work tirelessly to ensure that their seeds will grow uniformly, so when in doubt, be sure to check your seed source for any warnings about a variety.
Is Cold Stratification Necessary?
Lavender seeds can be purchased or collected in the garden.
Cold stratification is a process required for some seeds. After sowing, a cold period and then a warm period is required to break dormancy and allow germination. Some gardeners suggest cold-stratifying lavender seeds by placing them in moist soil in a cold greenhouse or refrigerator for two to seven weeks before moving them onto heat. If you are having difficulties in germination, you could consider this option, but I have had great success with germination by simply planting the seeds in trays and placing them on heat mats. The key seems to be to use the freshest seeds possible from a trusted seed supplier.
Now that is all out of the way, let’s start some lavender from seed, shall we?
Sowing Lavender Seeds Indoors
Always choose a sterile soil mix intended for seed starting. Black Gold®Seedling Mix is OMRI Listed® for organic gardening and is fine and easy to wet. Moisten the soil with a little water, and then fill a seed-starting tray with the damp soil mix. Sow lavender seeds on top of the soil and do not cover them. Add a clear dome greenhouse lid to the seed-starting tray to prevent drying out. Be sure that the lid has ventilation holes, and lift it once or twice a day to refresh the air.
Watering
If grown with good light, lavender plantlets will be full and robust.
Keep the soil lightly damp. Use a mister bottle to water as opposed to pouring water over the seeds. You can also bottom water pots and allow the soil to wick the moisture to the seeds. Mist often and check the soil regularly. Once your seeds have begun to sprout, continue bottom watering to keep the soil moderately damp, never wet.
Give Them Light
In order to germinate properly, lavender seeds will need a bit more than just natural light. There is much debate on whether or not expensive grow lights, with a high light spectrum, are needed for indoor seed starting, but I have always found that it’s not the cost of the bulbs that make the difference, but the distance away from the seedlings. Use adjustable chains to hang the grow light and position it as close to the seedlings as possible. As the seedlings grow, raise the light to be an inch above the tops of the seedlings. Light that is too far away doesn’t have the intensity to signal healthy growth and causes seedlings to become leggy.
Transplant the Seedlings
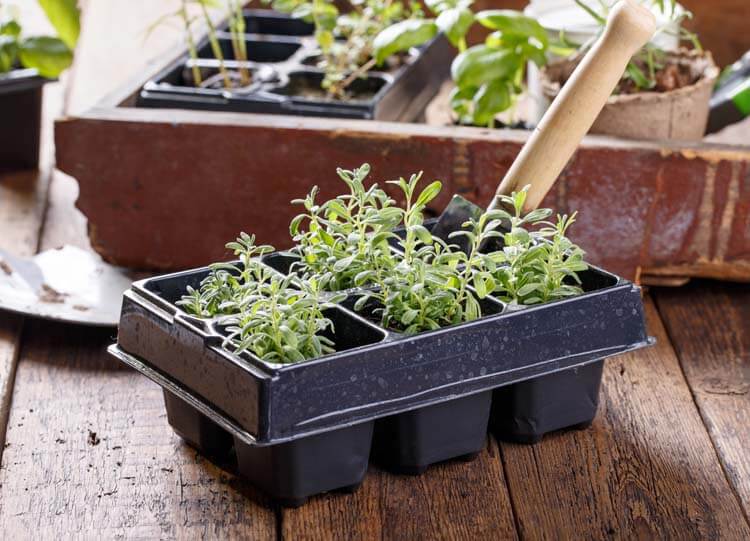
Upgrade lavender plants into larger pots as they grow, so they will be fair-sized at planting time.
After six to eight weeks of growth, transplant the seedlings into indoor pots and let them continue growing until they are ready to move out to the greenhouse or garden.
Harden Off
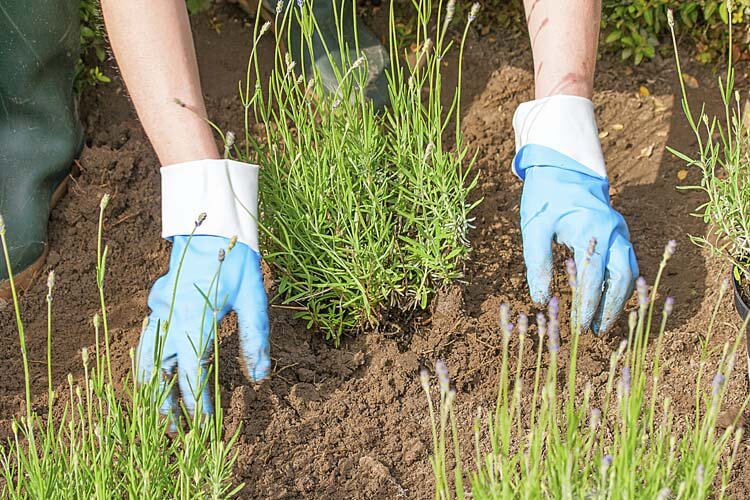
When you have passed the last day of frost in your gardening zone, it’s time to move the seedlings outdoors. To reduce shock and acclimate them to a sunny, outdoor environment, bring the lavender plants outside in their pots for a few hours a day, starting with one hour and increasing to a full day over the course of a week. This gradual introduction to the outdoor climate is called “hardening off.” After a week of hardening off, your lavender plants are ready to be transplanted into the garden. Choose an area that gets full sun and has porous, well-drained soil. Lavender can grow in poorer soils but appreciate organic matter. Amending the planting soil with OMRI Listed® Black Gold® Garden Compost Blend will increase organic matter and drainage.
Harvesting Lavender
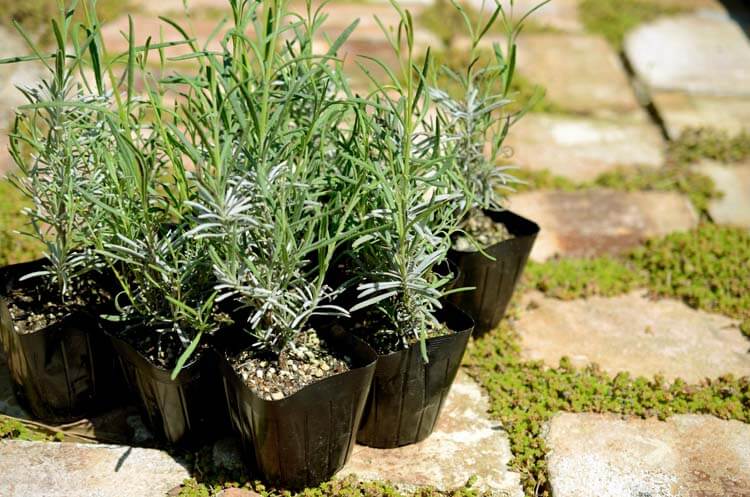
Plant lavender when the starts are well-developed. Then let the harvest begin!
I personally like to harvest some lavender for myself and leave some for the bees to enjoy. The best time to harvest your lavender is when the buds have formed but have not yet opened. Buds harvested at this stage will retain their color and fragrance much better than open flowers, and once you have dried the lavender, buds will fall off the stem easily so that you can collect and store them. Using sharp bypass pruners, cut your lavender stems leaving at least two sets of leaves on the green stem of the plant. If you cut past the green growth into the woody stem, it will not regrow.
Collect your lavender stems into a bundle and tie it together with twine. Hang the bundles in a warm spot away from direct sunlight and let them dry out completely.
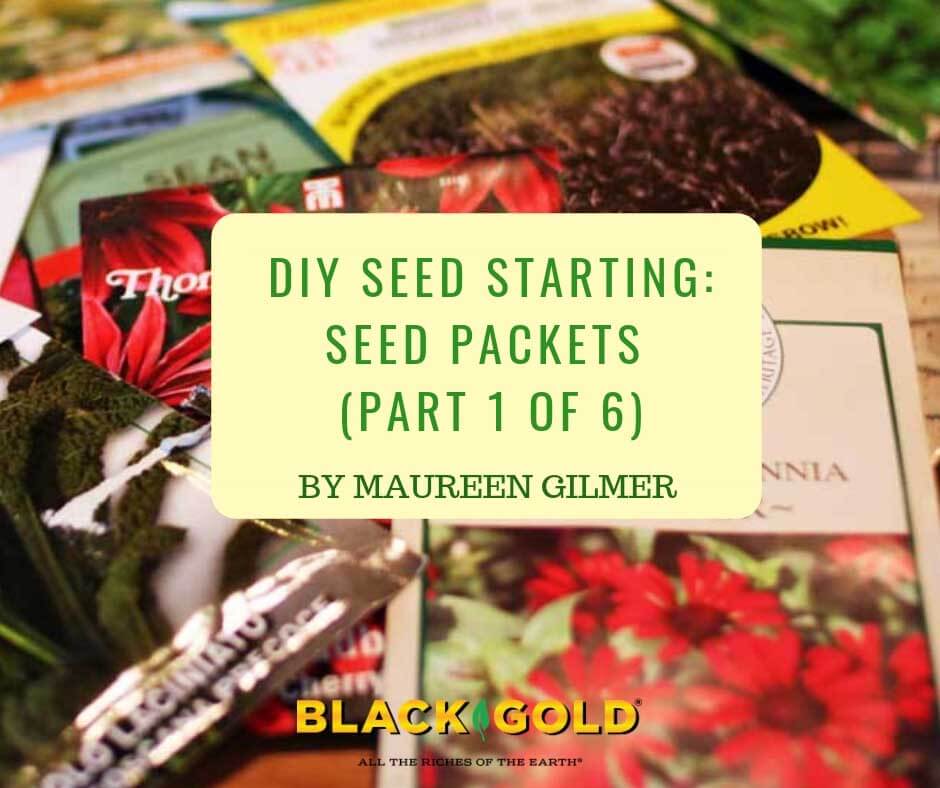
Read the back of your seed packet to find details essential to successful germination.
Starting seed indoors is the best way to get your garden off to an early start. It also provides for earlier and longer harvest by extending the growing season. Not all plants are suitable to start indoors–these include large-seeded or fast-growing vegetables that produce quickly, such as beets, radishes, squash, and melons as well as zinnias and cosmos. Those warm-season vegetables that enjoy a long growing season, such as tomatoes and peppers, should be started early. They also have small seeds are hard to keep track of outdoors and easily washed away or eaten by pests when very young. Raising your slower-to-grow plants indoors where you can control growing conditions yields larger plants that thrive once moved outdoors.
Seed Packet Information
The first step is to read all of the information on the seed packet. It is your guide to growing a plant from seed. Each packet should have the following information:
Date
All seed packets are stamped with a “packed for” date, which should be the year of purchase. Like food, dates ensure fresh seed has high viability. Out of date seed is not always a bargain because they become less viabile each year, though some can remain viable for several years (click here for a seed viability list). With lettuce, for example, the seed can survive for up to five years if stored in a cool, dry place.
Depth
Each seed type is planted at a specific depth indicated on the back of the packet. If planted deeper than specified or too shallow it may fail to germinate altogether.
Time to Emerge
Seeds generally take a certain amount of time before germination. If you sow it properly, and the soil is warm enough, you can expect to see a seedling in the number of days specified on the packet. If there’s no sign of life well after the germination window, then there’s a problem.
Spacing
This indicates how much space is required between plants of the same type. Distancing plants ensures that they won’t be overcrowded. While it is not essential for indoor seed starting, it is helpful in determining the required number of seedlings for a given garden. It is also wise to provide seedlings enough space to grow well in cell packs or pots.
Days to Harvest
The days to harvest tell you how long it will take before a crop can be harvested. Days vary from cultivar to cultivar, so check them before purchase. Fast-growing vegetables are often more gratifying. Many long-duration crops can and should be started indoors.
Finally, make a record of the seeds you grew and their overall success. Keep those that work, and drop those that don’t.
Read more articles in this DIY Seed Starting series.