Articles

DIY Seed Starting: Transplanting Seedlings (Part 6 of 6)


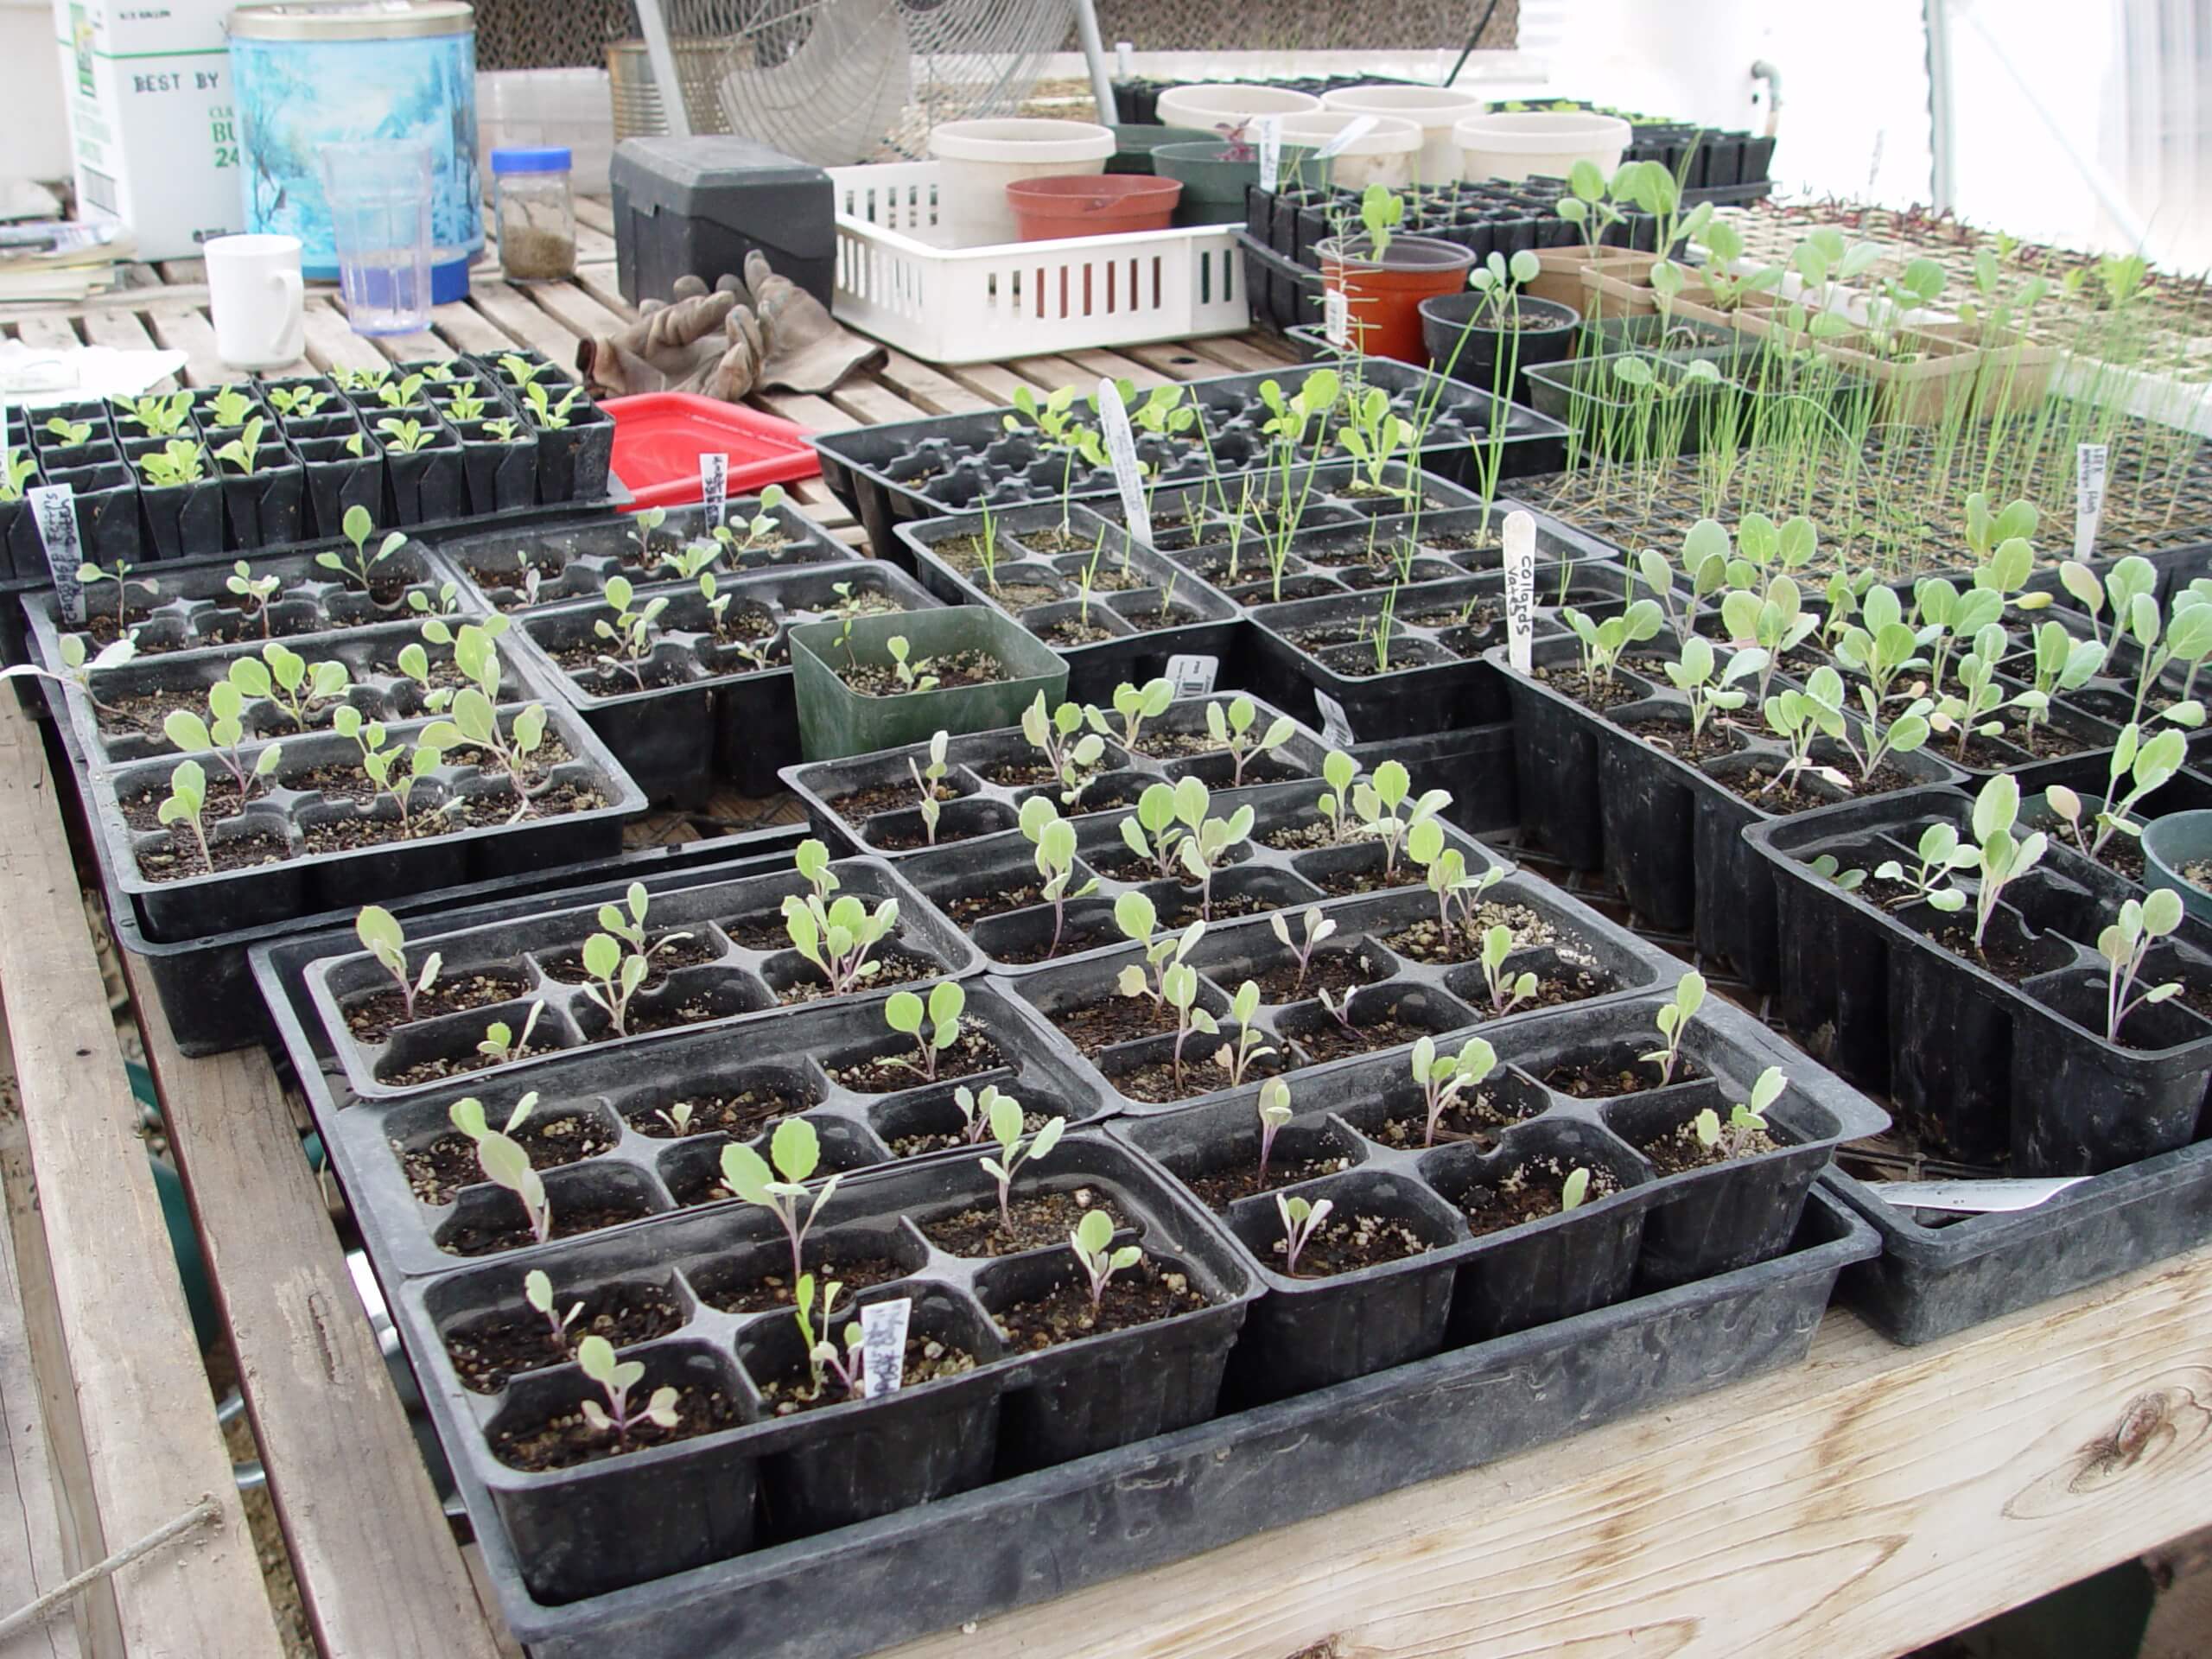
Most seedlings will need to be transplanted as they grow. Larger containers and a more robust mix with added fertilizer will enable seedlings to become large, vigorous plants. (Note that good seed starting mix contains no added fertilizer because it keeps some seeds from germinating.). As long as the light is plentiful, repotting will help your seedlings develop stronger roots and shoots.

Seedling Pot Size

A 3- or 4-inch plastic pot or larger cell packs are ideal for the transition. If you want to reuse containers for a greener approach, use recycled tin cans, yogurt cups, or similar-sized containers; punch two to three holes in the bottom of each for drainage. Use a hammer and thick nail for tin, and a paring knife or screw driver to poke holes into plastic (wear protective hand coverings when punching holes). For bottom support recycle flats from the garden center or line your pots up in a baking pan or any low, watertight container.

Seedlings - Maureen GilmerSeedling Potting Mix and Fertilizer

The potting mix you choose depends on your preference and garden type. If you like planting mix with added fertilizer, choose Black Gold® Moisture Supreme Container Mix or Black Gold All Purpose Potting Mix. Both feed products for up to 6 months. If your plants are going into an organic garden, use OMRI Listed Black Gold Natural & Organic Potting Soil. It is fertile, well-aerated, and holds water well. Because it does not contain a fertilizer boost, apply any quality, water-soluble organic fertilizer.

Fill each pot or container with soil to one-quarter to half-inch below the rim, so there’s enough room for water without overflow.

Transplanting Seedlings

Transplanting your seedlings should be done with a gentle hand. Use an ice cream stick or blunt butter knife to ease seedlings out of the media without tearing roots or disturbing the next seedling in line. Lift it from its roots. Always support the roots with the palm of your hand and lift a seedling by its leaves rather than stems, which are easy to bend or crush. Remove one seedling at a time. Use your finger or a dibble stick to open a hole in the potting soil large enough to accommodate the entire root system comfortably.

Plant - Maureen Gilmer
Plant: Don’t pick up seedlings by the stem; support the roots with your hand.

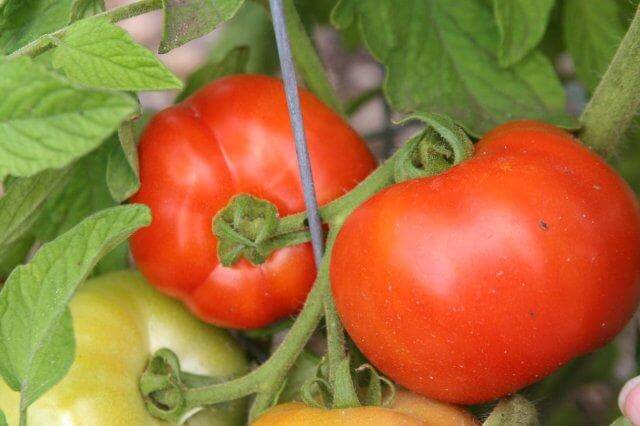
When transplanting tomatoes, they can be planted much deeper into the soil so new roots will form on the underground part of the stem. This is a rarity. With most other seedlings, transplant them at the same depth. Hold the seedling by the leaf and gently place the roots in the hole then cover with additional mix and lightly press it down. Next, water your seedlings gently. Allow them a week to revive from transplanting.

Hardening off Seedlings

On mild days take the whole flat of seedlings out onto the porch or covered outdoor area with partial sun to help them become adapted to outdoor wind and light. This transitional period is called “hardening off,” which is essential to toughen tender indoor plants to the harsher growing conditions of the outside. Over a week or two, slowly move them into higher light, if they are full-sun plants. If nights become warm, leave thems outdoors overnight to better adapt. Just keep them out of reach of curious pets and hungry wildlife.

With the nutrient-rich soil, growth will speed up so your seedlings will benefit from lots more direct sunlight. Just be careful over the first few days to ensure they adapt well to the exposure without wilt or burning.

READ MORE ARTICLES FROM THIS SERIES…

  1. Start Vegetable Seed Indoors Early
  2. DIY Seed Starting: Seed Packets (Part 1 of 6)
  3. DIY Seed Starting: Damping Off Prevention (Part 2 of 6):
  4. DIY Seed Starting: Containers (Part 3 of 6)
  5. DIY Seed Starting: Proper Sowing (Part 4 of 6)
  6. DIY Seed Starting: Watering (Part 5 of 6)
  7. DIY Seed Starting: Transplanting Seedlings (Part 6 of 6)

How Do You Start Raspberries from Canes?

How do you start raspberries from canes? Question from Deborah of Los Lunas, New Mexico

Answer: Raspberries are one of the easiest fruits to propagate from canes or cuttings because they readily root, even without the help of rooting hormone. In fact, if you let canes naturally weep to the ground in your garden, they will root as they touch the ground. In time a single plant can become a brambly thicket of rooted canes, which is why these plants need to be pruned and maintained each season.

If you have rooted canes, all you need to do is cut at least a foot of top growth from the rooted segment, dig up the root ball, and replant the berry wherever you wish. If you want to root cane cuttings, here’s what you need to do:

Rooting Raspberry Cuttings

Materials

  • Sharp bypass pruners
  • 1-gallon pots
  • Rooting hormone with added fungicide
  • Quality potting soil, such as Black Gold Natural & Organic Potting Mix
  • Raspberry cane cuttings (these can be dormant or actively growing)

Method

Use your pruners to take tip cuttings from your raspberries. Make sure they are about 1-foot long and cut from fresh, healthy stem tips. If you like, you can hasten rooting and protect the cuttings from rot by dipping them in rooting hormone with added fungicide. Place the cuttings about 3 inches down in 1-gallon pots filled with OMRI Listed potting mix formulated for organic growing. You can add up to three cuttings per pot. Water the pots in, keep them moist, place them in a cool spot with filtered light, and the cuttings will root in a matter of weeks.

I usually wait for two weeks, and then give the cuttings a small tug to see if they are rooted. If they resist being pulled out, they have set roots. Once new leaves start to appear on your cuttings, and they have clearly rooted, you can separate the rooted cuttings from the pot and plant them where you like.

To learn more about growing happy raspberries and other brambles, click here to read an article about growing them. Be sure to amend the soil where you plant them. I suggest OMRI Listed Black Gold Garden Compost Blend as the best all-around garden amendment.

Happy raspberry growing!

Jessie Keith

Black Gold horticulturist

Can You Help Me Grow Better Root Vegetables?

“I always have bad luck growing rooted veggies – but get a lot of tomatoes and cukes – and beans why?” Question from Christine of Adams, Massachusetts

Answer: Tomatoes, cucumbers, and beans are all warm-season crops, while many root crops are cool-season crops. So long as your root veggie problems aren’t caused by groundhogs, insect pests, rabbits, or voles, there are several reasons why you may be having troubles. Here’s an overview of how to grow root vegetables with success.

Growing Root Vegetables

Most root vegetables grow and taste best in cool weather and can be started in spring just before the last frost. This includes spring beets, carrots, onions, radishes, and turnips. Choose highly rated or award-winning varieties, like the AAS-winning carrot ‘Purple Haze‘ or ‘Avalanche‘ beet, to ensure good results. These vegetables require a sunny garden space, but before you plant, first consider your soil.

Root vegetables grow best in deep, friable loam that’s high in organic matter and has a pH of 6.0 to 6.8. Deep, loose soil is especially important for tap-rooted veggies, like carrots, parsnips, and Asian radishes. If the soil is tough down below, they will be stunted. I recommend double digging your root vegetable plot. Double digging involves deeply digging a garden area to loosen the soil, and amending with compost (Black Gold Garden Compost Blend) and slow-release vegetable fertilizer to encourage superior rooting. [Click here to read an article about double digging.]

When seeding your crops, create shallow rows with a stick and sprinkle them with added compost to aid germination. Label the rows, sprinkle in the seeds, cover with another light sprinkling of compost, and lightly water. Keep the rows just moist until the seeds start to sprout. As they grow, you can water them more vigorously. When the seedlings have reached 3 inches or so, thin them. (Please see the video below about growing beets for thinning instructions.) Keep these vegetables moderately moist and well weeded, and they should grow beautifully!

Later in the season, you may consider growing fall root crops, like winter carrots and onions, parsnips, and rutabaga. [Click here to read an article about growing these crops.]

Good luck with this year’s root crops!

Jessie Keith

Black Gold Horticulturist

Create and Enjoy Community Garden Tours

Written by Nan Sterman

I tend to divide the world into two kinds of people: those who walk or drive down a street, oblivious to their surroundings, and those who notice everything, especially cool gardens.  The latter group often dreams of strolling through gates and peaking over fences into the lush backyards and courtyards of others. If you notice everything (and of course you do), spring or summer is your lucky season for garden tours, private or public. And, if you lack garden tours in your community, consider creating your own!

Types of Garden Tours

The gardens included on tours are often private but can also be public and include speakers.

Garden tours are usually organized or offered by garden clubs, garden societies, and or public gardens. Some benefit causes like school gardens or educational scholarships or community beautification projects.  Other tours, such as native garden tours, have an educational goal.  Still, other tours are just for the fun of it. I went on a first garden tour more than 25 years ago. Since then, I’ve attended dozens, held my own garden on tour many times, and designed tours for the public.

Starting a Community Garden Tour

If you are innovative and know lots of other enthusiastic gardeners, you can start your own garden tour in your community. That’s just what I did. In 2005, I was first asked to head a tour for my community, the Encinitas Garden Festival & Tour.  Then in 2010 an annual self-guided walking tour of over 23 private gardens (a school garden, a butterfly vivarium, and even a fire station garden) was created where I live! Thousands now attend the event, which also features a marketplace of vendors selling plants, pots, tools, and garden soil (like Black Gold®), and close to a dozen talks on gardening topics.

Our tour is unusual in its size and scope, but if you develop and host a tour annually, it will surely grow.  Typically, a new garden tour features four, five, or maybe ten gardens on a driving and walking tour. For the price of admission, attendees generally get a map of the garden locations and a description of what makes each one special, in addition to garden access. Garden hosts are at the ready to help attendees better understand the plants, development, and overall design scheme of their gardens. Each tour will be as unique as its community. As it grows, so can its offerings.

The Dos and Don’ts of Garden Tours

Whichever tour you choose to attend or host, here are some dos and don’ts:

DO

  • Buy tickets ahead of time, so you know where to go, and so organizers can anticipate how many people to host.
  • Wear comfortable shoes.  (I’m always amazed to see high heels teetering down a garden path.)
  • Wear sunscreen, a hat, and bring a bottle of water — common sense.
  • If you have trouble walking or negotiating rough surfaces, inquire about the garden accessibility ahead of time. This is especially essential for people in wheelchairs and parents with children in strollers. Many private gardens are not designed for public access or ADA compatibility.
  • Get an estimate of how long it might take to visit the gardens, so you can plan your day.
  • With tours where there are just a few gardens but lots of people, expect some lines. Be patient. While you wait, strike up a conversation with the person next to you.  You may learn an interesting gardening tip or, at least, make a new friend.
  • Leave the dog at home. Fido may adore the walk but garden owners won’t be appreciative.
  • Bring a camera! Bring a camera! Bring a camera!  And a notebook.

DON’T

  • Pick flowers, collect seeds, or take cuttings. Taking anything from a garden without permission is, well, stealing. If you see a plant you like, take a photo or note its name. Take that information to your local nursery.
  • Go into areas marked as being off-limits.  There is a reason they are marked that way.
  • Try to visit a garden that is not on the tour, even if it looks absolutely fascinating.
  • Criticize a garden. Their owners work hard to prepare for your visit.

Then once you enter each garden, take a good attitude and have a good time! After you complete your garden tour, your next step should be to go home and implement some of your new garden ideas using Black Gold®!


The Well-Prepared Parterre Potager

The grand French Chateau de Villandry Ornamental Parterre Garden is in the foreground with the Ornamental Kitchen Garden in the background. (Image by Maureen Gilmer)

As with most things French, even vegetable gardens can be decidedly beautiful.  What makes them so special are parterre potagers, a practice of creating symmetrical, geometric patterns with beds of vegetables of different colors and textures. Within the geometric beds, which are often lined with trimmed boxwood, rosemary, or santolina hedges, are planted many different food crops over the season, sometimes formal, sometimes country casual.  What they all share, however, is the highly geometric layouts and the diversity of plants grown there.

Grand Parterres

Villandry
The vegetable beds at Villandry are edged in boxwood and filled with colorful edibles. (Image by Maureen Gilmer)

Parterres were originally created using clipped hedges and colorful ornamentals placed in grand designs for the French Aristocracy. They were to be appreciated from the high windows of a palace or chateau, such as the famous Chateau de Villandry built in the Loire Valley during the Renaissance. Patterns can be as simple as repeating squares and rectangles or consist of intricate designs, such as repeating Fleur de Lis, knotwork, and starbursts. The designs were created on a large scale, but their clean geometry also made them adaptable on a smaller scale with more functional plants.

Potager Parterres

The potager parterre doubles as both a kitchen garden and appealing ornamental garden and fits nicely into small spaces. Raised edging can create the same impact as low hedges without additional maintenance.  This makes it easier to create a unique look with symmetrically designed beds delineated by edging and gravel walkways.

edging
Simple, contemporary edging and gravel combine to create a French-inspired herb and vegetable parterre. (Image by Maureen Gilmer)

What makes the French garden so fun is that it’s rich in herbs as well as vegetables and other plants that contribute to the famous cuisine.  Some may be perennial, such as lavender, rosemary, and thyme, while most others are annual vegetables of all kinds.  Often the annuals are cycled in and out of the same ground, as the cool and warm seasons pass.  In the South of France, where conditions are warmer, these hard-working gardens are packed with heavy feeding veggies most of the year.  Unfortunately, many of these gardens experience a nutrient decline over time unless the soils are routinely fed with quality soil amendments and added fertilizer.

Amending Parterre Soil

When native soil is worn out and the microbial content depleted, it’s best to err on the side of overdoing it.  It is rare to experience ill effects caused by too much compost, because it’s quickly consumed by soil microbes, in a healthy organic environment.  The more the microbes feed, the more amendments you need to keep their numbers high for consistent soil fertility year in and year out.

BG-GRDNCMPST-BLND_1cu-FRONT
Black Gold Garden Compost Blend is superb food for microbes.

The best choice for in-ground parterres is OMRI Listed® Black Gold Garden Compost Blend, which is superb food for microbes.  Compost can be added to natural soil in spring and fall.  Turn your earth gently with a fork and blend in the compost at least 6-inches deep before planting.  This ensures there will be plentiful organic matter for crops to do their best.

For additional grow power and added nitrogen, amend with OMRI Listed® Black Gold Earthworm Castings Blend.  At planting time, work a handful of castings into each planting hole to ensure the roots will encounter a boost of natural nitrogen and micro-nutrients derived from the earthworm’s diet.

For parterres with hedge edges, mulch them with the leftover compost and worm castings to keep them healthy, green, and beautiful.  Just leave a 3″ ring of open ground around the base of the hedges to let their trunks breathe.

Petite parterres are a great way to create a formal look or one that’s rooted in history.  They can be planted with vegetables, or flowers, or both.  That’s what makes this garden style so inspiring. One can grow good food while never sacrificing great design.

hedges
This mid-sized parterre is a good solution for a functional backyard landscape. (Image by Maureen Gilmer)


Black Gold® Seedling Mix, A Professional Mix for Home Growers

BG-Seedling-1.5cuBlack Gold® Seedling Mix is the perfect medium for germinating seeds and propagating cuttings, and the formula is the same blend used by professional greenhouse growers. Our mix is designed to promote better root development in young plants and holds water well due to the addition of an organic wetting agent. Moreover, it is OMRI Listed®, which means it is approved for organic gardening.

We start with fine, screened Canadian Sphagnum Peat Moss  and fine perlite and vermiculite to give seedlings and cuttings the aeration and moisture retention they need to develop good root systems. An organic wetting agent ensures rapid water penetration, and the fine texture allows growers to germinate even the smallest seeds while also encouraging excellent rooting. Transplanting seedlings and cuttings with strong root systems grown in Black Gold® Seedling Mix is a breeze!

When it comes to germinating seeds, it’s simple working with this ready-to-use product. All you need is water, light, warm temperatures, and Black Gold® Seedling Mix.

Different seeds require different temperatures for best germination—some requiring cool temperatures and others warm. In general, seeds should be kept at temperatures between 60 and 70 degrees F and placed in bright light provided by grow lights or a window with a southern exposure. Some seeds need to be covered with mix to germinate and some require light to germinate and should be sprinkled on the surface of the mix, so be sure to check seed packets for details.

After planting, make sure the growing media stays moist, but not wet, and seeds and/or cuttings have plenty of water in the early stages of germination and rooting. Our seedling mix is designed with both peat moss and vermiculite, essential ingredients when you want to retain just the right amounts of moisture in your soil.

6-packsBlack Gold® Seedling Mix is made with the same ingredients we use to make our seedling/propagation mixes for professional greenhouse growers. Germinating your own seeds or rooting your own cuttings is a rewarding experience and one of the great delights of gardening. So, when you are faced with the question, “Why buy a premium seedling mix?” the answer is clear. Black Gold® Seedling Mix is high-performing and results in robust seedlings and cuttings. Why trust your seeds to anything else?

More seed-starting articles:

Bottom Heat for Happy Seed Starting

Seed Starting Tutorial: Part 1 of 6

Starting Seeds Indoors

Starting Perennials from Seed

Grow Free Bedding Plants with Cuttings

Raised Beds: Respecting the Law of Return

To enrich a full raised bed, use low volume, high potency organic fertilizers before planting time in early spring.

If you’re growing vegetables in raised beds, you must respect the Law of Return.  This law states that nutrients extracted from the soil by growing plants must be compensated for by tilling their dead remnants back into the soil or fertility loss will result.  Because plants are often grown more densely in small or raised beds, proportionately more nutrition is drawn from the soil each year than in in-ground gardens.  The chances of running a deficit are very real, and your plants will show it, but by then it’s too late.

The challenge of raised beds is that there’s no room for adding gobs of compost to the box because it was filled to the top in the first place.  The fertility of all raised beds will decline each year unless you return it with fertilizer to compensate for these losses.

Add Organic Matter

High-density gardening in raised beds draws proportionately more nutrition from the soil over the course of each season.

To keep microbe populations high, organic matter is needed.  If your potting soil is decomposing so the soil level has dropped, can you refill it with any of the Black Gold potting soils with RESiLIENCE® or just use Black Gold Garden Compost and work it into the old stuff.  But if your soil mass is maxed out, use fertilizers that provide higher levels of nutrition without much volume. Older soilless mixes can also acidify, which will inhibit plants from taking in needed nutrients while reducing soil microbes and overall soil health. A simple soil pH test should be conducted to determine soil acidity/alkalinity. To return acid soils to a  neutral ph is ideal, a liming agent is required.

Fertilize

Organic fertilizers are slower to become available to plants than synthetics, so preparing your raised bed soil well in advance of planting time.  Fall is ideal, but early spring works just as well.  This allows time for the various raw materials to decompose, interact and create the synergy between plants, microbes, and earth to give your garden everything it needs, naturally.

For gardens where there’s little space, two organic fertilizers offer everything needed to fuel this year’s vegetable crops.  They’re like ordering a la carte or choosing a combination plate at a Mexican restaurant. The combination is a tomato & vegetable fertilizer with added alfalfa meal.

An organic tomato & vegetable fertilizer, with a balanced ratio of nitrogen, phosphorus, and potassium should be added.  Estimate at least one bag of fertilizer for each 4′ by 8′ raised bed to calculate how much you need.

Rose growers have always been keen on using alfalfa Meal a la carte, which contains about 3% nitrogen plus other benefits.  What makes it doubly valuable is that alfalfa is a legume, a nitrogen-fixing plant, so all of its remnants from baled hay to this byproduct of milling also contain vestiges of the mycorrhizae, unique fungi that live symbiotically within these plants.

To apply these fertilizers, spade up your raised bed with a fork to open it up a foot or so deep, then sprinkle the fertilizers evenly over the soil.  Let them filter down into the nooks and crannies, then spade over each bed again to help the soil tighten around the fertilizer.  Once thoroughly blended, rake the surface smooth so it’s ready to plant.  Water deeply, if there has not been sufficient rain.

The Law of Return

Replenished raised beds perform better!

The longer the garden sits after you’ve returned nutrients to the soil, the more fertile it becomes.  As temperatures warm, microbes activate and enrich the soil further.  So when it’s time to plant your peas in March, and anything else after that, complying with the Law Of Return will guarantee you vegetables show their appreciation with the most generous harvests you can imagine.

Growing Cabbage, Kale, & Collards: Fresh Super Foods

A single large clay pot easily supports cabbage, parsley and Swiss chard for porch or patio.

Until recently, collard greens were known only in the South and among African Americans who brought this “soul food” into northern cities during the Great Migration a century ago.  Today collards and kales are heralded as “fresh super foods” due to the high nutritional value of these large-leaved members of the cabbage family. These “pot greens” are eaten stewed, steamed, or wilted for a quick healthy meal.

kale
Curly leaf kale is actually sweeter after it’s exposed to frost making this an ideal Fall crop.

Brassica is a genus with dozens of variants, most being from the original species, Brassica oleracea.   Among them are cauliflower and broccoli, Brussels sprouts, and collard greens.  Such close relations mean virtually all of them are grown the same way in western gardens.

Let back-to-school ornamental kale and cabbage displays in the grocery store be your reminder that it is Brassica season.  August is the time to start your fall and winter garden, which can feed a family with healthy greens even after frost sets in.  If row covers are used, plants can remain productive despite significant late-fall cold inland and at higher elevations.  The key is sowing your brassicas while it’s warm enough stimulate good germination and maturation of seedlings, indoors or out.

Start Them Indoors

Brassicas can best be grown from seed sown indoors in advance while conditions are too warm to plant outdoors.  Time their indoor planting so they’re ready to plant out into the garden when temperatures cool off in September.  Seed germinates best between 65 to 75º F but will sprout at lower temperatures, though it may take more time.

collards
Collard greens are a staple of the old South that’s catching on everywhere for plentiful pot greens.

Sow the small seeds in Black Gold Seedling Mix with RESiLIENCE® to provide a clean, moisture-holding media for optimal germination.  After the seedlings germinate, carefully move them to individual pots of Black Gold Moisture Supreme Potting Soil with RESiLIENCE®.  Be careful transplanting these vegetables because damage to stems can introduce unwanted disease.

Sow Them in the Ground

Cabbage family greens also germinate nicely out in the garden while the soil is warm.  It’s an old custom to cover seedbeds in wet burlap on hot dry days to keep them moist and shaded during germination.  Some gardeners create shade covers to aid seedling development.

greens
Pick a “mess” of greens from the garden for a quick, easy and highly nutritious meal.

If you grow a “mess of greens”, it’s enough to feed a family for months since leaves are cut while the plant lives on to make more foliage.  A big pile of leaves lose a lot of volume in the cooking process, so don’t underestimate the numbers of plants needed. Err on the side of overdoing it.  Space the plants as stipulated on the seed packet since these will be very large at maturity.

Recondition soil before you introduce your Brassica seeds or seedlings into the garden.  The ground may be depleted by summer crops, so it’s important to boost fertility.  Greens depend on nitrogen, the nutrient responsible for stem and leaf development in plants.  Make sure you fork in Black Gold Garden Compost Blend before planting.

Grow Them in Pots

Flowering cabbage, yet another Brassica, is often grown in pots with annual flowers for winter gardens.  This demonstrates how well-adapted leafy greens are to pots and troughs on your porch, patio or deck.  Blend your greens with violas and calendulas, both easy-to-grow cool-season annual flowers with edible blossoms.

Too many Americans have grown up without ever tasting real “pot greens”, but when picked fresh their rich sweet flavor will soon become a family favorite. (Keep in mind that most greens actually tastes better after it’s exposed to frost!)  What’s even more surprising is it takes less than an hour to harvest and cook greens into a healthy, garden-fresh meal.  That makes it a time saver that doesn’t sacrifice nutrition.

This year, grow a wide range of these super foods in your fall and winter garden, so there’s always fresh picked fast food in your kitchen at the end of a busy day.

Summer Vegetable Garden Nutrient Deficiencies

pepper
The yellowing of this formerly green pepper plant is a sign of nitrogen deficiency that often crops up at the end of the growing season when soil is depleted.


Organic gardeners must be readers of signs, which are the silent and often subtle ways plants communicate their needs to us. Summer vegetable garden nutrient deficiencies appear as changes that indicate something isn’t right.  They’ll show up during the heat of midsummer vegetable gardens because plants are working overtime to mature and reproduce, which requires optimal nutrition.

BG Earthworm Casting frontIt’s not unusual to find signs of nutrient deficiency in raised beds.  This is because the original potting soil may have been poor quality, or has simply worn out over the first year or two because vegetable plants are heavy feeders.  If the soil is depleted, the plants weaken, resulting in minimal yields, small size and perpetual problems with pests and diseases.  Raised beds must be liberally fortified with organic amendments and fertilizers each year to compensate for what was consumed by the plants over the previous growing season.

When garden soil is lacking one or more nutrients, plants often show it by changing color.  Their emerald foliage may fade to yellow green or develop yellowing is visible in stripes.  Sometimes just the leaf veins are green with yellow spaces, or the veins are yellow with green spaces. Poor leaf color can indicate disease, but often it is due to chlorosis, a result of a macro- or micronutrient deficiency. Macronutrients are needed in larger quantities and micronutrients are taken up in smaller quantities, but both are needed for good growth.

So what are these nutrients?

Macronutrients:  Nitrogen, phosphorus, potassium, calcium, magnesium, and sulfur.

Micronutrients:  Boron, chlorine, copper, iron, manganese, zinc, molybdenum and nickel.

If your plant is experiencing chlorosis, or you see other curious signs, you may never know exactly what nutrient is absent or deficient.  The best solution is a shotgun approach using amendments or fertilizers known to be rich in a wide range of nutrients.

macroNutMagnesiumBlack Gold Earthworm Castings is perfect for solving micronutrient deficiency.  Castings are rich in all sorts of minerals derived from the fertile soils where worms lived, and these can be easily introduced to your soil and root zone.  For a larger scale application, cultivate dry castings into the soil around each plant or along each row, then water generously so the material works it way deeper down.

For smaller gardens and raised beds, an application in solution generates more rapid results.  Mix castings into a bucket of water, then ladle or pour out this “soup” onto the soil around each plant.  Be generous because this is not a concentrated fertilizer, so it won’t burn. It’s impossible to overdo it.

Sometimes young gardens that haven’t benefitted from years of soil amendments can experience macronutrient deficiencies, such as low nitrogen.  Because nitrogen is responsible for leaf and stem growth, the plant will show signs of being stunted or it simply languishes when it should be thriving.  To test for a nitrogen deficiency in organic gardens, work alfalfa meal into the soil and water generously.  If the plants begin to put on new growth and larger more lush leaves within a few weeks after application, you’ll know it’s a nitrogen problem.

BG-Fert-All-Purpose-OMRI-120608Both macro and micro nutrient problems can be avoided altogether by adding quantities of rich organic amendments such as Black Gold Garden Compost and an all-purpose fertilizer in both spring and fall.

Avoid resorting to poor-quality, less natural fertilizers as a quick fix to nutrient deficiency because it’s only short term and not beneficial to the soil food web.  It’s much like eating a doughnut for energy, which won’t last long, then you feel lethargic and crash from low blood sugar. It matters what you eat, how much you consume, and how often you dine.  Be diligent, because feeding your organic garden generously in spring and fall with slower acting organic amendments and fertilizers ensures it remains chlorosis free and consistently fertile all year, every year.

vegetables 026 (2)
Here is the same pepper several weeks after fertilization and good care.


Three Drought Strategies for Tomatoes

irrigation
Young seedlings need only one drip emitter to start, but plan on adding more as plants grow larger and demand more moisture.

With statewide mandatory cutbacks in California water due to drought, we can’t grow vegetables the same way we used to when water was more plentiful.  In the desert, where water is precious and expensive, we’ve learned many ways to help vegetables grow in the heat with minimal irrigation. Since tomatoes are always the favorite crop of home gardeners, the goal is to help them get a really strong start for greater resilience when stressed in the dead heat of summer. Here are a few smart drought strategies for tomatoes.

Lycopersicon esculentum 'Early Girl' JaKMPM1. Increase Water-Holding Potential

Potting soils designed for dry climates have an increased ability to absorb and hold moisture for much longer than average garden soils.  When planting your tomatoes in containers, use Black Gold Waterhold Cocoblend Potting Soil or Black Gold Moisture Supreme Container Mix (with RESiLIENCE®) For planting in ground, blend equal part Black Gold Just Coir and Black Gold Garden Soil, then work a generous amount into the soil of planting area to capture and hold moisture immediately around young growing roots.

2. Train for a Larger Root System

BG-WATERHOLD_1cu-FRONTDrought-resistant plants often share large adventurous root systems to access trapped moisture far underground.  When tomatoes are planted like other crops, the root system remains relatively small.  But if you plant your tomatoes lying down in a trench, they develop prodigious roots all along the buried stem.  With a far larger root system that tomato will have much greater ability to survive heat with minimal moisture.

3. Mulch like Crazy

Perfect magazine-quality food gardens will soon be a thing of the past because thick mulches are more important than ever to conserve water. The thicker the mulch layer, the less soil moisture is lost to surface evaporation.  For larger gardens, invest in a bale of straw to cover all exposed soils, including pathways, to keep the overall soil mass evenly cool and moist.  Plan to thicken or renew mulches periodically throughout the growing season.

flowering
When vegetables begin to flower, up your irrigation rates and increase mulched area to ensure the entire root zone is protected.

Finally, be conscious of every pitcher, glass, or bottle of water you pour down the drain as well as water that runs as you’re waiting for the hot water before doing dishes or taking a bath.  Homes with a long distance from hot water heater to sink may require many gallons to pass through before you get water hot enough.  If you keep a plastic pitcher under the sink, every time there’s clean water that would otherwise be poured down the drain, dump it in the pitcher.  When full go out to your tomatoes or any other plant, and pour it on.