Stephanie Rose is an award-winning author and the creator of Garden Therapy (https://gardentherapy.ca). Garden Therapy started as a personal blog and has bloomed into a gardening and crafting community for those looking to live a better life through plants. Stephanie’s creative take on both crafting and gardening has been featured in many publications, such as Better Homes and Gardens, HGTV, Romantic Homes, Country Woman, All You, and Women’s Day.
Stephanie has written several books including Make and Give: Home Apothecary (Leisure Arts, 2018), The Natural Beauty Recipe Book (Rose Garden Press, 2016), and Garden Made: A Year of Seasonal Projects to Beautify Your Garden and Your Life (Roost Books, 2015), which was a Gold Medal Winner at the 2016 Independent Publishers Book Awards (the “IPPYs”).
In 2018, Stephanie launched the Garden Therapy Seed Collection with GardenTrends. This line of eight exclusive seed starting kits helps gardeners create their own DIY dream gardens.
Stephanie spends her time as a gardener, writer, and artist in Vancouver, BC, Canada. She is passionate about organic gardening, natural healing, and art as part of life. Stephanie lives with her husband, son, and a motley crew of animals, which provide her with inspiration and delight both in and out of the garden.
You’ve probably heard rumblings of stevia before. Found in many soft drinks and juices, many people find the taste strange and not at all like sugar. I agree completely with you! When tasting stevia in its white powder or liquid form, I found it to be bitter yet super sweet at the same time, but fresh stevia is different.
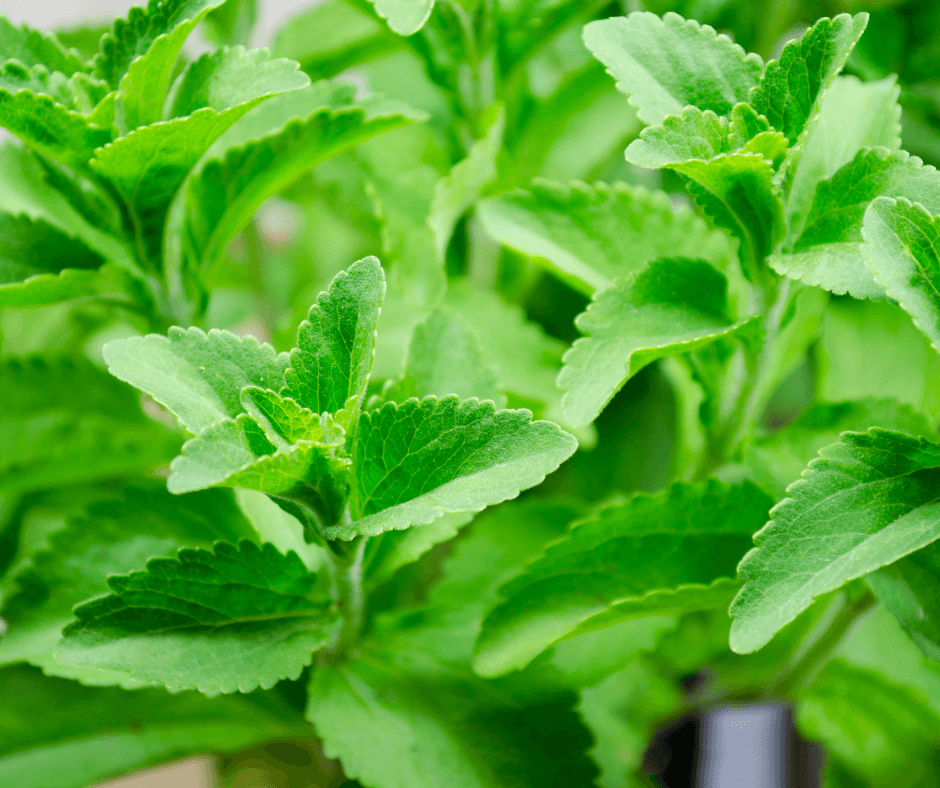
Green stevia (Stevia rebaudiana) is what I grow in the garden and it is completely different than what you will find in the store. Native to South America, it is a tender perennial herb with serrated leaves that is 200 times sweeter than sugar. The fast-growing plant is easily grown in northern climates as an annual.
How to Grow Stevia
Stevia tastes best when the leaves are young and plants are not allowed to flower.
Stevia can be purchased as plants or can be grown directly from seed in OMRI Listed Black Gold Seedling Mix. Nearly every year I plant stevia seeds, and they always grow into happy, bushy herbs. Keep in mind, they like full sun and require lots of warmth to get growing. Plants can be grown in well-drained pots filled with Black Gold Natural & Organic Potting Mix.
You can plant your seeds in containers or in loose soil that drains well. Start your stevia indoors 8-10 weeks before planting outside or directly sow in the ground during late spring. They need warm soil to get growing.
Stevia plants can grow very large in a season, so space your plants 18 inches apart. Expect them to reach anywhere from 2-3 feet tall. Give them light to moderate water. Too much water will reduce leaf sweetness and can cause root rot. You should also pinch the plant back throughout the year to encourage bushier and stronger growth.
Harvesting Stevia
Fresh leaves can be easily dried in the sun or stems can be hung to dry.
Stevia can overwinter in Zone 8 or above, but I prefer to grow fresh stevia each year as the young plant’s leaves taste the best. During the summer, keep stevia cut back to stop flowering. Once the plant flowers, the leaf flavor is no longer tasty. The good news is, every time you prune it, you get to enjoy some fresh stevia!
You can also choose to dry the stevia by bundling stems together and hanging them to dry in a cool, dark place. At the end of the growing season, you will want to harvest the entire plant to dry. It is also best to harvest the stevia in the morning as that is when it is sweetest.
Using Stevia as a Sugar Replacement
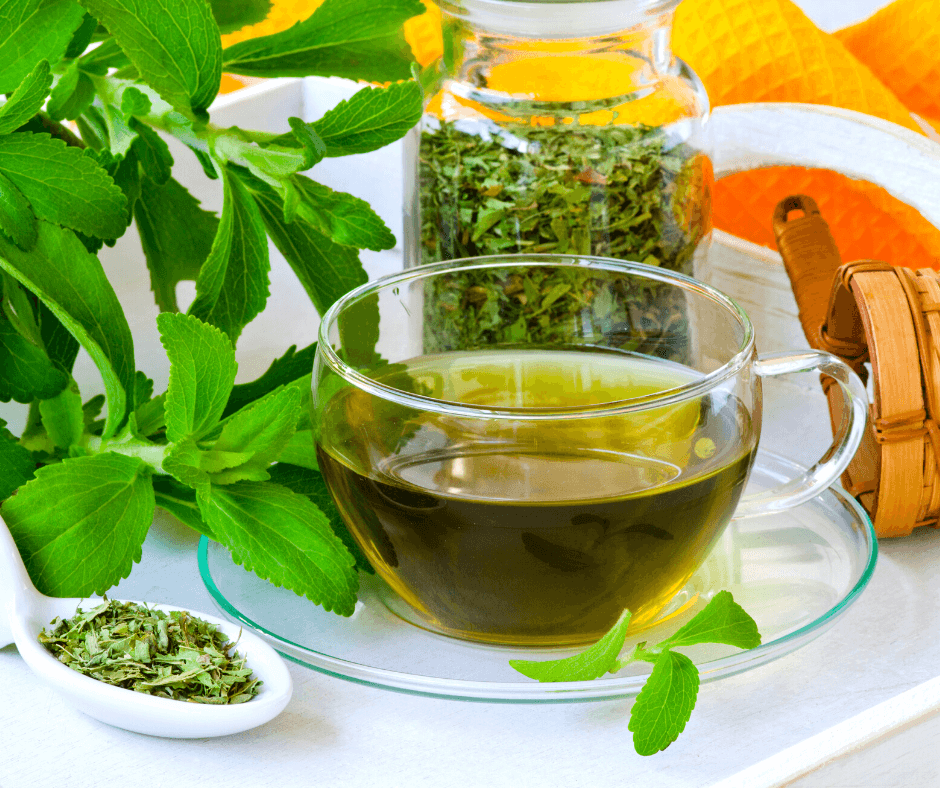
I prefer using stevia to sweeten drinks and tea.
Speaking from experience, going sugar-free is not easy. Stevia is a natural way to get your sweet satisfaction without spiking insulin or causing inflammation. When grown organically in my garden, it feels so much healthier to me than synthetic sugar replacements. With that said, I don’t tend to use it as a complete sugar replacement.
Though many people do use stevia in place of sugar, it has its own unique herby taste that I find similar to sweet green tea, and since it is so much sweeter than sugar, a little goes a long way. I personally favor it for sweetening drinks, but it can also be used to sweeten other things.
How to Use Stevia
Stevia powder is easily used for cooking.
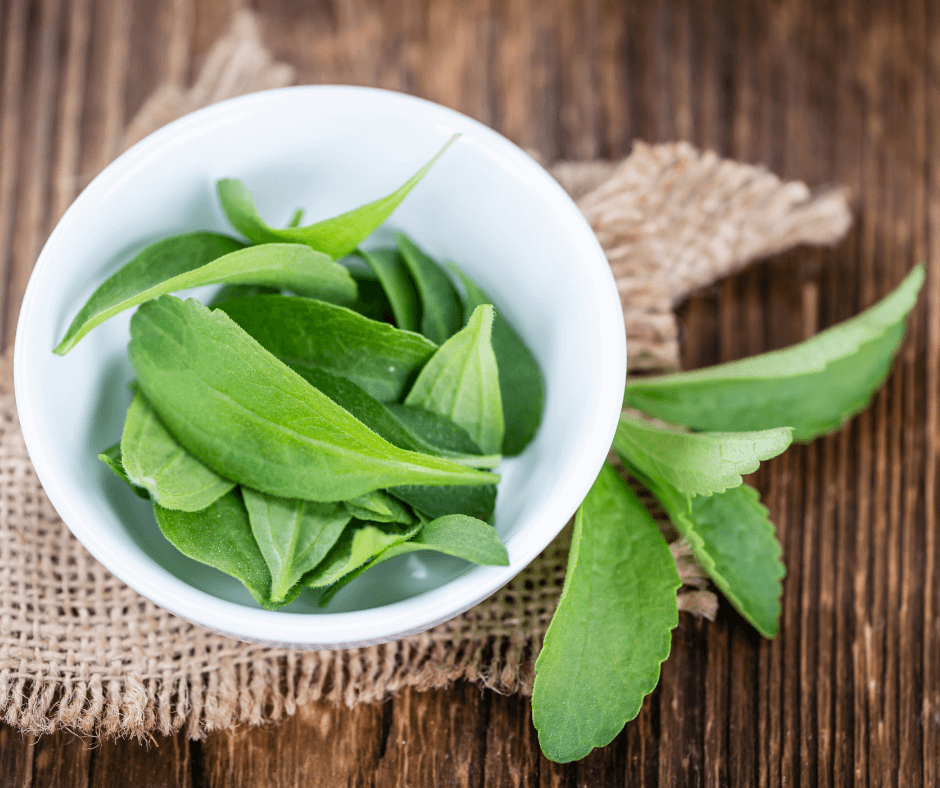
Sweetening up homemade baking, cooking, or drinks naturally is easy with stevia. And, the stevia does not need to be processed. Dried stevia leaf works just fine. Store stevia leaves in Mason jars until you’re ready to use them.
A single leaf in a hot cup of tea will bring a sweet, earthy flavor. You can also grind stevia leaves into a fine powder for baking or cooking. This can be done with a coffee grinder or a blender. I don’t recommend using the powder in drinks unless you want it floating at the top of your coffee–not nice.
The last way to enjoy stevia is by infusing it and using it as a liquid extract. To create the extract, stuff your dried herbs into high-proof drinking alcohol, such as vodka, and let sit for 24-36 hours. Any longer and it will get too bitter. Next strain out the leaves with a cheesecloth. You can enjoy it like this or heat the liquid to evaporate the alcohol. Be careful, however, as boiling the mixture will affect the flavor. Keep the heat low and evaporate slow. The final infusion can be added to drinks or used for cooking.
With gorgeous thick leaves and sparsely spiny edges, the aloe vera plant (Aloe vera, USDA Hardiness Zone 9-11) is renowned for its healing properties. Native to eastern and southern Africa, it is one of the oldest-known healing plants used by humans. Aloe grows wonderfully in dry regions because its succulent leaves hold moisture and make it incredibly drought-tolerant.
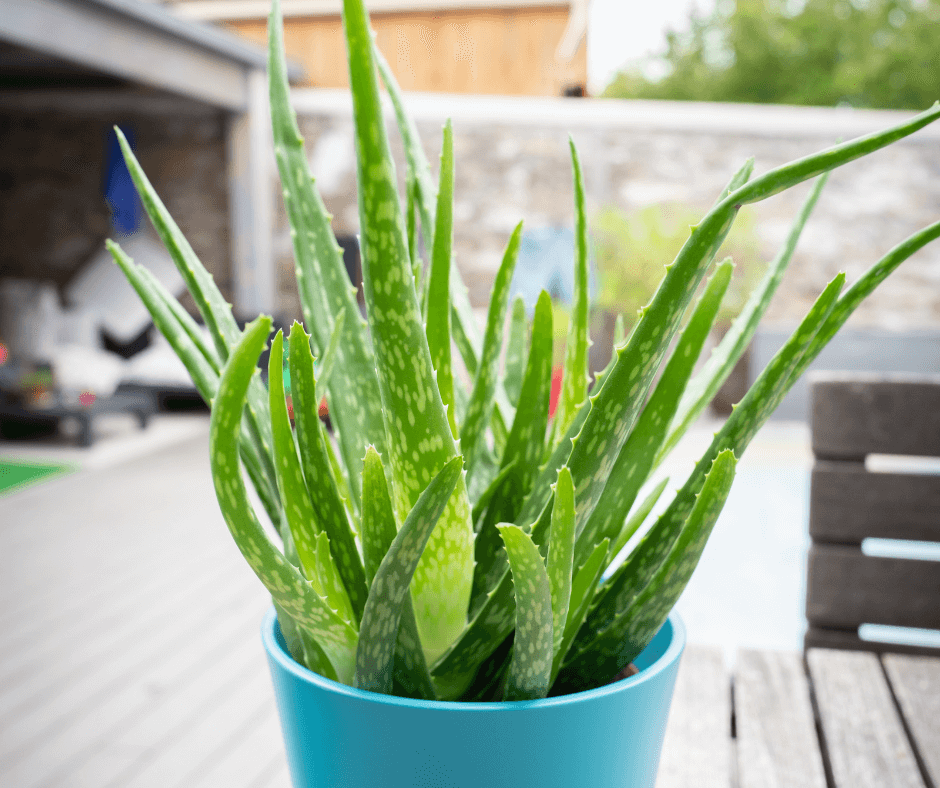
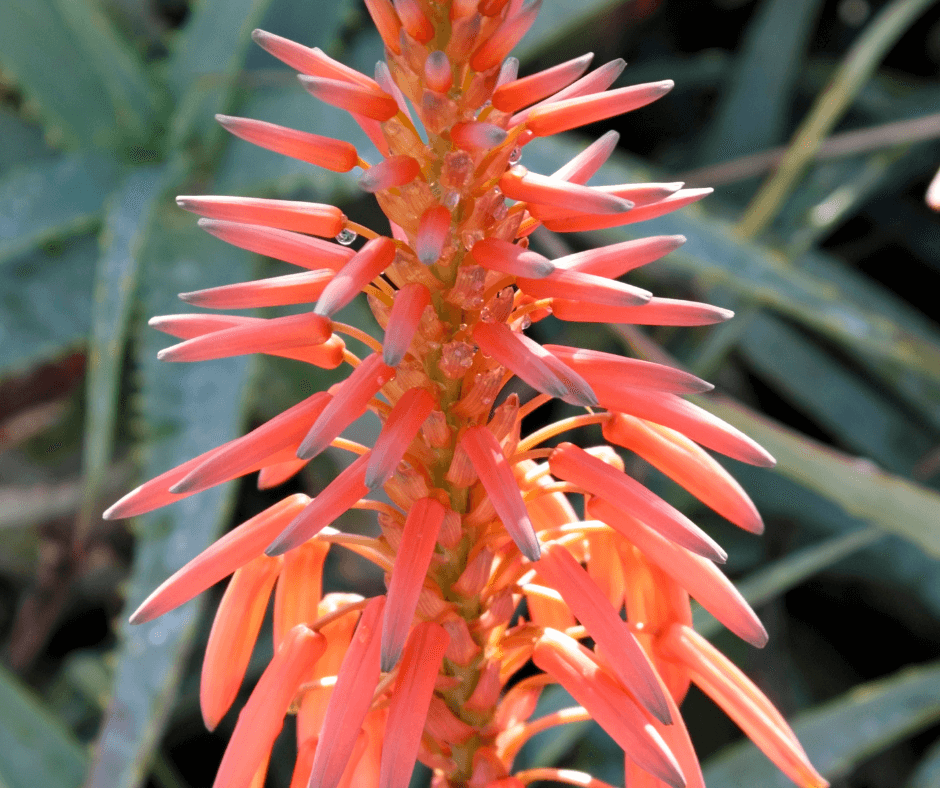
In temperate regions, many households, including mine, contain potted aloe vera as a house plant. It’s attractive as an indoor plant and very handy for the quick topical skin treatment of burns and scrapes. During the warm months, it is nice to bring it outdoors in a partially sunny spot where it can thrive in the fresh air and brighten a porch or patio. Southwestern gardeners have the advantage of being able to grow it outdoors as a landscape specimen. In warmer climates, the plants form robust clumps that produce spikes of reddish-orange, tubular flowers that attract hummingbirds.
One of the best things about the plant is how easy it is to grow and use medicinally. Aloe’s healing, anti-inflammatory properties are most potent when they come directly from the plant. No need to make a tincture or steep some tea in order to get treatment.
How to Care for Aloe Vera Plants
Pots and potting soil must drain well to encourage good.
Aloe vera is a succulent in the lily family (Liliaceae) that is easy to maintain. In fact, too much attention and watering will result in an unhappy aloe. Imagine the spare water that they receive in arid, tropical Africa. They don’t need too much. (Pro growing tip: only water your Aloe vera when the soil is completely dried out. I recommend watering every two weeks or so, but this can change based on the season and growing conditions. Outdoor plants typically need more water, especially in dry climates.)
When planting, pot them up in very well-drained soil–Black Gold Cactus Mix is an ideal choice. Good pot drainage is also a necessity. Place your potted plant in a spot where it can receive bright, indirect sunlight. Aloe is one of the more low-light tolerant succulents out there, but it should still get some sunshine to keep the leaves strong and robust. Plants receiving too much sunlight tend to take on a purplish color. Too little light results in thin, floppy leaves.
Aloe Vera Benefits
When grown outdoors in the American Southwest, Aloe vera will produce beautiful spikes of orange-red flowers.
The anti-inflammatory properties of Aloe vera are especially helpful for healing skin. Most know it for treating sunburns, but it also can help with frostbite, wounds, dermatitis, and other skin issues. It will also reduce redness, inflammation, and even itchiness caused by bug bites and poison ivy. (Cautionary note: It is very rare, but some people can be allergic to aloe. Test a little on your skin, and wait an hour or so to check for a reaction if you have never used it before.)
Aloe vera contains antiseptics and anti-bacterial properties, making it beneficial for treating small wounds. You can also apply it after a wound has healed to promote skin tissue repair and prevent scarring.
Outside of the skin, Aloe can be digested and work as a laxative. (Fair warning: it’s a strong laxative so use it sparingly.) Some new drinks on the market even contain Aloe vera juice, which can aid with digestion. Some studies even show the juice can help to prevent and reduce the size of kidney stones.
How to Treat a Sunburn with Aloe Vera
Let cut aloe leaves sit for 10 minutes before using them for first aid.
As a child, I loved playing outside and was very prone to sunburns. Obviously, it was not a great combination for summer fun. In those days, sunscreen was not available like it is today. My sunburns oftentimes kept me cooped up inside when I would rather be out playing. That was until the day my grandmother brought out the Aloe vera plant.
Placed on my sunburnt and freckled shoulders, the aloe brought my sunburn quick relief. I also saw the sunburns fade much quicker. Here are four steps to getting sunburn relief from an Aloe plant.
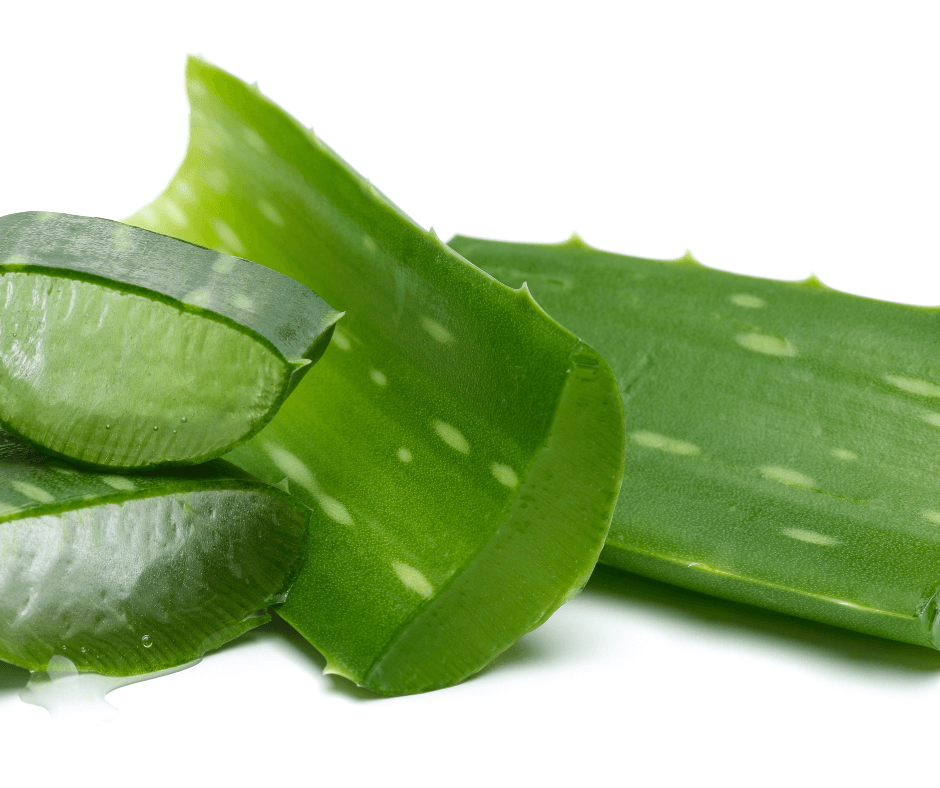
Using a sharp knife, remove a portion of an aloe leaf. Depending on how much you need, this can be as big as a whole leaf or as small as the tip of the plant.
Place the leaf on a paper towel and let it sit for ten minutes. This helps the dark, yellow latex to drain from the leaves. The latex can stain clothes or rarely cause reactions for people with sensitive skin.
Wipe the sides of the cut to remove the remaining latex. Next, take your knife and cut the leaf down the center to get more gel.
Apply the leaf directly to the skin. If your sunburn is hot and irritating, you can place the leaf in the fridge beforehand. The cold gel is extra soothing! Once you’re all done, compost the leaves.
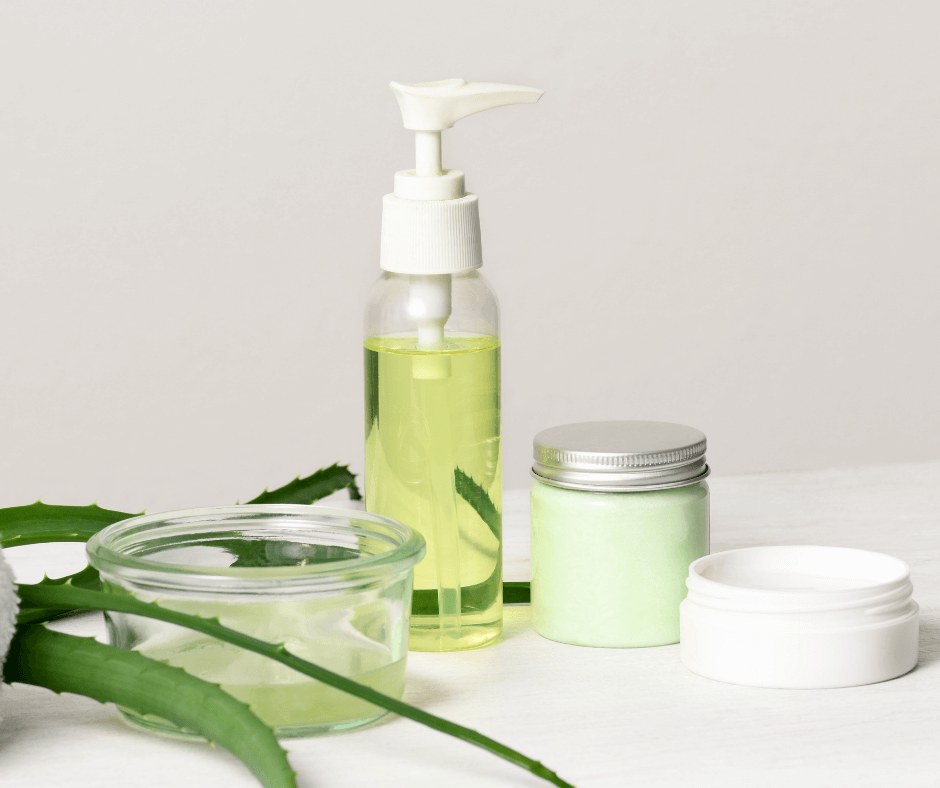
Recipes for Using Aloe Vera in Homemade Skin Care Products
Aloe vera can be used in lots of useful skincare products.
If you have healthy Aloe vera plants, then these recipes are a great way to use some of the wonderful properties on your skin.
Aloe vera liquid soap:With hand washing being essential around the globe these days, this healing aloe soap will also help repair skin.
Aloe vera hand sanitizer: When you can’t be near a sink, this healing sanitizer cleans hands on the go.
Aloe vera after-sun salve: When the summer sun gets the best of you, this salve is a great option for cooling the skin and helping with sunburn relief.
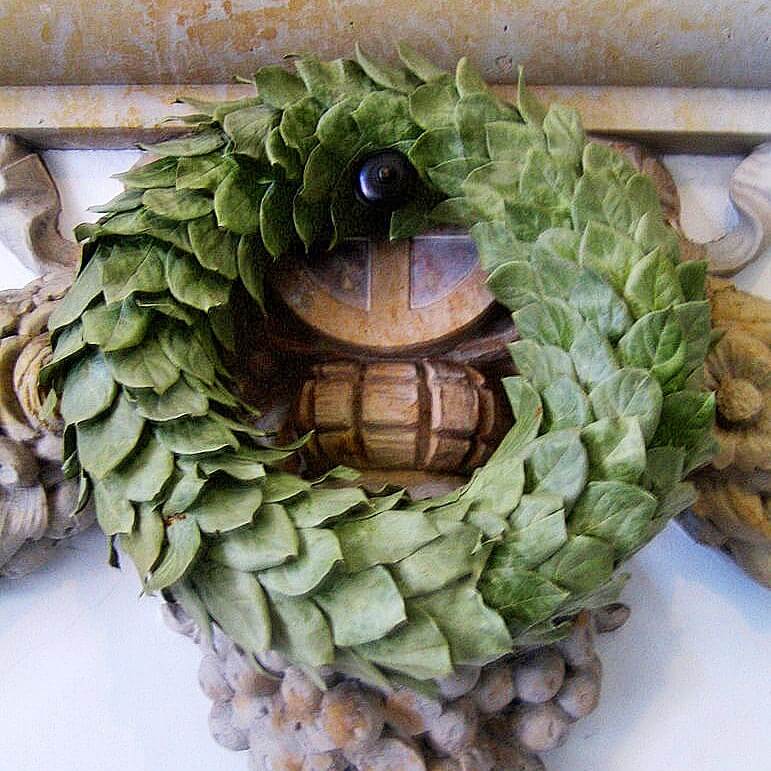
Fresh or dried herbs or herbal flowers can be used to make wonderful medicinal, culinary, or fragrant herbal wreaths in almost any season.
An herbal wreath is a fragrant and decorative way to dry your culinary herbs. While wreaths are most commonly used throughout the holiday season, especially pine or fir wreaths for their fresh scents, herb wreaths can bring aroma and ambiance indoors throughout the year.
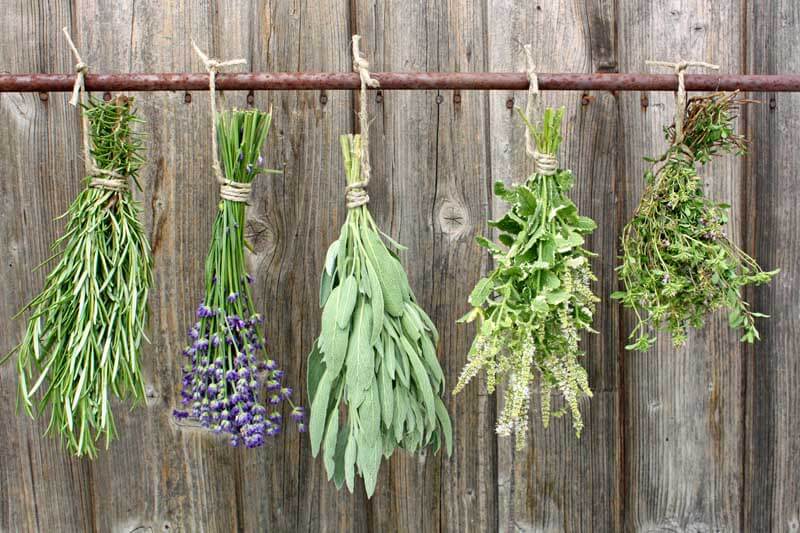
Harvesting Herbs for Drying
Drying bundles of herbs
Choose herbs to harvest that have not yet flowered. Cut the stems in the morning after the dew has dried, but before the heat of the day. Use clean, sharp scissors, or pruners. bundle them together in stems of five to ten, and hang them to dry. Once they are 3/4 of the way dry, they are ready to work with. At this point, they are not crisp. To dry bay leaves, place them between two paper towels and set a book on top of them. After a week, they should be ready to use. Here are four potential wreaths to make:
Herbal Tea Wreath–Pineapple Mint or Peppermint, Lemon Balm or Lemon Verbena, Chamomile Flowers, and Flowering Bergamot (Monarda didyma) are all perfect herbs for drying and teamaking. (Click here to learn more about growing and making tea.)
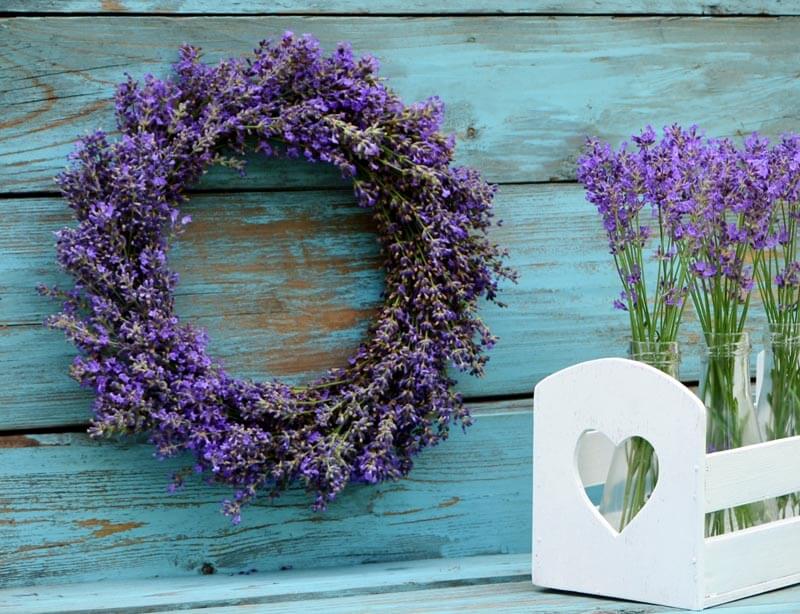
Lavender Wreath— Nothing smells better than a dried lavender wreath in the home.
Mediterranean Wreath–Bay stems, Rosemary, Sage, and Thyme make this a wonderful culinary wreath for any time.
Bay Wreath–Bay leaves can be dried to make a fragrant, culinary wreath to enjoy through winter.
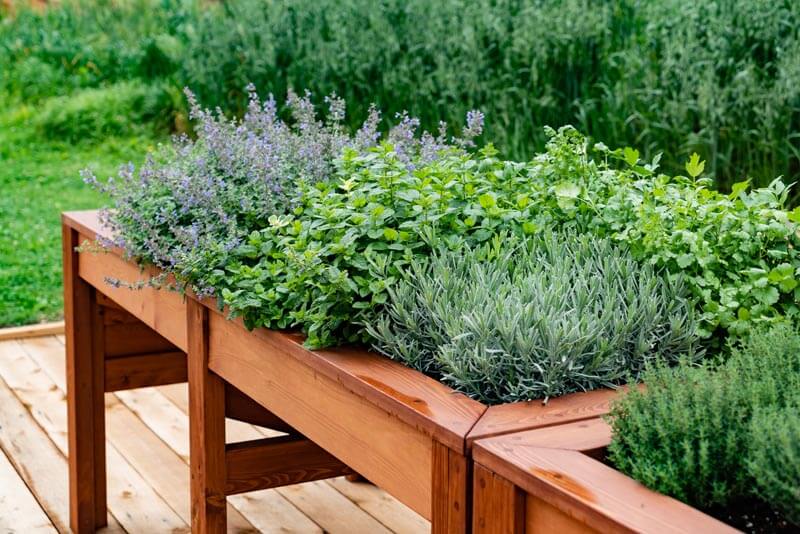
Harvesting Fresh Herbs
Grow lots of fresh herbs for wreath making. Be sure to grow them organically if you intend to consume them.
Some herbs last longer than others in fresh herbal wreaths. Good herbs to choose include evergreens, such as bay stems, lavender, rosemary, sage, and even thyme stems. Flowering herbs, like chamomile, tansy, rosebuds, and yarrow, also work well. Avoid more tender herbs, like dill, parsley, or basil; they do not last and look poorly after just a couple of hours.
Making a Fresh Herb or Dried Herbal Wreath
Twig or grapevine wreath forms make the best bases for herb wreaths, fresh or dry.
Once you have collected a variety of herbs, you can dry them in a beautiful wreath. I like to contrast needles with broad leaves and vary the color, but a wreath made of entirely one type of foliage can also be pretty.
Materials:
Grapevine wreath form
Rosemary, thyme, oregano, lavender, bay, sage, or other garden herbs
Everlasting flowers for color
Floral wire or twine
Scissors or snips
Make it!
A lavender wreath can perfume a home for a full year.
Lay the grapevine wreath on a table, and set out the freshly cut herbs and florist wire.
Build a bundle of herbs in your hands, like gathering a bouquet. I like to incorporate woody-stemmed herbs like rosemary as the base of bouquet because the stems can hold the shape of the softer stems layered on top. Be sure to add a touch of color with lavender flowers or fennel blossoms.
Snip off any long stems and tie the first bundle with florist wire, leaving one end of the wire long. Wrap the long end of the wire around the wreath form to secure the first bundle in place.
Gather the second bunch of foliage. Lay this bunch with the tops overlapping the first one, and secure it to the wreath form with the wire.
Continue adding bundles of herbs to the wreath by overlapping the previous bunch and securing with wire until there are no more gaps to fill.
Secure the final bunch by gently lifting the herbs from the first bunch and tucking the stems underneath it. Secure with wire by twisting it together.
Take a last look at the wreath. You can tuck in a few more greens to even out the design and hang in your kitchen.
As the herbs dry, use needle-nose pliers to twist the wire on the back of the wreath to tighten the hold on the herbs.
Harvest herbs from the wreath for cooking for up to three months or until they lose their flavor and aroma.
When making a bay wreath, use a solid wreath base of straw and arrange the leaves in the same direction all around.
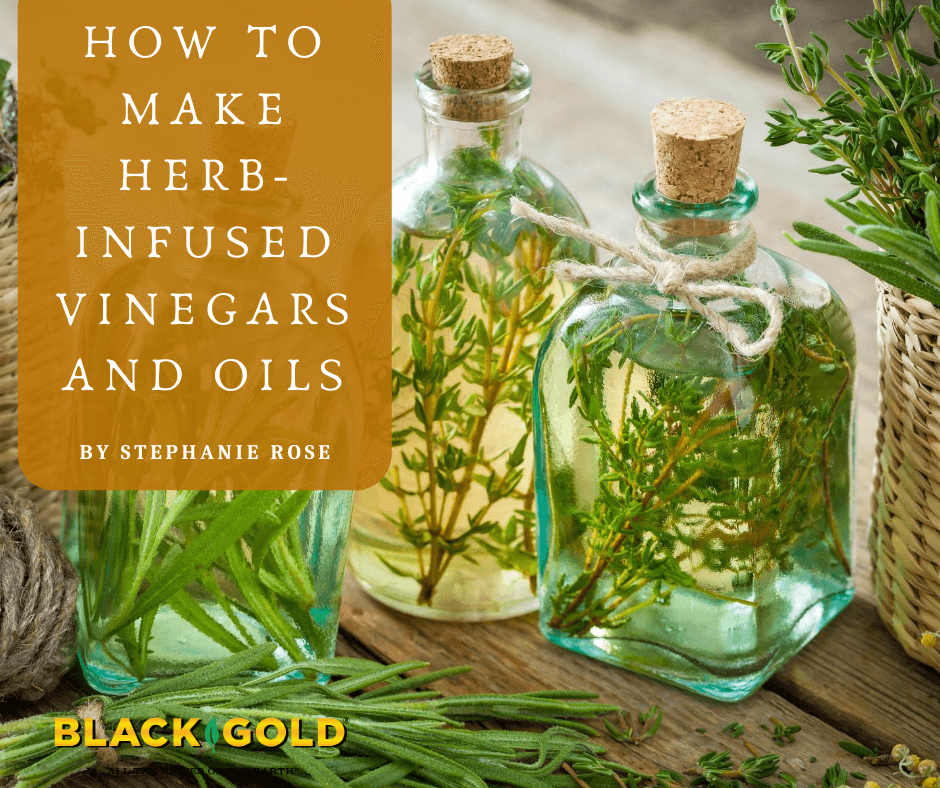
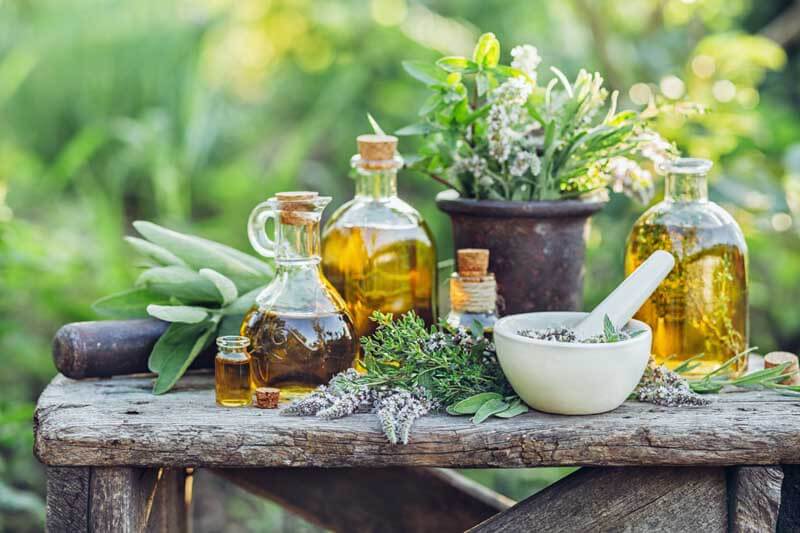
Making your own herbal infusions in oils and vinegar is a great way to preserve herb flavors from your garden. Since comparable store-bought bottles can be pricey, you’ll save money and have some delicious artisanal gifts to give to friends and family.
Harvesting and Drying Herbs
Bundles of rosemary, lavender, sage, pineapple mint, and thyme are easy to dry and retail their flavor.
Some herbs can be infused dry; others should be infused fresh. Dill, oregano, thyme, rosemary, and sage are all suited for dry infusion. Basil, cilantro, chili, and chives have the most flavor when infused fresh.
Harvest herbs from your garden early in the morning using clean, sharp scissors or pruners. If you plan to use fresh herbs, start your infusion immediately after cleaning the stems. To prepare dry herbs, hang them upside down in bundles or lay them in a single layer on trays in a dark, cool area. (Click here for some other drying methods.)
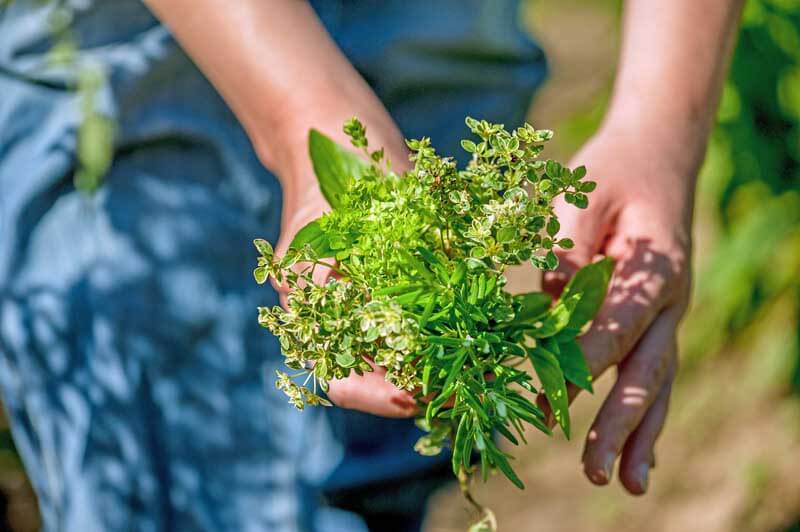
Which Herbs to Infuse
Choose herbs that are fresh from the garden in pleasing combinations that suit your taste.
The herbs you choose are entirely up to you! What are you growing? What’s freshest in the garden and best for your flavor palate? You can make single herb infusions, like basil oil or rosemary vinegar, or you can blend flavors together, like citrus zest, chili, and thyme. Choose a few options, and you’ll have plenty of ways to add spice to your kitchen creations.
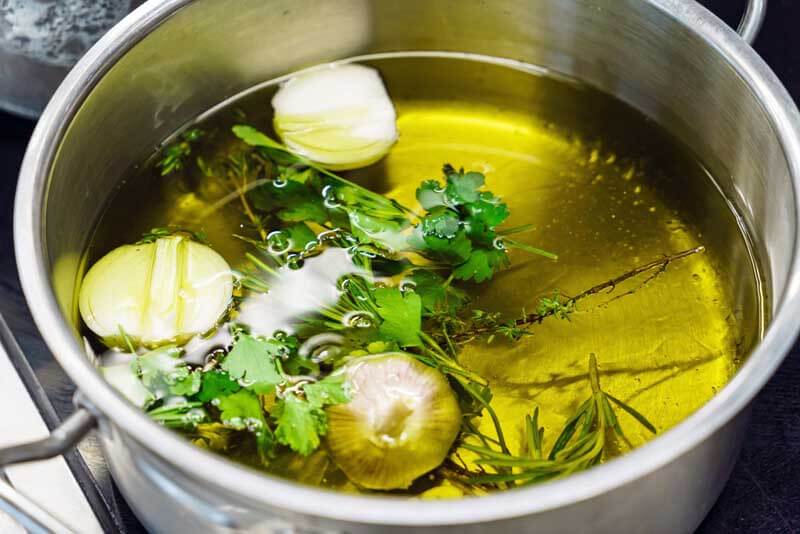
Oil Infusion Methods
The stovetop method is one way to infuse herbal oil. A double boiler or saucepan set on low heat also work. Cilantro, garlic, rosemary, and thyme are in this infusion.
Infusing the flavors of herbs in oil is most effective when the oil is warmed. This can be done on the stovetop, in the sun, or a Crockpot. The infused oils will be ready in just a few hours this way. You can also place herbs in oil for a cold infusion as long as you have the time to wait for six weeks to get your finished herbal oil.
Safety notes: When infusing herbs into oil, be sure to use dried herbs for the stovetop and sun-infused methods. Jars and bottles must also be dry and sterile. (Click here to learn how to sterilize jars and bottles.) Clean, dry, chopped or processed fresh herbs can be used for the slow-cooker method, as long as the oil is heated to a temperature just over 140 degrees F, which is hot enough to kill bacteria.
Stovetop Oil Infusion
Slowly heat the oil and herbs in a double boiler. Pack as many herbs as possible into the boiler top. Then, pour the oil over them–enough to fill your jars or bottles. Pour an inch of water into the bottom of the double boiler. Heat the double boiler on medium-high for a few minutes. Reduce the heat to low for a few hours until the oil becomes aromatic. If you do not have a double boiler, you can use a saucepan set on the lowest heat setting.
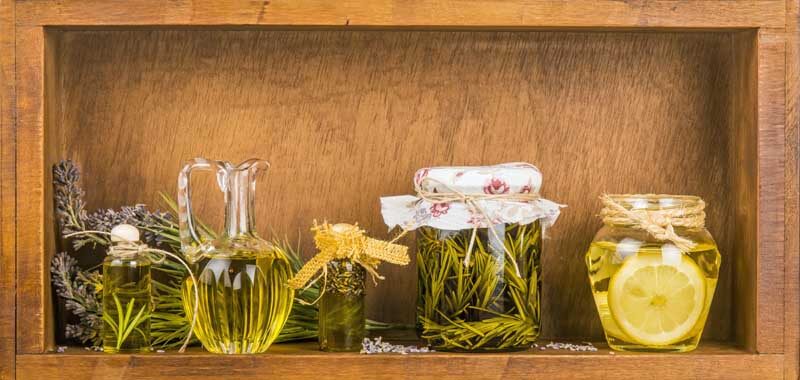
Sun Oil Infusion
Pack herbs into a large mason jar and pour oil over them, covering the herbs completely. Screw the top onto the jar, and leave it out in the sun for up to eight hours. To avoid overheating the herbs and eliminating some of their benefits, don’t use this infusion process during the height of summer. This method works best during the warm parts of late spring and early fall.
Slow Cooker Oil Infusion
Place the dried herbs into the Crockpot. Cover them with oil. Heat on low (190 degrees F) for a few hours or until the oil becomes fragrant. To create multiple oils at the same time, place the herbs in mason jars, cover with oil, and add a lid to each jar. Fill the Crockpot with a couple of inches of water and heat.
Editor’s note: If using fresh herbs, such as basil, start with a large bunch–maybe six big stems. Clean the stems and pat them dry. Blanche them in boiling water for 5-10 seconds, place them on a towel and lightly pat them dry, then put them in a food processor with a pinch of salt and puree them. Add the puree to a clean 16 oz. canning jar, fill with light olive oil, and cover with a lid. Fill the Crockpot with a couple of inches of water, place the jar in the water, and heat for a couple of hours. Finally, place three layers of cheesecloth over a bowl, pour the mixture through, and squeeze out all of the basil oil. Pour the oil in a fresh, clean jar and store it in the refrigerator for a couple of weeks. Another option is to store it in the freezer in a well-sealed plastic freezer container until use. A lidded silicon ice cube tray also makes a good container.
Cold Infusion
Pack dry herbs into a jar, lightly compacting them until filled to the top. Pour olive, canola, or grapeseed oil over them, gently pressing them down with a spoon to release some of the air bubbles. Completely cover the herbs with oil. Set the jar in a cold, dark room for four to six weeks.
Vinegar Infusion Methods
Apple cider vinegar makes lively herbal infusions.
The method you use to infuse vinegar depends on whether you are using herbs alone or adding fruit. In either case, the herbs do not need to be dried first. Pick fresh, clean herbs from the garden, and add them to the vinegar of your choice. Keep in mind that better quality vinegar will result in a better final product. White wine, apple cider, and coconut vinegars are lively when infused. If you have a sweet tooth, white balsamic is good for fruity infusions.
Herb and Fruit Vinegars
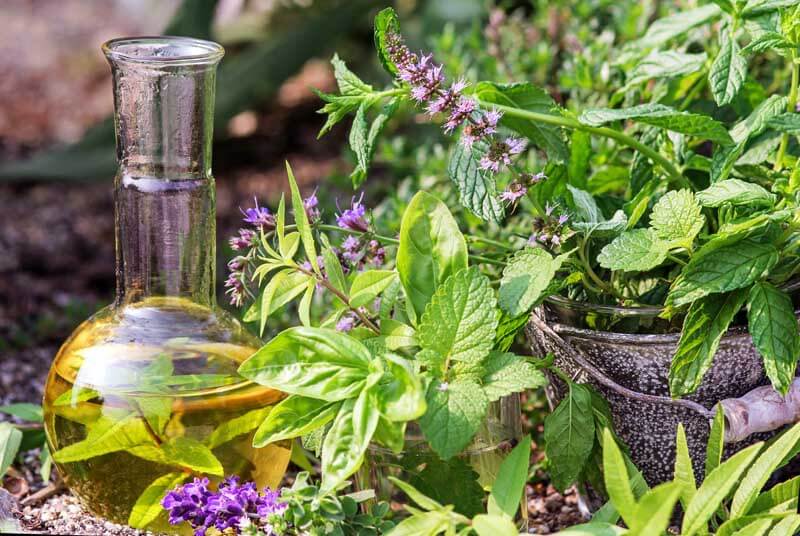
Herbs such as basil, lemon balm, and mint can make refreshing vinegars.
If you’re infusing vinegar with both herbs and fruit, such as strawberries, choose fruit that is ripe and free of blemishes. Wash it and cut off any stems. Harvest and wash fresh herbs. Bruise them with the back of a knife to release their scent and taste. Pack the fruit and herbs together into a jar. Cover them with vinegar and secure the top of the jar. Place it in a cool, dark room for ten days. Strain the solids out of the vinegar. Stire it in the fridge for up to a month.
Pack washed and bruised herbs into a jar. Cover them completely with vinegar and secure the top. Place it in a cool, dark room for about two weeks. Strain the herbs out of the vinegar. Store the finished vinegar in the fridge.
Five Easy Steps for a Socially Distanced Garden Party
A garden or spacious yard is a wonderful venue for an outdoor party, especially in the days of COVID-19. A warm summer evening with a drink in hand and a garden filled with friends, each on their own picnic blanket or lawn table, is a lovely way to hold outdoor gatherings where we can enjoy the beauty of nature together, safely. The surroundings are already decorated with bright flowers, flitting bees and butterflies, and sparkling sunshine. Add a few mosquitoes or mosquito-repellent plants are you are set (click here to learn more about naturally repelling mosquitoes.)
Under normal circumstances, I use waste-free reusable materials for my garden parties. A floral table cloth, vintage dishes, ornate cutlery, and decorative glassware all have a place at my table, and they are readily available at garage sales and thrift stores. But these days reusables are the safer option, so for these, I go green.
The need to maintain space is also essential. So, I am improvising this season with well-spaced areas where I can enjoy my friends at a safe distance. Follow these five easy steps to create a festive garden party experience, through COVID-19 days and beyond, and your guests may never want to go back inside again!
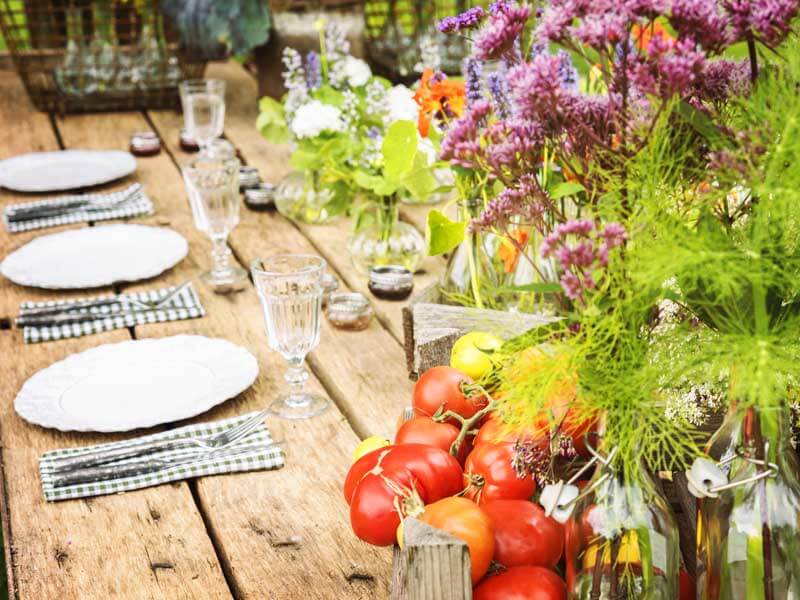
1. Garden Party Settings and Cloths
Usually, I use reusable plates, cutlery, and glasses, but now I am opting for compostable tableware, which is safer and feeds my garden. Here the tables are decorated with fresh tomatoes, herbs, edible flowers, and wildflowers.
When it comes to garden parties, forget minimalism! Keep the decor intimate, plant-focused, and functional, and spend both your time and money on beautiful reusable or compostable items that can be used again and again or eventually used to feed your garden.
Layer plenty of florals and natural elements on tables for guests, and keep dishes and cutlery pretty but green and compostable (a great way to add to that compost pile). Floral table cloths, such as bright, easy-to-clean Mexican oilcloth table cloths, green compostable, biodegradable plates, cutlery sets, and paper cups are all good choices. If the party is picnic-style, have friends bring their own blankets and pillows for comfort on the ground.
Go crazy with bright colors and mixed patterns or use natural materials, like burlap and unbleached paper, on the table to create a neutral base for festive decor. Then collect what is available in the garden and use it to decorate the table. When the party is over, most of the decorations can go right into the compost bin or dishwasher.
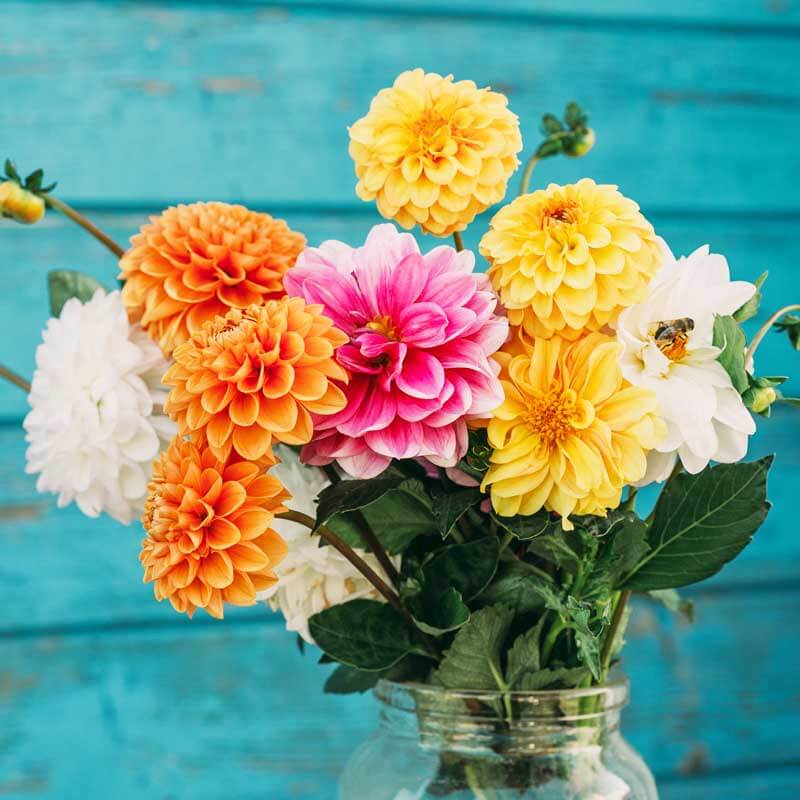
3. Garden Party Flowers
Mason jars make inexpensive, rustic-looking vases for colorful flower arrangements.
You simply can’t have a garden party without freshly-picked flowers, herbs, and vegetables! Add cut flowers to mason jars, vintage glassware, or recycled tin cans, or make a fragrant herb bouquet by combining herbs that have both foliage and attractive flowers. Black-eyed-Susans, purple coneflowers, sunflowers, and zinnias all add a nice pop of color to any herbal arrangement. (Click here to learn more about growing beautiful, low-cost cut flowers.) When planning your garden, you may want to consider potting flowers or succulents so that they can be arranged time and time again for your garden parties.
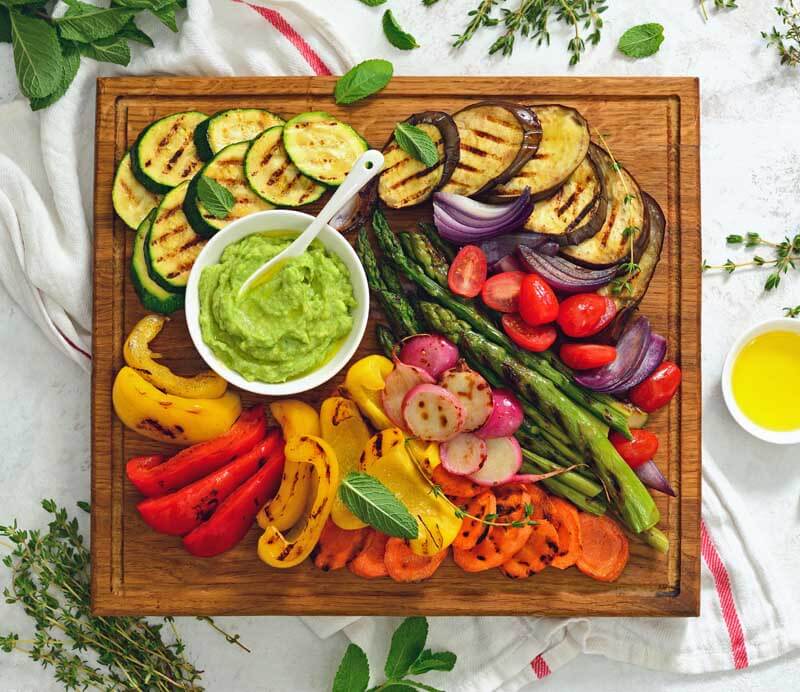
2. Garden Party Food from the Garden
Make a point to feed your guests from the garden with garden-fresh grilled vegetables, dips, and herbs. Basil-infused lemonade and mojitos made with your garden herbs will also impress guests.
Barbecues and garden parties can often be meat-centered. Instead, refocus the menu around plants! Fresh salads, crudites, and a plant-based burger add a light take to the evening. Plan the menu with foods that are in season, using fresh ingredients harvested from the garden. Add fresh vegetables to the main dishes, along with herbs in cocktails, and fruit for dessert. Make guacamole and hummus to reduce the extra waste from prepared packaged dips. And don’t forget edible flowers! (Click here to learn more about the tastiest edible flowers.) No garden party is complete without them.
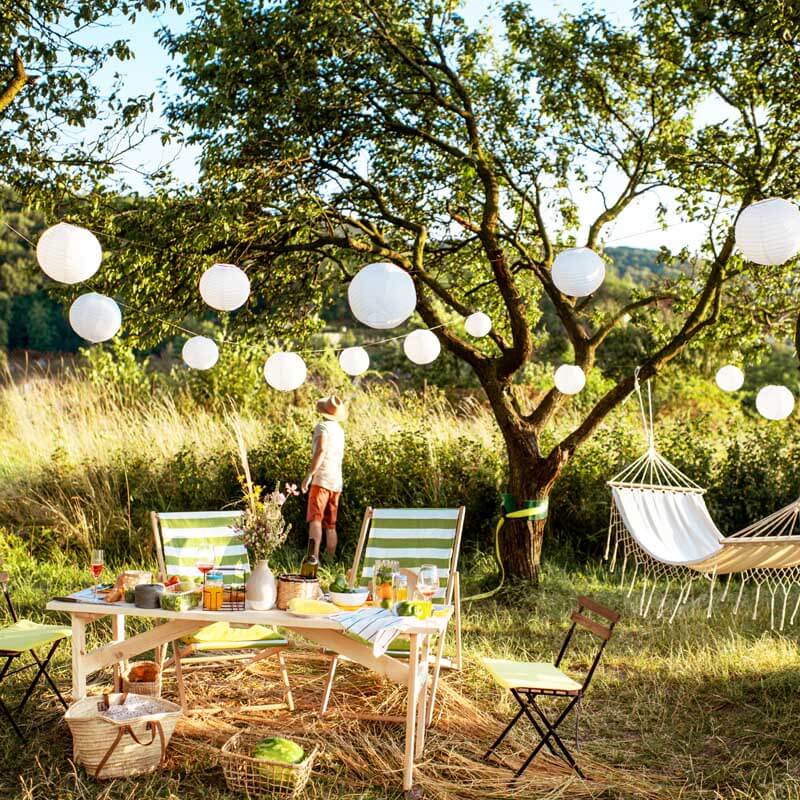
4. Create an Intimate Setting
Pretty lighting, natural backdrops, and attractive tables make garden parties look and feel extra special.
Keep the plant theme going and use your garden as the backdrop. Arrange eating areas throughout your garden where guests can fill their plates one at a time. Garden parties don’t have to end just because the sun goes down. String up some solar lights or lanterns to set the tone for a fresh, natural environment. Pop tea lights in mason jars and you have a simple, glowing table centerpiece. Keep unwelcome guests away with bug-repellent herbal candles containing lavender, mint, rosemary, or citronella for the tables. You can even use several of them to illuminate a pathway to your patio. There are endless ways to get creative with candles in the garden. Adding classical music at a low volume can add an elegant touch to your party. Your garden will start to feel like Buckingham Palace and your guests like royalty!
5. Garden Party Climate Control
Many parks are spacing lawned areas for public distancing. Do the same at your home.
Having a party outside is lovely for a multitude of reasons, but the great outdoors can get too hot or cold sometimes. As the host, it’s your responsibility to keep your guests – and yourself – as comfortable as possible. To keep the heat at bay, set up fans or even a foot pool, and provide cool drinks. On chilly evenings, break out blankets, heaters, or a cozy outdoor fire. Just maintain enough space for safety and comfort, and you will be set.
Now that your garden is party-ready keep these eco-friendly tips in mind, so you can enjoy your garden to the fullest while keeping your guests comfortable and not putting additional strain on Mother Nature.
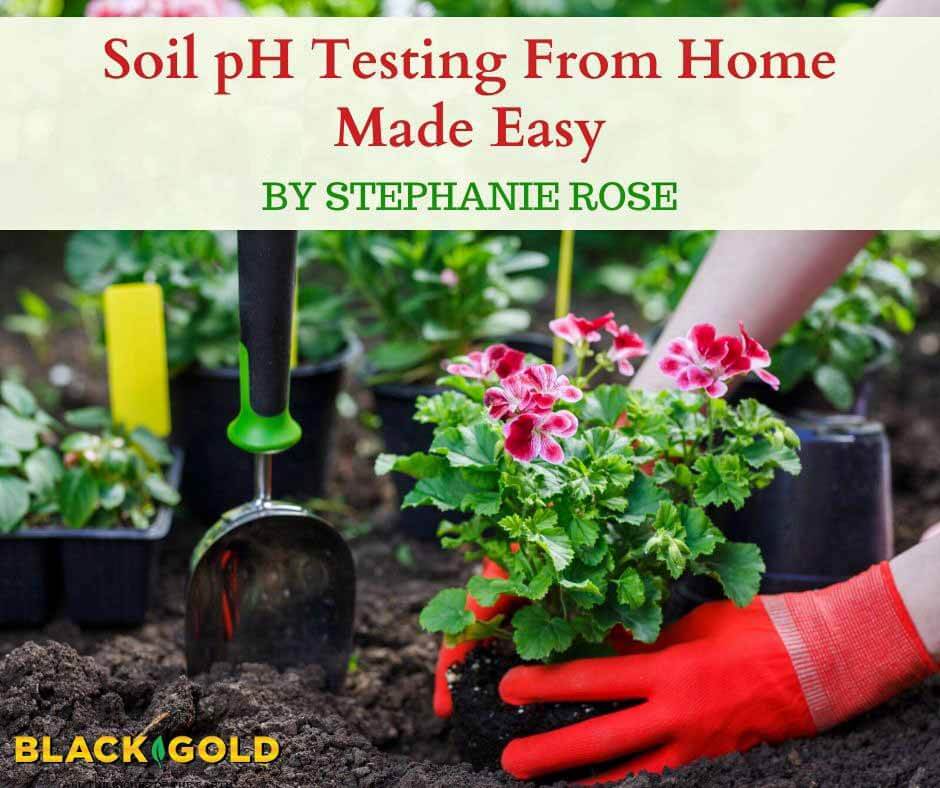
When asked about soil and gardens, the most common question I receive is about how to determine soil pH. Garden professionals emphasize the need to measure soil pH because it can be so important if the soil pH errs towards the extremes–too acid or too alkaline. Soil pH testing is certainly useful when you are getting to know your soil, and it can be managed once identified. It can also help one devise a game plan for what to grow where.
If you want precision soil pH numbers, your best bet is to reach out to your local extension agent for professional testing (click here to learn more), but this can be costly, and precise numbers are not always needed. I recommend this route for gardeners living in areas where soils tend to be more extreme.
For home gardeners living in areas with more average loam soils, it is not necessary to get exact measurements of your soil pH from all the different spaces of your garden. Simple, home-grown tests will help determine if your soil is acidic, alkaline, or neutral. Once you know that, you will know what grows best in your soil, and you can work with it.
The Importance of Soil pH
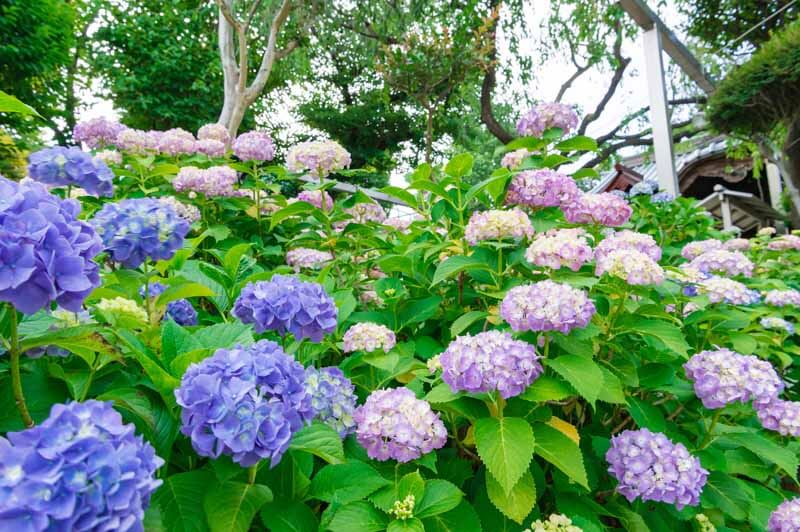
bigleaf hydrangeas (Hydrangea macrophylla) will bloom blue when they are in soil that is more acidic and pink in more alkaline soil.
pH is designated on a scale from 1 to 14; if you have a pH around 7 your soil is neutral, if your pH is less than 7 it is considered to be acidic, whereas a pH greater than 7 is alkaline. At the far extremes, hydrochloric acid (0 pH) has an extremely low pH, and caustic lye (12 pH) has an extremely high pH. Most plants grow very well in neutral or near-neutral soils, though some plants are specially adapted to more acid or alkaline soils.
For gardeners, soil pH can be an important determinant of what plants will thrive or struggle within a garden. As a general rule, most vegetables and flowers prefer neutral soils. Some plants, like camellia, blueberry, and rhododendrons, prefer more acid soils, while others, like crabapples, lilac, clematis, and sweet peas, tolerate more alkaline soils.
Some plants will grow in a variety of pH levels but show differences in how they grow. For example, bigleaf hydrangeas (Hydrangea macrophylla) will bloom blue when they are in soil that is more acidic and pink in more alkaline soil.
Collecting a Soil Sample
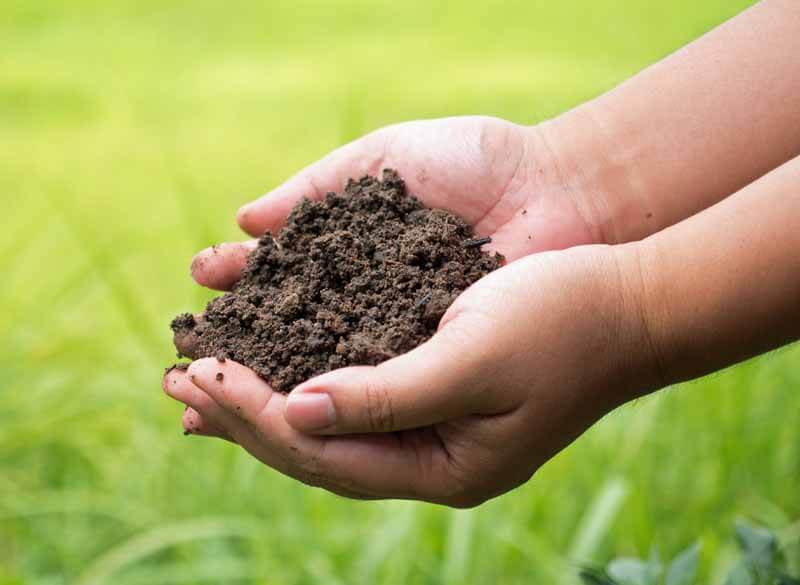
You just need 4 tablespoons of soil to complete these tests.
To test your soil at home, you are going to need to collect a sample. To do this, grab a trowel and dig three or four inches down. Scoop the soil into a bowl, making sure not to contaminate it by touching it. It’s a good idea to collect samples from three to five different areas of your garden to get a good idea of the average pH of the soil you will be working with. Mix them, and then perform the following tests.
Vinegar and Baking Soda DIY pH Test
Knowing your soil’s pH will help you garden better.
(These tests are from the book Garden Alchemy: 80 Recipes and Concoctions for Organic Fertilizers, Plant Elixirs, Potting Mixes, Pest Deterrents, and More (Cool Springs Press, 2020). Reprinted with permission.)
This simple test for soil pH will tell you if you have alkaline, acidic, or neutral soil using household vinegar and baking soda. White vinegar (2.5 pH) is acidic, and sodium bicarbonate or baking soda (8.4 pH) is alkaline. When they are mixed, they fizz. With two samples of soil from the same place in your garden, adding these ingredients will help to determine your soil’s pH type.
Materials
2 small bowls
4 tablespoons soil
Distilled water (do not use tap water as distilled water has a neutral pH)
White vinegar
Baking soda
Test Instructions
Add 2 tablespoons (30 ml) soil to a small bowl and mix it with 1 tablespoon (15 ml) of distilled water.
Add 1 tablespoon (15 ml) white vinegar in and stir. If the mixture fizzes, you have more alkaline soil.
Add 2 tablespoons (30 ml) soil from the same sample to a small bowl and mix it with 1 tablespoon (15 ml) of distilled water.
Add 1 tablespoon (15 ml) of baking soda and stir. If the mixture fizzes, you have more acid soil.
If it does not fizz for either test, you have neutral soil.
Once you know if you have acidic, alkaline, or neutral soil, congratulations! You now know what will grow best in your garden!
Managing Soil PH
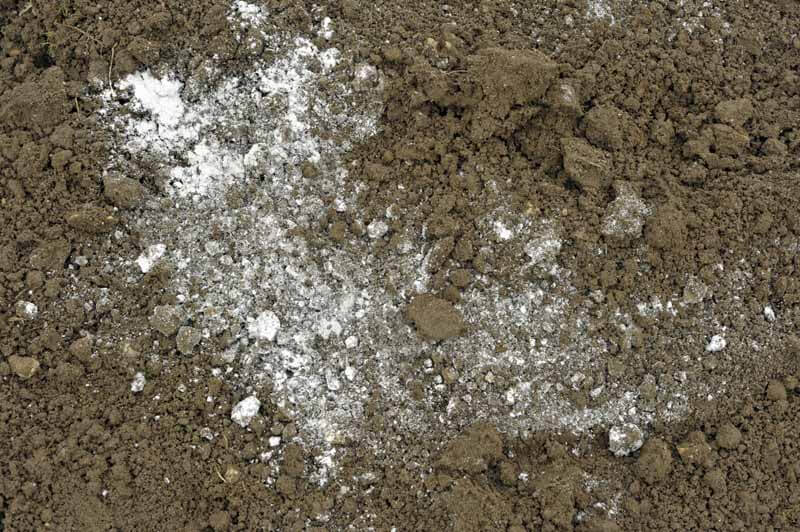
Garden lime will reduce soil acidity and add calcium.
Many folks want to take on the job of altering their soil pH if they are largely at one end of the scale or the other. There are various products one can use to manage soil pH. If you have acid soil, you can add liming agents, such as hydrated lime, in addition to more neutral soil amendments, such as Black Gold Earthworm Castings. If your soil is very alkaline, add more acid amendments, such as Black Gold Canadian Sphagnum Peat Moss, as well as acidifying fertilizers, such as elemental sulfur (click here to learn more about acidifying soil). For both liming or acidifying soil agents, be sure to follow the manufacturer’s guidelines for application.
Another practical option for managing soil pH is to only grow native plants that will naturally thrive in your soil, and reserve other plants less adapted to your soil to container gardens or raised beds (click here to learn more about Black Gold® Natural & Organic Raised Bed & Potting Mix). Either way, it always pays to amend your soil with great quality Black Gold Garden Compost Blend. Then celebrate your unique garden soil, and the plants that nature intended you to grow there.
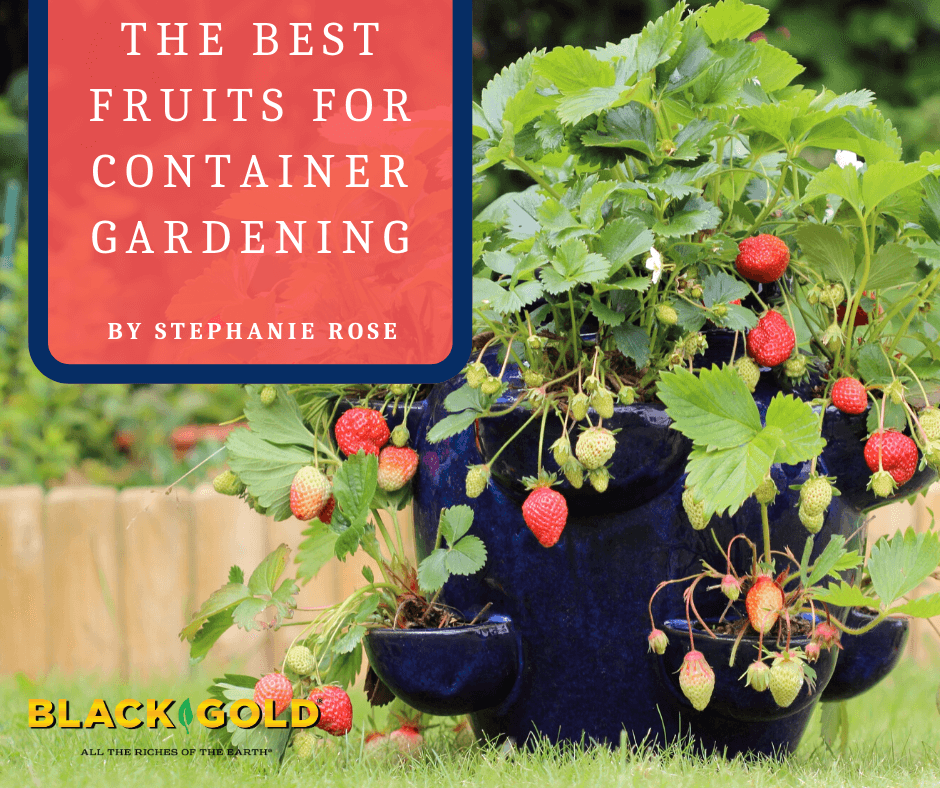
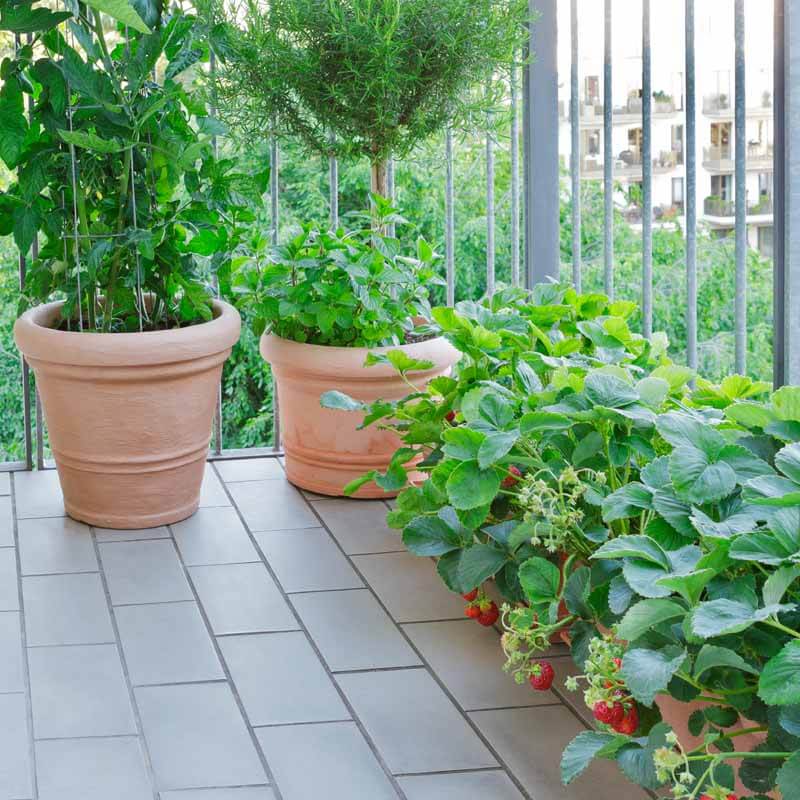
Strawberries are one of the very best fruits for container gardening.
You don’t need a lot of space to grow your own fresh fruit. Flowers, vegetables, and herbs are what we most commonly think of to grow in pots, but there are plenty of fruits you can grow in containers as well! The best fruits for container gardening make nice specimen plants for porch and patio and are perfect for families with little ones.
Why Grow In Pots?
Not everyone has an abundance of space to grow a garden, but that doesn’t mean you can’t grow fruit. Container fruit gardens can produce an abundance of fruit on just a balcony, patio, or deck, as long as you choose the right plants for container growing. These are fruit varieties that have been bred for small-space growing and are perfectly suited for pots. If you plant several fruits that bear at different times in the season, it will allow you to enjoy a prolific yield of tasty fruit all summer long. The best fruits for organic gardening are common fruits that everyone enjoys.
Strawberries
The beauty of strawberries is that they can be grown practically anywhere there is sunshine.
Strawberries (Fragaria hybrids, USDA Hardiness Zones 3-10) are one of the easiest plants to grow in containers, and varieties can be found for almost every hardiness zone. Some just bear fruit around June (June-bearing strawberries) while others are everbearing, which means that they produce one large yield in spring or early summer and then continue to fruit sporadically up to fall. Everbearers are better for containers because they continue to yield. (Click here to watch a video about how to choose and plant strawberries.)
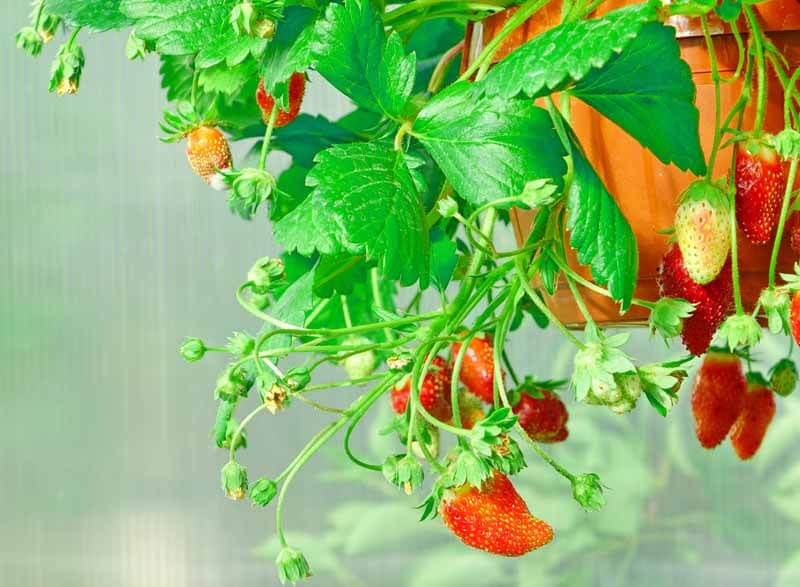
The shallow roots of strawberries do best in a container with good drainage. They can be successfully grown in barrels, tiered planters, hanging baskets, and, of course, strawberry pots. The key is to avoid heat damage to the roots. Use an insulated pot or add straw to the top of the pot to ensure extra protection. One 6-inch container will hold one strawberry plant, and a large hanging basket will hold between 3 and 5 plants, but keep in mind that smaller containers will require daily water for fruiting success. Hanging baskets look lovely filled with flowers and berries and even better when the runners hang over the sides.
Strawberry hanging baskets are a great way to grow these fruits, just be sure to keep them well watered.
Strawberries are most commonly purchased as bare-root starts. When planting them, dig a hole large enough to cover their roots, place the plants in, while making sure their crowns are just above the soil level, cover the roots, and lightly press the soil down. There should be a 1- to 2-inch space at the top of the pot for watering. When all the strawberries have been planted, water them. Continue to keep the pots evenly moist for good fruit set, especially in hot summer weather.
Strawberry plants will stop producing after three years or so and will need to be replaced. It’s good practice to plant the runners in the soil in between the established plants so they can take over when the mother plants stop producing.
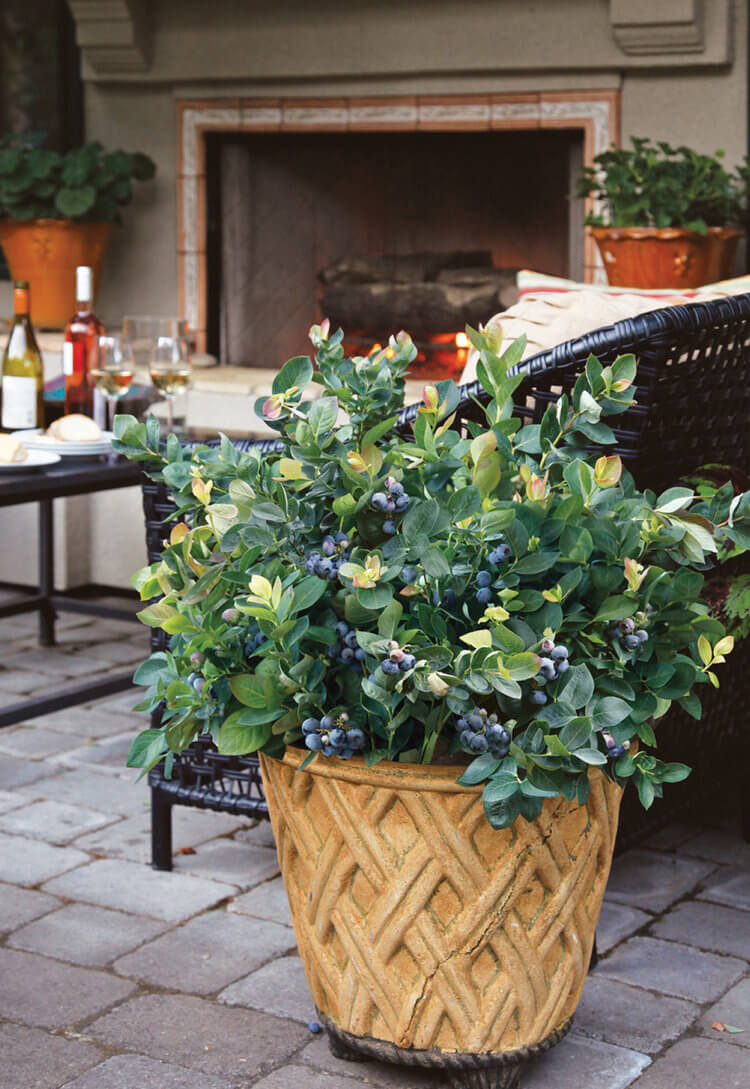
Blueberries
Peach Sorbet® blueberry has attractive leaves in addition to tasty berries. (Image thanks to Bushel and Berry)
While all blueberries (Vaccinium spp.) can technically be grown in pots, lowbush blueberry varieties (Vaccinium angustifolium, Zones 2-8), or dwarf, self-pollinating varieties, like the Bushel and Berry®’s Jelly Bean® (Zones 4-8) and Peach Sorbet® (Zones 5-10), are best for containers. Blueberries prefer acid soils with a pH between 4.5-5.5. Hence, it is important to amend their potting soils with additional Black GoldCanadian Sphagnum peat moss and feed them with a fertilizer formulated for acid-loving plants (if you live in Canada, try Black Gold® Rhododendron, Azalea & Evergreen Fertilizer (5‑5‑3)). For potting soil, choose a good, water-holding blend such as Black Gold Waterhold Cocoblend, which is OMRI Listed for organic gardening and also provides good aeration and porosity.
Plant blueberries in thick, weatherproof ceramic pots (click here to read more about the best weatherproof pots), and make sure they are at least two to three times the size of the shrub’s root ball. Add a mulch of coarse, decorative peat moss to help the pots retain moisture. Keep them in full to partial sun. In more northern climates, full sun is optimal, but in areas with hotter summers, partial sun is best. Protect them from the hot sun of the early afternoon. Every few years, change out the soil and prune the roots to keep them healthy and happy. If necessary, upgrade the pot.
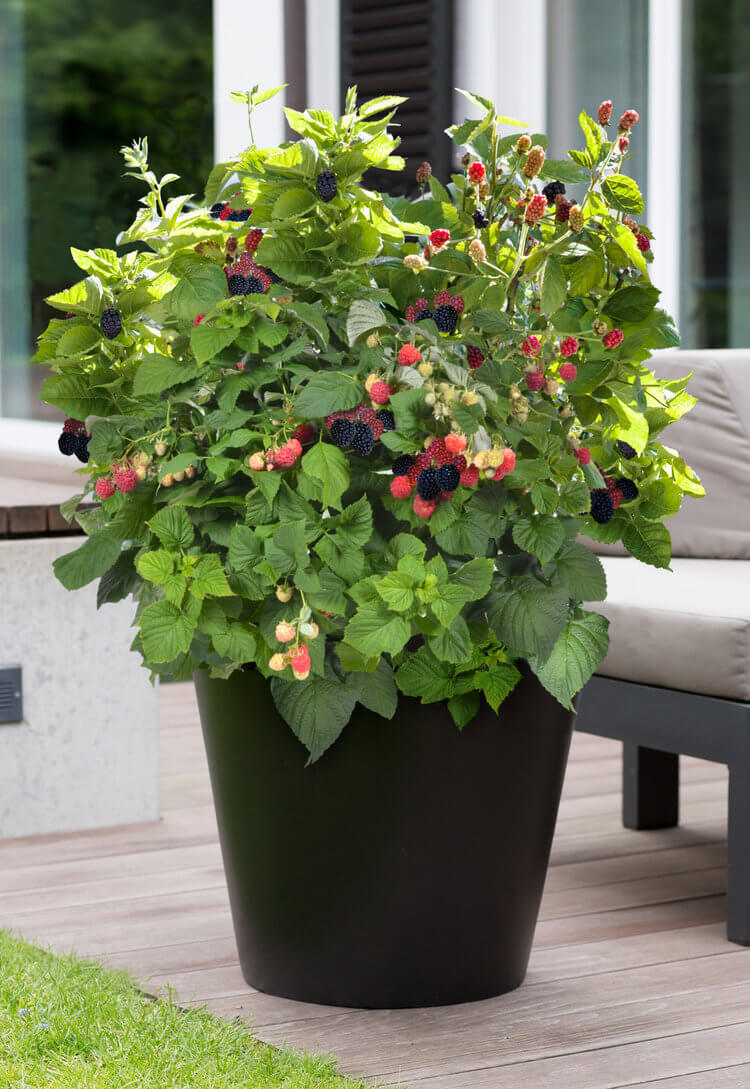
Raspberries and Blackberries
Baby Cakes® blackberry produces two crops in a season and thrives in pots. (Image thanks to Bushel and Berry)
Generally, you shouldn’t grow raspberries or blackberries (Rubus species and hybrids) in containers because they need a lot of room to spread and bramble. However, there are container varieties of each that are making waves! Also from Bushel and Berry, Raspberry Shortcake® raspberry and Baby Cakes® blackberry are dwarf, thornless varieties bred just for container growing. Raspberry Shortcake® reaches 2 to 3 feet, becomes full of large berries, and produces well throughout the season. Baby Cakes® blackberry reaches 3 to 4 feet and often produces two crops of berries in a season. Occasional pruning is recommended for both shrubs, and supplemental support, such as caging, is beneficial for Baby Cakes®.
Even though they are small, you’ll still want a fairly large 18- to 24-inch container. Plant them in Black Gold Natural & Organic Ultra Coir, which is OMRI Listed for organic gardening and contains mycorrhizae, and supplement with a balanced fertilizer blend for small fruit in spring.
Dwarf Columnar Apples
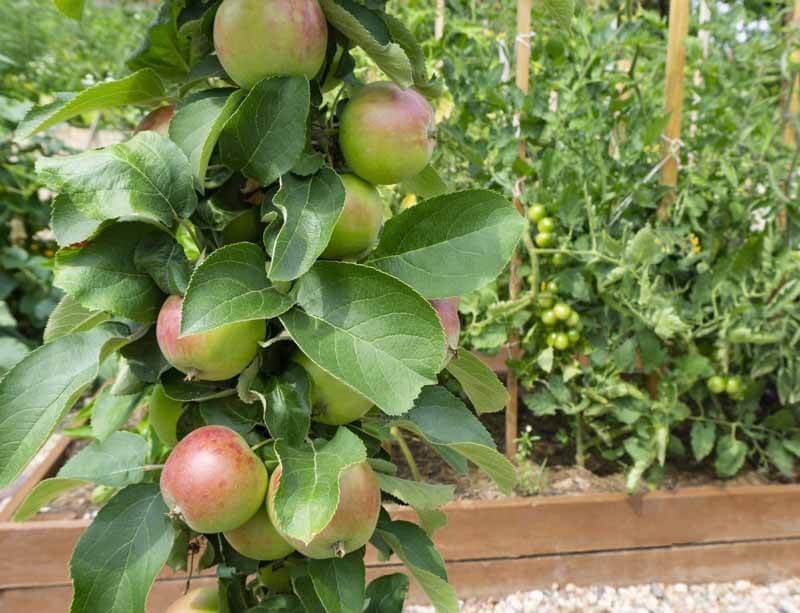
Pots of columnar apple trees fit in perfectly beside a thriving vegetable garden or on a sunny patio.
Dwarf columnar apples (Malus domestica hybrids) are linear apple varieties grown on dwarfing rootstock, so they stay upright and small. Each grows like a vertical column and does not develop side branches. Instead, leafing, flowering, and fruiting spurs arise from the central trunk. While the trees only grow to 8 to 10 feet tall, they still develop full-sized fruit, so they’re an excellent solution for small-space gardens. The columnar trees in the Urban™ Series (Zones 4-8) come in several varieties that offer both disease-resistance and quality fruit. Two to try are Tasty Red™ Urban™ Apple, which has firm, sweet, juicy fruits, and Golden Treat™ Urban™ Apple with blushed golden apples that are lightly tart and sweet.
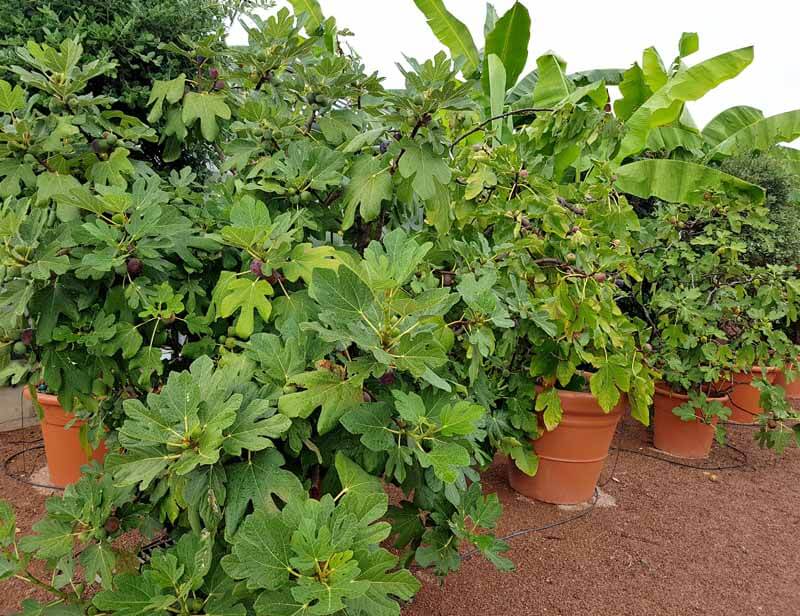
Figs grow very well in pots but may require summer pruning if they become too happy.
Truly dwarf figs can grow and produce well pots 24 inches or larger, and they are gorgeous plants to grow in the home garden. Figs are Mediterranean shrubs that prefer hot, dry conditions, and vary in hardiness. Choose a container with good drainage holes that drain well. Water your fig only when the top few inches of soil are dry.
Look for a self-fertile variety that produces the type of figs you like best: white or red-fleshed, green or brown-skinned, and sweet or earthy. My favorite variety is the somewhat compact (6 to 10 feet) ‘Celeste’ sugar fig (Ficus carica ‘Celeste’ (aka. ‘Celestial’)), which survives in Zones 6-9 and has small, sweet, purple-brown figs with white flesh. Newer, truly dwarf figs, such as the sweet-fruited Little Miss Figgy™ (Zones 7 -11), reach just 4 to 6 feet and make excellent edible specimen plants.
Pruning figs is essential to maintain a compact size. They can be pruned back hard to 2 to 3 feet in late winter if you require a more compact plant. Be sure to remove any small or inward-facing branches. Pruning can also encourage better fruit production. (Click here to learn more about growing figs.)
Meyer Lemons
Meyer lemons ( Citrus × meyeri, Zones 9-11) have a distinctly sweet taste, unlike other lemons. Like most citrus, they are warm-climate trees, needing full sun and warm temperatures to thrive. In cooler climates, Meyer lemons can be planted near buildings for warmth, protected from frost over winter, or moved inside during the colder months and brought back outside as the weather warms up in the spring. Many gardeners in cooler climates find it’s worth the effort for homegrown lemons! (Click here to learn more about growing citrus indoors.)
For a tree that’s at least a couple of years old, choose a 5- to 10-gallon pot that’s at least 18 inches high with excellent drainage. Do not use a self-watering pot. Instead, pick a pot with drainage holes that flow freely to avoid overwatering. For these trees, I recommend Black Gold Natural & Organic Potting Mix for planting, and good fertilizer formulated just for citrus. Regular fertilization makes all the difference in encouraging good growth and fruiting.
Prune off overgrown or crossing branches as they arise. And at fruiting time, thin clusters of fruit to one or two when the lemons are marble-sized.
Potted fruits are great for kids and homeowners that enjoy growing their own food. Start small with strawberries, and you’ll be hooked.
Creating painted rocks is a fun family activity, and they look beautiful in the garden. (Image by Jessie Keith)
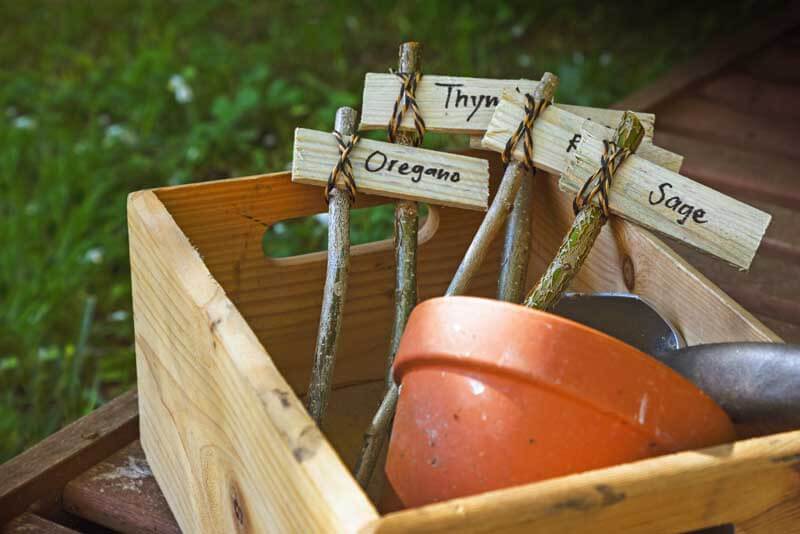
Making your own plant markers can be a fun way to repurpose used items and put a touch of personality into your garden. They are a useful and fun activity for a rainy day, humdrum weekend, or when you have extra time on your hands.
Here are some of my favorite ideas for DIY plant markers, all are easy projects for those who love to craft, garden, and be green! These plant markers are fun to make and will help keep your garden beds in order. No matter what your style, skill level, or budget, you will find the perfect DIY plant label for you in this list of seven easy-to-make plant labels using materials that you may already have around the house.
1. Painted Rocks
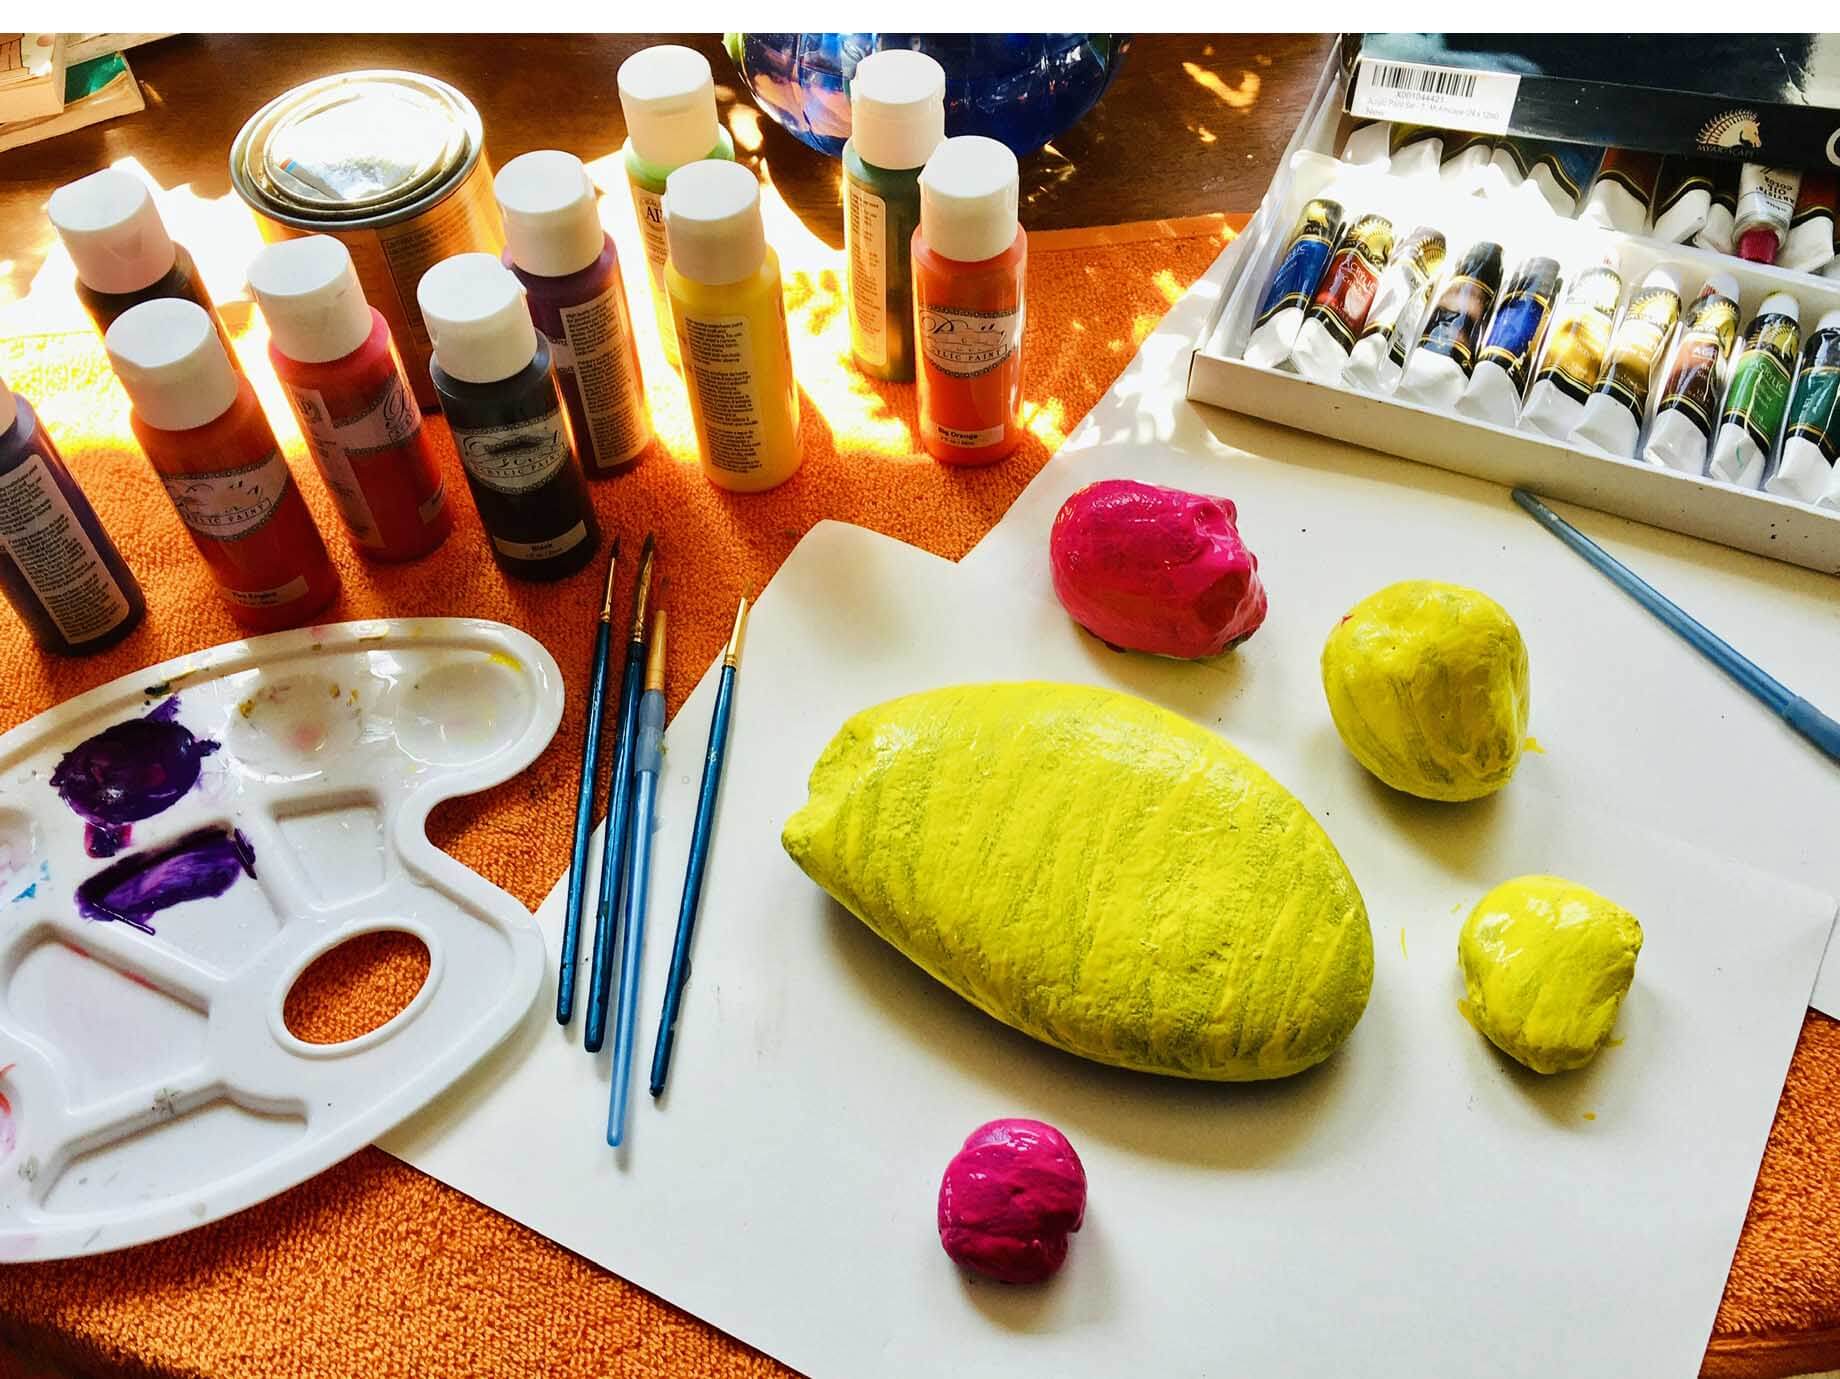
Materials needed for making painted rocks include smooth, clean rocks, non-toxic acrylic paints, water, paint brushes, and creativity.
Being a naturally occurring material, stones are easy to obtain and place among your garden plants. Rocks are generally excellent plant markers because they are sure to outlast the winds and rains typical during springtime planting. This is also a fun craft project you can do with kids!
The key to creating a long-lasting rock plant marker is all in the paint. Look for non-toxic acrylic paint to decorate the rock and use an outdoor clear sealer like Mod Podge to protect it from the elements. Speak with the staff at your local craft or hardware store if you’re uncertain about sealer options available to you locally. See the steps to make them here.
2. Twig and Stick Markers
Take some twigs, a bit of twine and wood, and put them together to make attractive garden markers.
When you are out doing a bit of pruning, be sure to hold on to those sticks and twigs to use as garden markers! There are several ways to do this, simply or using bits of string or wood from around the house. Both start with sticks that are similar in size and shape that have been cut to equal lengths
For the whittled stick method, pare away the bark of the stick to expose the raw wood underneath. You can do this with either a potato peeler or a small sharp knife (a pocket knife will do). Be sure to wear protective gloves. Expose just enough of the stick to be able to write the name of your plant on the raw wood. You can use a permanent marker with a clear coat of sealer, or even a wood-burning pen to get a permanent etch.
Another way is to use the sticks as stakes for more elaborate wooden markers of your creation. Any small, flat piece of wood or bark can be affixed to the twigs with twine and/or strong glue. Then label them as desired.
Once complete, place the stick plant markers into your garden, which may involve using soft mallet hammer if the soil is hard. At the end of the season, simply pop the plant markers in the compost bin and start anew next year.
3. Wood-Burning Tool
Speaking of wood-burning pens, you can also use pyrography to create charming plant markers with inexpensive wooden spoons, popsicle sticks, or other stakable wooden odds and ends decorated with a wood-burning tool with a pen tip attachment. Draw your label and decorations onto the wood in pencil first, and then go over it with the wood-burning pen. Wood-burning tools are both fun and easy to use, as long as you keep your fingers clear of the tip (youch!).
As for the design, get creative! You can use your wood-burning tool for anything that is wood so practice a bit before you get started. Then try it out on wooden spoons, clothespins, tiny signs from your local craft store, or wood scraps leftover from your last project. Click here to see how to make elaborate wooden spoon markers.
4. Clay Plant Markers
Clay markers are fun for kids to make.
Use oven-bake clay and rubber stamps, cookie cutters, a knife, or ravioli roller to make stylish garden markers for your herb or vegetable garden. Simply roll out the clay with a rolling pin to a 1/4 inch thickness, cut into strips (or circles and shapes for hanging labels), and curl up one end for a decorative topper. Use rubber stamps or toothpicks to imprint or carve the names of the plants before baking. Be sure to put holes at the tops of the circular labels for hanging. Follow the baking instructions on the clay package, and you’re done!
5. Metal Stamped Spoons
Hammer-struck hardware letter stamp sets can be purchased for as little as $20, but they can be used over and over again. There are many ideas available for recycled metal plant markers involving anything metal like frozen juice lids, metal washers, soda cans, and copper sheets. Yet, a simple metal plant marker can be made with just an old spoon, small hammer, two pieces of wood, and a stamping set.
To create a metal stamped spoon label, first select your spoon to create into a marker, and place upside down between two flat pieces of wood. Strike the wood with a hammer until the spoon becomes flat. Remove the top piece of wood, and continue to hammer until the spoon is completely flat. Hammer the name of the plant you want to label, then, color in each letter with a dark permanent marker to make them stand out. Use steel wool to scuff off excess color from the marker.
The spoon shape is ideal for a plant marker, with the handle making insertion into the soil easy. These also are a fun way to label a plant as a gift, or bundle a few together with common herb names as a gift idea.
6. Wine Corks on a Stick
One of my favorite recycled plant label ideas comes from my favorite beverage, wine! It can be as simple drinking saving the corks, adding them to the tops of bamboo skewers, and labeling with a permanent marker. If you need a lot of plant labels, you can always get bags of used corks at a local winery.
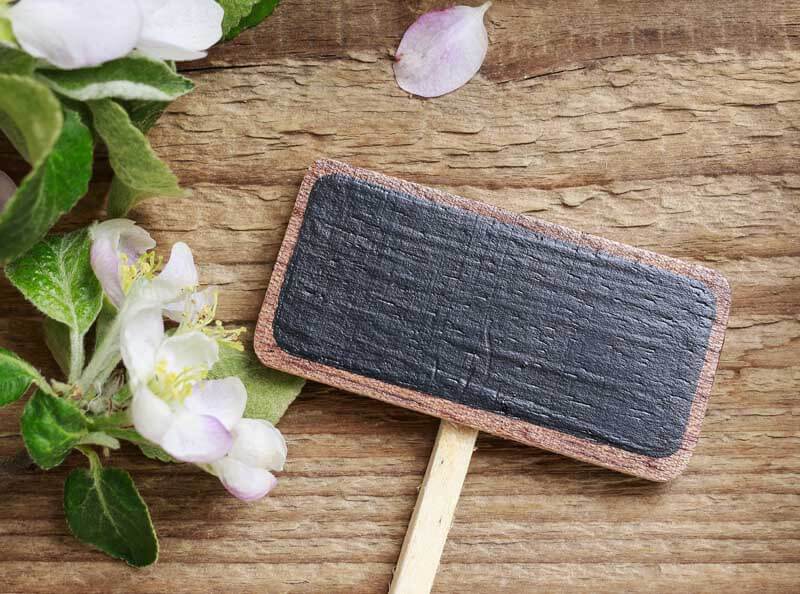
7. Chalkboard Paint
You can paint practically anything with chalkboard paint to make an easy label.
These super easy markers are surprisingly long-lasting and look great. They are especially useful for vegetable gardens because they can be erased and reused once the plants are grown in enough that you no longer need a label to help identify them. Just dip paint stirrers, popsicle sticks, or any wooden label in chalkboard paint, let it dry, and write your labels with a liquid or oil-based chalk pen that will look clean and last for a whole season, even through rain and watering. Click here to see my step-by-step paint stirrer labels.
Hopefully, these projects inspire you to create your own eco-friendly plant markers, which will make organizing your garden both prettier and greener.
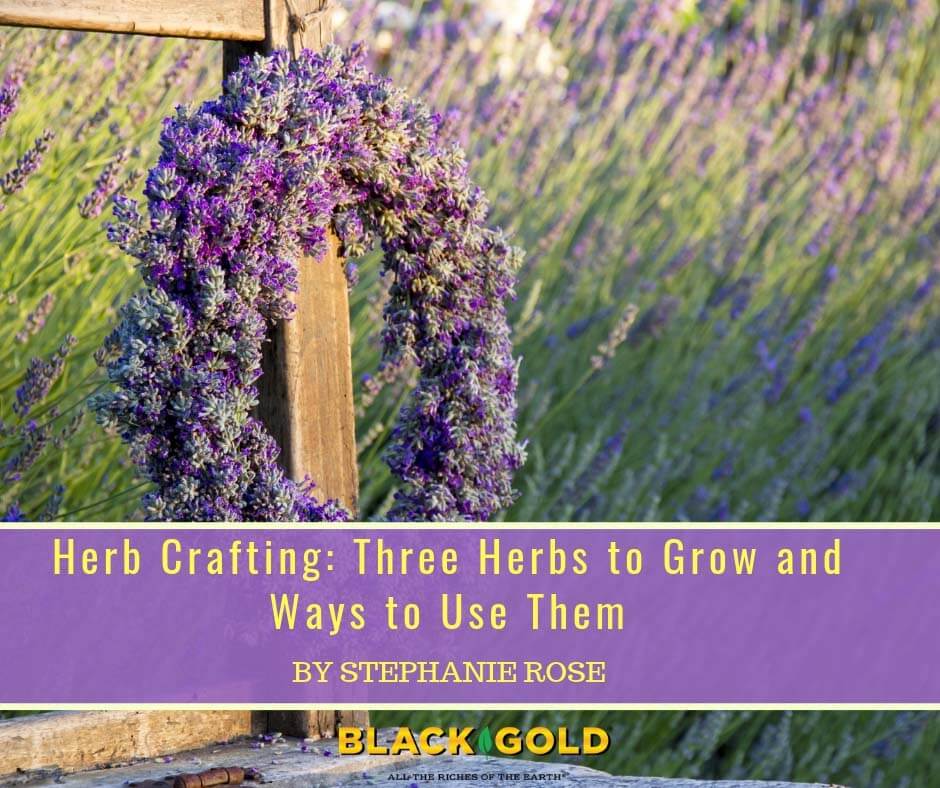
You don’t need a huge garden to make an abundance of herb crafts to benefit your home, garden, and artistic inclinations. Starting with just a few common and versatile herbs is an easy way to get your hands dirty and feel the magic of plants. I’ve chosen three herbs that are perfect for herb crafting because you can turn them into all sorts of potions, lotions, recipes, and garden crafts. Wait until you see all that you can create with these three familiar garden herbs: lavender, rosemary, and calendula.
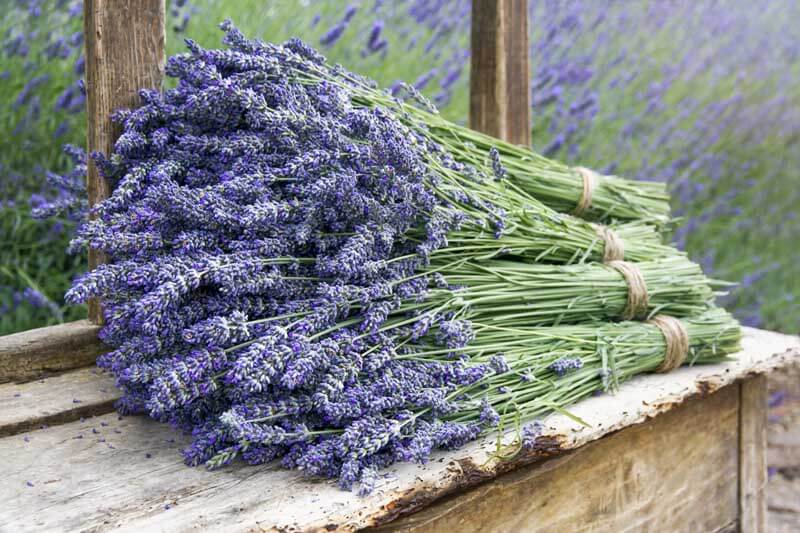
English Lavender (Lavandula spp.)
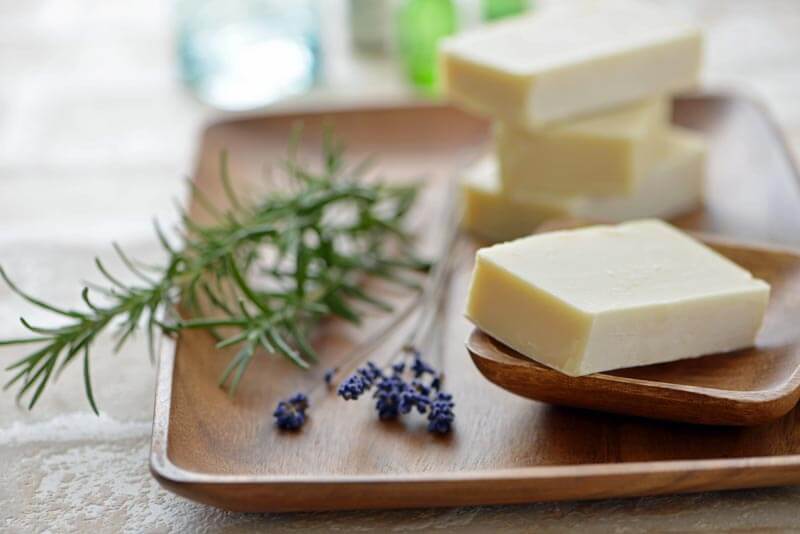
Homemade lavender soap leaves one fragrant and refreshed.
Lavender is my all-time favorite scent. It’s light, floral, and soothing, but even more, it has helpful herbal properties that can be used in your home, garden, on your skin, and also in the kitchen. The scent of lavender has a balance of sweetness and spice that makes it appetizing and appropriate for baking, tea, soda-flavoring, and all kinds of body care recipes. The scent promotes relaxation and exudes cleanliness, which makes it ideal for scentings linens and clothing. And its antiseptic and antibacterial properties make it a perfect aroma to freshen the air, your skin, and your home.
Grow
English lavender (Lavandula angustifolia, USDA Hardiness Zones 5-8) is native to the Mediterranean, so it loves climates with hot, dry summers and cool winters. It is drought-resistant and thrives in well-drained soil with some organic matter and a neutral to slightly alkaline pH (6.4 to 8.2). Plant English lavender in full sun and prune in both early spring and late summer to keep a neat and productive plant. Cut it back up to one-third while pruning and reserve the unopened flower buds and leaves to use in recipes around the house. (For a more detailed growing guide, read more here.)
Harvest
Harvest Lavandula angustifolia when it has visible purple buds but before the flowers open.
For dried flowers, harvest Lavandula angustifolia when it has visible purple buds but before the flowers open; buds retain better color and fragrance. Harvest the stems in the morning when the oil content of the leaves and flowers is the highest. Use sharp, clean pruners. (Leave some of the shorter bud stems on the plant for bees.) Gather the harvested stems into a bundle, tie them together with twine, and hang the bundle upside down to dry in a cool place away from direct sunlight.
When dry, roll the stems between your palms over a plate to catch the buds. You can also remove the leaves to infuse the oil, vinegar, and make tea. Store the dried flowers and leaves separately in airtight containers for up to one year.
Make
Fill small muslin drawstring bags with dried lavender buds for sweet-smelling sachets. Tuck them into your pillow, linen closet, sock drawer, or anywhere that could use a little refreshing.
Make a lavender eye pillow with unpopped popcorn or flax seeds and lavender buds.
Make a decorative lavender wreath that adds fragrance and beauty to the indoors.
Add dried lavender buds to your favorite herbal tea blend for a floral flavor and soothing effect that can help with insomnia. It pairs wonderfully with chamomile and rose.
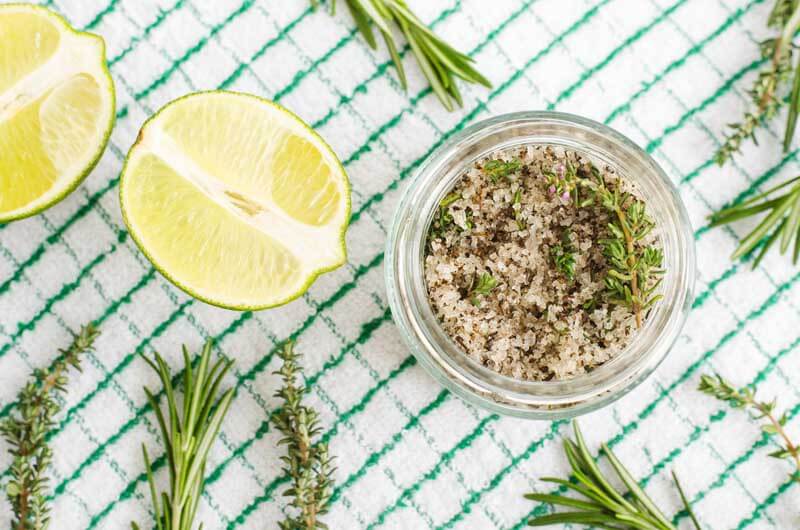
Rosemary (Rosmarinus officinalis)
Homemade rosemary lemon salt is delicious and easy to make.
Rosemary has long been prized for its antiseptic and antibacterial properties. It is excellent for deodorizing and cleaning; the scent is purported to help focus and memory. In ancient times, scholars wore crowns of rosemary when studying for exams, so imagine how it can help you perk up in the morning shower! Did you know that rosemary is also well known to be THE herb for healthy hair? It stimulates hair growth and adds shine.
Most of all, rosemary is beloved for its delicious flavor in recipes. It ramps up a roast and cooked root vegetables and adds an earthy punch to soups and stews. Whether you are freshening up your home, trying to wake up or adding oomph to hearty recipes. Rosemary can’t be beat!
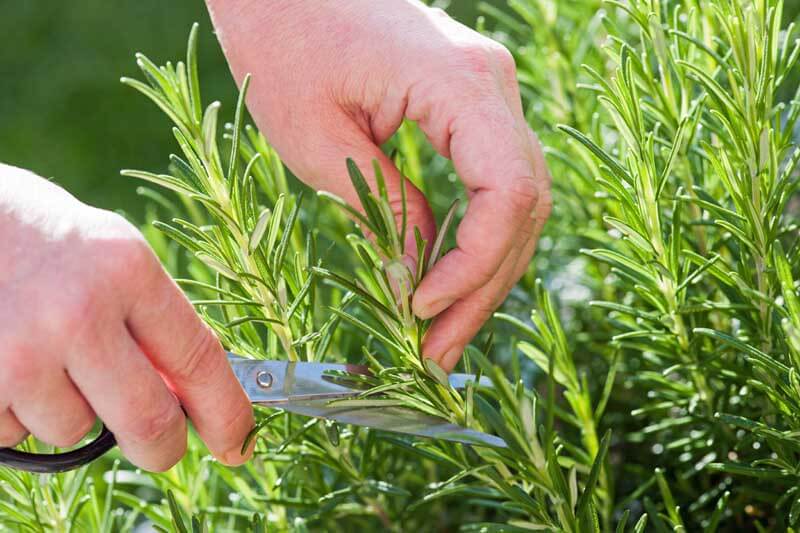
Grow
Rosemary cultivars have variable hardiness. Most overwinter in USDA Hardiness Zones 8-10, but some hardier varieties, like ‘Arp’, may survive in Zones 6 or 7. Otherwise, grow rosemary in a pot that you can bring indoors in fall or grow it as an annual. It likes well-drained soil and full sun. Rosemary does well in dry conditions, so be careful not to overwater it. Overwatering rosemary can commonly lead to root rot.
Harvest
Cut rosemary springs and dry them as you would lavender.
Cut sprigs of rosemary to use fresh or tie them up in a bundle to dry, the same way you would with lavender. When dry, remove the leaves by pinching the top of the stem with your finger and thumb and running it along the stem to the bottom. The leaves will pop right off. Keep dried rosemary sealed in an airtight container for up to one year.
Make
Make rosemary sachets to deodorize any place in your home that needs it, like gym bags and stinky shoes.
Add the leaves to homemade soap recipes or a morning salt scrub for exfoliating skin treatment and energizing scent that will help you start the day with a spring in your step.
Make a rosemary hair rinse by infusing three fresh new stems of rosemary in one cup of apple cider vinegar for 2-3 weeks. Apply to the scalp, massage in, and rinse thoroughly to add shine and softness. Here are a few more rosemary hair care recipes.
Chew a rosemary leaf for an instant breath-freshener.
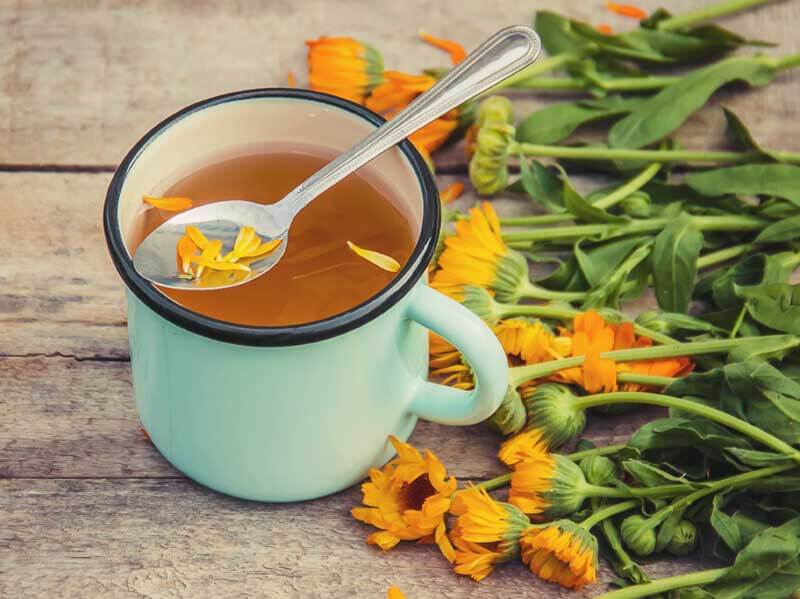
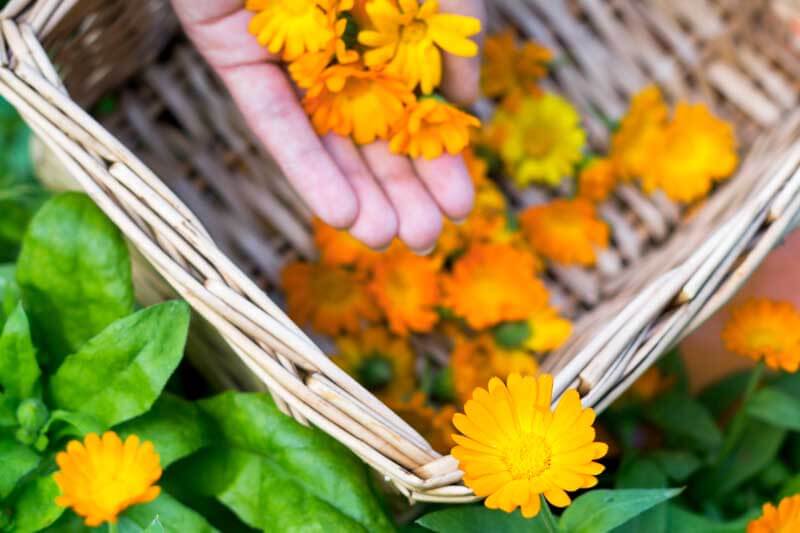
Calendula, Pot Marigold (Calendula officinalis)
Calendula tea is healthful and effortless to produce and store.
Many people view calendula as an annual garden flower, but with so many healing properties and beneficial uses, herb nerds see it more as a versatile garden herb. It’s been used for thousands of years to help heal minor wounds and inflammations, has a bright and sunny personality that attracts a host of beneficial insects to the garden, and it could not be easier to grow. Include calendula in your herb garden this year for some pops of color and fun herbal crafts.
Grow
Calendula is an annual that grows easily from seed either sown directly in the garden or indoors. Begin seeds indoors about eight weeks before transplanting calendula in the garden. Plant your calendula somewhere in the garden with good soil amended with fertilizer-boosted Black Gold Earthworm Castings that gets a lot of light but isn’t extremely hot. Deadhead and harvest the flowers liberally throughout the season, and you’ll have continual blooms to pick from spring to fall.
Harvest
Harvest calendula flowers when they are freshly open.
Harvest the full flower heads from new blooms and spread them out in a single layer in a drying screen (which can be as simple as using a window screen) or setting them in one layer in a shallow basket. Leave the flowers in a well-ventilated area that is cool, dry, and away from direct sunlight. After a few days, test for dryness. The petals should sound crunchy and not feel cool to the touch. Store the dried flowers in an airtight container for up to one year.
Make
Use fresh calendula petals to decorate cakes or other desserts. The bright orange and yellow ray florets are a festive natural way to add color that is appealing on sweet treats.
Calendula petals have a mildly spicy taste that pairs with savory foods as well. When entertaining, add them to salads and pizza for a fresh summer presentation that also helps to aid in digestion. They also make a soothing, healing tea.
Add dried petals to bath salts for natural colors and a spa-bathing experience amongst floating flowers.
Infuse your favorite oil with calendula petals and then add it to any skincare recipe that calls for oil.
Make a healing salve for minor cuts, bruises, and scrapes.
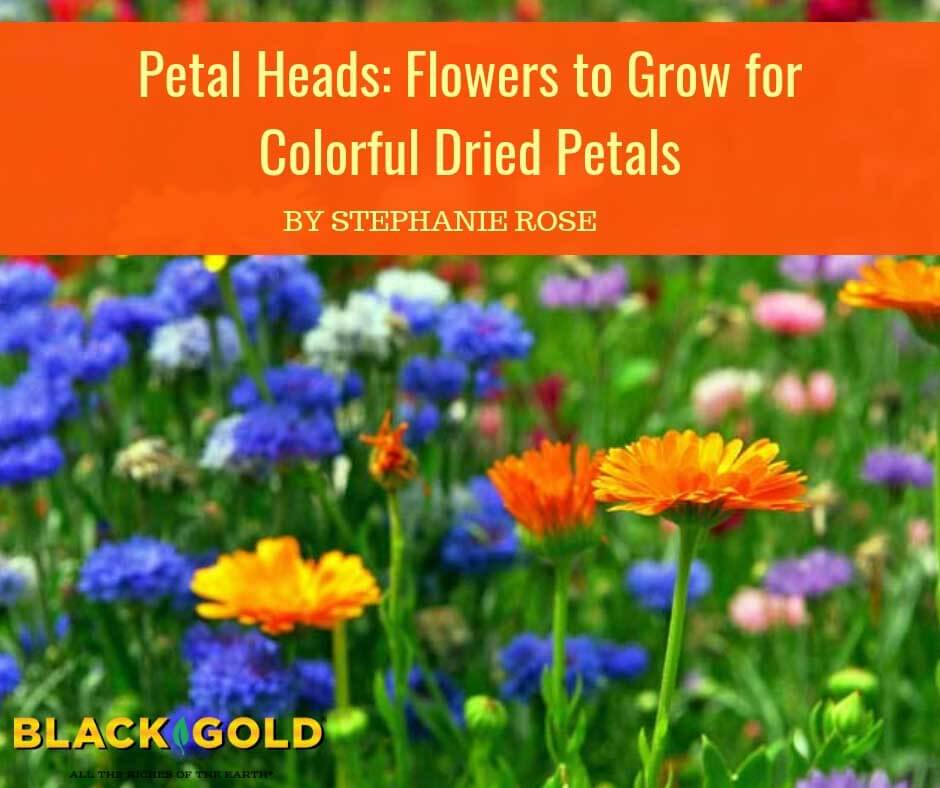
Cornflower and pot marigold petals are some of the best and brightest for drying.
Flowers are gorgeous in the garden and freshly cut for indoor arrangments, but their benefits go beyond the beauty of the fresh bloom. Dried petals are a wonderful material to have on hand for craft projects and homemade skincare recipes.
I keep a whole collection of jars of different dried petals on hand in my home apothecary to use throughout the year. You can use them to make pretty greeting cards, frame them to create wall art, sew them into fragrant sachets, mix edible petals into herbal teas for a custom blend, or—my favorite thing to do—add them to your own natural skincare recipes! They bring gorgeous color and healing properties to bath salts, bombs, or infuse the oil to add beauty, and sometimes fragrance, to recipes.
How to Dry Petals
For all petals used for craft projects, especially in skincare recipes and teas, be sure that the flowers come from an organic source and have not been sprayed. Many florist’s blooms are heavily chemically treated, so you are much better off growing and harvesting flowers from your home garden or buying them from an organic flower farmer at the local market.
For petals used for paper-crafting purposes, press them between the pages of a large book or in a wooden flower press. If phone books are still being distributed in your town, pressing flower petals is a perfect way to reuse them. You can fit quite a few petals between the pages, and then top them with some heavy books to press.
When you don’t need the petals to be flat, you can spread them out on a large flat screen like a window screen. Space the petals out so they are not piled up on top of each other and have good air circulation. Leave them in a dry area away from direct sunlight. It can be tempting to dry them in the sun, but this will cause their color to fade and leave you with a less-than-impressive end product. When they are completely dry (they will feel crispy), store them in an airtight container away from direct sunlight.
Which Petals to Dry
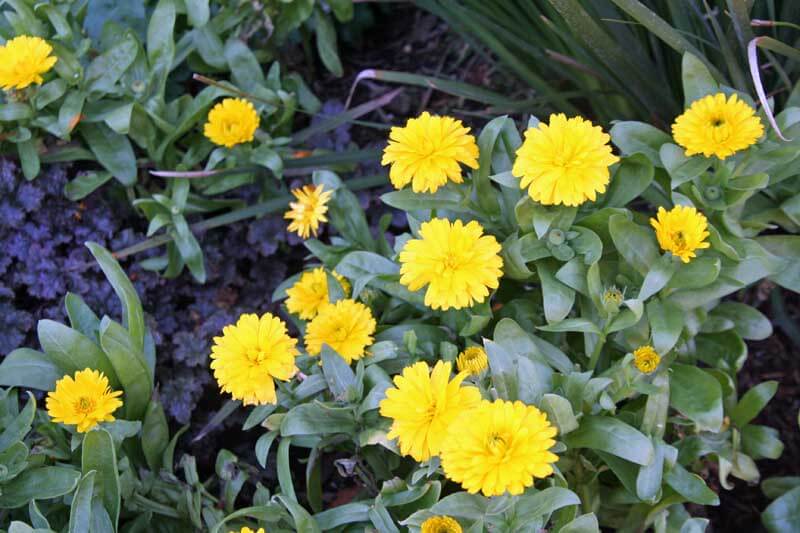
Pot Marigold (Calendula officinalis)
Bon Bon Yellow Pot Marigold (Image by Jessie Keith)
These flowers with their striking orange, yellow, or deep golden petals are more than just a pretty face; they have also been prized for centuries for their healing properties. I love to add the petals straight into my favorite summer lotion bars, infuse the oil with calendula petals, and use it to make healing salves and balms for minor cuts, scrapes, and bruises.
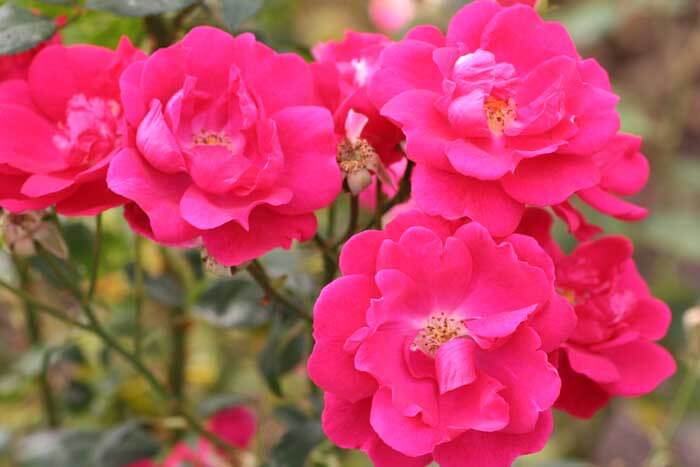
Roses (Rosa spp.)
Improved Lafayette Rose (Image by Jessie Keith)
Deep-colored rose petals look beautiful when added to craft projects or floating in a bathtub. I choose red, pink, and coral petals to dry because the pale lavender, white, and yellow ones fade and brown too much. Also, look for fragrant varieties as they will impart scent in the projects. The petals are wonderful in tea, bath salts, and bath bombs where they are presented dried and used submerged in water. Rose petals will not hold color in soap projects but they can be used to decorate the top of soaps. (Click here to learn how to make your own fragrant rose water.)
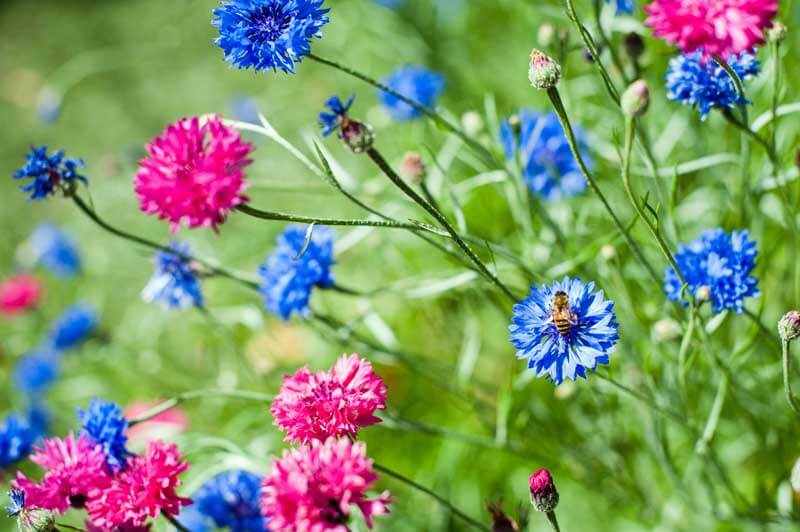
Cornflower (Centaurea cyanus)
Cornflower Mix
Cornflower petals hold their bright blue, pink, and purple colors beautifully and have a lovely delicate shape. I like to add them to bottles of homemade perfume to give them a pretty botanical look. My favorite mix to grow is the Classic Artists’ Mix (which can be seen in the Garden Therapy’s Natural Beauty Seed Collection). With a seed blend, you get a huge variety of colorful petals that range from deep tones to pastels in blue, purple, and pink.
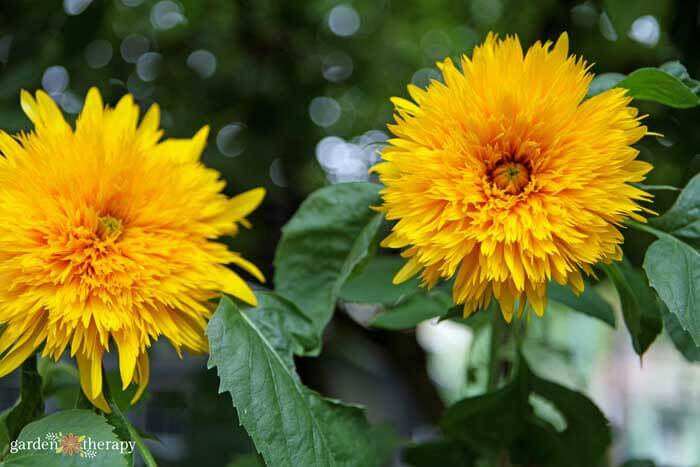
Sunflower petals are just gorgeous in rich yellow, gold, or russet colors that remind me of the late summer sun. They smell faintly of sunflower seeds, but their value is mostly in their bright hues. Use them for adding natural color to bath salts, adorn homemade bath bombs, or soap. Add them to anything that needs a pop of color. Look for those varieties with fully double blooms for the most petals. I love to grow ‘Goldy Double’ or ‘Teddy Bear’ double varieties.
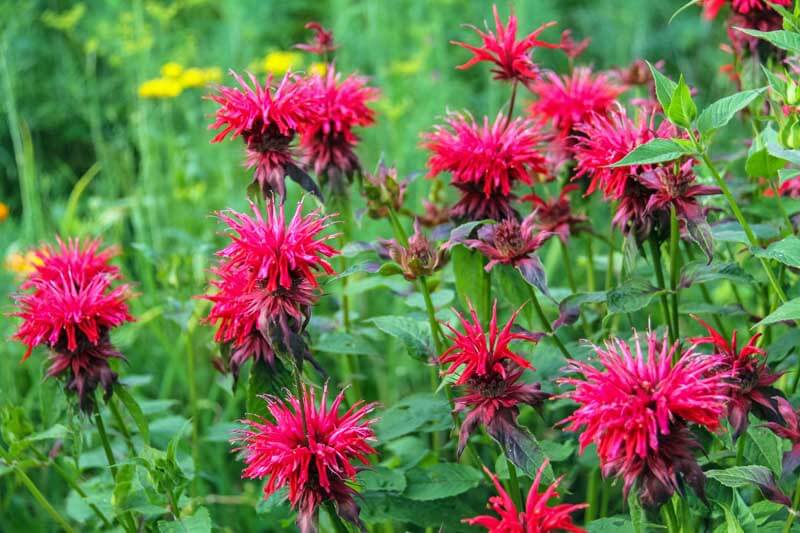
Scarlet Beebalm (Monarda didyma)
Scarlet Beebalm
Grow and harvest scarlet beebalm for the bees, but also leave plenty of bright-red petals to harvest and dry for craft projects. The petals have an almost minty fragrance (the plants are in the mint family) and hold their color well when dried, although they become quite small and thread-like. They look wonderful in a mix of other dried mints for homemade tea blends, bath salts, and a fragrant, relaxing foot soak.
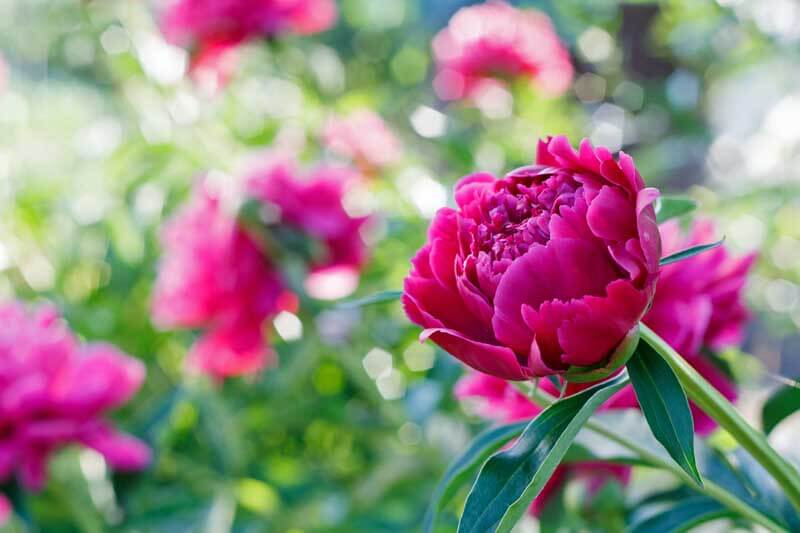
Peonies (Paeonia spp.)
Rosy Pink Peony
The large, colorful petals of peonies are perfect for making wreaths, wall art, greeting cards, and other pretty crafts. Collect and dry them from the flowers just as they are falling to the ground but before they start to turn brown. You will get to enjoy the bloom in the garden and save the mess that they create. Darker flowers yield prettier dried petals. Dried peony petals set in a dish make for a fragrant and decorative air freshener.
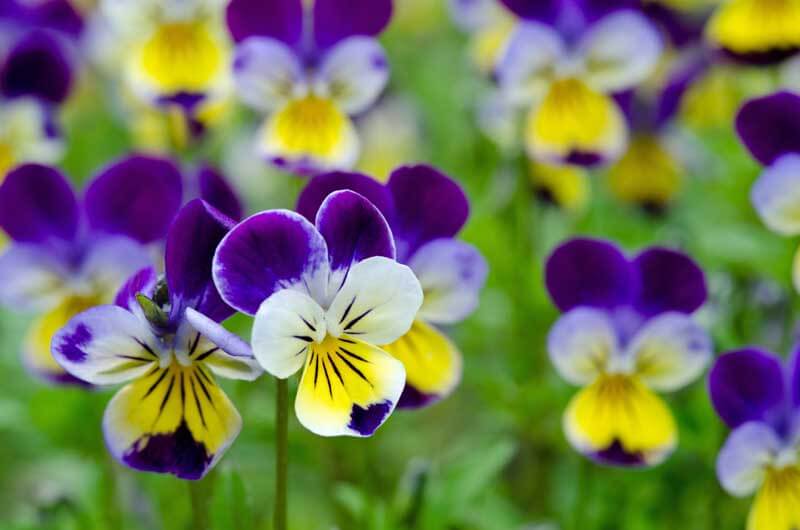
Pansies and Violets (Viola spp.)
Johnny Jump Up Pansies
These sweet little flowers are best preserved by pressing. Try to keep the whole flower intact by keeping a bit of the stem in place. When they are completely dry, they will hold their colors well for many years. They look lovely adorning homemade greeting cards or pressed into bath bombs as decoration.
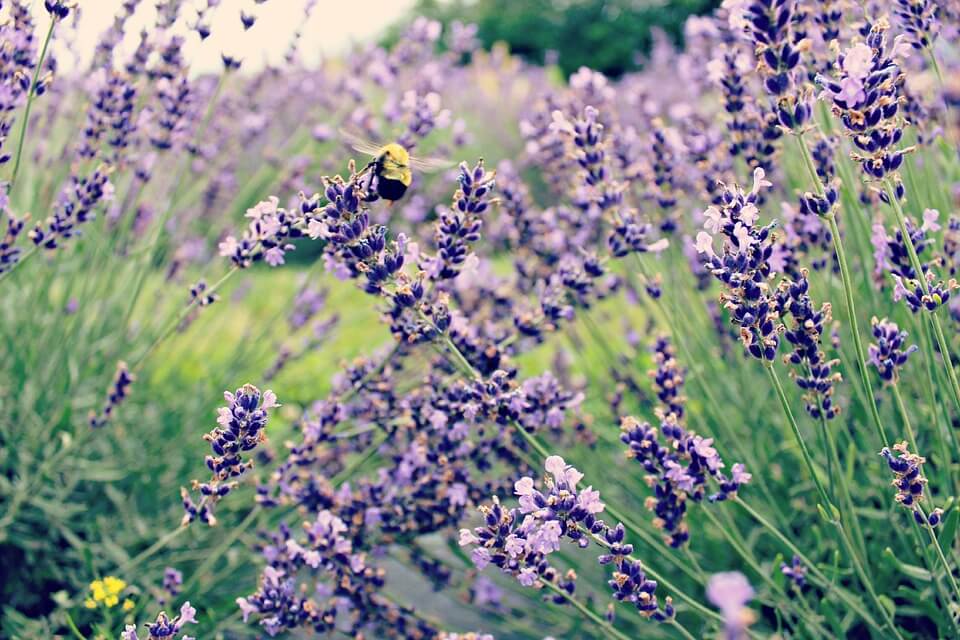
Lavenders (Lavandula spp.)
English Lavender
One of the easiest and popular flowers to dry, lavender has the most heavenly scent that lasts long after it is dried. Make lavender sachets to keep linens fresh. The scent will also help to promote a night of relaxing sleep. The floral stems can be made into wreaths, dried flower arrangements, or used to decorate homemade candles. If you want your lavender buds to retain their purple color when dry, choose a dark-colored variety like Lavendula angustifolia ‘Thumbelina Leigh’, which keeps the deep purple buds many years after harvest. Harvest the stems when the buds have formed but before the flowers have opened. Bundle the stems and hang them in a dry, cool location.
All of these flowers need fertile to average soil with good drainage. Black Gold®Garden Soil is high in organic matter for increased fertility and has the added bonus of fertilizer to ensure good establishment. Fortify your petal garden soil, and your flowers will shine!